All Activity
- Past hour
-
 That is true, but it could have been converted from auto. I'm just throwing out bread crumbs. Something is drawing too much current. Find the thing.
 - Today
-
 The pic shows a stick shift in the console so I assume it’s manual. Possibly a chaffed cable touching metal.
 -
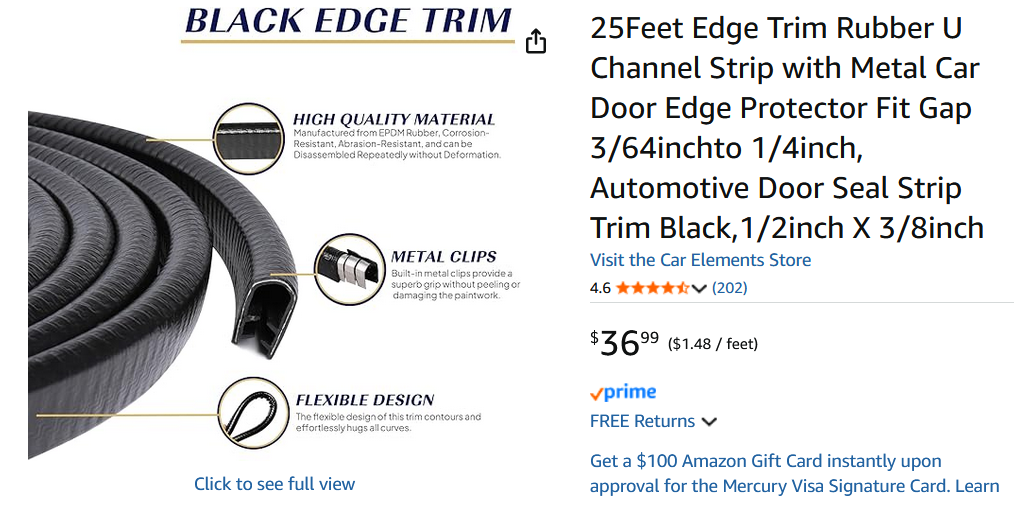
 There are sources for the OEM gripper strips and I bought 25 feet of it on Amazon (nice stuff, BTW, and I used some of this channel, in white, around my interior roof line) before I got my Precision weatherstrip kit and saw the gripper integrated into the door seal. If anyone wants it, let me know and we'll work a deal.
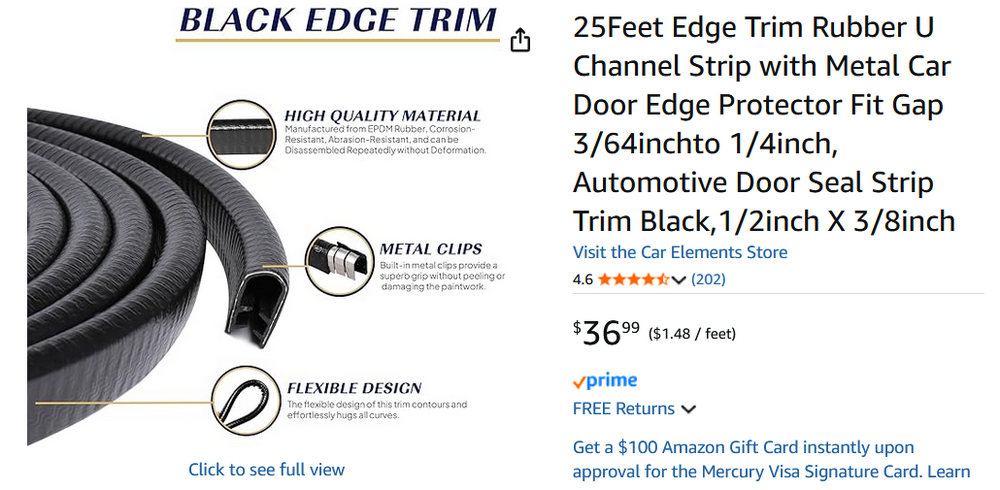
-
 I can attest to the fact that the Kia Sportage weatherstrip requires no adhesive (even at the top rear corner of the window) to conform to the shape of the window opening. That's because it uses a more modern design, wherein integrated metal Z-coils replace the need for adhesive or a separate gripper strip. The Kia design also uses a 'lipped bellows' design that provides a more effective seal than the Z's old-fashioned (sorry) cantilevered-lip design. The recent arrival of Z Store's retro-design weatherstripping (i.e. cantilevered-lip design) presents a bit of a dilemma to restorers, because they (apparently?) don't also offer a repro of the gripper strip. If I've got this right, it means that you have to use an adhesive to make the weatherstrip not only conform to the window shape, but also stay that way for some reasonable period of time. If your definition of 'reasonable period of time' is 20+ years, then use just use epoxy and be done with it. Otherwise, I think that 3M's 'old-fashioned' weatherstrip adhesive will do just fine (provided that you read and follow the instructions). It will also offer some forgiveness if you happen to; a) screw up during the installation, or; b) decide, a few years later on, to try something 'more better'.
 -
IIRC, there may be something funky about the the cabin light's wiring and switching logic (even one of the terminals is 'different') that requires a special testing procedure. I'm thinking about how the lamp is controlled not just by its integral switch, but also by the door P/B's (wherein toggling the integral switch can override Door Open/Closed). Bottom line: You may not have a problem at all (emphasis, however, on the word, 'may') Perhaps we should ask CZCC's designated electrical expert (Steve ____? ) for some guidance before you add yet another cabin light to your collection.
- Yesterday
-
 Just posted today on eBay. Make an offer? eBayDatsun 240Z 3 Screw Round-top Carburetors, W/ E46 Manifol...Nissan Datsun 240Z Hitachi 3 Screw Round Top Carburetors, E46 Manifold, with Air cleaner. This set up was removed from a wrecked 240Z. These partshave been sitting unused for a while so will obviously
 -
 PNG Mangi joined the community
 -
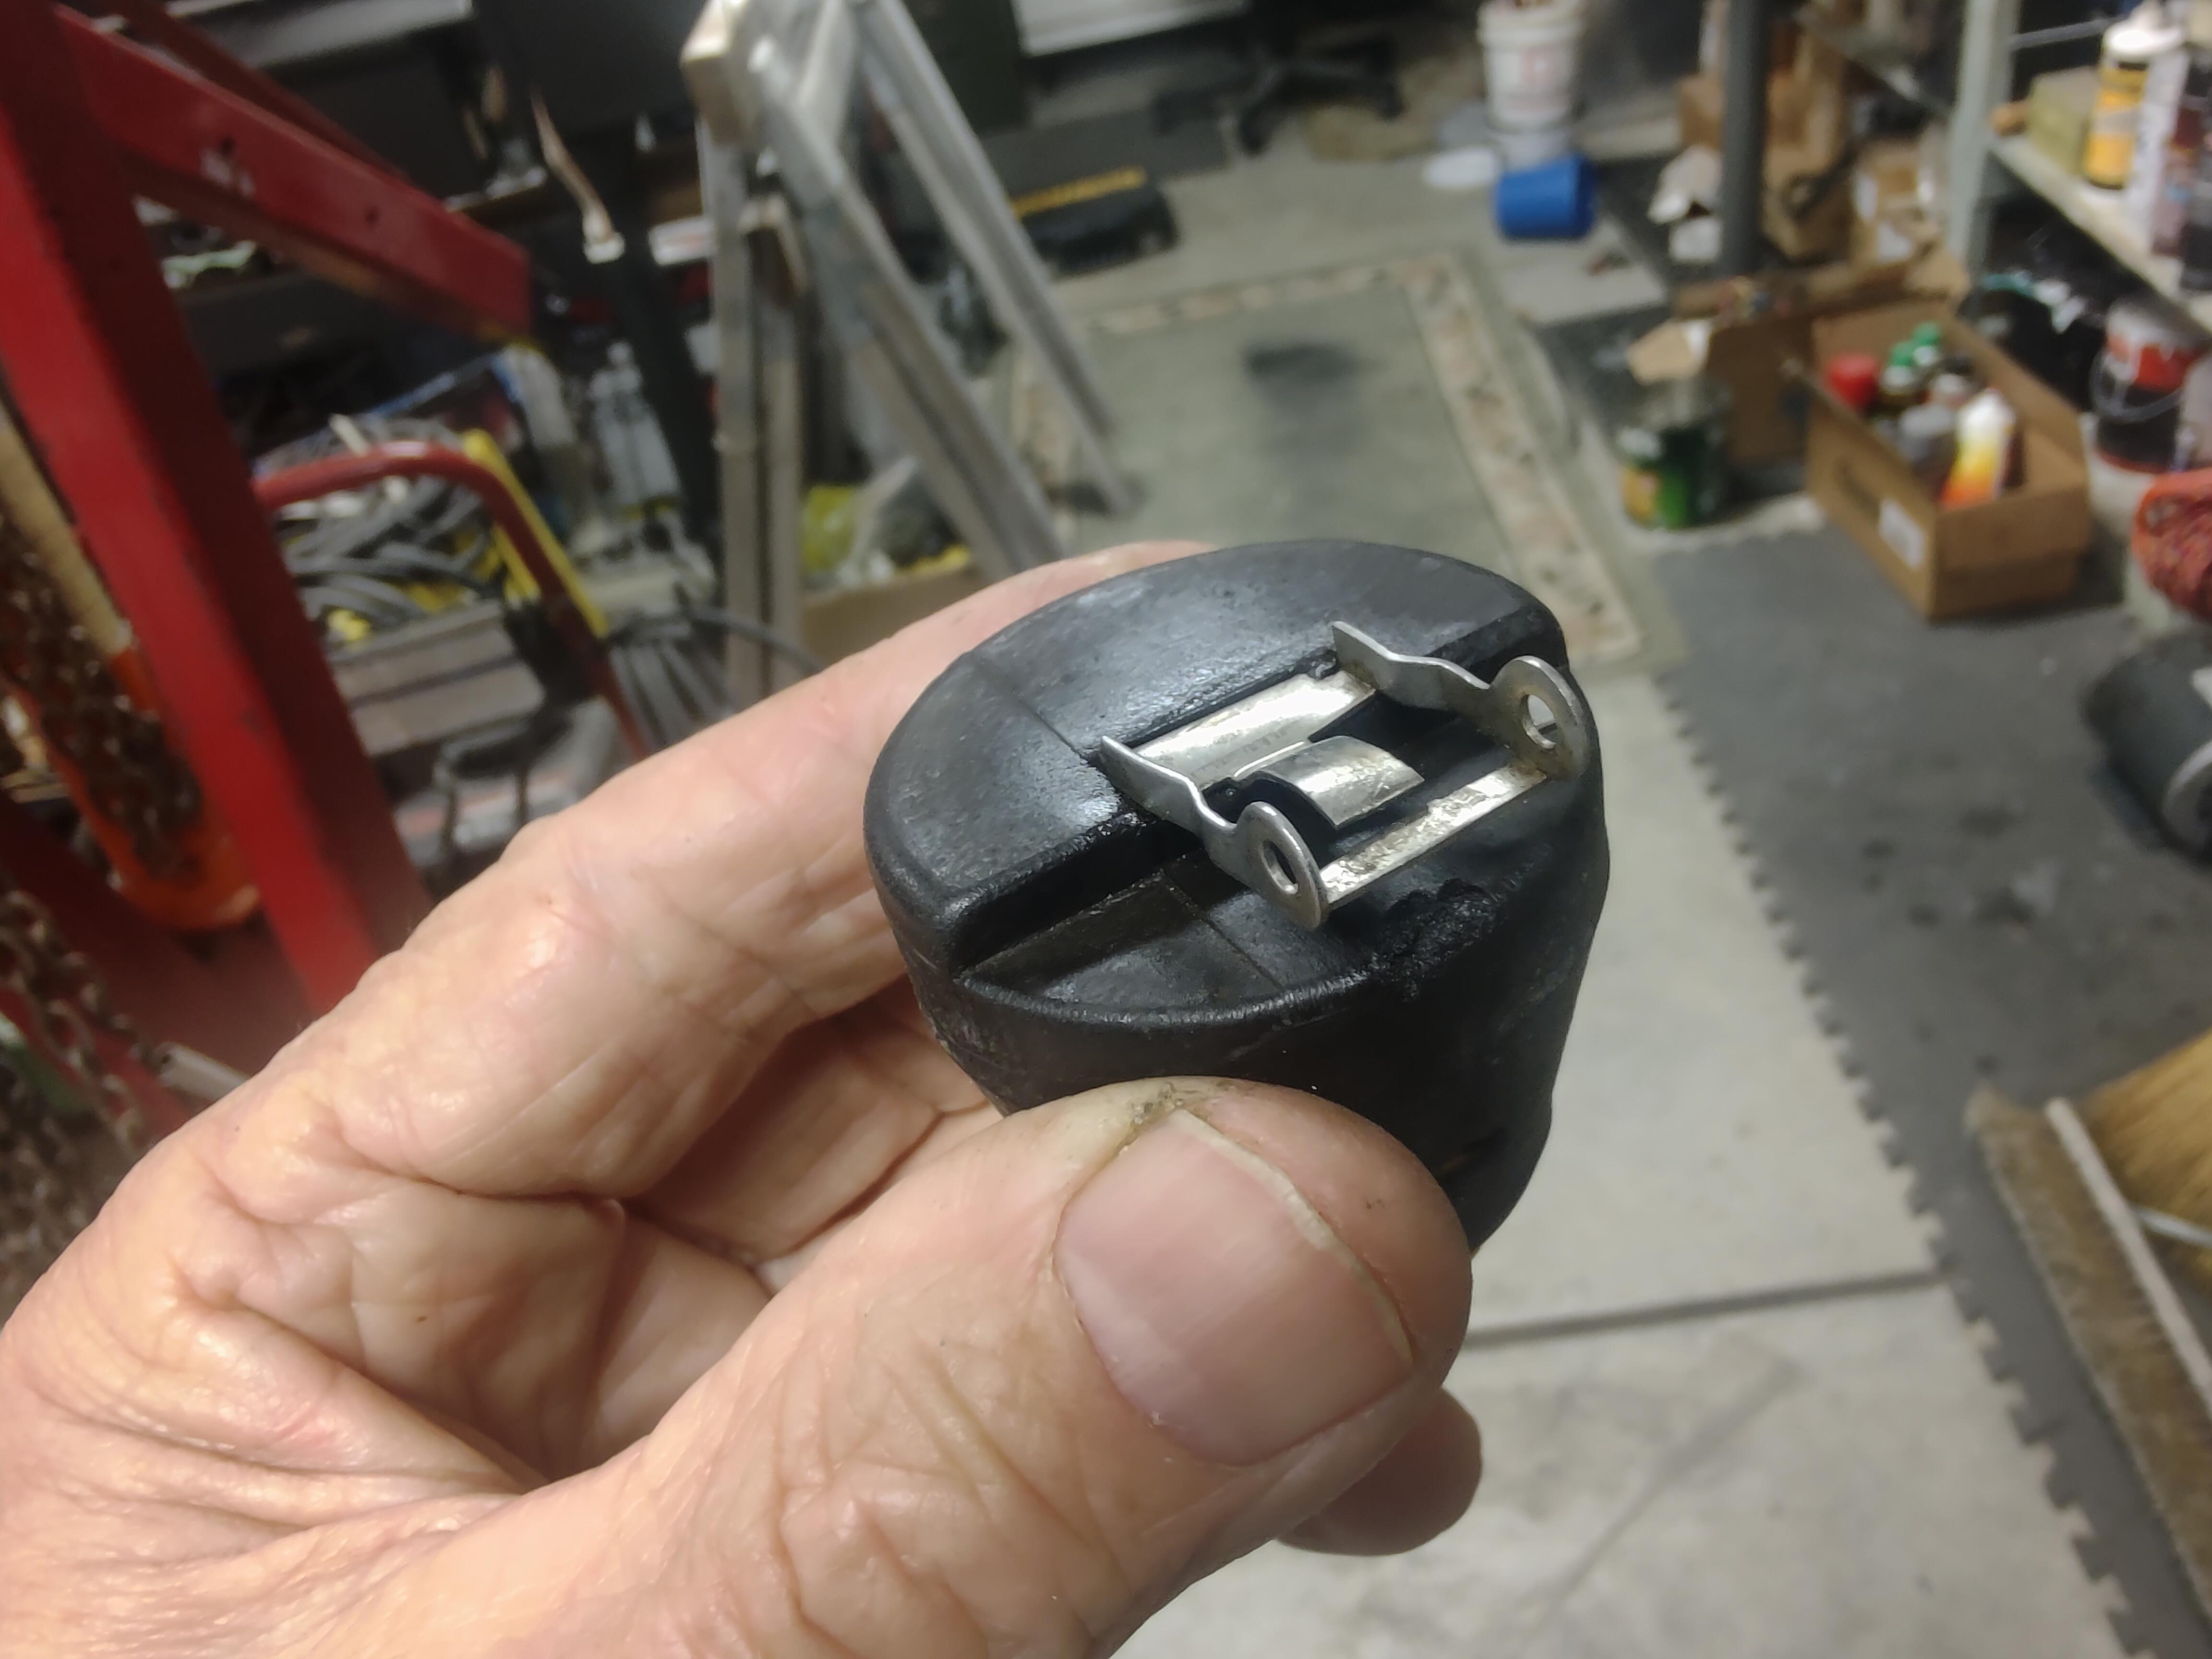
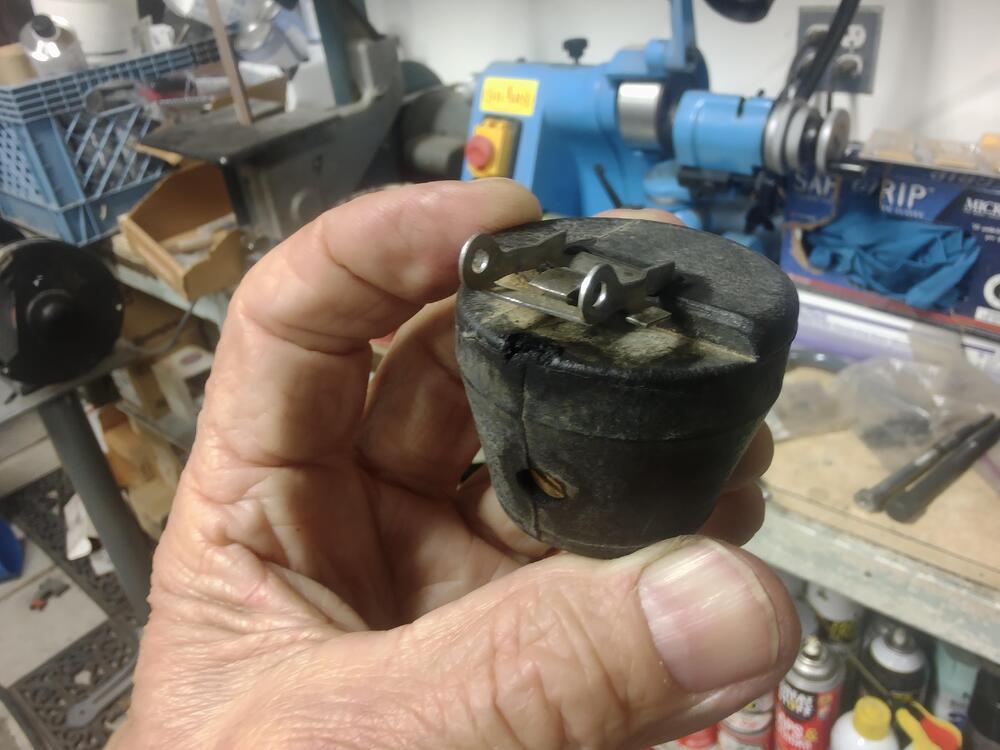
 Hmmm, that's one switch that I've never taken apart... Now you have me curious. I think I'll see if I have a spare and drill out the rivets.
 -
Could AI be smarter than marketers? Better speller for sure.
-
Actually, Amazon added a W.
-
Right you are, Zed Head, as temperature, humidity and the area actually exposed to atmosphere are the critical variables. And, don't blame Amazon for that spelling. It's what is on the cartridge itself. Ah,marketers... Many's the time I've had fascinating discussions with the ones I worked with. Always looking for that "hook" to drive customer recognition and product uniqueness. Sometimes a few weren't securely tethered to reality. I remember one asking if I could replace air with something less expensive. 🙄
-
Put a meter from the fuse exit to ground in continuity/resistance mode and see when the circuit goes open. Wiggle that nest of wires around. If the fuse is blowing it must be because that wire to the switch and lights is shorting to ground. Could be at the switch ( a bad switch) or after it. Or crawl under the car and test the pins on the switch to see if they're shorting to ground when you put it in reverse. Check the wiring diagram to see if any of the things after the switch are shorting to gorund. You didn't say auto or manual.
-
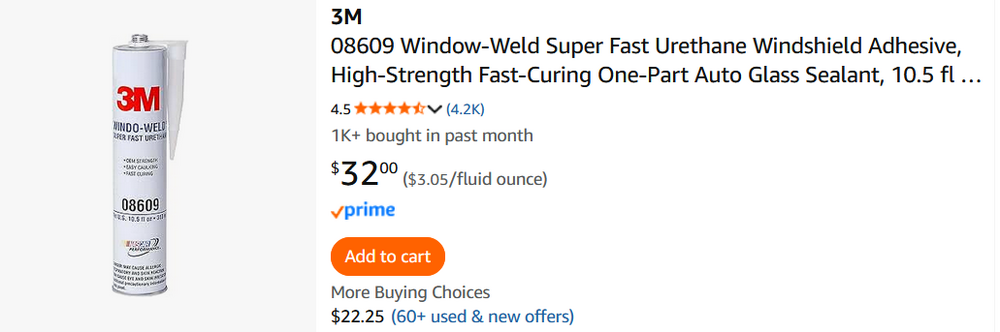
I think it depends on the weatherstrip. I have a vague memory of metal clips in the Kia Sportage weatherstrip. No adhesive was needed. Really though, just put it on and if it's loose put some glue on it. Handling time 10 - 20 minutes, full cure 24 hours for the Windo-Weld (Amazon can't spell). Sometimes marketing converts a problem in to a supposed benefit. They don't actually say that "super fast" is a good thing. Work super fast and you shouldn't have any problems. Forgot to say, cure time probably depends on relative humidity. It's a moisture cure. I remember using a moisture cure construction adhesive on a hot dry day in summer and it took forever to set up. Full Cure Time 24 hr Handling Time 10 min - 20 min https://www.3m.com/3M/en_US/p/d/v000074326/
-
That's 3M's marketing terminology and being a chemist who has worked with one-component urethanes, I know the many variables involved. BTW, I spoke today with a local auto service shop owner who has many collectible cars and has installed several windshields over the years. He advised that the 3M product is what should be used but not to bother with using it in the channel where the glass goes unless the car will be parked outside or driven in the rain regularly. Wick Humble's restoration book also does not advise using any adhesive in this channel during glass insertion. He also advised to place the windshield on the car without first applying the urethane to the weld flange and then to "backfill" the inner part of the weld flange channel with urethane. Humble advises putting adhesive into the weatherstrip's channel before installation and then backfill both the exterior of the weld flange AND glass channels with adhesive once you're satisfied with the placement. Makes sense to do that on the exterior portions so I'll see what things are like when I get to that point. Finally,as for the door weatherstrip, my local guy says to put it in "dry" and only use some 3M Yellow Super Weatherstrip and Gasket Adhesive at the point where the two ends meet up on the door sill.
-
I’m not sure about the “super fast” part of it. You should only need sealant on the corners of the wind shield IMO.
-
So, I bought a cartridge of 3M Windo-Weld Super Fast Urethane adhesive to use when I set my windshield. It's $44 at my local NAPA store but I see it for $32 on Amazon. Do you who have done weatherstrip replacements think this will be good for the door weatherstrip as well? It sure seemed as though the OEM weatherstrip had a "permanent" adhesive used on it.
-
 The problem is intermittent. Also what is the proper route for the choke cables?
-
I’ve had the new fuse box for several years before this problem happened. My reverse lights work.
-
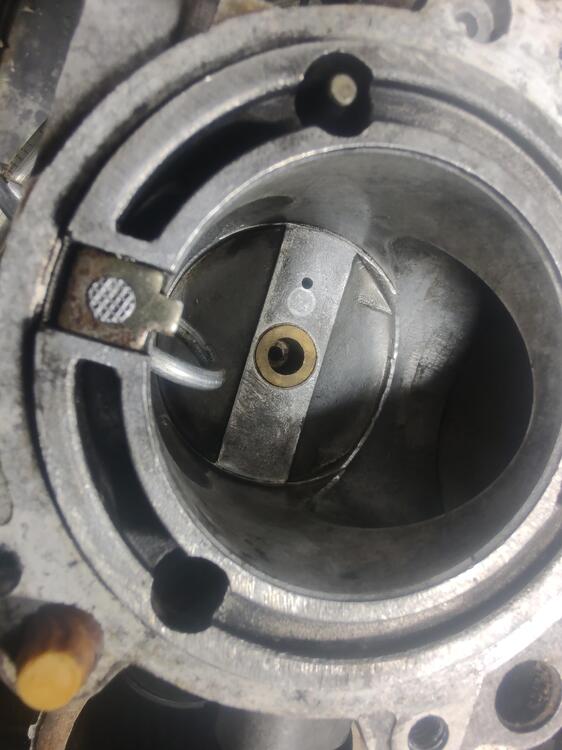
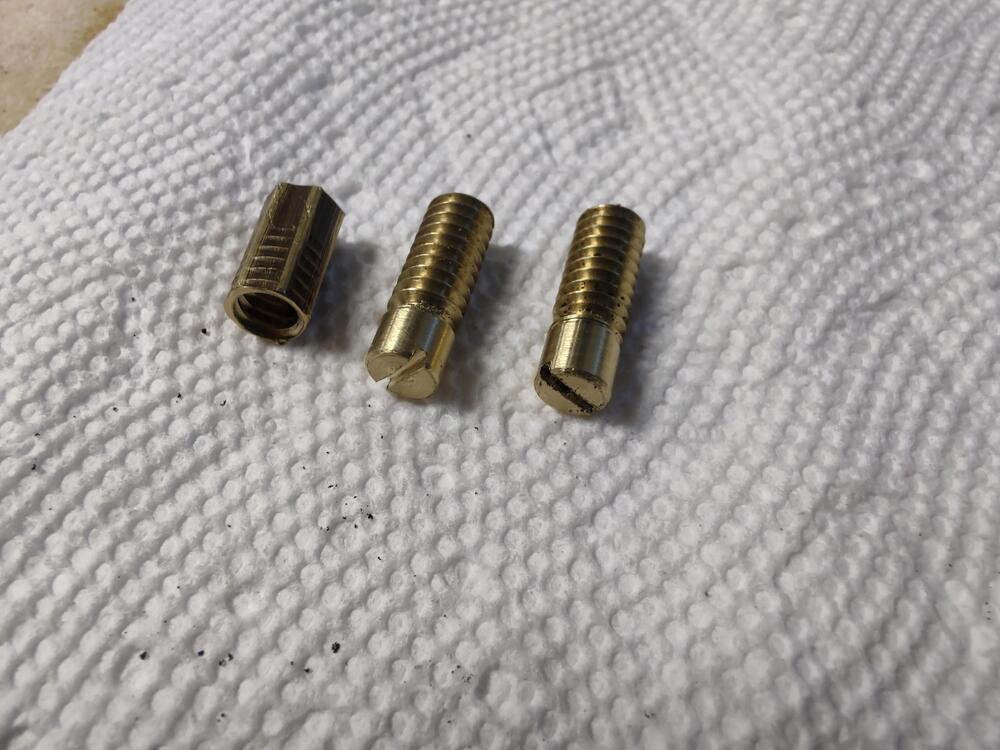
 I'm getting very close, one carb at a time. One photo is the view looking down the nozzle, which has been set to 10 turns. Once there is fuel, I can shine a flashlight down the hole and see the level, I'm usually either too high or too low, trying to find that sweet spot. The other photo is the rear float, you can see the weight that was added so when the bowl is at the proper level, the float is level, not canted, where it would hit the ceiling of the bowl. There has been a lot of discussion on that in this thread. One of the photos shows the weights that were fabricated. BTW, although the carbs are from a 240z, they are being installed on a 260z, getting rid of the flat tops. Jim emptech@surewest.net
-
p.s. 2 - check the reverse light sockets to see if they're melted and shorting to ground. I had one do that. Not reverse but a tail light socket. They get crusty and resistive and produce heat.
-
Did the problem show up immediately after the new fuse box? More detail might help. The wiring diagram doesn't seem to show any connection between the reverse lamp circuit and the brake or gauge lights. They do all have a fuse though. The fuse box seems like the common element. Also, the FSM shows a different wiring scheme for automatic compared to manual. Body Electrical chapter. Accessory Relay and Inhibitor Switch. p.s. do the reverse lights work? They're on a separate fuse right? Can't find an illustration of the fuse box.
-
 Gotcha. In that case, try this. The tach won't work, but the car should run. If this works, we'll deal with the tach next.
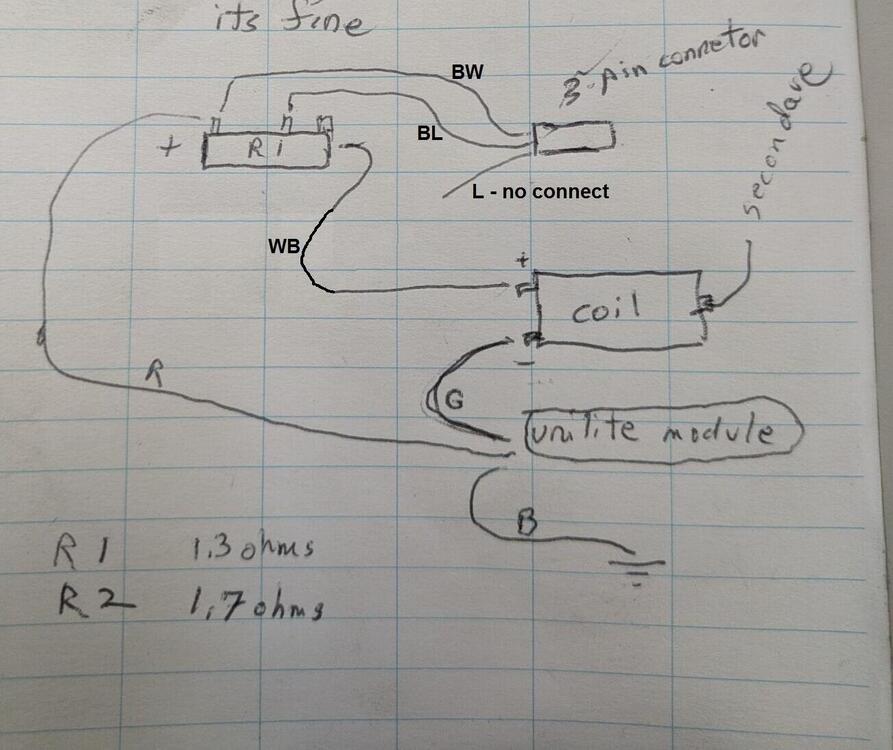
- Last week
-
 I had an alternator that popped mine. It was a reman from a chain store. The smart electrical guys on here said it was "back charging". Took it back, they tested it and it showed BAD. Gave me another one and so far so good.
 -
 Rsikes61 joined the community
 -
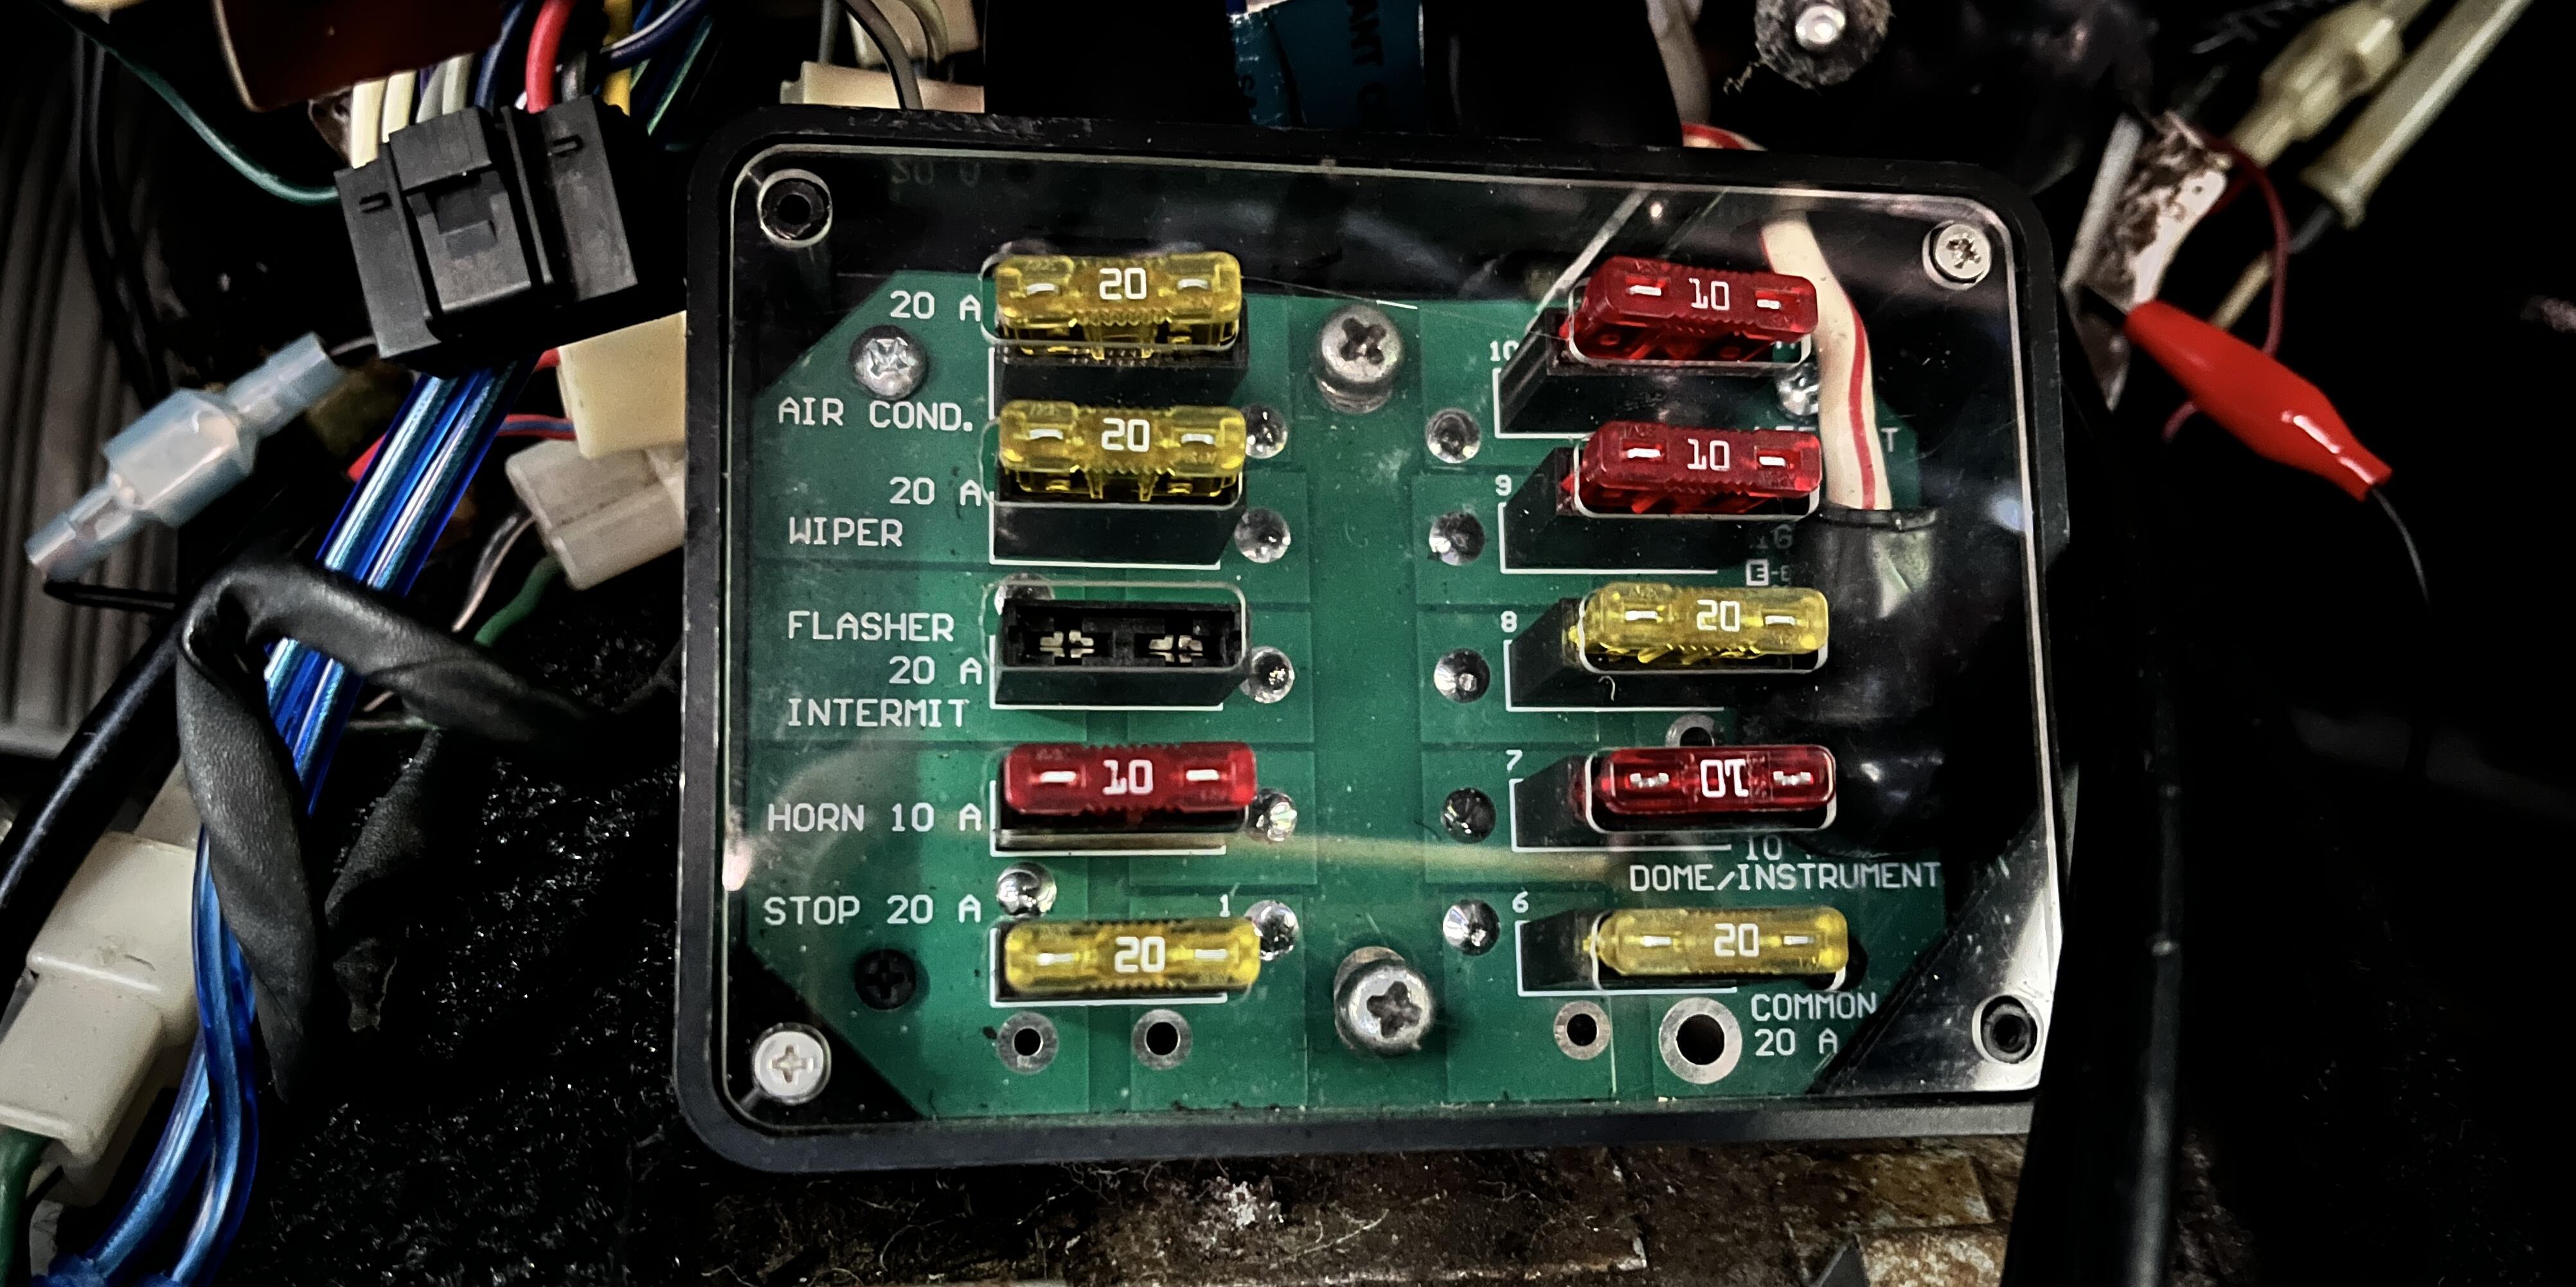
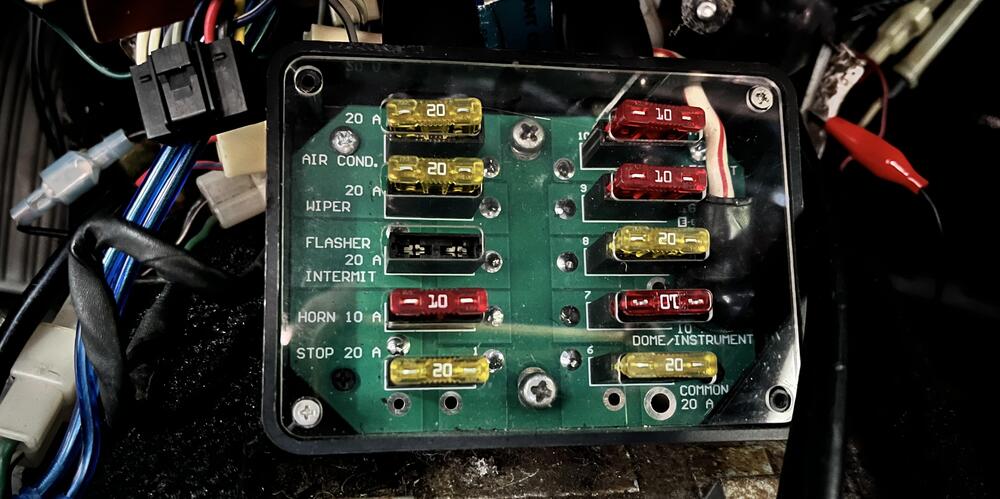
What would cause my brake light and gauge lights fuse to blow? I put the car in reverse and it blew! As you can see in my picture, I upgraded to the blade style fuse box. The fuse missing is the 20 amp that keeps blowing. The car is a ‘73 240z.
-
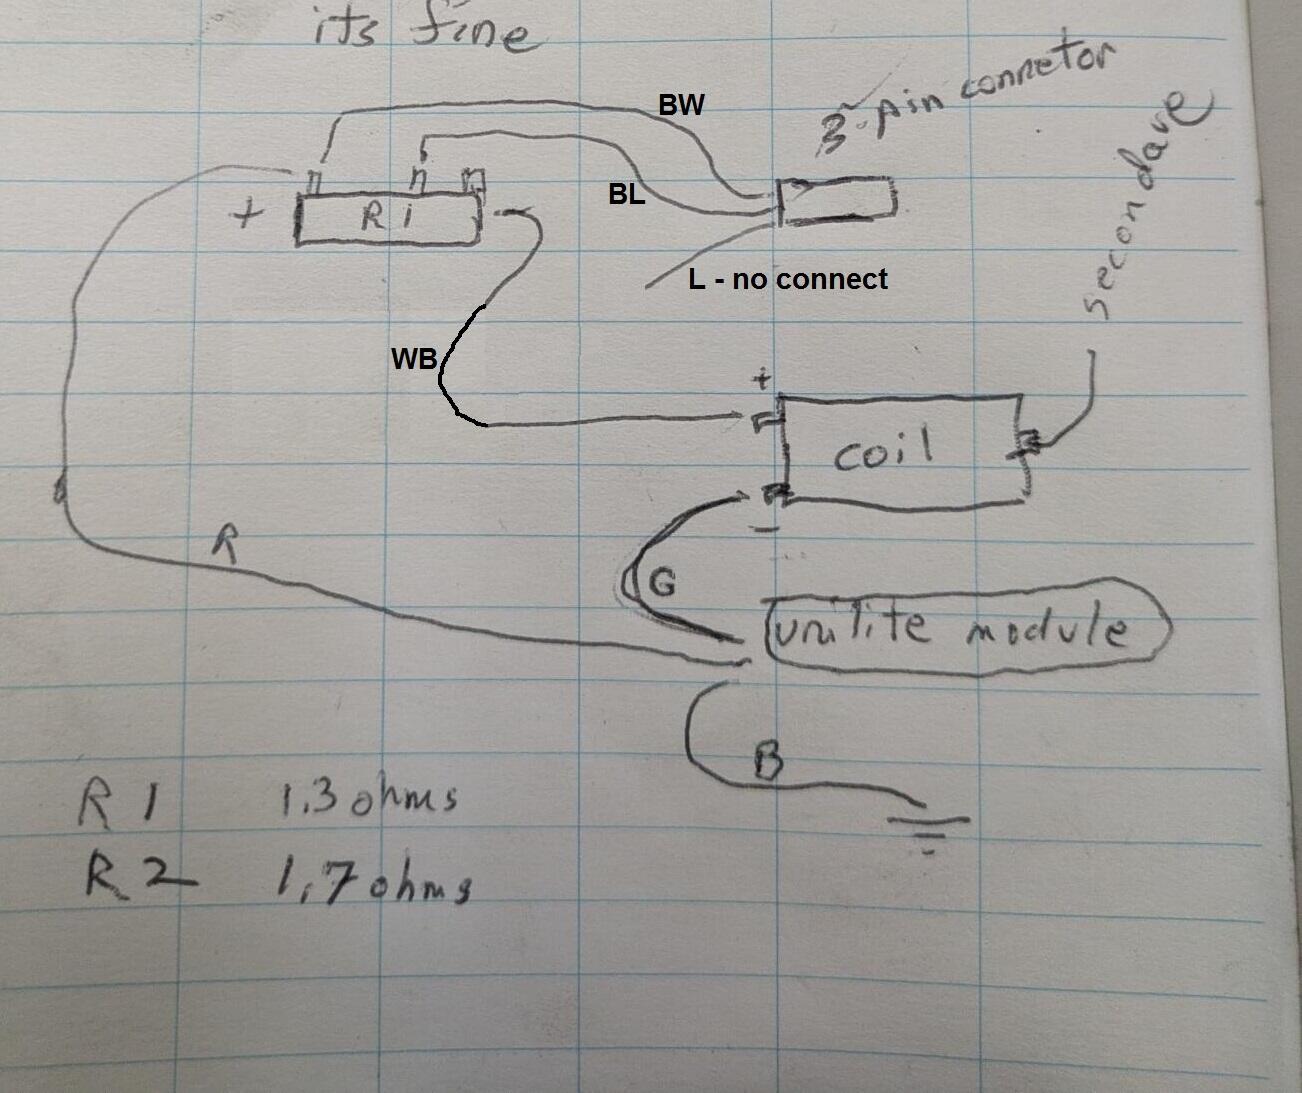
 The connector is definitely factory and is shown on the wiring diagram. The blue wire splits with one wire going to another resistor and on to the C-4 connector and the second wire that leads to what's labeled as a "full transistor ignitor unit" (FTIU) (whatever that is). The black with blue wire goes to the C-5 connector The black with white wire goes to the emergency switch, the FTIU and the Inter Lock (sic) switch.
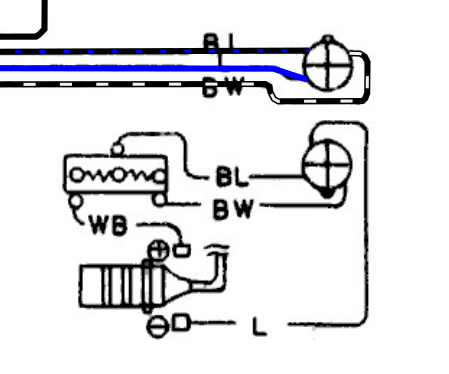
-
Can you post a picture of your floats? It should not look like a ramp, more like a hump. They should look like this... Not like this...