All Activity
- Past hour
-
 The ZX has a 3 groove pulley. Third groove was for the power steering pump.
 -
@Mike
- Today
-

-
 Yep.
Yep. -
 Did precision plate those door latches? They look really good!
 -
 Find a weather resistant maxi fuse (or ANL fuse) holder if you are planning to mount the fuse holder where the current fusible link holders reside. I also suggest using ferrules on the wire ends to improve clamping force on the wires. You will need to find a ferrule crimper that can handle the wire sizes (relatively easy to find on Amazon). Here is an example of a marine ANL fuse holder: https://www.crutchfield.com/p_867FUSEDIS/Wet-Sounds-WWX-FUSE.html
 -
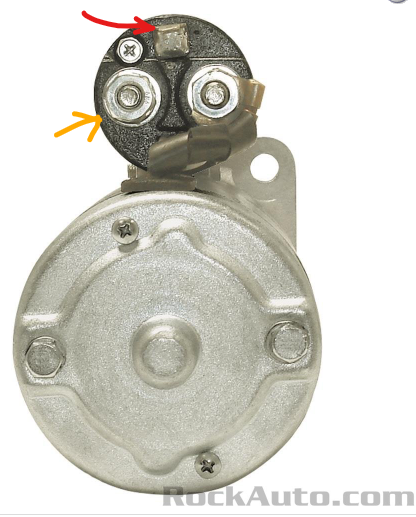
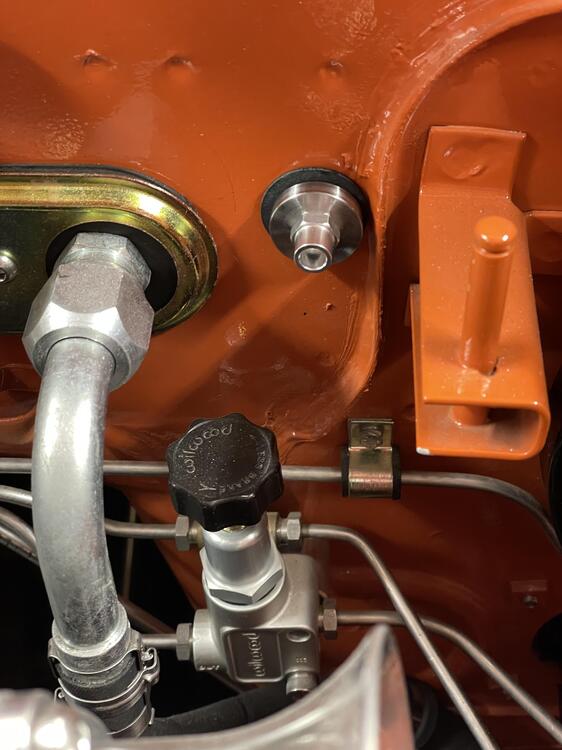
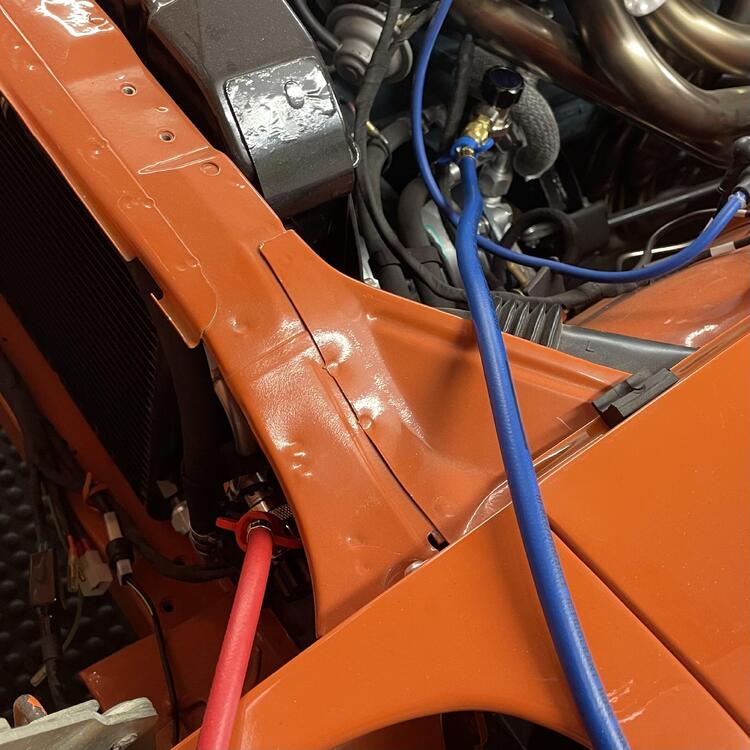
The click you hear is normal. That is the accessory relay. Move on from that. You need to verify voltage to ground (or negative) at the starter solenoid when the key is in START. That is the black/yellow wire. Suggested actions: Pull the black/yellow wire off the starter solenoid. Put the positive voltmeter lead on the black/yellow wire and the negative lead on the battery negative. Have your assistant turn the key to the START position. Measure the voltage (and report it here). If you have around battery voltage at the black/yellow wire, then here is the next test. Keep the black/yellow wire removed. Ensure the car is in neutral. Get a screwdriver. Touch the screwdriver to the positive cable on the starter and the spade terminal where the black/yellow wire was. You don't have to hold it there for long. If it doesn't engage the solenoid immediately, try a couple of more times. Red arrow - Spade for black/yellow wire Orange arrow - Positive cable from the battery. If the solenoid immediately engages, then your starter solenoid is probably in good shape. Report your results.
-
 When it’s time to buy a laptop, one question always comes up: new or used? The right answer depends on more than just your budget—it’s about getting the best value for your needs. In this article, we break down when a used laptop is the smarter choice and what to look for before you buy. Looking for quality and affordability? Check out Soum, a trusted platform offering a wide selection of carefully inspected used laptops to suit every need. Advantages of Buying a Used LaptopOpting for a used laptop can present buyers with numerous compelling benefits. Here are the most significant advantages: 1. Substantial Cost SavingsThe foremost benefit of purchasing a used laptop is the significant financial relief it offers. Buyers can save a considerable portion of the original cost—often 50% or more—especially when purchasing from reputable brands or high-spec models. In today's economic climate, such savings can be a game-changer. 2. Access to High-End Models at Affordable PricesGoing for a used laptop opens the door to premium specifications at a fraction of the price. Consumers can afford devices equipped with faster processors, more RAM, and superior graphics performance—all of which are typically out of reach with new models in the same price range. This makes used laptops an attractive option for various groups including students, programmers, designers, and professionals who need powerful machines without breaking the bank. 3. Environmentally Sustainable ChoiceChoosing to buy a used laptop is a responsible environmental decision. It helps reduce e-waste and extends the lifecycle of electronic products. Prolonging device use lessens the demand for raw materials and the energy required to manufacture new products, thereby shrinking the tech industry’s overall carbon footprint. 4. Conservation of Natural ResourcesBy choosing a pre-owned laptop, you contribute to minimizing the exploitation of raw materials, many of which are sourced from ecologically sensitive regions. This supports environmental preservation and encourages circular economy practices within the tech sector. 5. Greater Availability of Spare PartsOlder laptop models often come with the benefit of having more accessible and affordable replacement parts. This makes maintenance and repairs easier and more cost-effective, allowing the device to remain functional and serviceable for longer periods. Potential Challenges of Buying a Used LaptopLike any second-hand purchase, buying a used laptop comes with certain risks. Below are some of the common challenges: 1. Hidden Technical IssuesOne major concern is the potential presence of hidden defects or wear-and-tear issues. Problems may involve the battery, screen, keyboard, or even internal components like the hard drive or memory—leading to unexpected repair or replacement expenses. 2. Lack of Warranty CoverageUsed laptops frequently lack warranty protection or come with very limited coverage. This means any post-purchase repairs fall entirely on the buyer, possibly straining a carefully planned budget, especially if major issues arise shortly after purchase. 3. Absence of Cutting-Edge TechnologyUsed laptops may rely on outdated technologies that don’t support modern software or applications. This could limit your ability to use the latest tools or require future hardware upgrades, which may be costly or impractical. 4. Compatibility LimitationsCompatibility can also be an issue, particularly with newer accessories or software. Older laptops may not support modern connectivity standards like USB-C or Thunderbolt 3, reducing their adaptability and future-proofing. 5. Hidden Ownership CostsWhile the initial price may be attractive, hidden costs can accumulate over time such as purchasing updated software, hardware upgrades, or dealing with downtime due to repairs. These factors can significantly impact the long-term cost of ownership. Buying a used laptop is a smart move when done right. For trusted deals and quality you can rely on, explore Soum’s collection of inspected, budget-friendly laptops tailored to your needs.
 -
gehad almalky joined the community
-
Suggestions Please: As is, my Series I (Jan. '71 build) will start. The problem is it is taking more and more turns of the ignition key to get it to fire-up. The only constant is that every time I turn the key for ignition, I hear a very audible 'click' coming from a relay(?) mounted on the interior wall in the area of the passenger's right knee. In addition to this clicking sound, I can feel the actual internal movement by touching the metal housing with my right hand while turning on the ignition with my left hand. To help with a diagnosis, the battery is strong, and the wiring contacts to the starter motor are clean. Also, this problem occurs the same with both sets of the original ignition keys. So, is the problem coming from the keys, the key barrel, the relay (as noted above), or farther down the line to the starter? Where do I begin? Thanks
-
 Somebody bumped the bid on the white 1970. By an odd amount. The guy buys a lot of car so there could be an interesting battle on tomorrow. Does anyone know if a 1970 240Z could have a three groove damper pulley? It has an L28 crankshaft so the damper has been off. The sellers on BaT are interesting because they often don't really know the details but don't want to say "I don't know".
-
 I don't know what others are using but I installed a pair of marine brakers on the firewall.
 -
 They have this kit and one with several more pieces, which I assumed was for 280zs.
 -
 Good luck, and just let us know if there are still unanswered questions.
 - Yesterday
-
@Matthew Abate Do you know if Newark Auto makes a carpet kit for the early cars? You're making good progress!
-
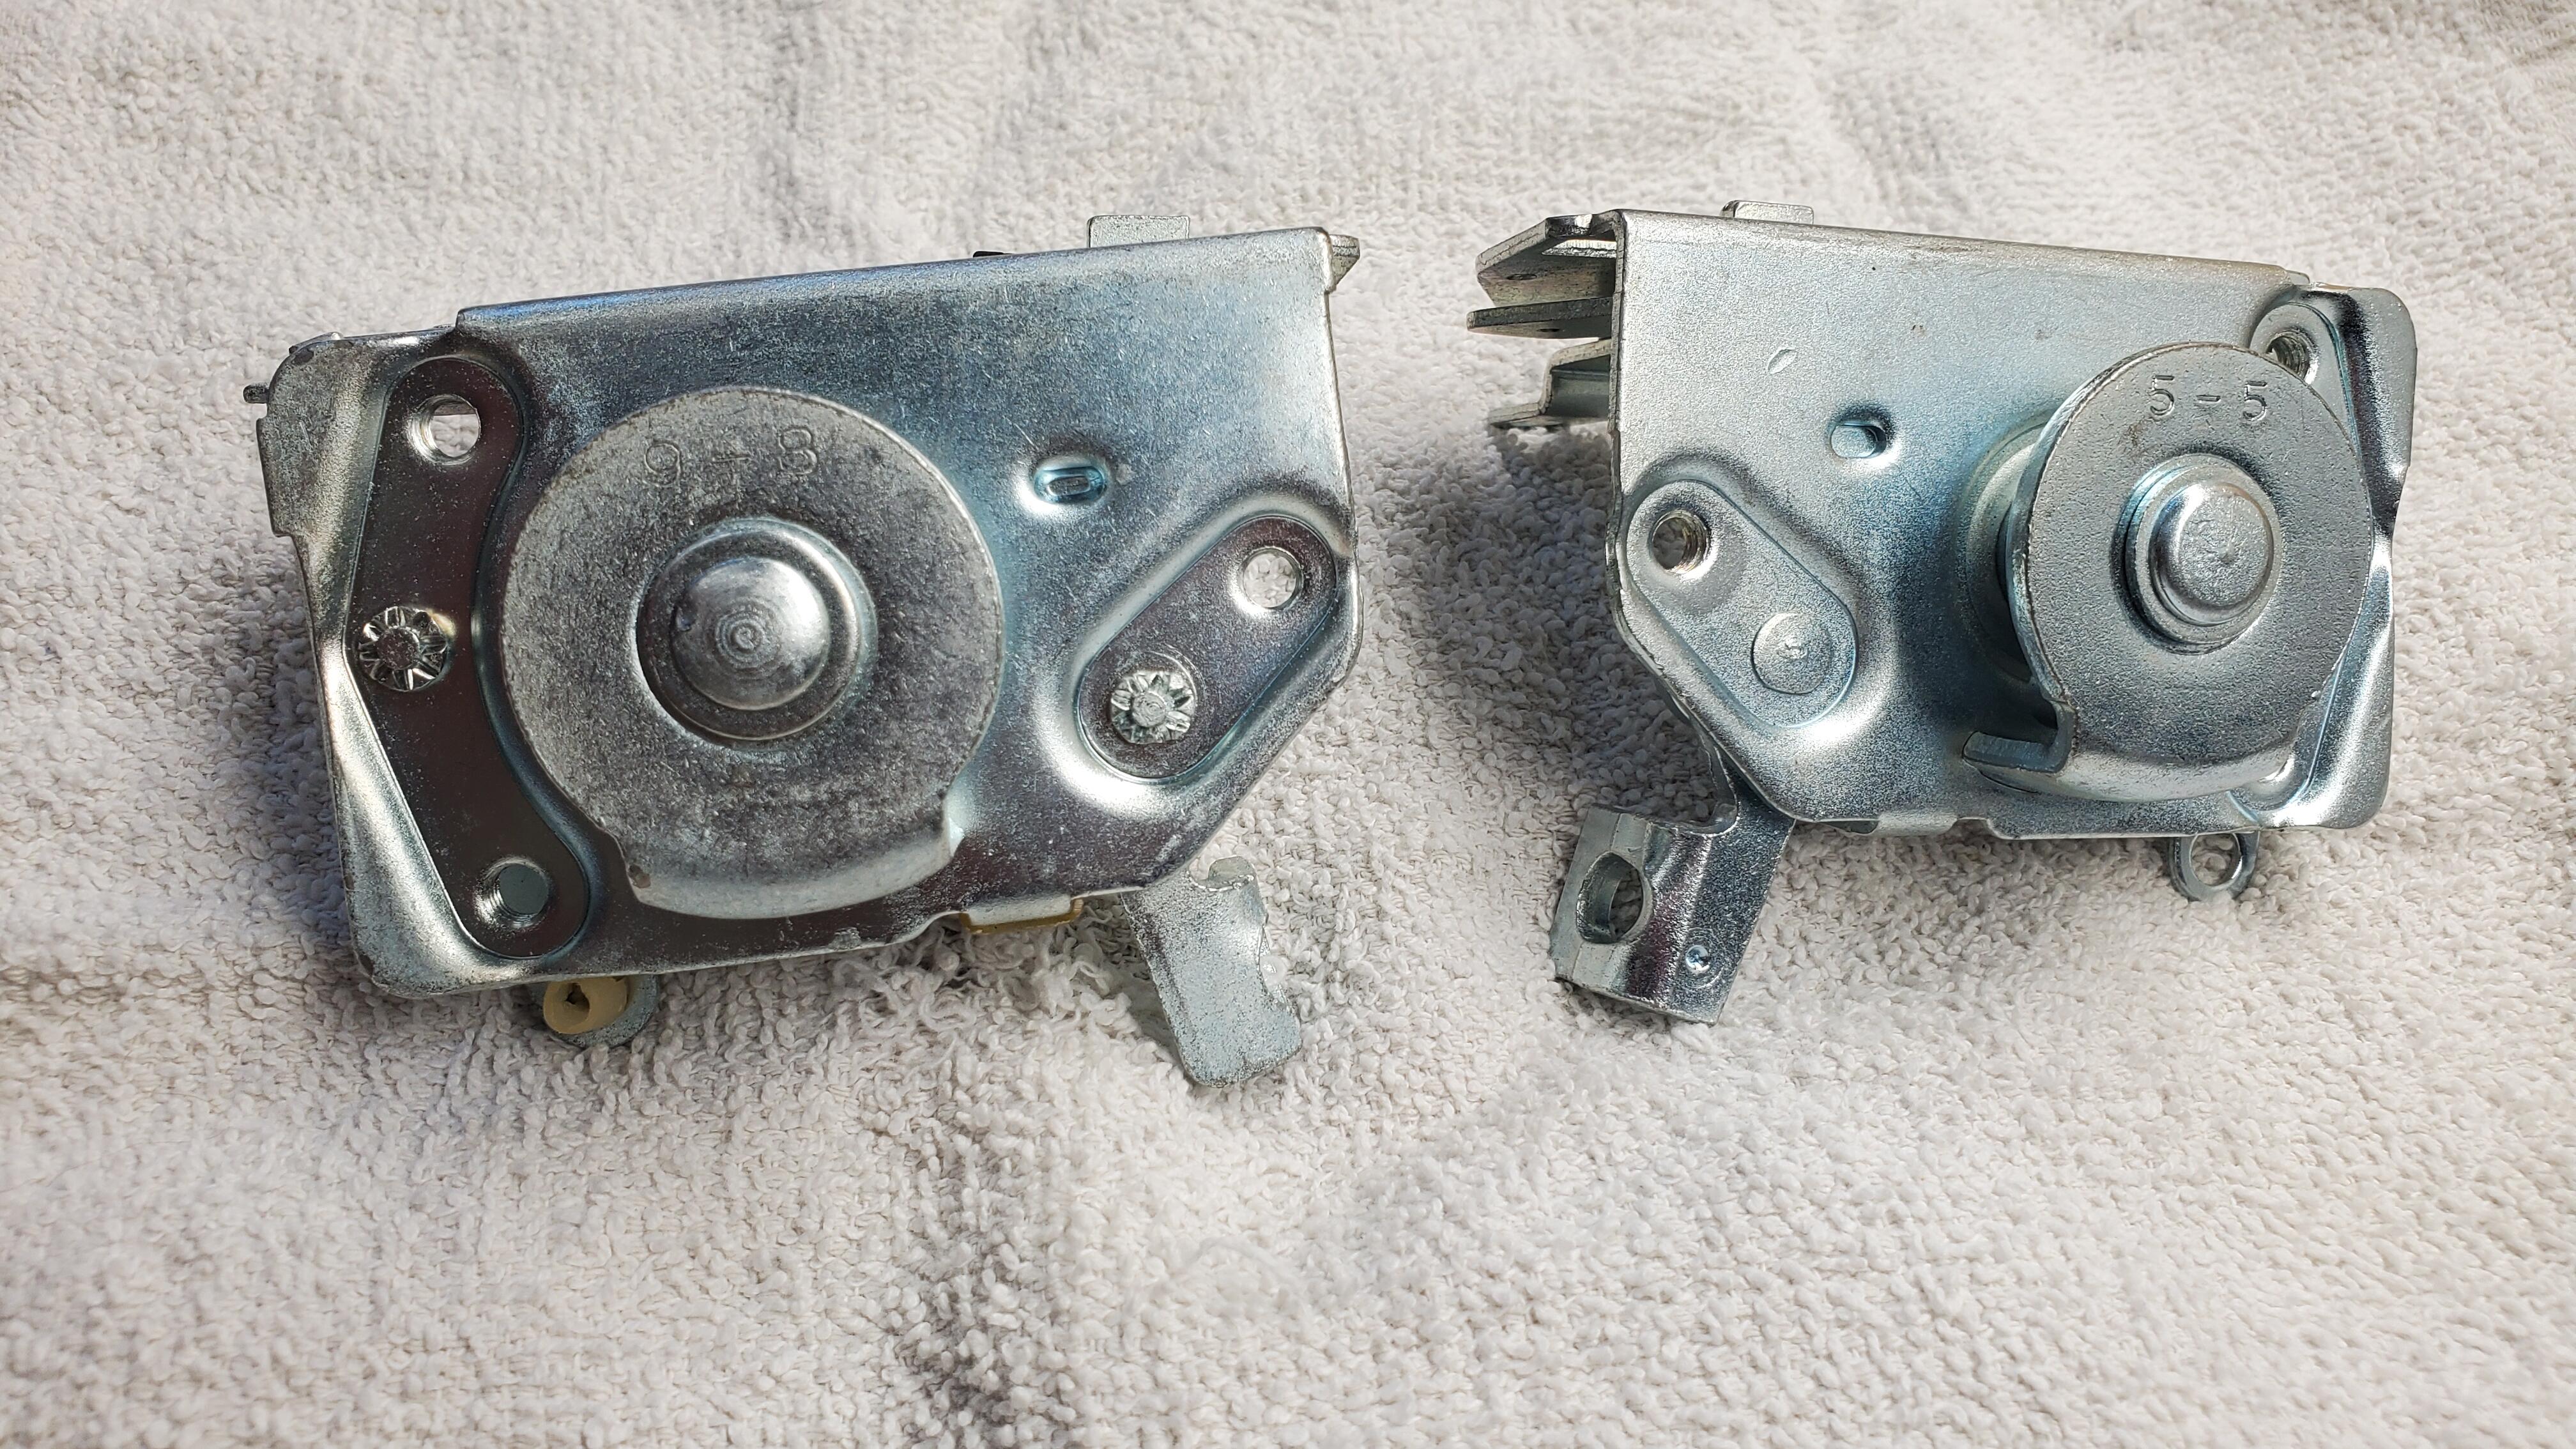
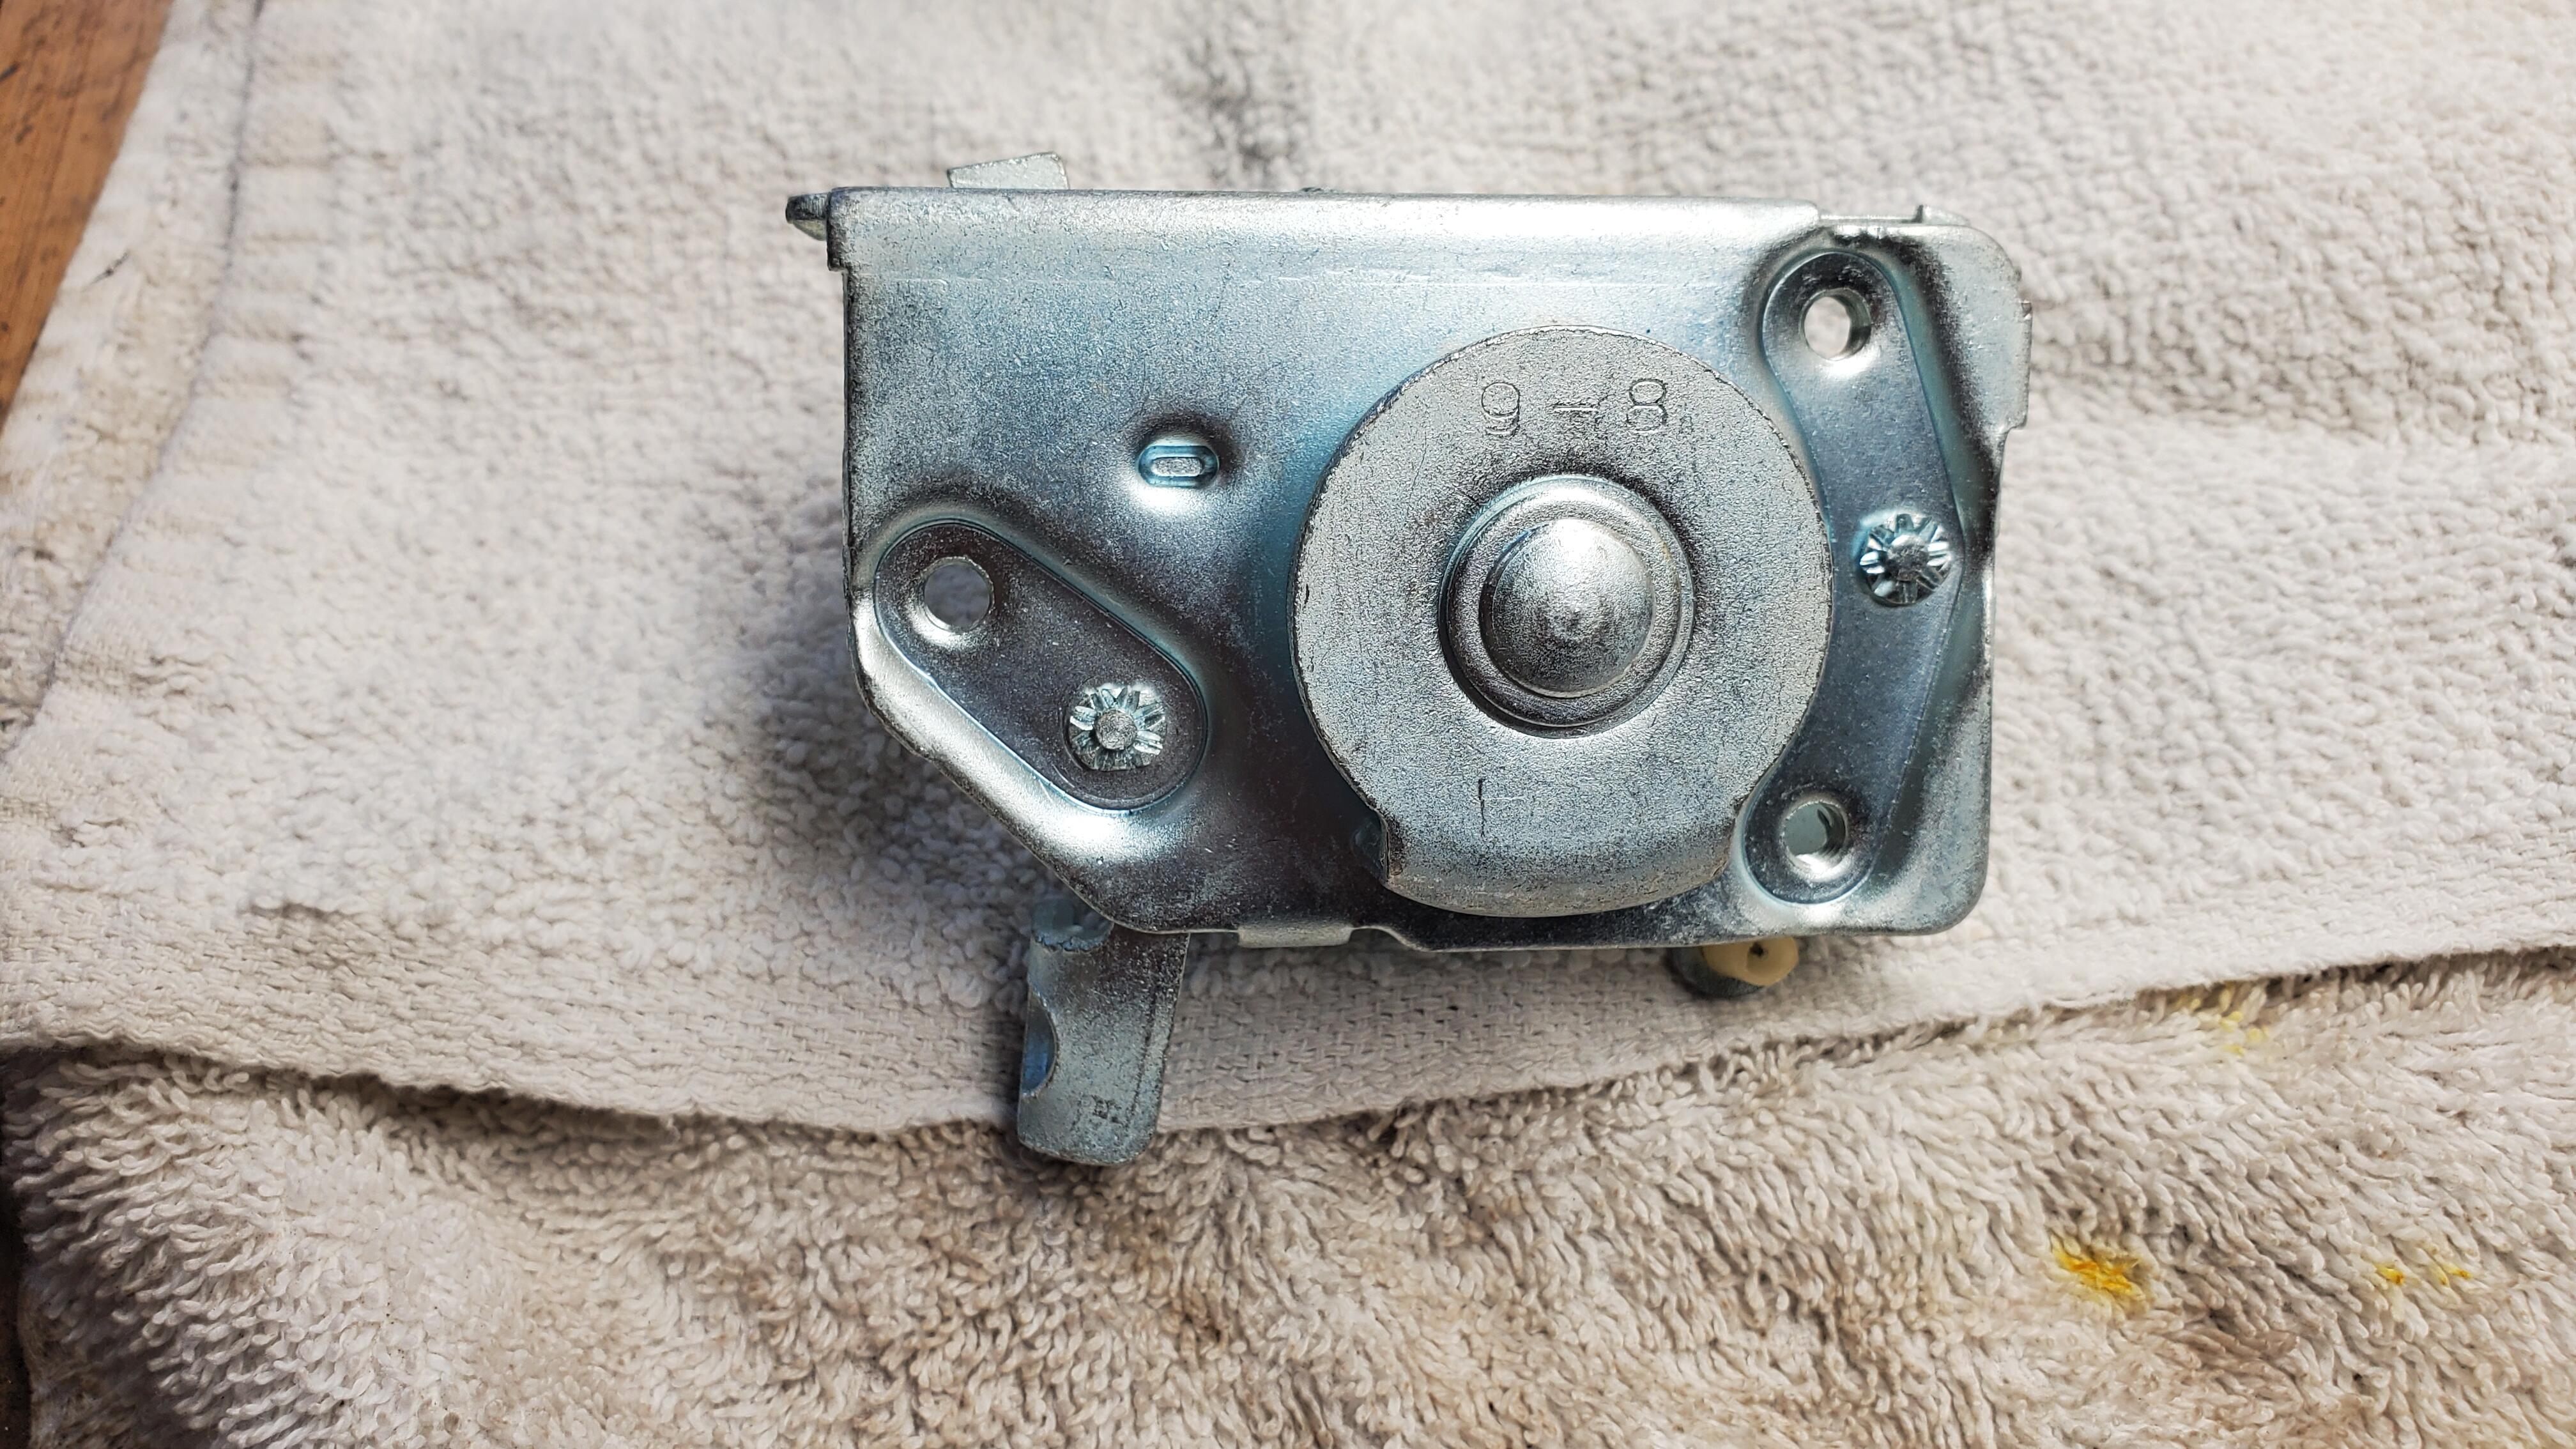
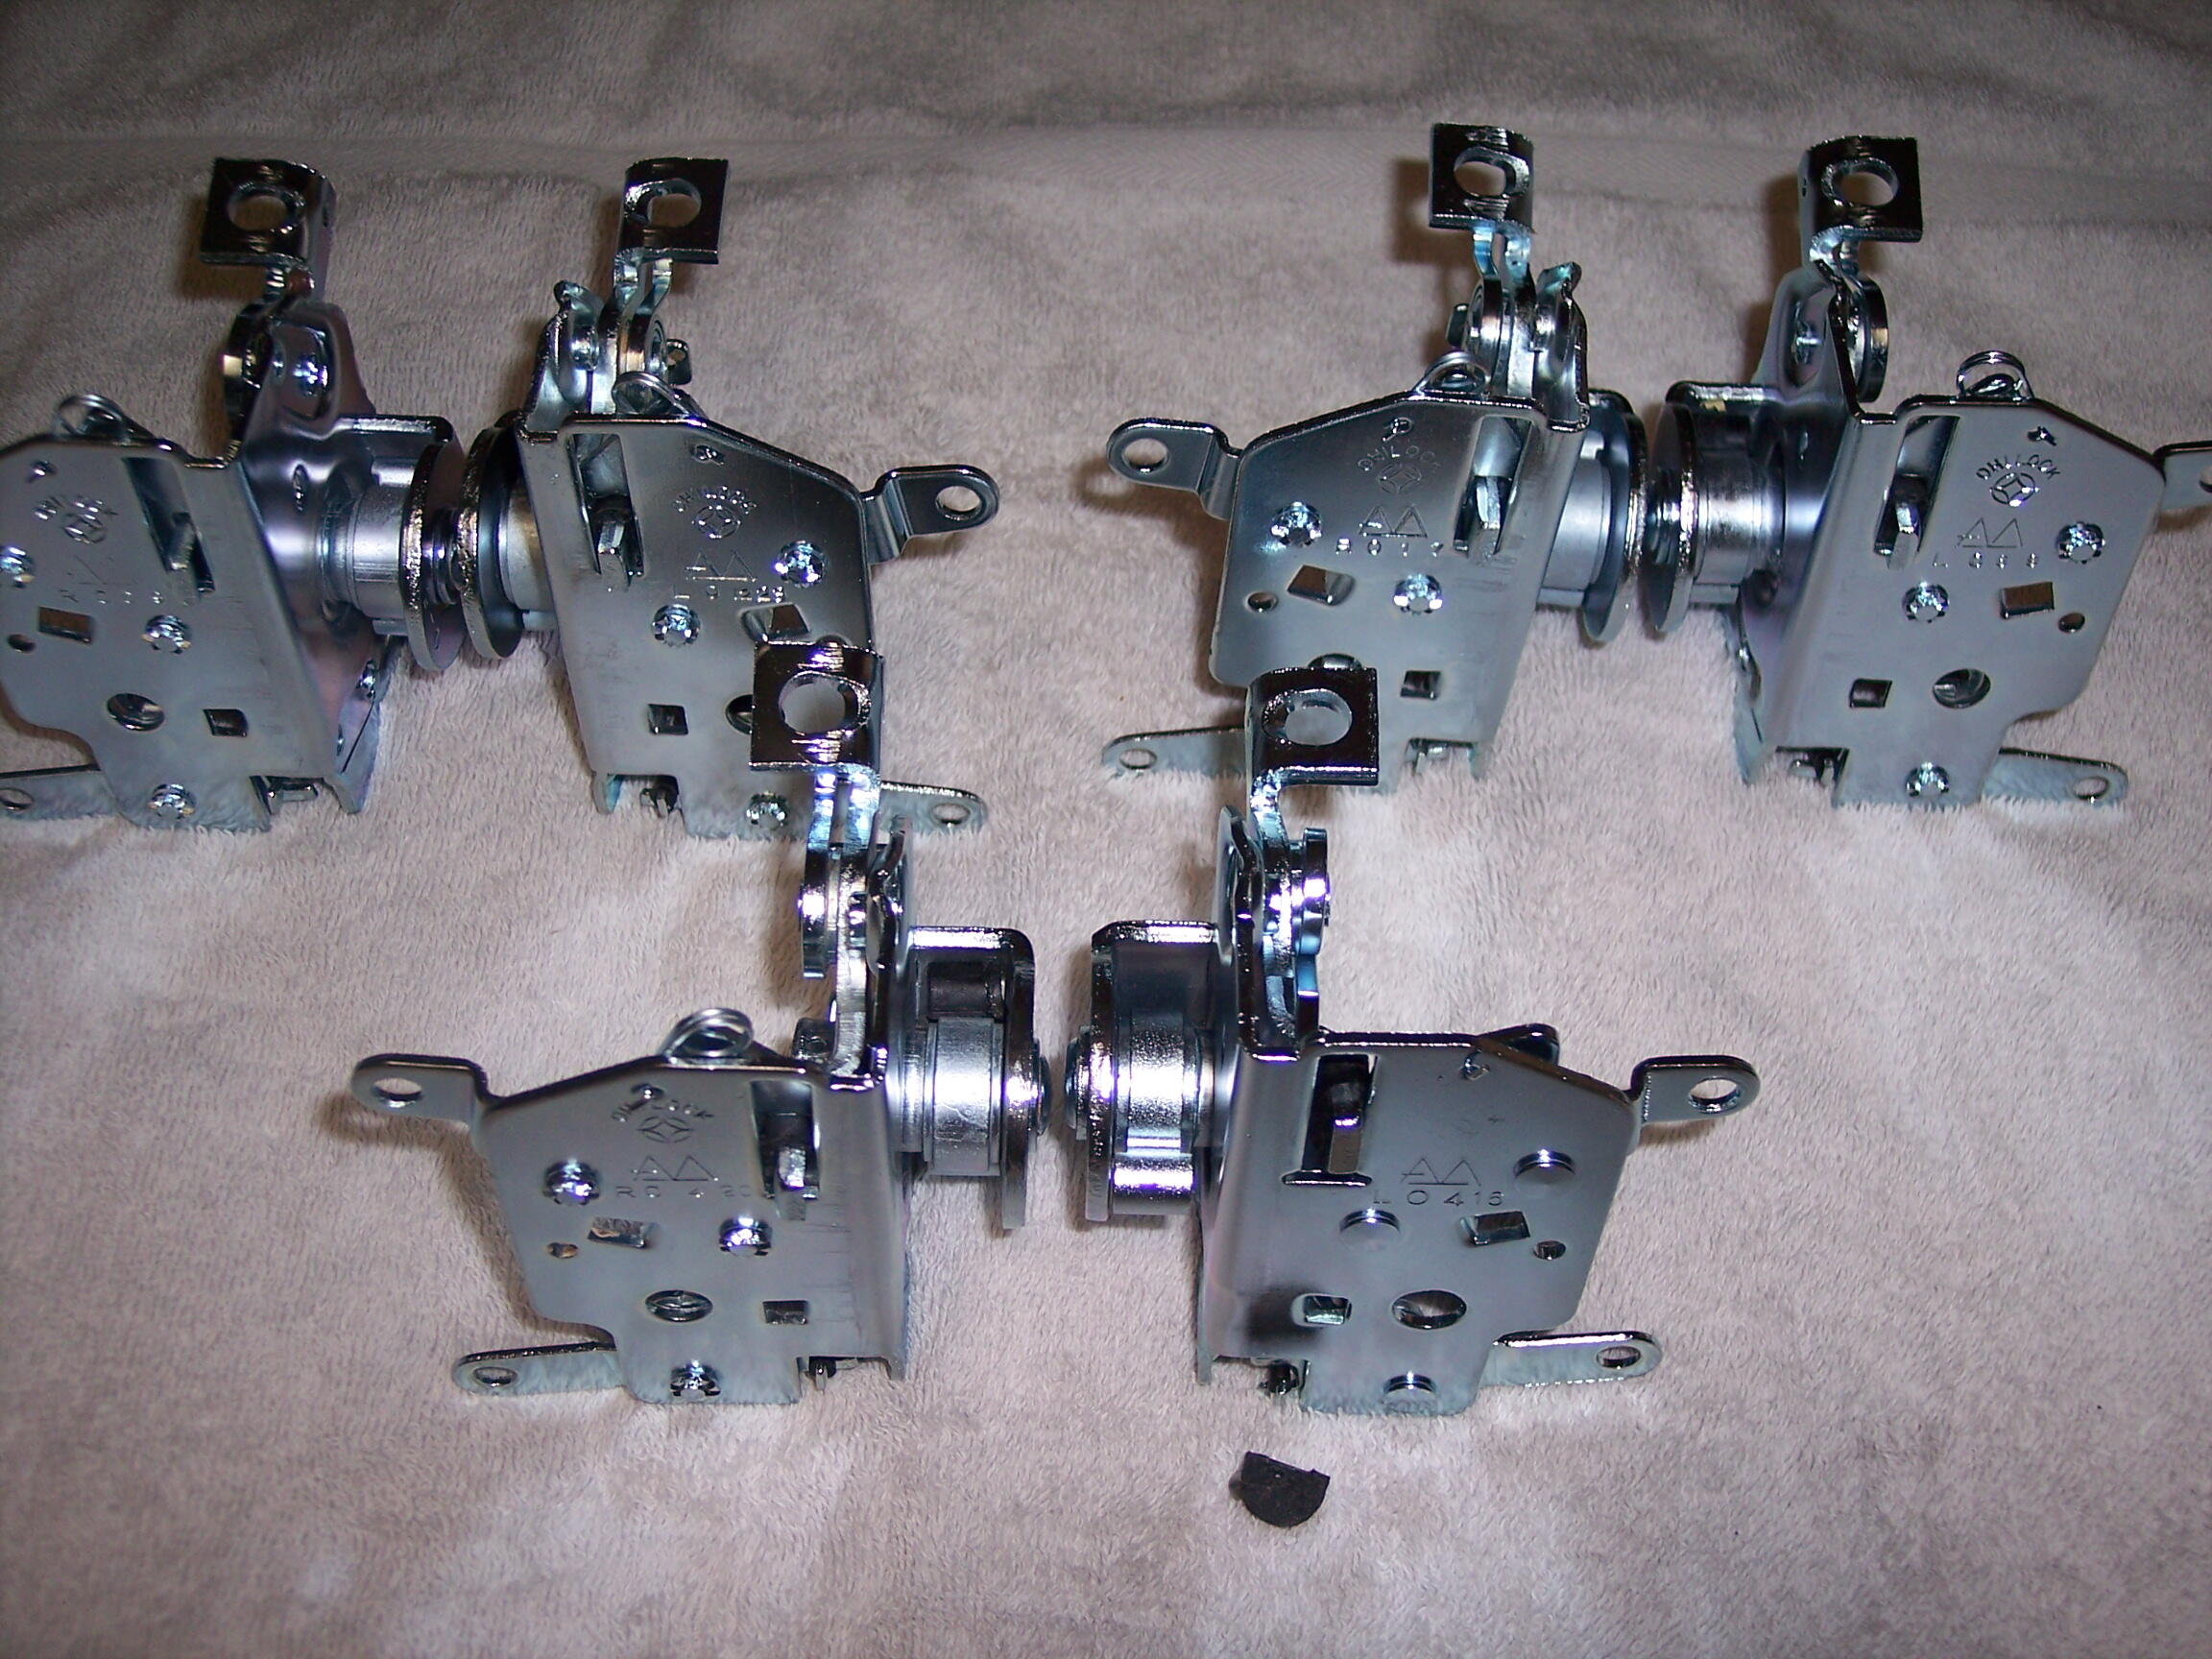
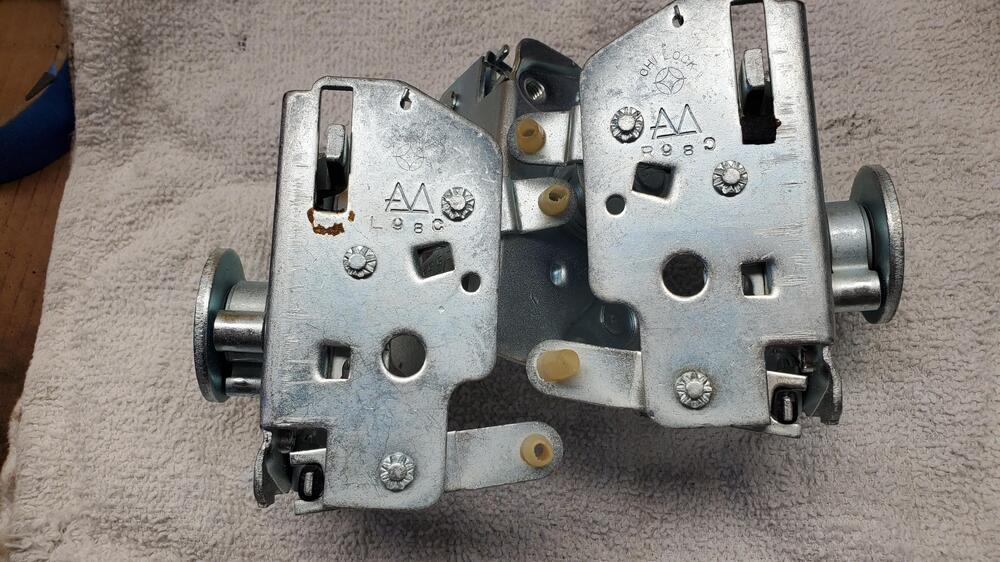
 This is all great info regarding date codes. I had to check my parts on this as the drivers door on 00042 was obviously replaced, passenger door is original. Drivers door has a 5-5 date code, while passenger door is 9-8. Amazingly, I checked my stash and I actually have a 9-8 driver's latch. Guess I will swap those out so they both say 9-8 Last pic shows the two spring types
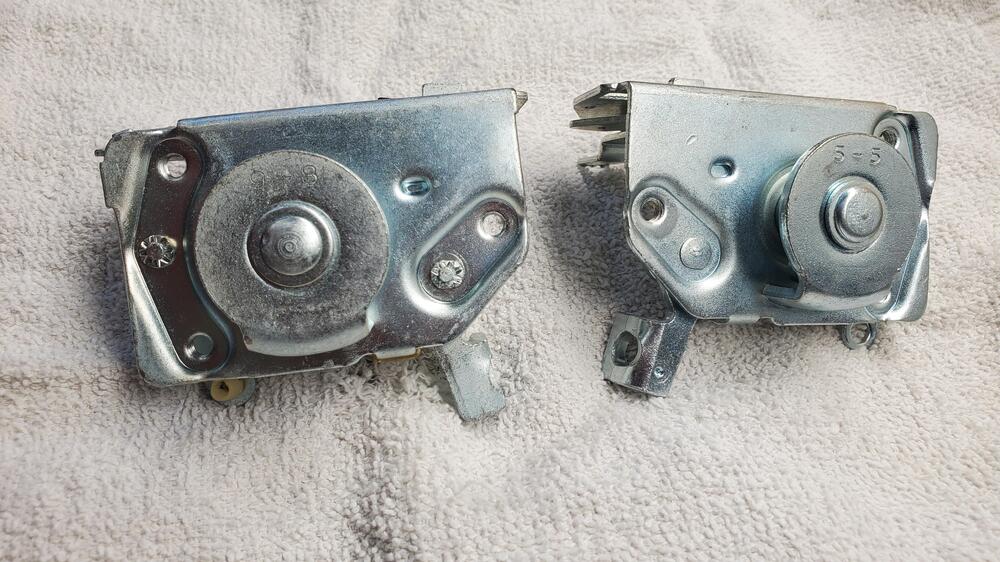


-
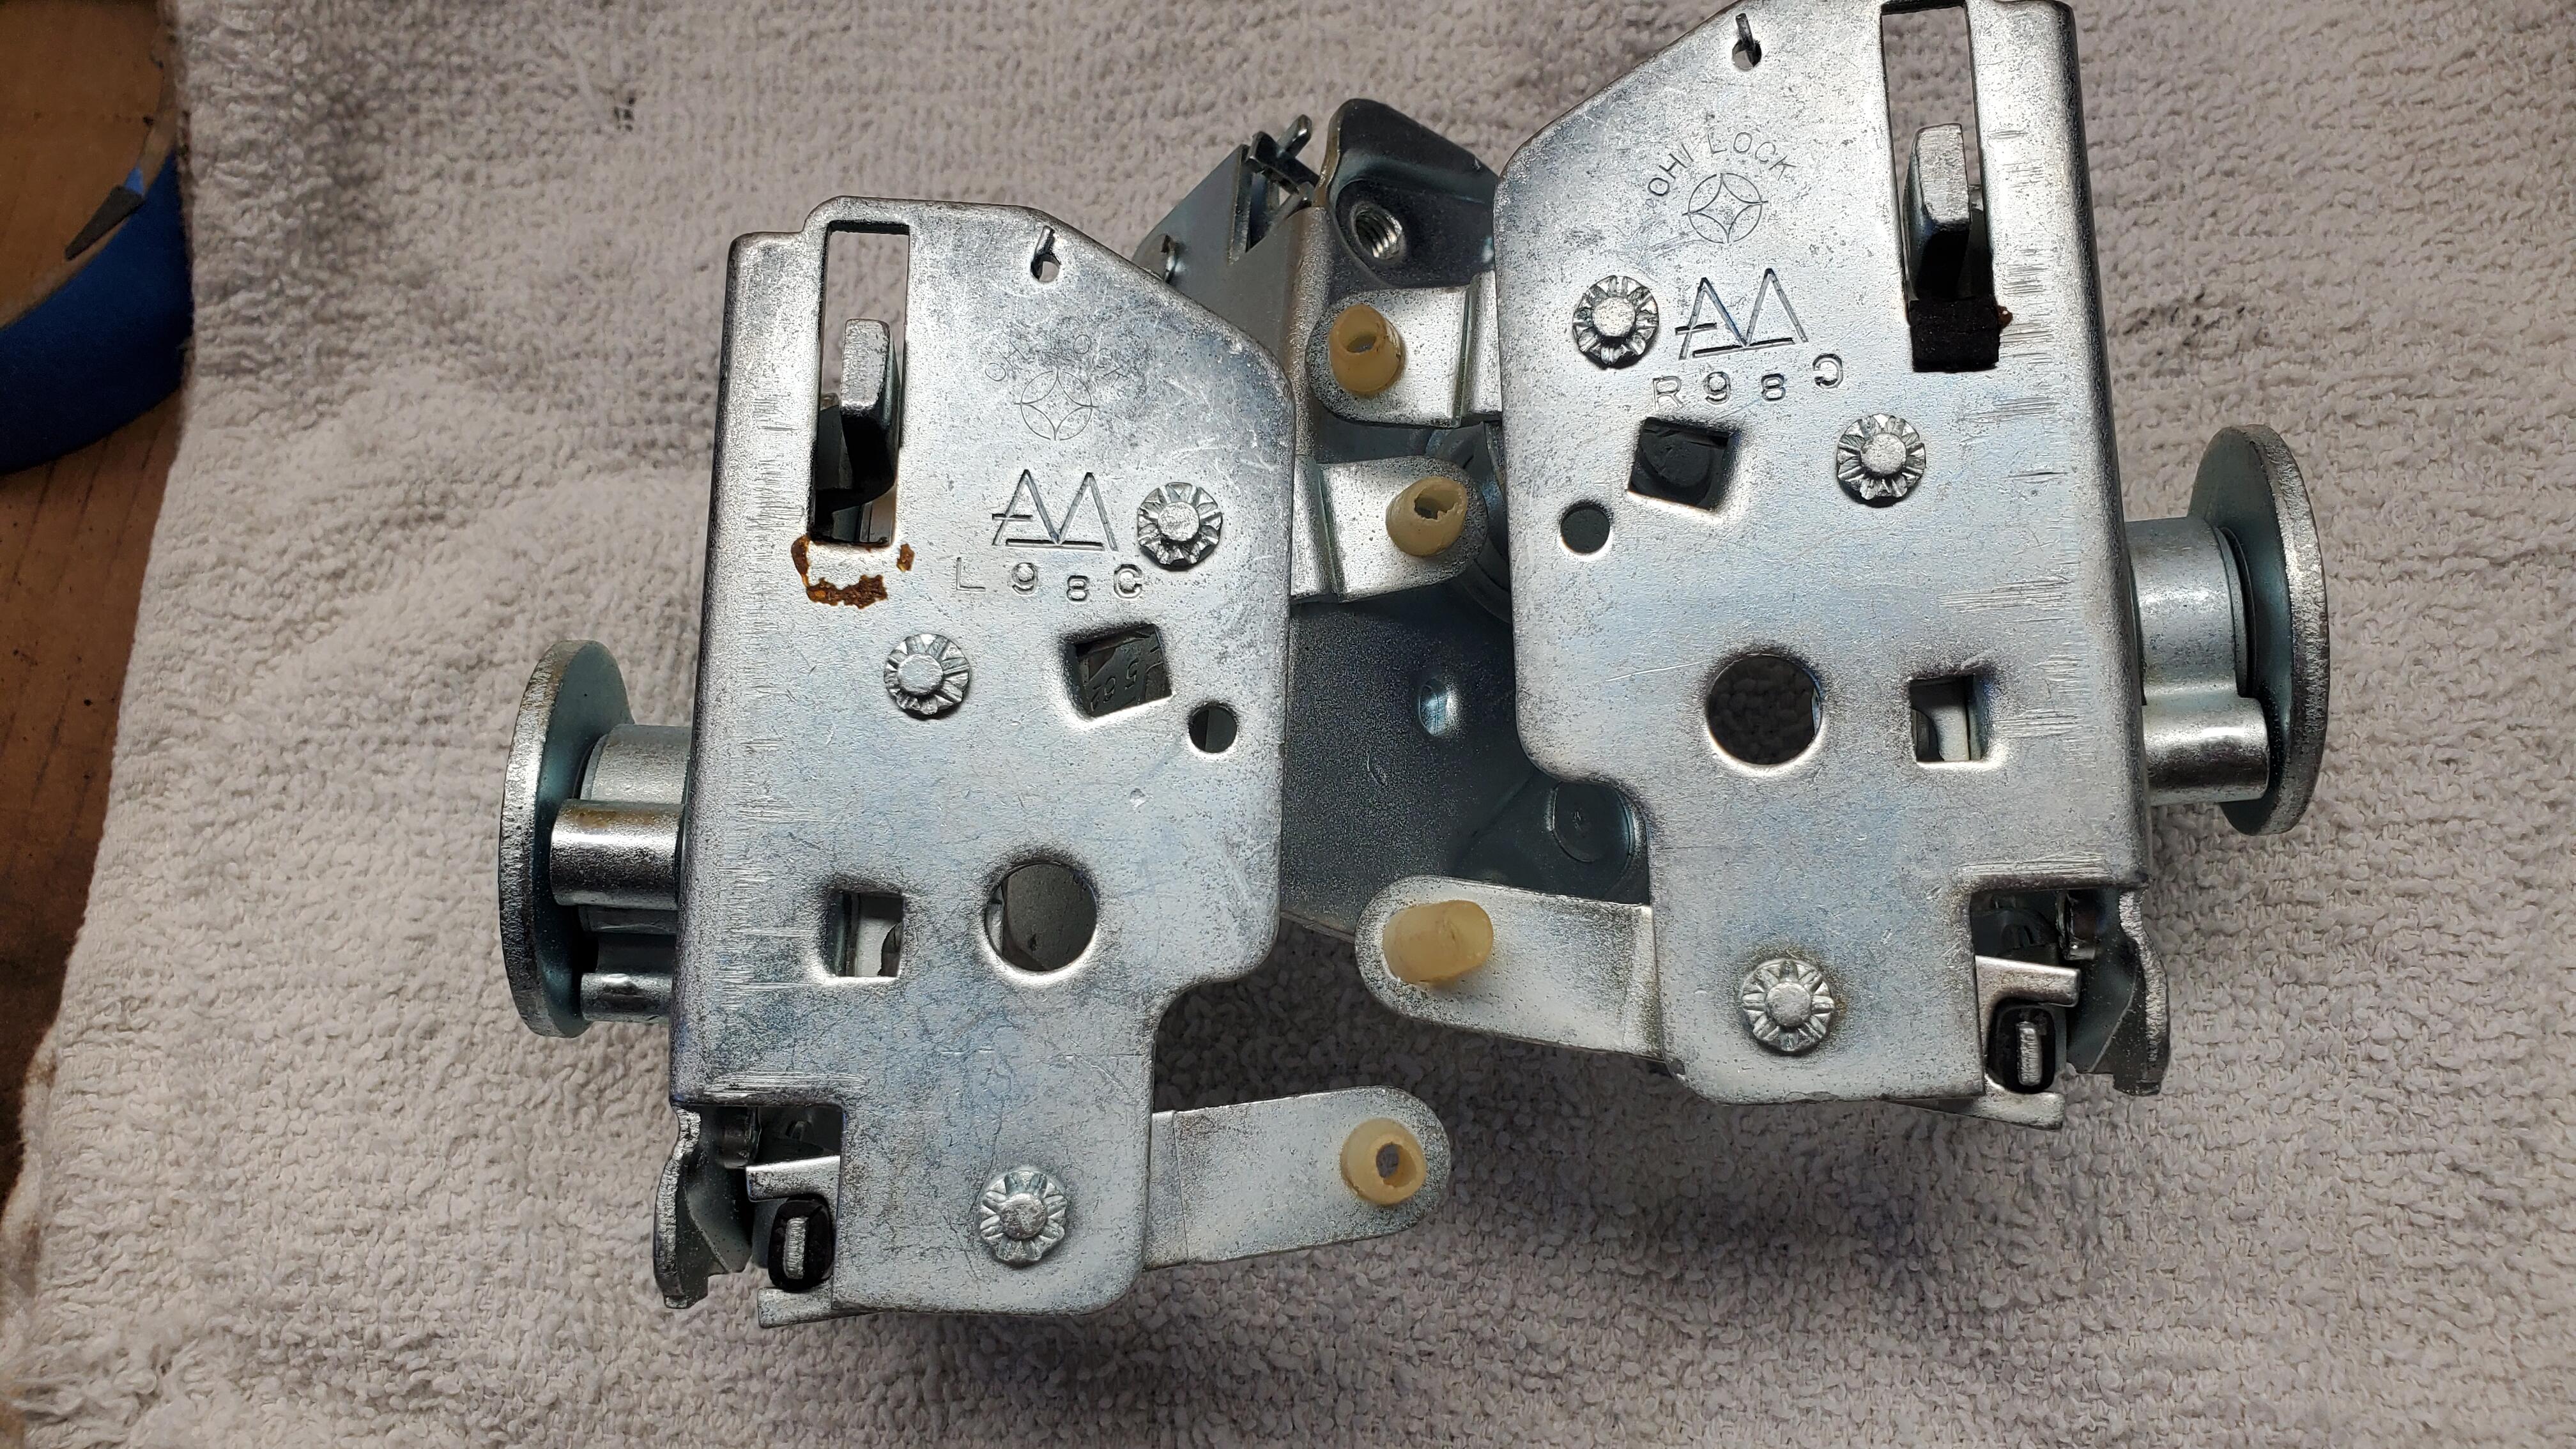
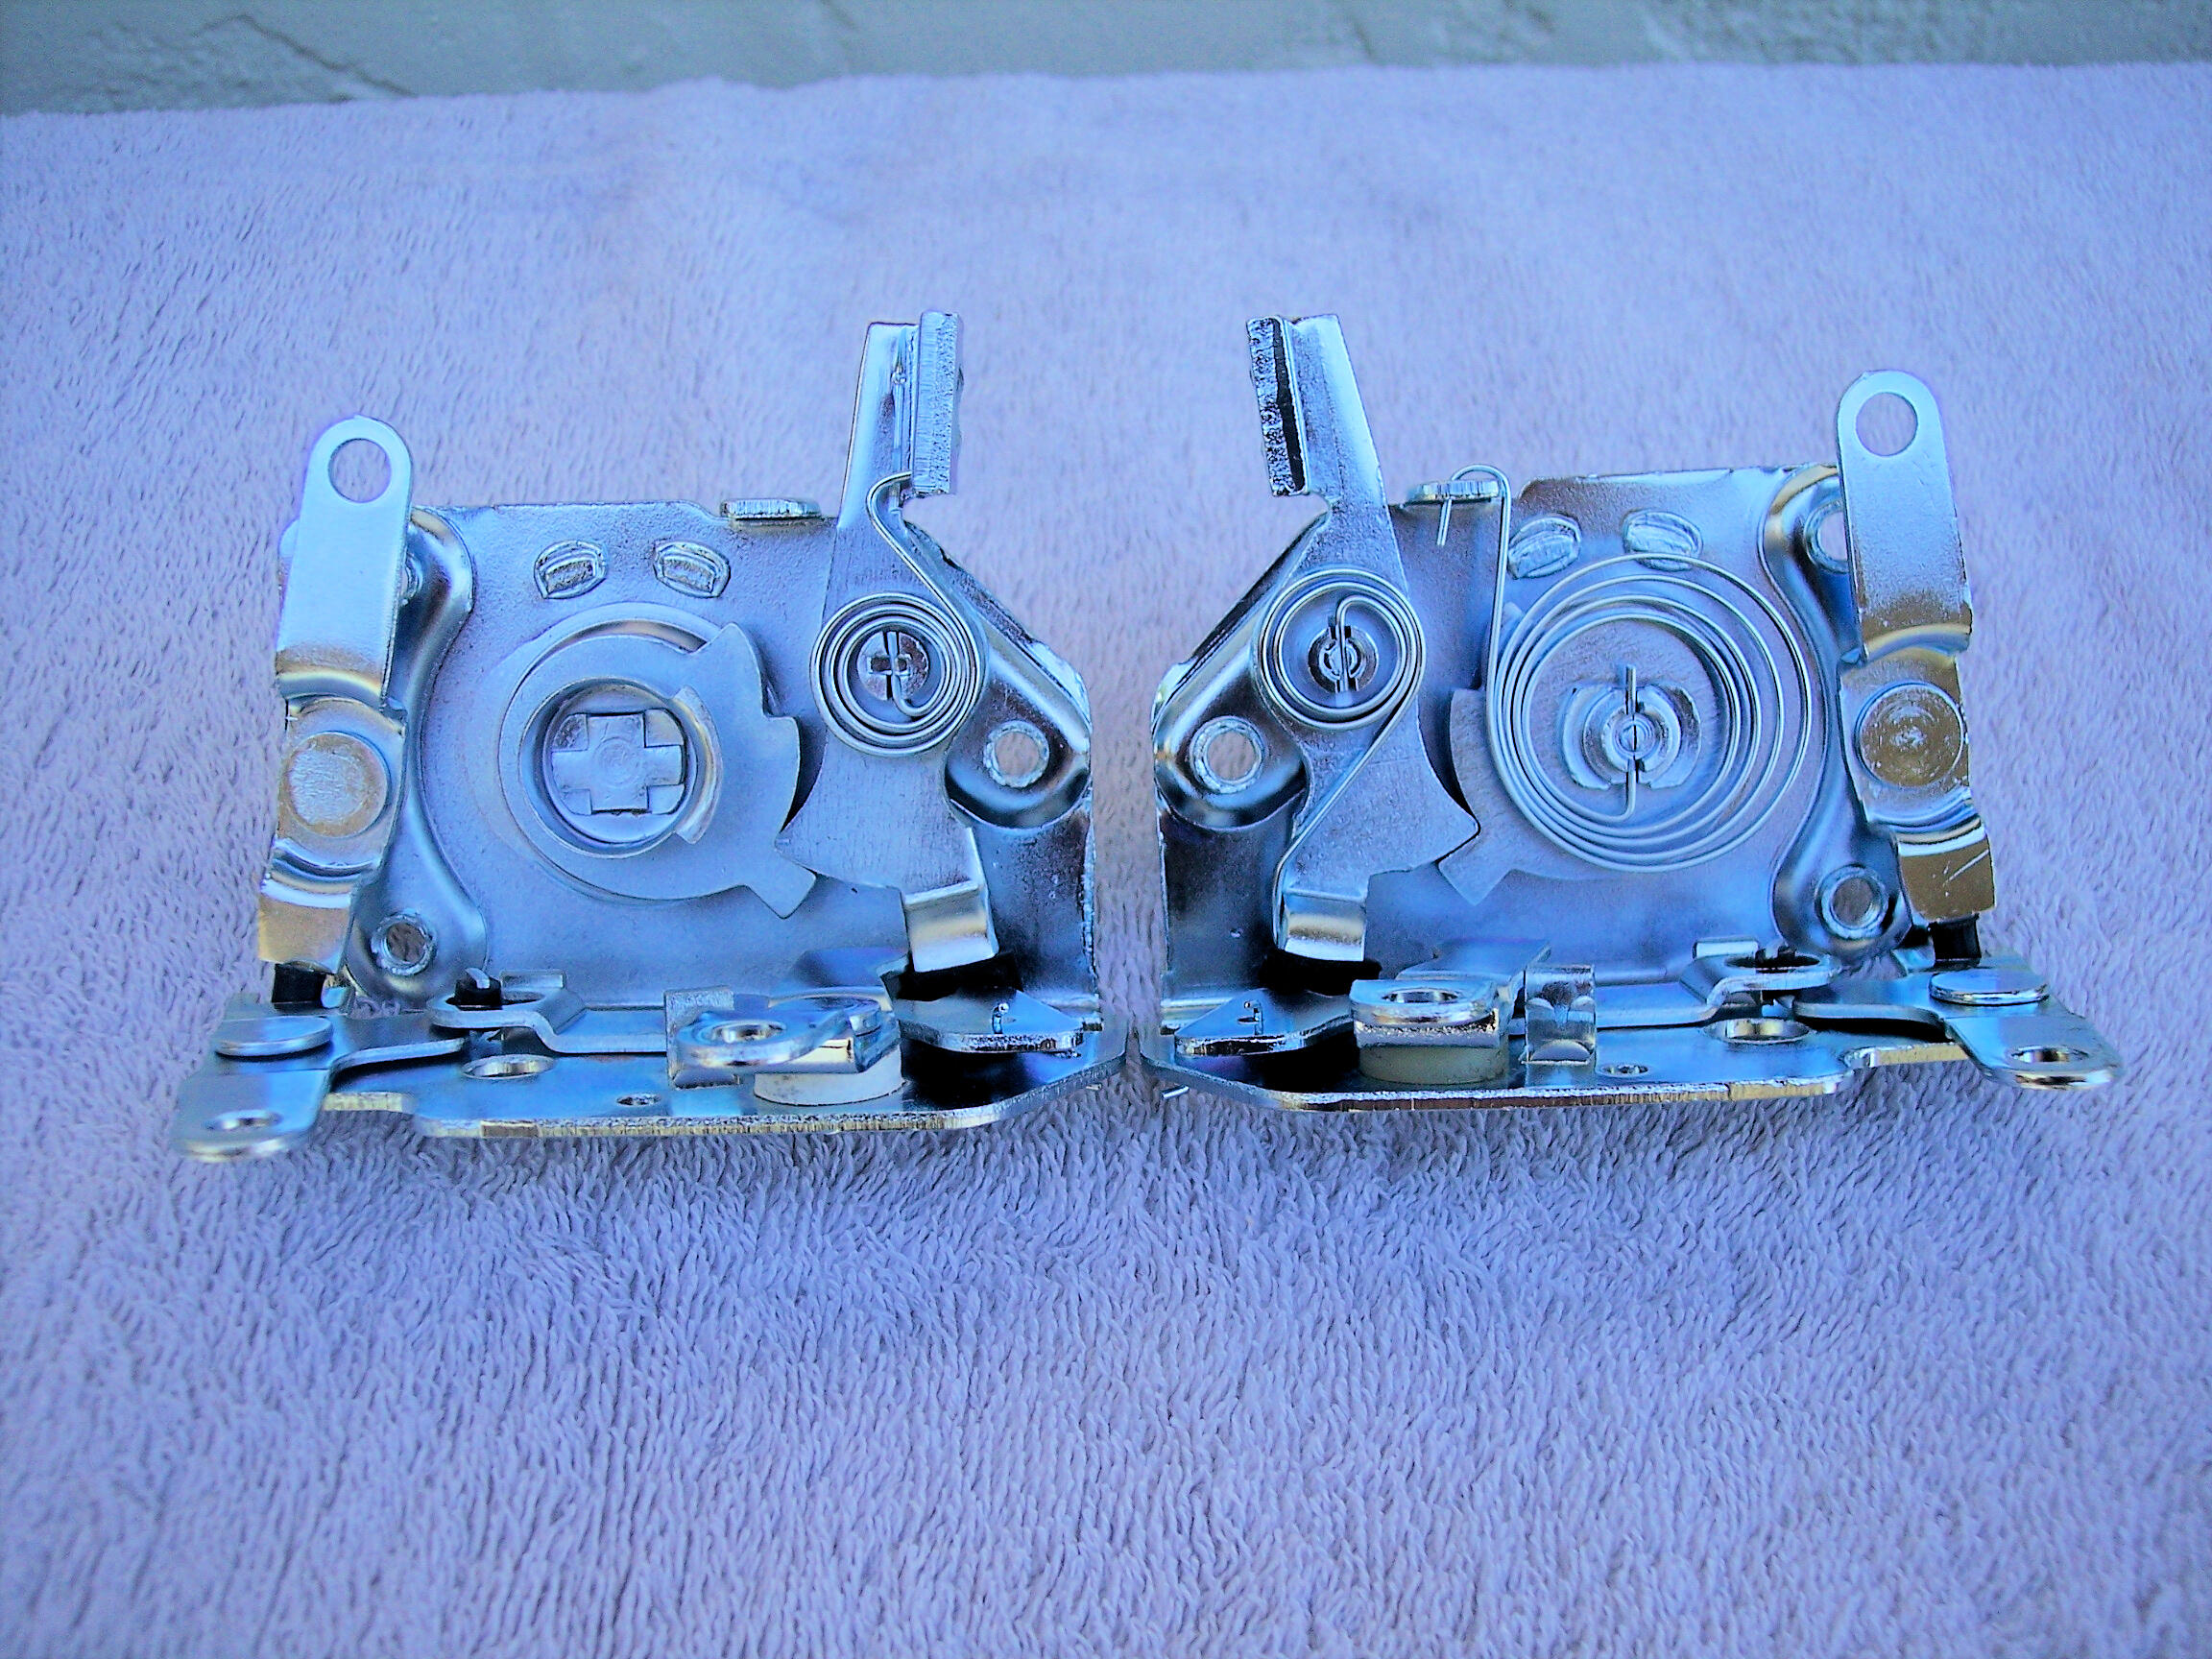
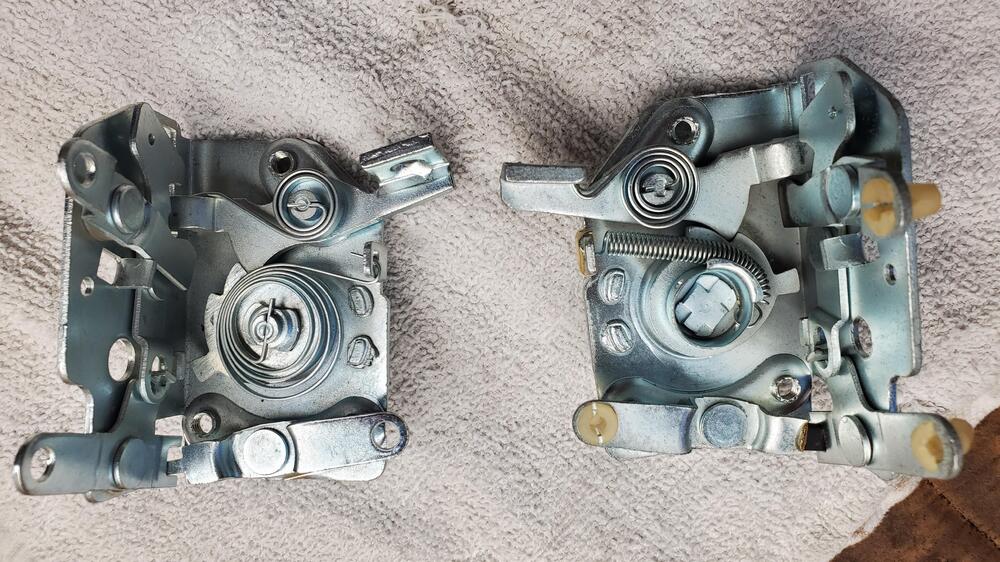
That was the 1st pic I posted, here it is again. The clock spring was only on one of the batch of six I picked up, all the others used a coil spring. What was interesting was that five of the six bodies had the straight slot, not the "T" slot. Pretty sure the "T" slot was an improvement to retain the bumper - at the bottom of the pic. Sorry I don't have a better pic to discern the date codes. I recall one set was matched and an early date, I think they went to @26th-Z .

-
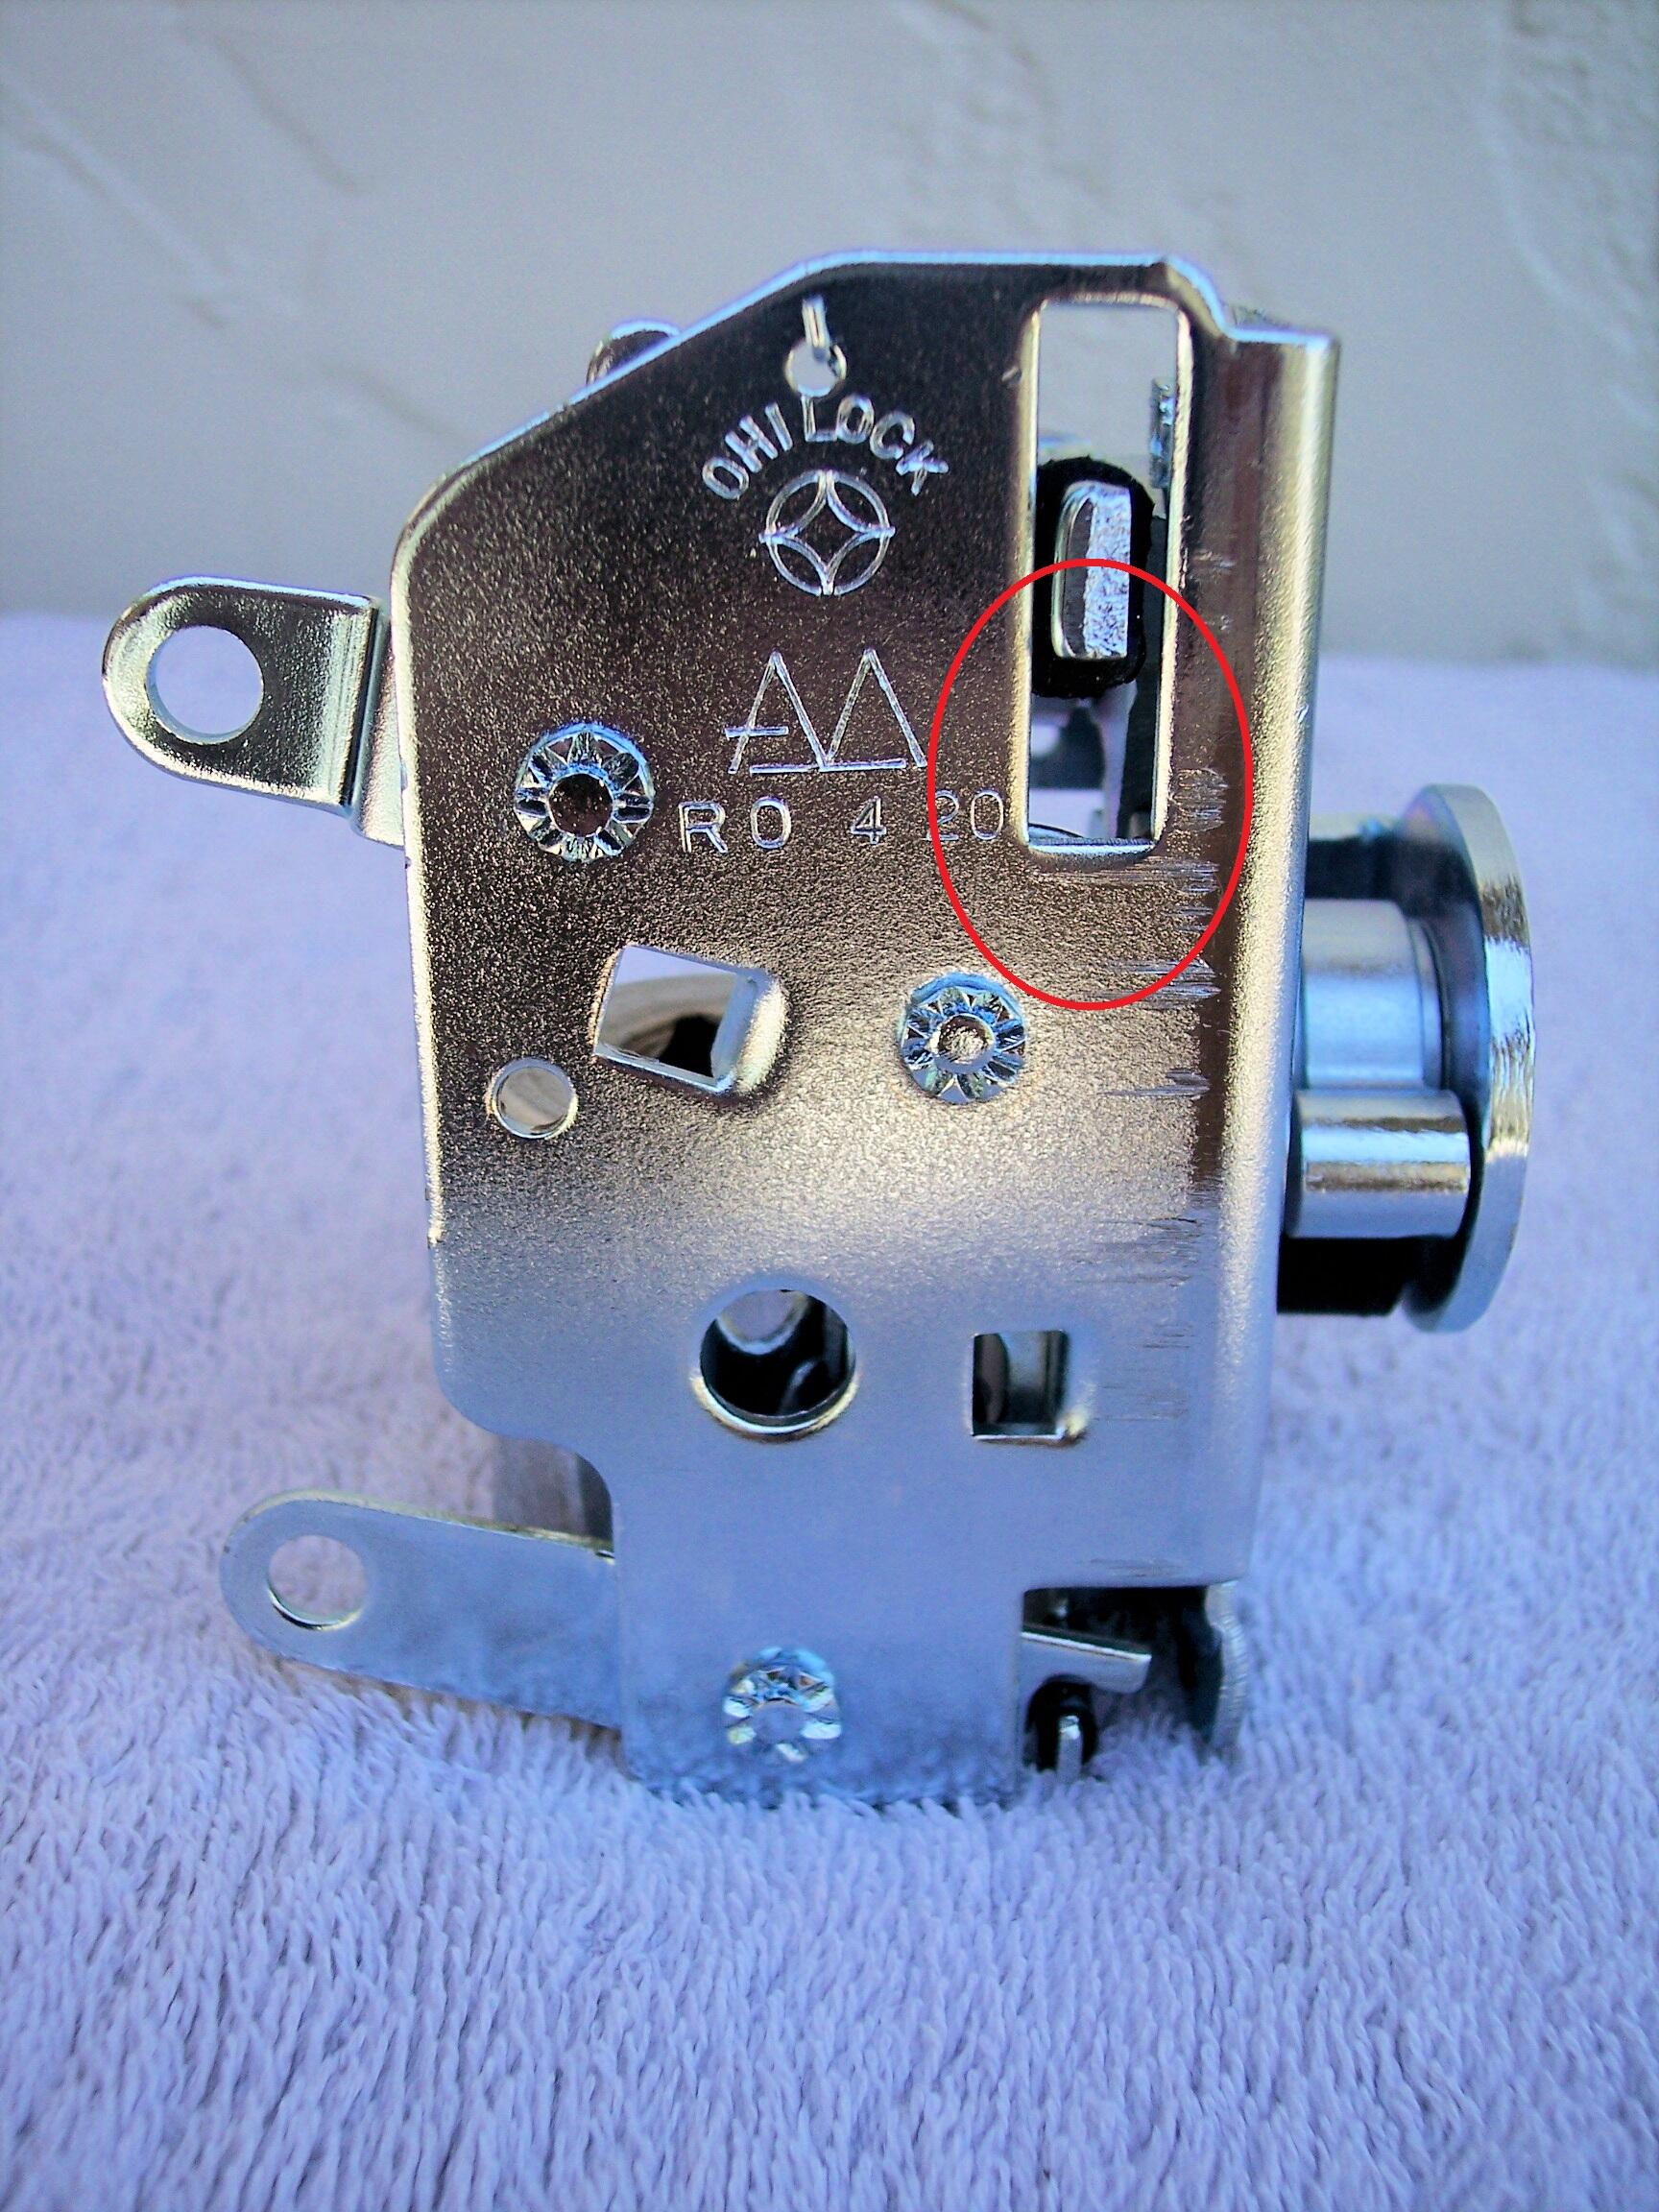
So the early locks had the T-slot? Do you have pictures of the spring side of those locks?
-
 So cool! Fun build and I love following along. Gosh I hate facebook compared to forums.
 -
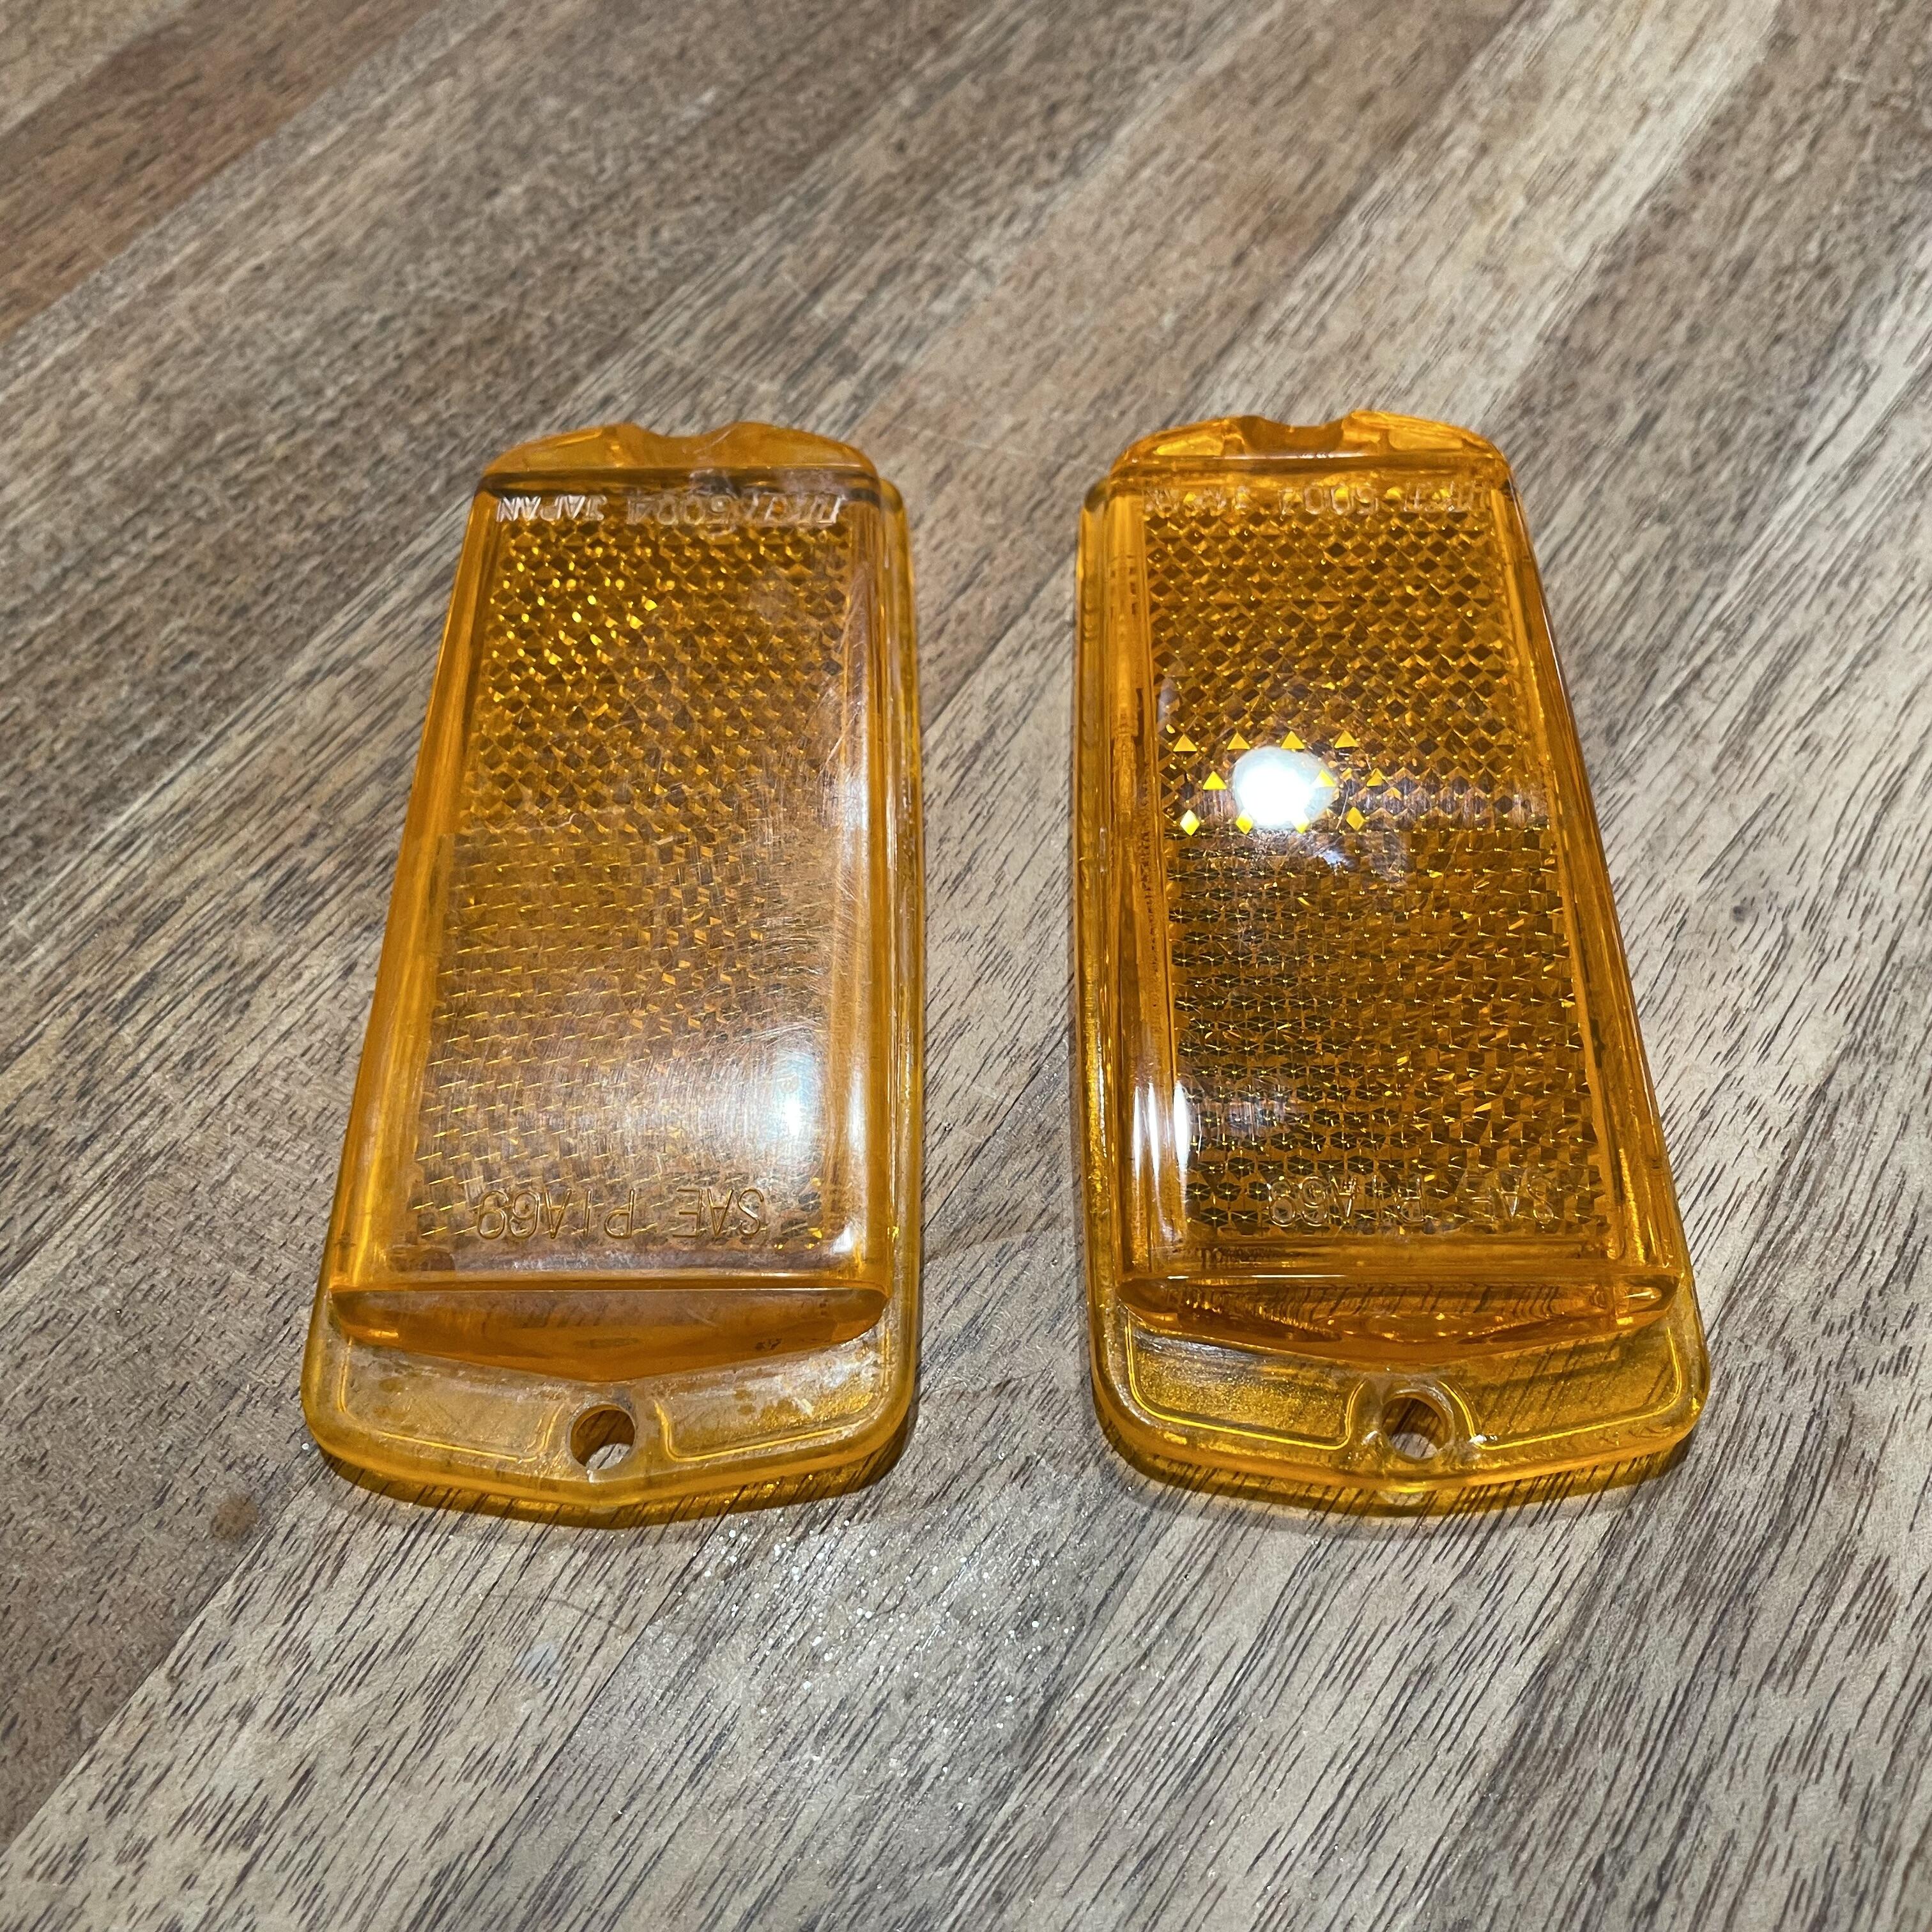
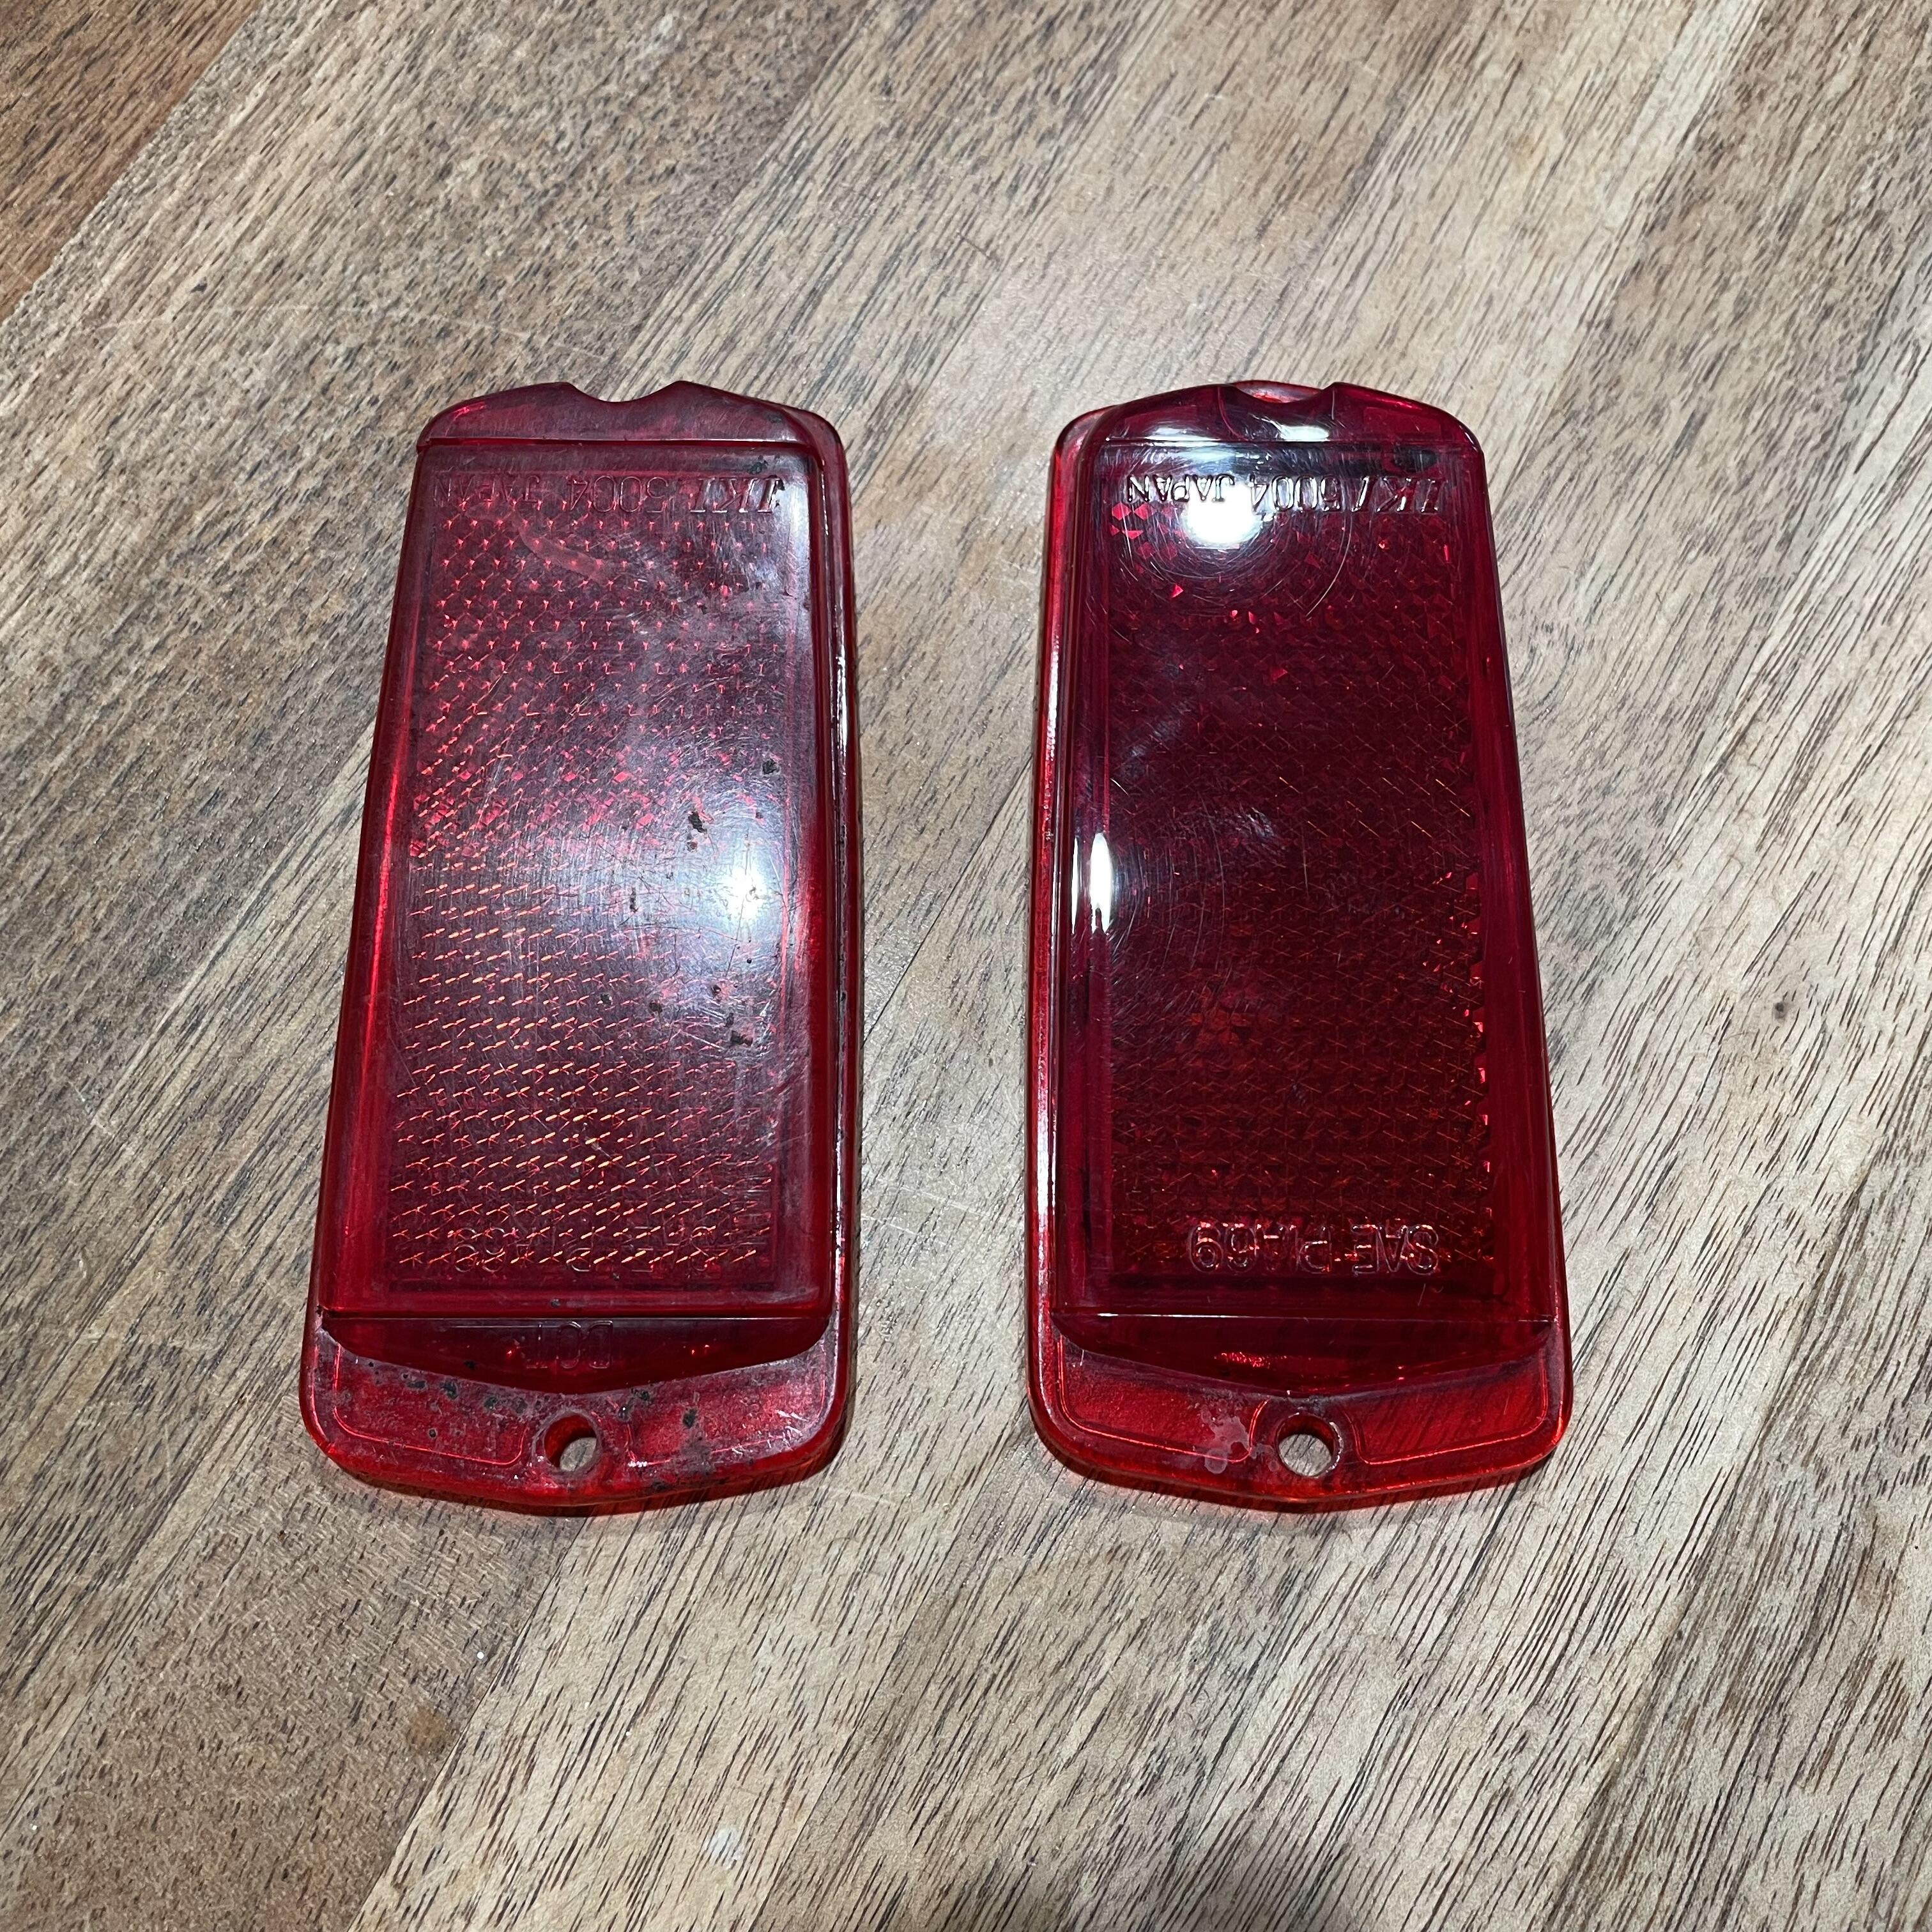
 never know when a September/October 69 dated glass may pop up!!??
 -
 Got it, thank you! Now to see if I can figure out what it is saying. lol
 -
Perfect. I just couldn't see the bottom washers in the other pics. Looks great.
-
 tmag71 joined the community
 -
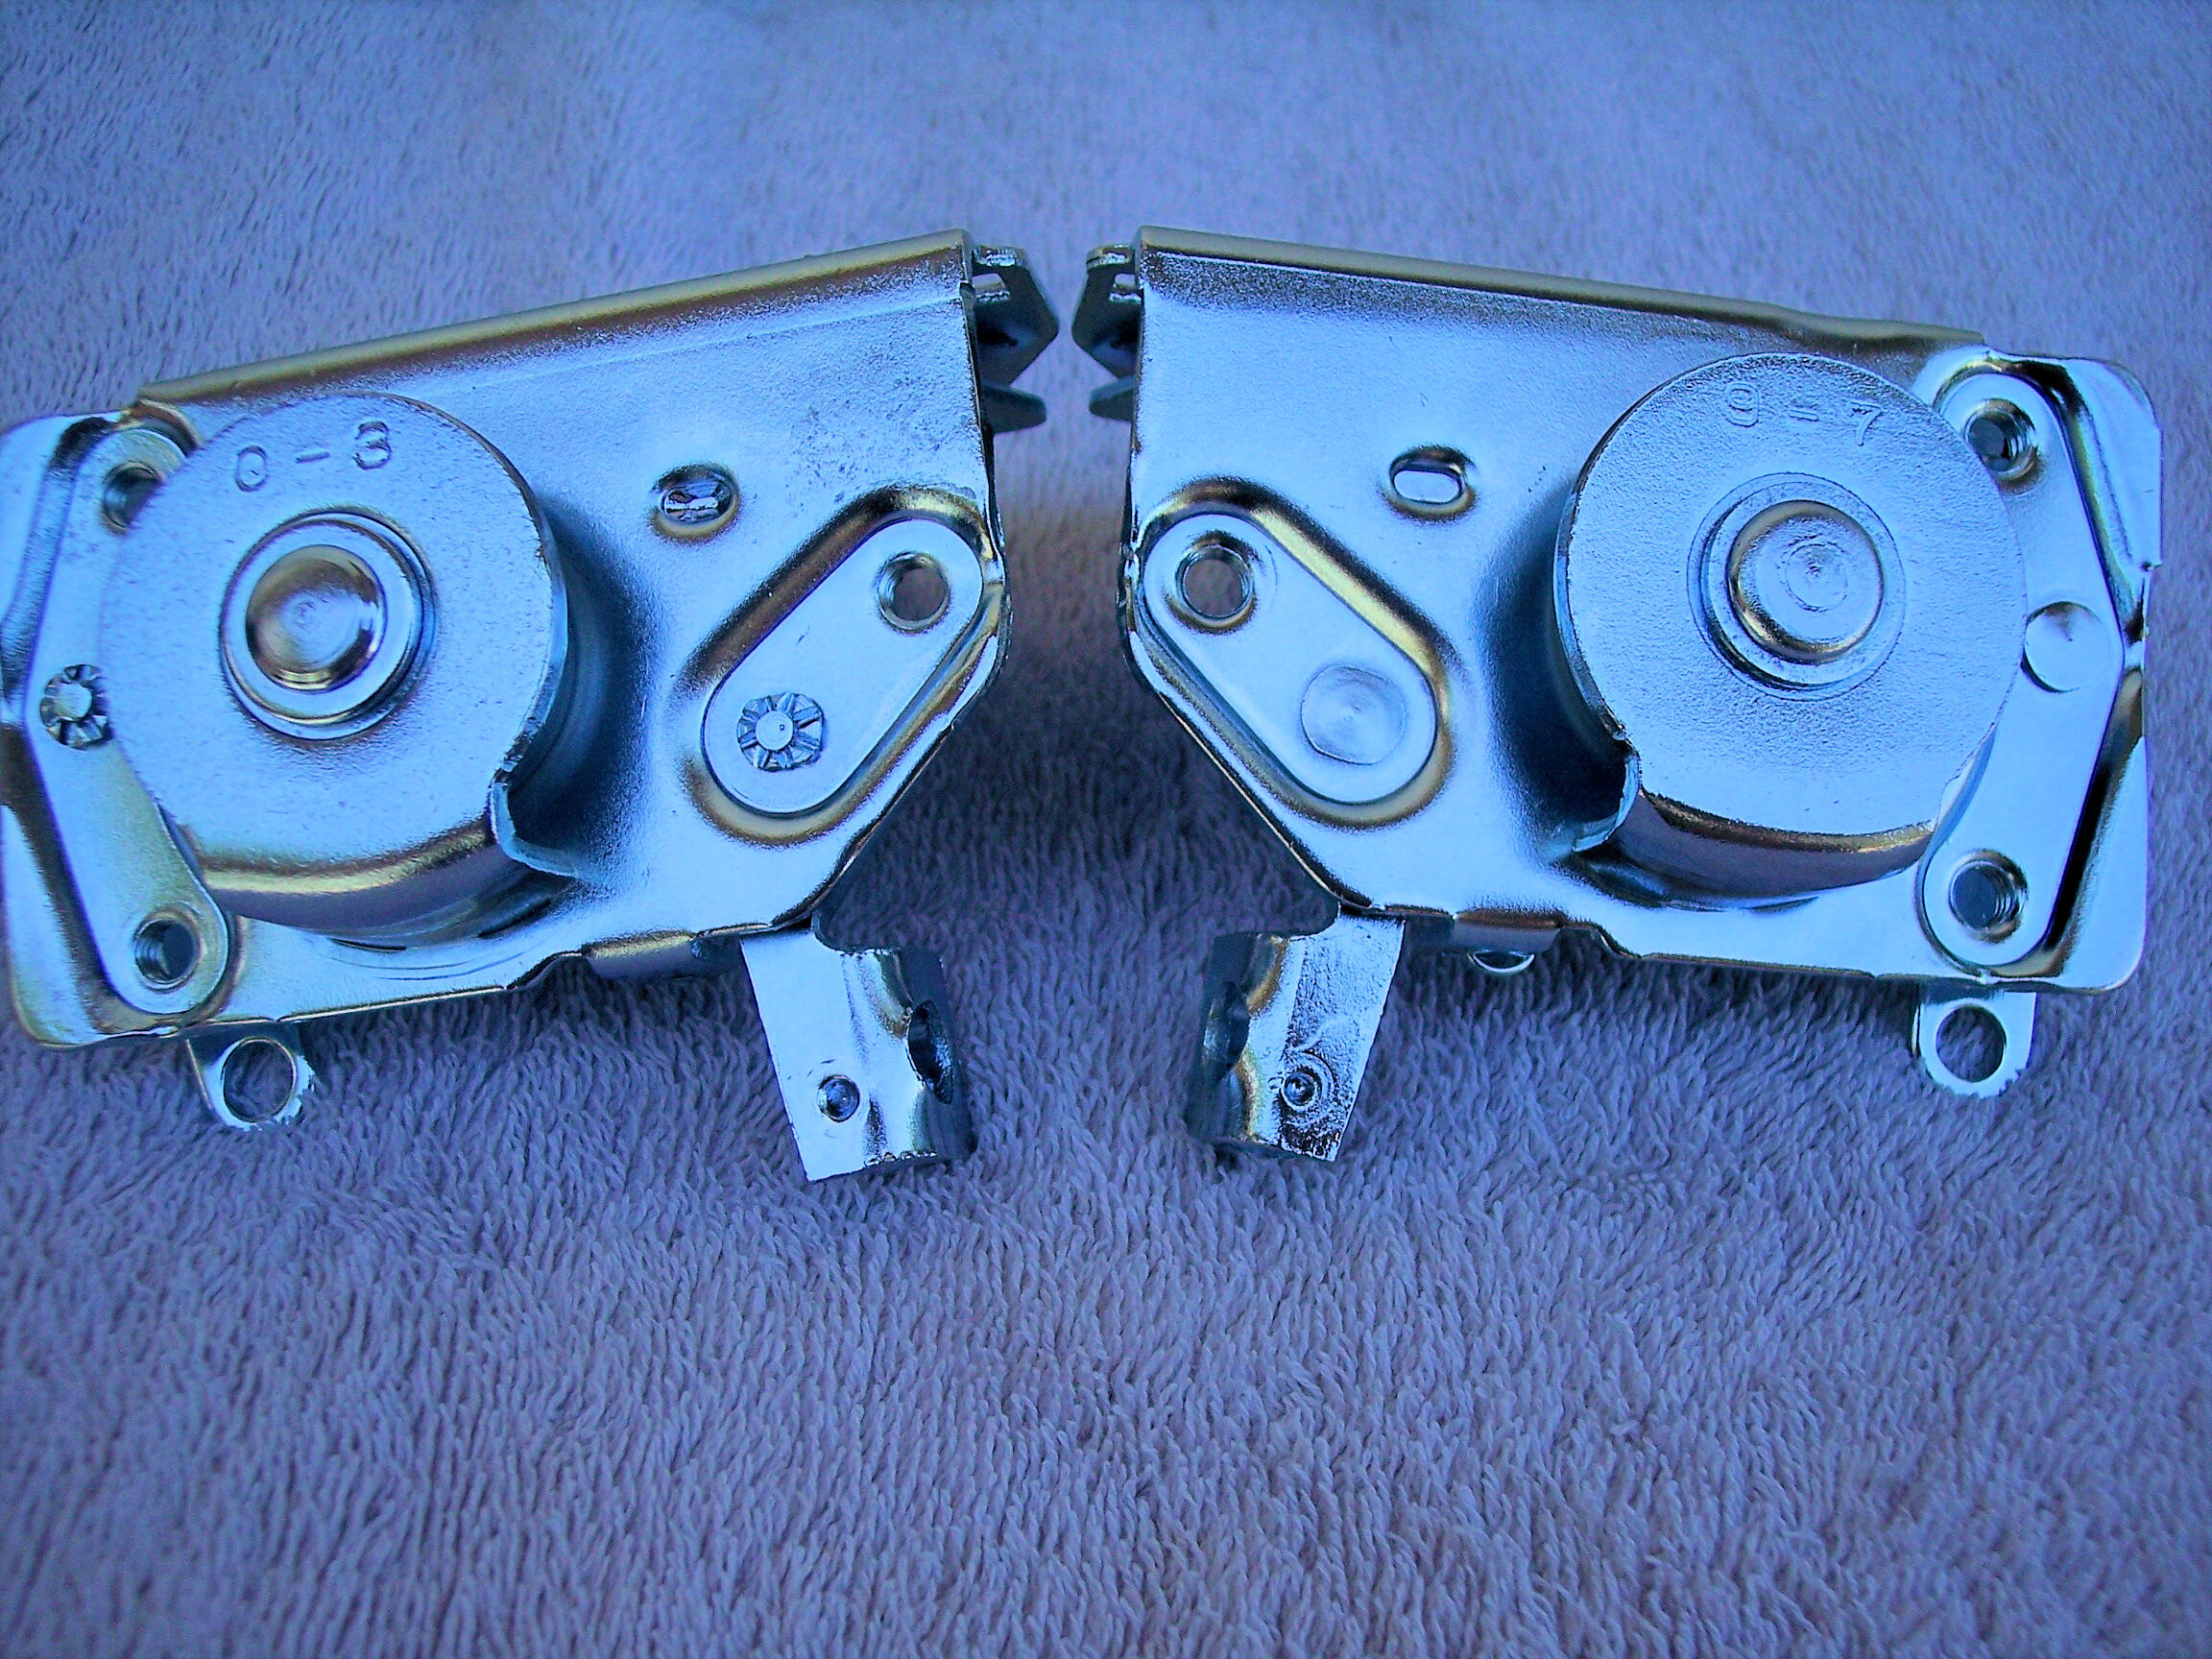
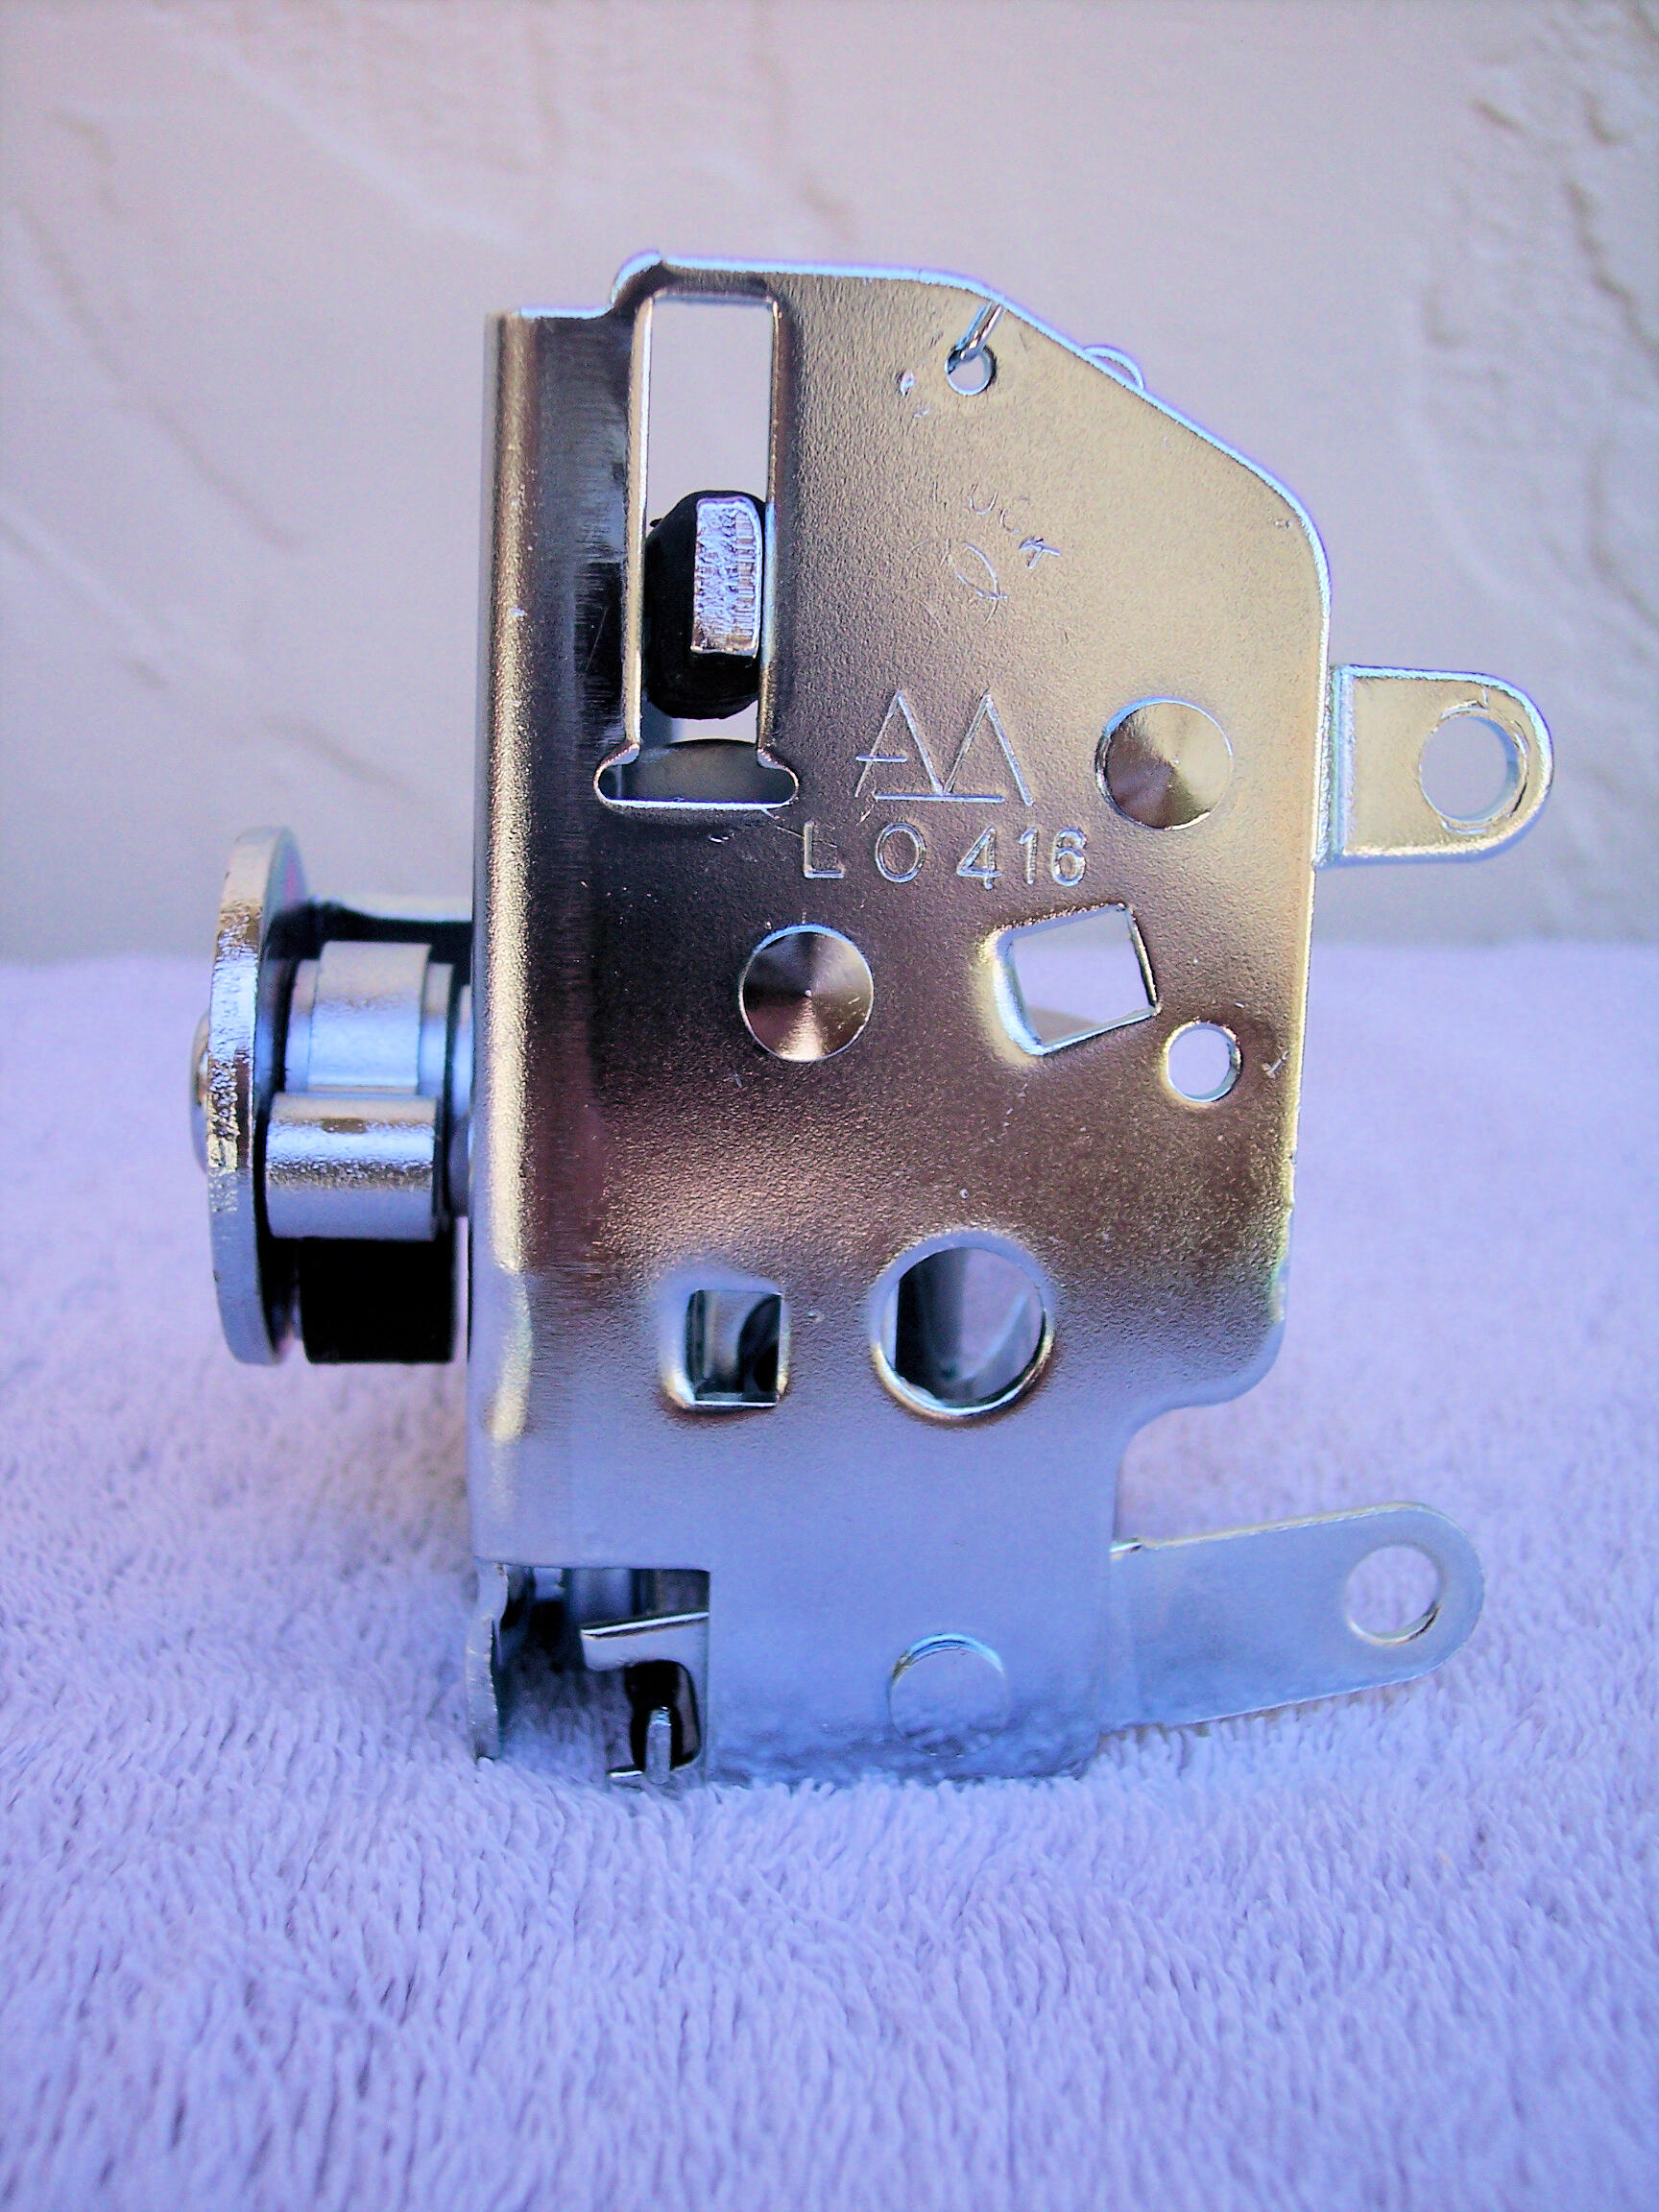
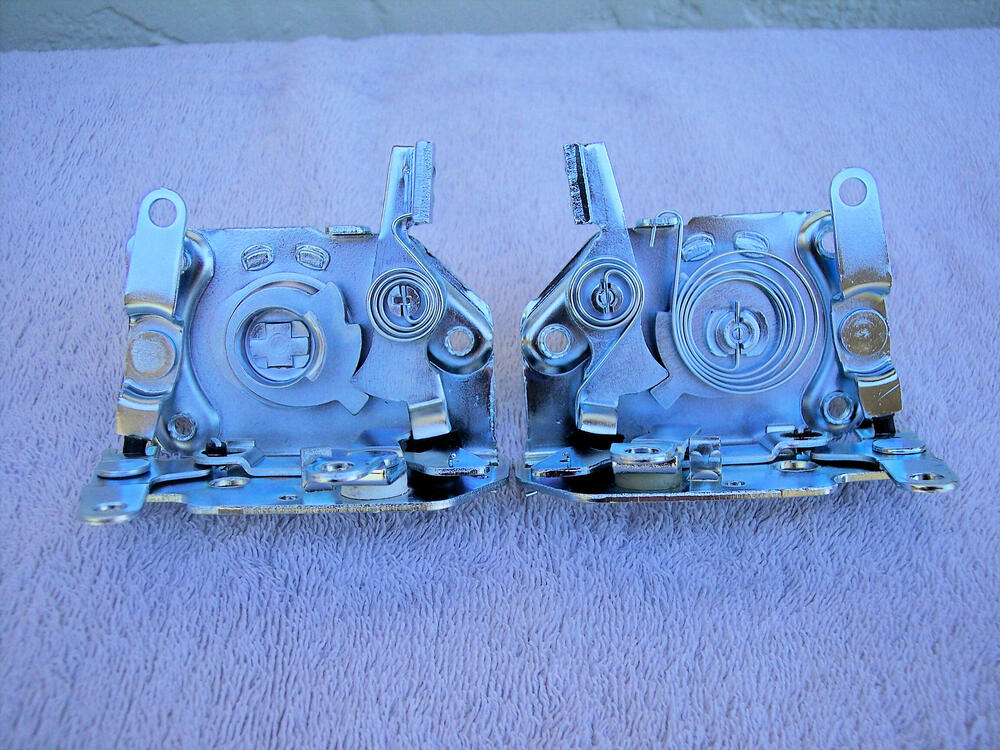
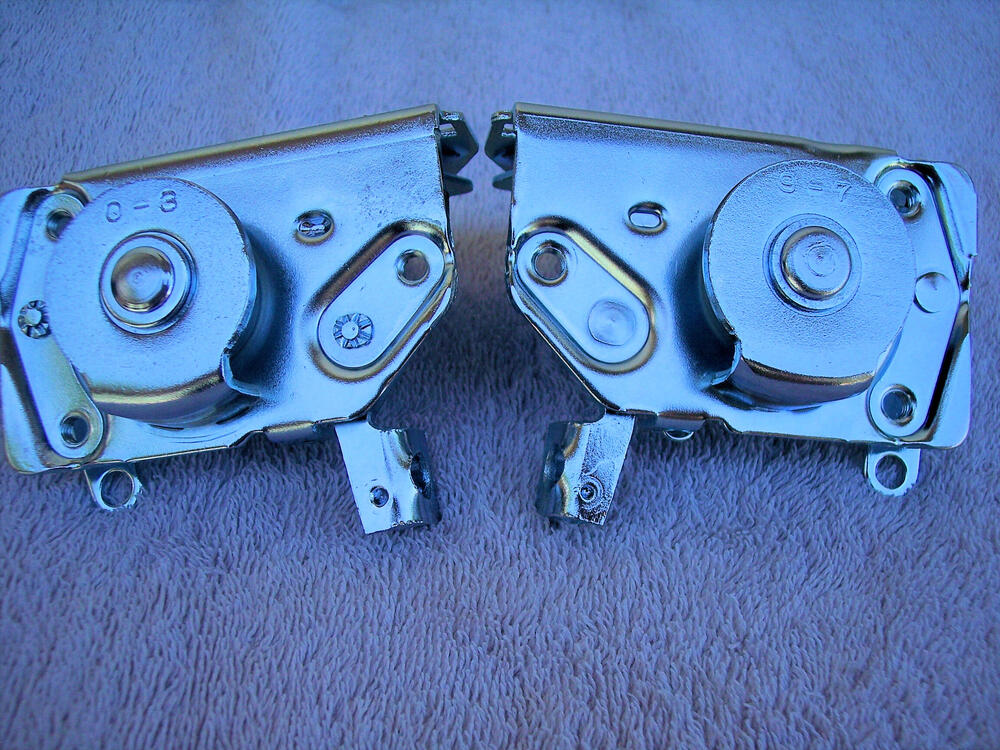
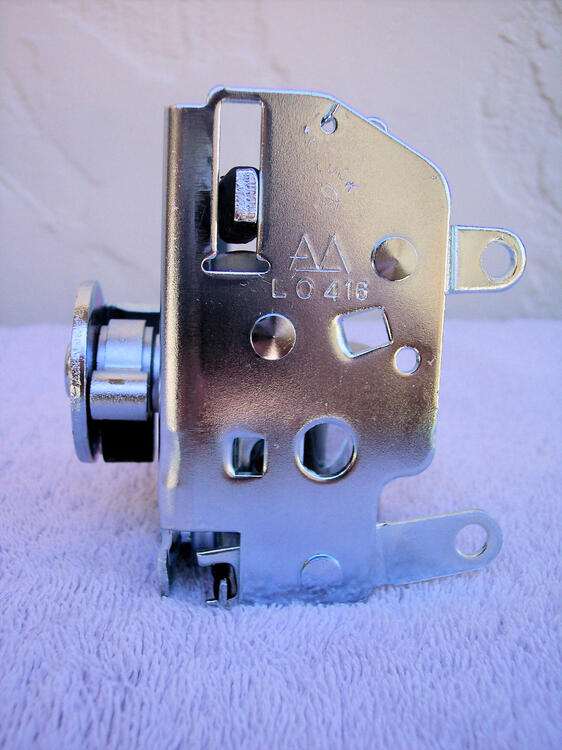
The lock core has its own date code. Below on the left is year 0 (1970), month 3. On the right is year 9 (1969), month 7. The lock assembly also has its date code. This one is Left, year 0 (1970), month 4, day 16 (I think). This pic is the assembly for the 0-3 lock core above. Just for grins, here is the lock assembly for the 9-7 core above, note the difference in the slot as you noted on one of yours.

-
@jfa.series1 can you tefresh me on deciphering the date codes?
-
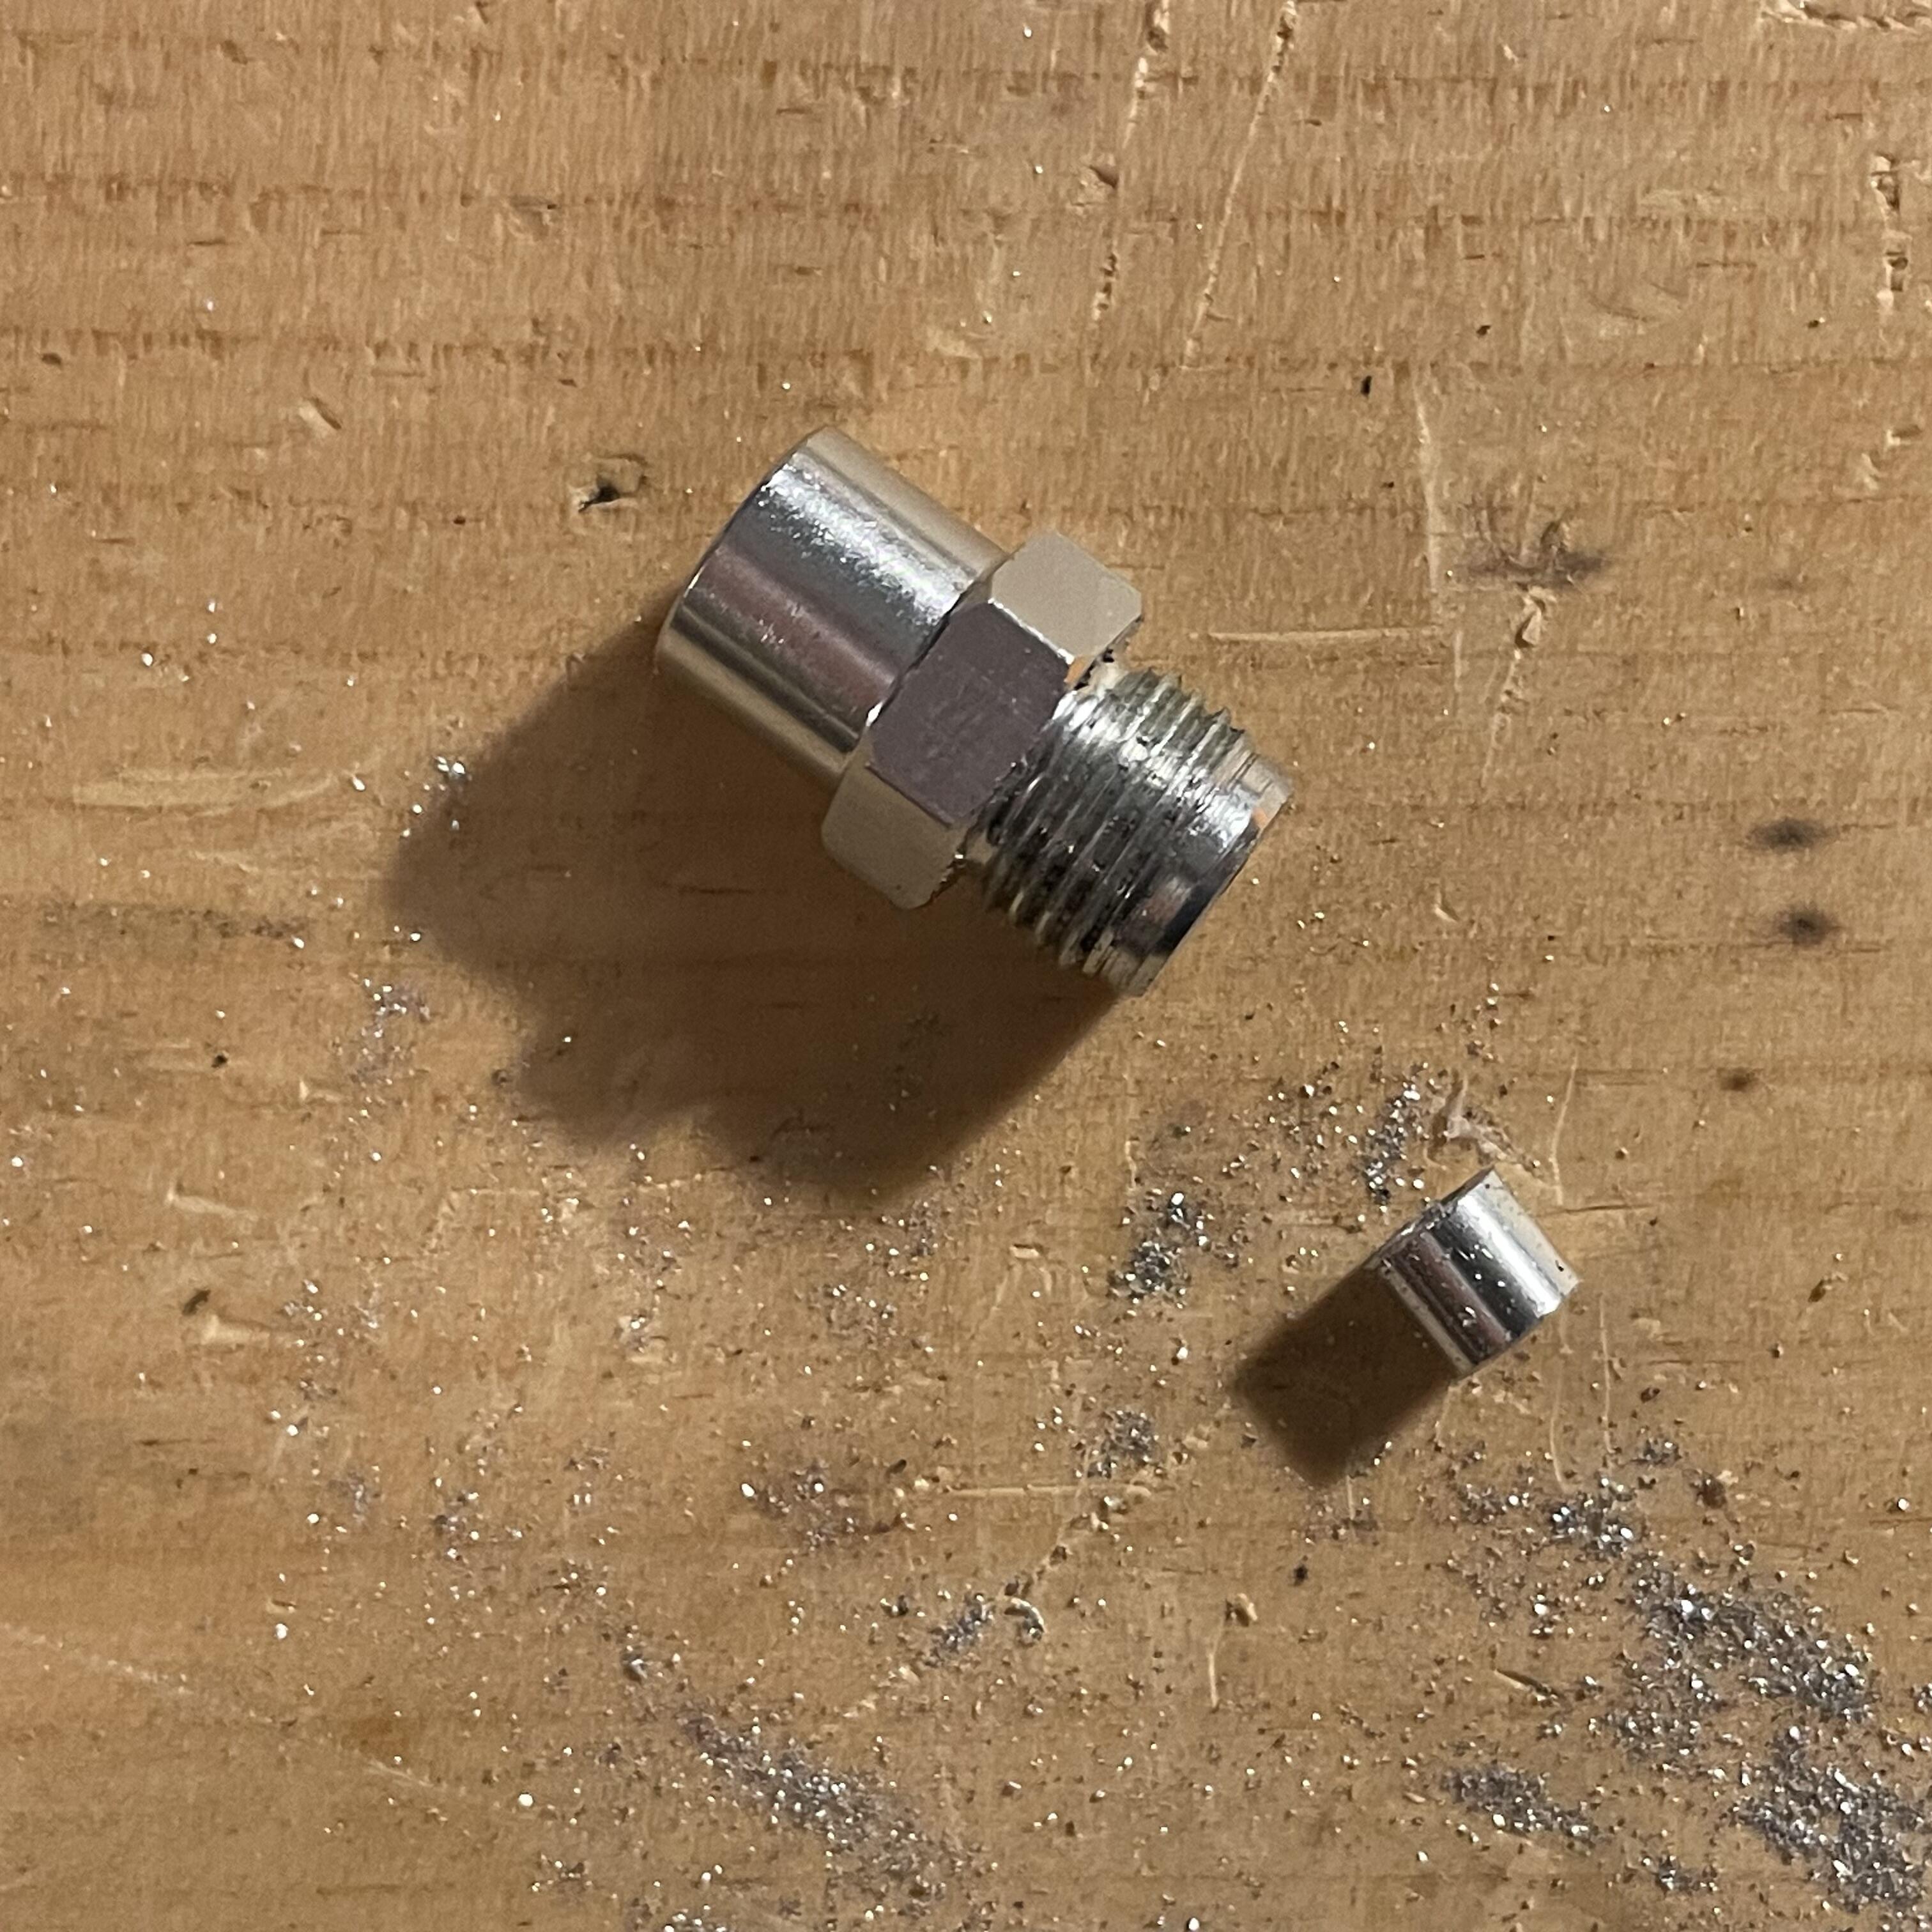
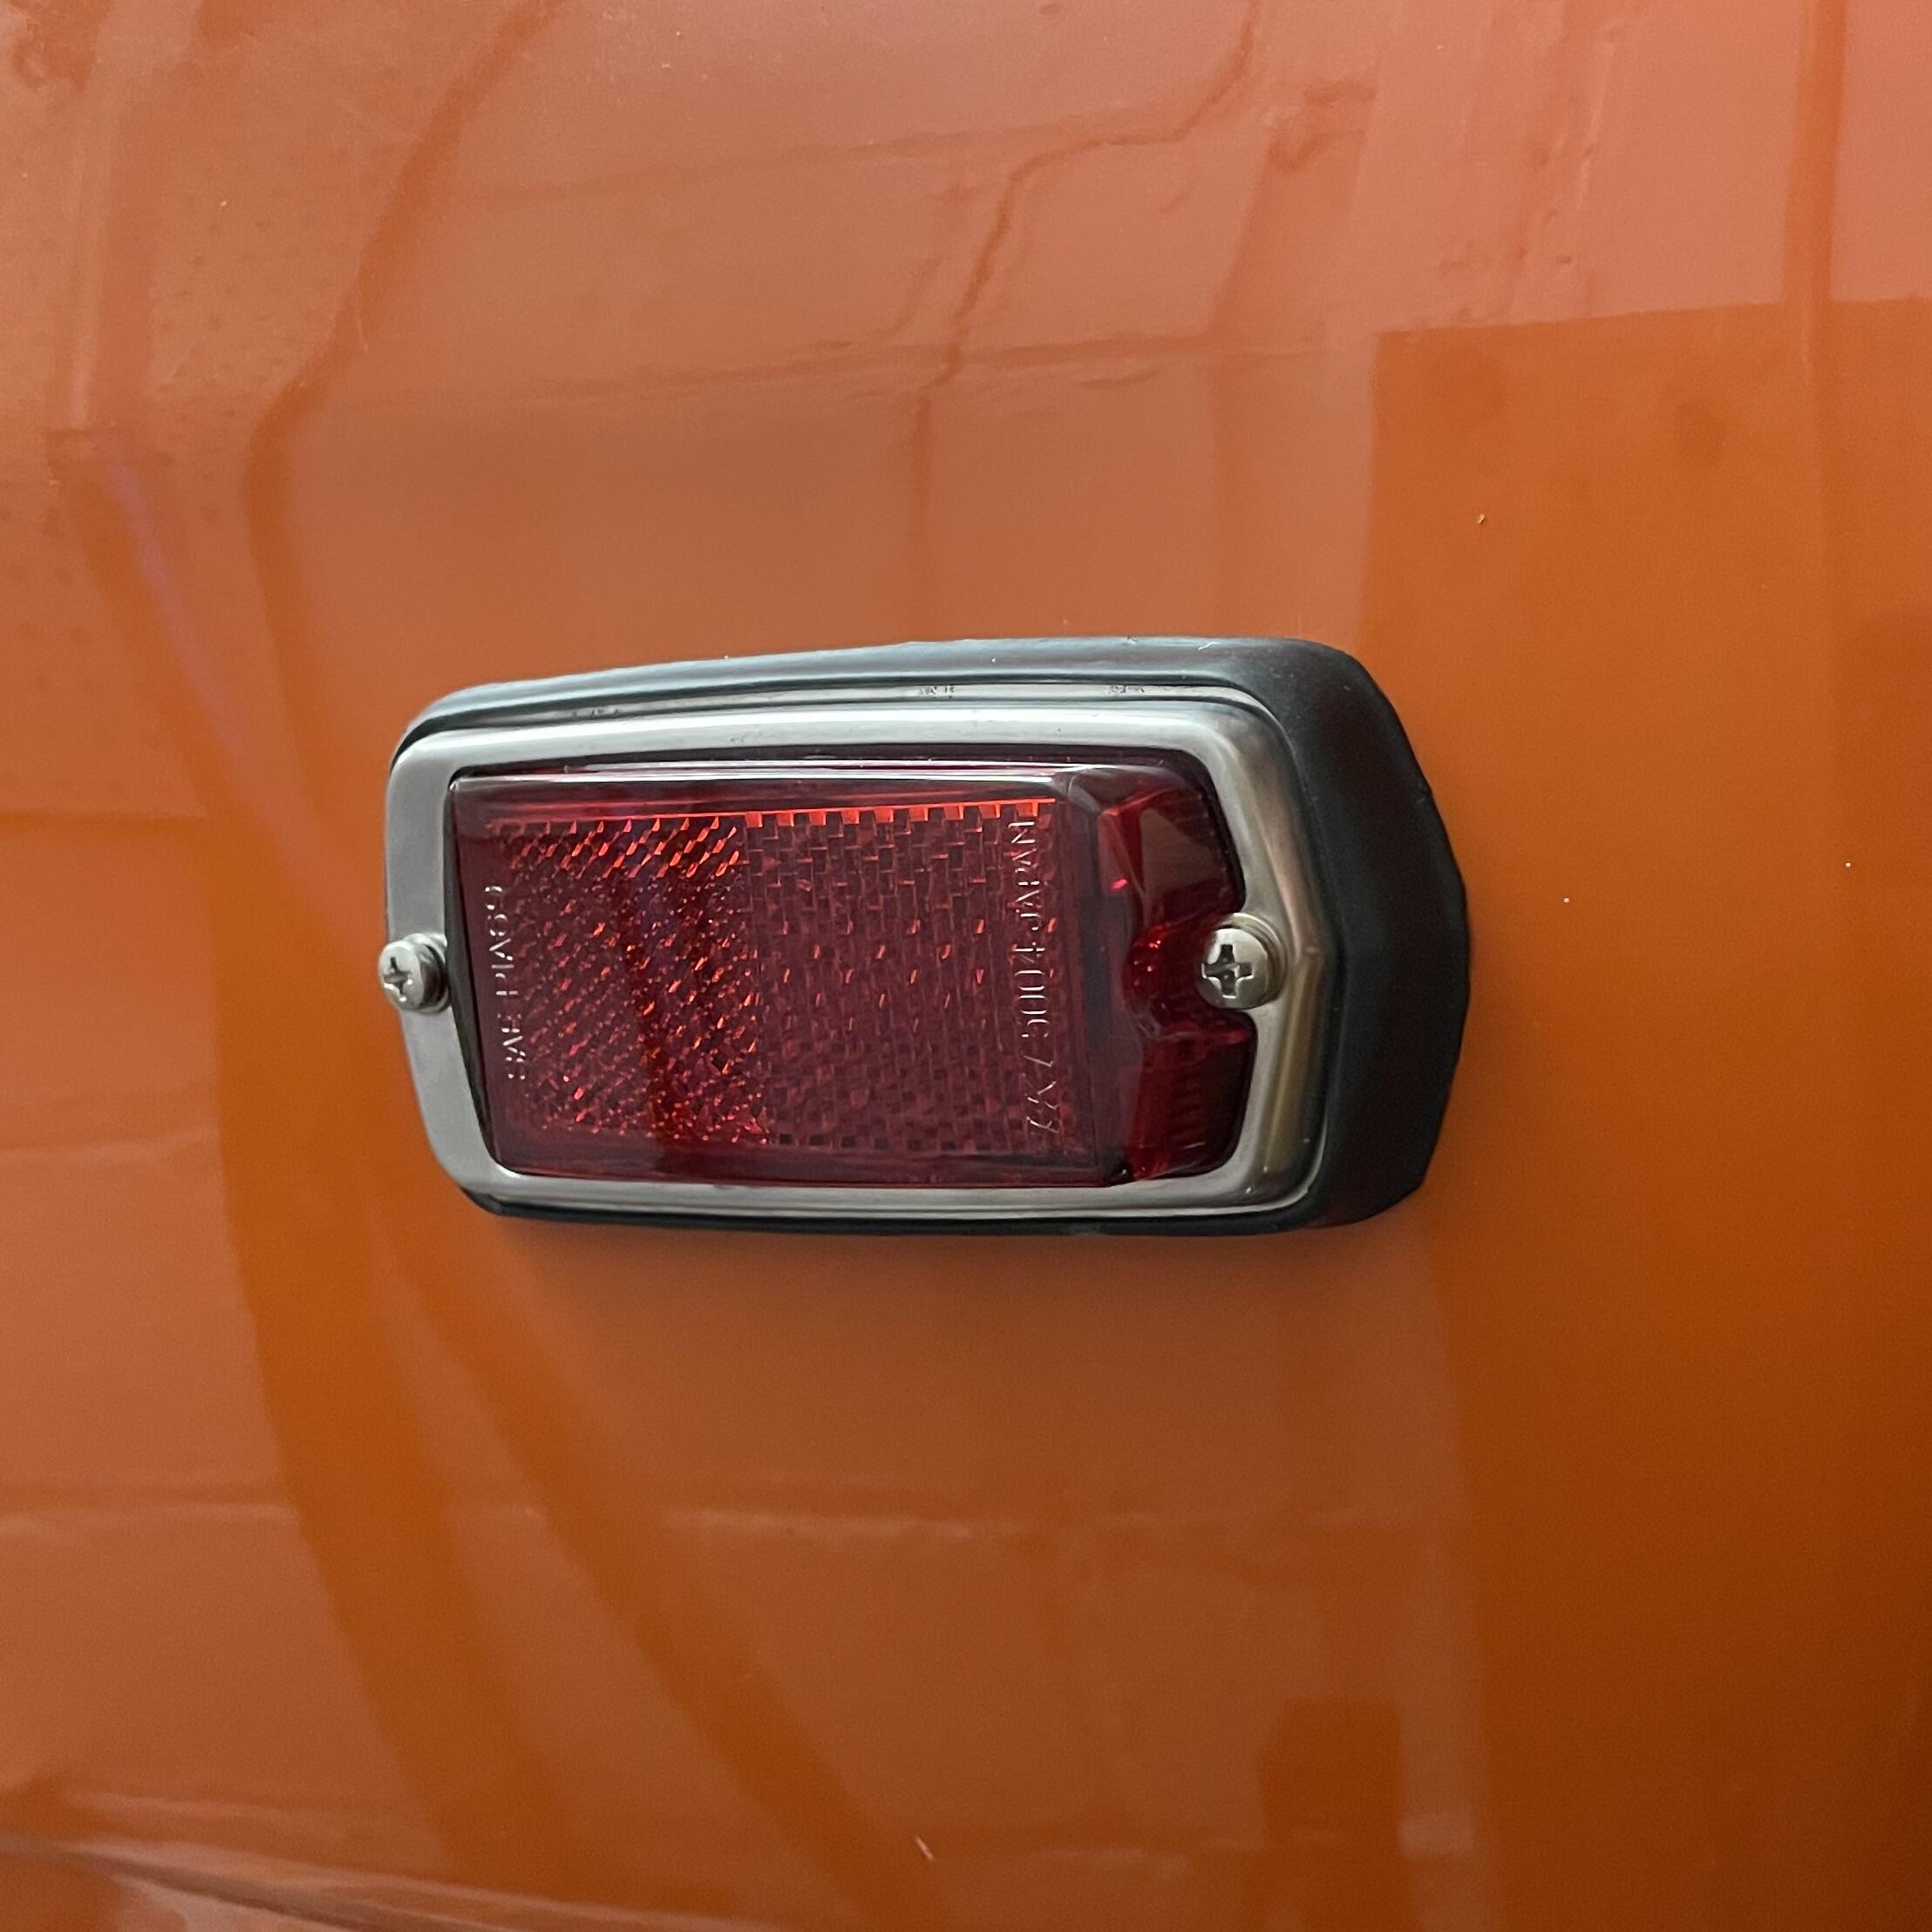
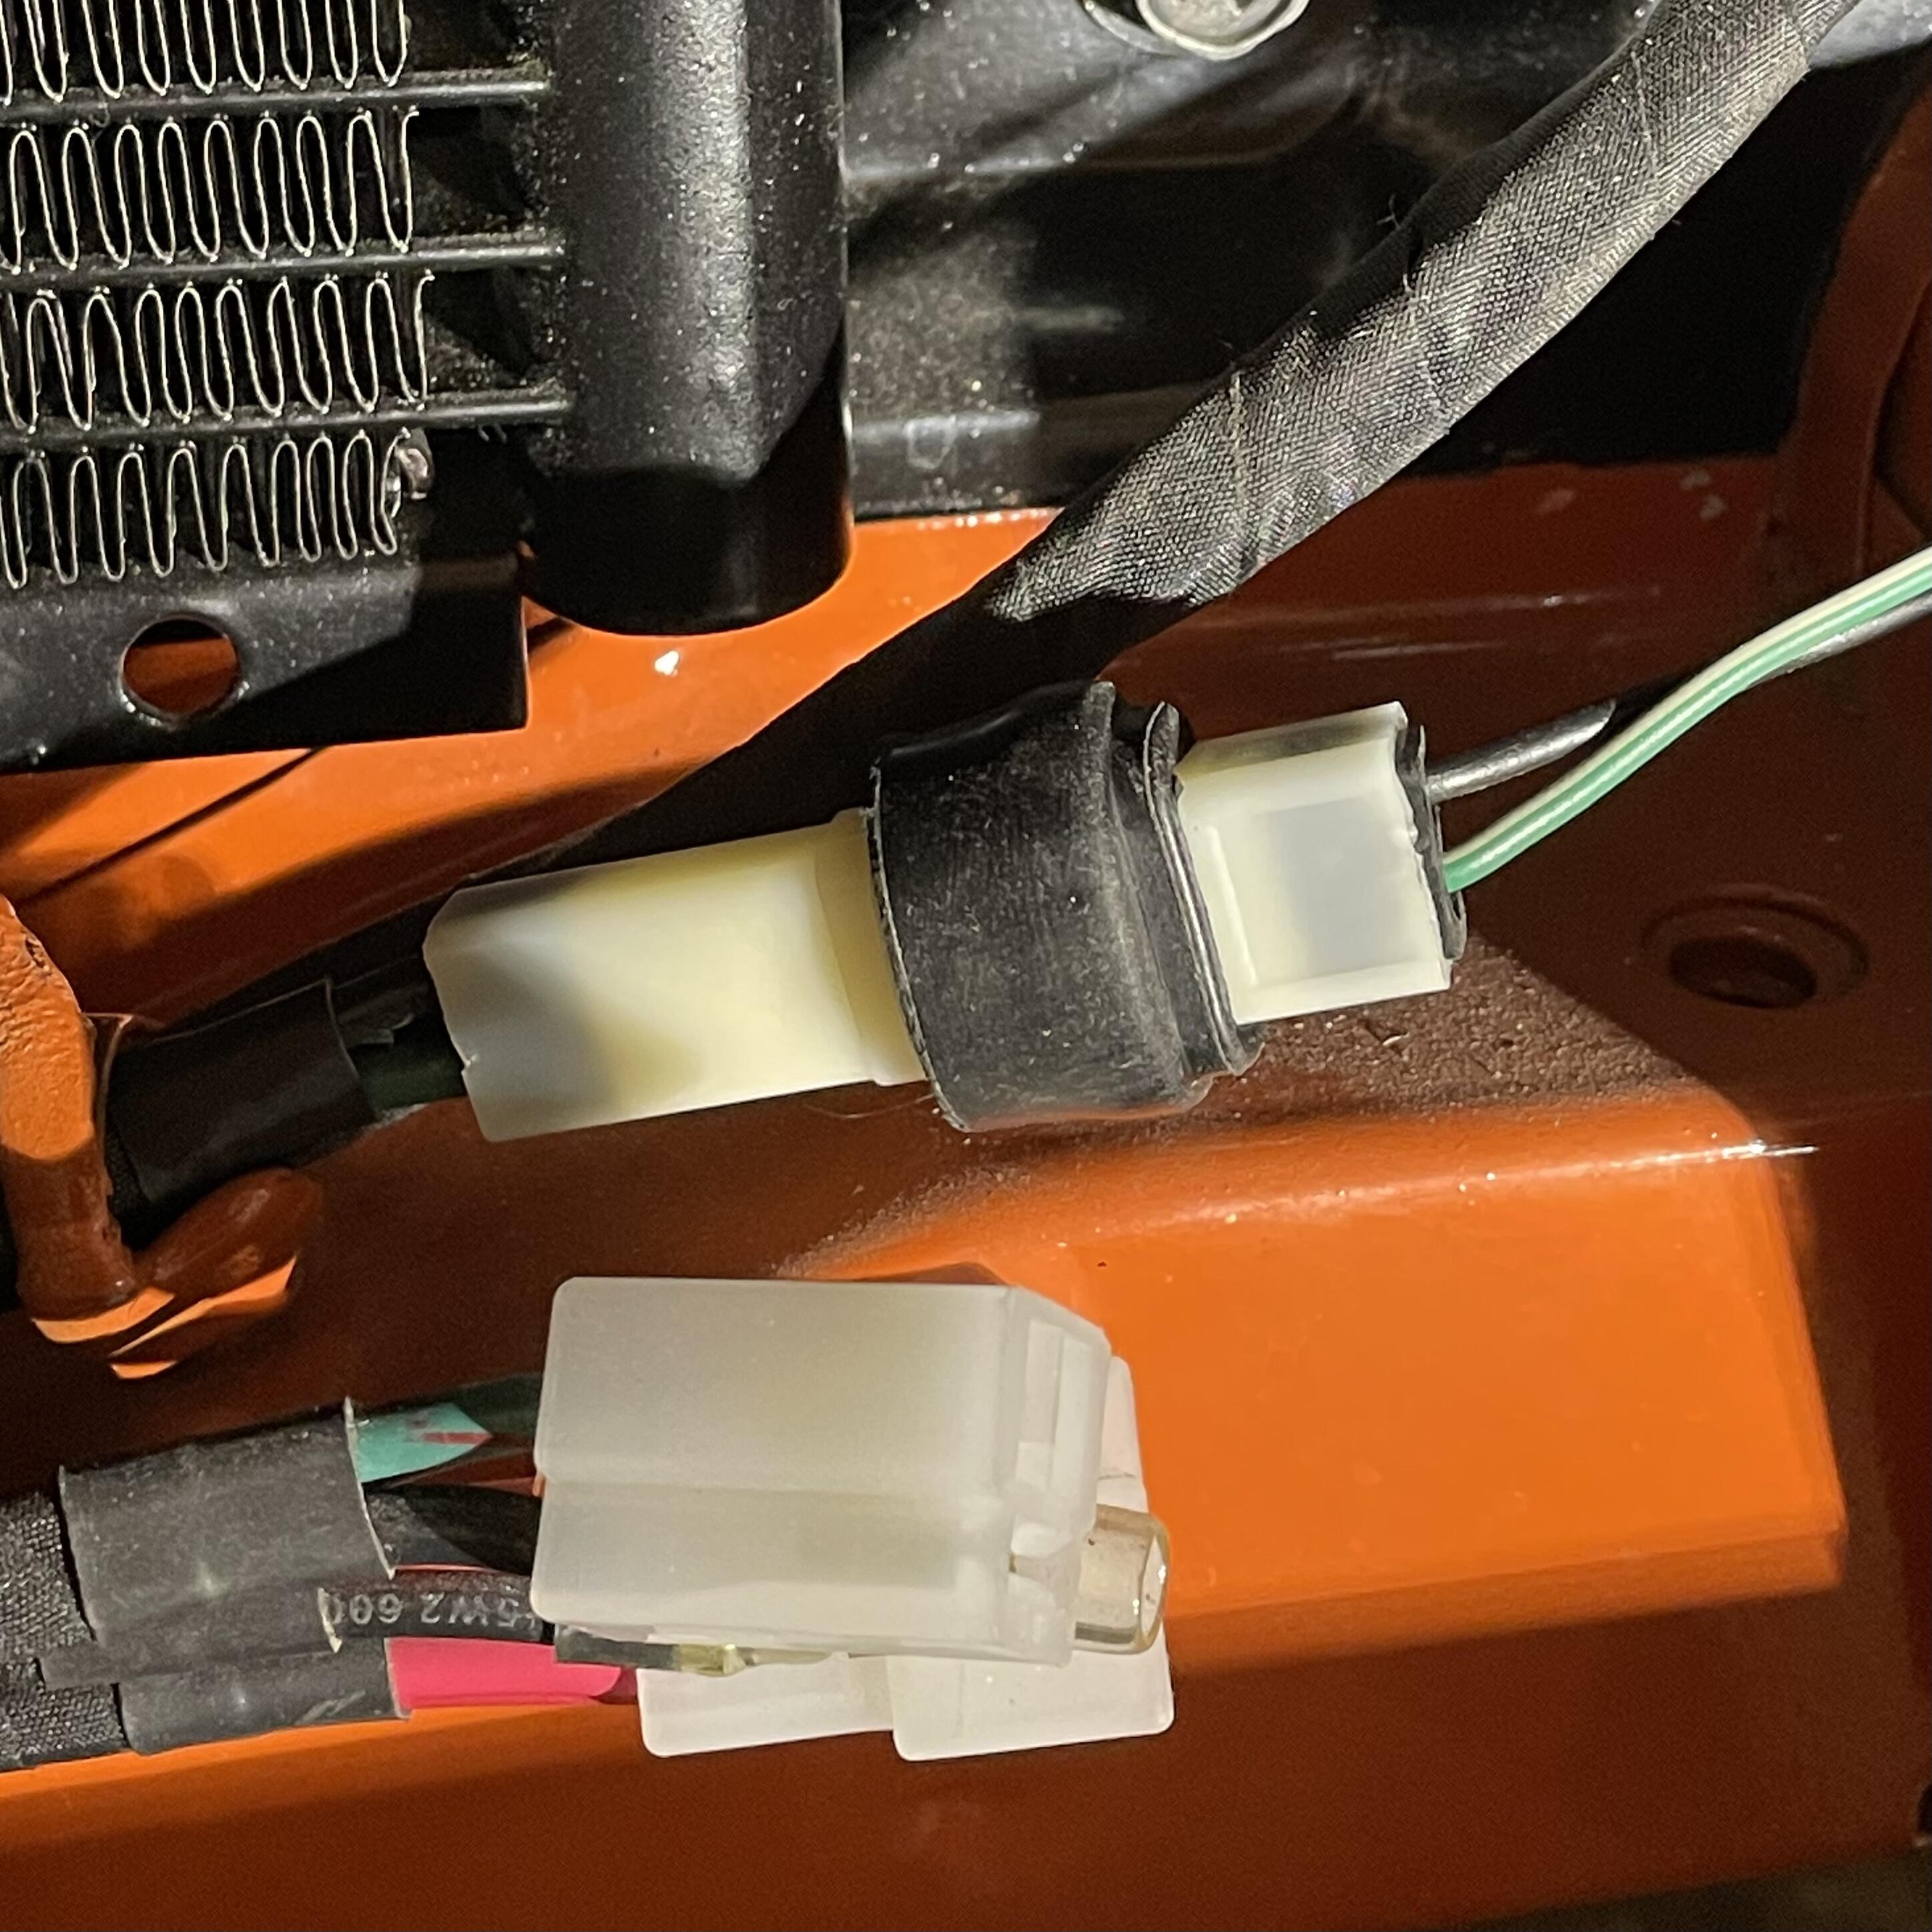
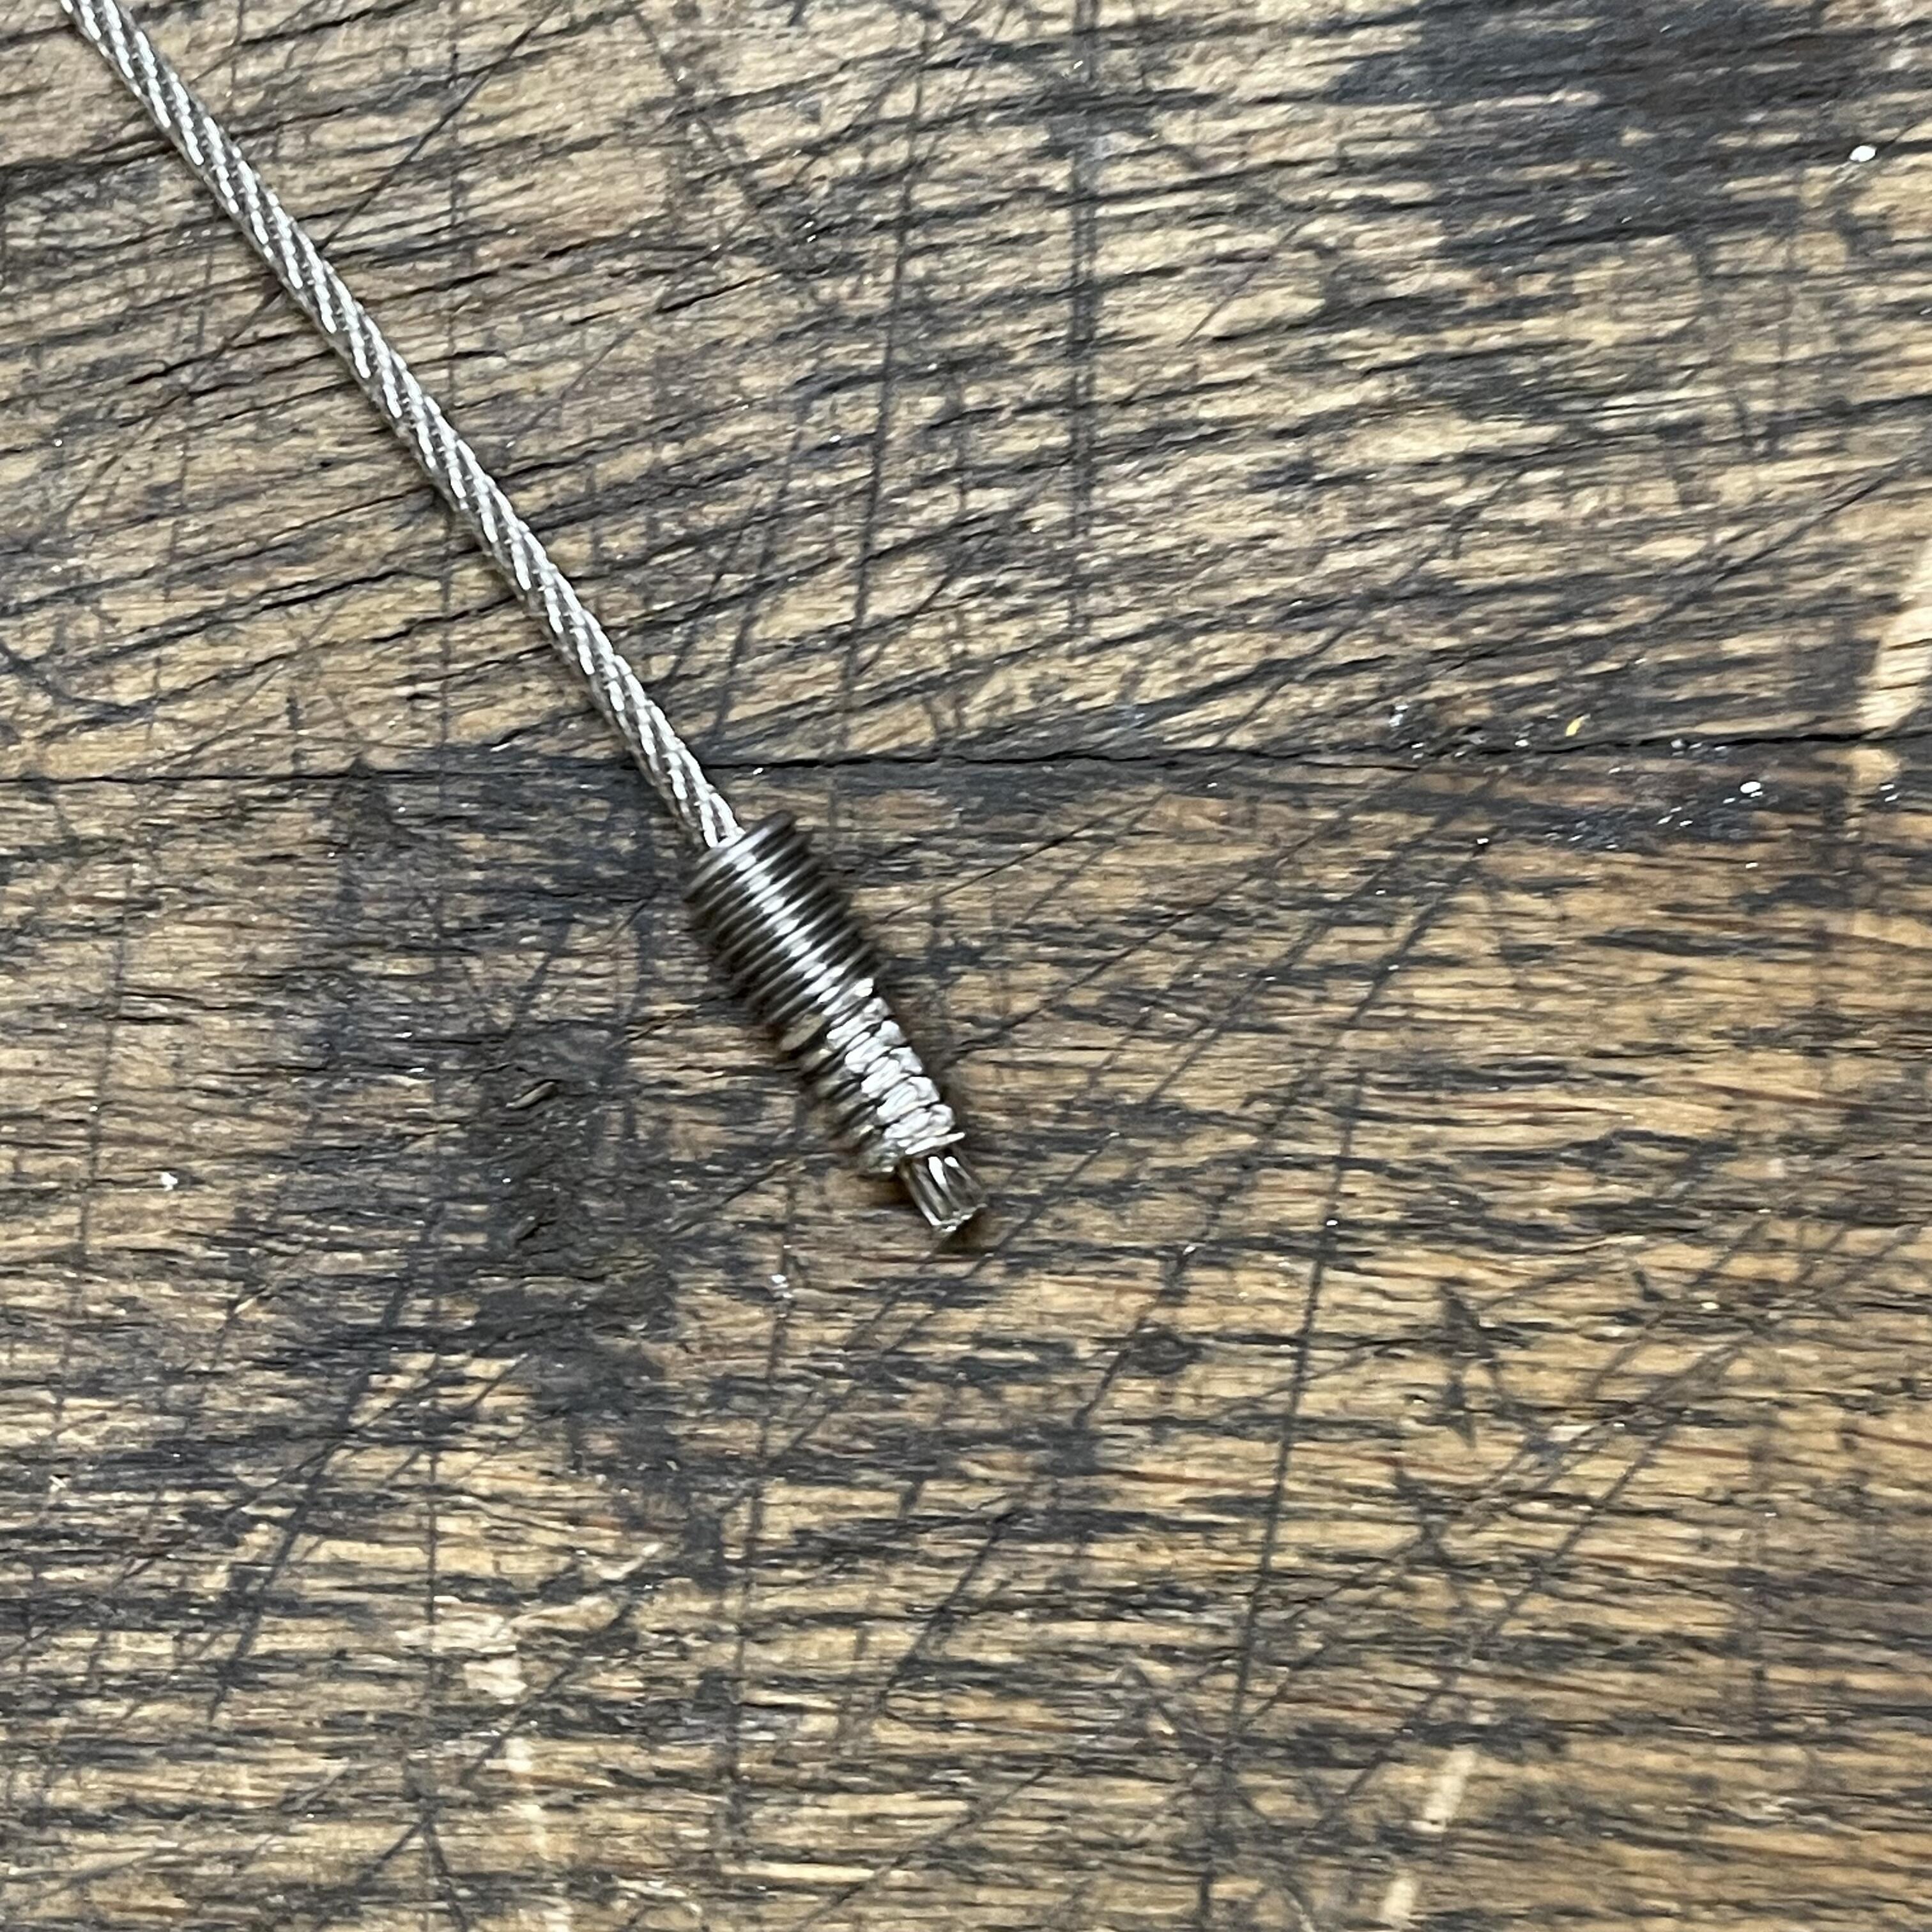
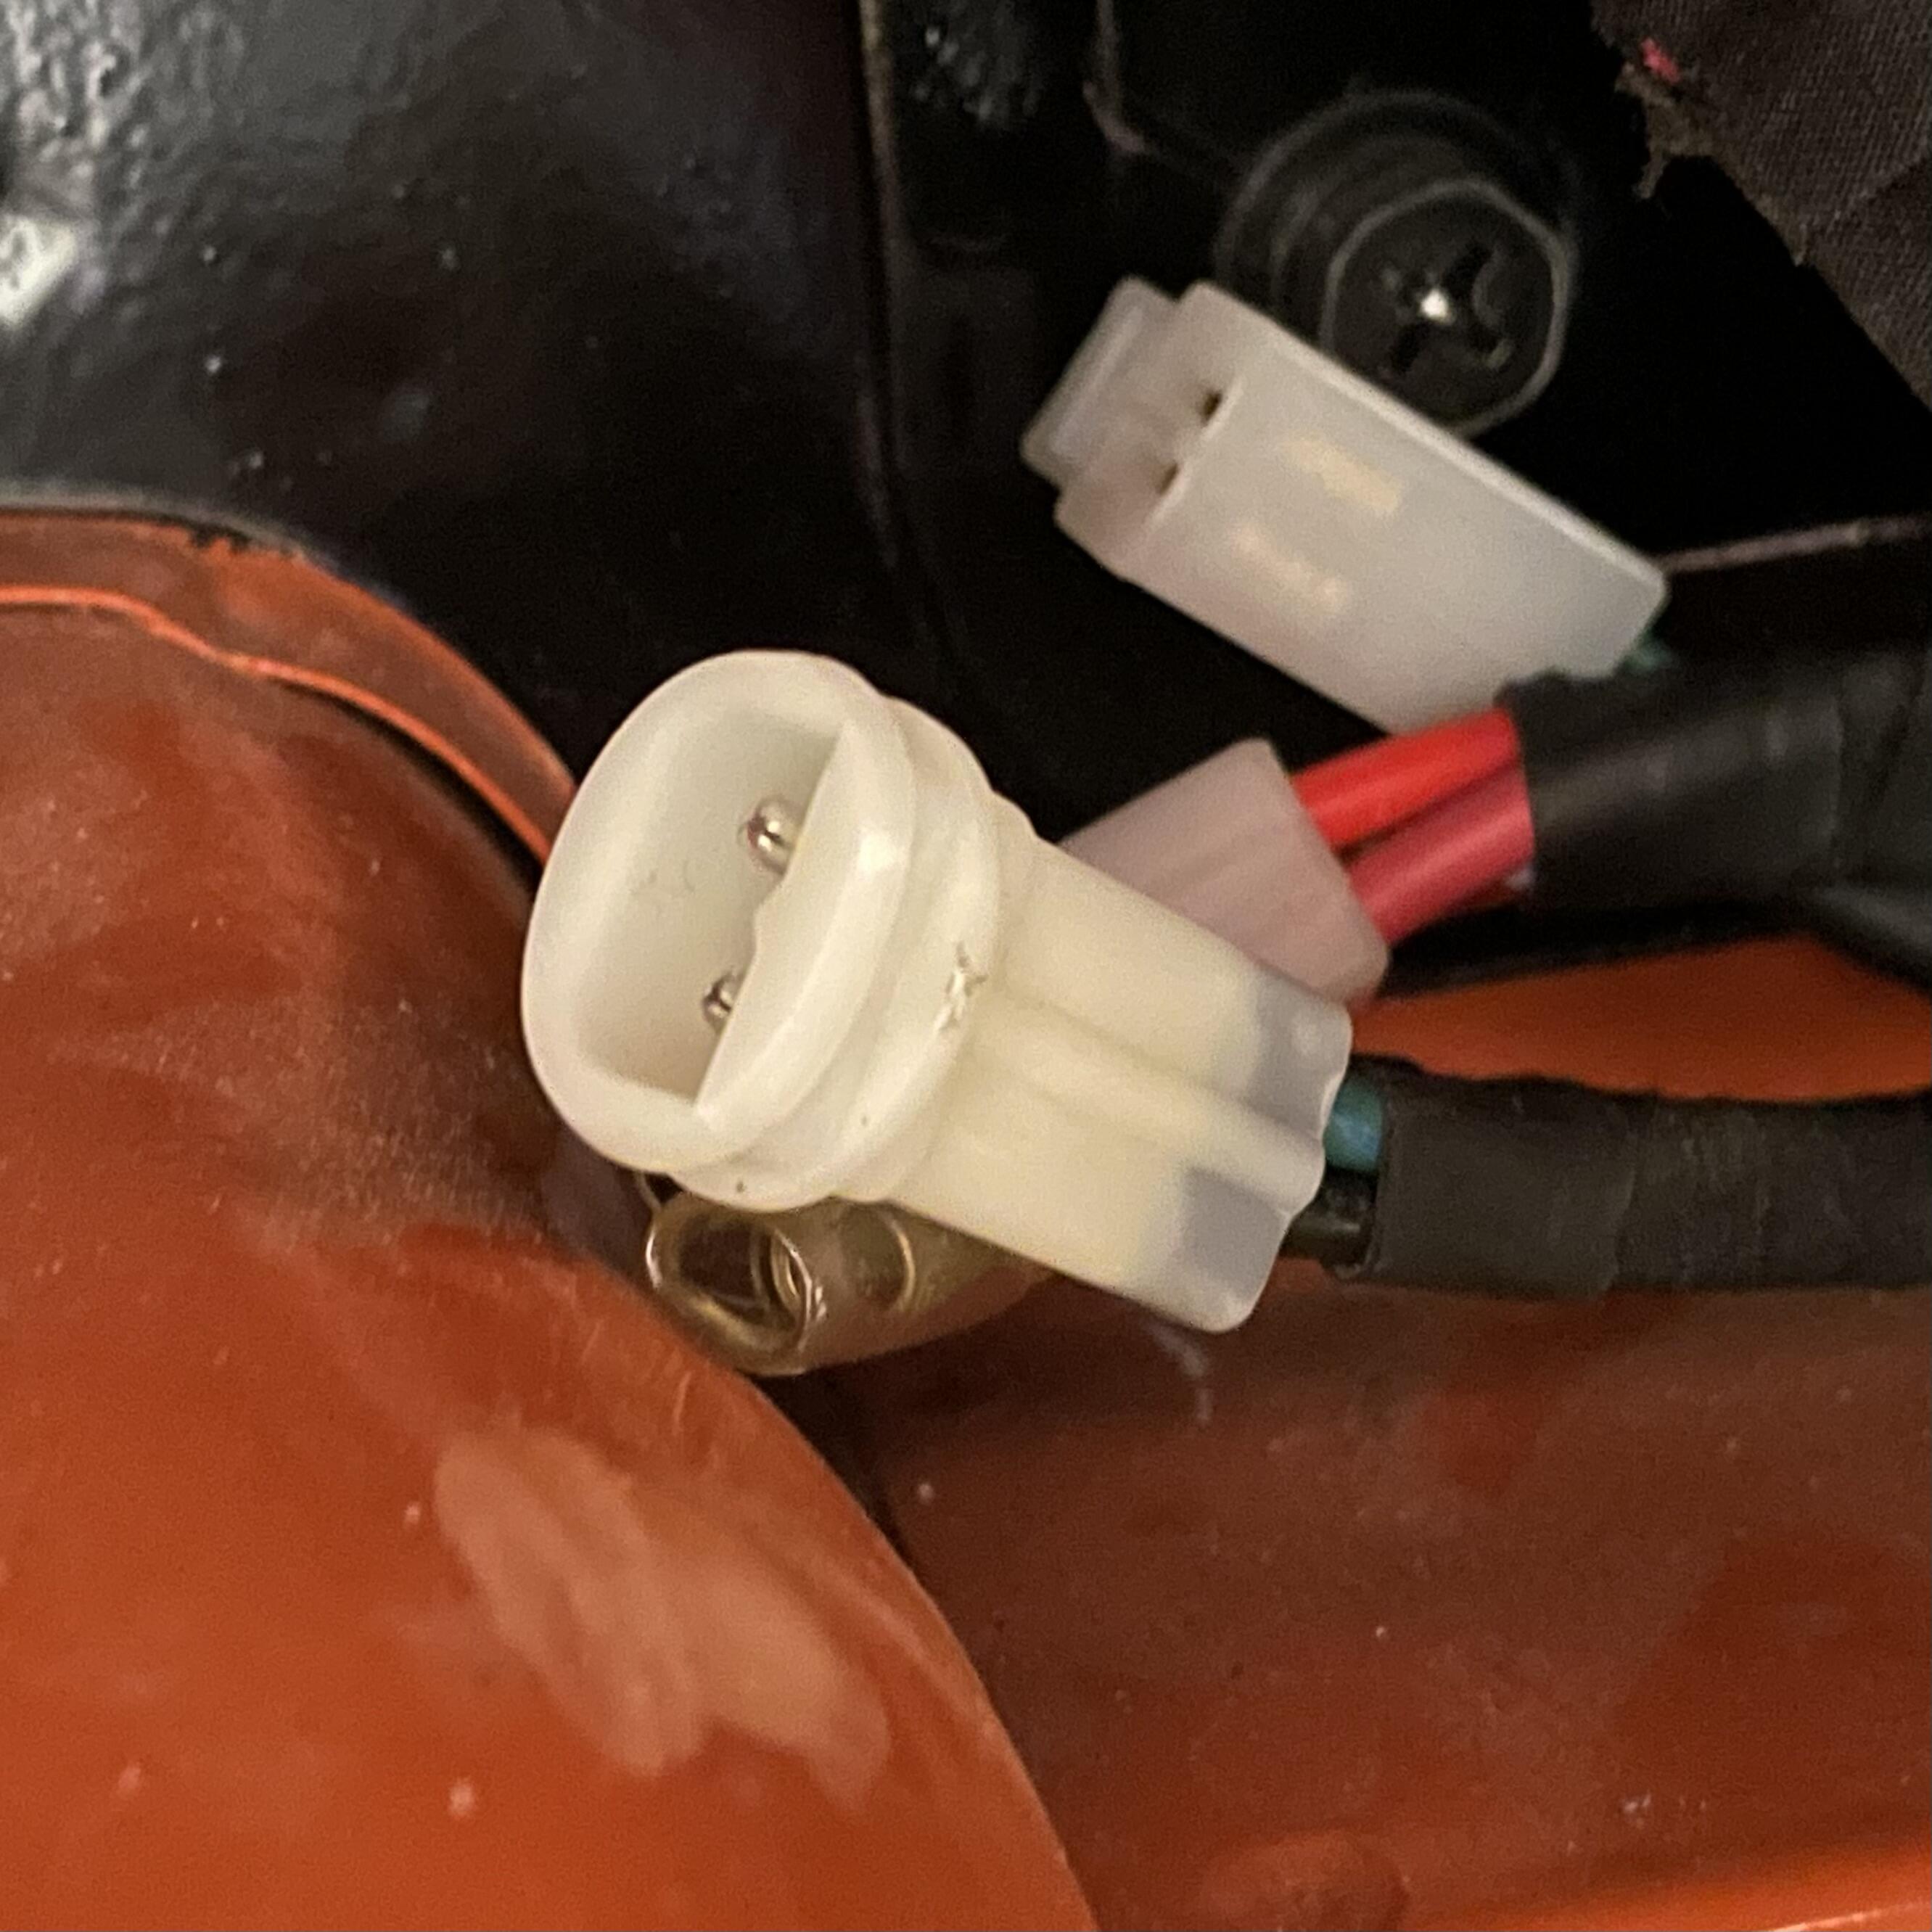
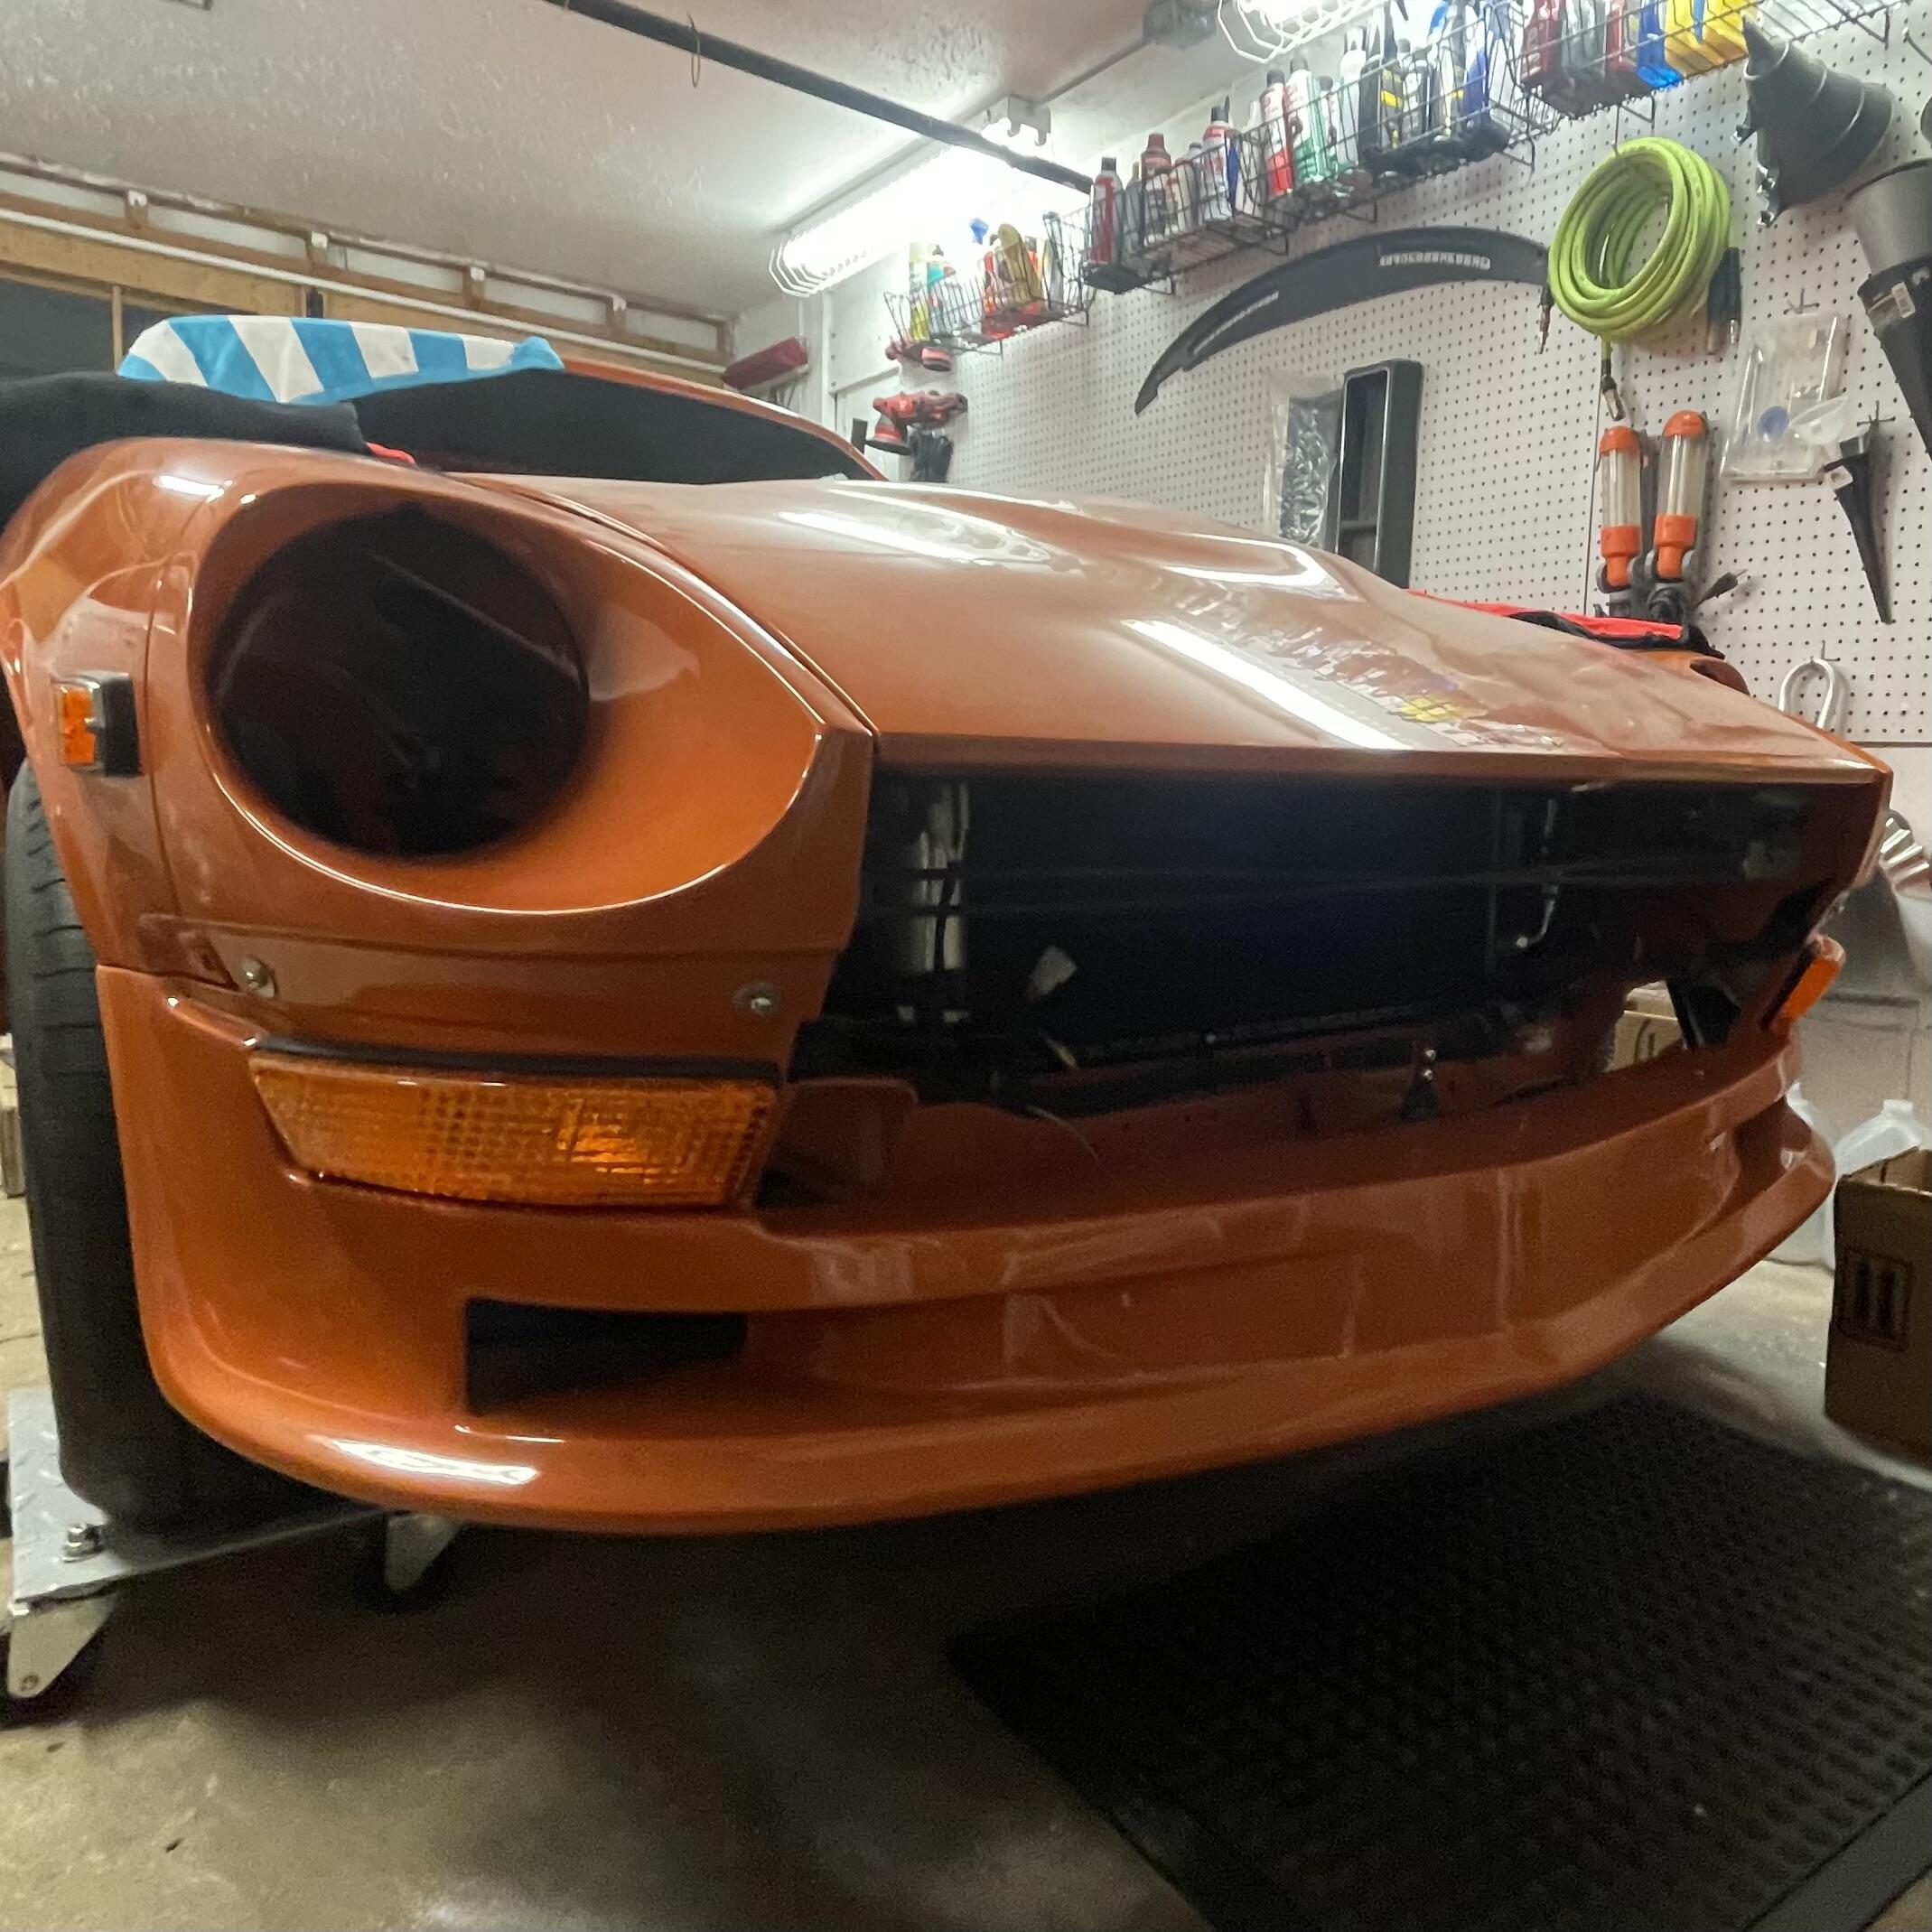
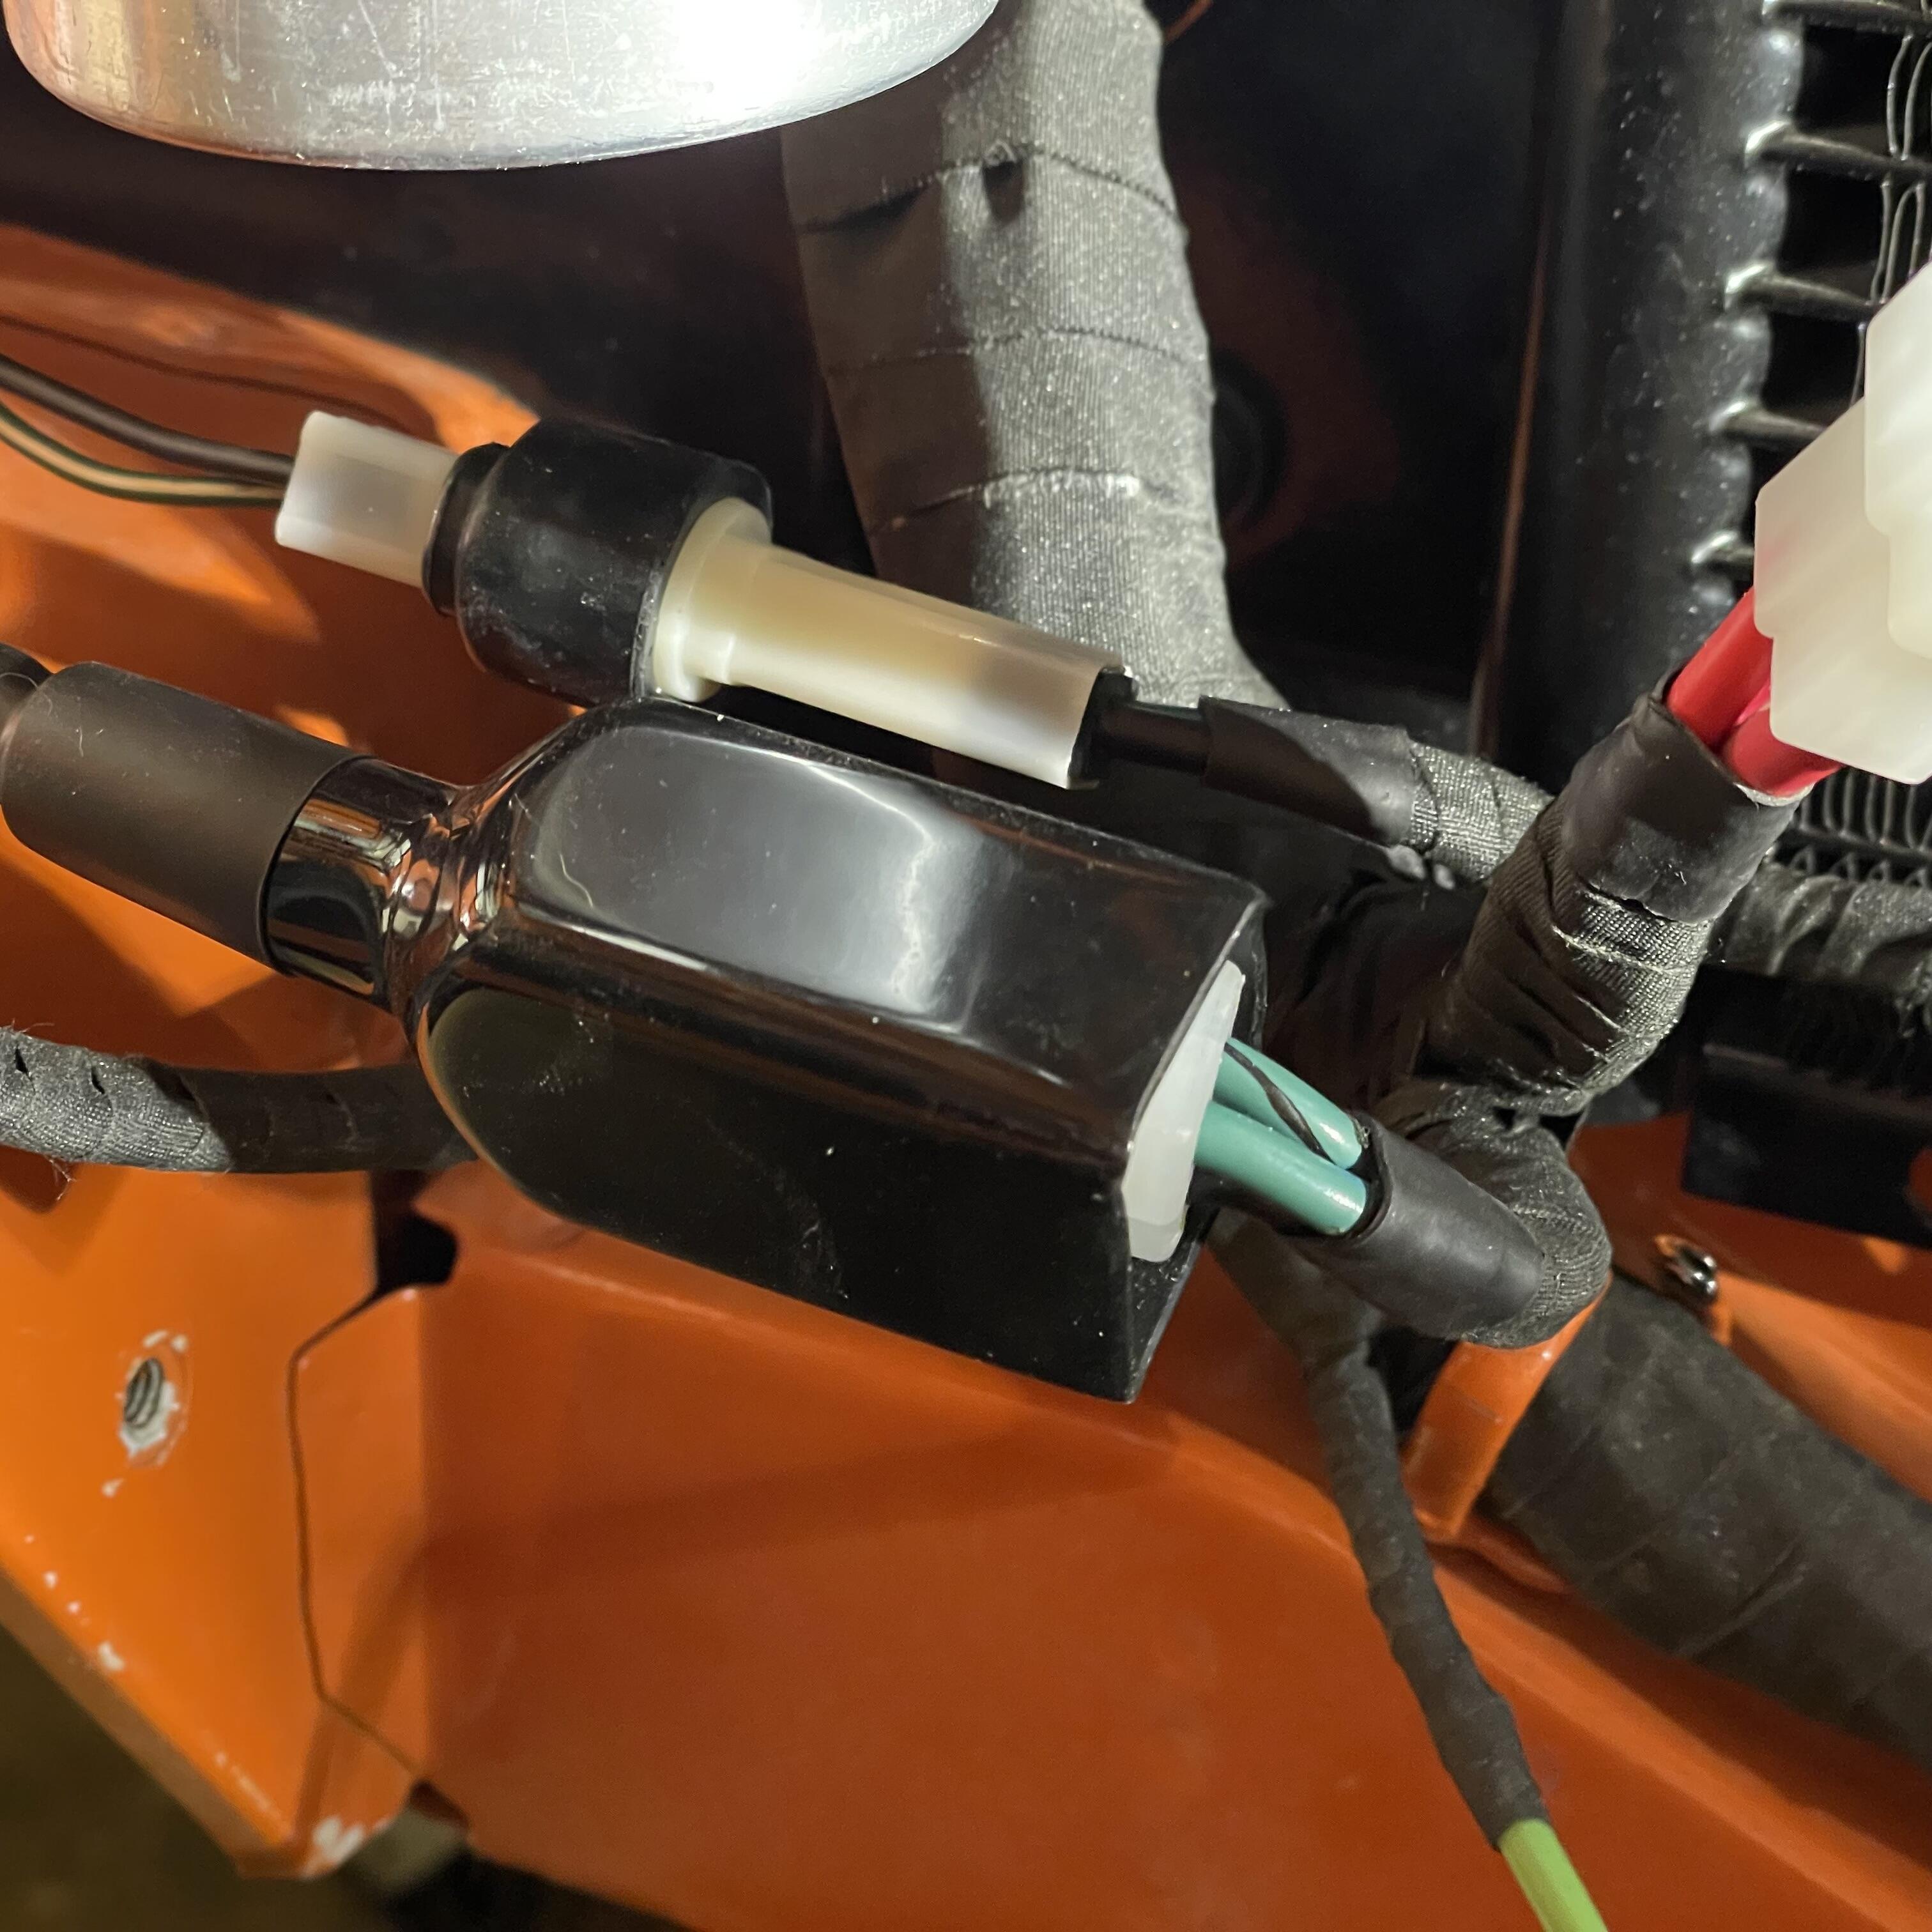
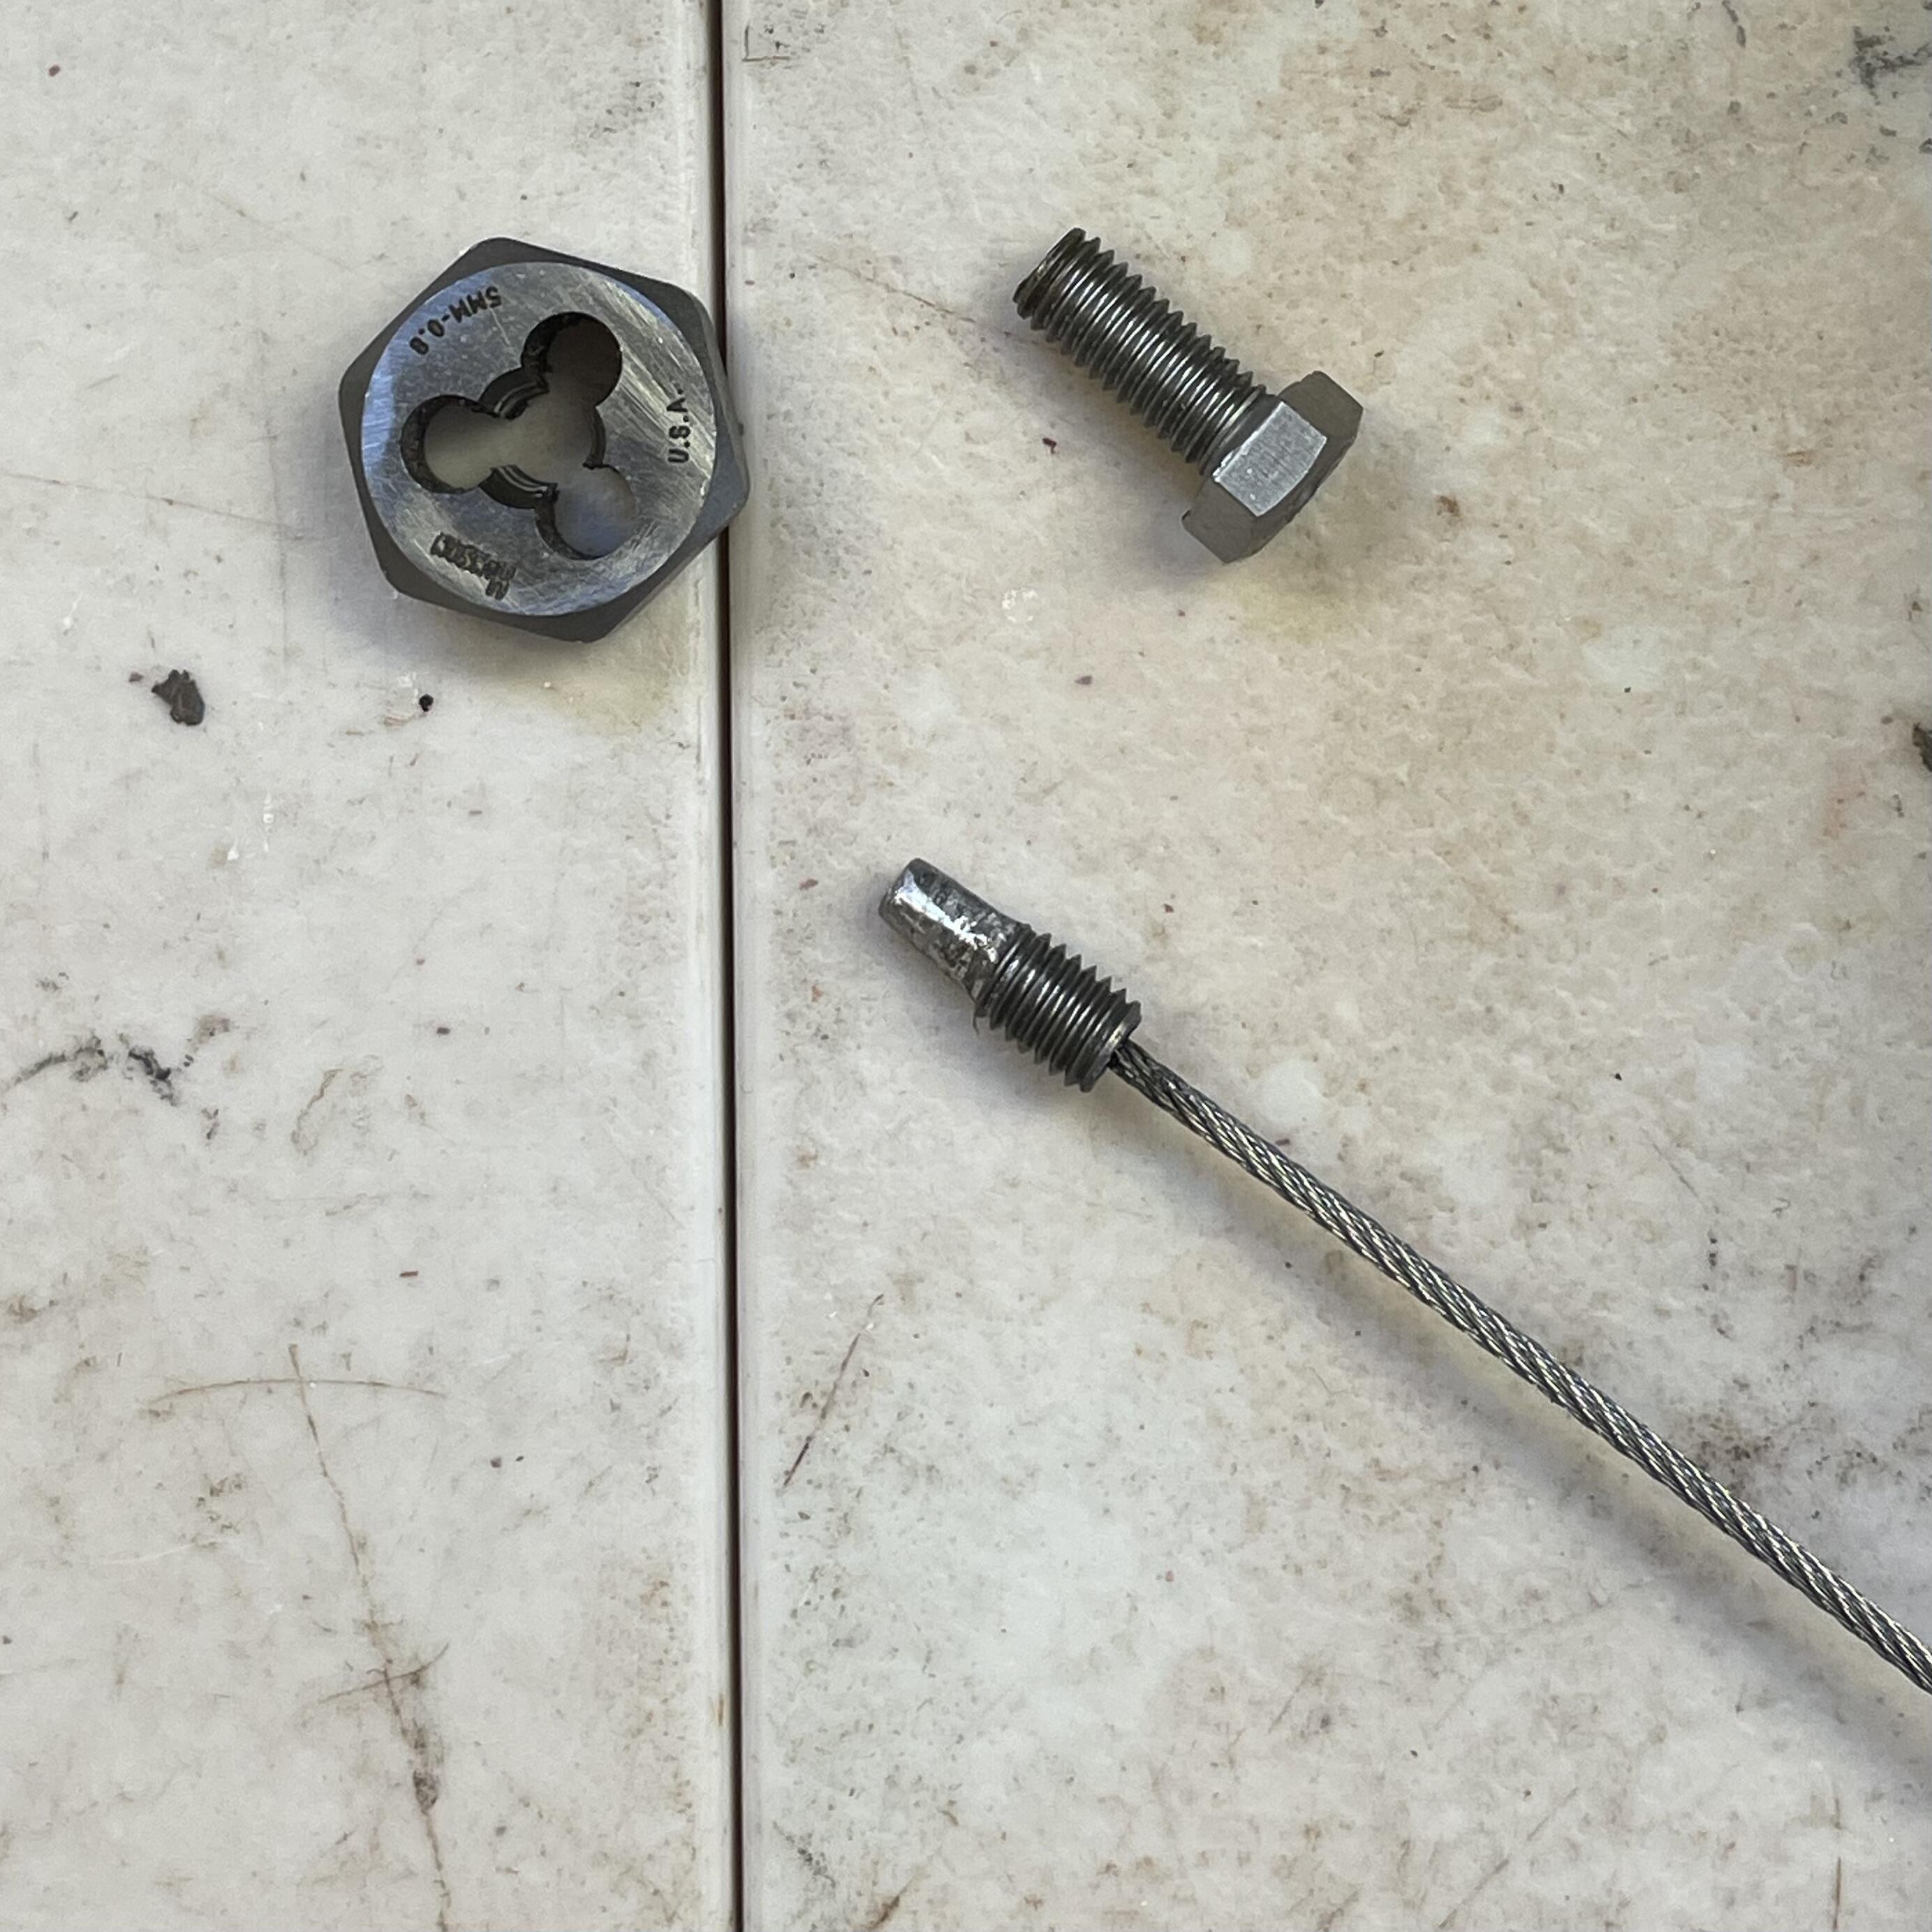
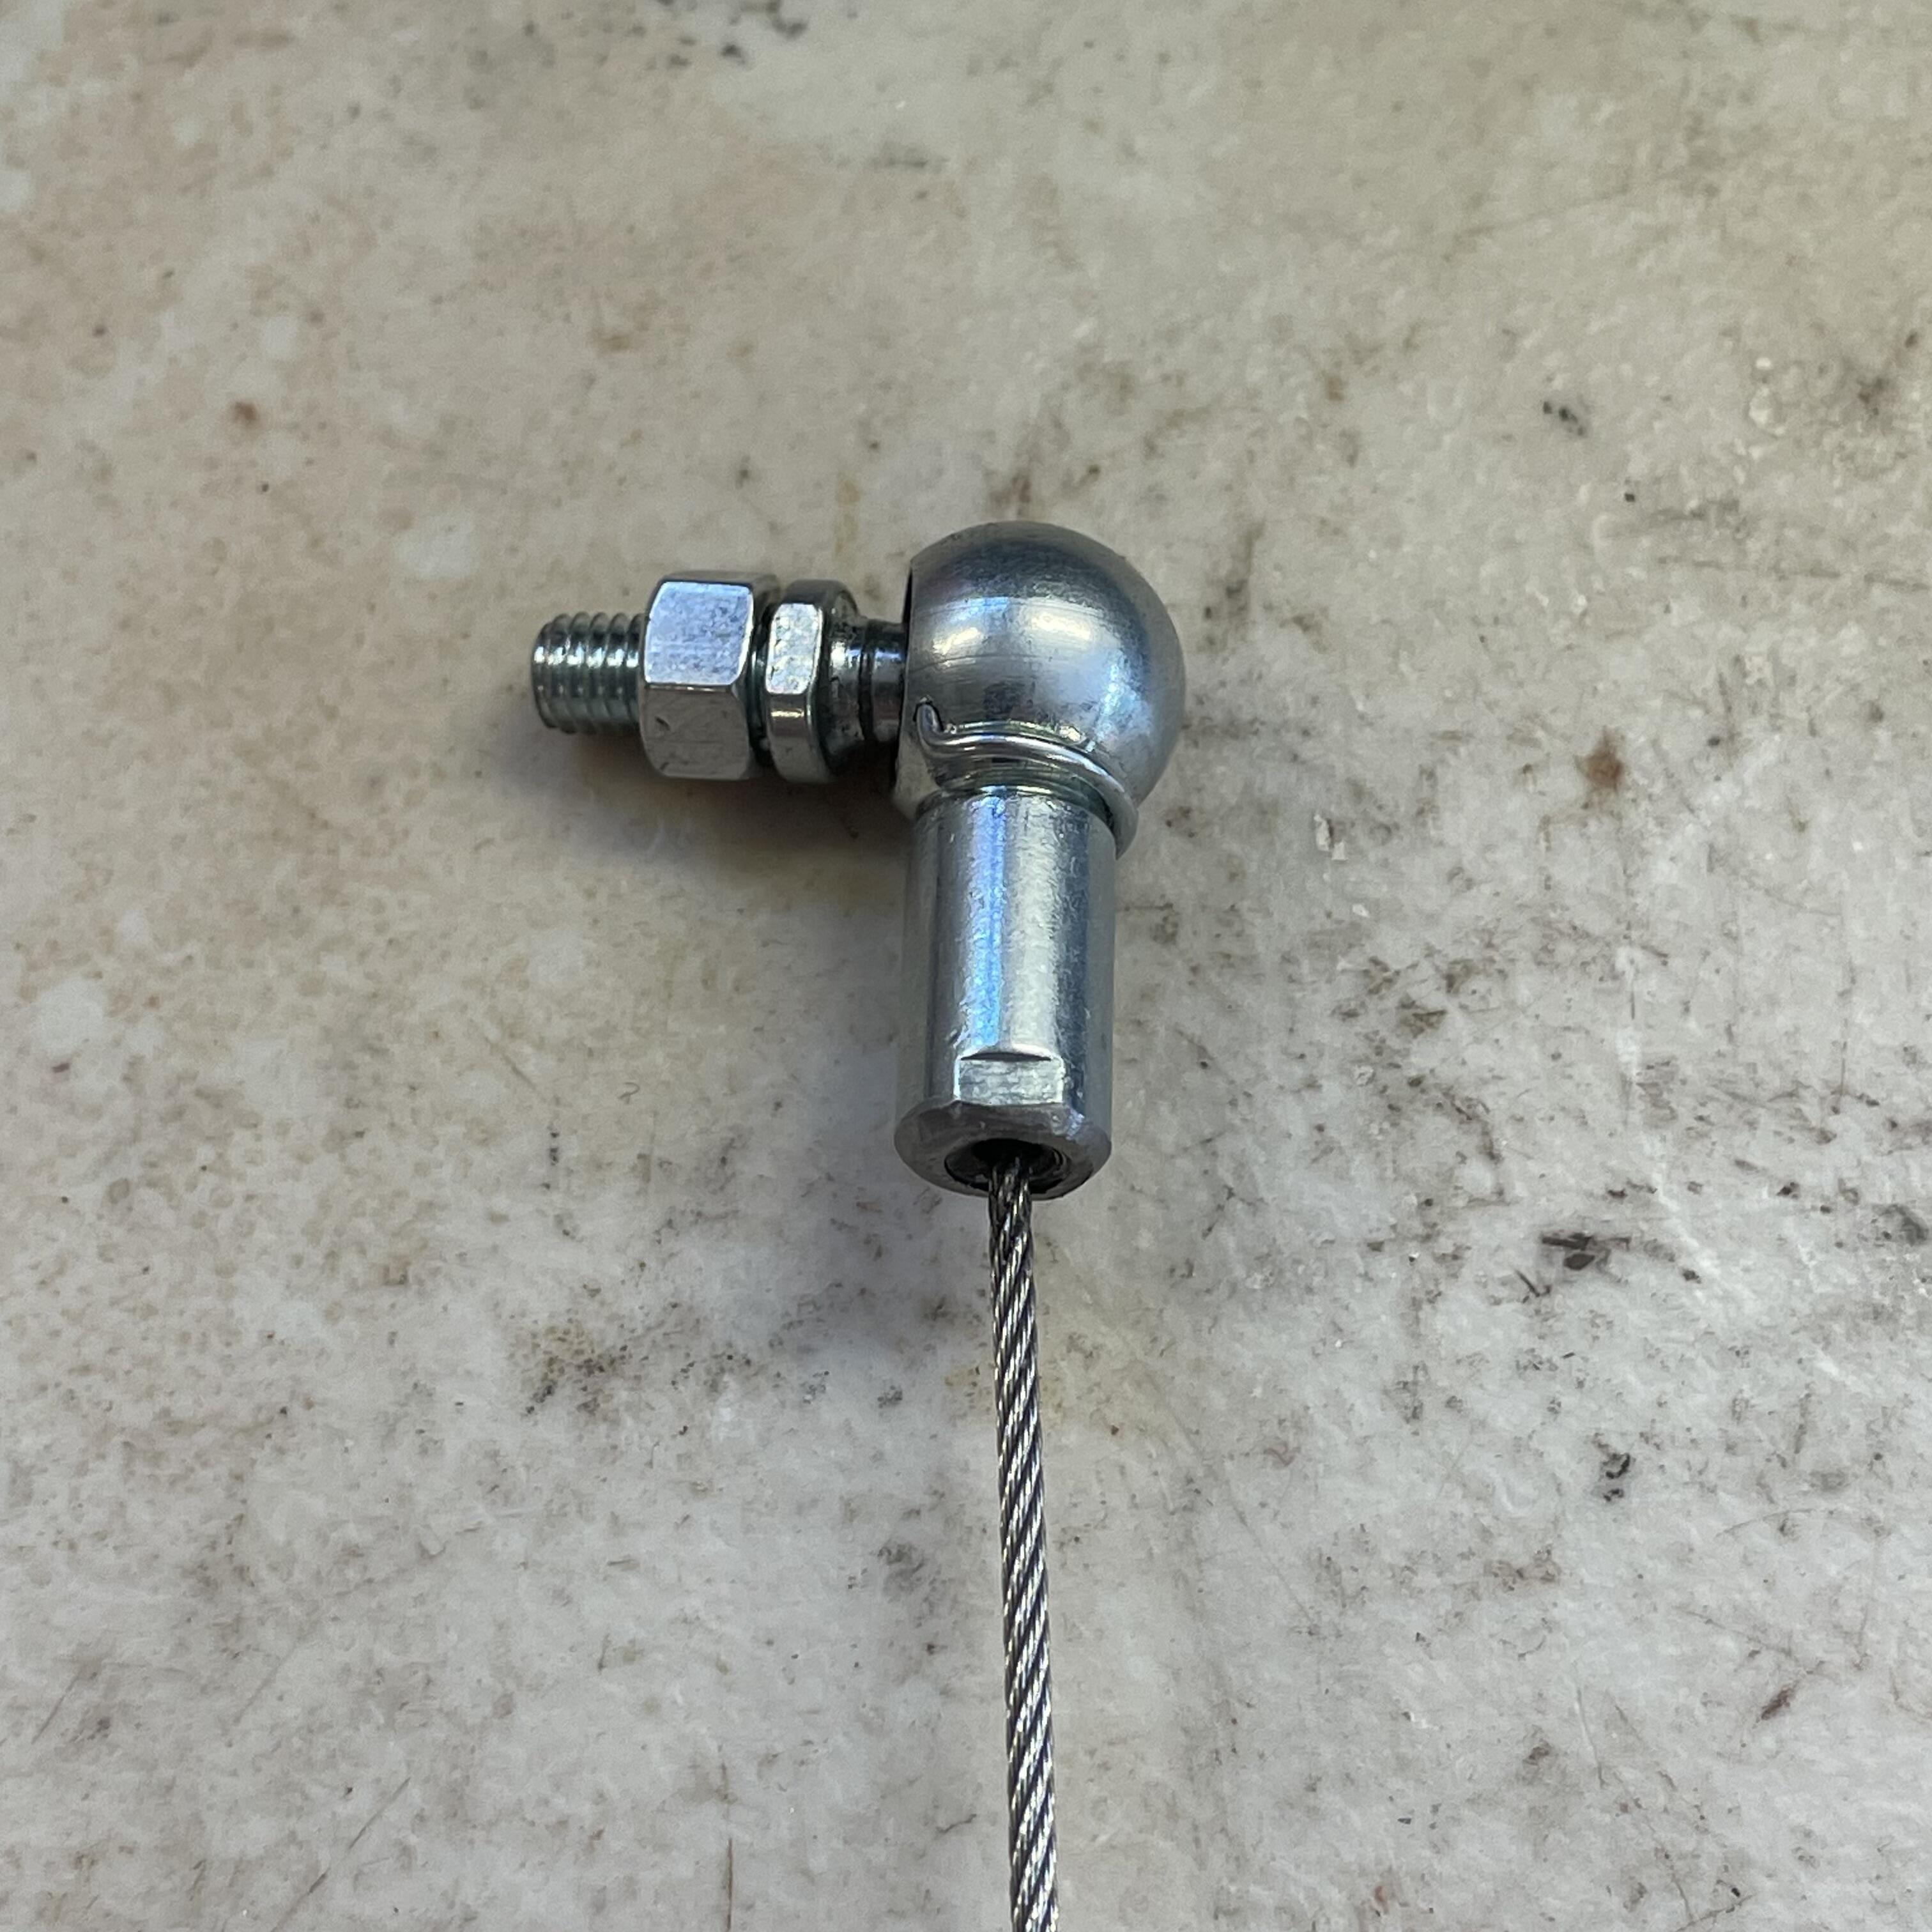
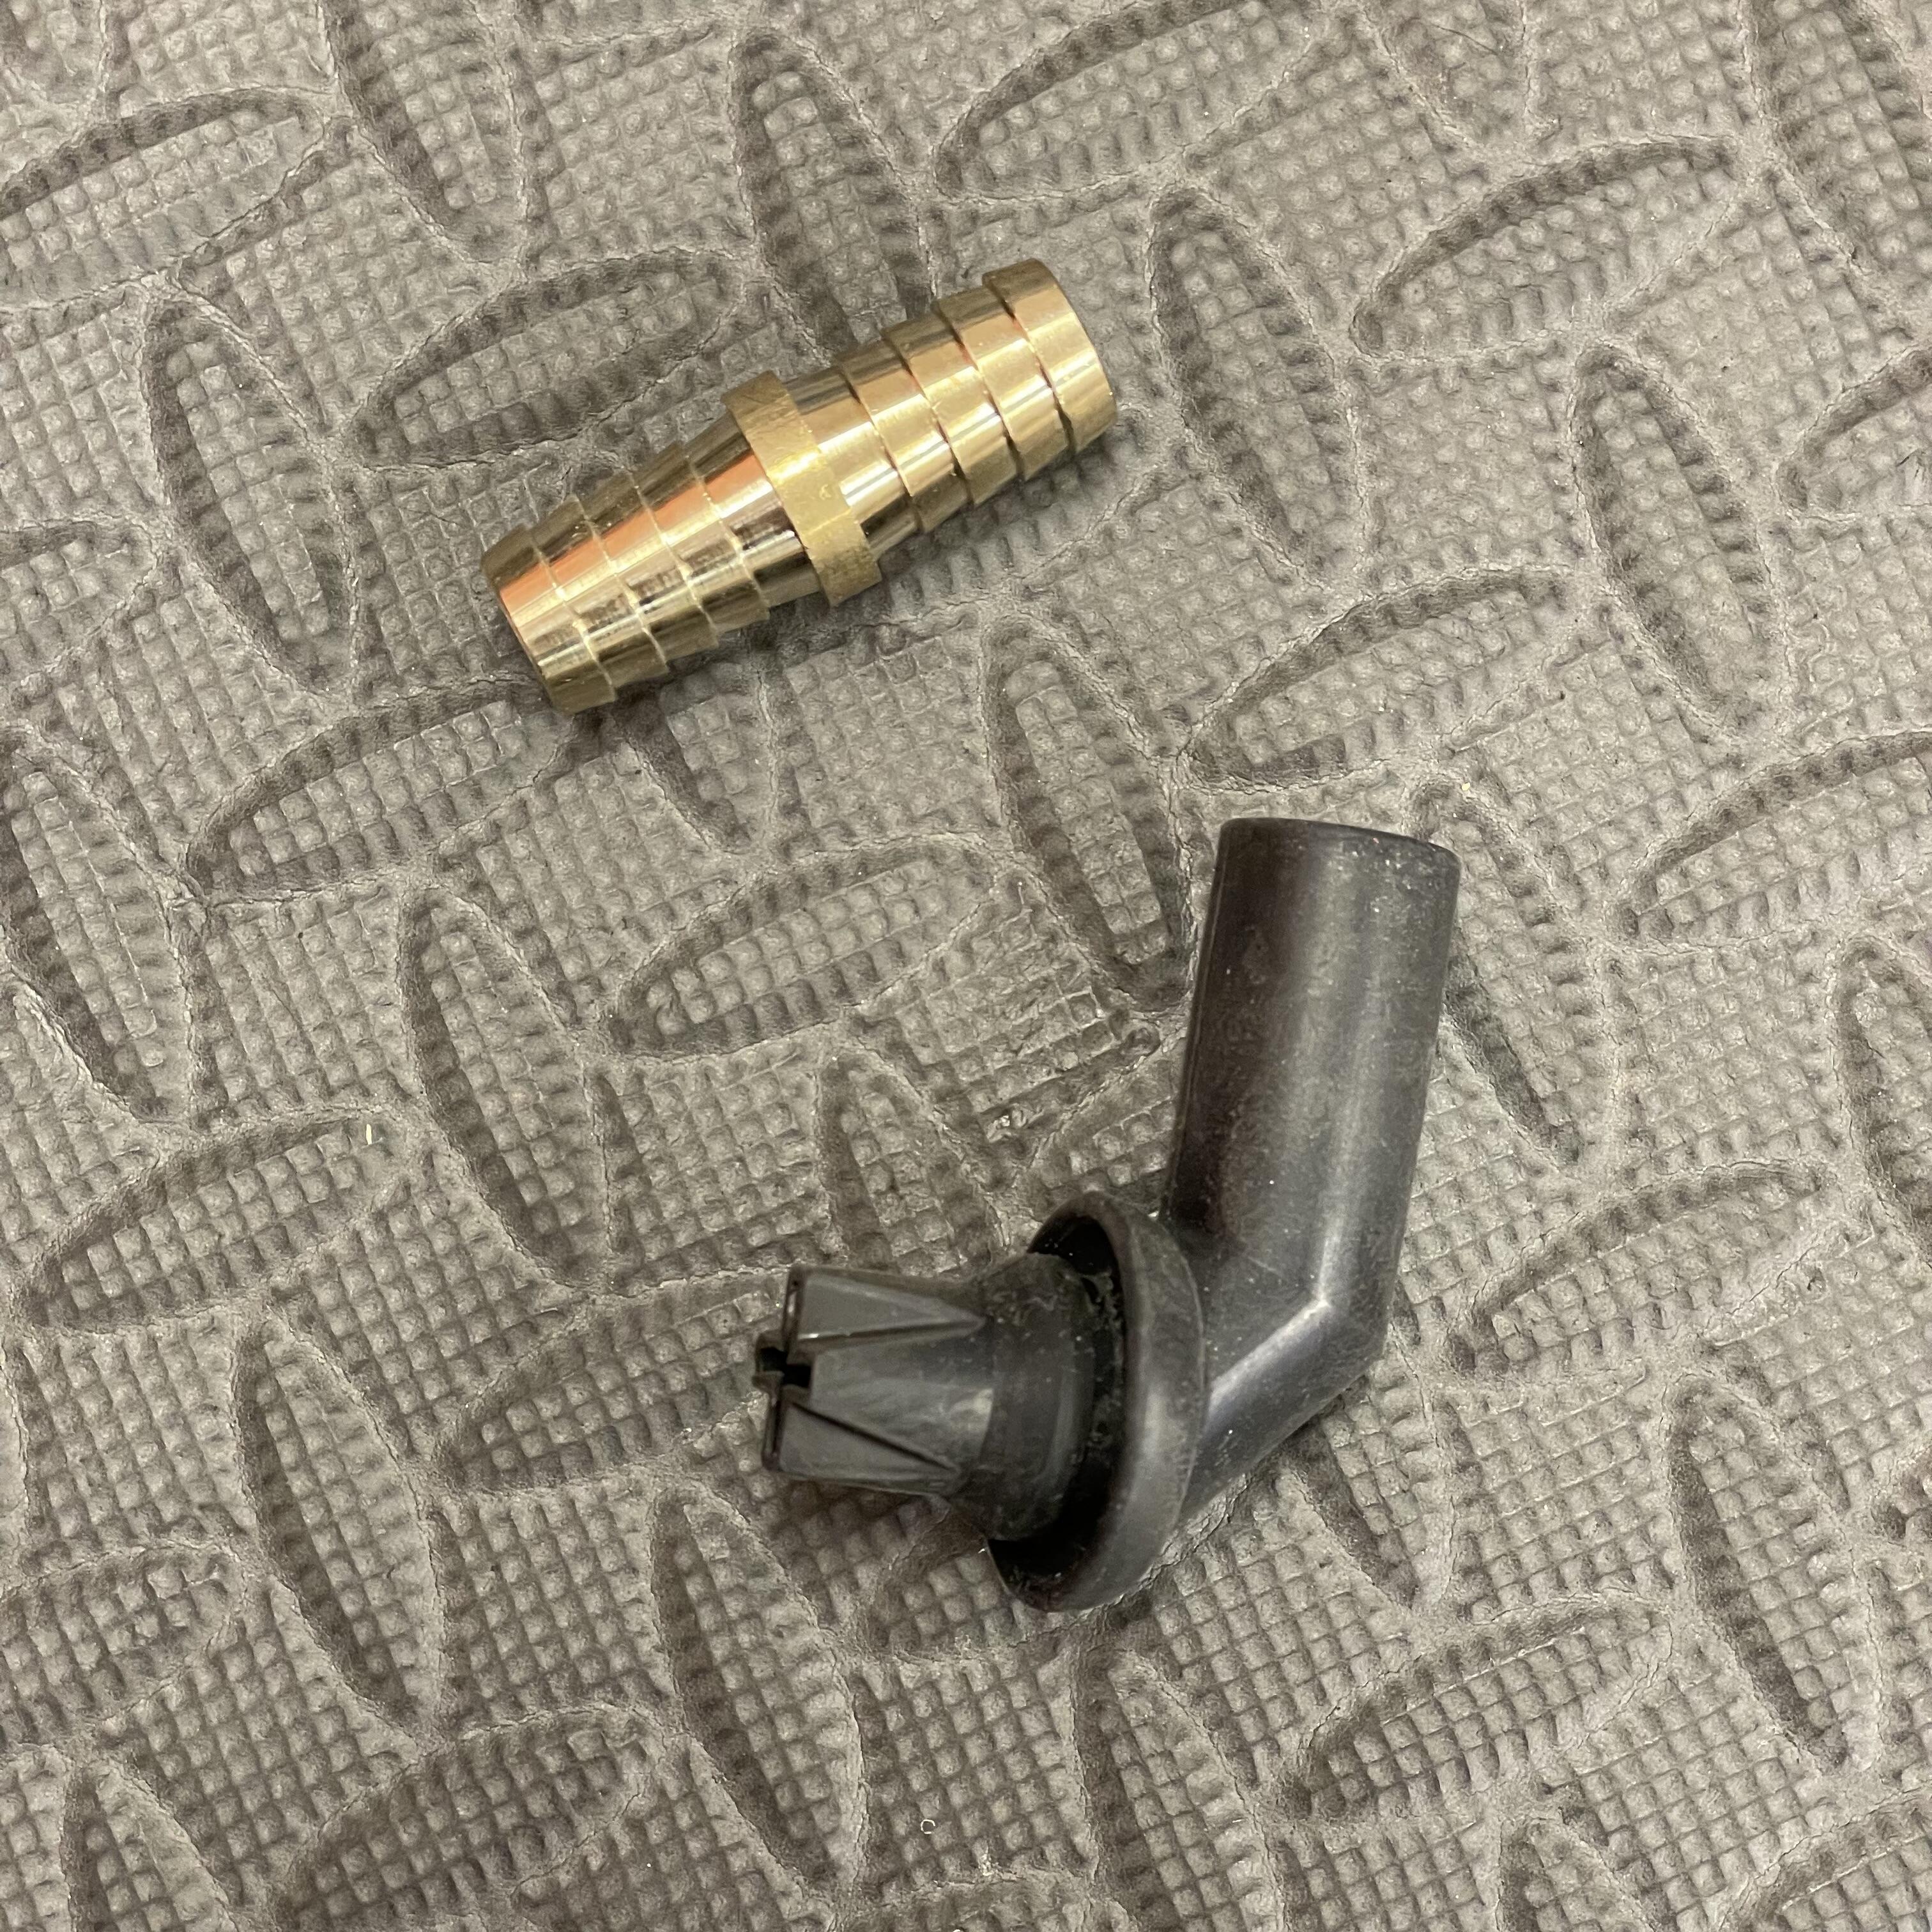
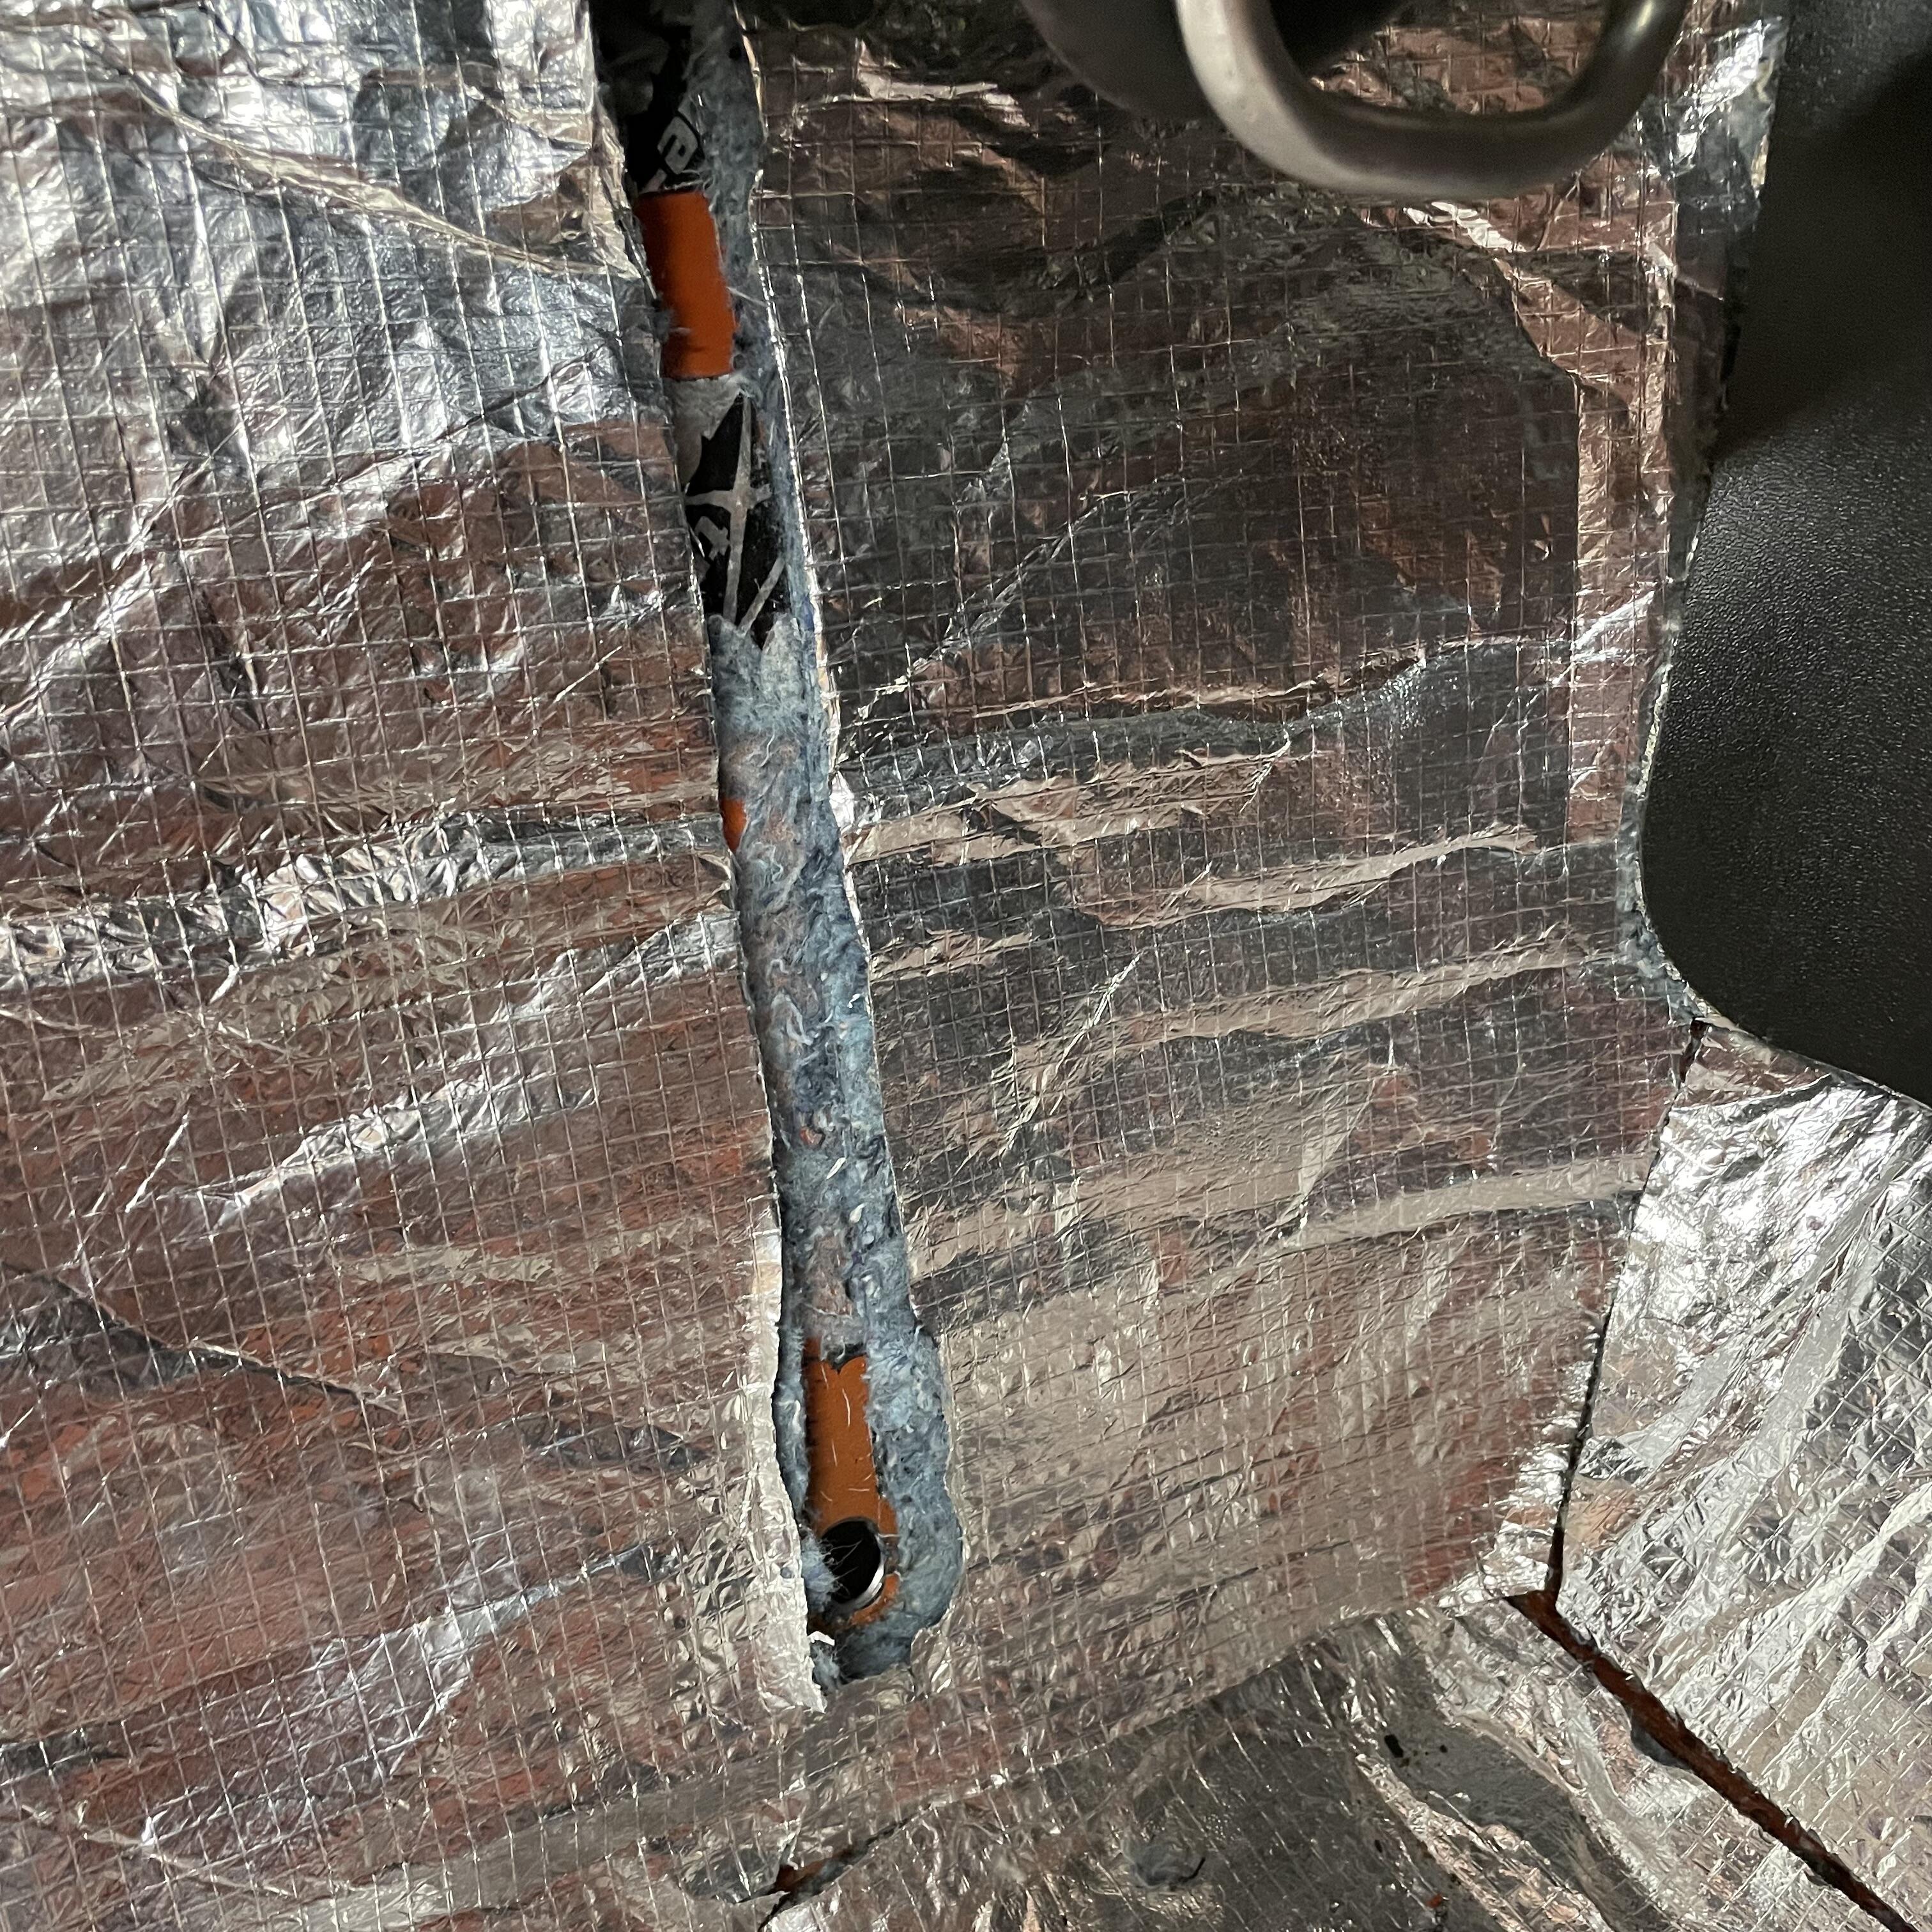
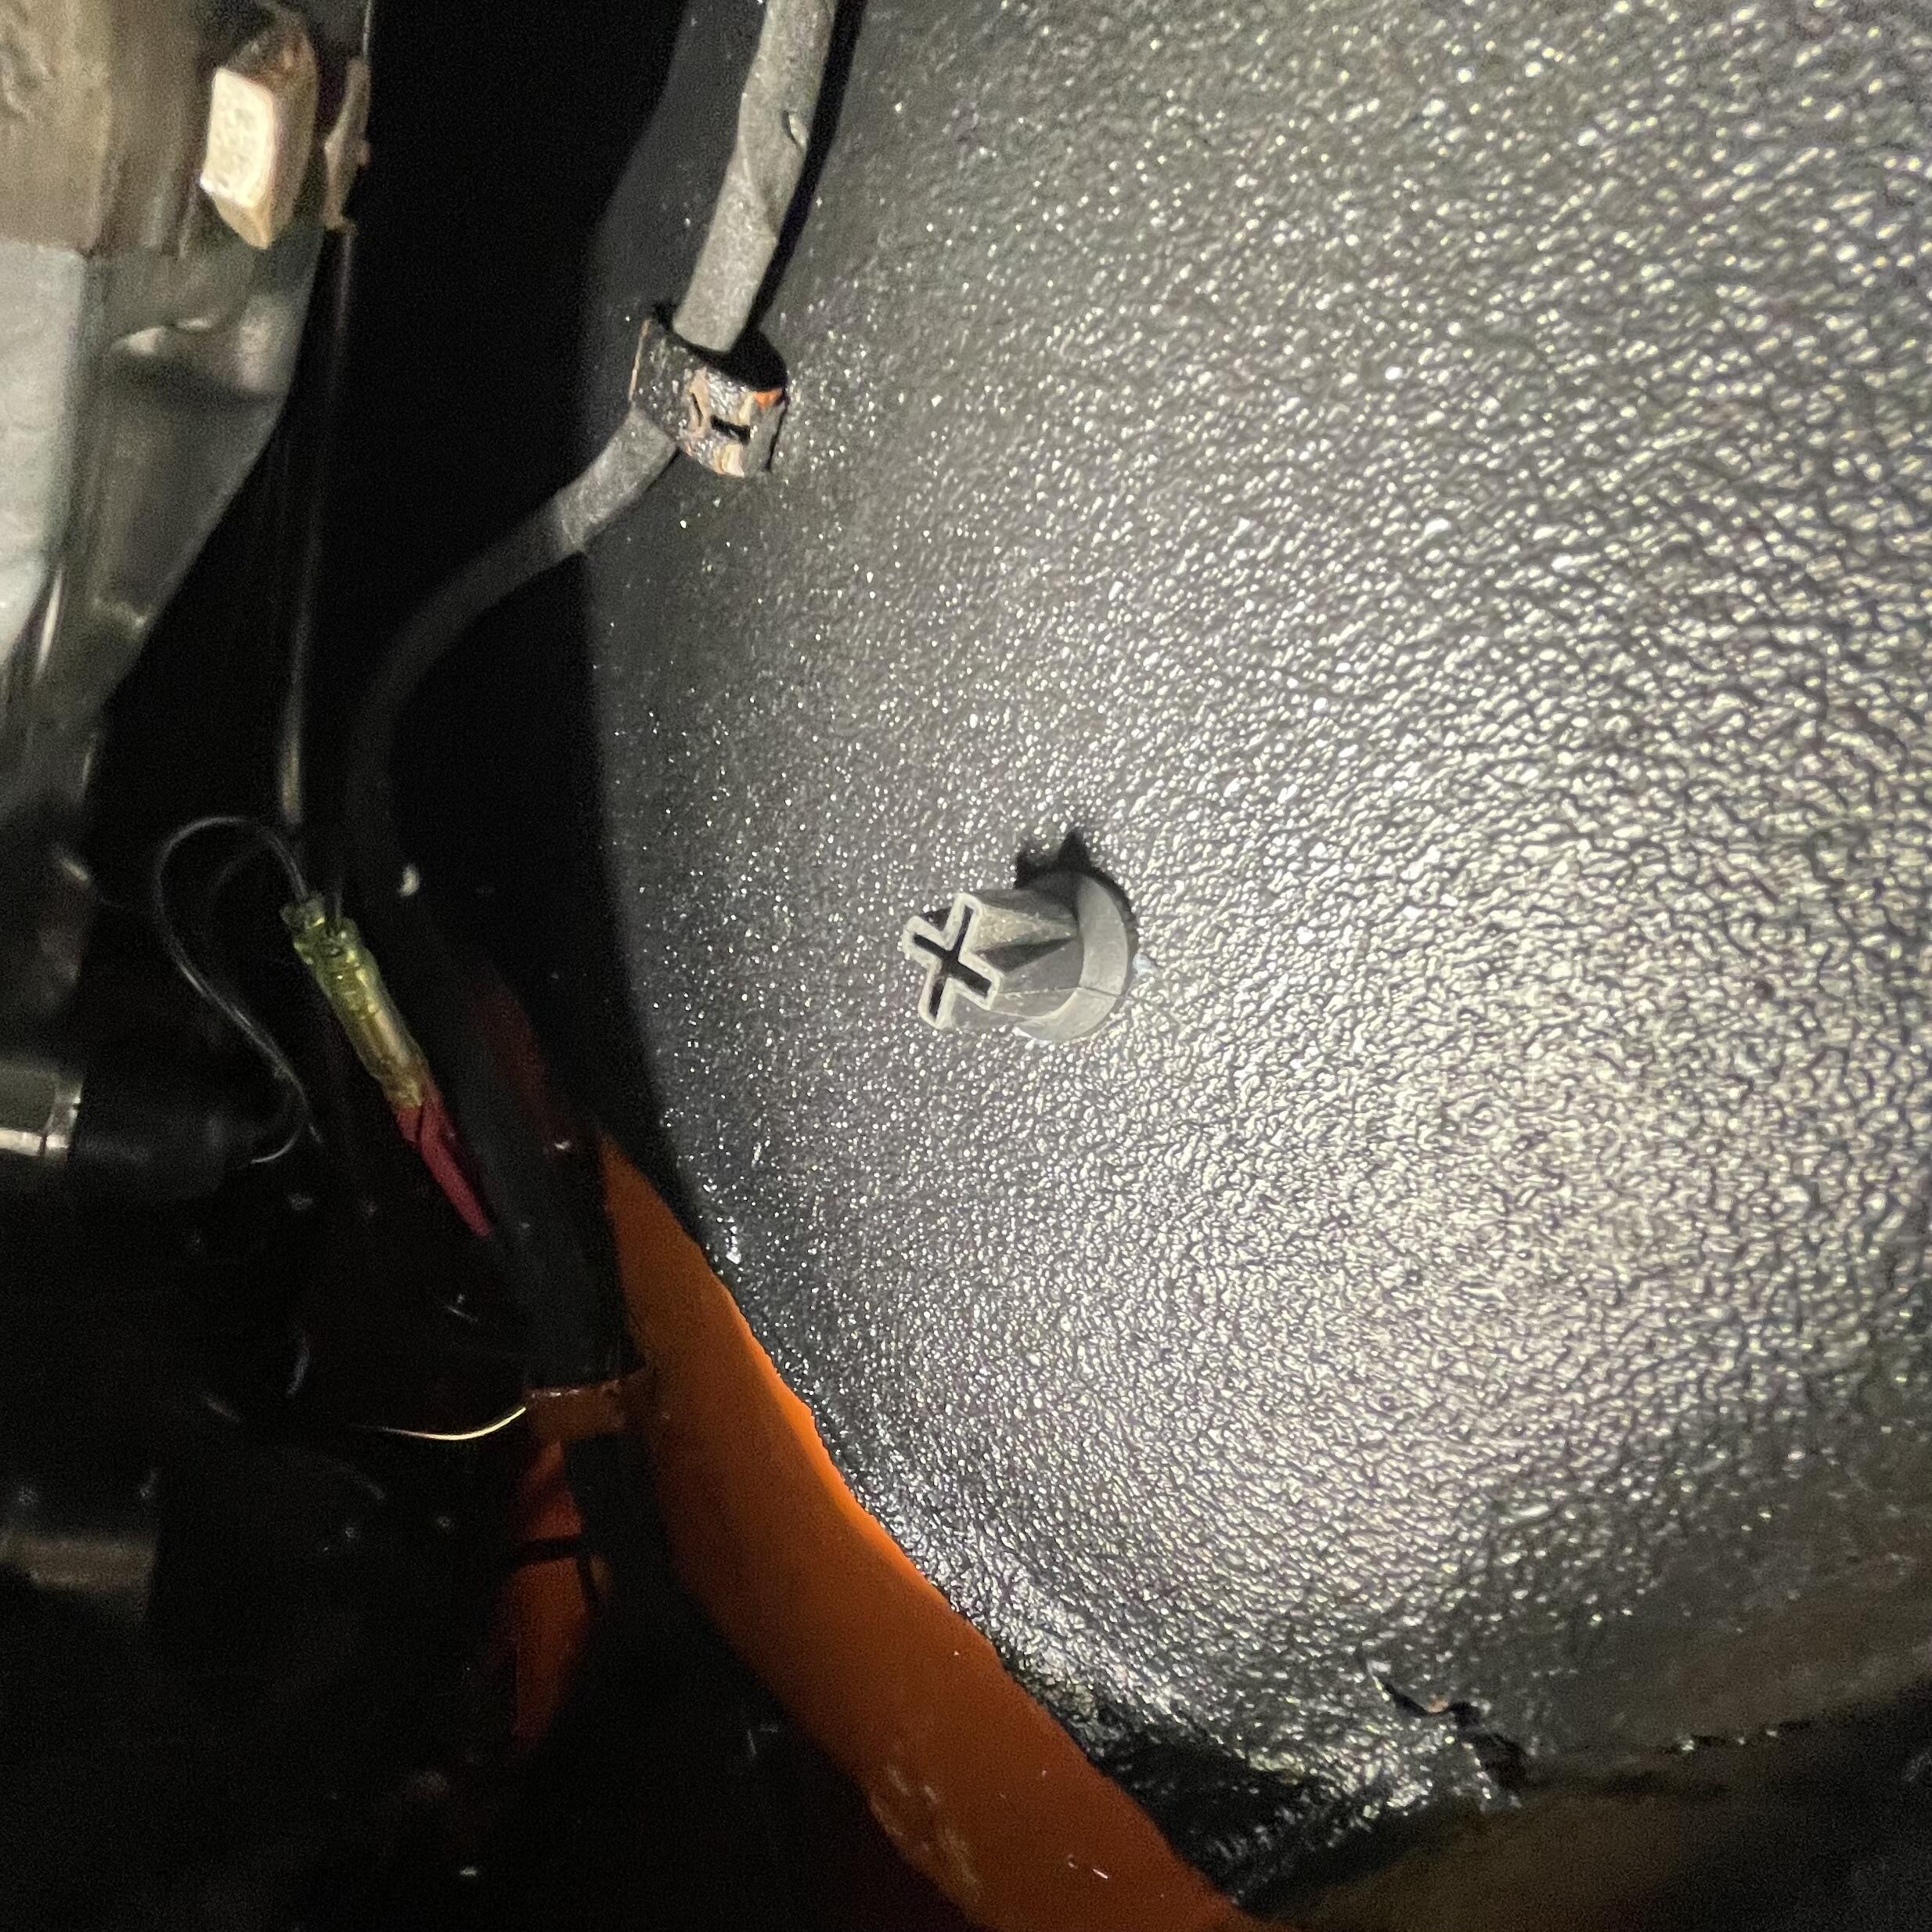
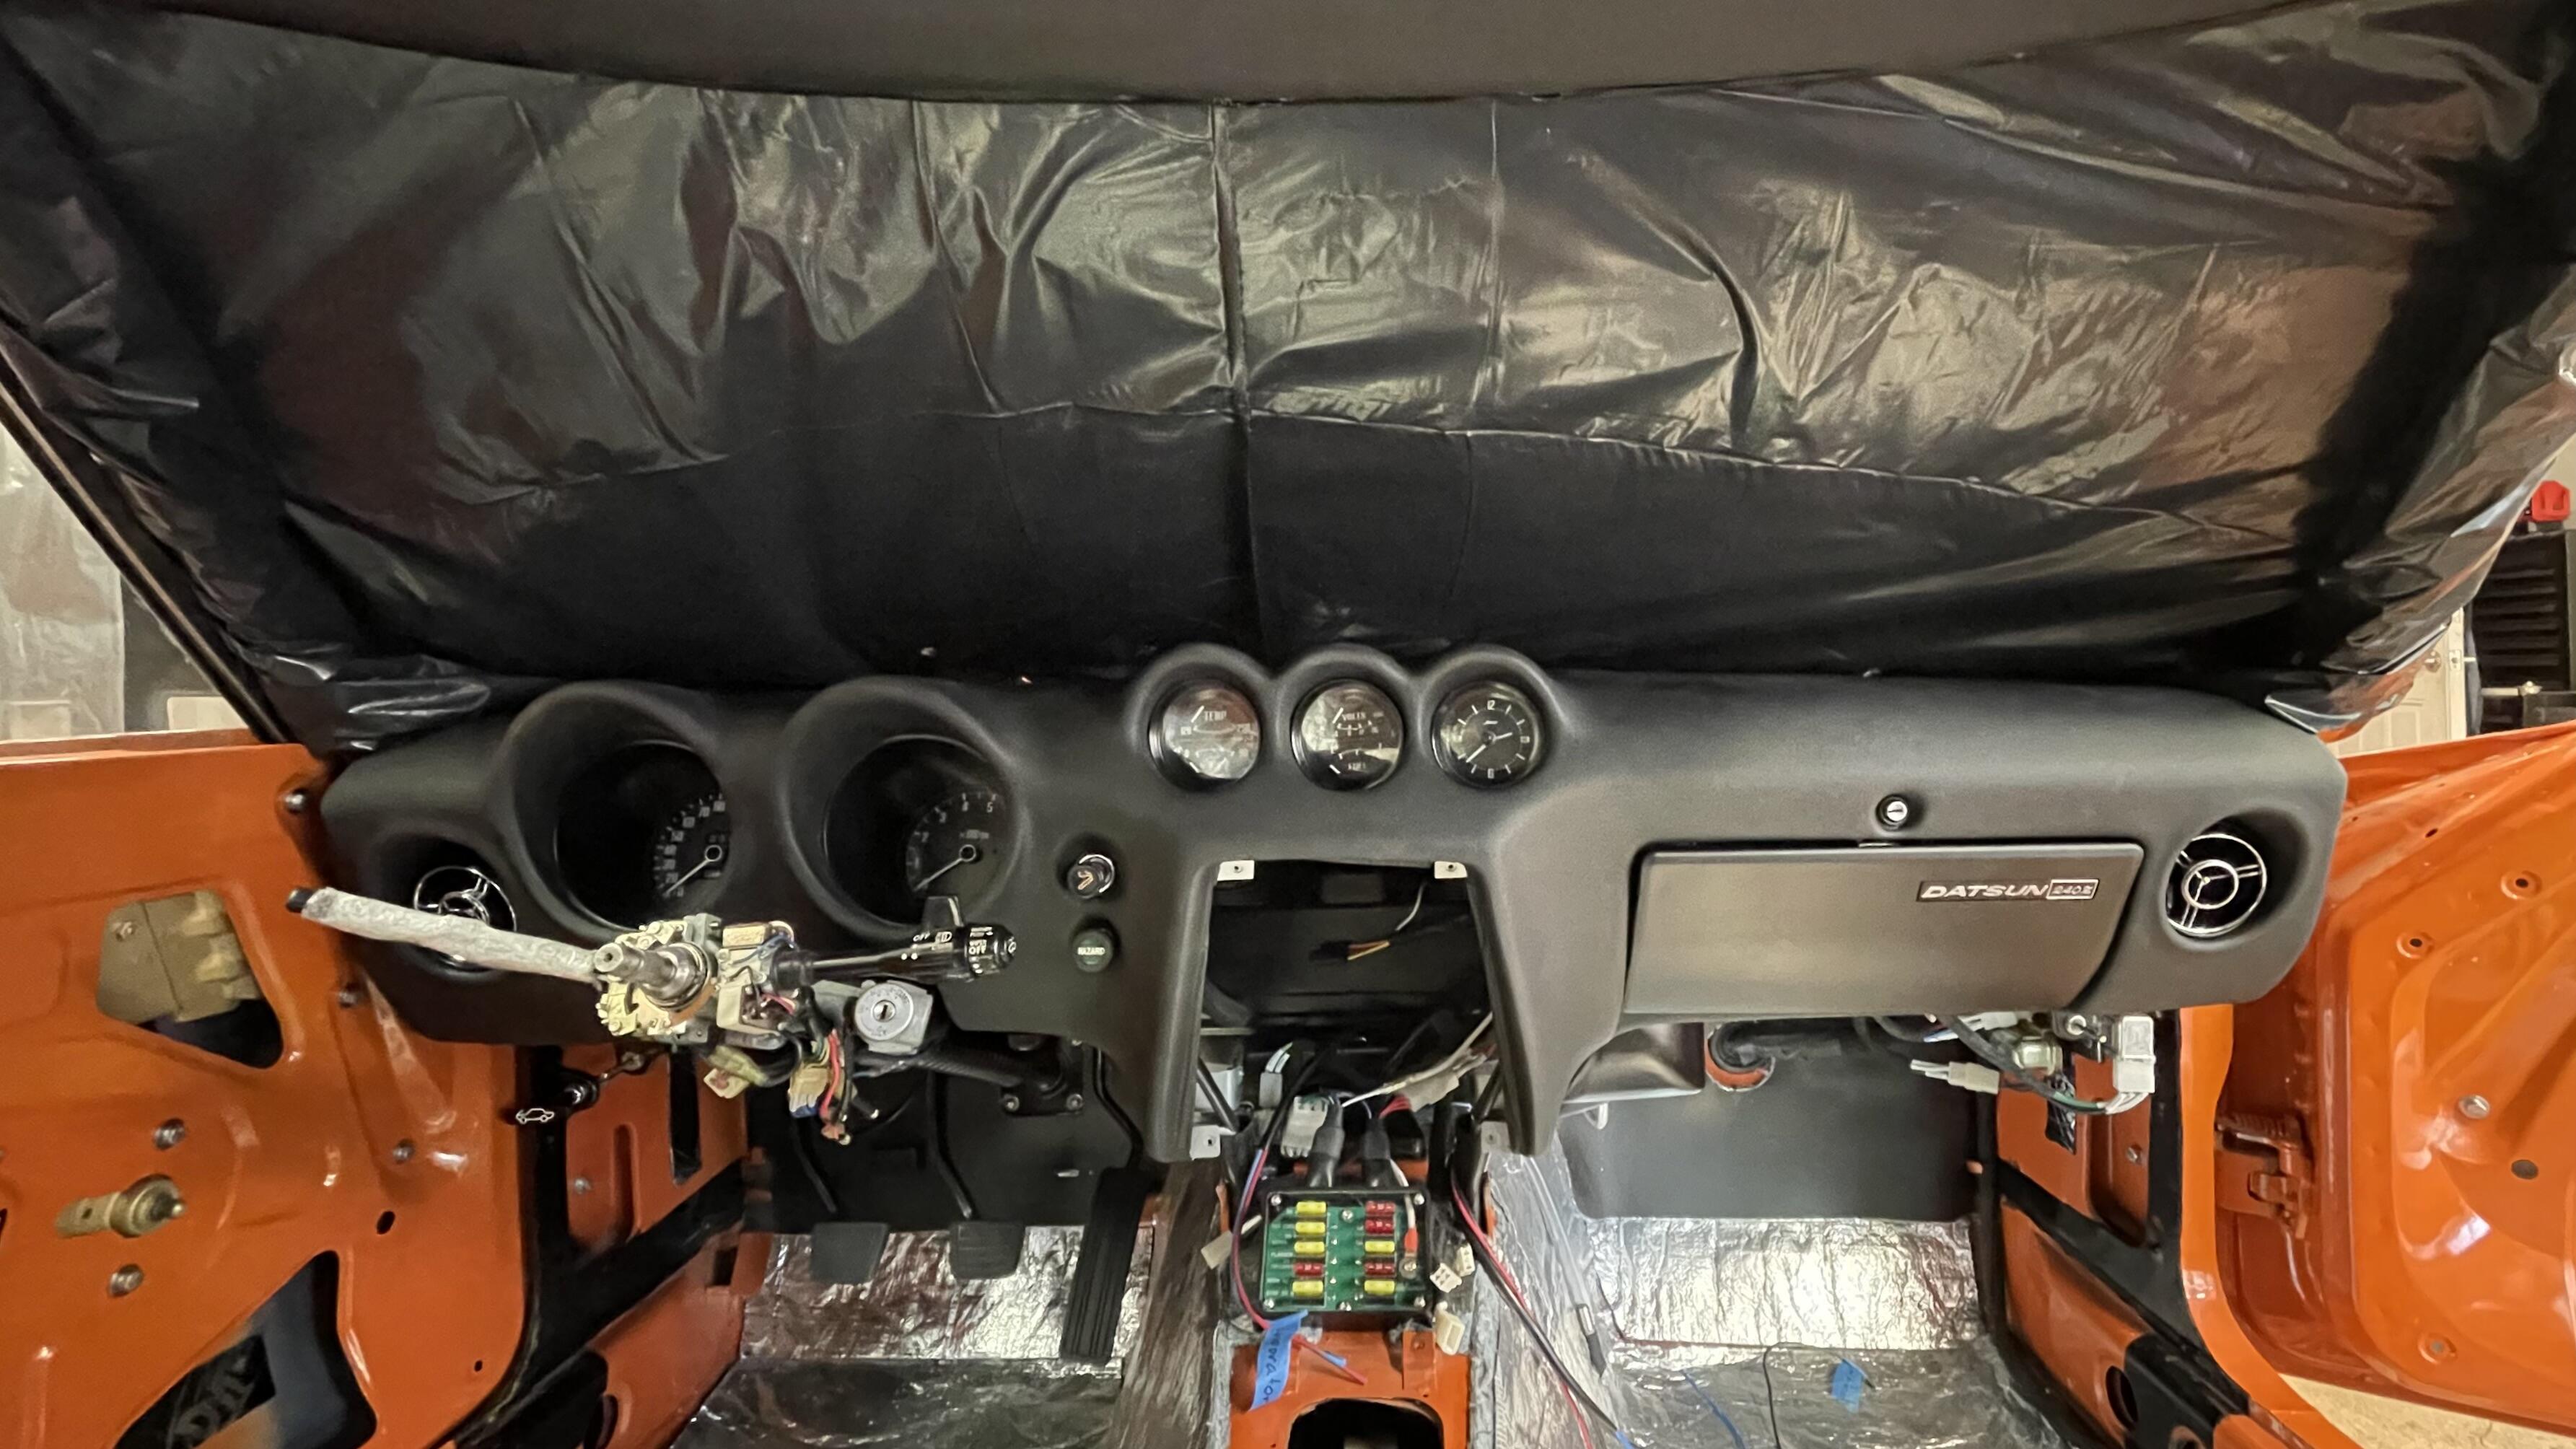
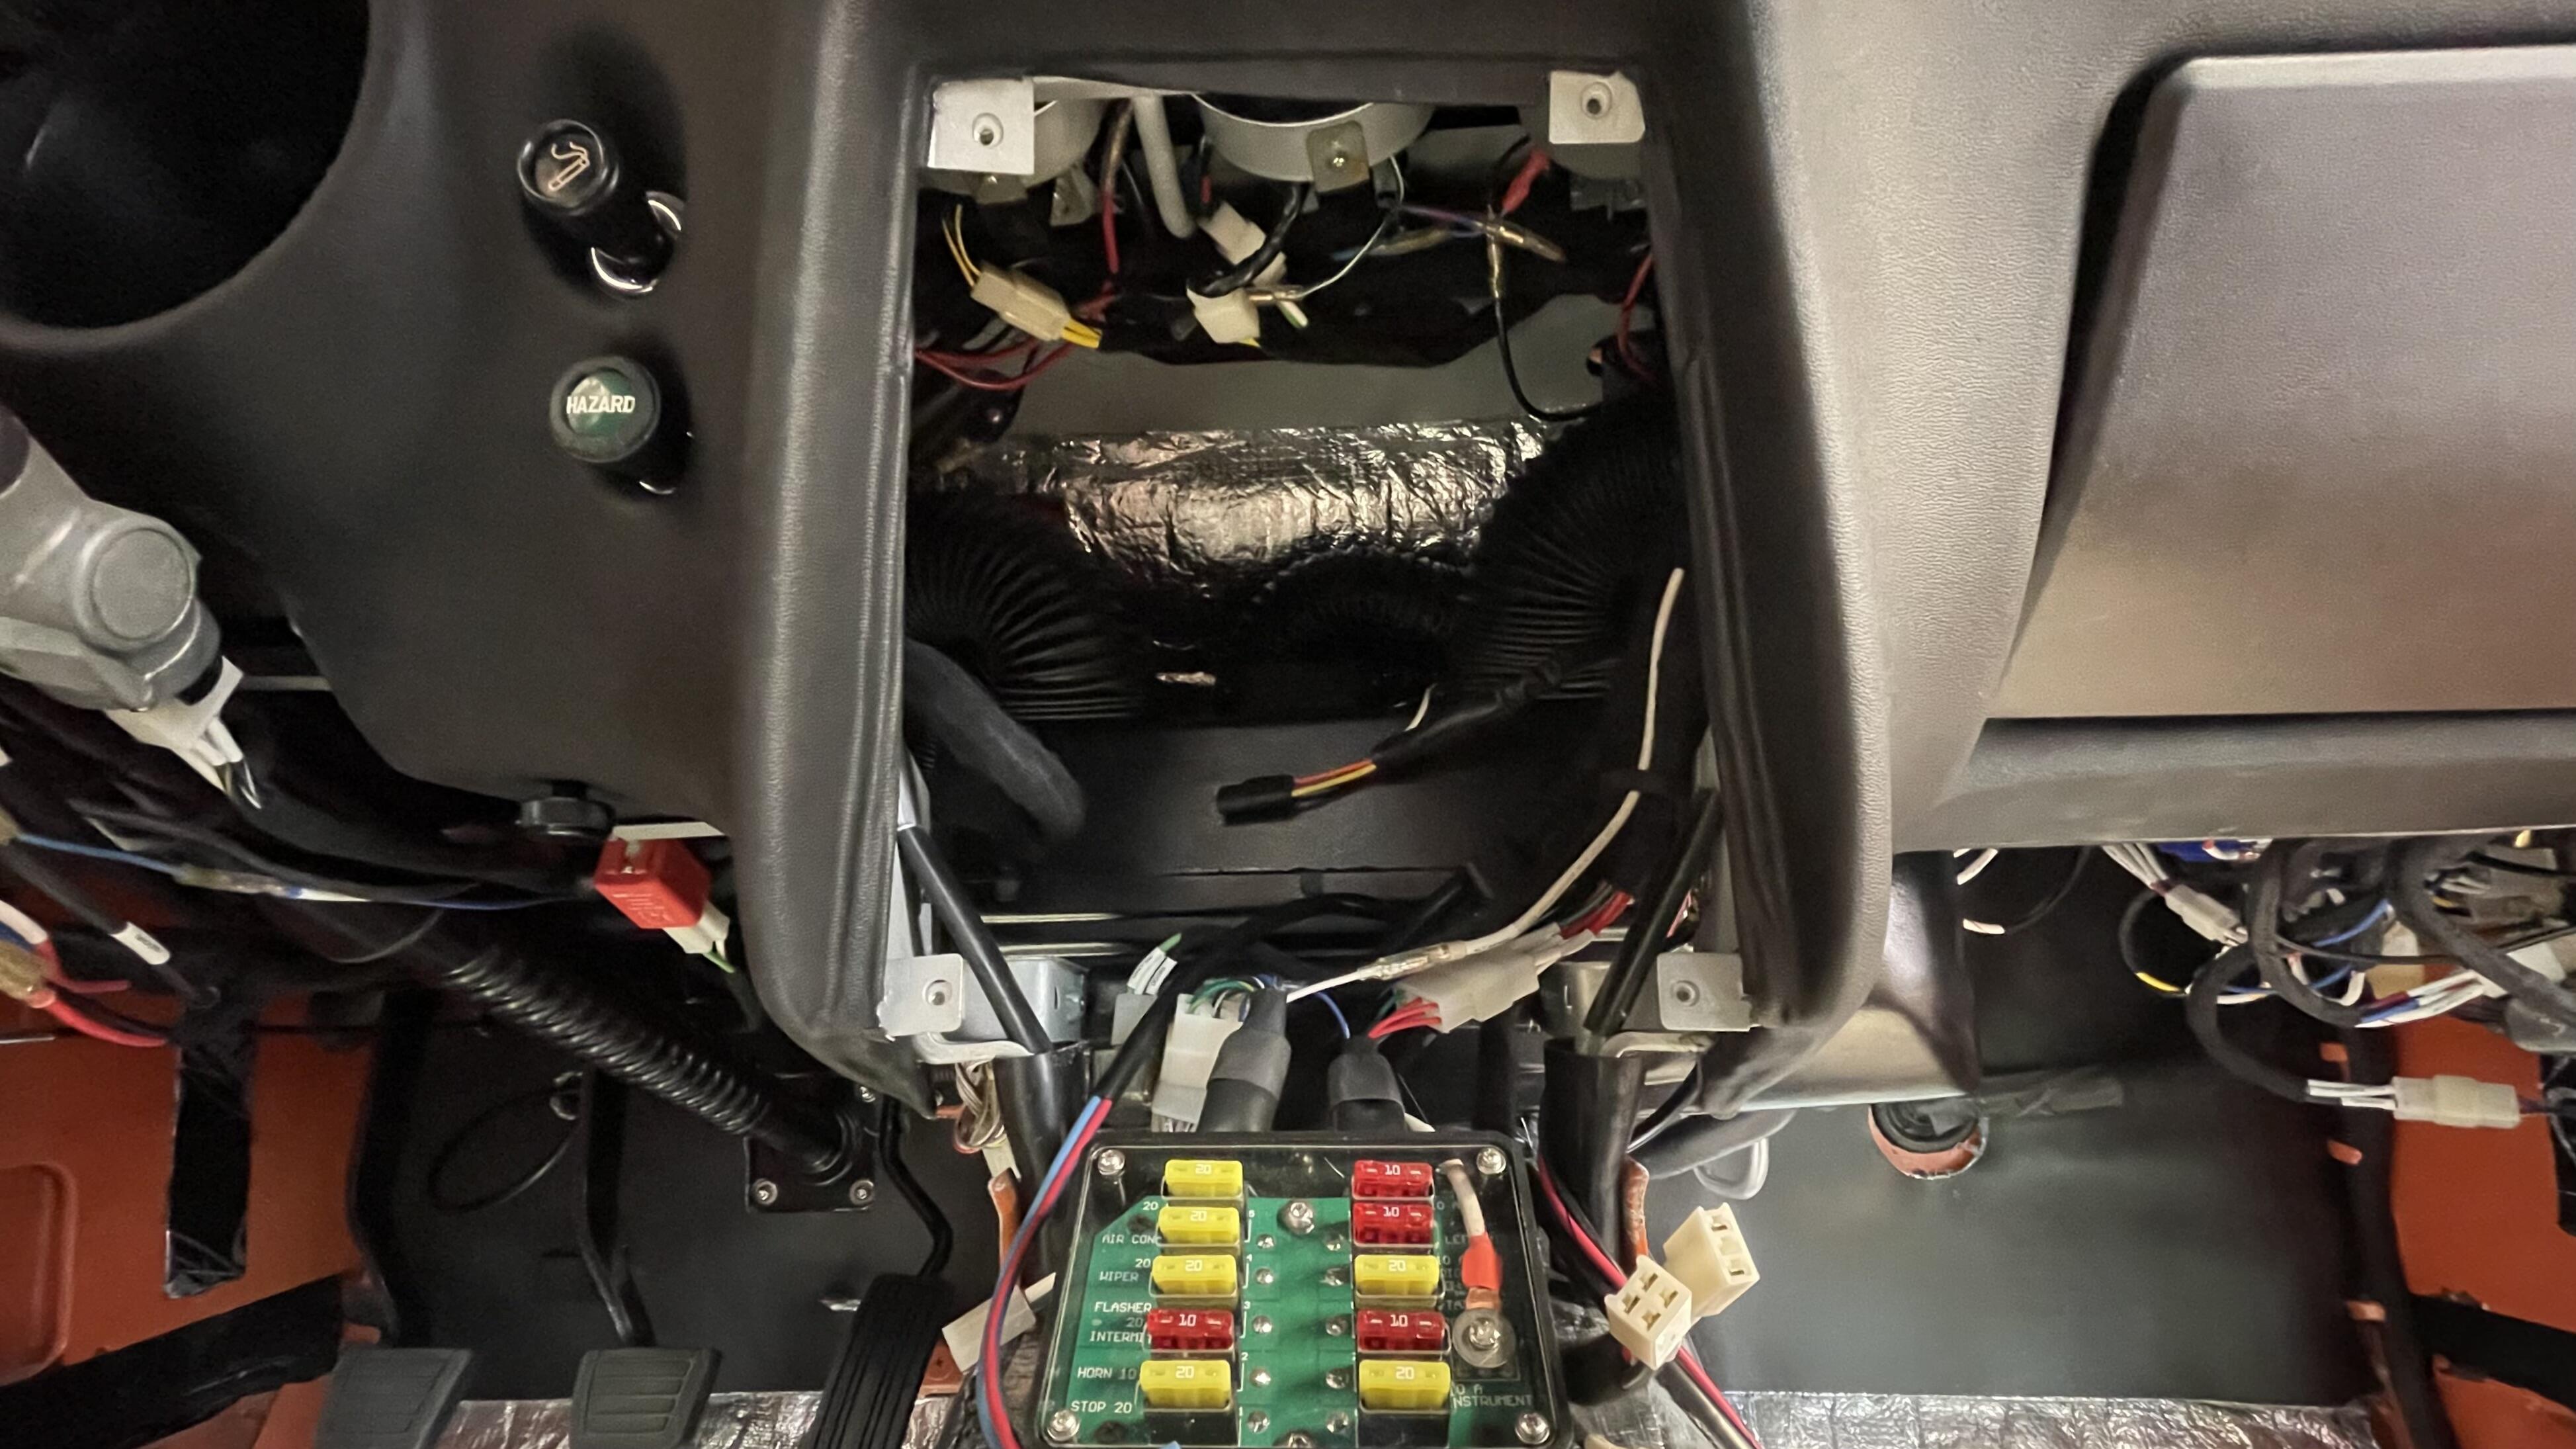
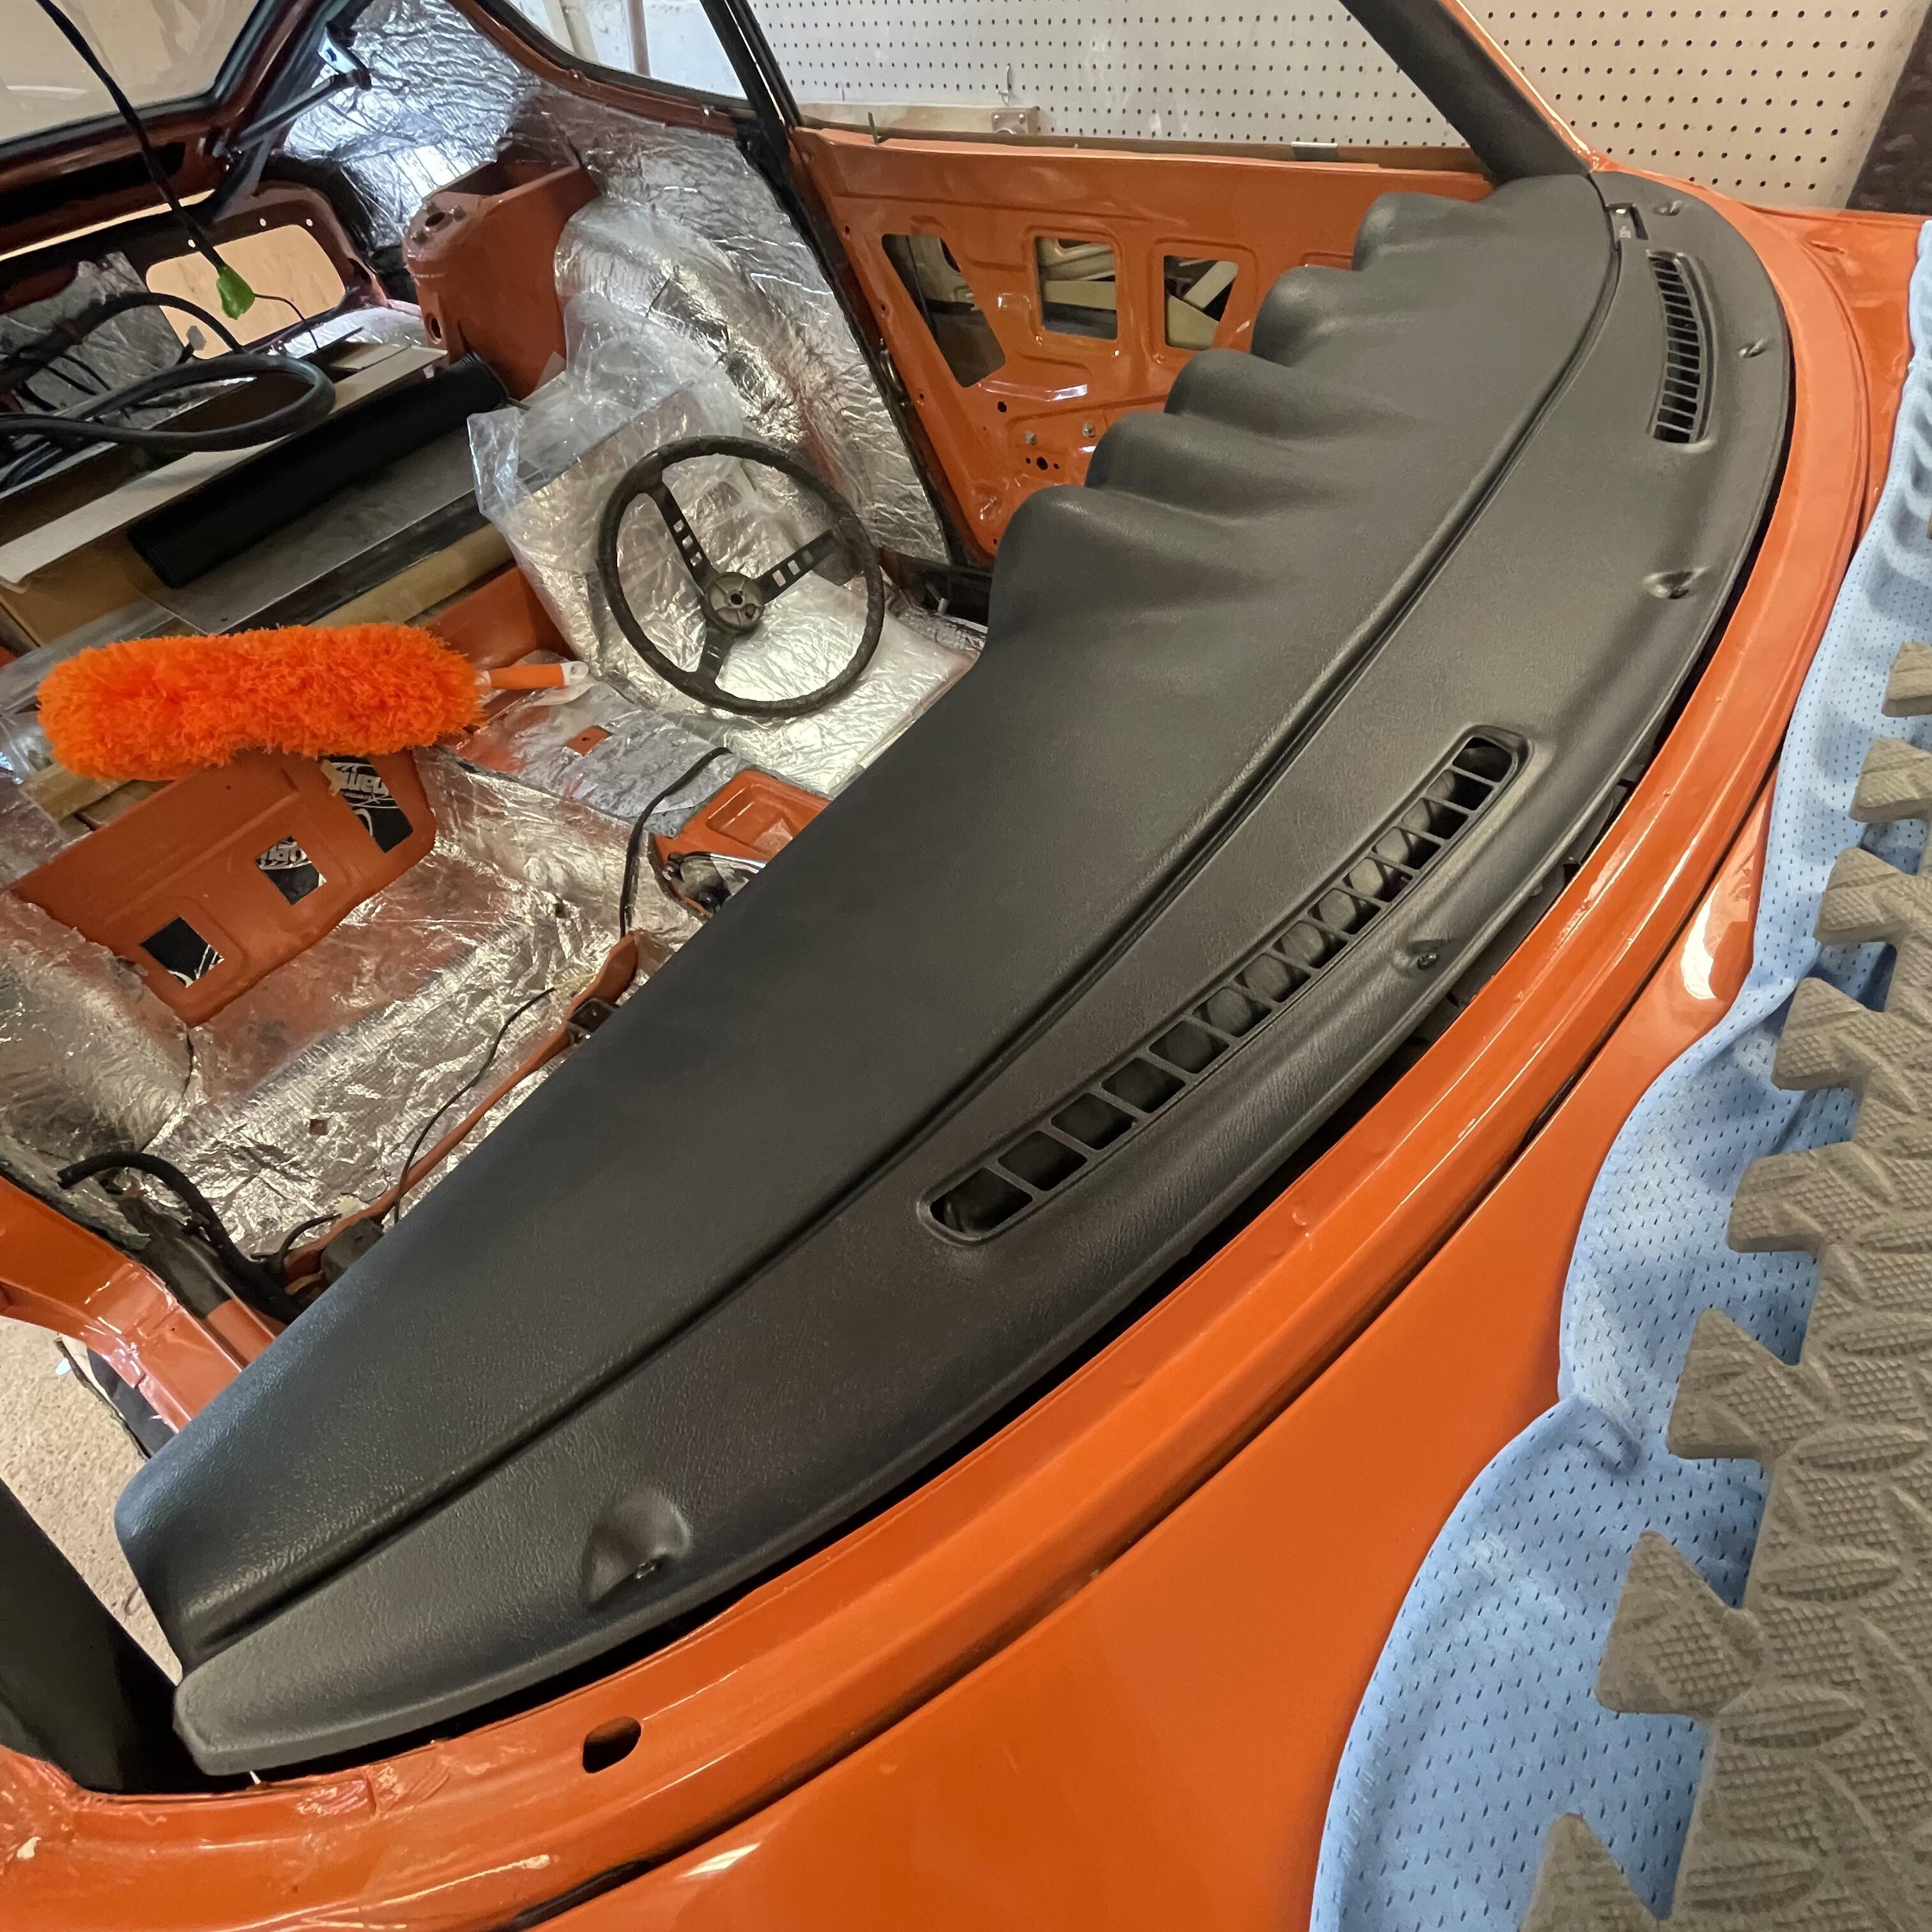
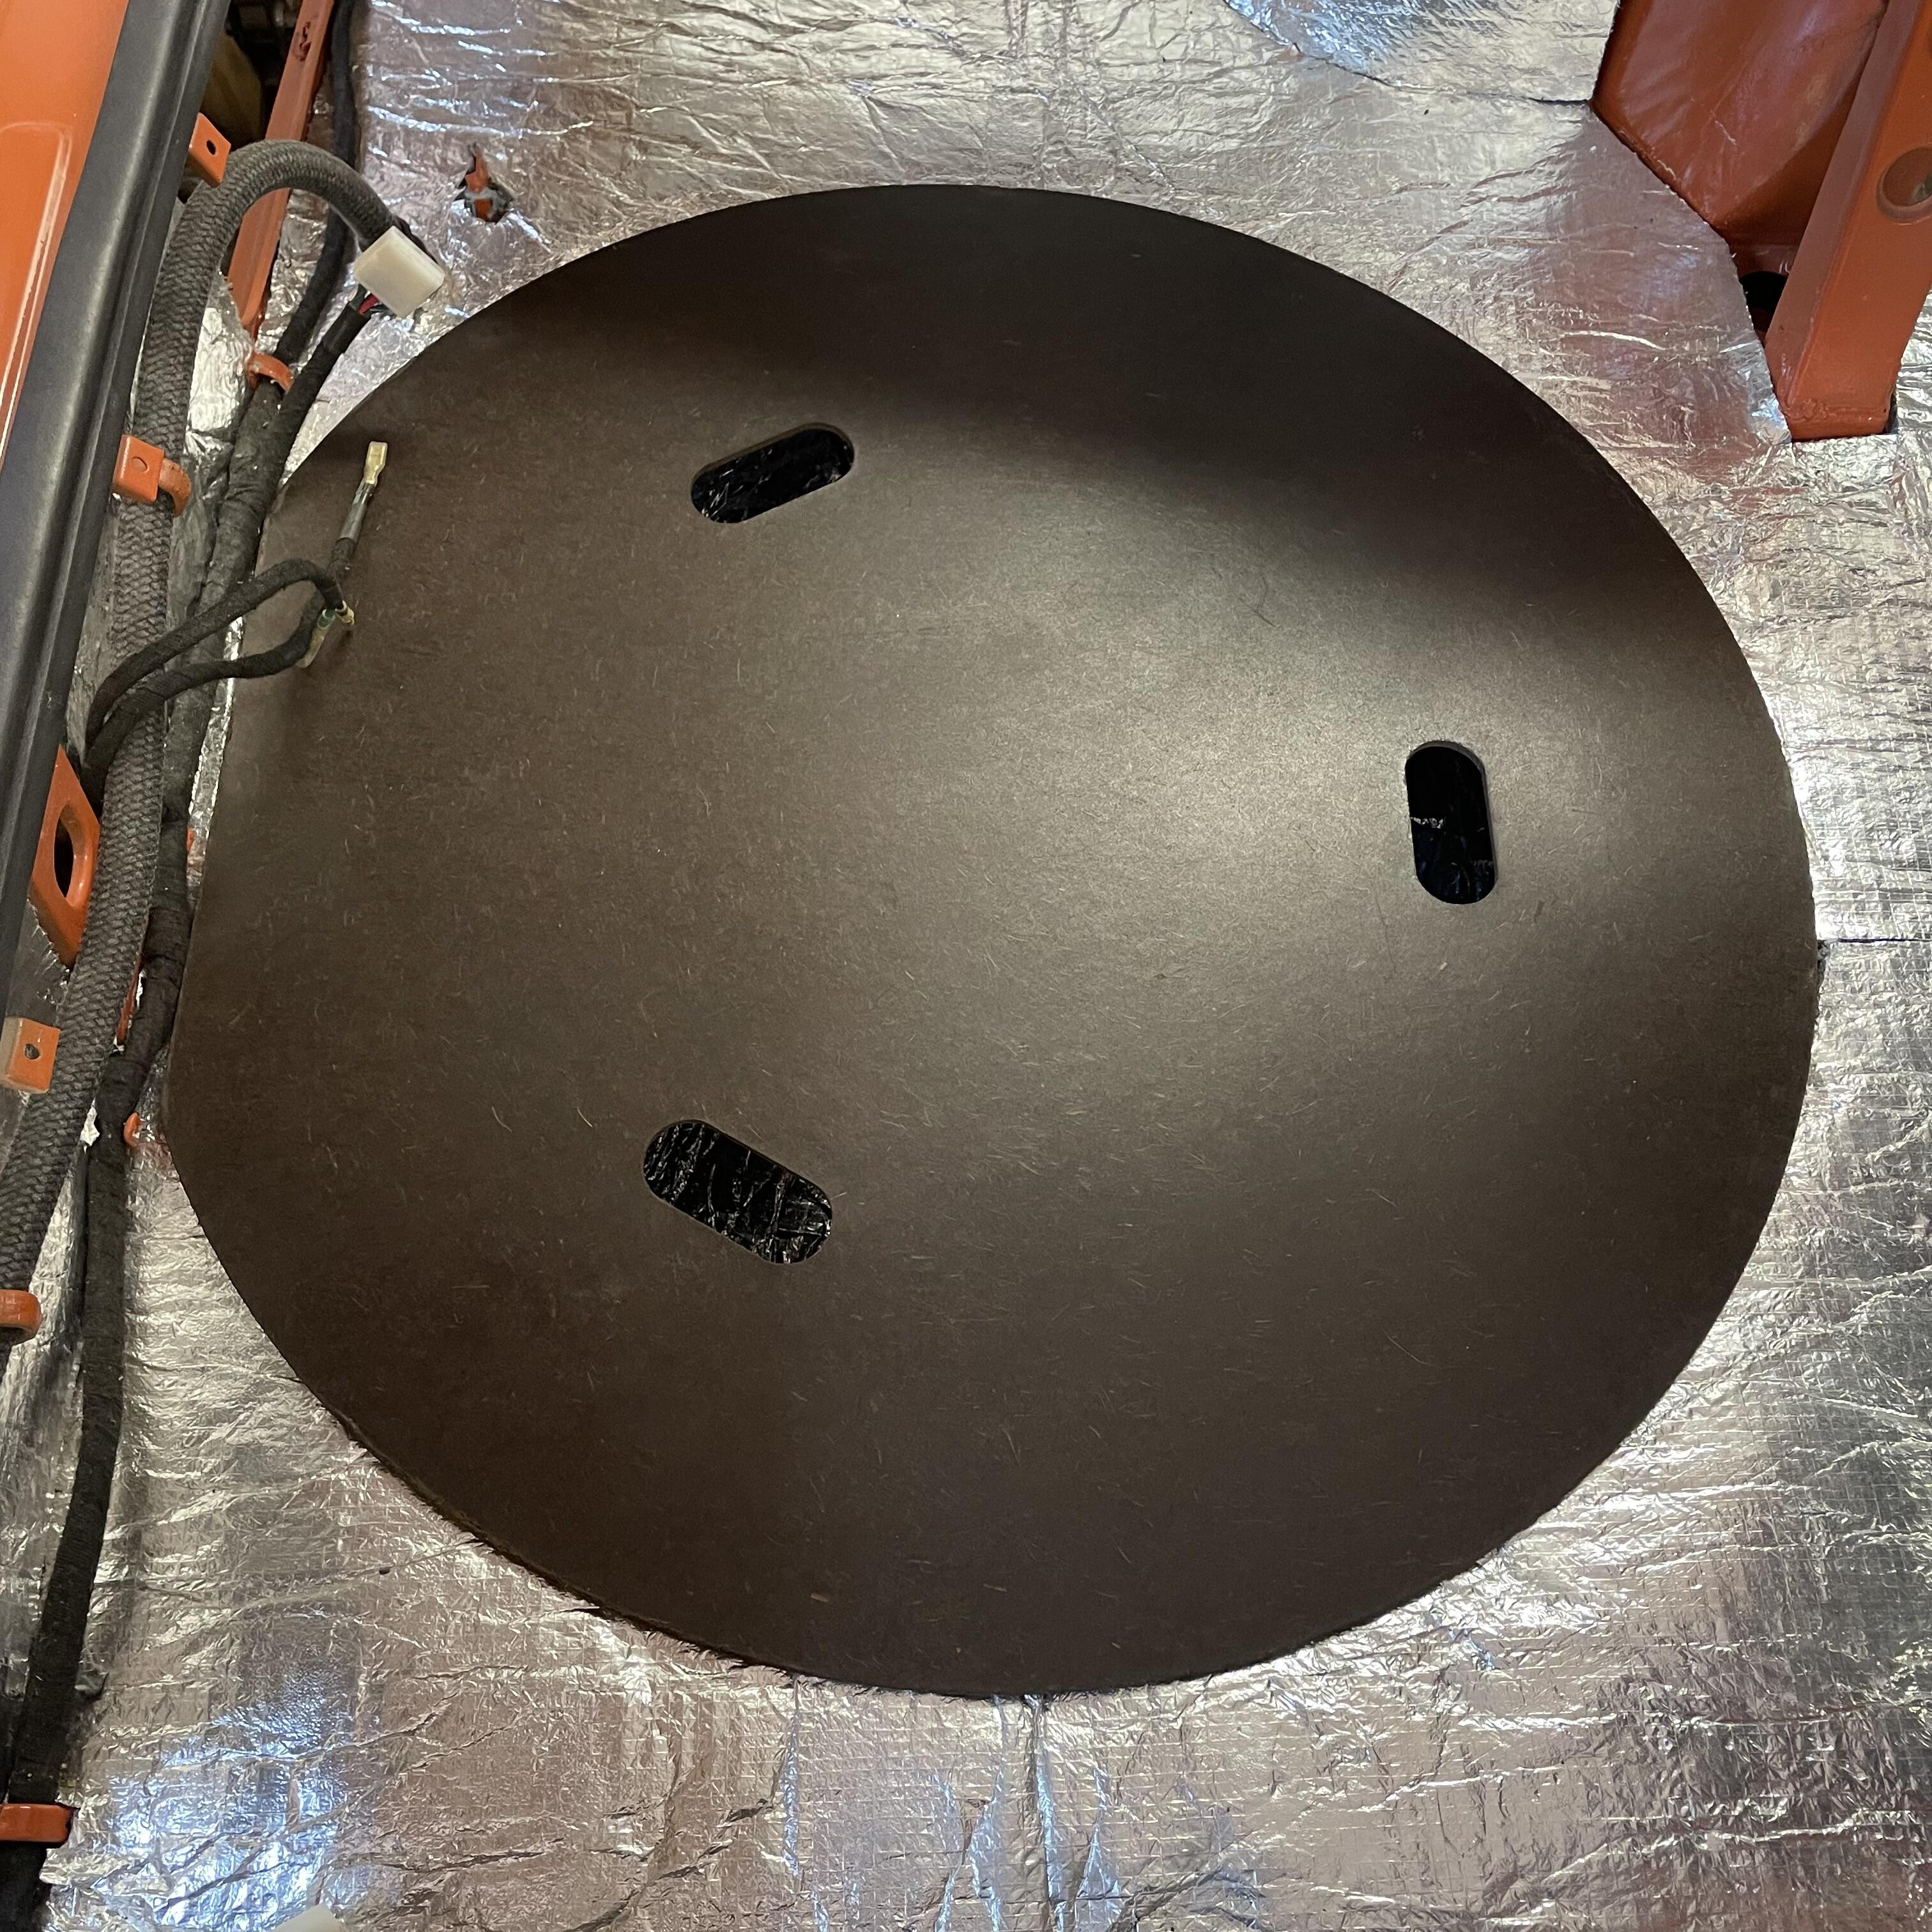
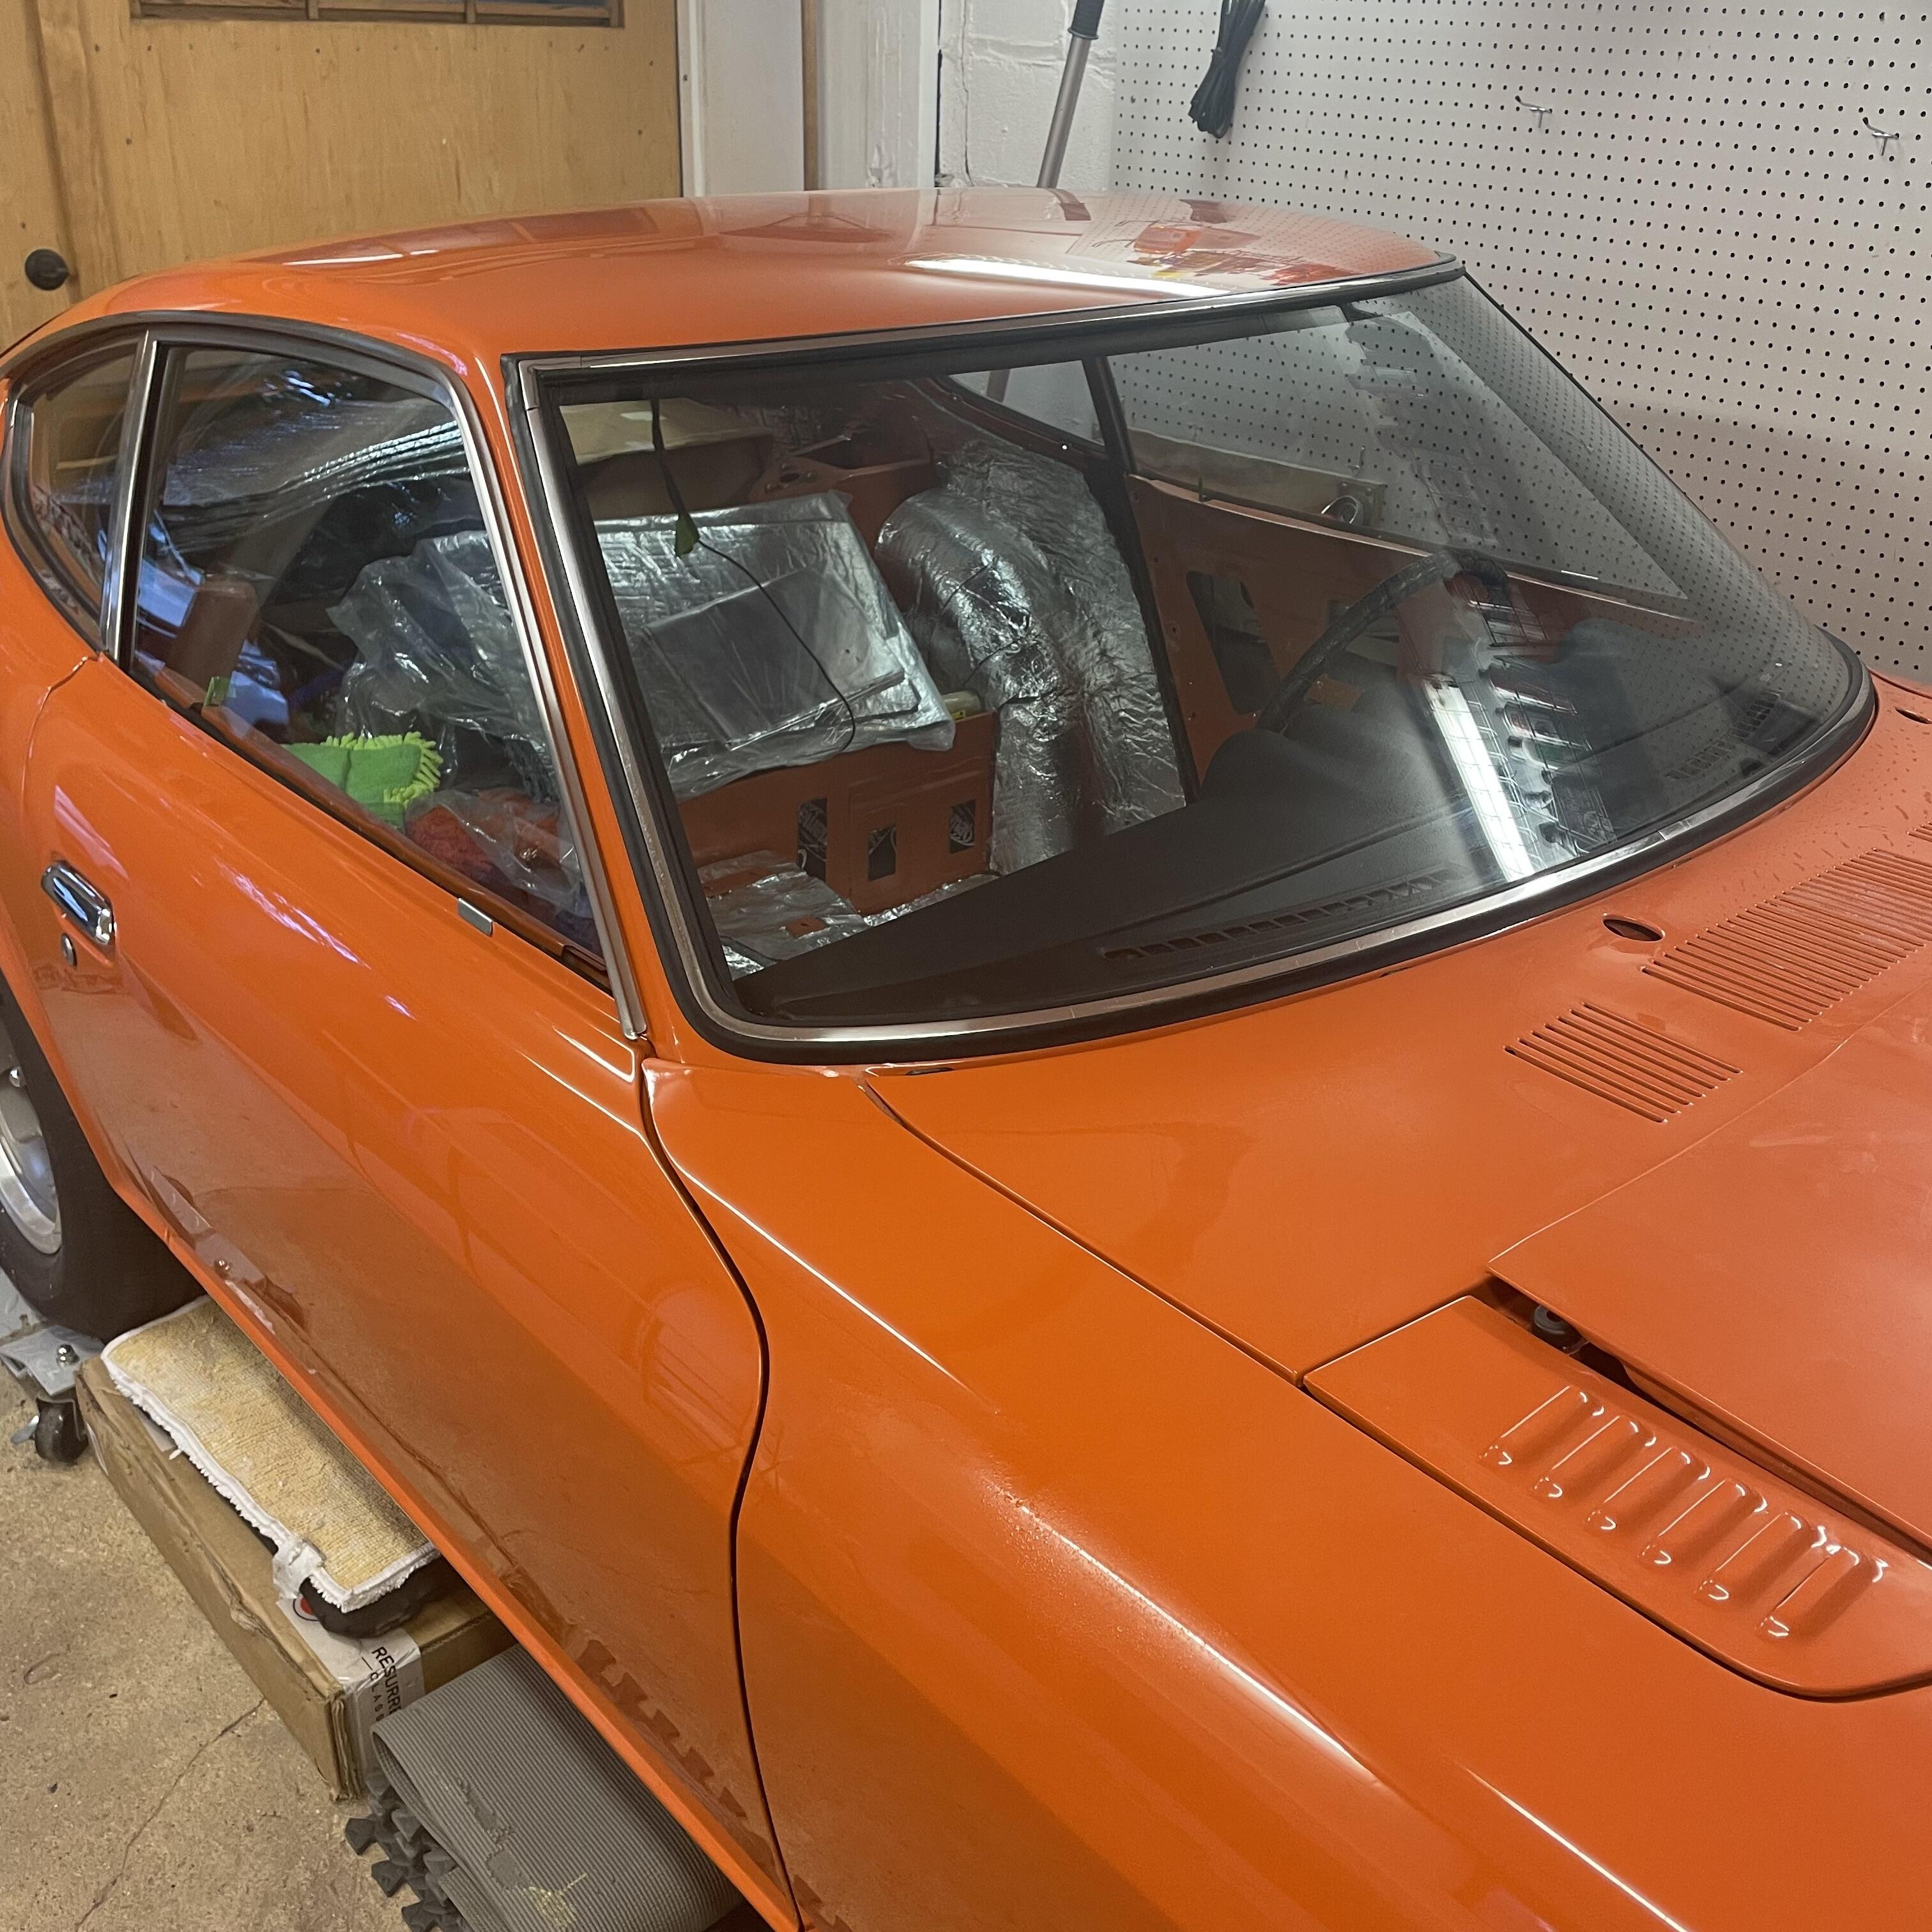
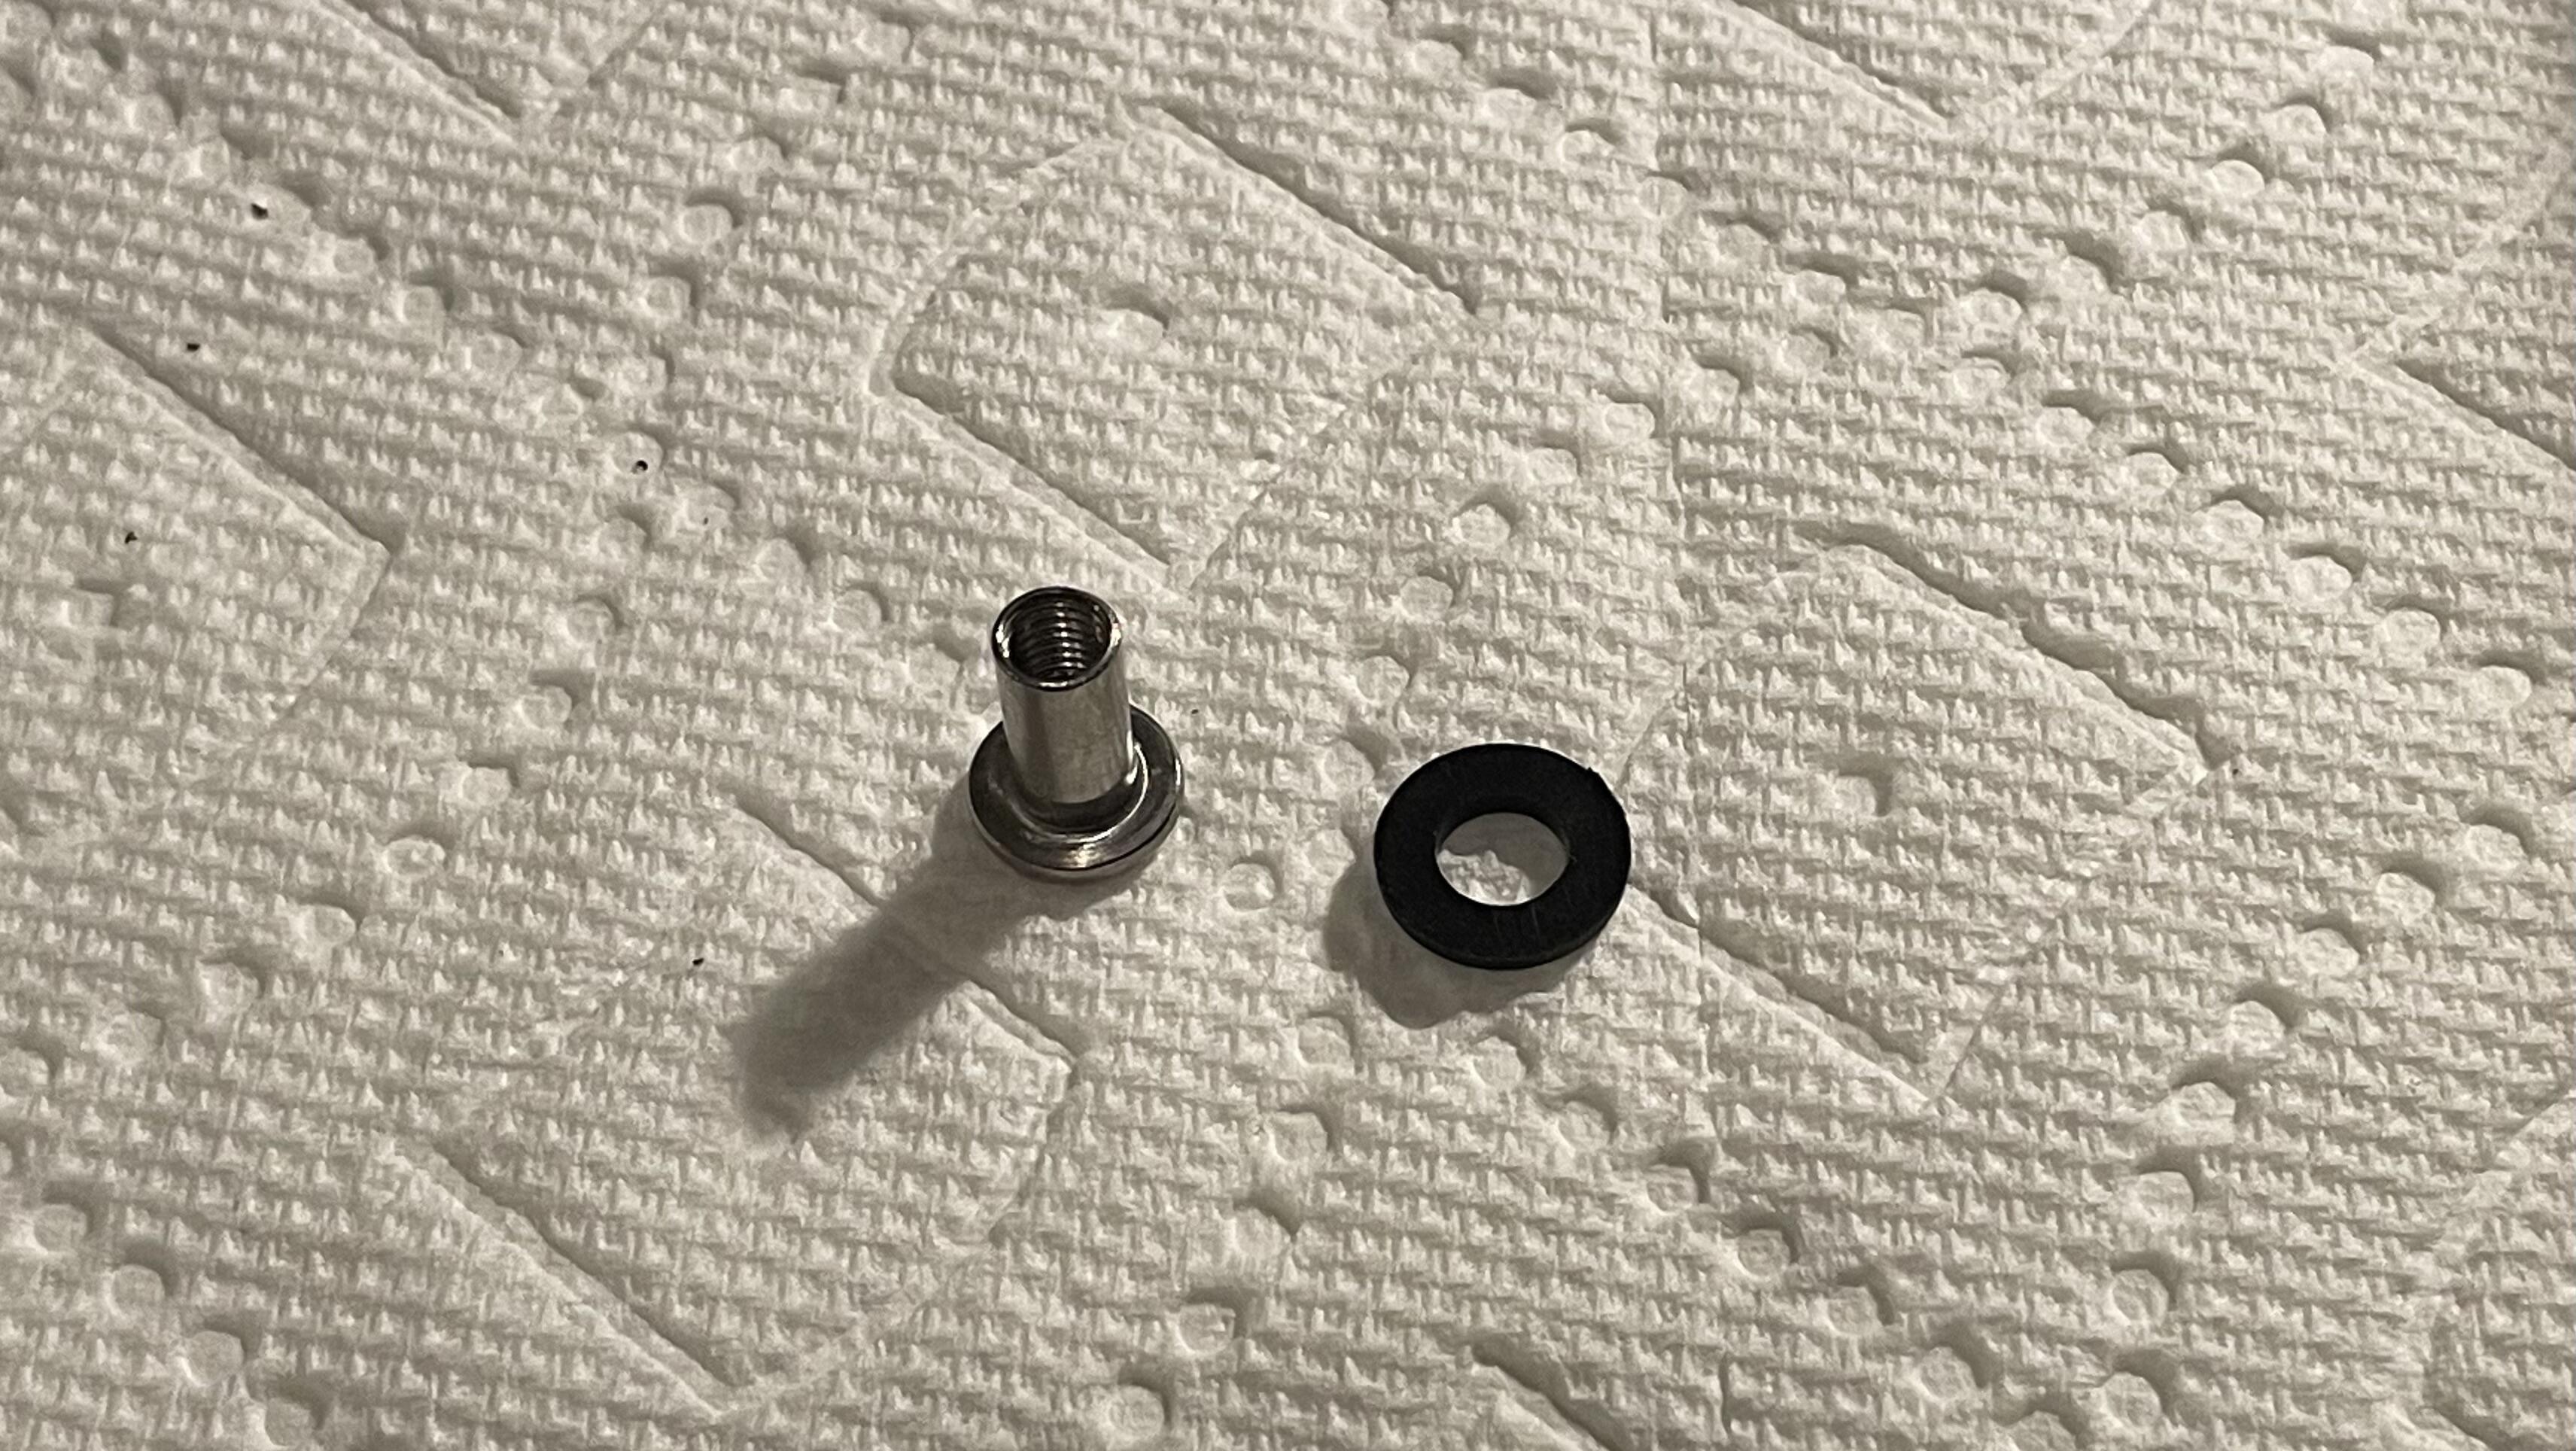
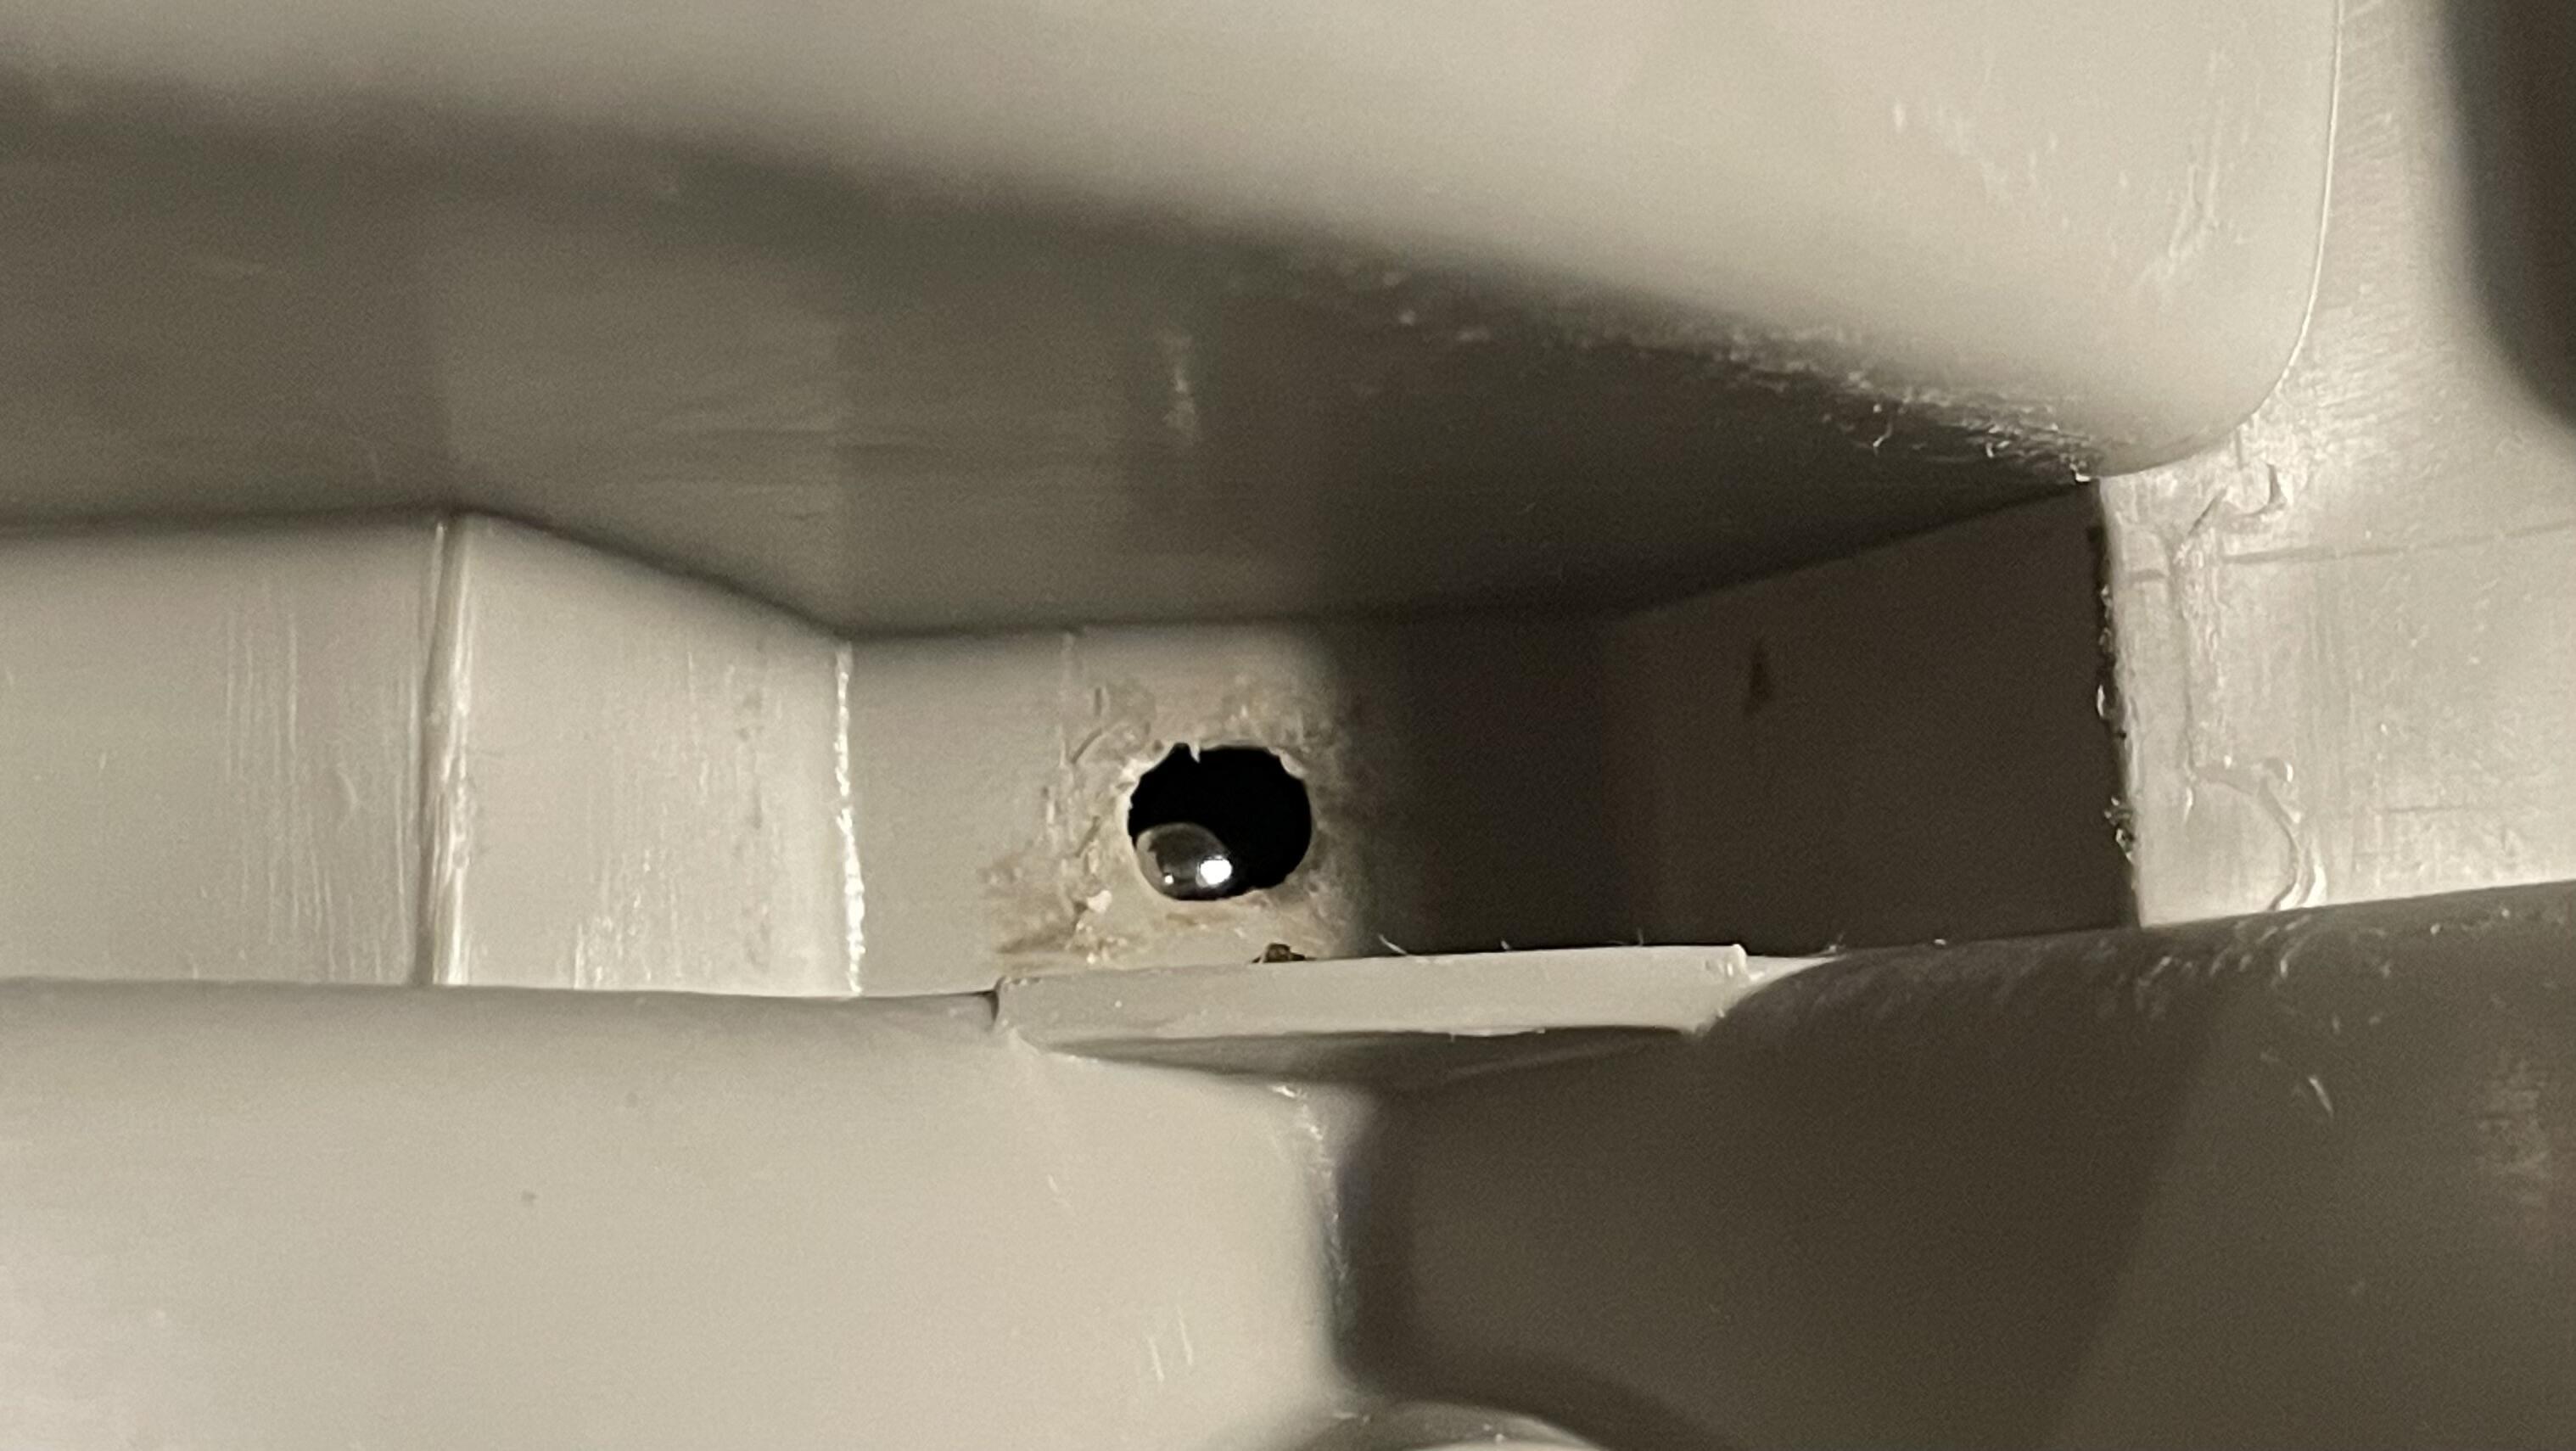
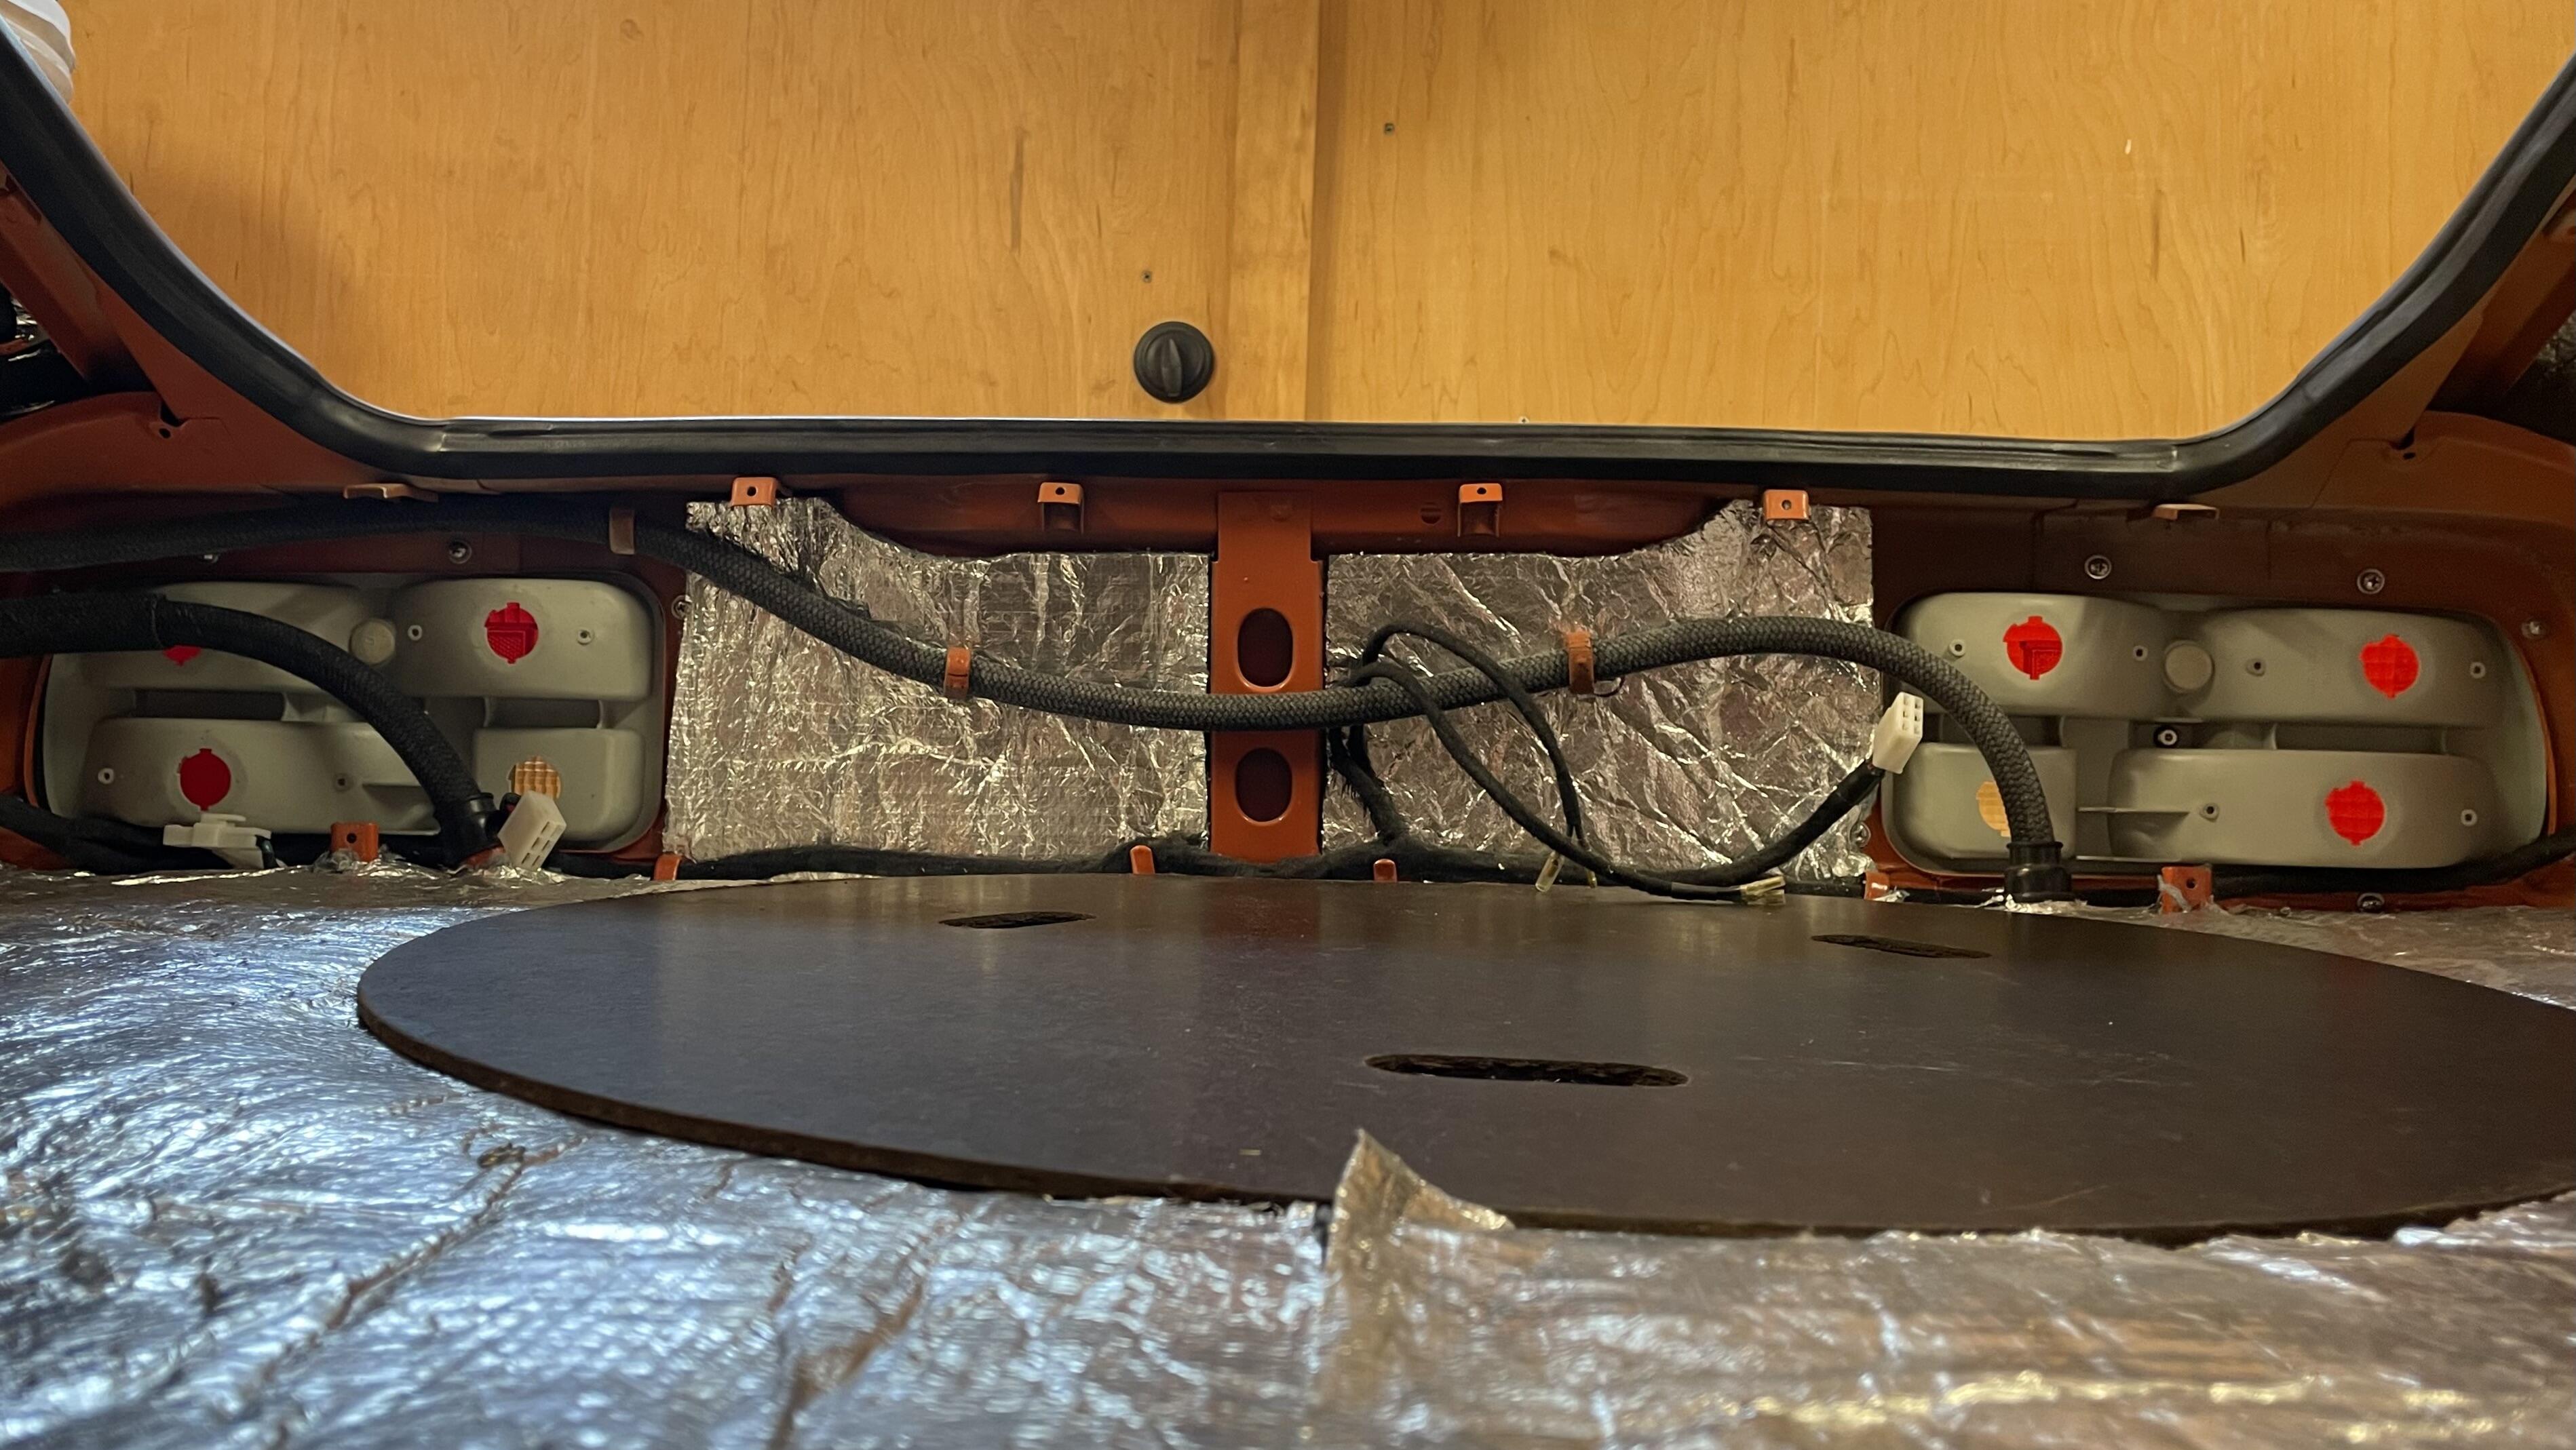
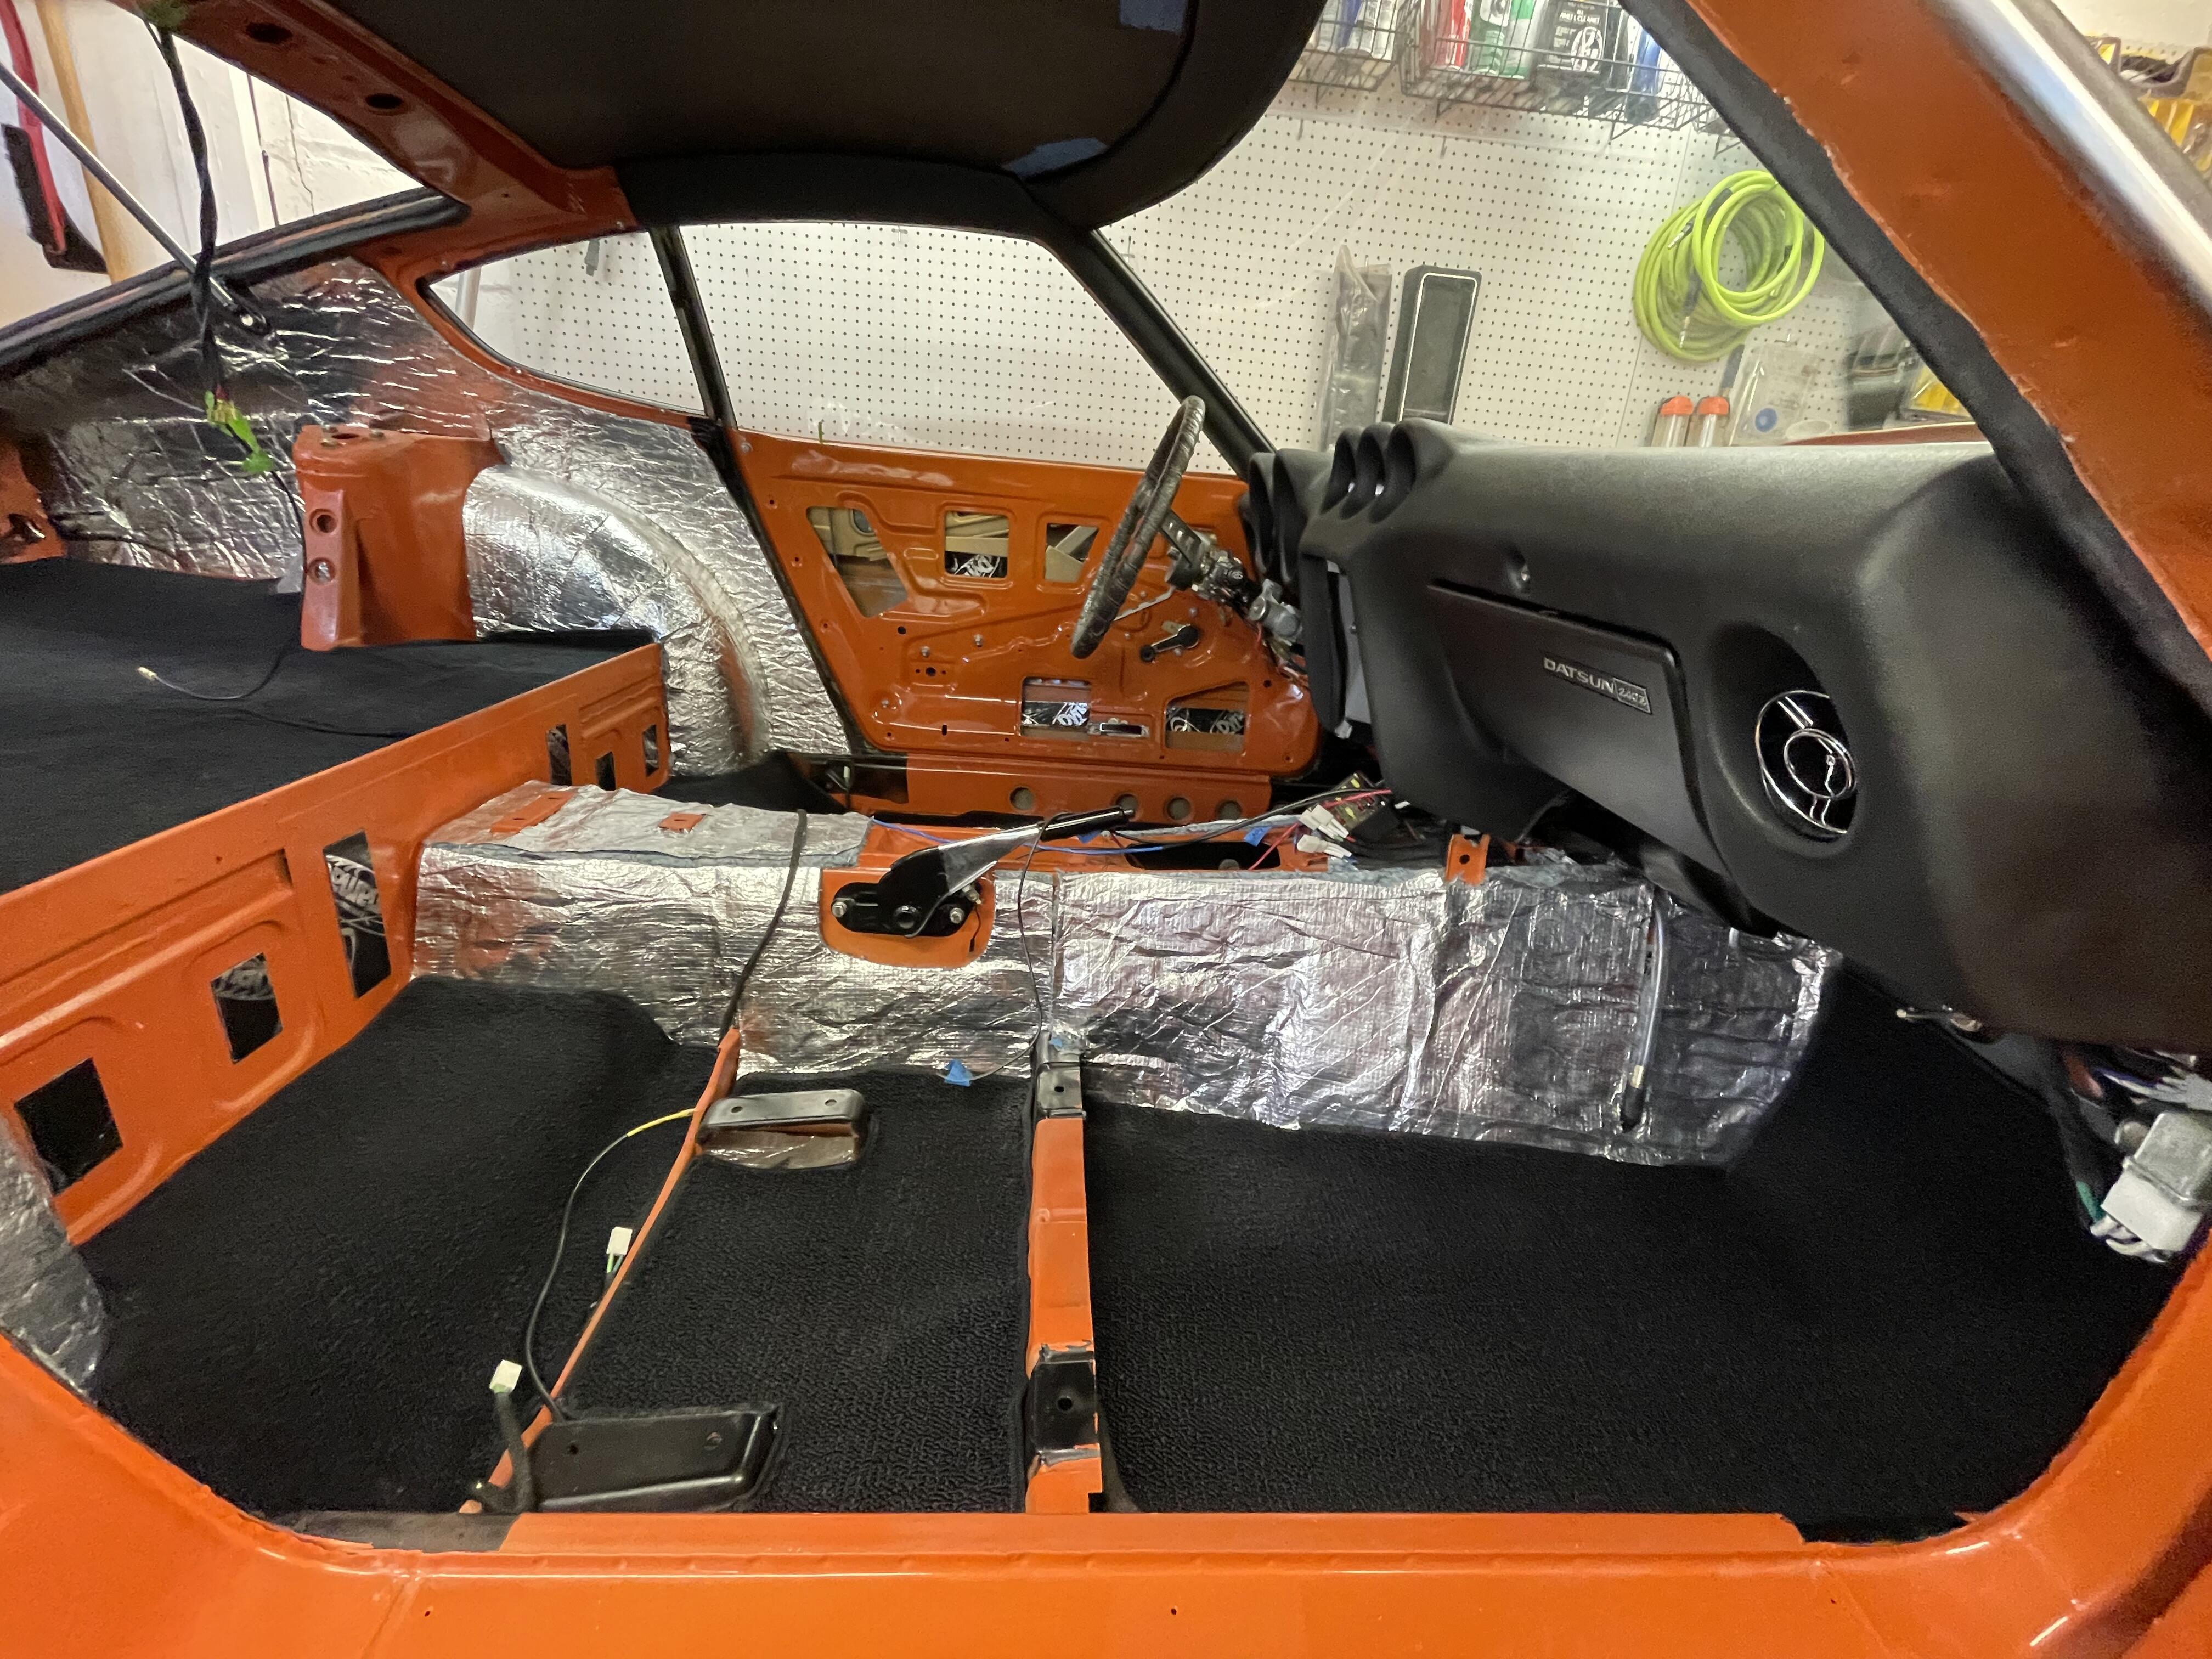
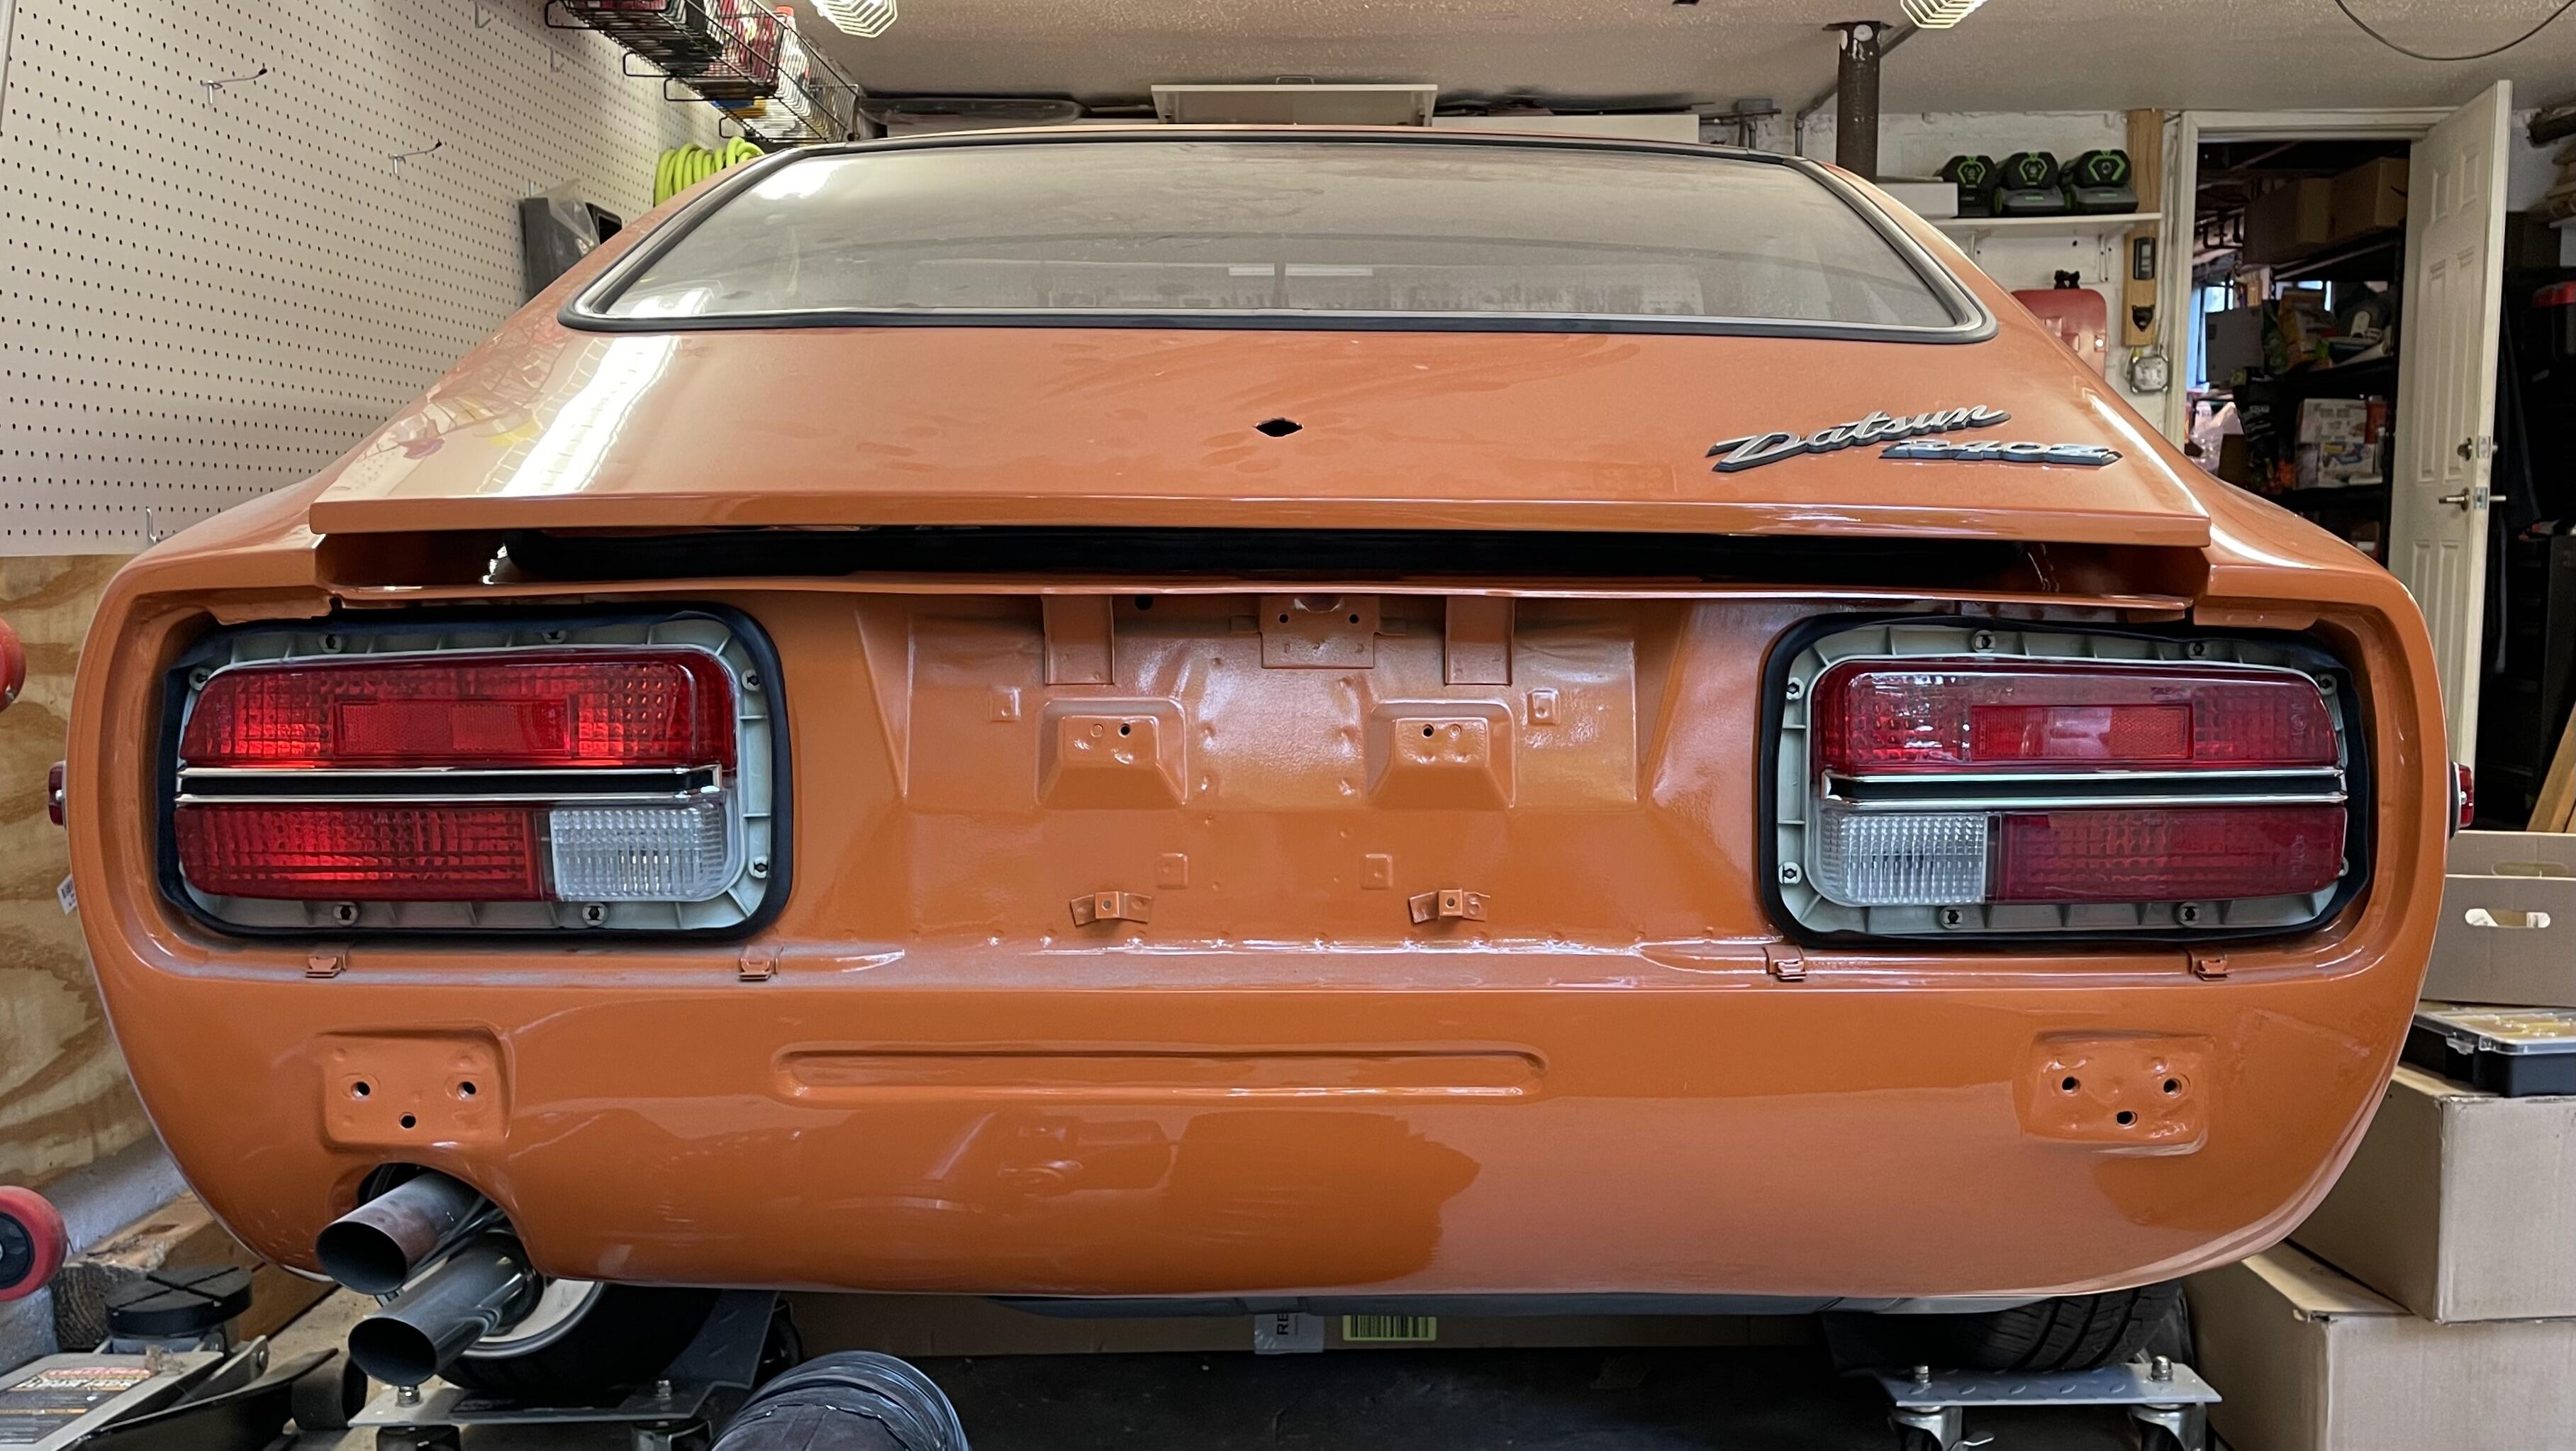
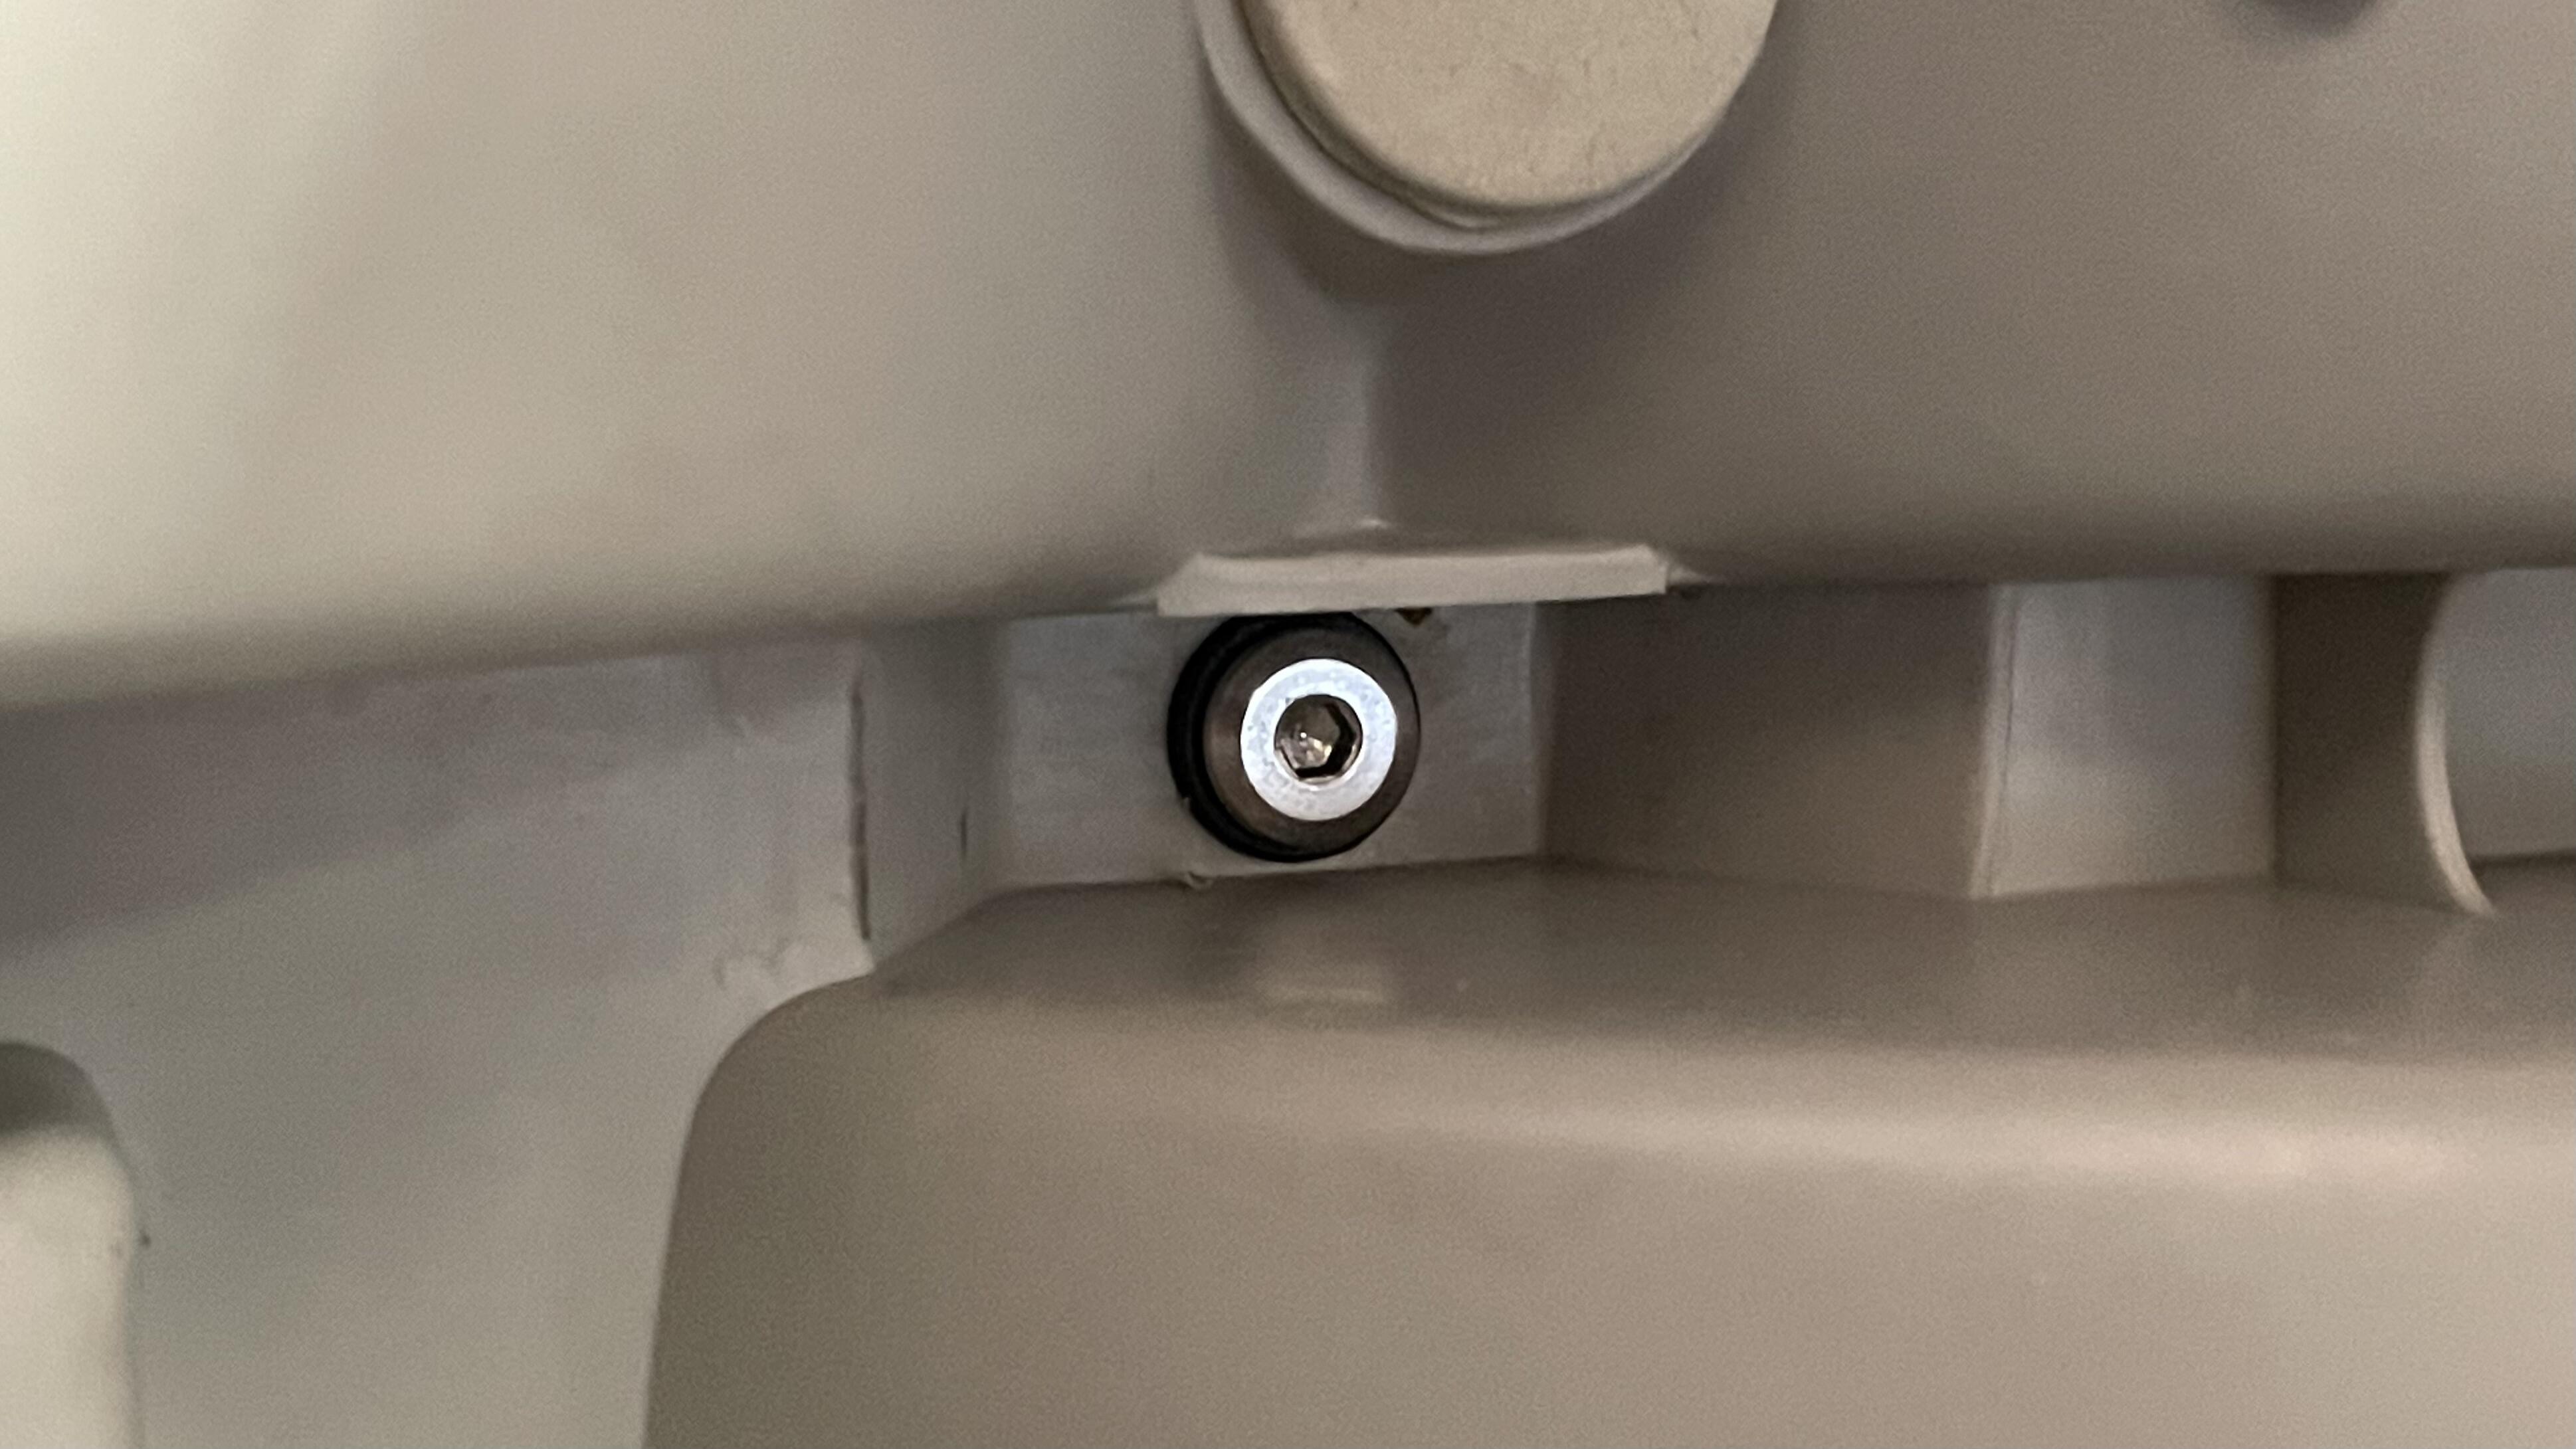
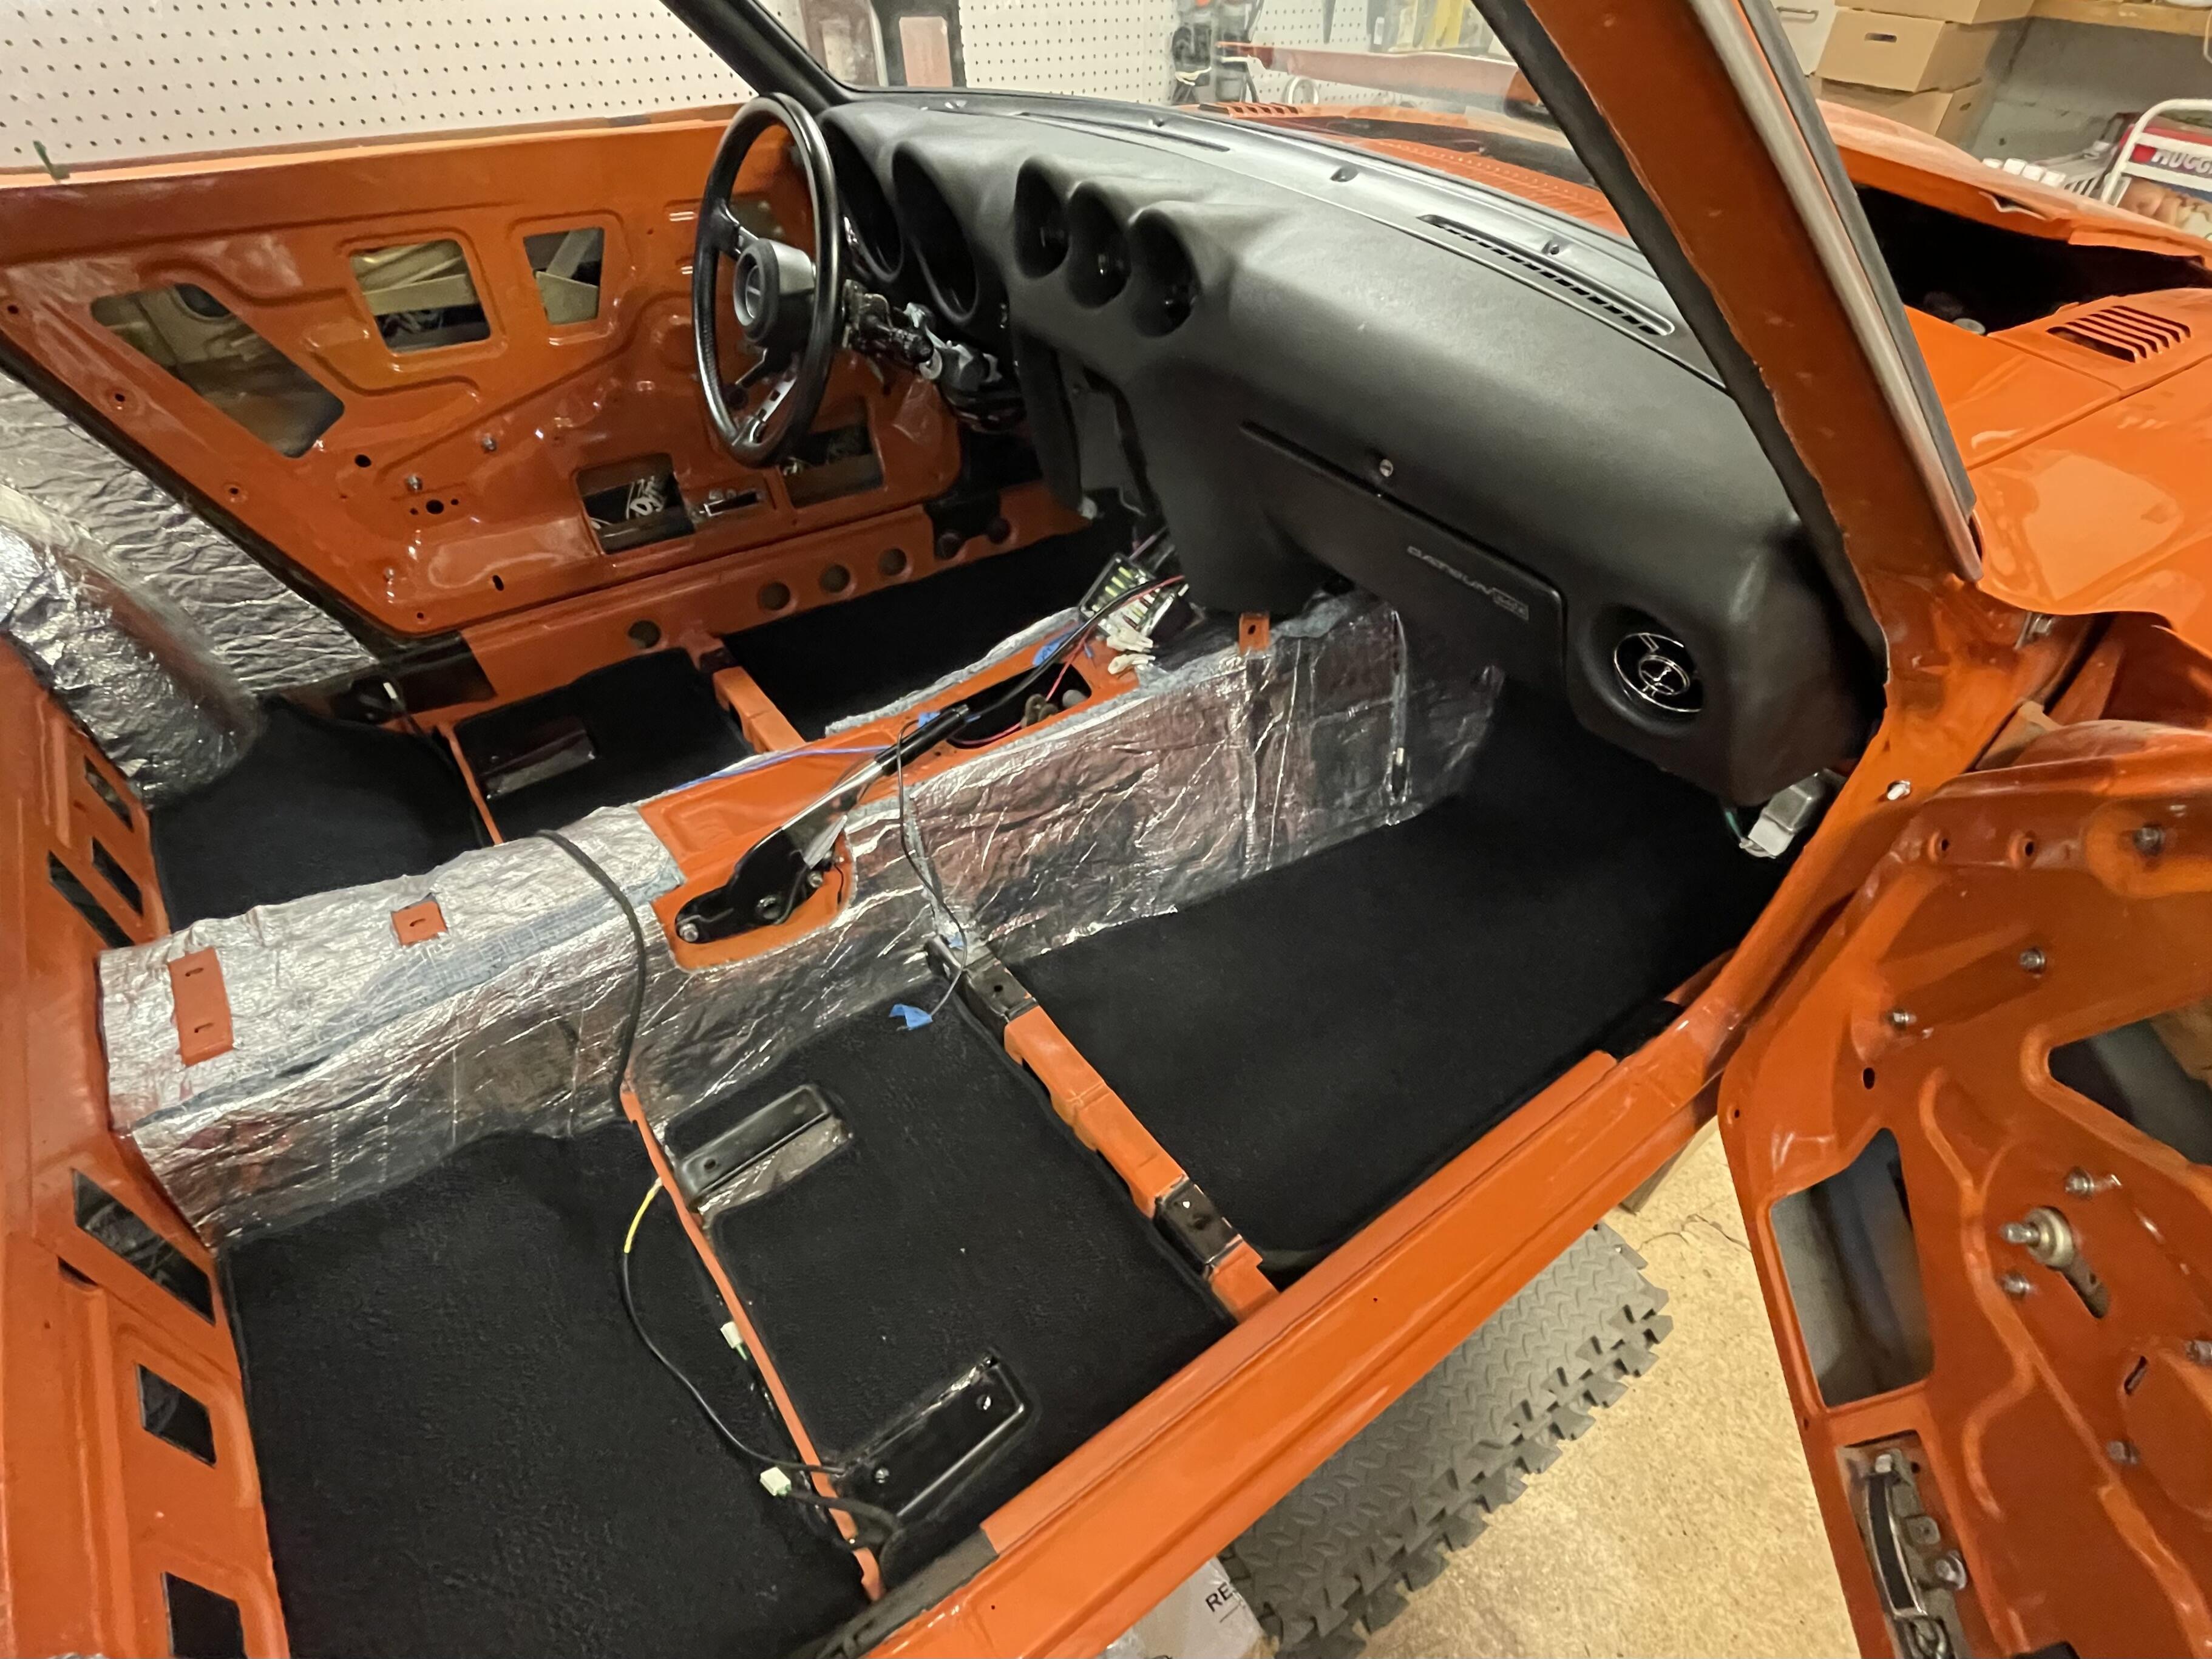
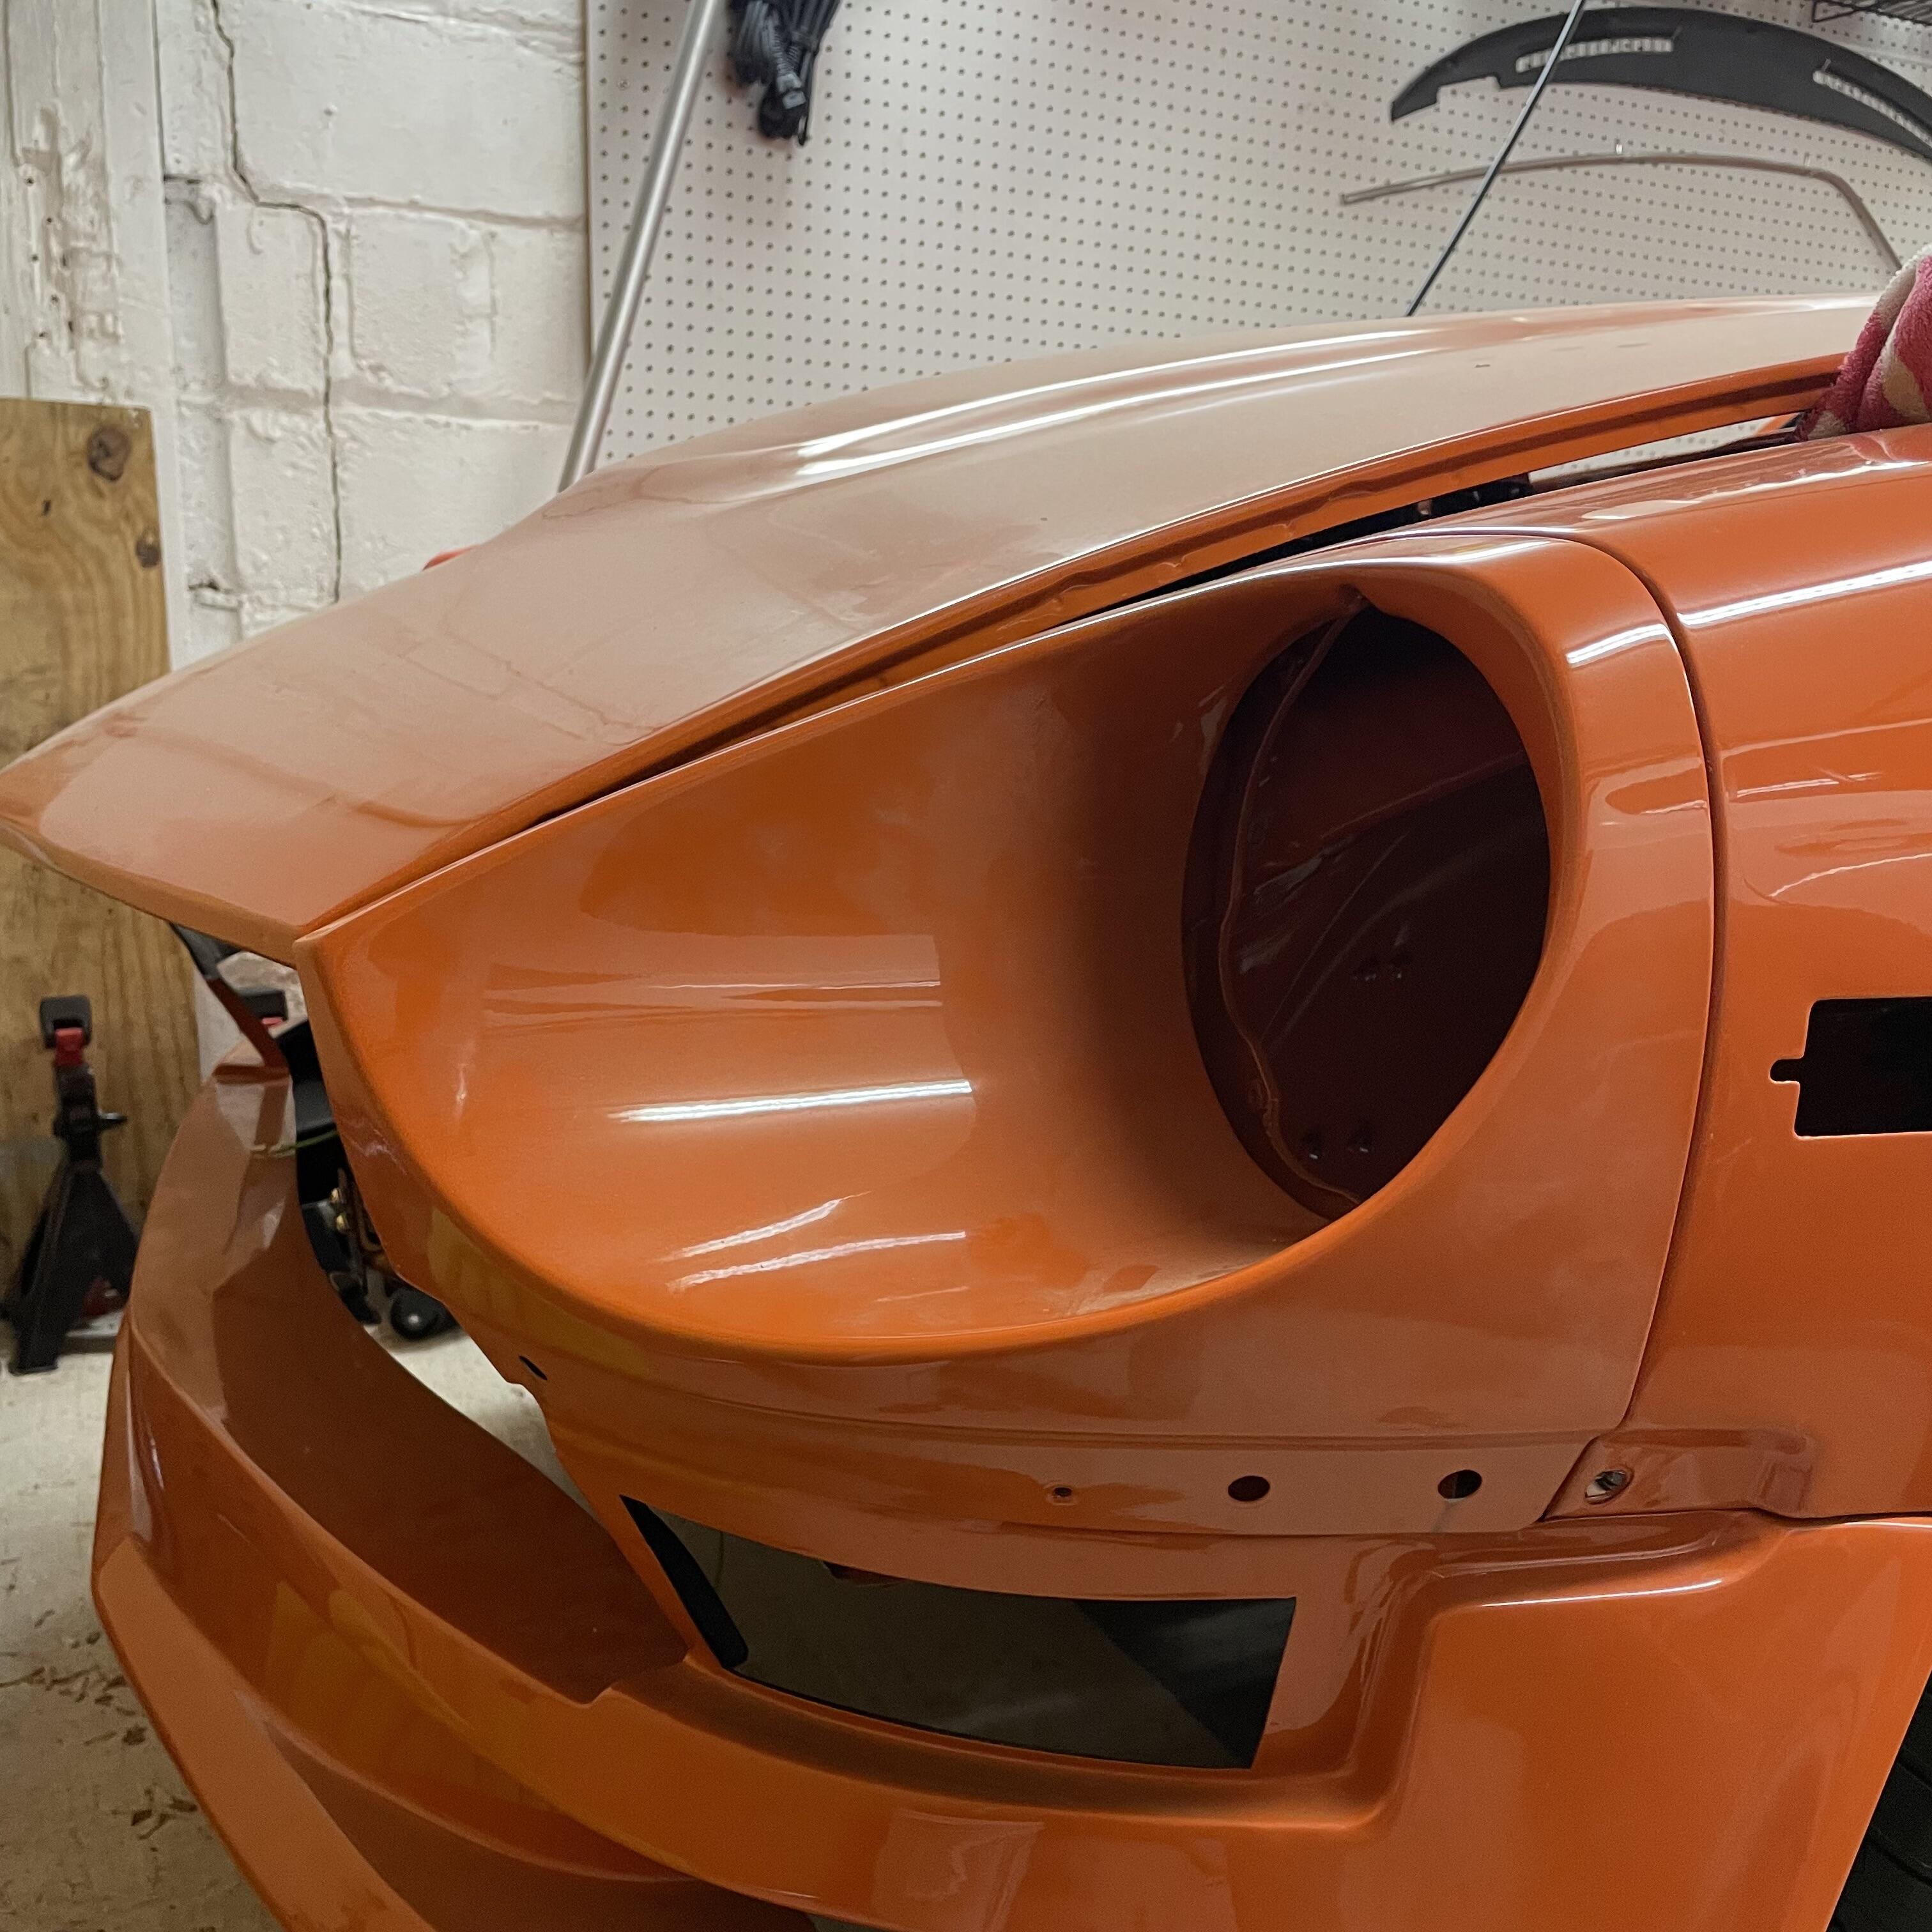
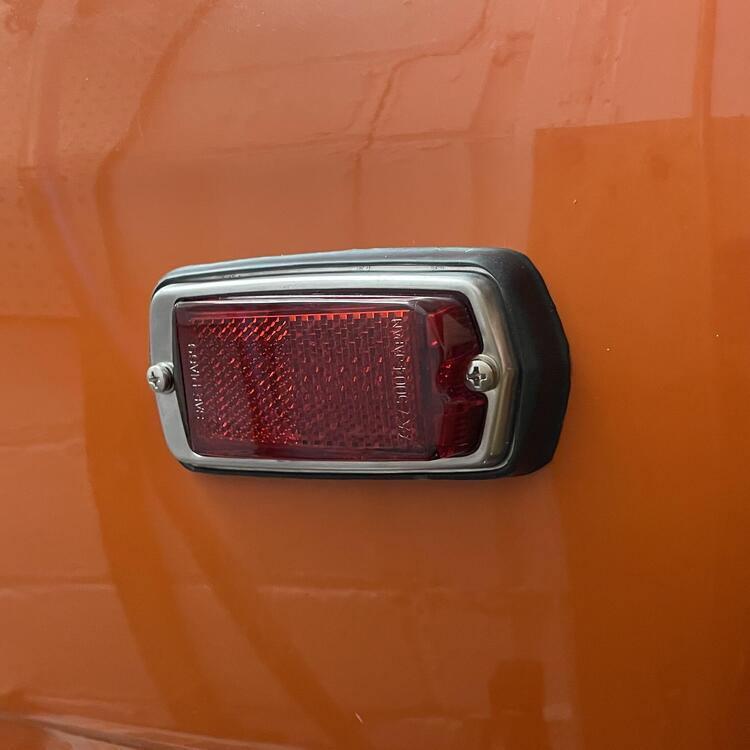
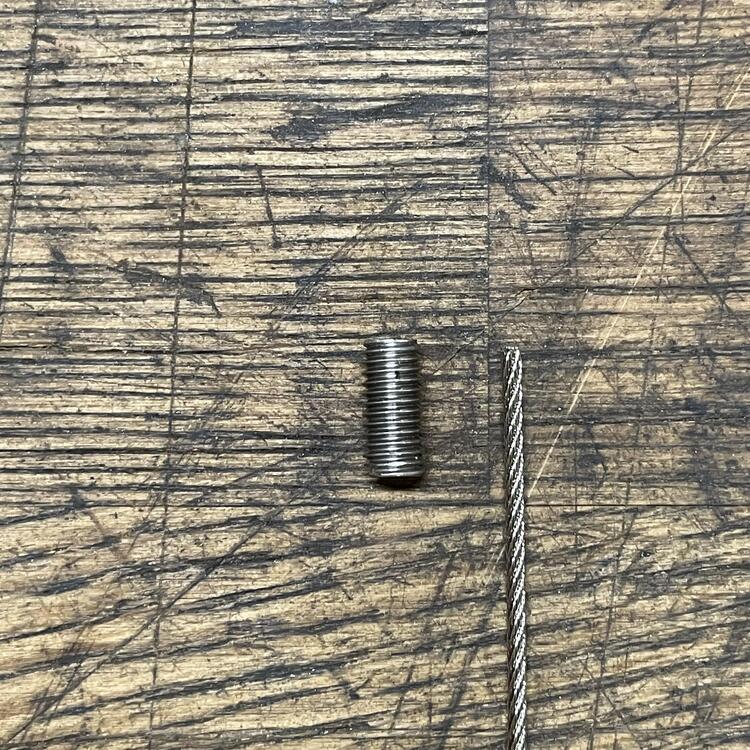
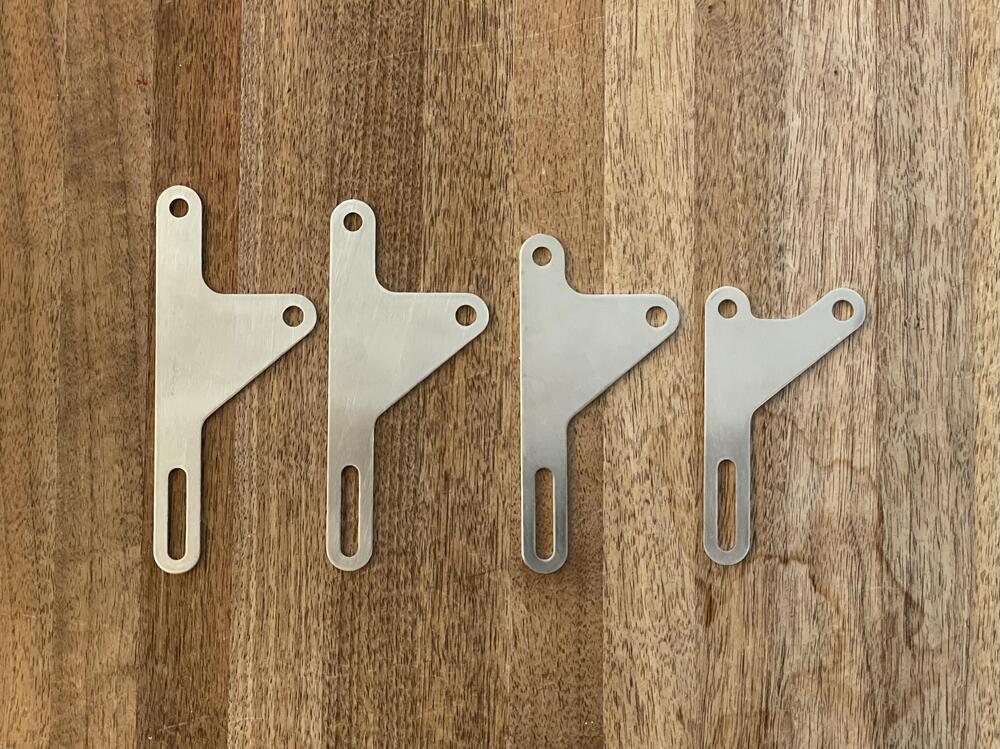
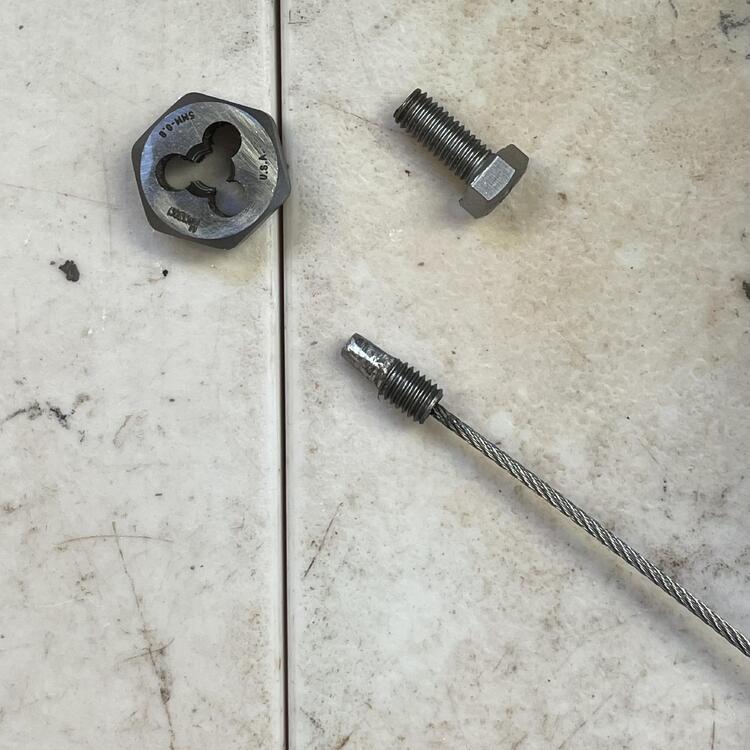
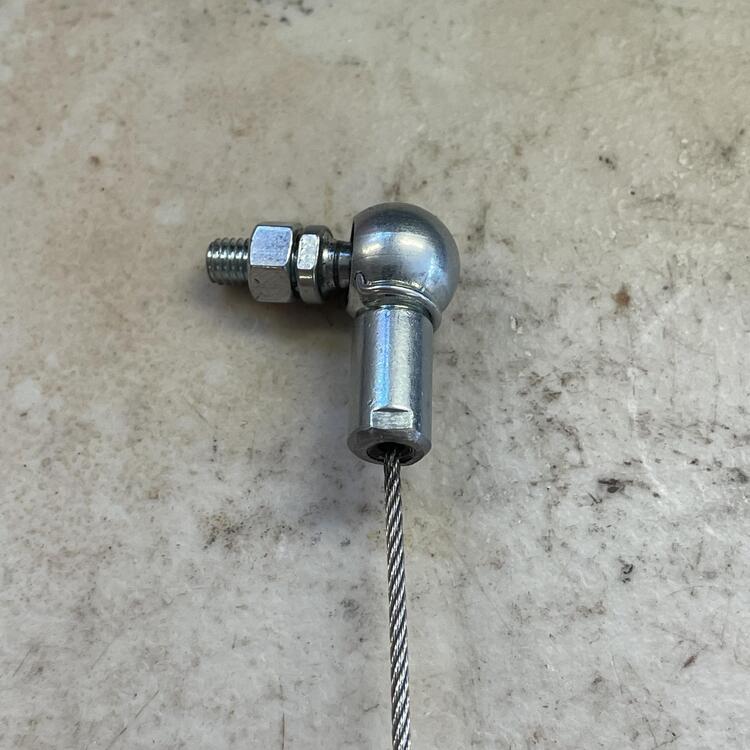
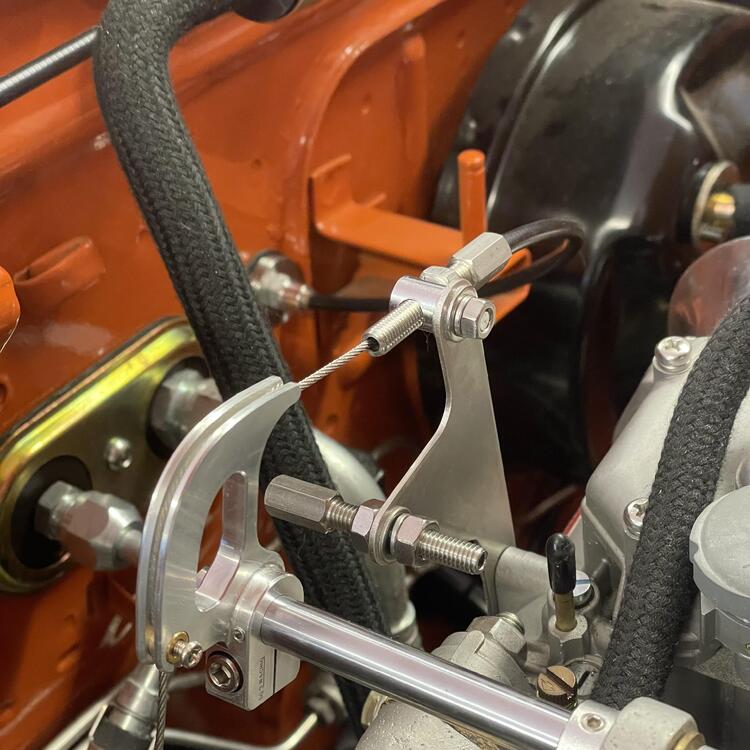
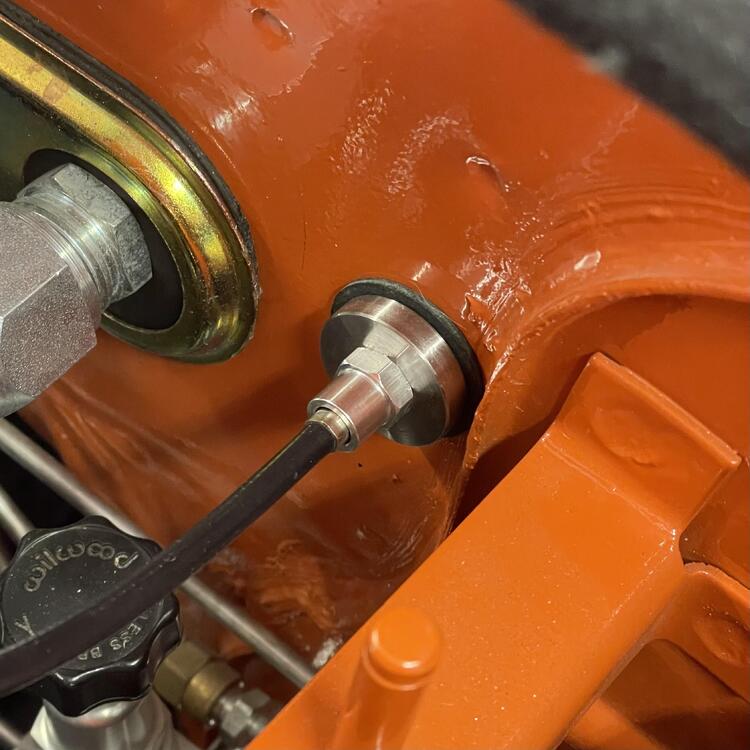
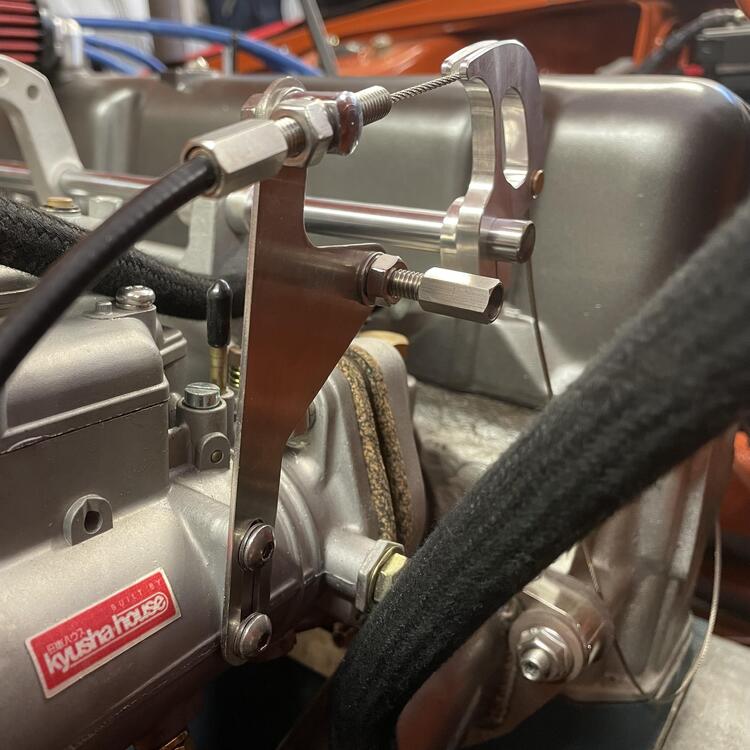
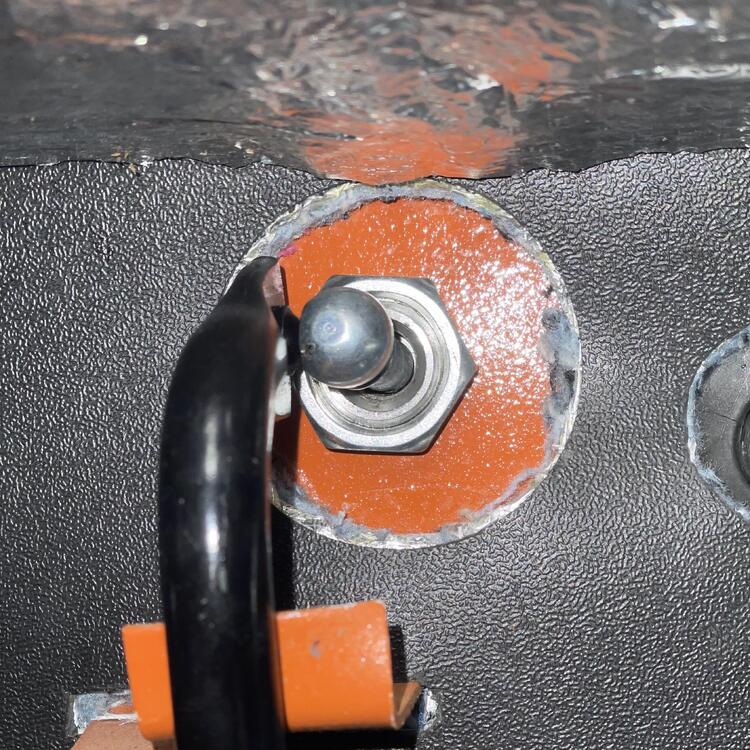
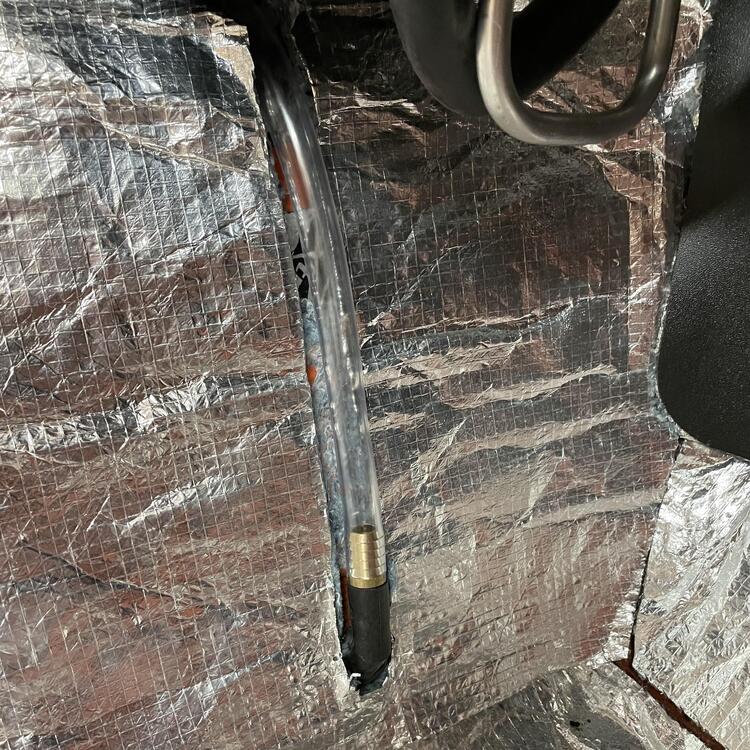
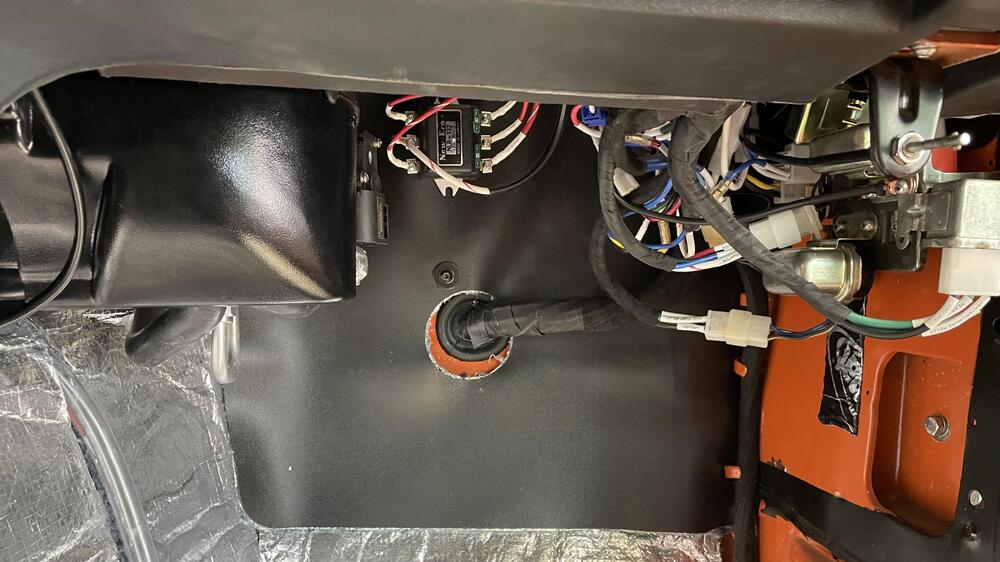
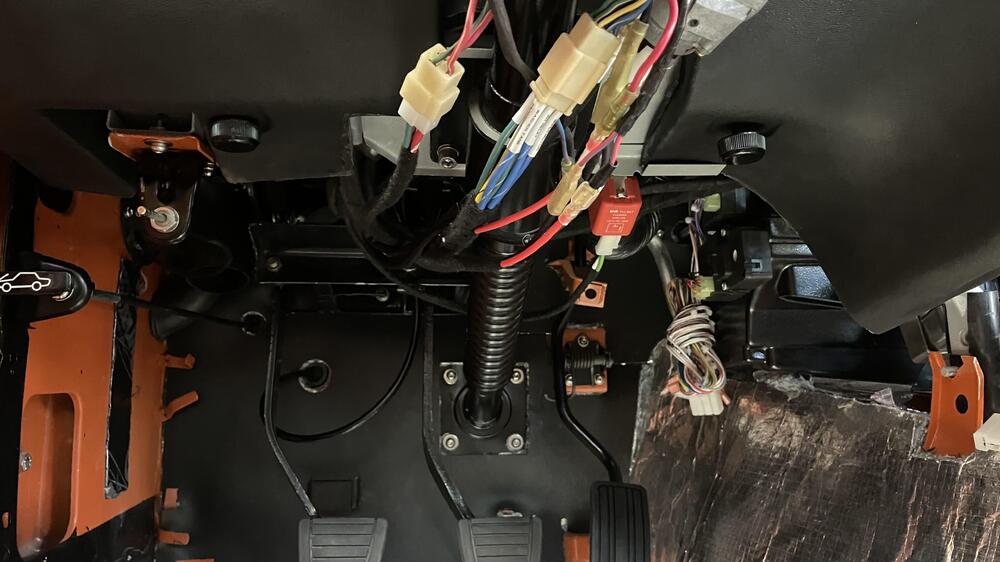
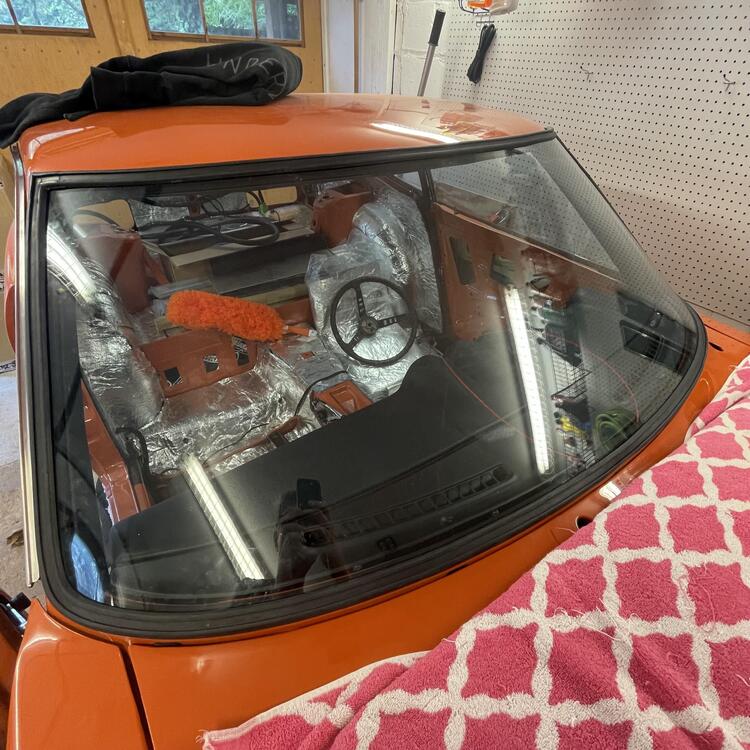
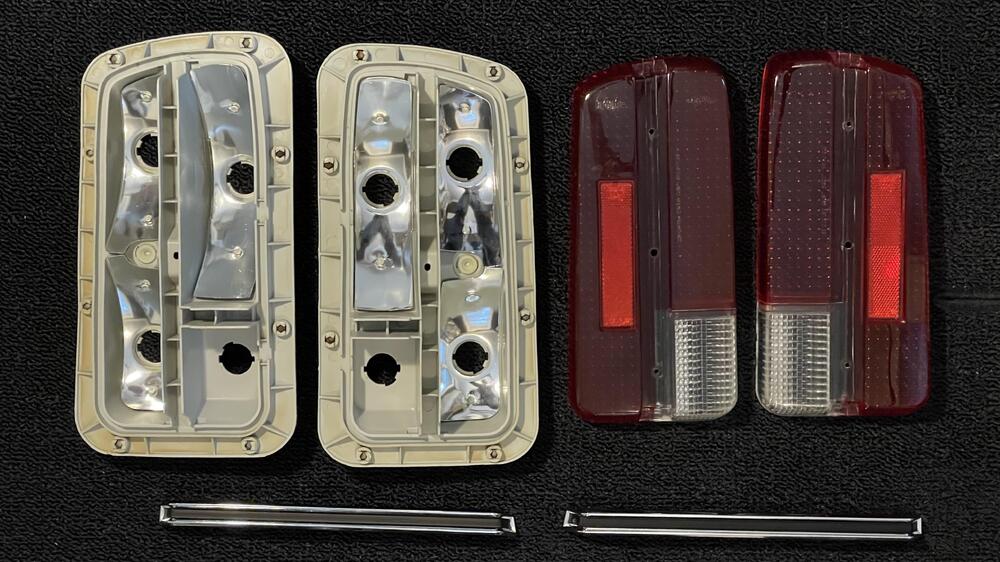
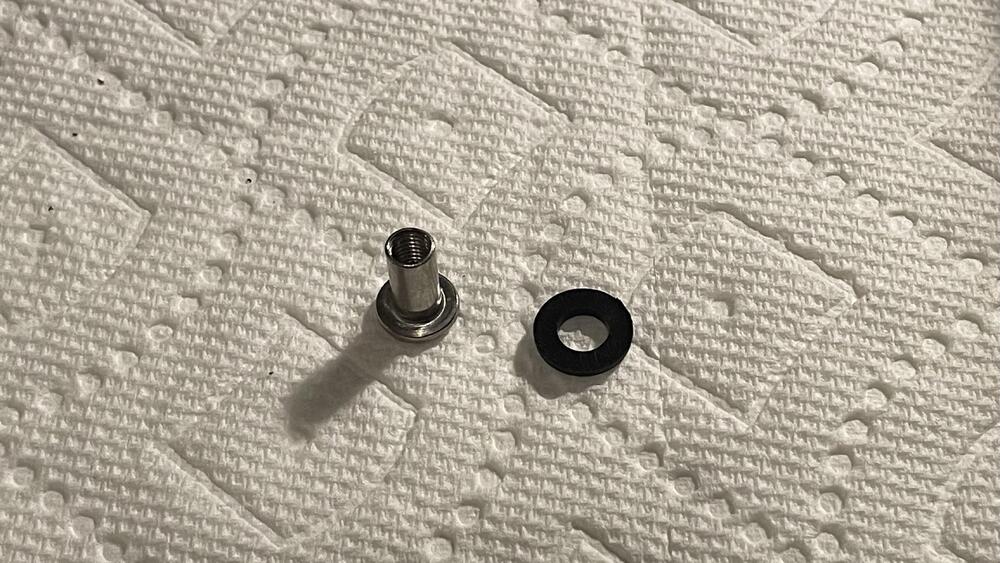
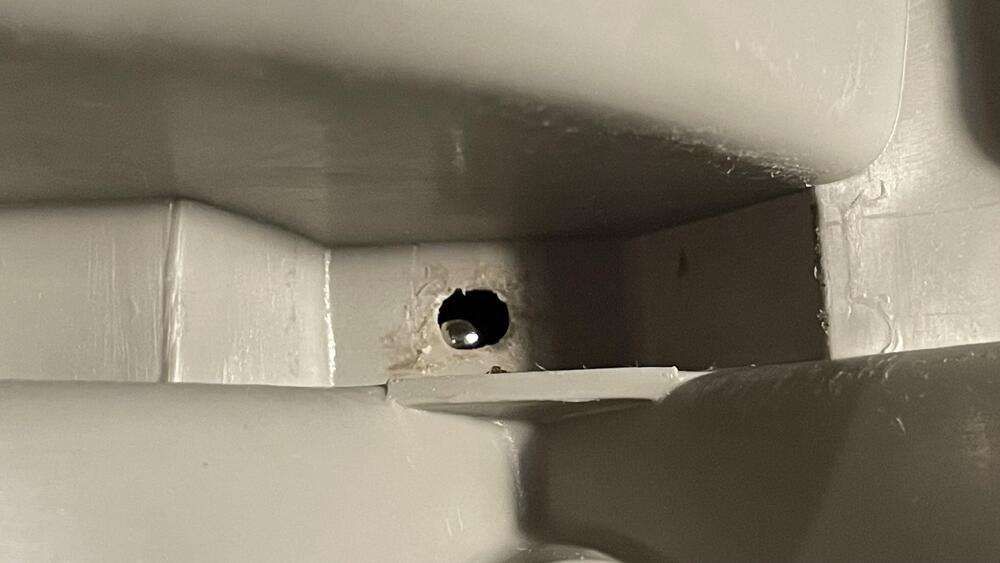
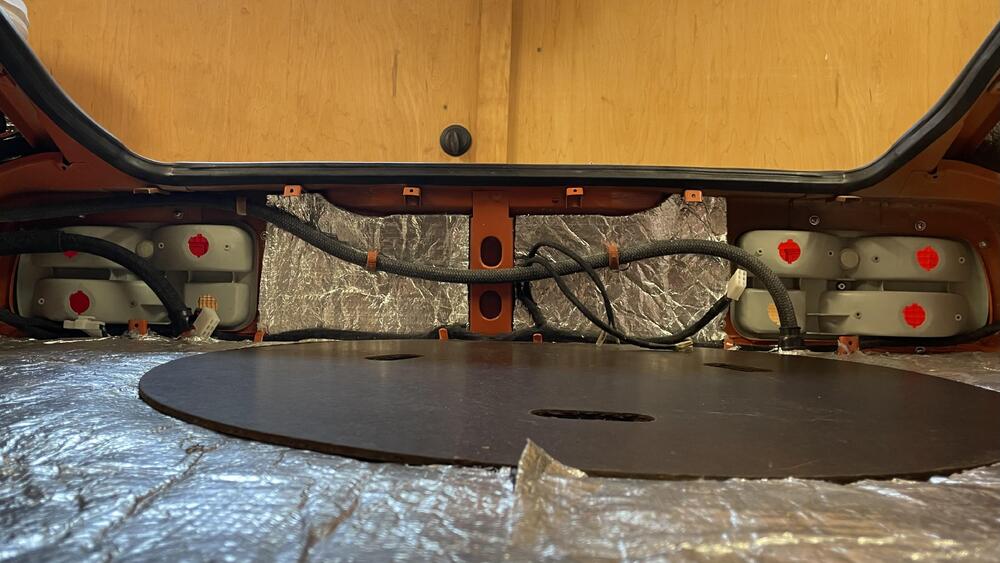
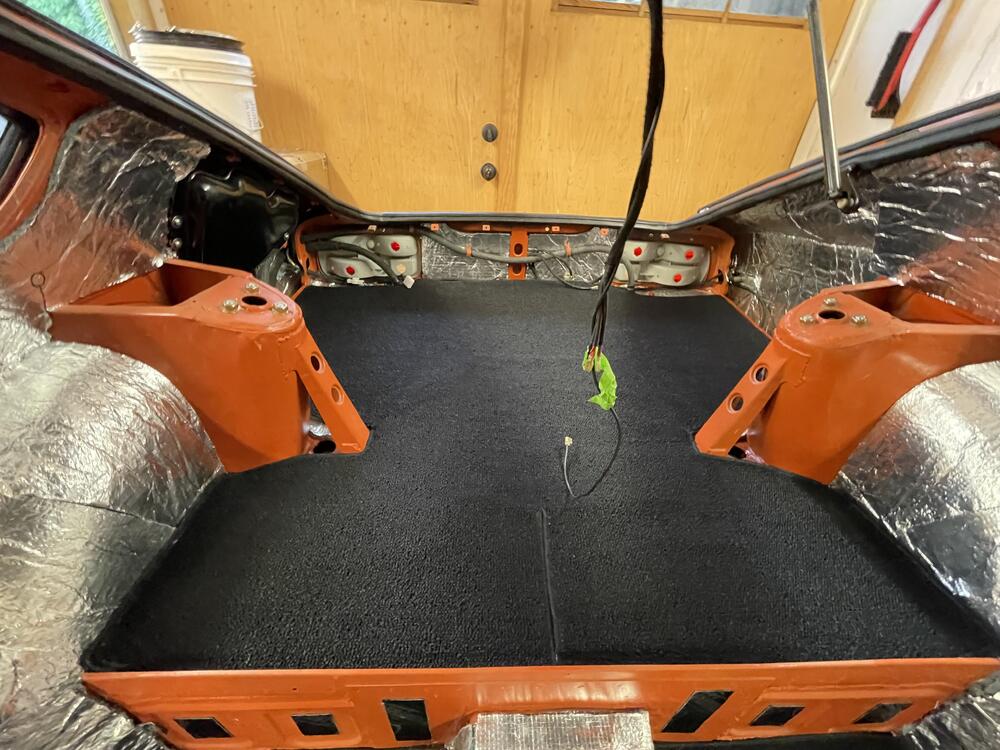
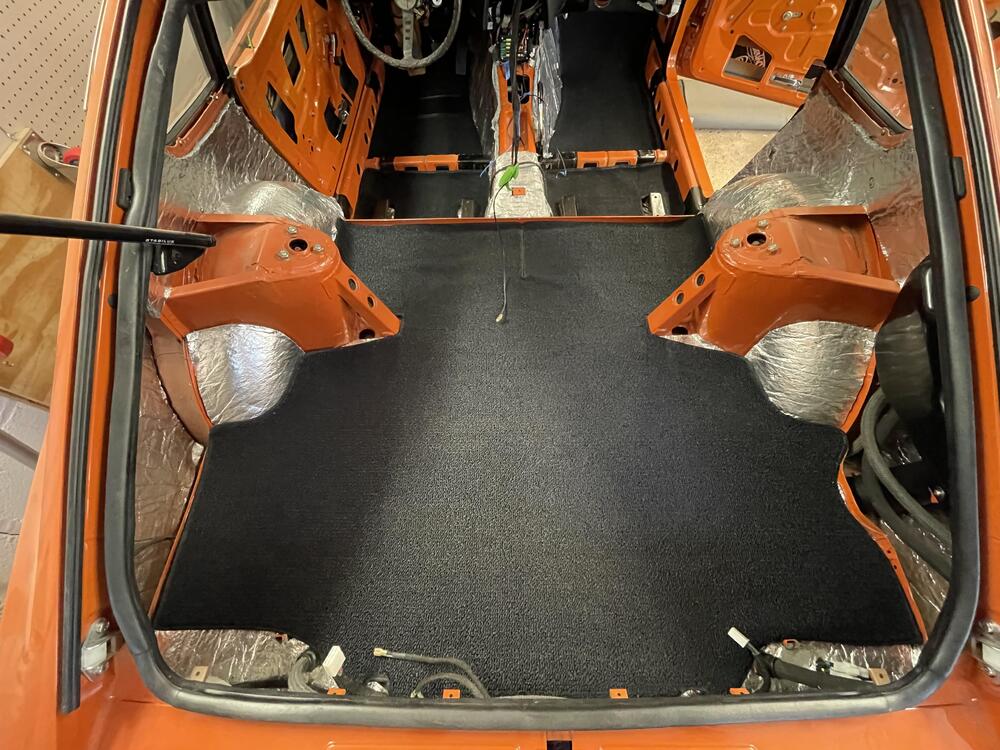
Okay, it’s been a minute so this post will be all over the place… I’m going to start with baby steps that feel like giant steps. I was able to install the left side headlight bucket. It seems small, but I hadn’t been able to get to all of the weatherstripping that goes under the fender so I put it off. This was the first time I’d seen it together (on one side) since it came back from the painter. I found there was a sizable gap between the bucket and the fiberglass air dam and I didn’t know how far the dam was going to flex. It ended up working out when I got the blinkers on, but it’s not a crisp clean fit. More on that later. ••• I didn’t do a great job documenting this, but I did a complete refurb of my marker lights and turn signals, inside and out. Left side is before, right side is stage 2 of the 3 step polish. The left front TS and three of the marker lights were pretty beat up. The white plastic was nearly brown inside and the mirror of the fronts and metal housings of the marker lights were all rusted. I stripped these pieces and painted the metal parts with highly reflective silver spray paint. The plastic housing I sprayed white inside and left the outside raw, painting the mirror the same as the marker lights housings. The lenses were sanded with 400 grit wet/dry paper, then up through 5,000 grit, and finally polished with Novus plastic polish. Surprisingly, I was able to reuse all of the OEM rubber parts. They just needed scrubbing with a green scotch bright pad. I decided to replace all of the hardware with stainless bolts instead of sheet metal screws because the right rear screws are uncomfortably close to the fuel vapor hoses. I wasn’t able to get JIS screws quickly enough so I just went with generic M5 cap head bolts, with fender washers and lock nuts on the inside. The ones in back got rubber caps on the bolts, too, just to be safe. All of the wiring and connectors for these were replaced. The OEM sockets and rubber boots were refurbished. I ran out of bullet connectors so I used Yamaha sealed connectors for the front marker lights. I’m a bit bummed that the rubber covers from Vintage Connectors for the turn signals are so short. I’m wondering if I need to do something like wrap them in tape to keep the water out. The bulbs are color matched LEDs from Super Bright LEDs, which I think look nicer than using white ones under the colored lenses. The color is much richer while still being… uh, super bright. The gaps around the air dam closed up a bit after I got all of the hardware on, but the curves of each piece (headlight bucket, air dam, and blinker housing) don’t match, which is irritating. I’m hoping it will disappear once the bumper is on. ••• I FINALLY finished my throttle cable setup. I looked at a bunch of off the shelf options and a few specifically for Z cars, but the prices and not quite being what I wanted pushed me into making my own. The two challenging pieces were the bulkhead and the bracket. I made the bulkhead out of a stainless steel drain plug that a friend drilled out and tapped for me on his lathe. We broke a tap and probably dulled a second to the point of not being usable any more. If I did it again I would use aluminum. It’s held on with an M18 nut and has the cable adjuster for a triumph motorcycle brake lever screwed into it for the cable sleeve. That’s probably also unnecessary as I could have made the bulkhead so it acted as the cable sleeve seat on its own. The bracket was another Send Cut Send job. I had to wait until everything else was figured out to design and order it, but I made four versions with the hole for the throttle cable adjuster at various heights. I opted for the second tallest, but I’ll change it if this ends up feeling wrong. I’m definitely going to have to ad a bend along the long edge to reduce flexing. I went with a progressive cam from @duffymahoney and had to make sure there is no interference when all said and done. The shortest bracket looked the best but was uncomfortably close to the cam at full throttle. All of the cable bits and pieces I got from Venhill Engineering for a song. The reason there are two adjusters in the photo is so the bracket can also hold the choke cable, which I am repurposing to operate the starter valves on the Mikunis. I doubt I’ll ever use them but I don’t like having inoperable parts in the car. The cable is affixed to the ball socket by a m5 lamp bolt that was decapitated, crimped to the cable, rethreaded, and soldered. So yeah, the throttle half of this project is done for now. I just need to change the screw holding the cable to the cam to be a set crew, cut the excess cable, and cap it off so it won’t fray. The bracket will definitely need to be stiffer, but that’s for later. ••• Unfortunately I keep forgetting to take pictures, but I can show you how I ran the AC drain so it minimizes the size of the lump when I install the transmission hump upholstery. The Vintage Air evaporator came with a black hose, but I swapped it out for some hose with a thicker side wall, which should keep it from compressing under the upholstery and inhibiting the flow of condensation. A nozzle connects to the hose with a 1/2” barbed splice fitting. The black piece is from sun roof drains on GM and other vehicles and its X-shaped aperture should create a Venturi effect when mounted perpendicular to air flow to pull water out and prevent anything from traveling back up the hose. Pretty generic and available on Amazon for a few bucks. I cut the insulation to make a channel for the hose to rest in. A 5/8” hole and some RTV to make sure it doesn’t pop out and I’m good to go. I also finished the passenger side door window and the rest of the interior firewall work the same day. Now to check the refrigerant plumbing for air leaks. 👍🏻 ••• After I was finally able to get all of the firewall work done, I put the dash in and plugged it all together. Nothing major to report since I’ve discussed the details in previous posts. This time I took more care to tuck the wiring away nicely. The few loose ends are wire for a set of foot well lights that are switched at the doors, a feed for a USB plug I intend to put in the center console, and the power/ground and control wires for the evaporator. The biggest challenge was getting it back in with the air ducts installed. This corrugated tubing from Vintage Air is nice but it’s not flattened/ovular like the OEM stuff so it requires some persuading. I still think it’s better, though. It’s tough to see in the center but it’s really well fit to the evaporator without any clamps, which keeps it clean and free of things to chafe of the hose or wiring looms. I’m hoping a harness cover will clean up the mess around the relays, but I’m going to zip tie some of this up tight before any cowls or covers go on. ••• And here it’s starting to feel like a car! Or, at least I am staring to get some storage space back. 🤣 I’m really pleased with how the Vintage Dashes dashboard looks. The glove box door needs adjusting, but after hitting the finisher with some Landau Black SEM Color Coat it all came together. It seems the internet was correct about that being the right color. I’d heard these aftermarket windshield gaskets leave a bit to be desired compared to OEM, and it’s true, but I think you can finesse it into shape. The gaps in the corners were really bad until I put the steel trim in. That stretched them out a bit, but it’s not perfect. I’ll let it settle for a while and then might just pump the gaps full of weather strip adhesive until it’s filled in. Speaking of steel trim, that’s a fun chore. 🙄 ••• My spare tire cover was FILTHY. Luckily it cleaned up well and didn’t pucker or warp. The orange flecks in the fiber board are a nice touch. ••• Lights! No before pictures but here’s everything put together. I used the same process on the lenses as the blinkers. The housings were scrubbed and then wiped lightly with acetone to get the last of the adhesive off. Thankfully I didn’t need to recondition the mirrors. The center lug on the replacement chrome trim is too short to function as the only fastener holding everything together. I used a M5 threaded socket left over from installing the blinkers along with a rubber washer. It worked fabulously, but I think it would be really easy to screw up if over tightened. No wiring yet. I just wanted to close up the cabin for the next step. ••• Looking clean figuratively and literally. I picked up the basic carpet set from Newark Auto in black 80/20 loop. It’s really nicely made, but I don’t think it’s meant to go with an insulation kit like the one I have. There are a few places where it would have fit better if there was no insulation, and there are a few places where it is just straight up wrong. Overall give it a 89 or 91 out of 100. Worth it but could be improved. I’ll be using the vinyl kit from MSA on the sides. I’m going to cross my fingers and hope my original interior pieces clean up nicely. I just put them straight into storage without unpacking them when I bought the car, so who knows what shape their in. If they suck I’ll be new replacements. But yeah, the car is starting to feel like a car.


-
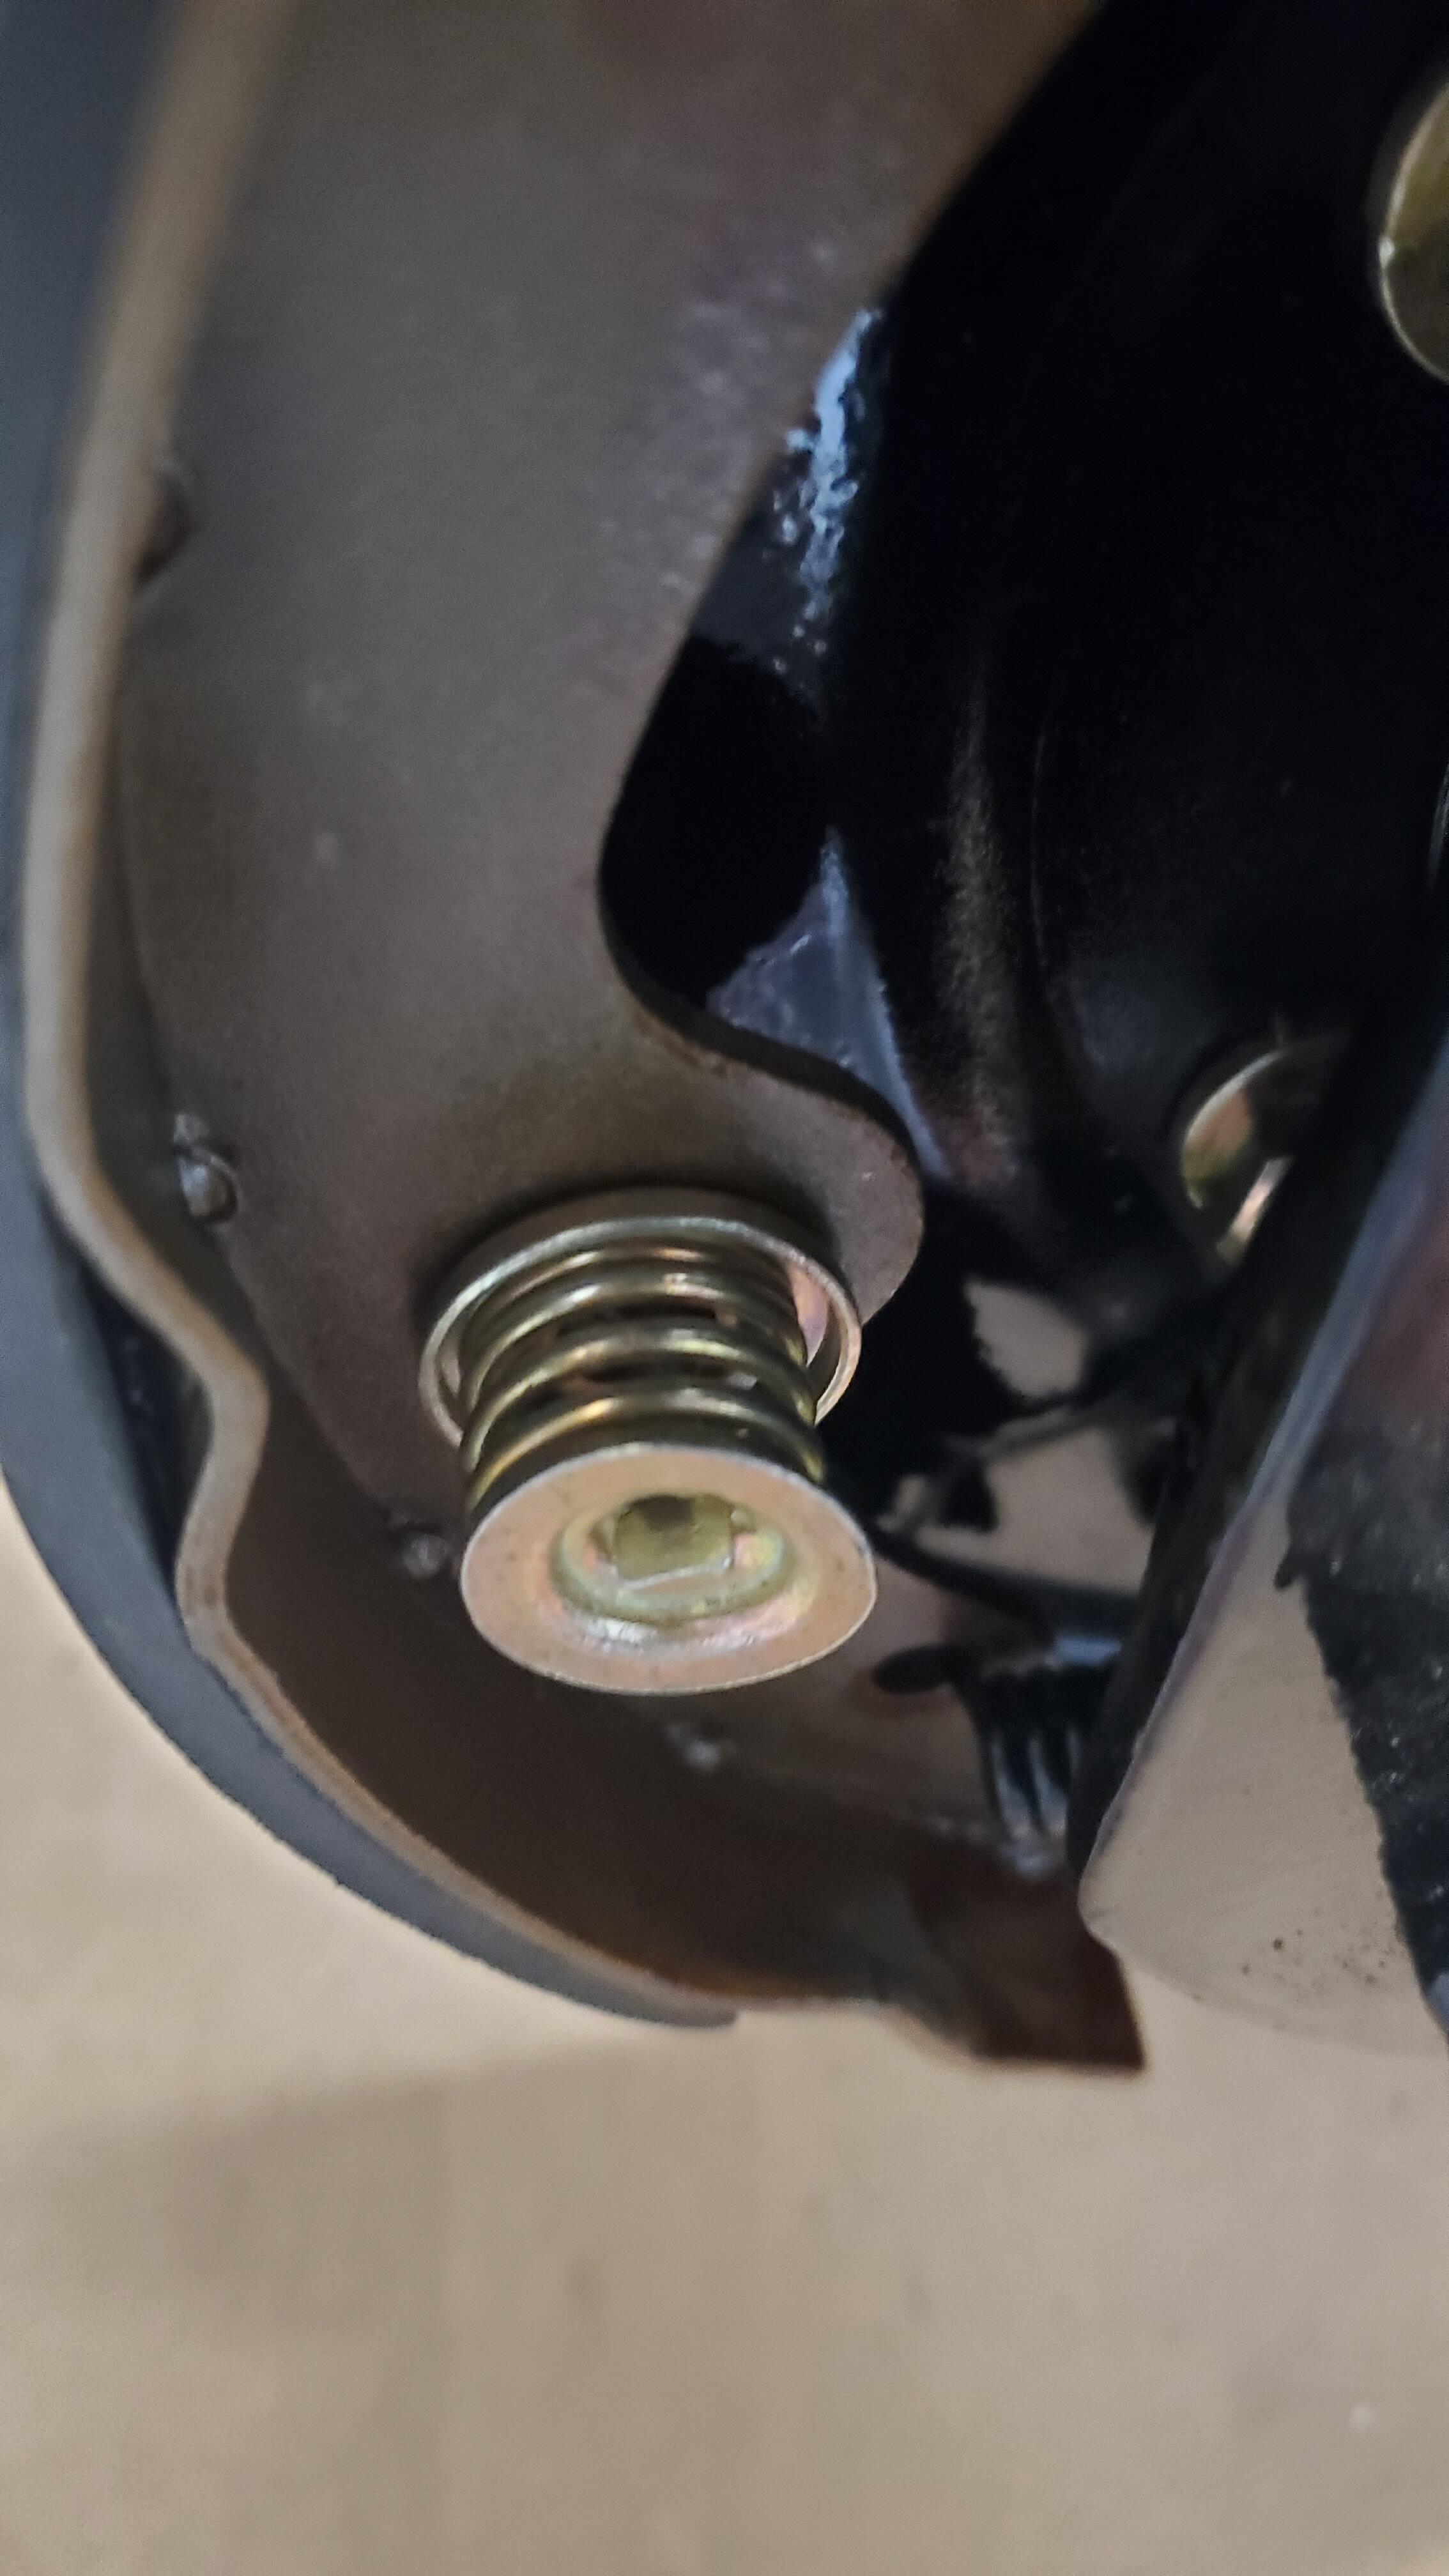
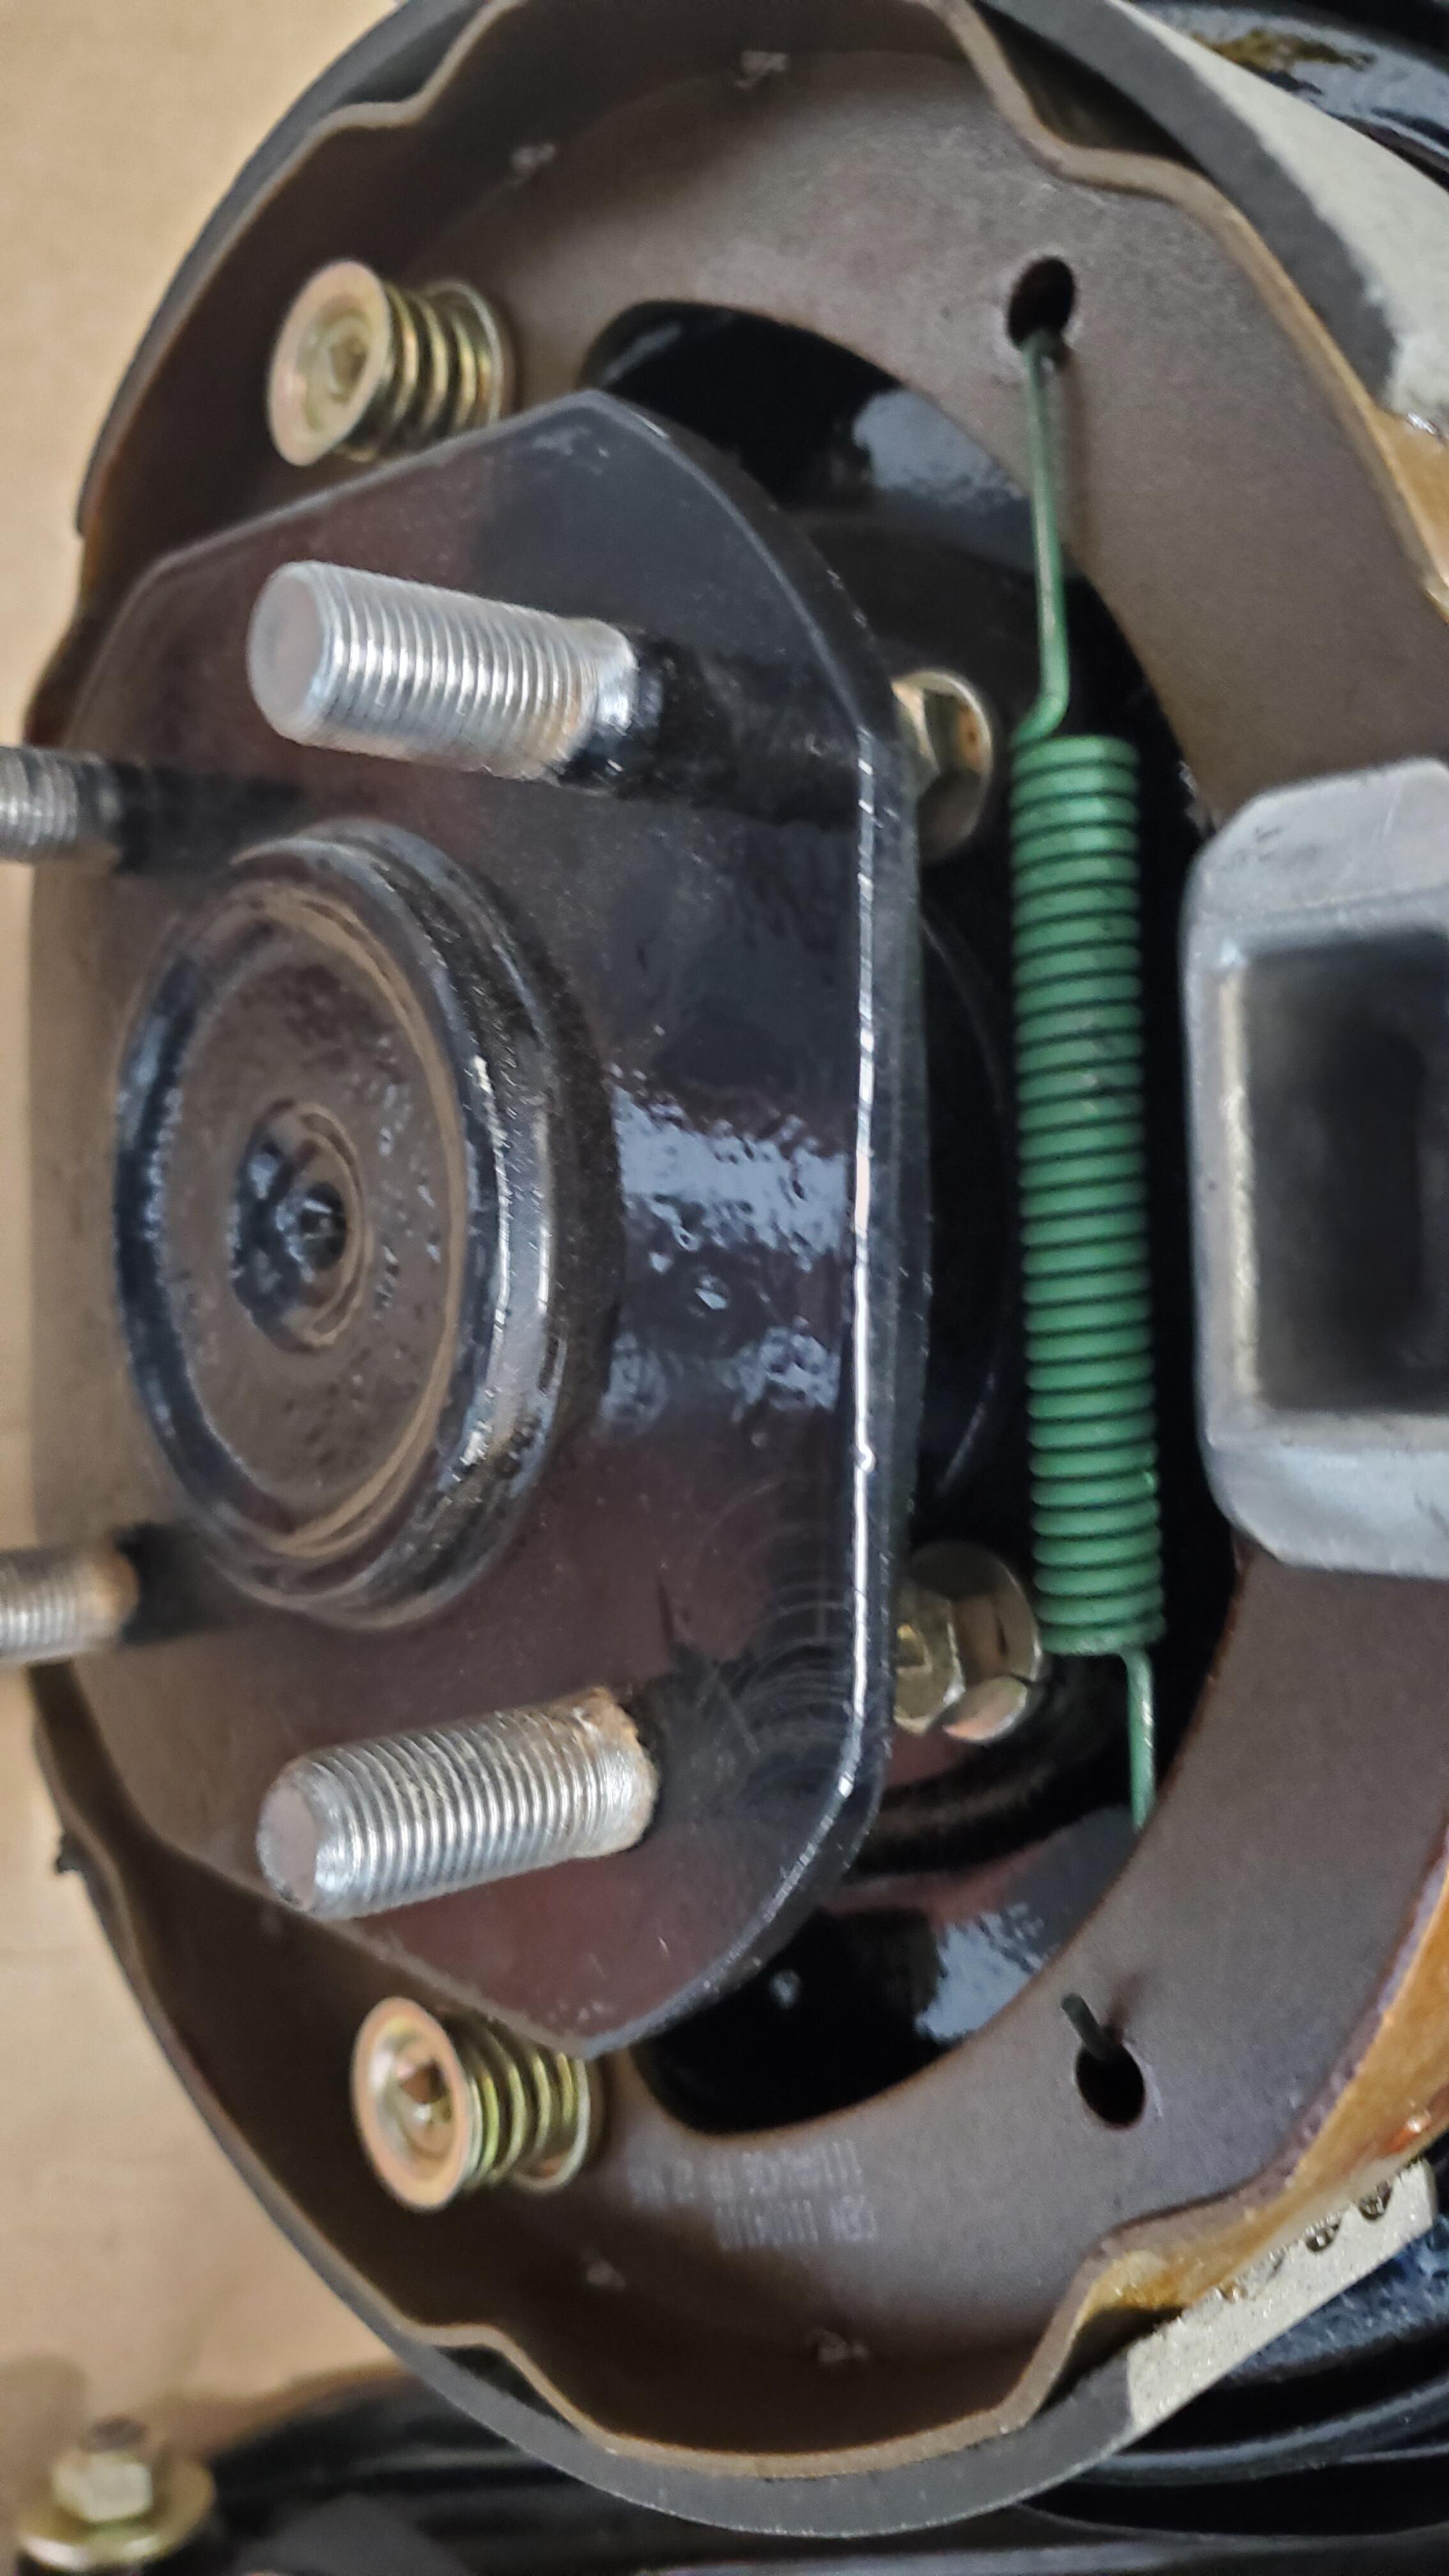
Brake shoe hold down retainer spring pics