7T1240
Community Member
-
Joined
-
Last visited
Everything posted by 7T1240
-
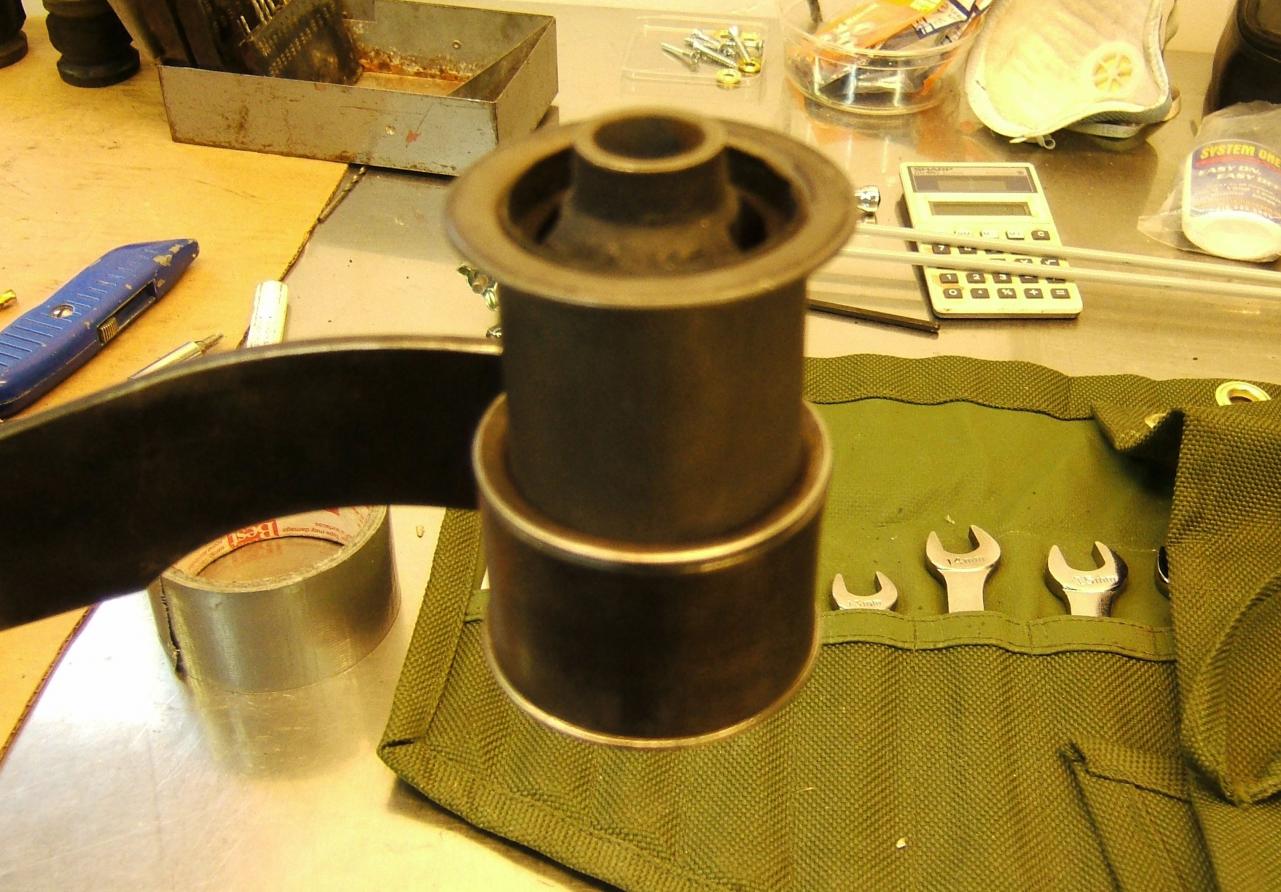
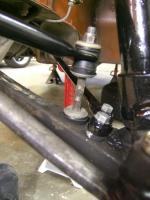
FSM says: "When assembling the stabilizer connecting rod and transverse link, be sure to tighten the first nut to 8.7 to 13.7 ft-lb torque and tighten the lock nut to secure the first nut." Haynes says: "...do not tighten the mounting bolts or nuts beyond the specified torque which is 18 lb/ft for the (stabilizer) bracket bolts and 15 lb/ft for the drop link nuts." Wick Humble says: "Tighten the link until the rubber grommets bulge slightly--don't try to bottom the thread. When you estimate the links are tight enough, jam the nuts together. Then tighten the (top) locknut--you may have to hold the link with Vise-Grips pliers." I need some help here. Do any of these torque specs. refer to the top locknut on the front stabilizer connecting rod? And when I torque the bottom bushing to the lowest torque spec cited (8.7 ft-lb - FSM) the new stock rubber bushing is significantly more compressed than Humble's "bulge slightly" recommendation (see attached photo). What do you guys suggest for stock rubber? Thanks, Gary S.
-
The press release thread that Mike B started can be found here: http://www.classiczcars.com/forums/showthread.php?t=35384&highlight=press+release
-
A little engine bay detailing how-to featuring our favorite car, courtesy of Classic Motorsports. http://classicmotorsports.net/articles/clean-room/
-
Somewhere back in about 2002, I became intrigued with the idea of finding a 240-Z again. I had previously owned a '73 for about a year in 1985, replete with vapor lock issues from the flat top carbs. So, in hopes of making a better choice and with the internet as a resource, I found zhome.com. There is a segment on Zhome that touts the desirability of the early VIN cars, as well as the special edition Black Pearl. Over the next year or so I searched for Z's in general, with particular emphasis on those highlighted on zhome. During that year, I became somewhat frustrated by the lack of good Z candidates and thought maybe I was a bit late to get into that game. I asked myself a similar question to Zedyone's thread starter, and came up with the same answer as bigoak, the Miata. Employing Carl's logic from the zhome articles, I looked for an early VIN or Special Edition car (of which there have been many during the Miata's run). The first special edition Miata was the 1991 British Racing Green with tan leather, and came with a commemorative plaque denoting which number in a run of 4000 each car was. I ended up finding number 2990 in St. George Utah in January 2003. The car had about 42,000 miles on it at the time, and now has just north of 50K. Within the past week I was looking through Grassroots/Classic Motorsports and they had one of those features titled something like "10 possible future collectibles" or something like that. One of the selections was the first gen. Miata. Well bigoak and GRM, I hope you're right! Gary S.
-
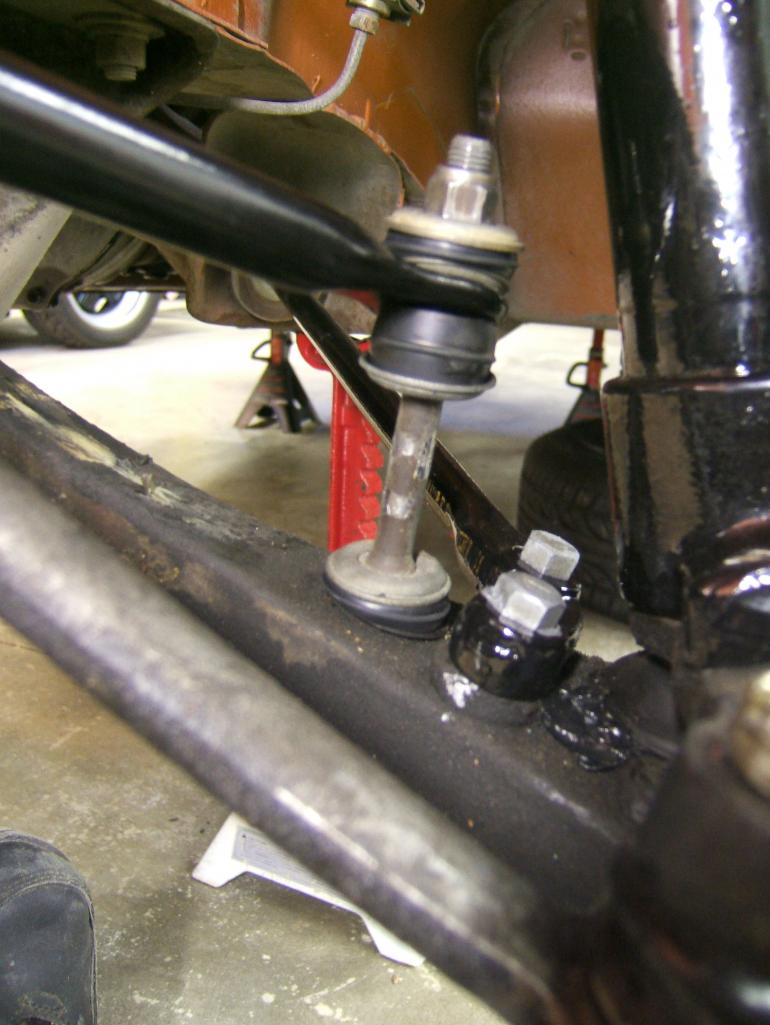
Here's a picture of the "Y" on my 240Z - production date 11/70. Second picture shows where a glasspack was welded in downstream of the Y. Arne, I'm curious what you are contemplating for your exhaust? Gary S.


-
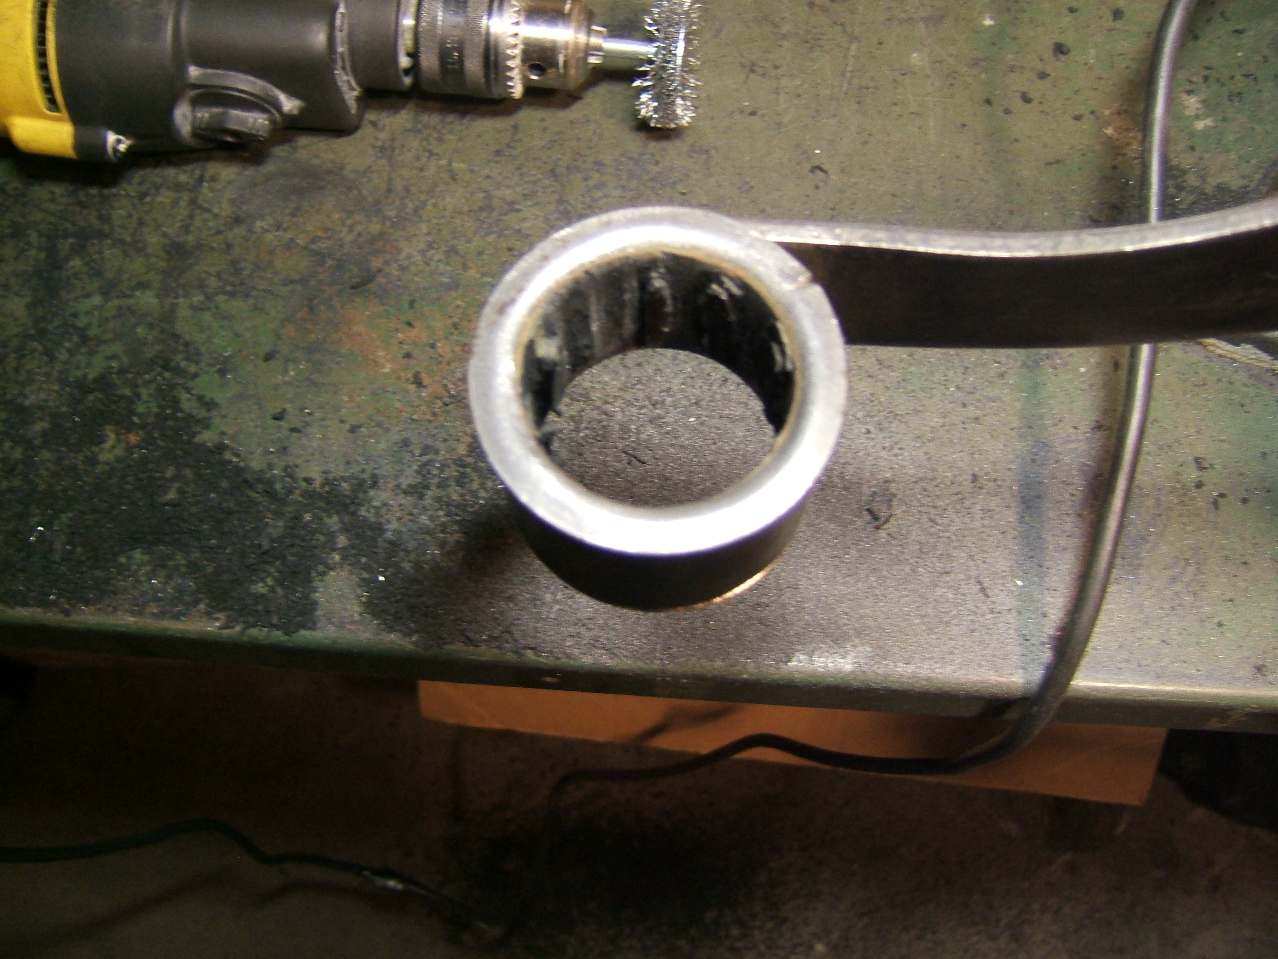
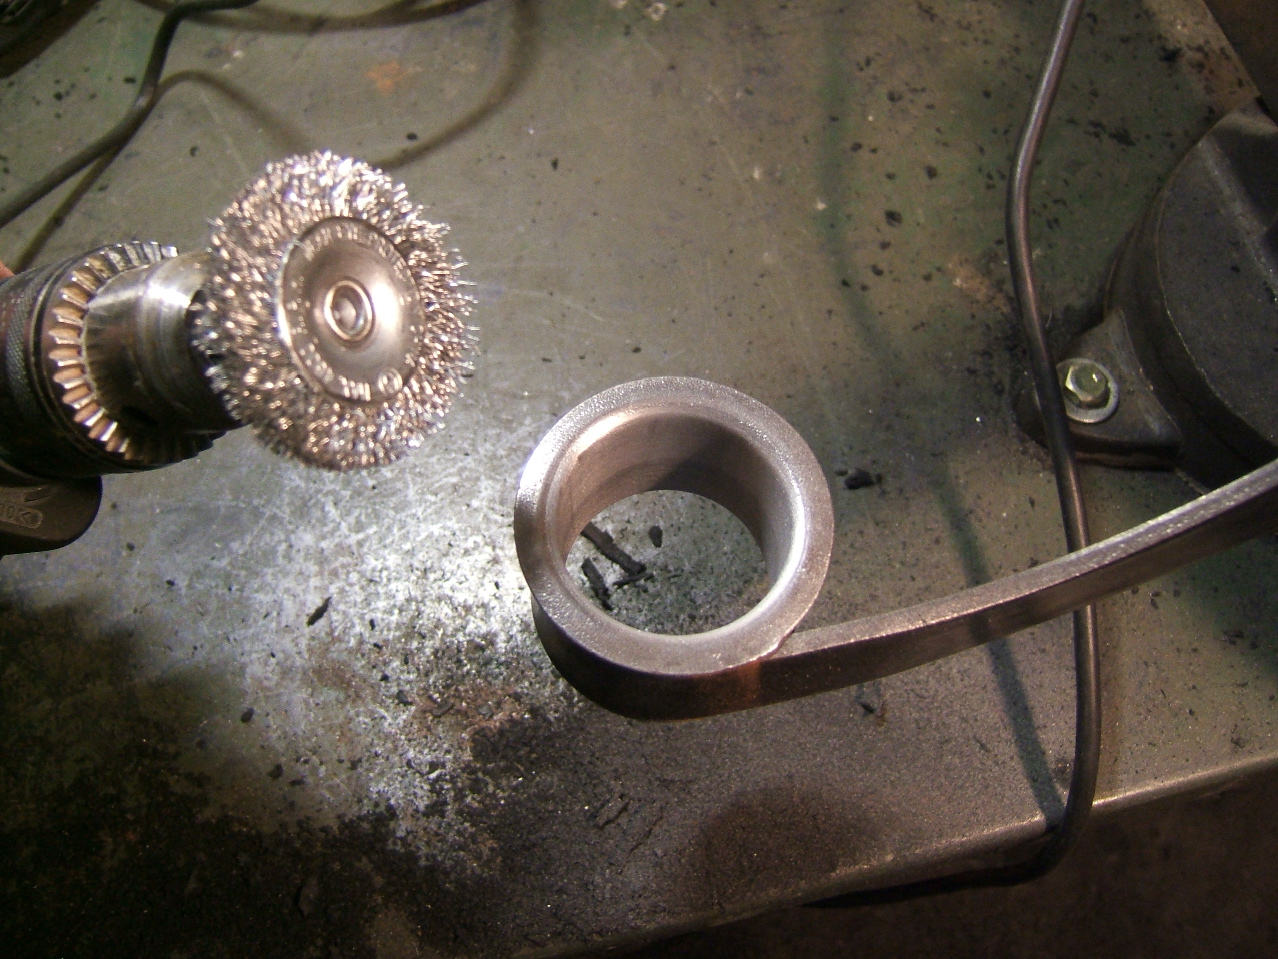
I used progressively larger drill bits to remove most of the rubber, then a wire brush on a drill to hone out the rest. In this way I was able to avoid the stink in the garage AND THE IRE OF THE MRS. I'm hoping so...I plan on attending. Gary S.
-
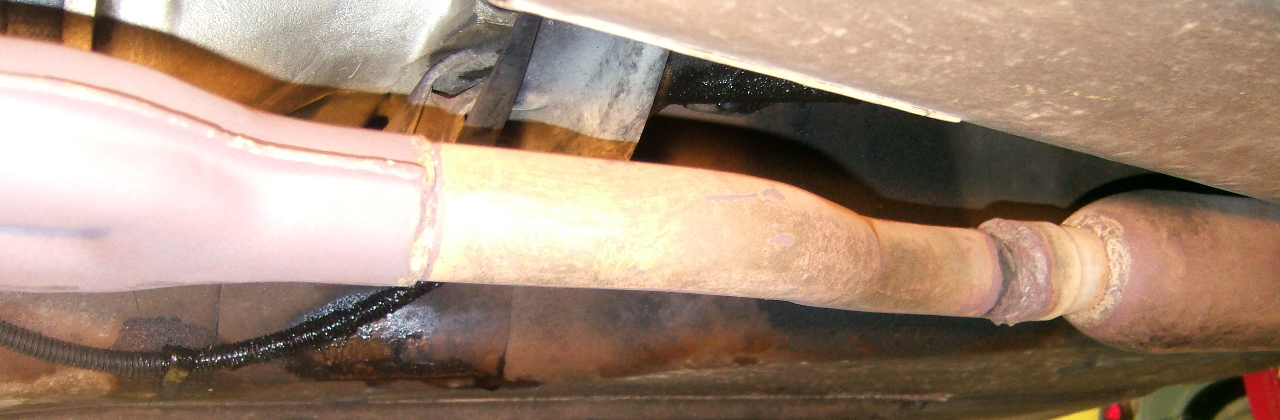
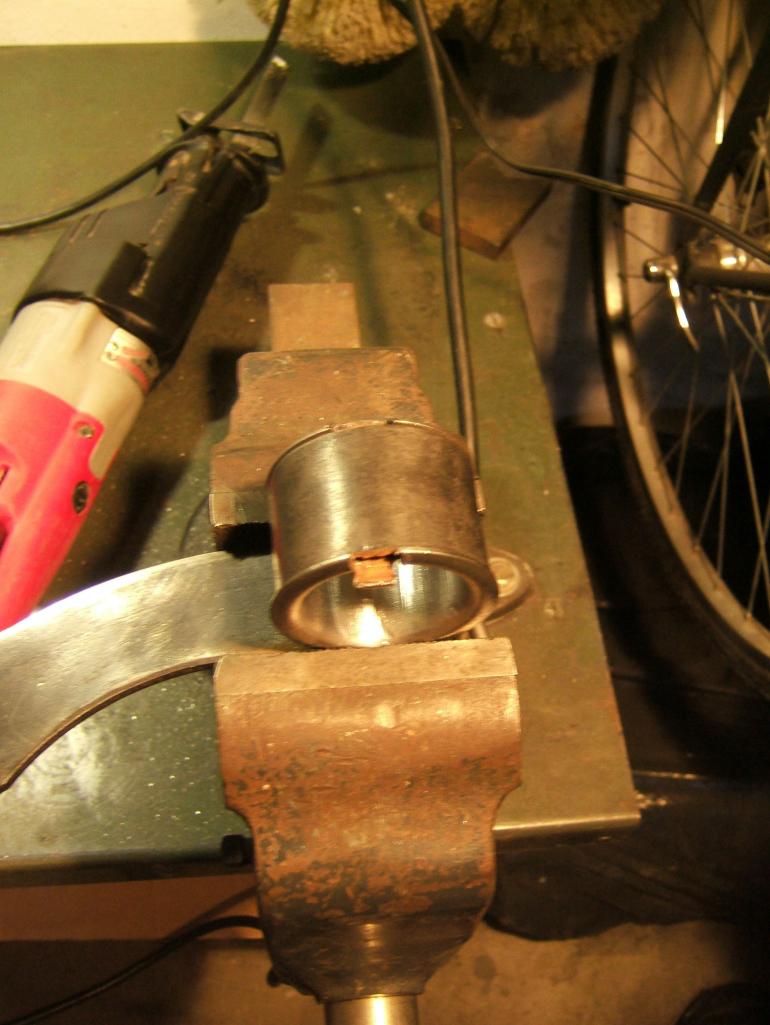
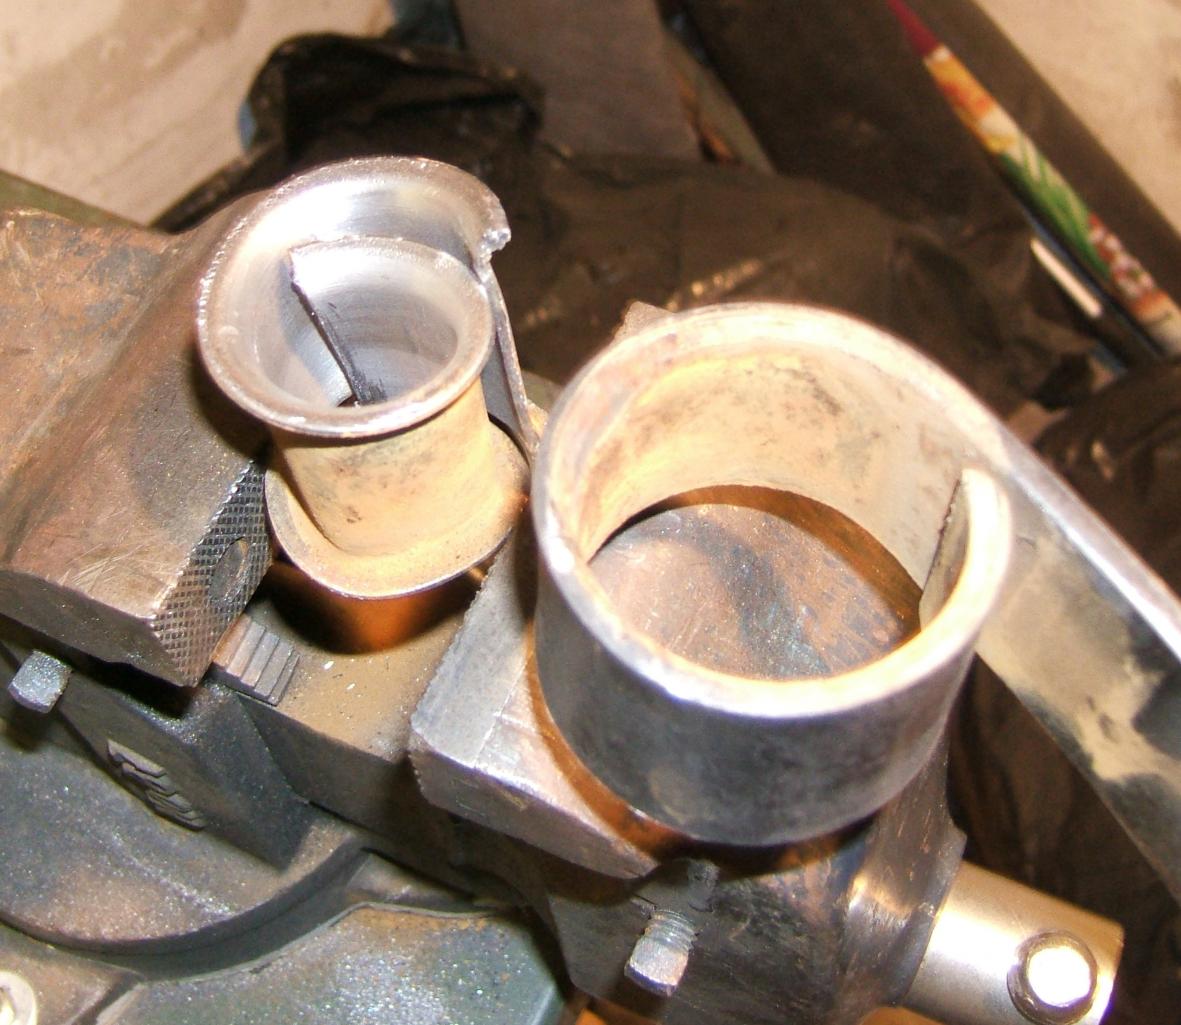
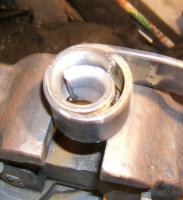
Just to follow up, my Nissan mustache bar bushings arrived today. And as can be seen in the first photo, the new bushing will not fit into the end loop with the old sleeve still in place (the old rubber inserts were removed previously). So, I employed a technique that has been used for removing the spindle pin bushing sleeves. I used a cutting wheel to cut two notches about 1/2 inch apart on the rolled edge (not quite cutting all the way through). Then, after reorienting the bar in the vice, I used a sawzall to make two parallel cuts through the inside of the sleeve, being careful not to cut into the mustache bar loop proper. Next, vice-grips were used to pull down the tang and wiggle out the sectioned piece. Finally, the bench vise was handy for squeezing the sleeve in so that it could be removed. Gary S.


-
Hi Arne. No, I don't have the replacement bushings yet. However, I did find a picture of the part in another thread asking basically the same question, with no responses. http://www.classiczcars.com/forums/showthread.php?t=31765&highlight=mustache+bar My thought is that if the sleeves have to come out, I'd prefer to do it before painting the mustache bar. Gary S.
-
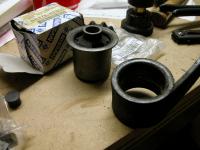
Hello guys. I just want to verify this. I have removed the factory mustache bar bushings (using Marty's drill technique which worked very nicely) and cleaned up the residue as shown in before and after photos. The mustache bar will be painted, and Nissan rubber bushings (PN 55476N4300) will be installed. So, as posted by Marty and clayton 260Z, the sleeve inside the loop ends is not removed, correct? Gary S.


-
Welcome Mike, and congrats. Little to no rust - that's 2/3 of the battle behind you right there. And damn, when I saw your thread title, I thought for a minute maybe another Spokane guy to go along with myself and deadflo (aka Steve), but no such luck. As Gary and Mike said, there's a great contingent of very knowledgeable Z fanatics along the I-5 corridor. So, how'd you find the car? And when will we see pictures? ' Gary S.
-
Very, very interesting. The '72 - what a nice find! And I had no idea what an "SMZ" was before reading this writeup. Nice collection Bob! Gary S.
-
Great, then the Port of Los Angeles it is - Thanks Carl. Gary S.
-
I have some of the original paperwork for my Z. The selling dealership - LeMans Motors, Inc., 101 "E" St., San Bernardino, CA. - does show up in Mike B.'s list linked earlier. However, the paperwork I have does not show a port of entry. Any educated guesses on the correct port of entry for what was LeMans Motors, San Bernardino, CA.? Gary S
-
Hi Bryan. Do you still have grommets for the shift boot? I bought one of your boots early on and just came across this thread. Thanks, Gary S.
-
I saw this ad on zcar.com and thought I'd pass it along to classiczcar folks. The description, linked here: http://www.zcar.com/forums/read/8/2003084. The car has been disassembled and some restoration efforts begun. Also comes with a pretty impressive number of NOS parts, and the seller seems thorough and well organized. Here is a link to an extensive photo slideshow detailing parts and progress: http://www.kodakgallery.com/ShareLanding.action?c=6o7mje4z.8s6vh2vn&x=0&y=-13vcz7 The car is in Rockville, MD. Asking price is $9000. Disclaimers - I don't know this seller, I'm not affiliated in any way, etc., etc. Gary S.
-
I'd love to have some seat time in a GT-R...congratulations Gira! In looking at your photo, I am struck by how positively petite the Z looks by comparison. Gary S.
-
Very much...the wheels with the unpainted front and rear spoilers give a your car a unique look. Indeed they do! It's cool that your car came with them! Gary S.
-
Yes, and your neighbors to the northeast (Spokane) are getting HAMMERED:stupid:. It started snowing about 9 am and hasn't stopped since...about 8 inches so far and still coming. So, I'm going out to snowblow. Ney, not with trepidation, but with joy in my heart, for I know that when I return to my computer CZC is back online! Gary S.
-
1969 - 1973 Datsun 240-Z Sports promotional video featuring design studio video, African Rally footage and John Morton commercial. http://www.carlist.com/blog/?p=1111 Click link, then scroll down from the top of the page to access the video player. Gary S.
-
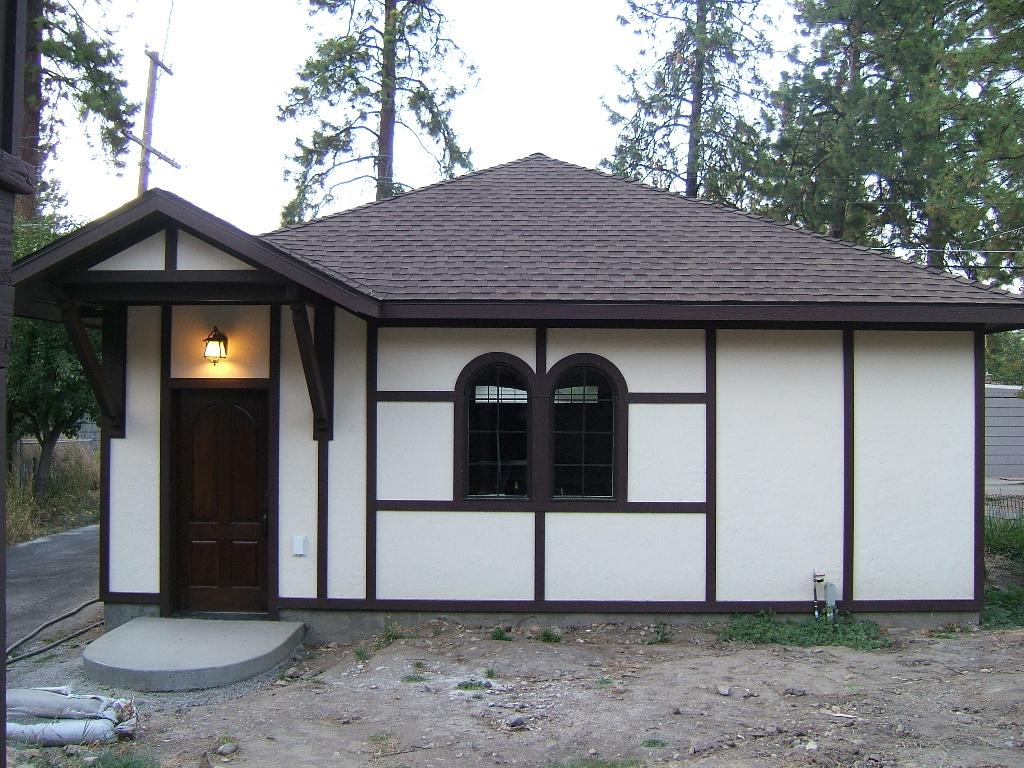
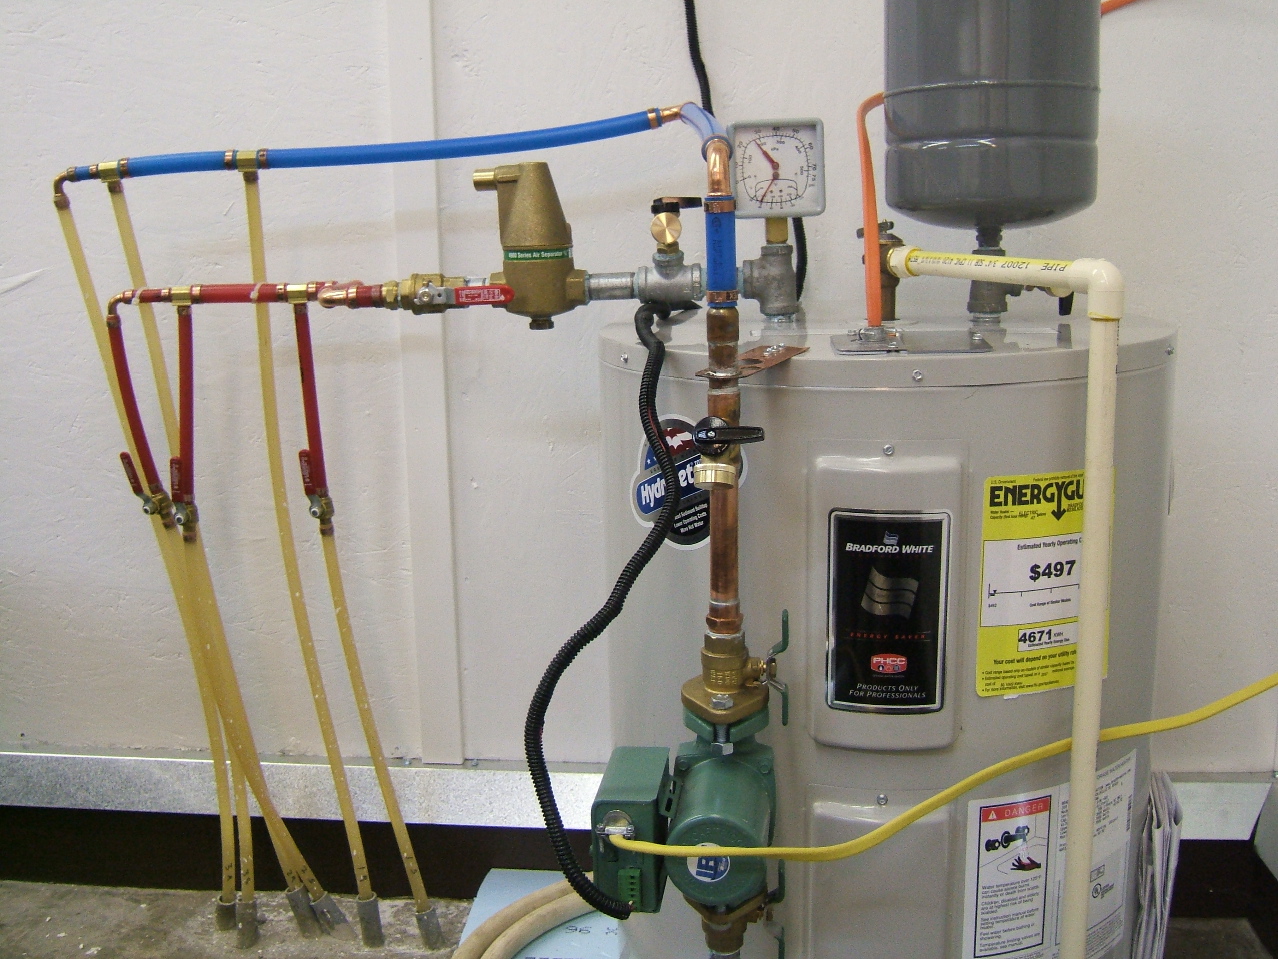
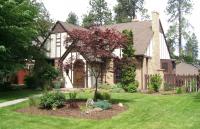
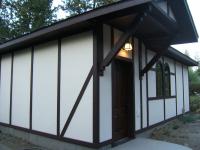
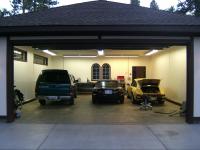
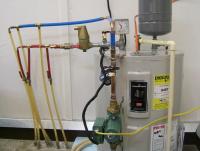
Hi Richard and all. I was pretty surprised to see this thread resurface. I began this thread (April '07) when I was in the planning stages for my garage. Things got rolling pretty good about mid-September of '07, and the building was pretty much roughed in by November of that year. Electrical was completed by about March '08. This spring and much of the summer was spent finishing the exterior and interior. Most recently, I powered up the hydronic floor heat about a week ago. We ended up going with 26' x 30' dimensions. The door is an insulated 18' x 8'. Wall height was set at 10', with the ceiling height being about the same. Much like conedodger suggested, I poured a pit with buried conduit to fit a scissor lift. We also incorporated radiant floor heat in the concrete pad. I did use the SIP's panels alluded to earlier in the thread, and had R-48 blown into the attic. The building holds heat quite well. Pictures as follows: 1. The house we tried to emulate the style of when designing the garage. 2. Garage mandoor, board and batten detail. 3. Arch top windows. 4. View from alley, garage door open. The pit for the scissor lift is currently covered by the reinforced plywood seen under the Nissan truck in this picture. 5. Hydronic heat system, circulates propylene glycol / water mixture through hot water tank and into pex tubing in the concrete slab. Generally, I'm really happy with this building. Right now the Z is tucked in there with a '91 Miata, a '78 911SC, and a '96 Nissan truck. It's a bit tight, but I'm not complaining...just happy to have stewarded this project from planning to construction and near completion. Thanks to all of you who made suggestions here and elsewhere - many great suggestions were incorporated into the end result. Gary S.


-
The five speed was not available as a special order for the US market 240Z. More likely sourced from a Nissan product that did come with a 5 speed. According to the Datsun Z car garage http://datsunzgarage.com/engine/ : Datsun used three 5-speeds for U.S. Zcars * One from '77-80 * One from '81 to 83. * A Borg-Warner T5 in 1983 Gary S.
-
As of this past Sunday, 12/08/08, there's something new in my garage - heat! Pictured below is the system that is now circulating a water / propylene glycol mixture through the pex tubing laid in the slab last fall. Just in time for the predicted 4 degrees F low expected this coming Monday. I'm hoping to get some car projects done this winter, and this will sure make it easier crawling around on the floor. Gary S.
-
Yup, I'm likin' that! Welcome. So, tell us the story...where'd you find it? How'd you find it? Etc. Gary S.
-
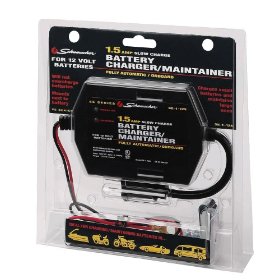
Hi Unkle. I am currently using a Deltran Battery Tender Plus and two different models of Schumacher battery tender. The Deltran is on an Optima and has been great for 5 years now. One of the Schumachers, a stand alone model similiar to the Deltran, is also on an Optima - and for about the same duration, 5 years or so. The other Schumacher (pictured below) is actually affixed to the gel battery in a Miata, so I just run a cord into the trunk and plug it in. All three have worked great - no issues whatsoever. Gary S.

-
Edited, thanks Mike. Reason for Editing: 3:30 a.m. post time makes for a lousy accuracy check.:cross-eye Gary S.