Seppi72
Supporting Member
-
Joined
-
Last visited
Everything posted by Seppi72
-
Ooh, they look nice but quite pricey.
-
We'll see once they arrive later this week. I think I have plenty of room to twist them into a proper up-angle and still have a good seal with gasoline-rated Teflon tape. Probably won't even use the Buna-N O-rings unless I have to.
-
Well, that's the thing, @LeonV , the washers I got are not copper. I've gone with the M12 x 1.5, 90 degree hose barb fittings and be done with it. A lot of my grief is because I'm using the Nissan competition fuel rail from JDM-Car-Parts (https://jdm-car-parts.com/) that has three outlets - one for each Weber, like wiring something in parallel. I'll likely just do direct, in-series plumbing for my other L28 with Webers when I get to that one.
-
If, @Yarb, by "old school," you mean brute force, then that's the way I ended up going too. I initially cobbled up three hook arms from coat hanger wire and attached them to my 5-pound slide hammer. They didn't have the tensile strength to overcome the press fit friction between the tranny tail housing and the rear seal. So, I cut away as much inside rubber from the old seal as I could and then used small cold chisel and hammer to gradually cut a groove down through the metal ring of the seal. Once that was done, I hammered one edge of the cut at an inward angle until the metal bent inwards, relieving the press fit at which point the old seal was removable. There are a few nicks on the aluminum tranny housing edge from doing it this way, but nothing that will affect performance. Some 3-in-1 oil and a 36 mm socket and hammer then made it easy to install the new seal. Now, @Zed Head, I have another question. I was easily able to use 800 grit paper to remove residual gasket material and pitting on the front cover. But doing the same on the mating surface inside the bell housing is another matter as I can't get a sanding block down in there. I don't want to use a scraper as I won't have angles to prevent gouging the aluminum. Any recommendations?
-
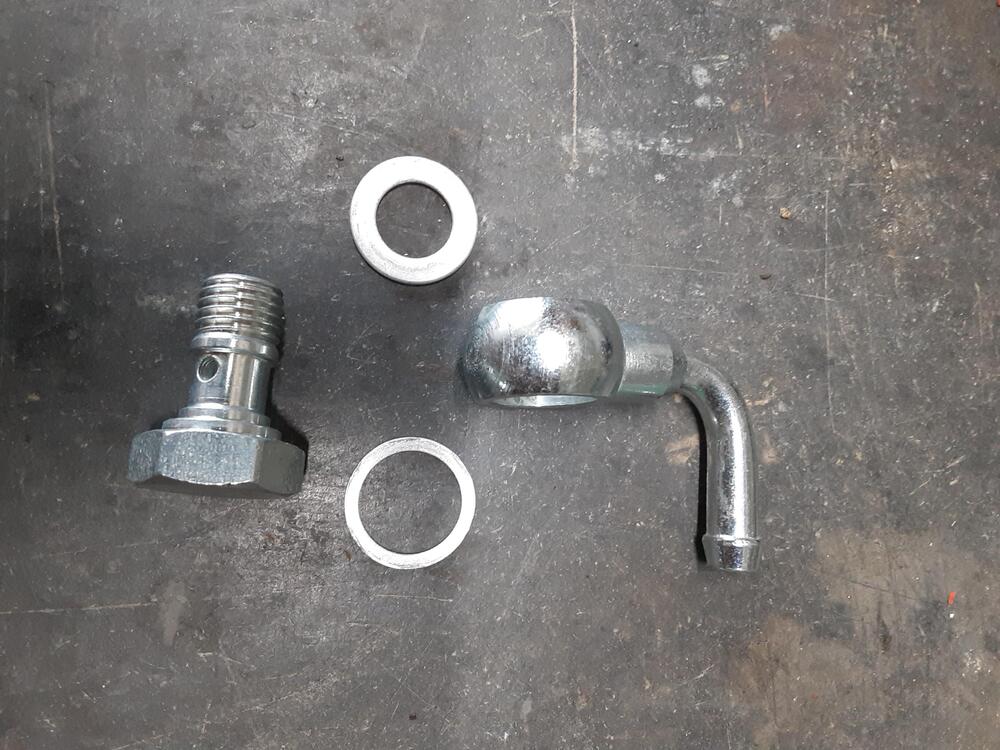
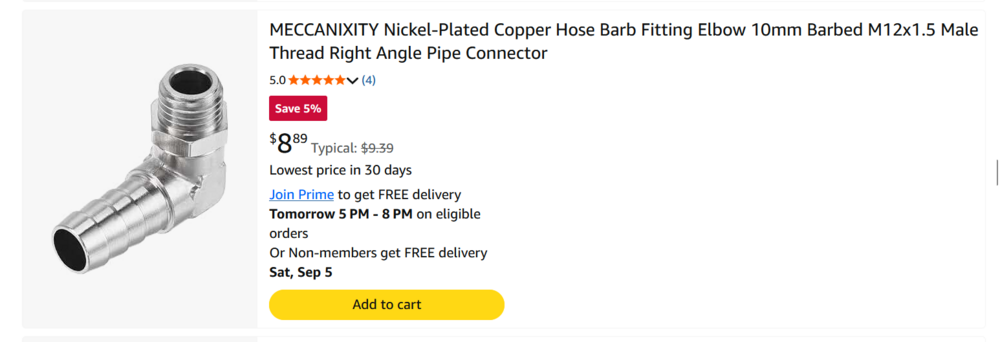
I have triple Webers for my L28 and they came with banjo fittings for the fuel inlets. However, the fittings only have metal washers for both sides of the banjos. Even at the rather low fuel pressure needed for carbs, I don't think that metal washers alone are a good way to ensure against leaks. Buna-N rubber has high resistance to gasoline so I was thinking of using O-rings or thin flats cut from 1/32" sheet material in addition to the metal washers. But in doing so I'm not sure that the stack height will give me enough thread engagement with the carb body. Has anyone got useful experience either way? I'll probably call Pierce Manifolds to see what they have to say. Honestly, I would have thought that an M12 x 1.5 threaded hose barb fitting, Buna-N O-ring and gasoline-rated Teflon tape would be a better call here. There are nickel-plated copper fittings (the plating gives it extra corrosion protection) of that size on Amazon so I'll probably get some. Just miffed at having to spend the extra money.
-
Thanks, @Zed Head , I do know the shim is in the front cover. I'll get some Hylomar Blue. Any advice on pulling that rear seal? Modified slide hammer?
-
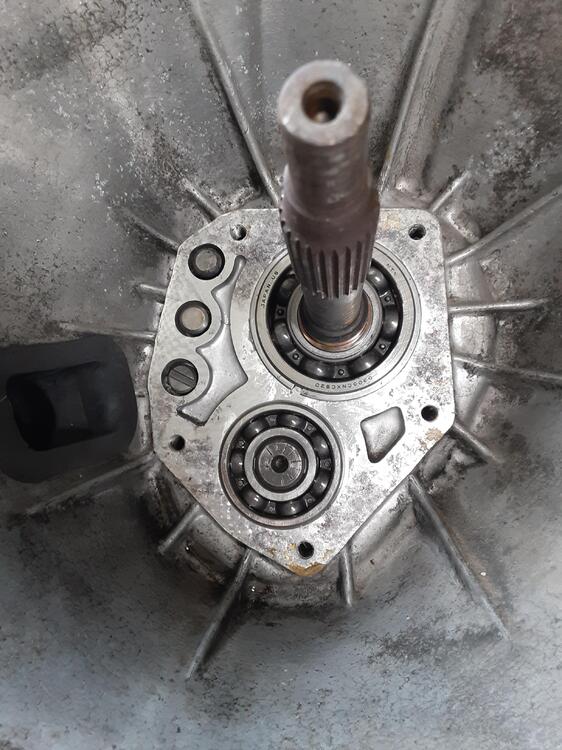
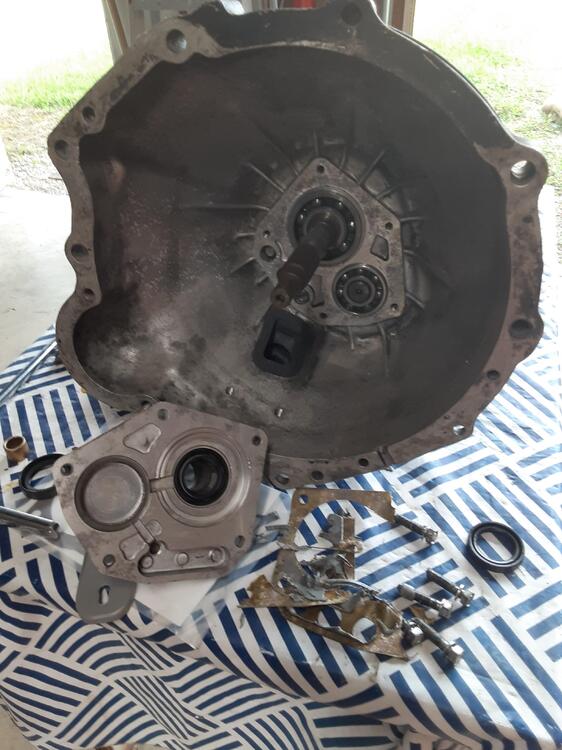
I'm only replacing the front and rear seals as the tranny is otherwise in fine shape. But this also requires replacing the front cover gasket as it was destroyed during disassembly. A couple of questions: The front seal was easy as there's a hole in the cover where I could insert a drift pin to drive out the old seal. But there's nothing similar for the rear seal. What's the best way to remove it and not damage the shaft? I don't have any internal hub pullers. Do I put the gasket on dry or use some kind of sealant on both sides? A PO apparently used some gray RTV silicone as it was all up on the outer races of the main and secondary shaft bearing cages and covered the main bearing snap ring. Anybody have experience or a reasoned opinion?
-
He has a whole bunch of similar, meticulous operations in restoring his '71.
-
Our you can do like this Swiss phenomenon does. I stand in awe of his craftsmanship.
-
Oh, I do have some of those shims. I didn't know where they were to be used. I'll clean and yellow-zinc plate them and have them ready to go if needed. Thanks, @Terrapin Z As for the bolster plates, mine are unthreaded. The threaded portion of the assembly on the door hinges. Trying to get bolts lined up inside those upper door pockets is a royal PITA, especially if you don't have slim fingers - and I don't. While the whole assembly nominally only needs a 25 or 30 mm bolt length, I ended up using spare 40 and 50 mm bolts to make engaging the hinge threads easier and then cut them off nearly flush. Once I have the doors aligned, I'll sequentially back each bolt off a bit and apply blue thread locker even though there's a lock washer at the other end.
-
Thanks, @Patcon. I certainly don't need more work to do putting this car back together so I'll probably just use some doubled-up fender washers for the lower bolts.
-
OK, those are shims that go between the hinge and the door shell. I've never seen them on my cars. Has anyone ever seen them? I asked my local Nissan dealer to see if they're still available and was told all four parts are NLA. What I'm talking about are ~1/4" plates that go on the inside of the chassis (in those cramped pockets, especially the upper ones), through the chassis wall and get bolted to a door hinge. I can't find a reference to the ones my car has for the upper hinge. Am I the only person who has them? My car is a unicorn in some respects. I suspect these plates have to do with supporting the weight of an open door without eventually distorting the chassis sheet metal. There would be an outward force on the chassis metal for the upper hinge and an inward force for the lower hinge. I would have expected that if such a bolstering plate was thought necessary for the upper hinge, there would be similar plates for the lower hinge. Is it possible that with the lower hinge point being closer to the more substantial metal of the rocker panel and chassis bottom there is less chance of flexing and plates there weren't necessary?
-
I'm putting the door hinges on my '72 and noted that the upper hinges have thick plates that go on the inside of the body. However, neither of my cars seems to have equivalent plates for the lower door hinges -- even though the through-holes on the body are quite large. Those hinges' bolts seem to be secured on the interior side just by large washers. I've looked at the S30 microfiche files and can't see any indication of even the upper bolster plates, much less the lower ones. Just confusing diagrams. For instance what are Parts 31 and 32 supposed to be? I think these might be a good idea, but want to get the opinion of this league of extraordinary gentle(wo)men. Now would be the time for me to fab some from 1/4" steel plate.

-
I put this in the Open Discussions forum as it could be put in any of three other ones. So, here goes. I'm using the OE throttle setup to control triple Webers on my L6 stroker. Obviously, I will need to make positional changes to get things like the idle speed and WOT to my liking. The problem is that there are several locations that are adjustable between my right foot and the butterfly valves in the carbs. 1) Inside the cabin at the ball joint at the top of the gas pedal assembly (Part 18). 2) The ball joint at the top of the bell crank on the firewall in the engine bay (Part 17). 3) The three ball-end links between the main throttle shaft (mounted on the intake manifold) and each carb's throttle shaft. 4) The various adjustment screws on each carb's barrel. Is the a consensus of where at least the first two items should be set initially? I know that's asking a LOT for the first item. Perhaps just the amount of thread that's inside the adjustable ball joint arm? Can anyone measure the distance between the ball ends on the bellcrank-to-torsion shaft linkage on their car? In addition, there is a rectangular metal piece that goes tight up against the ball joint that gets attached to the gas pedal assembly. I assume it is there as some kind of additional stop for gas pedal travel even though there is a hard stop at the base of the pedal itself. Sorry that the illustration is blurry, but you who know these cars know these parts as well.

-
That Silvermine seal looks a LOT like the door seal profile offered by Precision Replacement Parts (PRP), which is sold not only by them but many auto parts retailers as well. I hope it might work for you. It certainly does NOT look like either the OE real main seal or the one that PRP markets, which I just put on my '72 a couple of days ago. I have to say "markets" here because the parts I got from are not made in the U.S. (but not in China either) although they probably are made to PRP specifications. I do have a question, being a retired research chemist and all: Are you smelling exhaust fumes or are you smelling raw gasoline fumes? If it's the latter, then no outer seal will help as those fumes are coming from the evaporative emissions system (EES) hoses on the rear passenger side of the car. You likely know that after your family has spent 55 years with this car. If it is exhaust fumes (could be bad grommets for those EES hoses) and you are worried about CO poisoning, there are inexpensive portable CO monitors that you can get. One in particular is being offered by Walmart for $41 and you could tape it to the headliner or the inner side of the passenger seat if you have high-back bucket seats. I don't have this unit so I can't really speak to its utility but I'd suspect that the liability exposure of offering something that, if junk, could wind up killing people is a bit too much for Walmart to have ignored.

-
The Z gods must be smiling upon me today as I actually found the part in my cache of "things-I-took-off-the-car-long-ago". And, even better, the AutoZone Duralast gas strut I bought actually fits the brackets at both ends (as promised) and seems WAY stronger than my OE part. I suppose 55 years will take that toll. It, and add a few more years, certainly feels like it has on me some days. Now to media blast both brackets and get some POR-15 on them. Then, it's "hatches away ,me boys." Arrgh.
-
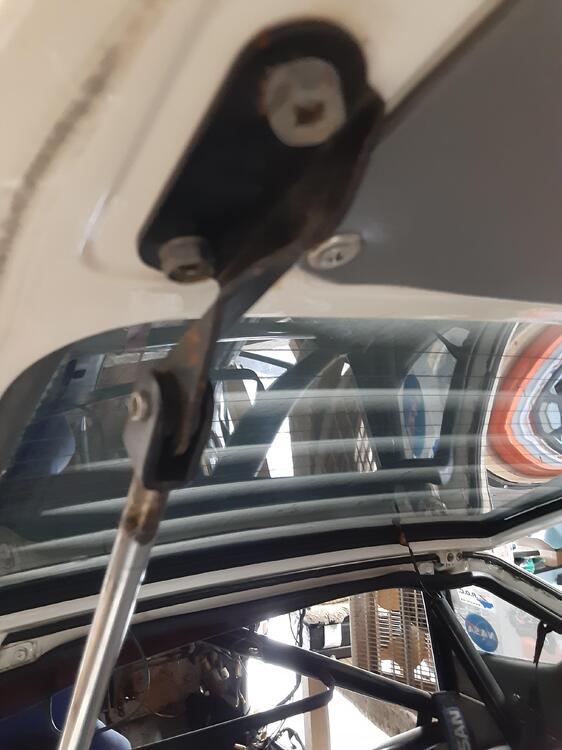
I'm sure it's around here someplace but I can't seem to locate it now that I need it, so does anyone have a spare mounting bracket that attaches to the left side of the hatch on a '72 model. I suppose that I could fab one but I'll try an easier route first. The photo is from my other '72 that will eventually get rebuilt but I'd just as soon not take that one if I don't have to as I'm in and out of that car regularly.
-
Sorry to have dredged up painful memories, @Terrapin Z . You and I drive in rural areas and deer are seemingly everywhere. That's why I'll try to not drive those reaches in early morning nor around nor after sunset when my car gets going again. I once had to go off-road to avoid a deer. Luckily, it only cost me a ripped-off air dam.
-
As do I. I've been watching a hardcore 280Z ground-up restomod on YouTube from BLOK Garage (https://www.youtube.com/@BLOKgarage/featured) and this is the way he successfully went for his brakes so I figured to give it a try as well. Time will tell.
-
Well, if they do leak, I get to send it back to Amazon and then buy one of the higher-end units like what @Patcon has.
-
Maybe name your car Bambikiller II in honor of our old friend and colleague, Carl Stahlnecker? Can't believe it's been 20 years since he passed.
-
@Terrapin Z , don't you just love those VTO Le Mans wheels? I can hardly wait to get my set on my car when it's closer to being drivable, hopefully by the end of July.
-
Yeah, @Patcon , that is a sweet kit. I've seen them online for a bit under $80 but I went with a kit about half as expensive as I'm likely to use it this one time and then, I suspect, it's a (small) boat anchor in my garage. Thanks for the O'Reilly tip, @Zed Head , and I'll take a look at my local stores (O'Reilly, AutoZone, Advance Auto and NAPA) to see what's available. I have some pre-made short metric lines that I bought probably before half of the folks in this club were born and even a couple of those impossible Nissan OE strut-to-caliper S-bend ones.
-
I did notice that "he" only joined CZCC only a few hours ago and has made five posts, most of which are related to photos. But, at least "he" got me interested in doing a deeper dive into flare fittings and I found a very nice, 2-minute explanatory video at Belmetric (https://belmetric.com/brake-end-m10x1-0-double-bubble-flare/?).
-
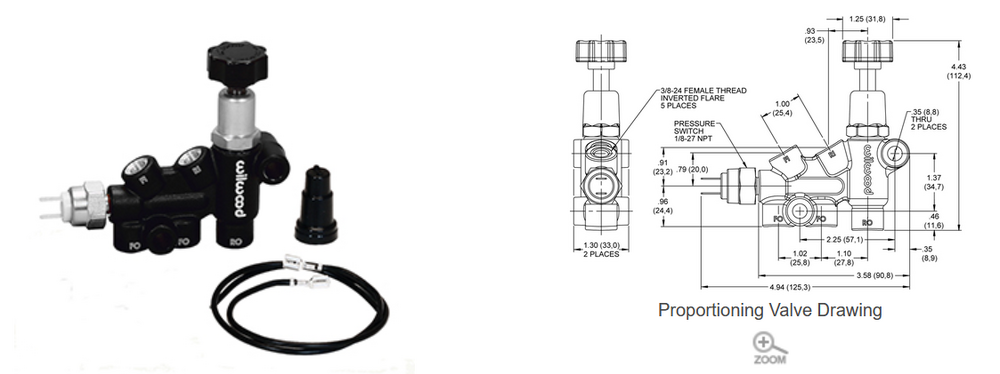
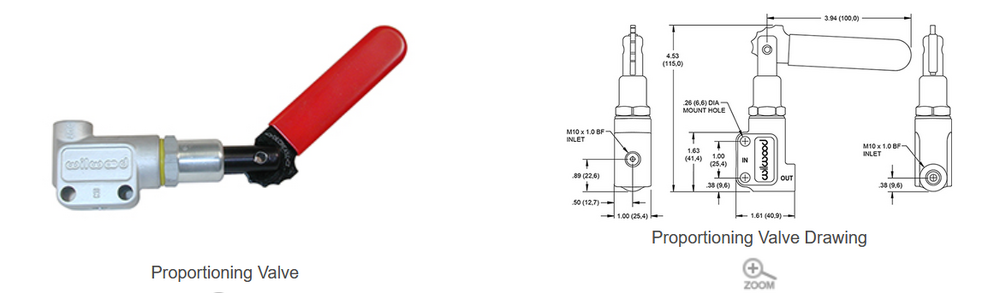
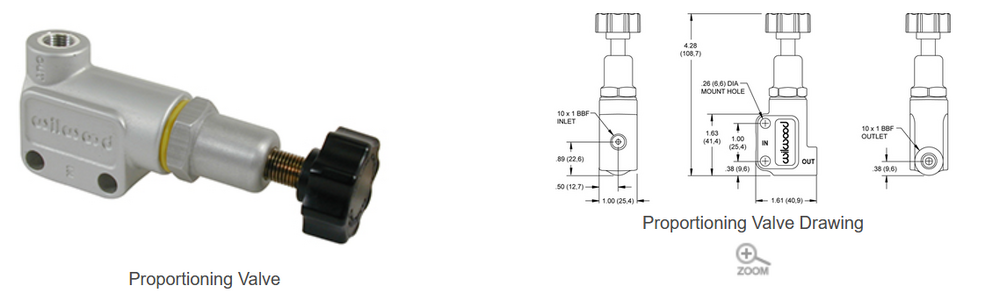
Thanks, @rex_morten , that's clearly the answer I was hoping for as a want to add a Wilwood proportioning valve, which uses 3/8-24 SAE fittings, to my car but don't yet want the expense of going "full-on Wilwood" with a new vac booster and master cylinder as well. It seems odd to me that, because these items have to be machined after casting anyway, that Wilwood does not offer a 10 mm x 1.0 version of their all-in-one valve yet they do offer metric versions of their single line proportioning valve (lever or knob style). I'm going to ask Wilwood about that. Heck, what about offering an 3/8-24 SAE male to 10 x 1 female metric adapter? Does anybody make that?