



DrFeelGood
Community Member
-
Joined
-
Last visited
Everything posted by DrFeelGood
-
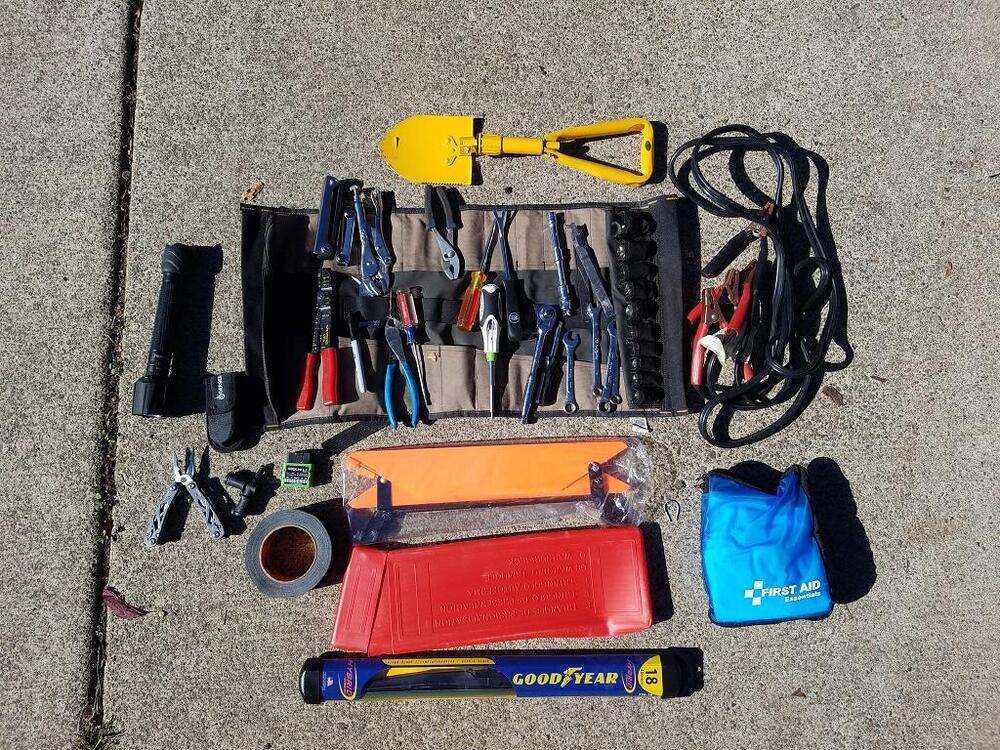
I use McMaster-Carr for most of my specific hardware.In addition to things like first aid kit, Mylar blankets, stable calories, flashlight, points and condenser, jumper cables, fuses and a bulb or two, I take a tool roll, flares, safety triangle, replacement wipers and a small utility shovel (winter travel). (OBD II tester is for the other vehicles in the fleet.)
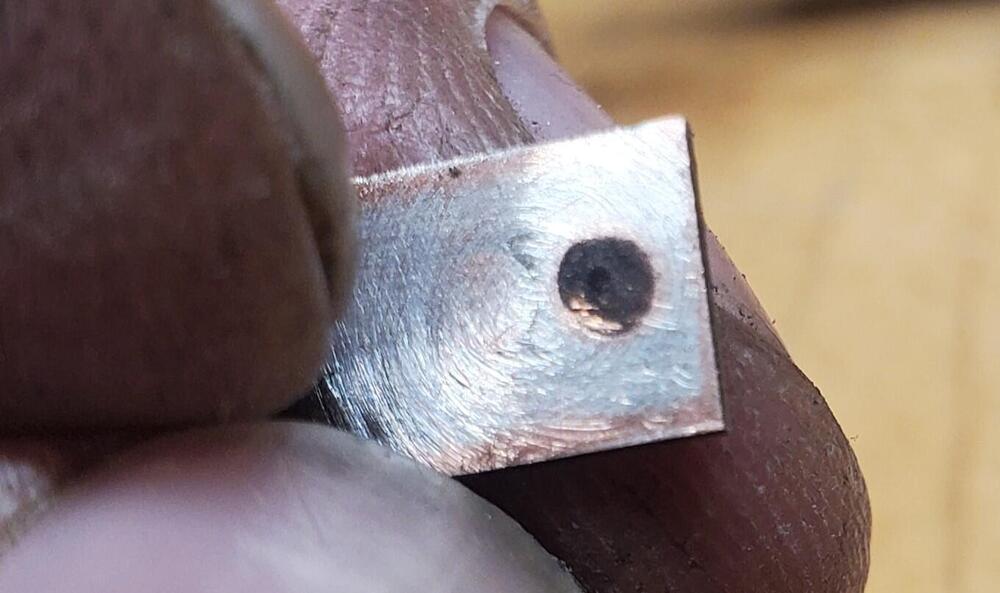
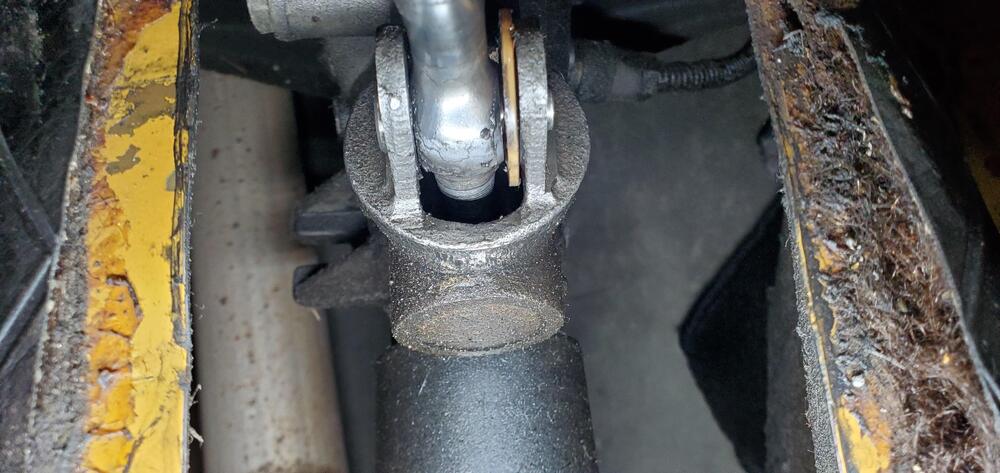
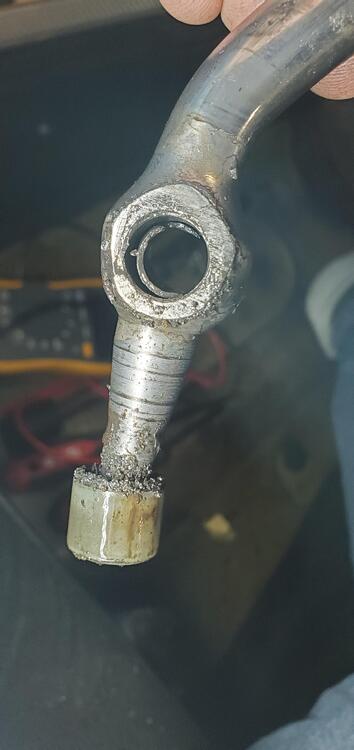
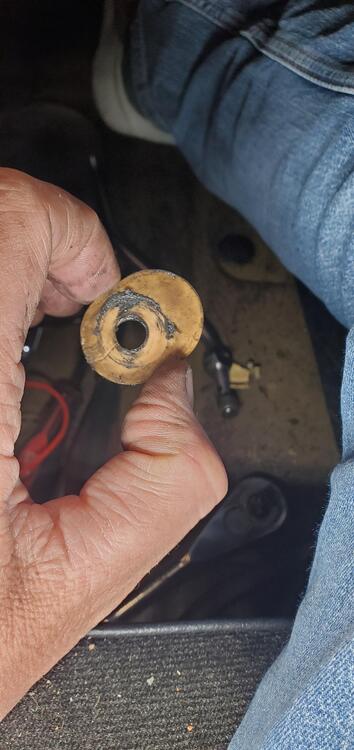
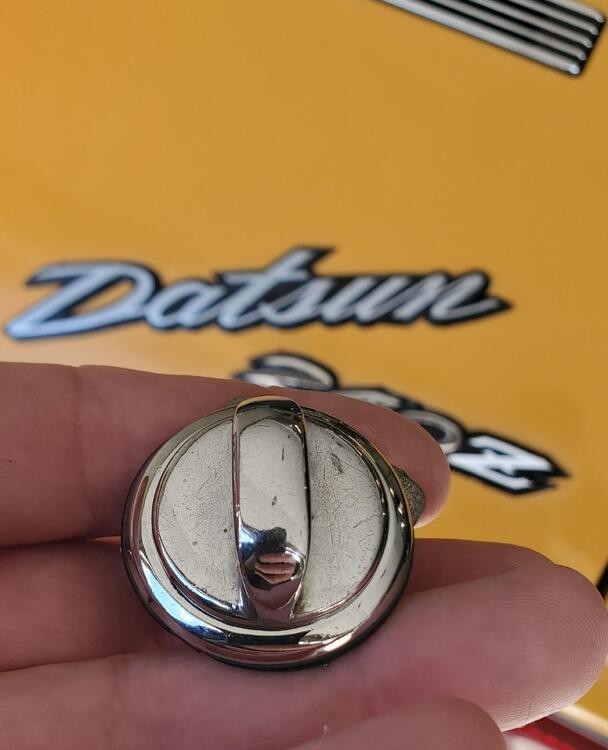
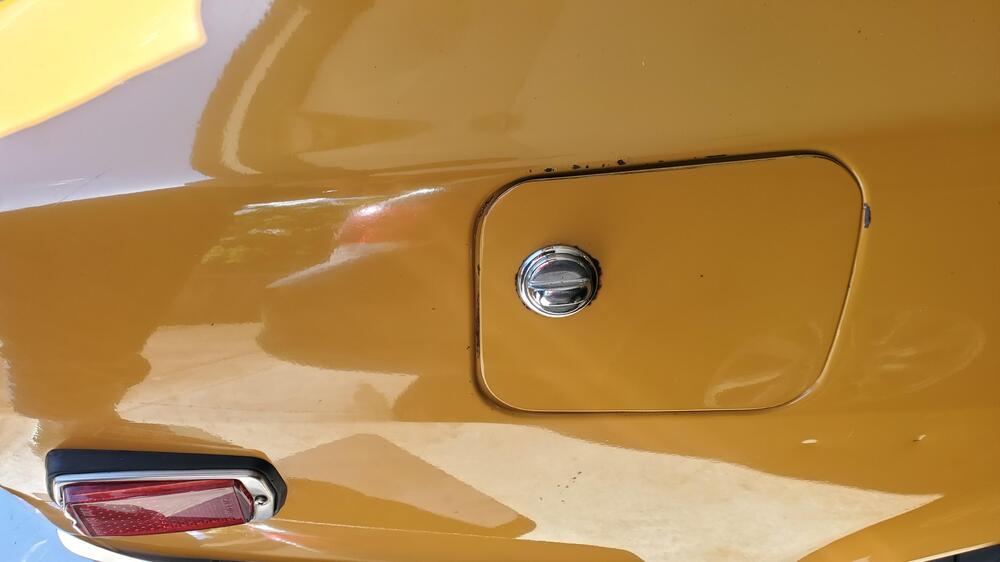
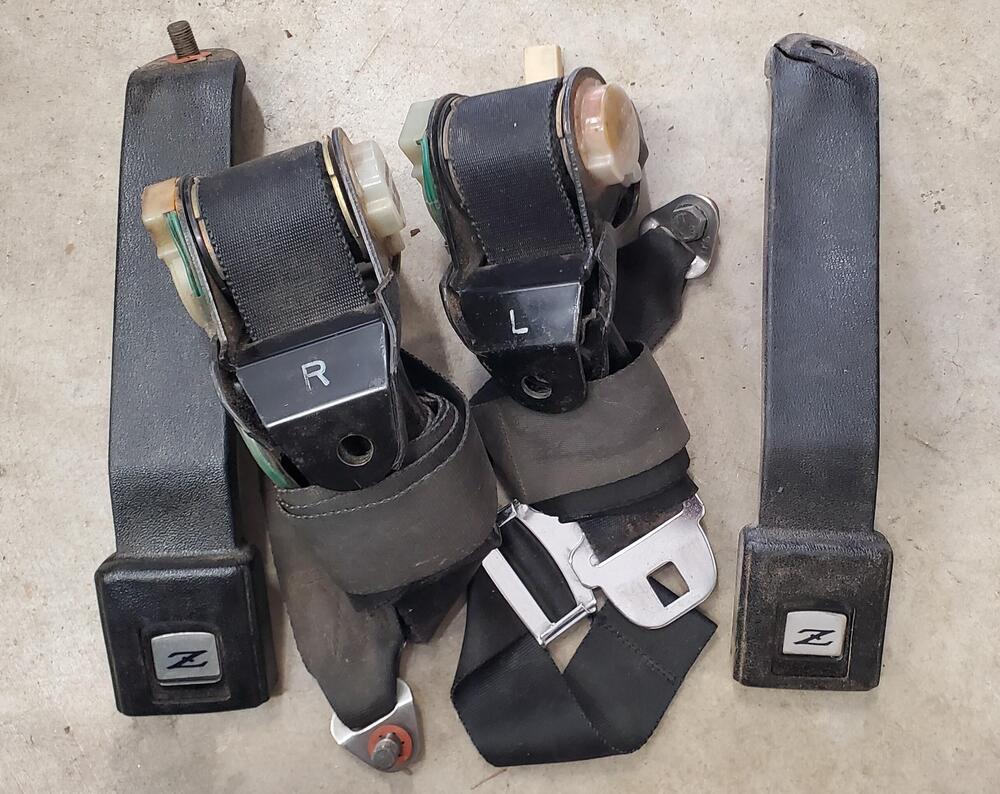
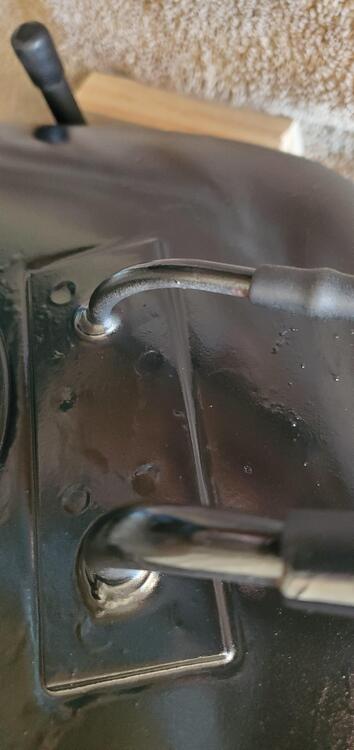
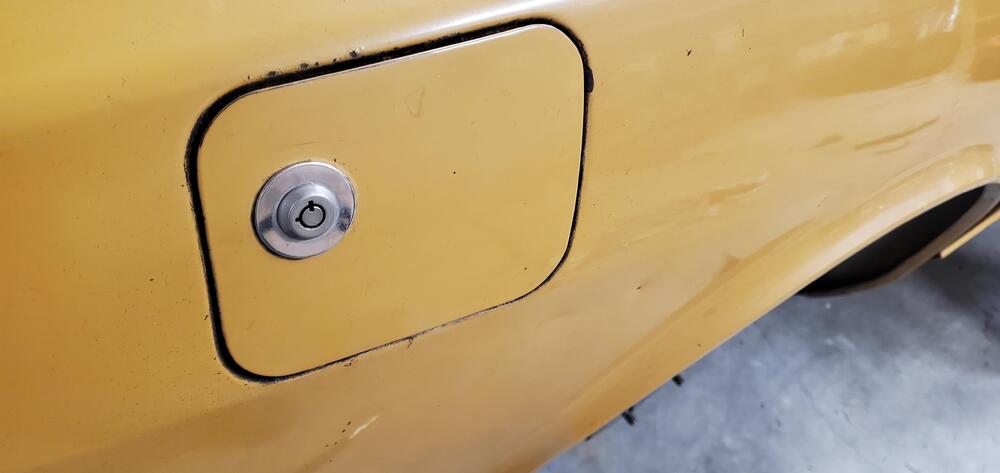
 I was able to get a few more little things done recently. The lights were not doing well. Turning on the headlamps would result is a warm glow that developed after about 3 seconds. I could probably read by them if I gave my eyes time to adjust. Reminiscent of teh glow of the Milky Way on a moonless night but without with magic. Opening the headlamp, wiper and turn indicator switches revealed evidence or arcing and some pretty knackered contacts. I was able to use a punch on the back side of the contact plate to remove the arc craters (not pictured above). A rotary tool with a wire attachment made quick work of the remaining contacts. This change saw an immediate improvement in headlamp function. The high beams even work now! I have a Koito H4 headlamp conversion, complete with wiring harness and relays, sitting in a box that I picked up for $19.59 (thanks to this site) waiting to go in. When the Parking Light Upgrade Harness arrives from Motorsport Auto I will tackle both. The parking light harness will likely be less useful after the switch to LED bulbs (which I also did since last post) but anything to avoid another melted fuse box is welcome. I also switched all the marker reflectors for new units that were completely rust free. It has always fascinated me to see how the Japanese in this era approached manufacturing. I had a Landcruiser FJ40 from the mid-seventies and it was basically the same approach. The moment it is revealed that there is a problem or flaw in design, it is corrected, even mid-production. The marker lights I had for replacement used different plug strategies. In my car, (Jan 1971) the side marker lights remove with two male bullet plugs attached. The donor Z has a male on the positive and a female bullet receptacle on the negative. This is the way I would assume it to be in order to avoid connection confusion. The early car is not like this however. Some quick soldering and the plugs on the marker lights were converted to the older style. Additionally, the front marker lights, have rubber gaskets that are molded into fully contained rubber hoods. I like this style better even though it is not year correct. We are well past that now. It's funny to think that all this started from a broken horn contact switch. I just want to honk those beauties up front with my newly refurbished steering wheel and horn button that does not fall into my lap every time I press it. In removing the center console to try and reason why the horn fuse was the only one missing, I noticed a few additional things that were suspected issues. The most glaring from a drivers perspective, was the shift mechanism. It was a little like stirring a pot of oatmeal. A veritable "choose your own adventure" of gear selection. It appears that there is no bushing left in the selector lever but there is a portion of another later model bushing that was used as a shim but that is just a guess. I will try and use one of the brass shifter bushing kits from ZCarDepot. 🤞 In combing through the boxes of extra parts (again) it seems I missed two items. First item I missed was the original metal fuel door latch. There it was, wrapped in a plastic bag. Ahhhhh! I also found all the parts to the original "aviator" style seat belts (not pictured). They were wrapped up inside a set of retractable belts (pictured). So now I have the original early aviator style (which I love) and a set of push button belts I suppose that is all for now. Cheers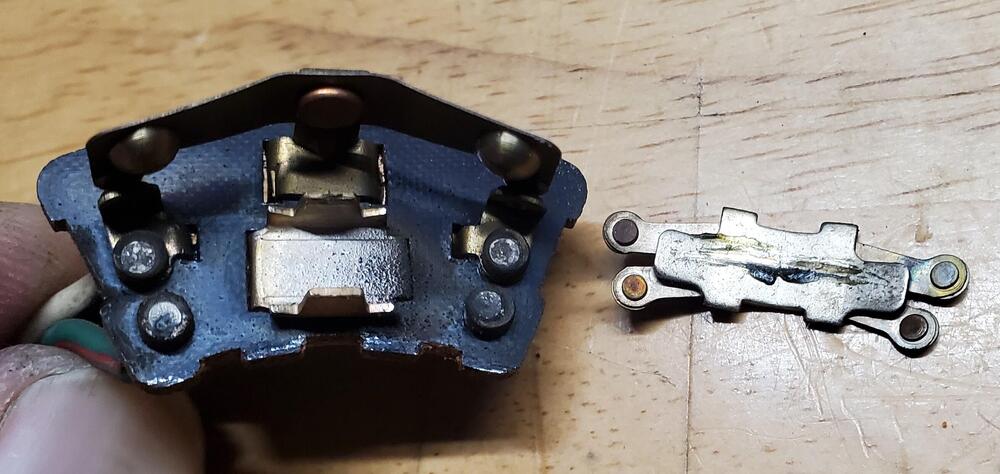
 This is also now available. https://zcardepot.com/products/radio-delete-cover-plate-aluminum-or-plastic-240z-copy?_pos=3&_sid=7b12cbc71&_ss=r
 Hello everyone. I seem to be getting some conflicting wiring information from the various diagrams available. I was hoping you could all help me verify what some of the wires on my car are for. It is a Jan/1971 wiring harness with a 1972 dashboard and 1972 center console and fuse box installed ( I believe. There has been a bunch of extra stuff done for aftermarket radio, choke light that is illuminated whenever it is pulled and an always hot alarm blinkey LED.) CENTER CONSOLE BEHIND RADIO Blue circle - Large blue wire not connected to anything wrapped with blue tape. Is this the power lead for an AC? Red circle - Is this the power and illumination (+) for the radio? Green circle - Black with white stripe and green. Is this the wiring for electric fuel pump? Violet circle - No idea what this is for. Orange circle - connected to fan control. I am guessing fan switch and illumination but I cant match the colors. PASSENGER (RIGHT) KICK PANEL White circle - Step light wiring? Thank for any help and confirmation. It all started with trying to check if it was safe to insert the horn fuse (currently not installed) to get it working on my steering wheel refurbish. Now the whole car looks blown up. What the heck is this.... take it apart...discover something else wonky....take it apart...repeat.... [face palm] I love it.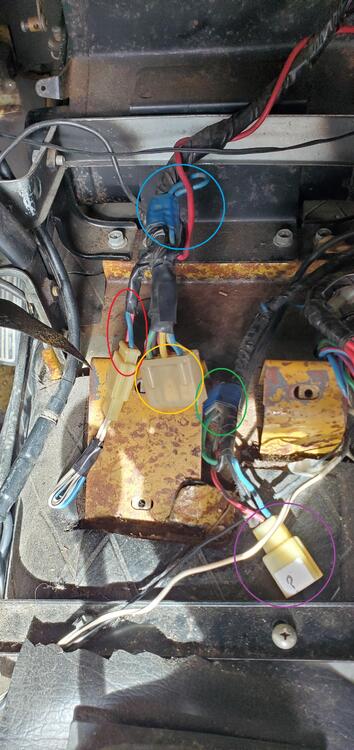
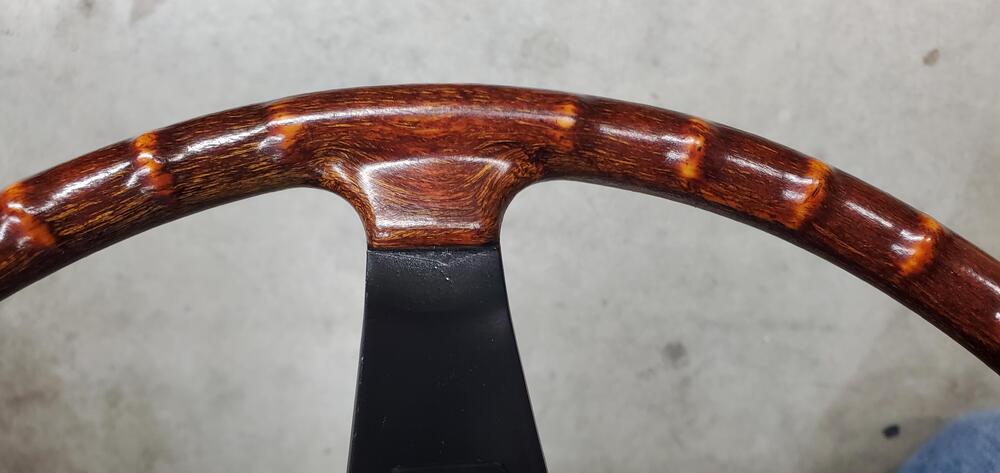
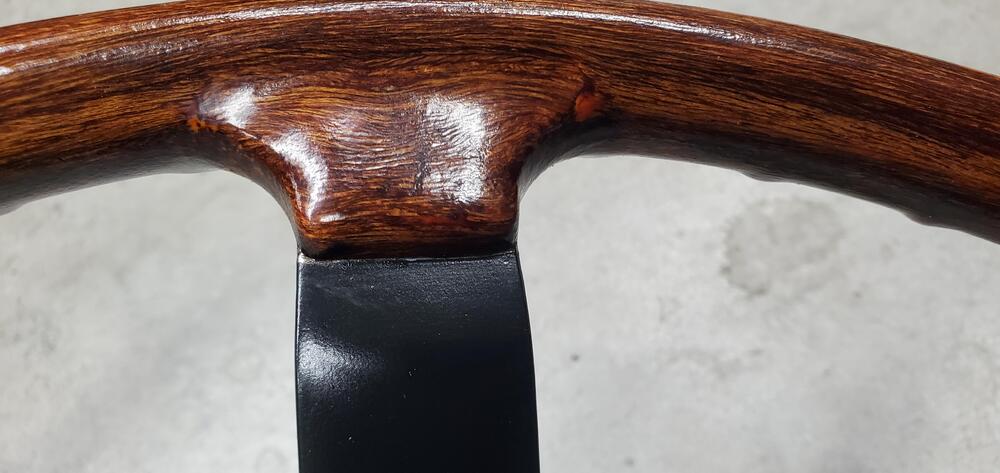
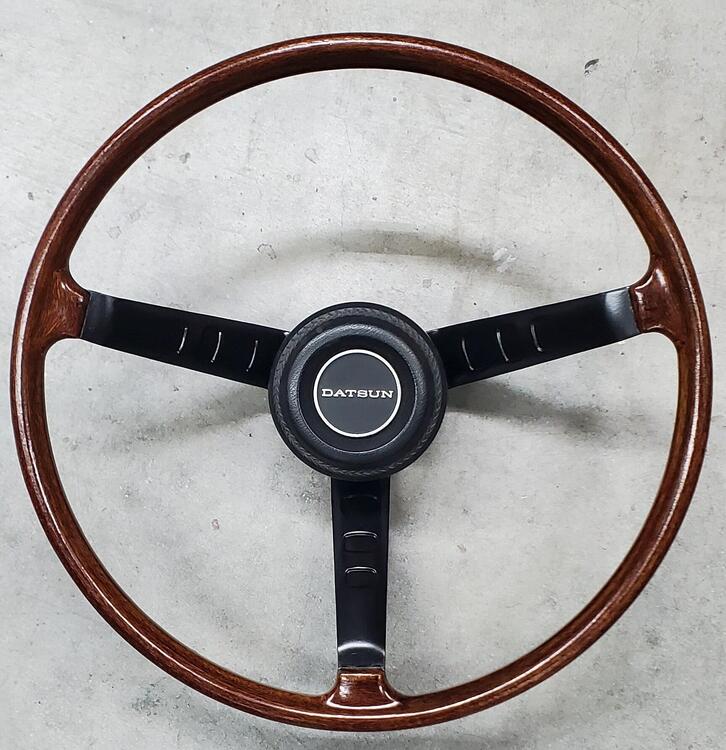
 Been busy at work so just a little time in the evenings. I have been working on the steering wheel and am pleased with the results. I stripped the spokes to metal and painted with 2 light coats of VHT engine primer followed by 3 coats of VHT engine GM satin black enamel. I then sanded the rim smooth and finished it with 600 grit and 00 steel wool. The spokes were prepped with acetone before painting and the rim with isopropyl alcohol. I coated the rim with 3 coats of Helmsman Spar Urethane in warm semi-gloss. One light and two medium coats until it flowed smooth with about 20min in between coats. I kept it moving the whole time spraying in my hand and immediately used the hair dryer for a few minutes on high heat, low fan to set the application so it didn't slump or run (just in case). Ambient air was 72-76 degrees F and around 50% humidity for all the days. The color is just the wheel with no stain. It really is a beautiful thing, this 240z wheel. I love its simplicity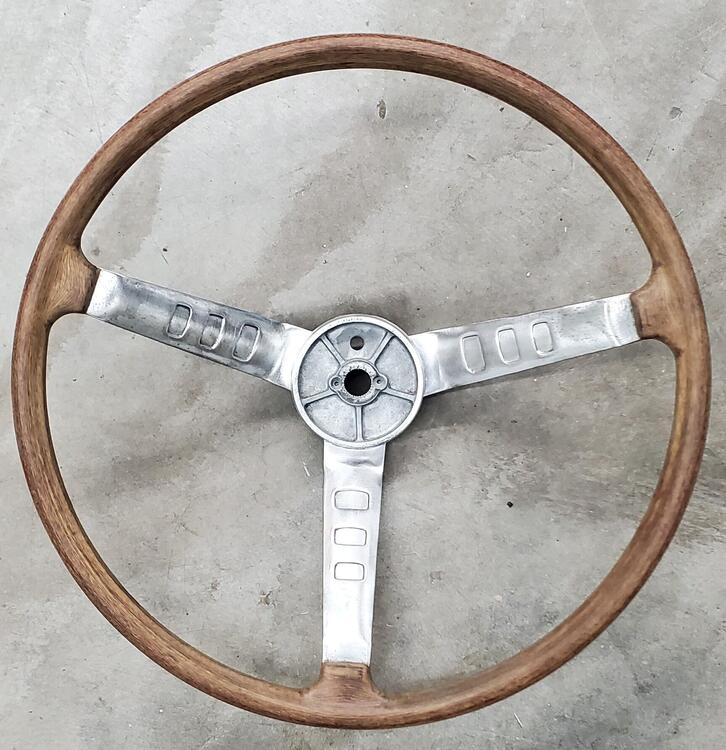
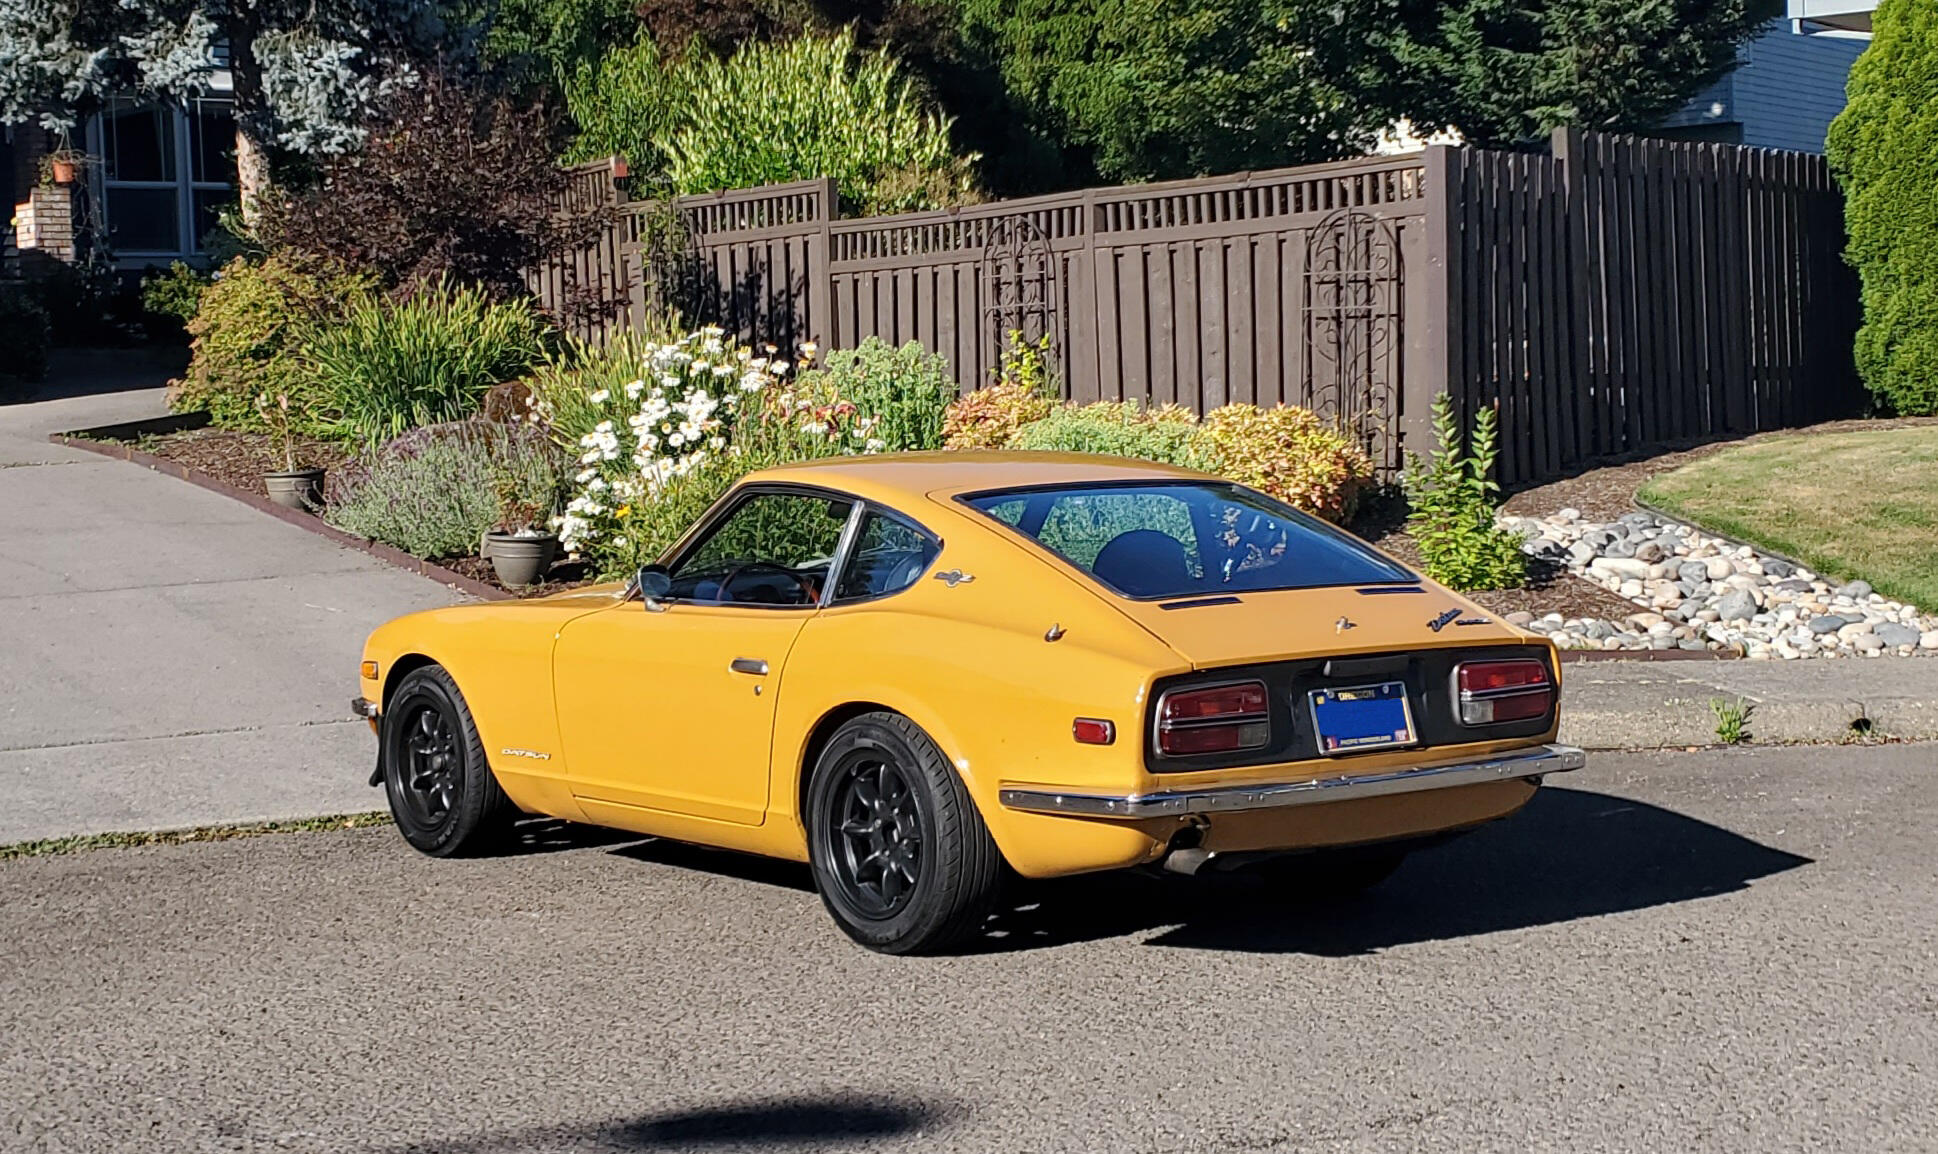
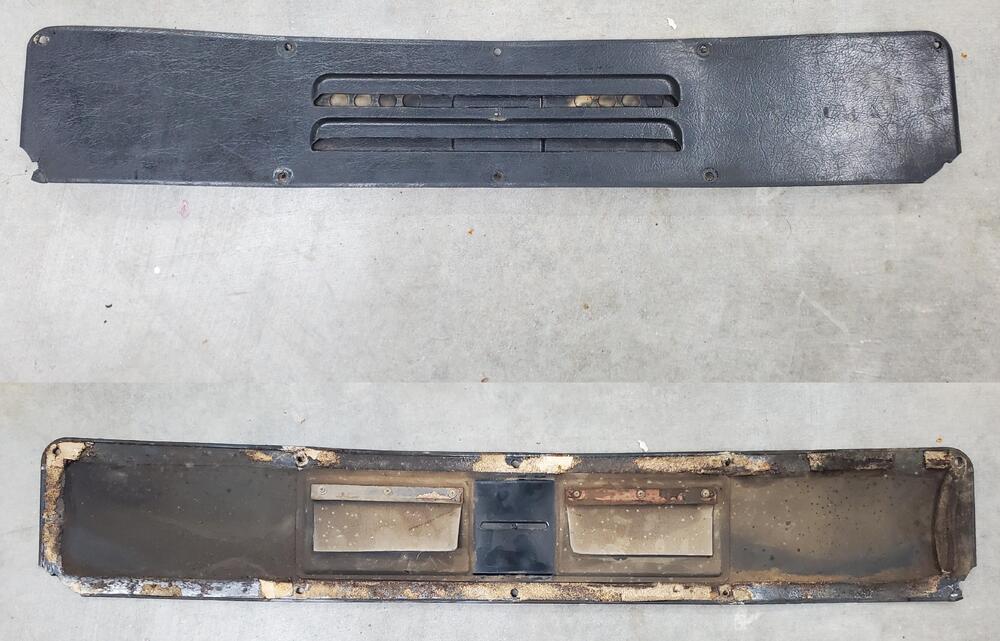
 While I was waiting for the repairs to the cracked fuel tank, I took the opportunity to clean up and refresh the tail section a bit. Some fresh paint and stainless hardware, new tail seals and lights that were in much better condition than what was installed really made a difference. The wiring connectors on the "new" tail lights were different than what I had, but swapping the whole bulb harness was easy enough. Maybe series 1 and series 2 differences... :shrug: I also removed and painted the metal hatch emblems, replaced the vents, and replaced the lift strut. I need to still figure out why the gate makes noise when I drive. The latch is retracted all the way so it probably needs new seal rubber. Still working on the interior hatch vent as it is pretty rough. I also replaced the bald hockey pucks that were installed on the wheels. Selecting tires is always such an unknown, but I settled on a Yokohama Advan Fleva V701 in a 205/55R15 on the Panasport FZ 15x7 wheels. It feels pretty good. I am running 32 PSI for lack of any reference yet. Still so much to clean. I am basically just distracting myself from getting into the carburators as it is running a bit rich and doesn't seem to be improving. I CAN now open the hood without fear of breaking the handle so there is some real utility to cleaning. I replaced the front bumper strip (rear to come) with aftermarket units from Resurrected Classics, so now I don't ruin pants when I walk too close to the front. The over riders will be dressed with rubber from Vintage Rubber shortly. I gotta stop spending money.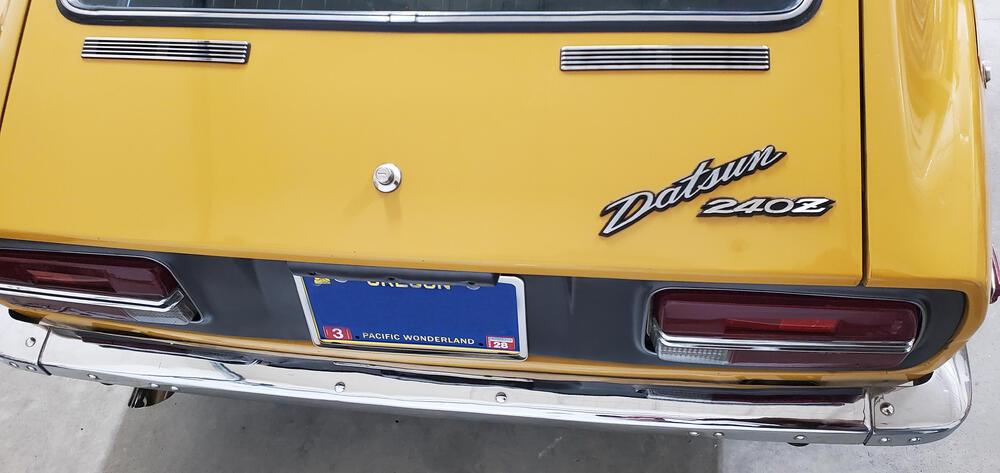
withYokohamaAdvanFleva215_55VR15Tires.thumb.jpg.089703c6fe71f81604a11df49d57add6.jpg)
 Came here with this exact question. I am trying to rebuild the interior portion and source the rubber flaps and foam trim. Thank you.My Original 1971 has those clips with metal emblems. FWIWOld thread I know but, my one owner 01/71 has metal rear hatch emblems and the 240 has a white 'Z'. Don't pry these up from the deck surface but rather pry the clips off the posts from the underside.
metalreardeckemblems.thumb.jpg.3c361f23e67da34f9f456e06fe5663d1.jpg)
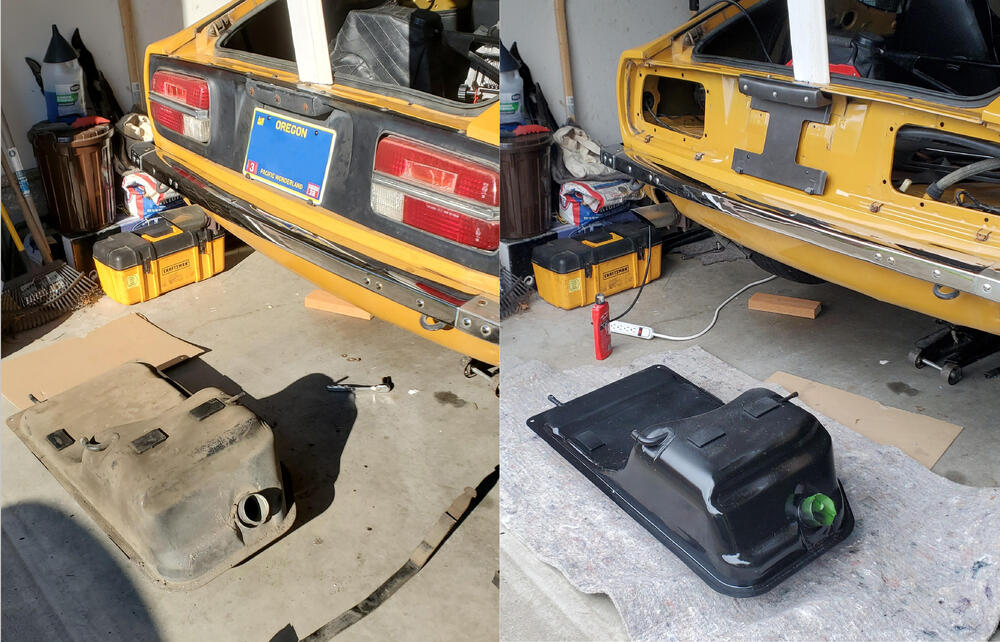
metalreardeckemblemsunderside.thumb.jpg.aba63827f45095a366179f8e520bc165.jpg) MyMechanics dog leg repair You all have probably seen this by now...My father installed a Pioneer 8-track that doubled as an armrest in the center console. Epic sound system back then. Lots of CCR and Rolling Stones played on that in my youth with dad. I still distinctly remember the whirring sound of that antenna going up and the click-click-click whet it was at the top.This is the answer. TYFuel tank back from the shop and after applying the new insulating rubber to the holding straps, taking the opportunity to replace hoses and clamps, and cleaning up a ground point, its back on the car. One thing I noticed was there was no drain plug washer when I removed the tank. It did not leak from here but after looking it up online there is a part number for the plastic washer. I purchase and installed it but it does not look right. Fingers crossed, hopefully nothing leaks.
MyMechanics dog leg repair You all have probably seen this by now...My father installed a Pioneer 8-track that doubled as an armrest in the center console. Epic sound system back then. Lots of CCR and Rolling Stones played on that in my youth with dad. I still distinctly remember the whirring sound of that antenna going up and the click-click-click whet it was at the top.This is the answer. TYFuel tank back from the shop and after applying the new insulating rubber to the holding straps, taking the opportunity to replace hoses and clamps, and cleaning up a ground point, its back on the car. One thing I noticed was there was no drain plug washer when I removed the tank. It did not leak from here but after looking it up online there is a part number for the plastic washer. I purchase and installed it but it does not look right. Fingers crossed, hopefully nothing leaks.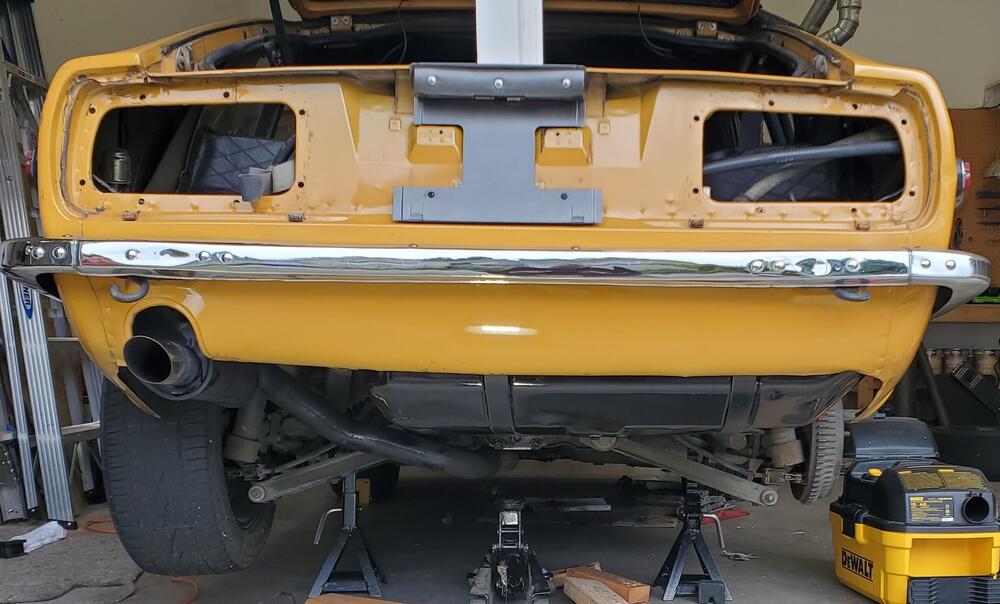
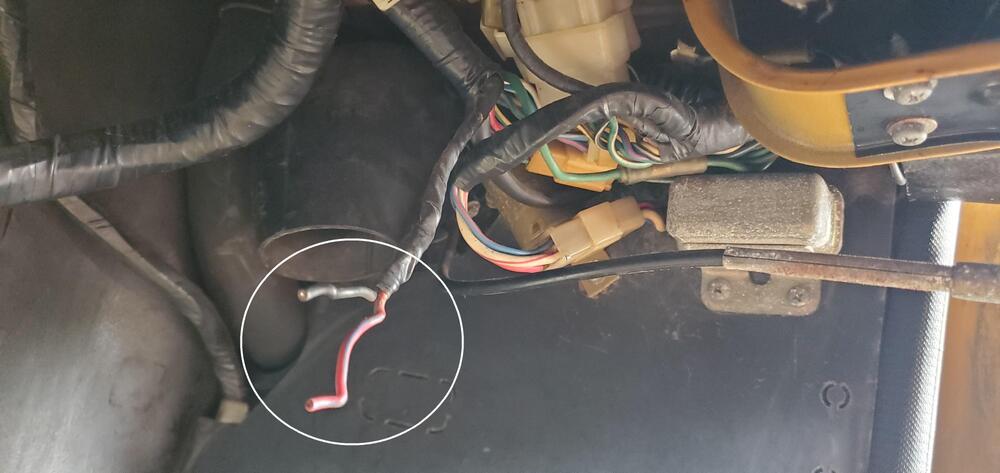
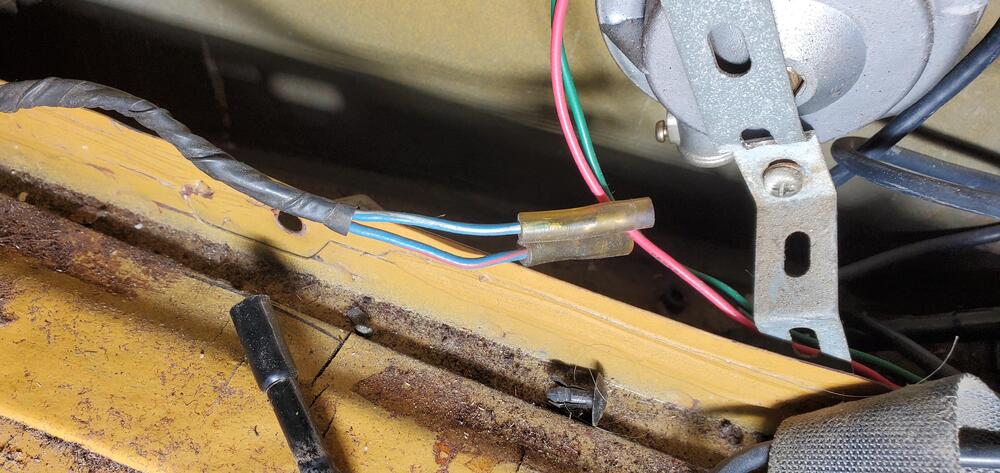
 I believe Harbor Freight also has an inexpensive kit.@SteveJ Thank you. Of course that's what it is for.Hello everyone. I have been working my way through issues with my 240z acquisition and am generating more questions for the forum than answers (net negative member). Thank you for your patience and help. I have the OEM wiring diagram, (purchased in 1971 by my father) and some others including a fancy place-mat color diagram from ClassicCarWiring.com (not affiliated). I cannot seem to find what the additional wires are for, stemming from the left rear marker light harness. The wires are white and white/black. I do have the antenna wires back here as well but they are currently not attached to the aftermarket (guessing) antenna as there is no radio (I only ever needed to listen to the glorious inline-6 ) Does anyone have any idea what these wire are for? Thank you.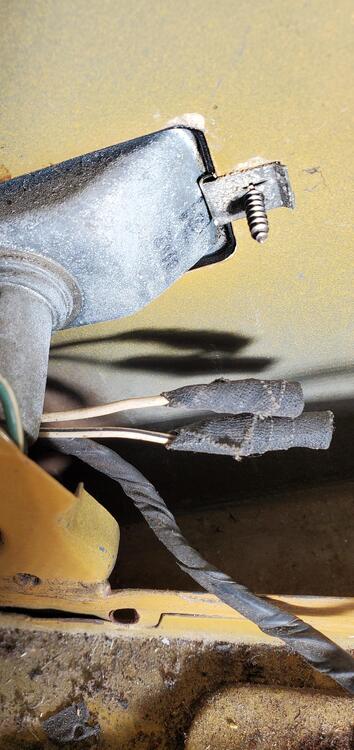
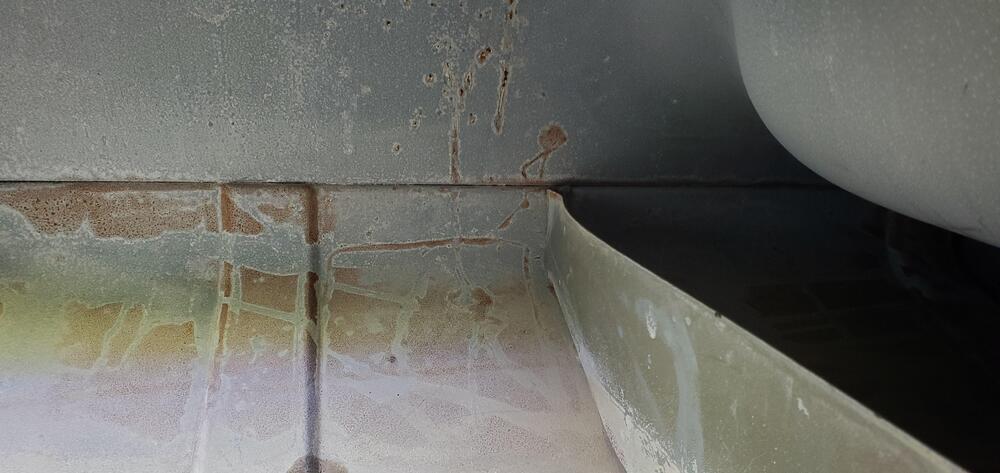
 I would have loved to know what they used as well to create a safe brazing environment. The workman was not around when I retrieved it, sadly. When I picked up the tank I could not smell fuel like before so maybe steam? The inside looked the same as when I dropped it of however, which is to say pretty clean, thankfully. They did pressure test the tank. Those plugs were mine. Nice to see they persisted. We do have some cool places around still. I didn't know about that one but one of my favorites is W.C. Winks Hardware. Another gem is Hippo Hardware & Trading Co.To circle back and close up for posterity. I did find a local Portland, OR shop that does fuel tank work still, (Macs Radiator - Portland). The previous soft solder was removed. Both of the joints and support plate were cleaned then hard soldered (silver solder). I then had them media blast the tank exterior (my 240v A/Comp is not up and running). Summary: Tank bath and weld shop repair (Oregon, April 2026) = $168.50 Same job done with soft solder (California, May 1993) = $105.00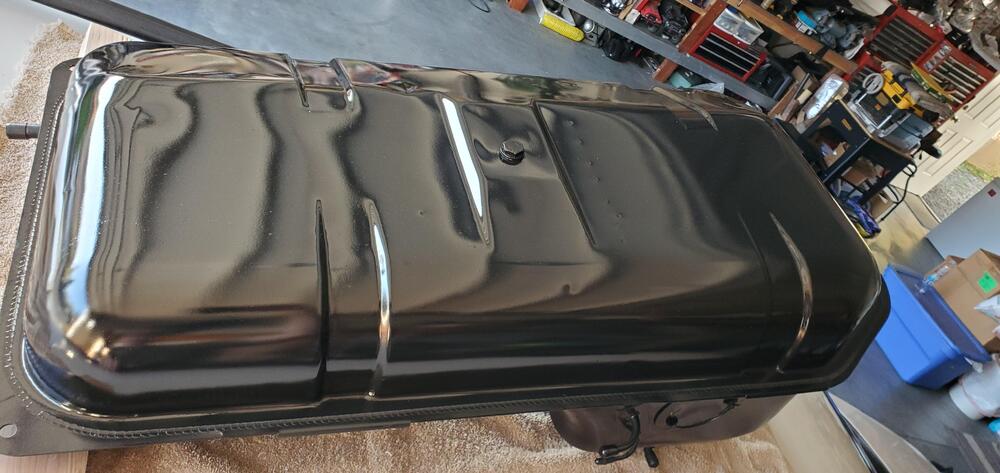
 @Terrapin Z Thank you for replying.Hello everyone. I have gone through all the boxes I have (I think) and cannot find the original fuel door latch that the little orange zed came with. Somewhere along the line my brother swapped it for a lock cylinder. I think someone siphoned his gas in the city at one point. Does anyone have a lead on this part? I remember it being metal. Thank in advance for any help you can give. Cheers
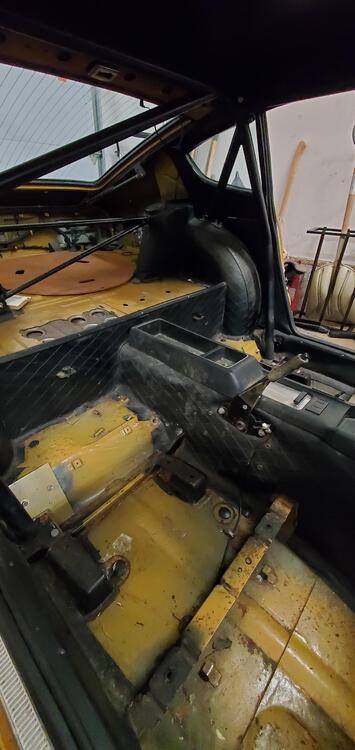
 Well, I did get the Safety Designs roll cage removed so now I fit a little better. I still cannot adjust the drivers seat back to teh final notch but I also have not disassembled it yet. I will wait until I get the correct seat covers and can get rid of the "velour" ones installed now. I did move the cage onto another local Z-owner. New home acquired for $375. In 2001, it was purchased new for $699. This feels more than reasonable for 25 year used safety equipment. That money goes right t back into the zed of course. I will have to weld the holes closed and figure out a fix for the rear wheel arch covering that was cut for the bar mount. I likely will put rubber stoppers in there for the driving season.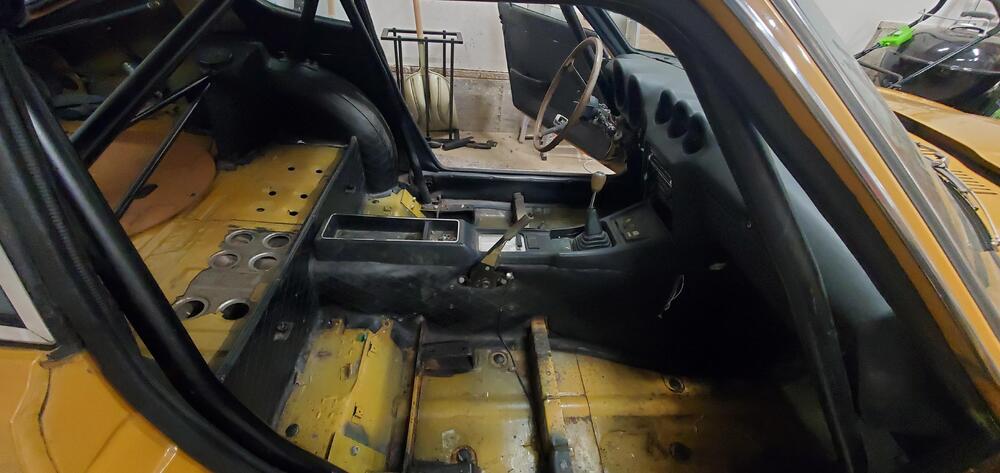
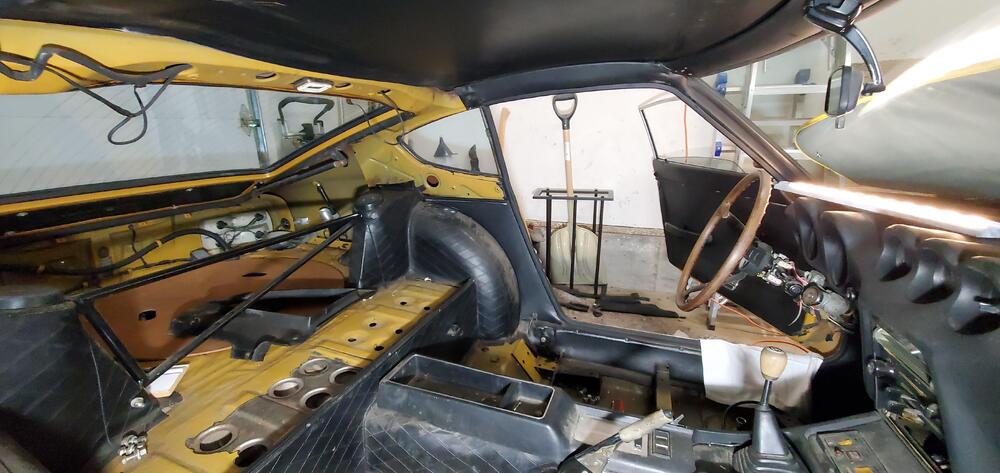
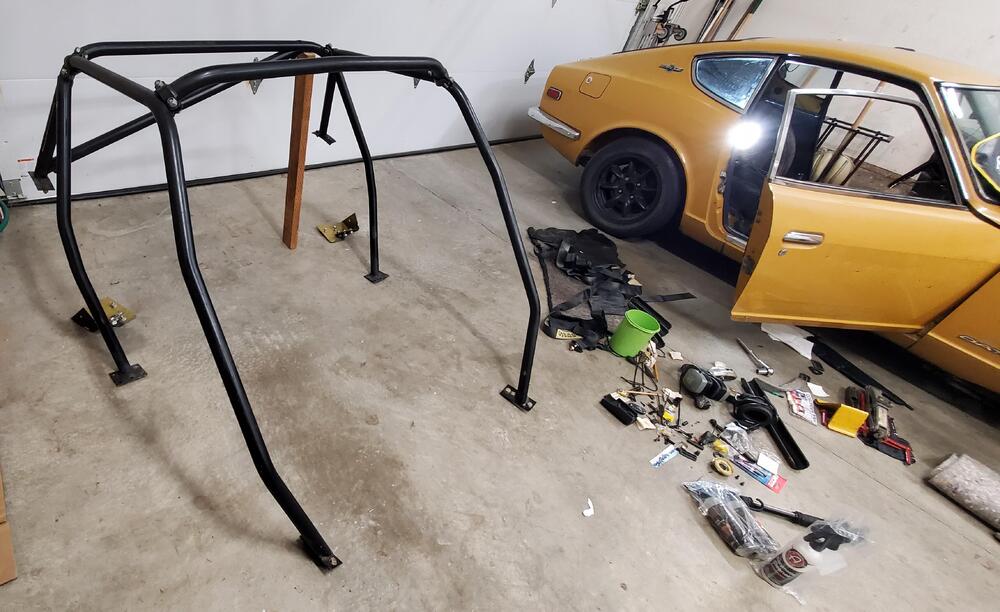







withYokohamaAdvanFleva215_55VR15Tires.jpg.a4c93ca6dd3f4588e94df25630891b95.jpg)


metalreardeckemblems.jpg.620e90d8317108bd7e838192eb3a75e3.jpg)
metalreardeckemblemsunderside.jpg.099c22e3c5f727d7eecb48c8ece6e61a.jpg)


Important Information
By using this site, you agree to our Privacy Policy and Guidelines. We have placed cookies on your device to help make this website better. You can adjust your cookie settings, otherwise we'll assume you're okay to continue.