Inf
Community Member
-
Joined
-
Last visited
Everything posted by Inf
-
My only experience with courtesy was in person. I drove over and went in to buy some shift bushings last year, the guy behind the counter was very cold and unfriendly. Suffice it to say, I avoid doing business with them now. I would much rather take it to midwestZ whenever possible. I wasn't around when MSA was 'in their prime,' but ordering some stuff from them earlier this year did not leave me with a positive feeling. The job they did on packing my stuff was very poor and i'm amazed it arrived without any major damage.
-
Hrmm, I think i'll give that a try. There aren't any sensitive components mounted in that backplate really, just the power input leads and the negative trigger lead. If the ~0F of the regular freezer isn't cold enough, I will try getting some dry ice or something and make just the back of the housing cold. I don't want to make the whole thing extremely cold since i'm not sure how the caps and other parts on the main board will take it. I've been taking a ton of pics so I will probably throw a little writeup together if I get everything working.
-
And here is a picture of the inside of the tach housing. Note : there didn't seem to be any residue left on the housing from the glue/putty once it came free.

-
Today I started started on swapping out my 240z 4-wire tach internals for a 280z 3-wire. I've already figured out the wiring, so that's not the issue here. Have any of you guys found a trick to getting that second PCB off the back of the tach housing? In the tach from the 240Z it was glued on by some bondo-looking stuff, and I only managed to get the board off by using a punch on the hardened-putty stuff from behind (and shattering the PCB on the other side of the putty in the process). This isn't a big deal, since I am swapping it out anyway, but the 280Z tach has the same stuff holding the back board down and I certainly don't want to damage this one too. Attached is a picture of the stuff in question that was between the back PCB and the housing.

-
-
-
Find the notches on the dampner when the engine is not running and clean/mark them with some whiteout or something similar. They might just be filled in with road grime or something.
-
So I guess animal and inmate are the same person? Edit : also, my vote goes to MikeW's from the previous thread on the same topic
-
What year is the car? On my '72 240Z there is a connection on the front carb where a line connects to the diaphragm on the distributor. I'm attaching a picture of the connection, the line the arrows point to is the one that runs to the advance on the dizzy Purists, forgive me for using fuel lines for vacuum stuff!

-

From the album: Reference pics
My temporary fix on one of the plastic insulators inside the combination switch (I just used an epoxy). Seems to be working well so far after putting everything back together -
 Thanks for the comments, I'm not exactly sure what year Nissan was putting these wheels on S30s, I have seen them on a whole lot of 260s and 280s
-
I briefly did some research and found that Trust is mainly known as Greddy (http://www.greddy.com) here in the US. The US website for greddy didn't seem to have any stuff for the S30, or any products marketed as Trust. The Japanese website for Trust is http://www.trust-power.com . I poked around with my limited knowledge of japanese, but couldn't seem to find anything for the S30 other than an NA exhaust manifold, and a pretty nice looking stainless twin turbo manifold (but expensive! 190,000 yen). I saw a new (or maybe NOS?) Trust 432 style exhaust system on ebay a while back, and it had a pretty high base bid. Don't remember if it ended up actually selling or not. Edit : found it by searching the forums - http://cgi.ebay.com/ebaymotors/ws/eBayISAPI.dll?ViewItem&category=33630&item=2459181642 According to the seller the parts are discontinued. It would probably be cheaper to have someone local put one together anyway I would expect.
-
Thanks for the pic and reply Alan, this will be a useful reference. Andrew
-
-
-
-
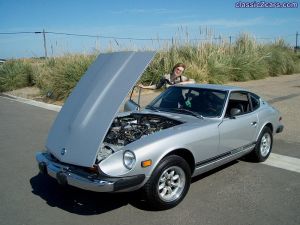
 After a 2 day marathon to put her back together for this great weather, I took a pic on top of the parking garage at my university.
-
Thanks for the reply v12horse, I was thinking of gathering together some pics and finding a decent exhaust shop to fab up something similar connected to set of 3-2 headers without the collector. This will help a lot. Pics of the system installed would also be very useful Thanks
-
I searched the galleries and couldnt find any pics of the 432 exhaust plumbing (based on keywords people put in). Could someone post a pic of the underbody with a good view of how the twin pipes are arranged? Thanks in advance
-
That just takes more energy. There is no free lunch.
-
Bullitt had a pretty good chase scene I didn't much care for the chase scene in the new 'Gone in 60 Seconds' movie since all the camerawork involved really tight shots that made telling what was going on a little difficult. It also loses points in my book for using CG in certain parts.
-
Great photos posted in this thread. I really love the 2000GT
-
Well, I guess i'll be taking the front cover off then Thanks for the pic dspillman, from the length of the threads that are left it seems pretty likely that a decent amount of the bolt will be sticking out from the block. I looked in with a borescope and did not see where the front cover ended.
-
Could someone post a picture of the OEM water pump mounting hardware? I remember seeing Chloe post it on midwestZ a while back. I need it for a reference to know how long it was and if these are even the correct bolts (darn that PO!)
-
Well, I just learned a very important lesson, and I guess it will prove to be a very costly one too. I was installing my new water pump, and decided that the original bolts looked ok. Wrong! I guess years of heating up and cooling down created some small cracks in one of them. Just now one of the bolts (one of the LONG ones, the one at the 10 o'clock position looking from the front) had its tip break off in the front cover under about 5 ft-lbs of torque. Just about the last 1/4" of it I would estimate. Anyone have any ideas as to how to get this out? It's not easily accessible since it is about 2-2.5" back in the hole where the threads start. I really want to avoid taking the front cover off to get at it if at all possible. TIA