grannyknot
Free Member
-
Joined
-
Last visited
Everything posted by grannyknot
-
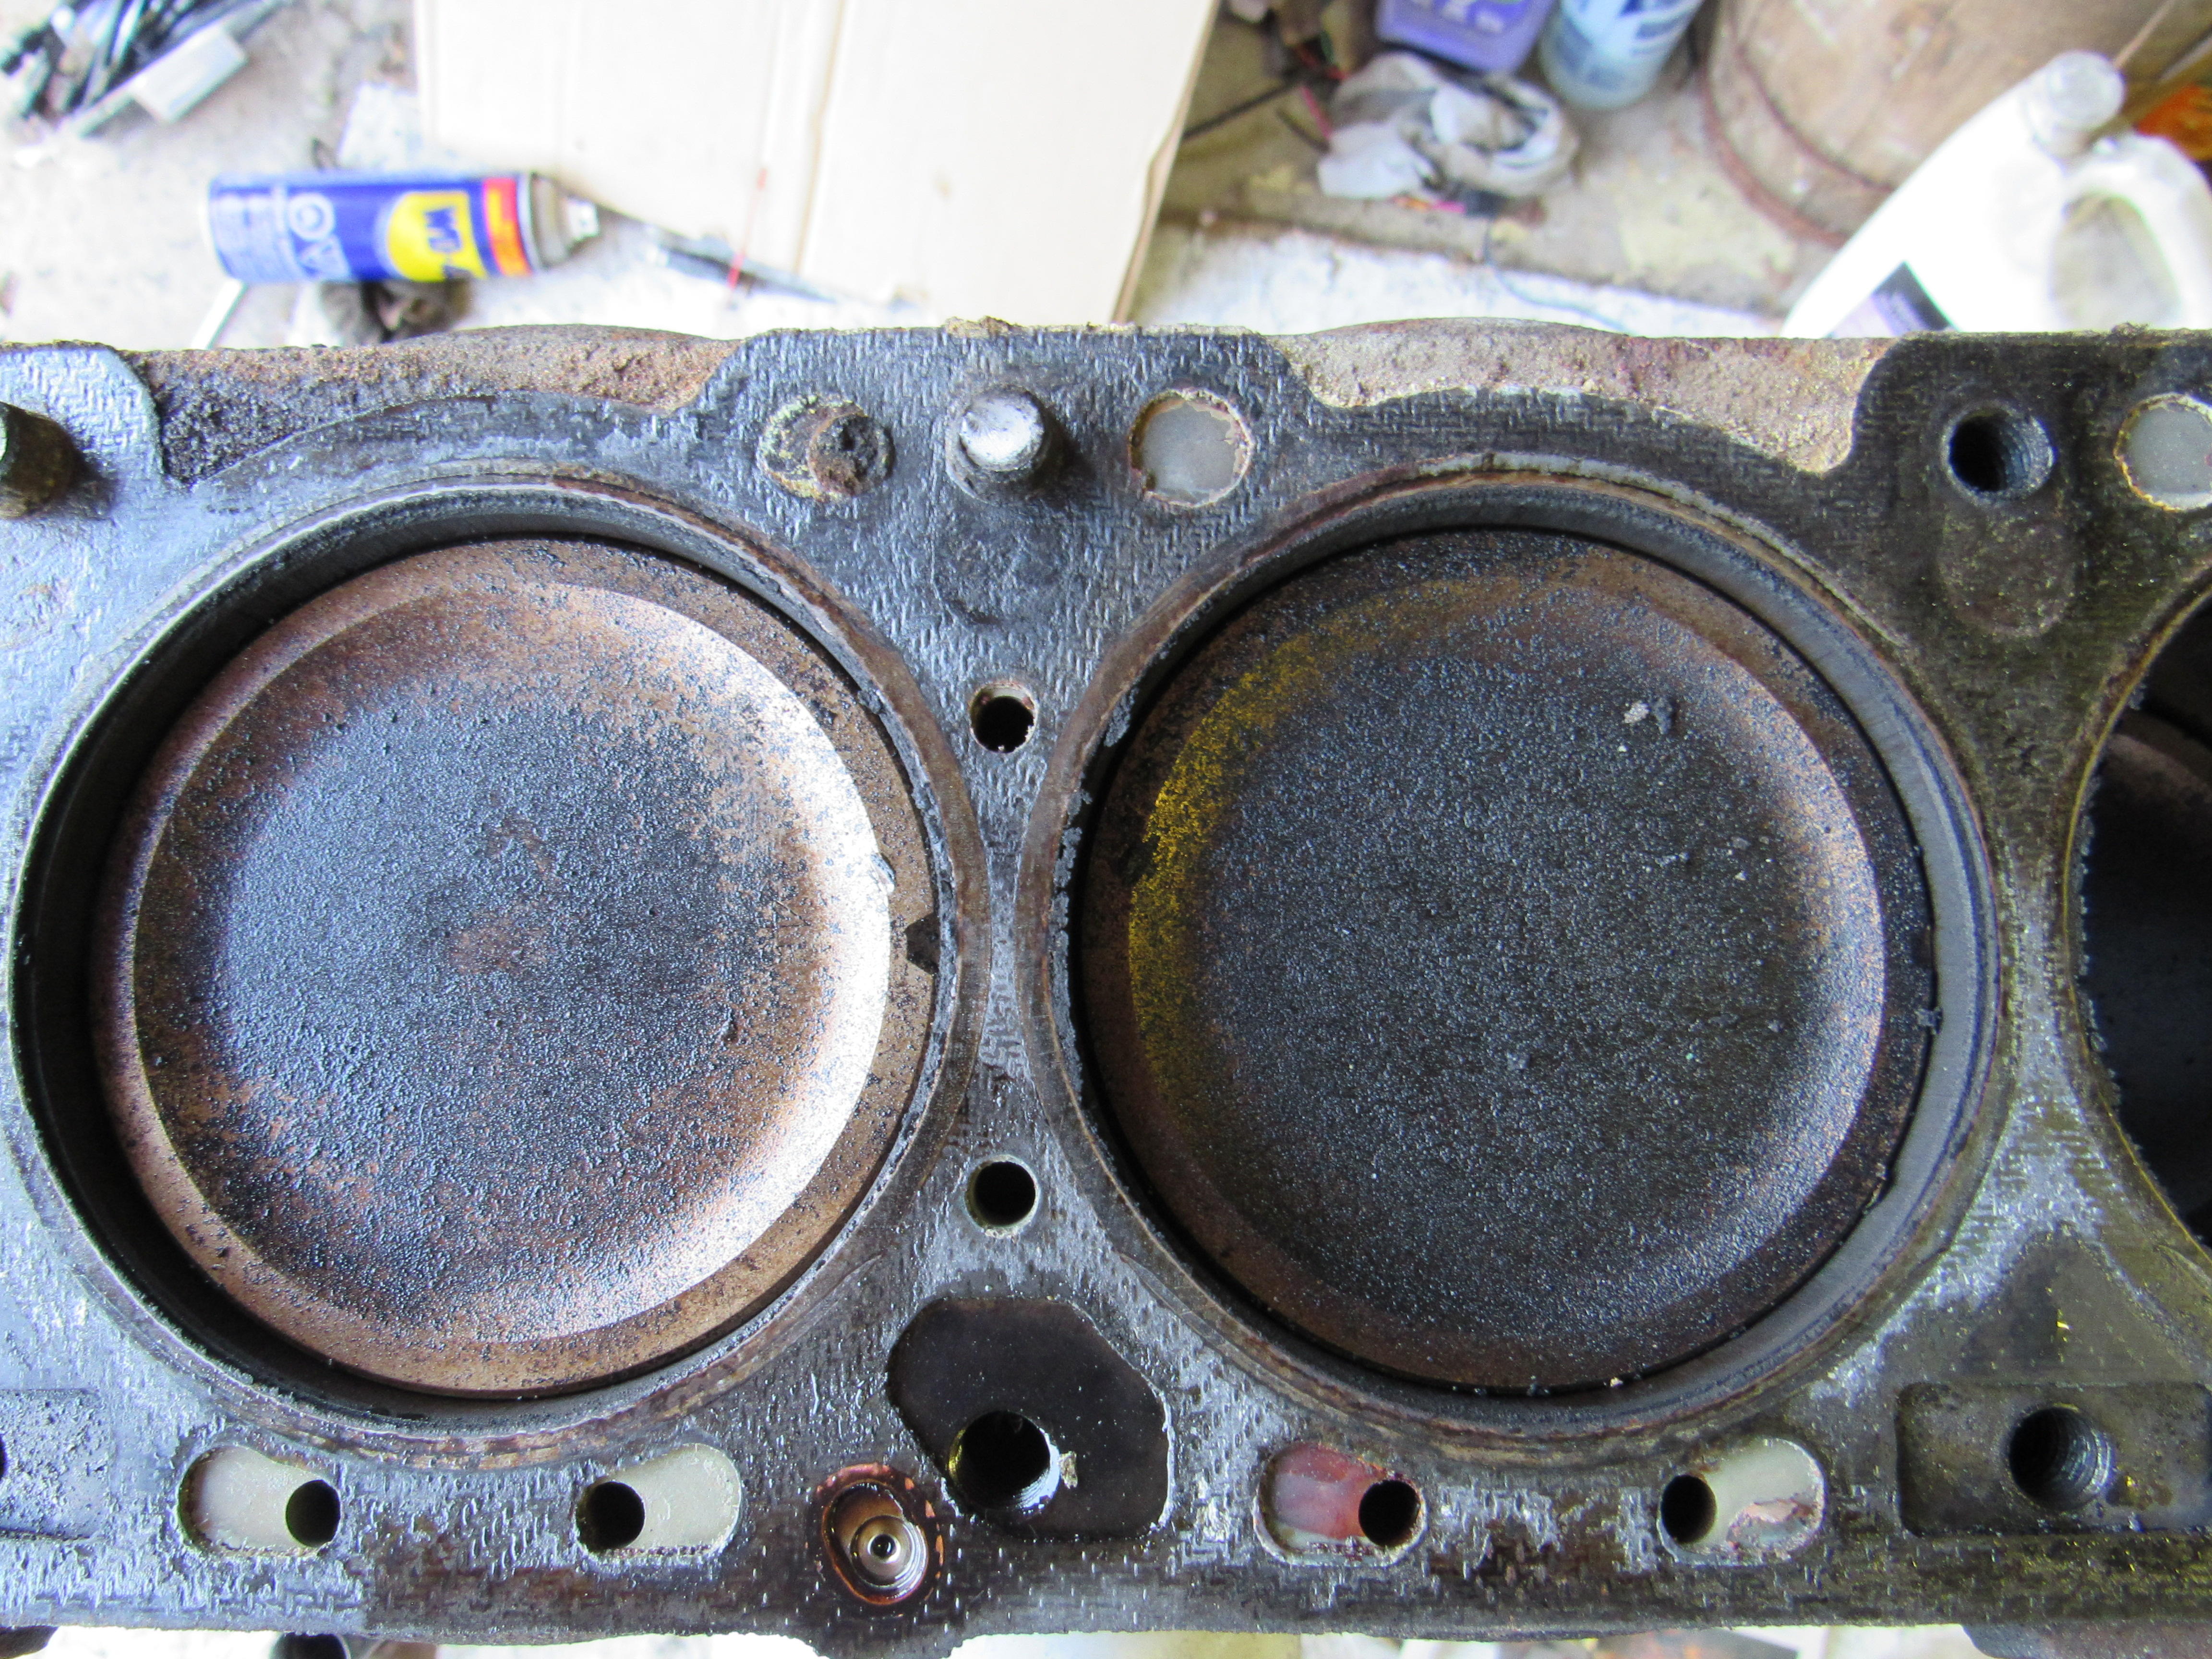
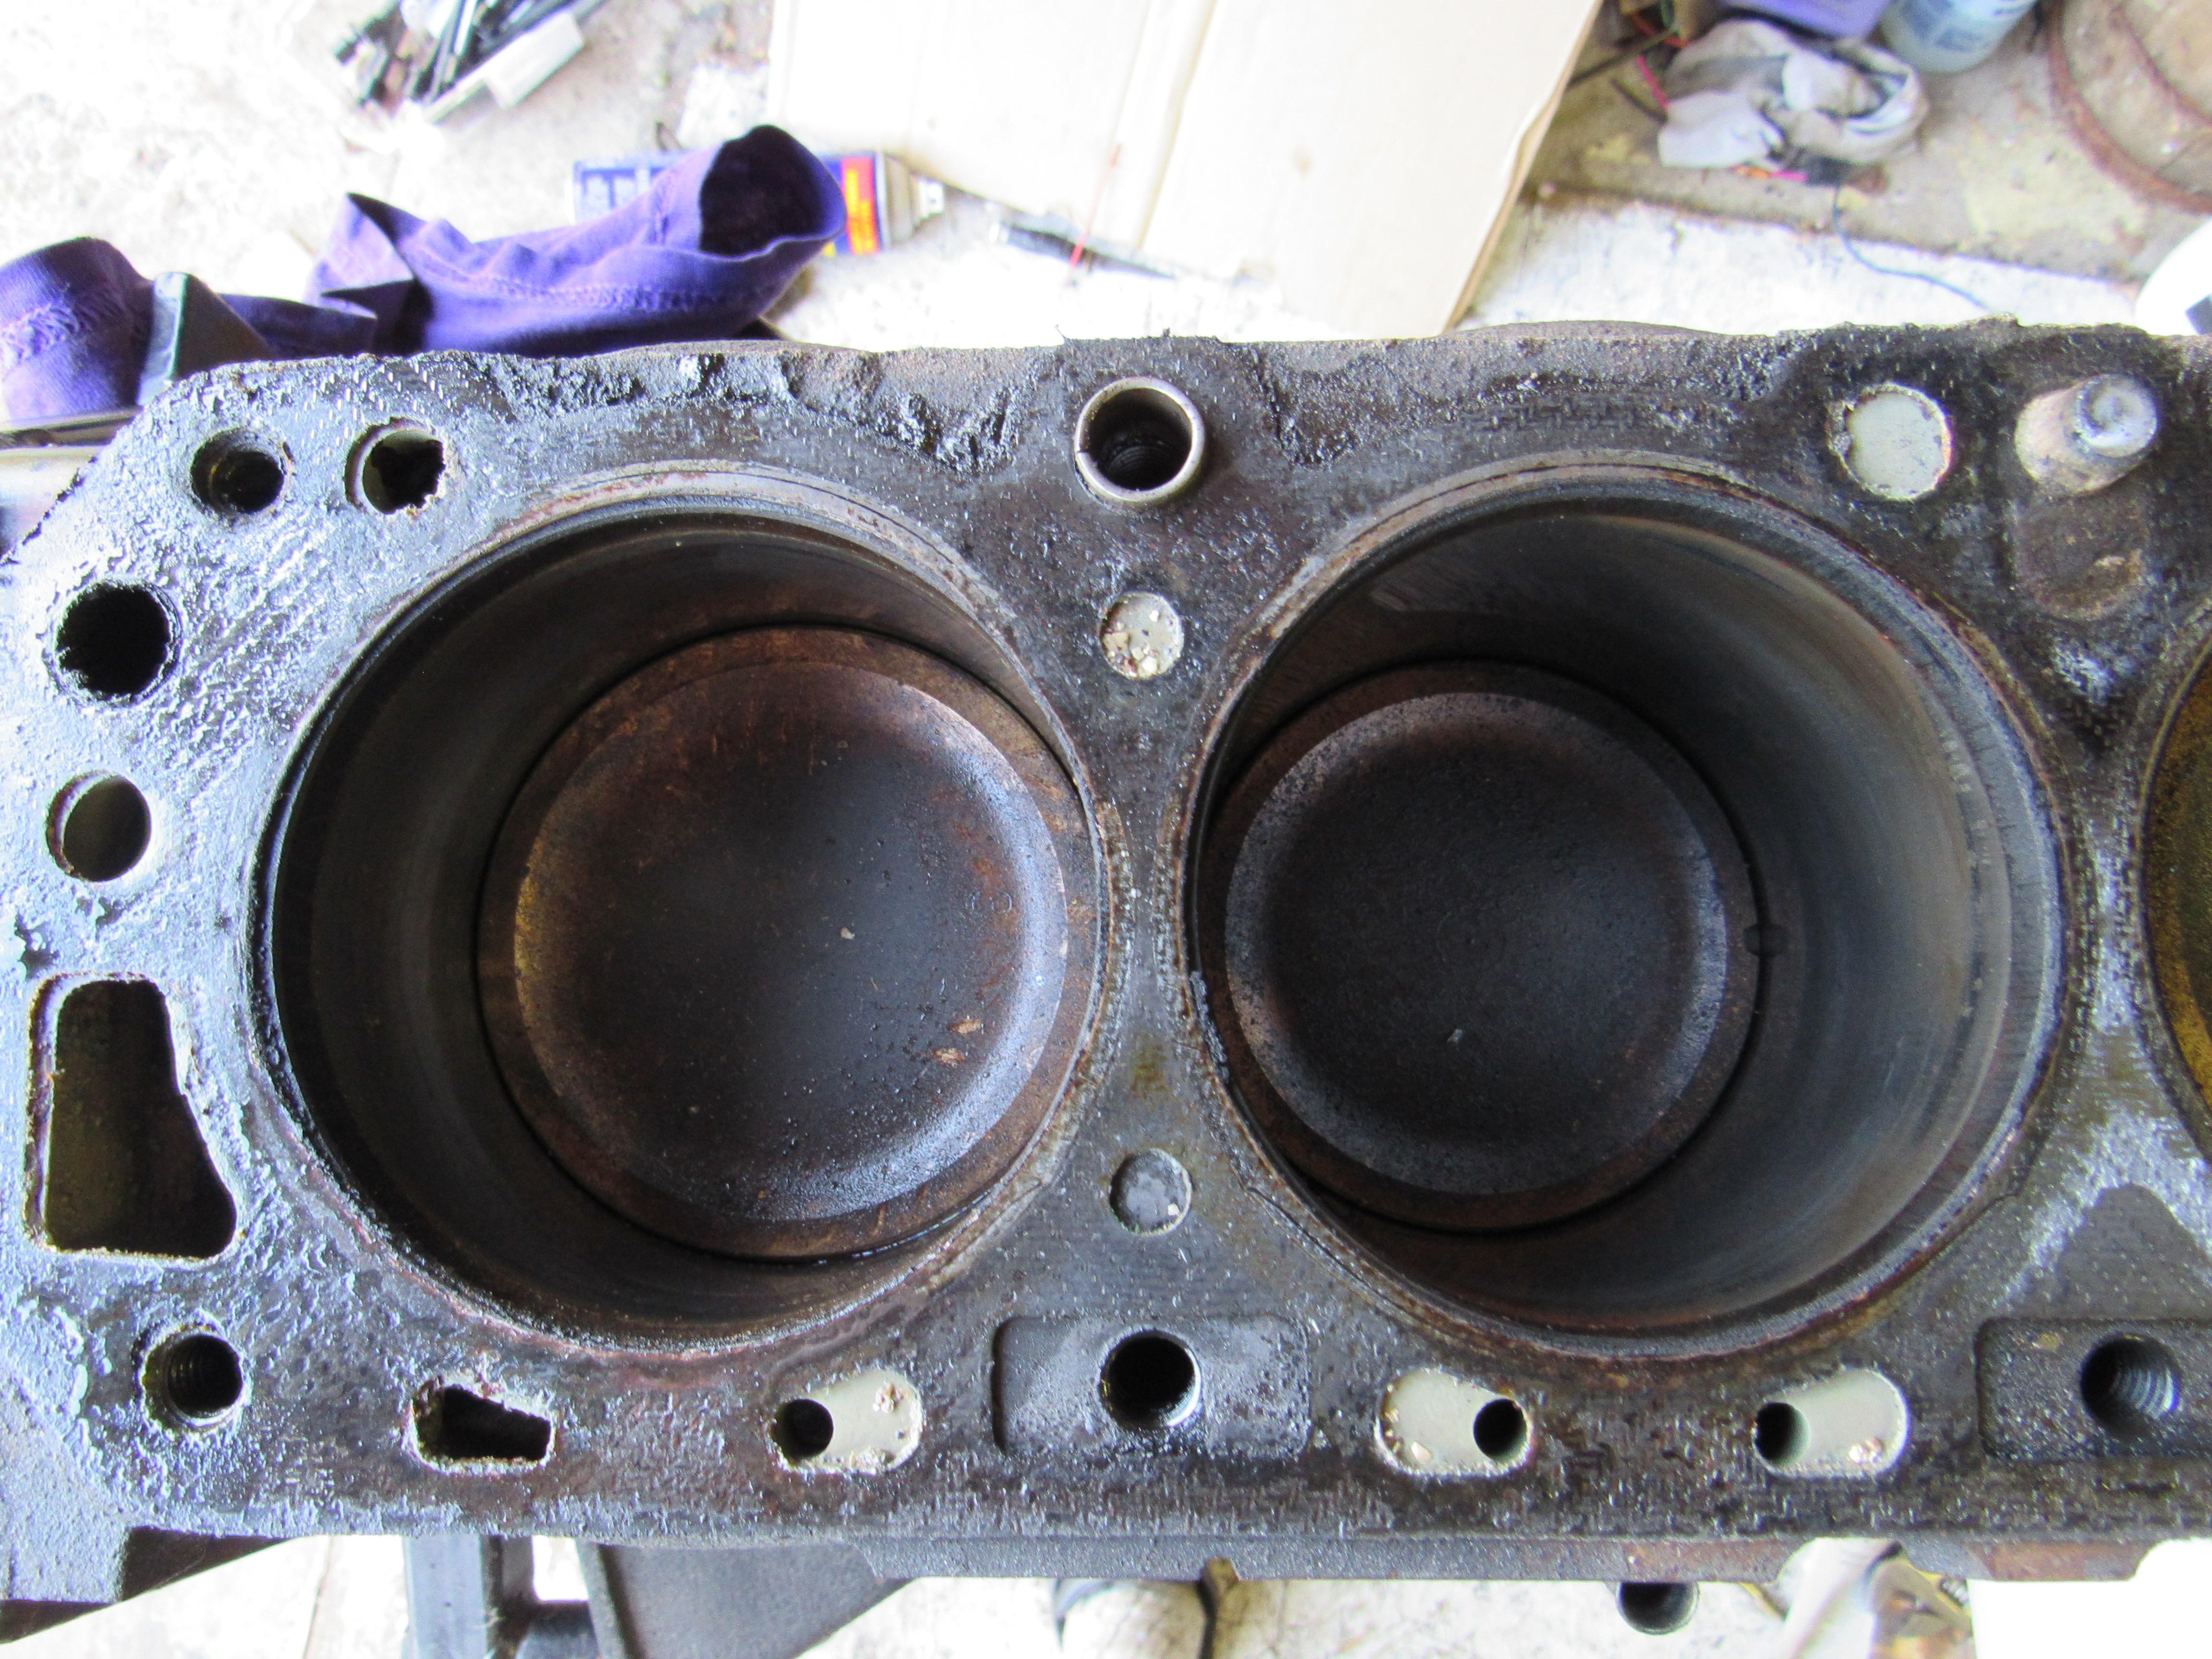
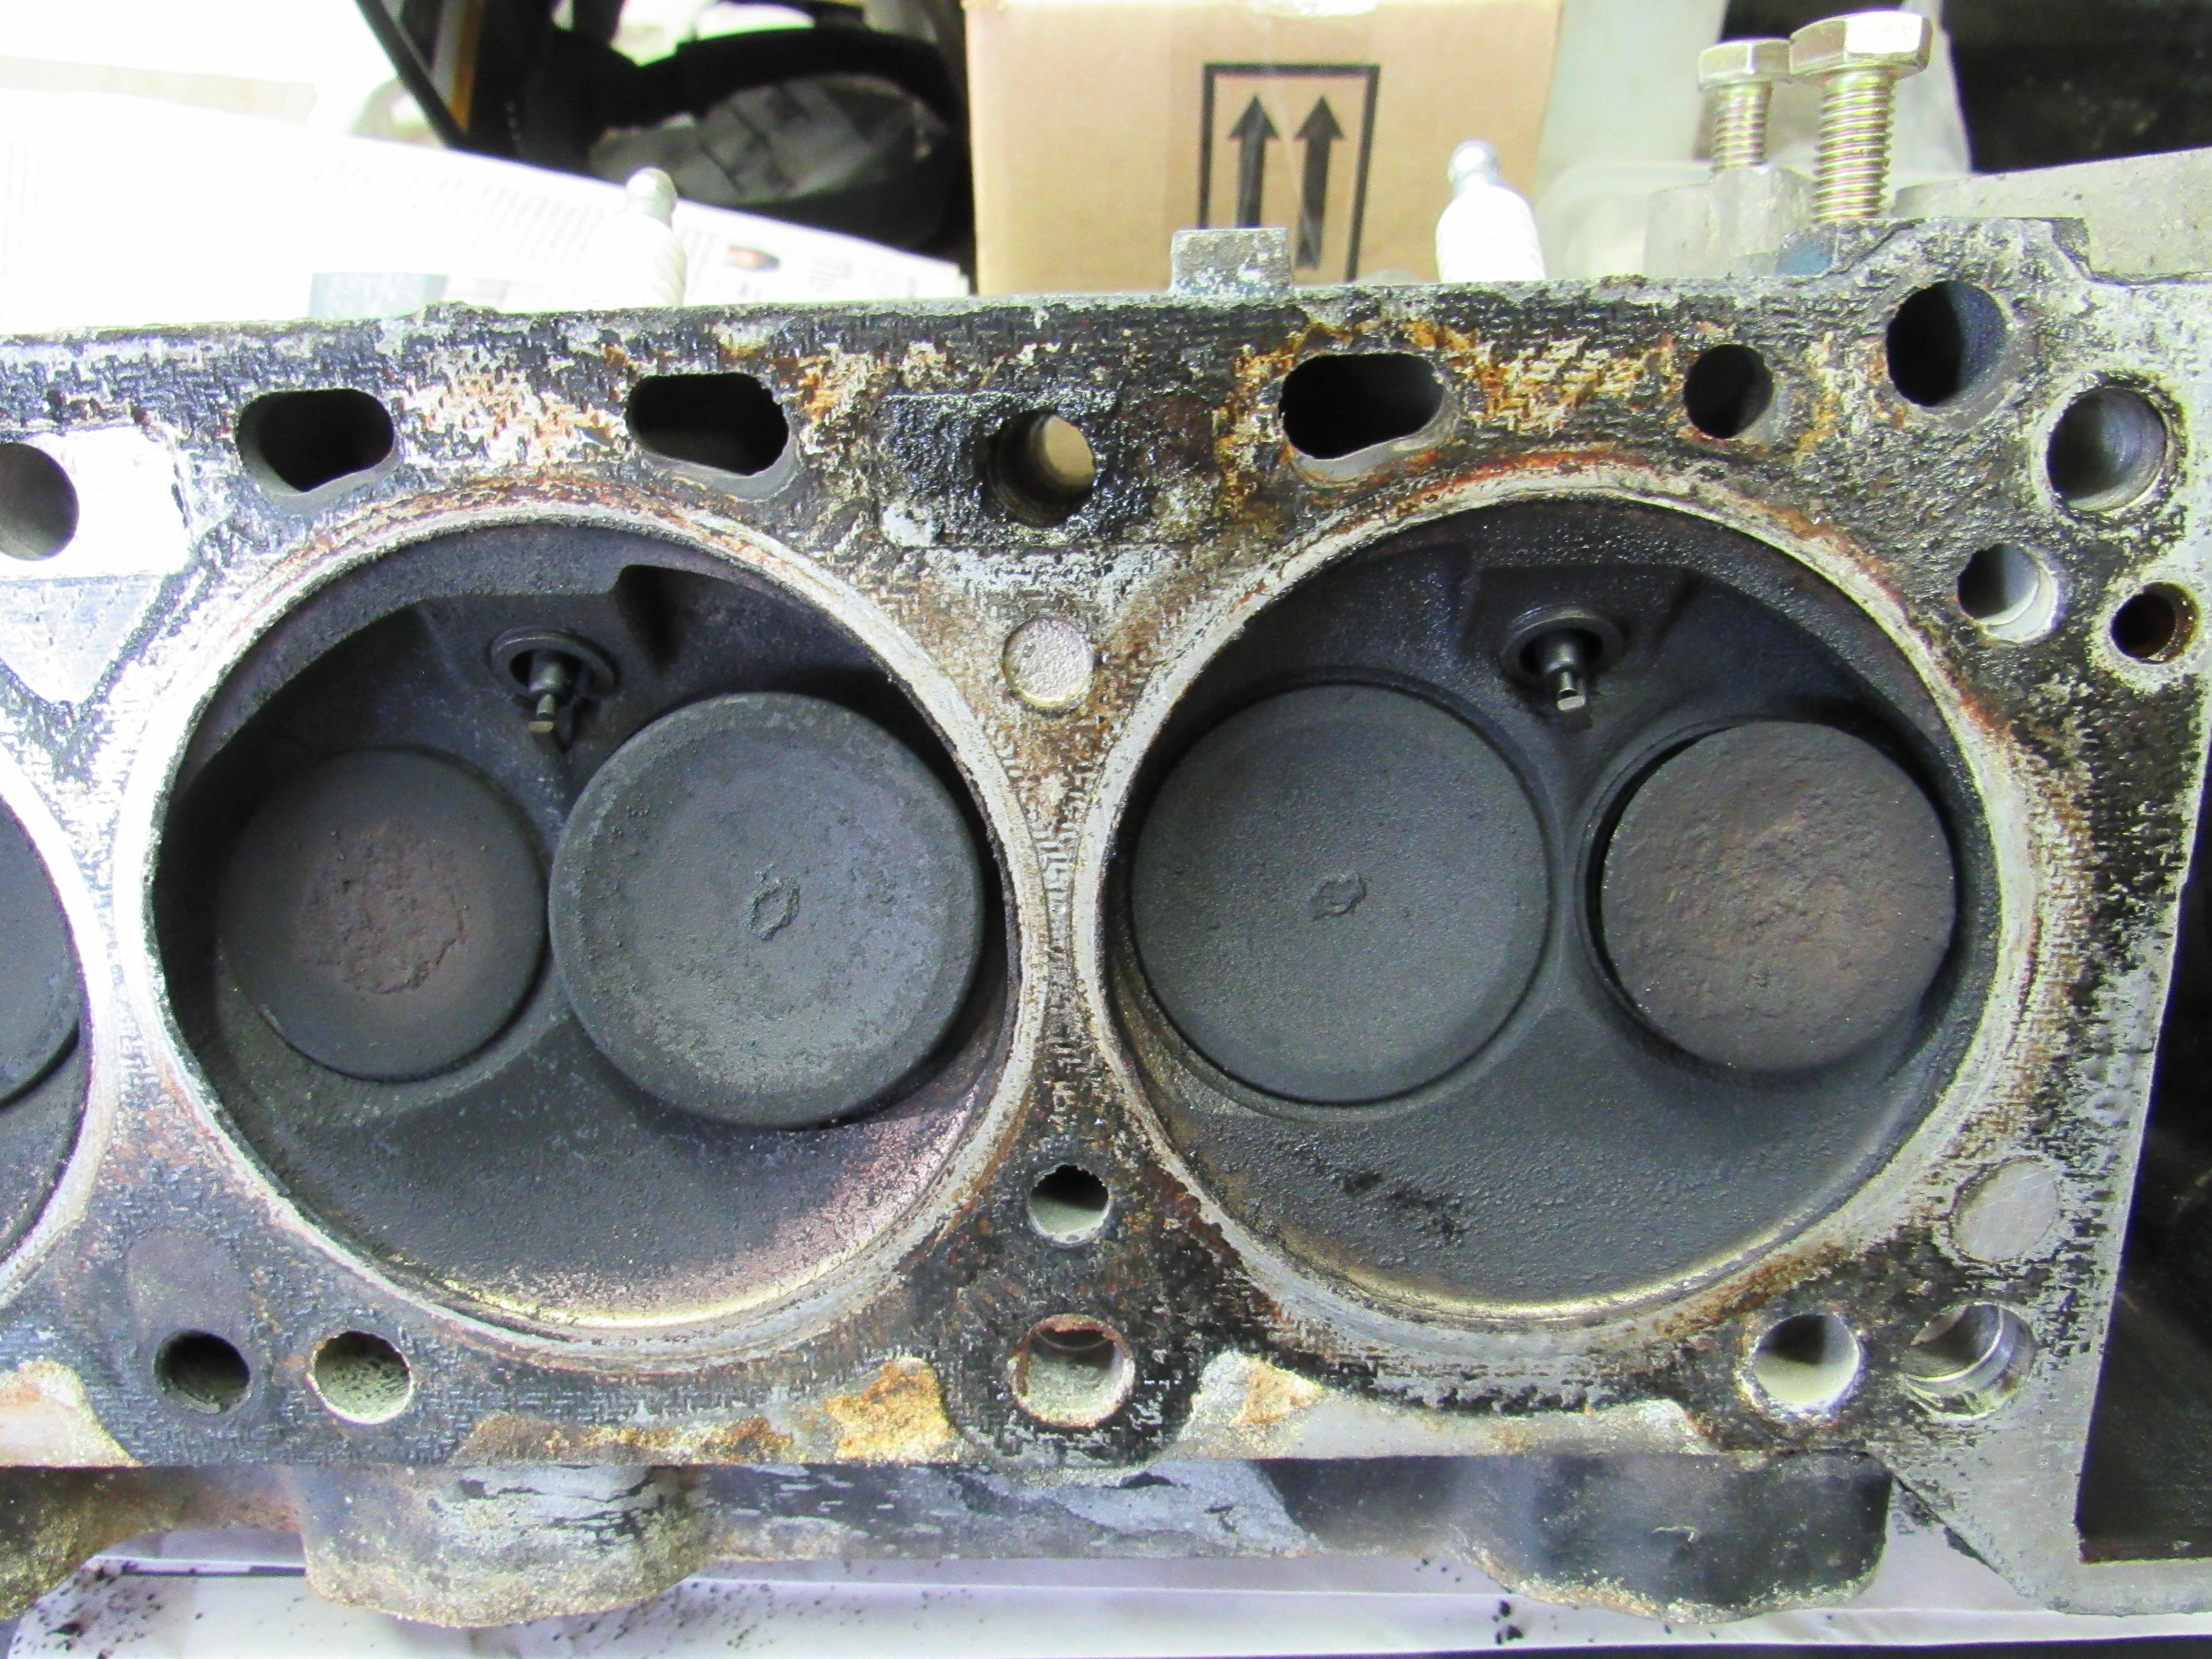
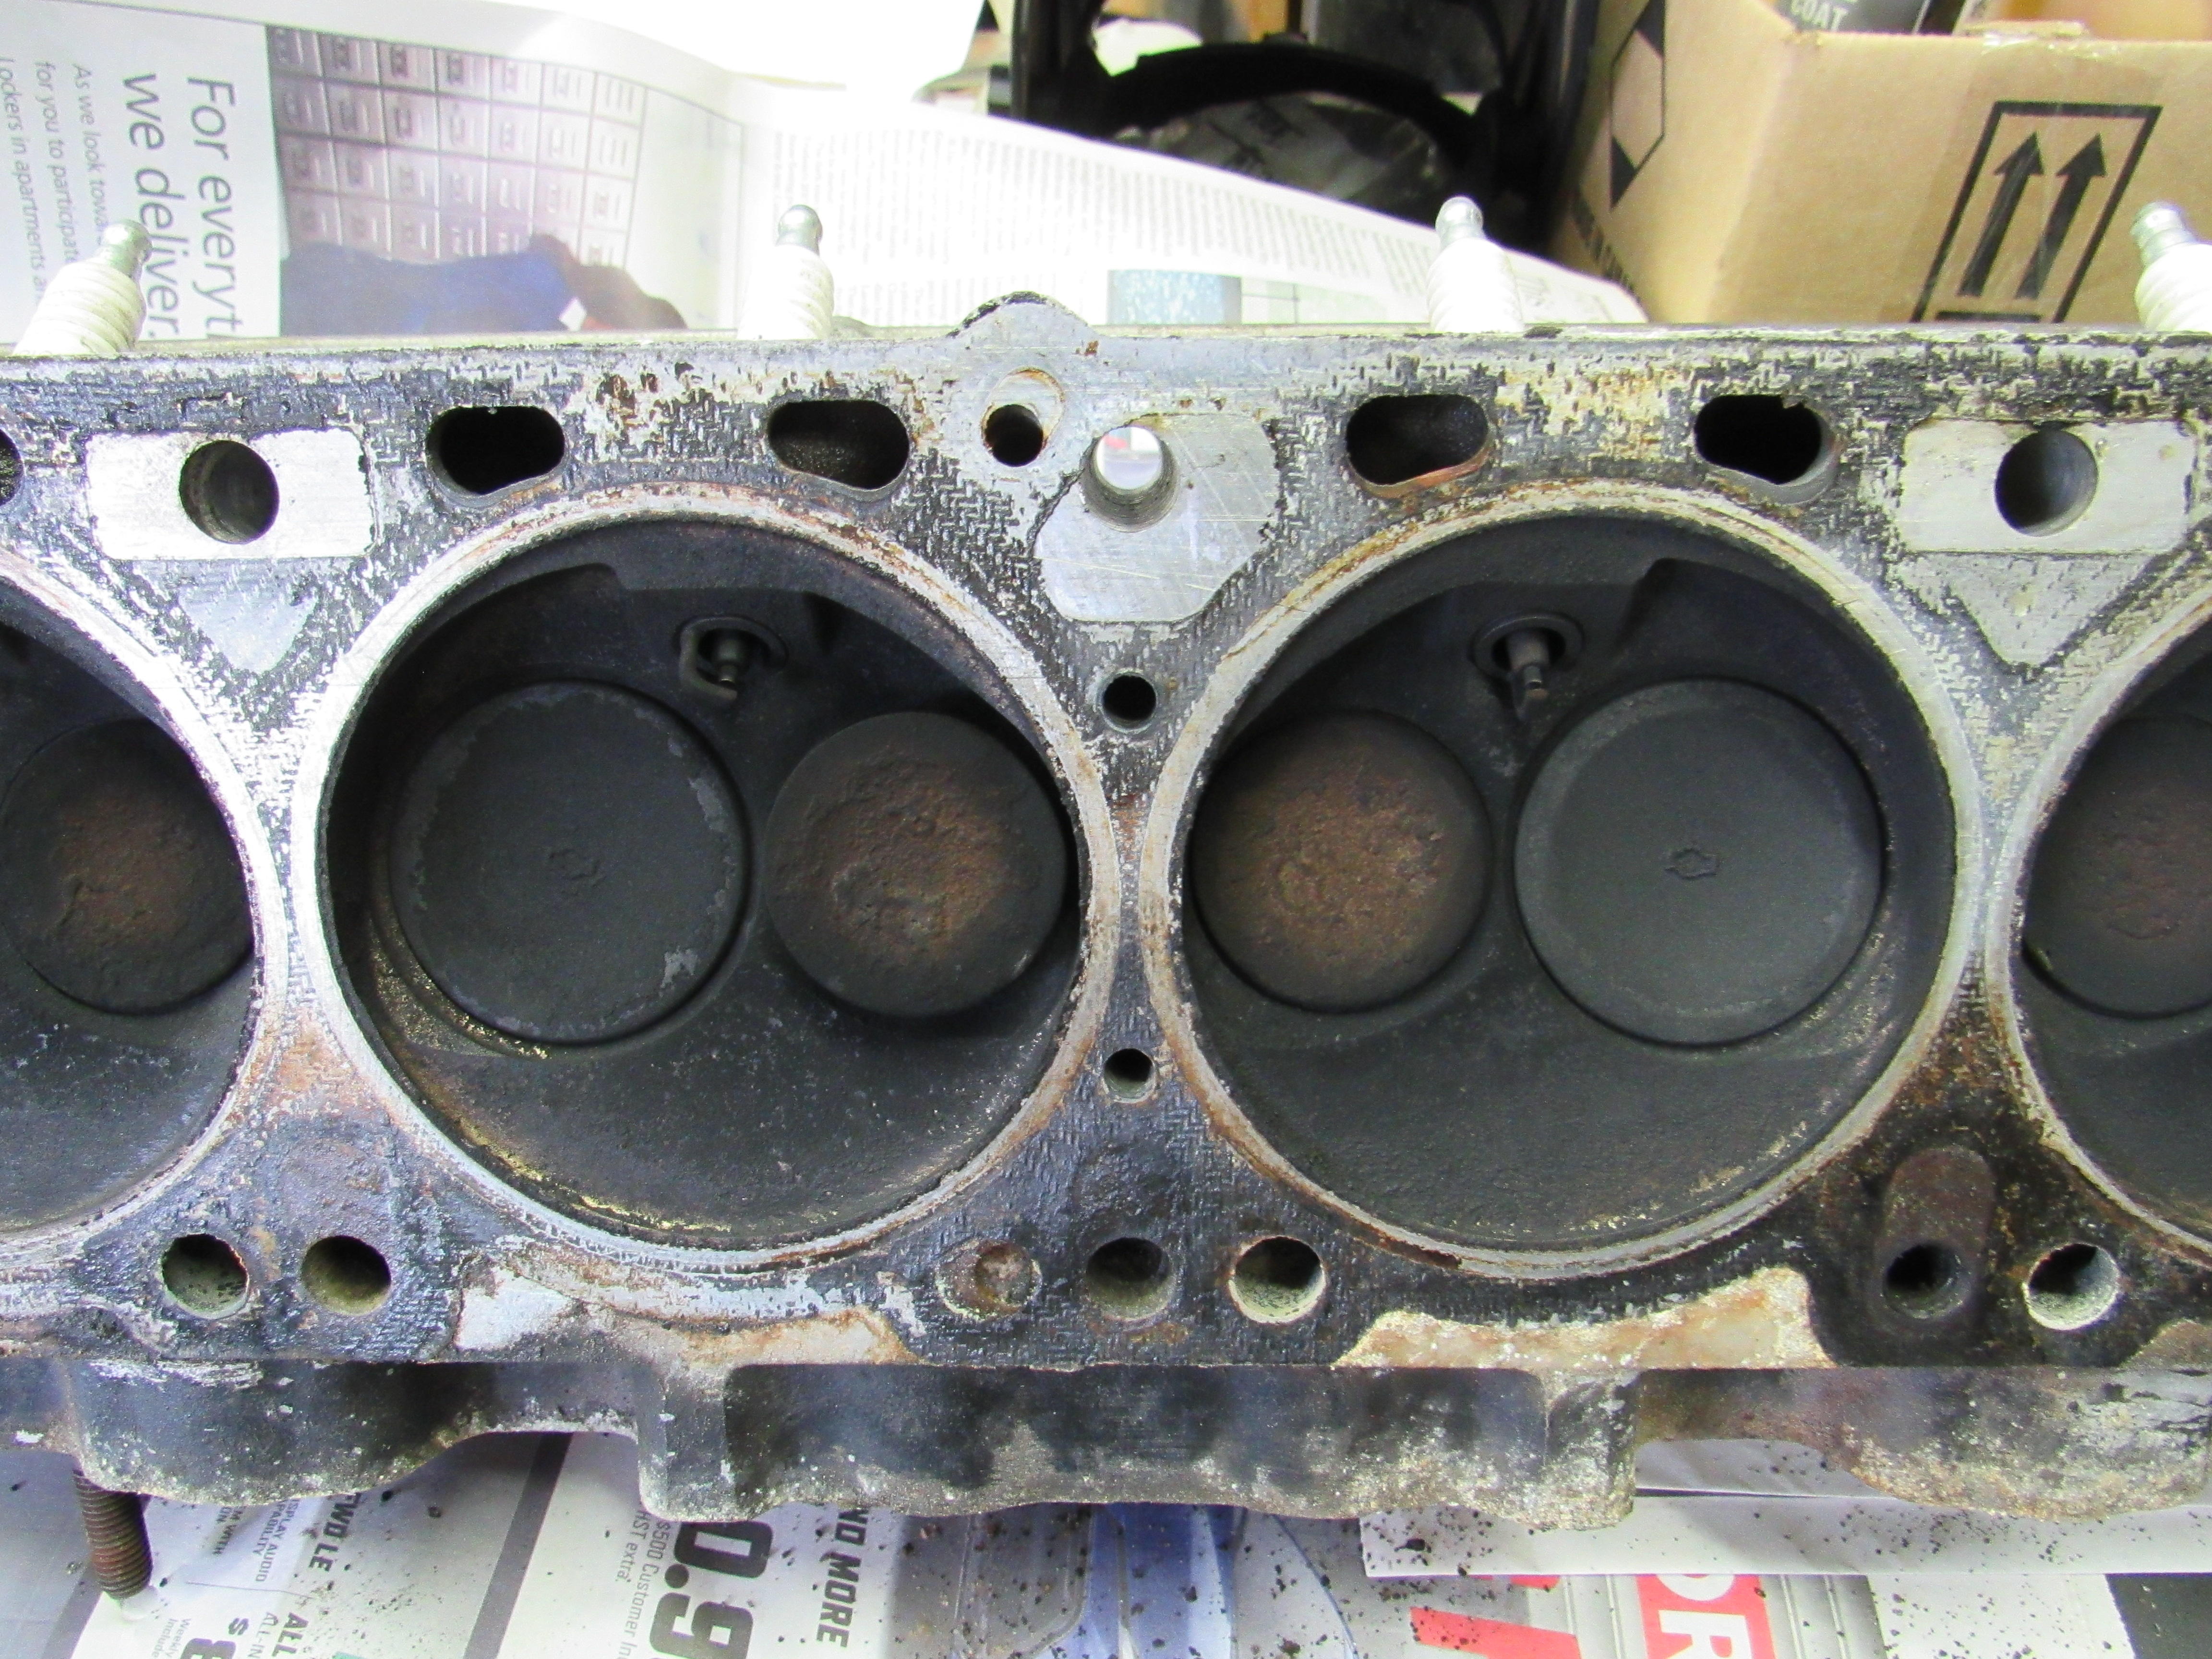
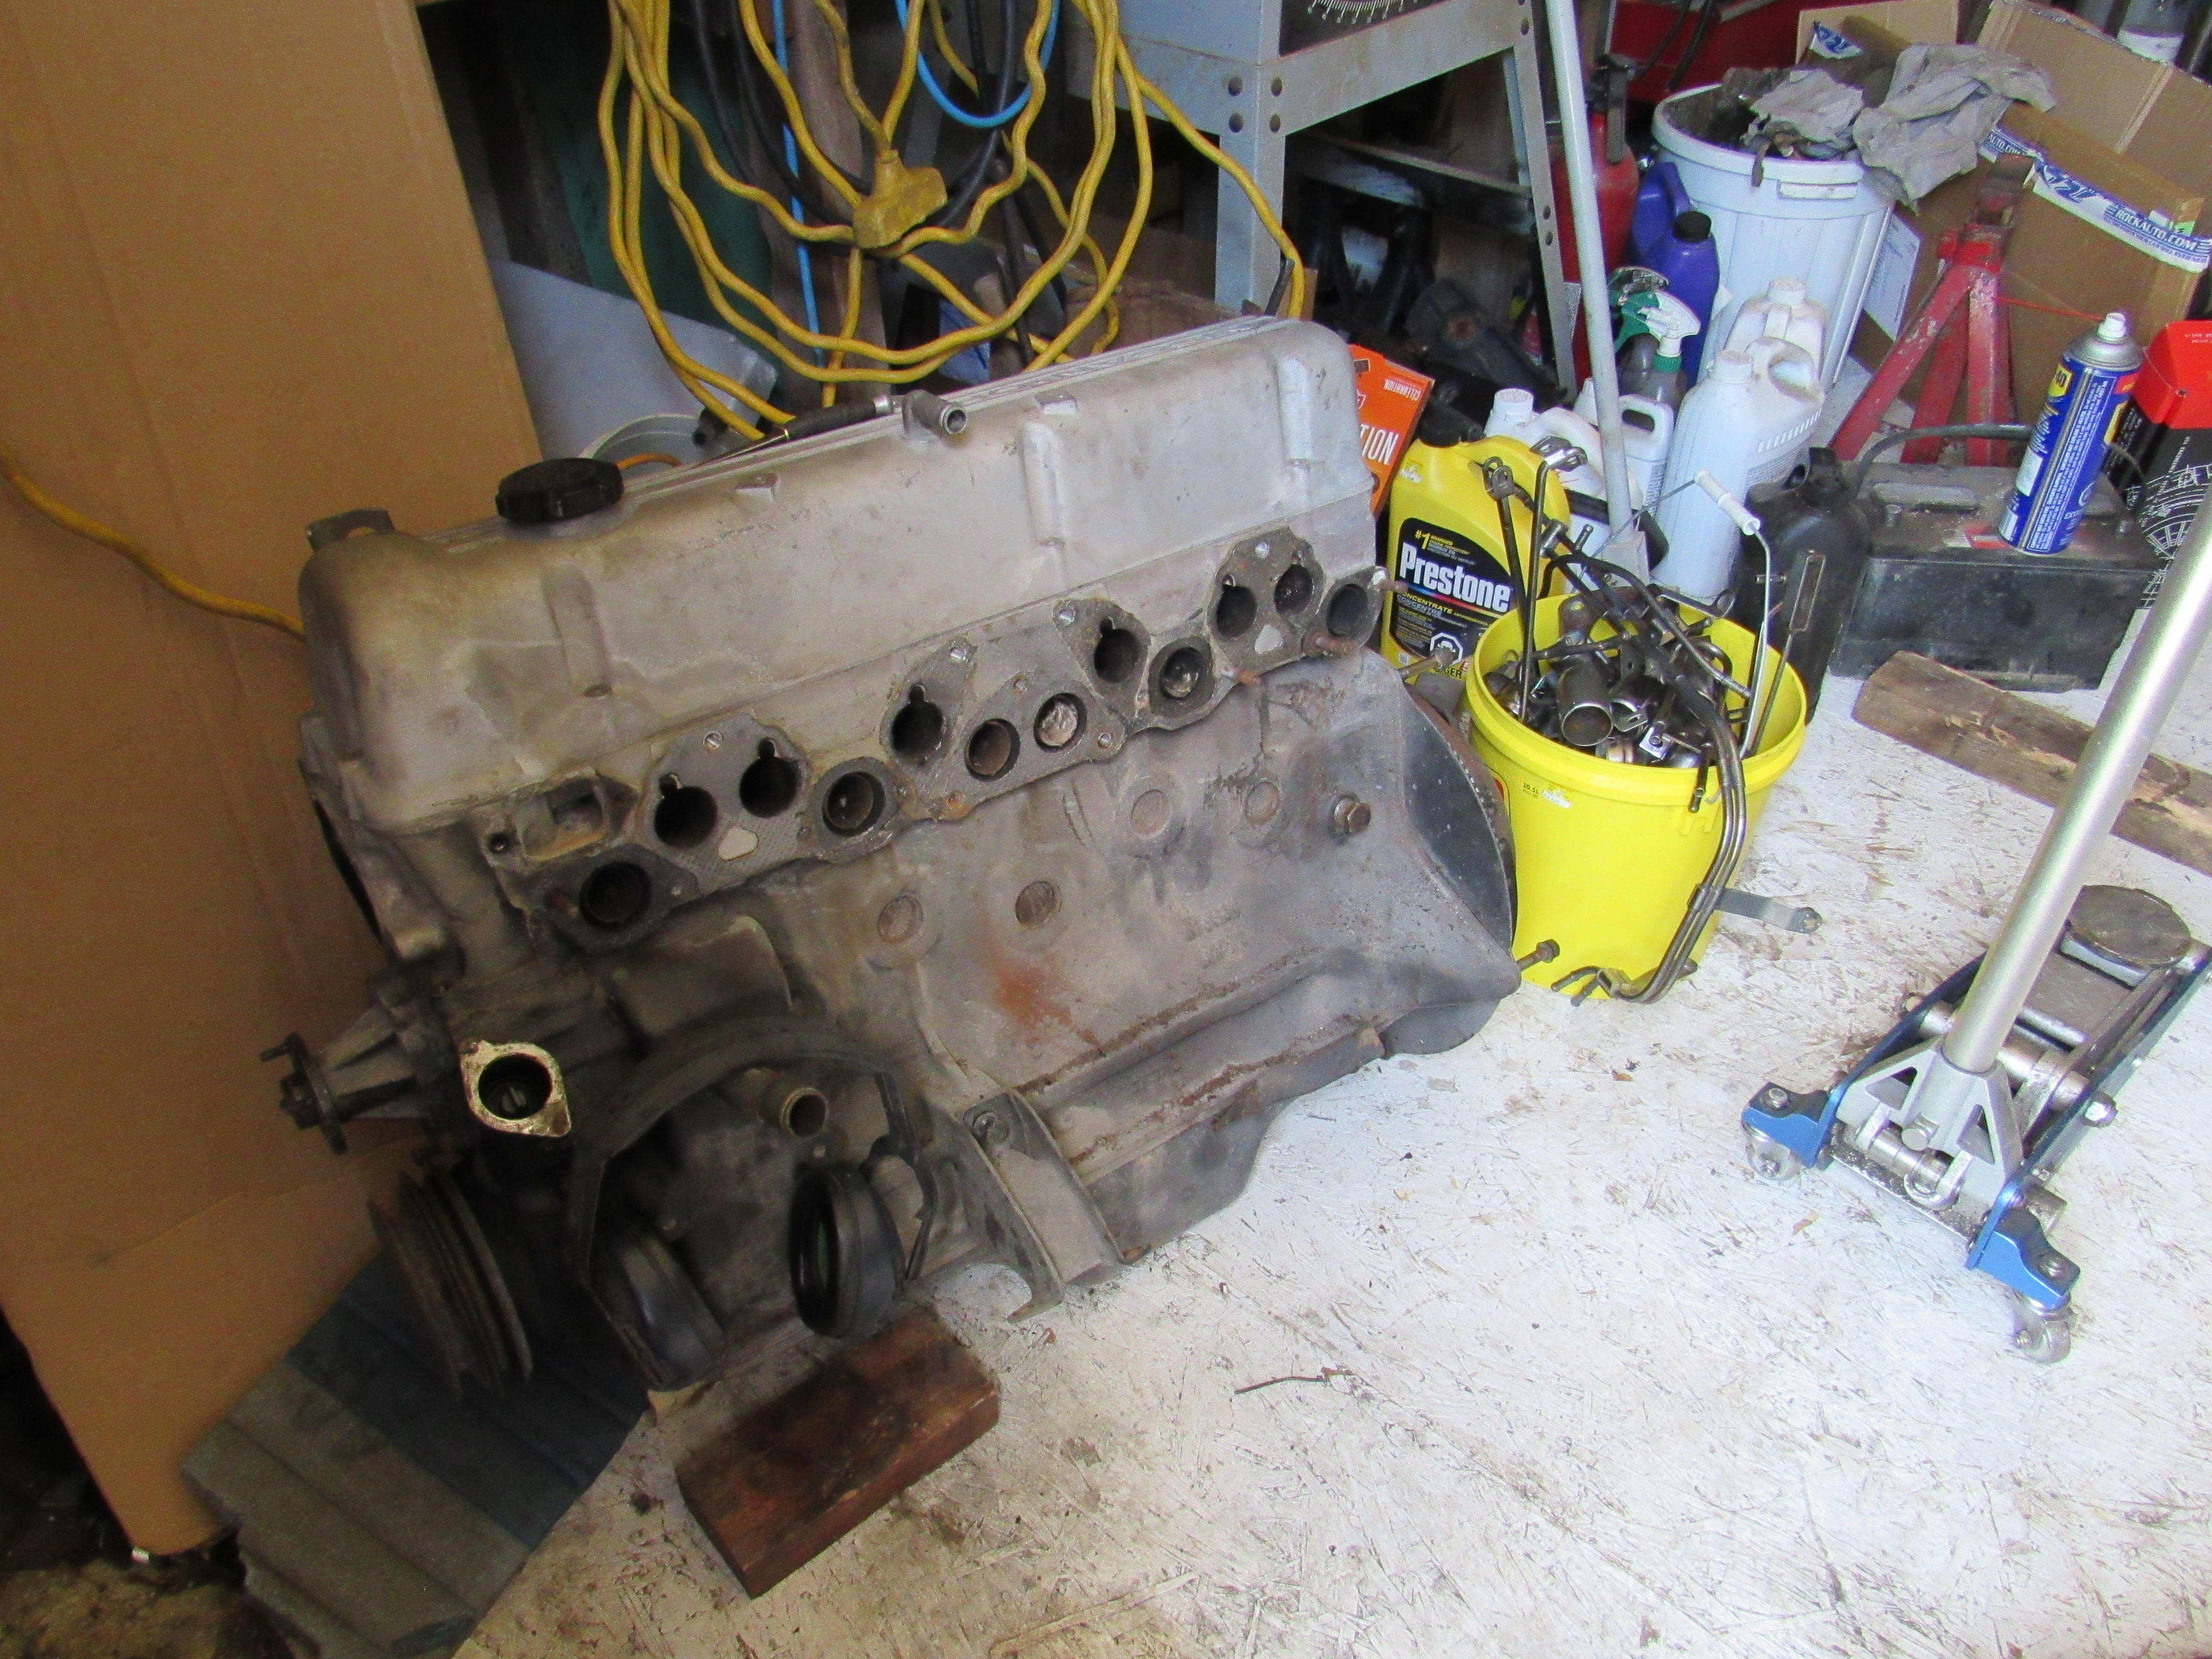
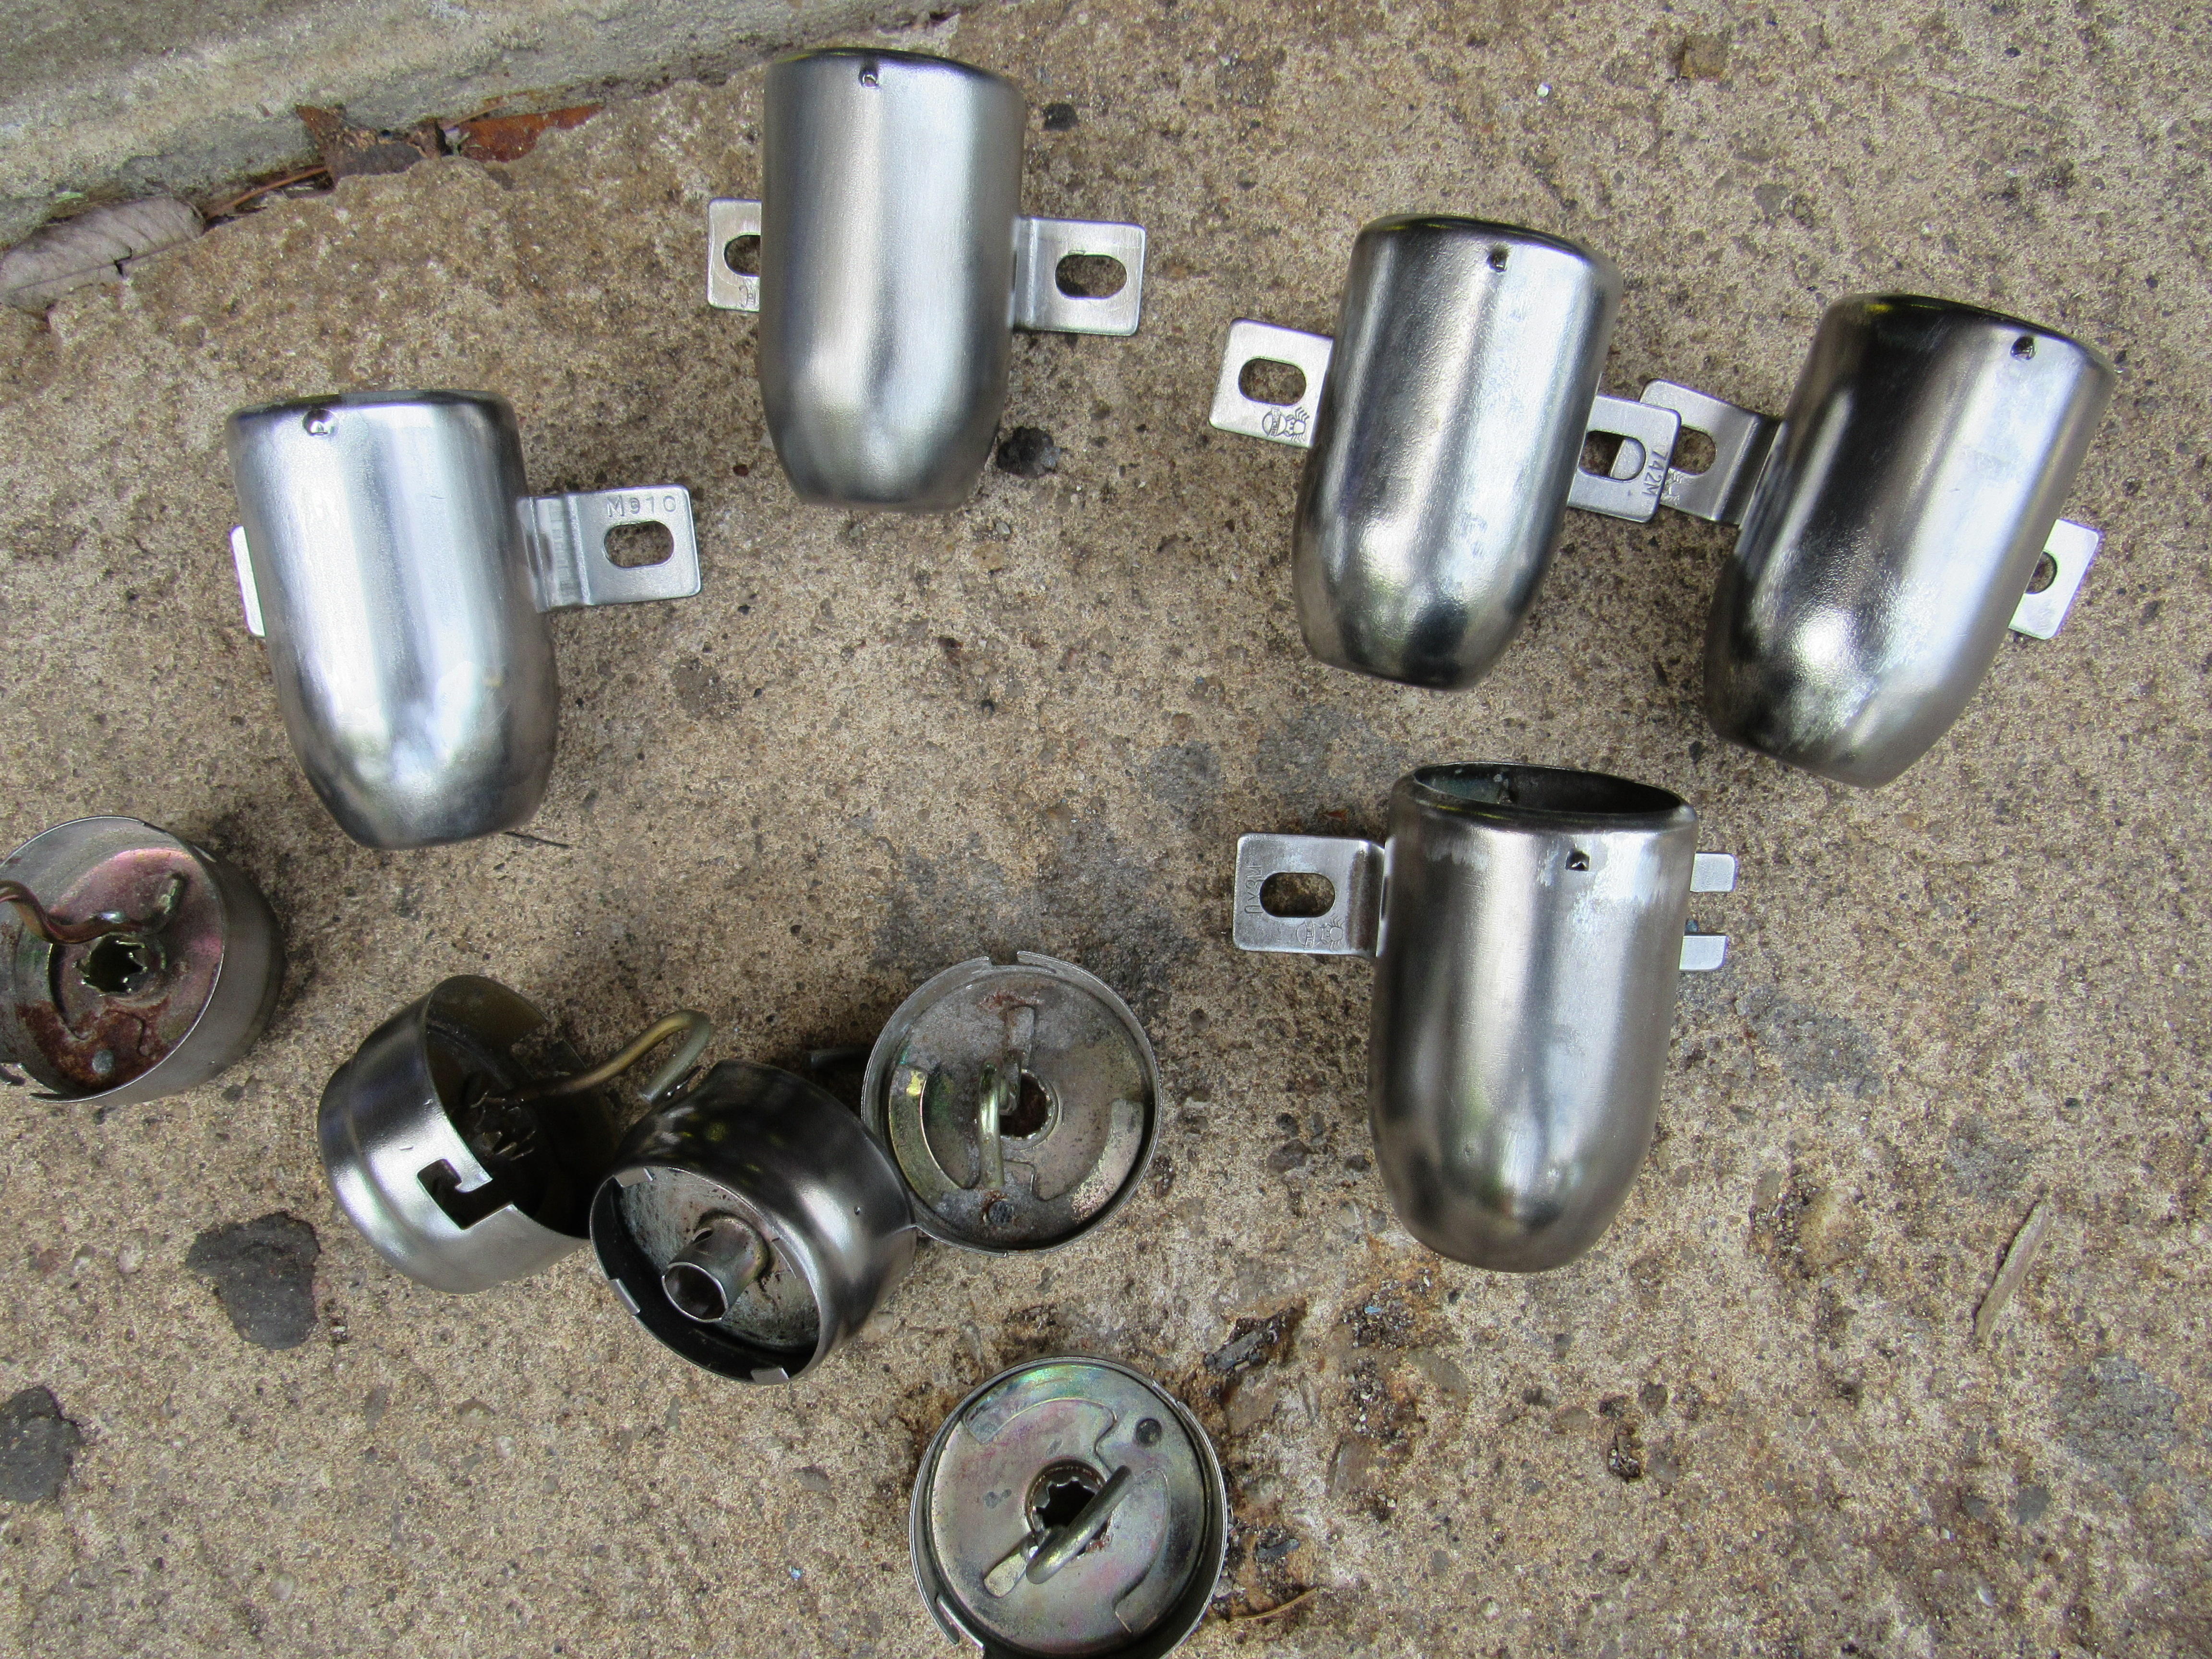
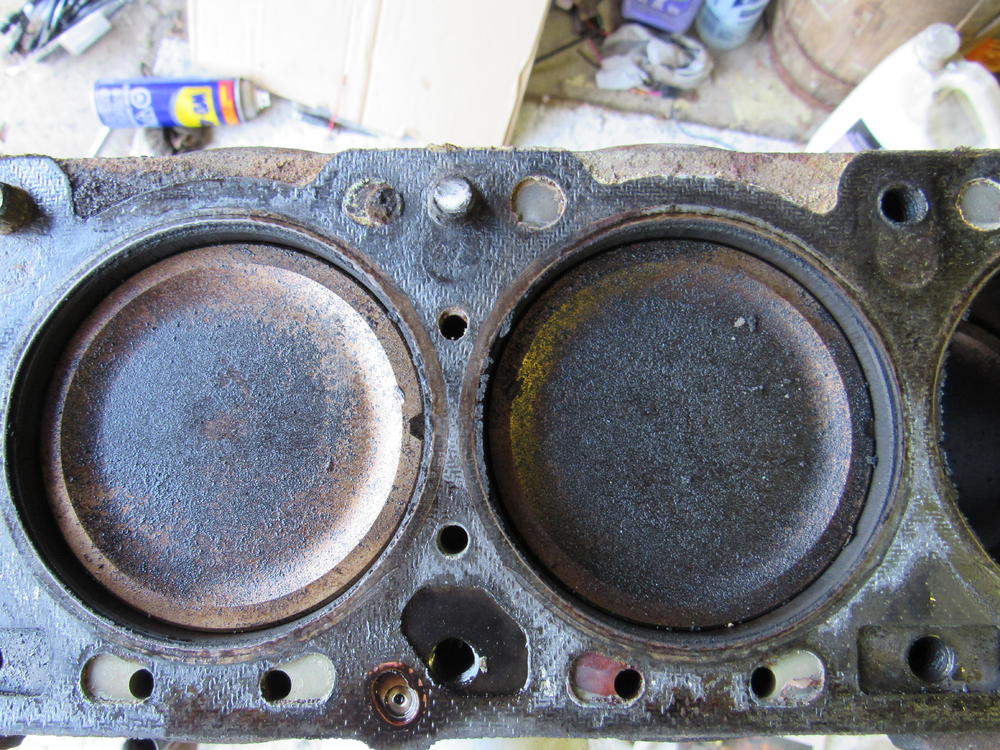
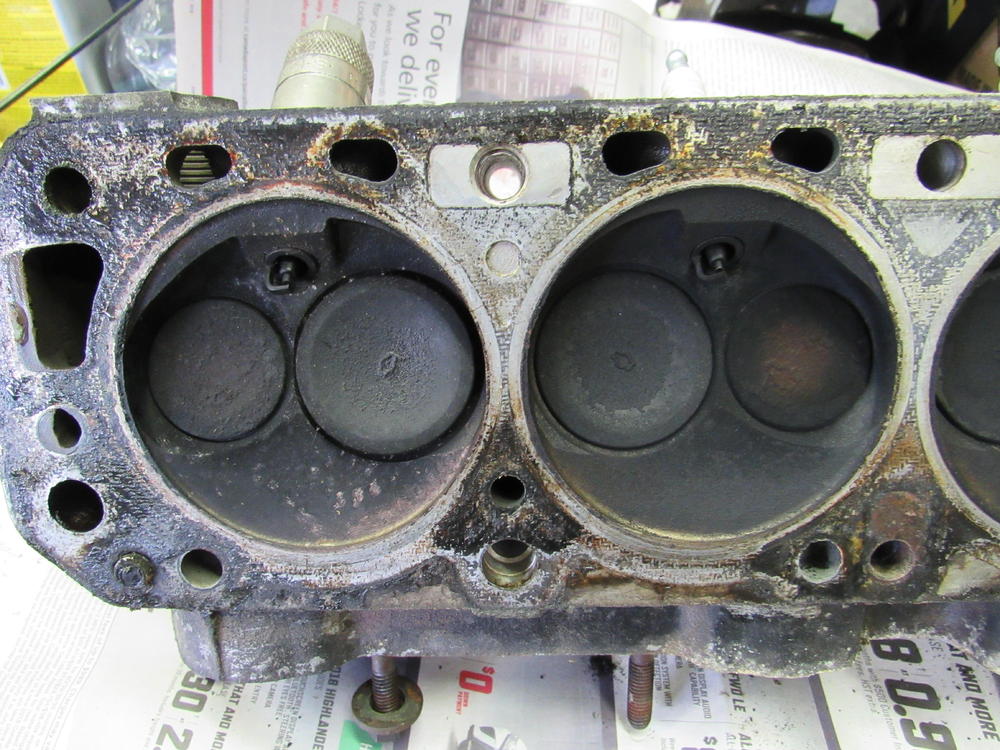
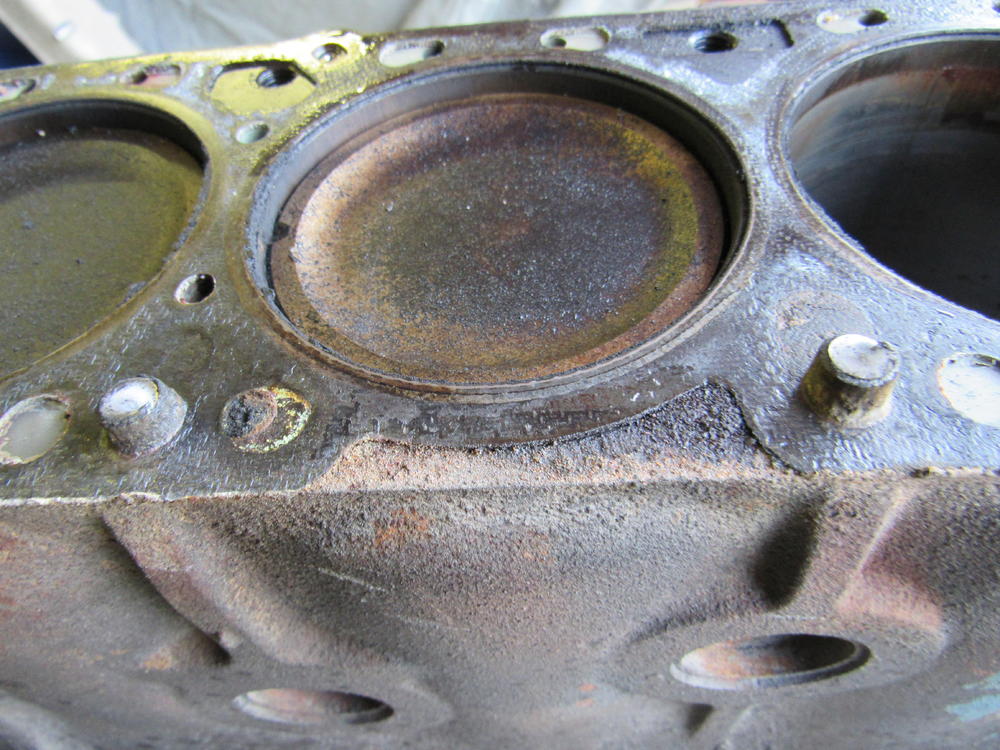
 All right, I got the head off the engine today, pistons look very clean for over a 100k miles, valves are pretty caked with carbon. I have never had a head bolt break on me before and two head bolts broke on this engine, one on either side of #4 cylinder, also there there are four other bolts that broke, 2 in the timing cover and 2 in the front of the block. There is about 7-8 other bolts that have broken of on the body so far, never had such bad luck. I did sit for 20 something years. pics go from front to back on the block and the head, last pic in the broken studs. Should I attempt to weld nuts on to the stubs of the head bolts or should I just take the block to and engine builder or someone who does this all the time?
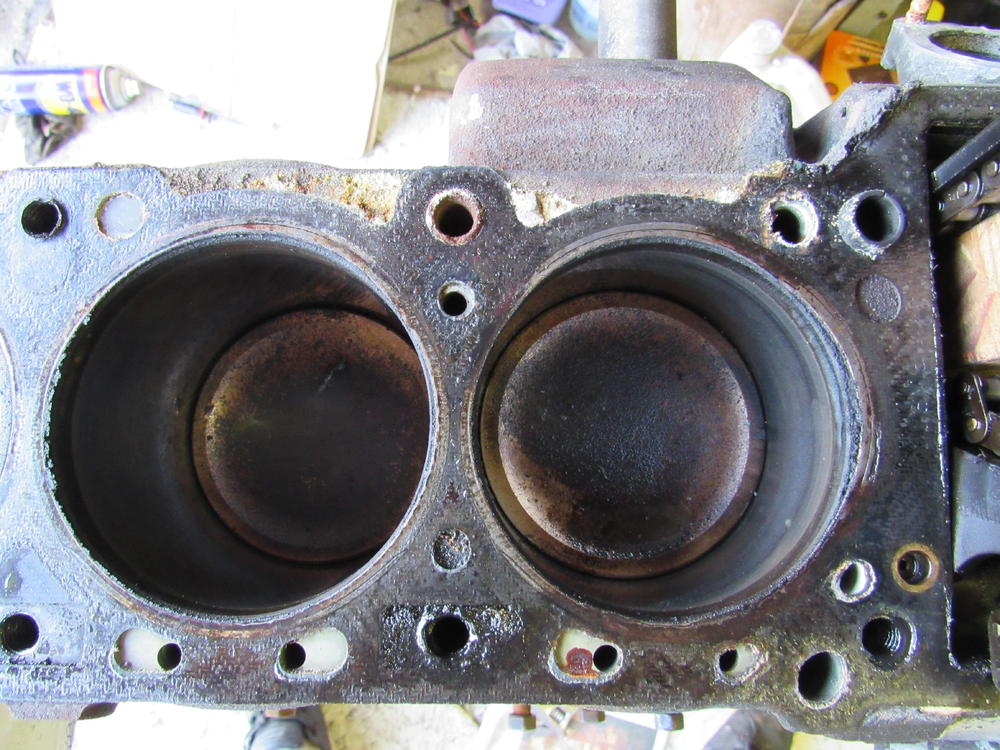


-
That's a smokin deal, if I hadn't just bought a 77 I would down there with cash in hand, hope you change your mind. Did you keep the headlight scoops for square lights? Collectors item.
-
Good find, you have to jump on them fast these days. It looks pretty straight, how is the rust?
-
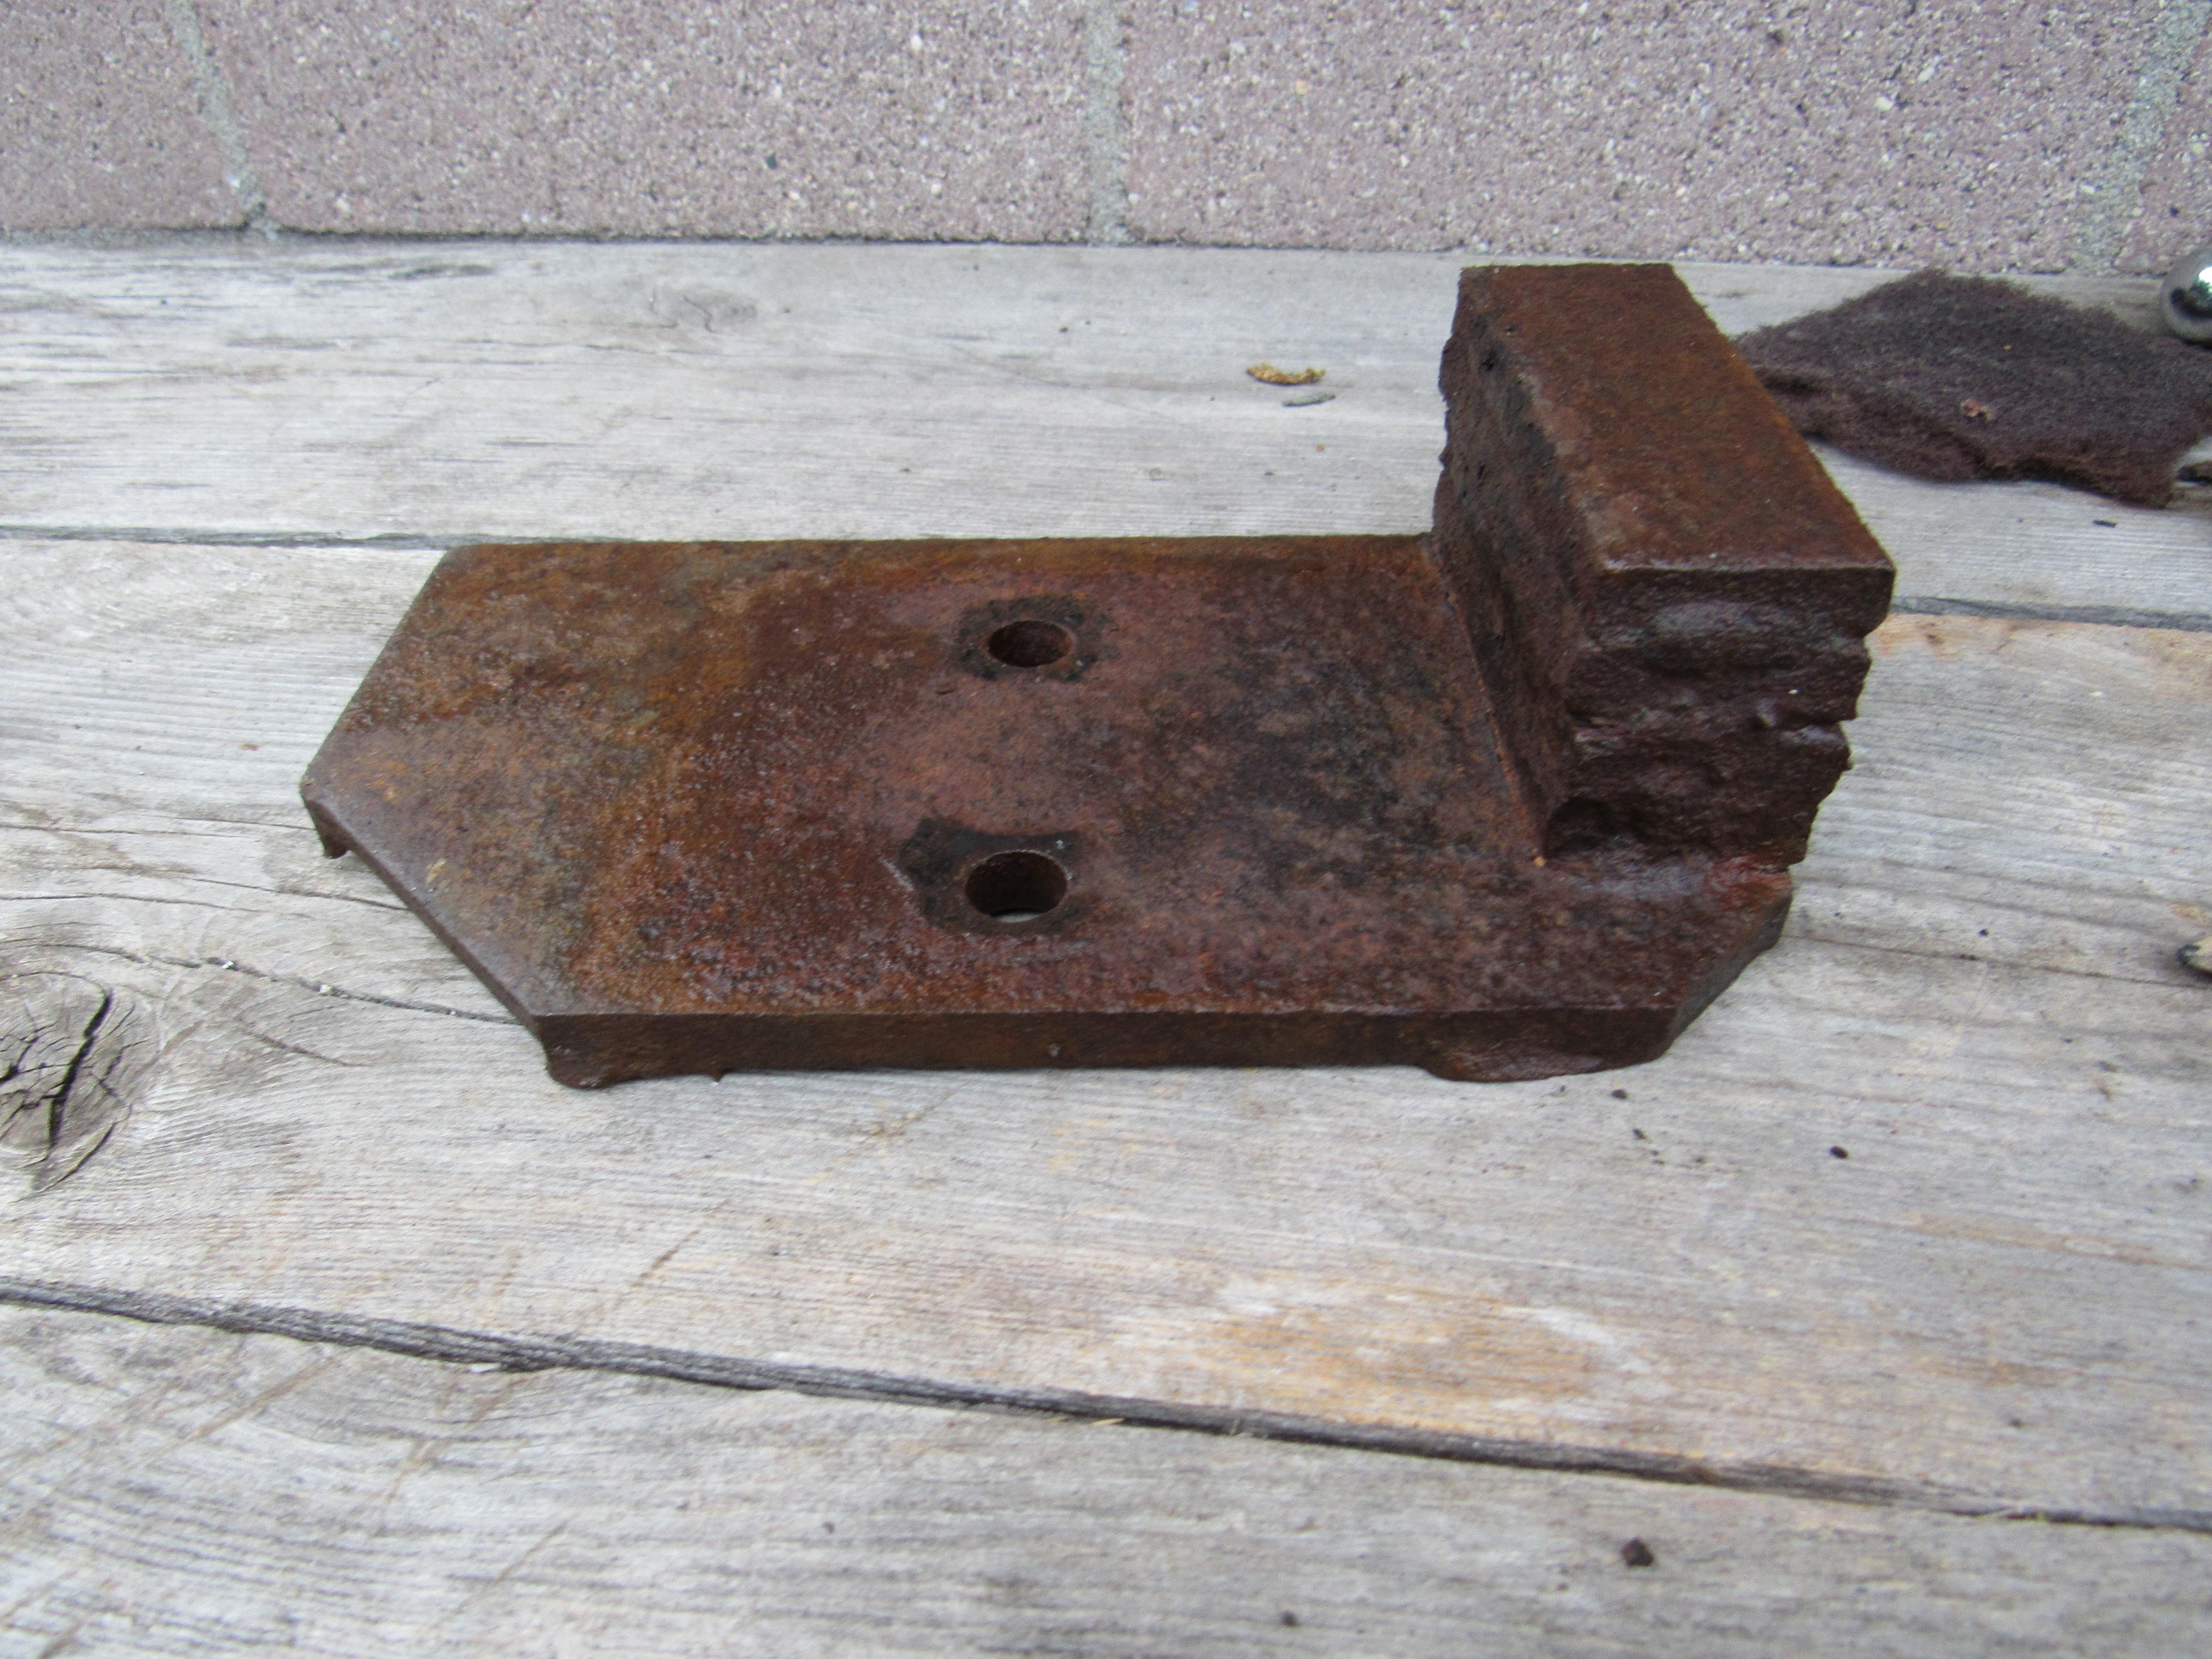
I think you are right ZH, can you imagine the damage a 4"x7"x 3/8" steel plate could do the guy following behind when that thing fell off? So my damper is about a 1/3 lighter than most, does that mean I can call it "custom tuned"?
-
With carbs and 3-4 psi you could probably get away with it, but with fuel injection you should really have a proper barb on the end for the clamp to brace against.
-
Are your candy scoops welded to the fenders? When the gap is filled in properly so it looks like one piece it can look very sharp, looking forward to the finished pic.
-
@Jaymanbikes did the artist work from a photo? The proportions are perfect.
-
You guys are right, I went back to have a look and the bottom of the plunger will fit through but my 40 year old seal is so hard that it stops dead. A new seal with some lube is probably how they got it up there.

-
Do you know off hand if it is cleared for fuel injection systems? It certainly looks like it but it doesn't mention that in the link.
-
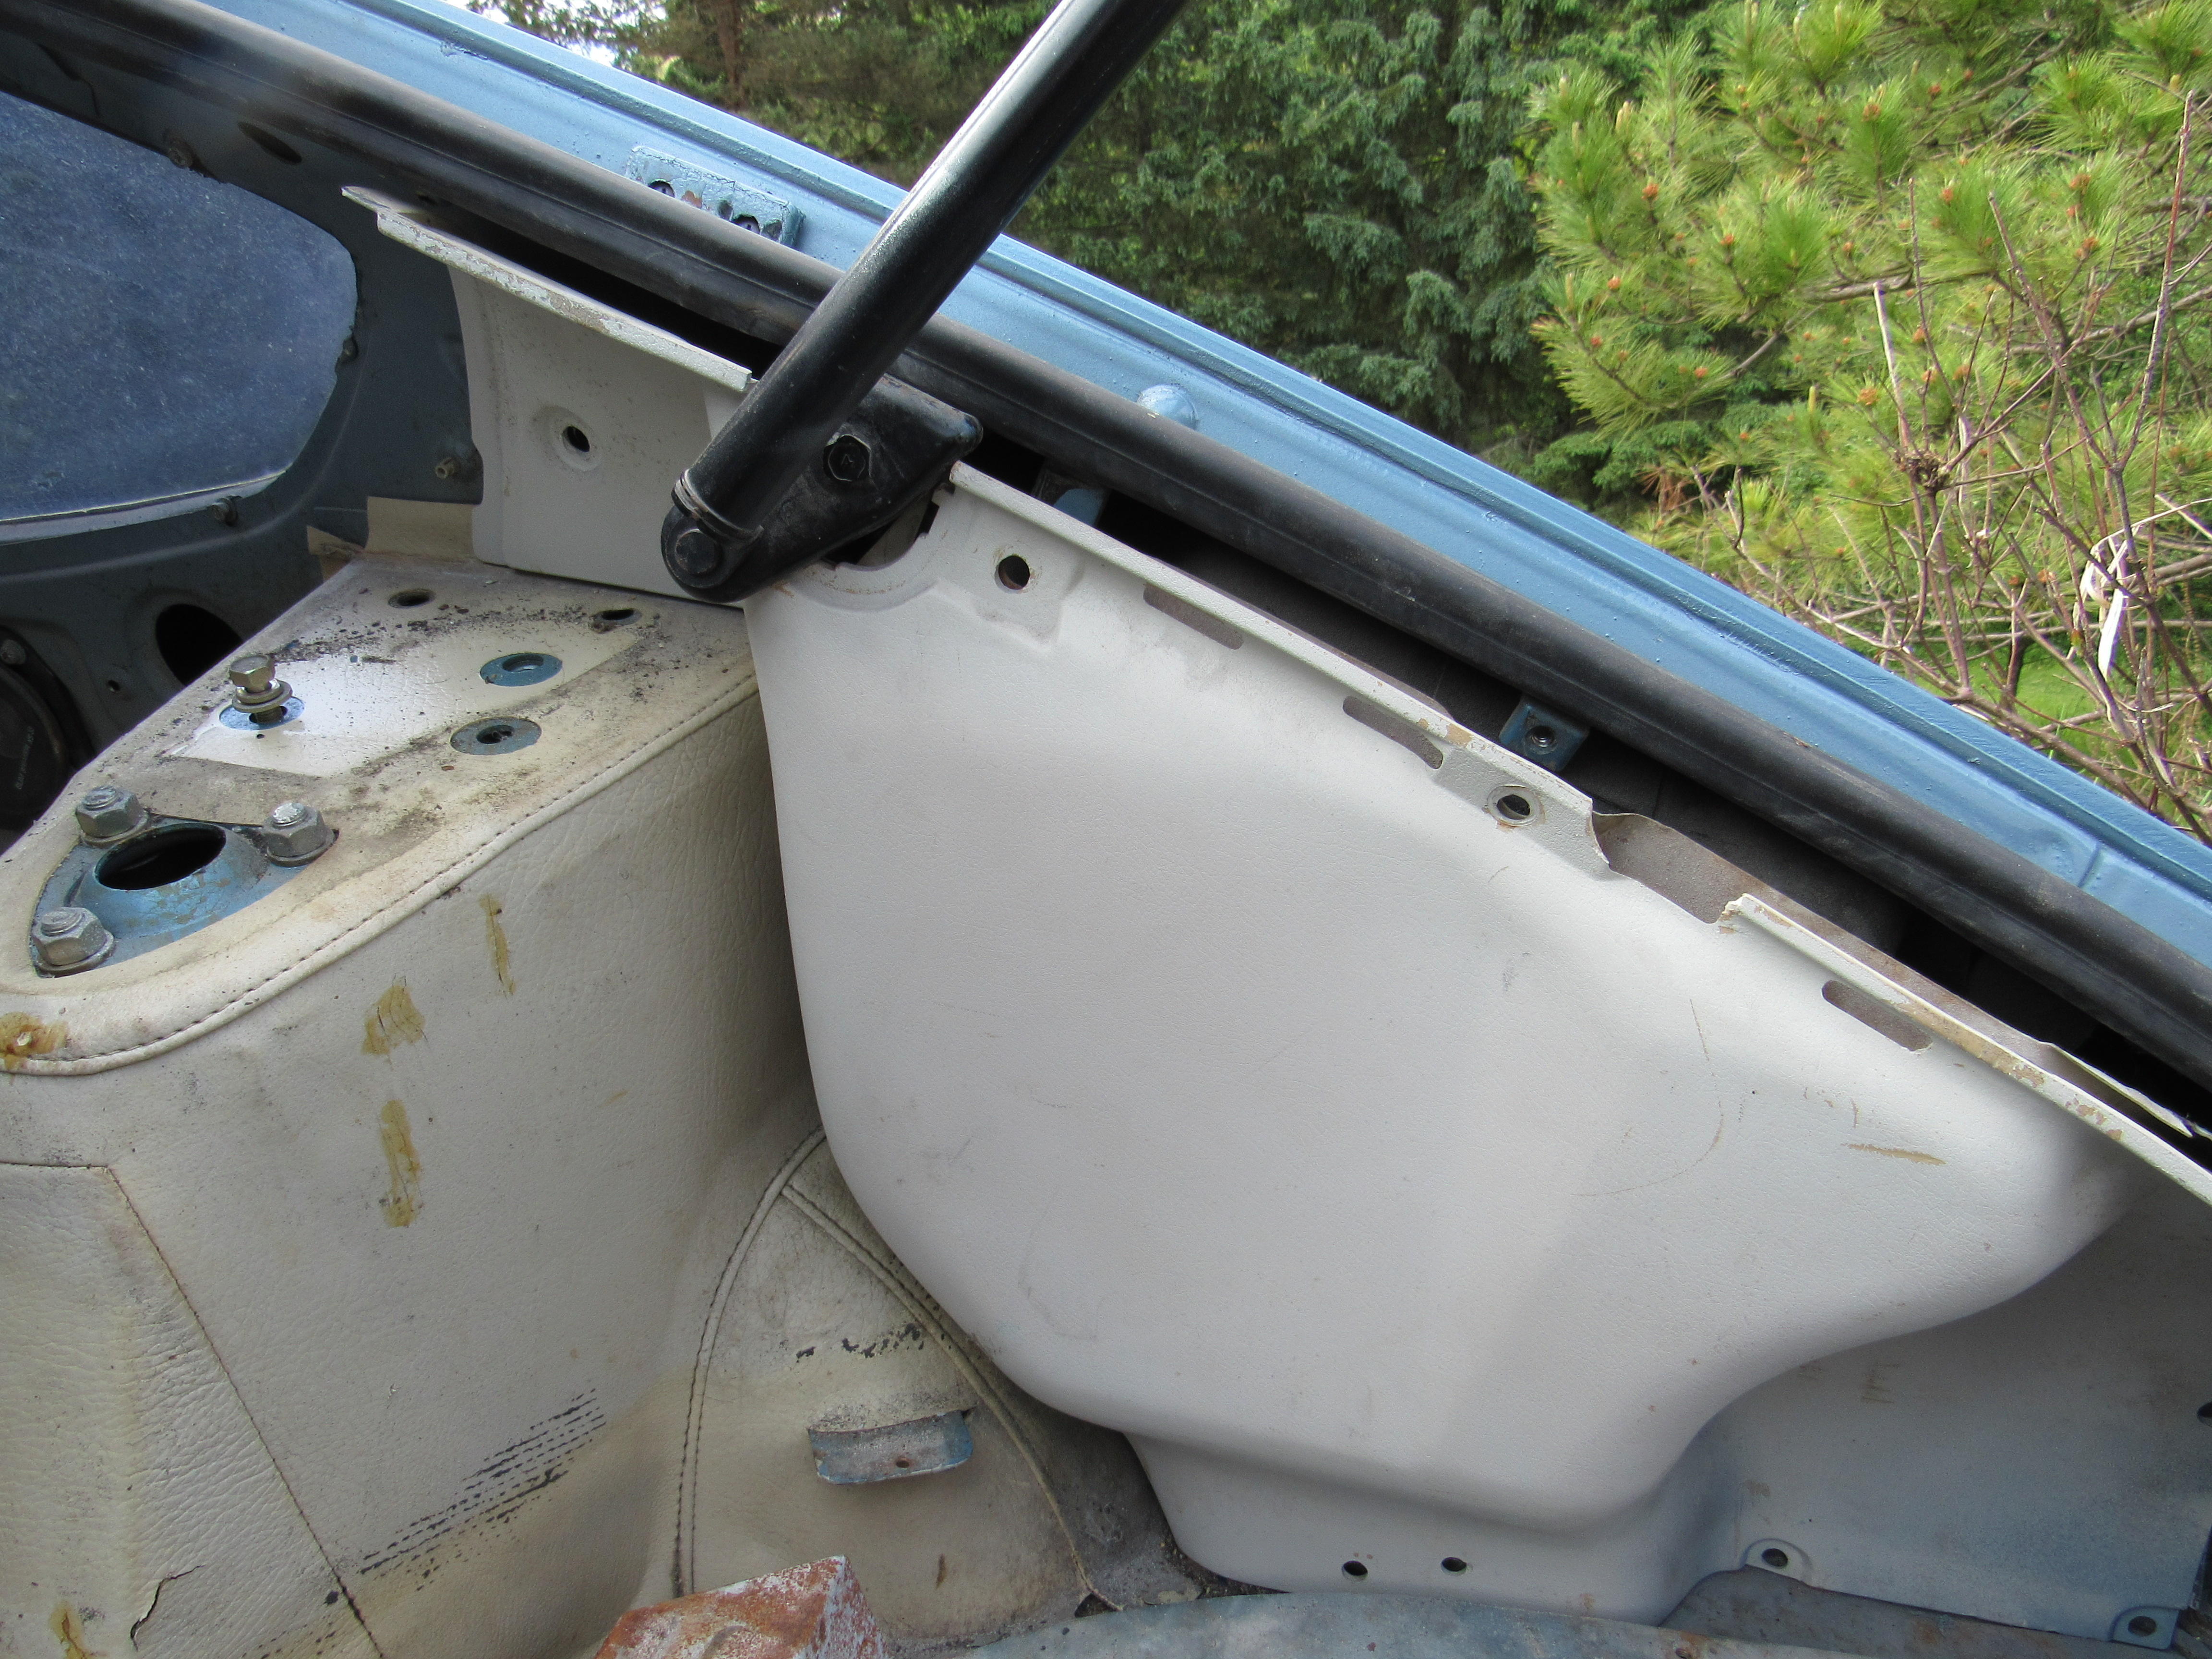
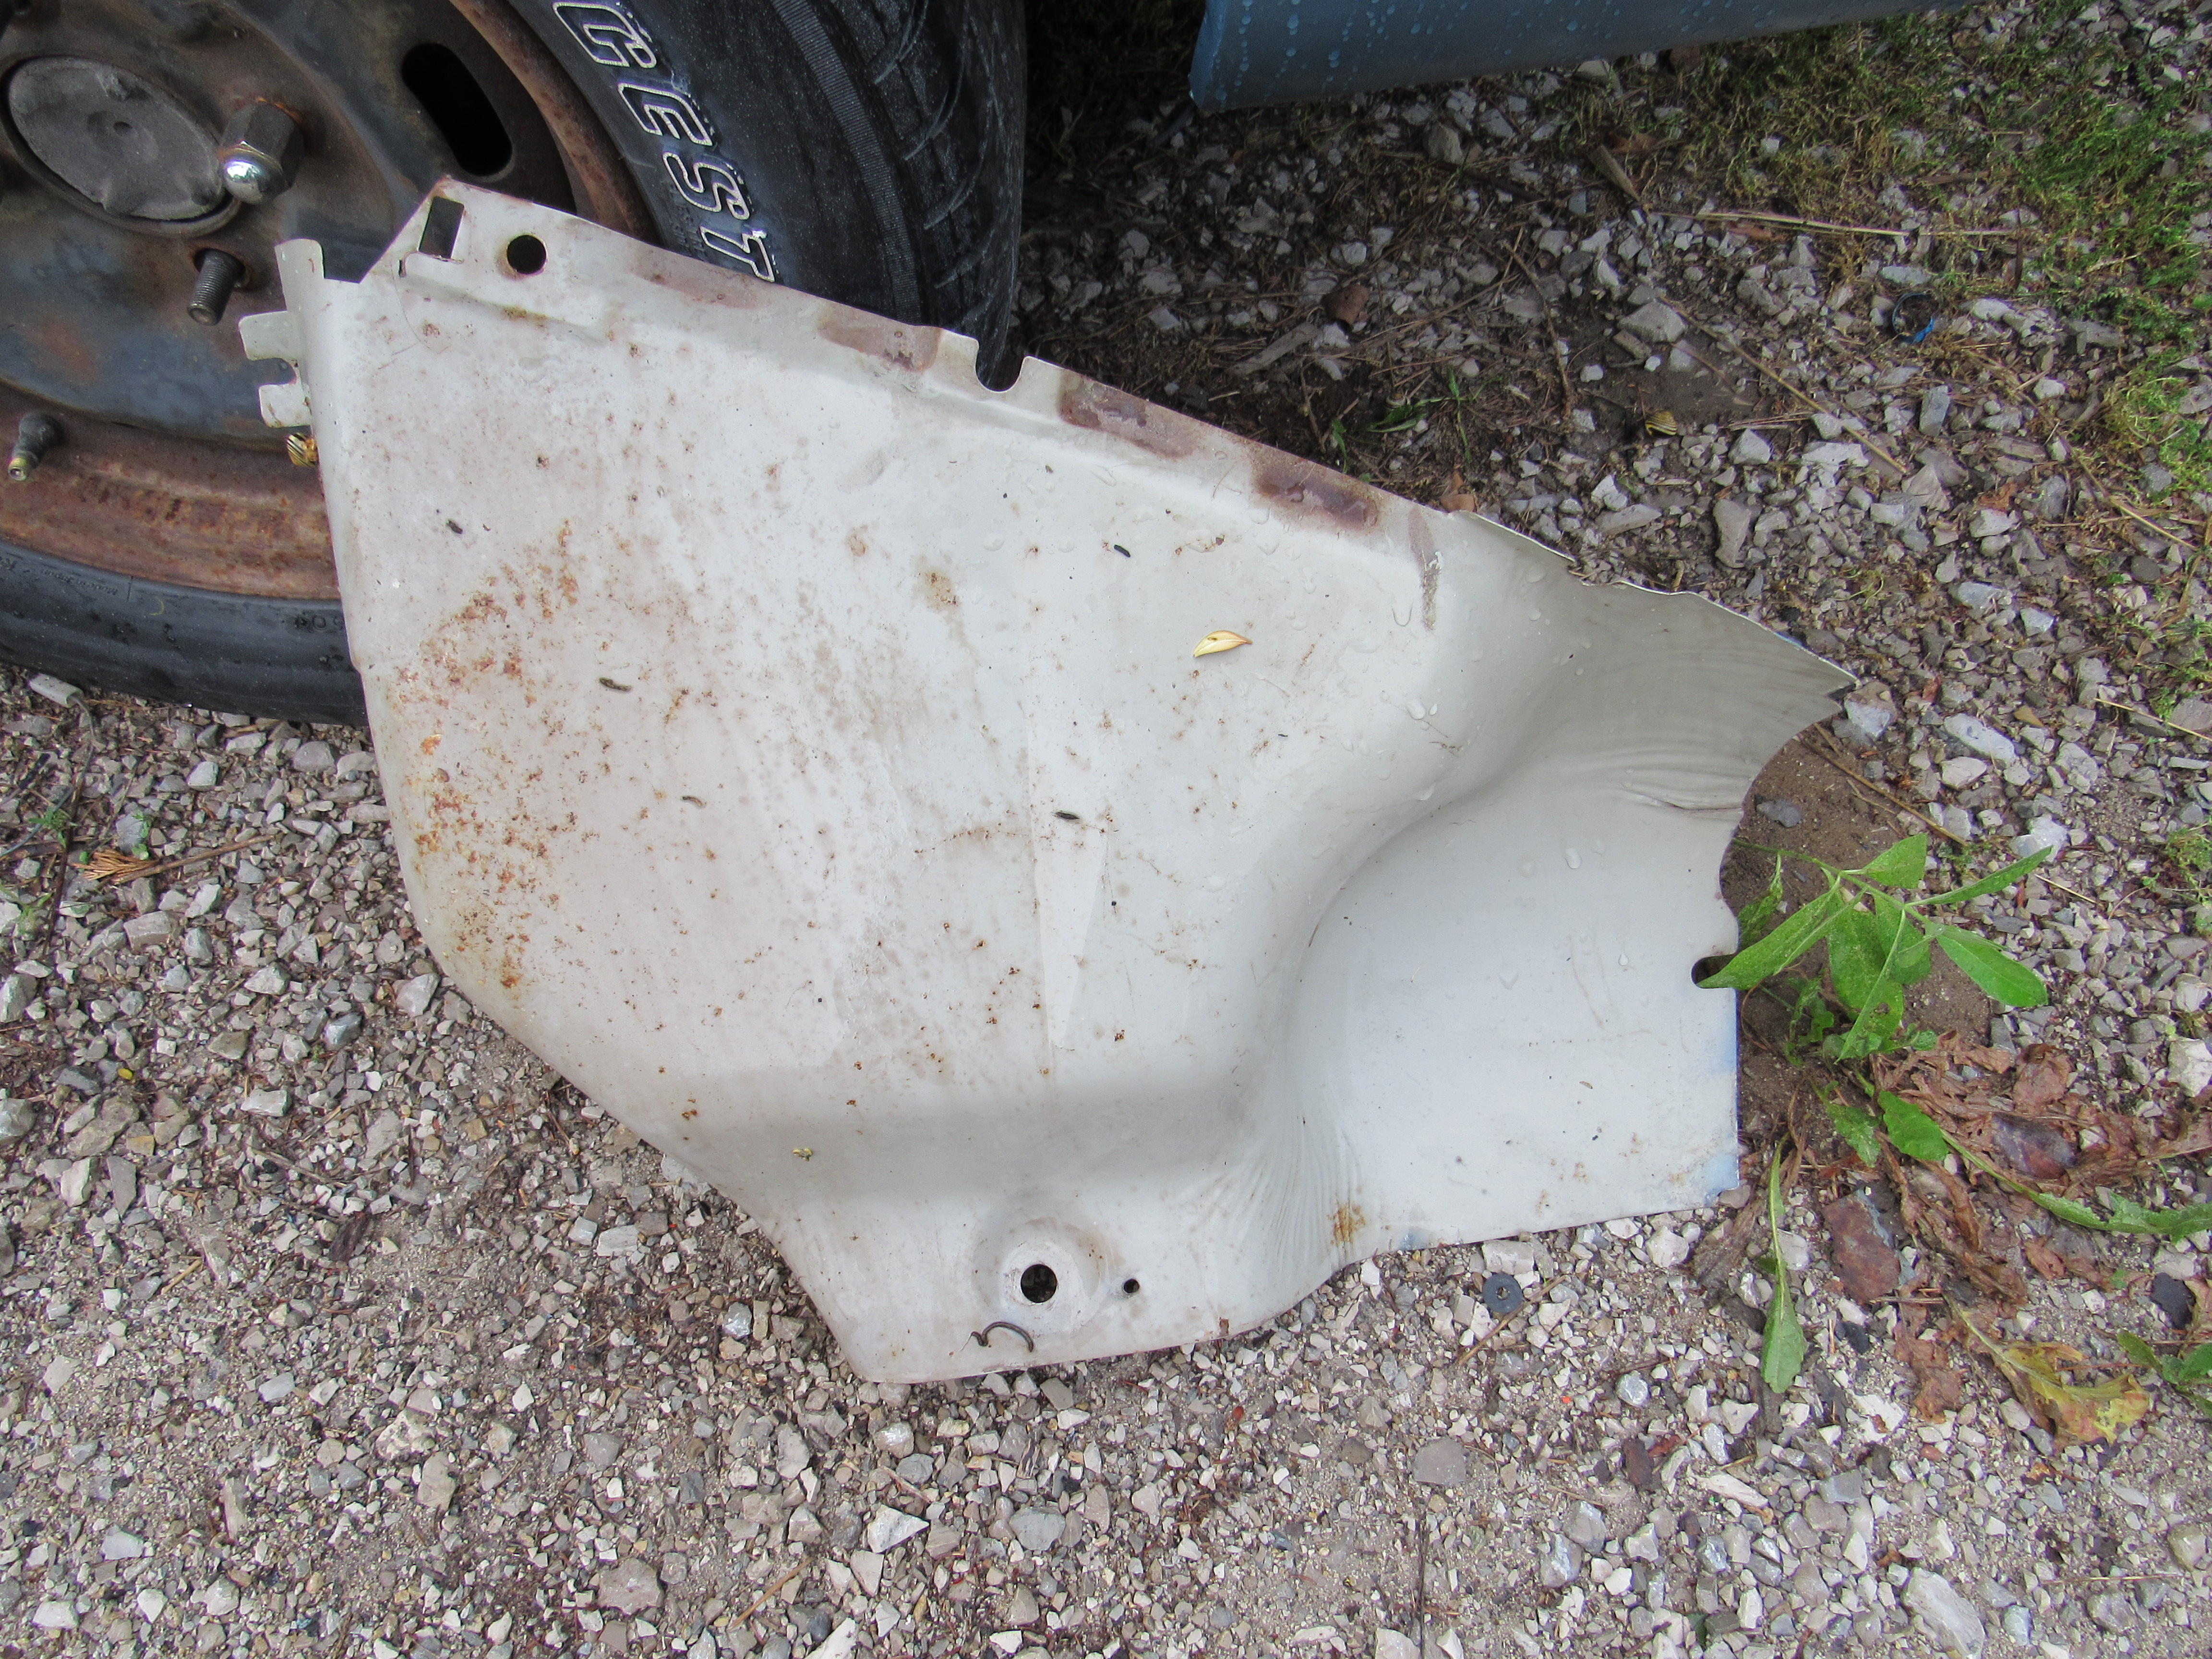
Probably right, if I do put it back in I'll add a some dense foam between the steel panel and the vapour tank, then there will be some noise reduction.
-
Behind the passenger side rear plastic panel there is a steel panel of almost the exact same shape covering the gas tank vapour recovery tank, does it really serve a purpose?


-
Does this crude looking thing actually work at quietening down the R200 diff? Wondering if I should reinstall?

-
https://heplating.com/small-lot-orders-electroplating/ Too bad about Zfest eh? Pouring rain all over Southern Ontario.
-
I thought so too but the more I disassemble for cleaning the more I find that needs attention. Besides installing a freshly restored part back on the car is a satisfying feeling that I can never seem to get enough of. The car is going to bone stock except for a few electrical upgrades.
-
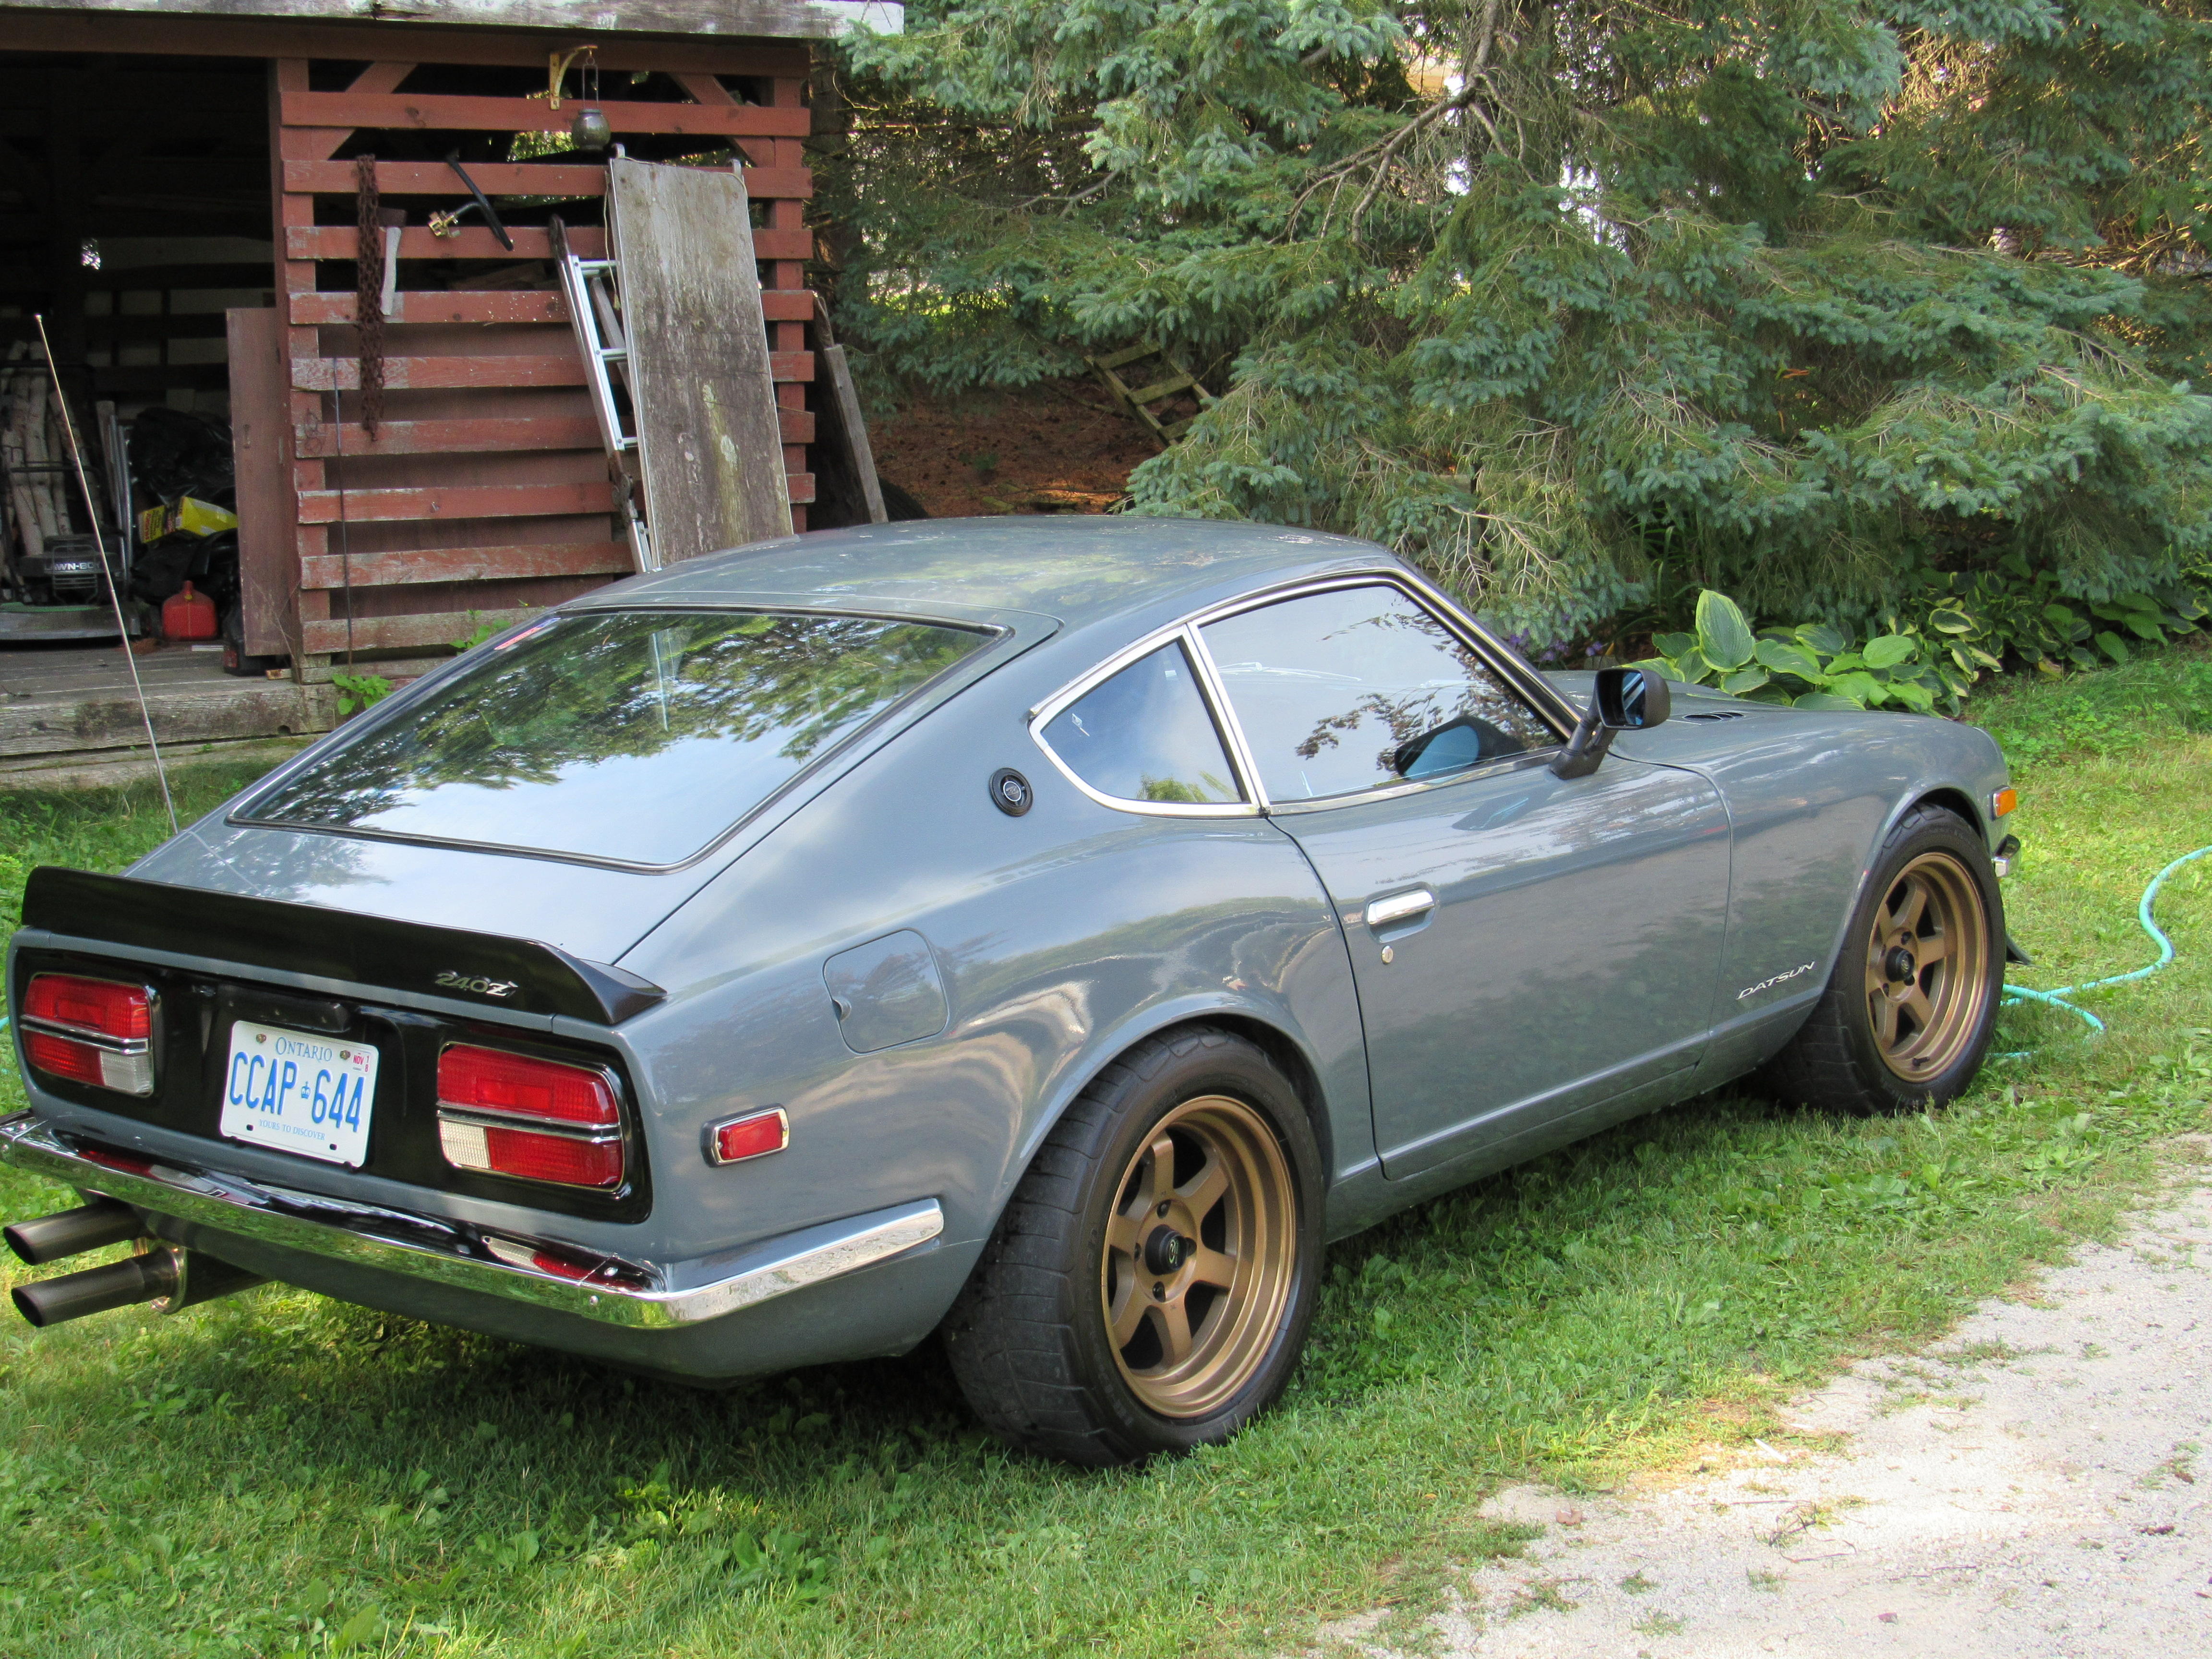
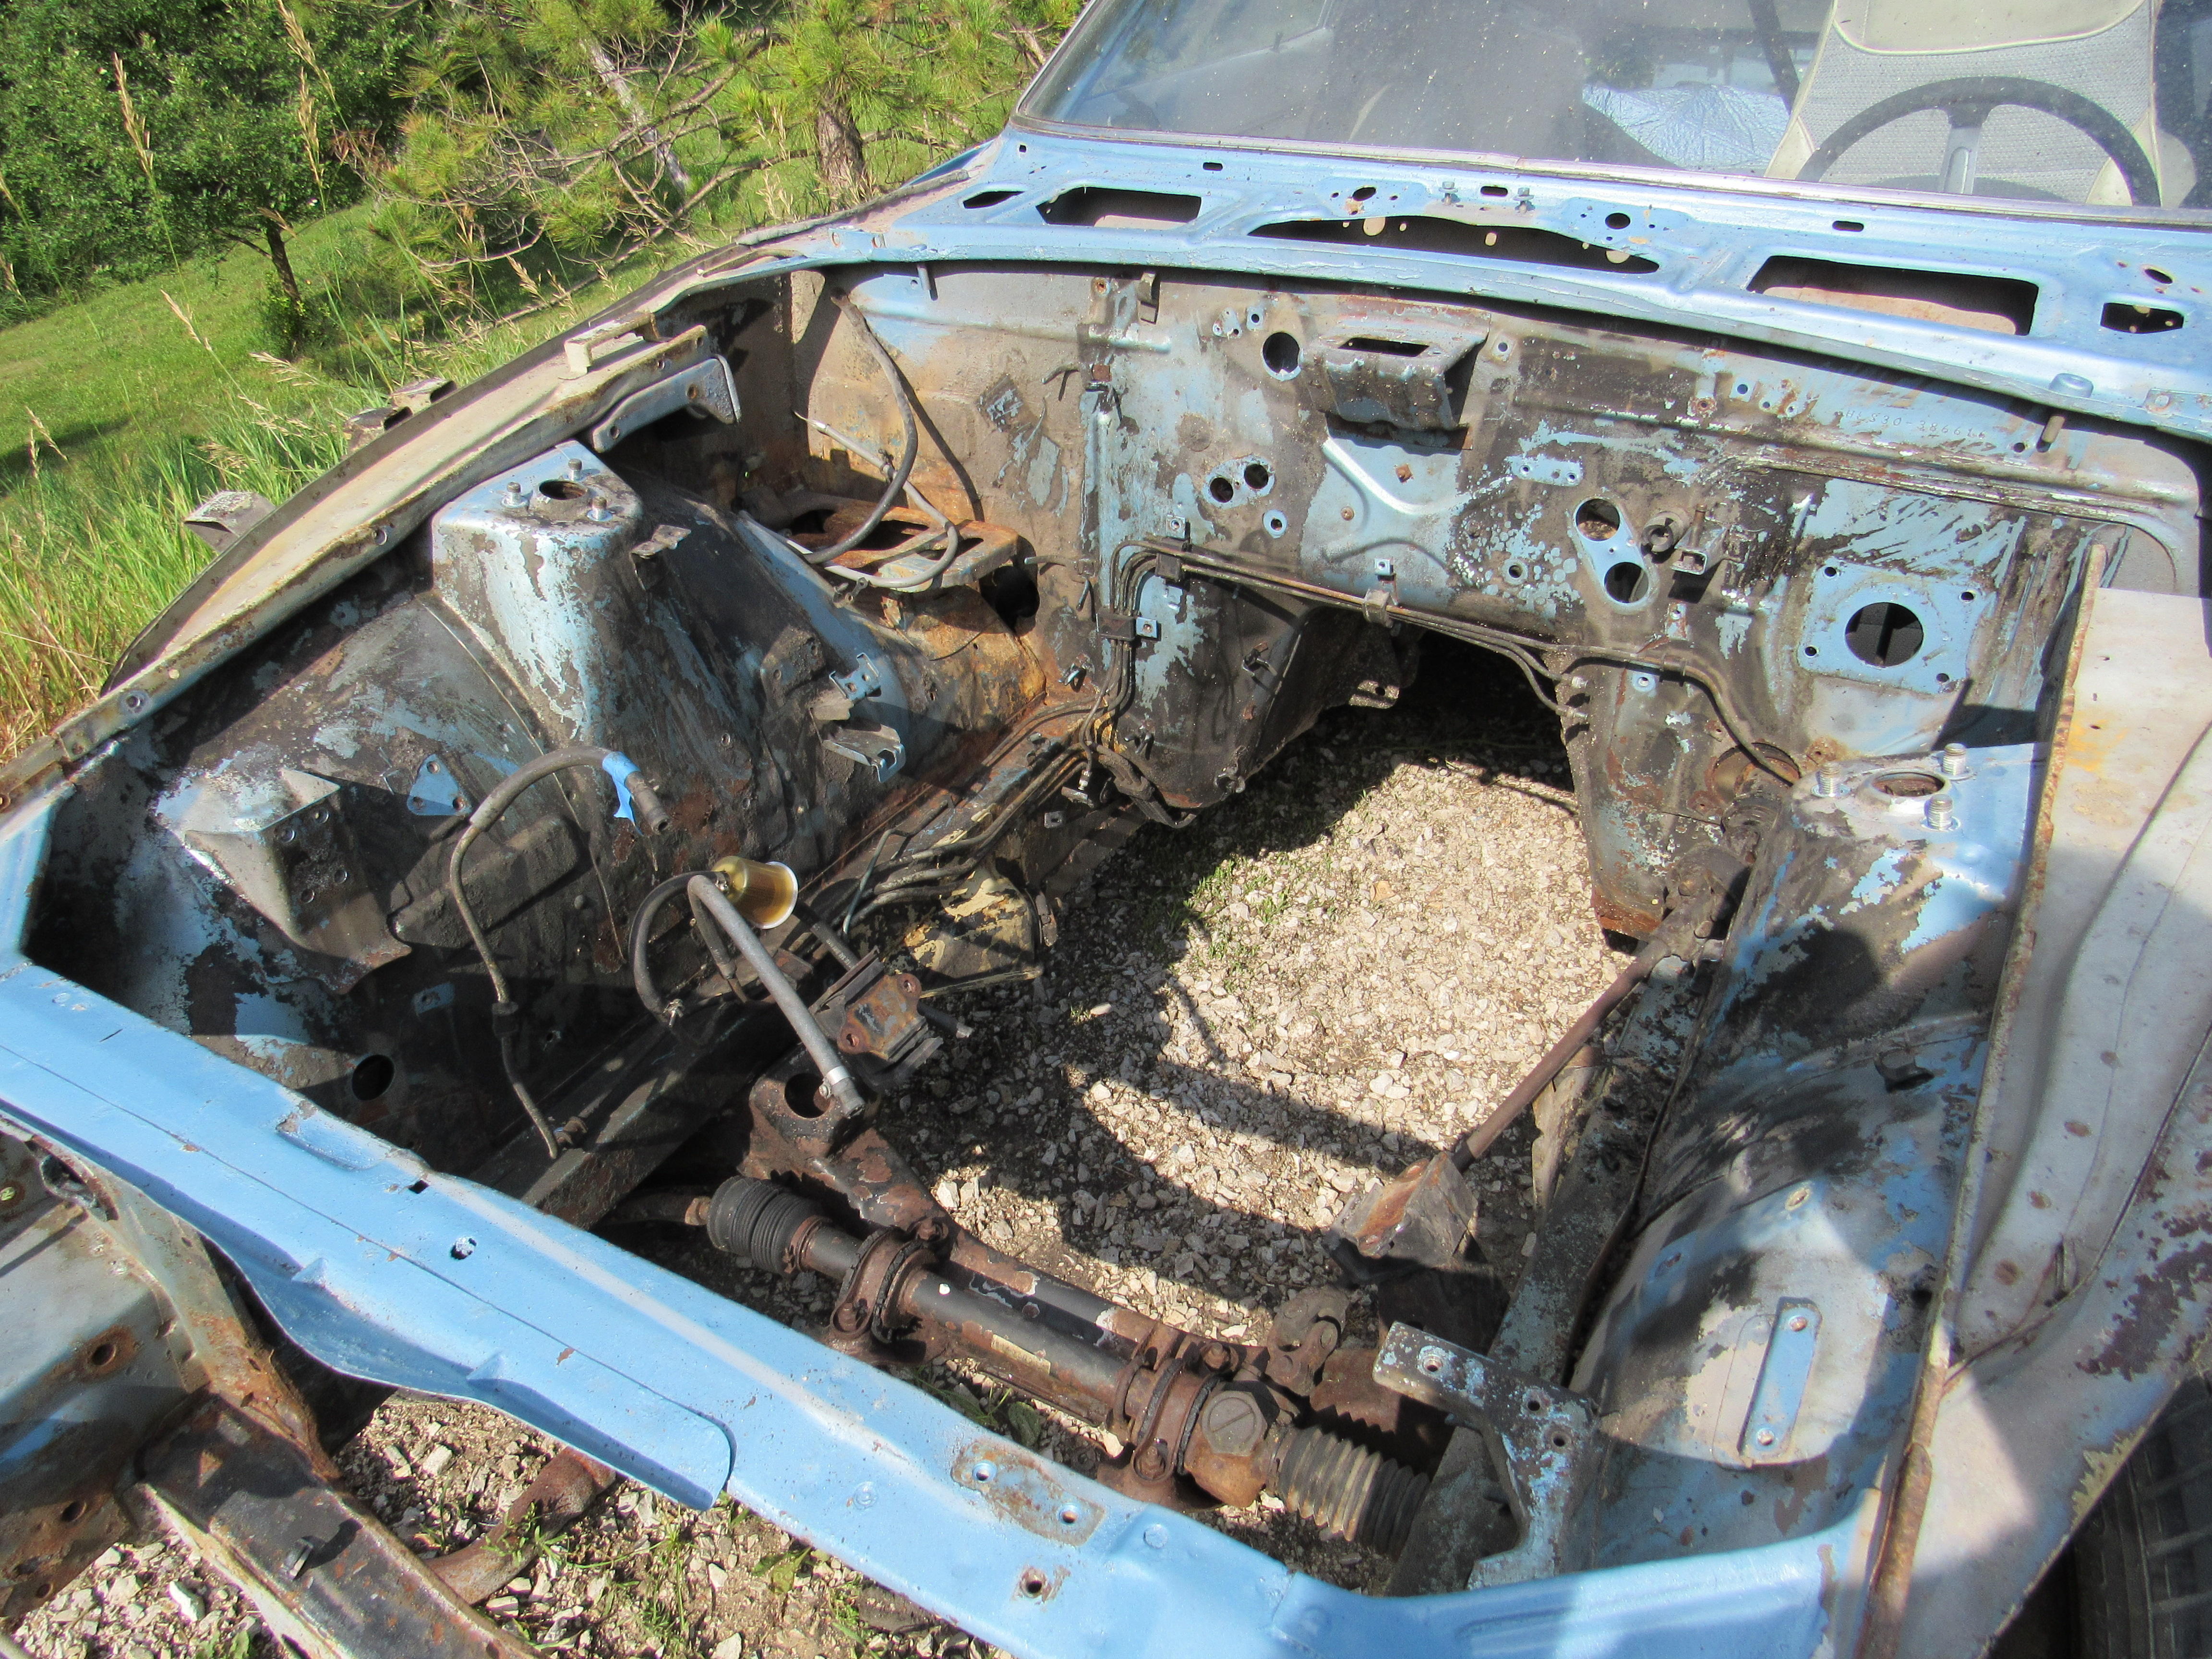
I got the engine pulled today and a chance to pressure wash some of the crud out of the engine bay, lots of work to go. I found a place that will yellow zinc plate everything I can fit into a 5 gal bucket for a $100 so after I put everything from the 280z in there I started to go through my collection of spare Datsun bolts, then all stray metric hardware. I even went through an old box of engine bay work lights that I have p/u over the years at swap meets. Tomorrow is our local Zfest so gave the 240 a wash, clay bar and wax.


-
-
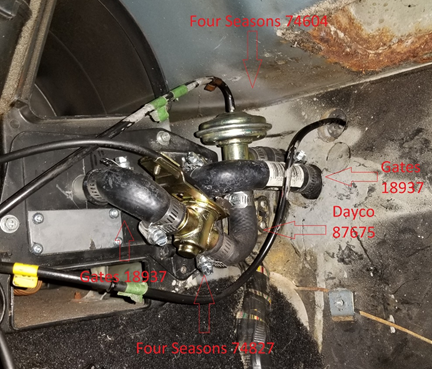
I might be borrowing heavily from your design, looks great. The Four Seasons 74604 I guess is a vacuum unit for the A/C?
-
I'm not sure how they assembled it but the rubber seal on the plunger is too large to be able to push through the pipe.
-
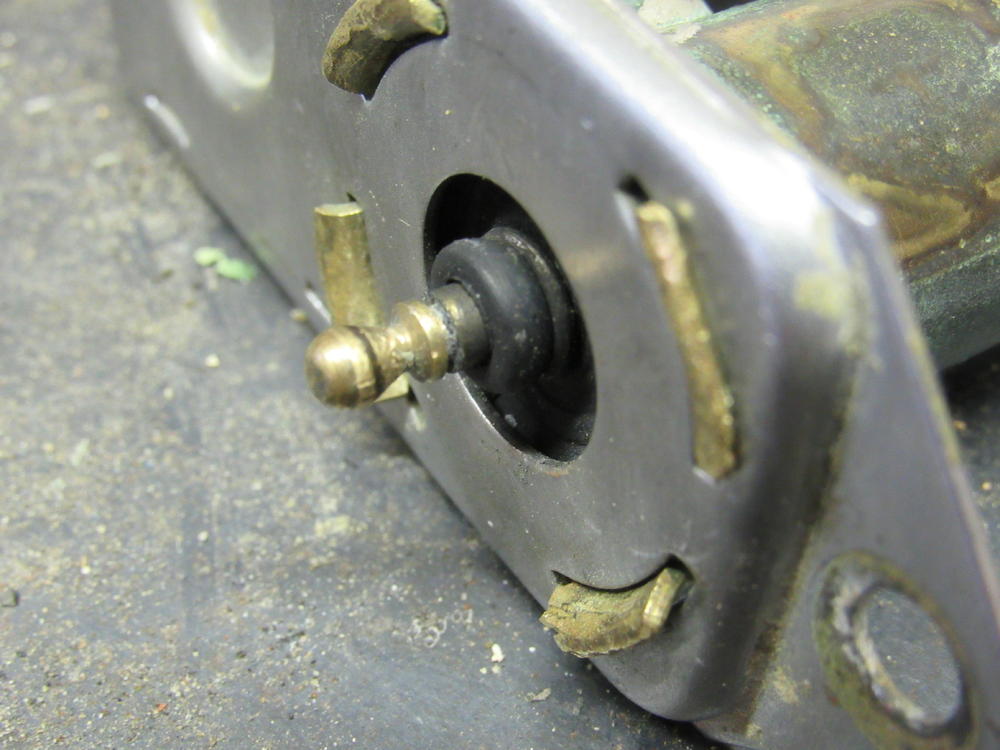
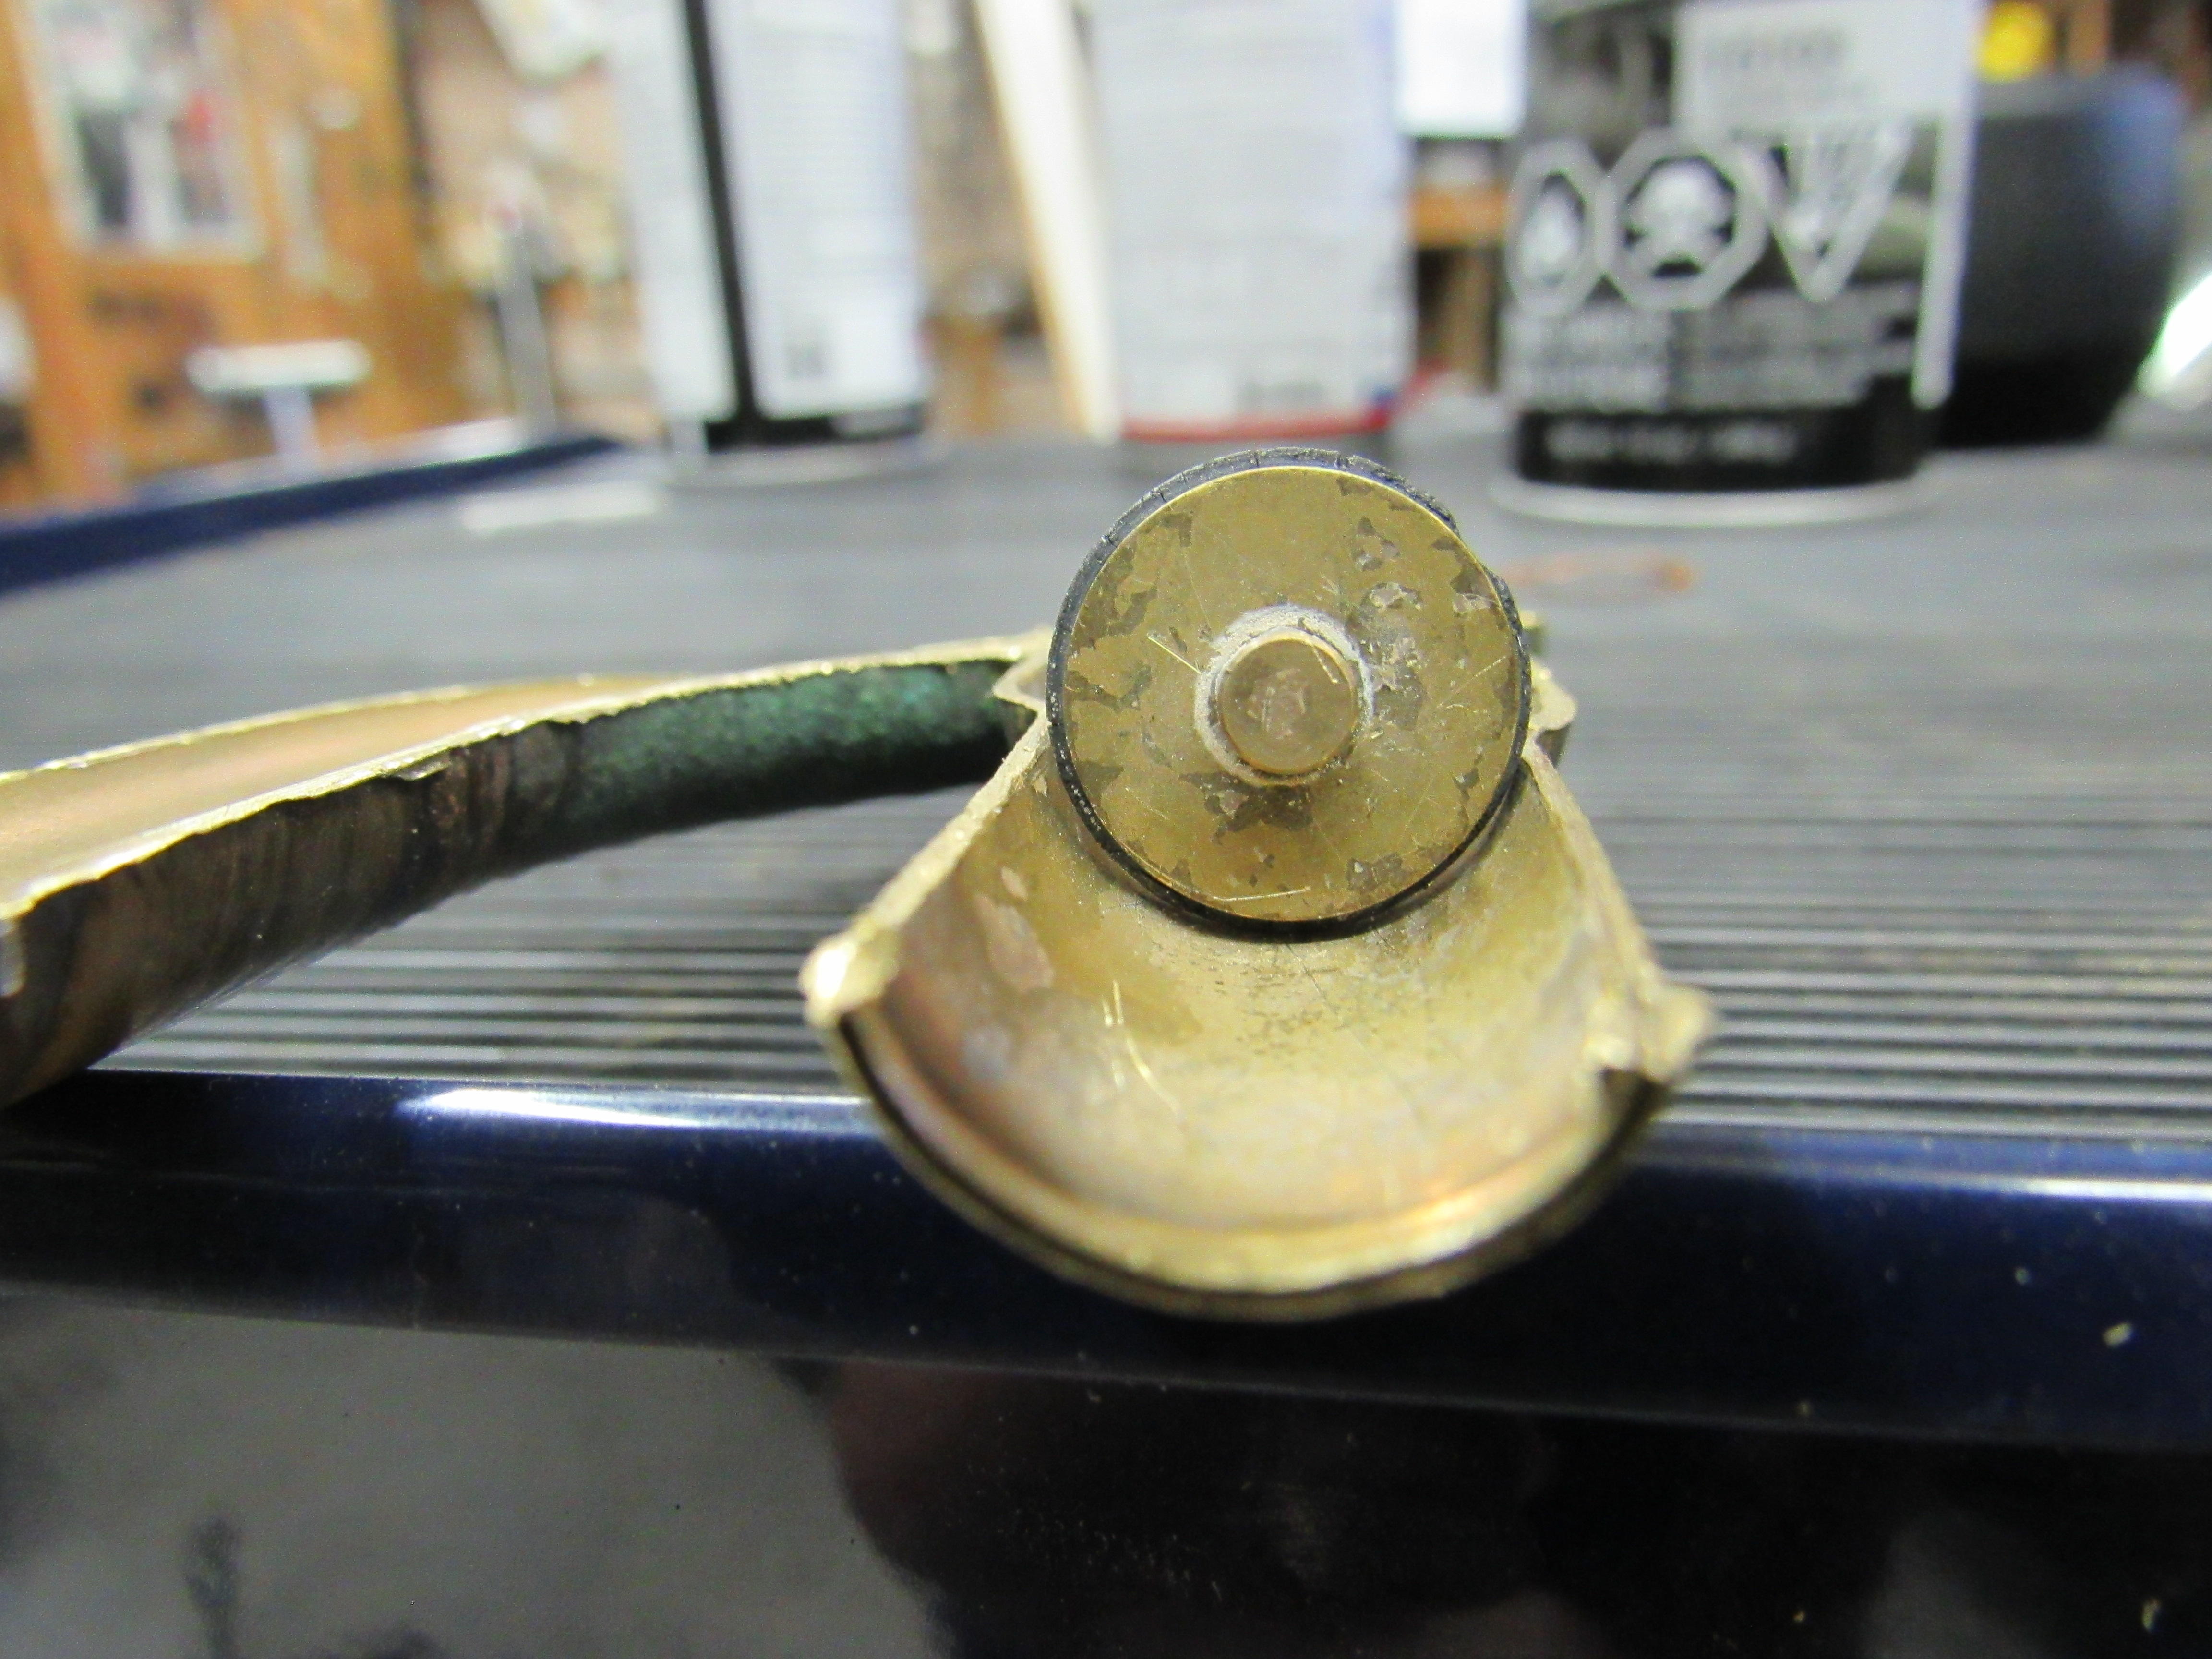
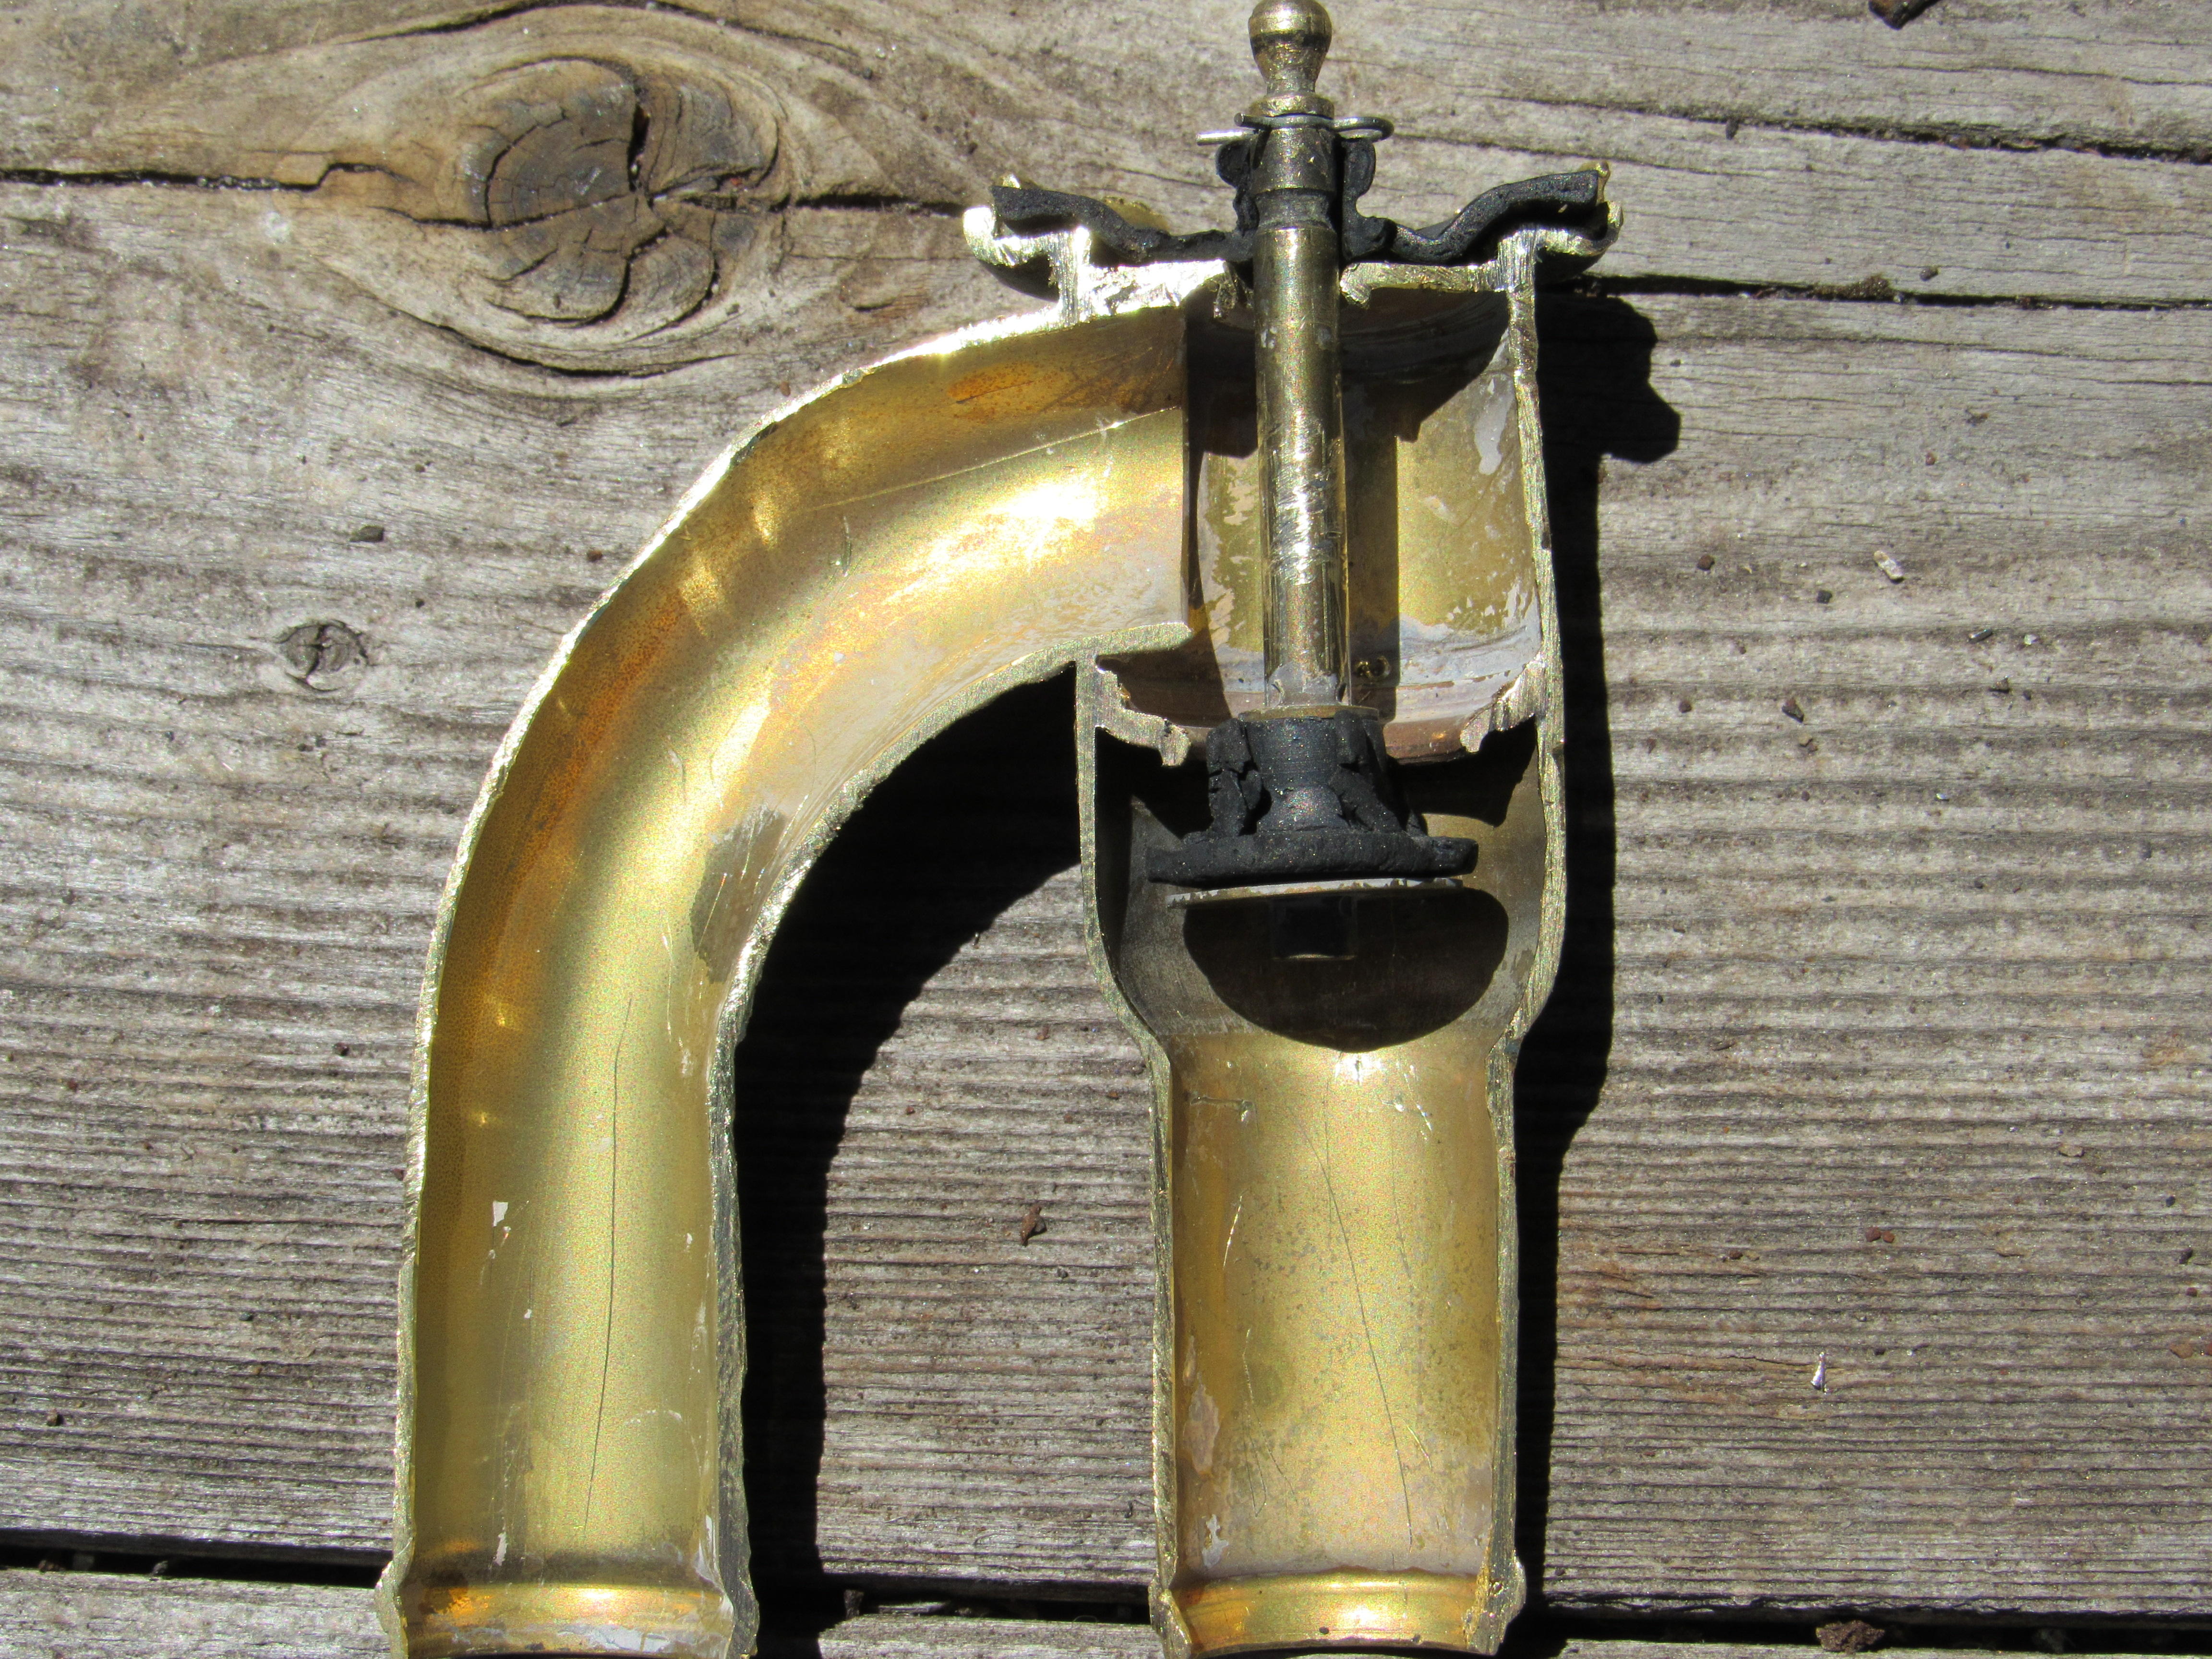
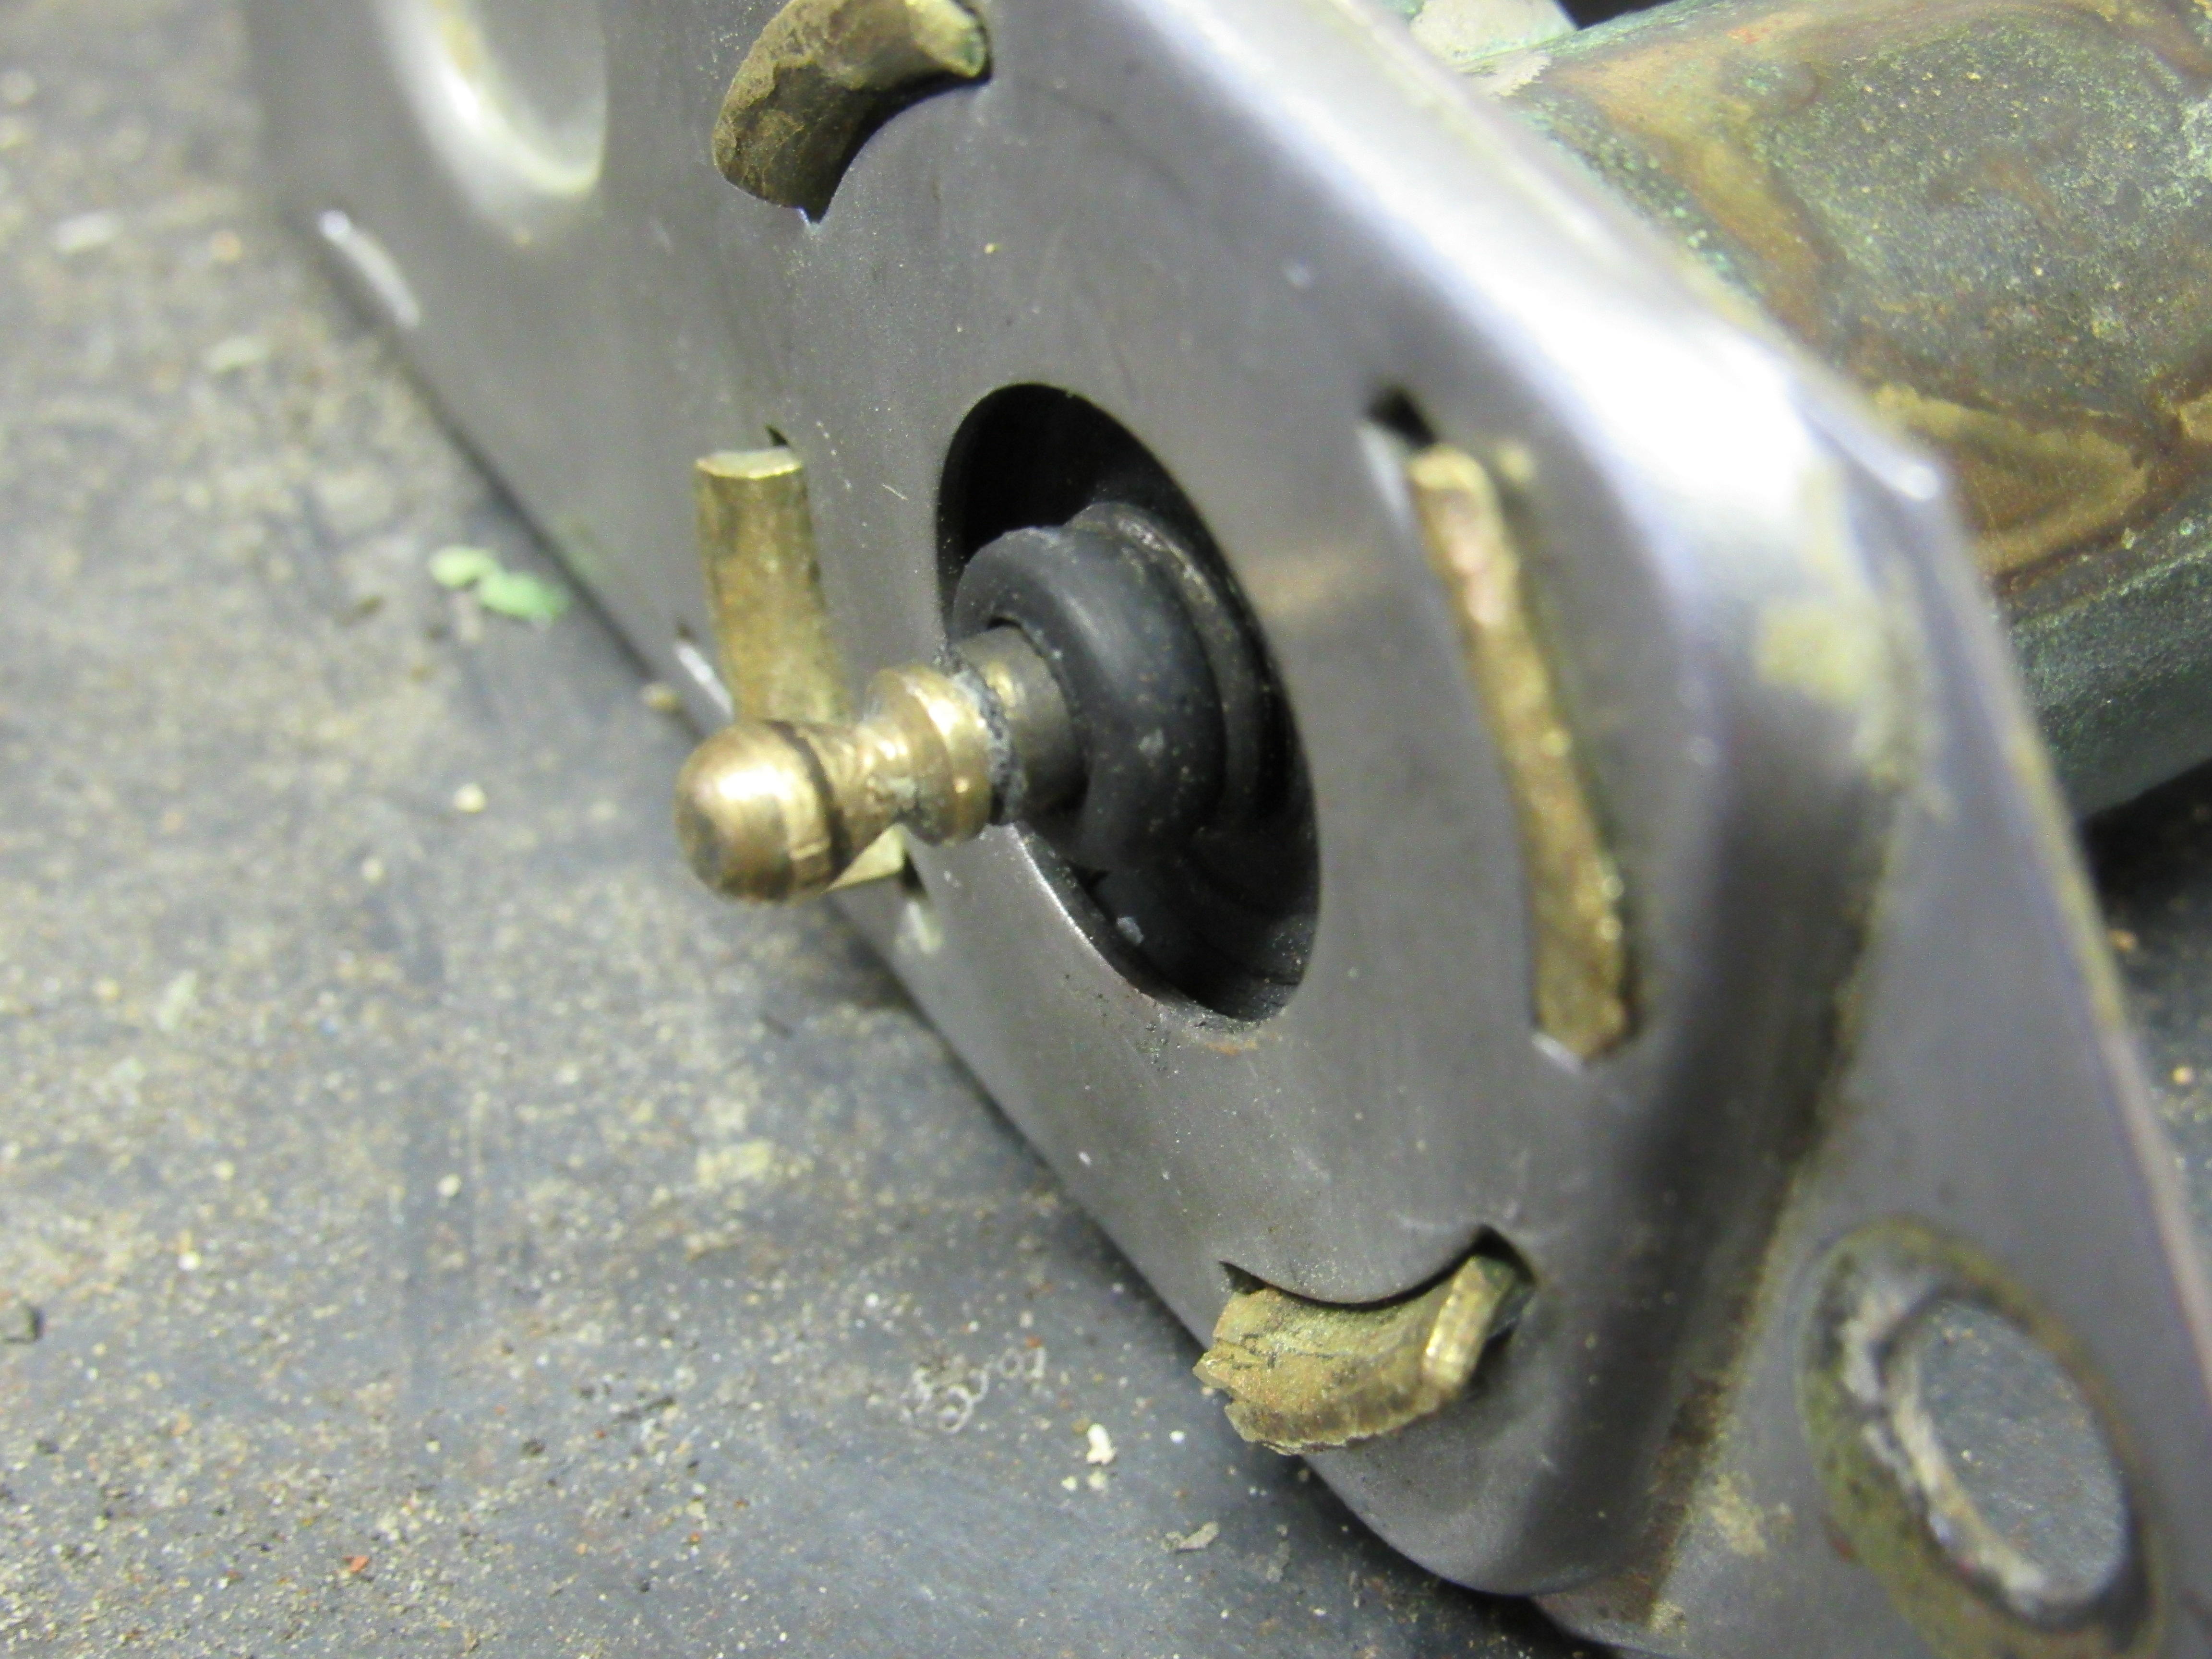
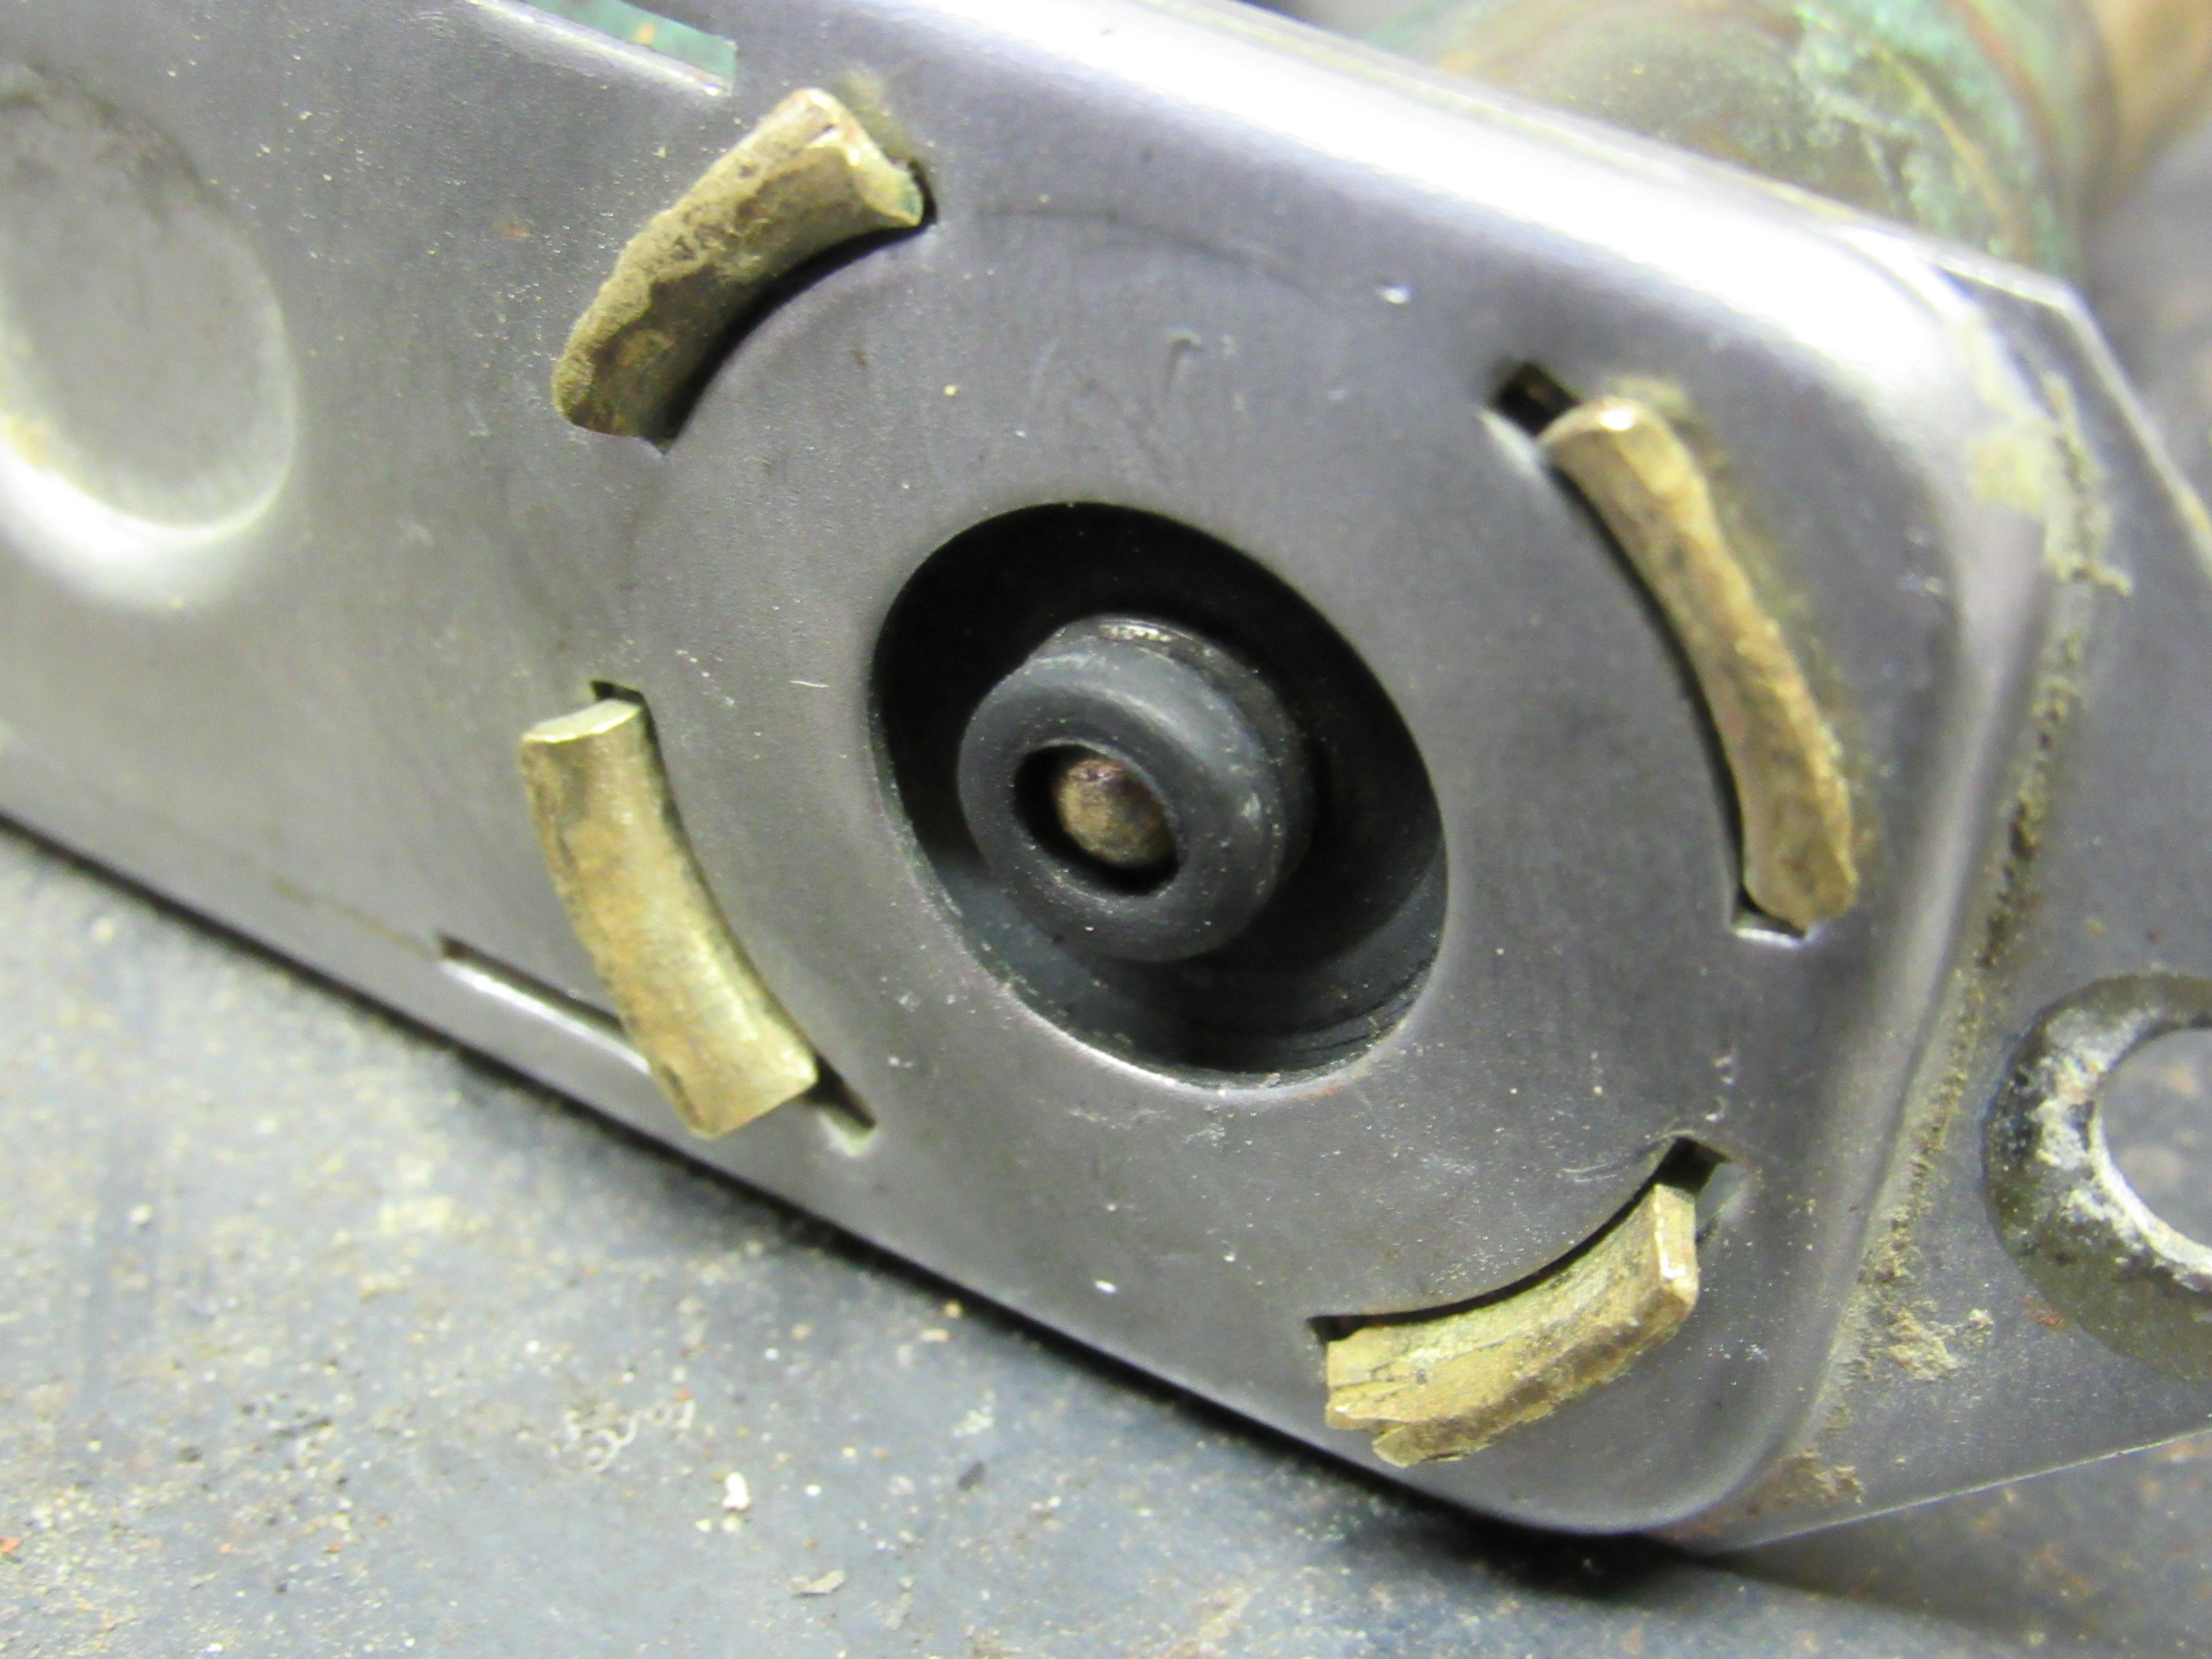
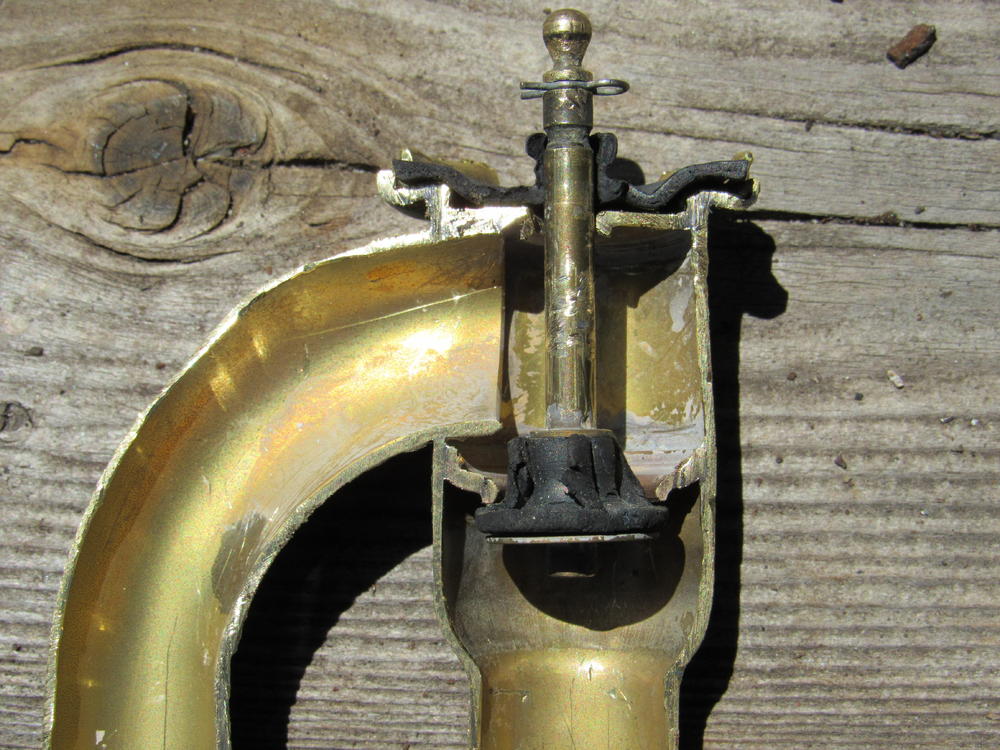
So here's the money shot, not only is the valve not missing anything, it opens and closes 180 degrees opposite of what I assumed. When the plunger is up the valve is closed, down is open, however, the valve was leaking out of the top past the worn out rubber seal so it had to be replaced regardless.

-
Thanks, I'll do that. There is also the Four Seasons 74827 heater valve that @mikev88 is using here,
-
All the pics are kittens yelling at photosuckit.
-
Bingo, I can't see any other way that it could work. The seal on the bottom of the plunger must have been longer because there really is only about 3/16" travel on the plunger. OK, so off to the wreckers to look for a 2000 TL Acura heater valve. Now that I truly know that the valve is buggered I'll open it up and post some pics, part of my ongoing mission to show the world the inner workings of the Z... or just cut stuff up to see what's inside.
-
It just a before and after shot, same girl but 4 yrs apart.
-
I have posted further detail about the heater valve here,
-
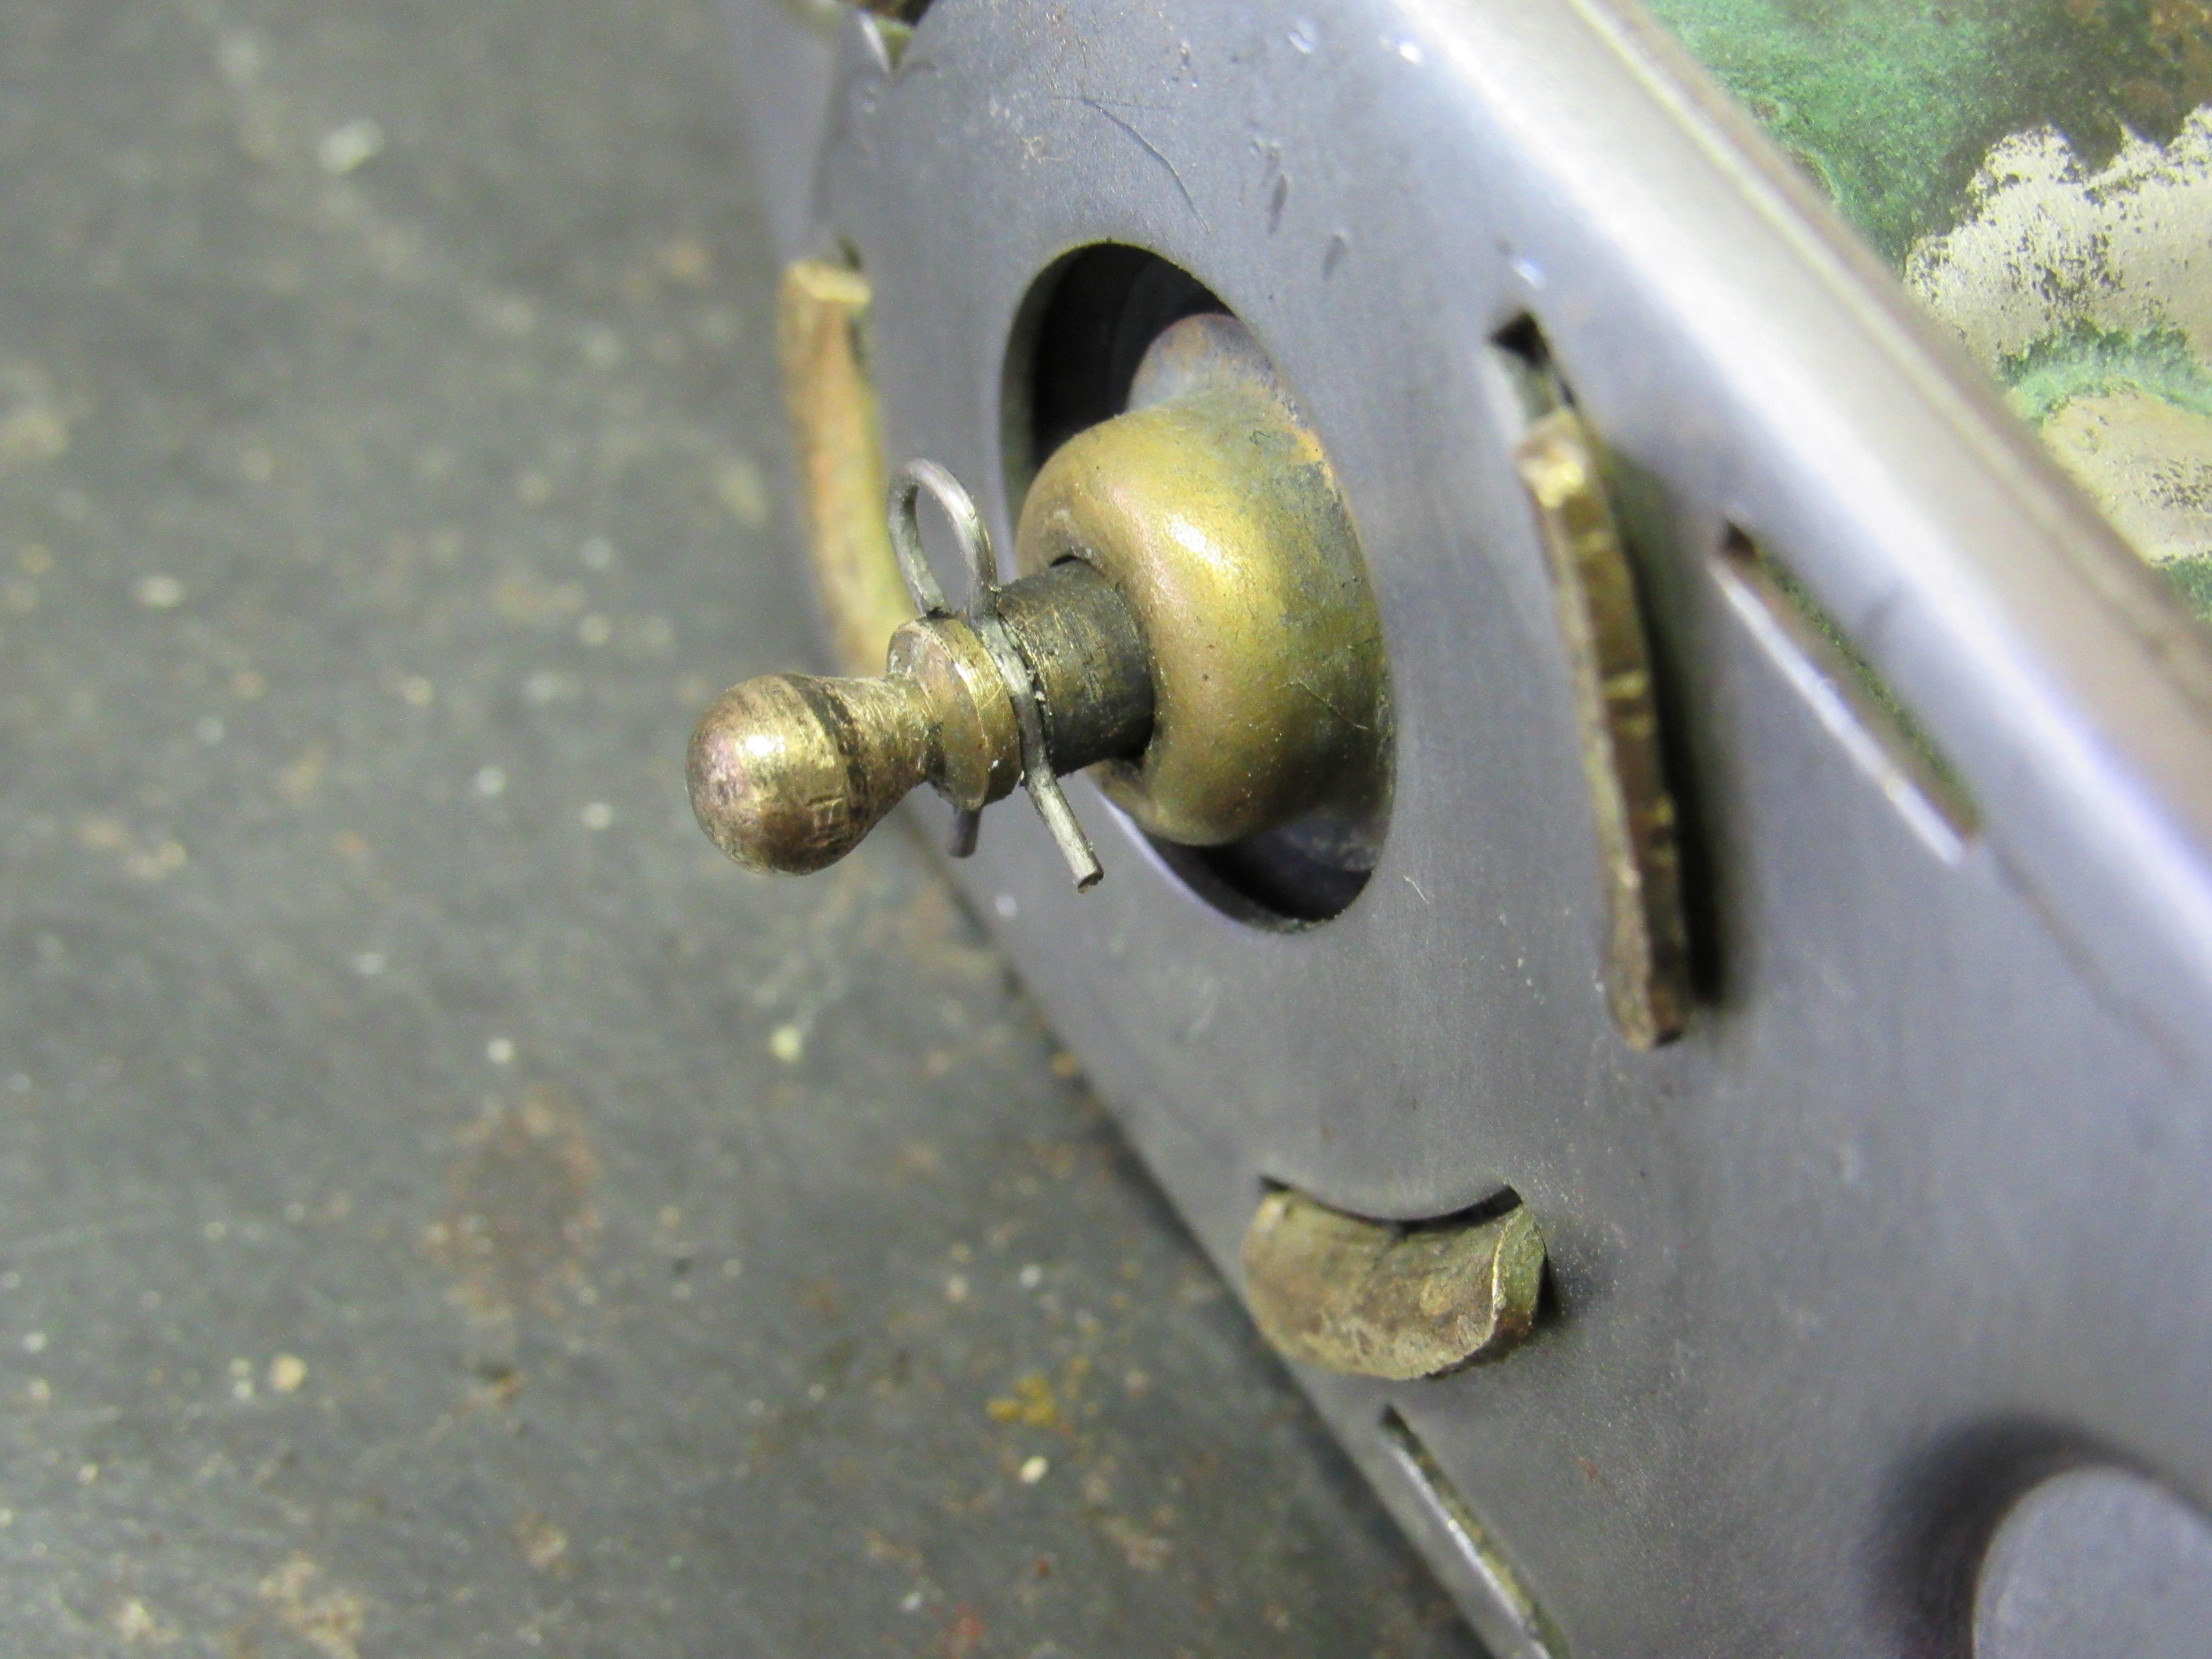
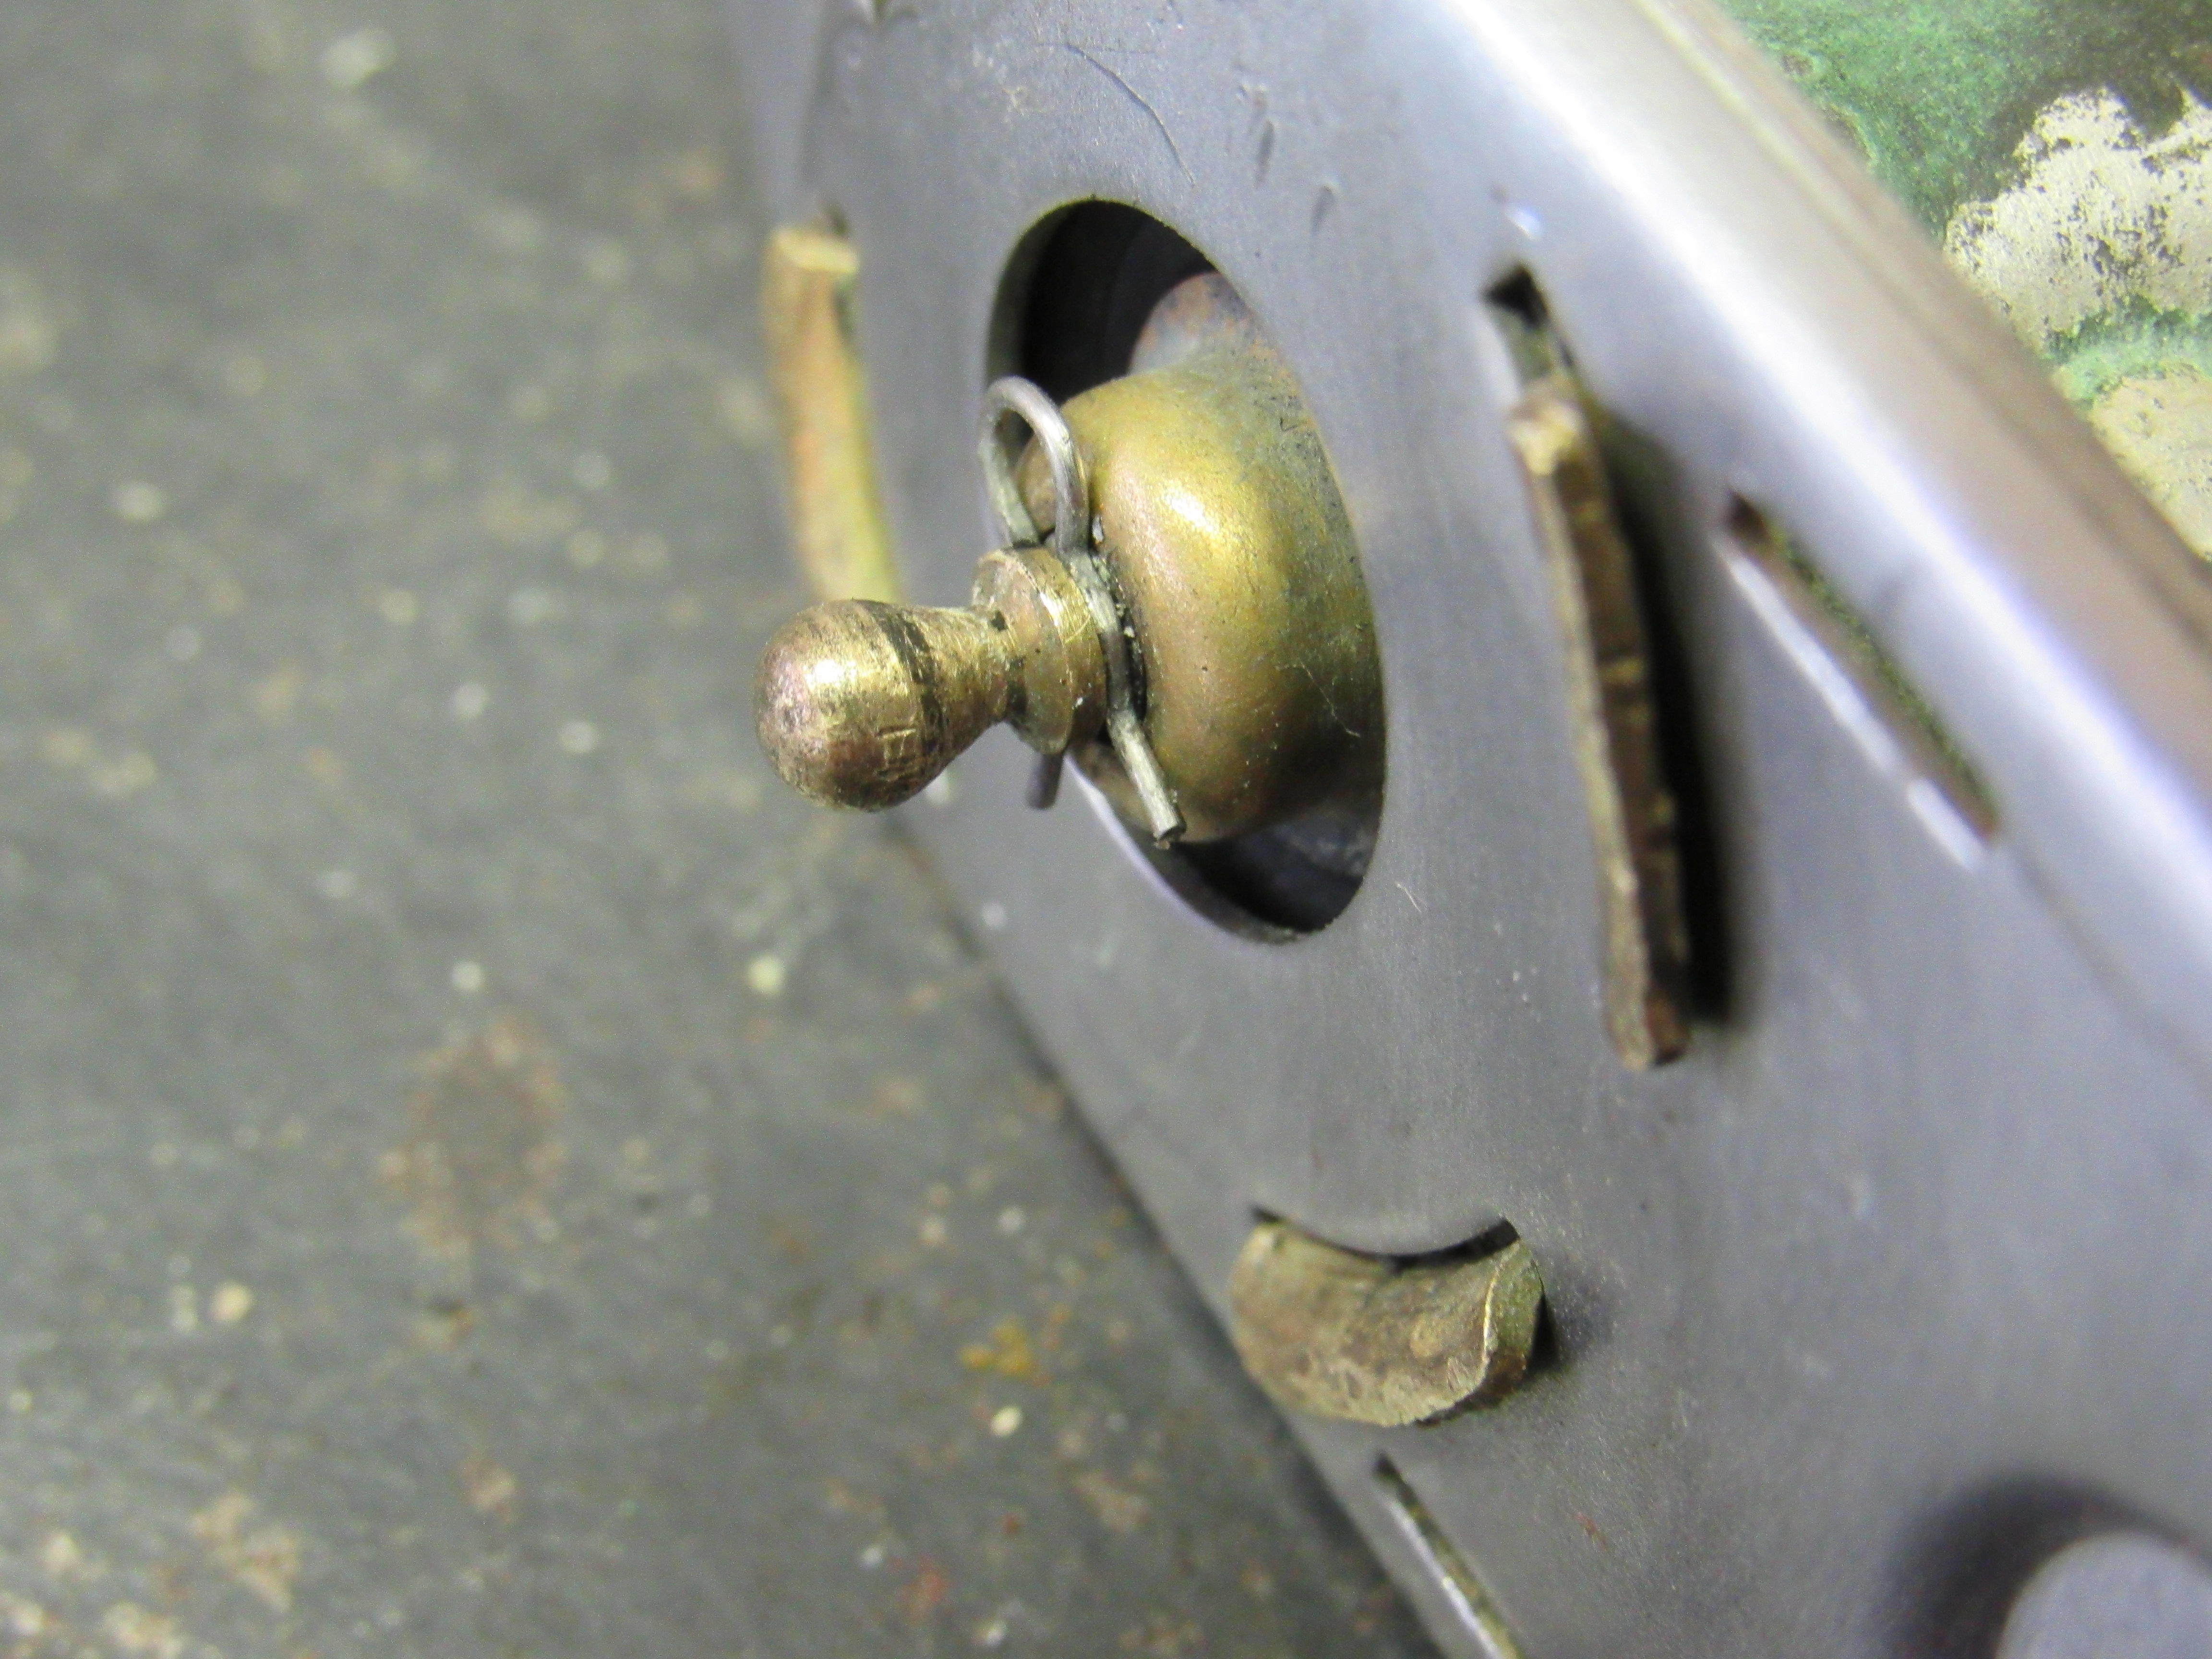
77 280z The heater valve on this car has been in a permently open position, I thought it was corroded into that position but I have cleaned it, removed a bunch of silicone gasket pieces but still can't get it to close. When I look at it close up I'm thinking I might be missing a part that connects to the plunger valve or perhaps the rubber seal/diaphragm is so hard with age that it can't move. In the first 2 pics I have removed the switch that sits on top of the plunger, you can see that there is only about an 1/8" of movement and the valve is wide open in both positions. In the pics #3 and #4 I have removed the cotter pin and the brass cap, so the # 3 pic is in the same position as #1, #4 is the valve actually in the closed position. I guess the rubber is to hard to be flexible.