Hardway
Free Member
-
Joined
-
Last visited
Everything posted by Hardway
-
 Awesome! Can't wait to hear all about it.
 -
A few years ago I modified a socket to make this job easier. This keeps the jaws of the pipe wrench or pliers from chewing up the gland nut. I have used it several times and it has never failed me. For an extremely stuck gland nut, get as much 50/50 ATF Acetone mix in to the threads as possible, let it sit, heat it up, then try unscrewing it. https://www.classiczcars.com/forums/topic/57215-diy-gland-nut-socket-with-pics/
-
To check for oil pressure, pull the power wire going to the coil and the power or ground wire to the fuel pump if it is electric. If it is a mechanical fuel pump, you can leave it connected or remove the feed hose to it and plug it. Take the valve cover off and ensure the oil pressure sensor it connected on the passenger side of the engine. With the battery hooked up, turn the key to turn the engine over and let it spin over several revolutions. You should see the oil pressure gauge needle lift off and start to rise. Once you see this the oiling system is pressurized which is what you want. If you can, have a second set of eyes watch the cam turning while you are turning the engine over to ensure oil is covering the cam as it spins. If no one is there to help you should see it coated with oil once it has spun over. What lash did you set your intake and exhaust valves at? Carbs might be gummed up but if the car ran before you did all this work, they are probably okay enough to let it start. I would have the distributor set at 0 and advance a little while you are trying to start it. There are other things to check regarding the distributor and timing itself that has been mentioned above. When you installed the distributor, did you ensure the engine was on the combustion stroke on #1?
-
Austin area Z owner here if you need a hand. Everything above is correct. Need to be methodical and check each item off. I agree that getting the distributor in the right spot to start is usually the culprit. Usually easier to have some turning the distributor slightly while someone else turns the key. Before you move too far ahead, have you confirmed your getting oil pressure? How far down did you disassemble the engine? Have you pulled one of the spark plugs and checked for spark at the plugs? When it sputters on start fluid, is it actually sorta running for a few seconds? Are you running the stock SUs or something else like dual Webers or triple Weber or similar type carbs?
-
Glad you got it fixed! Since you mentioned the debris in the rear prop. valve, I am betting you ended up circulating some rust or dirt throughout the system when you bled it. Then the debris got stuck causing the issue. The brake components are somewhat precision pieces so it would not take much to create an issue. Taking everything a part, cleaning it, and rebuilding it along with the blow out of the lines ensures your system is clean.
-
Yeah, that is usually the case. You end up with several sets to make one really good set. If you go down the restoration path, the chrome plating of the plastic is the biggest challenge. It is unfortunate that once they are painted, very little of the chrome is revealed but there is not substitute for the trim as it would look wrong if it was just silver. Check out the place below, they may be worth calling. https://www.muellercorp.com/custom-chrome-plastics-and-restoration/
-
Can you shows us some current pictures of your wheels covers? You would need to find a chrome plater that can and will plate plastic. There are some other method to get chrome on to plastic that you can research. Once plated, the wheels covers would need to be masked and painted. Nice sets of non-D type wheel covers come up for sale here and there and are usually pretty reasonable. Given the labor involved in restoring a set, may be cheaper to get a nice used set.
-
Another issue with these locks is the steel arm wears out the end of the pot metal cam. I did a write up of using coat hanger to overcome the issue. Did the same thing on the end of the arm but wrapped it with some electrical tape as I did not have any tubing or hose at the time. https://www.classiczcars.com/forums/topic/42253-how-to-s30-door-lock-coat-hanger-repair/
-
@jfa.series1 Hey Jim. I haven't seen anything lately but we can reach out to some contacts and see what is out there.
-
No thread ever dies, it just fades away for awhile only to be awakened by a new idea or perspective on the topic. Here is the rebuild I did on my door hinges. Plenty of pics.
-
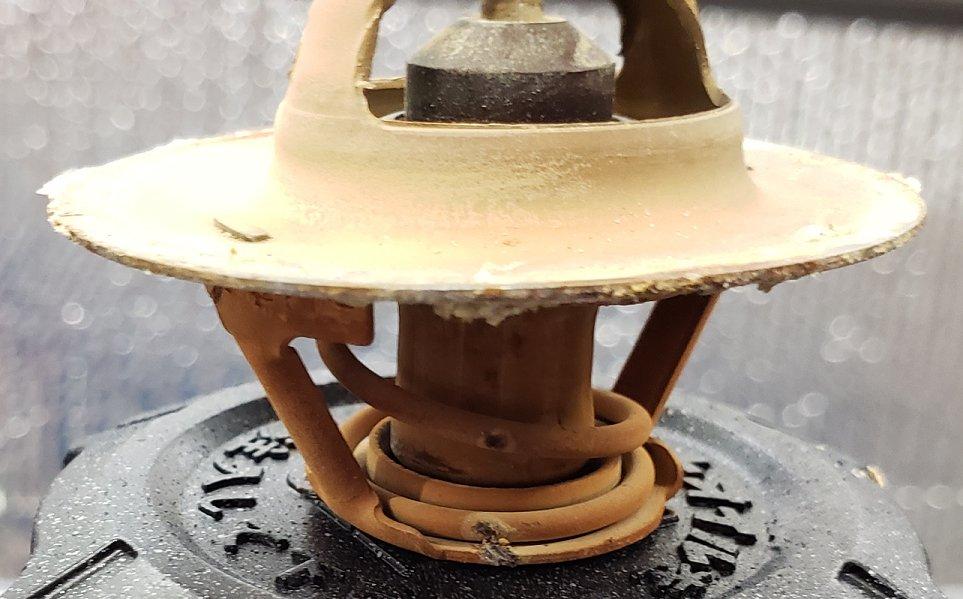
I turned my attention to the thermostat housing and realized I needed to temporarily mount it on the engine in order to get the top cover bolts out. Luckily they did not snap off but they were in awful shape. Luckily, I ordered all new hardware from MSA for this project and so far it has paid for itself many times over. I am using an oil pan drain plug to cap one of the holes and upon closer inspection I can see it was hitting the thermostat. I will take note of this when I install the new thermostat as thermostat core is not centers and can be turned away from the plug. The housing will get a complete clean up and paint job before re-assembly.
-
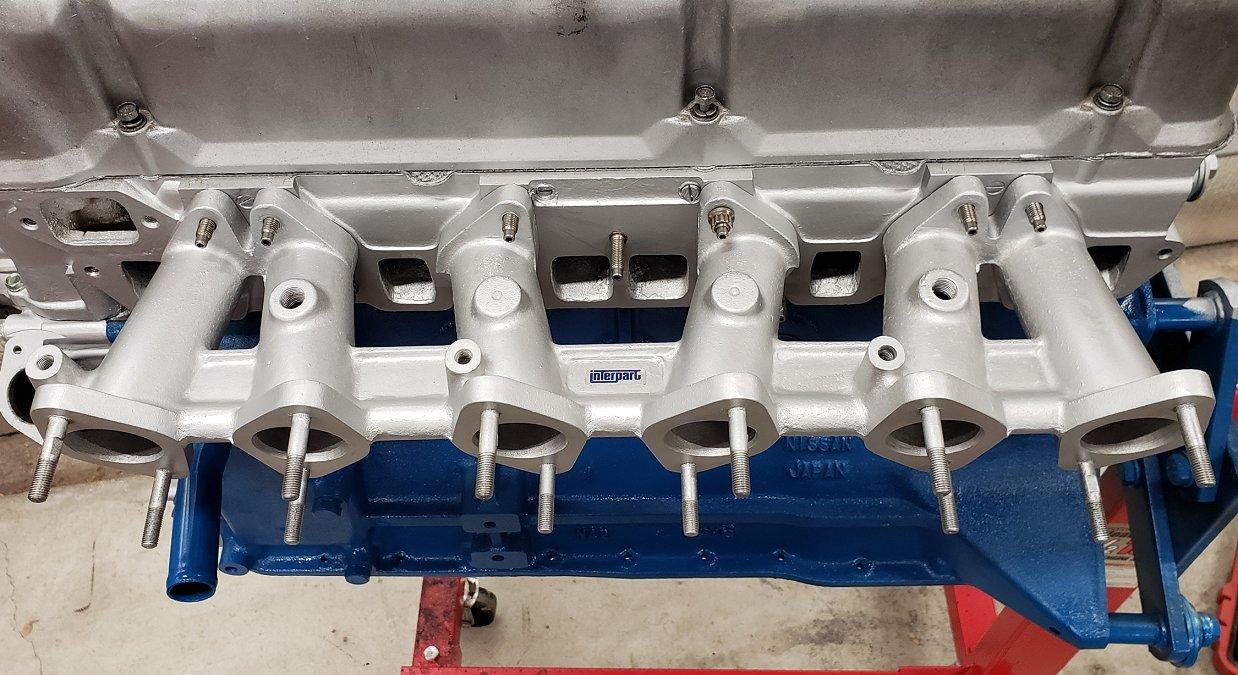
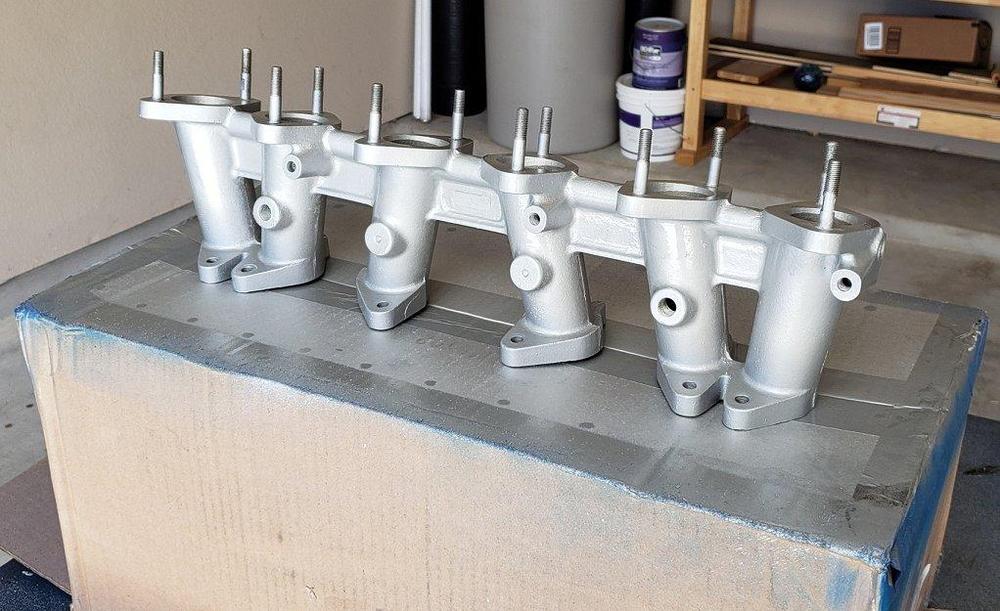
Had a super busy week at work last week so this weekend was not as productive as I was hoping. I did manage to the get the intake painted which came out really good. While it dried I used my tap to clean out the holes for the mounting studs. M8x1.25 for anyone that needs to know. This really makes all the difference in the world! There no shortage of debris in the holes along with some slightly damaged threads, all of which were corrected with the tap. I used WD-40 to keep it lubricated as I am not looking to cut new threads, just clean up what is there. Installing the ARP studs was easy peasy. Hung the intake on for a photo.


-
The buyer is a repeat customer for the seller according to the comments. The seller goes as far as to say the buyer got a "bargain". This kind of action is good and bad for these cars. Hopefully more quality replacement parts will become available and stuff that is not low mileage and show worthy will remain reasonable. Congrats to the seller and I hope the buyer posts some driving impressions of the car once he gets it.
-
Another option would be to find a paint store that custom mixes cans of spray paint and take your paint card from SW. A Car Quest store in Georgetown just north of Austin does this. I had them mix up a can of orange paint for an original air cleaner I painted. Think it costs $22. Even in Plano there has to be a place in Plano or Richardson that does this. Call around, someone knows. So happy to see that this thread continues to live on and help other owners.
-
Great work Jay! You are striking a great balance between pain staking restoration and getting it done! Look forward to seeing it on the road.
-
This is Robert Jackson's car in Oklahoma. He has been keeping all of us updated on it via Facebook. Currently sitting at $44K with 6 days left. It will be interesting to watch.
-
Super cool! Love posts and pictures like these. Thank you for sharing @jayhawk
-
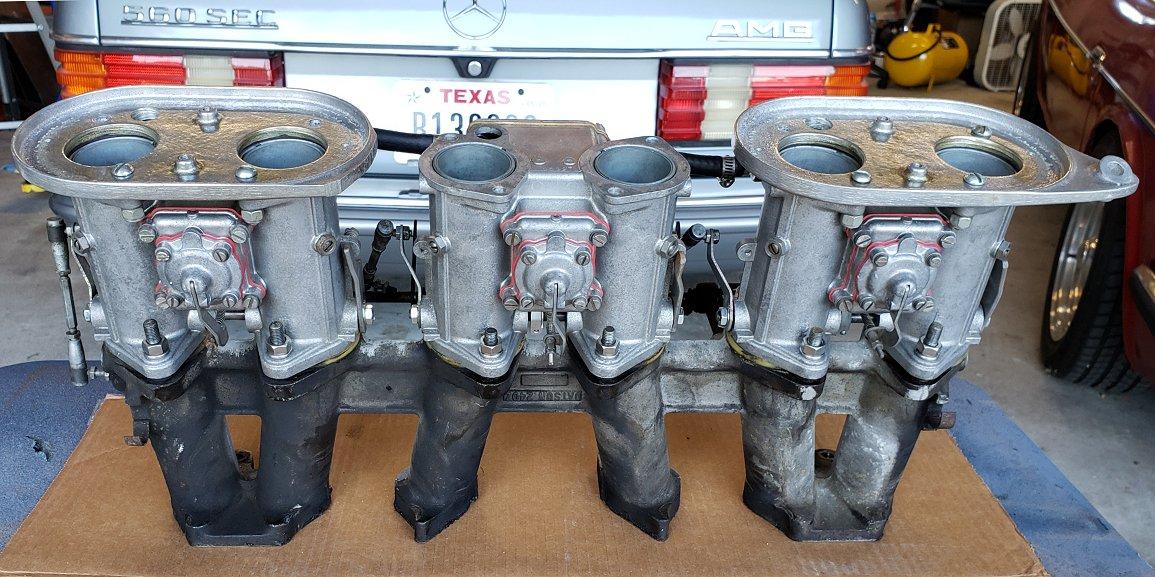
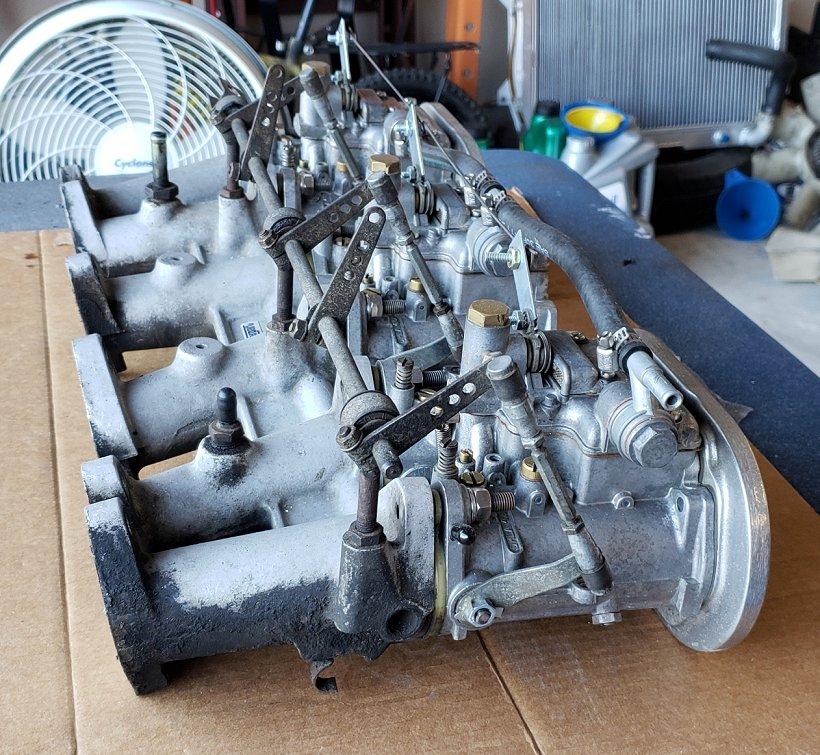
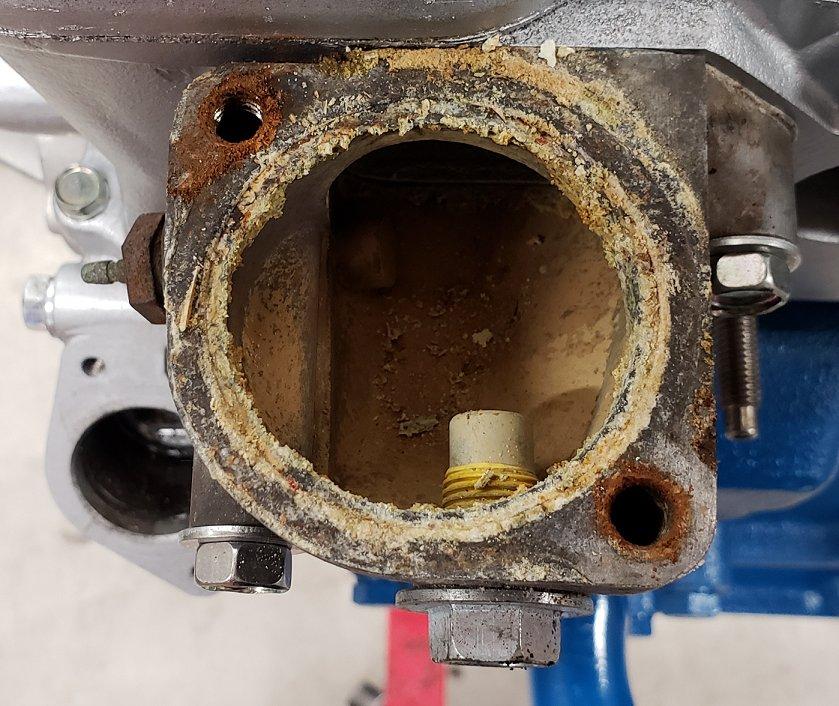
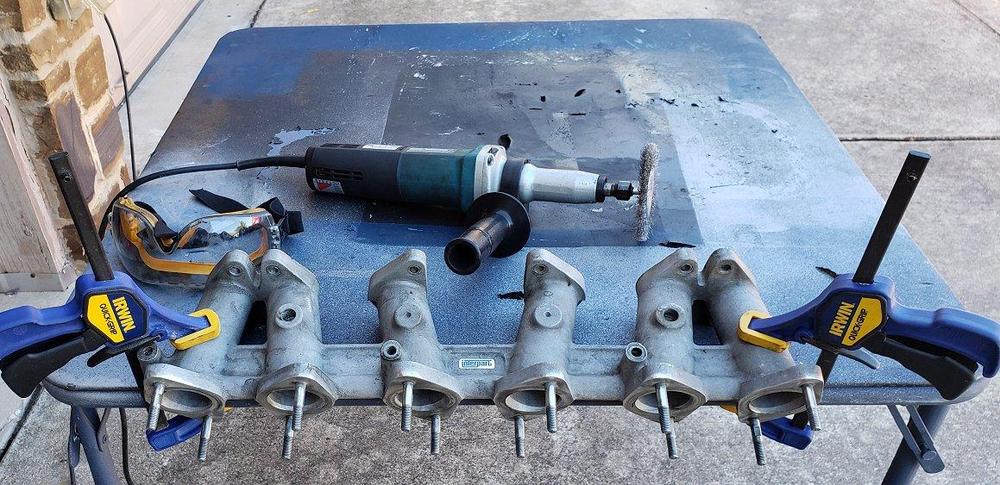
The Interpart triple carb intake was just as bad as the rest of the engine. I do not have a parts washer but used a large tub clean it. I started with a good soaking of engine de-greaser and proceeded to scrub, scrub, scrub, and scrub some more with various nylon bristle rushes. Next up was a round of brake cleaner and scrubbing and anything that was left was removed using my wire wheel equipped rotary tool. I also took some time to wire wheel the carb studs so the threads were nice and clean. With warm dry weather in the forecast for the next two days I am hoping to lay some paint on it soon. I am also deciding what direction to go with the carb linkage as what I have is in pretty poor shape.


-
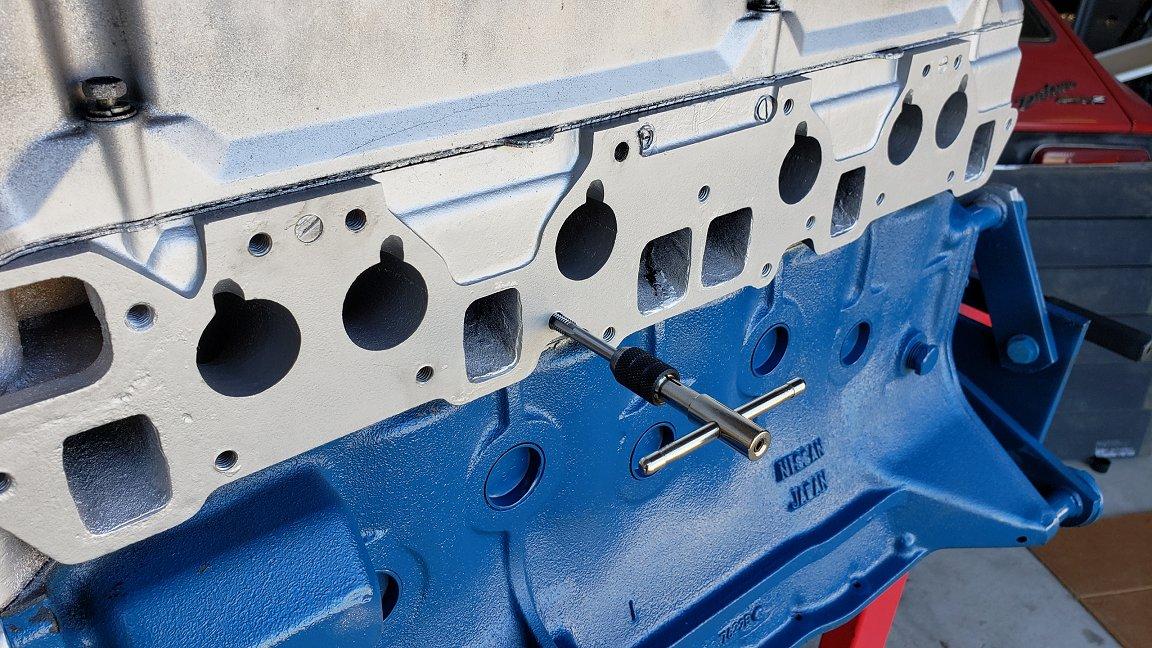
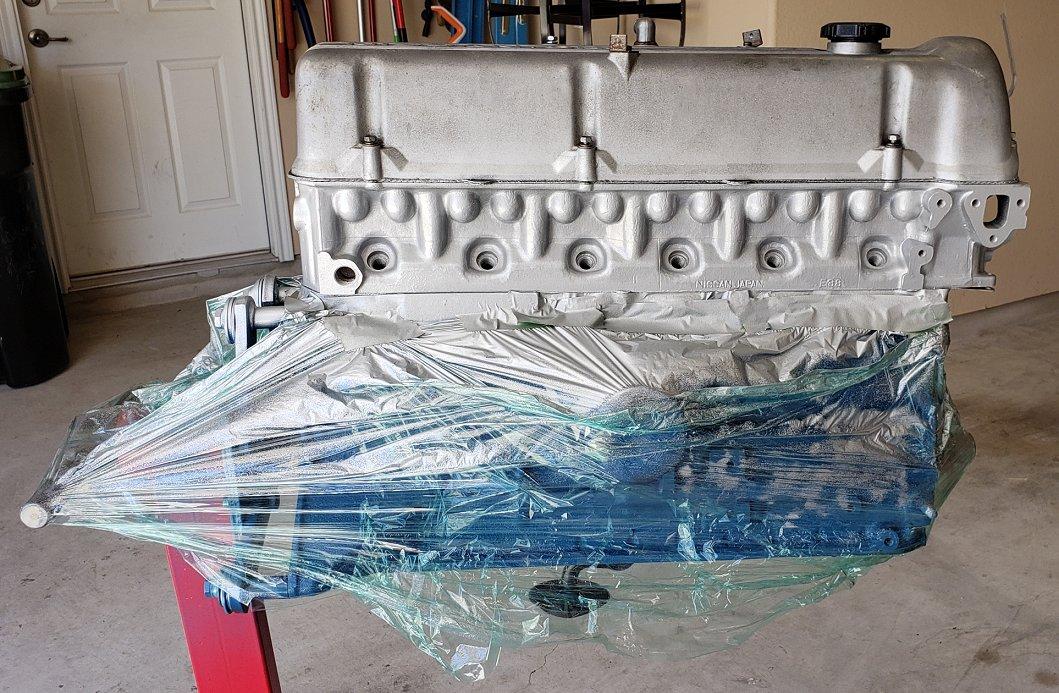
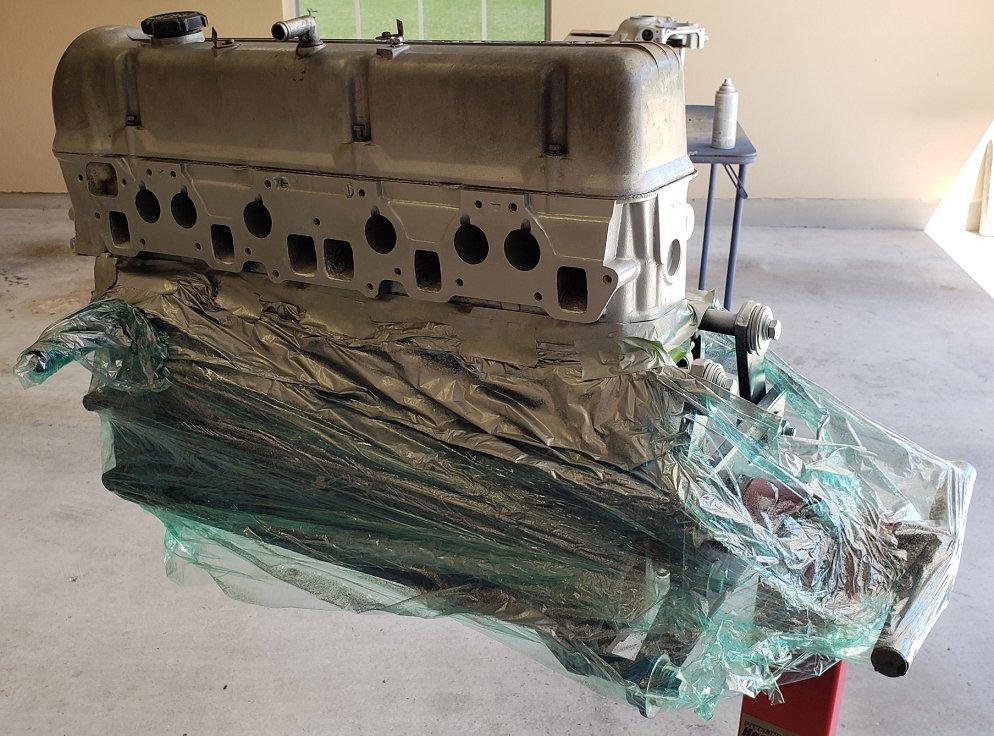
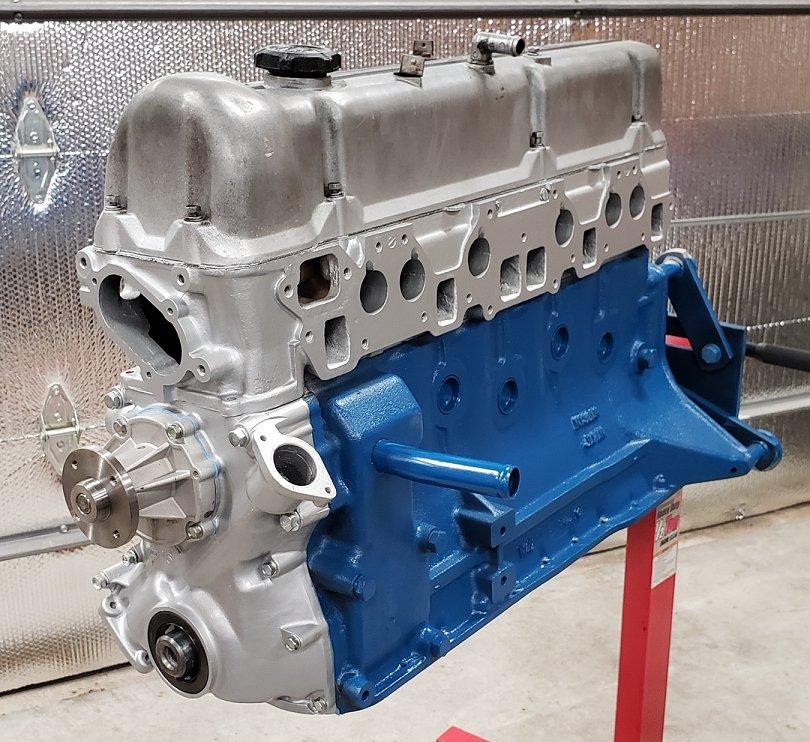
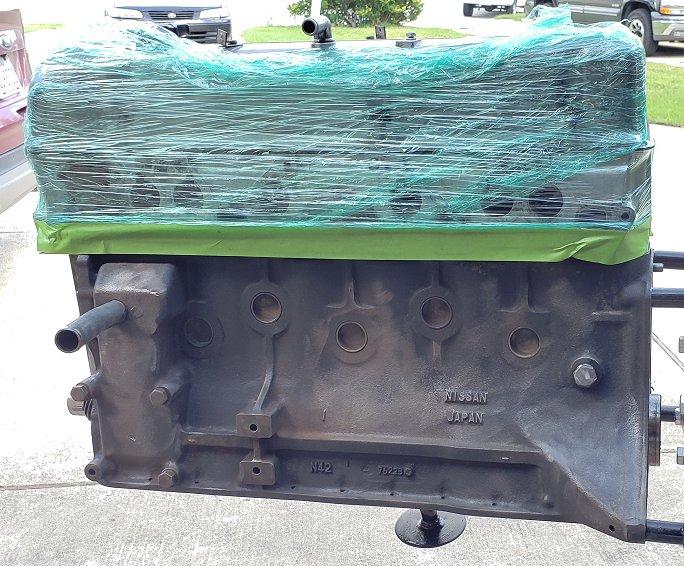
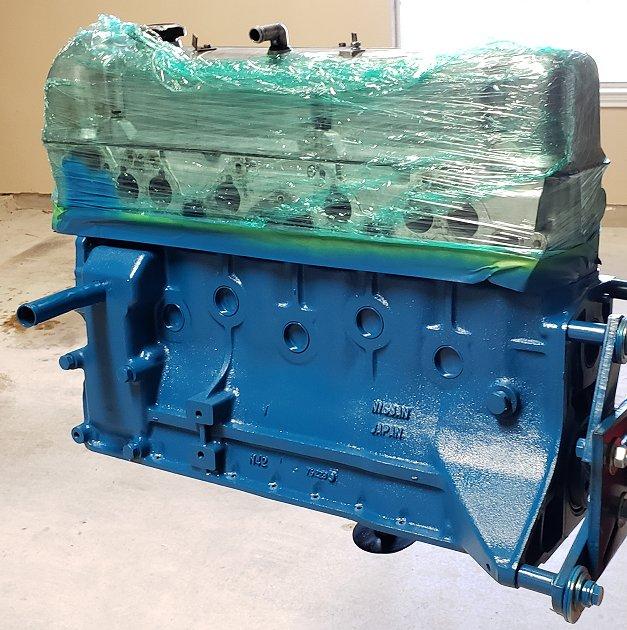
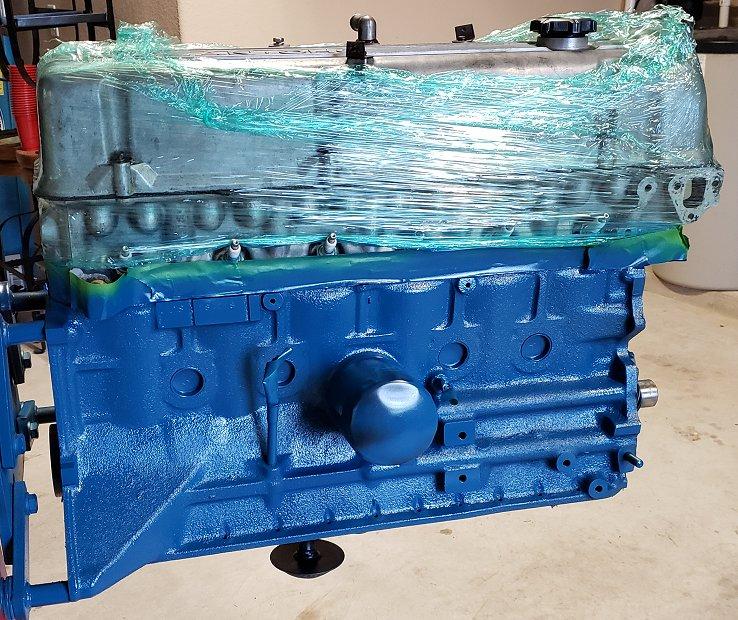
As @lordkarma88 indicated, you have to take advantage of the sunshine while you can. This weekend was no different. After the honey-do's and Cars and Coffee at COTA, I was back to cleaning, painting and assembling what I could. I masked off the block to paint the head. Getting the tape to stick to the cast iron surface was a bit of a challenge but I got it to stay on just long enough to the paint down. Don't worry about the valve cover, it is next in line to get cleaned and painted but not sure what I want to do with it yet. The timing cover got the same treatment as everything else along with a new crank seal pressed in. I bolted the timing cover up along with a new water pump using a new bolt kit from MSA and Fel-Pro gaskets. I had planned to install the oil pan but the gasket I have must have shrunk or is not the correct gasket because it was too small so that will have to wait. It is very satisfying to see it start looking like an engine again.


-
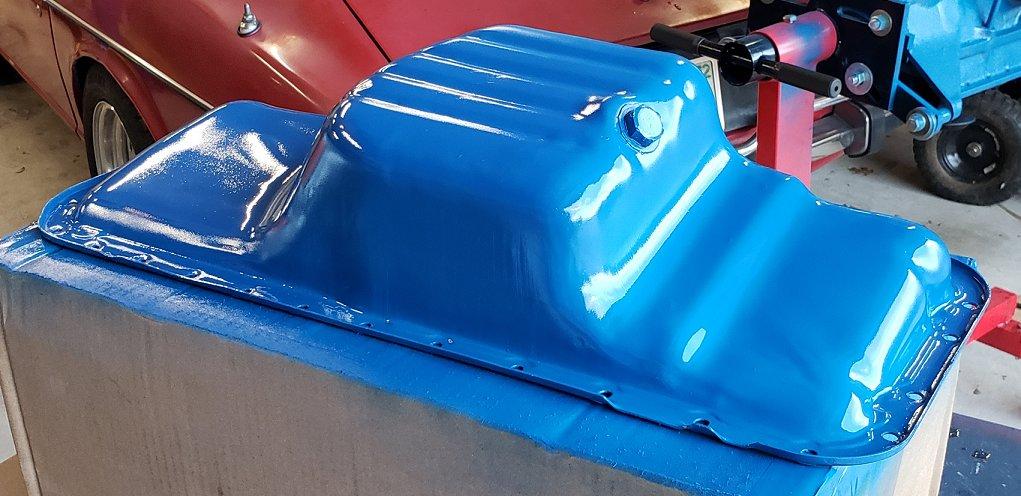
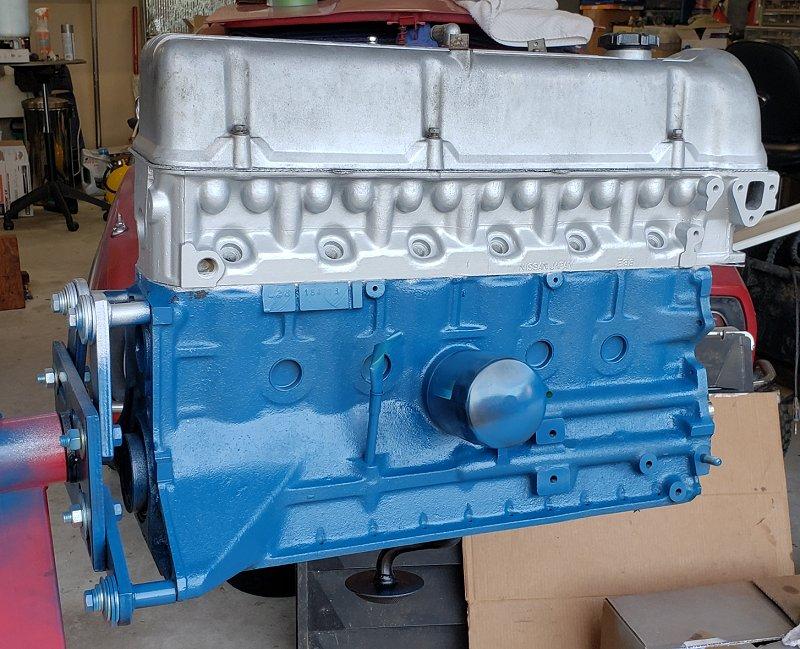
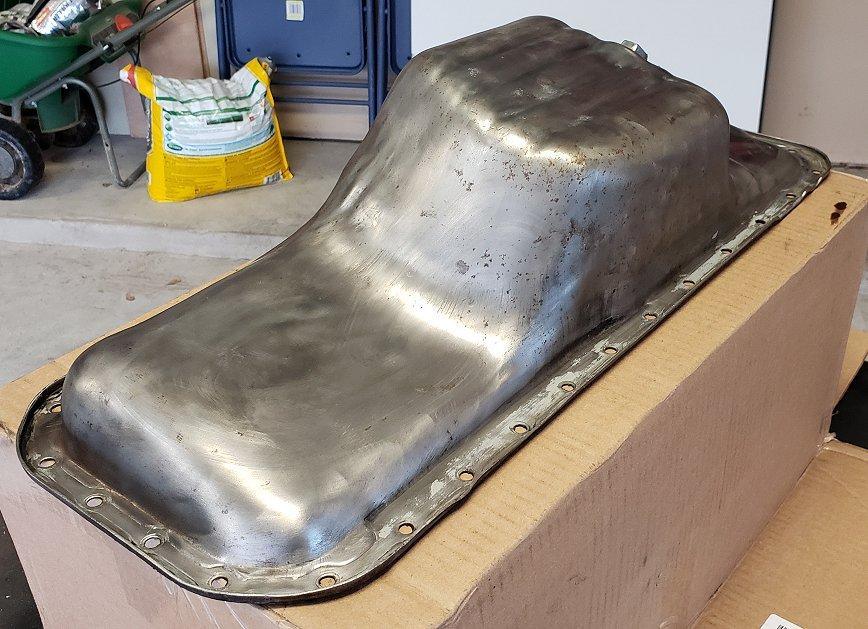
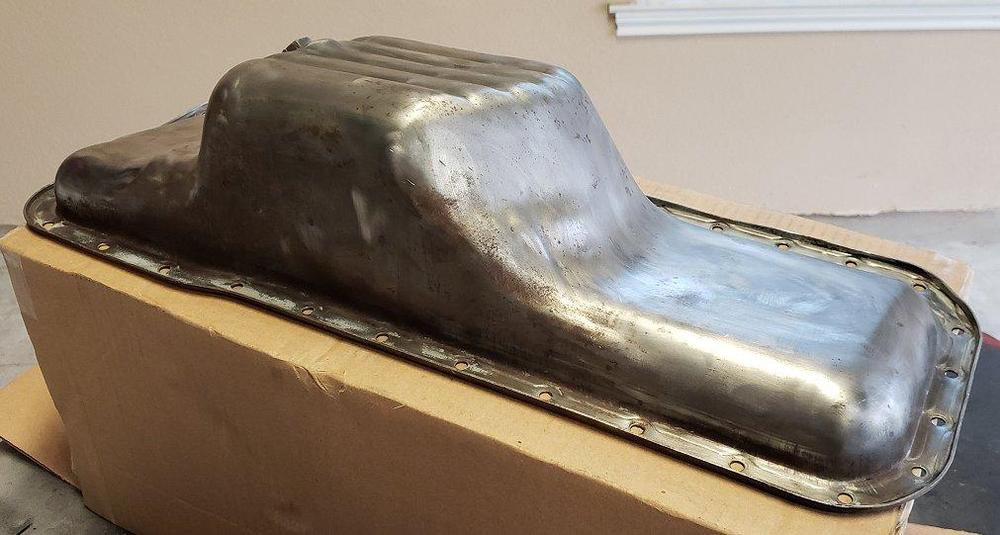
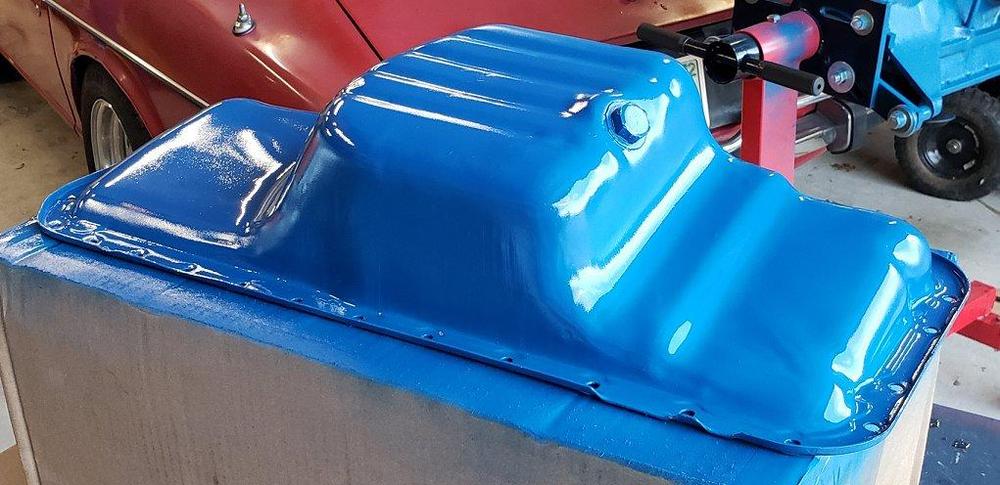
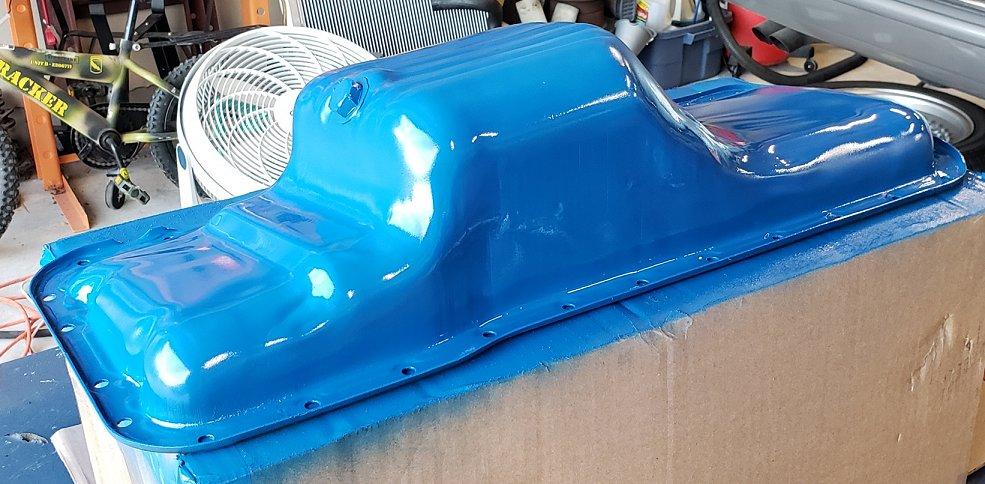
The oil pan took even longer since I had to get the old gasket off. A previous owner had used liberal amounts of adhesive to hold it in place. Luckily after that there were no surprises. The pan itself is in great shape so I am thankful for that. The bottom of the pan just had a few small pieces of the old chain rails. Everything was cleaned inside and out. My wire wheel equipped rotary tool made short work of the left over black paint. I used the same Old Ford Blue for the pan. I know it is "supposed" to be black but I just think it all looks better when it matches. 2 light coats and 1 wet coat later, things were look very nice. With the forecasted sun for tomorrow I plan paint the front timing cover, head, and oil pan support strips.

-
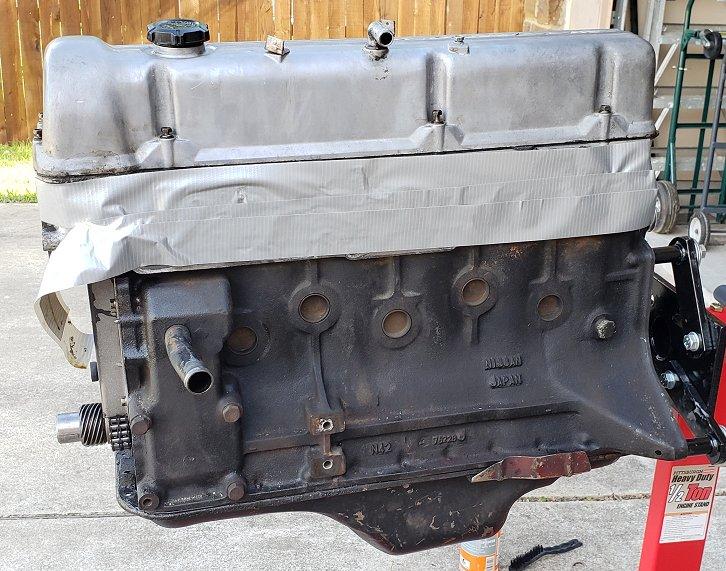
I got the engine back a few weeks ago from the Austin Z Clinic. Isky Stage 2 cam installed, new timing chain, rails, etc. and everything setup and dialed in for me. With all the rain we have been having, last weekend was my first chance to clean it up and do some paint work. The oil pan gasket needed to be changed so I pulled it off. For all you guys and gals that have been there, you know what it takes to clean and de-grease an engine for paint. I used a wire wheel on the end of my Makita rotary tool to knock off as much of the oil paint as I could. I sprayed 3 light coats and 1 wet coat of Old Ford Blue engine paint. All in all the results came out just as expected... even with no runs and very blue!


-
Jim along with everyone else has hit the nail on the head. Buy the best car you can afford. Yes, prices are going up but that is no reason to buy junk or anything with a checkered past. A friend of mine has a '73 240z here in town he is looking to sell. Its an automatic but could easily be swapped to a 4-speed or 5-speed if you desired. PM me if interested and/or we can chat over the phone. I am in Hutto near Round Rock and Georgetown.
-
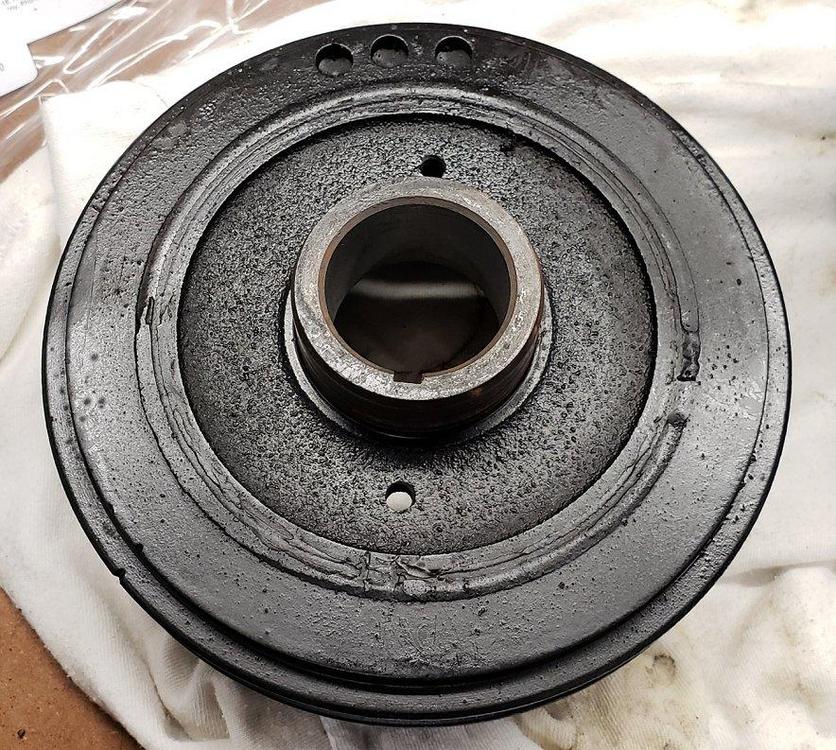
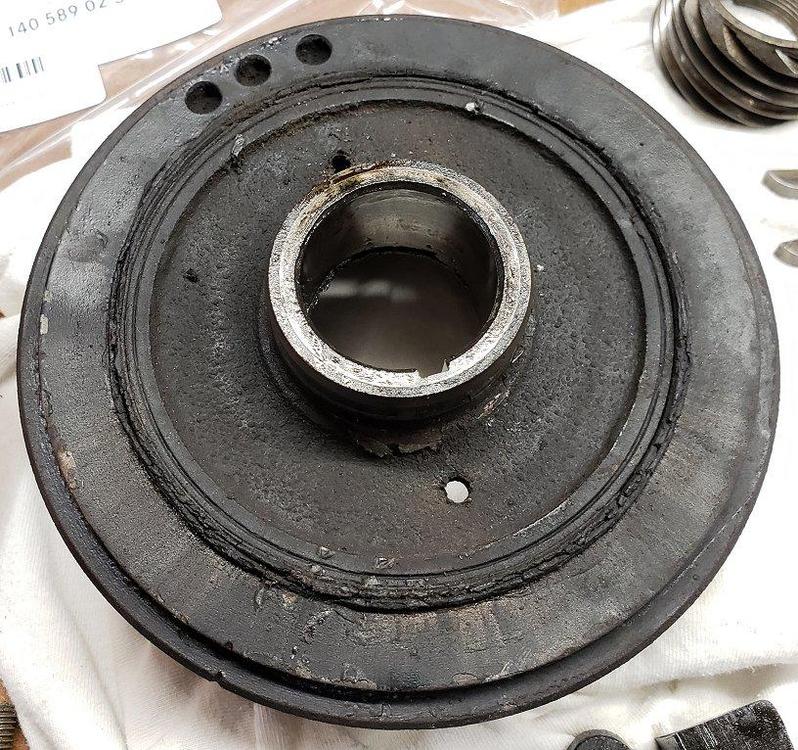
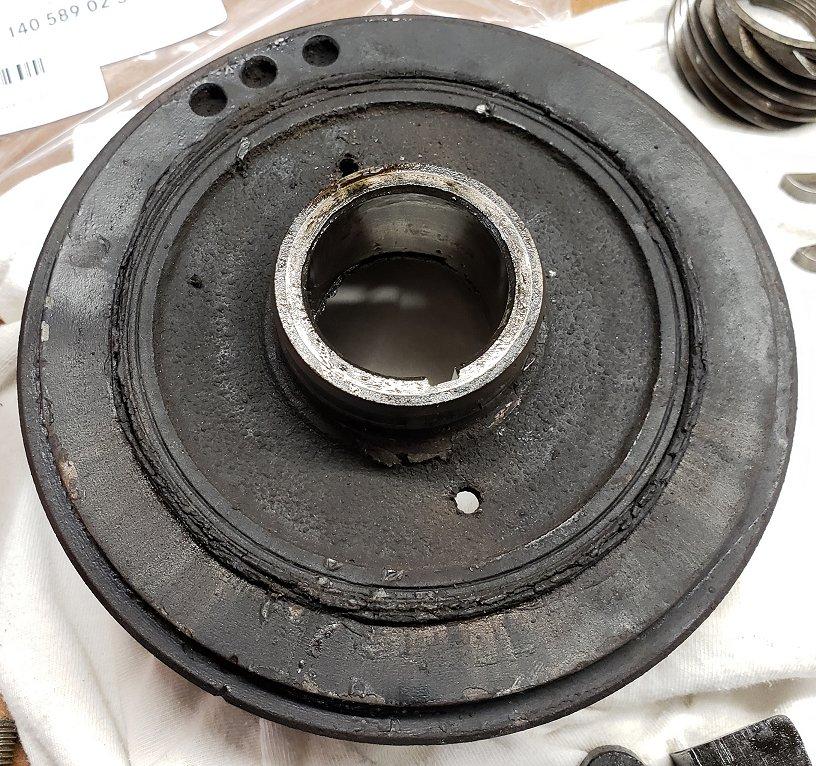
I had my stock balancer rebuilt and based on the condition of yours, I would do the same thing. I used Dale Manufacturing, link below and the work was just as expected at a very reasonable price. Regarding the grooves in the snout, a repair sleeve is what you need. Any competent machine shot can install one for you to regain the stock spec. I would look in to getting the sleeve done first before having it rebuilt. http://www.hbrepair.com/
-
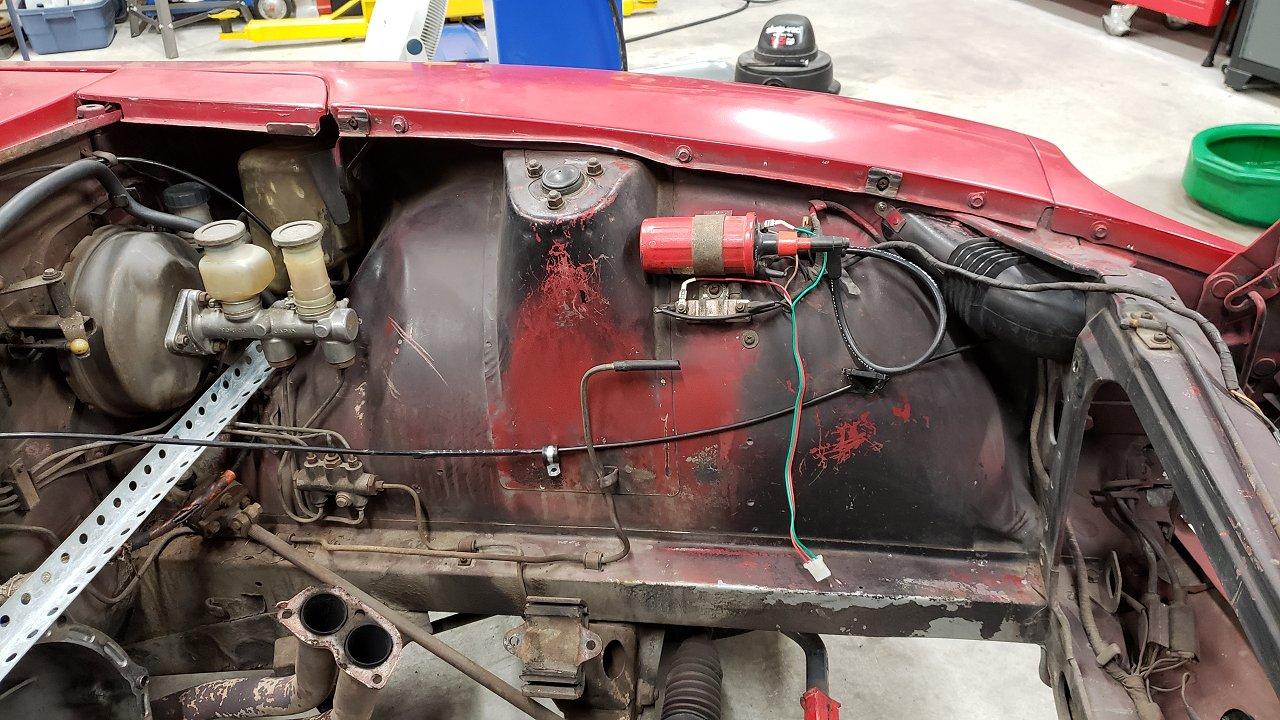
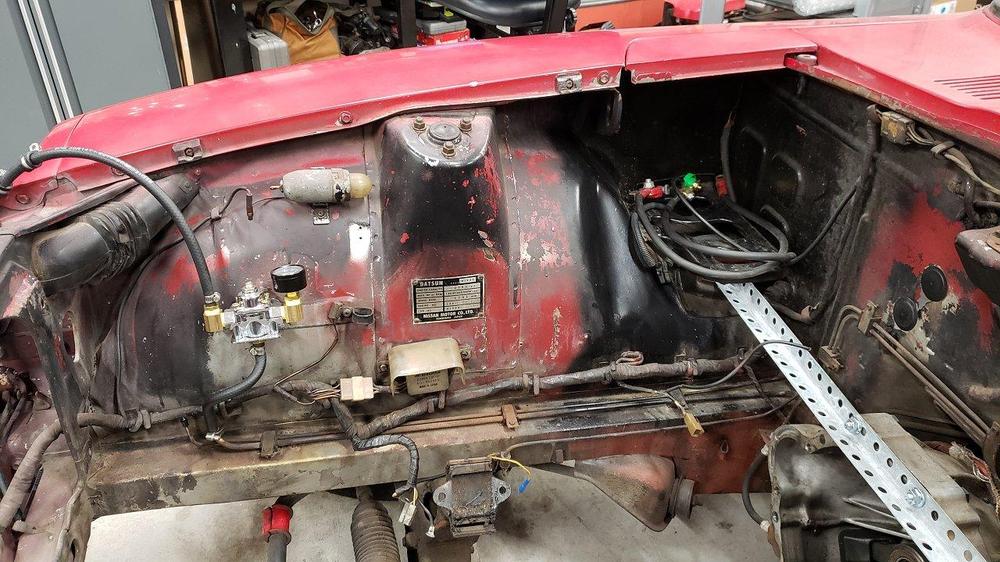
Got a few updates. I sent my stock balancer to Dale Manufacturing to be rebuilt. You can find him at www.hbrepair.com. Ran me $130 plus $26 shipping for going there and coming back. Cheaper than an aftermarket unit and lets me keep the option of running A/C in the future. The Isky-2 cam is in the head and I will be ordering my lash caps as soon as I get the invoice from Precision Shims in Australia. I also tried scrubbing the engine bay some but after several rounds of just working on the inner fenders, everything still looks to be in a sad state. A lot of what I thought was dirt and dust is actually over-spray from previous owners. Part of me really wants to give this car what it deserves, strip everything out of the engine, pull all the glass, make the bodywork right, and get it re-painted. However, just not sure if that is in the cards right now. Seems it would be wrong to strip the engine bay and just paint it without making the body better. Decisions decisions.


-
Good news! Got my balancer back from Dale and it looks a lot better now. I will re-paint it blue once the engine comes back but wanted to share a picture. Dale was great to work with and the total turn around was 8 days with shipping to and from. If anyone is looking to get their stock balancer rebuilt, give Dale a call.