Datsun Dealers
Community Member
-
Joined
-
Last visited
Everything posted by Datsun Dealers
-
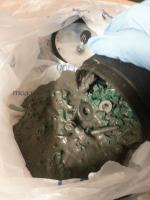
Last year my diff was whisper quiet last year while driving. There was a clunk every once in a while during hard shifting, but that's all. I was coming back from a local team's baseball game. I wanted to take a buddy for a spin. My Dad swore up and down I drained it. I figured my memory was better than his--I was wrong. I was driving around 25-40 mph for about a mile. Then got on a stretch of 50-70 for a mile and a half. In 4the gear it immediately started a high pitched whine while under load. In about 4 seconds I knew it was the differential. I cursed, and turned around. The 2.5 miles to return home was unbelievably painful. Metal against metal humming is not a good feeling. I must've had just enough oil in there to last a few minutes. I wanted to cry, but I've since put about 80 miles on the car after refilling the fluid. Now it just hums. I think the bearings are pretty torn up, but it seems to drive ok for local easy driving until I swap it later this week. Please continue to vote! I plan on dropping it with the mustache bar as mentioned above because it seems a lot smoother.
-
Preface: After firing up my high(er) compression L29 with triple SKs, I was so eager to go for a ride that I made it 2.5 miles before realizing I had drained the diff fluid while the motor was being built at the race shop. Luckily, I have an extremely clean open R180 with 4.11 gears that I found from a guy with a source at salvage lots. I've read many threads and have searched multiple forums. The FSM seems to say to drop/swap the differential on the ground using jack stands, doesn't it? I have access to a car lift on base at the self-help garage. Will this make the process any easier? I can also use the lift with the built in transmission jack if needed. Are there any tricks/lessons learned that may not be seen in most write-ups? Thanks in advance.
-
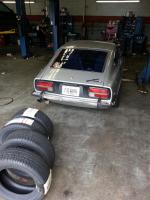
So far I'm really impressed with the tires. When I park in my garage dirt and tree buds, etc. stick to the tread all around the tire. Even touching the rubber feels very grippy as opposed to most tires I've felt before. Hopefully within 1,000-3,000 miles I'll autocross it and will definitely hit the drag strip a few times before buying some slicks.
-
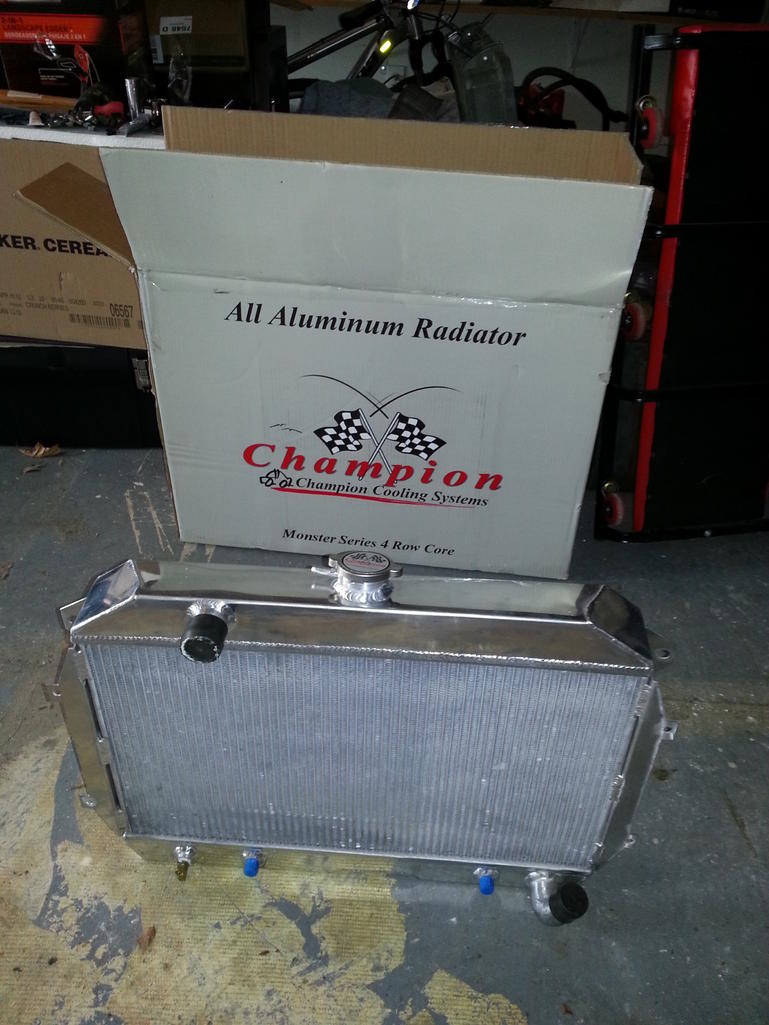
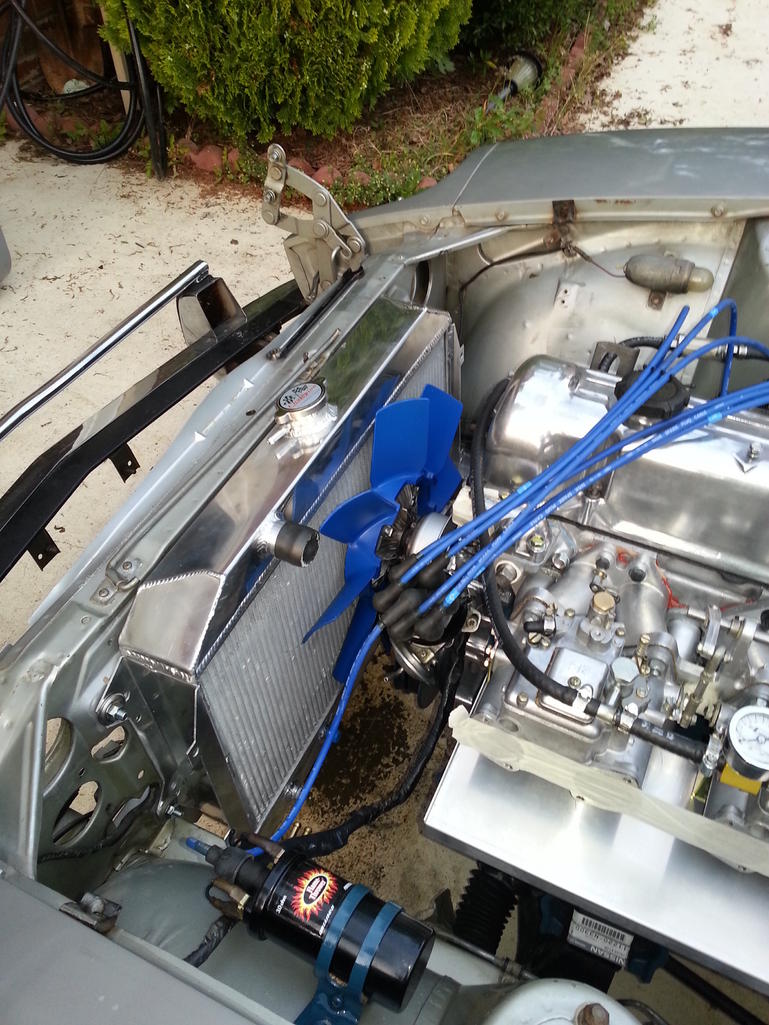
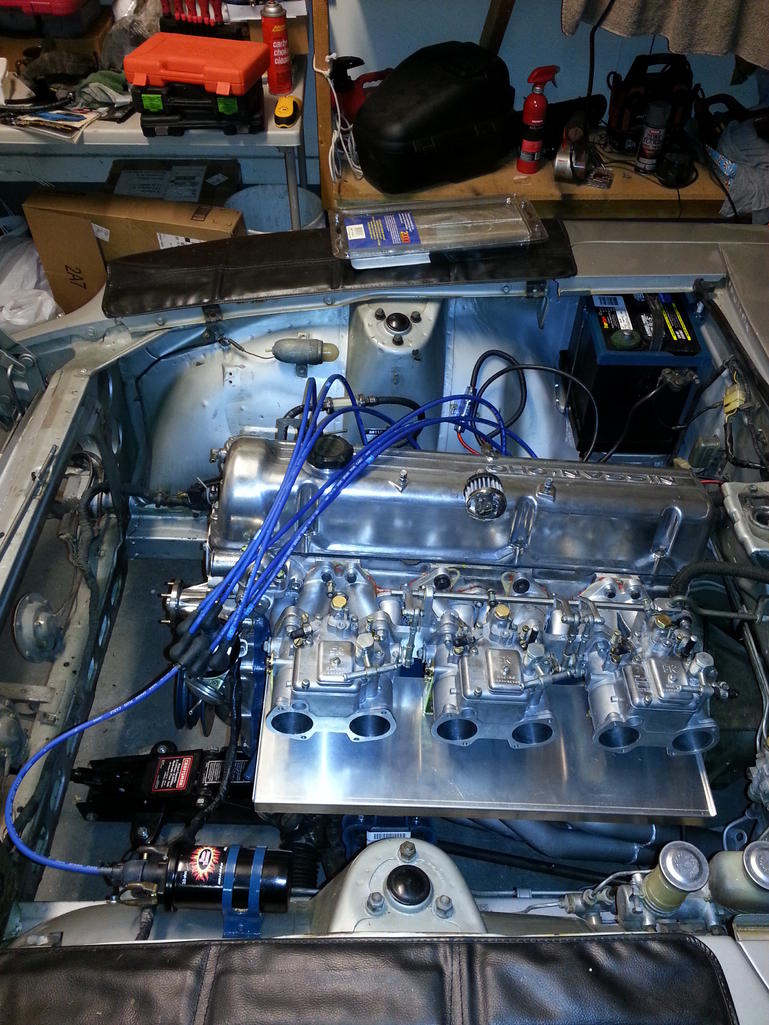
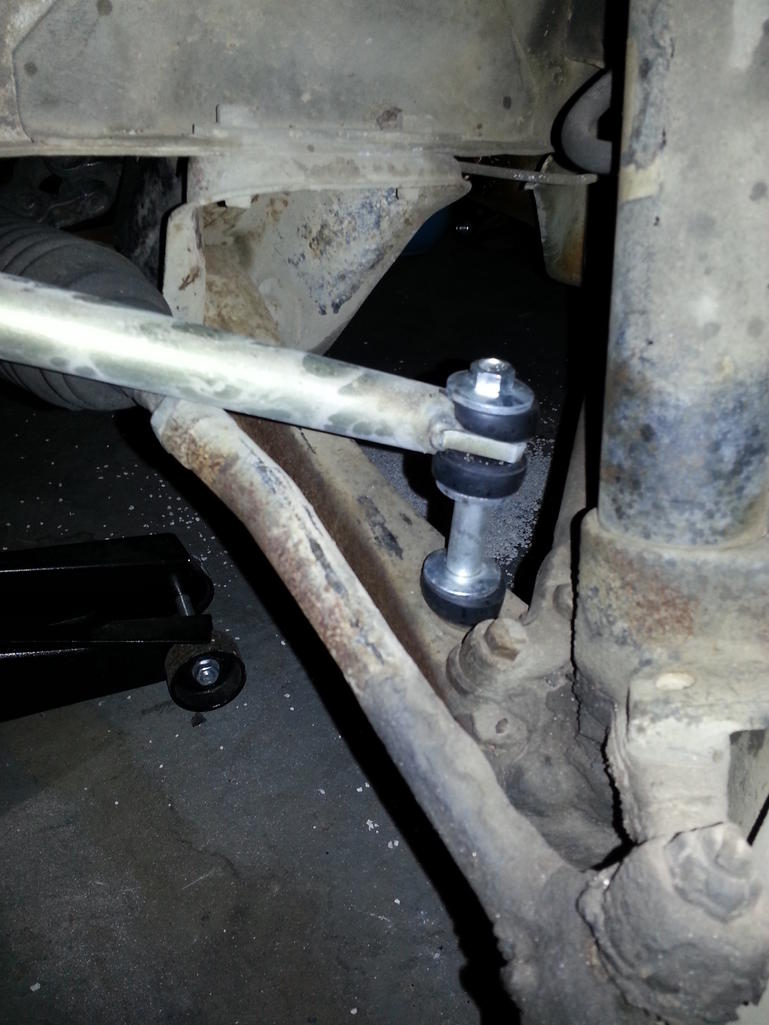
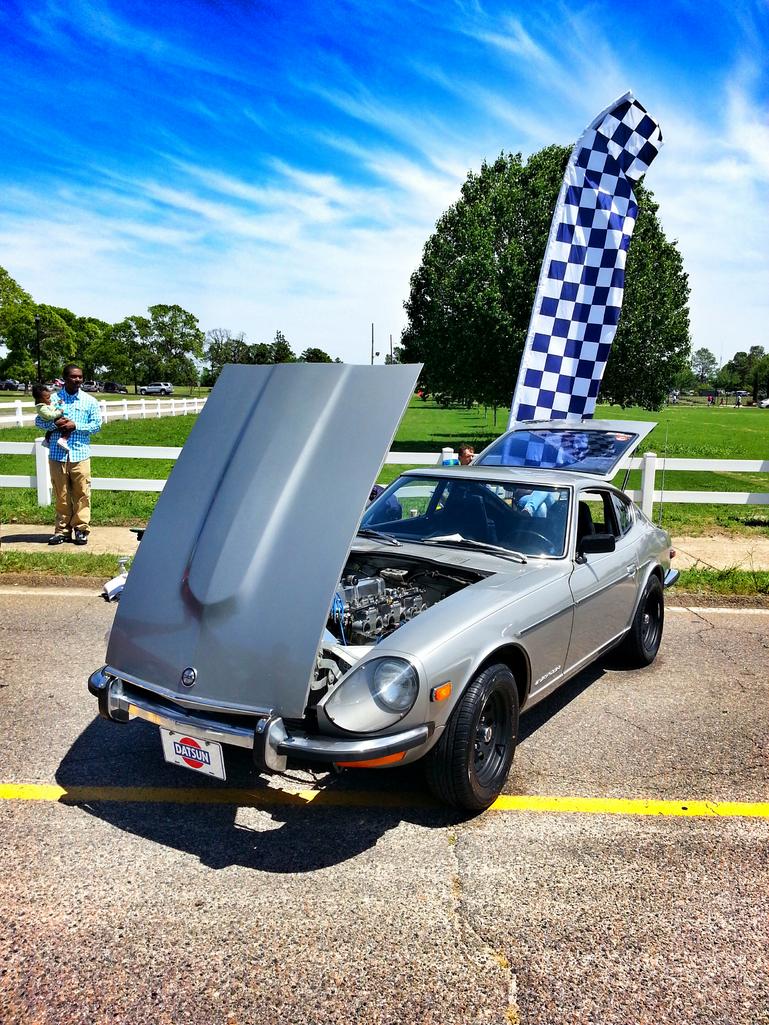
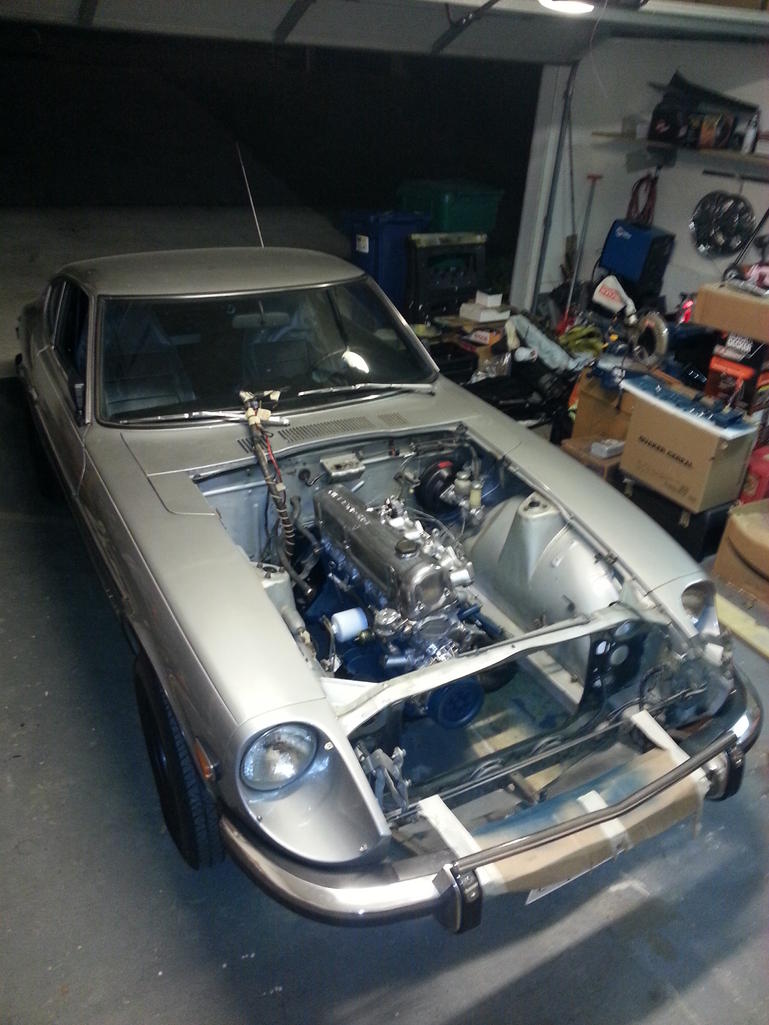
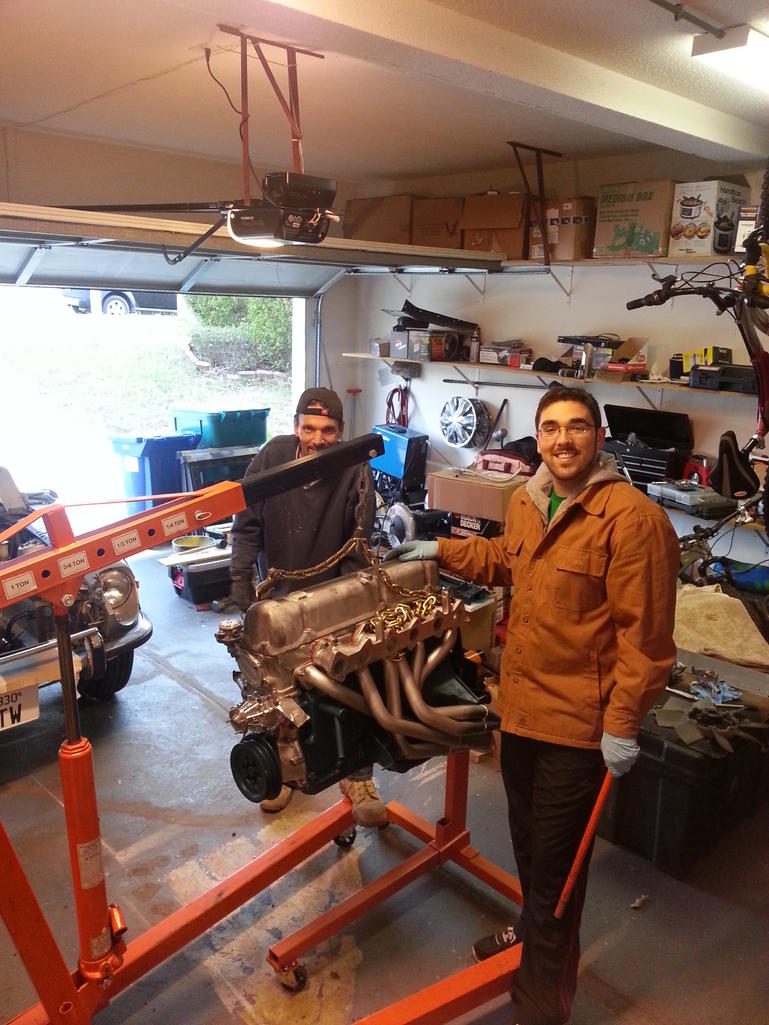
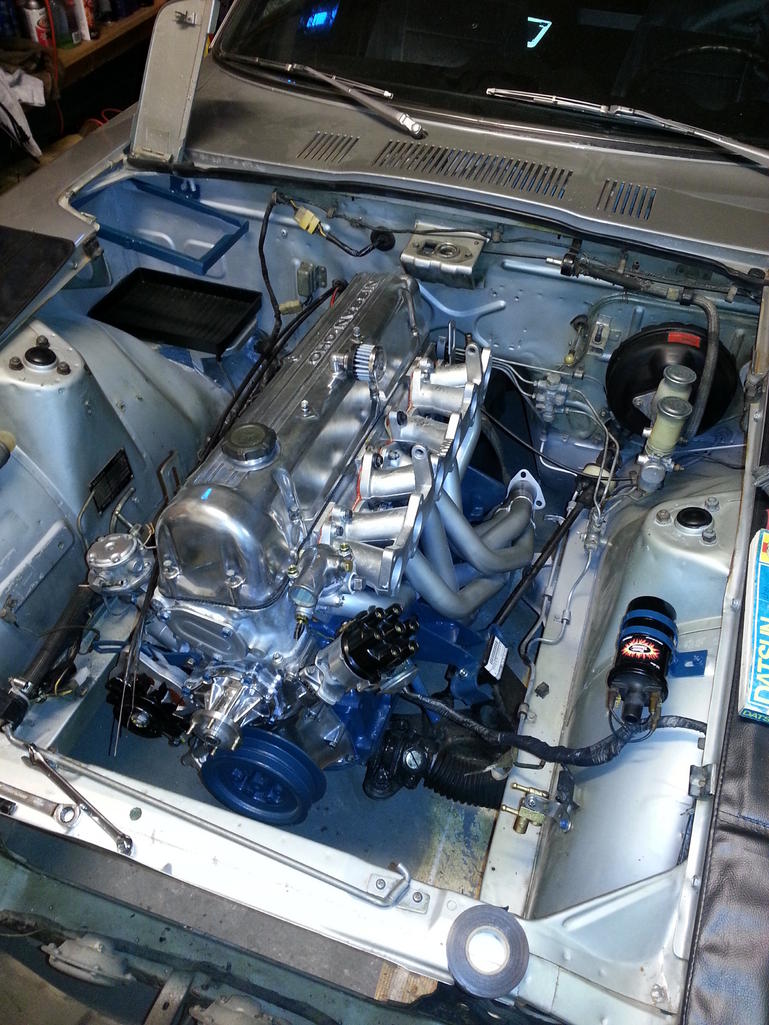
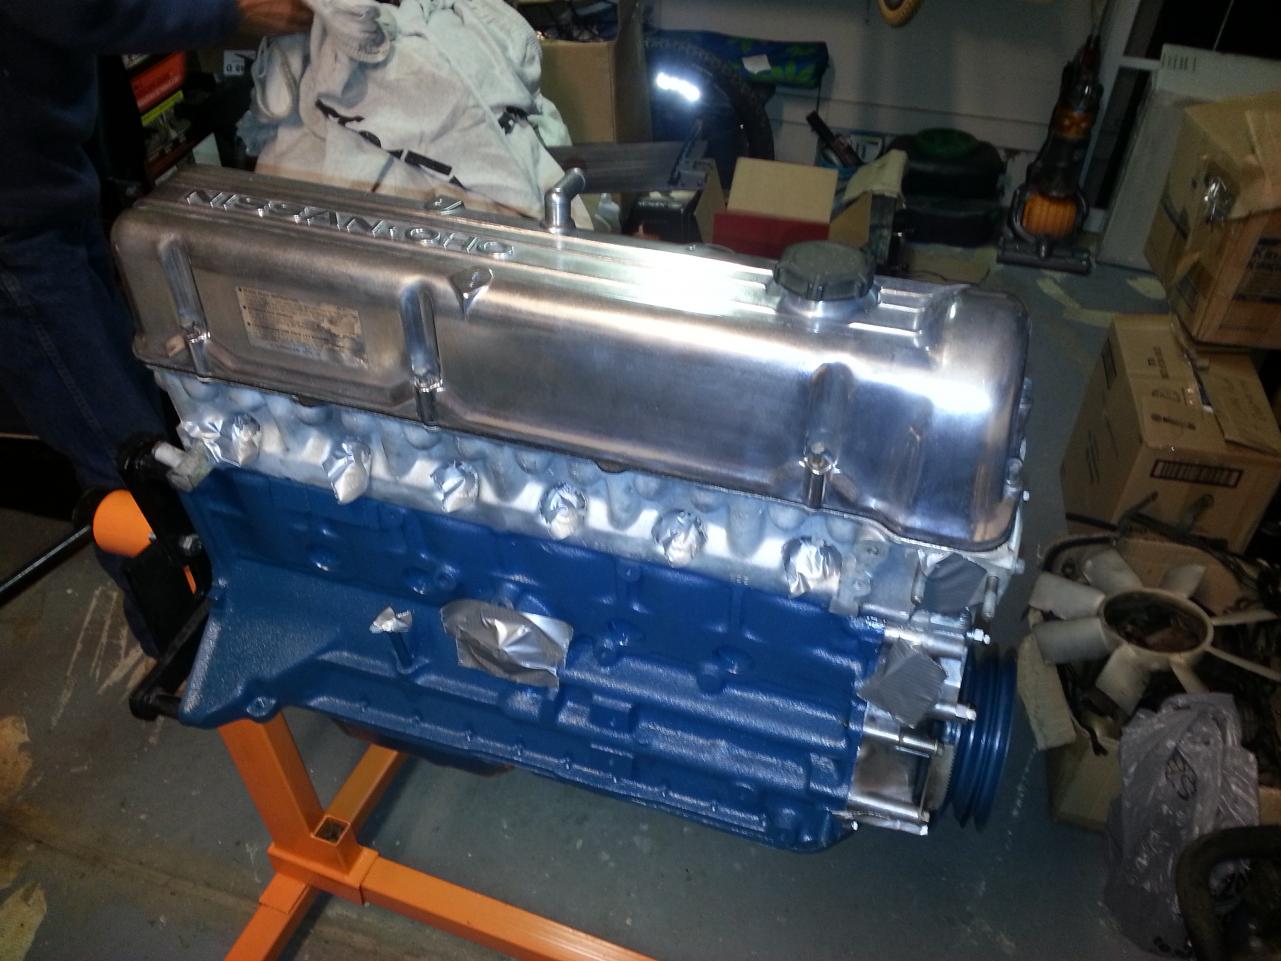
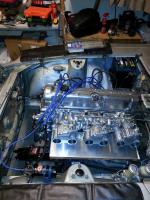
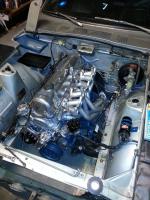
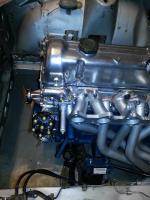
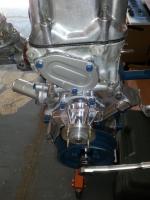
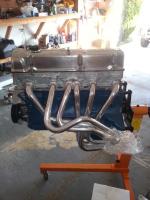
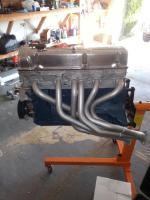
It's been a while since my last update. Layla is breathing and running on the road. All I can say is it's an amazing feeling. A couple steps back: I installed a Champion 4 row aluminum radiator from eBay. 4 Row Champion 1970 1975 Datsun 240Z 260z Radiator | eBay I swear I paid $225 for a 3 row on eBay, and was shocked to get the 4 row in the mail. I think they were out of stock and sent me the 4 row or something. I also found some rubber shifter bushings at AutoZone which I used to run the bolts through to provide a small amount of vibration dampening against the radiator support. All holes in the radiator lined up perfectly to factory mounting holes. With the thickness of the four row radiator along with the 280zx 3 row balancer pulley, it is a tight squeeze. I mounted the fan and clutch to the pulley before I installed the radiator for the sake of space. It is an extremely close fit with perhaps 1/2" between the 240z fan and the new radiator. I think it'll be fine and haven't found any issues. The finish and craftsmanship look excellent; my thermostat stays below the halfway point with city driving (temps 70-85 degrees in May right now). I'm happy and feel as though it should handle Georgia and Texas summer temps of 100+ degrees just fine. The next order of business was to install my thoroughly cleaned and sorted triple 45mm Sanyo Kiki (SK) racing carburetors originally from Japan. Cleaning all three carburetors was a tedious process; they were pretty gunked up inside. I will be experimenting with Weber and Mikuni chokes/jets in the next 1,000 or so miles to try to find my best setup. I also installed a triple carb heat shield from Datsun Spirit for $116. It was a little disappointing at first to see how simple it was to make; but the quality of the zinc plated brackets and hardware were really nice. I will also apply 2000 degree thermotec heat shield/fiber/sticker to the top and bottom of it. It's nice because it has lips to keep any possible gas leaks away from the headers. At the moment I don't have any air horns or filters. YIKES! :stupid: That's my next order of business. I ran all the fuel lines, spark plugs, NGK wires, etc. I installed a Mr. Gasket liquid filled fuel pressure gauge from Amazon: http://www.amazon.com/Mr-Gasket-1564-Liquid-Pressure/dp/B000N8ISFS/ref=sr_1_2?s=automotive&ie=UTF8&qid=1368232326&sr=1-2&keywords=mr+gasket+liquid+filled+fuel+pressure+gau ge From my research and advice I received I decided to break in and run the engine with the factory mechanical fuel pump. The gauge will allow me to keep track of the pressure it produces. I dumped the Schneider break in additive all over the camshaft and in the timing chain area in the head to let it get to the block and pan. Next came the moment of truth. After being satisfied that oil was being pumped to all lobes of the cam (I blocked off the spray bar holes with the hardware supplied in the Schneider Stage III kit) and seeing sufficient oil pressure, I decided to go ahead and try to start it and let her fire. To much dismay, it just wouldn't start. I had spark. Spark plug and point gaps were set. I had fuel. FRUSTRATION ensued. My father's impression was that we had the distributor off by 180 degrees, which is the initial guess for every backyard mechanic. I was certain I did enough research about installing the oil pump and spindle at the 11:25 position. We removed the distributor anyway to double check; it was spot on. Firing order and spark plug wires were double checked. I slept on it--depressed a little I might add. The next day I was reassessing the situation without my dad there. After referring to the wiring diagram in my FSM, I realized that the condenser for the coil was on the wrong terminal. After switching it to the negative as it was supposed to be, SHE FIRED UP IMMEDIATELY! I was running my sandblasted and painted header that was originally on the car. She was LOUD! Soon thereafter I reinstalled the rusty 2 1/4" exhaust with a new Magnaflow muffler. I recorded some HD videos but I think they're too long to post. I let the engine rev at ~ 2500 rpms for about 15-20 minutes to let it reach operating temperature. My oil pressure was amazing (thanks to the NISMO high flow pump) and was over 45 lbs. I inspected for leaks--NONE! Here is a super low quality video I took on my cell phone. Trust me, it does not do it justice. This was before I used the synchrometer to synch the carbs. There is some bog and the linkage could use some attention. After dialing in the idle and balancing the carbs it runs amazing. I reinstalled the front sway bar with new end links and bushings. I also drove to a local tire shop to get my new Falken Ziex Ze 912 195/60R14s mounted and balanced. I put the hood and grill on with my father on a Saturday morning and immediately drove to a local car show on Fort Gordon. All the rushing made me feel like I was on a car TV show rushing to complete a build. I was amazed at how much attention the car received. A surprising number of women came up to me talking about how it was their first car in San Francisco, Florida, etc. The older men reminisced about how fast they were in the day. Here's a shot from the car show: I put about 80 miles on it in two days, always varying speeds, etc. So far I haven't gone above ~3800 rpms. It feels like a completely different car. I plan on emailing the PO who owned it since 1976 and show him the progress I've made. I can't wait until the engine is broken in and I can really drive it. :beer::beer::beer::beer:


-
The WRX was a show car owned by a 55 year old woman. She traded it in to a dealer on a new WRX. The dealer stripped it for the most part before sending it to auction. Wheels, stereo, CAI, exhaust. Overall I'm happy but the dealer is withholding service records even though I am in contact with the previous owner.
-
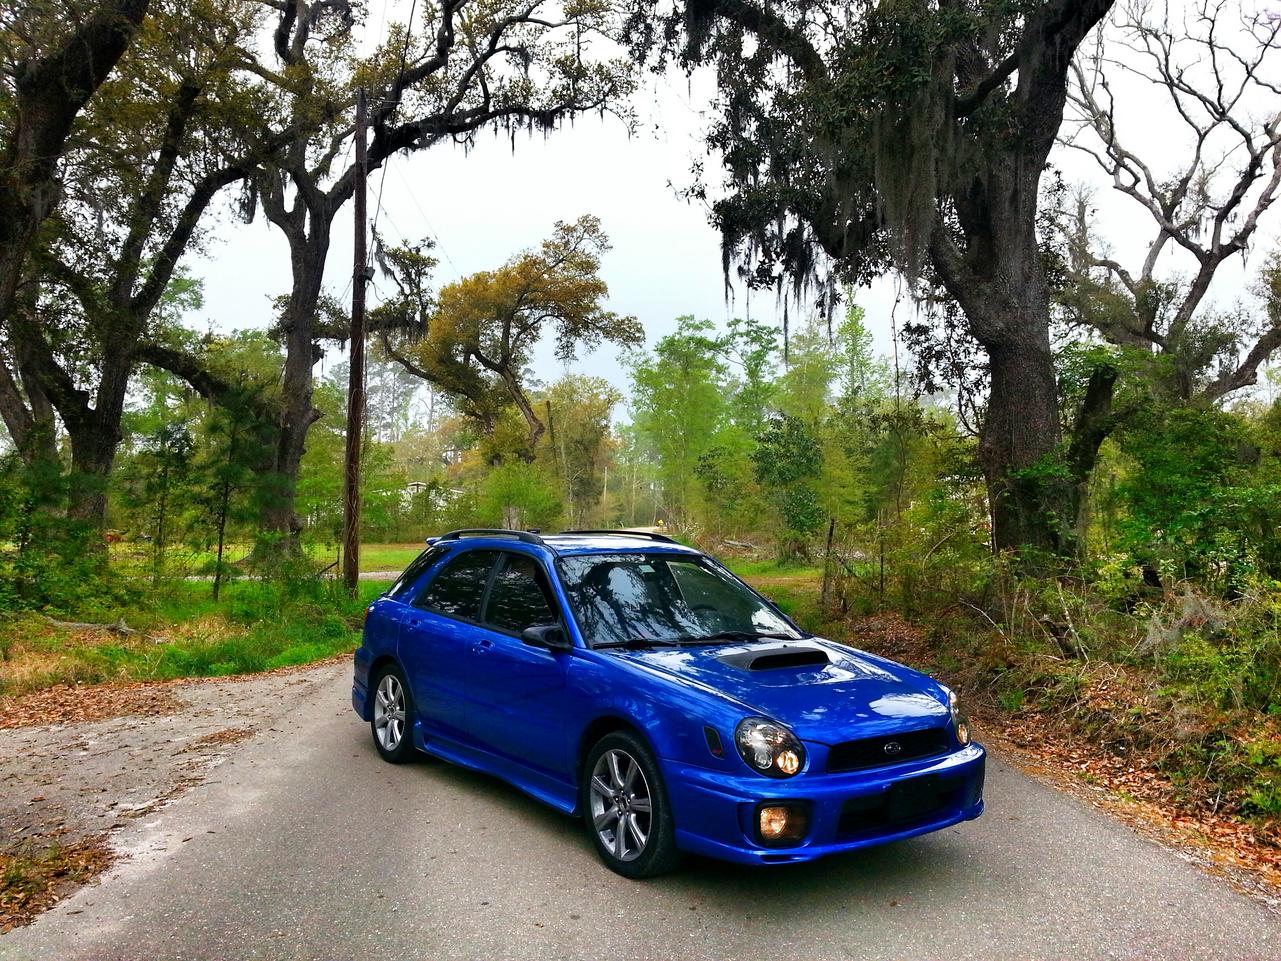
And not Datsun related, but in between all this I flew to Houston to pick up a new daily driver. It's a one owner 2002 Subaru WRX wagon with 115,000 miles after the road trip back to Georgia.

-
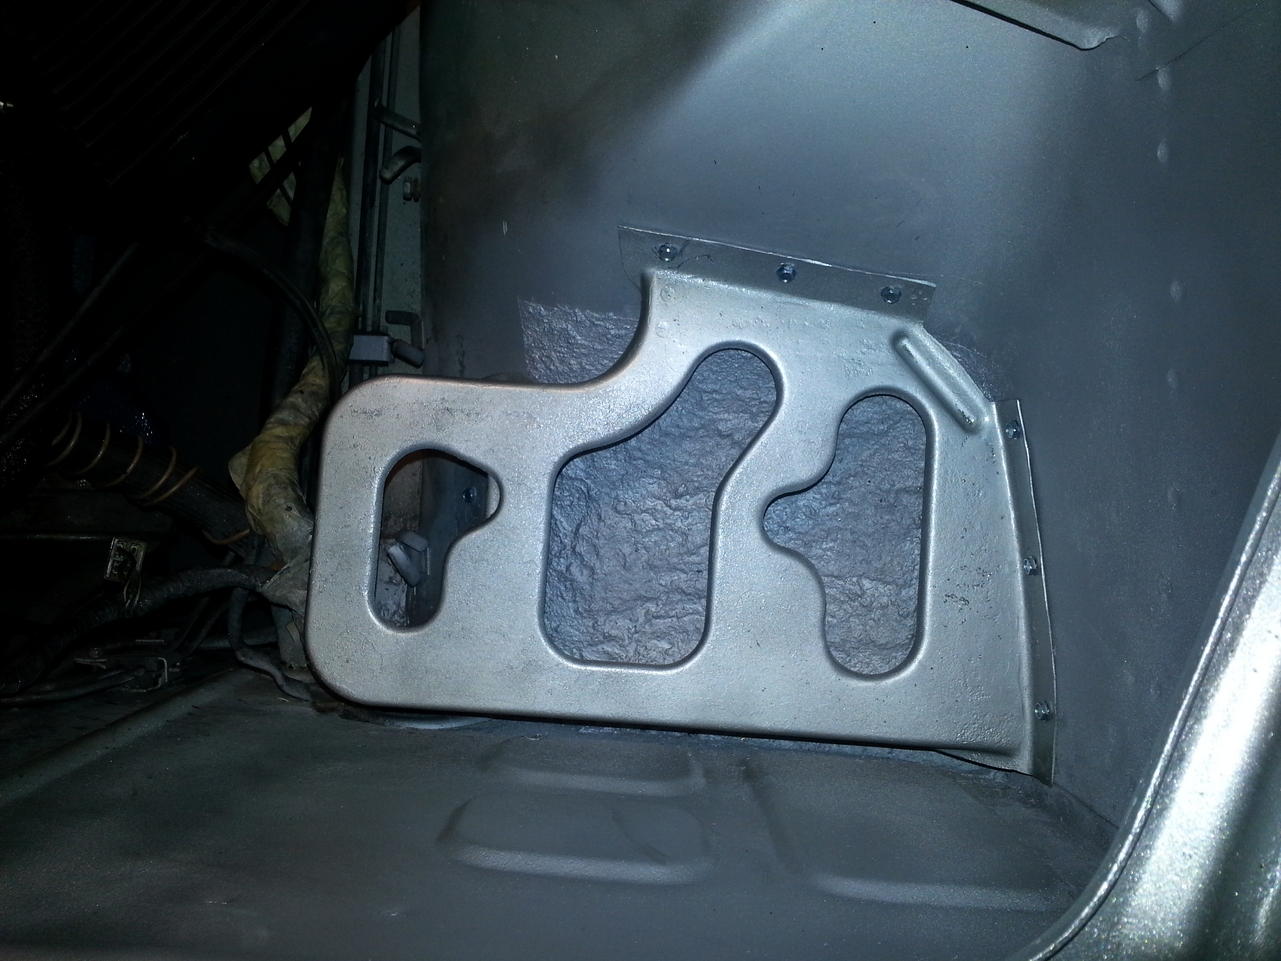
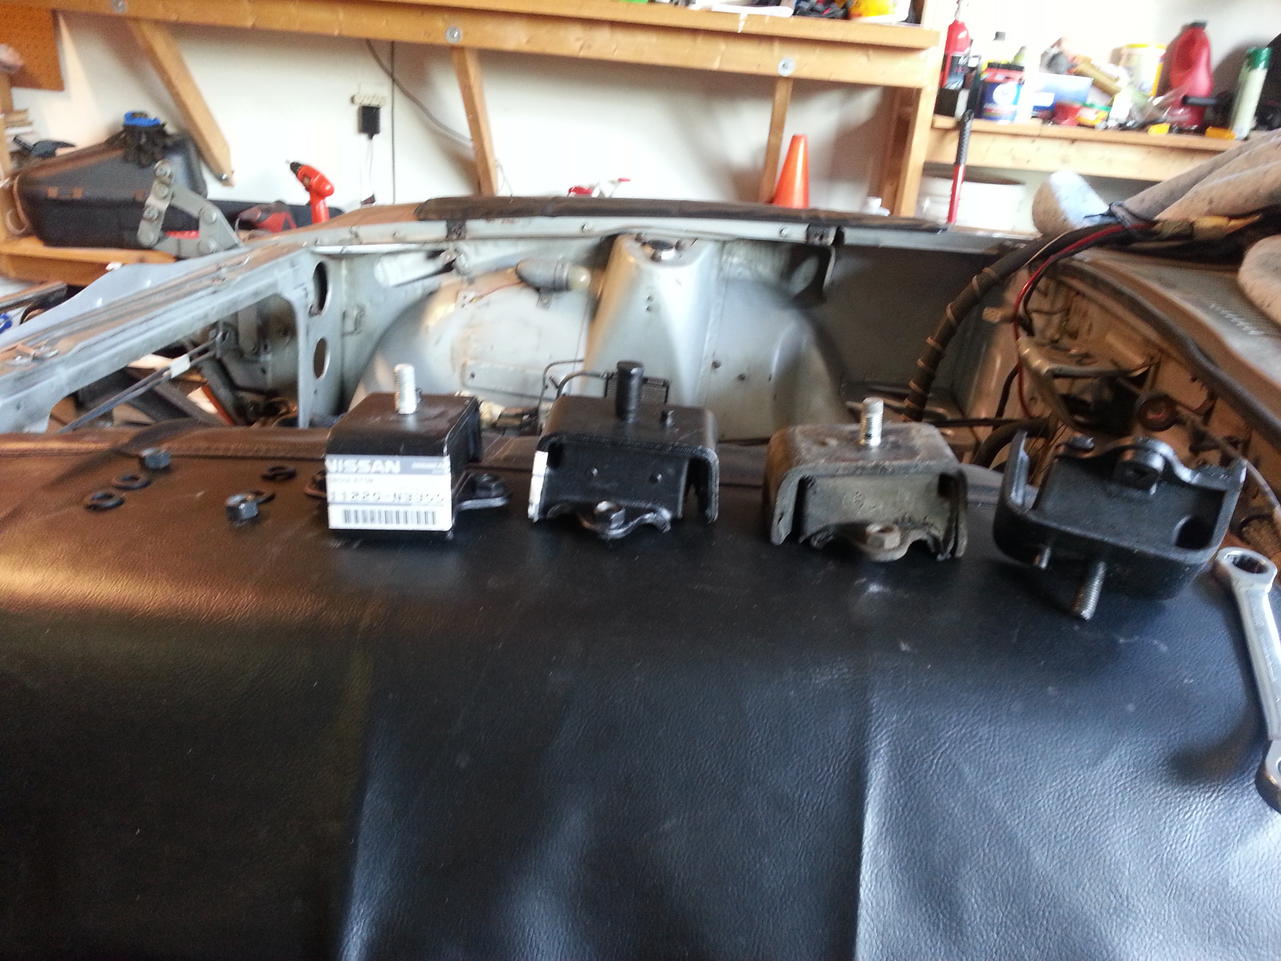
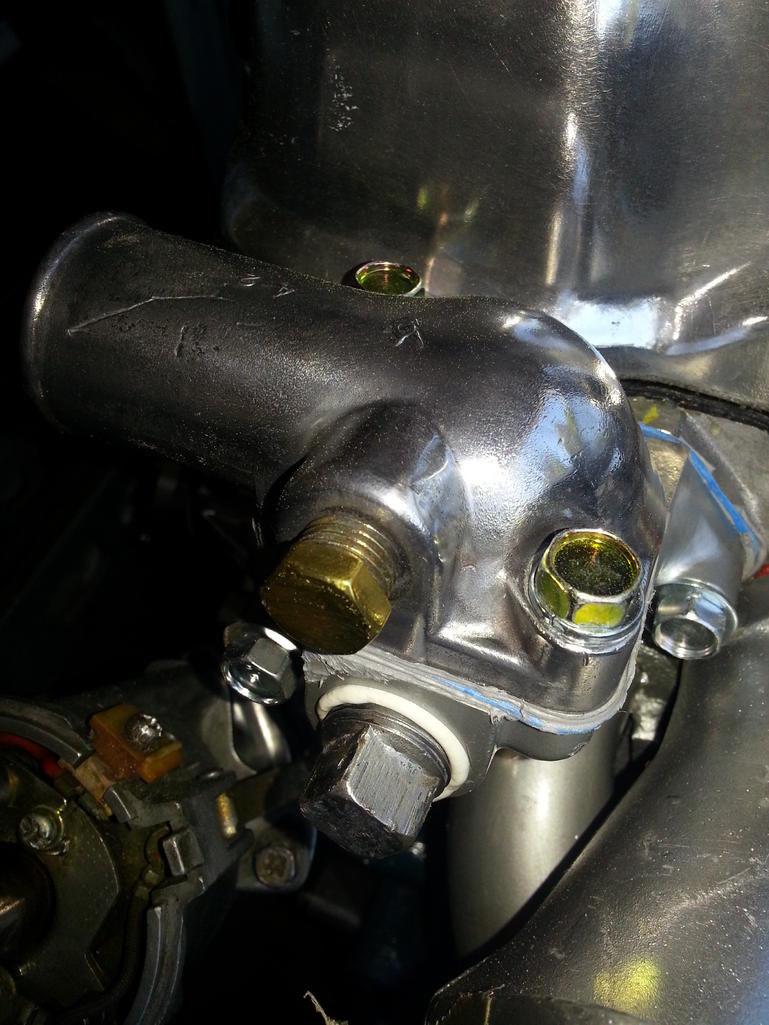
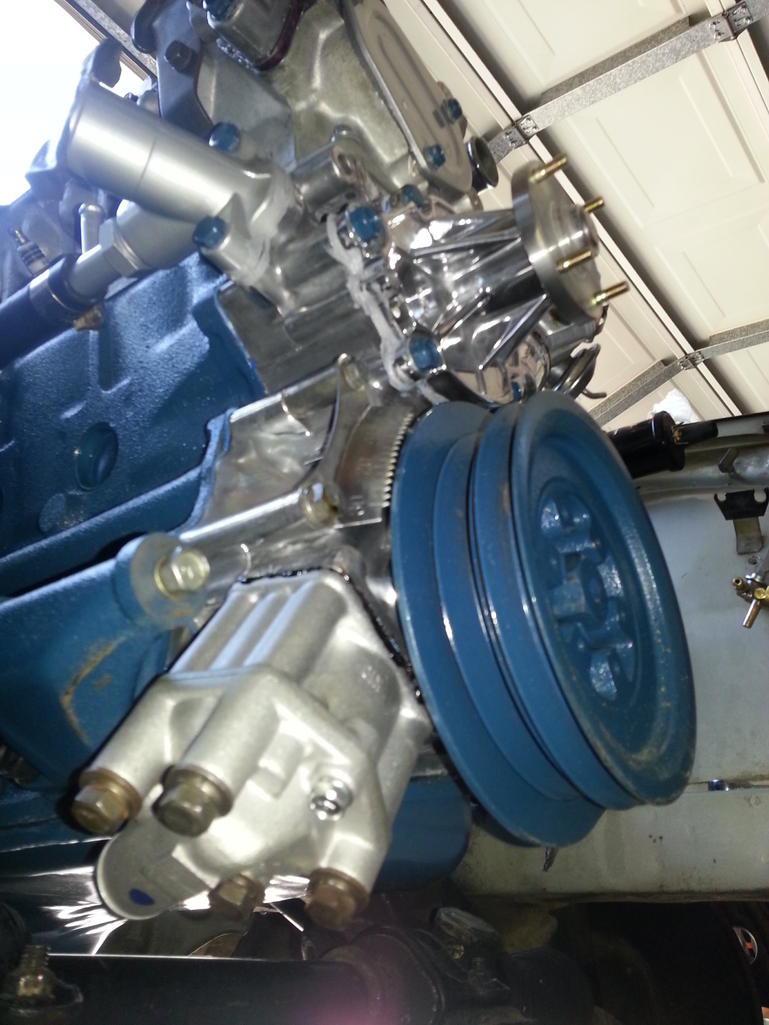
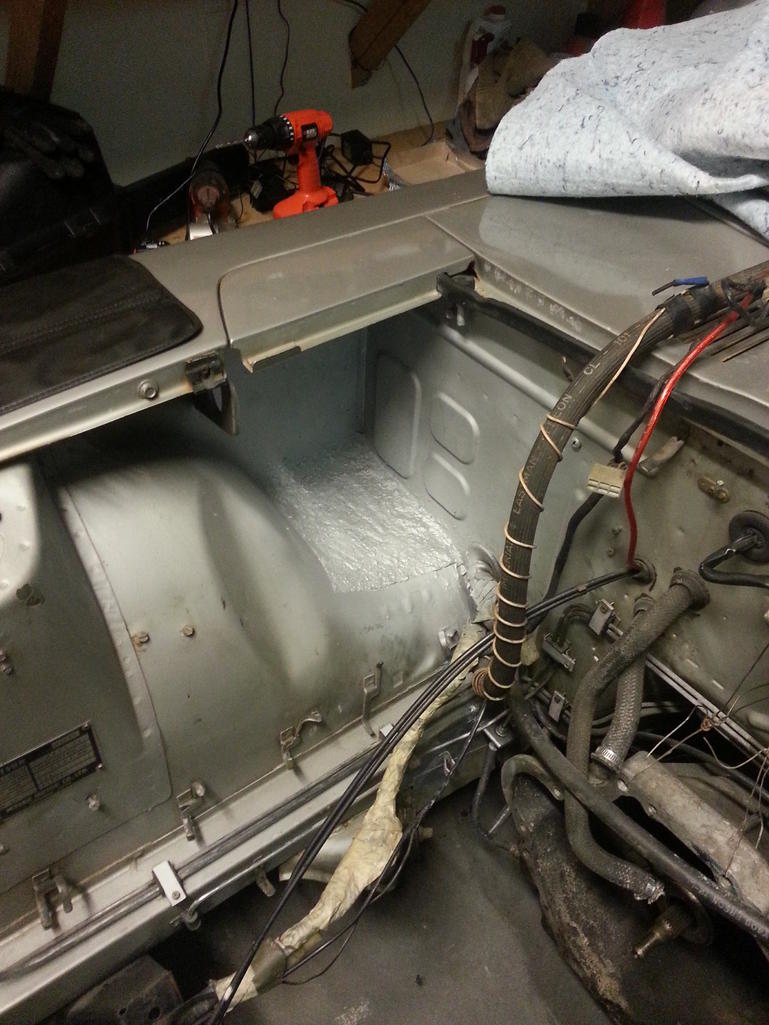
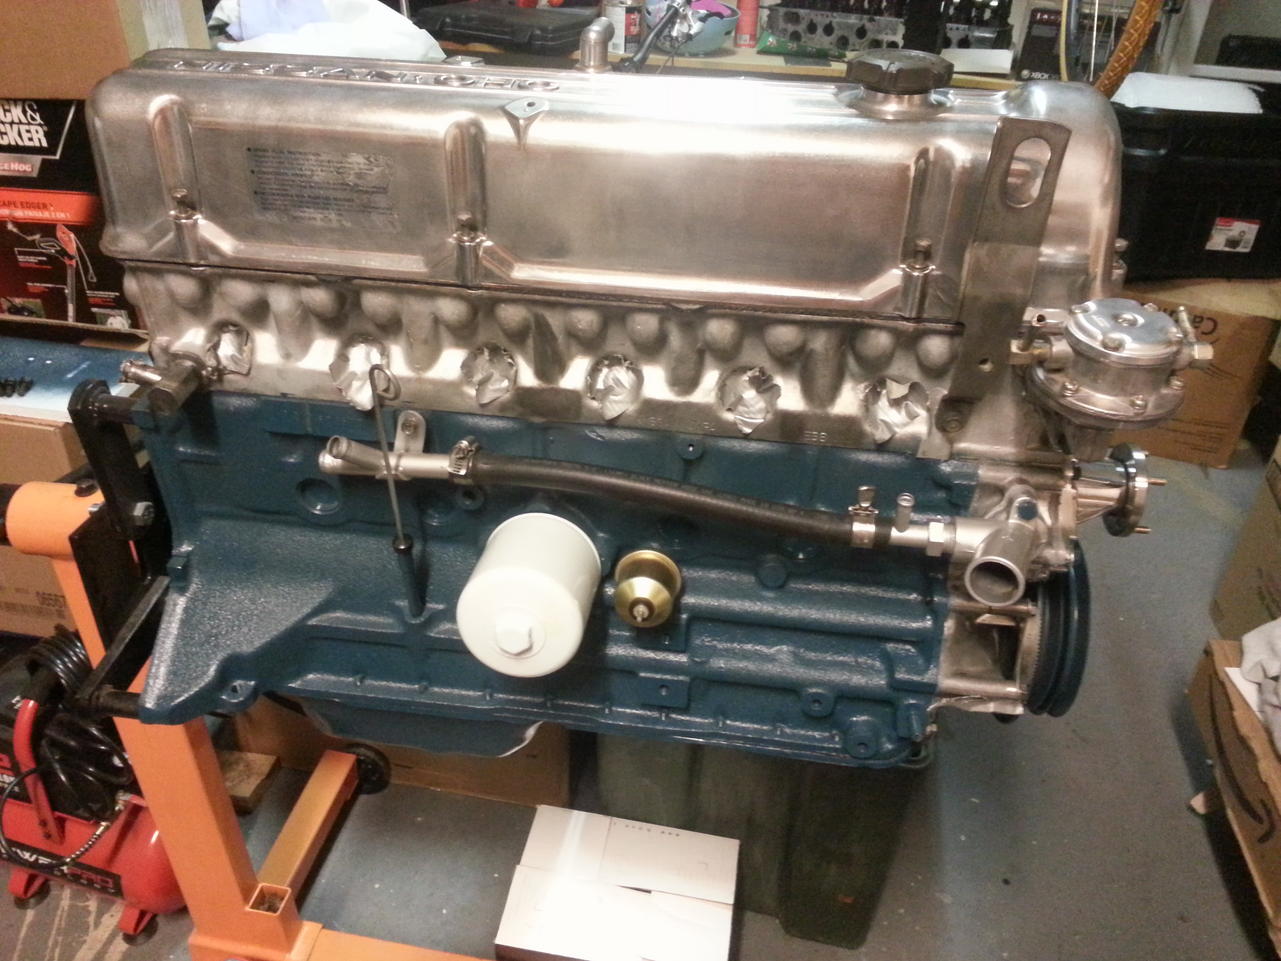
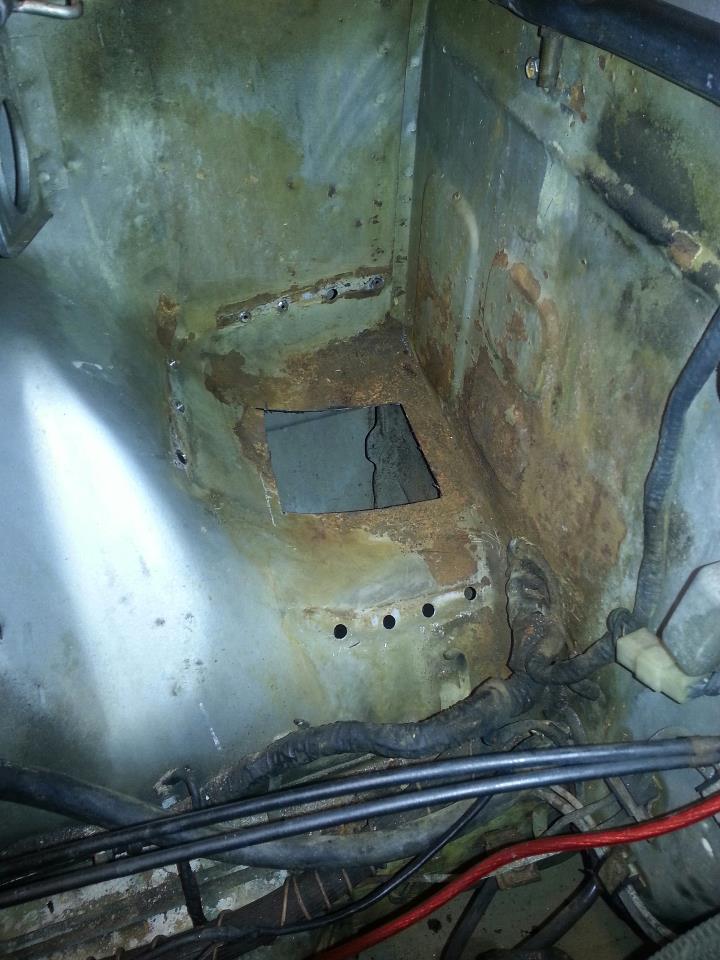
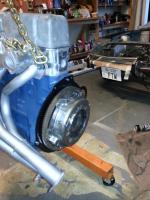
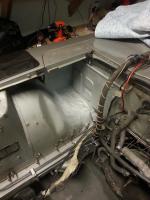
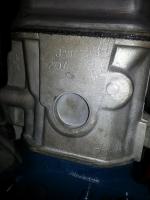
Made some decent progress with my 2.9L L28 swap in the past couple weeks. For the area where I replaced metal under the battery tray, I coated it with bedliner to add another layer of protection, then painted it silver. I also stripped, sanded, primed, and painted the battery tray itself. I made the decision to screw the battery tray in with self tapping screws instead of welding it in. I also have a new plastic battery tray with hose to place on top. Now on to the engine itself. Obviously the first step was to install it! After dealing with ill-fitting and poorly made motor mounts from Black Dragon and Beck Arnley, I decided to bite the bullet and spent the $90+ on the factory Nissan mounts. Boy did it make a difference. The photo below shows the two new Nissan motor mounts. Then the old one. On the Black Dragon mounts, the small pin on the bottom which lines up in the crossmember below the bolt was about an 1/8 of an inch off. On the Beck Arnley motor mounts, it wasn't threaded for factory bolts--it required the use of a nut and washer. Also, the rubber was not cut/molded properly to attach the independent bracket supports. I purchased the clutch/transmission spline alignment tool for about $4. It actually gave us a bit of trouble. About 30 minutes of fidgeting and adjusting the motor/transmission alignment it finally all came together. I installed the 60 amp alternator, flame thrower 3 ohm coil to delete the ballast resistor, 280zx gear reduction starter. I also stripped, painted (Datsun blue), and clear coated the battery hold down bracket. After that, my dad and I hooked up all the wiring in about 15 minutes. I don't like the look of old/dirty wiring next to a new shiny motor but I have heat shrink wiring wrap that will go on once it's on the road and everything is sorted out. I went out and spent about $100 on various odds and ends. The ~ one foot coolant line from the lower radiator hose to the heater core lines. Various vacuum and coolant line block off caps for the triple SKs and to block off / remove the hard coolant line that used to wrap around the block and warm up the stock intake manifold. Rubber bushings to place between the aluminum radiator and radiator support wall to shield from vibrations. I also had to cut the tube coming out of the lower thermostat housing because the carb would not be able to bolt to the intake. I planned on buying a brass plug to screw in but was lucky enough to dig through my original intake/balance tube zip lock bags and found one that fit perfectly. It looks a lot cleaner. I finished thoroughly cleaning the insides of two out of the three 45mm SK carbs. Now there's only one left. Once the carbs are mounted with the Datsun Spirit heat shield and the aluminum 4 row radiator is installed, all I have to do is fill up the oil and fluids and crank her up. I'm hoping to be able to drive it to enter a local car show on Fort Gordon on Saturday.


-
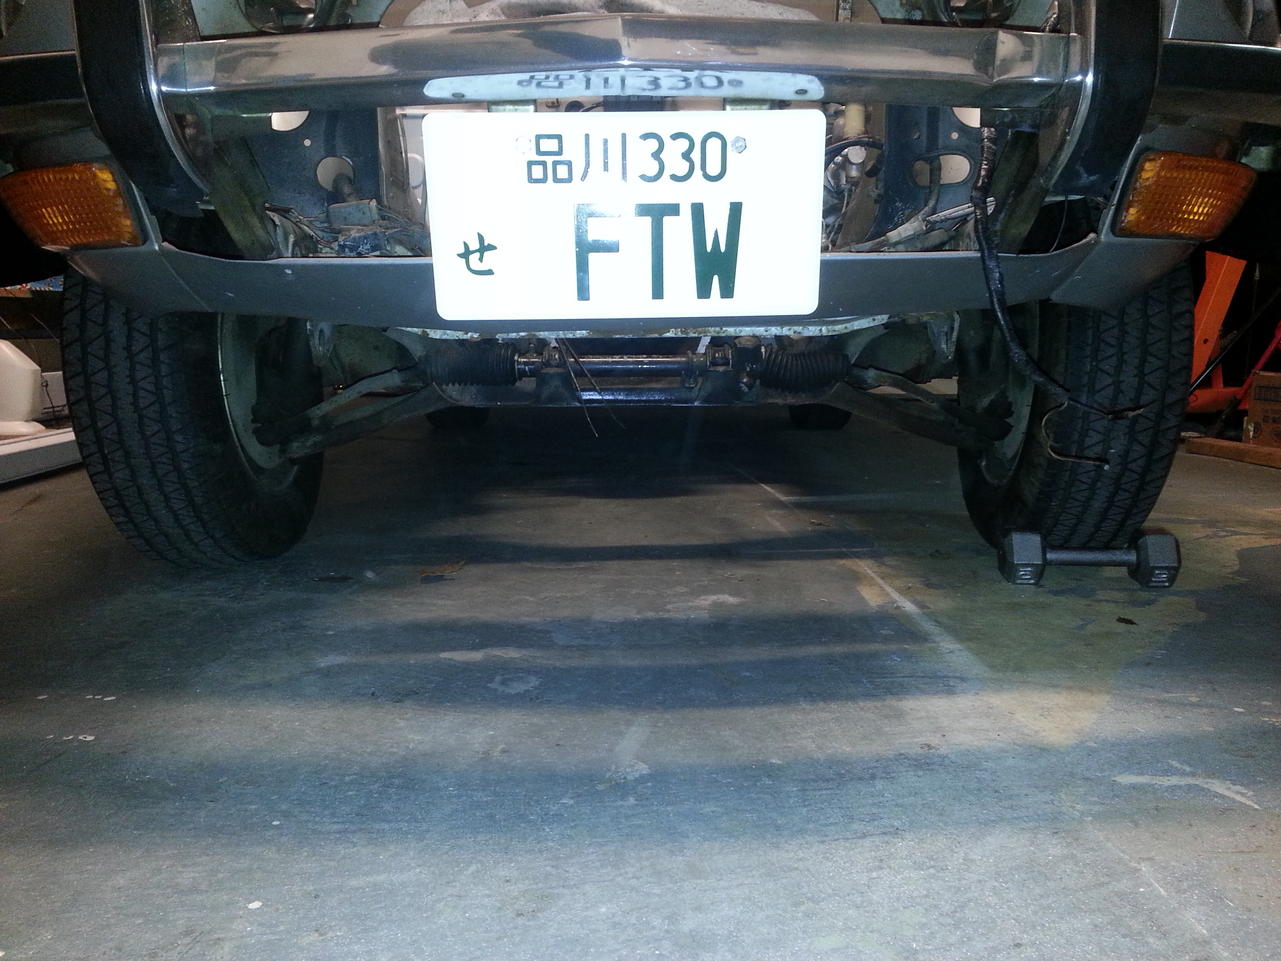
Just to confirm my idiocracy, the tires look perfectly aligned with no issues after the L28 was put in.
-
Looks like you'll be back on the road soon to enjoy the Austin weather! I can't wait for that day myself--I have a new L28 motor swap with triple SKs that will be finished this week.
-
I like it on the white. I have a silver '73 240z and just bought the stripes. I'm going to wait until my new motor is all up and running, then will put them on. I have flat black rims, and will have a flat black type 1 air dam and (haven't quite decided which one) flat black rear spoiler. I like the contrast it offers.
-
I ended up purchasing one from Datsun Spirit Inc. It's aluminum with zinc plated mounting hardware. $116 with shipping. Triple Carburetor Heat Shield | | Datsun Spirit, Inc.
-
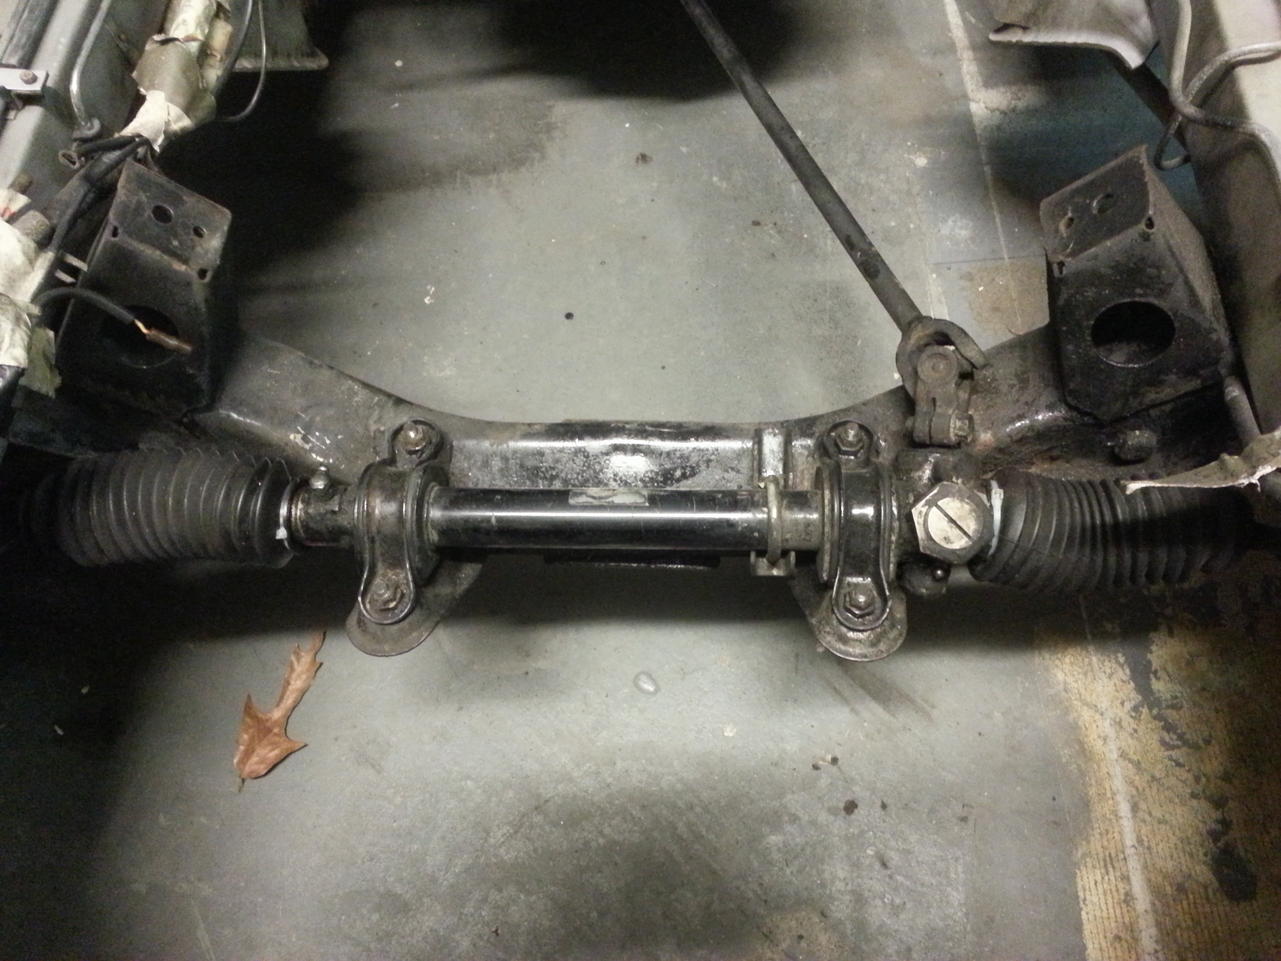
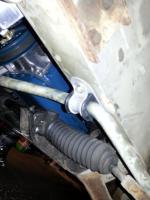
I searched through the forums...just as the title states. I replaced the steering rack bushings with new OEM rubber while the engine was out of my 1973 240z. The car did not move during installation. I admit it was a pain to put the bushings in, but after enough wd-40 and wiggling the rack itself, I was able to bolt the clamps back on successfully. I also refilled the rack with grease and zip-tied the boots. My Dad did kick one of the tires to help the process. My father is convinced that moving the tires while the steering rack was unbolted could not mis-align the tires--because it's a solid unit so to say between the wheels. Now when rolling the car back and forth you can hear the tire(s) rubbing because one is kinked in a little bit...probably the one he kicked. Is this possible? Does it make sense, or am I crazy? How do I solve this? :stupid:


-
I appreciate your attention to detail and you're making amazing progress! I too am going through my 240Z in the same fashion. The only difference is I started with my engine. It'd been depressing how long it's been since I've driven her. I will be sure to follow this thread.
-
I have a house and a mortgage here, so I'll be here for a little while. The current plan is to find a job, stay here through the rest of the year, then move to Austin, Texas to finish my Bachelor's Degree at UT.
-
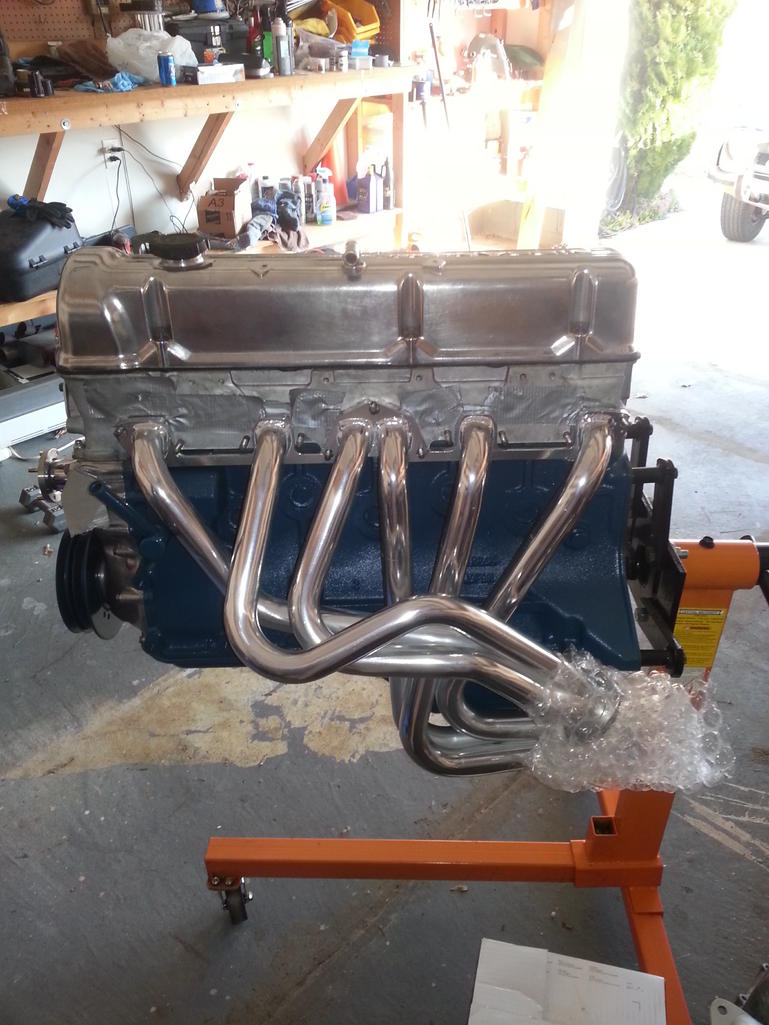
After reading posts on this website, and consulting my How to Modify Your Nissan/Datsun SOHC Engine book, I got my hands on two Clifford Research 6-2 headers. The first set is NOS, with absolutely beautiful welds, a nice true thick mounting flange, and is ceramic coated inside and out. The second is used, sandblasted, and coated (not ceramic). There's one small hole I'll have to fix up. The welds aren't as nice, and look to be of the quality of the set I have now. I guess it's safe to say I'm a header nut. I plan to use the ceramic coated one, and got 2nd one just to have around.


-
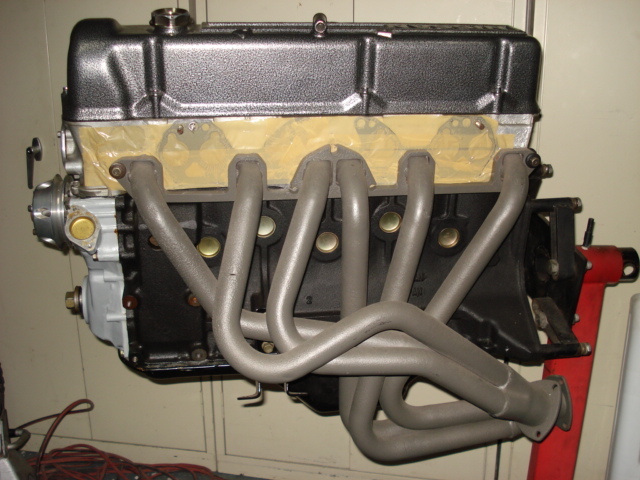
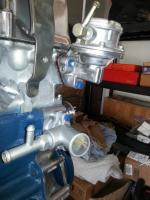
I've been busy with job applications and interviews during my transition out of the Army. Haven't had much time lately (odd given that I'm on terminal leave) but the weather has been nicer the past couple days and I'm getting antsy. I haven't driven the Z in a YEAR! I reinstalled all the fuel and brake line brackets. I finished up the battery tray area with roll-on bedliner to toughen it up. I painted it silver. Most of this will be invisible to the eye with battery tray, battery, etc. Instead of welding in the battery tray I'm just going to use self-tapping screws. I still need to touch-up the brake booster. Sanding, cleaning, polishing, painting nuts and bolts is a long, tedious process. I'm hoping the finished results will pay off. I installed the fuel pump (after cleaning it up with a wire brush) with new gaskets and original spacer. Installed the timing chain cover. Installed the water pump. Installed a section of the coolant/heater hose T-bar and line. Next is finishing the coolant/heater hoses, install the NISMO high flow oil pump, factory distributor (still haven't decided which one to use; I have the factory '73 dizzy and '83 dizzy on hand). Need to install alternator, starter, and motor mounts. I got pretty frustrated yesterday--it looks like my gasket set didn't include a thermostat gasket? WTH? I also picked up a NOS Clifford Research header. The plan is to get a competent local exhaust shop to build a full twice pipes system. Here is the original header I had, sandblasted, primed, painted, and cleared with 2000 degree header paint: I may use this original one first to break in the motor and have my original exhaust ready to bolt up.


-
How long ago did you purchase the heat shield? I've been checking on the ZCC website for a while now and the L6 heat shield has always been unavailable.
-
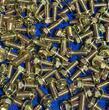
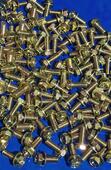
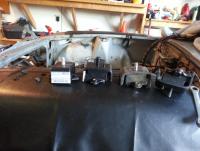
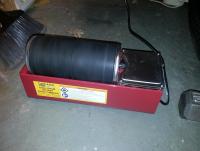
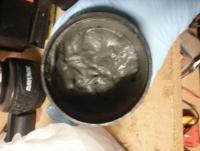
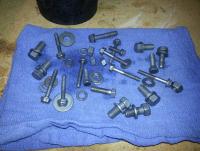
I have investigated the plating process for nuts and bolts. So far I have been using a large wire brush mounted to a bench grinding machine. Laborious holding a bolt for a while at all angles; but it does make them shiny! The cheapest fake self plating kit I saw was about $54 for a three stage zinc/cadmium kit from Eastwood with less than stellar reviews on Amazon. It's looking like many of my nuts and bolts will either be clear coated or painted Datsun engine blue to contrast the polished aluminum parts. I recently purchased the double barrel rock tumbler from Harbor Freight Tools. Looking back, I could have gone with the single barrel. I bought some rust removal product from the same store, as well as a 40/70 glass mixture. I filled the barrel about 2/3 of the way with the rust removal product (small glass feeling pyramids with a funky smell), put water up to that level, then threw my bolts, nuts, and washers in. I wrote down which ones they were. They were pretty greasy, and the ones that weren't greasy had some rust in the threads and on their heads. [ATTACH=CONFIG]60756[/ATTACH] After 24 hours of it running in my garage, I checked out the bolts and they looked pretty clean and most of the rust-removal product had turned to a dirty sludge. I decided to stop the machine and rinse all the parts off and to restart them in the 40/70 grit mixture. It says it won't harm soft materials, and I'm hoping it'll polish them a little bit. I'll check on them in another 12 hours or so. [ATTACH=CONFIG]60757[/ATTACH] [ATTACH=CONFIG]60758[/ATTACH] [ATTACH=CONFIG]60759[/ATTACH] Overall I'm happy with the results so far and it lets me do other stuff while the machine is running. It's not too loud.
-
I too have investigated the plating process. So far I have been using a large wire brush mounted to a bench grinding machine. Laborious holding a bolt for a while at all angles; but it does make them shiny! The cheapest fake self plating kit I saw was about $54 for a three stage zinc/cadmium kit from Eastwood with less than stellar reviews on Amazon. It's looking like many of my nuts and bolts will either be clear coated or painted Datsun engine blue to contrast the polished aluminum parts. I recently purchased the double barrel rock tumbler from Harbor Freight Tools. Looking back, I could have gone with the single barrel. I bought some rust removal product from the same store, as well as a 40/70 glass mixture. I filled the barrel about 2/3 of the way with the rust removal product (small glass feeling pyramids with a funky smell), put water up to that level, then threw my bolts, nuts, and washers in. I wrote down which ones they were. They were pretty greasy, and the ones that weren't greasy had some rust in the threads and on their heads. After 24 hours of it running in my garage, I checked out the bolts and they looked pretty clean and most of the rust-removal product had turned to a dirty sludge. I decided to stop the machine and rinse all the parts off and to restart them in the 40/70 grit mixture. It says it won't harm soft materials, and I'm hoping it'll polish them a little bit. I'll check on them in another 12 hours or so. Overall I'm happy with the results so far and it lets me do other stuff while the machine is running. It's not too loud.
-
Any reviews of this one: OBX SS Exhaust Manifold Header Nissan Datsun 240Z 260z 280z 280ZX Fairlady Z New | eBay I researched the company; looks like they make a lot of parts for modern imports. It says it's stainless steel. Not sure about performance gain or fitment.
-
I too thought about buying that NISMO header on nissanparts.cc. I just bought the high flow oil pump. Too bad it's NLA. I've decided to stick with the headers that came with my car, unknown brand, rusty 6-2. Does anyone know who made this or what decade it may be from? http://www.classiczcars.com/forums/exhaust-s30/47169-can-you-identify-header.html I'm gonna get it sandblasted, paint it aluminum with header paint, wrap it, and call it good.
-
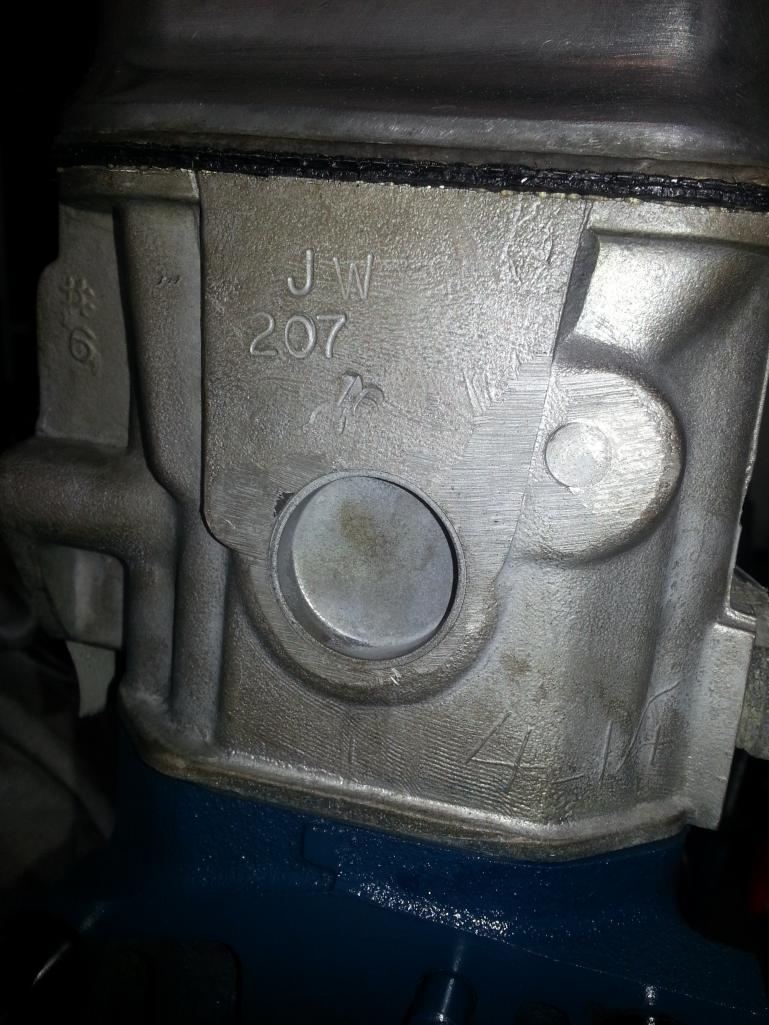
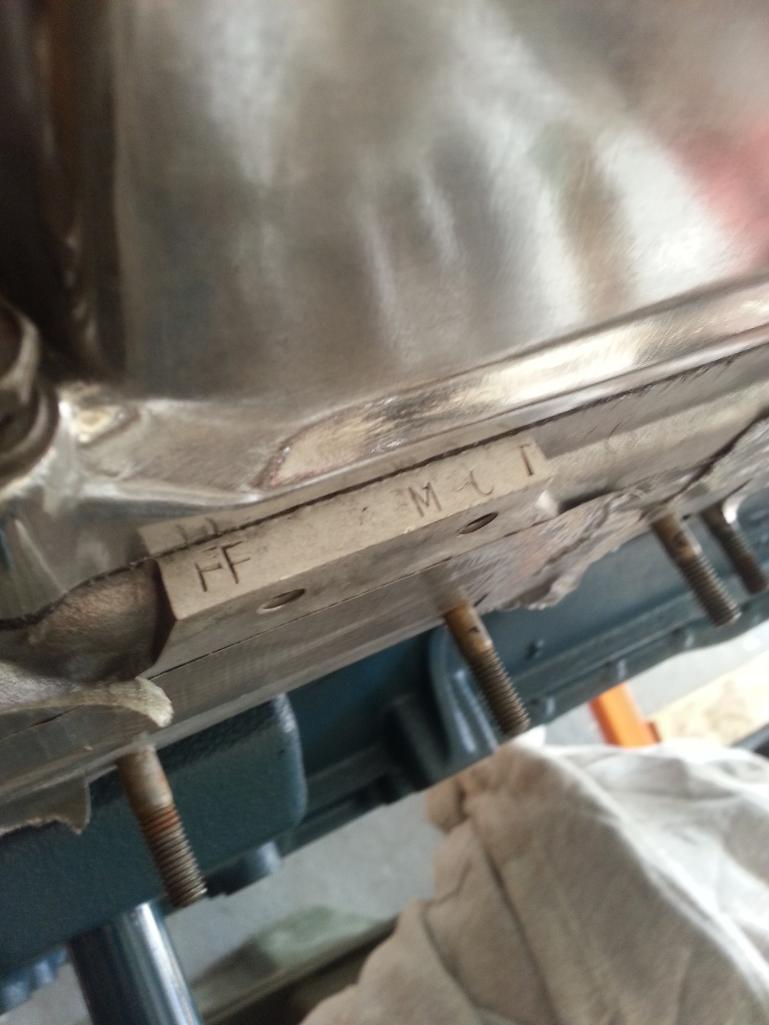
As the title states, I've noticed quite a few non-factory appearing stamps on my '73 E88 head. I'm assuming they're not factory, but could be? Funny, the one on the back (JW 207) are my initials and the area code of my childhood hometown.

-
Zedyone_kenobi, Do you ever regret going to the L28? I don't think I will performance wise, but I'm tempted to keep my numbers matching block and ebay found 90,000 mile E31 head for the forseeable future. Also, are you running triples? I already have a regulator, need to source a good pressure gauge as well. What pump did you end up choosing?
-
One last note: the engine builder said the compression ratio is right around 9.9:1.
-
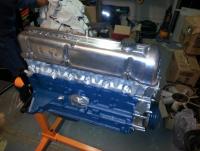
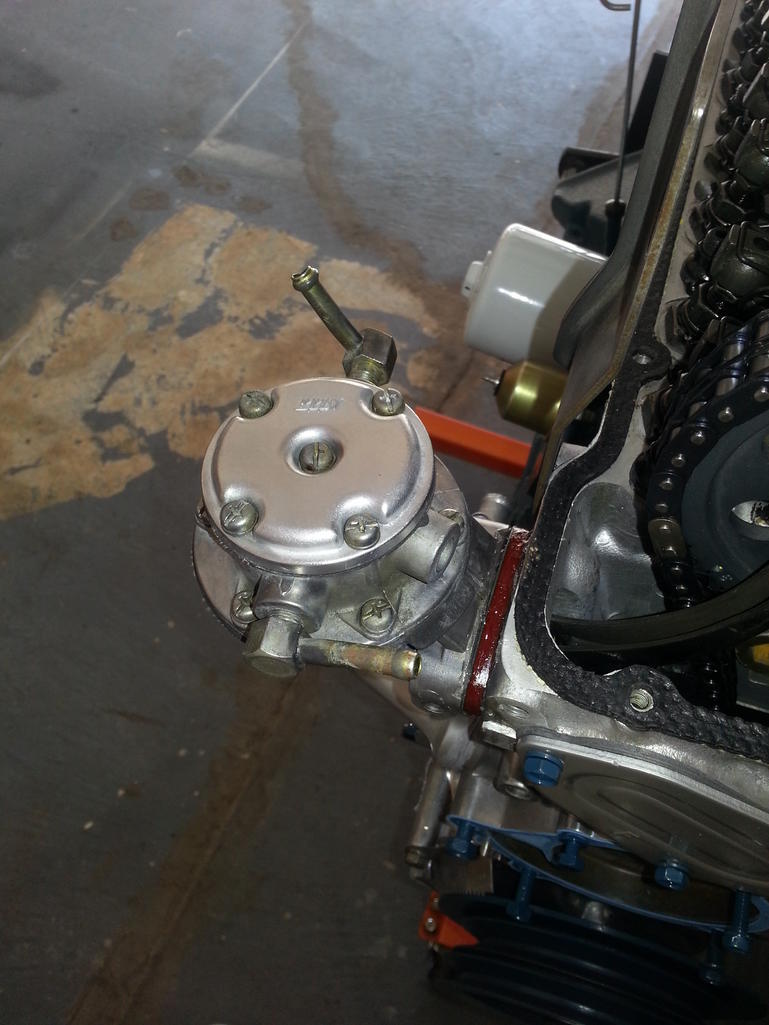
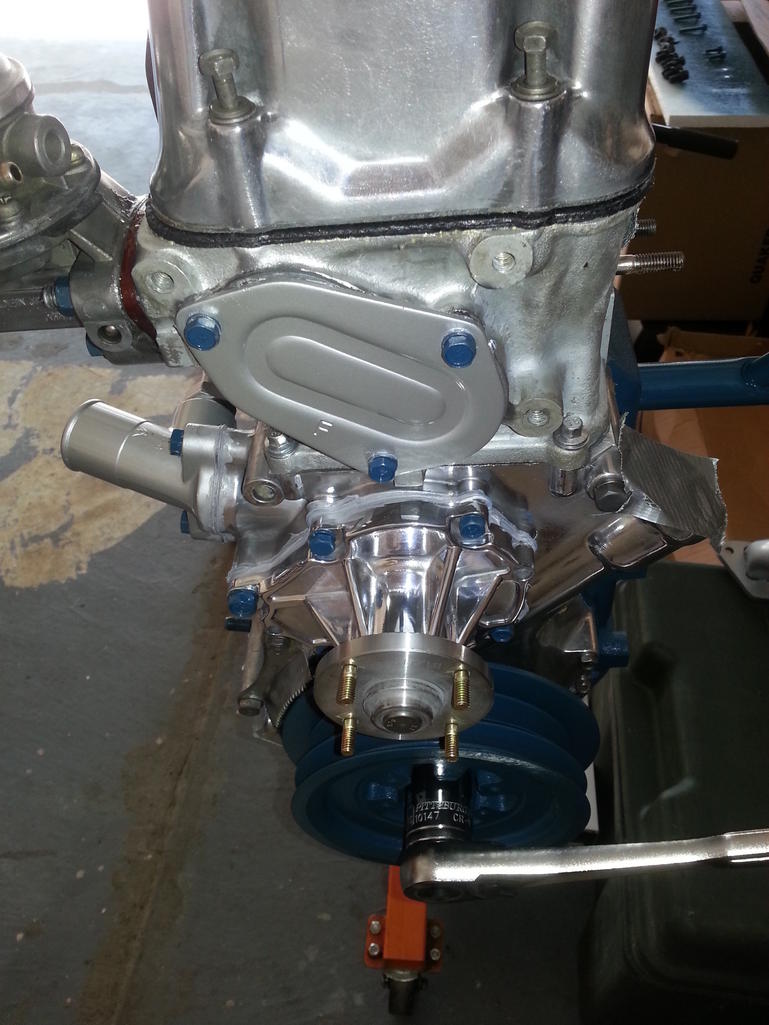
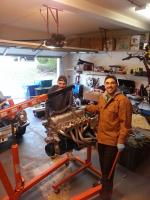
I did this shortly after my last post waaay back in September: I'll post a picture later of the finished product. Again, that was a whopping four months ago. What have I done since then? Let me think. Waited FOREVER for my engine to be finished. There were some hiccups along the way. Sourcing ARP rod bolts. Choosing a cast piston. Re-ordering a few different sized lash pads for the proper cam/lobe wipe. I'm on my way out of the Army, so that means the funds won't be flowing quite so well but I still have a little nest egg to work with. Good news--more time for Layla! I picked up this bad boy last Friday: Here are some details: F54/E88 with a very intensive port job Oversize 280zx stainless steel valves ARP main, head, rod bolts L28 polished/balanced crank, connecting rods cast flat top pistons .020 overbore full timing chain kit Schneider Stage III cam kit (including rockers, springs, etc.) polished water pump/timing cover (to be installed) new NISMO high flow oil pump (any reviews for this--part number 15010-S800A) new 280zx gear reduction starter new 60 amp alternator w/ plug adapter I will be painting an area of the passenger's side frame rail today and welding in the battery tray. Then bolting on the engine accessories! Question: the local pull-a-parts have no Mazda RX7s for the fuel pump swap (I have triple SKs). What PSI does the factory mechanical pump put out? Will it at least let me run the engine for 15-20 minutes at 2000 RPM as my engine builder suggested? Has anyone over tried to run triples with only the mechanical pump? I figure it'll just die out at the upper RPM range? Otherwise I think (for now) I'll put my rebuilt SUs back on for a simpler, quicker way to break in the engine ... and take it for a ride! :beer: