


Patcon
Supporting Member
-
Joined
-
Last visited
Everything posted by Patcon
-
Excellent progress
-
He illustrated the technique well. Copy what he did. Take you time. Get some dollies and hammers, cheap ones will work. With a good welder you'll be fine. ?
-
Aaaahhh Christmas! My wax & grease remover is definitely not water based. Solvent based and flashes off as quick as lacquer thinner.
-
That's funny. My grandmother offered to loan me 10k in high school to buy one I saw. I declined...I didn't think owing my grandmother money was going to be a good thing. I am also too big for it now anyway. I doubt it would have survived my wildness even if I had been able to afford it. They have such beautiful curves though!!!!
-
Unless I miss something, that's a pretty low number car. The RHD thing would be an issue for me, but it could be a very nice car for the right buyer. Would be interesting to know what it sells for. BaT might be a good option for it.
-
-
-
That was funny!!! Yeah a little body massage just like that It's surprising how much I have gotten used to just moving panels around with my hands
-
I had two inductive loop Z tachs. They both measured .04 Amps too! So does that mean that the tach should work or could the circuitry still be bad?
-
Good to see you too Guy. Cody's is still growing hope he doesn't get much above 6'-7" Getting shorter every day. That's funny. I was trying not to fall down
-
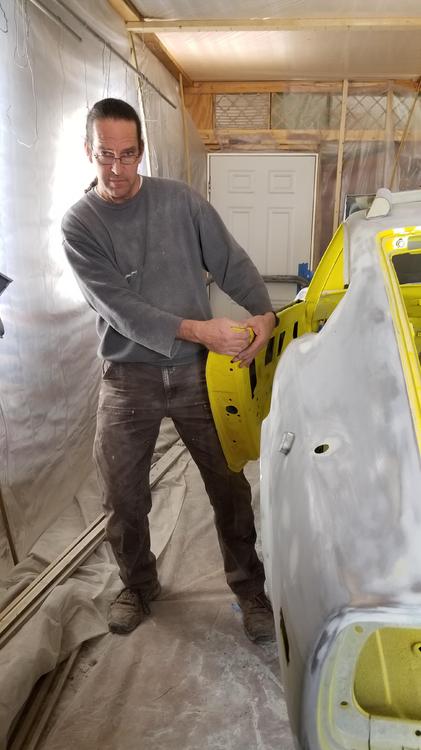
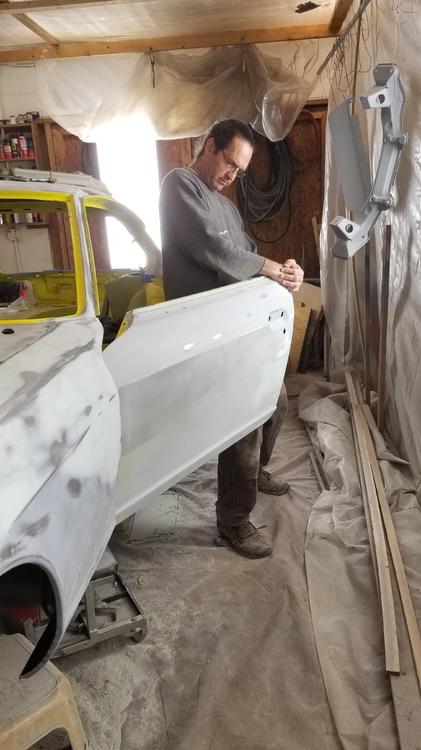
Someone PM'd me with this: "Hi Charles: A while back you mentioned that you had, on occasion, resorted to twisting a door as part of your panel alignment strategy. I can see an element of usefulness to this, because it seems like it would permit moving the bottom (or top) of the door inboard or outboard at the rear without disturbing the front edge quite as much. On the other hand, using shims at the hinge-to-post mounting point looks like it would move both the front and the rear edge outboard by the same amount, meaning that the door-to-front fender alignment would be affected. Also, shims will only move the door outboard. Can you tell me a little bit about: Why you decided to try twisting the door. How you did it. How you think it worked (i.e Did the door's box structure twist, or did the front wall of the door distort where the hinges mount?) How much movement you accomplished at the bottom (or top) of the rear of the door. Any cautions that need to be observed?" So this was my reply, it occurred to me it might beneficial to others so I copied it over to here: Why I decided? There are actually body tools available to do this. They fasten into the door latch so you can twist a door. I could get three corners of the door right but never the fourth. How you did it? So I set the front two corners of the door properly. If I need to shim the hinges, I do that. Then you have one of the rear two corners that line up. So If depending on which way you have to twist it you brace your leg against the door and pull with your hands. I am sure if you got too rowdy you could crimp the door somewhere. This door is a 280z door, so it is stouter than the 240z door. The drivers door was 3/8" or more proud of the rocker panel when it was flush at the top. After a couple of tries at twisting, it lines up really nice. I haven't seen any unintended consequences of this technique. I suspect you could twist a door 1/2" or more if necessary but that door would be pretty far out. I tape some shims in what ever location is flush so it makes it easy to repeatedly check when the door lines up on all 4 corners. Does that make sense?
-
Never had a tach I might could did up an early 240z tach and check it. We'll see what I get.
-
I got like .04 amps when I tried it today. That seems awful low. Does that seem right?
-
The real issue with using the compressor for an air supply is compressor oil. The air needs to be filtered and run through an oil remover to make it suitable for breathing. The other thing is the compressor intake needs to be pulling air from a safe area. Not near any exhaust ports or pulling fumes into it. It's the filtration on these systems that make them expensive. I have a fresh air mask but usually use the respirator as it's so much easier and I don't have 2 hoses to keep out of the paint. When I do a big spray I use the fresh air mask. It is much nicer because there is no inhaling effort compared to pulling through a cartridge and the air is cool in the hood so it helps reduce sweating in the booth and dripping in your fresh paint The ones that feed the gun and mask off one line are really nice systems although the air will only be as cool as the compressor supplying it.
-
I don't now. It's a good question. Like lead in paint. The lead made it work better but was hazardous, so no more lead.
-
Be careful spraying epoxy! Good respirator! You don't want any isocyanate exposure.
-
Will it come off with lacquer thinner? If it does, it's single stage. If it doesn't it's probably a 2k primer. I wouldn't expect epoxy. What type I don't know, but from my experience it seems to stick pretty good.
-
I have concerns about reinforcement around the fuel tank. I just see a piece of steel failing to yield and breaking instead, to end up punching the fuel tank it's meant to protect. I would think reinforcement would have to be very well thought out. I think a more interesting idea would be coming up with a puncture resistant liner like fuel cells have.
-
Yes, I would agree with that
-
There is very little room between the rear valance and the tank. It would be difficult to make anything substantial enough for reinforcement to the rear and still be able to get the tank in and out.
-
I have not. It would be interesting to know how in order to refresh hem. Provided it could be done without compromising them
-
I don't think I have what you need but I have found that is a difficult place to put back right. There is a lot of really solid metal right there. My car took a similar shot but less and I have had a hard time making it right. You will want to pull the tank or have the shop do it to have a good shot at getting it back the way it needs to be Look on "Car-part.com" and find yards with the right year cars. Then call them and tell them what you want. I wouldn't search for the rear valance. I would search for rear quarters. If they have good quarters they most likely will have a good rear pan. Might take some leg work but you should be able to find one
-
That's actually not a bad idea. Many people get the cart before the horse when they get the extra horsepower before they get the extra braking. Much wiser to improve the braking then improve the "Go"
-
Thank you from one who would know!
-
I think I agree. It's much harder to make a crooked hood straight. If the rust is bad enough I might actually weld in a patch, but you would have to be really careful and keep the heat low.


