Patcon
 Subscriber
-
Joined
-
Last visited
Everything posted by Patcon
-
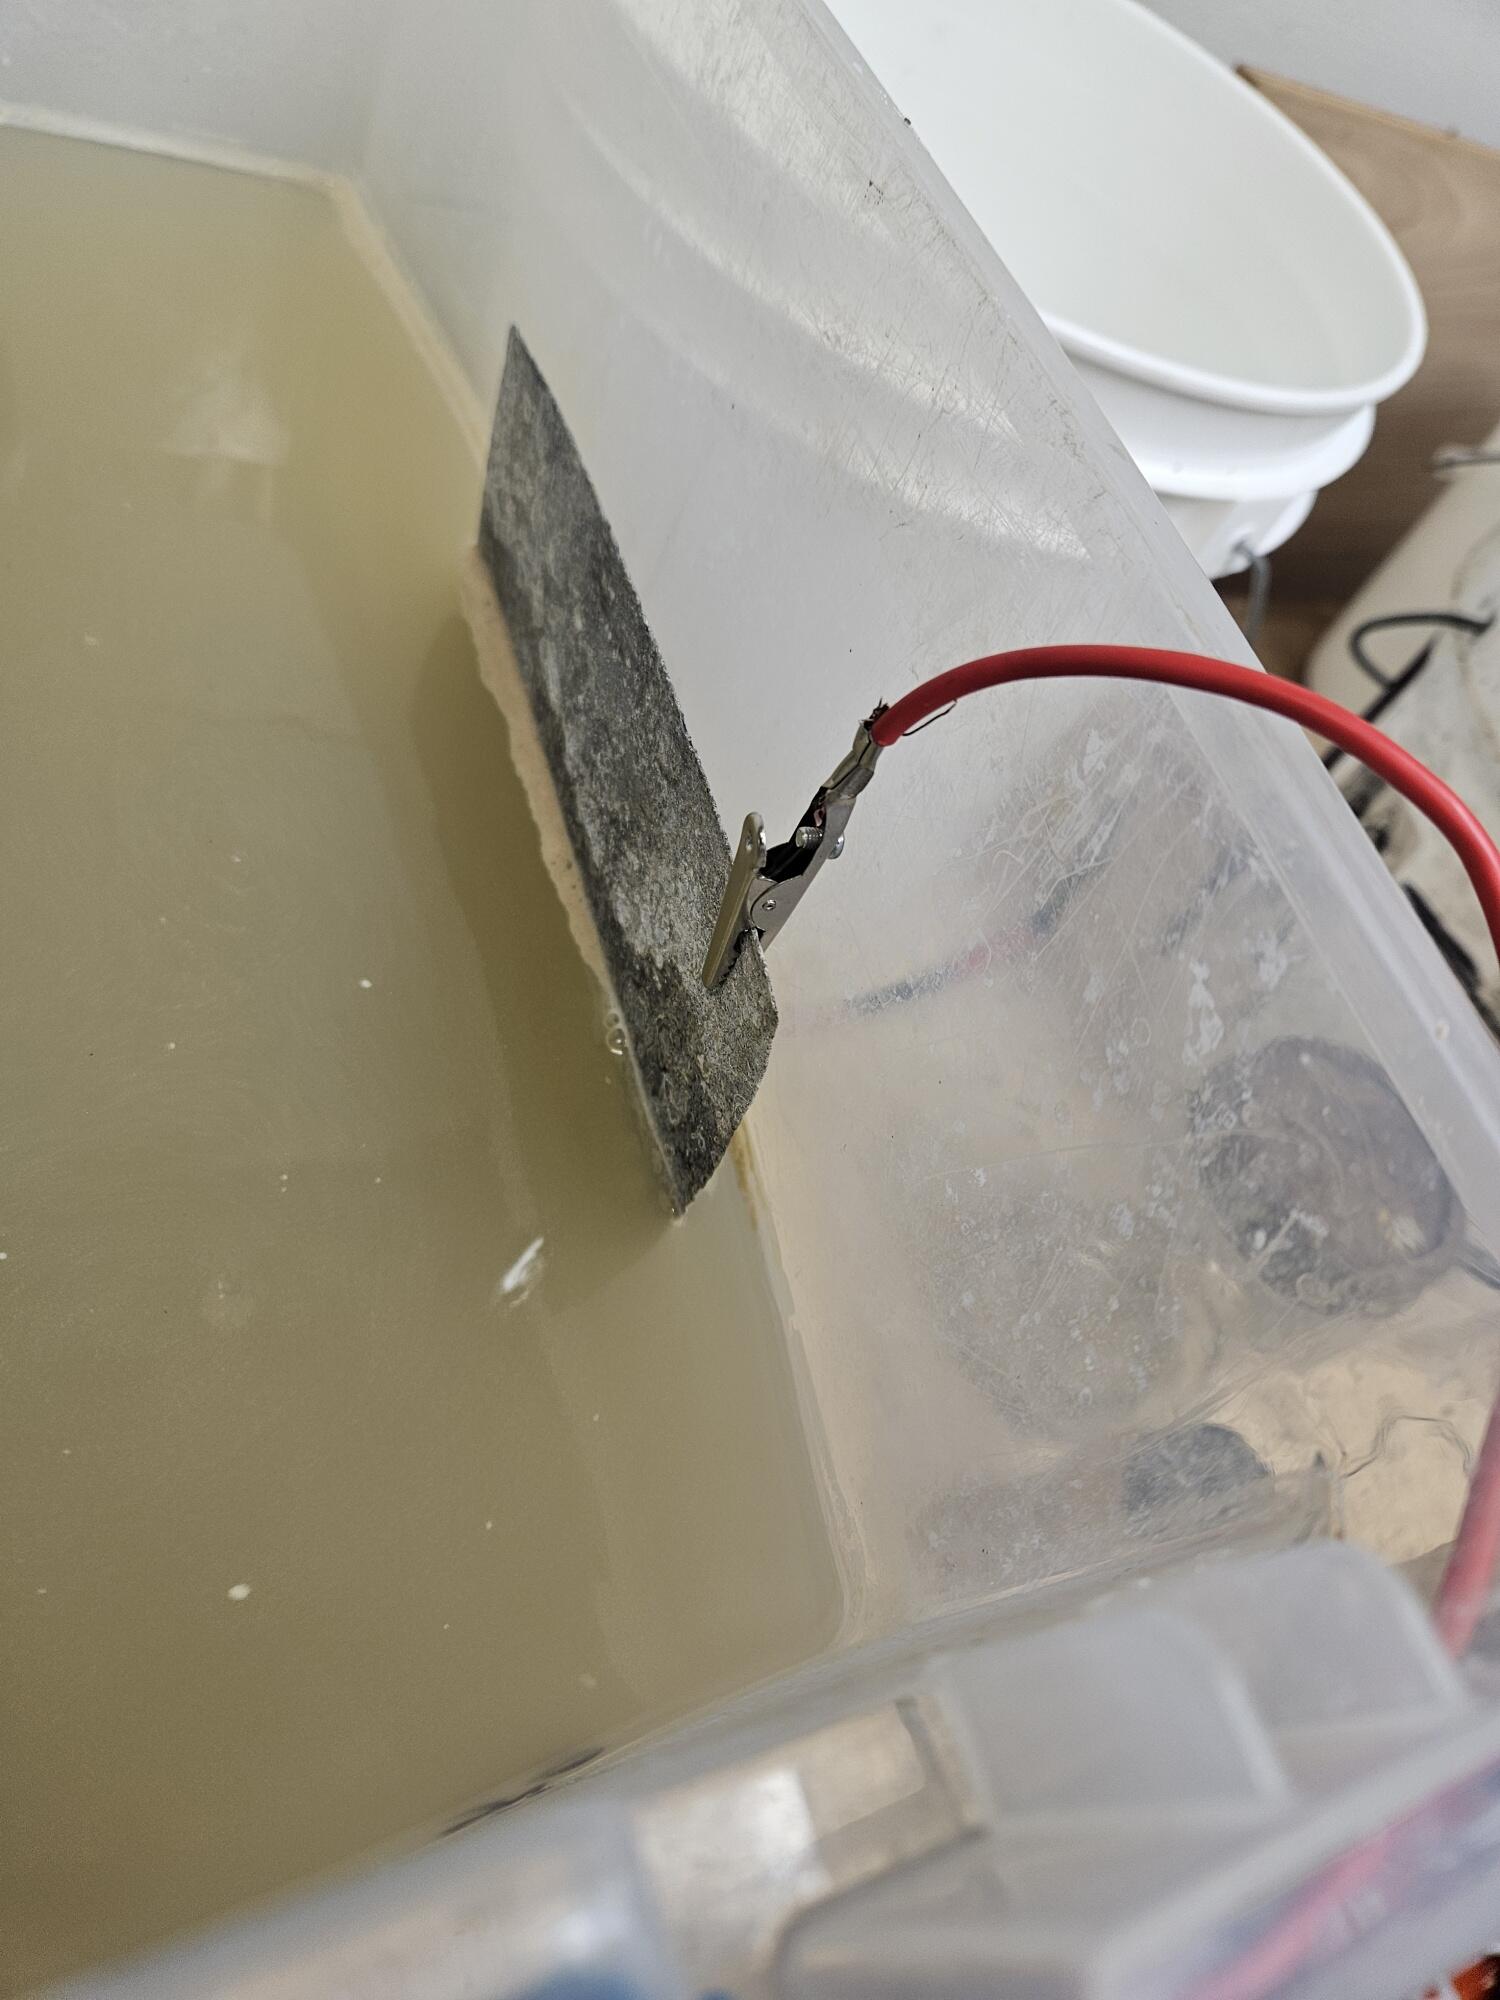
 I was trying to do some plating and not getting good results. So I checked the resistance on my leads. The hot leads had decent high resistance, So I redid them and used stainless clips. I also put my ground directly to the copper stringer wires. The plating did improve. I am still having some challenges with brightener. It helps but too much causes blistering, Still working on the solution
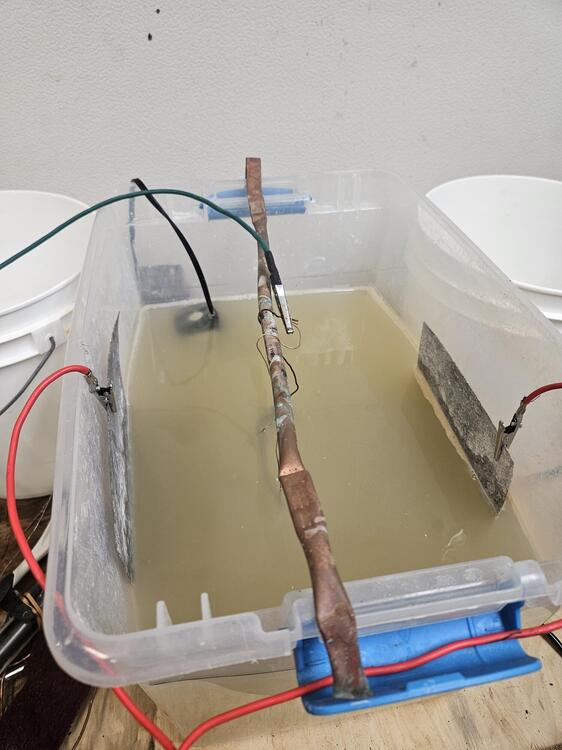

-
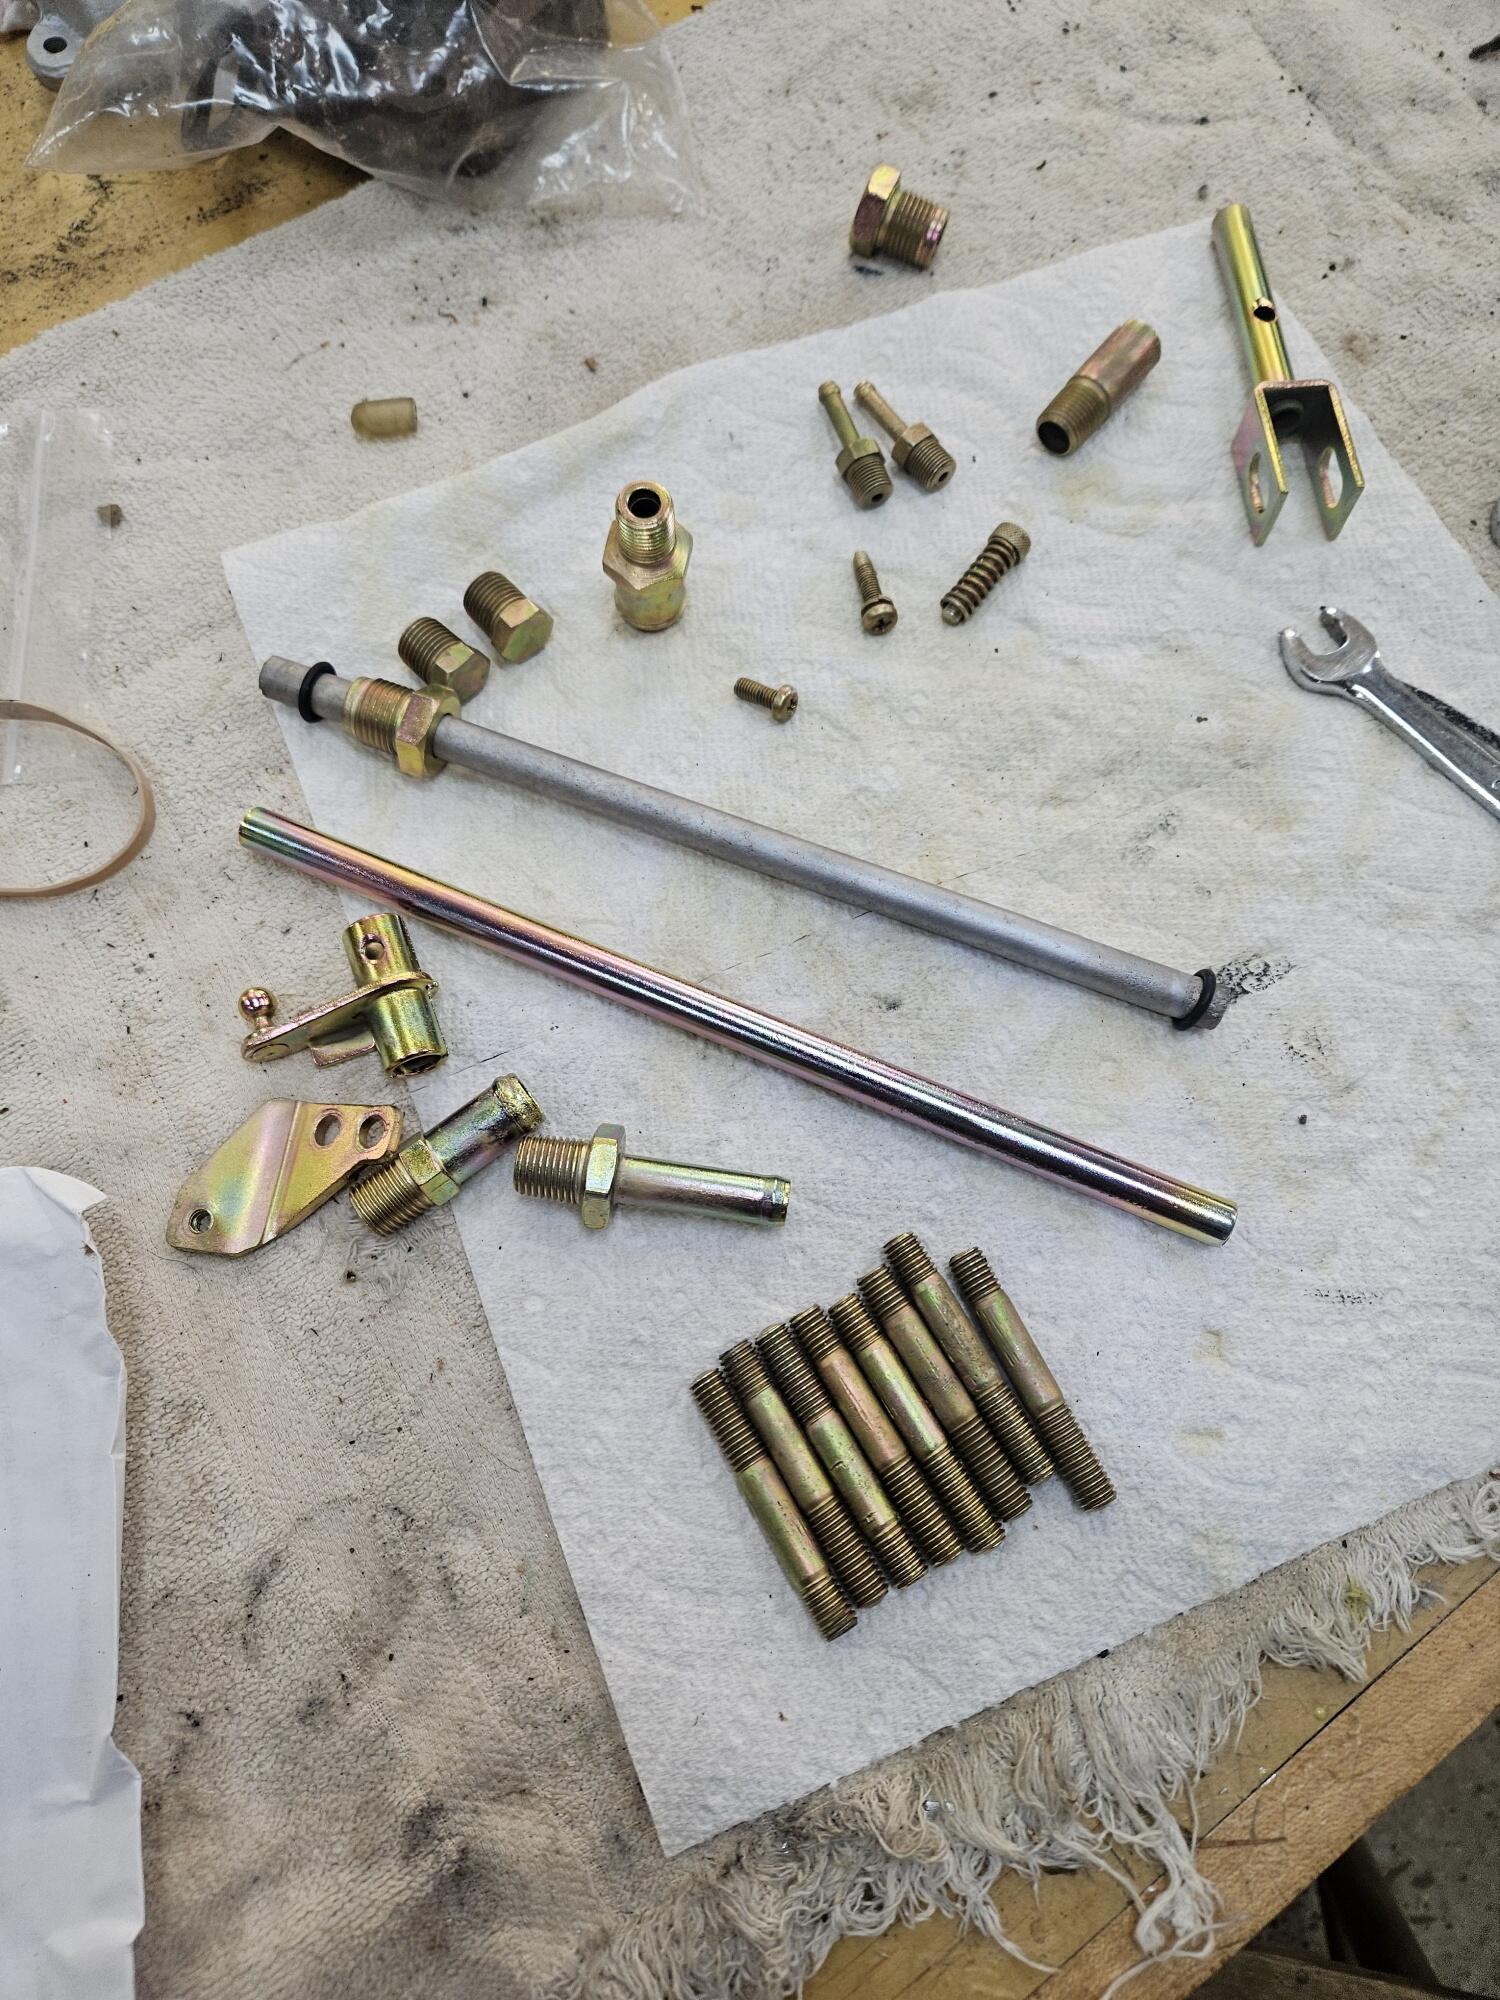
I sorted the parts that need to be re-plated by color, yellow zinc or clear zinc. I did a quick clean to knock off excess dirt and wire wheeled the areas where there was paint overspray from the previous paint job. I put some shrink sleeve over the plastic portion of the carb linkage to protect them during the cleaning process. I also plugged the holes of the carb and smog accessories to prevent the fluids from entering inside. I then put the small parts in gallon zip lock bags. I had one box of the clear/silver zinc parts, and 3 boxes of the yellow/gold zinc parts. I used three boxes for the yellow zinc because of the excess weight (USPS flat rate shipping box). Each box weighed approximately 20 pounds For the plating process, the 3 yellow/gold zinc parts will be thrown into a single barrel, so the charge will be for just one yellow zinc barrel plate. The plating company does a good job of cleaning the smaller parts in their prep process. I am guessing it is either a vibe or tumble process along with a chemical clean that they use to clean the parts to remove dirt and rust. I spent a bit more time cleaning the long tubes and larger parts as they will be rack plated and I do not think they get cleaned as well. On the long tubes I put in a large diameter bend in order get the parts to fit in my 4 foot shipping box. They said they can accomodate parts up to 6 feet in length. All plating is done by Sav-On plating in Phoenix, AZ. They have done a great job with my parts on previous restorations. Pics Below
-
I have no idea. I just bought locks because the car will live outside a good bit. It was just as easy to get locks as to get hexagonals. The locks might have a little more clearance too
-
I have some chrome valve stems and black locking type lugnuts
-
I don't know
-
-
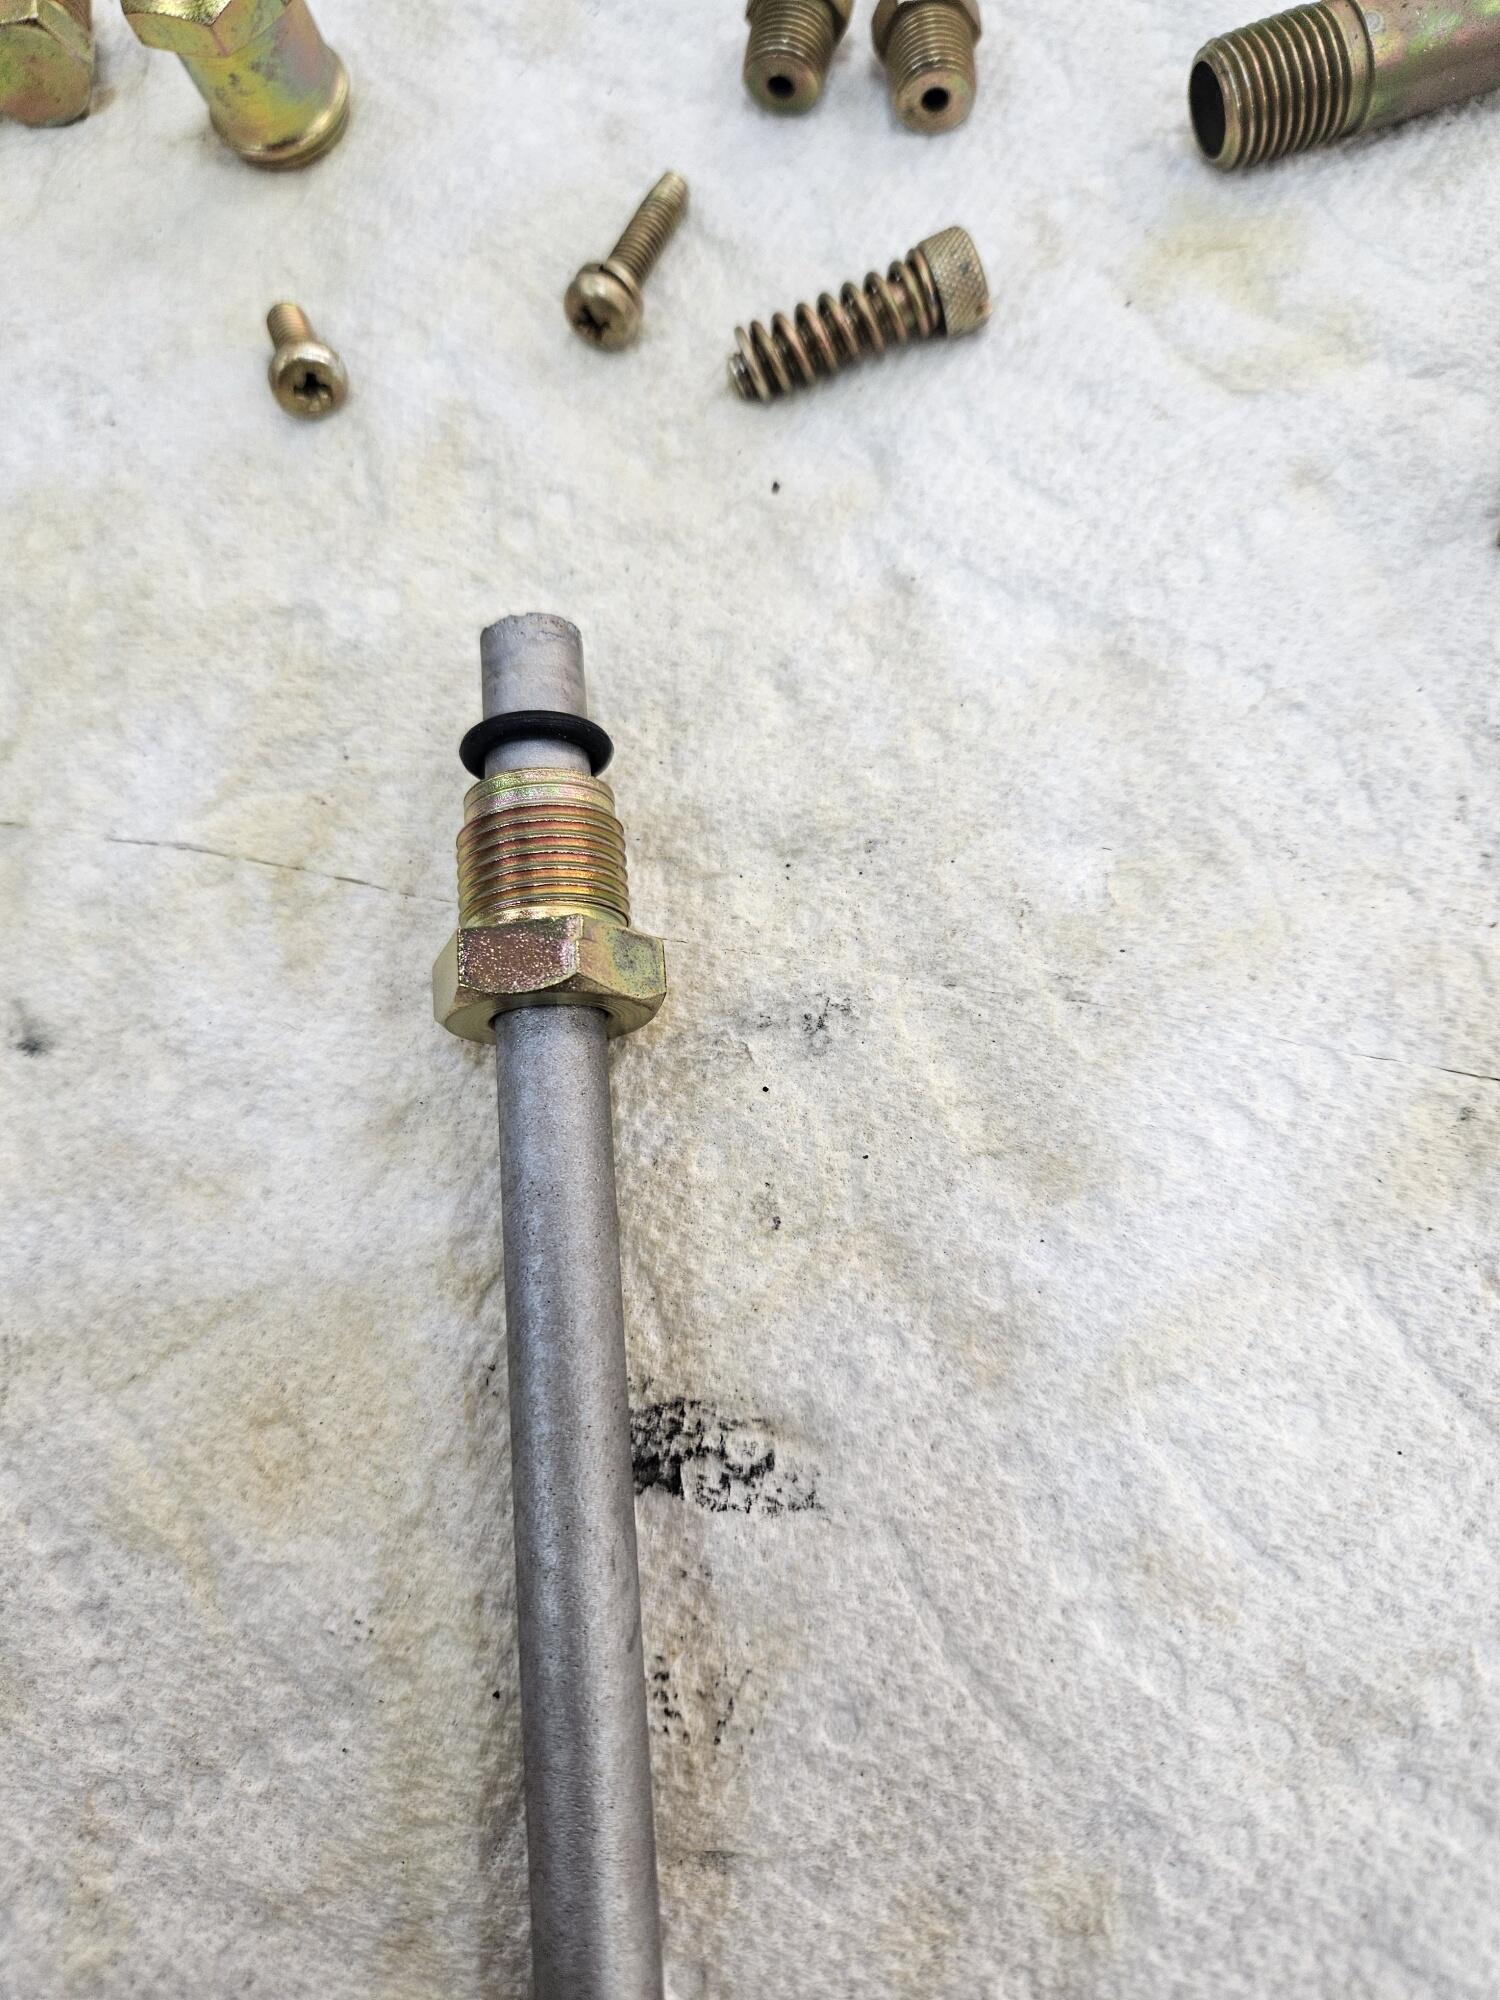
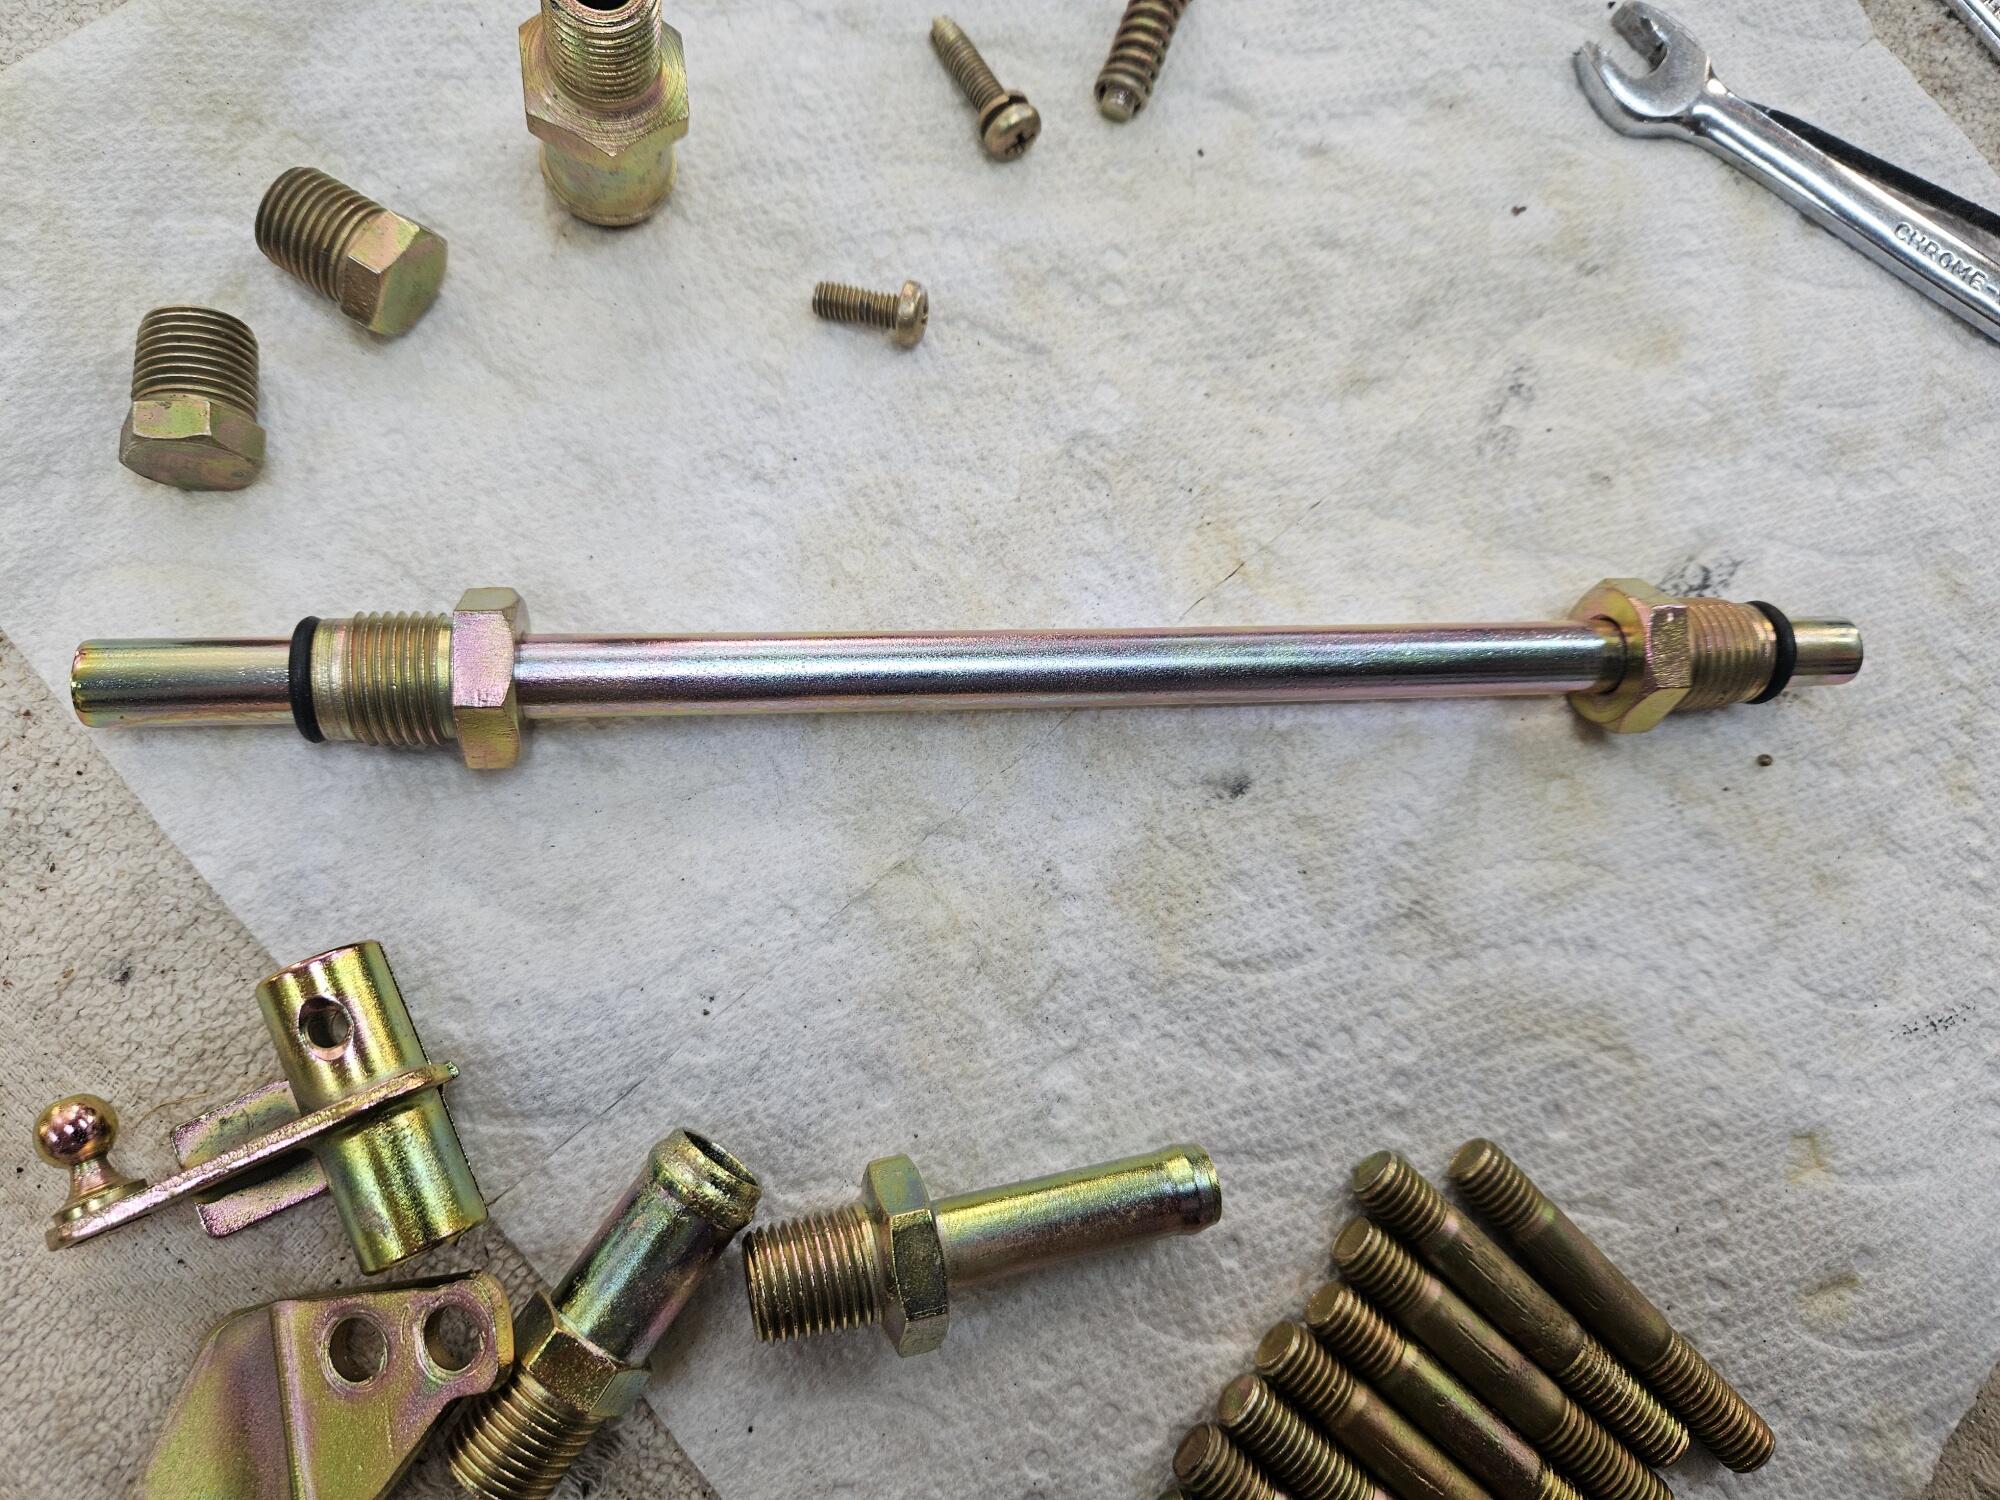
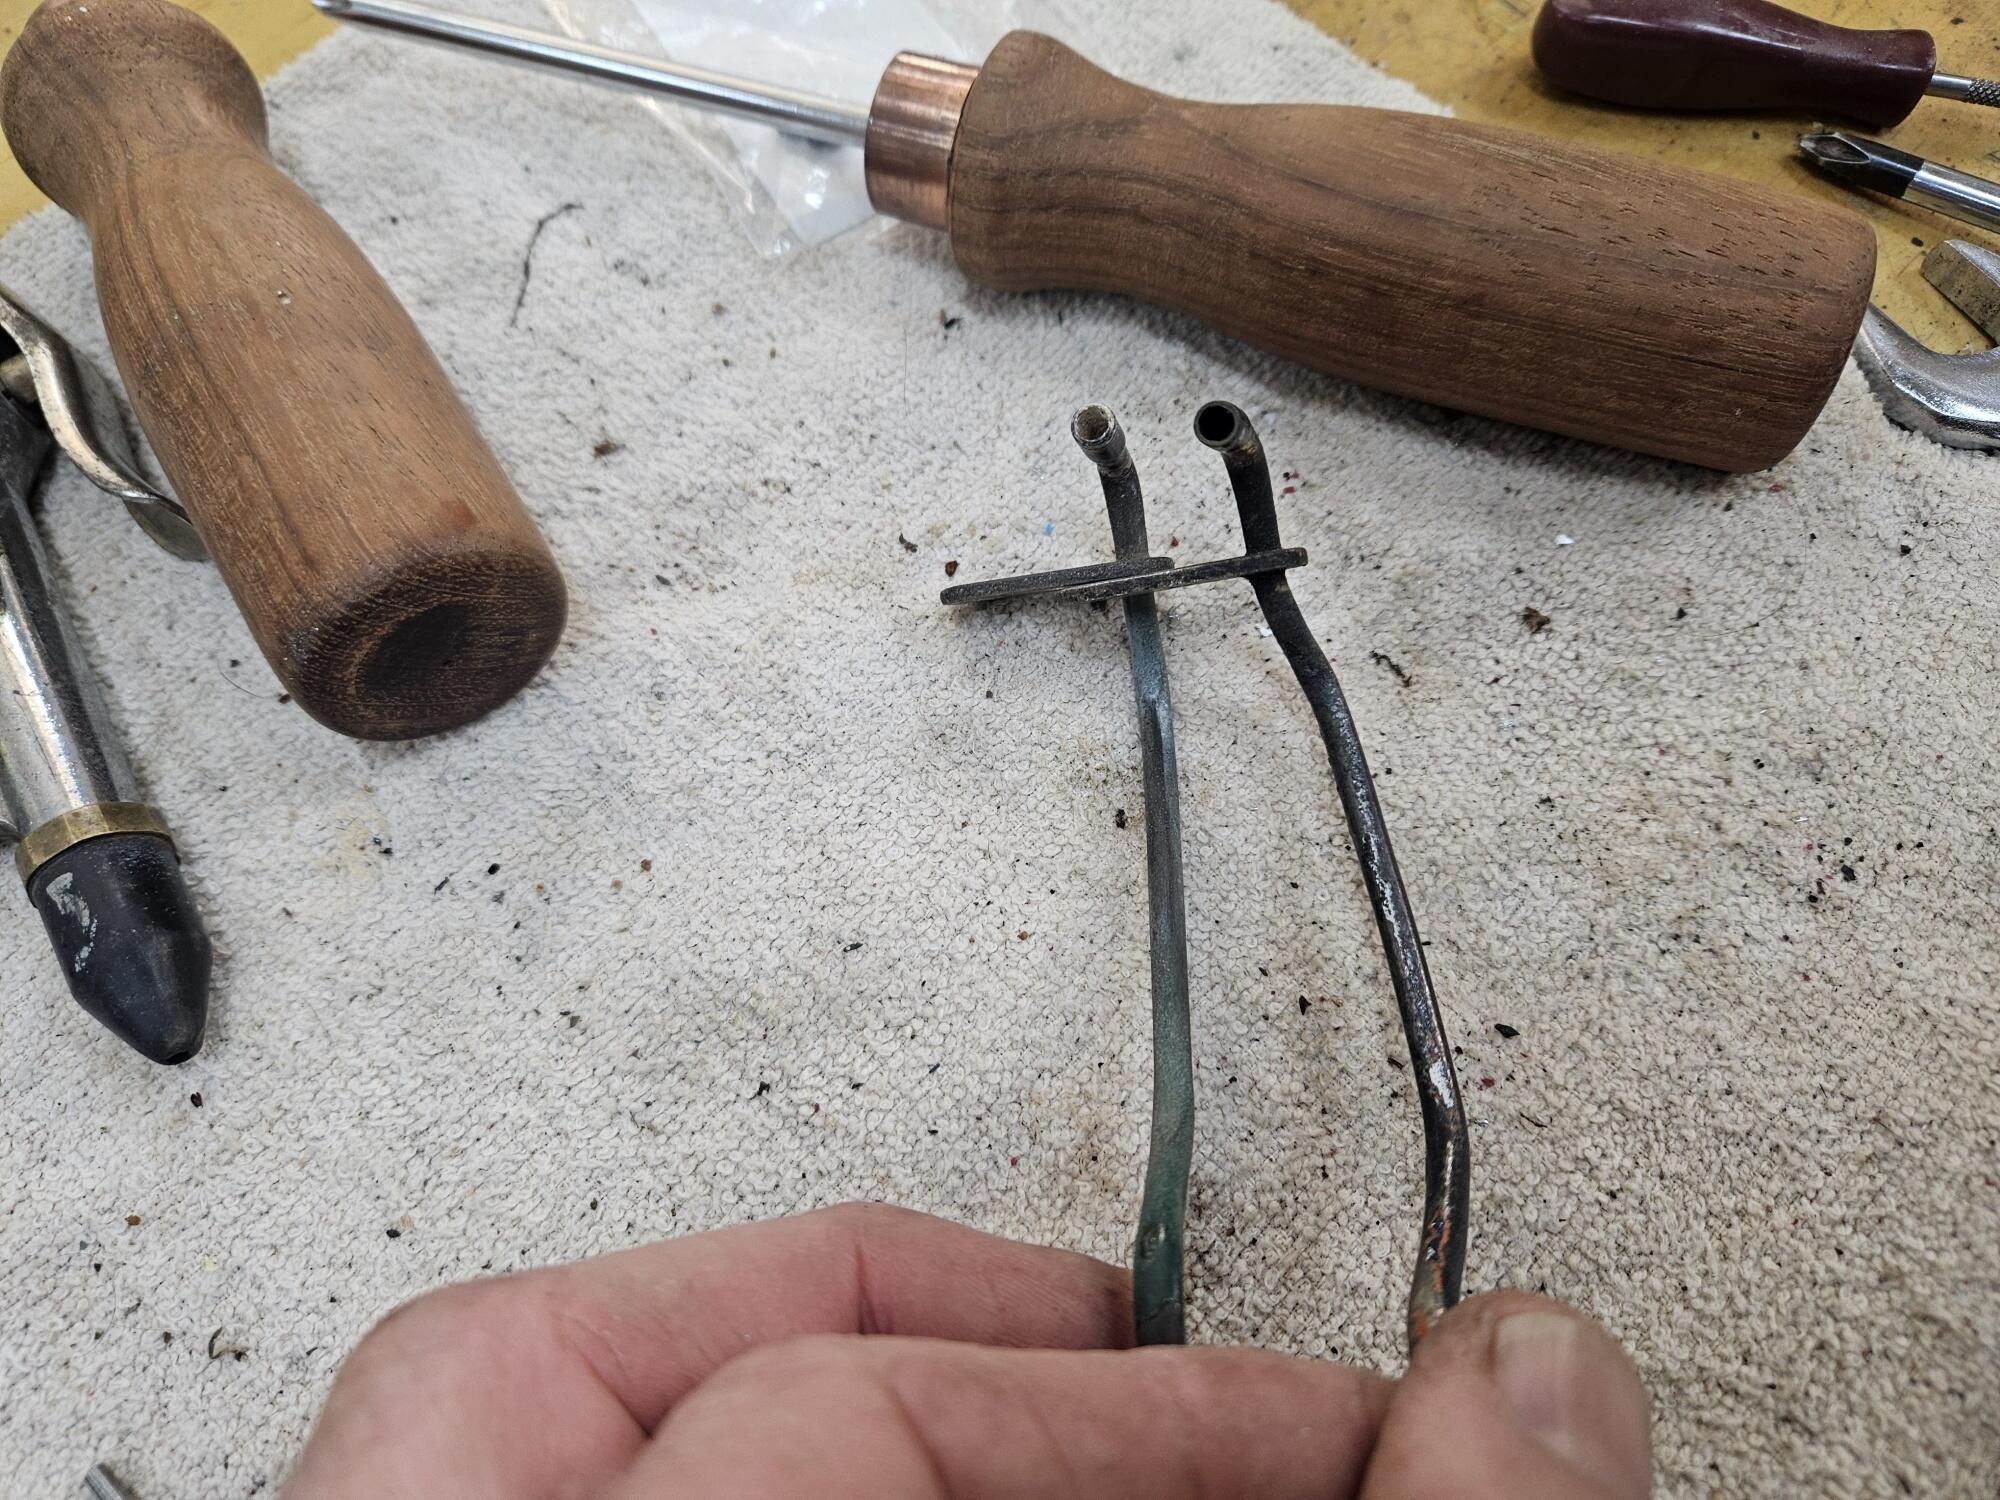
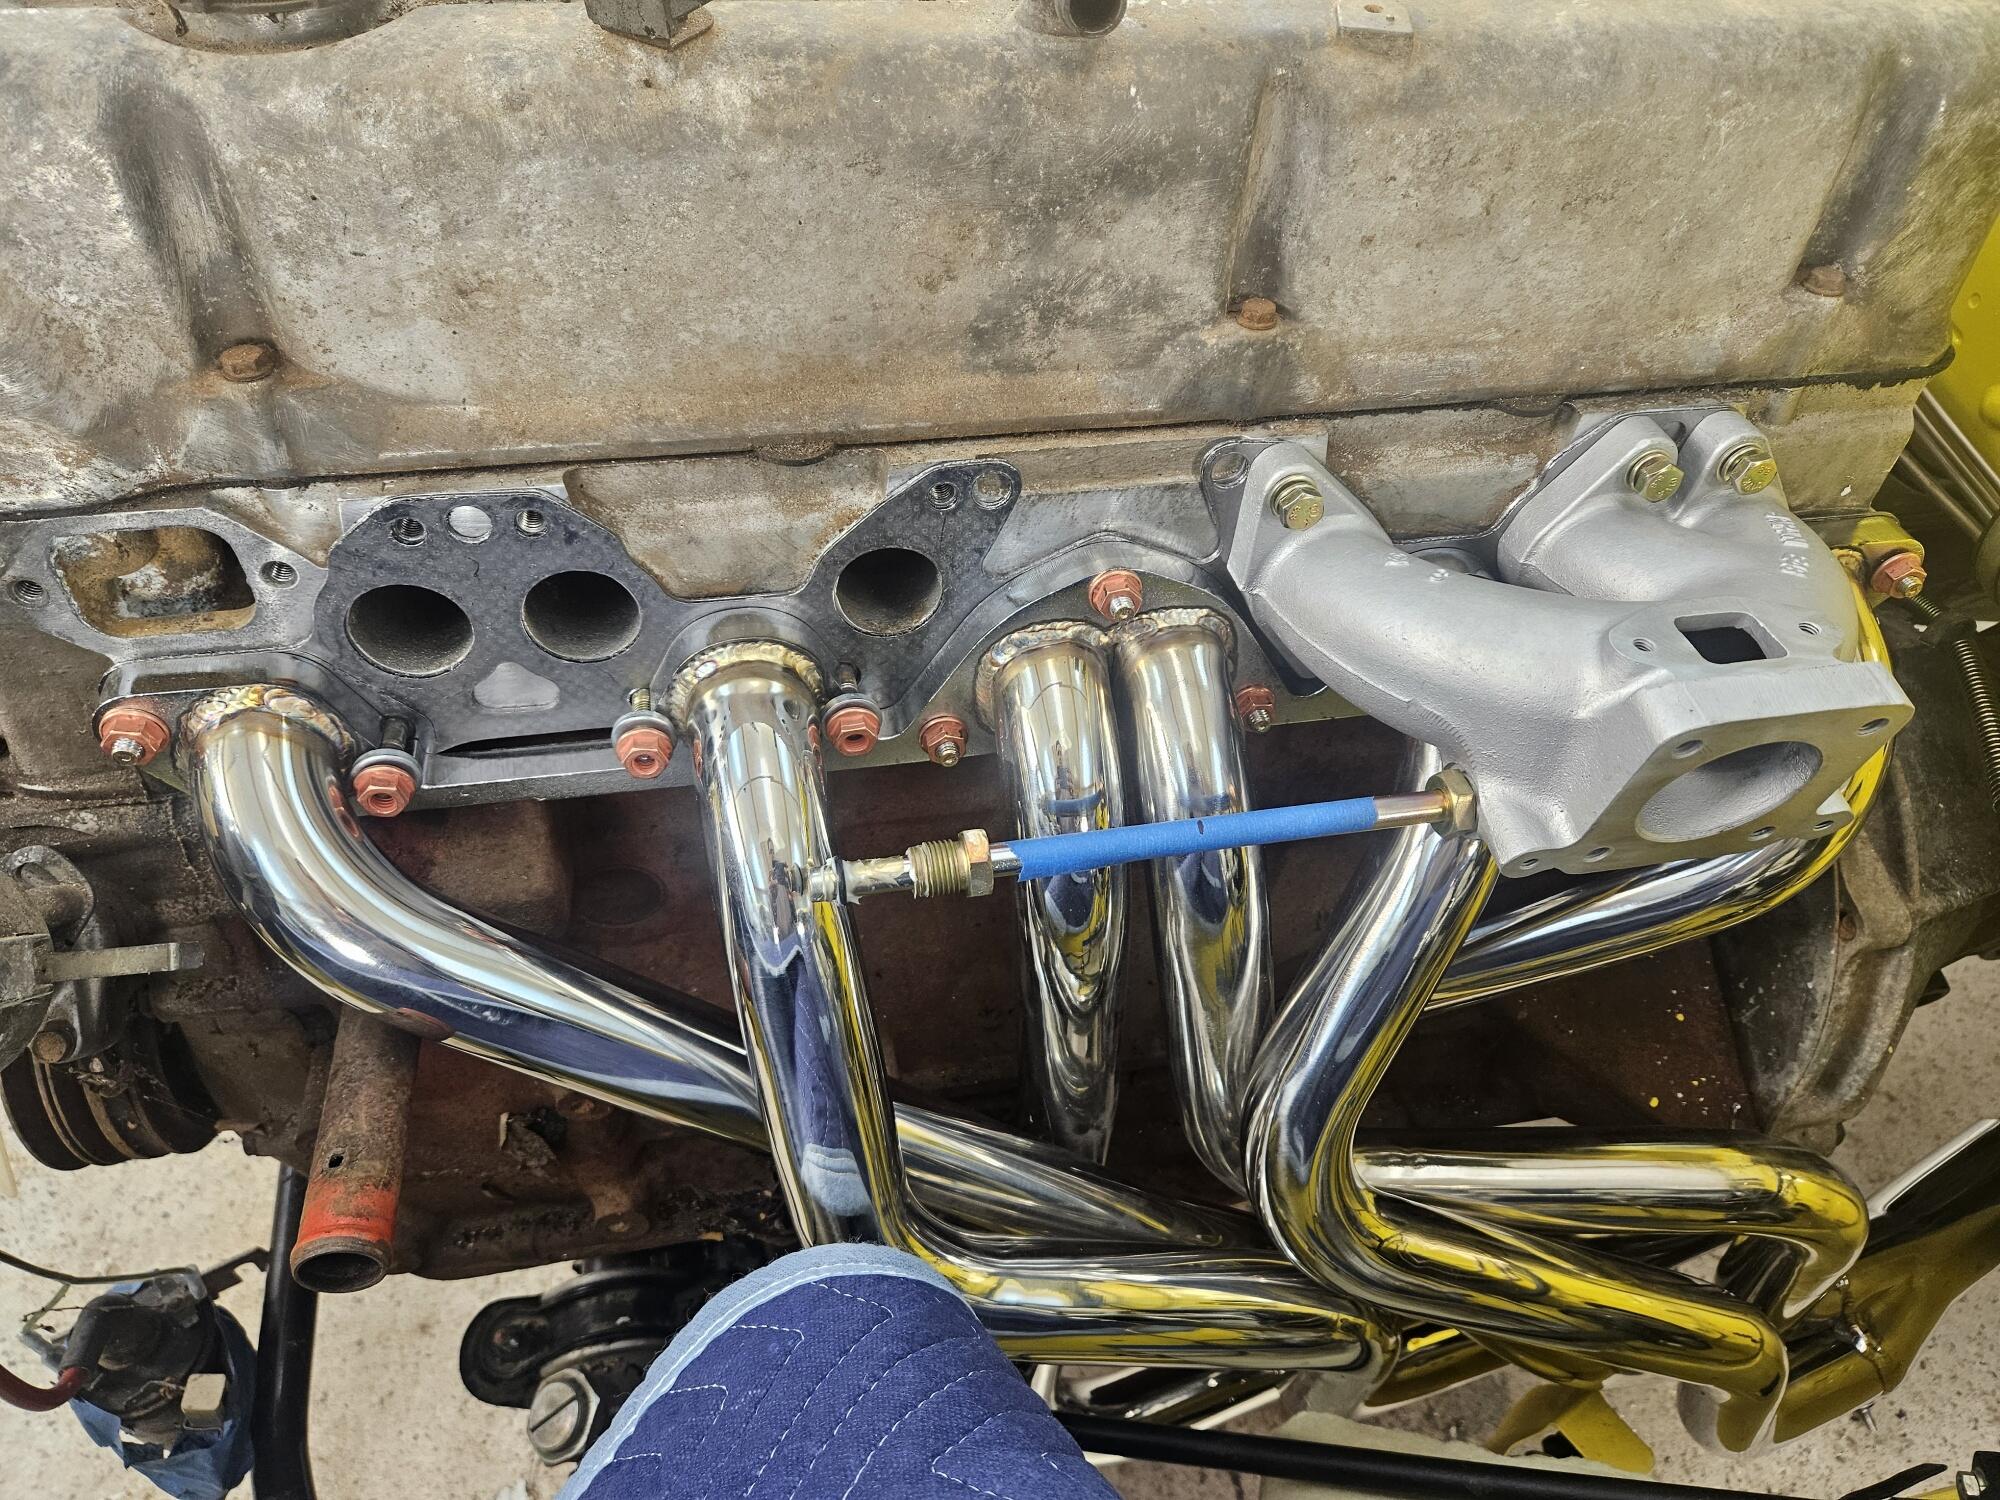
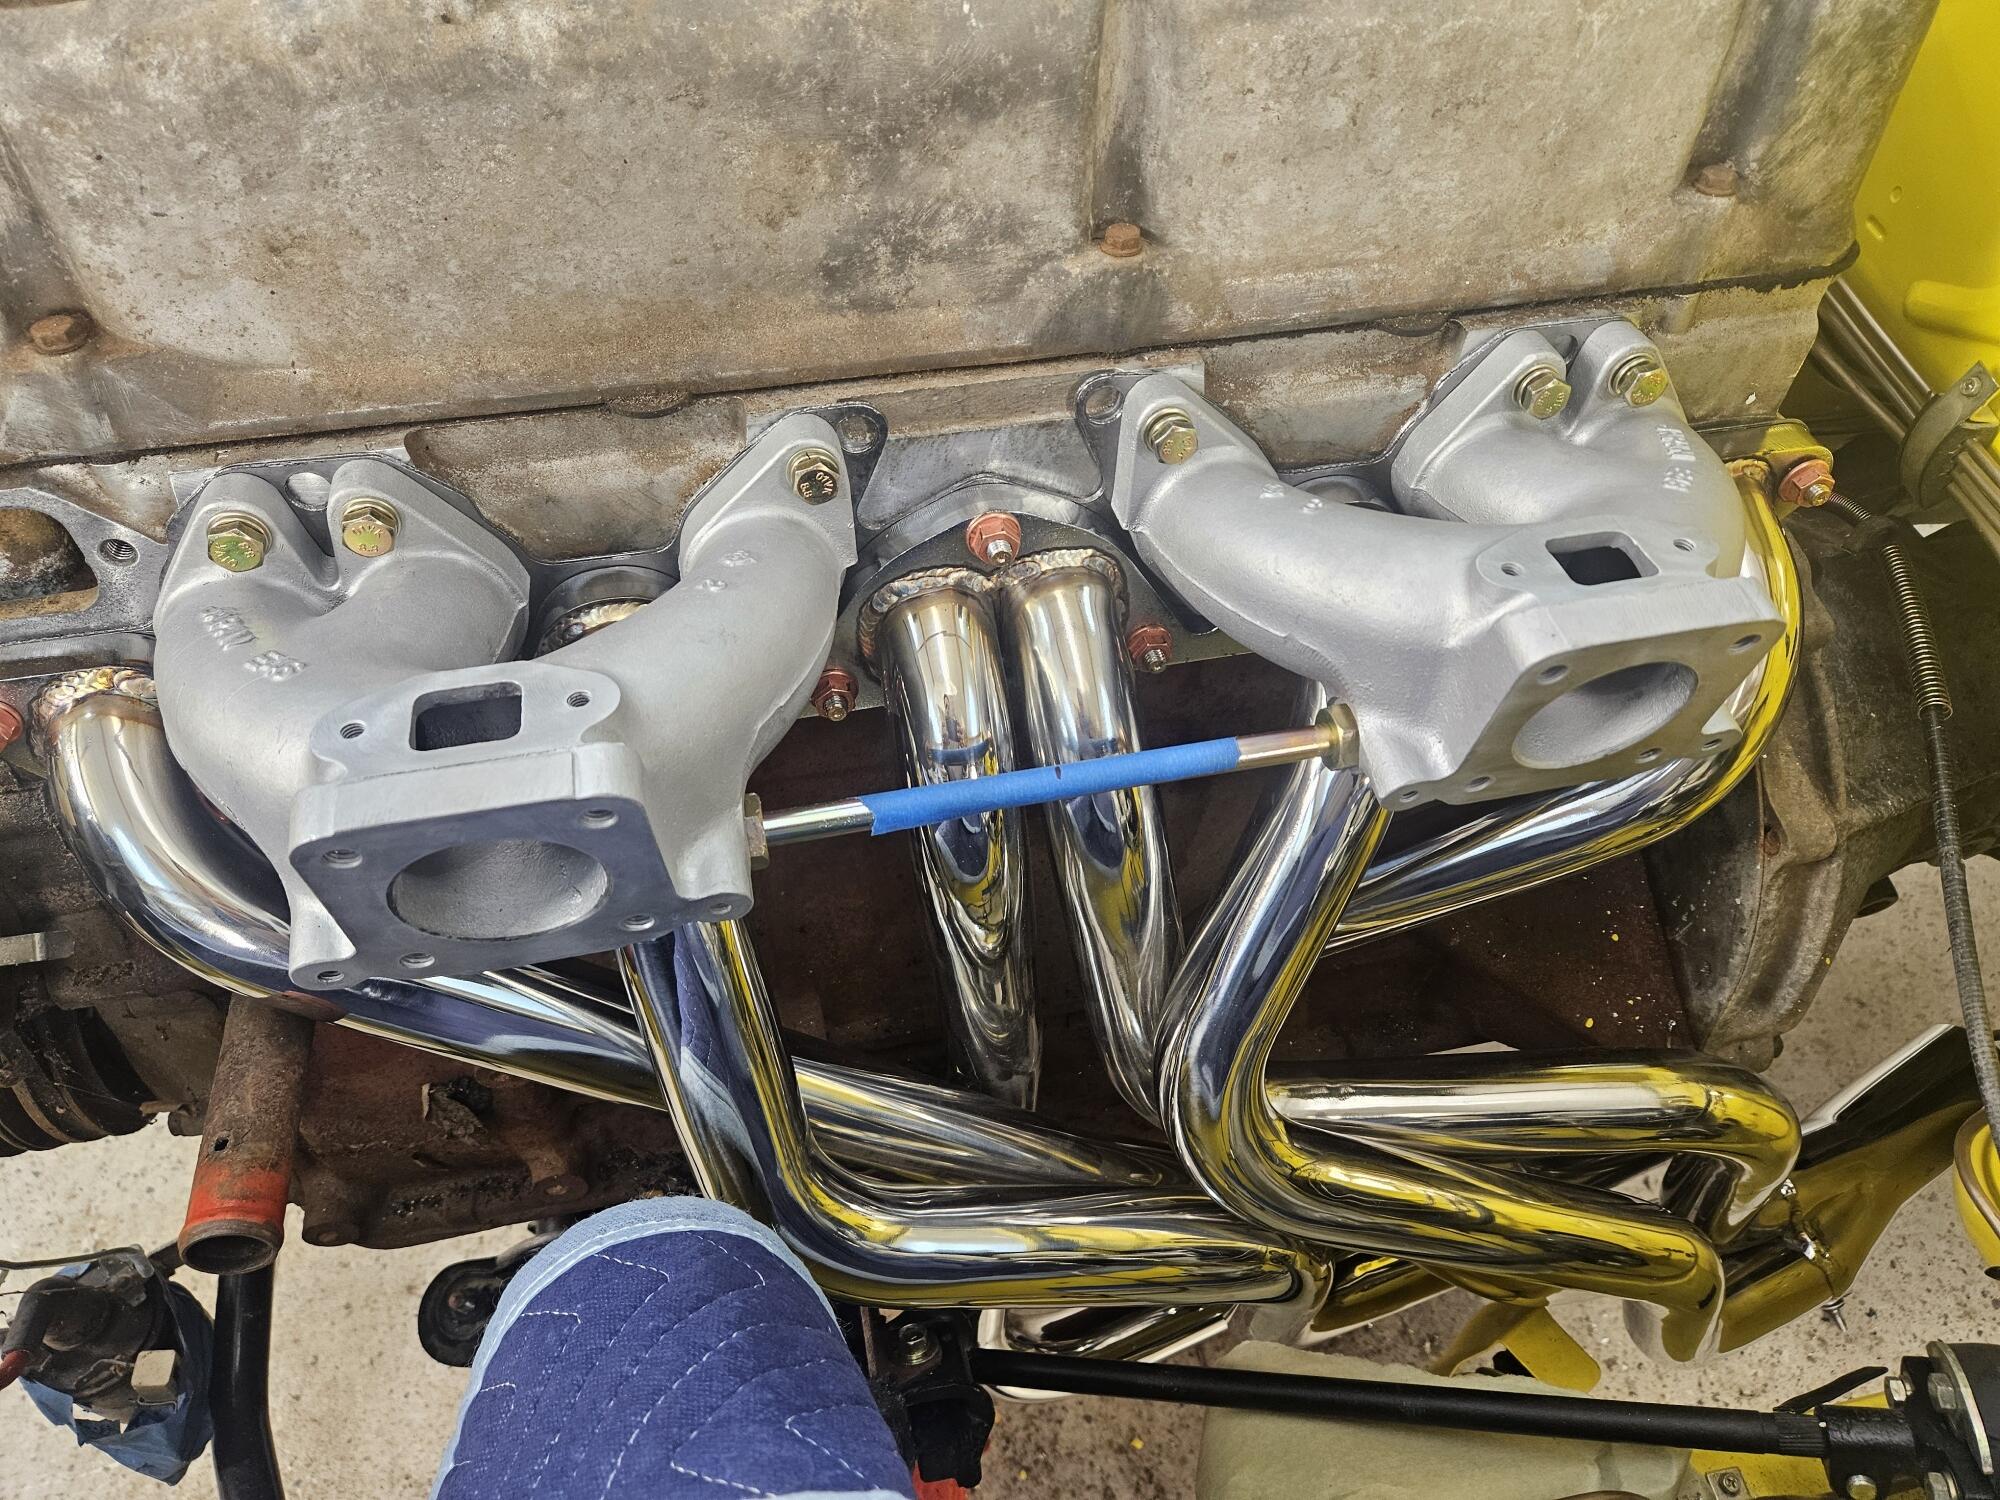
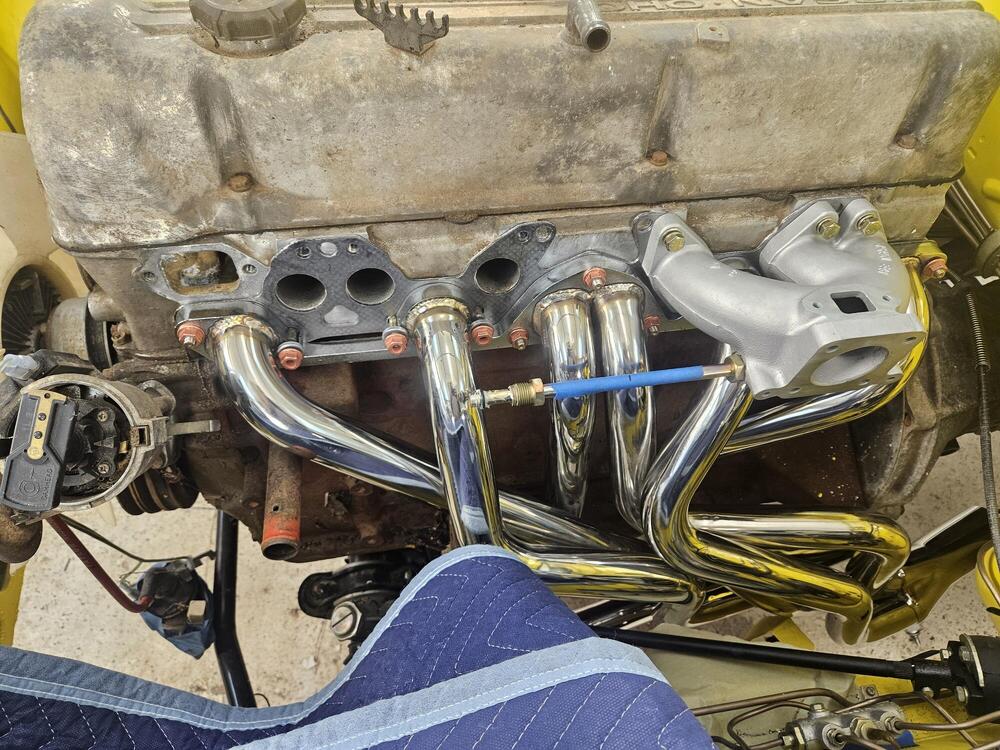
Got the driveshaft reassembled I painted it all black I bought a piece of tubing out of china. Cut it down and replated it last weekend. I used a nitrile o ring on the end. I would rather have a small square hydraulic ring instead. We'll see if it leaks The intakes need to be reassembled on the car to hold the orientation and the spacing I made a center line mark to help get the pipe centered between the manifolds. I also had to drill out the manifolds to get the corrosion out so the tube would go in. I also started working on the washer tubes I have to figure out how to straighten out the tubes


-
I worked on the engine some more today. My baby orangutan put the oil filter on so tight I couldn't get it off without pliers and I didn't want to mark up the pretty blue filter. So I dropped the oil pump out and filled it about 75% full. It was totally dry even after all the attempts to prime. Rotated it a little to make sure the air was out. Put it back on and hooked it up to my truck again. It primed pretty quick after that. You could tell when it started to prime because it started turning faster and the pitch changed. I blacked out the cowl area Put the fan on after some longer 4mm studs came in from Belmetric I tried to bleed the clutch, but it wouldn't prime. I will check the push rod length next time I work on it
-
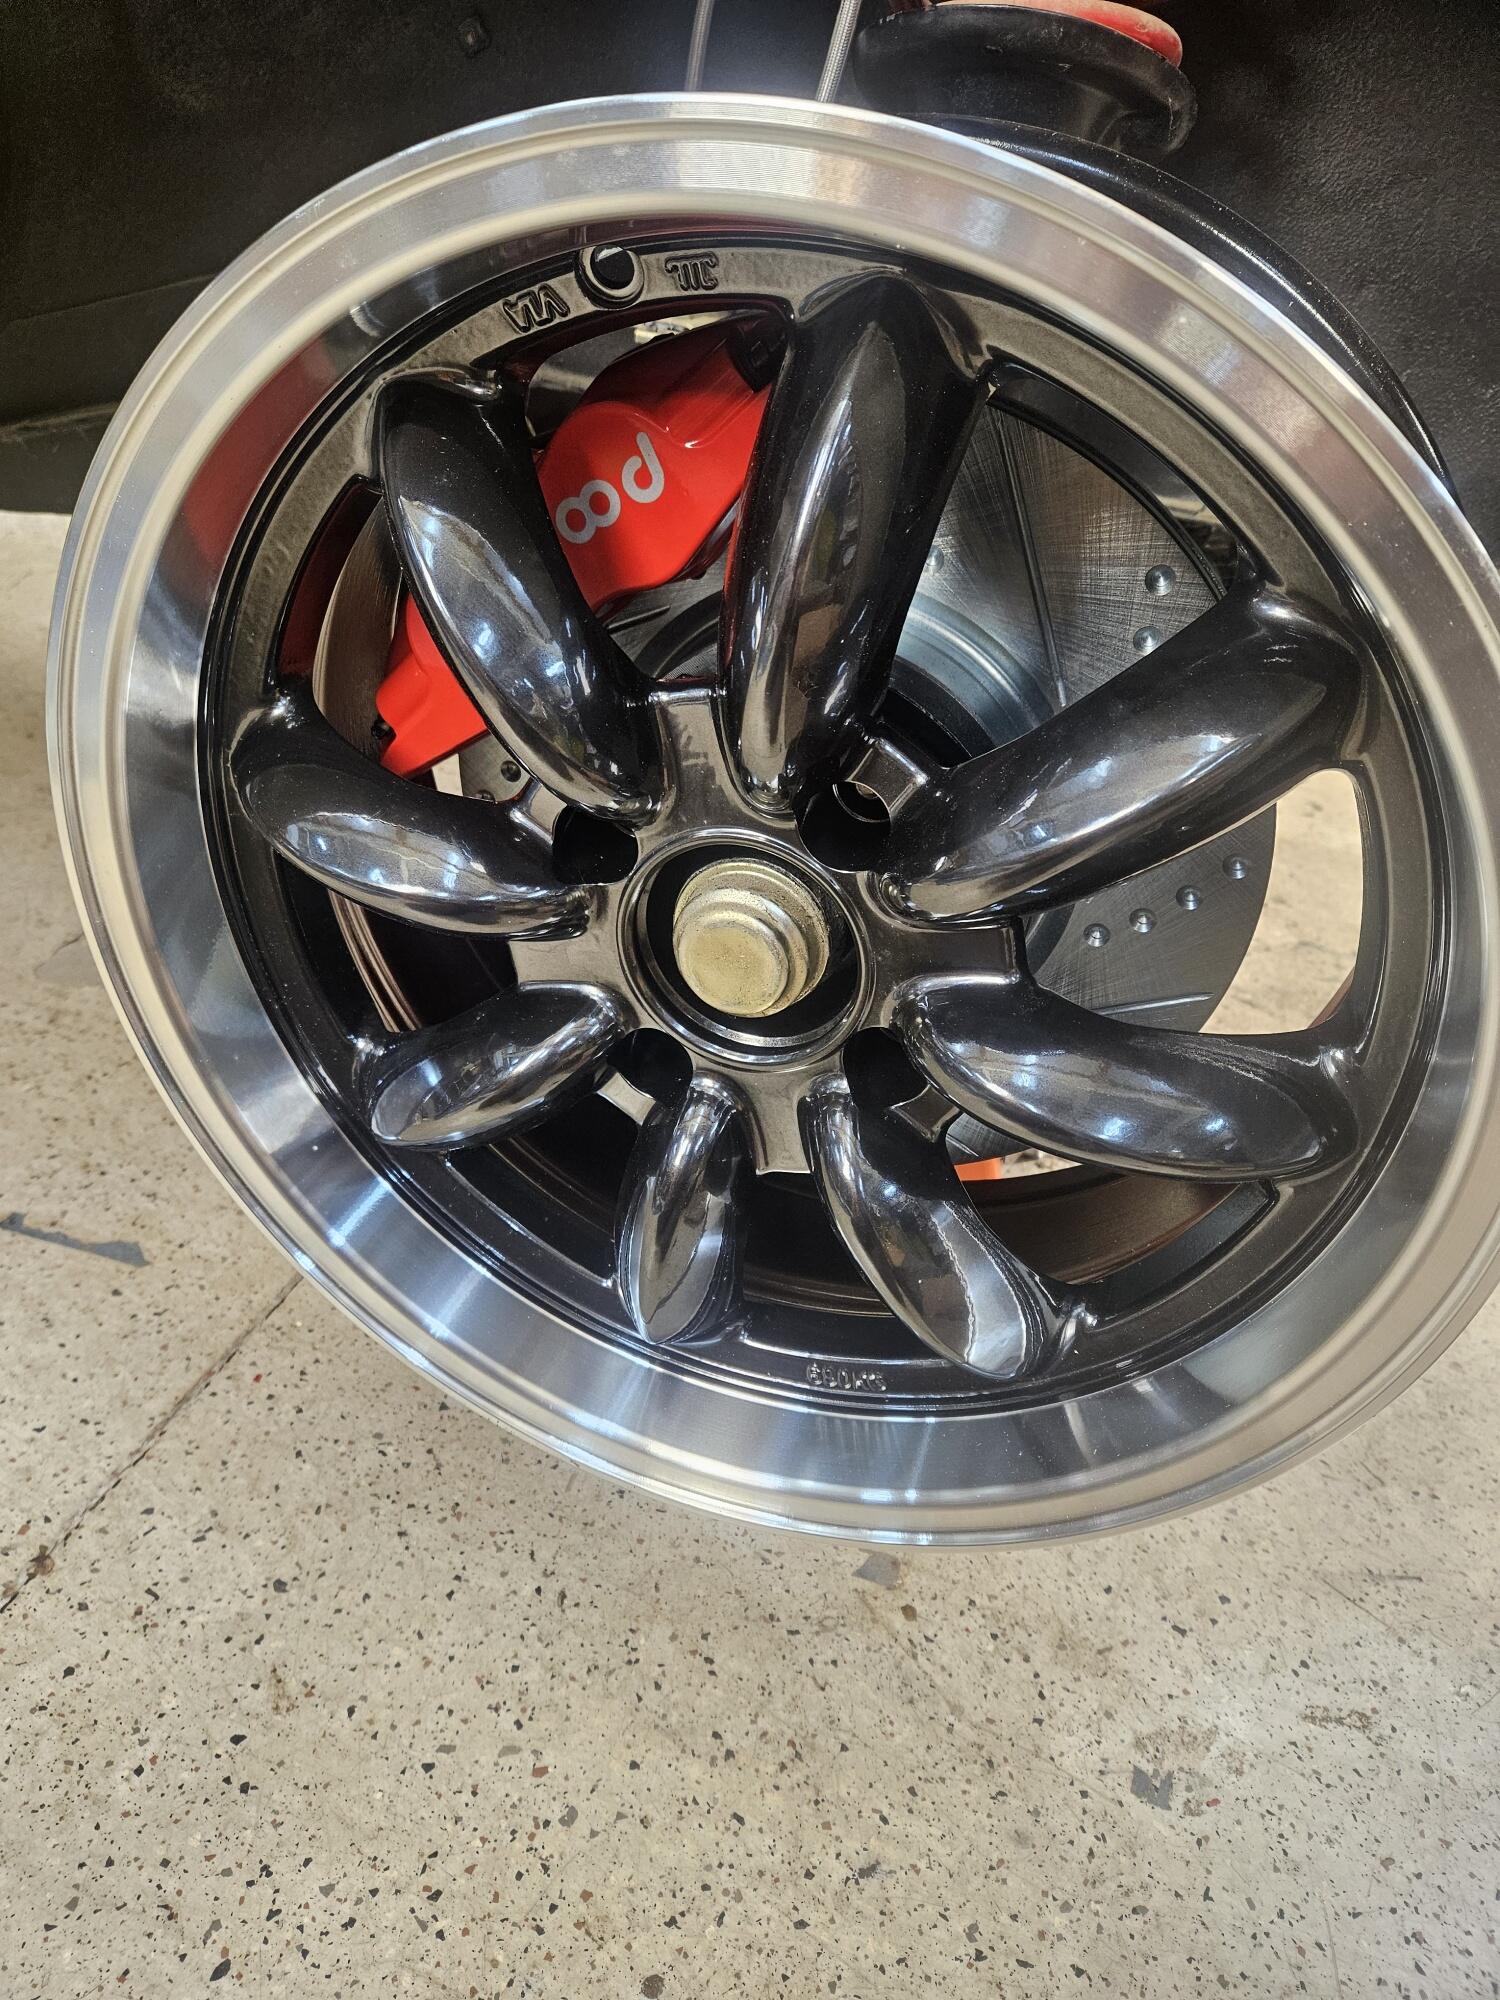
16 inch Rota RB's +4
-
-
I saw that. I thought the same thing when he made the ball joint. Just crazy! He also had to make two of the receivers he used for case hardening the ball joints and I suspect he had to make the fixture he used to mil the elliptical grooves in the ball joint heads!
-
Ive never seen that early water pump. How did you source it?
-
I would trim the qtr window one back. Maybe even at an angle. Do it in small steps until you like the results
-
-
-
-
I also used a straight pick in the screw holes to help pry it into place and line up the screw holes. They can be difficult to get in properly. I would use some of the Precision sealant lube. Do not use silicone on painted surfaces. It's is very difficult to get off later if paint work needs to be done.
-
I was going to look but hadn't gotten back to the shop yet, sorry...
-
I was buying a number of other things and with my lack of free time I appreciate not having to make another trip. Also my local Nissan dealer is a pain just like my local BMW dealership so I work around both of them with online resources
-
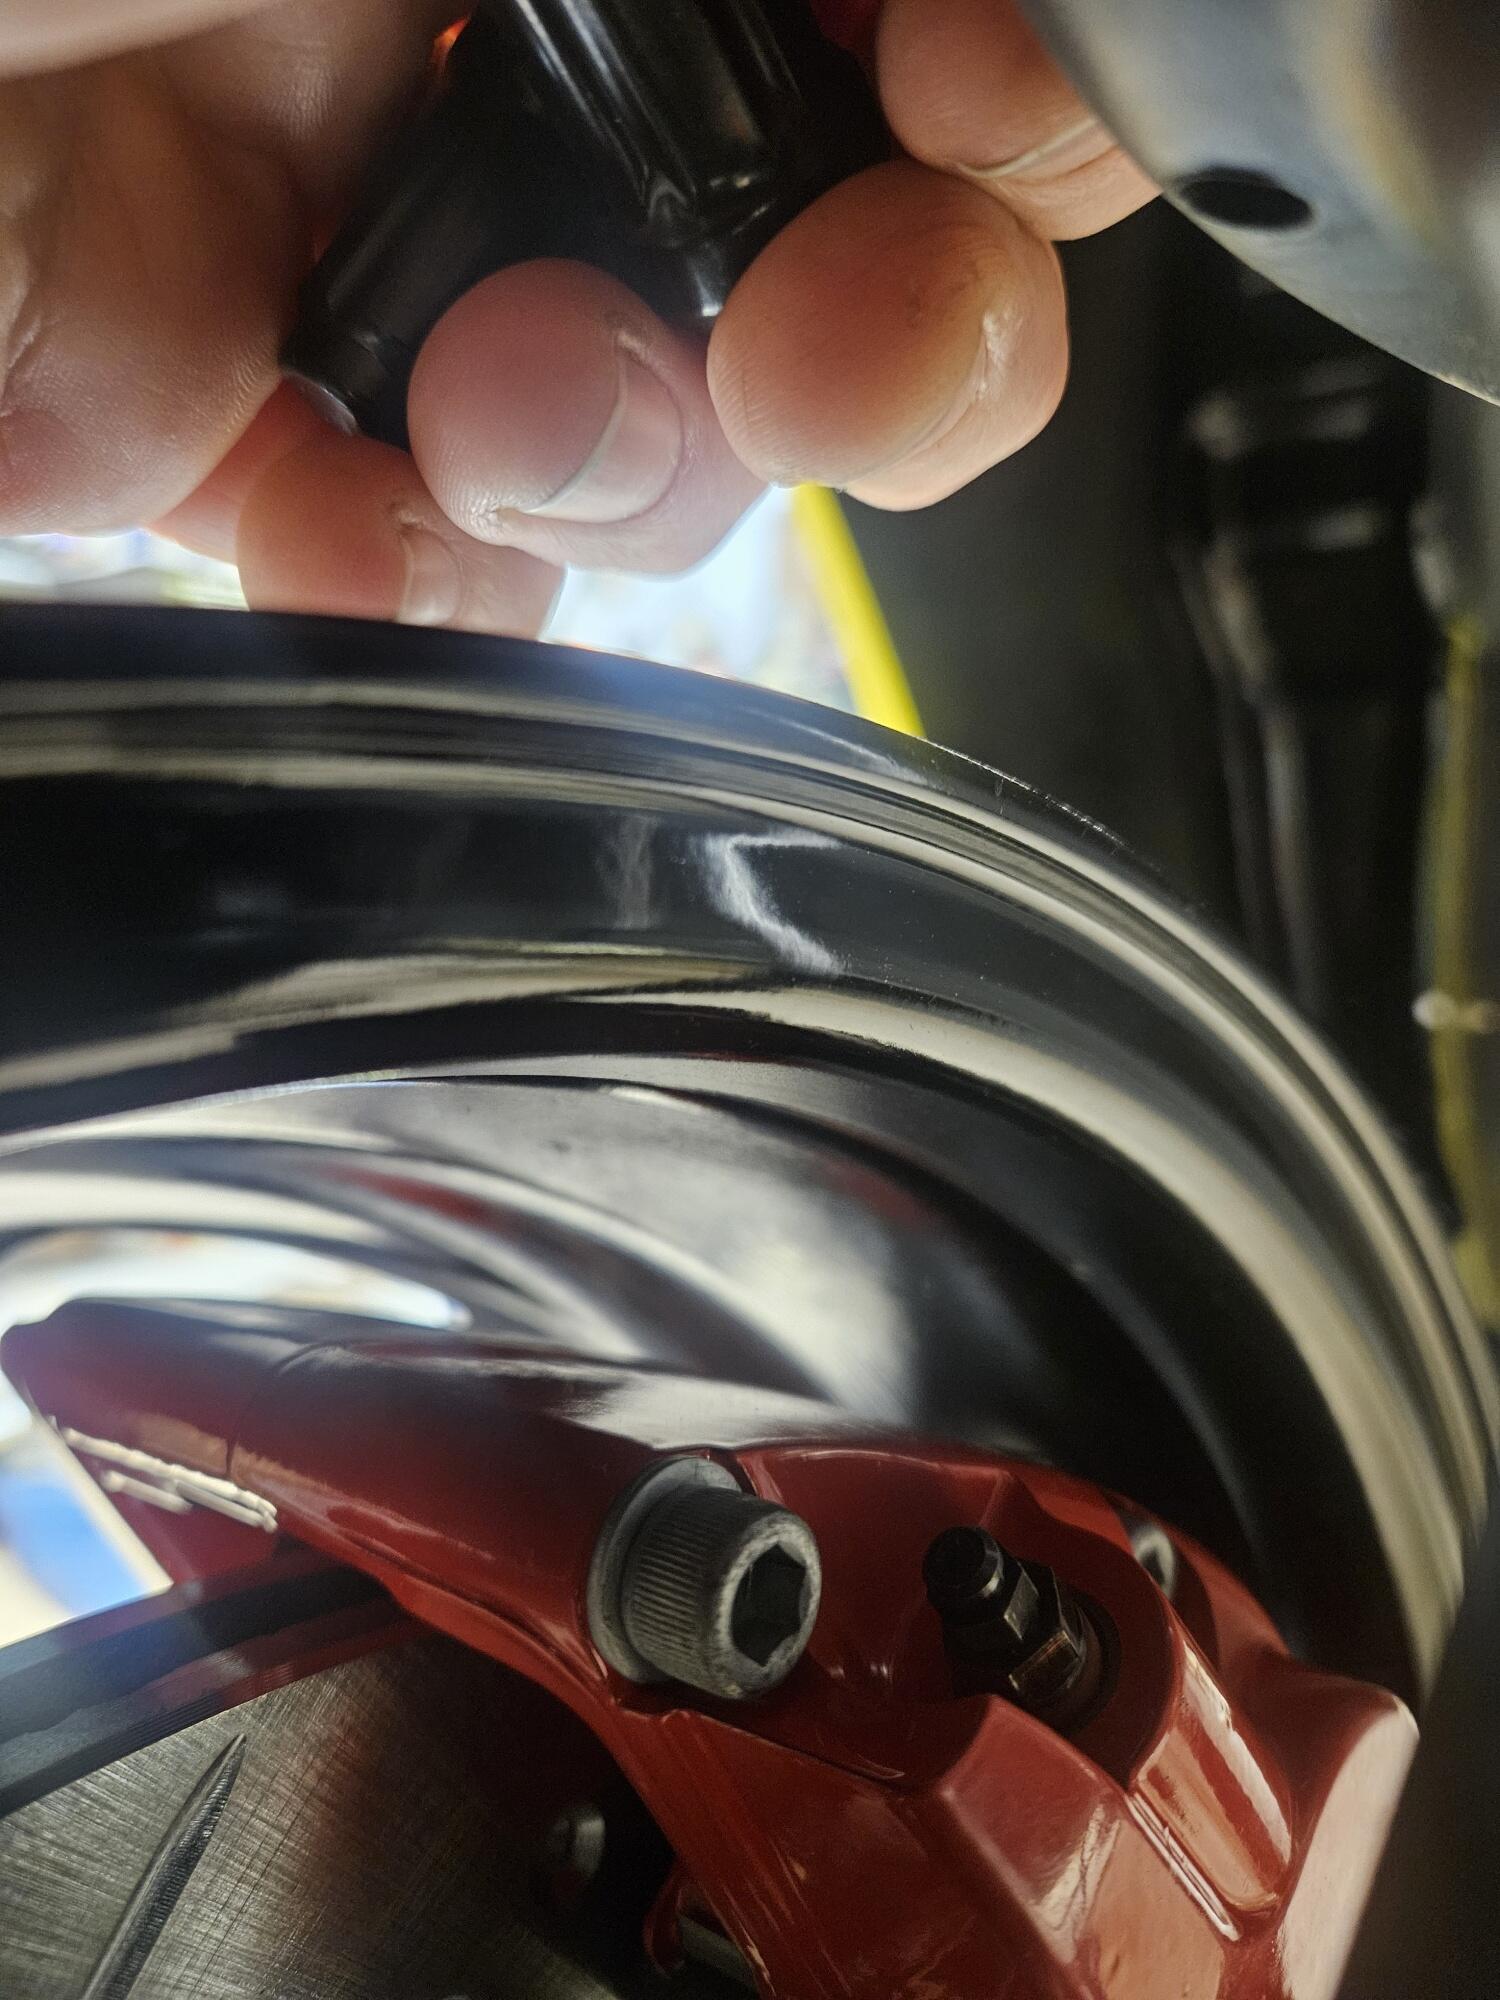
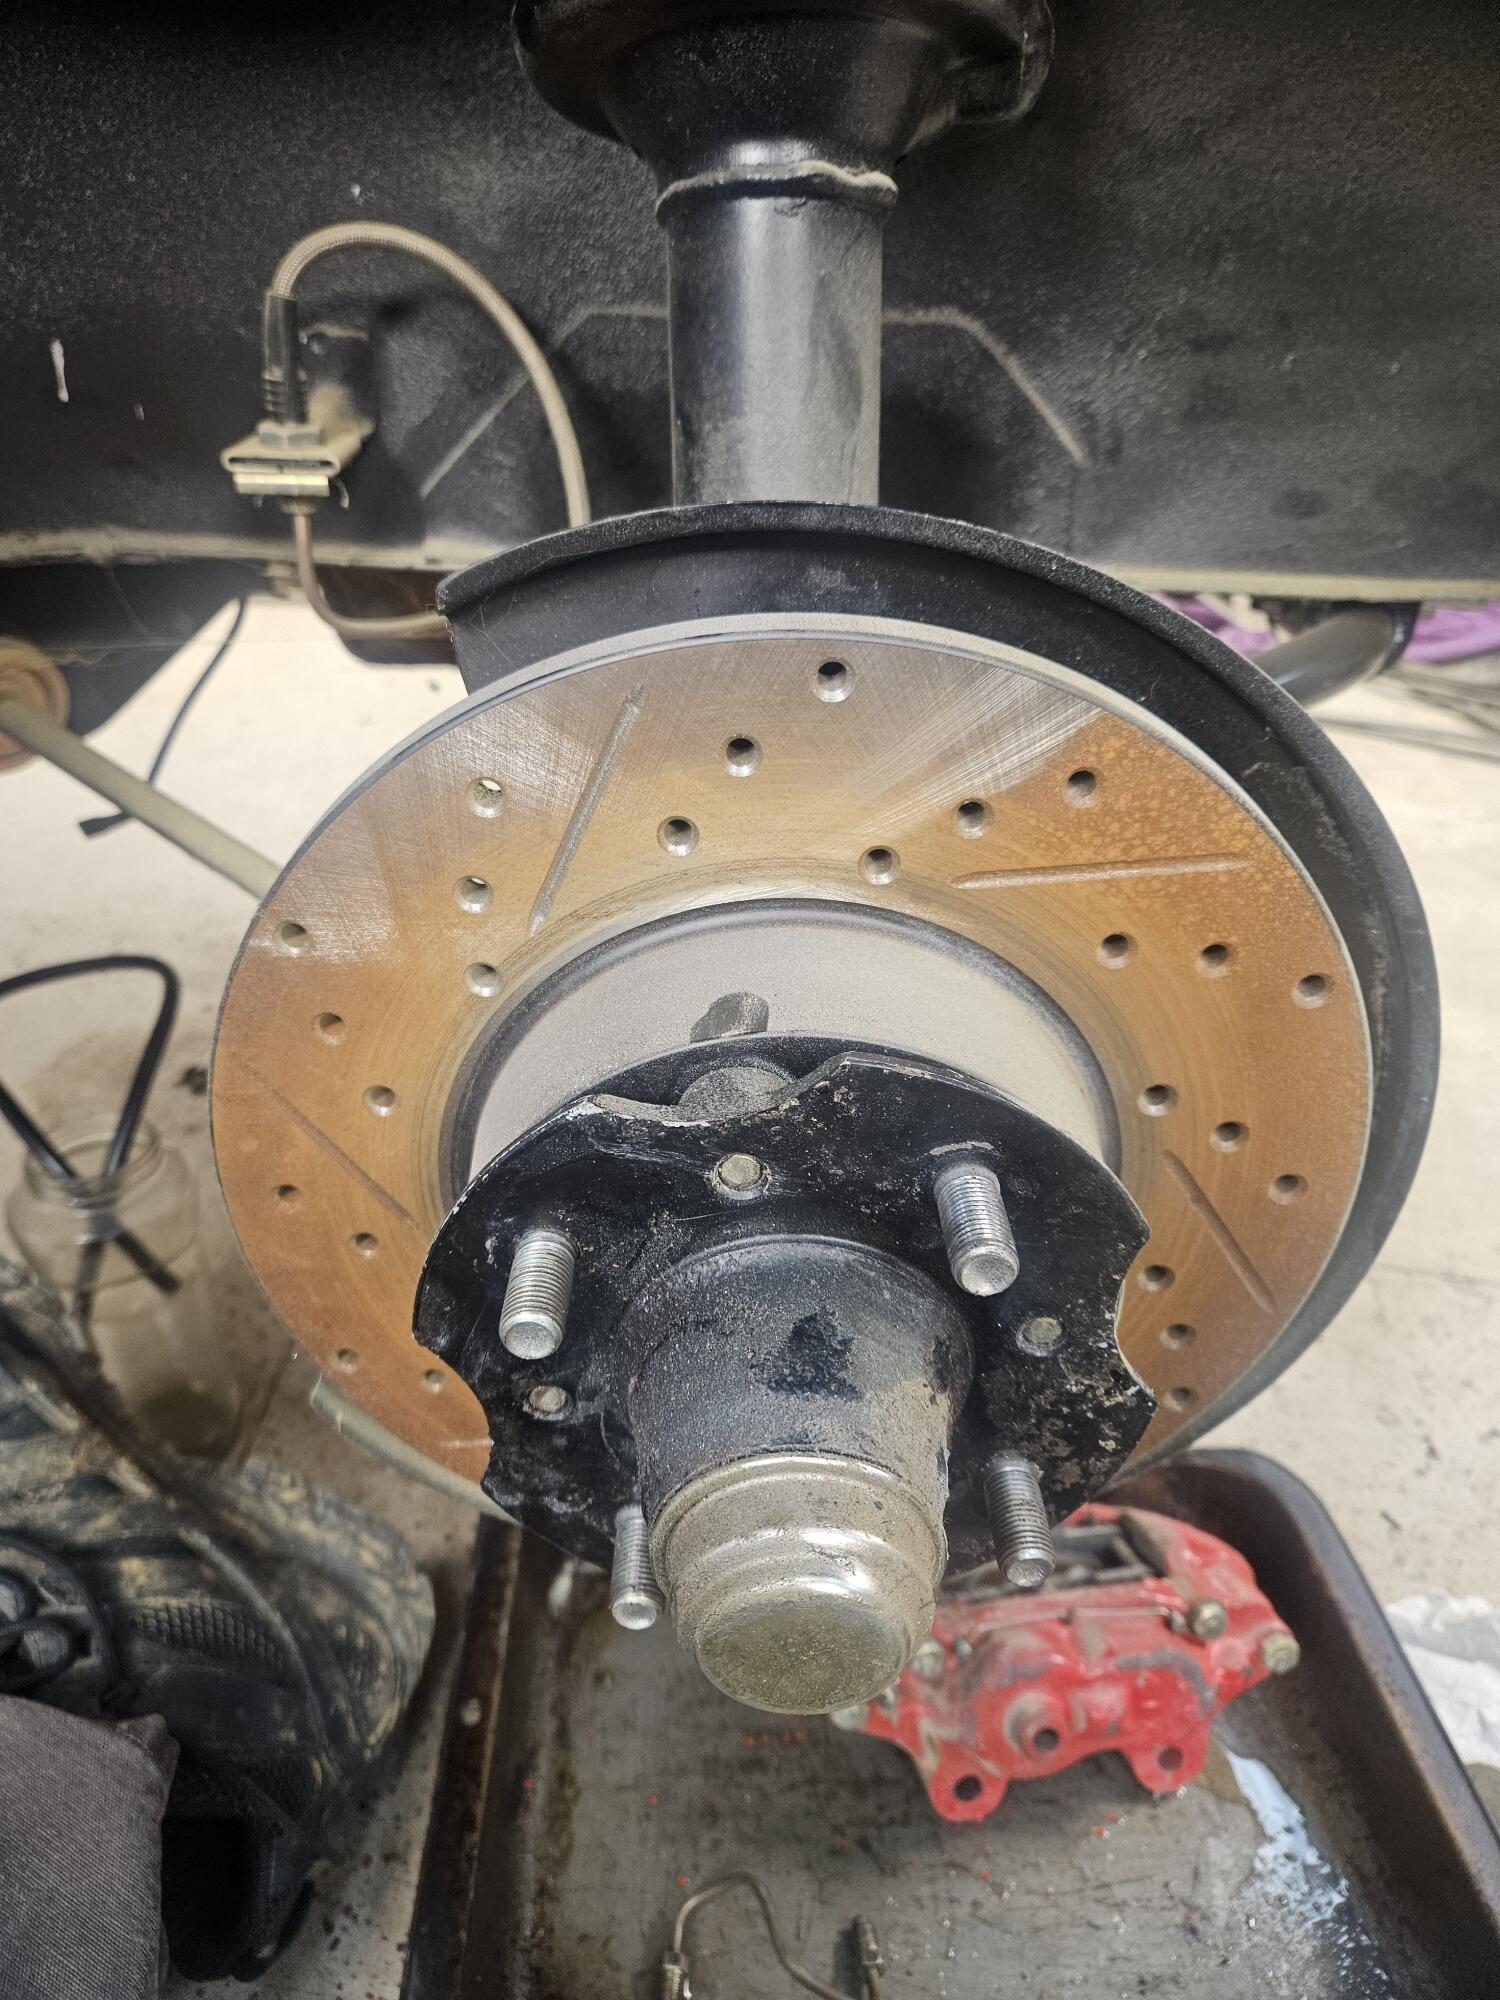
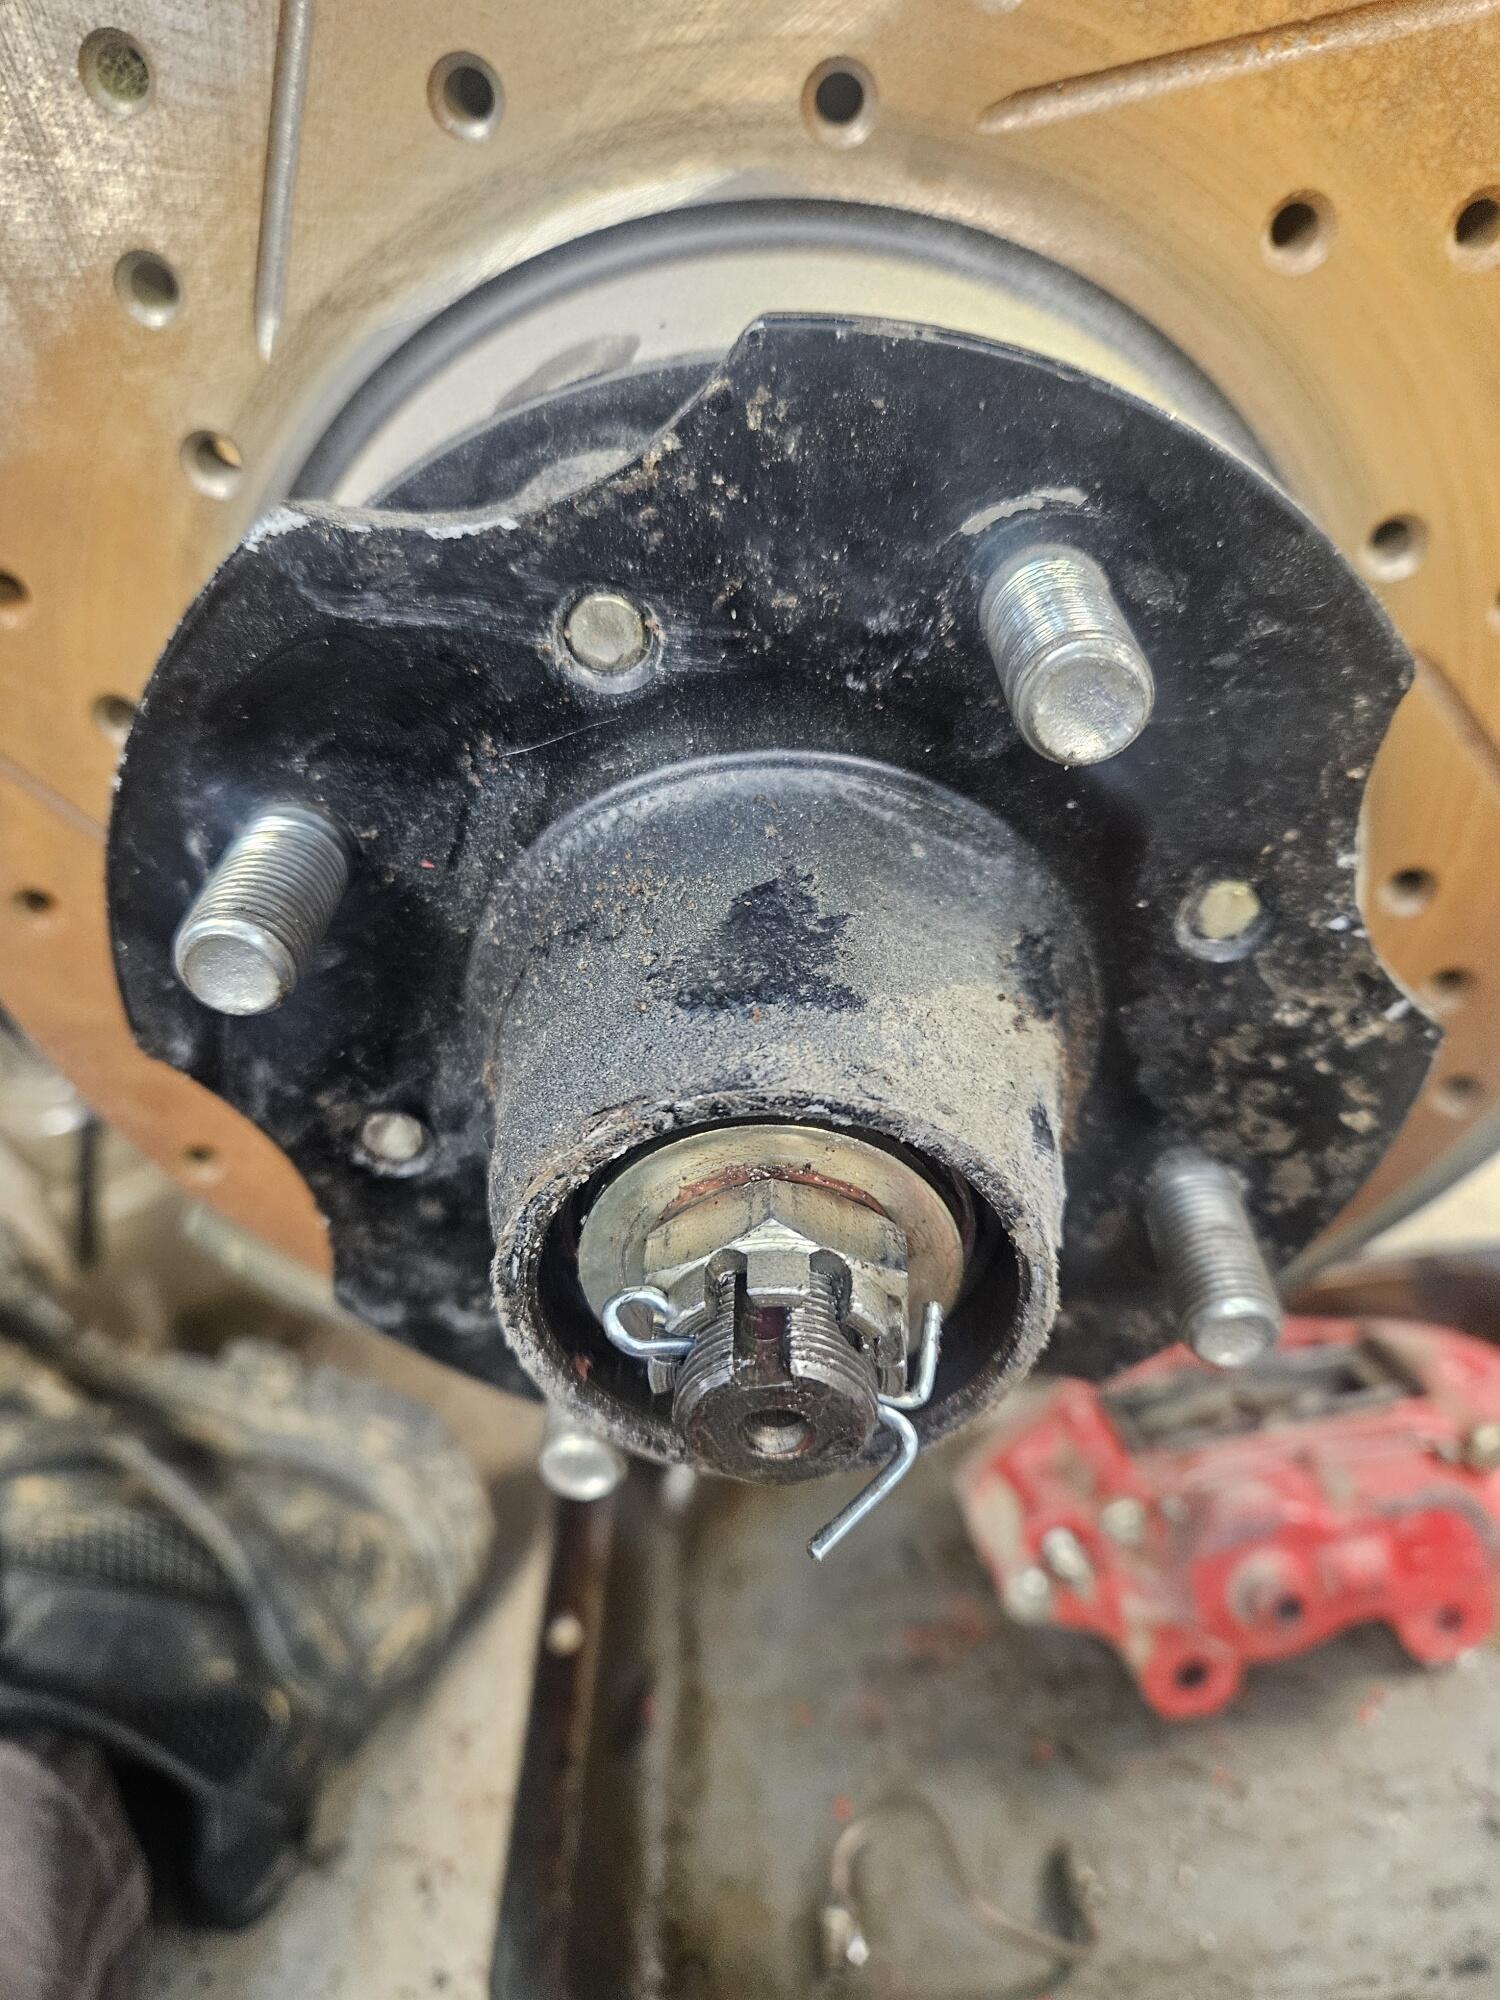
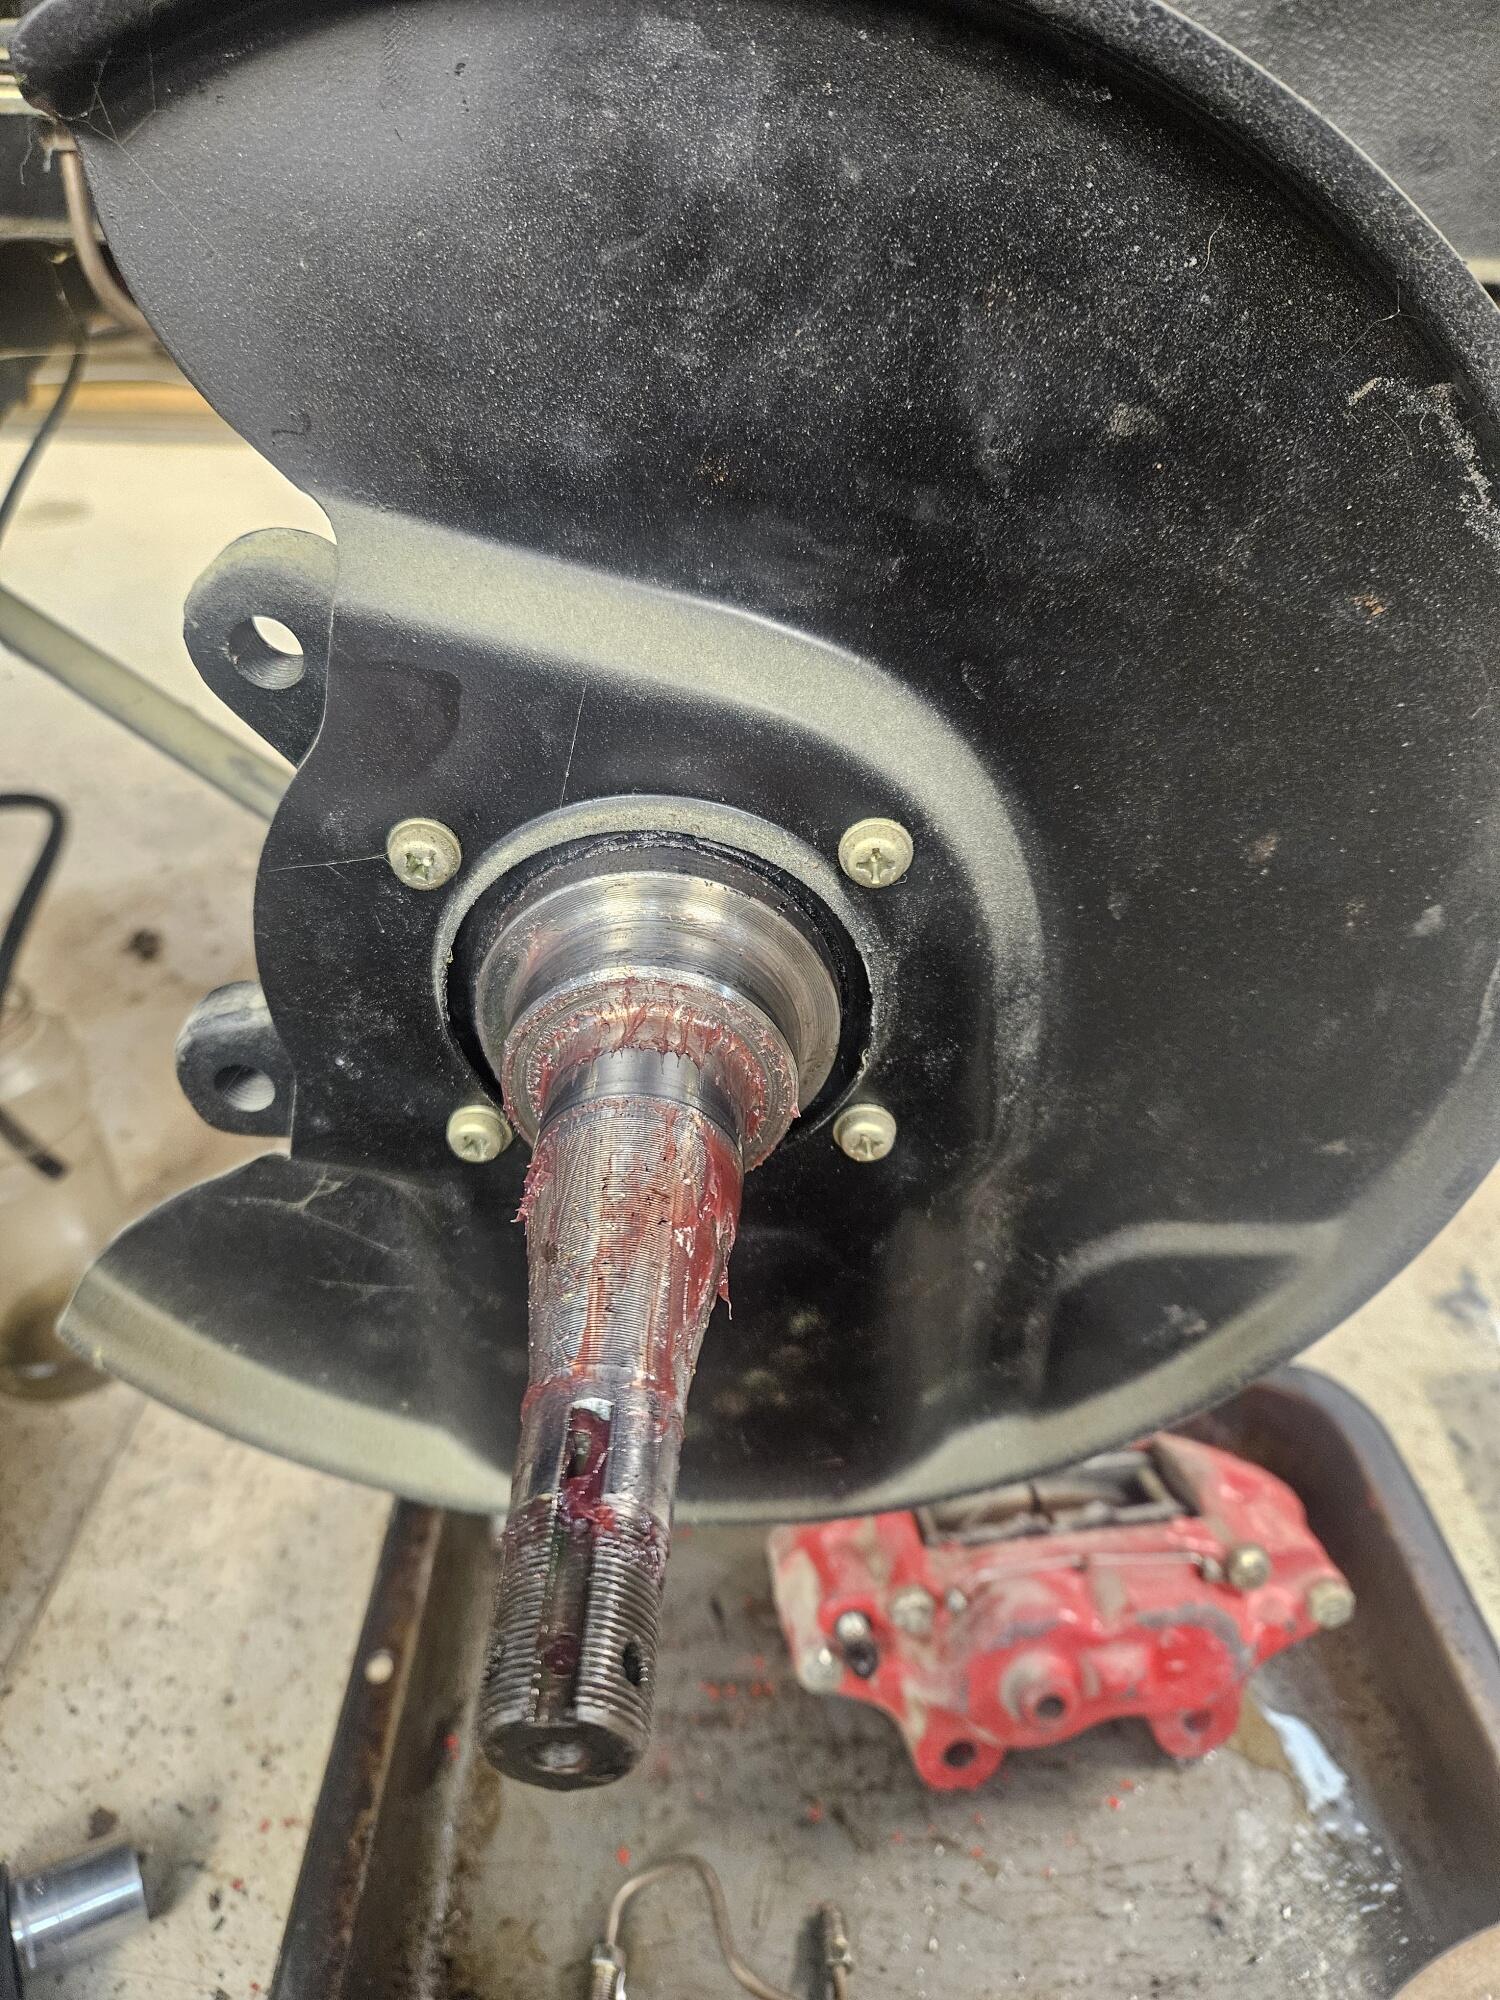
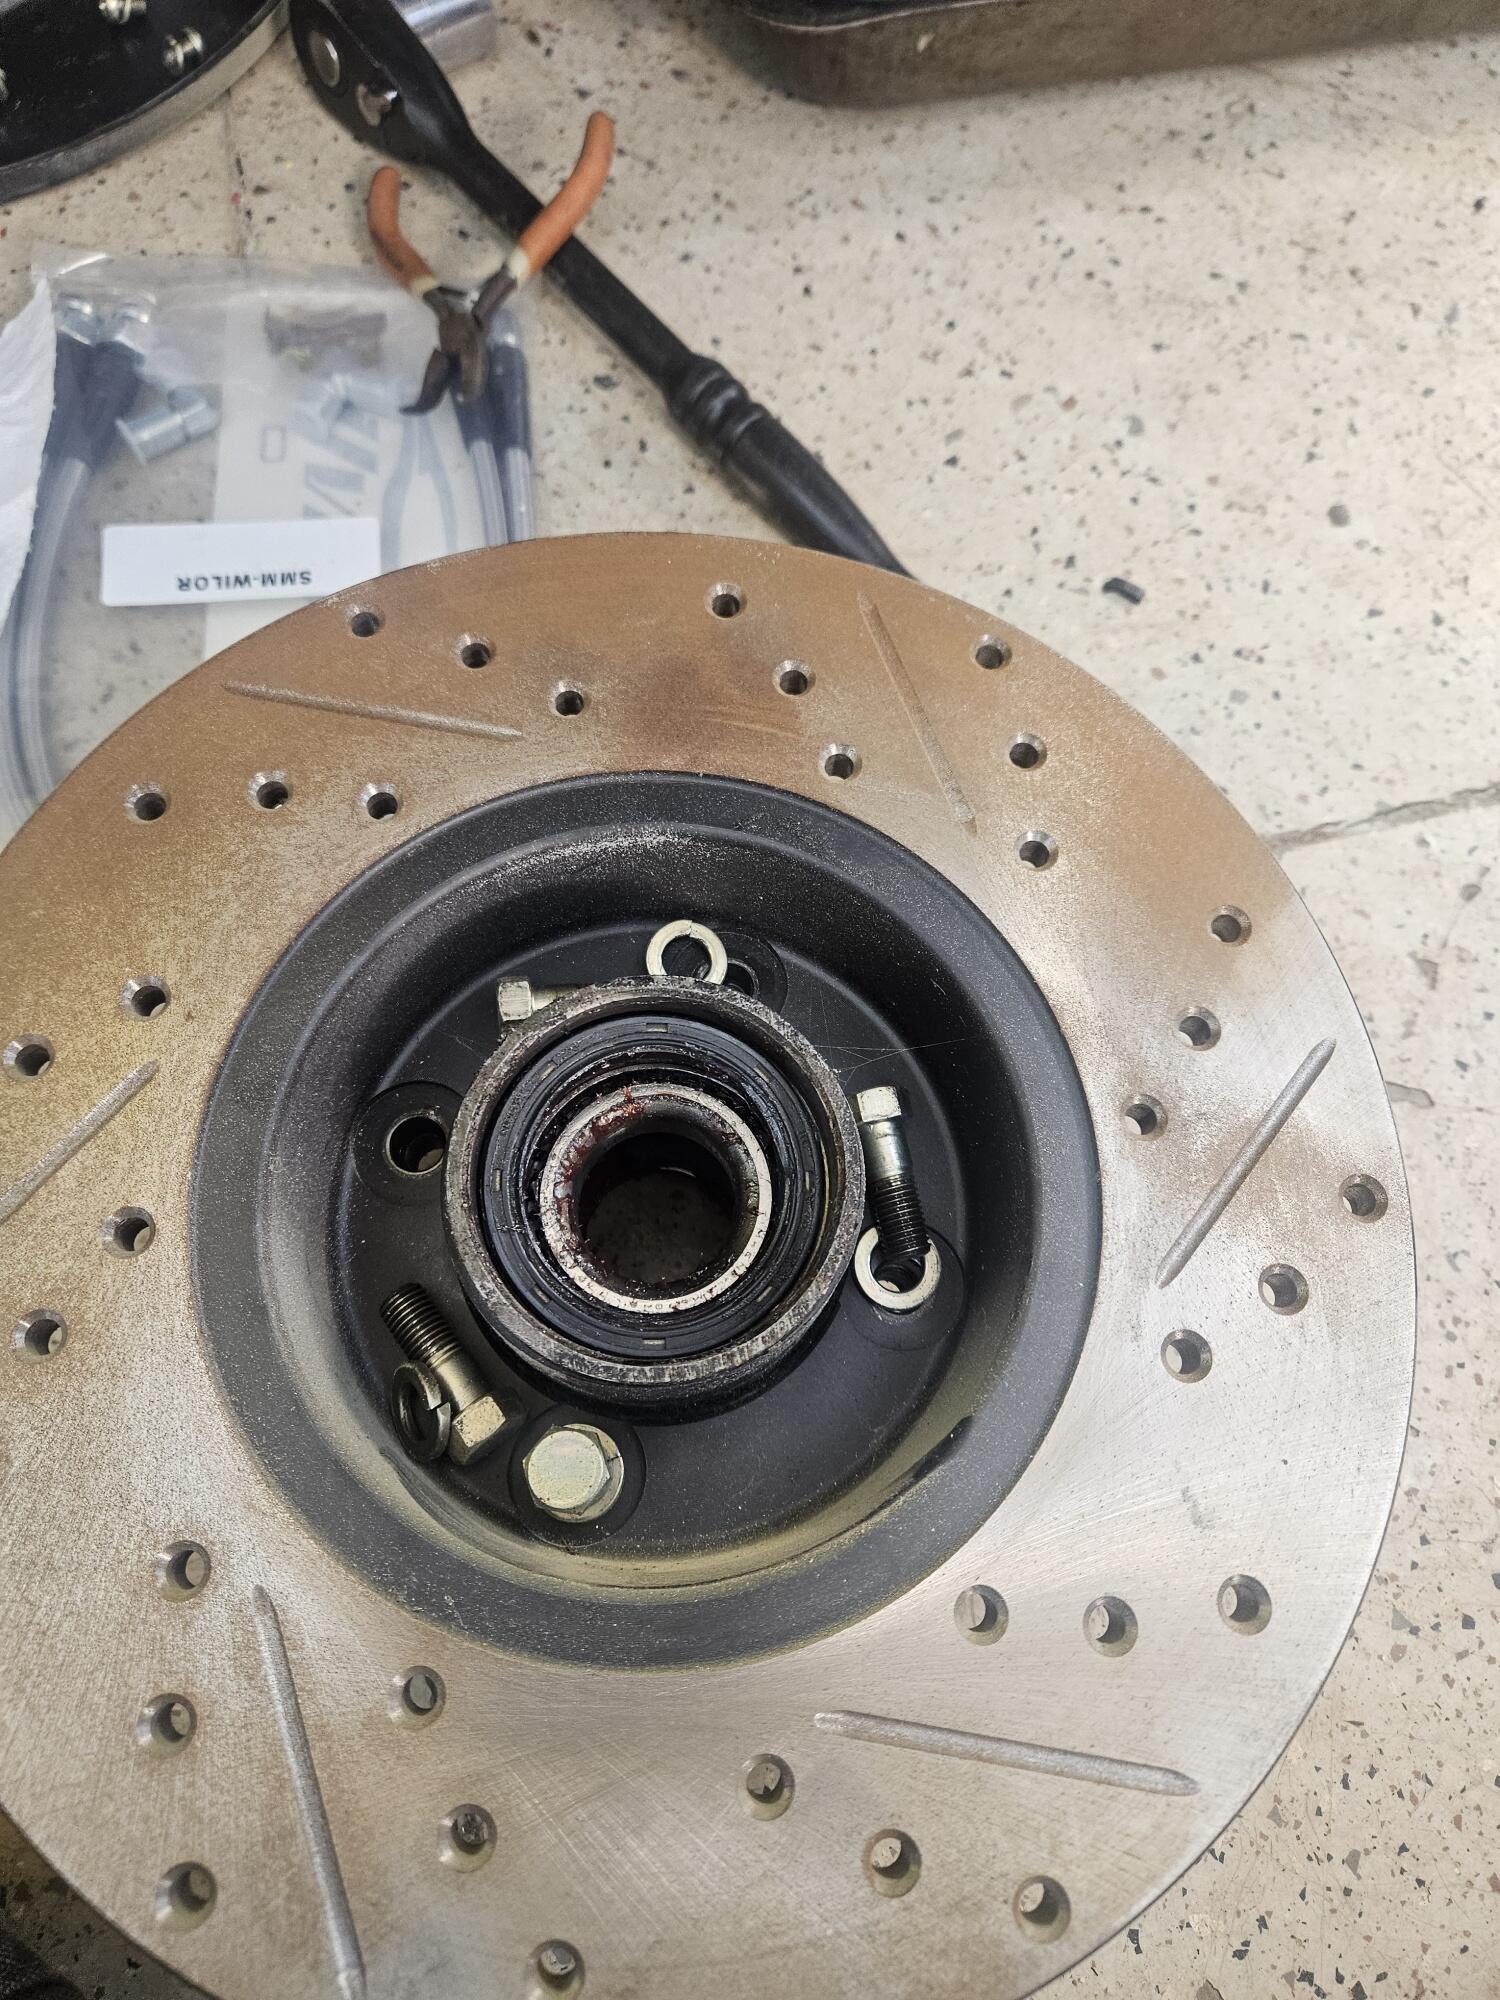
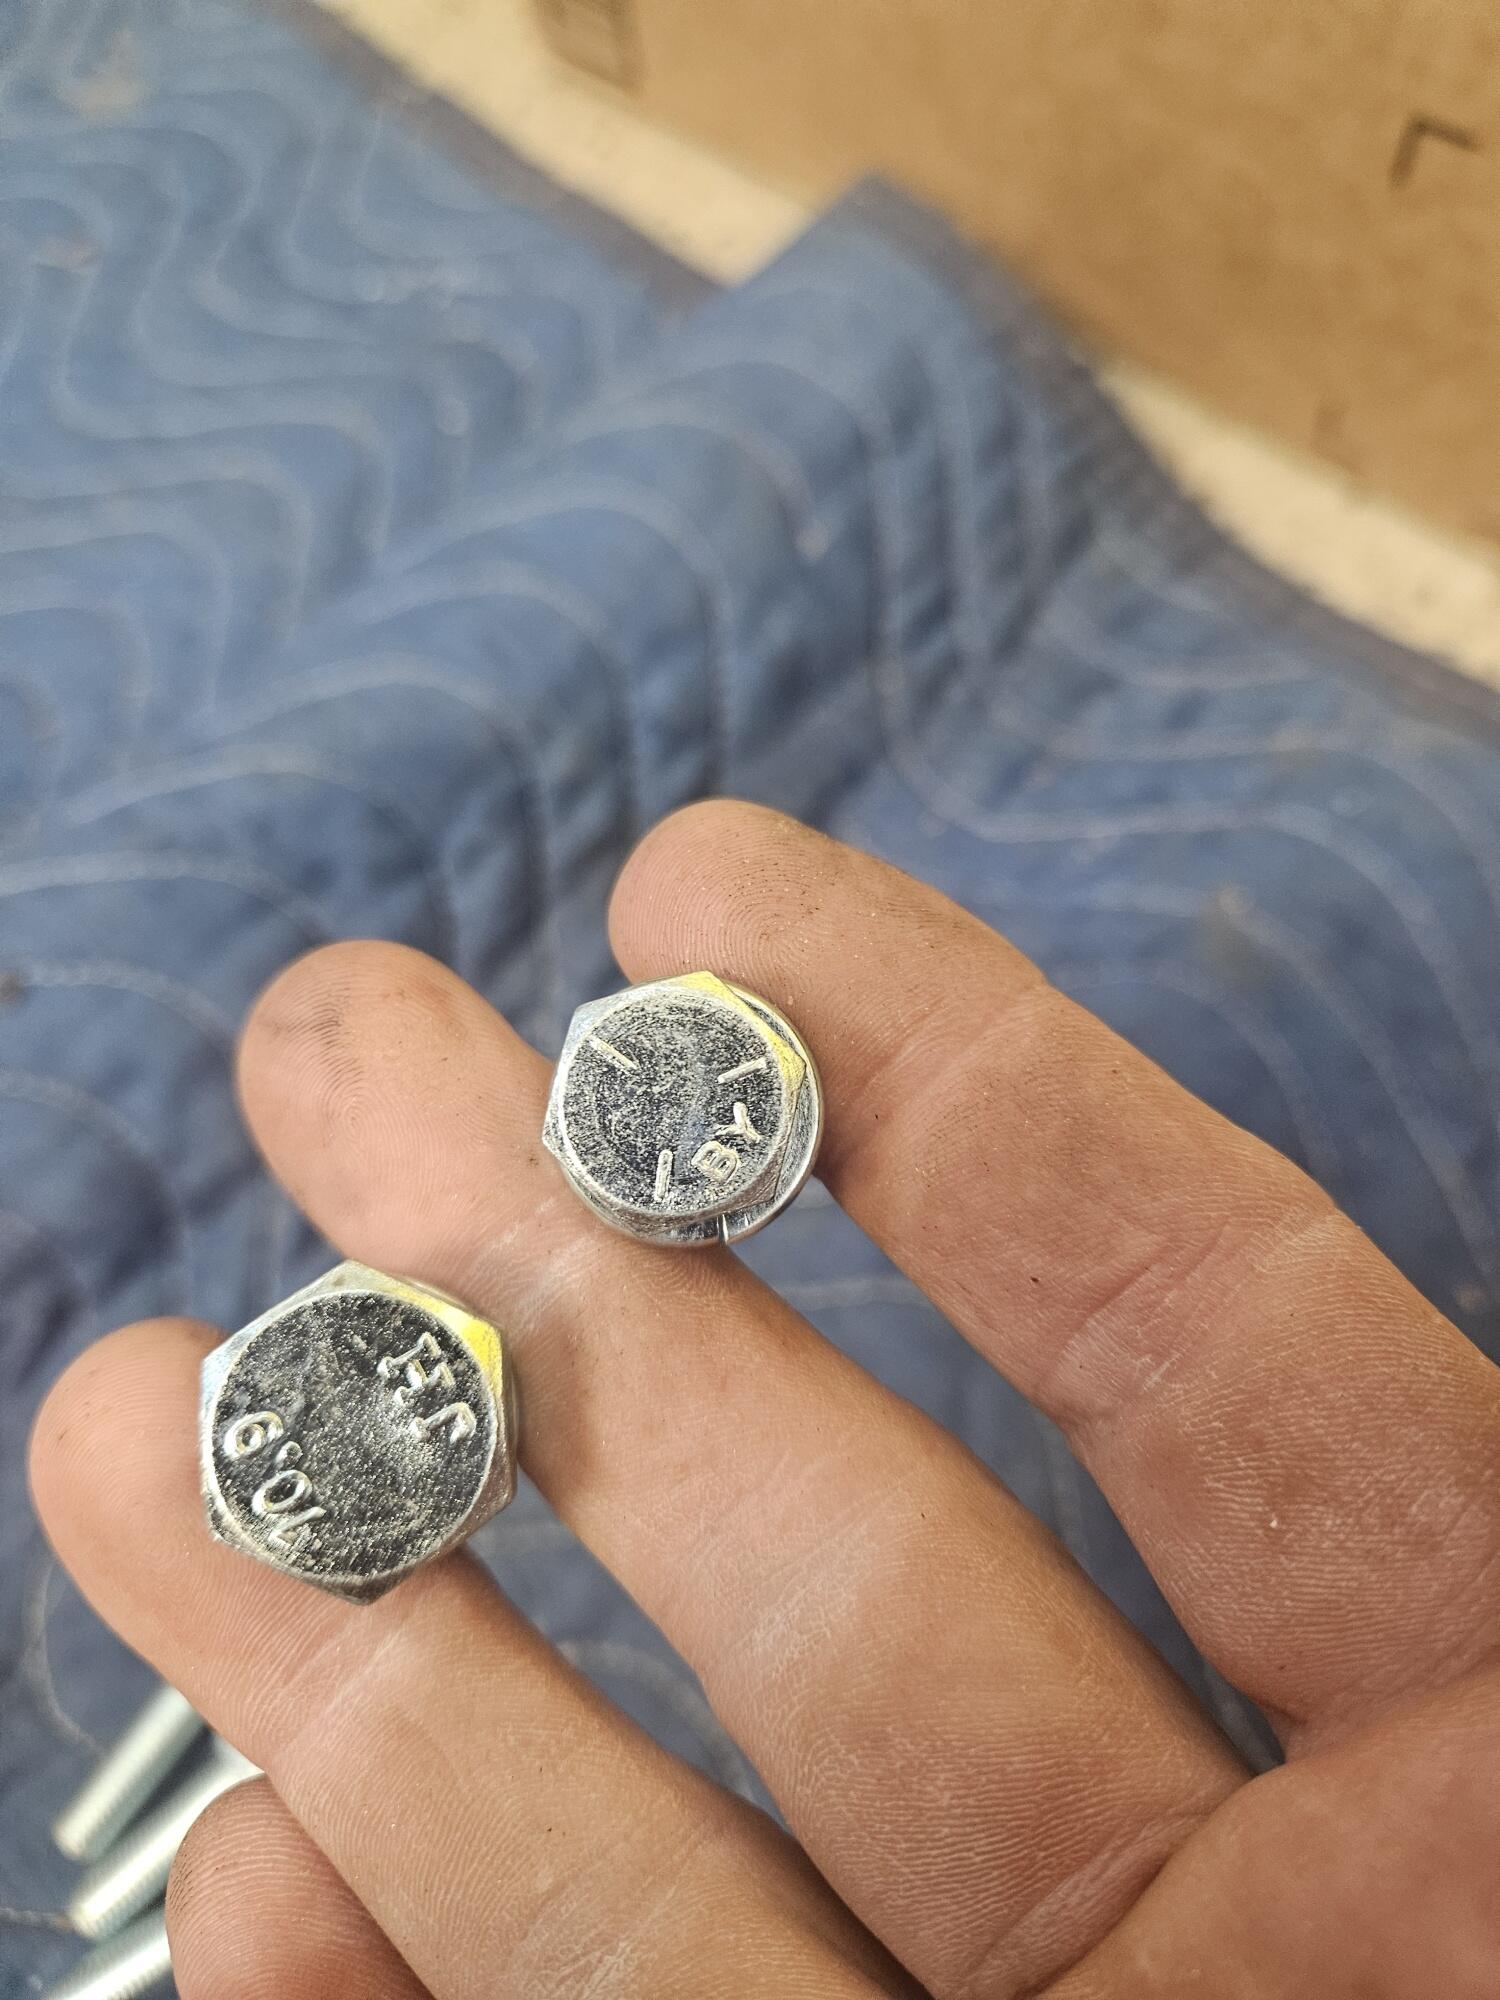
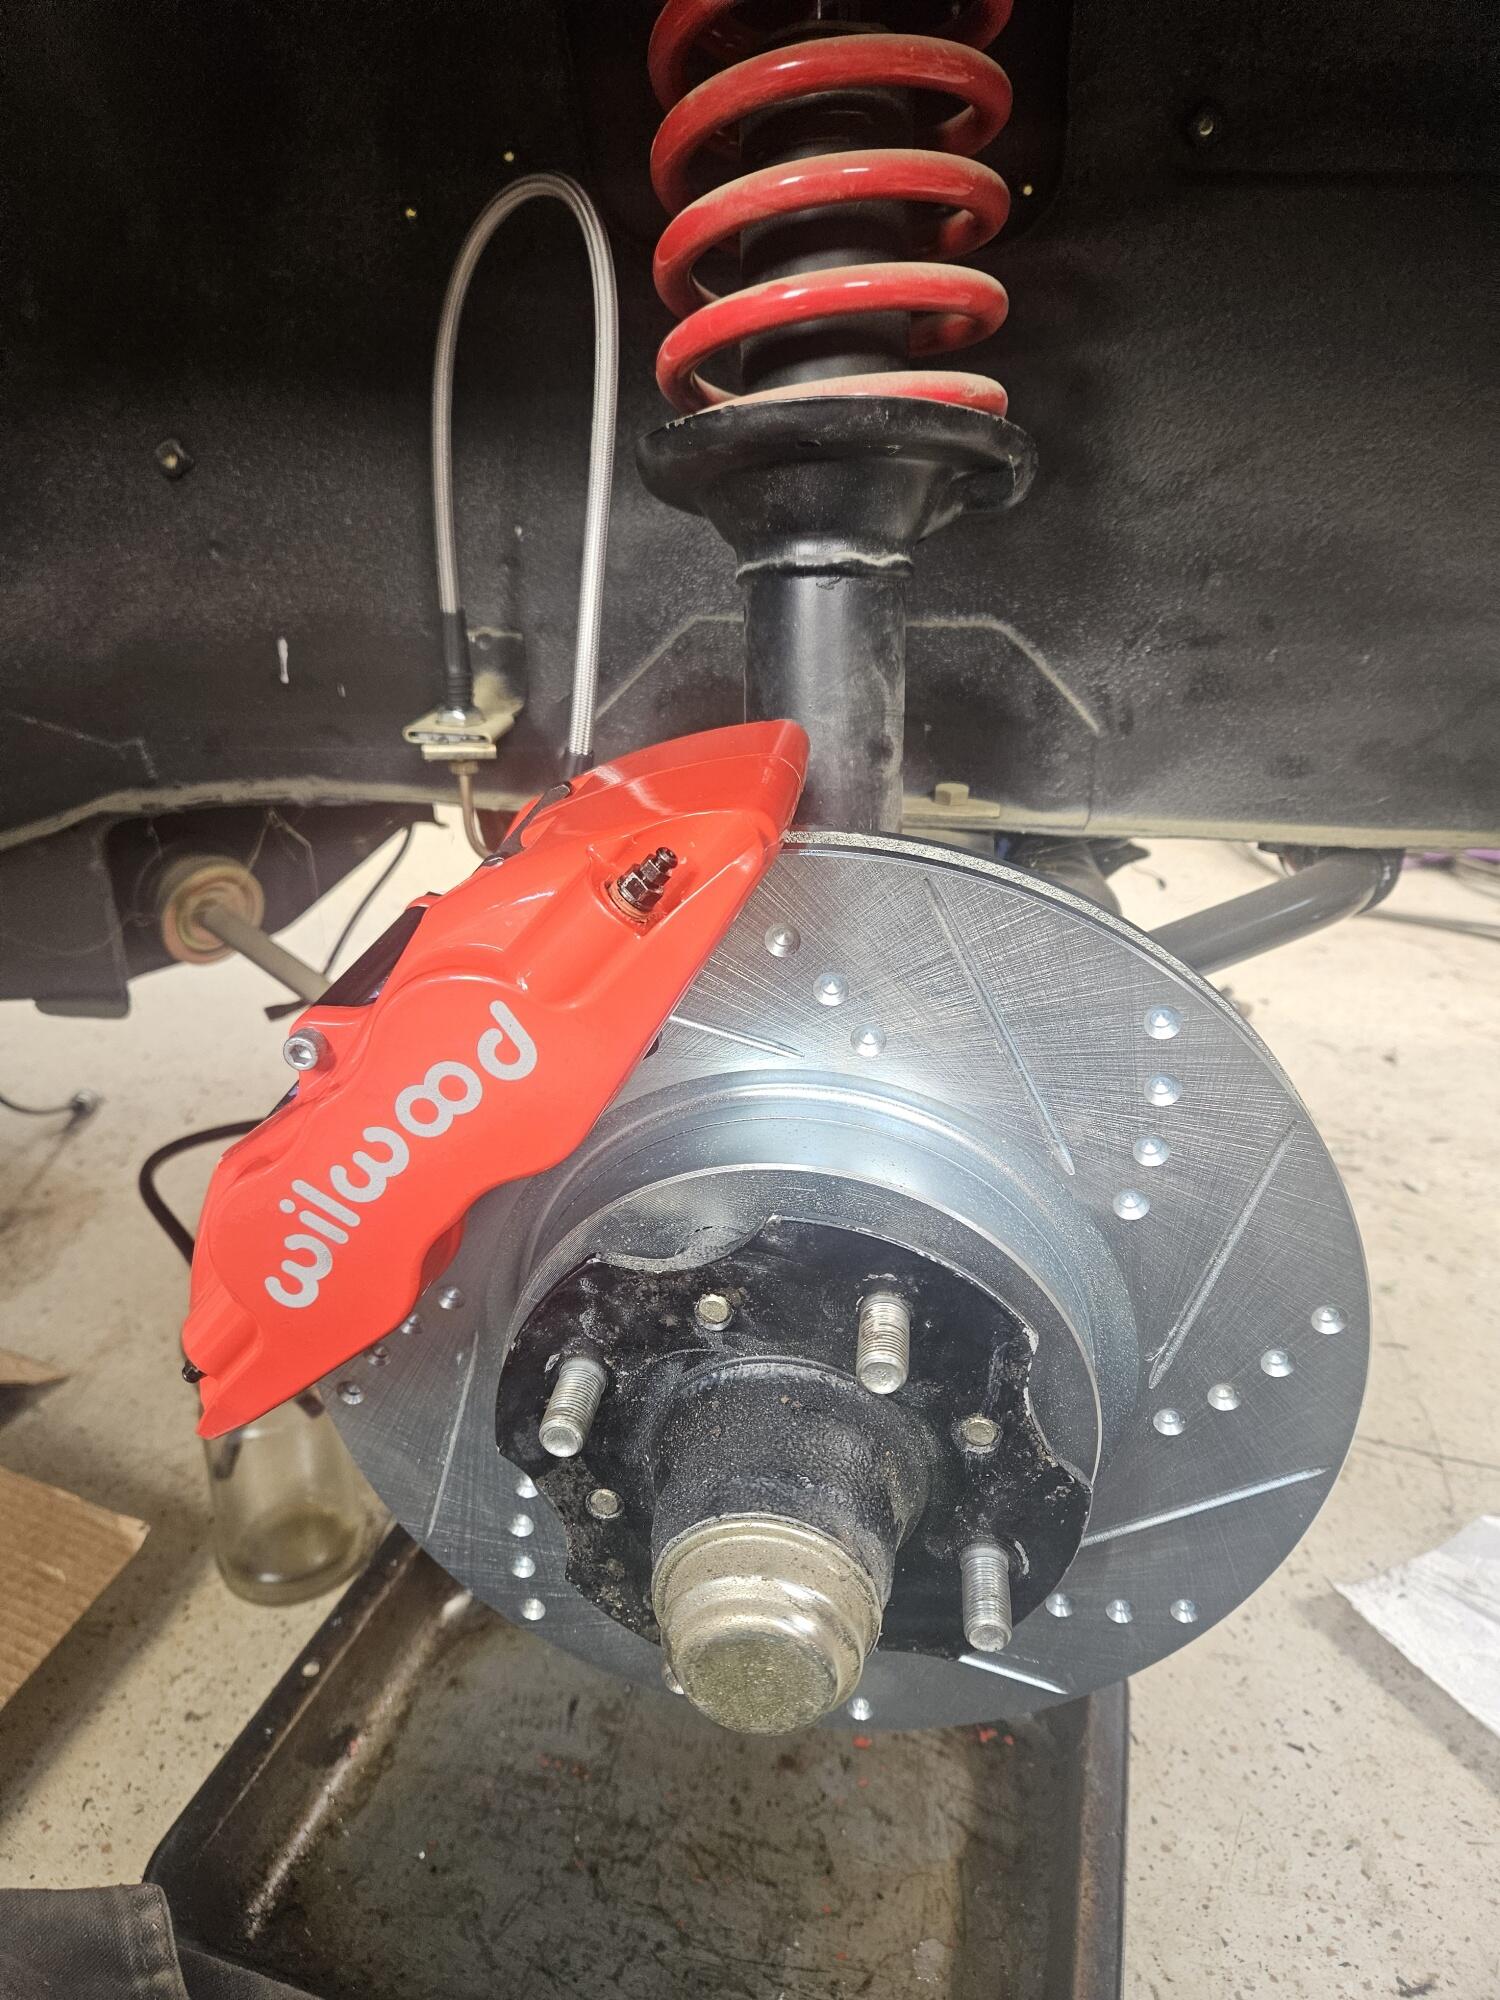
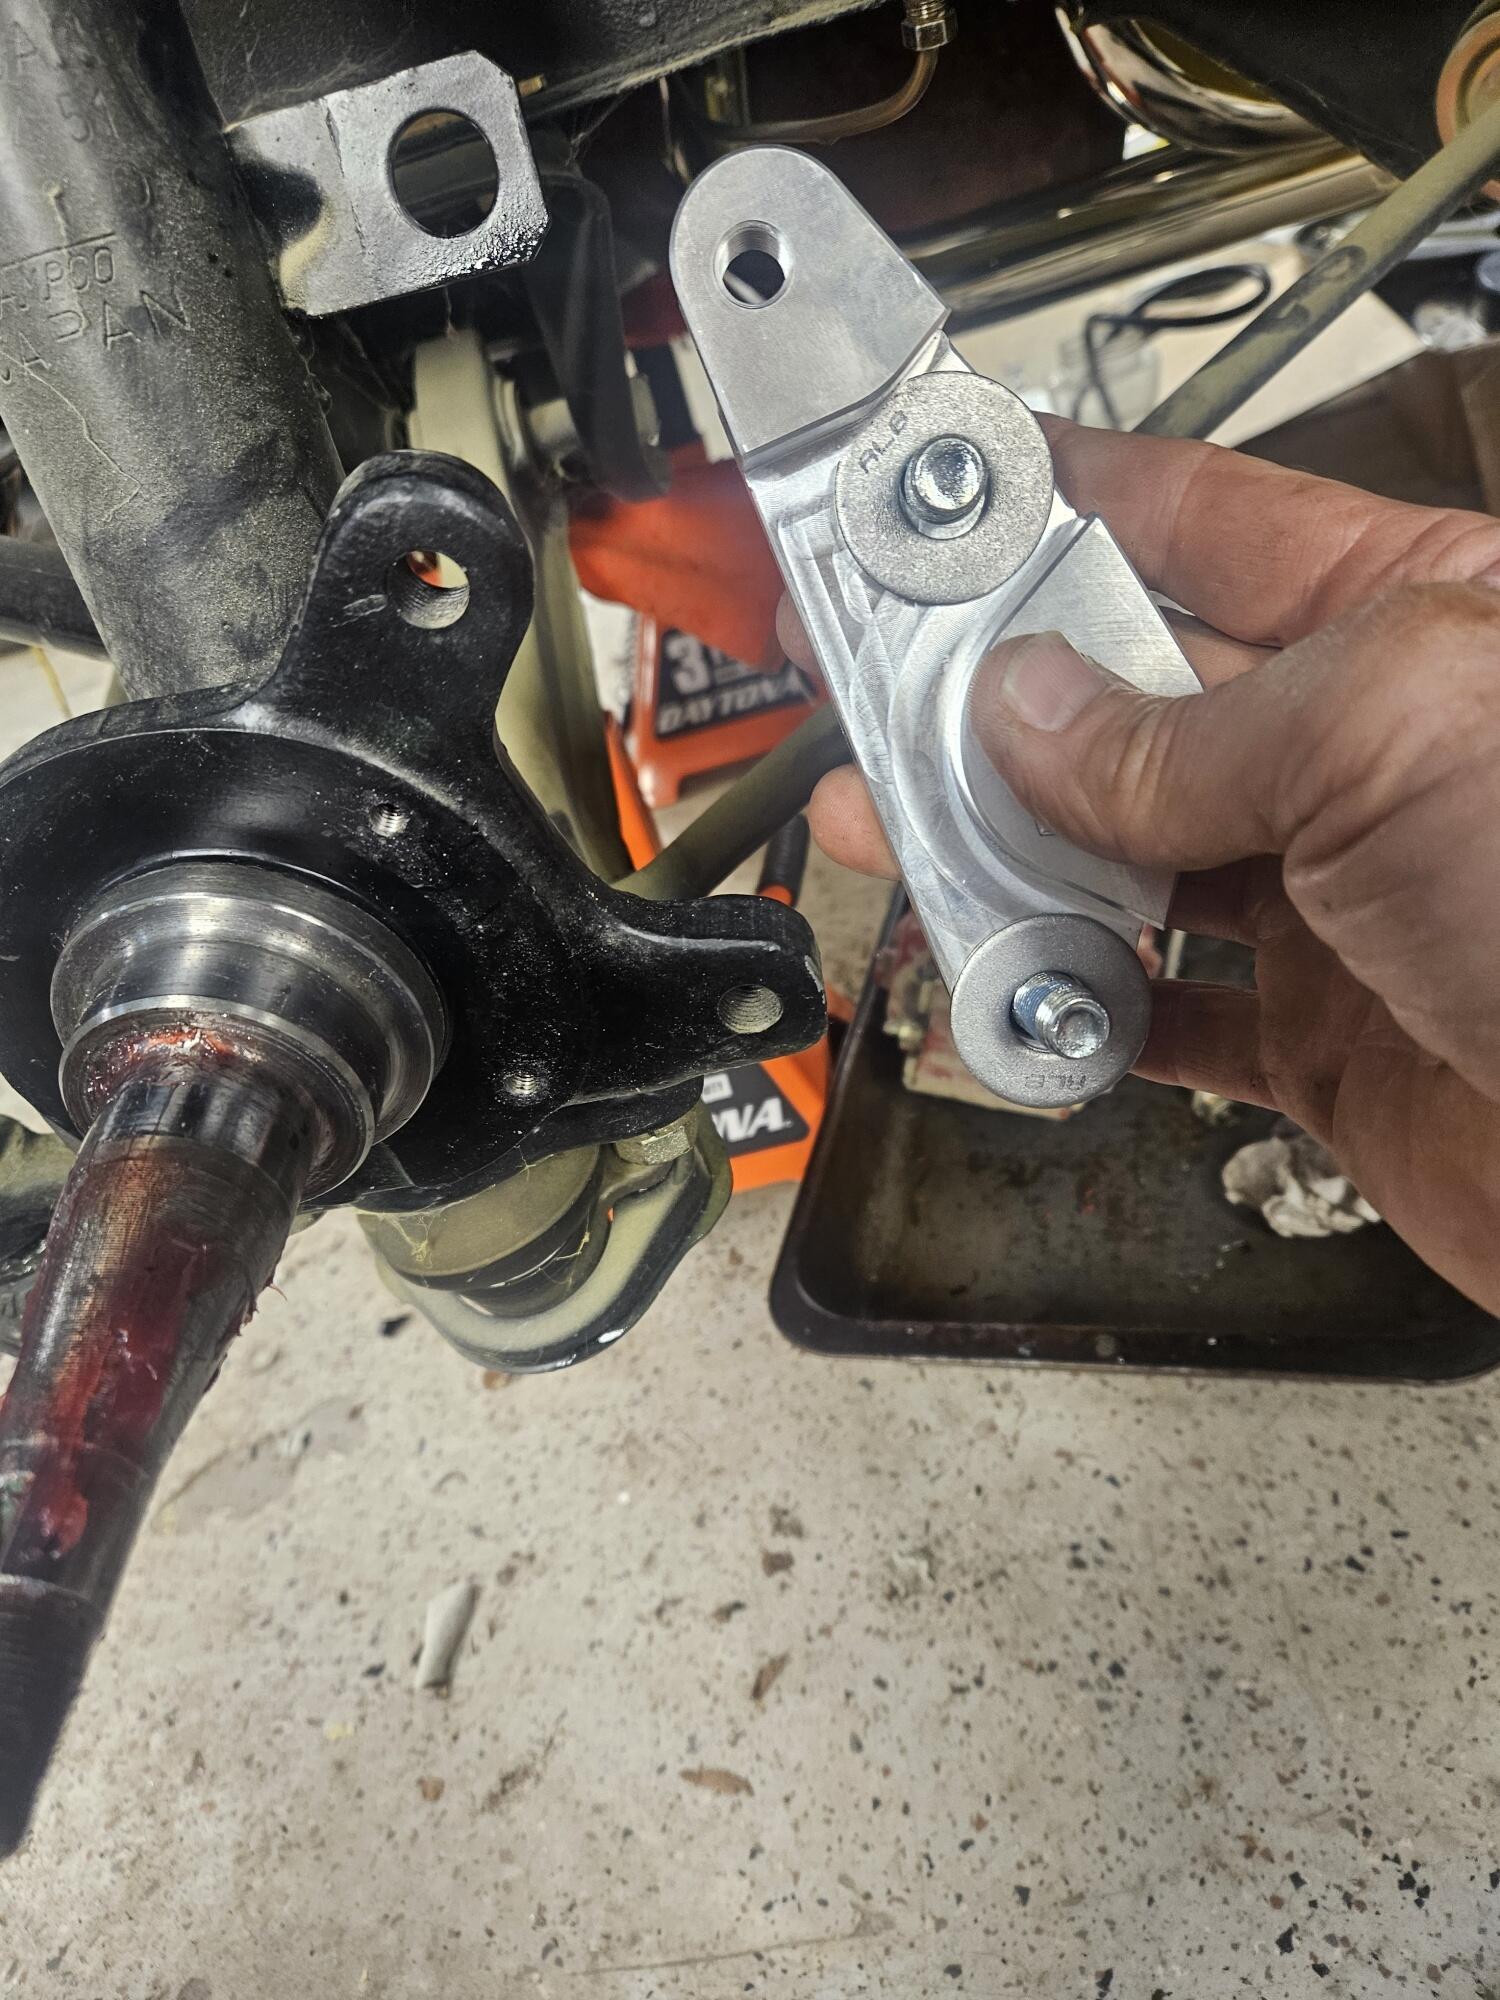
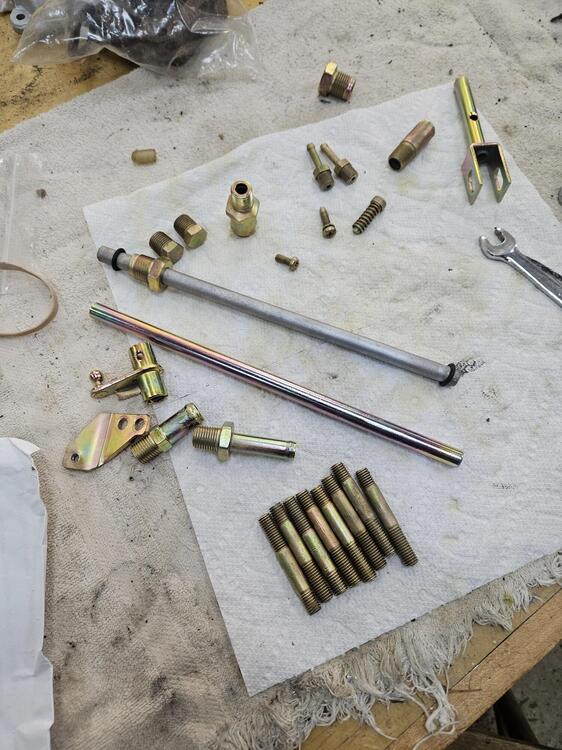
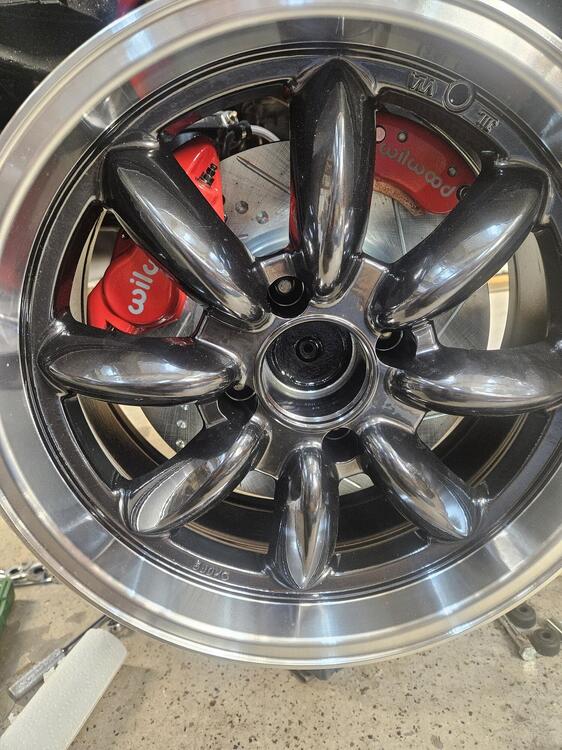
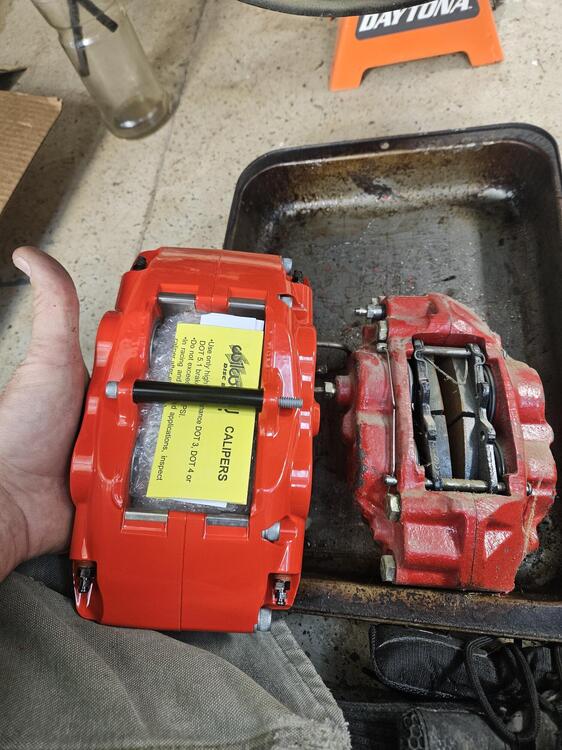
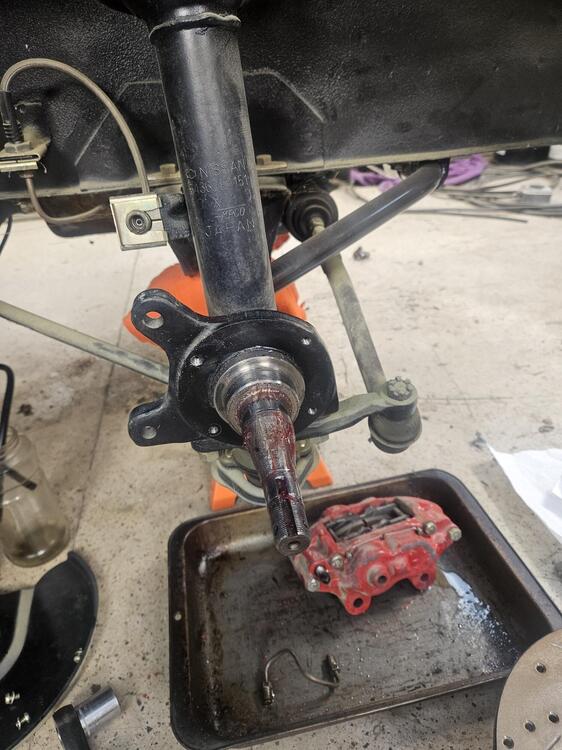
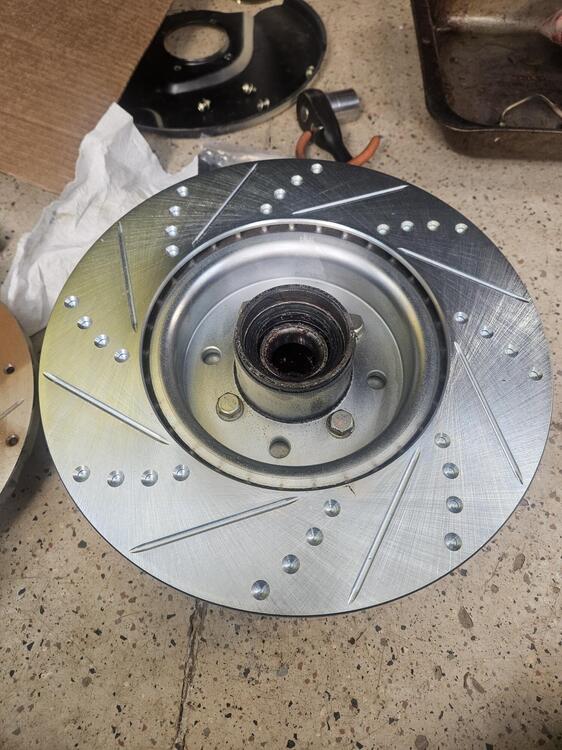
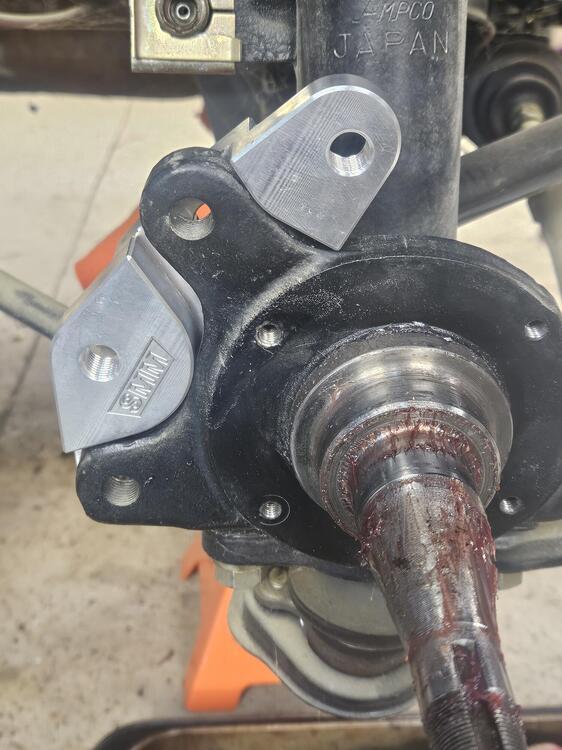
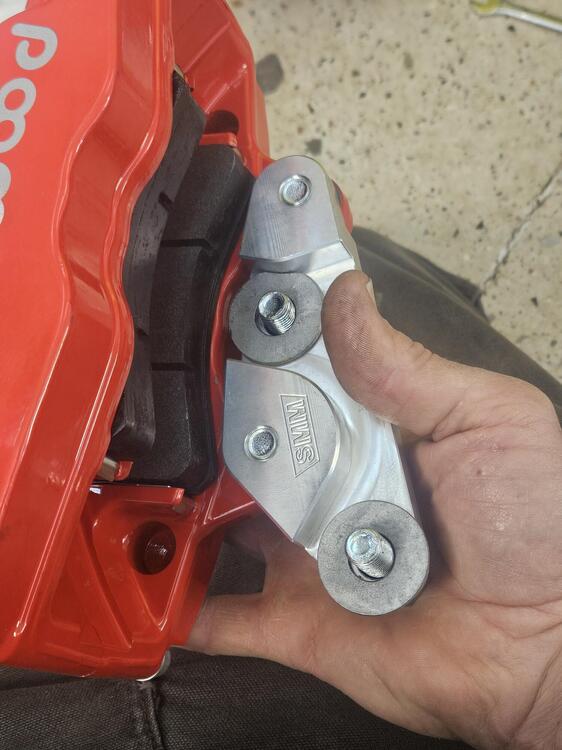
I have another thread documenting the Wilwood rear brake install I did. In this thread I am going to document the front disc install. I am using the Wilwood Dynalights. The discs are the same front and back but the swept area of the pad is different. The front discs have also been drilled to match the bolt pattern of the hub. The new front calipers are very light. All aluminum. Here it is compared to the Toyota caliper Here is the starting point for my front brakes. I did have the Toyota caliper on and the dust shields have been trimmed Hub has to come off Then the dust shield needs to come off Then remove the bolts from the hub and swap rotors A brass hammer might be helpful to get every thing lined up and seated Everything on the Wilwoods seems to be SAE so there are two different bolts in the kit. The two metric bolts for bolting the adapter to the strut ears and the two SAE bolts for attaching the caliper to the adapter plate The Silvermine logo appears to face outward on these adapters When I first bolted this side up, it bound up against the rotor. So I had to add some washers to space it back a little bit. The metric bolts have plenty of length so that wasn't an issue. I didn't have any pretty washers to use so I used these. Also I had to trim the upper washer because the OD was too large to center over the hole All together It is easier to add the washers when installing the adapter if you know you'll need to I guess you could install it with washers and you don't need them you can drop them out. It's a lot easier to drop them out than get them in and centered over the bolts. This install is on an early series one car. Your mileage might vary...


-
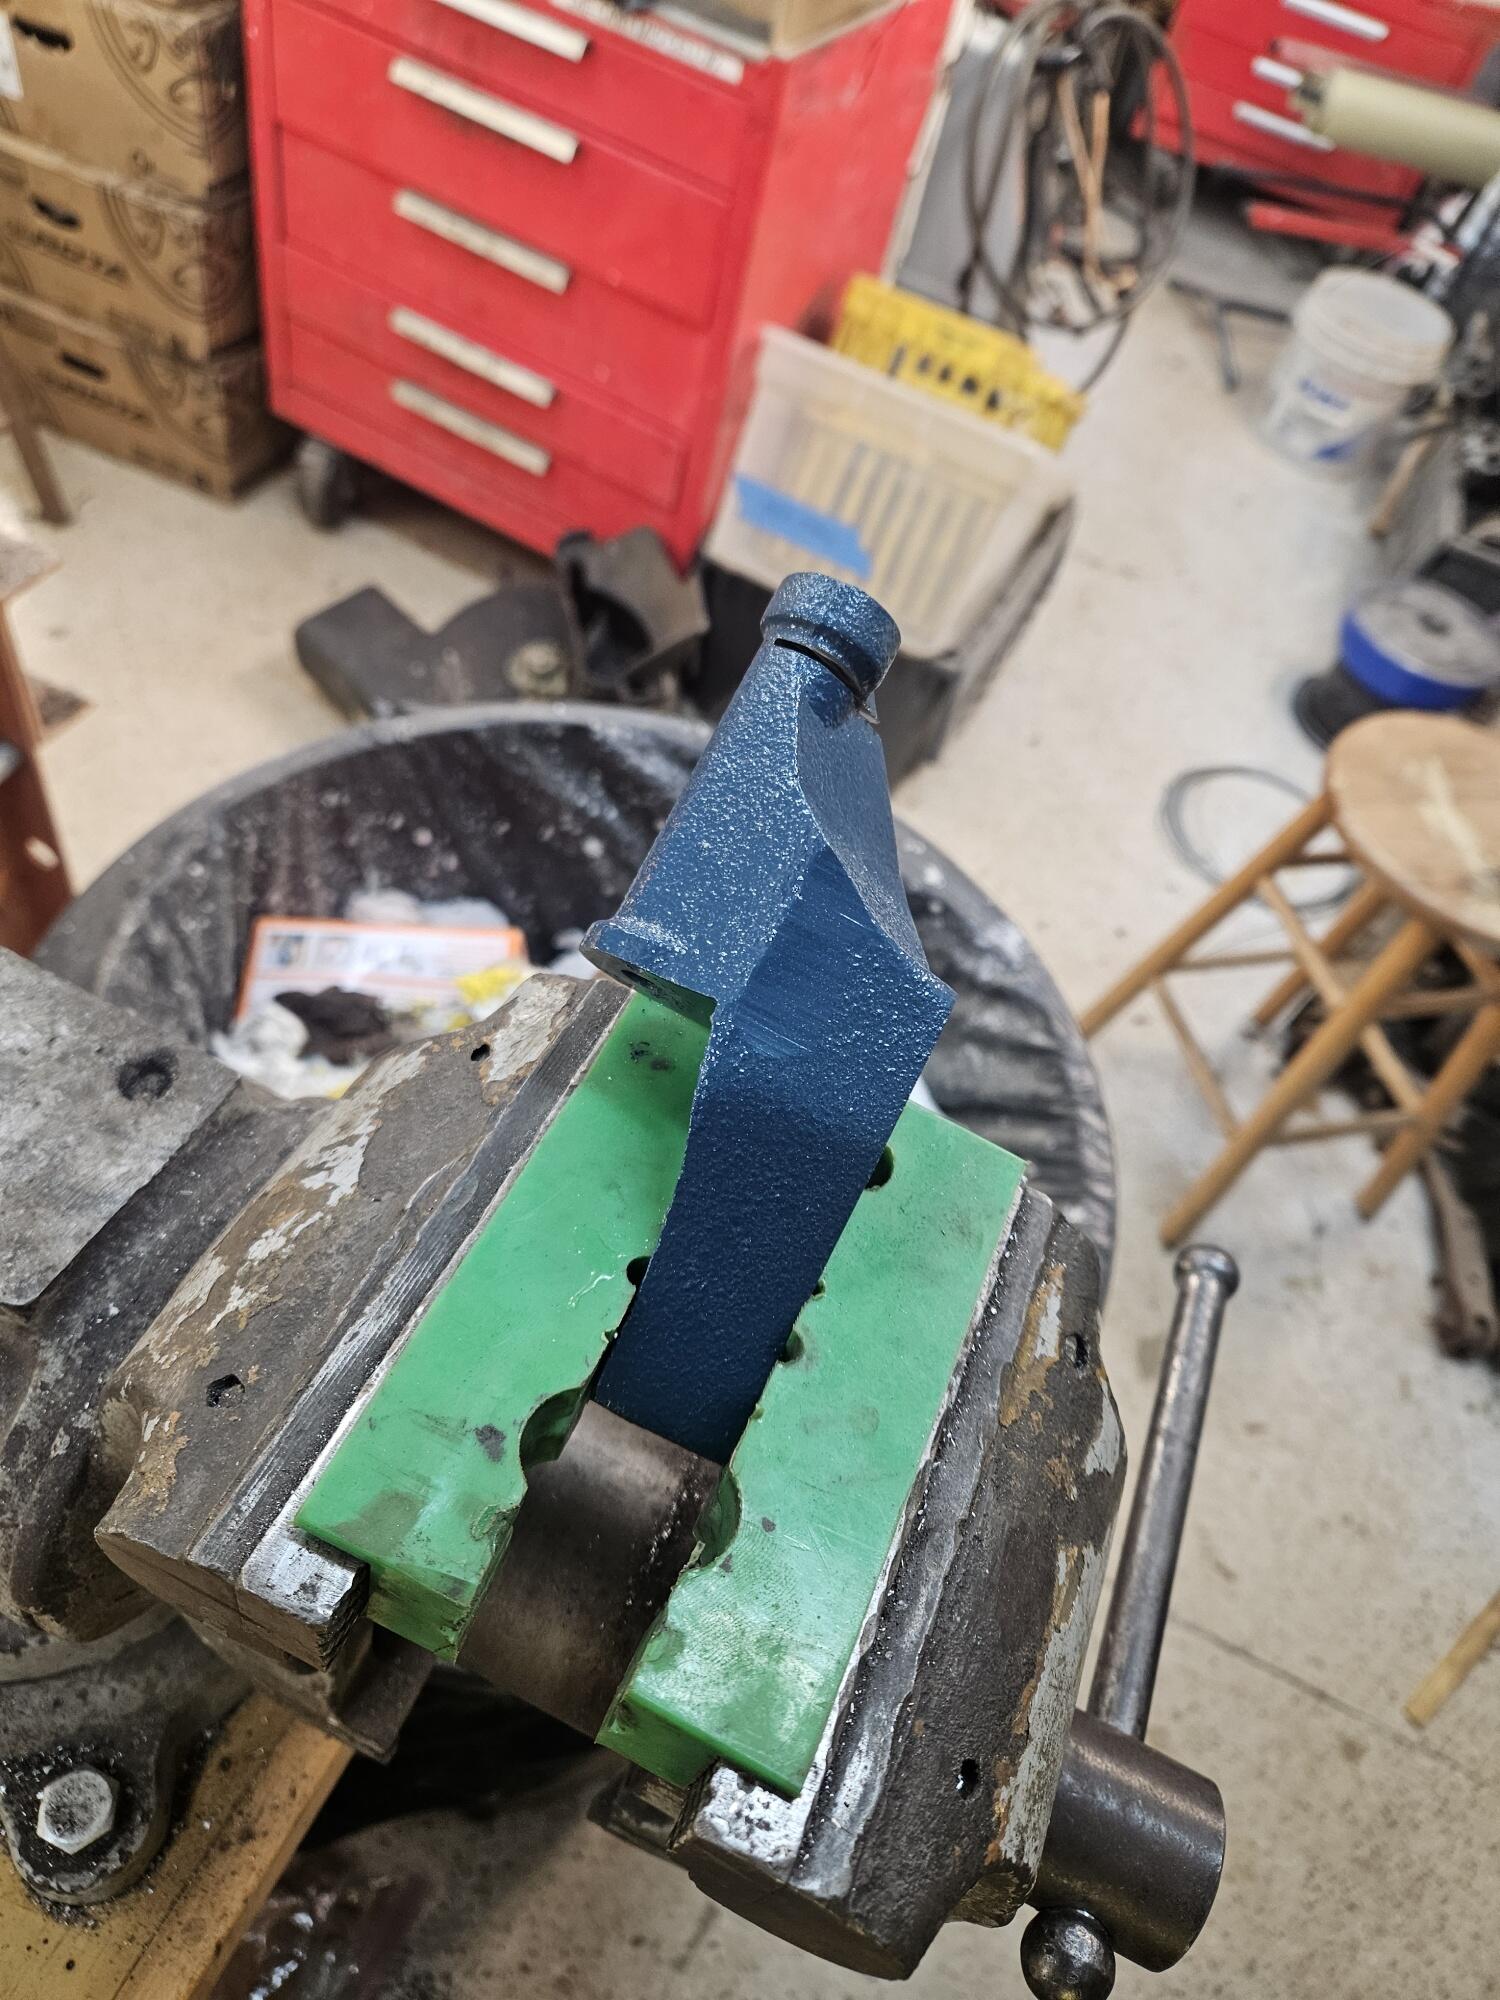
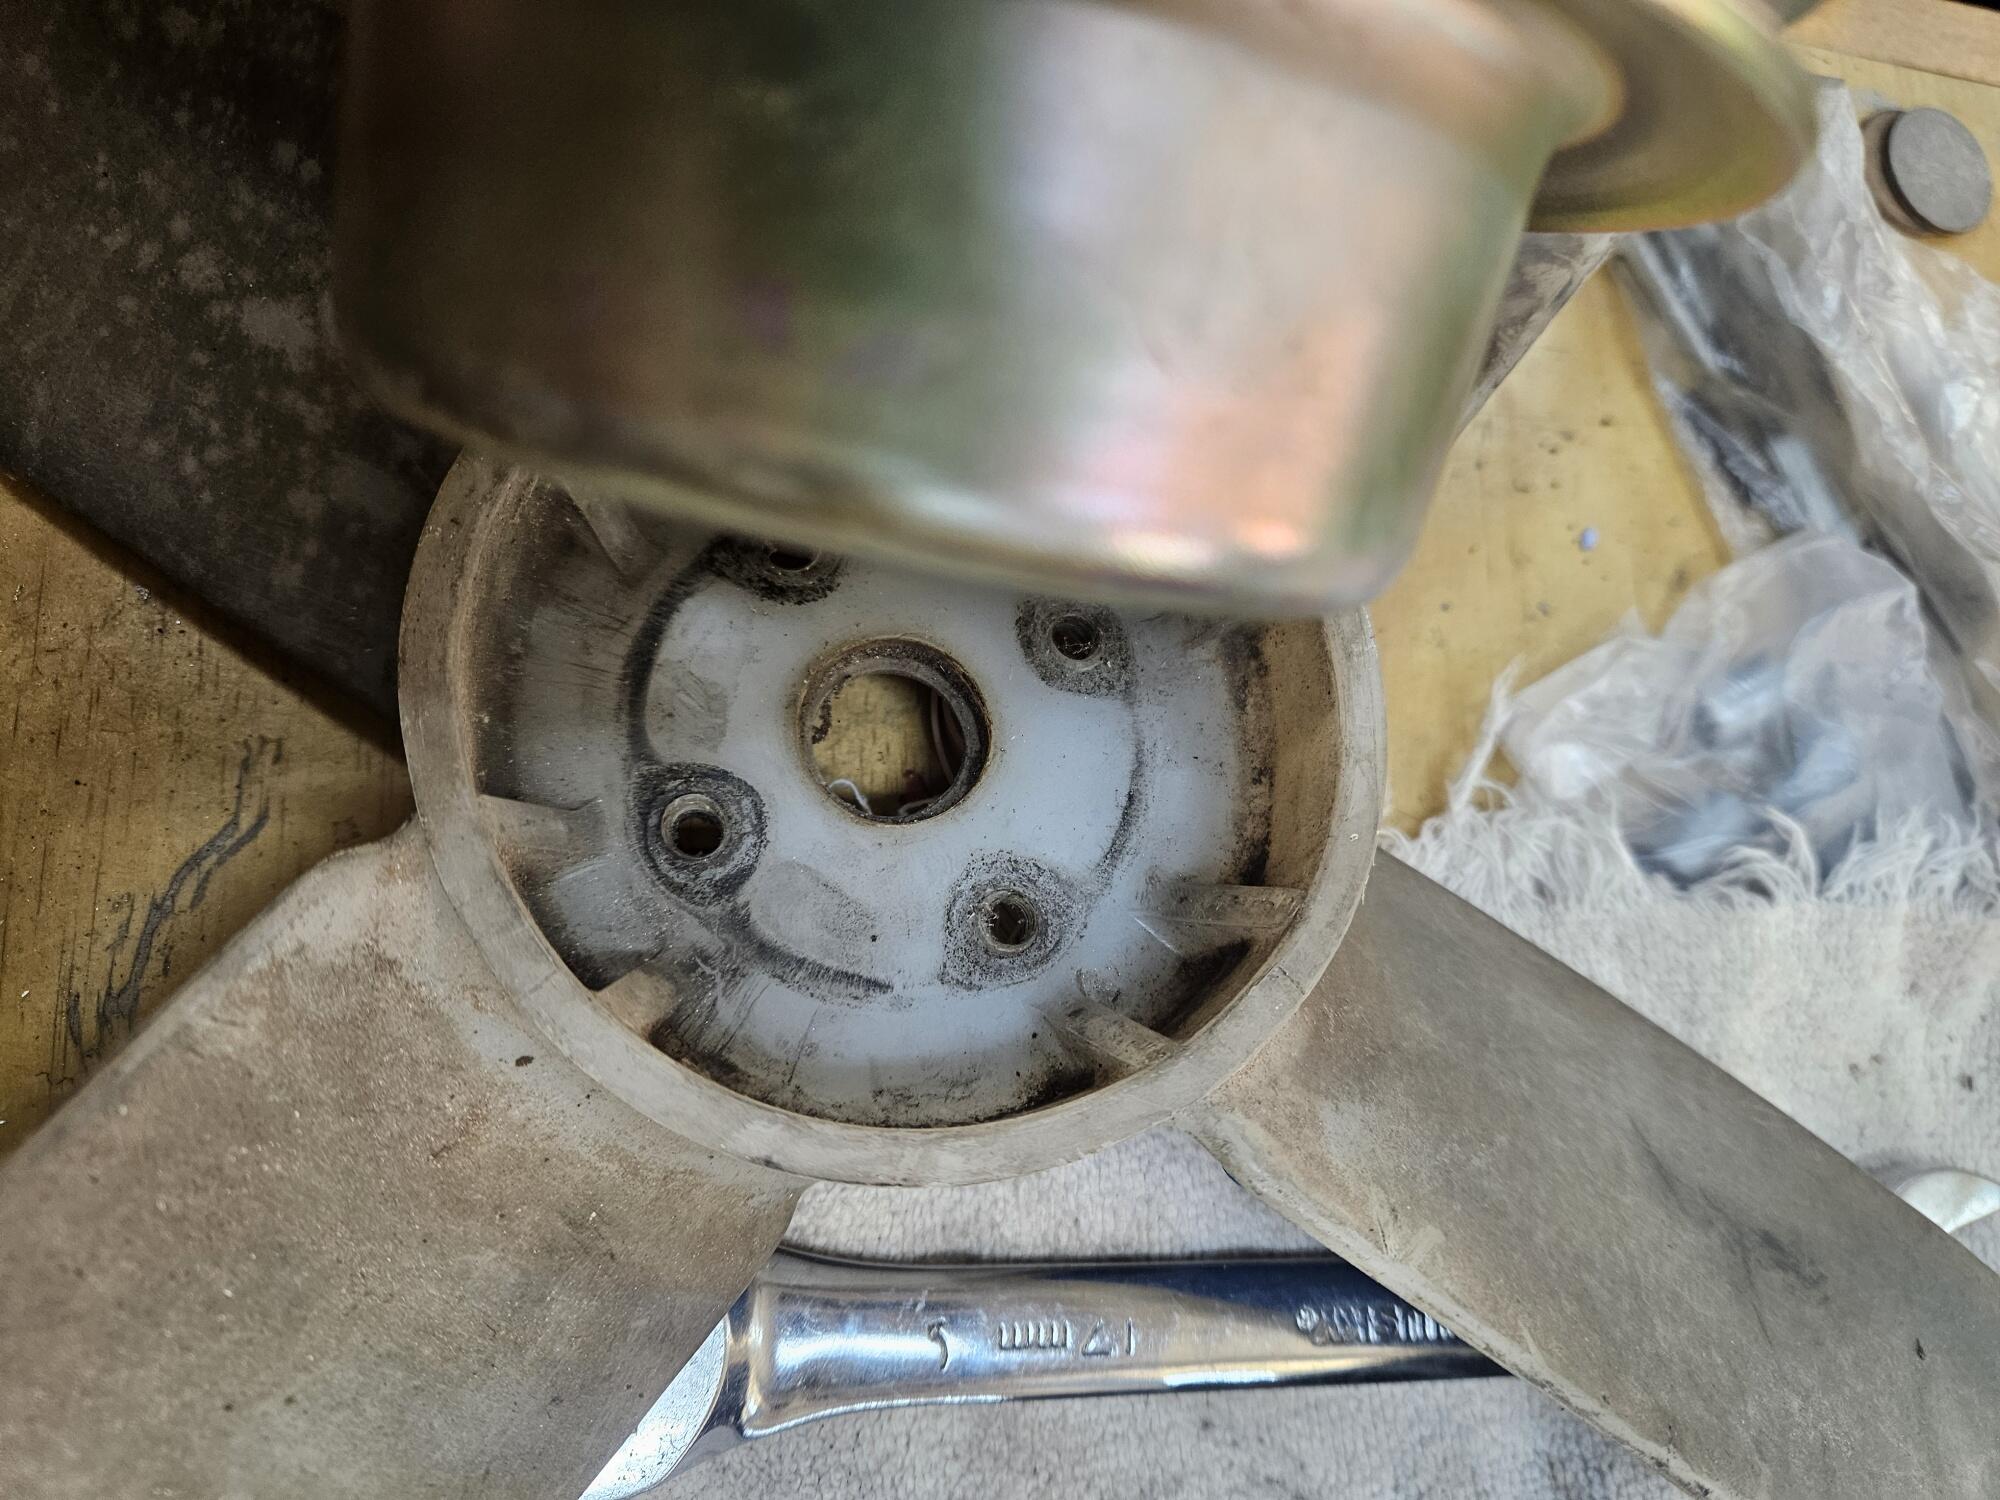
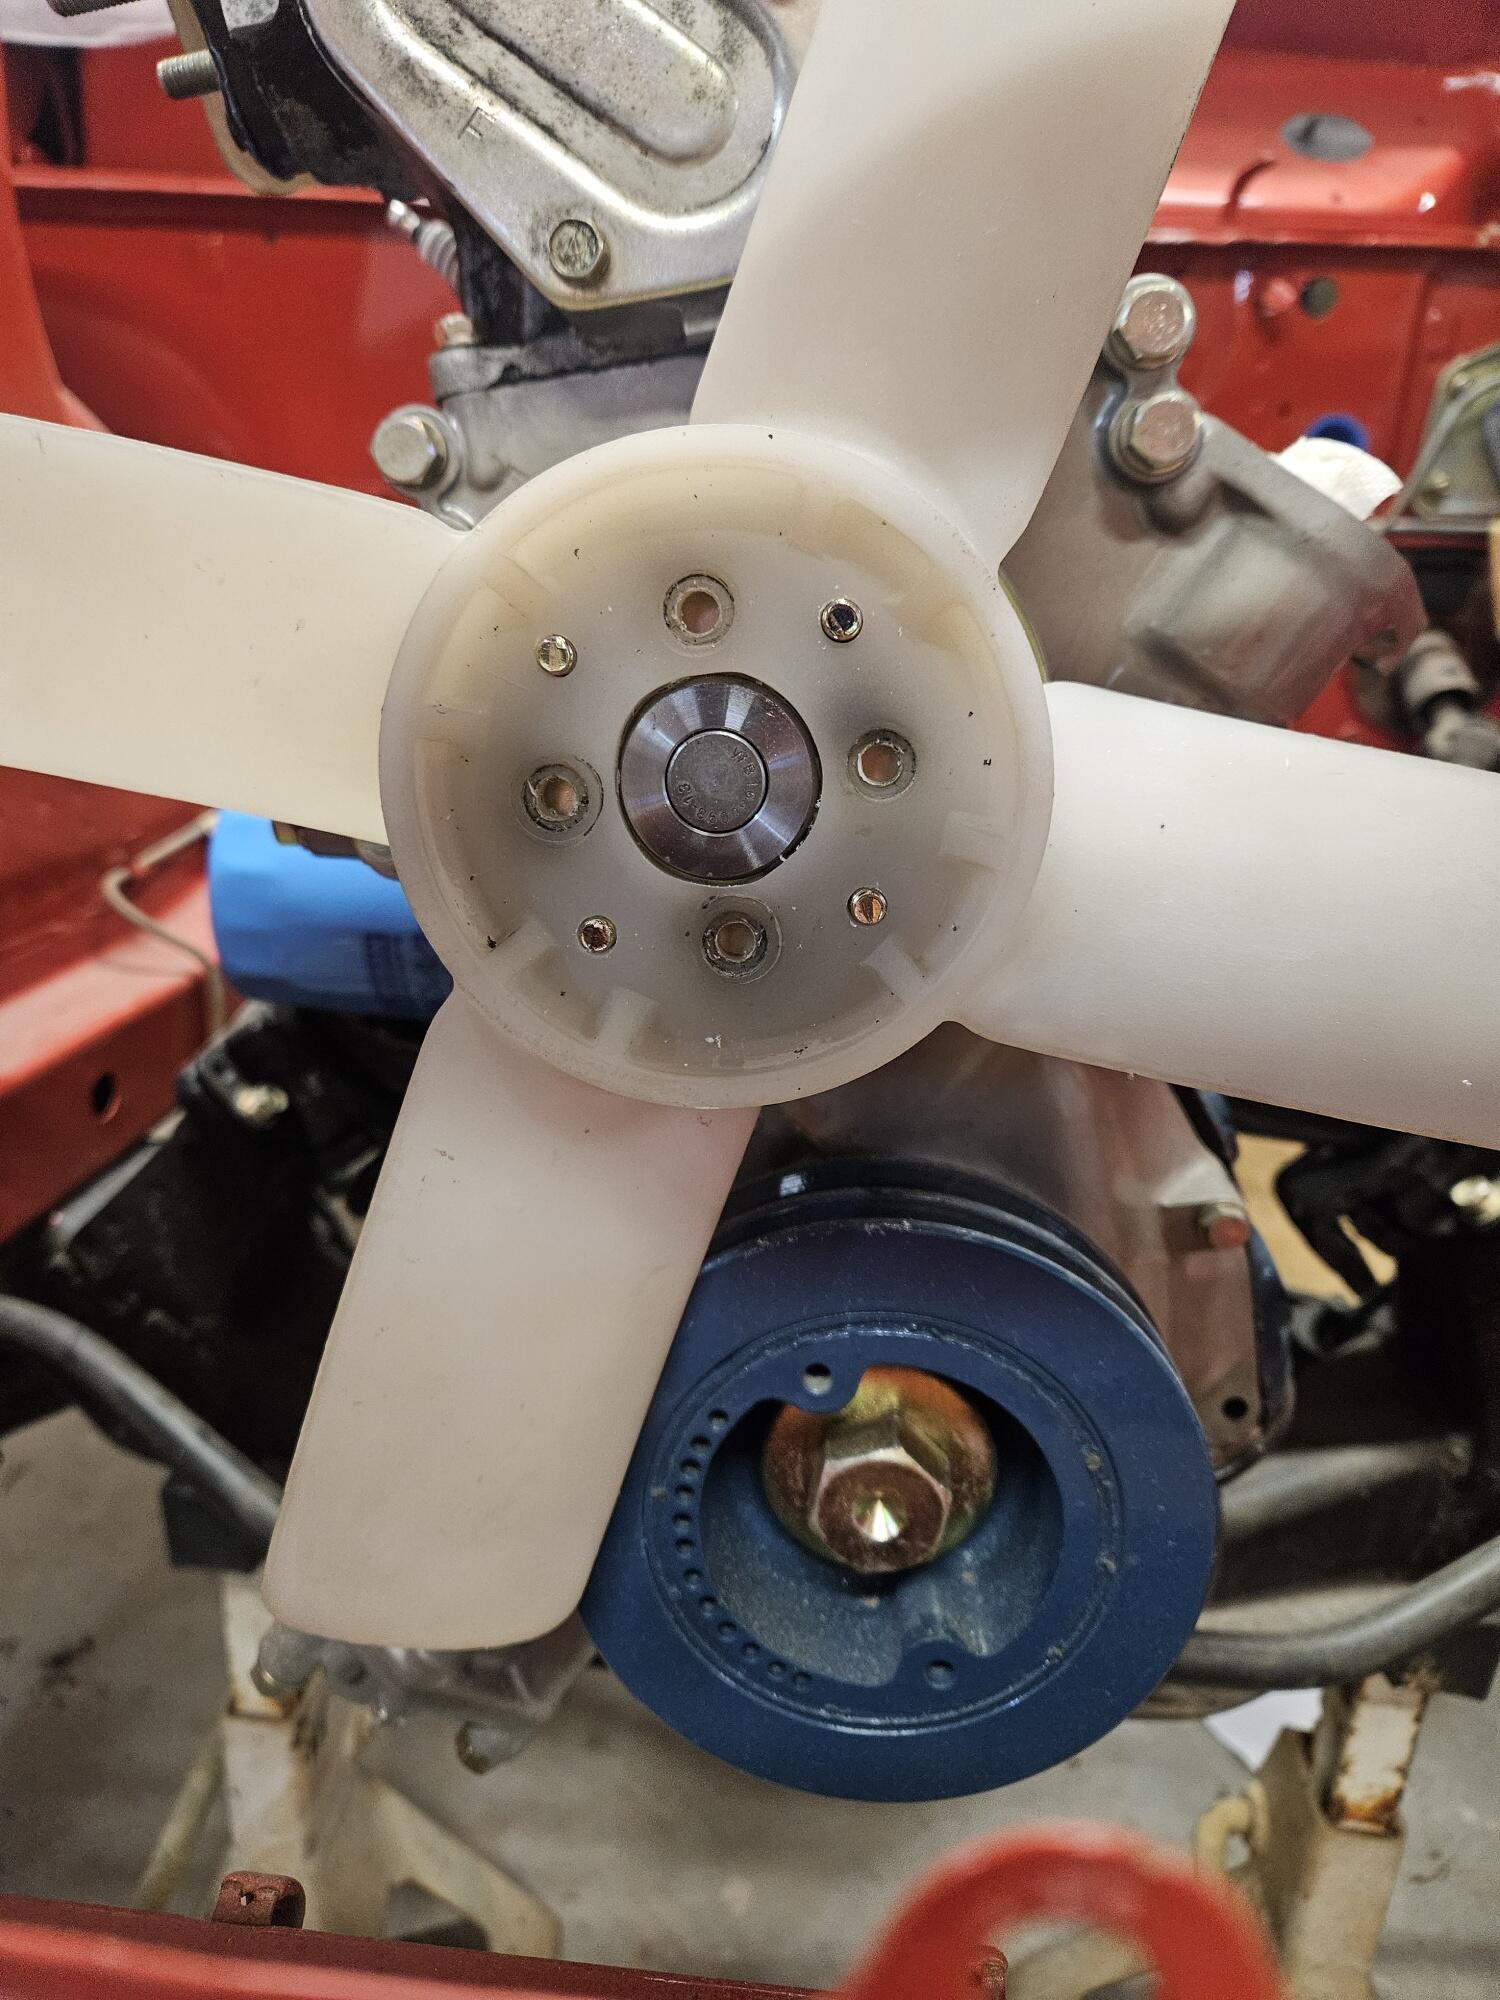
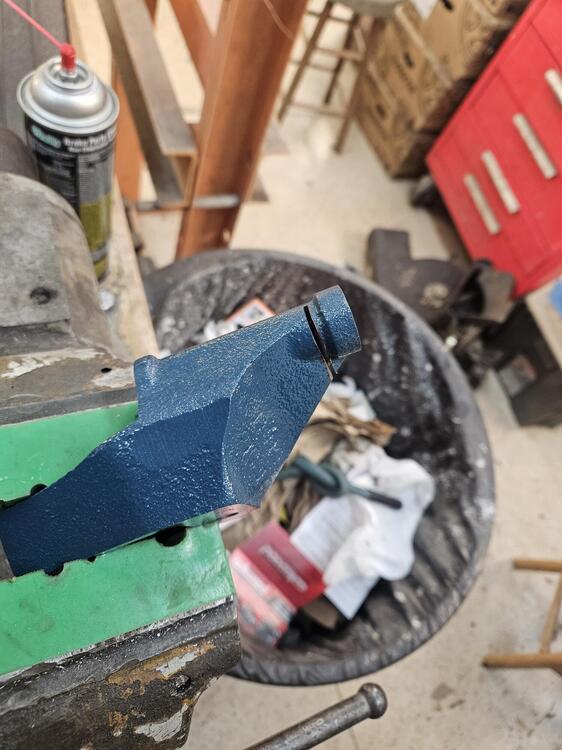
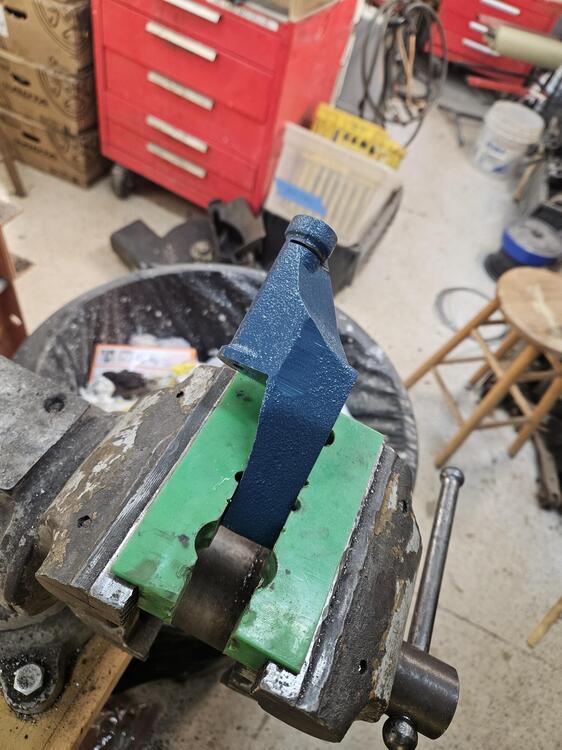
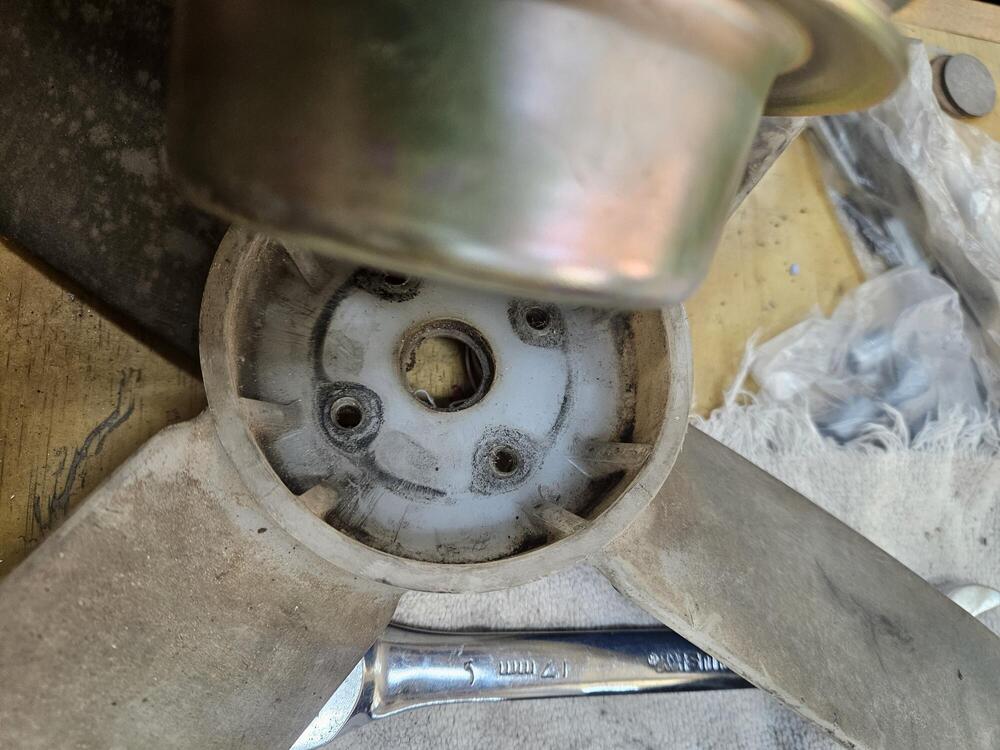
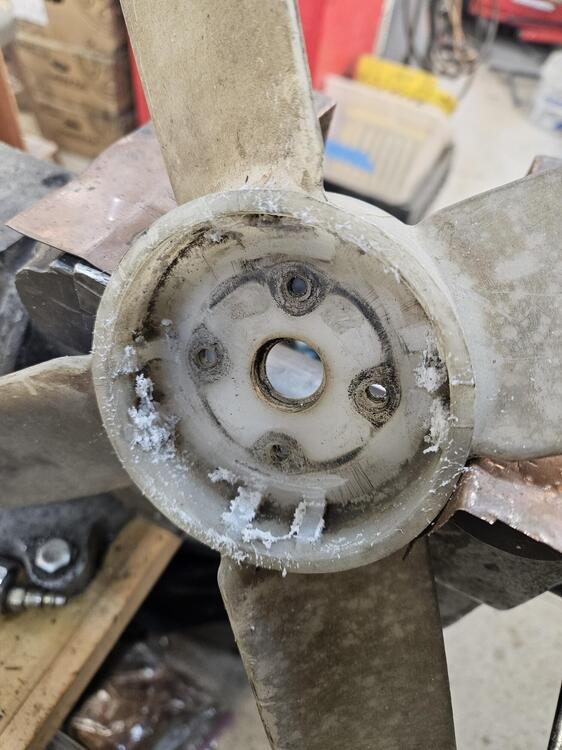
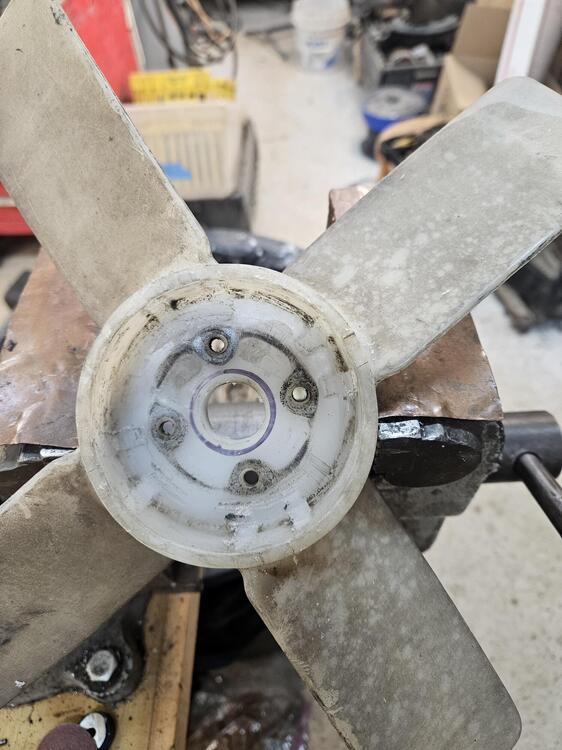
So over Thanksgiving when Cody and I were working on the car. We were trying to get it ready for startup. Maybe Christmas, we'll see. We were working on getting the alternator on. Well when you change to the 240z water pump and damper that means the alternator doesn't line up anymore... 😞 So we got out the cut off wheels I cut this off the front and dressed it out and move d it to the rear with a washer. In the future we might make a more elegant solution, but for now it works Another problem we created with the 240z water pump is the 510 fan doesn't fit anymore and there's not enough room for a 240z setup. So these ribs inside the fan prevent it from fitting down against the pulley So more air tools I dressed them up nicely and lightly bead blasted it. I had to make the center hole larger by free-handing it. I also had to add 4 new bolts holes because the bolt pattern is different I had to order longer studs from BelMetric too... Two forward, one back... 😉

-
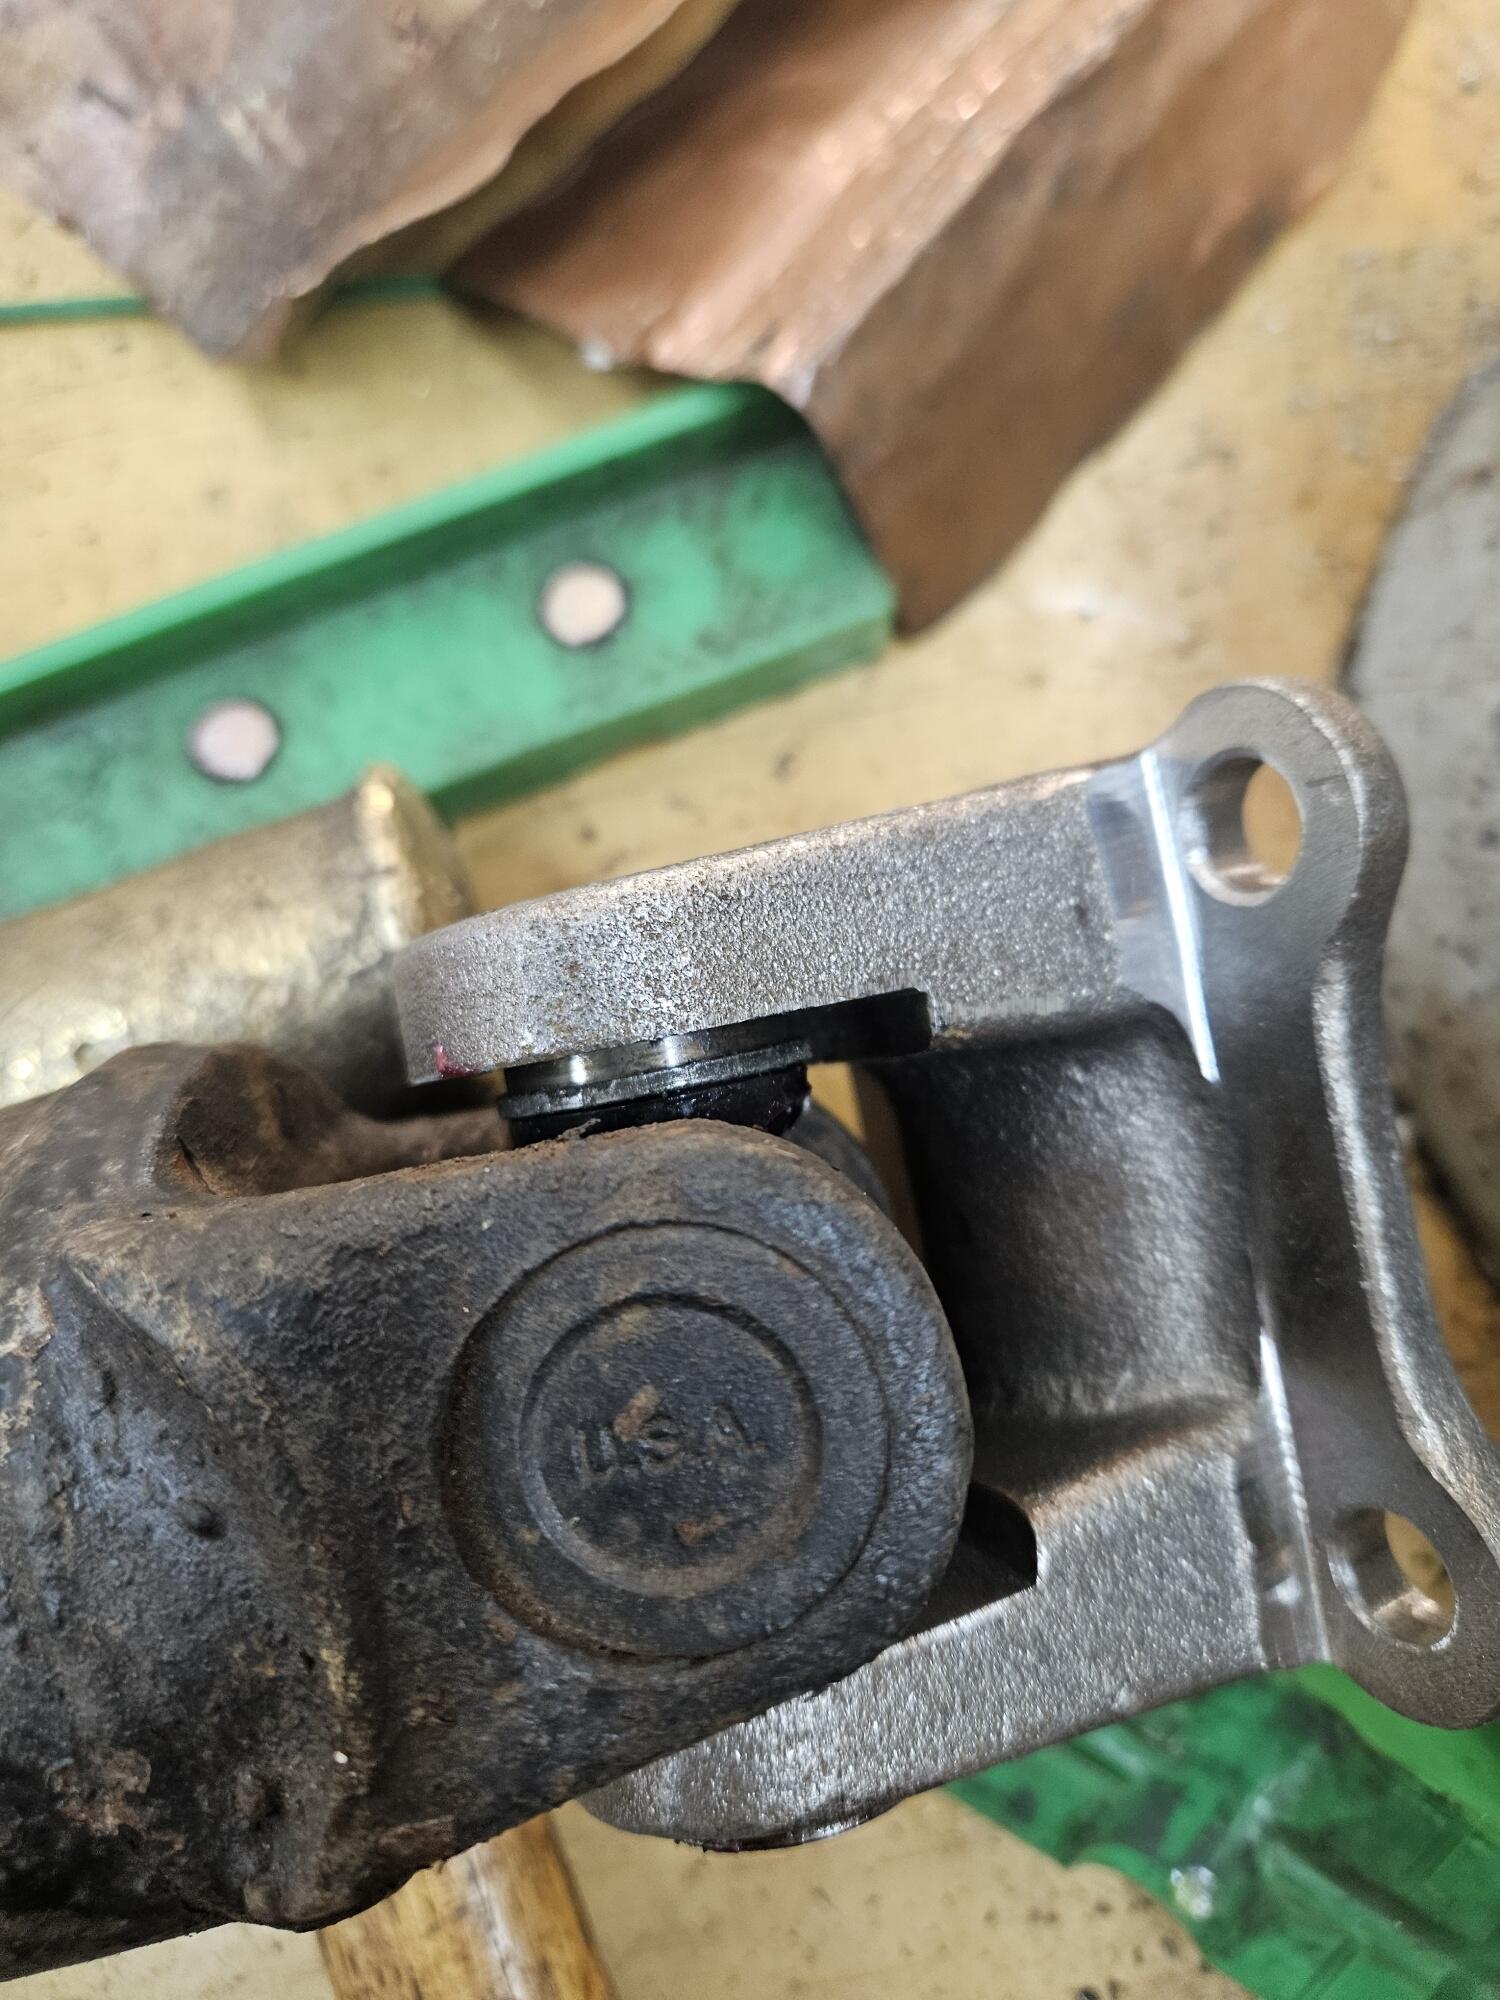
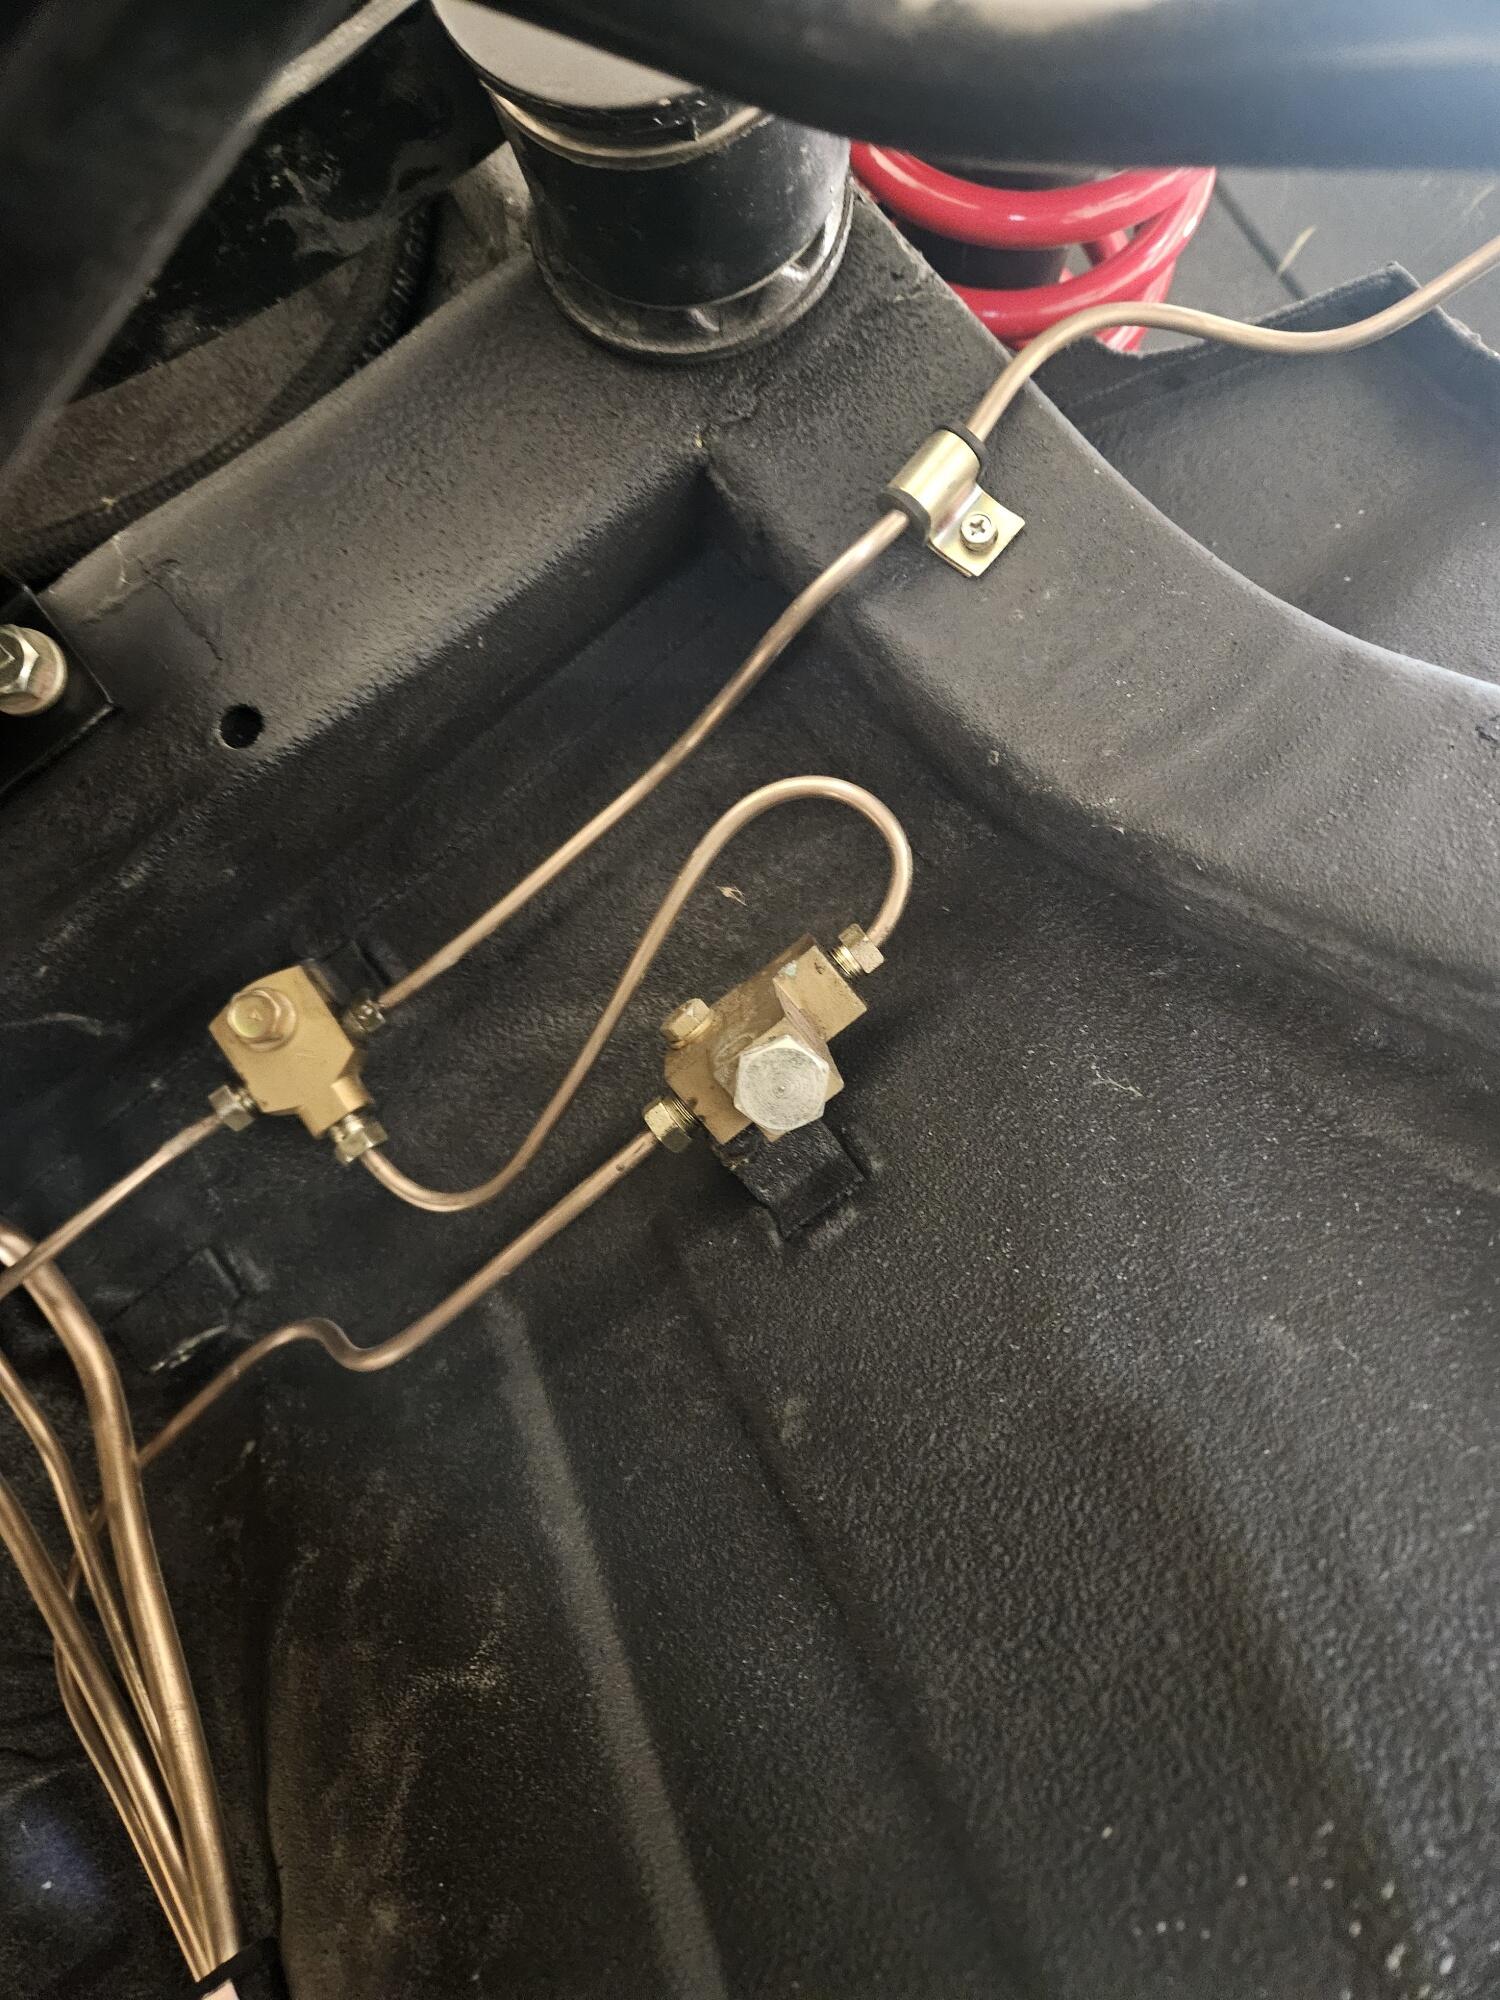
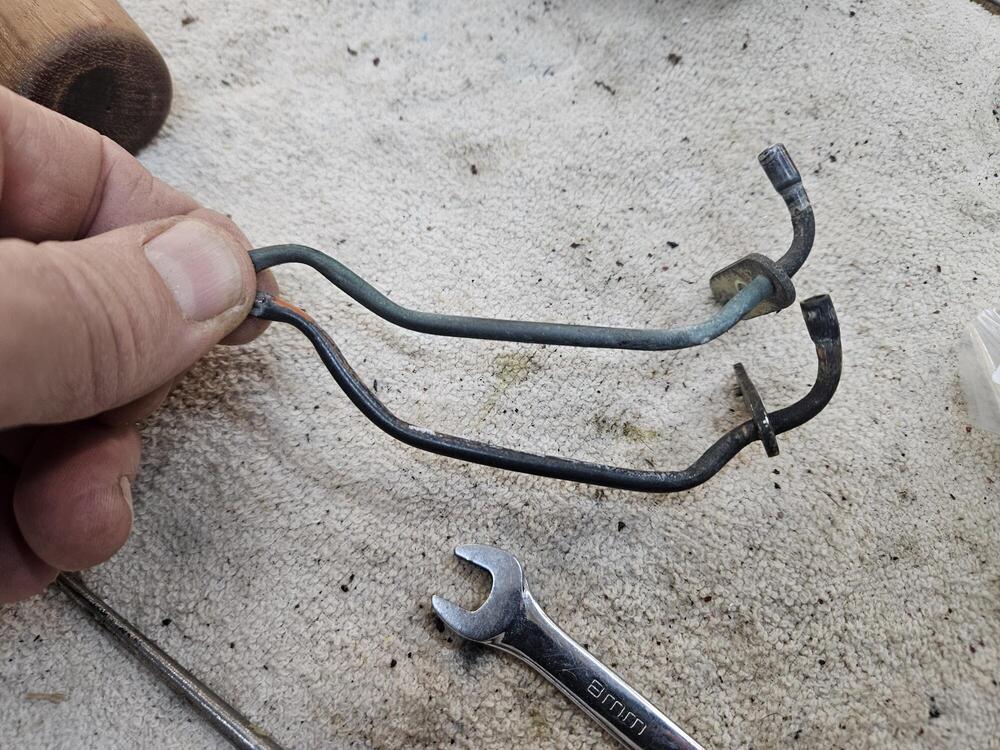
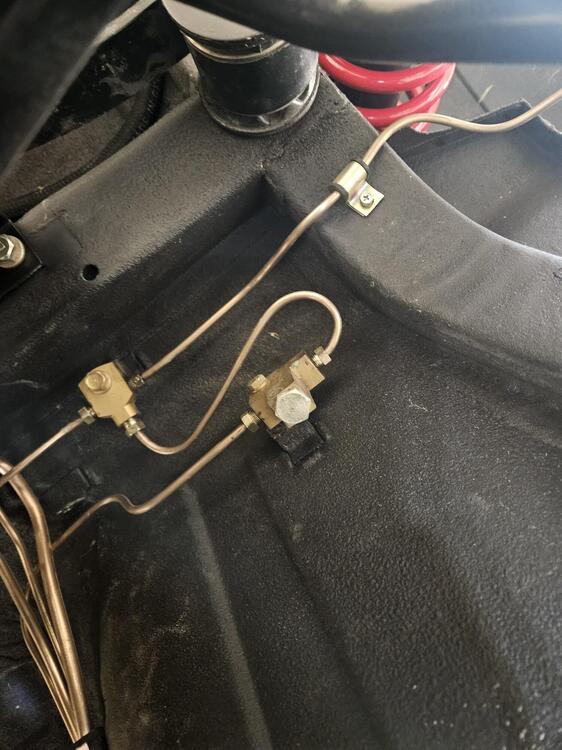
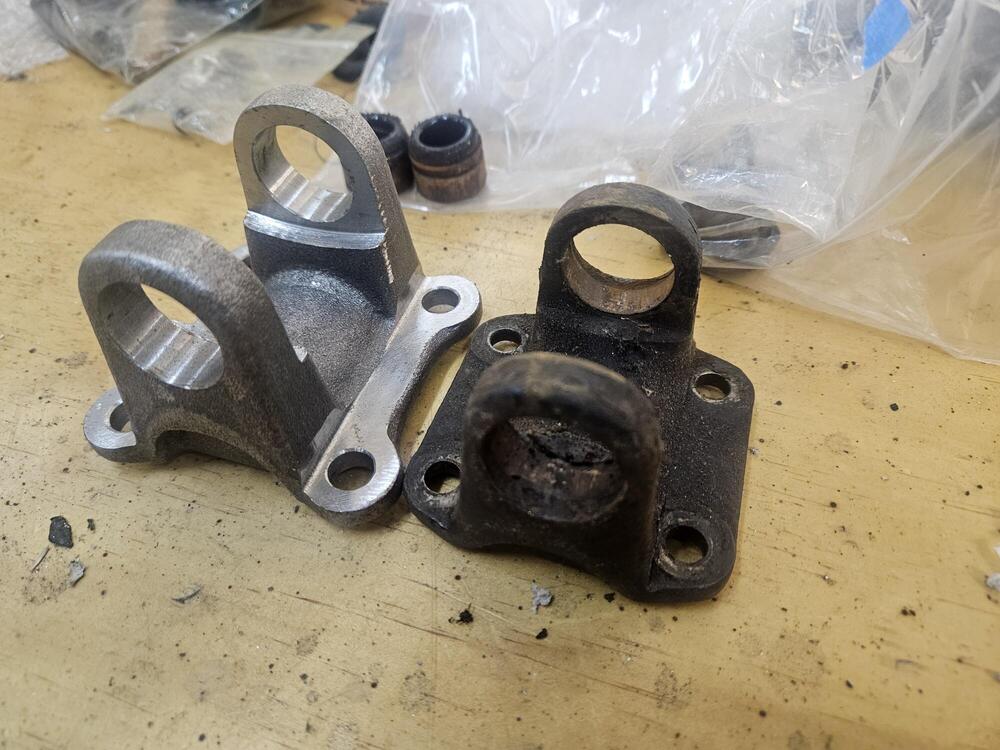
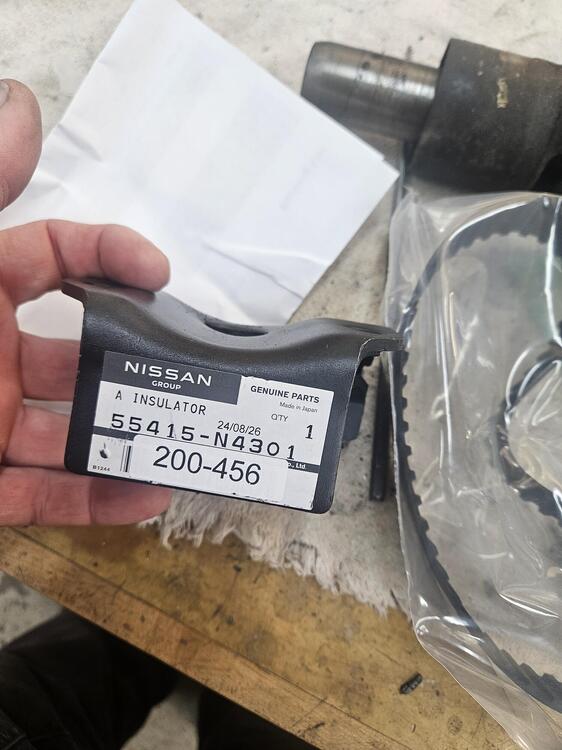
I am thinking I will remove the incoming line from the rear brake device and route it straight into the brass union I bought a R200 flange for the driveshaft from Zcardepot. Looks like it will work good. Here it is next to the old flange I also bought a new rear diff mount. I suspect these are available straight from Nissan

-
-
I use to be 6'-5" and never had that issue with the wheel. I agree, the seat seems to be really close to the wheel. Are the seat rails all the way against the floor bracket? Metal to metal? No plastic spacers in the way?
-
So at Thanksgiving Cody and I tried to prime his engine using a battery and a jump box. Eventually the battery ran down. So today I used my diesel F350 and jumper cables. I cranked it and cranked it. Even in the cold temperatures the starter got warm and I never got flow on the camshaft. So I am going to need to prime it with a drill. Does anyone offer a premade priming spindle? I might have any extra quill somewhere and could DIY something but was wondering if a premade solution existed?