jfa.series1
 Subscriber
-
Joined
-
Last visited
Everything posted by jfa.series1
-
 Rockers and nubs, note the burnt/worn nub at the top right that needs replacing. Buildup on the rockers that needs to be polished out.
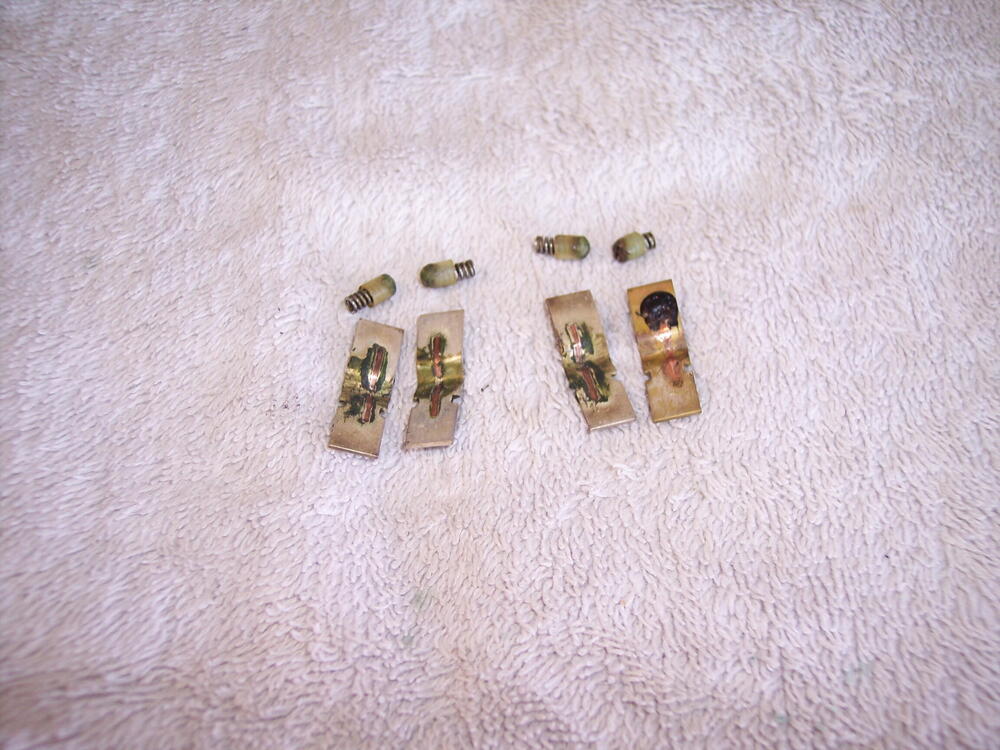
-
The factory had shims that installed at the hinge mount points to correct the alignment when needed, sounds like it is time for one on your ride. I'll look to see if I have one in my collection of bits and pieces.
-
The two at the top right are the hood corner stops that get a rubber cover, install behind the rear hood seal. The bracket at the bottom right is for the flow guide valve under the ballast resistor. The two in the middle right might be for the wiper arm.
-
+1 on agree. I see it as a splash shield to keep excess water out of the door sill. Look at the outer hatch seal and you will see a similar function - it is the first line of defense for the hatch area, not a perfect seal but enough to deflect most of the water.
-
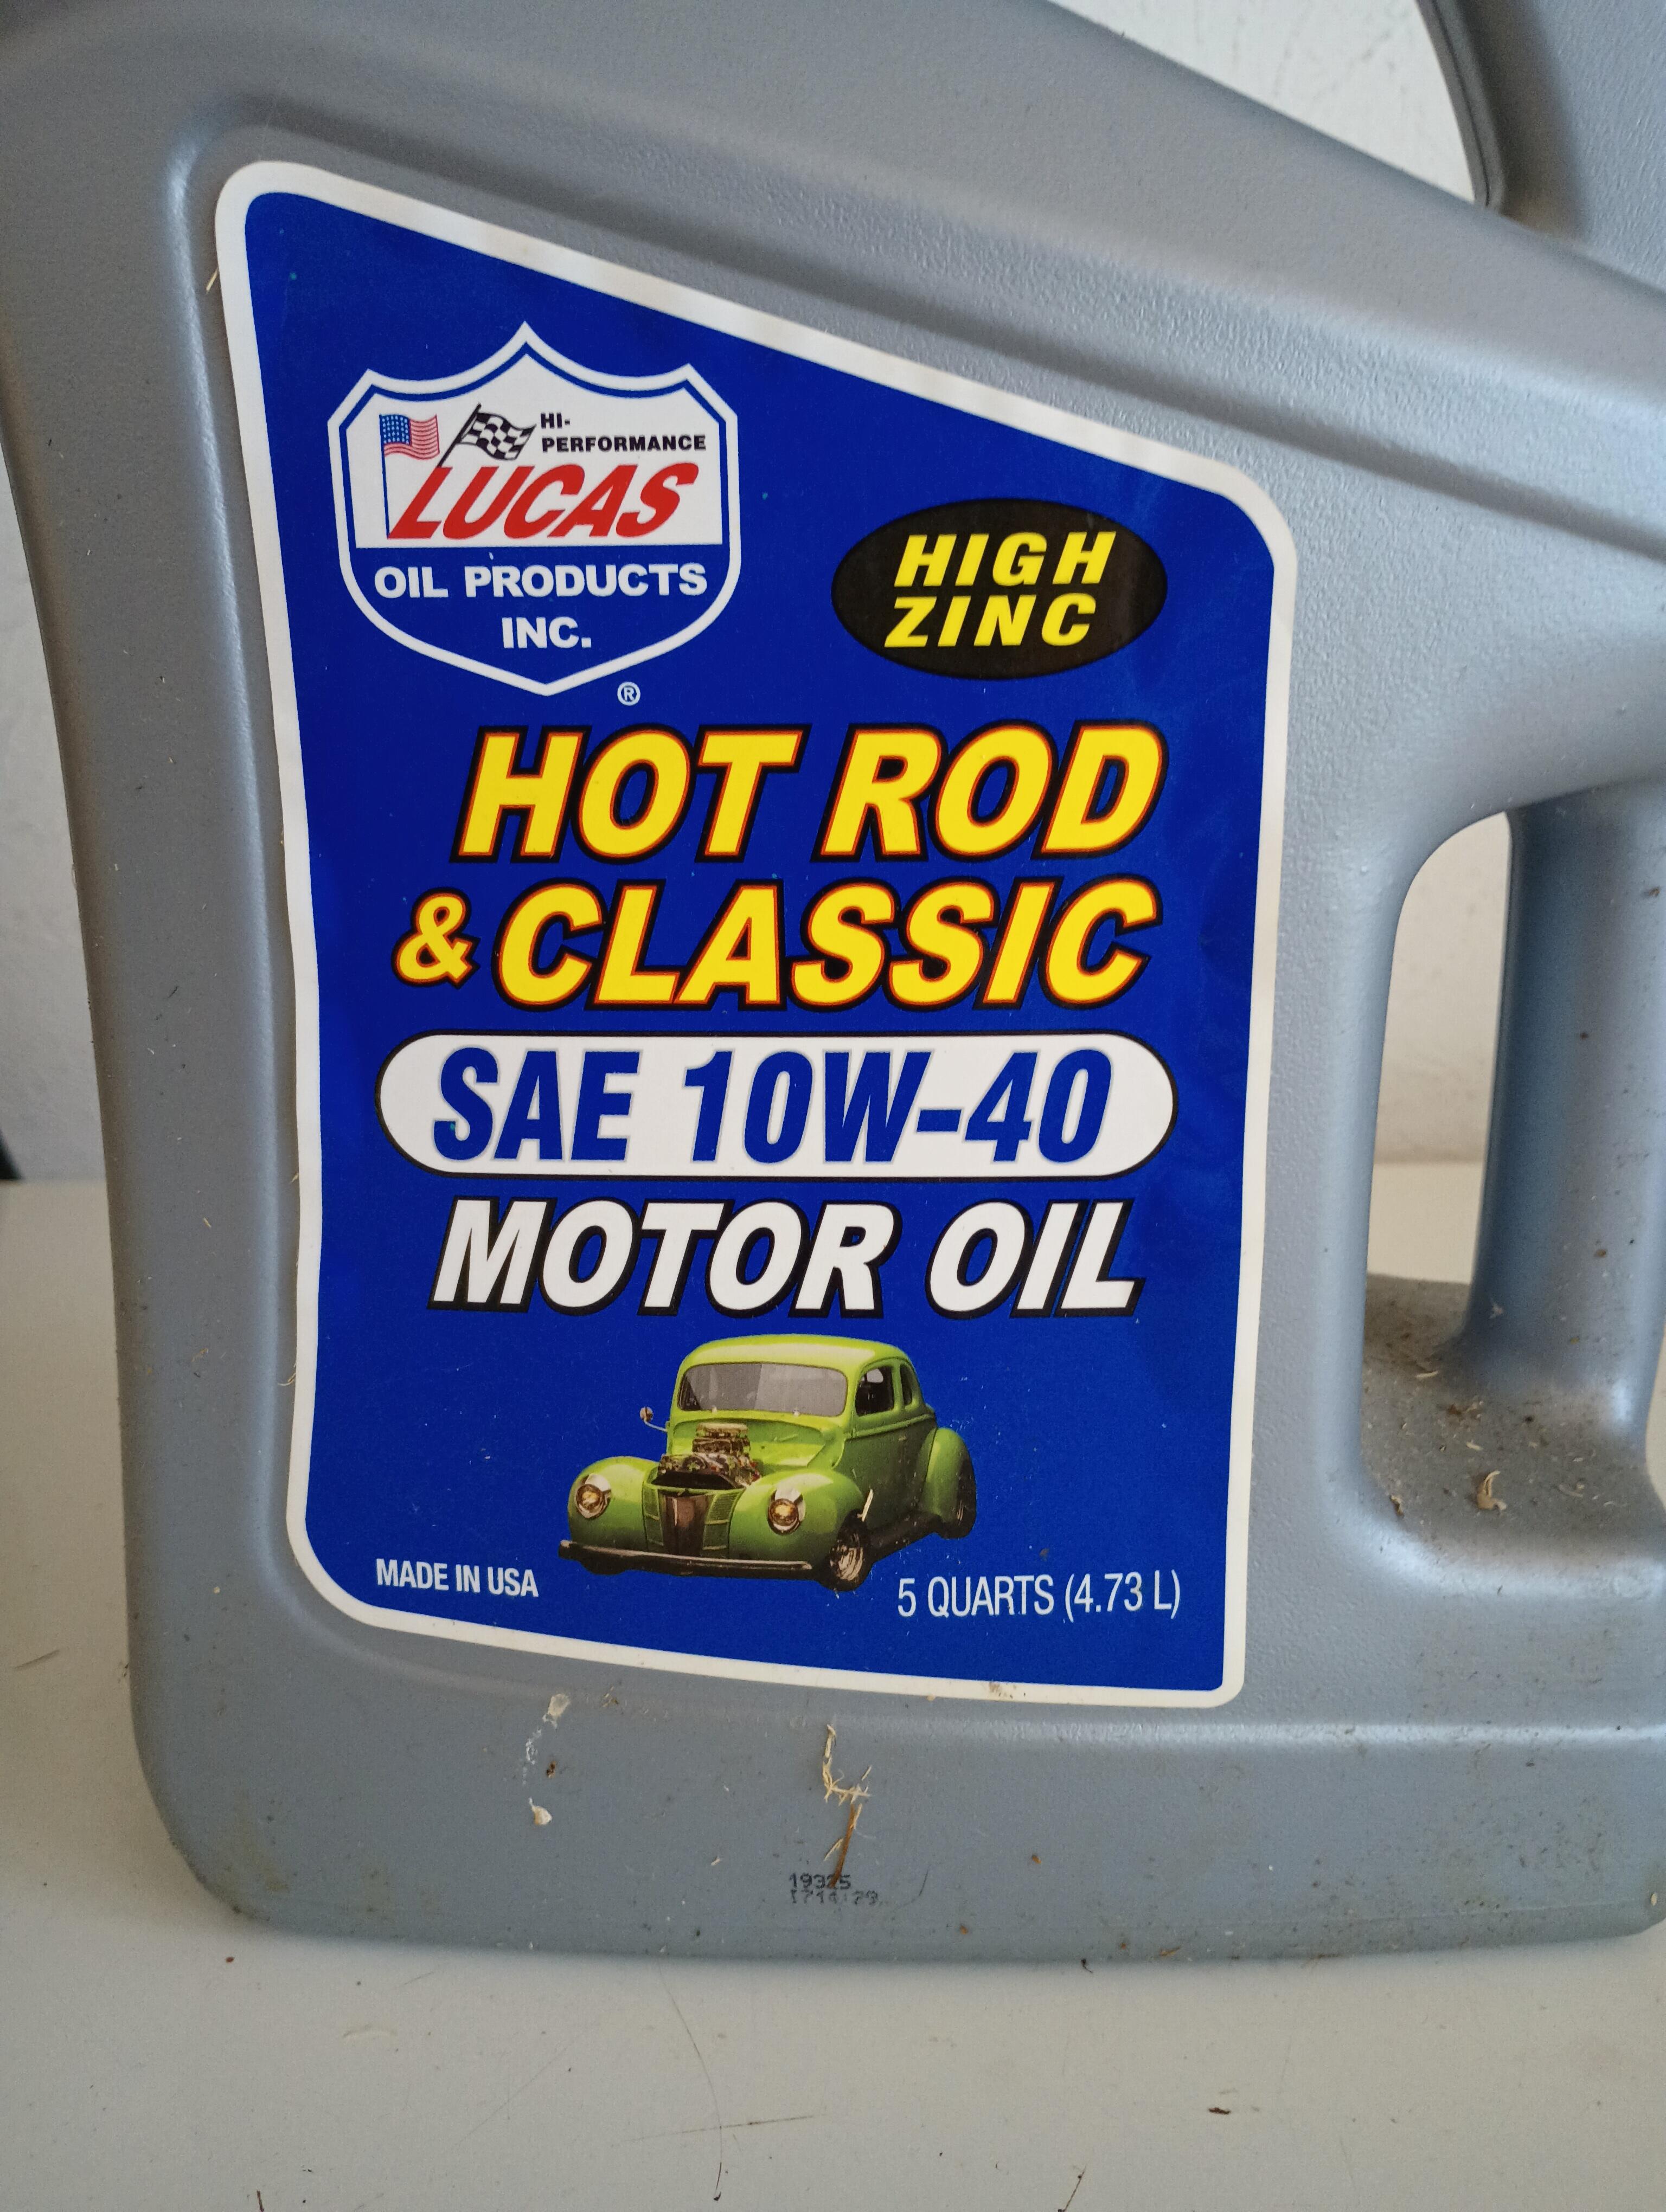
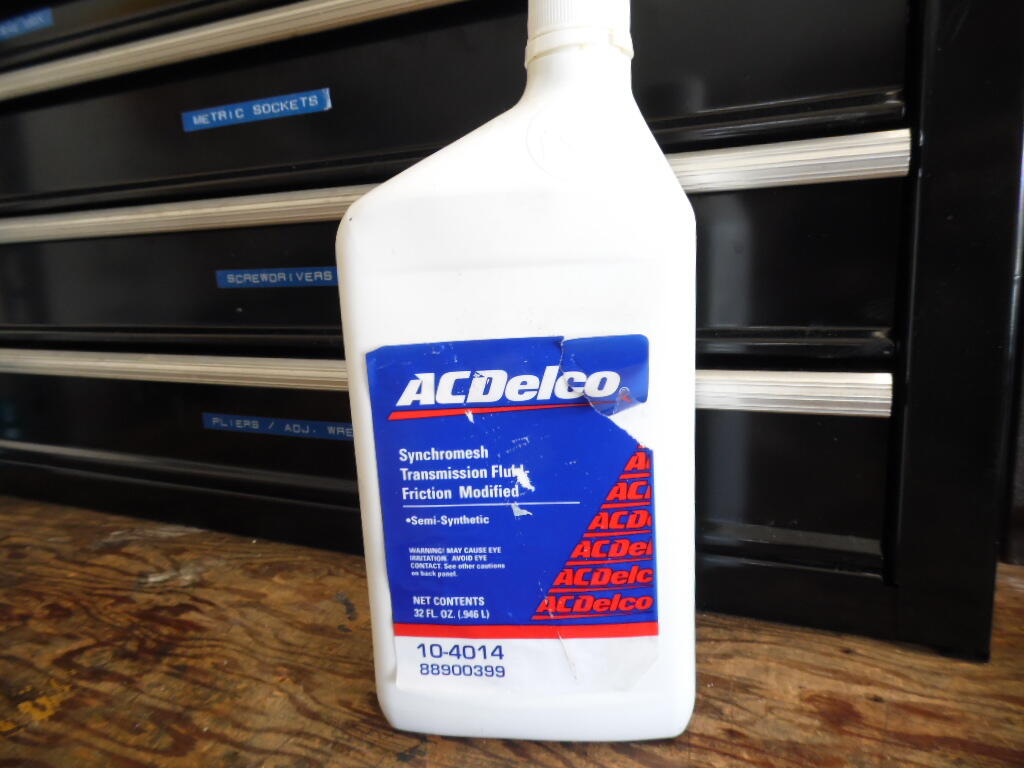
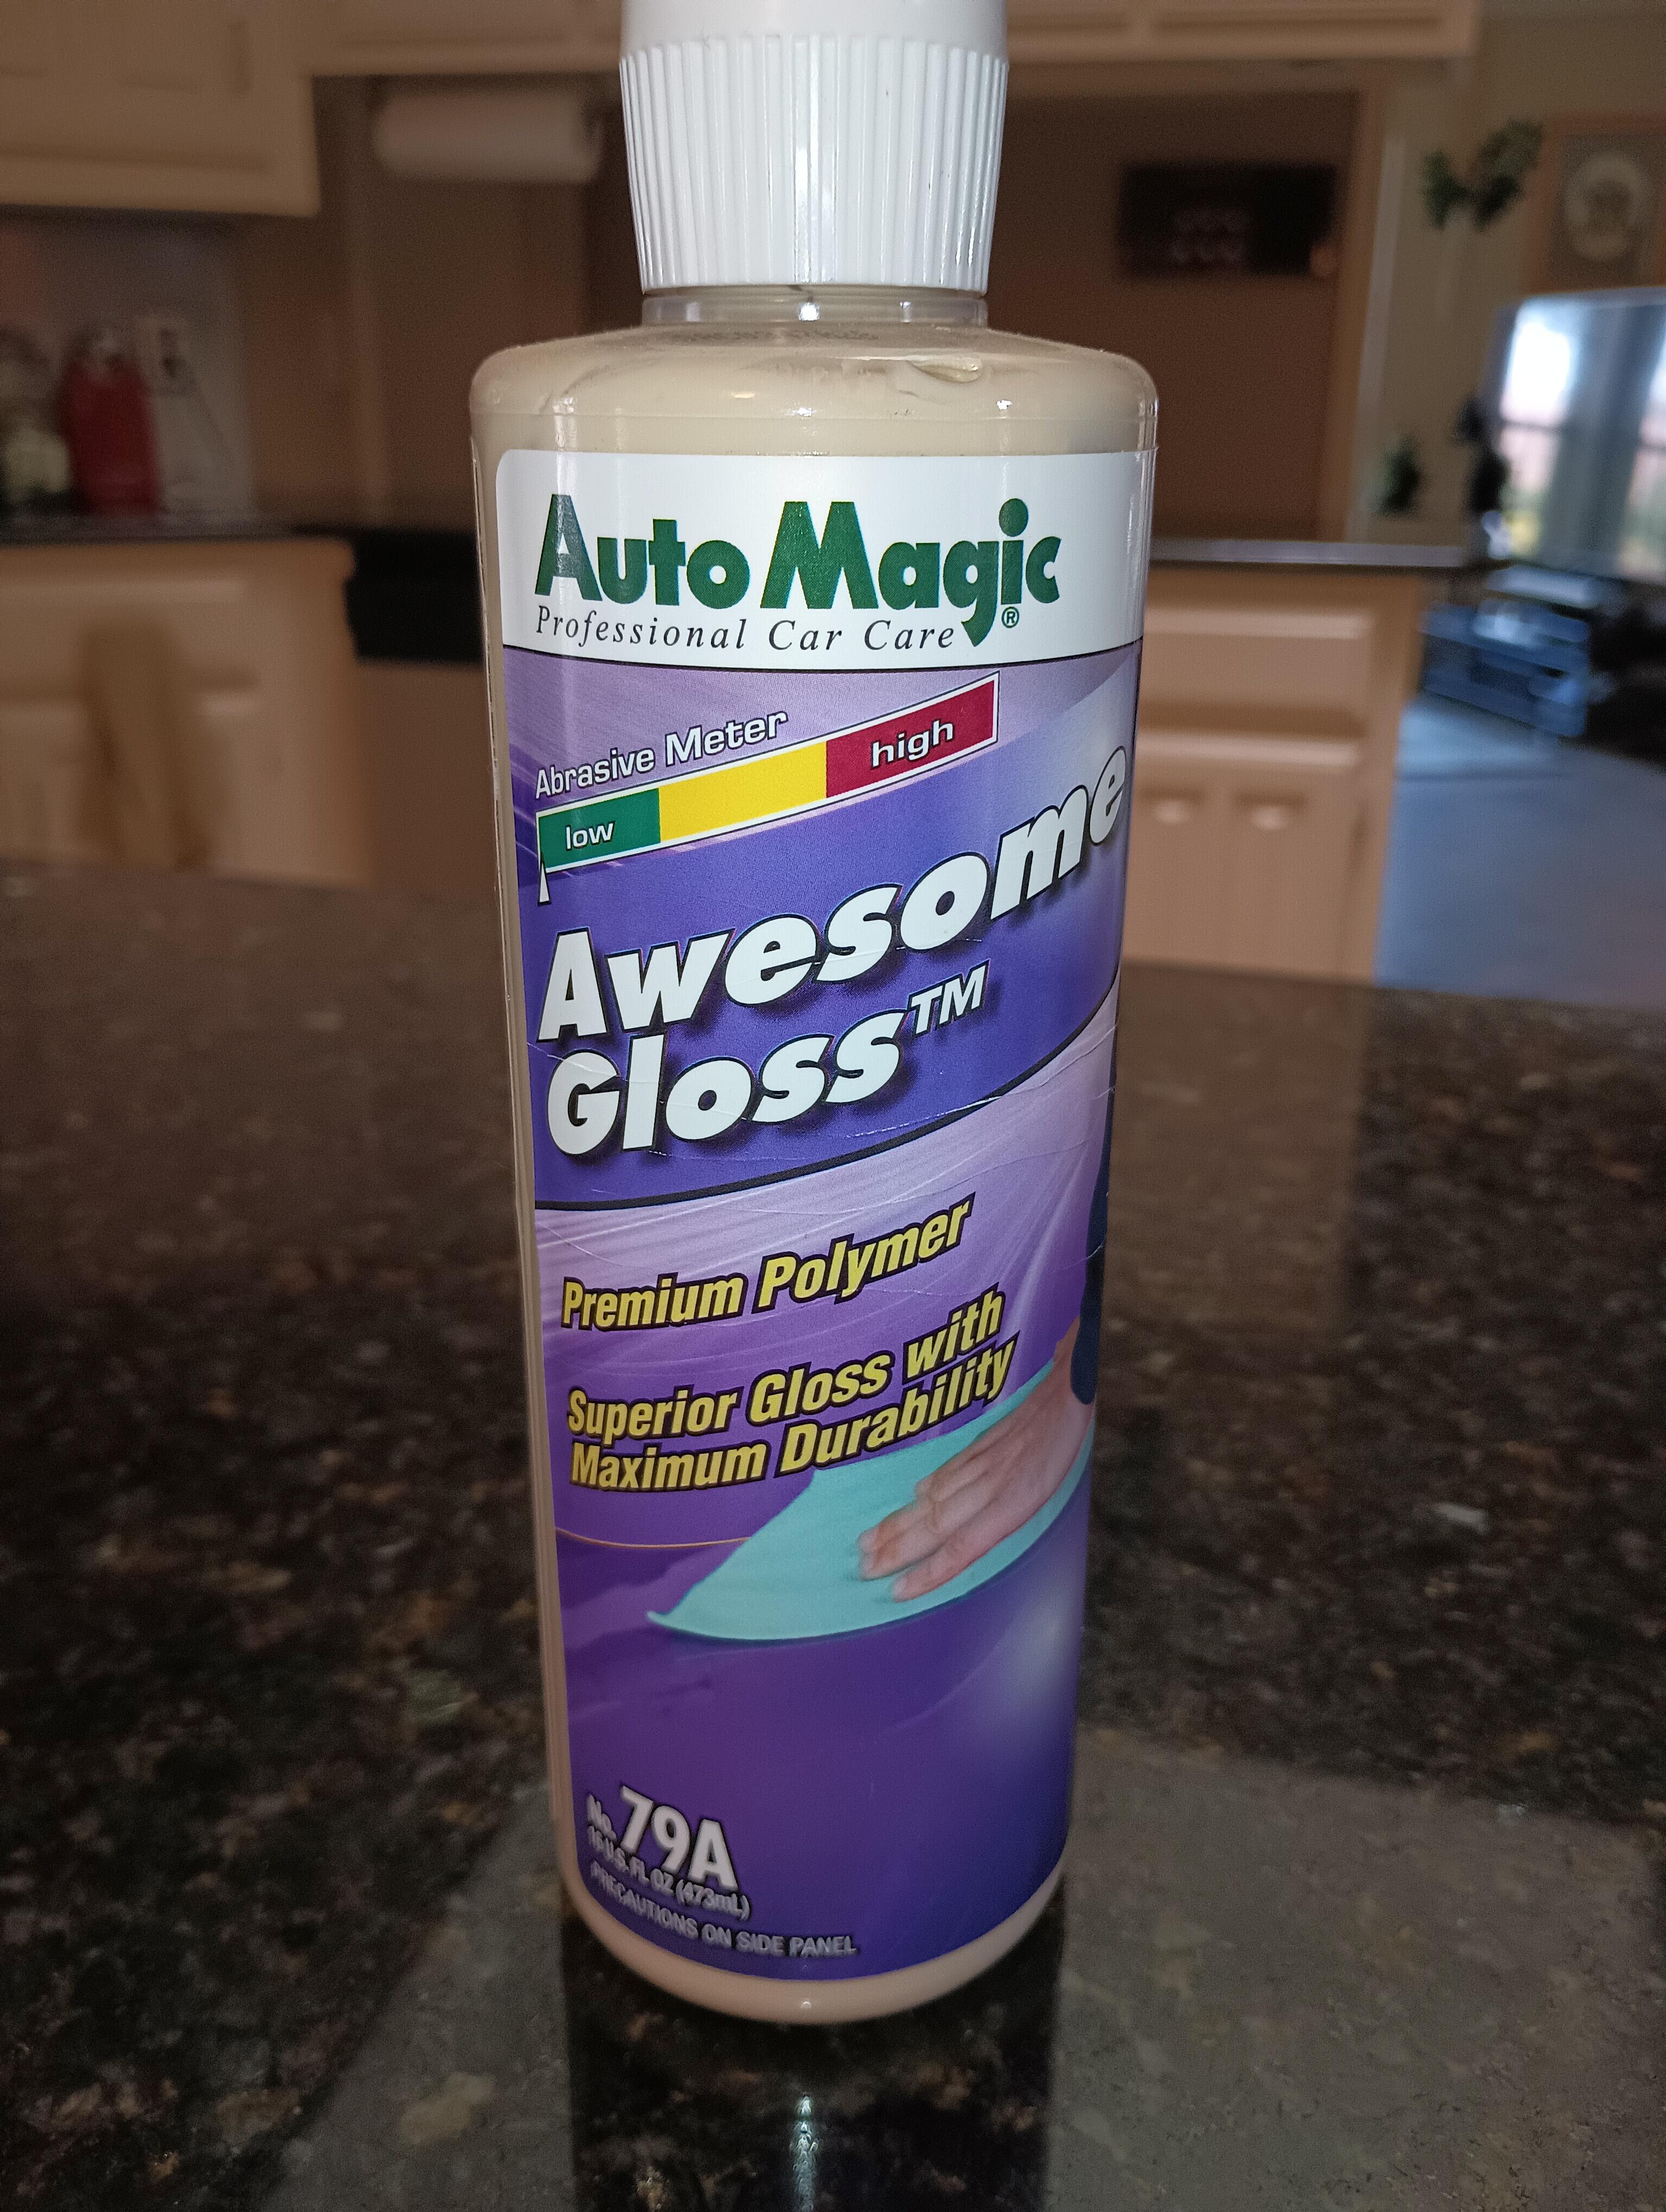
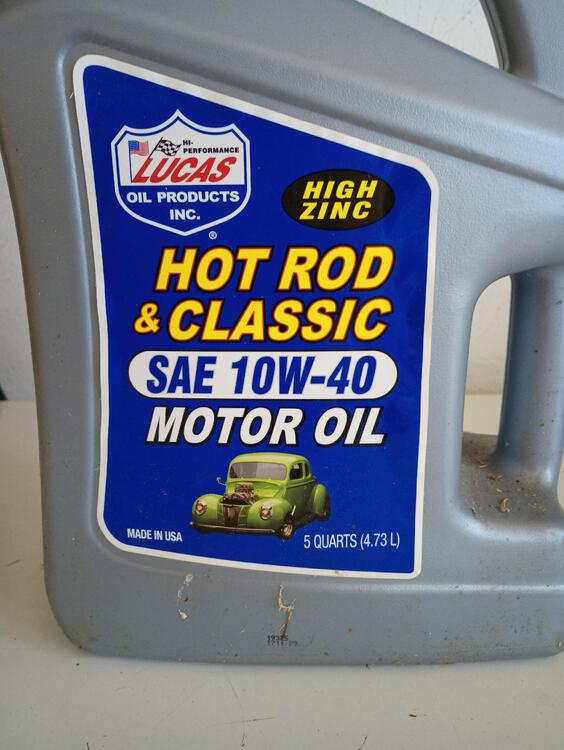
Here are a couple of good products for you - a high zinc oil and great transmission fluid for our old gearboxes. The old paint might benefit from a good clay bar treatment to get rid of old wax, dirt and other buildup, followed by a non-wax polish such as AutoMagic Awesome Gloss, topped off by the ceramic coat or wax of your choice. The clay bar process might leave a few swirl marks so the Awesome Gloss is a way to polish them out.


-
-
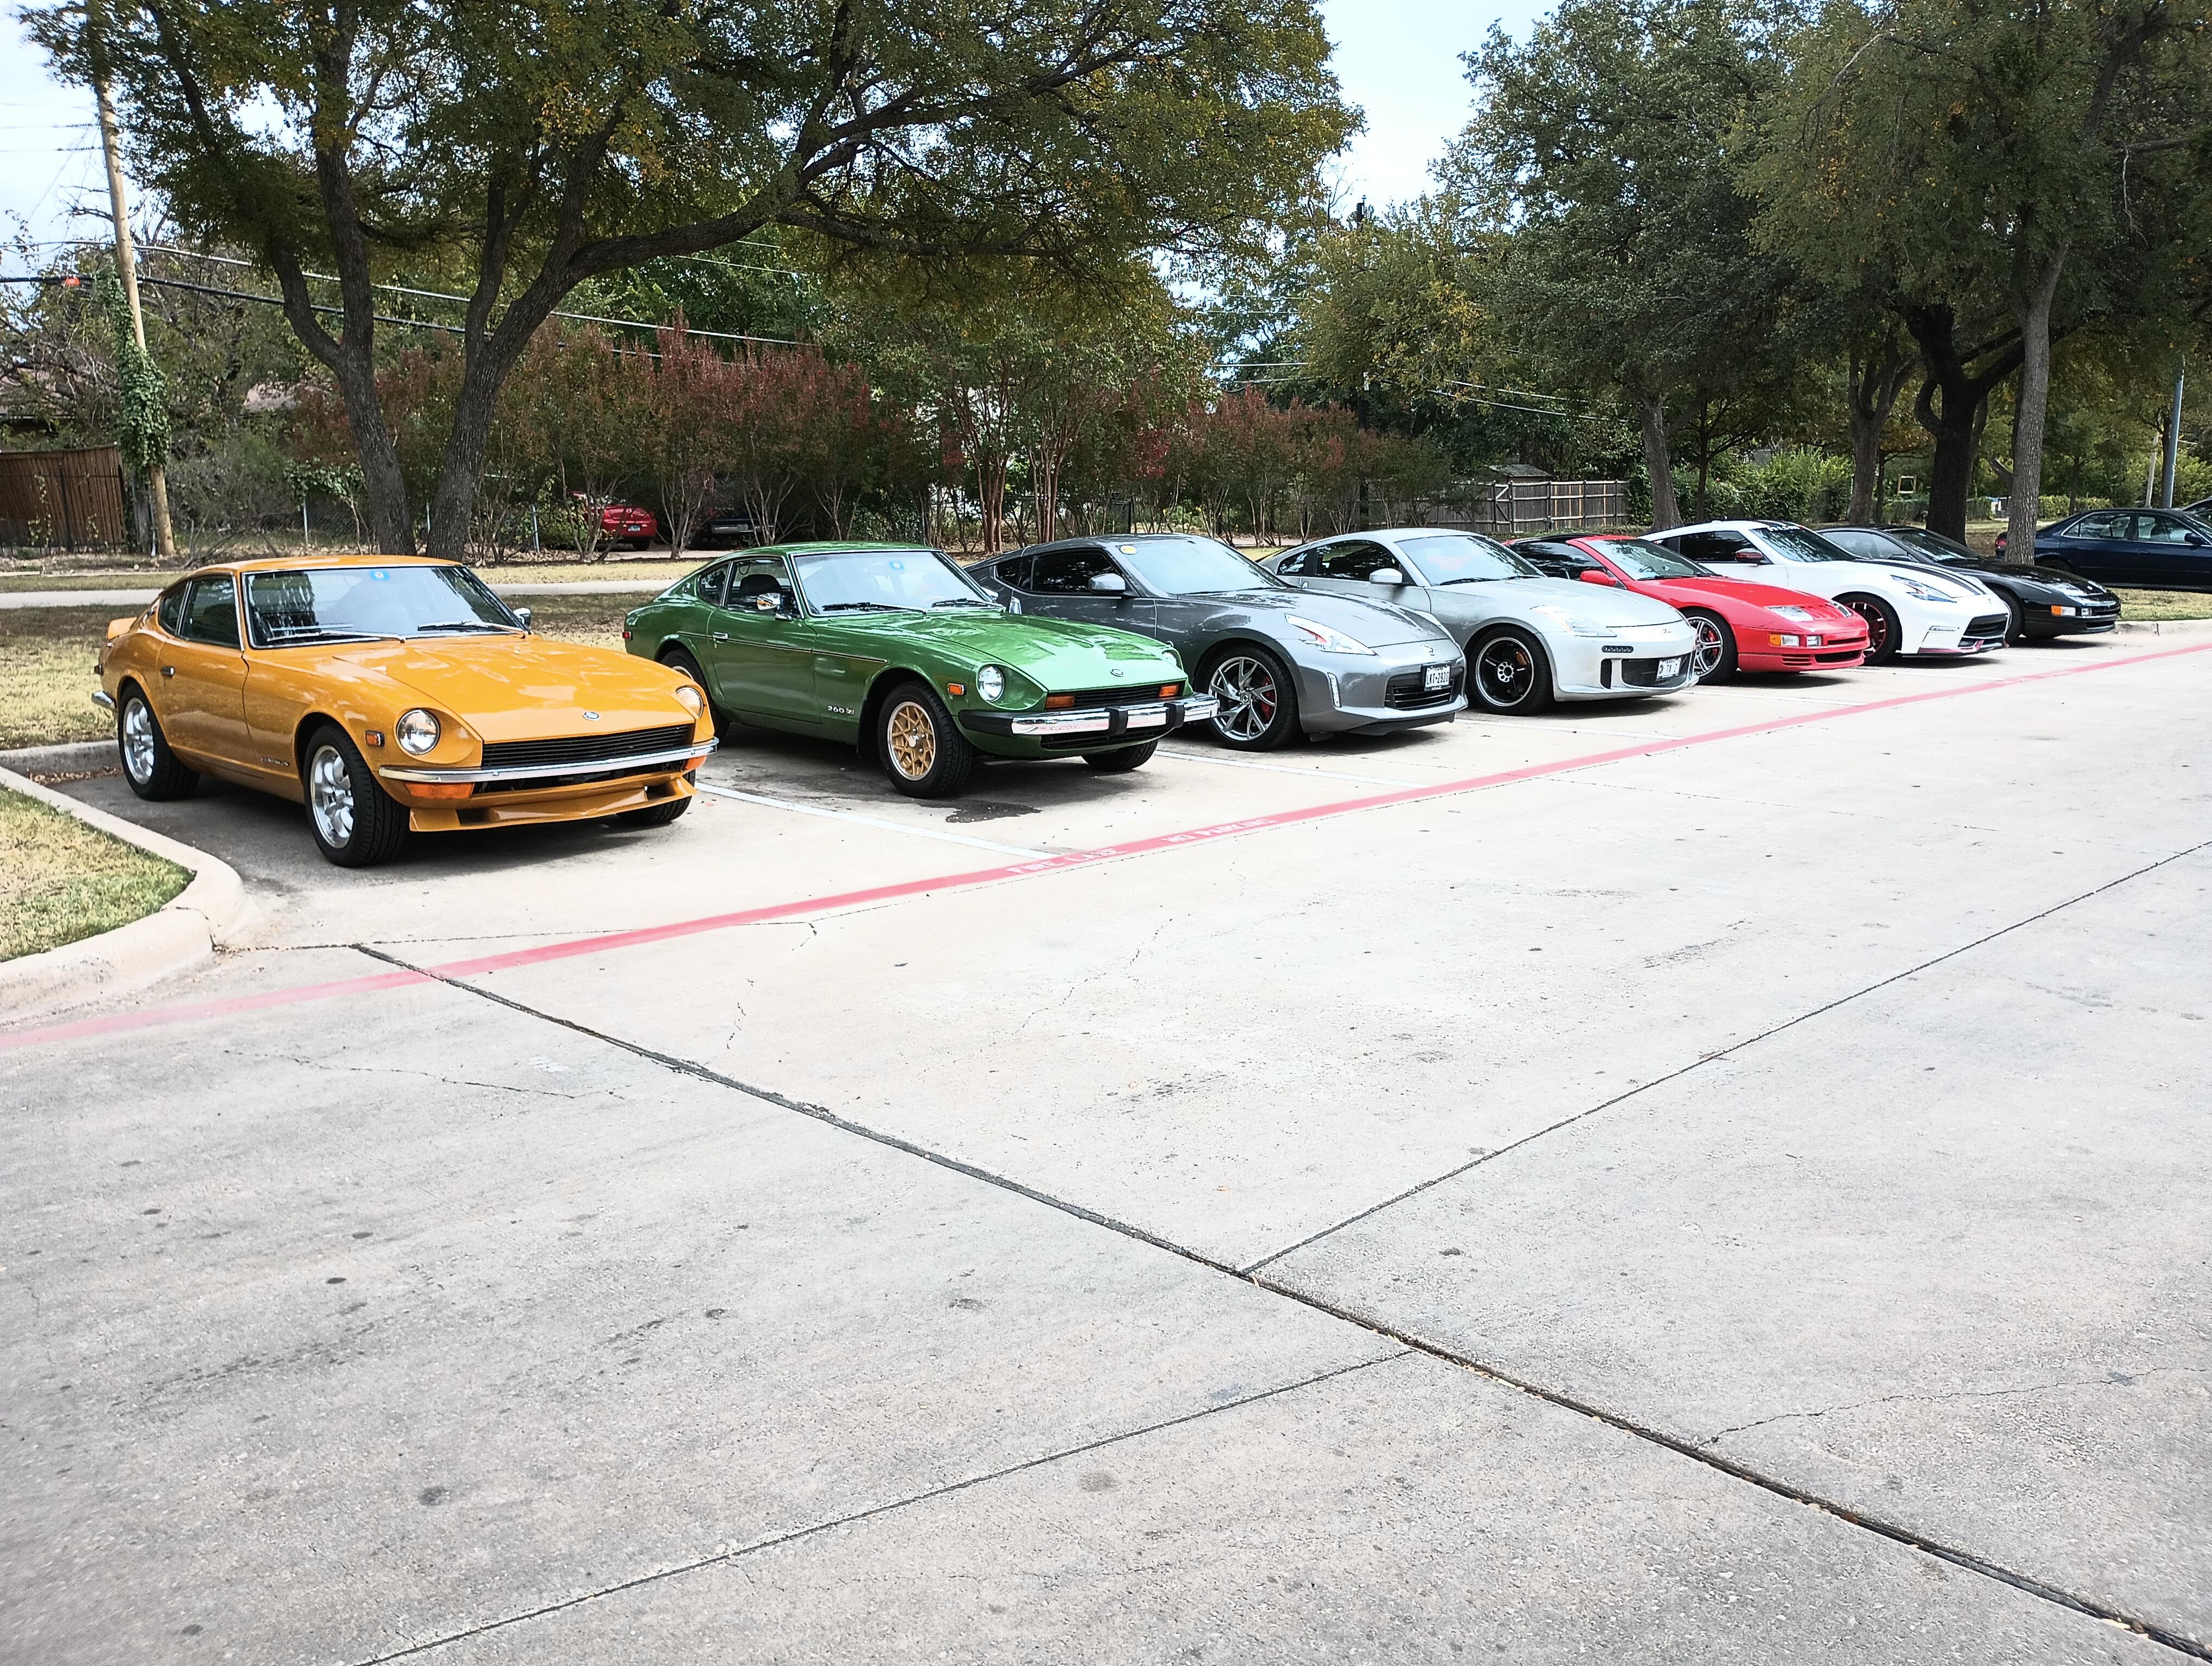
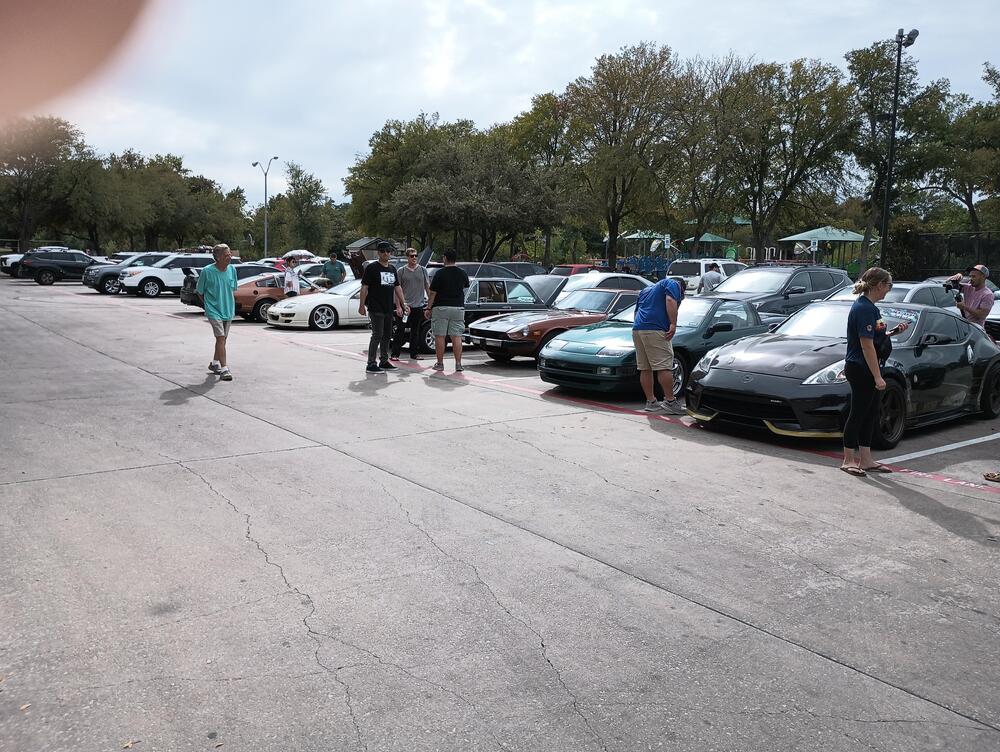
Attended a Z Club of Texas Fall Picnic yesterday, we are hoping to make this an annual event. Great weather and a really nice turnout. Yes, that is my fat finger in the corner of one pic.

-
Great looking car, congrats on your acquisition! You certainly picked the right color for your first Z and I'm not at all predjuiced, nope - not one bit! 😉 Welcome to the group, the source of lots of helpuful information and no snarky comments.
-
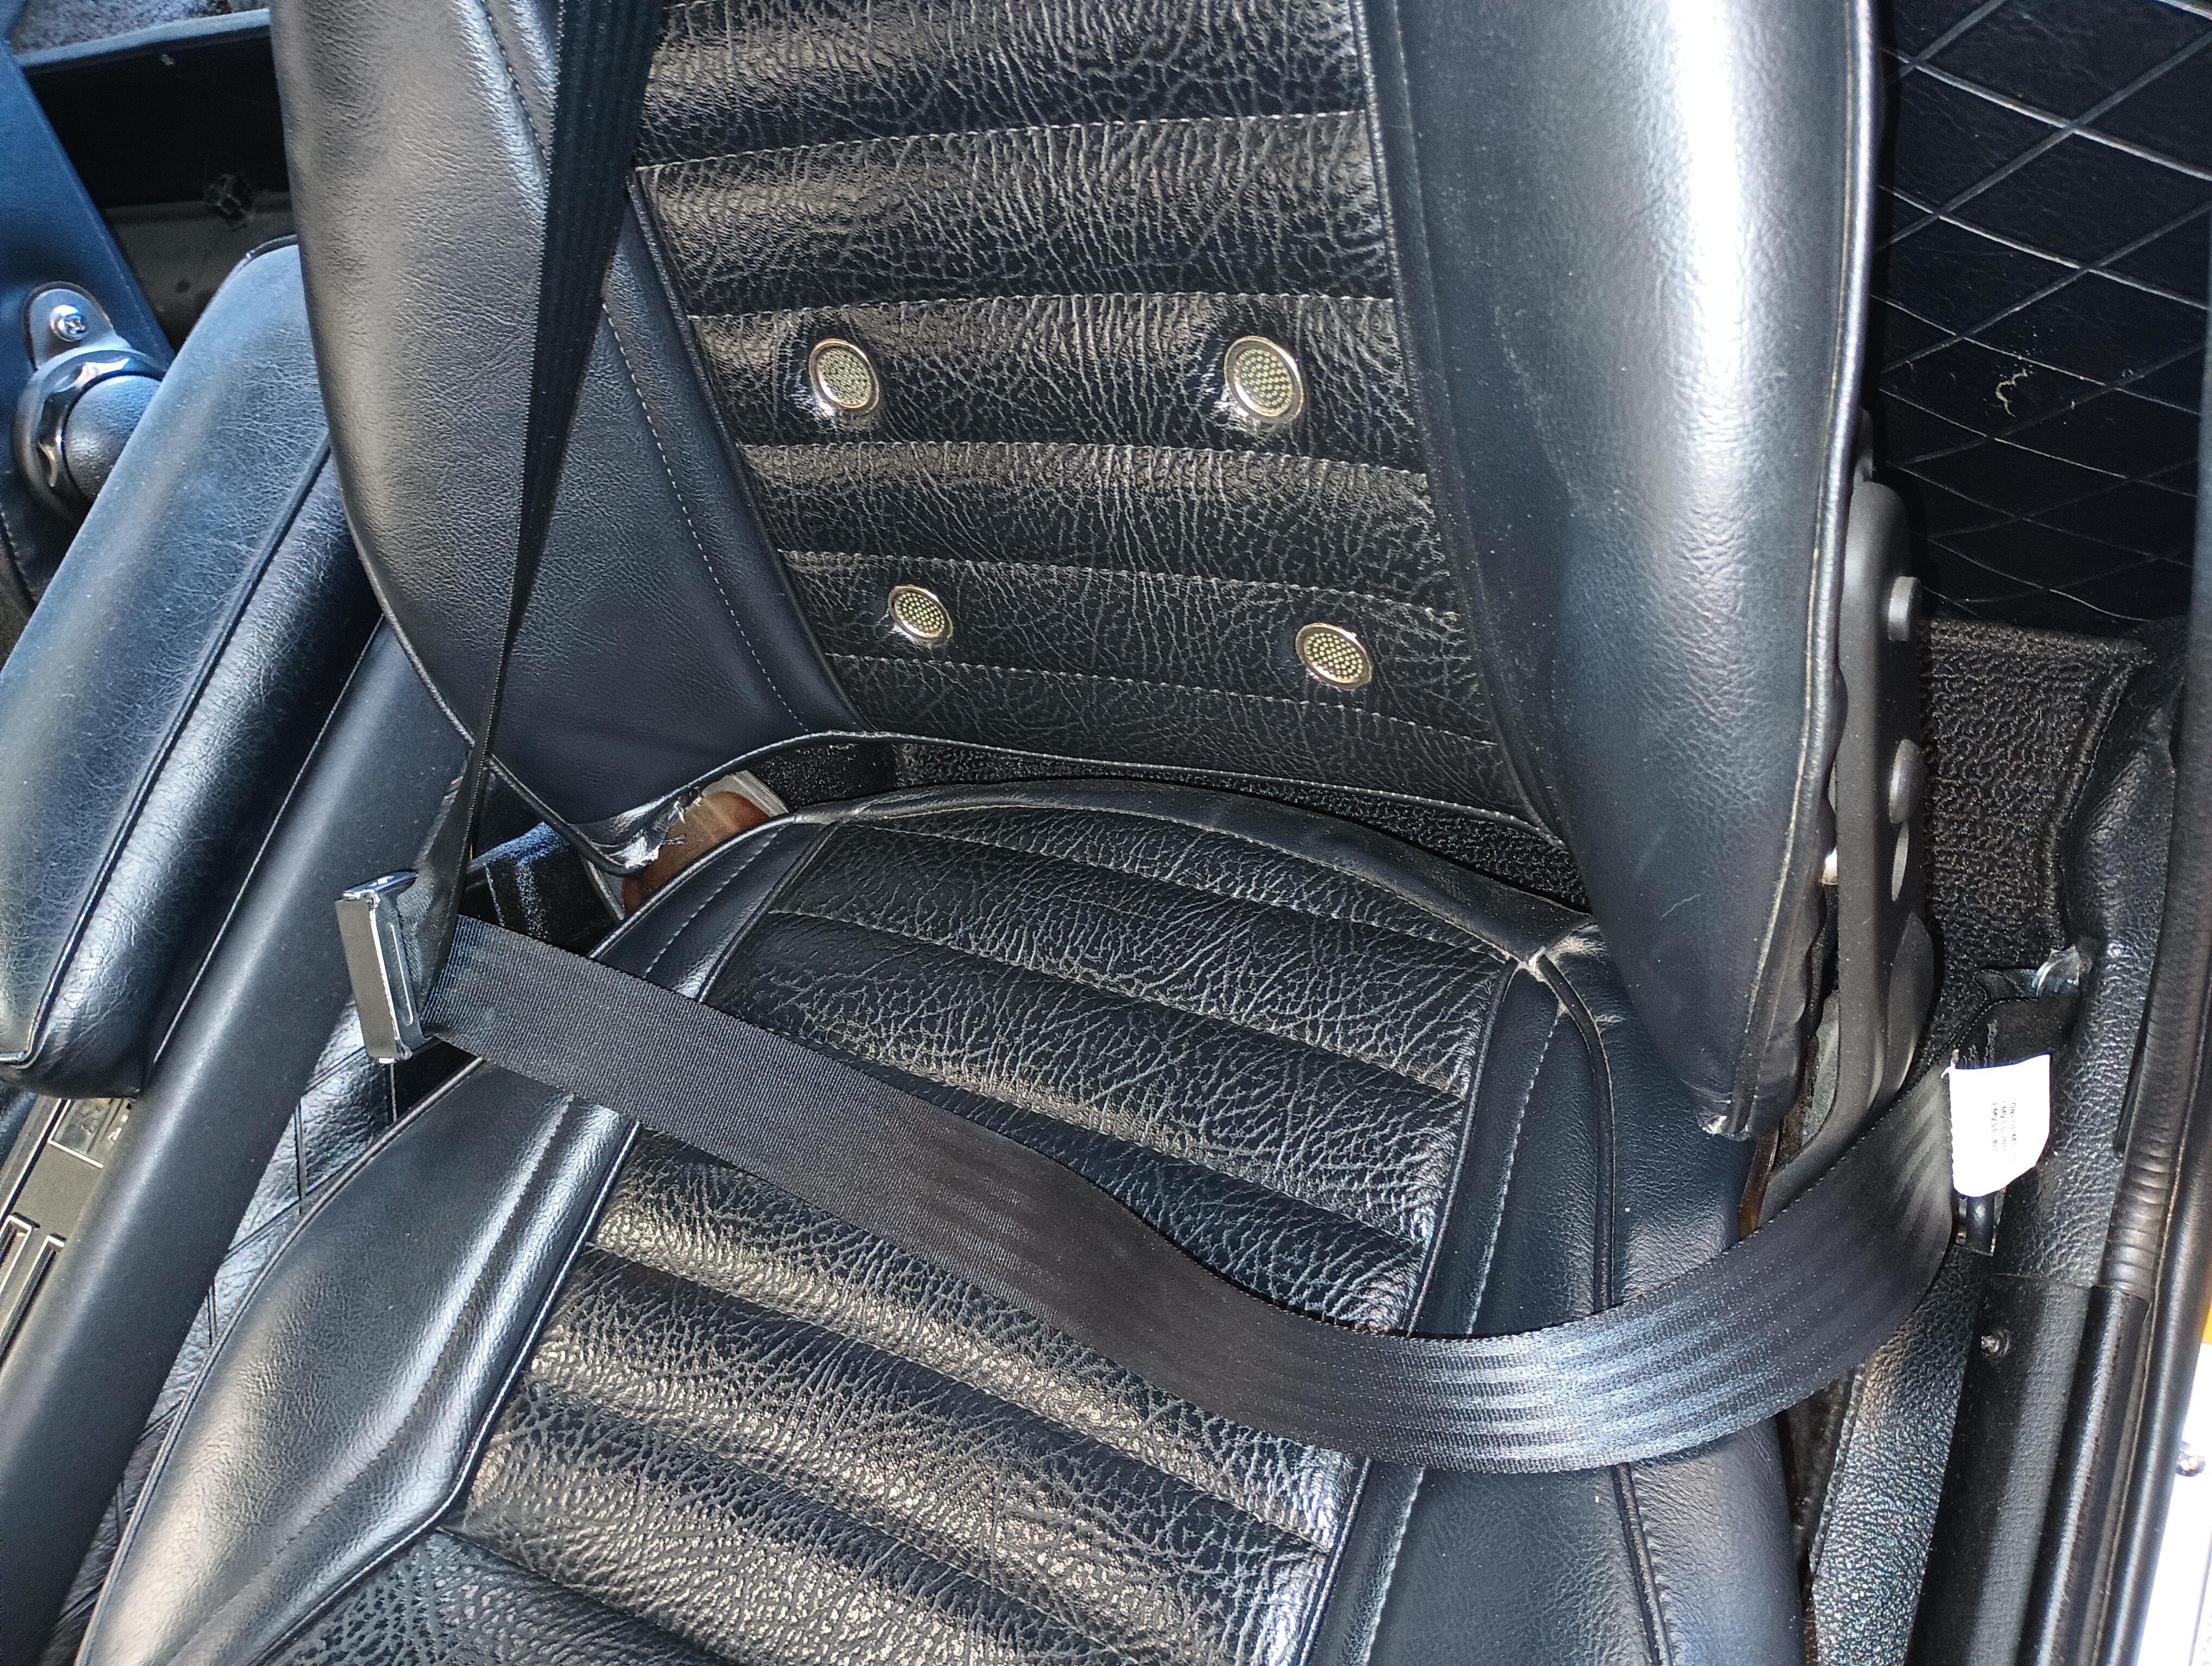
Correct, it is a toggle. There is a cam of sorts on the roller pin that flips from one side to the other. This in turn flips the contact rocker from one side to the other. I doubt that changing out the spring is going to have the desired effect since the phenolic board for the wiring is broken and moves every time the cam is flipped..
-
OMG... I didn't know that anyone else used this same Rube Goldberg technique as I did 13 years ago! With no car guys anywhere around, i had to single-hand virtually all of my assembly. Wierd creativity was sometime called for. 😉
-
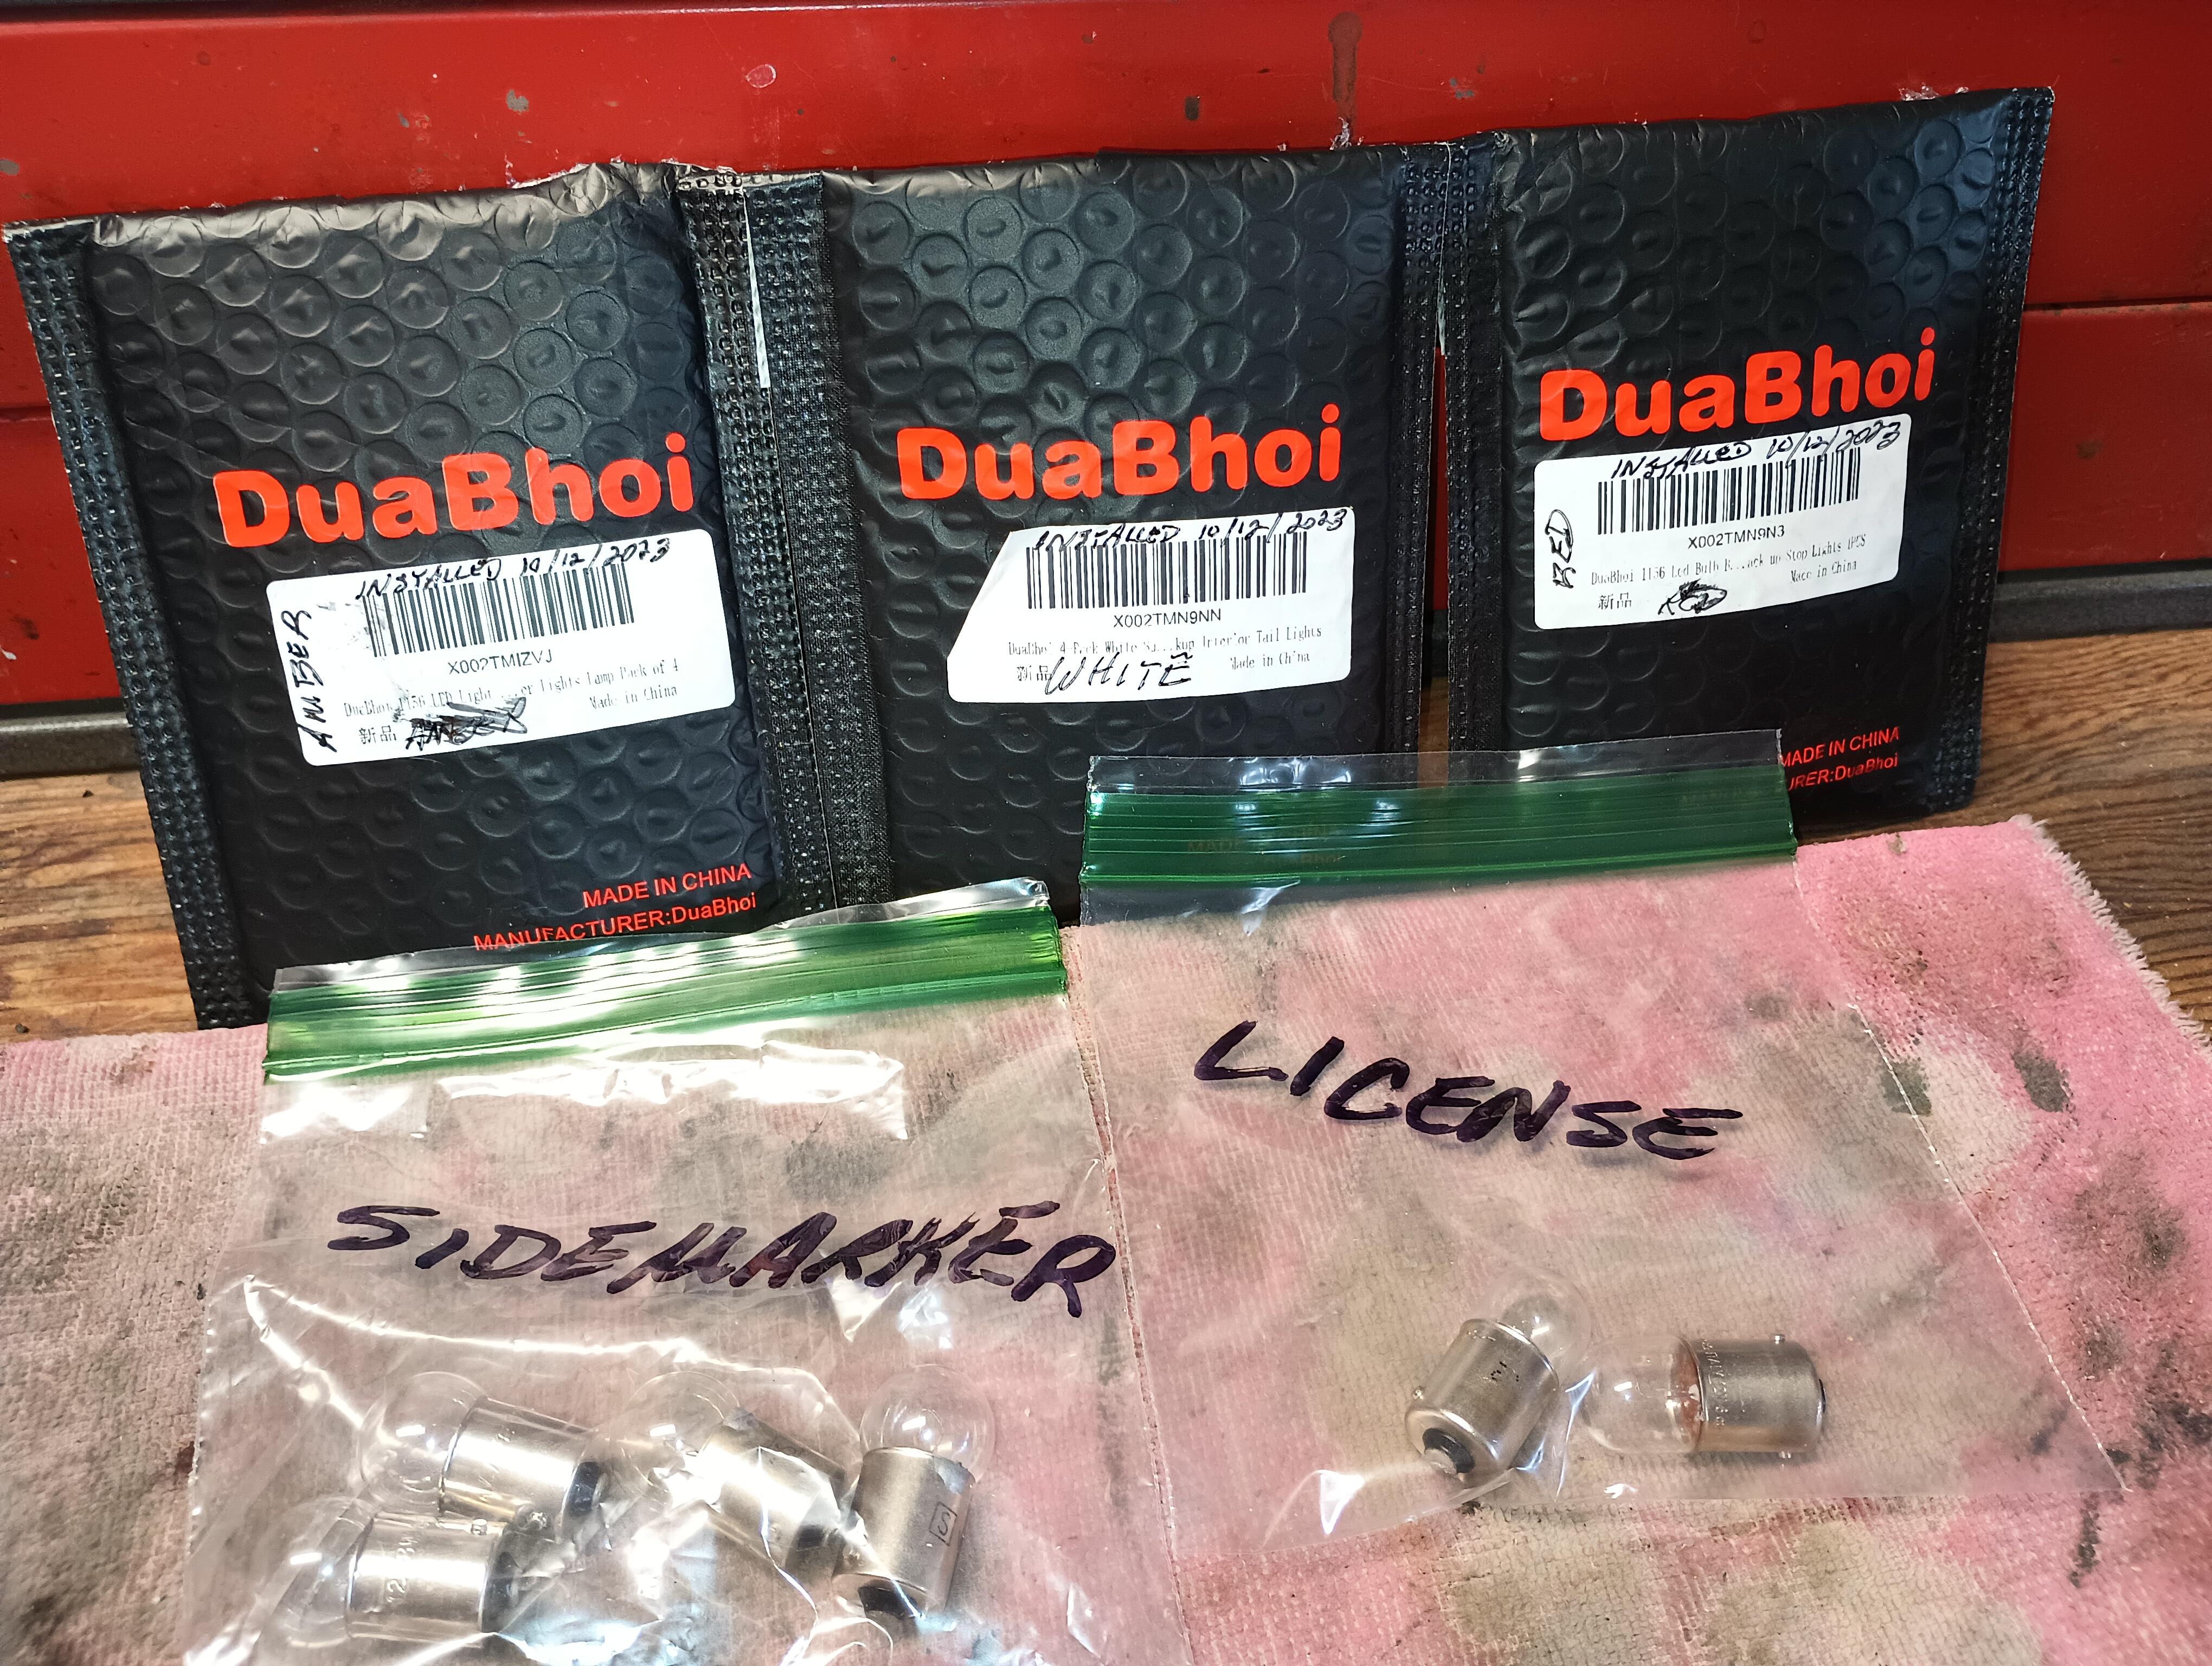
Hey Steve, I'm drinking your kool-aid and changing out some bulbs for LED's, the sidemarkers and license light are done. My 204Z and presumably yours have a two-filament bulb for the front parkling light / turn signal. The amber LED in your list for front turn signal appears to have only a single pole. Is there a two-pole amber LED in your recommendations? Thanks, Jim VID_20231013_113401697.mp4

-
Had to do this PITA repair so very many years ago. Possibly seperate the compressor from the bracket to increase manuverability of the bracket?
-
Awesome work Charles. All the credit for the paint products selection goes to @CanTechZ who did all the testing to make this possible.
-
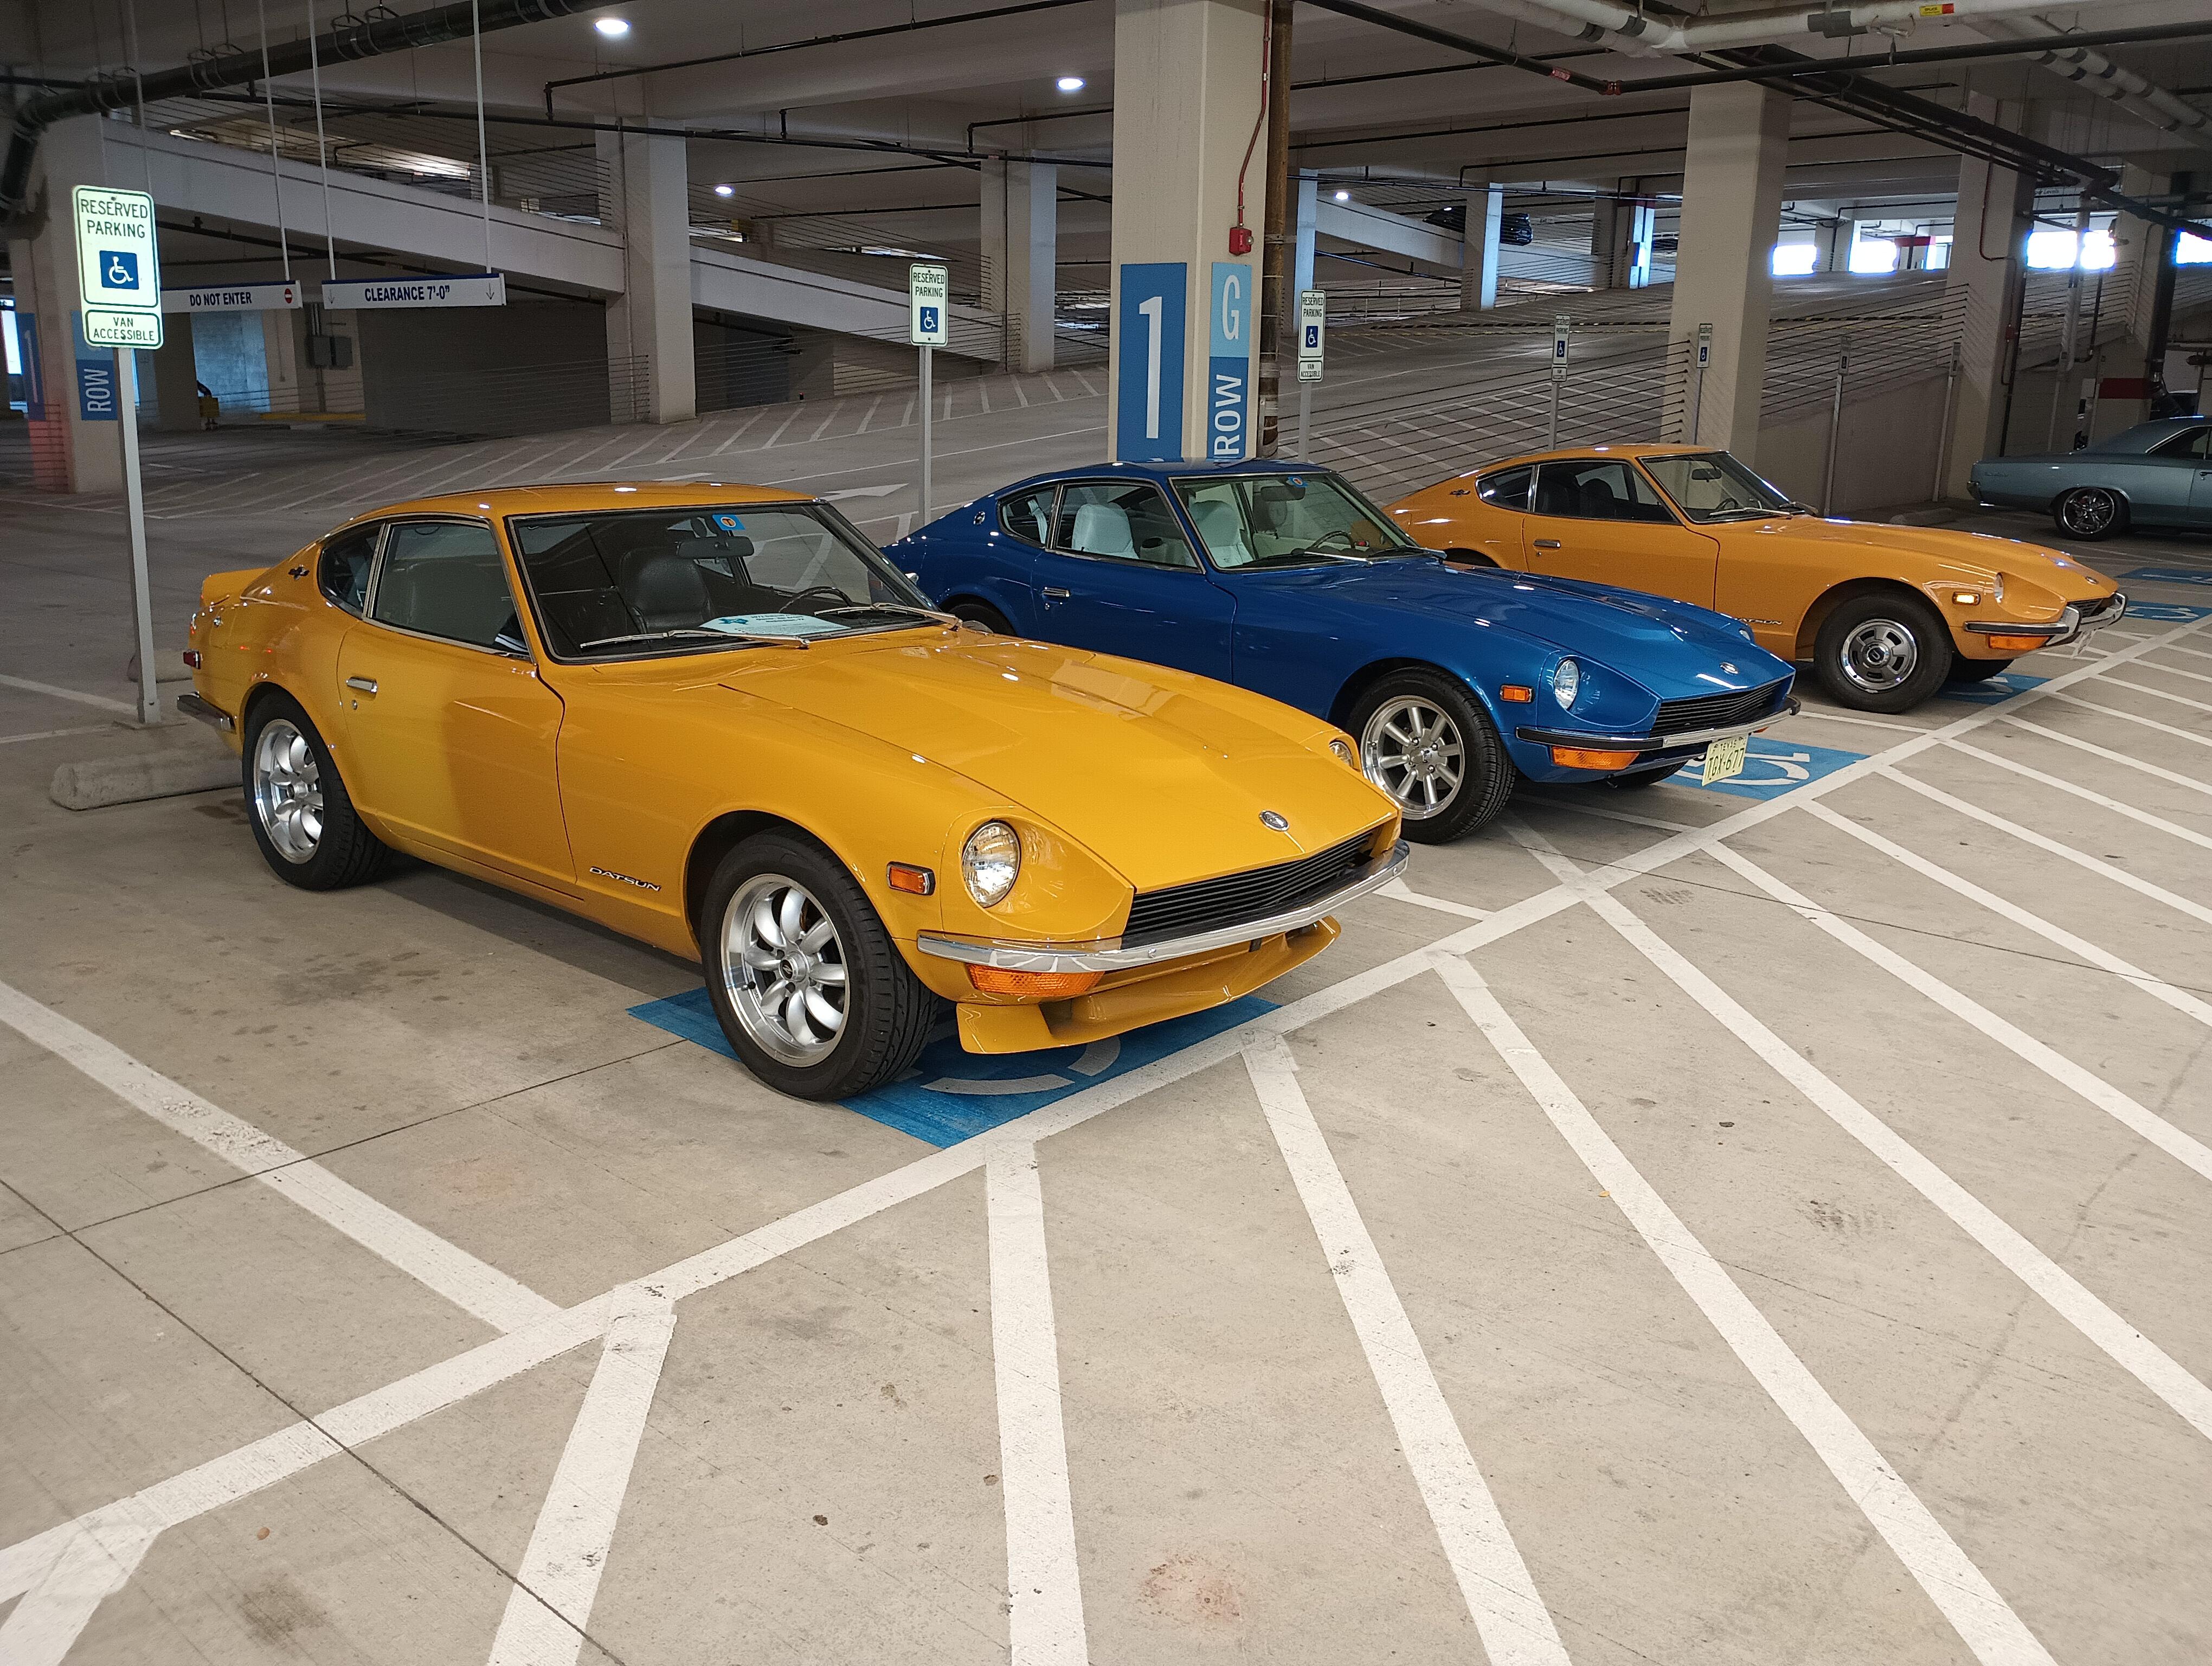
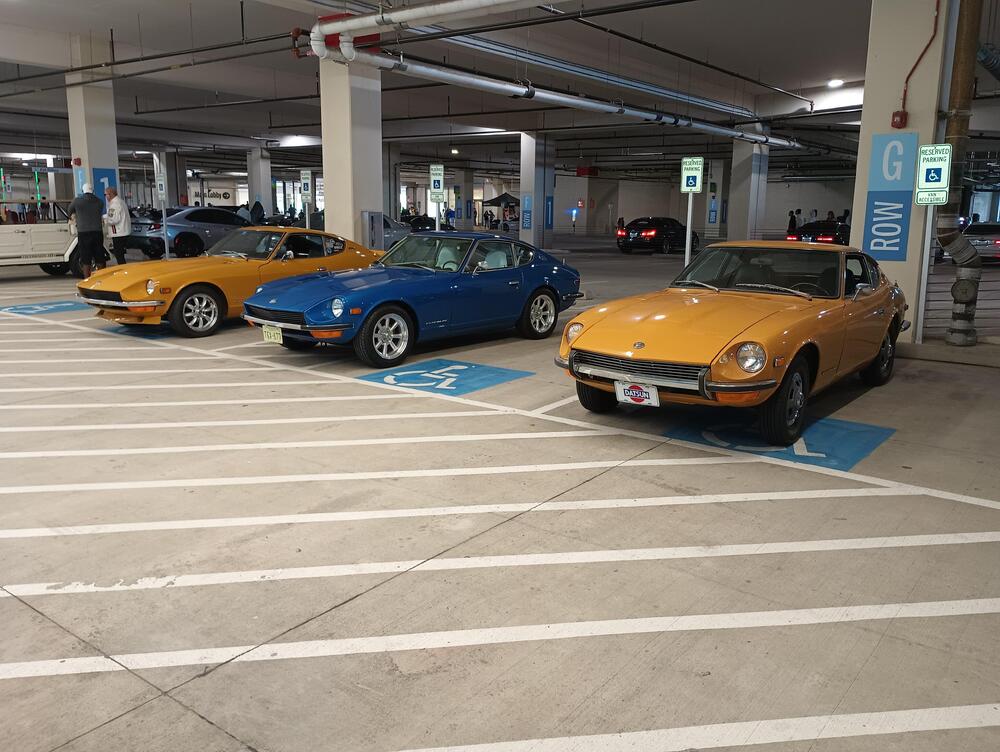
Attended a Hagerty Cars & Caffeine event this morning, co-sponsored by Liberty Mutual and held in their parkling garage. Joining me were fellow members @Dens240 and @zed2. After the cars thinned out we were able to get our rides together for a pic. That is Dennis' beatifully restored blue over white '72 and Keith's very original '70 parked beside me. There was probably close to $5-6 milion worth of exotics at the gathering with a Ferrari F40 as a featured display car.

-
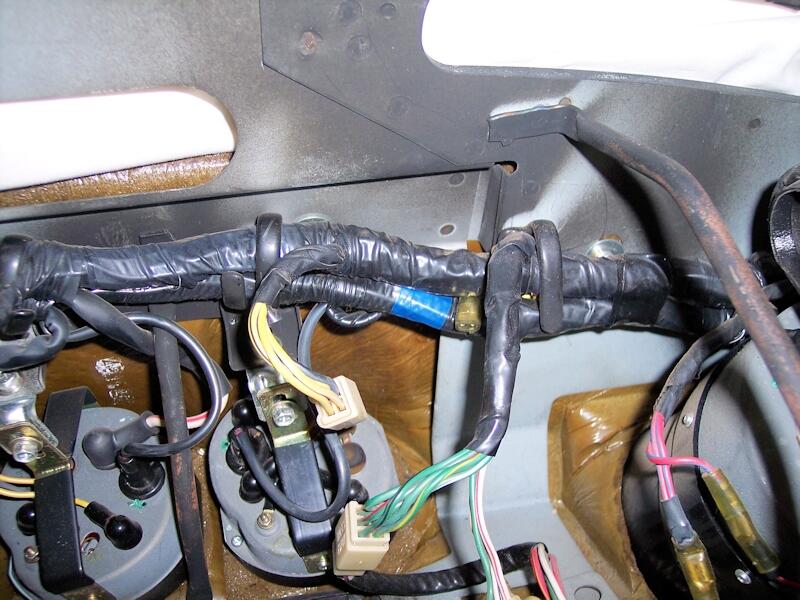
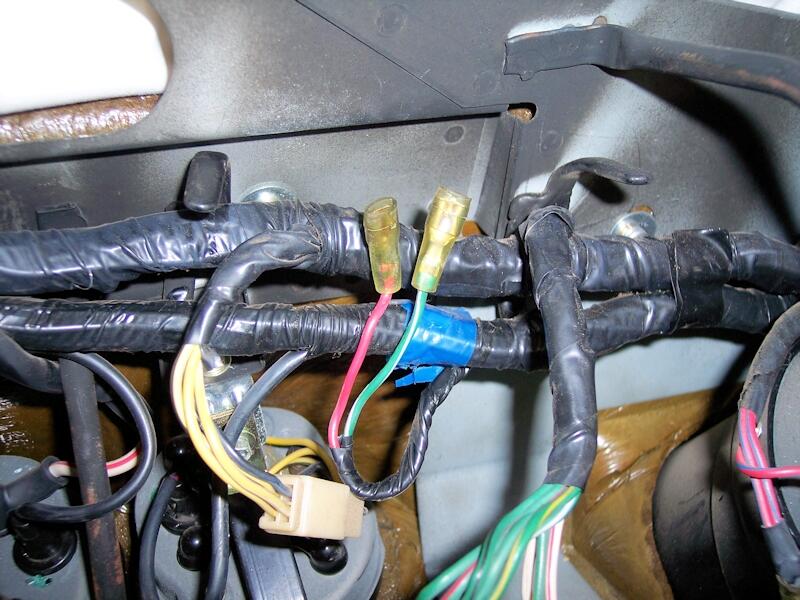
I can't be sure about your car but on my car there is a prewired pair of terminals just waiting for a switch to activate the fog light circuit. They were "concealed" by the Nissan blue tape marker for unused circuitry. If present in your ride, they could be used to trip a relay and avoid running new wires.
-
I suspect this is a vendor production line issue: think of a process where the pieces of glass are all oriented in the same fashion i.e. leading edge forward, irrespective of curvature. The etching process would always be presented with the same corner in the same position and only one etching line would be required. If the right side glass was to be etched on the outside a second etching line would be required for the reverse orientation of the glass. Work simplification, think W.E. Deming in Japan.
-
Unfortunately for you, the switch will never work correctly as long as the board that the wires are soldered to is broken. Pressure on the diamond-shaped rocker to press against the contacts on the board is always going move the board section out of position. Perhaps you can find a donor turn signal switch with the high/low beam switch intact and swap it out. The beam switch is the same for all S30's. I checked my partZ box, don't have one to offer.
-
Switching to LED bulbs will also lighten the load on the turn signal and hazard flasher cans. If you still have the OE thermal-style cans the flasher will likely not work. Switching both out to new electro-mechanical type units will take care of things. Something like this will work for both: https://www.autozone.com/electrical-and-lighting/turn-signal-hazard-warning-flasher/p/novita-turn-signal-hazard-warning-flasher-el12/849385_0_0 I'm still running incandescent bulbs all around with relay kits, these type flashers work very well.
-
As is mine!
-
Don't overlook the possibility the combo light switch may be contributing to the problem. If the individual rocker and corresponding contact post are heavily carboned up that could be creating resistance that is backing up to the fuse block.
-
If you go back to my orignal post that started this thread, you'll find my coment that the OE housing has to be trimmed about 1/16" all aroound to accomodate the new squirrel cage.
-
All of mine have come from rotted out / damaged lights that I parted out. I have a small supply of the shorter ones.
-
NLA at Nissan. Not for the headlight, a thin gasket where the sugar scoop fits against the fender. They had completely disappeared from my car by the time I took it apart. I made no attempt to replicate for my build.
-
Not lubrication, just a stain on a very old switch. There is no lubrication inside the switch unless one adds a tiny drop of grease on the back of the rocker for the nubbin to rub against. As best as I can recall, that switch came out of #1818 that was parted out by one of our members.
-
It is a gasket between the sugar scoop and the fender.