jfa.series1
 Subscriber
-
Joined
-
Last visited
Everything posted by jfa.series1
-
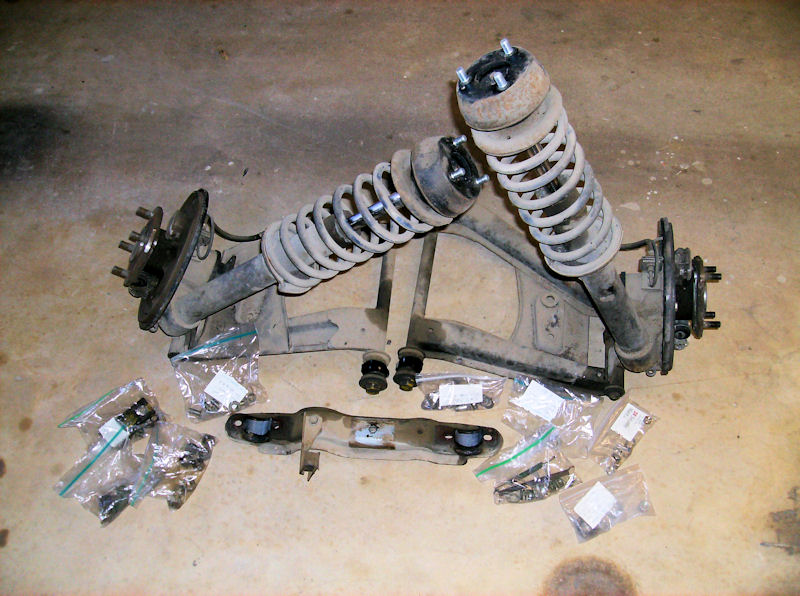
 Definitely a bent suspension part and big time impact to your alignment. Here are a couple of shots from my resto project. The "before" image shows the part very clearly with no LCA attached. The "after" image is a bit busy but the part is visible. Hope this helps. Jim
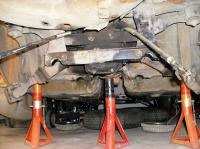
-
Here is a quote from the MSA site: "If you own a 70 240Z you’ll have to use steering knuckles from a later car (71-78) to use these ball joints, because the 1970 uses a smaller ball joint which is not currently available." Currently available balljoints should fit the steering knuckles on your '71 car. The catch may be in your build date. If it is a '70 date, you probably have the smaller steering knuckles. Contact Roger at the Z Barn to get some used knuckles like I did. The cost was $50 plus $10 shipping. http://www.zbarn.com/index.html Jim
-
But... as the man says, no 240 data on that tab.
-
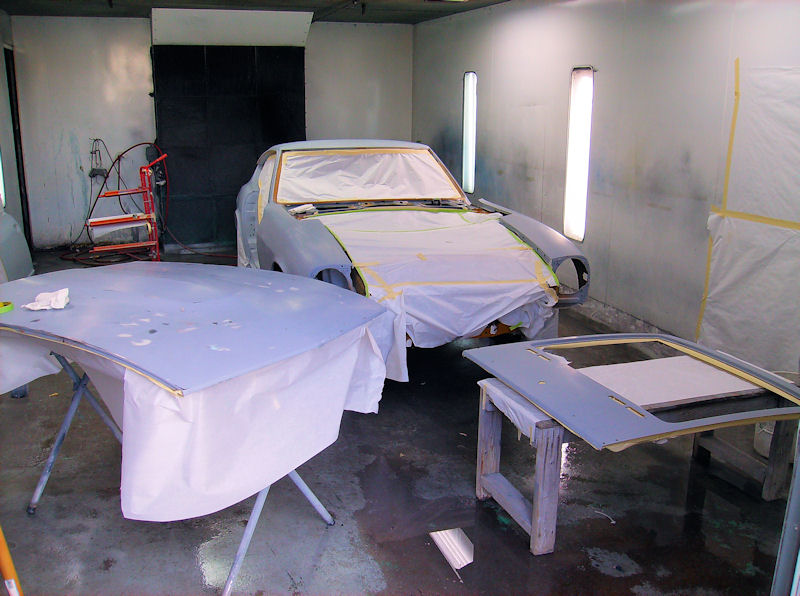
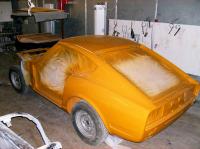
Nothing too grandiose - just finish the total restoration and have it sorted out and back on the road by May! - The car is still at the painter, the four month estimate is now 6 months and counting, but - at least it got painted Christmas week. - The engine rebuild is complete. - Suspension rebuild is complete, front and rear. - All interior components are on hand except new carpet. - Most of the engine bay bits are on hand. Hope my timeline is doable! Jim
-
I just hit the link Mike posted on 12/15, it worked fine. Jim
-
I got new paint (920 gold)!!! Major completion point of a total restoration. Whoo Hooo! Jim

-
With my car as an example, here are the components: A five section looped carpet set (think of the horizontal surfaces) - footwells, floorboards under the seats, rear deck. Pebble-grained vinyl strip along each rocker panel. Diamond-pattern vinyl on the tranny tunnel, the vertical bulkhead behind the seats, the suspension towers in the rear. I think all of these materials are available from Brian Rolfe at Seatz, restoration quality. Jim
-
Correction in terminology - gland nut, not flange nut. Thanks Chris!
-
My experience is that the flange nut does not seat flush with the top of the tube, you should usually see a couple of threads. Perhaps a build-up of road grime is hiding the threads. Maybe the PO really honked down on them during the installation (not a good practice). By the way - new shock inserts typically come with new flange nuts. Jim
-
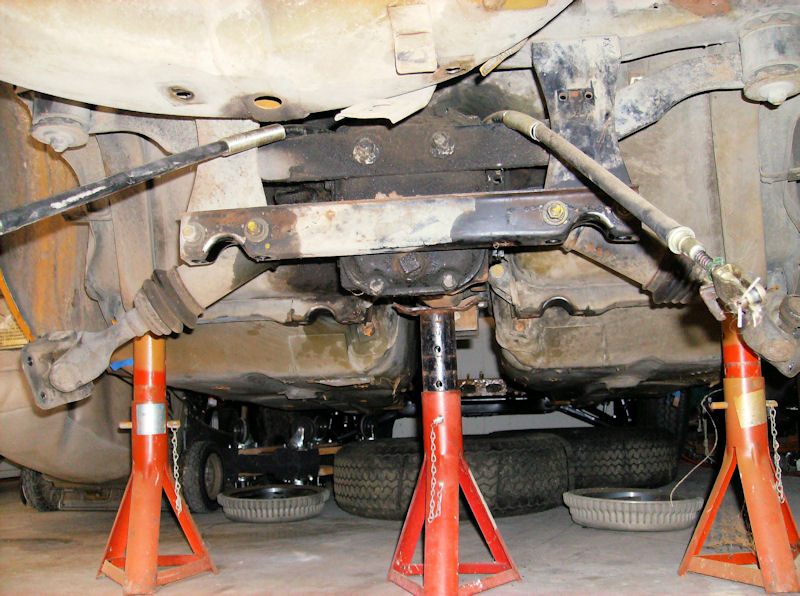
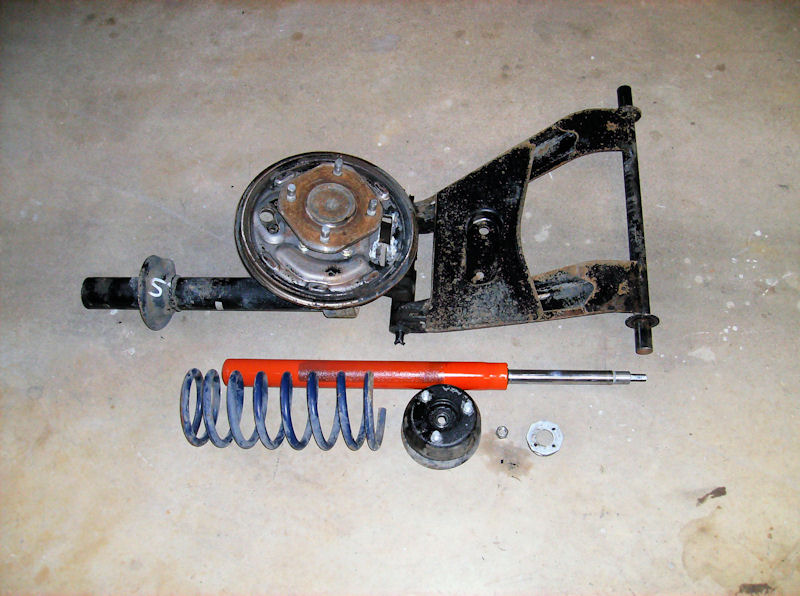
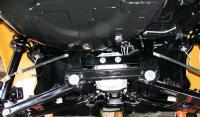
The stock tube is threaded internally for the flange nut at the factory - that is how the shock insert is locked into the tube. Here's a few pics of what you are looking at. If you do this, do not attempt to separate the transverse link from the strut, getting out the spindle is a major PITA and probably not needed. My brake components are off because I was doing a complete restore, not required for shock replacement. Hope this helps. Jim


-
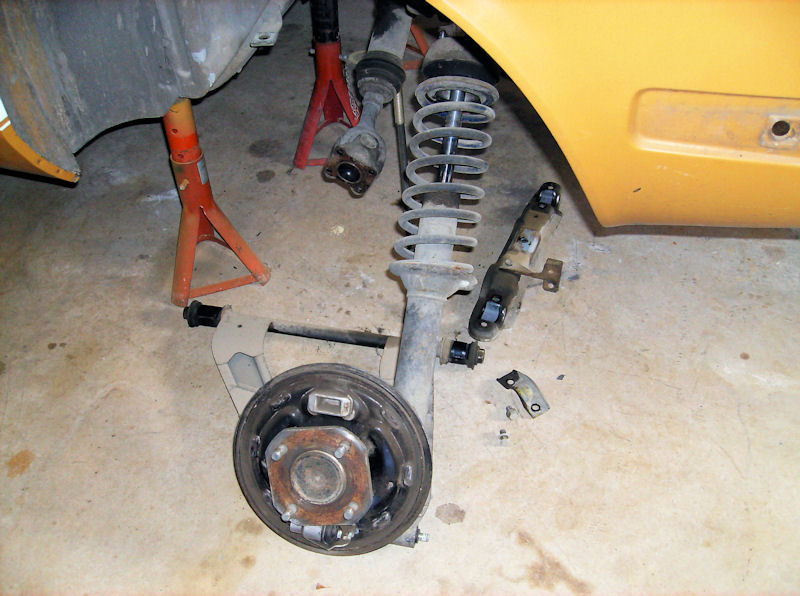
Geof - to clarify some terminology, what you probably bought was a strut or shock insert, not a strut. As 5th says, the insert will go inside the strut tube after you remove the strut assembly from the car. I've attached a couple of photos to give you a better idea of the parts involved. Note that my strut assembly is totally broken down, including brake parts removal. You do not need to go this far just to replace the insert. Caution, do not attempt to separate strut tube from the transverse link unless you are prepared for some major work. Extracting the spindle that connects the two pieces is a major PITA, usually involves a machine shop with large press or other specialized tools. You should only do this if converting to urethane bushings or similar. Hope this helps. Jim


-
-
Check with Brian Rolfe at Seatz. http://www.seatzmfg.com/seatz/index.htm
-
WOW! An awsome Series 1 find. Congratulations! The interior looks to be in SUPERB condition and a very clean engine bay. If it stayed on the west coast a long time, you likely have no rust issues to be concerned over. This one is ready to enjoy!!! Jim
-
You mention the Konig Rewinds and Rota RB's. Although they look a lot alike, be sure to check the available offsets on these two brands (and any others you consider). The Konig's sold by MSA are zero offset, just like the Datsun OE wheels. When I checked on the Rota's, I did not find them in zero offset. I think the smallest is +4mm, not sure how this might affect handling. Similar to d240zx2, I plan to go with the Rewind 15's. (Yeah I know, tire selection ...). Here's a couple of good tools to help you thru the process. http://www.miata.net/garage/tirecalc.html http://www.1010tires.com/WheelOffsetCalculator.asp Jim
-
The original rivets for the rear finisher or facia are smaller than those used on the interior. While I haven't actually measured them, I'd say they are about 2/3 the dia. of interior rivets, 6 are req'd. I have not come across a source for the smaller ones, they may be NLA. I suspect interior rivets will work fine as long as you are not going for a concourse judging. Jim
-
Keep in mind the factory clips are spring steel. This is to ensure the rubber seal remains upright and makes a firm seal against the underside of the fender. Using sheet metal might work, but it is a soft metal that might give way and fold when the fender is installed - the rubber seal strip is pretty stiff. Once the fender is in place, there is no way to see if the seal is secure. If buying new clips is not acceptable, hit a salvage yard to get some from a donor car. Jim
-
The jack stores on the passenger side so the smaller door goes on that side to allow the jack to extend beyond the open side of the door. Jim
-
Hey Jodus, On your tire size question, I raised the same issue on another club forum. The original 175's did not have an aspect ratio on the tire. Here is the answer I got from Carl Beck: "Actually I believe the original 175's were a 78 series radial. 78 series tires were pretty common stand in the US circa 1969/70 If you inflate an original 175 to the same psi and have it on the same rim - you'll find that the 195R70x14 is all be exactly the same diameter. 175R78: 175mm = 6.8897638 inch x 0.80 = 5.3742 inch times two= 10.7484 inch 10.7484 + 14 inch rim = 24.7484 inch 195R70 195mm =7.6771654 inch x 0.70 = 5.3739 inch times two = 10.7478 inch 10.75 + 14 inch rim = 24.75 FWIW, Carl B." Hope this helps, Jim
-
Hi Jodus, Check out Banzai Motorworks for your stickers (and other resto goodies). I am doing the air filter box refurb thing right now, that's where I got mine. Mike will give you great service and has a very nice product set. http://www.zzxdatsun.com/catDecals.php Jim
-
I called Randy on Monday, got a bit more info but not everything I hoped for. He was not at his shop when we talked, so everything was from memory. His new basic kit probably has the same list of 19 items as on Les Canady's site. He is working closely with PRP since neither one can build all items and be cost effective. The windshield gasket is from PRP as are the main door gaskets. The door gaskets are from all new tooling. Randy gave out 3 sets of new door gaskets, says the feedback was "perfect fit" - no door bulging issues. He said he could have a kit ready to ship within a week of an order being placed. He has been busy with tooling issues, was not aware that the new kit was not yet up on his web site (and it still isn't). Jim
-
I talked to Randy at Vintage Rubber recently. He has a new 19-piece "basic" kit priced at $390, said it was to be on the website "soon" but it has not made it there yet. I plan to give him a call this week to clarify details: what parts are included (Les has been offering a 19-pc kit for some time); which ones are the new extrusions; any parts from other sources. Randy also mentioned the new "master" kit, about $850 or more, I can't recall the exact price. Jim
-
-
Check with Bryan Rolfe at Seatz to see if butterscotch is available. He has some of the best restoration quality seat covers available. I'm in the Dallas area but my interior is black - I do have Bryan's covers if you need to check out the product. http://www.seatzmfg.com/seatz/index.htm Jim
-
I forgot this one, a wheel offset calculator. http://www.1010tires.com/WheelOffsetCalculator.asp Jim