Zed Head
Community Member
-
Joined
-
Last visited
Everything posted by Zed Head
-
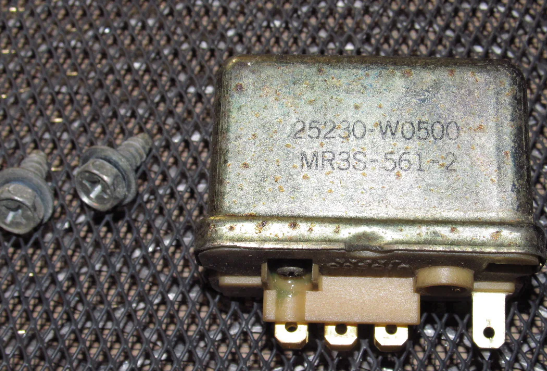
Here's a ZX relay just to fill the thread out. Maybe it's just two years. https://www.autopartone.com/products/79-80-datsun-280zx-oem-relay-25230-w0500
-
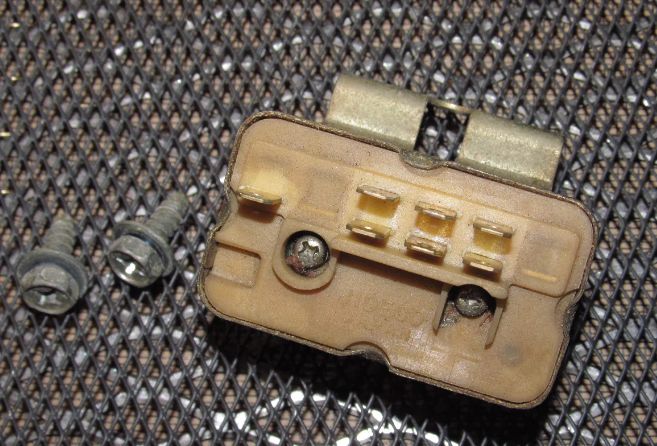
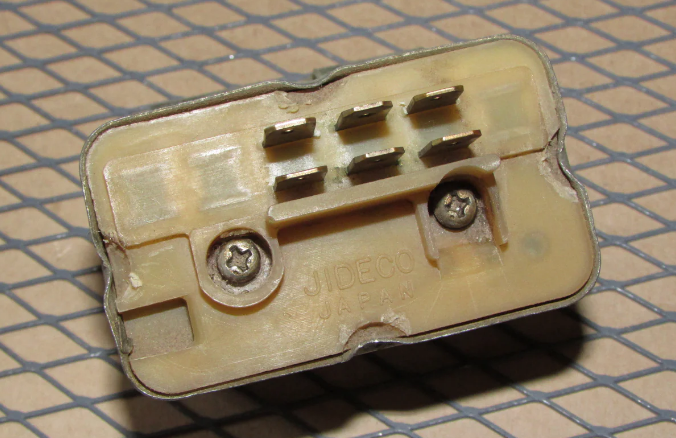
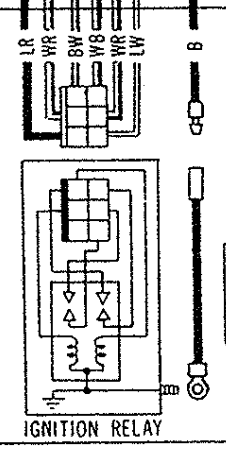
Yes, I looked at the 76 diagram and it shows the same thing. What's funny is that the ZX's did have a terminal and a dedicated ground wire so the drawing does match a ZX. Weird. It was a spade terminal though, not a threaded stud. I picked up a spare from a ZX just in case. In the ZX's they're behind the glove box. Here's a listing and a picture of 78 relay. You can see the four places to bend to get the cover off. I called them tbas but they're really more like crimps. A pair of straight jaw pliers and four squeezes and it will pop right off. Might be a ground wire connected inside though so be careful, if you get that far. https://www.autopartone.com/products/75-76-77-78-datsun-280z-oem-ignition-relay-25230-89958
-
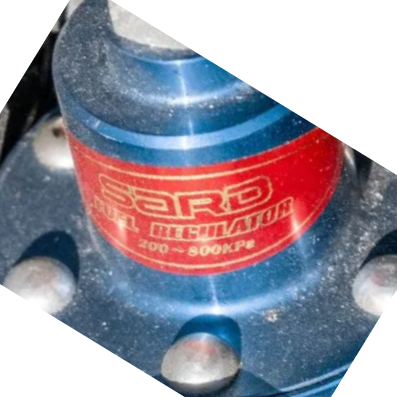
Looks like the SARD might be like others. https://www.google.com/search?q=sard+fuel+pressure+regulators+leak+down https://www.rx7club.com/new-member-rx-7-technical-256/sard-fuel-regulator-leak-injector-line-816953/ But then this guy below says his does hold pressure. I'm seeing that many people aren't real clear on things like the check valve inthe fuel pump. The guy in the link above could have a check valve problem. https://aus300zx.com/index.php?threads/holding-fuel-pressure.337928/page-2
-
Weird that that link is dead now. It should have opened to a page with a couple of SARD FPRs. Google shows them on eBay too. I'd search around first and see if you can find any internet comments about leak-down. Just because one didn't doesn't mean that they all don't. https://www.google.com/search?q=sard+fuel+pressure+regulators
-
The pinout to the relay is shown in the wiring diagram. And you can easily pry the four tabs up and take the cover off. Don't overlook that it grounds through the mounting points. Looks like they might have added a wire in 78, I don't think my 76 had that.
-
I was browsing pictures of a new BaT Z and found what looks like an FPR that holds pressure. Might be worth some research. Picture 114. https://www.nengun.com/oil-fuel-fuel-pressure-regulators/ https://bringatrailer.com/listing/1972-datsun-240z-290/
-
The Isuzu valve was nice because it was all one piece and the metal tube is 5/16" / 8 mm. cut the tube and slide it in. I posted a picture in a previous thread. I can't remember the year, I think it was late 80's. Unfortunately, not really common to find them in the yards.
-
Which option above? Whichever way you run the hoses there needs to be a connection to the intake system, if you want a sealed system. That's where the crankcase pressure goes. There's always blowby so there's always going to be pressure. The simplest method would be to maintain the stock flow paths but to extend their length to run through the catch can(s).
-
Doesn't show up on the web site. https://www.sstubes.com/search?q=280z&_pos=3&_psq=280z&_ss=e&_v=1.0
-
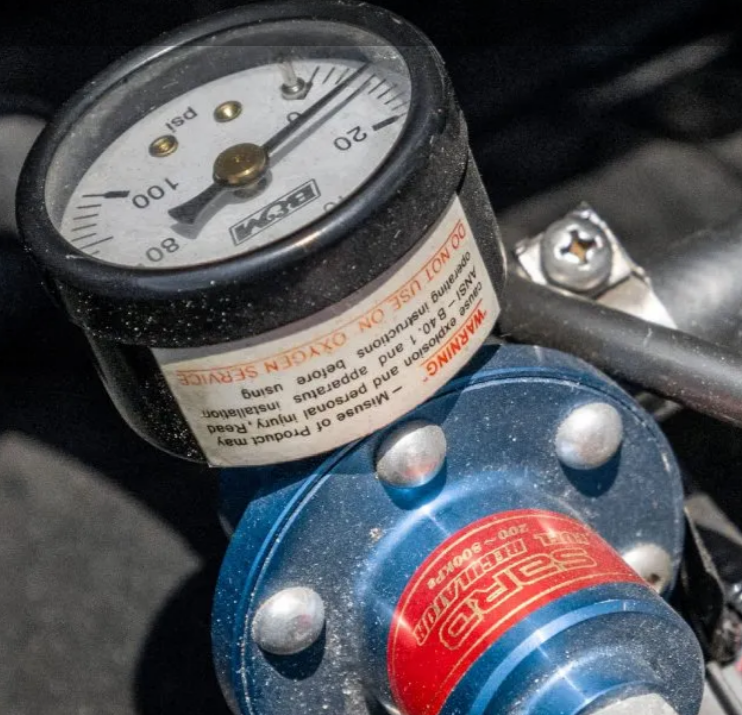
It's definitely a real-time reference. Once I got my Z problems all sorted out I barely opened the hood more than once a month. And that was only to check the oil and coolant reservoir. So, it really depends on where you're at in your project. I also had found a Schrader valve T'ed in to an Isuzu fuel line in the wrecking yard. So I had a Schrader valve for measuring pressure easily. Many different ways to do things. You can probably find electronic methods today and have a gauge in the car.
-
I made one from some inexpensive blemished bar stock. It wasn't too hard. I had a drill press and built a jig to hold the bar. I think it might have been from here. Still out there. Edit - not sure if one foot is enough though. The eBay listing reads like you can only get one foot sections. Can't remember. Probably in site's thread. https://www.ebay.com/itm/204109661735?mkcid=16&mkevt=1&mkrid=711-127632-2357-0&ssspo=Pm6JCi7cTr6&sssrc=2047675&ssuid=bBzFtXzvTQO&widget_ver=artemis&media=COPY
-
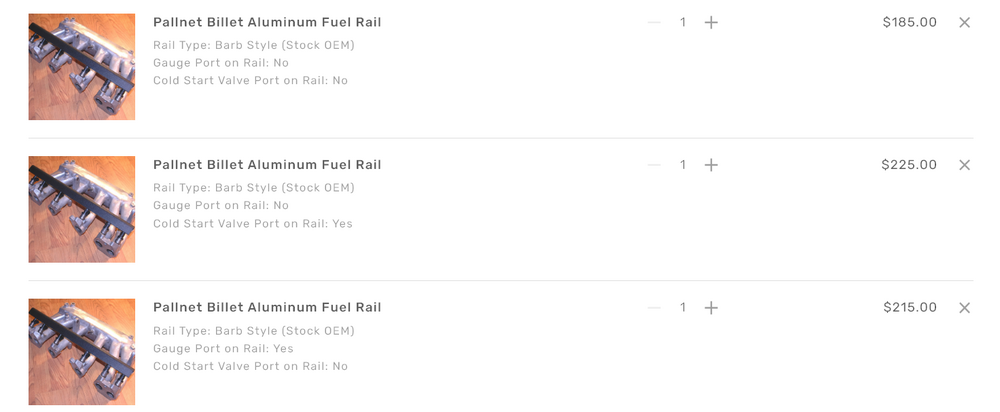
That seems like a lot. There's really no need for a gauge, unless you plan to change fuel pressure often. Once you set it it doesn't change. Looks like they're charging $30 - 40 just to drill and tap a hole. If you're handy you can do that yourself. https://www.godzillaraceworks.com/fuel/pallnet-billet-aluminum-fuel-rail
-
It's been off the road for a while. I think I see a 94.
-
Maybe this guy will run a comparison. He does some pretty neat stuff. https://www.youtube.com/@ProjectFarm
-
I just looked on Rockauto and the Airtex E8312 isn't even offered anymore. Did you get an Airtex or a different 8312? I had an Airtex for quite a while and it worked well. https://www.rockauto.com/en/catalog/nissan,1976,280z,2.8l+l6,1209226,fuel+&+air,fuel+pump,6256 Looks like Airtex might have discontinued the product. Google shows Airtex E8312 on the Rockauto link but opens an Ultrapower page. And the Airtex site doesn't show an E8312 at all. Very weird. Other Nissan products come up but not the E8312. Bummer. I'd probably buy the Rockauto Delphi before the MSD 225. The old hot rod brand names have all been sold and stuck on to cheaper products. It's probably just a GMB with an MSD sticker on it. p.s. look at the HP ratings on the Walbo pumps. You don't need a flow rate that supports 769 HP.
-
Most, maybe all, of the aluminum aftermarket regulators leak pressure down rapidly after the pump shuts off. It can cause starting problems. Something to be aware of. It's a flaw but the marketing guys manufactured some laughable BS to explain it. https://aeromotiveinc.com/tech-help/faqs/faq-efi-regulators/ 6.) I’ve installed my new Aeromotive bypass regulator. Fuel pressure seems to adjust fine and holds great when the engine is running, but when I shut the engine off, pressure drops quickly to zero. Shouldn’t the pressure hold like it did with a stock regulator? No, Aeromotive EFI bypass regulators may not seal perfectly when the pump is off. They are engineered for the highest possible performance when the engine is running. OEM regulators must hold pressure for 30-minutes after shut-down to pass EPA emissions standards. At Aeromotive we know our customers priority is to have the best possible flow and pressure control when the engine is running and we don’t compromise this standard to force the regulator to seal when the engine is off. If extended crank or hard-start becomes a concern, first allow the pump to run and prime as long as possible after turning the key to the run position, then start cranking the engine, just before the pump shuts off. If the priming cycle is too short to allow the engine to start easily with this approach, extend the priming cycle in the ECU if programmable, or add a timer board or momentary button to the fuel pump run circuit.
-
Good old Google found it though. https://www.mecum.com/auctions/monterey-2023/collections/the-mike-and-debbie-rogers-datsun-collection/
-
Tried it. No go...

-
Edit - I searched "240Z" on the Mecum site and it brought up a bunch. But the site has reset somehow and now just brings up other stuff. Put 240Z in the search box. https://www.mecum.com/auctions/monterey-2023/lots/?wp_posts_lot_feature_sort_asc[configure][filters]=&wp_posts_lot_feature_sort_asc[refinementList][taxonomies.auction_tax.name][0]=Monterey 2023|1692230400|1692403200&wp_posts_lot_feature_sort_asc[query]=240z&wp_posts_lot_feature_sort_asc[sortBy]=wp_posts_lot_sort_order_asc
-
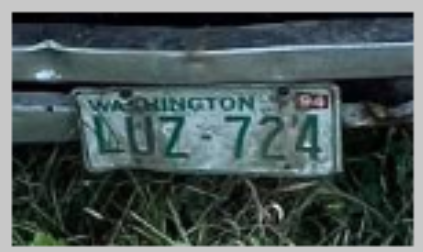
Can you see bids on OfferUp? It might actually have some value. That green crud grows pretty quick out here, no telling how bad the rest of it is. Fresh water isn't like salt water.
-
Just stumbled across 229, apparently, on eBay. https://www.ebay.com/itm/134685619600
-
Today? Can you paste an image of the error message? I just opened yours and it works fine. I do still get the endless spinning wheel though. when I try to go directly to a recent post. I have to use trickery to get it to open.

-
It's only at $2,300 now

-
One of these? https://www.rockauto.com/en/catalog/nissan,1979,280zx,2.8l+l6,1209293,transmission-manual,clutch+release+bearing,1968
-
Looks like an estate sale business, they don't really know how to sell a vehicle. Don't know what people want to see. Weird that the "View Sale" link takes you to a worse page. The best pictures (unexpandable thumbnails) are on Carl's link. Might be worth a look. Plenty of time. Seems to be a roller. Ararity Presents A Rare Datsun 240z 2/1971 Classic Car. A True Treasure! 4-Speed Manual Transmission, AC Equipped, and 920 Gold Paint. Minimal Rust for the Year! Garage Found. Nissan Motor Co LTD. Located in VA DC MD Metro Area. Car is available for viewing. Sale is live bid now! BID NOW! Sale Closing September 7th 7:00 PM EST.