Mike W
Community Member
-
Joined
-
Last visited
Everything posted by Mike W
-
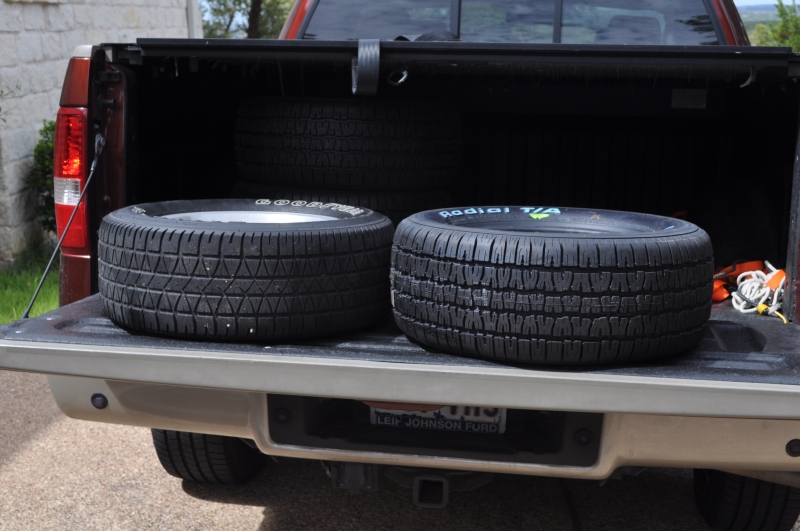
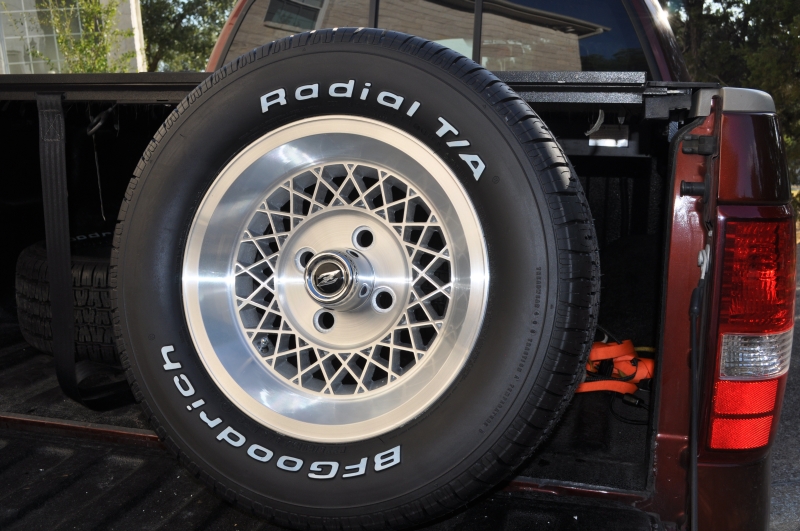
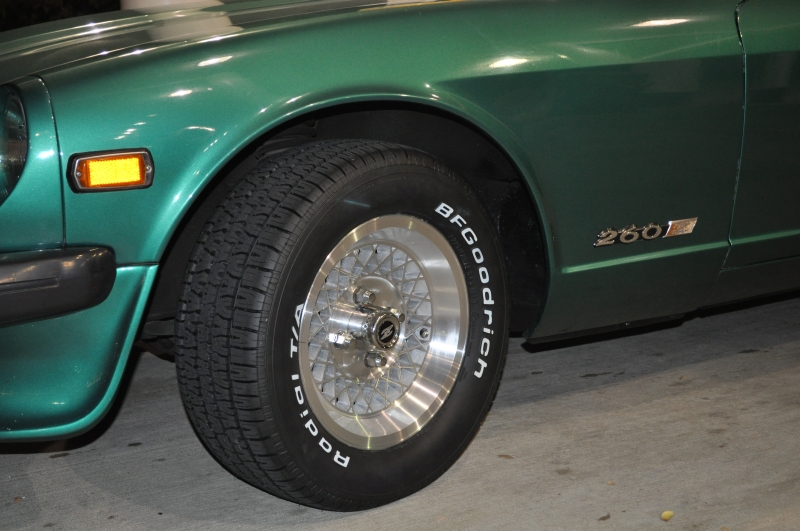
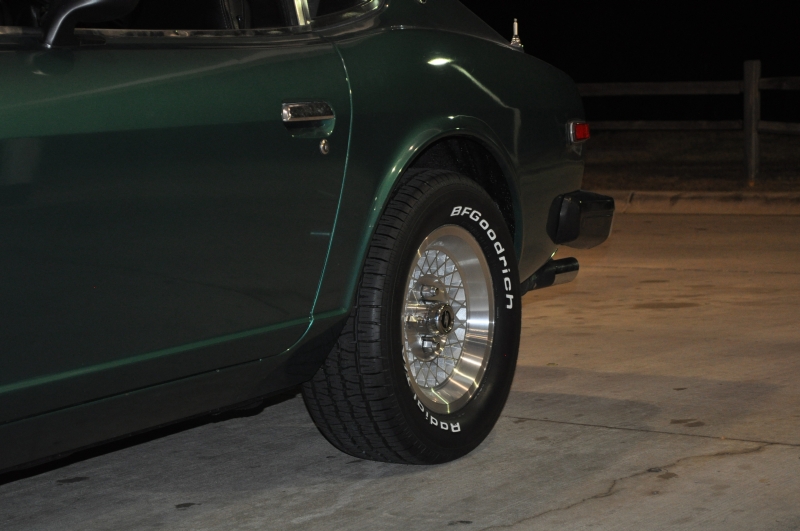
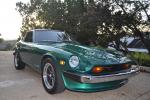
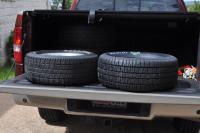
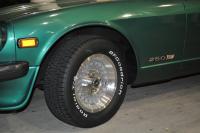
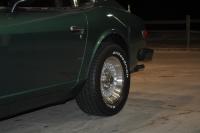
Not sure what I did in my last post. Posted before I was finished. On tires, I decided that I wanted to go a little larger in size and have as much rubber on the road as possible. I was also very concerned about rubbing, etc with larger tires than what I was going to replace. I ended up going with BF Goodirch Radial TA. 225-60 R14. Actually had a very hard time finding anyone that had them in stock. Ended up finding an online dealer I had never heard of before (tirecrawler.com) who claimed to have them in stock and also had the best prices. Came through on everything and I had them in less than 3 days. Had them mounted on the refurbished Appliances (subject of another thread) and so far they have been great. No clearance issues at all and I really like the ride and feel of the larger tire. I'm also amazed at the improvement in handling and overall drivability of the car. It's been so long since these have been changed, I guess I forgot how mch of a difference new tires can make. Finally, I was also concerned about the width of my old rims (6 inches) and whether they would work with the 225-60 R14's. I went to the BF Goodrich site and looked up the tires that I wanted and they provided all of the specs including minimum / maximum rim size. Here's the link for the tires I selected: http://www.bfgoodrichtires.com/tire-selector/size/PMetric/225/60/14/OE/BNW/radial-t-a/tire-details I've attached a few pictures of my car so you can see clearance, old / new tire differences, etc. Mike.

-
So I just recently went through a similar exercise as you on tires / wheels / sizes, etc. My old tires were shot and really needed to be replaced. They were mounted on original Appliance 14 inch mesh wheels (that I purchased in 1975 or so) and were 215 -60 R14. I went through a lot of back and forth on whether to upgrade the wheels, which would give me an almost infinite choice on tire sizes / brands / etc, or to stick with the Appliances and try to keep the car as period correct as possible. In the end I decided to stick with the Appliance wheels and live with the very limited choice on tires.
-
A couple of questions for D240zx2 (frank I believe). So I have a similar setup on my 260Z with triple Webers and have been wanting to change out the rubber lines I have now with a braided AN setup with a fuel distribution block. Your installation is the closest I have seen to what I am looking for (and yours looks great by the way). I have a few questions that hopefully you can help me with: 1. Where did you get the bracket to mount the fuel block to the bolts on your intake manifold? Was this custom made or were you able to purchase a bracket to start with even though there might have been modifications required? 2. You indicated that you used only an electric pump by the fuel tank. Did you need to install this or was it already there? Also did you need to do anything specific to get the pump to run all of the time? I know that on my 260, the electric pump does not start running until the engine reaches 600 rpm so I also have a mechanical pump in my system as well. If I went with a setup similar to yours I would need to find a way for the pump to run as soon as the key was turned on but also find a way to disable it in the case of an accident (ie low oil pressure or something similar). I assume that you completely removed your mechanical pump and just used a block off plate instead. 3. How did you make the transition from the hard line coming from your tank / pump to the AN fittings? Did you use the original hardline installed on the car or did you run a new one? How did you connect the two together? Thanks in advance for your help. Your system looks awesome and so I appreciate your help in getting mine to look similar. Mike.
-
So I'm a little confused. I thought that Dave's headlight upgrade was only available for the 240Z. However both rcb280Z and Powderkeg both used this for their 280Z's. I have a late model 260 that I believe has the same wiring as the early 280's and so if this upgrade can be used on the 280 it should also work on my car. How do you go about getting Dave's upgrade for the 280Z? Mike.
-
Ben, I just went through the same process for my rear struts. Did not have the issue you had with the gland nut though. Replaced my old Kontrolle struts with KYB's as well and as I recall the new KYB's came with new gland nuts so I used those. Hope that helps. Mike.
-
Charles, I went through this same exercise late last year, and came to the same decision that you did which was to replace all of the bushings with stock rubber from Nissan. To summarize all of the parts that were needed I compiled a spread sheet with all of the Nissan part numbers as well as online pricing that I found from Gastonia Nissan (Buy Nissan Parts . com). Although my car is a late model 260Z I assembled this spread sheet for both the 240Z as well as the 260Z. I also included part numbers from Black Dragon for the urethane versions becasue at the time I was compiling this list I was still undecided. I have attached this spread sheet here and trust it will give you a good start on your project. In addition to this I decided that I was going to replace all of the associated hardware (ie nuts, bolts, washers, etc) and compiled a list of each of these components by going through the micro fiche (line item by line item) and transferred this to another tab of the spread sheet as well. That info is also included in the attachment but beware that it was only for the 260Z and so there may be some differences. I should also add that this is just for the read end as I have yet to start on the front. I purchased almost all of these components from Gastonia Nissan in North Carolina and worked directly with Rob. He was awesome to work with and provided better prices than what was advertised on their web site as well as good prices on shipping. I would definitely recommend working with him. I also worked with Courtesy Nissan in Dallas for some other parts and found them just as accomodating. Finally, at least for the rear end of the car, I replaced just about every component except for the wheel bearings and this included a partial rebuild of my diff (R180). I have picture documentation on all of this and so if you need any help on any bushing, bearing, U Joint, etc, just let me know and I can probably help you out. I also had to have a special tool made in order to "flare" the OEM bushings for the moustache bar and so if you need this I can make it available as a loaner as well. Let me know if there is anything I can help you out with. There is also a ton of info on this site and a lot of people who can help you out if you get stuck. Hope this helps. Mike. Z-Car Work List - 2_17_11.xls
-
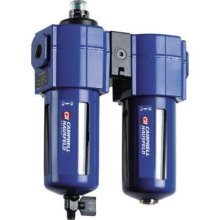
I have a much smaller Ingersoll Rand which I use with a media blasting cabinet but had the same issue with condensation build up. It would get so bad that I would get water dripping from the hose connector where it attached to the cabinet. I purcashed a filter / dryer from Campbell Hausfeld, which was a little pricey, but I managed to find it on line at Home Depot for about $80. I installed it close to compressor as that was the most convenient place for my setup, and no more water. This really worked much better that I would have expected. The only issue that I found with this is that the dryer uses a desiccant and the unit comes with about 2-3 recharges. It starts out blue and needs to be replaced when it turns pink. Given the amout of compressed air that the blast cabinte uses, I was finding that I was going through about 1 recharge every 1-2 days. The replacement desiccant from Campbell Hausfeld was really expensive but I managed to find it in bulk at guess where, Harbor Freight, and I believe that I paid $4 for 8 pounds of it. Problem solved. Here's a picture of the unit that I purchased.

-
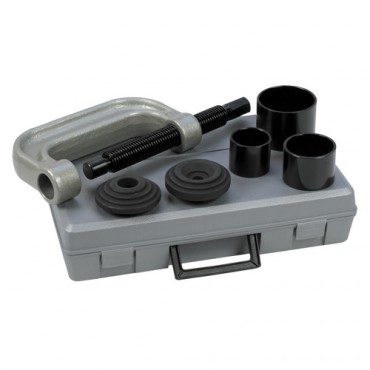
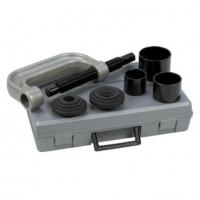
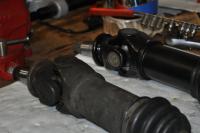
I just got finished doing all my half shaft and drive shaft u-joints and replaced them all with new Spicers. I tried a number of different methods, but ultimately found that the U Joint tool that I purchased from Harbor Freight worked the best. I got it on sale and also had a 20% discount coupon and so got it for about $35. Great investment and worked really well even with some of the more difficult joints to free up on removal. Would definitely recommend this if you are going to do your own especially if you can get it on sale.
-
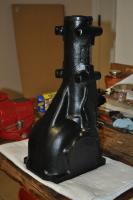
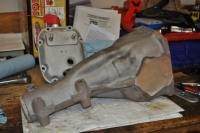
I just got done doing this to the rear of my late 260Z although I opted for the OEM rubber bushings rather than poly. I did not want the harsher ride associated with poly nor the potential of noise that can be created by these bushings. While I was at it I also opted to refresh the diff (clean, paint, new outer bearings and oils seals) so I literally had everything out of the rear end. I also rebuilt the half shafts with new U Joints as well as the drive shaft. Refreshed the electric fuel pump / filter assembly while I was at it as well. Also replaced the and brake cable which turned out to be a little trickier than I thouhgt. This project started as bushings and struts and ended up as a "while I have this apart I might as well ......................." From a timing perspective, my son and I tore apart the rear (with the exception of the diff) and had it apart in less than a day. Over the course of the next 3 months I took apart all of the sub assemblies (ie struts, springs, shafts, diff, hand brake cable, etc), blasted them, painted them, and put them back together. My goal was to have this all completed by Easter when my son was going to visit me again and re-assemble the rear end. We met the target and had the car re-assembled and back on the road in a couple of days. I was in no hurry to get this completed so I took my time to do it right and would spend a few hours most evenings after work tackling each of the individual pieces. I also considered power coating but in the end went with paint. I used Eastwood rust encapsulator as a primer and Eastwood Satin Chassis Black as a finish. All of the pieces came out great. I have included a few pictures so you can get an idea. If you are going to go this far you will need some special tools. You will definitely want a spindle pin removal tool if you are going to refresh the outer control arm bearings. I have one of these and am willing to lend it out if that would help. If you are going to do the U Joints you definitely want a tool for this. I picked up one at Harbor Freight for about $40 and it worked great. I also purchased a large blast cabinet from Harbor Freight (for about $200) and it was worth it's weight in gold. I blasted just about everything and the only thing that did not fit inside was the sway bar which I had to clean by hand. Even if you go the powder coat route you should consider one of these. The OEM bushings created some unique issues that you would not have with Poly as well. For example, on the mustache bar I needed to remove the inner sleeves, which were a royal PITA, but even more challenging was re-installing the new bushings and finding a way to "flare" the other end. I ended up having a spacial tool made to do this, which you can use on a large press, and can make that available for loan as well if someone wants to do this. Finally, I went through the micro fiche of the rear end and made a spread sheet of every bolt, washer, nut and other miscellaneous hardware with the goal of getting all new stuff from Nissan. It turns out that some of the pieces are NLA so I ended up refeshing all of the hardware I was not able to source from Nissan in the blast cabinet which brought it all back to like new finish. I also documented most every step with pictures and I must have hundreds, soif you need any to see some of the details just let me know. With the rear now completed and like new again, I am anxious to get the front done, which I think will be an easier and faster process, but I have decided I need a little break so I can enjoy the car for a bit. I plan to start on the front in the next few months. Hope that helps. Let me know if there's any info you need as you go down this path. Mike.
-
Looks really nice. I am planning to do the same thing to my late 260. So what is the difference between the 3 into 2 and the 6 into 1? Mike.
-
So I was nearing the end of the re-assembly on my complete rear end rebuild and one of the last tasks that I had to complete was to drain and re-fill my transmission. I had lost some fluid when I removed the drive shaft for refreshing so I wanted to just drain the old oil( not even sure the last time it had been done over the last 30 years) and replace it it new. Well as many owners have experienced, getting the fill plug out can be quite a chore. I tried just about everything I could find on the forum (barring removal of the transmission) but to no avail. Big and small pipe wrenches wouldn't budge it and it was really hard trying to get the wrench head on the plug in order to get a good grip. I also tried standard 17 mm open end wrenches, channel locks, crow foot 17 mm, and even tried using a jack to put pressure on a crowfoot attached to a 24 inch breaker bar. Nothing. So at one point my son, who was under the car trying the different tactics, asked for the standard 17mm open end wrench again. When he put the wrench on the plug, it happened to be straight down and it gave me an idea. I ended up using a chain puller (ie come along). I put one end on the end of the 17 mm open end wrench that was on the plug. I attached the other end to the front frame member and then I cranked. After I got all of the slack out, I just started to slowly crank harder. Just about as I was about to give up for fear of breaking something, ( and after about 2-3 hard cranks), it broke loose. This turned out to be a pretty easy and straightforward way to solve this problem. Unlke the pipe wrench approach, the 17 mm open end is easy to get on the plug and easy to see if you are not on correctly. The chain puller provides an easy way to get some leverage on that bolt without being in contorted positions. In any case, it worked for me and was pretty siimple in the end so I thought that I would pass this along for those who might have to tackle this in the future. Mike.
-
I believe this was a relatively popular brand of shock insert back in the late seventies or early eighties but I don't believe they are made any longer. I actually have a set on my 260 that I installed years ago and am ironically just replacing now. I am starting with the rears and essentially have those complete and will then move to the fronts. Will be replacing them with KYB. From my experience they were a good product. Provided a stiffer ride than OEM with good handling. The ones I removed from my car were beat, but what can you expect after 20+ years. Hope that helps. Mike.
-
No problem. Hopefully I won't be needing this for another 30 + years and so it should be readily available for anyone else in the mean time. Mike.
-
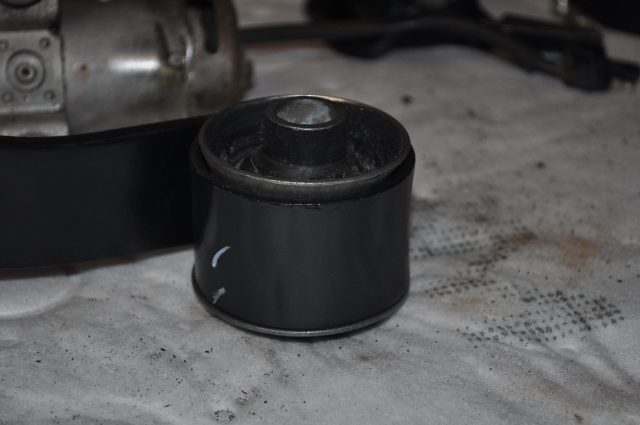
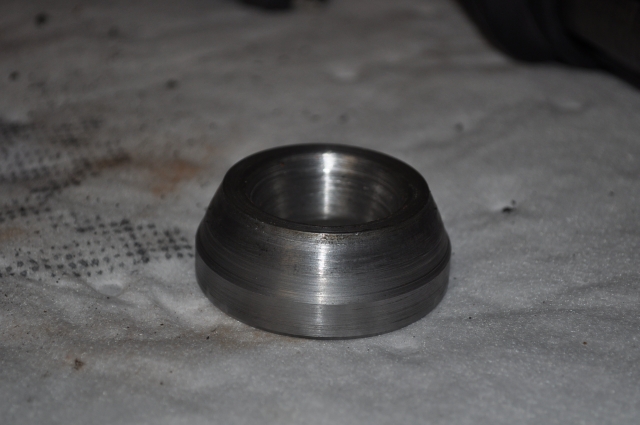
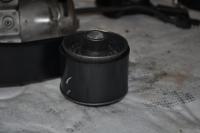
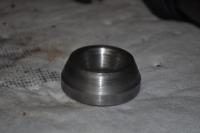
As a part of my rear end rebuild I decided to go will all OEM rubber bushings in an attempt to try and get back the original ride of the car. One of the challenges that I have run into has been the installation of the OEM mustache bar bushings. There are many good posts on this site about removing the old bushings including the inner sleeve and these were extremely helpful in getting that done. However, the more challenging part of this is re-installing the OEM bushings and more specifically "flaring" the end of the bushing so that it is securely installed in the bar. At least in Austin TX I found it very difficult to find a suspension shop, drivetrain shop, or machine shop who had the proper equipment to flare the end of the bushing and mostly got strange looks when I inquired about this. So I happened to find a very old post from "Son of Z" in Washington state who successfully found a shop to do this and fortunately listed the name and number of the shop in the post. So in desperation I contacted this shop in the hopes of finding out the exact tool that they used to perform this flaring operation. Astonishingly, after 9 years the shop was still there and even more surpising I talked to an individual who remembered the process. It turns out that this particular shop is largely focused on brake applications and so used an "alignment cone" from their brake lathe as the tool to create this flare. So I attempted to find a brake shop that had the correct sized cone, but no luck. However, in the attempt to do this, I was pointed to a local machine shop called "Scotty's Driveshaft" who had been described to me as a shop that could solve every problem thrown at them. In short, they solved my problem. They actually made the correct tool (cone shaped flaring tool) and them pressed the flare into the bushing. It is not actually flat against the mustache bar, but there is no way that it is going to separate. As a part of this transaction, I also received the tool that they made. If anyone has this issue and needs to flare the new bushings I would be happy to try and make the tool available to you on a loaner basis. Just contact me via PM and we can work something out. Mike.[/ATTACH]
-
Mark, Sure. Just send them to Austin and I'd be happy to install the new ones. Just make sure you have the old ones out first. That's a job i'd prefer not to do again. Mike.
-
So after struggling with the installation of the first set of new rubber control arm bushings, I took the advice of the 5TH Horseman and purchased a new bench vise from Northern Tool that was a significant upgrade from my last one. All I can say is what a difference. They went in like a breeze. I also used the appropriate sized sockets from my impact wrench which are much beefier and stronger. This will give you a sense of the size differences of my old vise and my new one. What a difference the right ools make. Mike.

-
So I can report success but the path to get there was a little different than the advice that I received. It turns out that the spindle pin puller that I have uses a 1 inch threaded rod and so was way too big to fit through the hole in the bushing. It turned out that I did have some spare threaded rod that fit the hole perfectly and so decided to use that instead. I did freeze the bushing but decided not to heat the arm as it had already been painted and I did not want to risk ruining the new paint job. I also used anti seize as you all recommended. In the end, I got the bushing about 3/4 of the way in and the nut on the threaded rod was so tight it just stripped and locked and could no longer be turned. I ended up cutting the rod and using my vice to get the last bit in and it worked perfectly. For the second one, I decide to just use the vice, but only got it about 1/2 way in before my vice was out of gas. Even with a pipe on the handle I could not turn it any further. Fortunately i did have a larger vice and that one did the trick. I slipped in a new spindle pin just to check alignment, and it was perfect! I think that I am planning to purchase a new vice with finer threads as you described before I attempt the other control arm. Thanks for all of the help. I think I have the process down and the next one should be a lot easier. Thanks again. Mike.
-
So I am making good progress on the rear end refresh of my 260Z and thought that the worst was behind me after I had removed the inner sleeves of both the outer control arms (ie spindle pin bushings) as well as the moustache bar. However, I have a question about the installation of the new outer control arm bushings. I have opted to go with the original rubber bushings from Nissan instead of poly. Is there a trick or technique to installing these? I have a large shop press but the configuration of the control arms does not provide enough clearance to actually use the press. I have attempted to use a large vice along with a socket as a press, but even with a fair amount of pressure on the vice I can't get the new bushing to start moving into the control arm sleeve. There are alot of threads about the ins and outs of installing the poly bushings but I have not really seen anything on the original rubber ones. Has anyone done this before and do you have any specific advice on how I should proceed? Thanks for the help. Mike.
-
I am in the middle of completely overhauling my rear end on a late 260 and have had the same problem locating these. The correcr part number by the way is 54320-N3701. I tried ordering these from Gastonian Nissan who told me they were discontinued but the front ones were suitable replacements. Unfortunately I did not realize the height difference until after I received them and so now I have 4 of all the same height and do not want to lower my car any further in the rear as it already has lowering springs. I did find these at MSA but they are super expensive at $215. You can find them here: http://www.thezstore.com/page/TZS/PROD/SSSC01C02/23-4382 I do not plan to pay that much and fortunately my old ones look to be in pretty good shape so I am repainting / refreshing them as best as possible and will just re-use these until I can find a suitable replacement at a more reasonable price. Let me know if you find a source. In the meantime if you decide you want to use the front ones as replacements, I have 2 extra that I could make available to you. Mike.
-
texasz, Just saw your response. I have the diff with half shafts still connected out of the car. Removed the first half shaft last night and going through an inspection now. While I have it out of the car, I'm inclined to just replace the bearings. I still don't quite understand how to press out the old bearings. I have a splitter as well as a shop press so I think that I have all of the tools. Just need to get the removal process down. Perhaps we can figure out a way to hook up in Austin and share some Z war stories. Might even be able to help each other if needed. Let me know. Mike.
-
Bought from this seller a couple of times. The last time I purchased multiple items and paid shipping as if each was going to ship separately. Without even asking he refunded a significant portion of the shipping charges which were credited immediately to my PayPal account. Not always the best prices but a fair businessman and good communication. Would engage in another transaction without hesitation. Mike.
-
Jon, Thanks for the response. I will be tearing this down in the next week or so and will have a look as you suggest. I have the press and the brass drift already so I just need to pick up a bearing splitter / separator if they need to be replaced. Mike.
-
So I'm in the process of rebuilding the rear end of my 260Z (bushings, bearings, struts, etc) and now have everything removed including the differential (R180 as near as I can tell). While I have the differential out of the car, I am considering replacing all of the diff bearings since it has never been done before on this car and I felt that while I had it out it would be a good thing to do. Has anyone ever done this before and how challenging a task will this be? Are there special tools required to remove and install the new bearings? Am I asking for more trouble than it is worth? Thanks in advance for any recommendations. Mike.
-
I am in the middle of rebuilding my entire rear end. All new bushings, brakes, mounts, etc. and will eventually be getting to the front end as well. As part of this I am preparing all of the major components ie strut tubes, springs, etc) for painting (or possibly powder coating) and would like to get a recommendation on the type and brand of paint that people have used in the past and have achieved good results. Would appreciate any and all comments. Mike.
-
Yes the two Mike W's was a total accident. When I registered, I used a login name which I use regularly not realizing that there was a MikeW who was already a part of the forum Hope this hasn't caused any confusion or inconvenience. Mike.