motorman7
Supporting Member
-
Joined
-
Last visited
Everything posted by motorman7
-
ZCCA judging question: I noticed in the judging manual that the stock Z car must be in the "exactly as shipped from the factory" condition. For the 1973 Z cars, there was a service bulletin that later installed items such as the insulation that cover the fuel lines among other things. Based on the manual verbage, my understanding is that the insulation should not be on the car for the official judging. Does this sound correct?
-
Technically, this is just one of a number of 'Blips' in the Z car world. While this is double what might be considered by Hagerty a 'Concours' level car, it's rarity is what makes it valuable. This pretty much goes with anything in a free market economy. Other Z car 'Blips' in the $100K range would be any of the gold medallion cars, the VZ cars, Very low S/N cars and low mileage original unrestored cars. These cars are going off in the $100K range RIGHT NOW, they are just not as publicized as this one. Yes, this is a minority of the Z car population, but it is reality. Yes, the average price of a very nice condition restored Z is going to be in the $30-60K range, but the cream of the crop are commanding top dollar and truly worth what the market will pay. Unfortunately, most of us are not in that market.
-
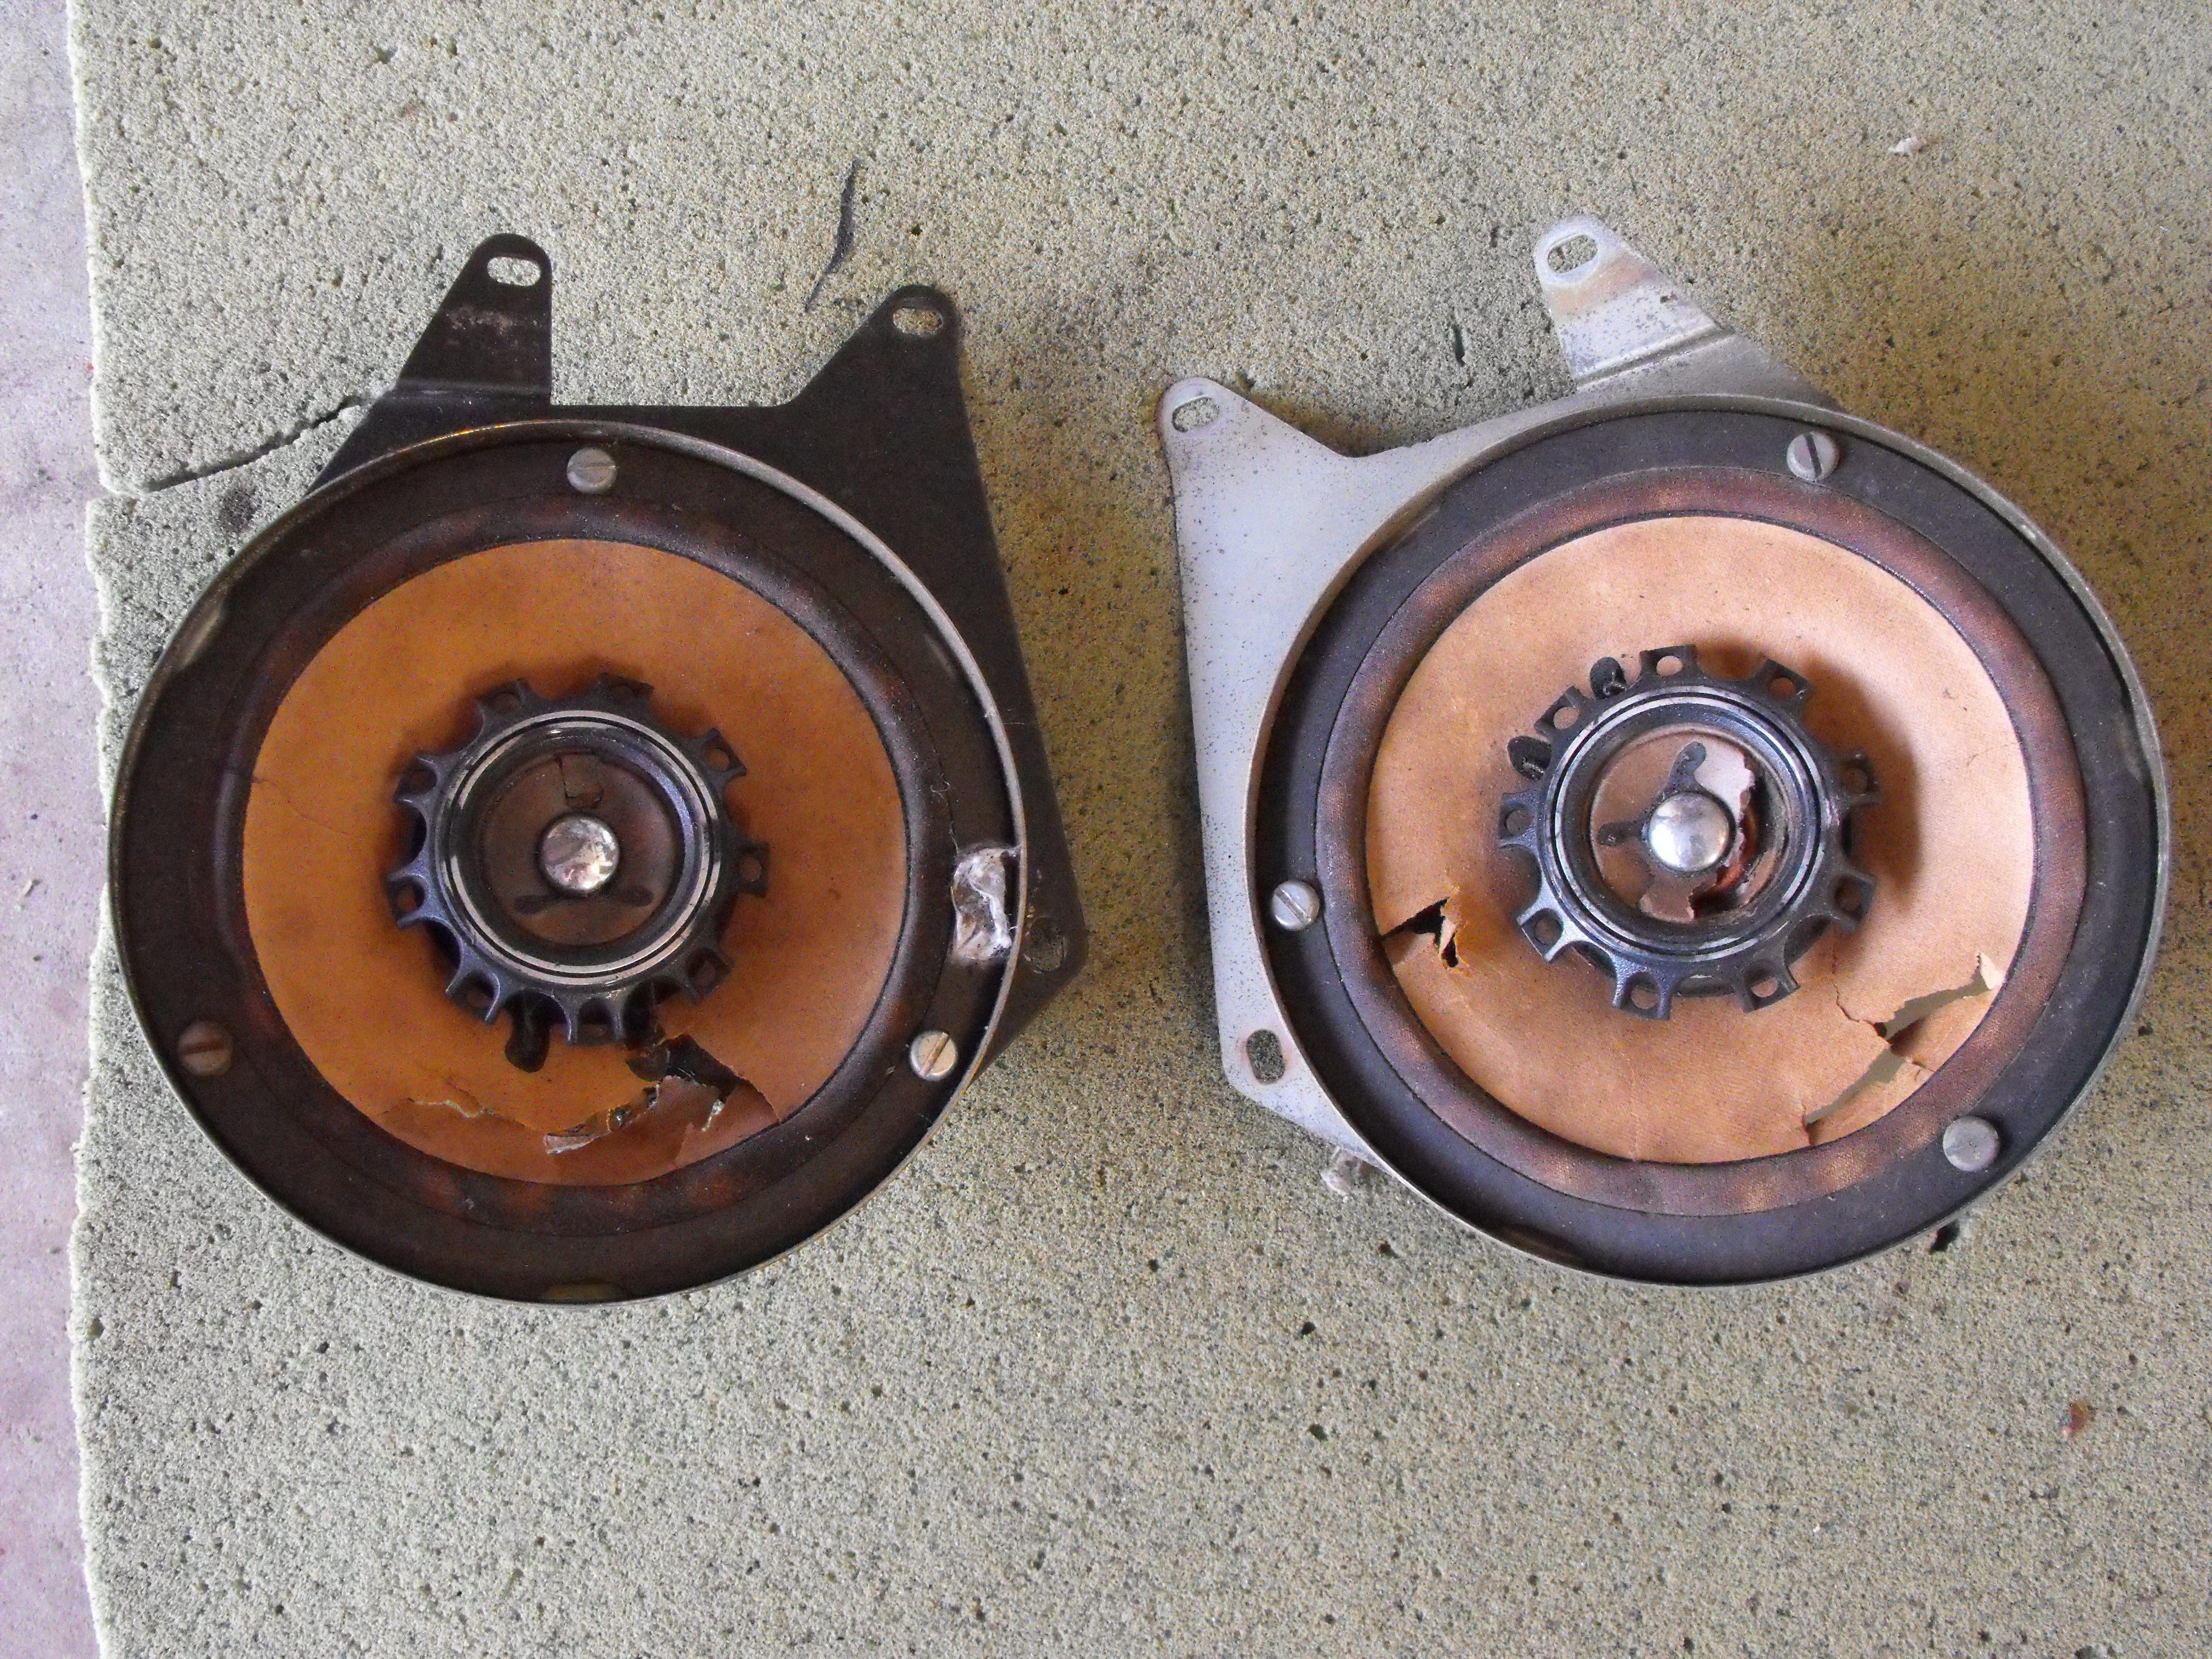
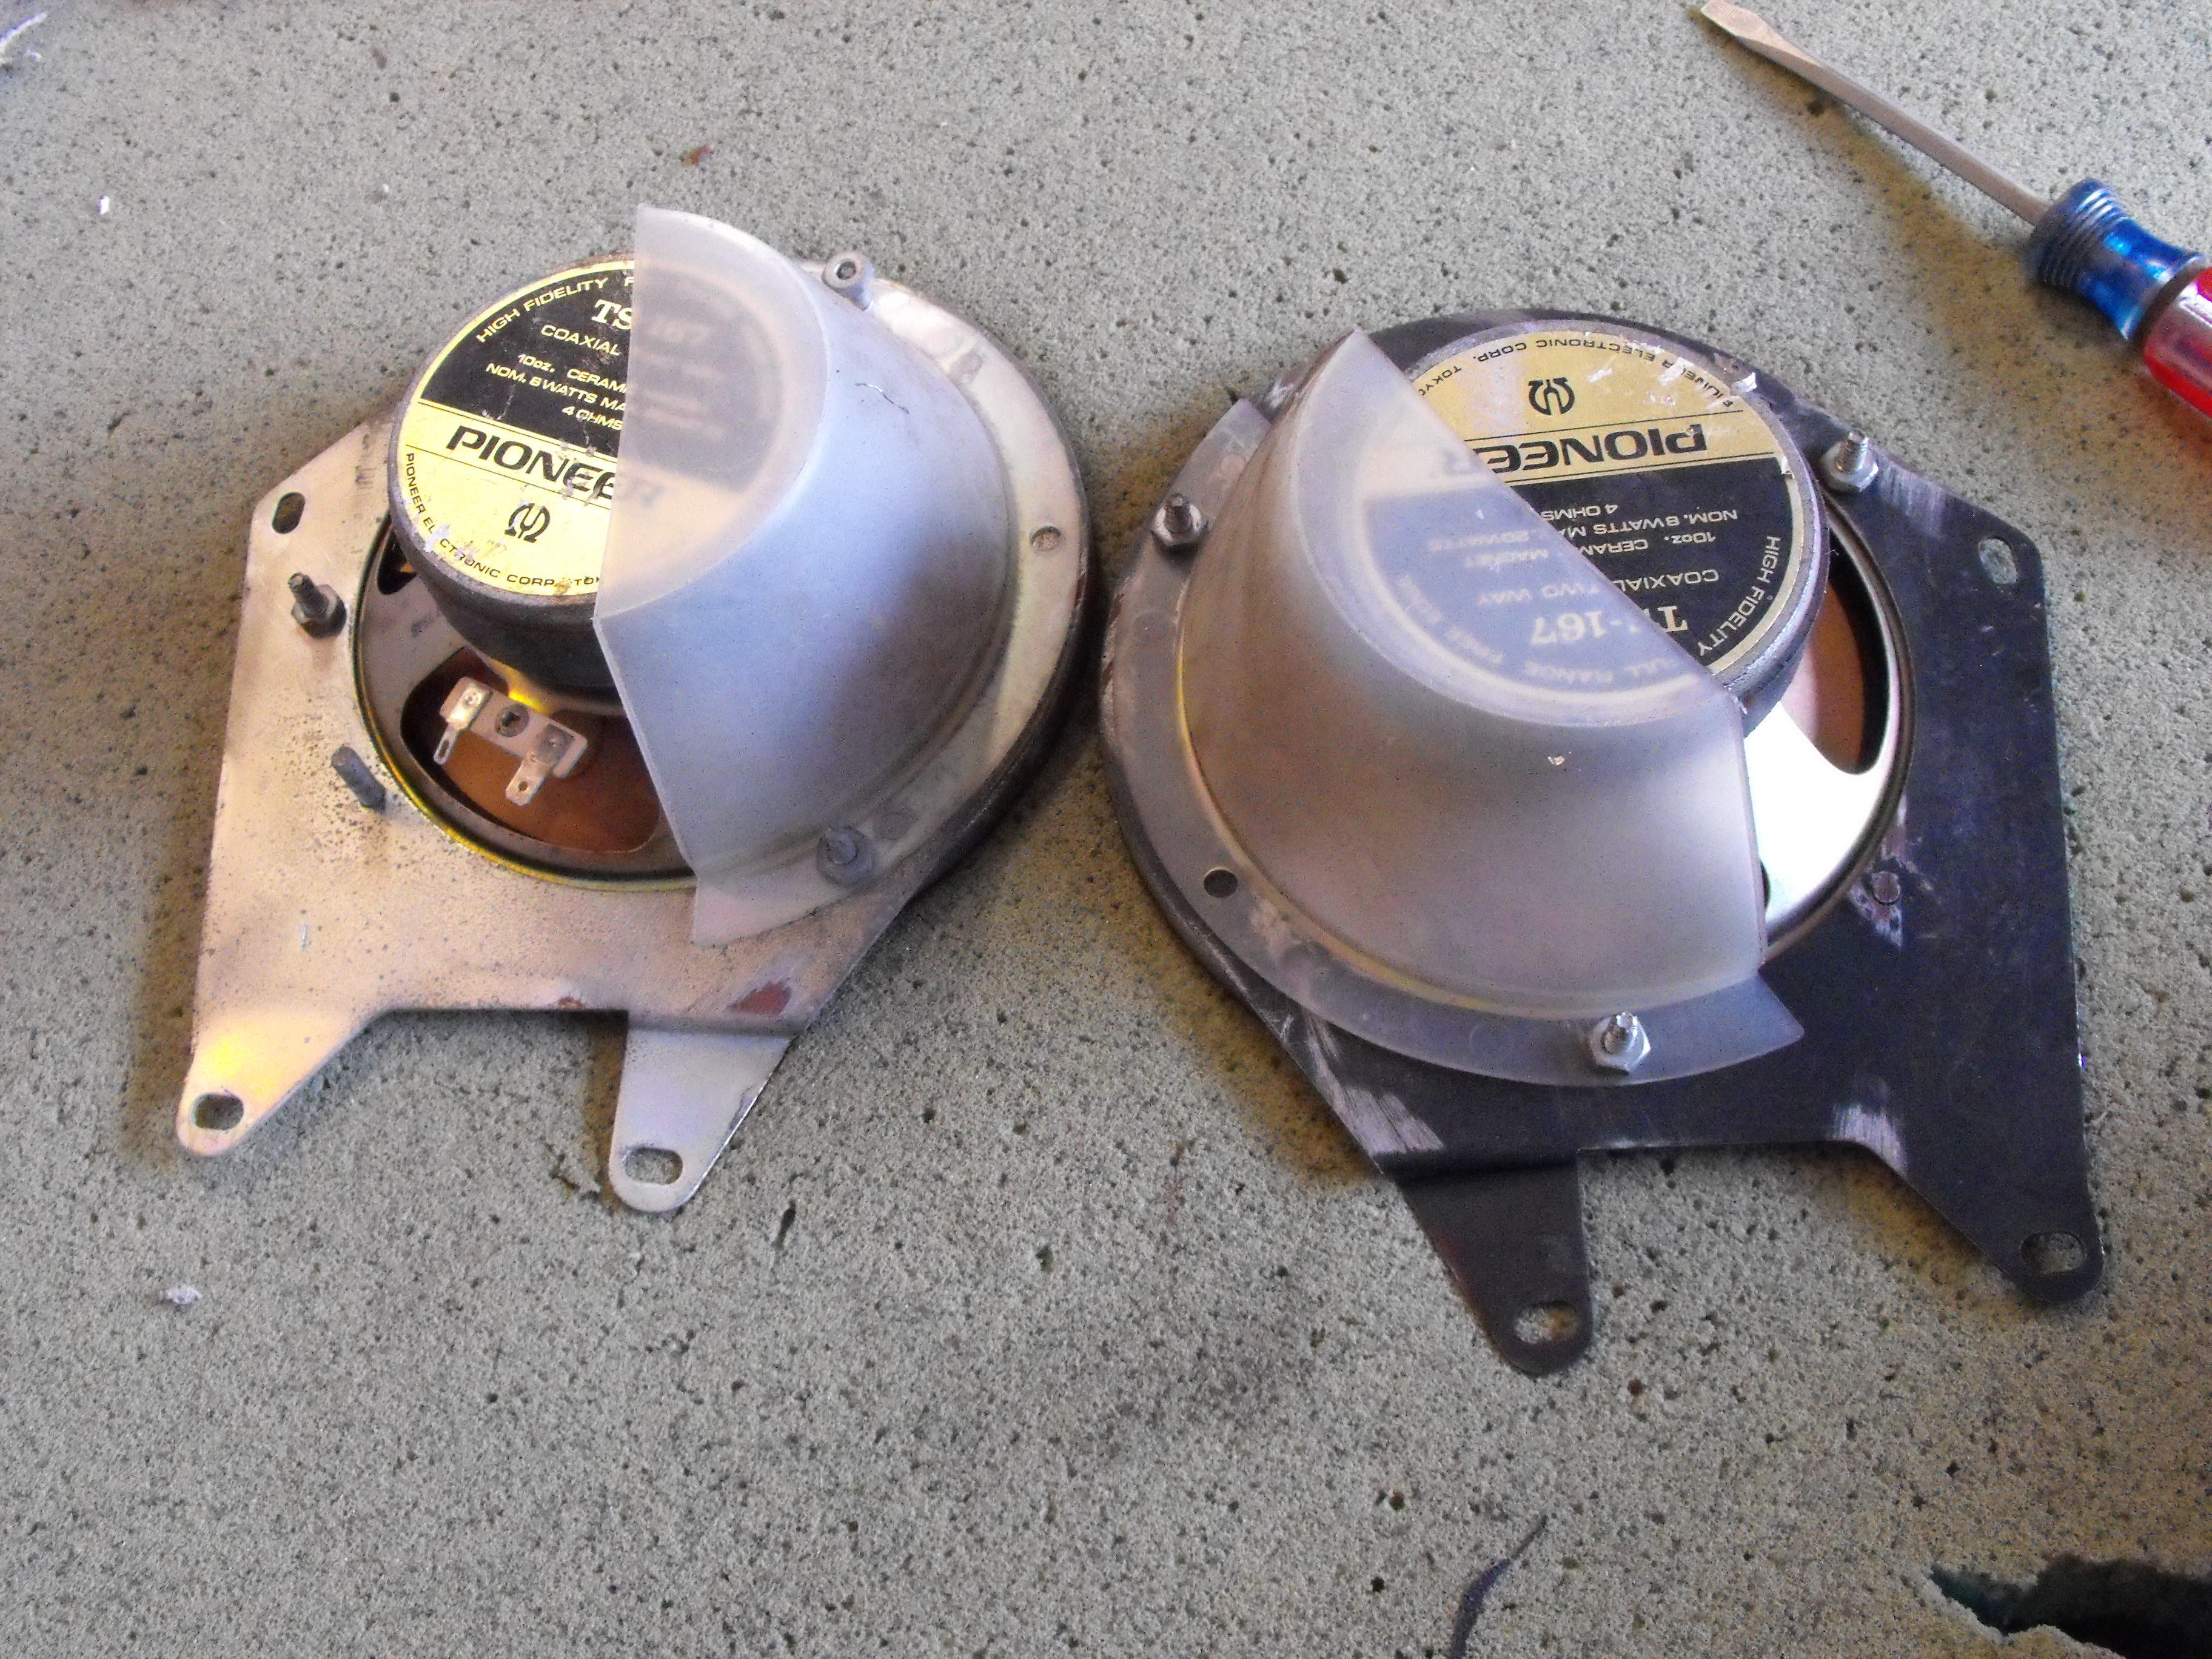
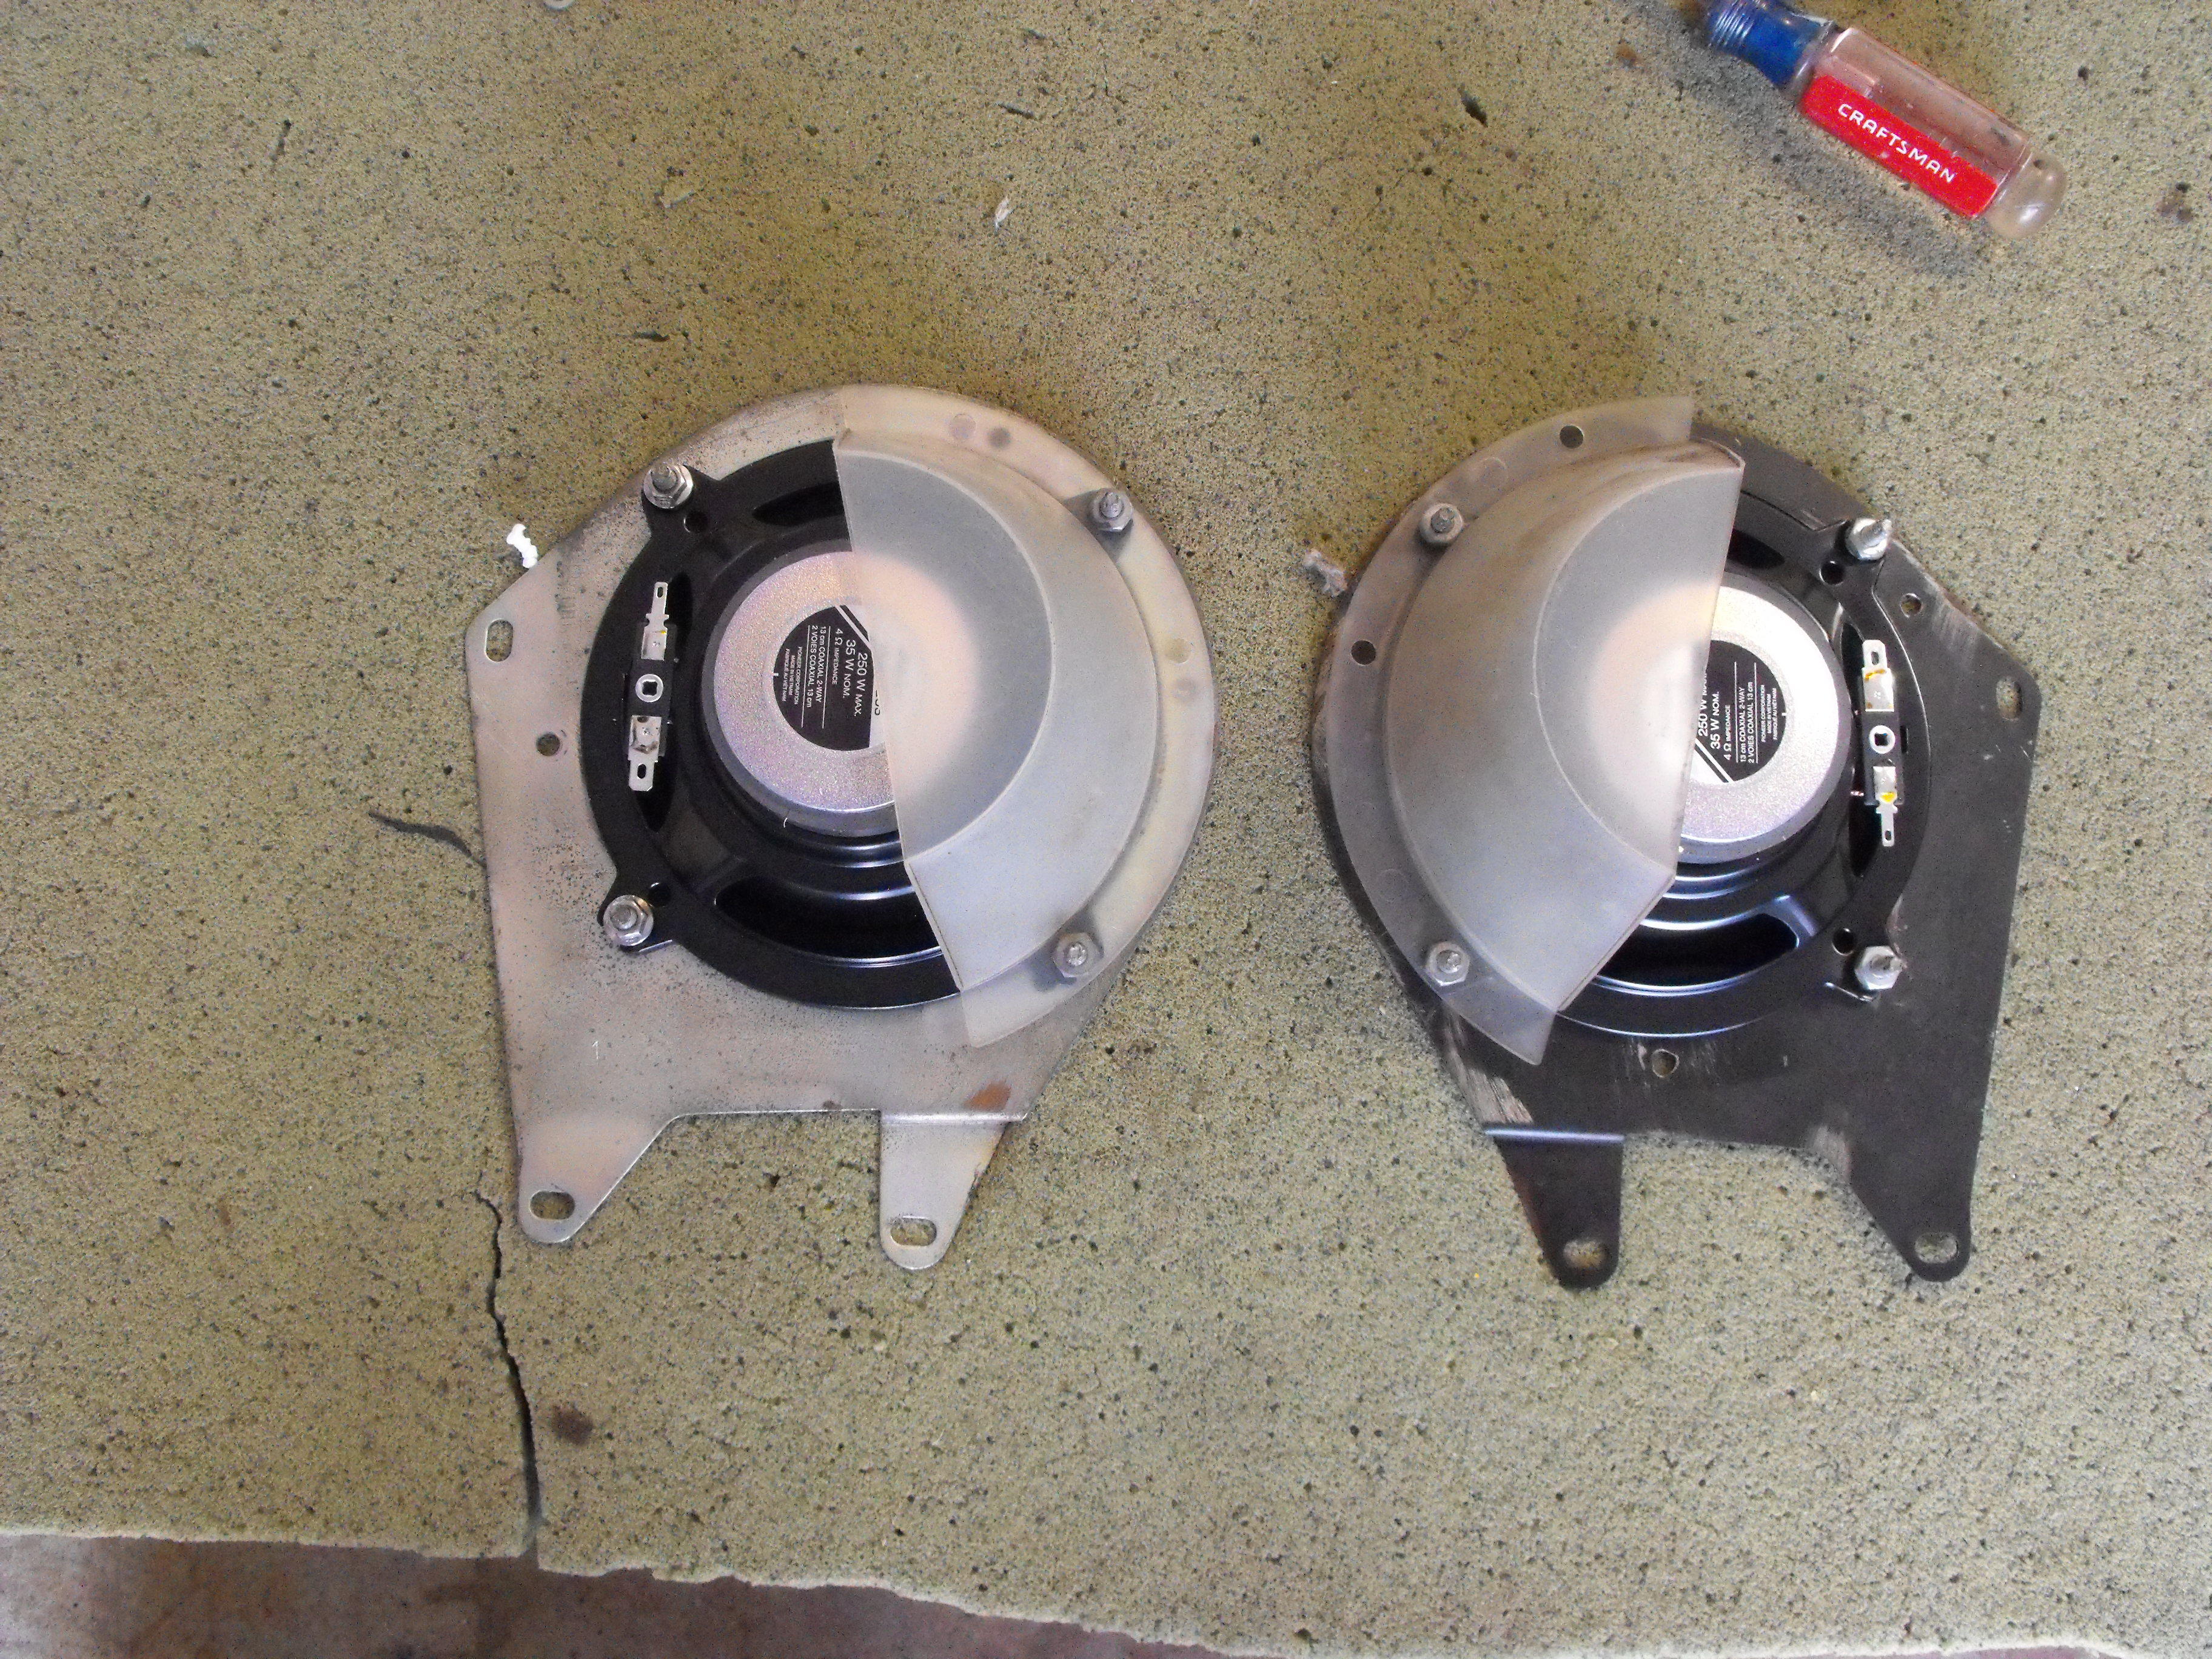
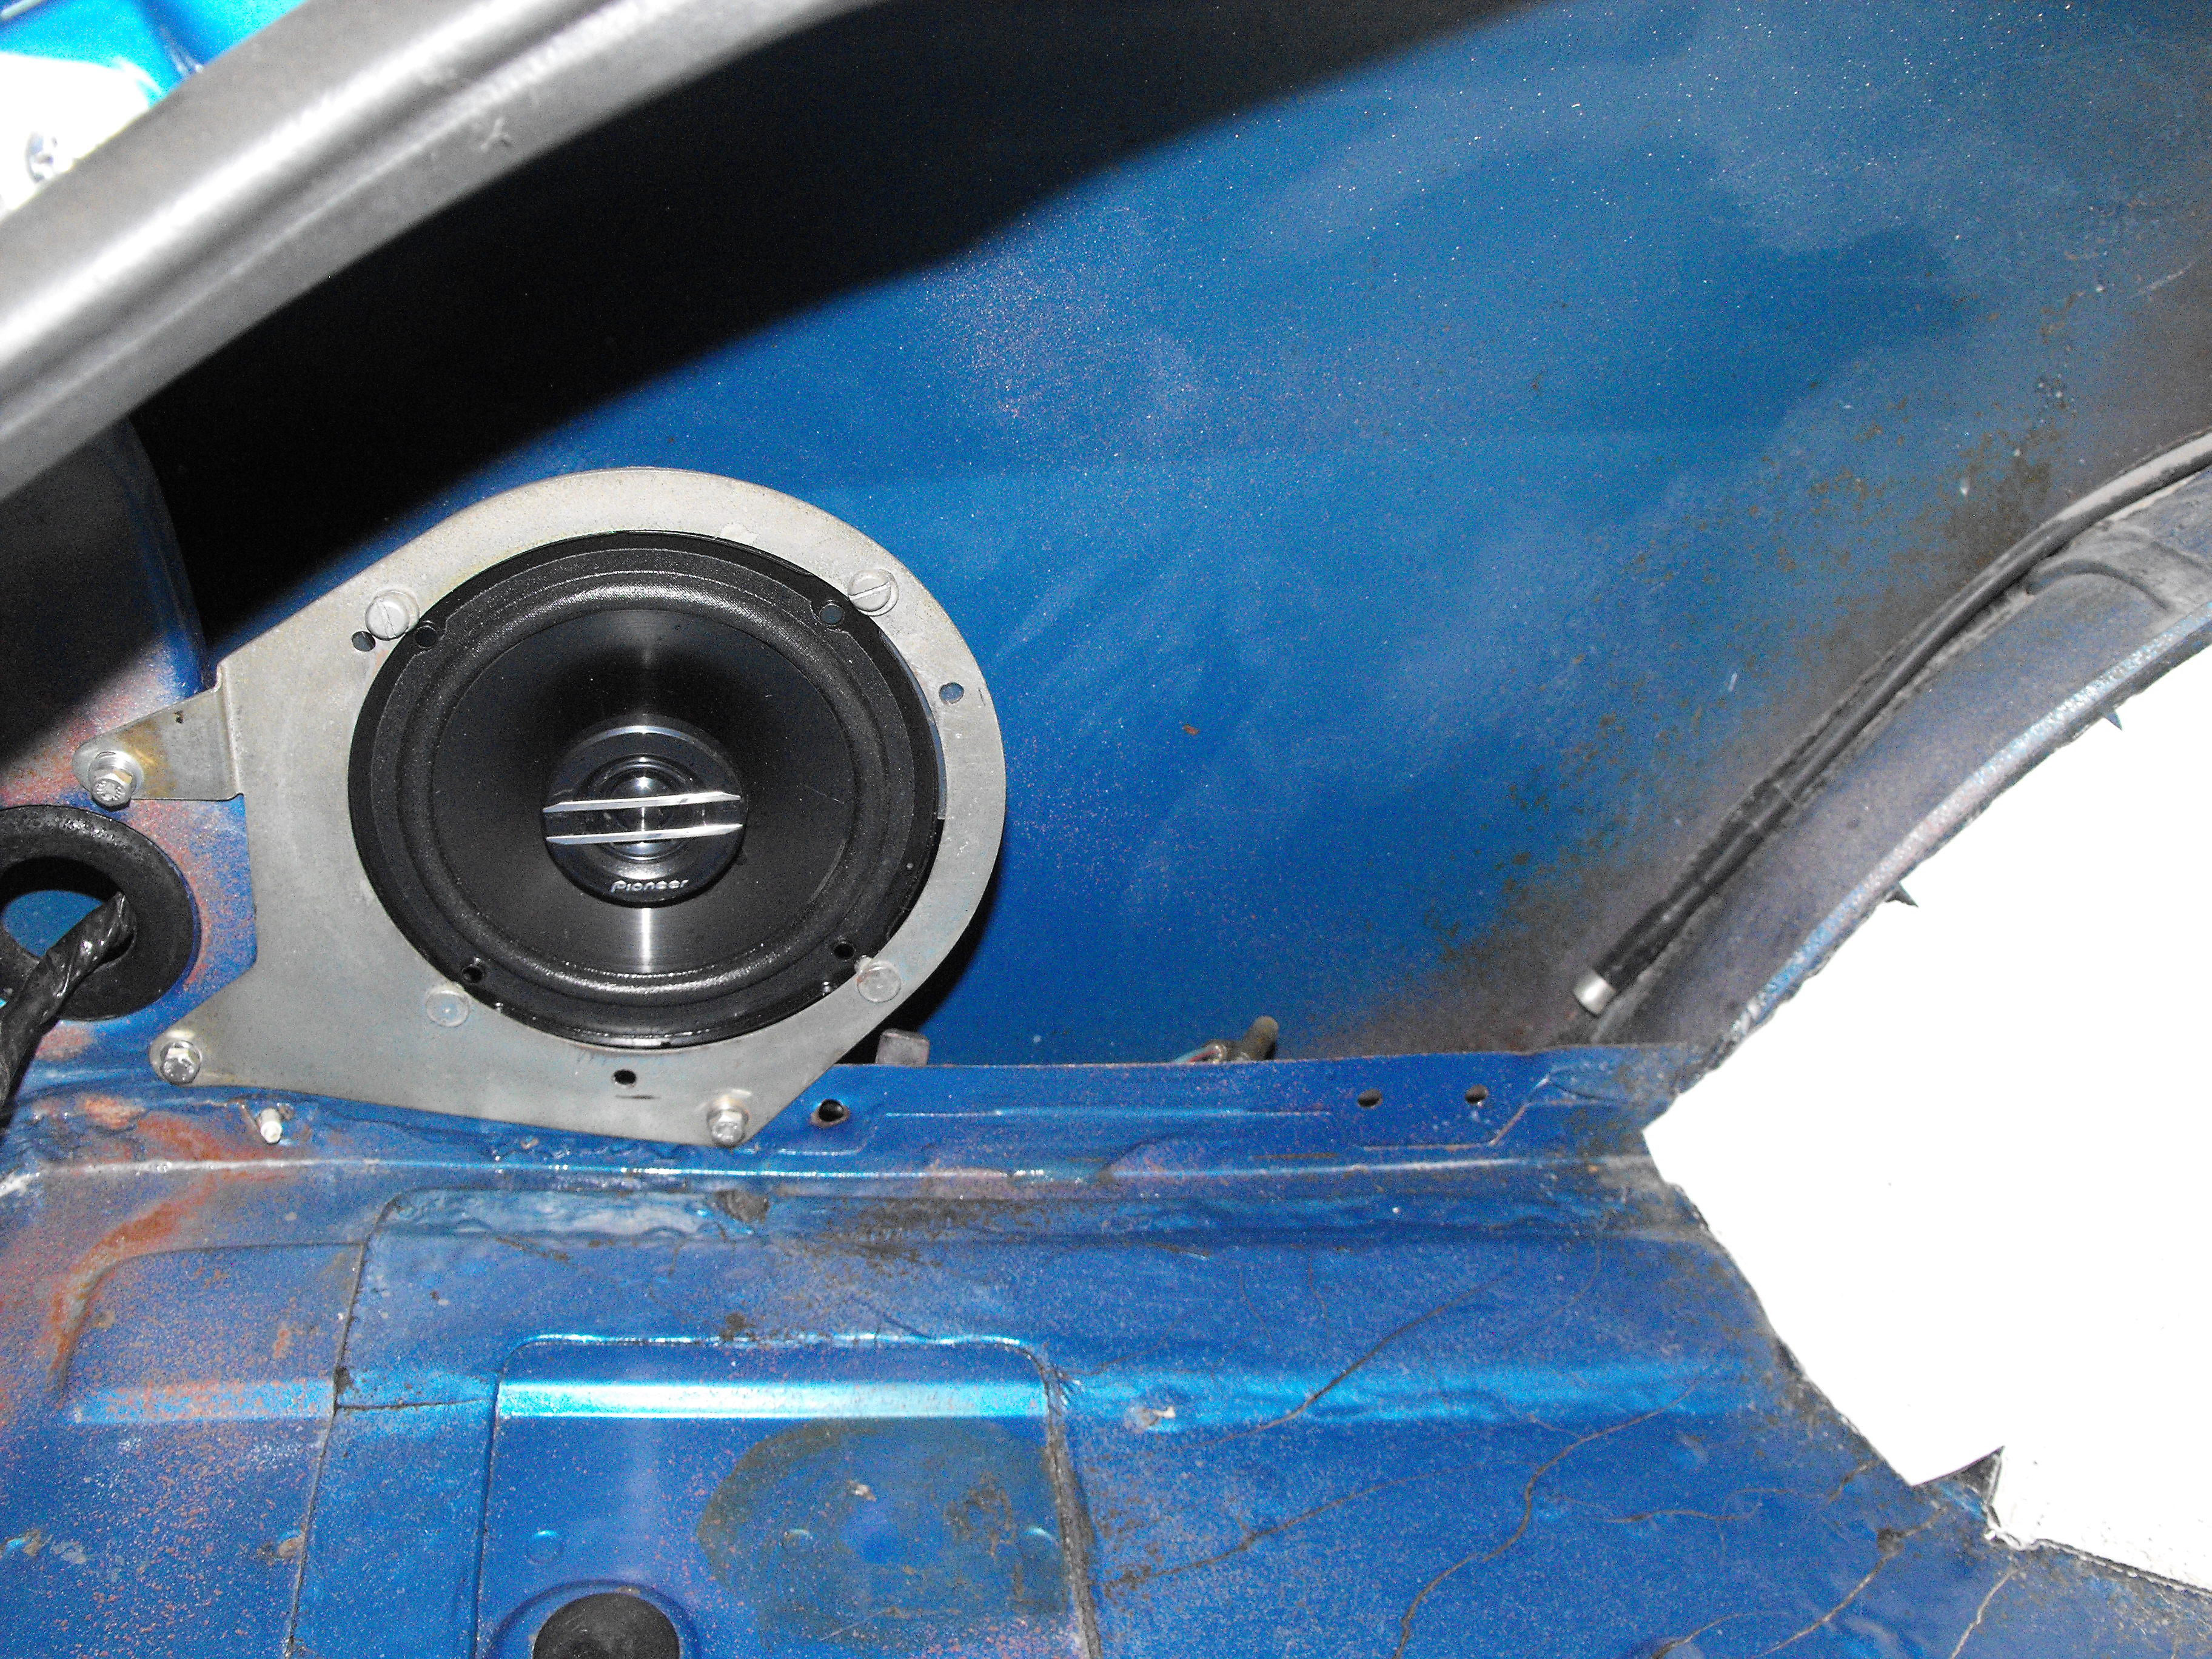
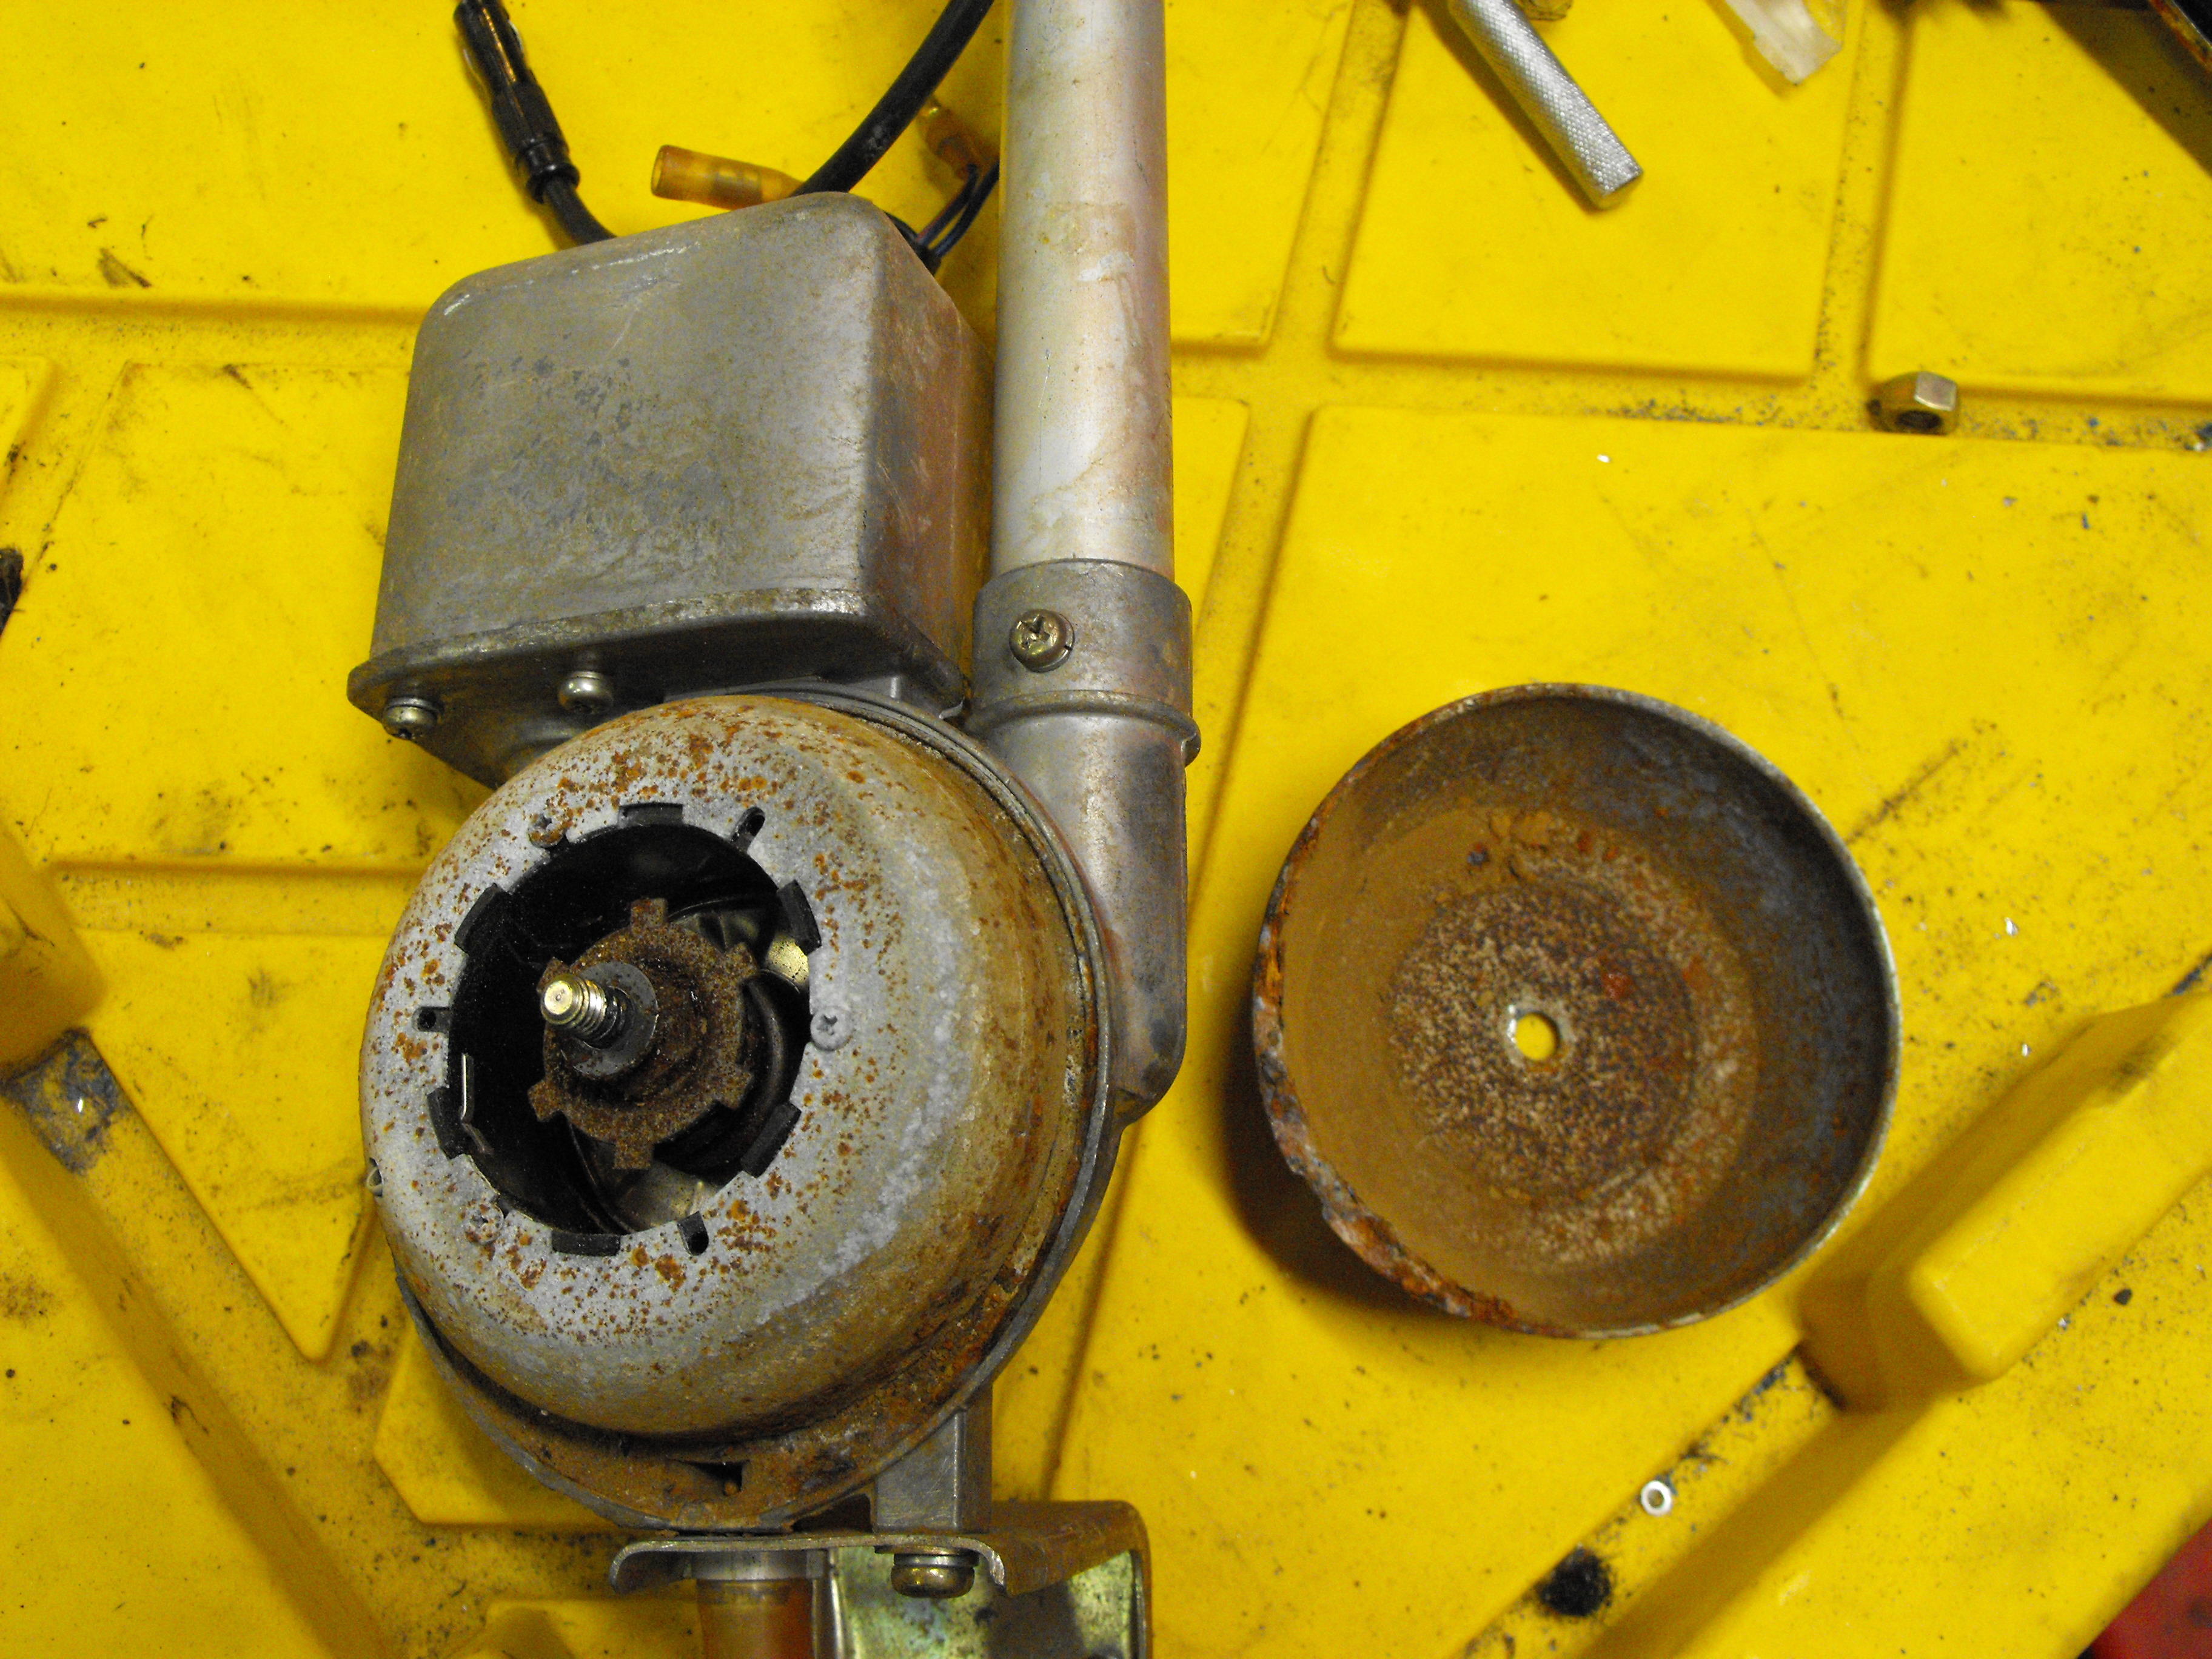
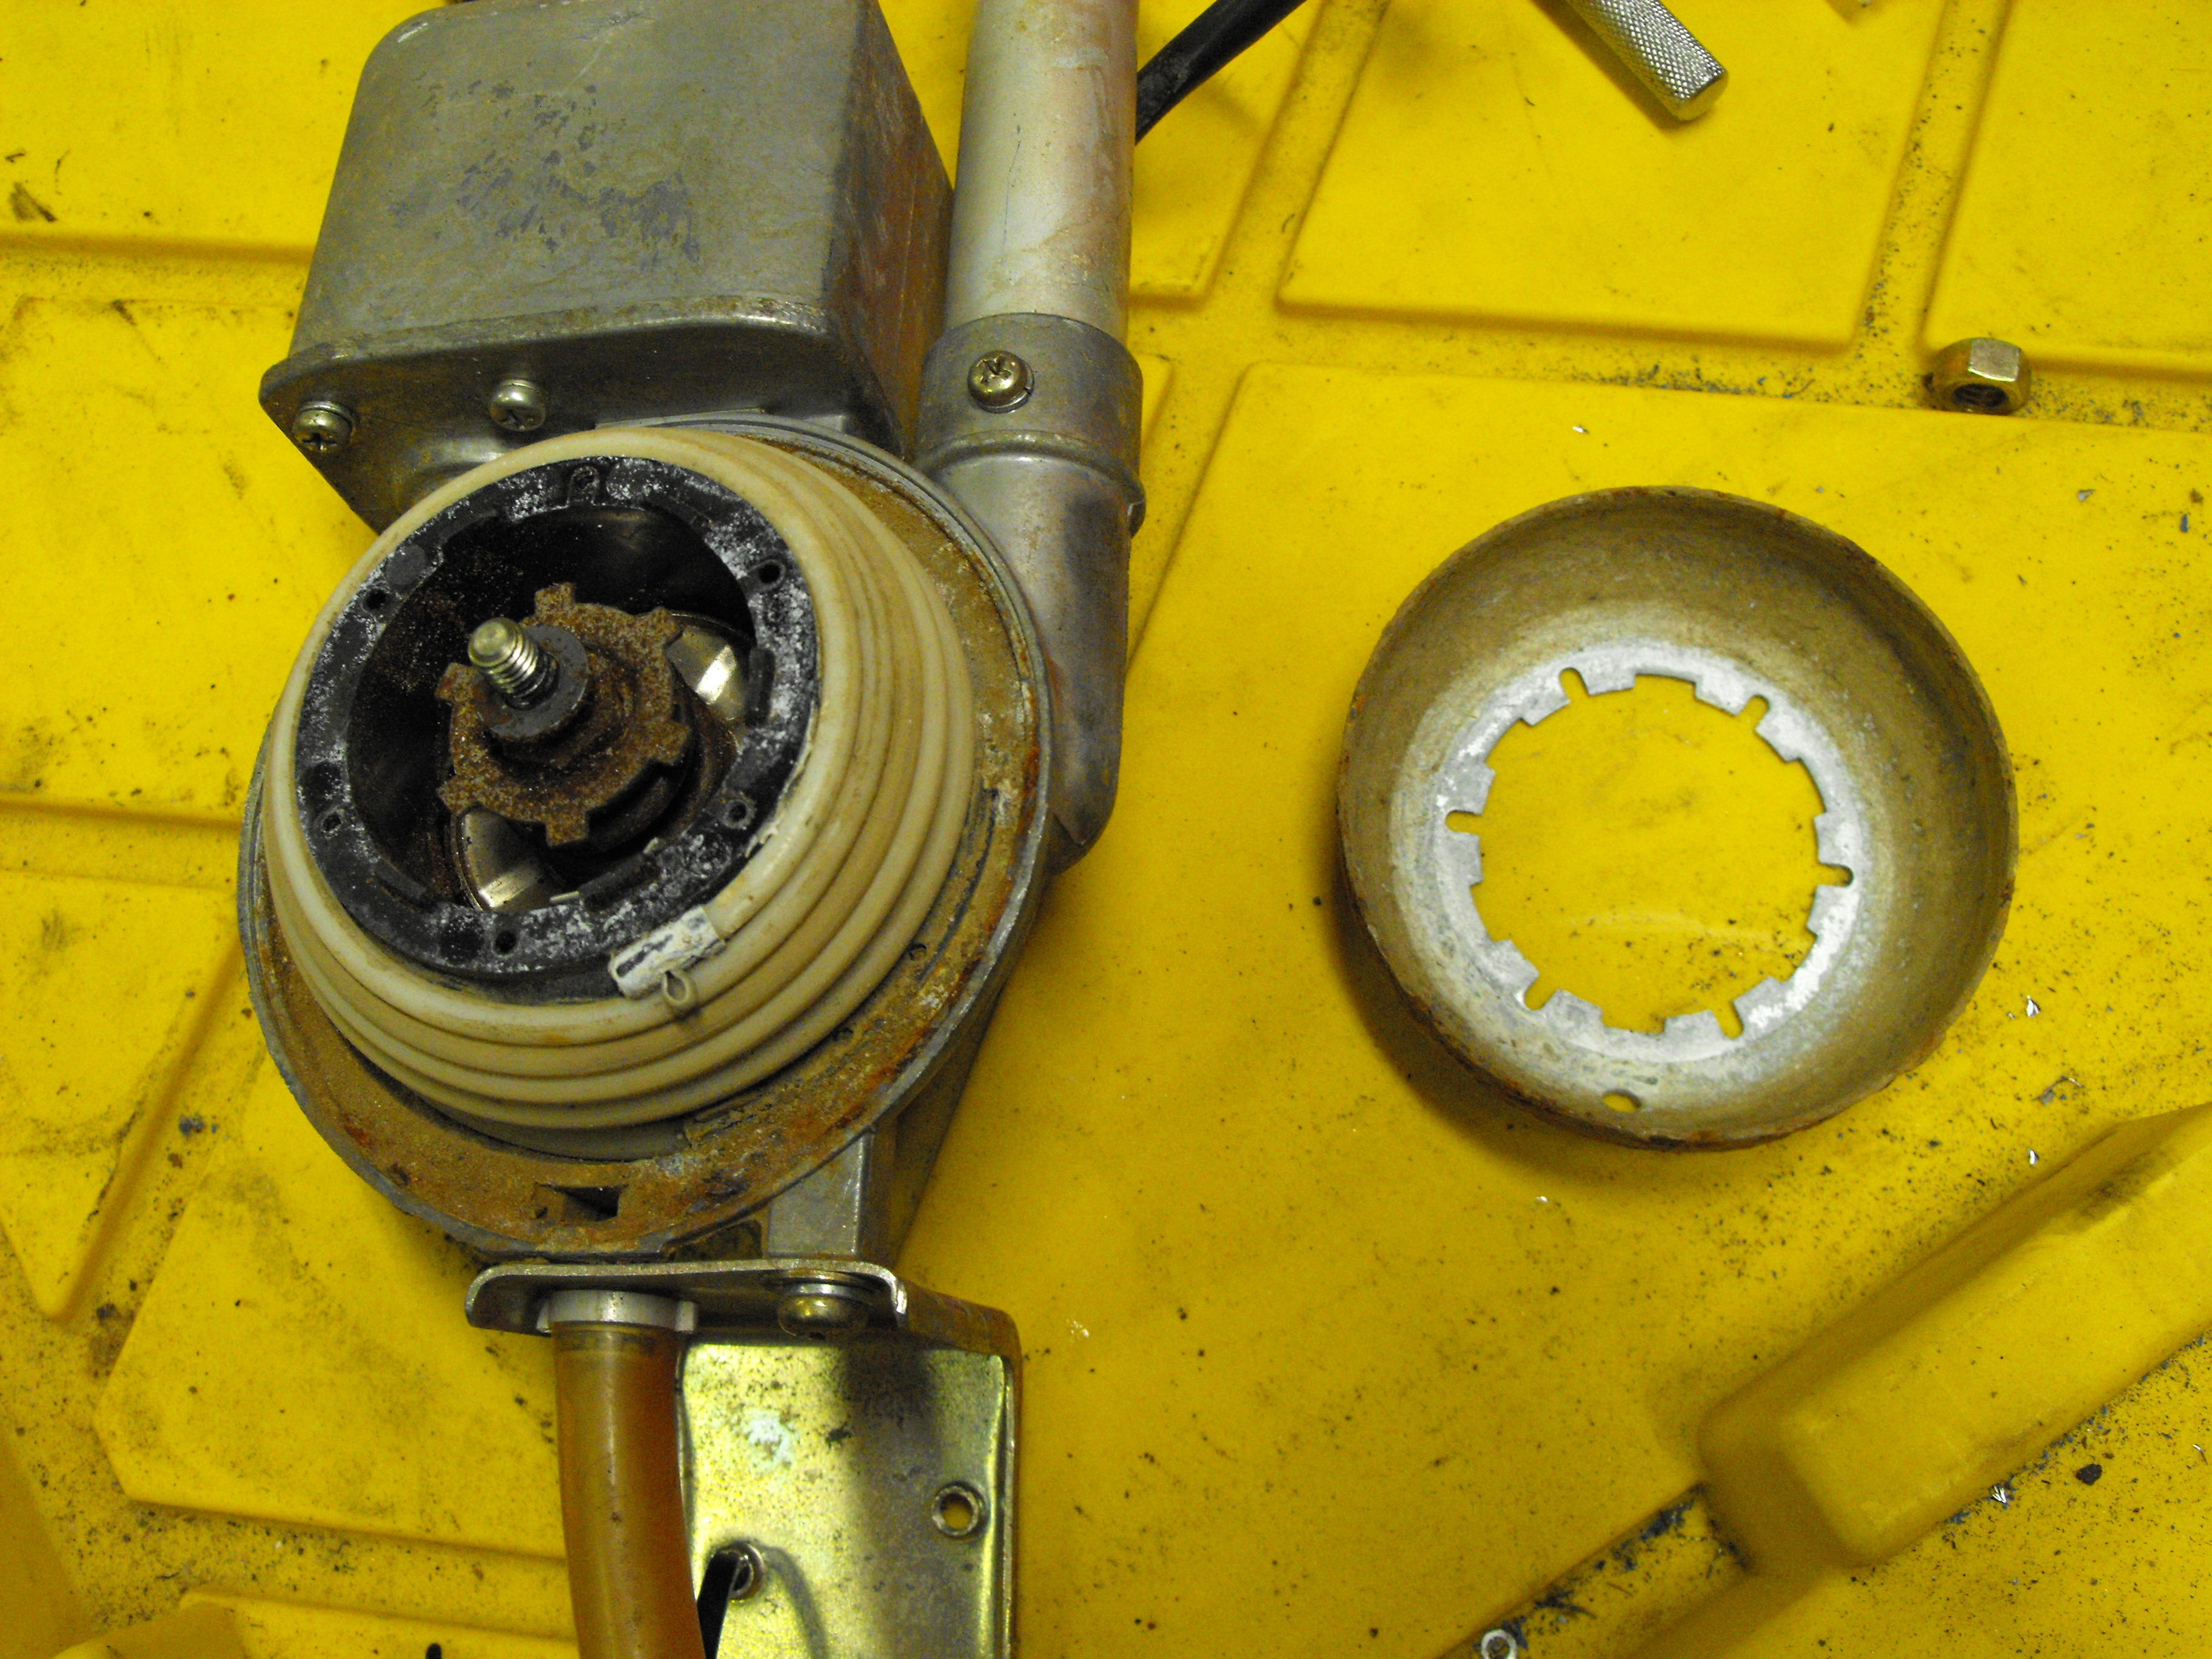
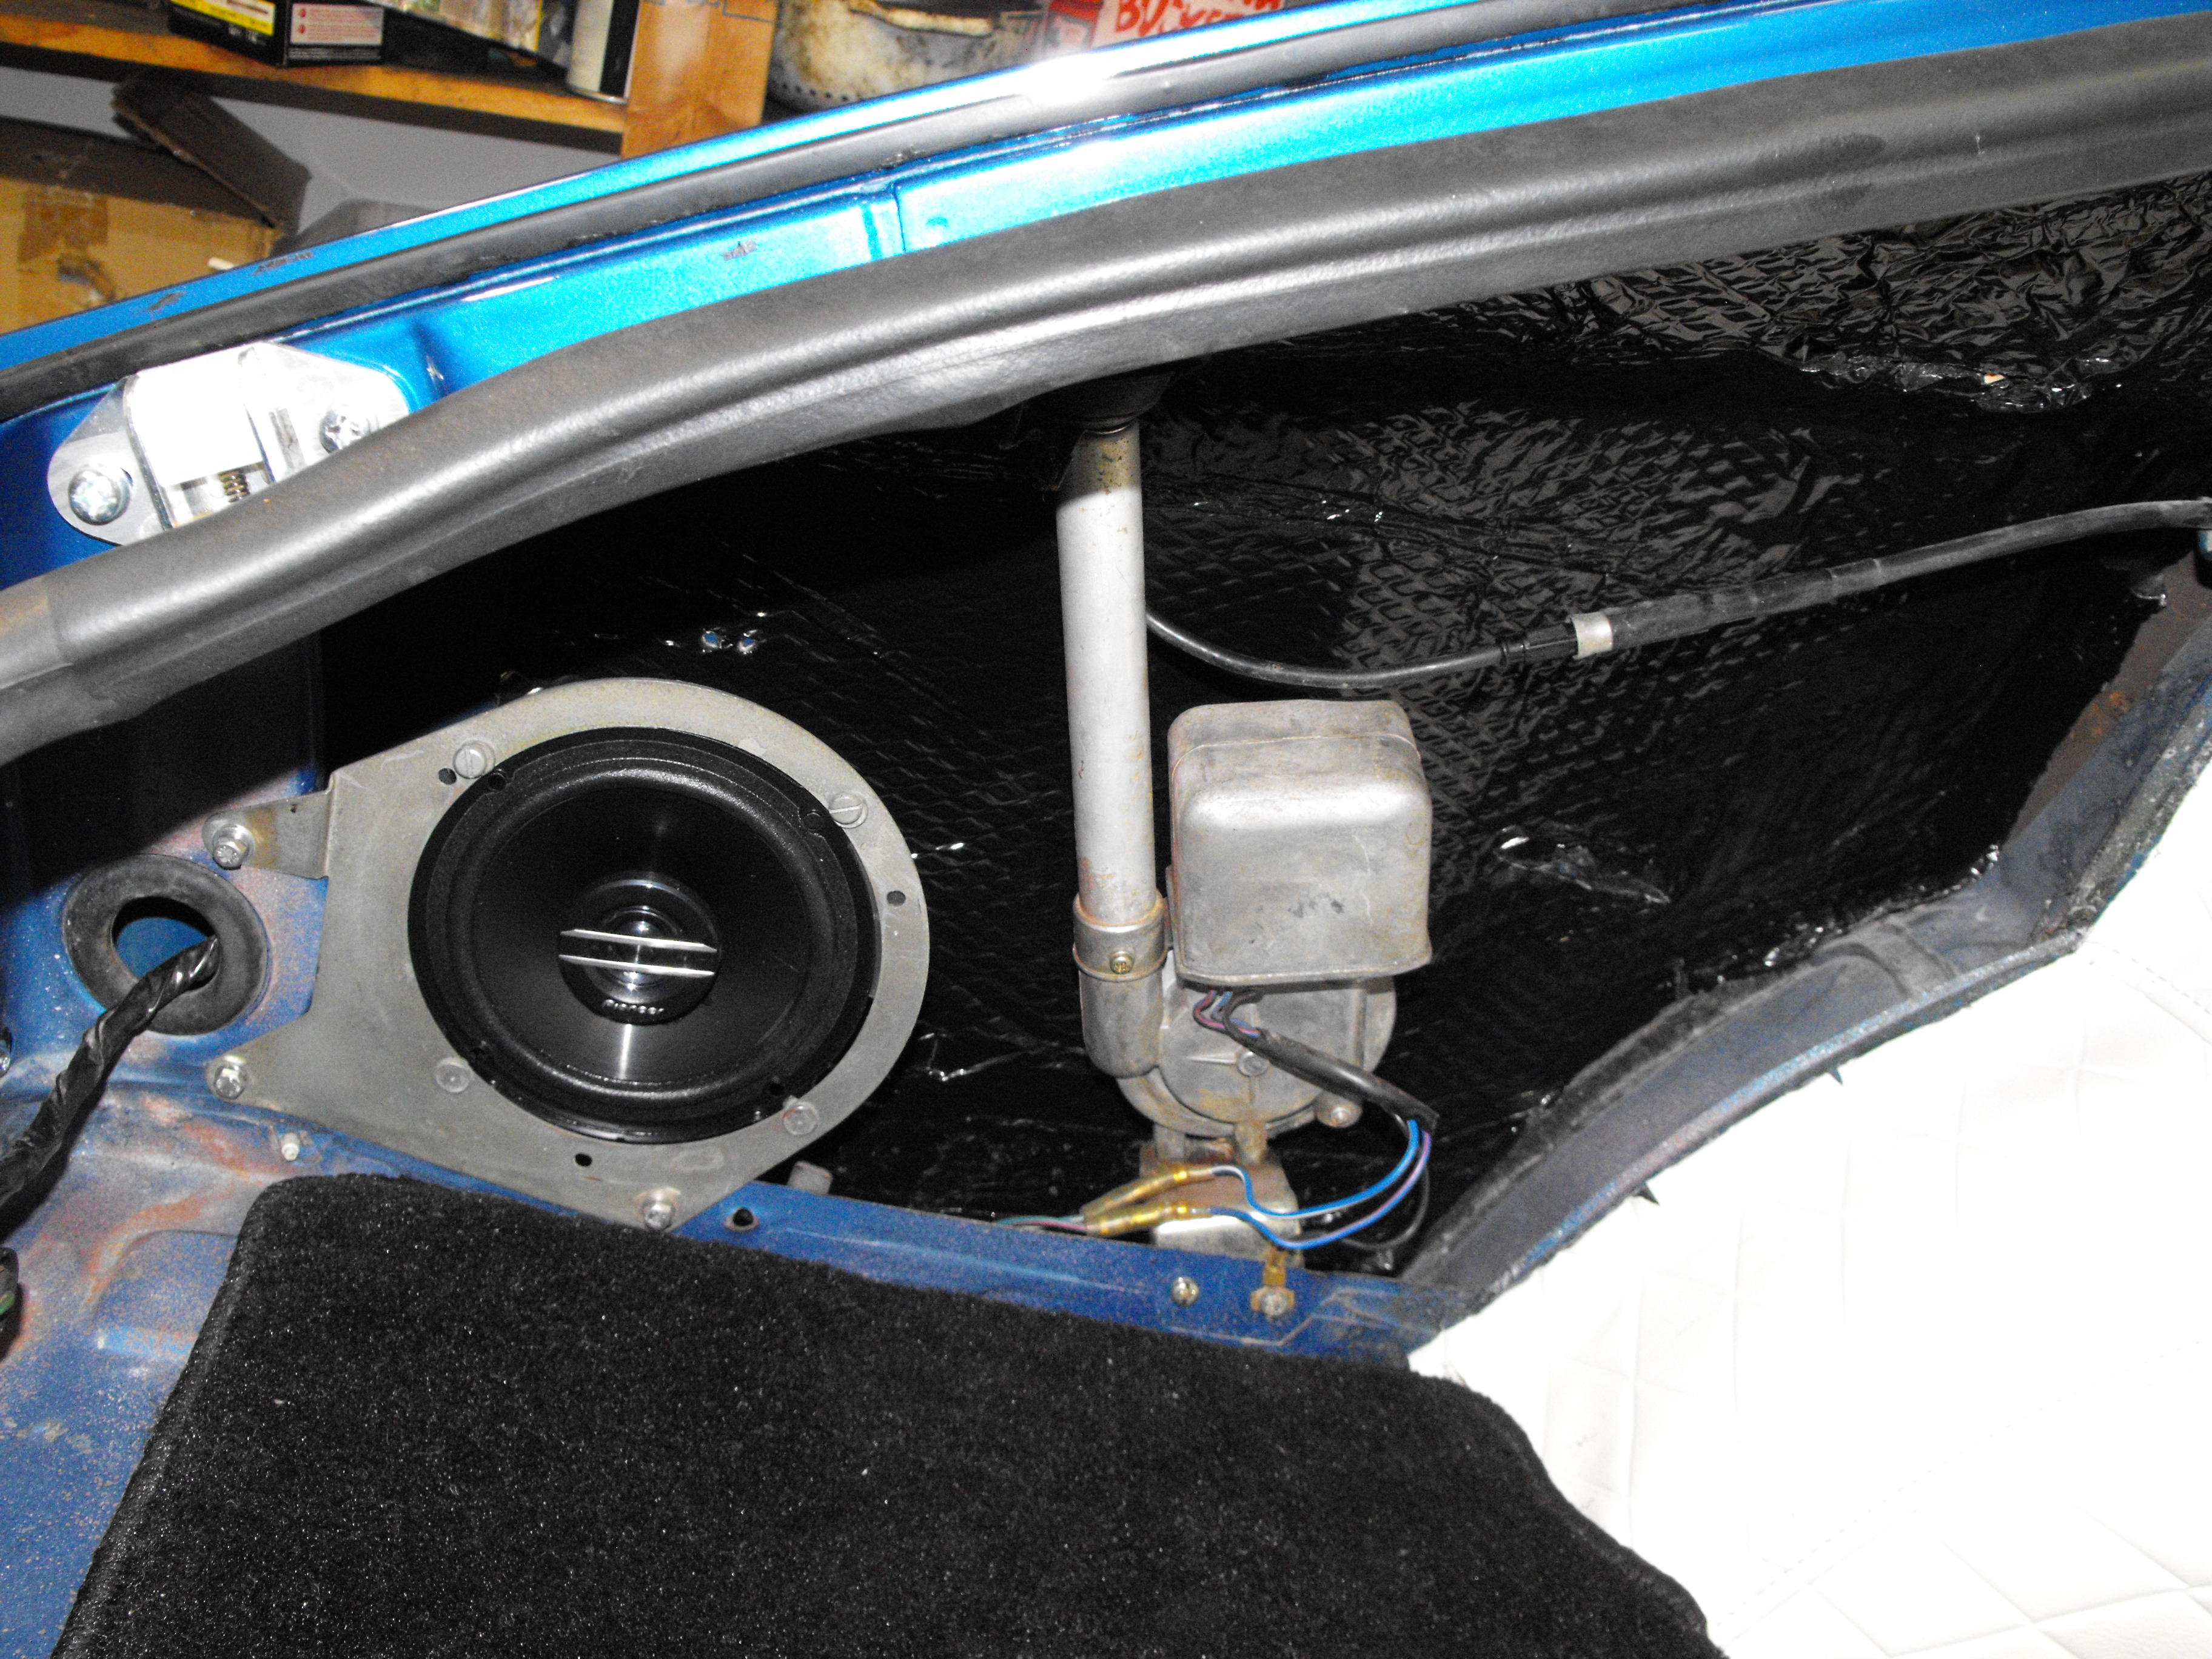
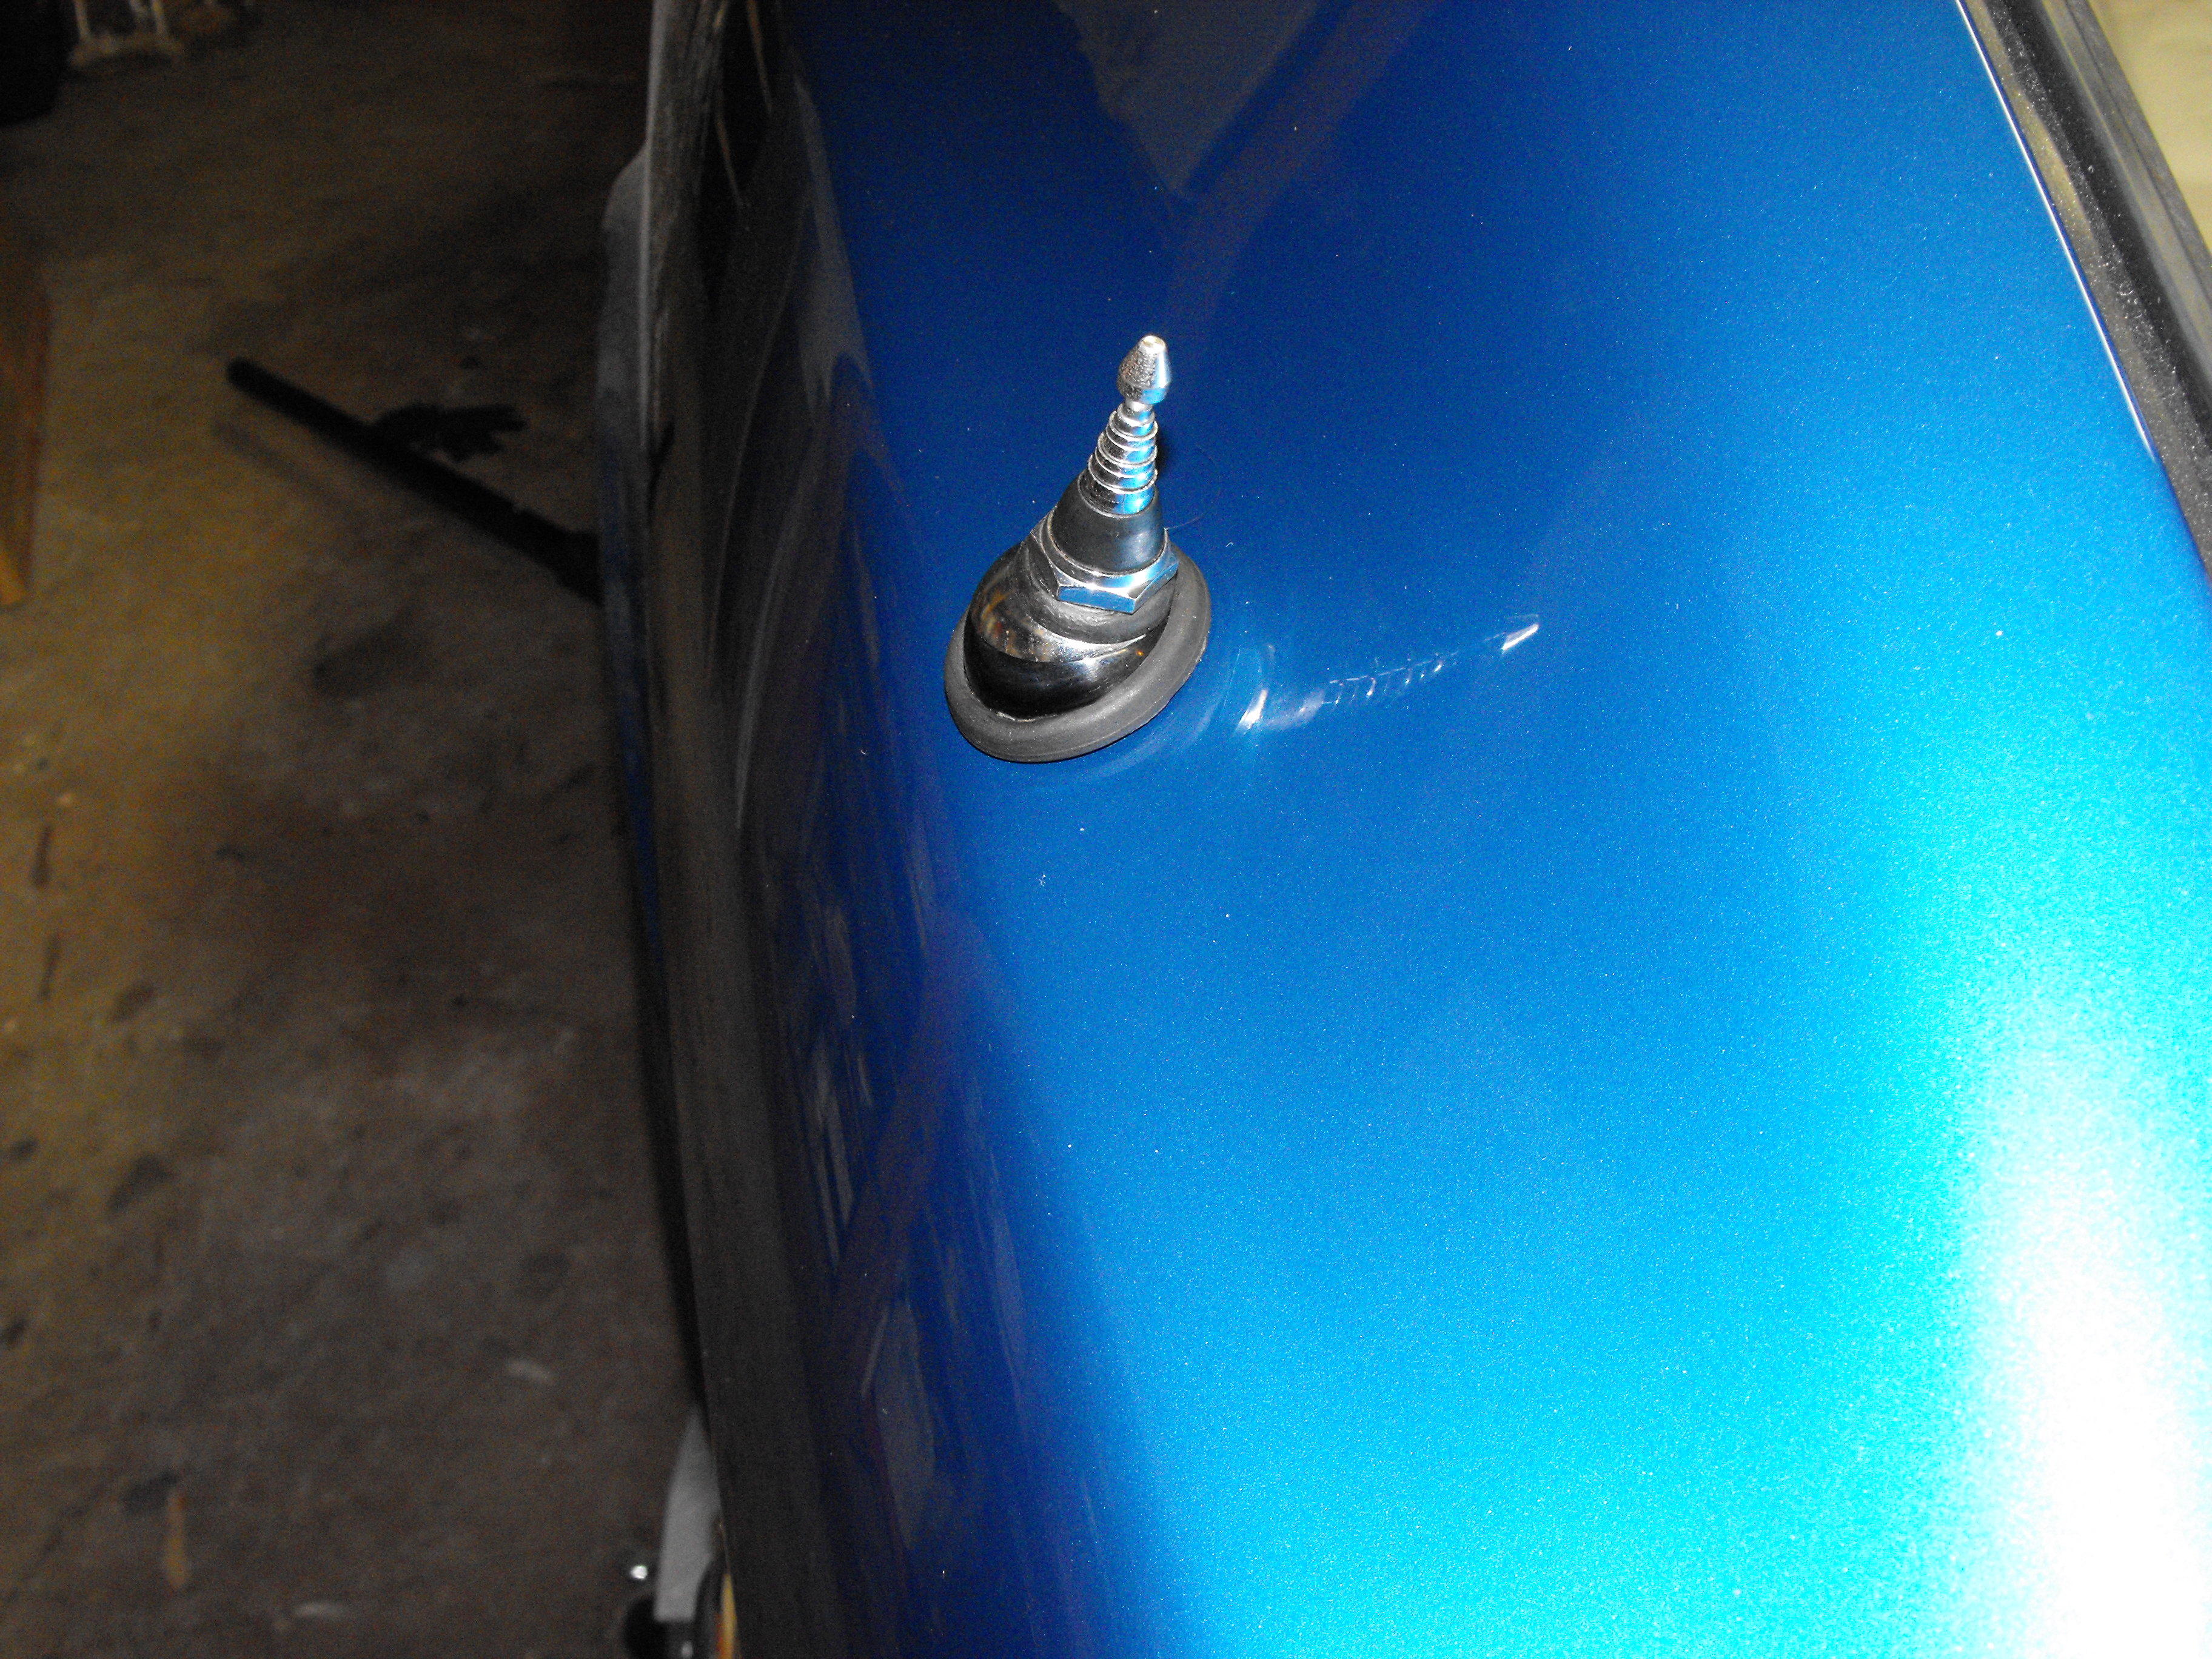
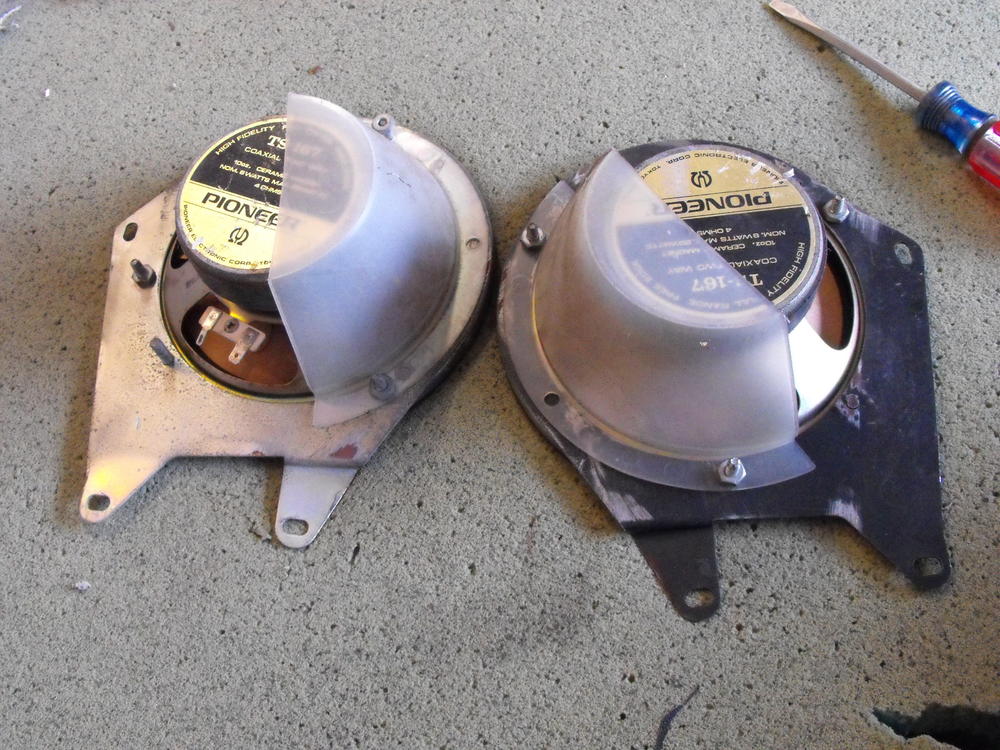
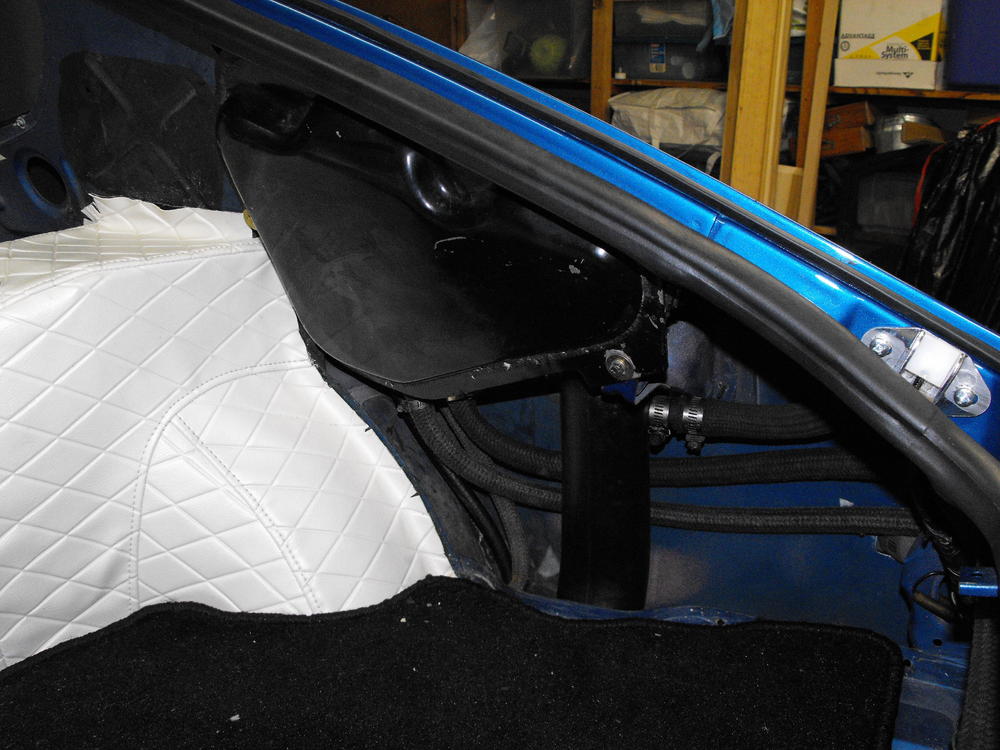
Replaced the old Pioneer speakers with new Pioneer speakers. I installed the new speakers on each side, however, there is no wiring going to the passenger side speaker. I guess that can be hooked up in the future if needed. Cleaned up the antenna and did a little straightening so that it operated smoothly. Got the antenna installed along with a bit of sound deadening material. The rear end of the car is mostly complete at this point. My panel rivets should arrive tomorrow, so I will start with the panel install


-
Just had to share this....the Petersen Museum did a nice photoshoot of my roadster when it was there. Here is a link to the photos. Looks pretty cool with the white background, white on white. https://ted7.smugmug.com/Cars/Professional-Party-Photoshooti/Petersen-Museum/n-VpDPSh/JDM-Exhibit/Datsun-1600/
-
Very cool and thanks for sharing a little bit of history. Looking forward to watching the restoration. ?
-
Wow, love the powdercoating. I may have to learn how to do that.
-
That switch is looking pretty corroded. A new one would be nice. The only item that I can answer above is that you do not need to remove the dash as the connections are close to the bottom of the dash. You will have to remove the kick panels. Those are definitely easier.
-
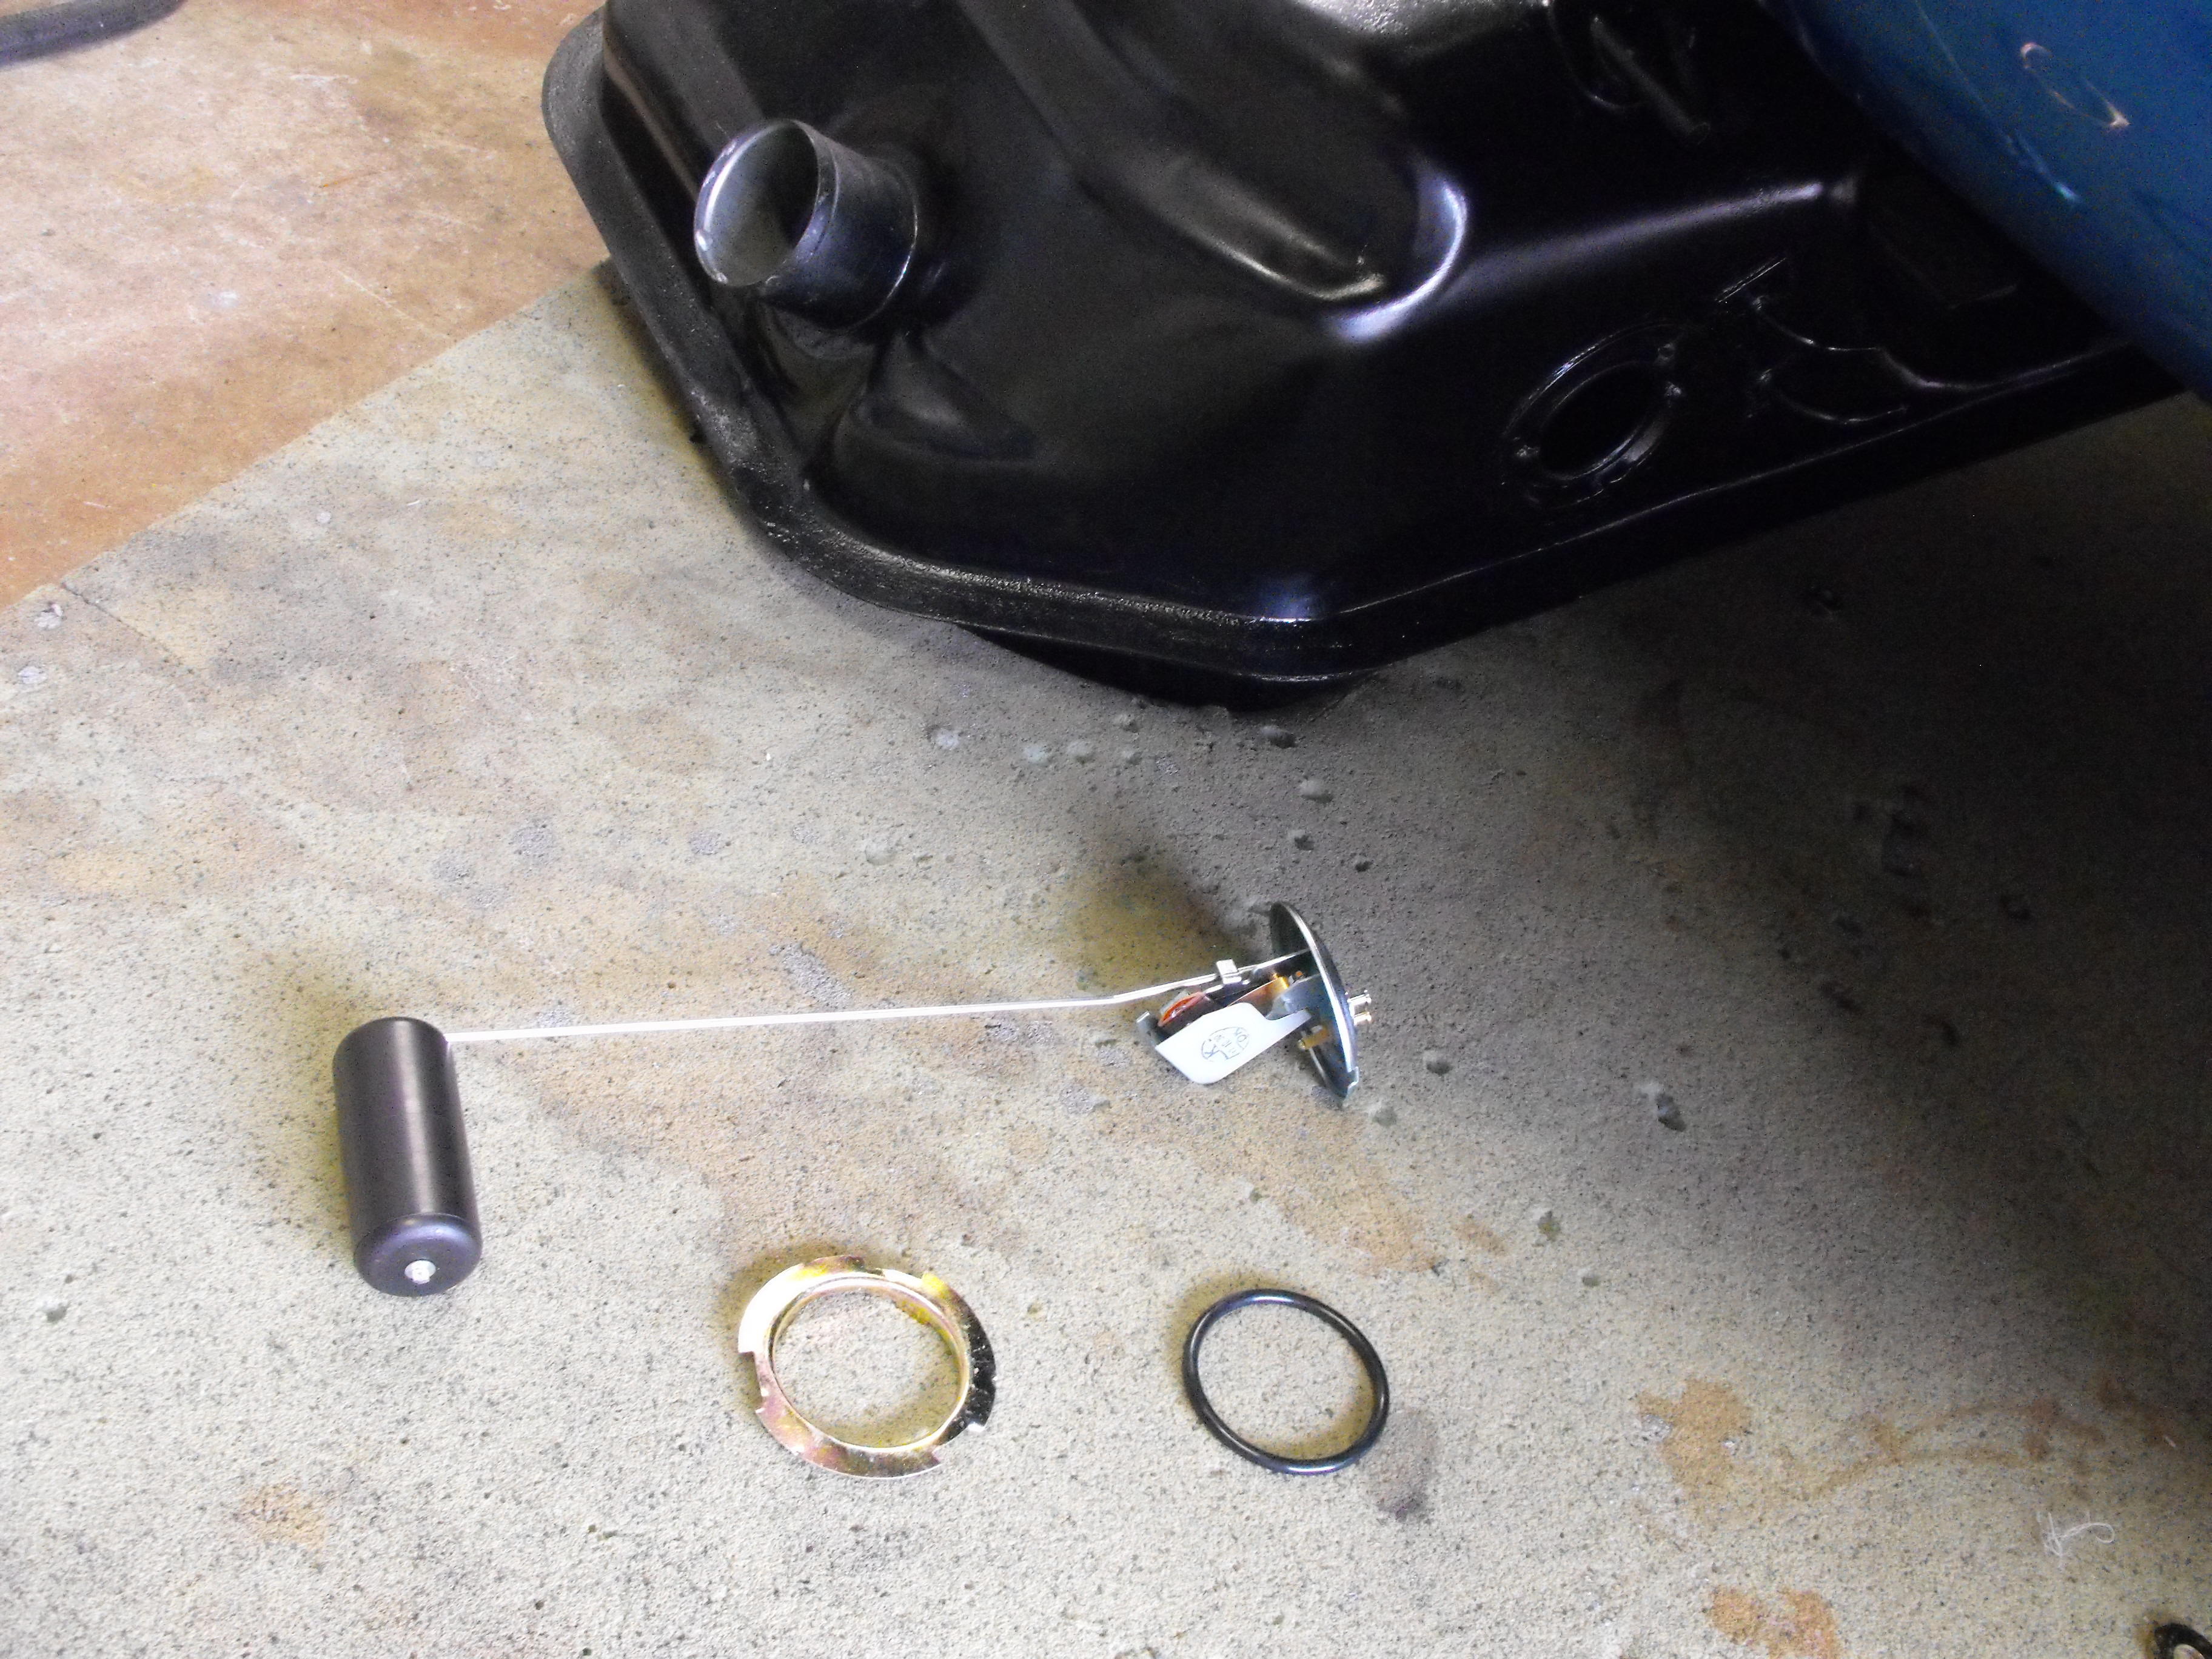
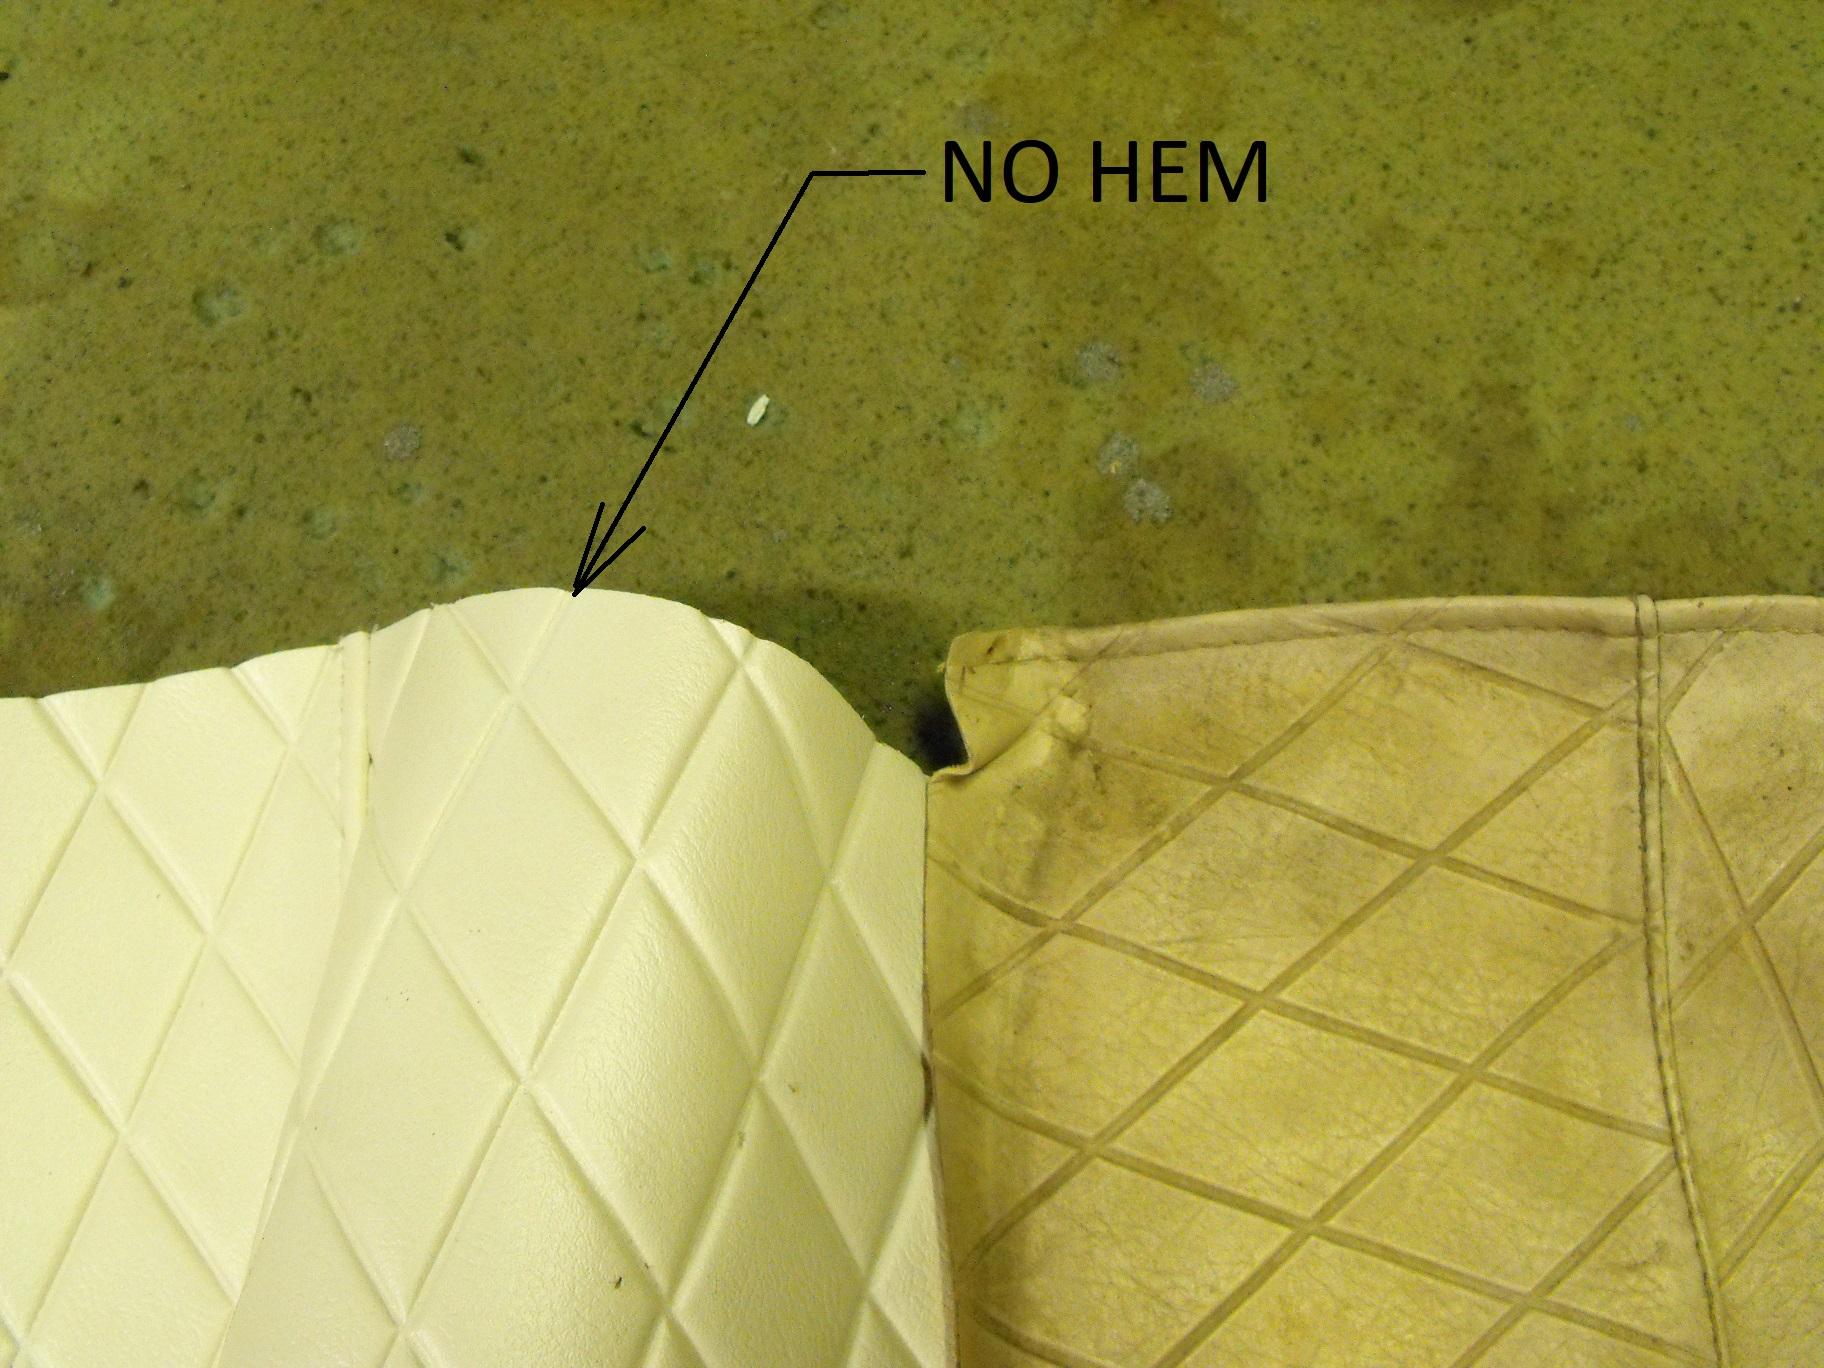
Got the evap tank in Along with the fuel tank items and rear fuel lines. Since this is not very visible, I did on spend much time cleaning things up. Also, you can see the missing hem on the vinyl here. Good thing the wife can sew. She has made stick shift boots and hand brake covers in the paste. Nice!


-
Test Picture

-
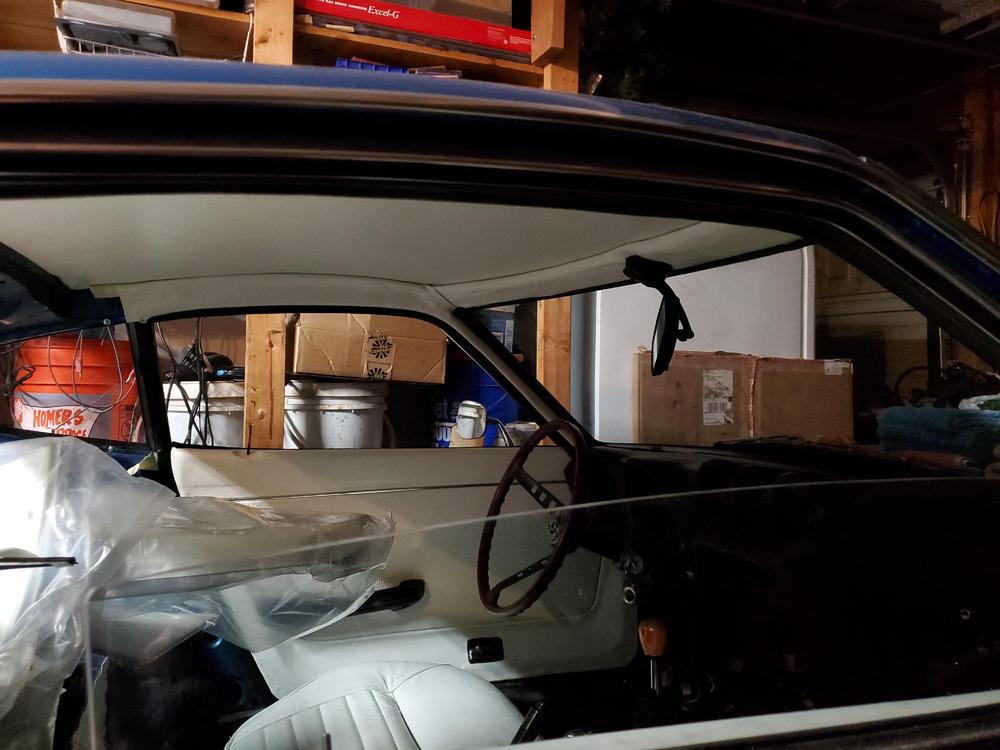
The interior really looks great and even better in person of course. For what it's worth, this interior kit is made by the same company that made the interior for the Franklin mint car, currently on BaT. The quality is excellent....except for that missing hem. Will try and show pics of that tonight.
-
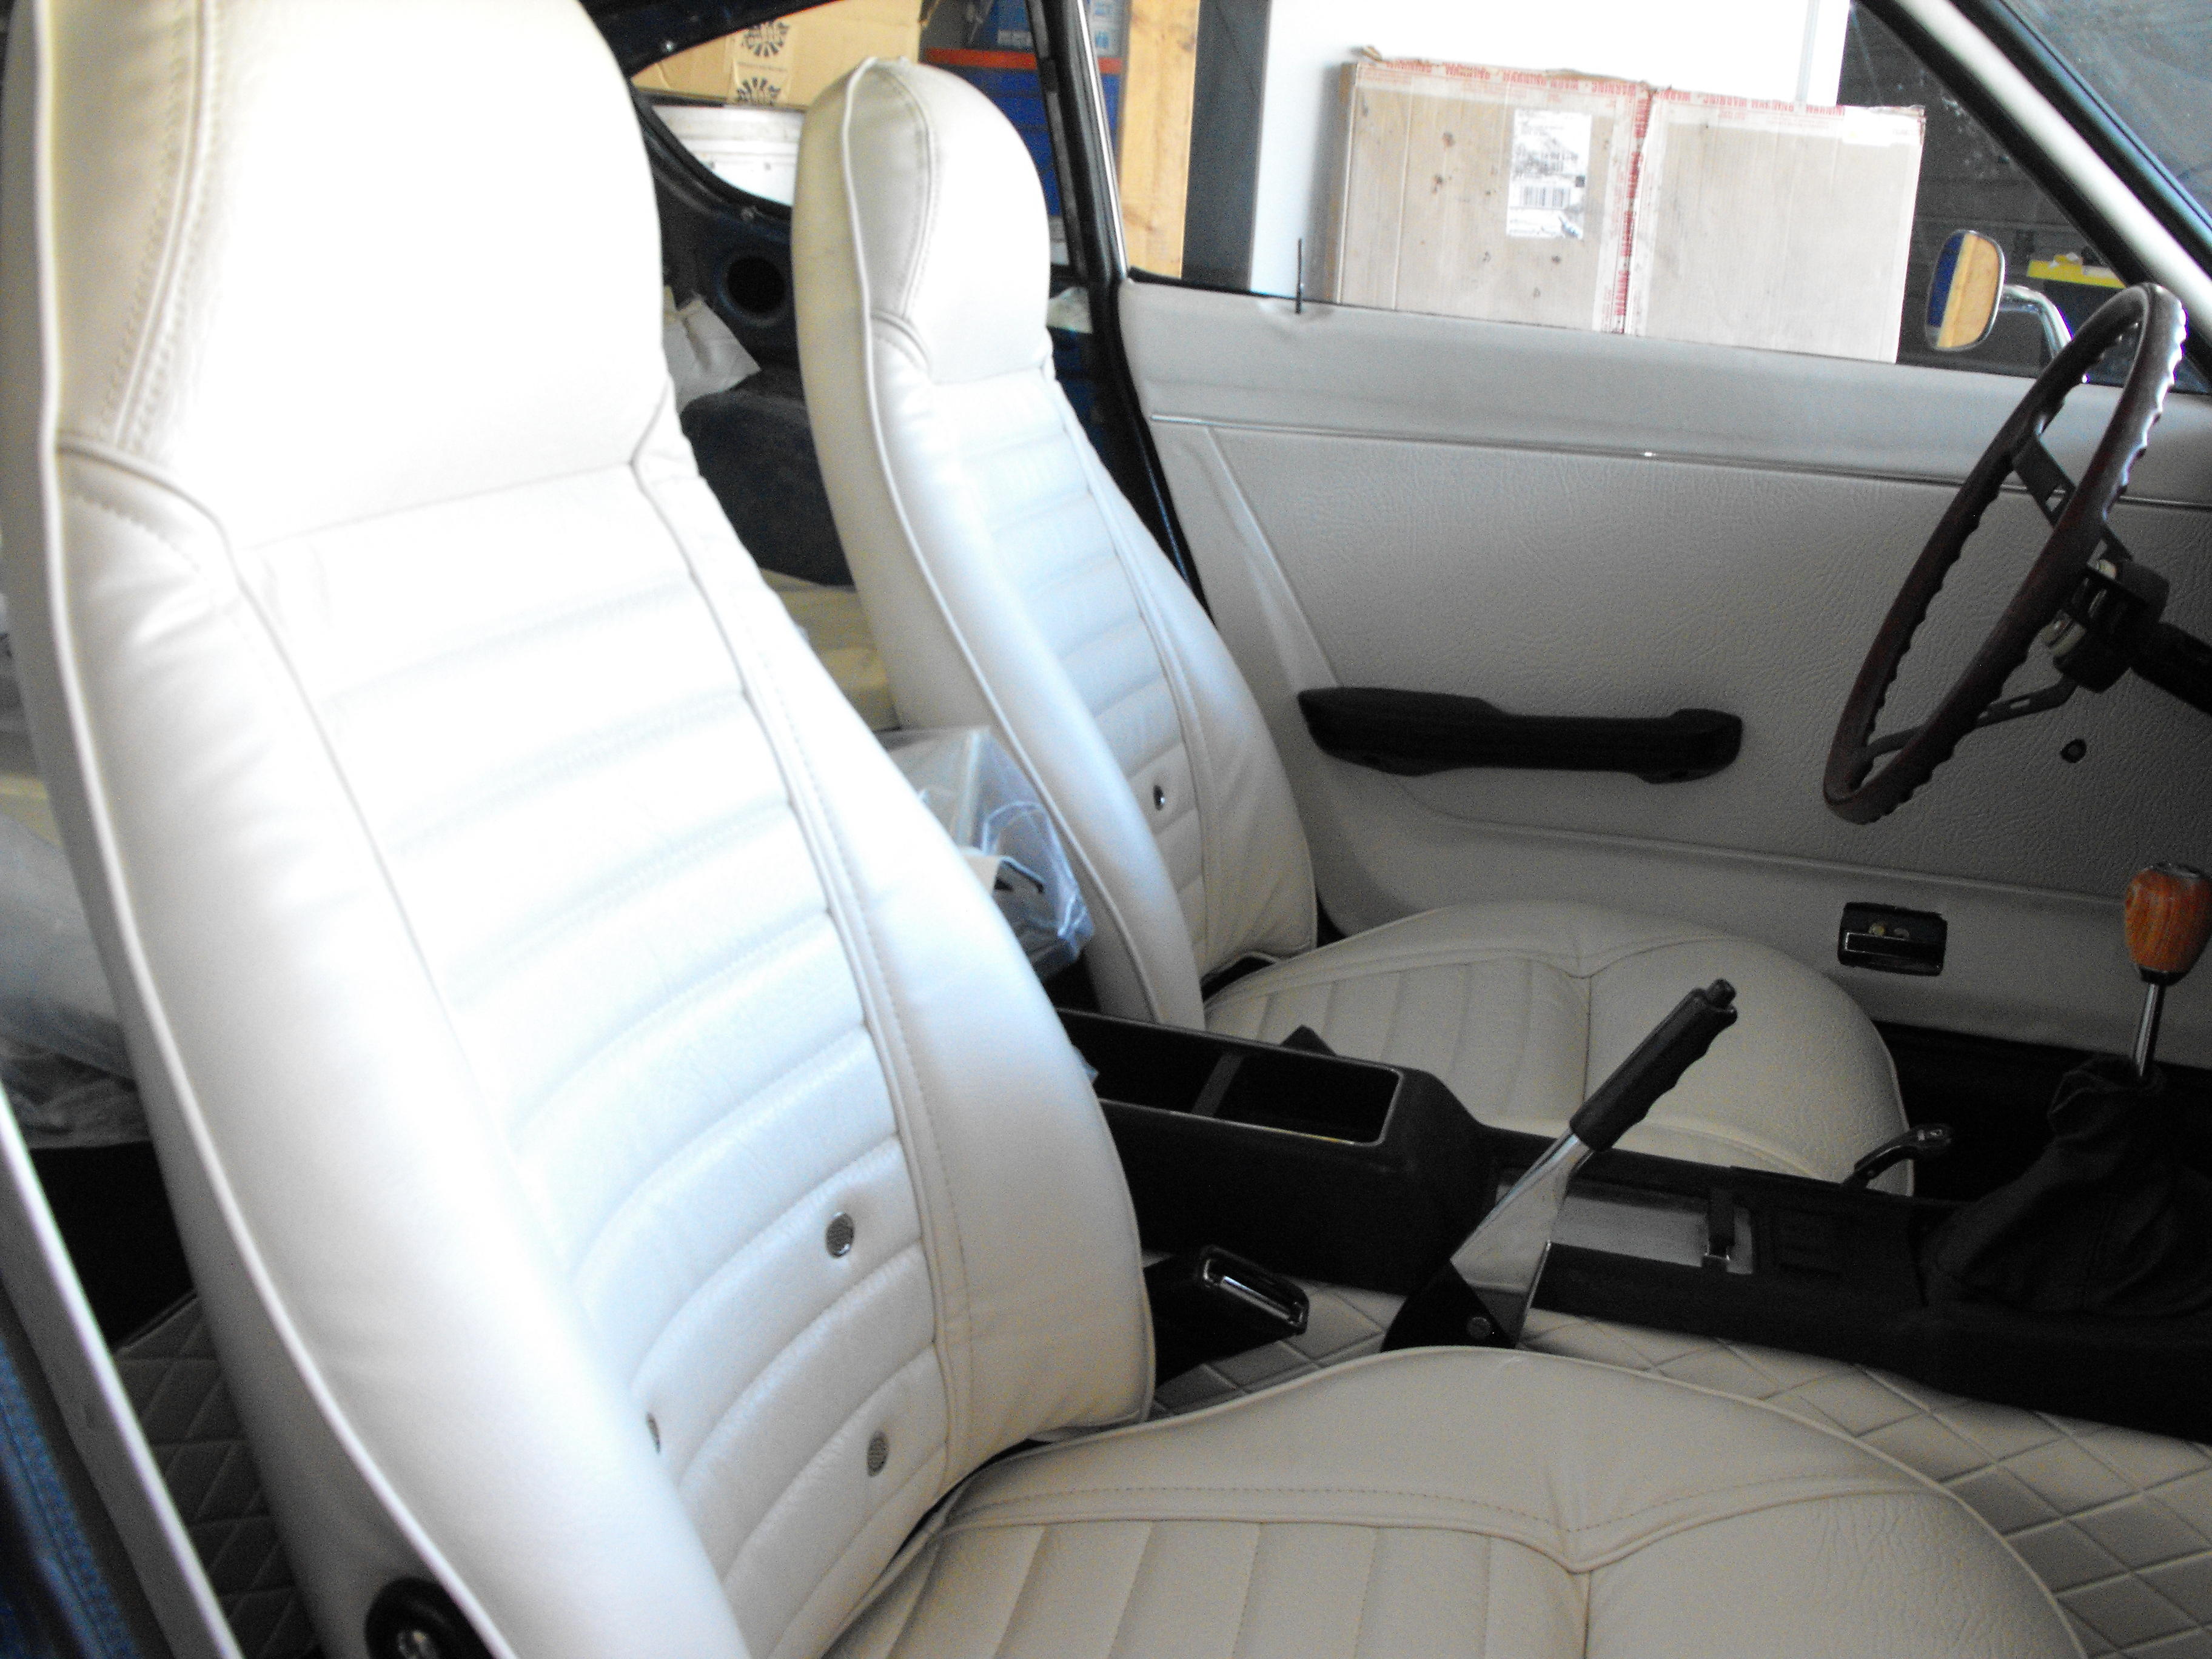
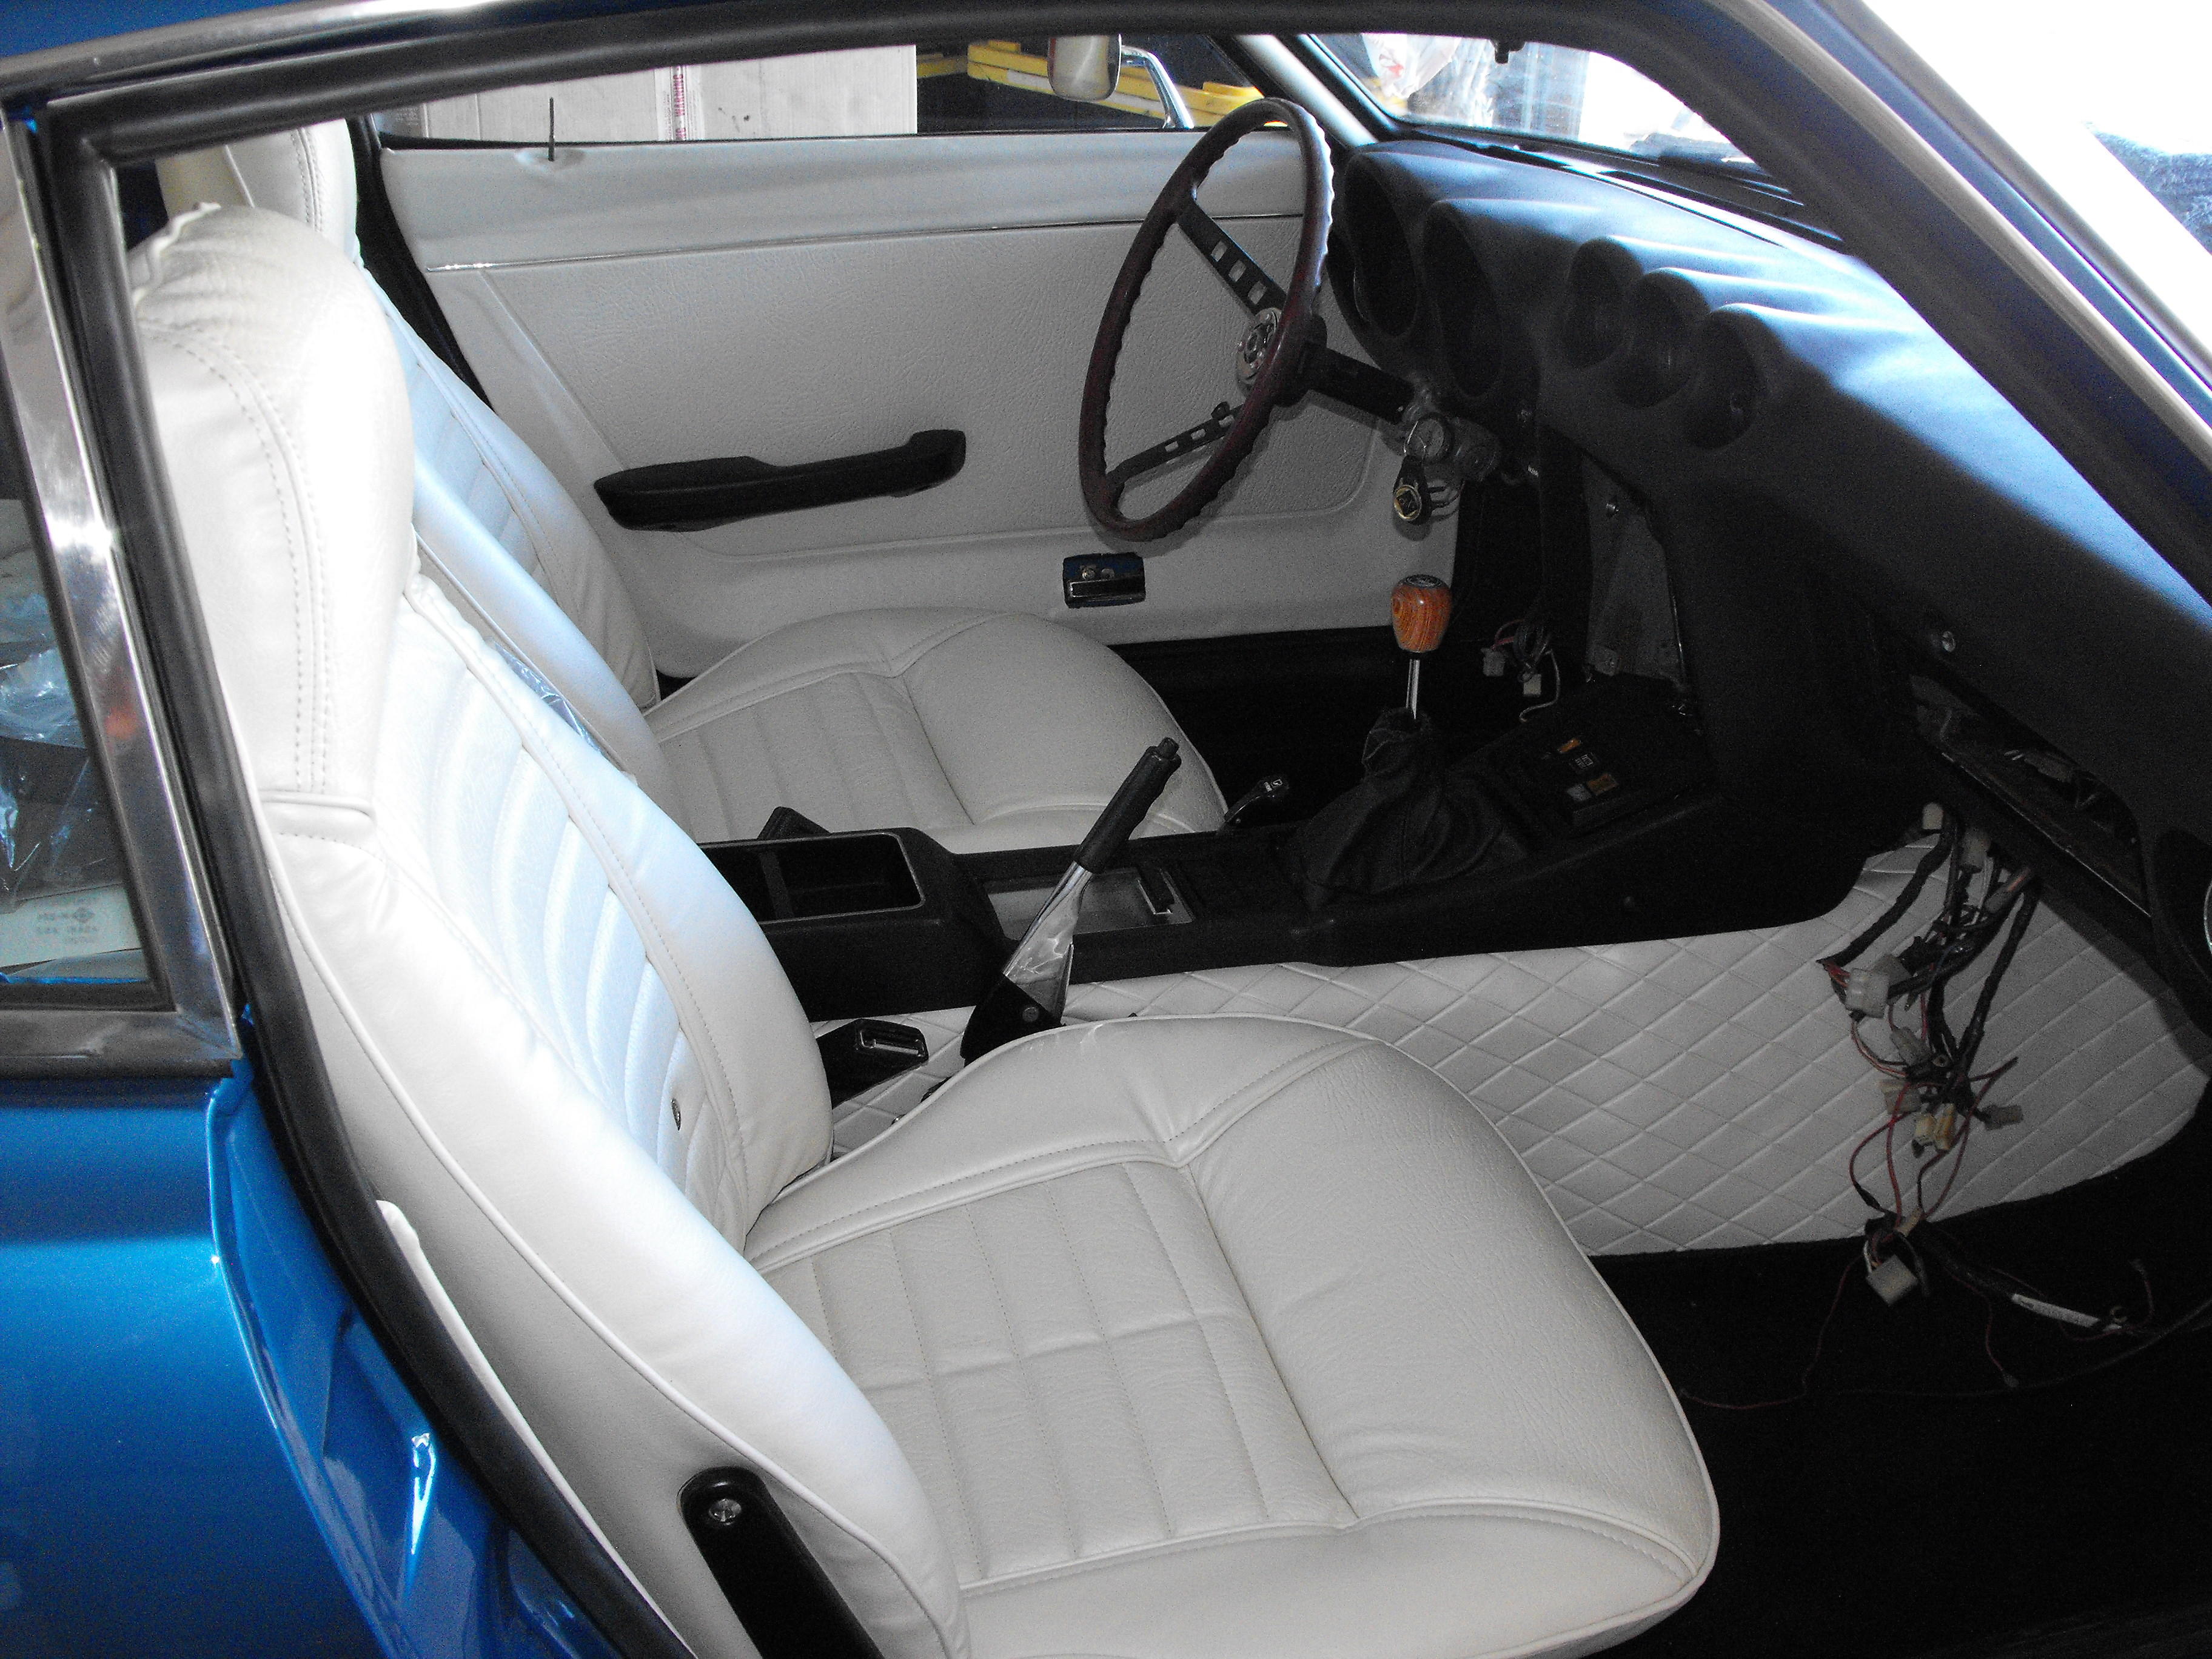
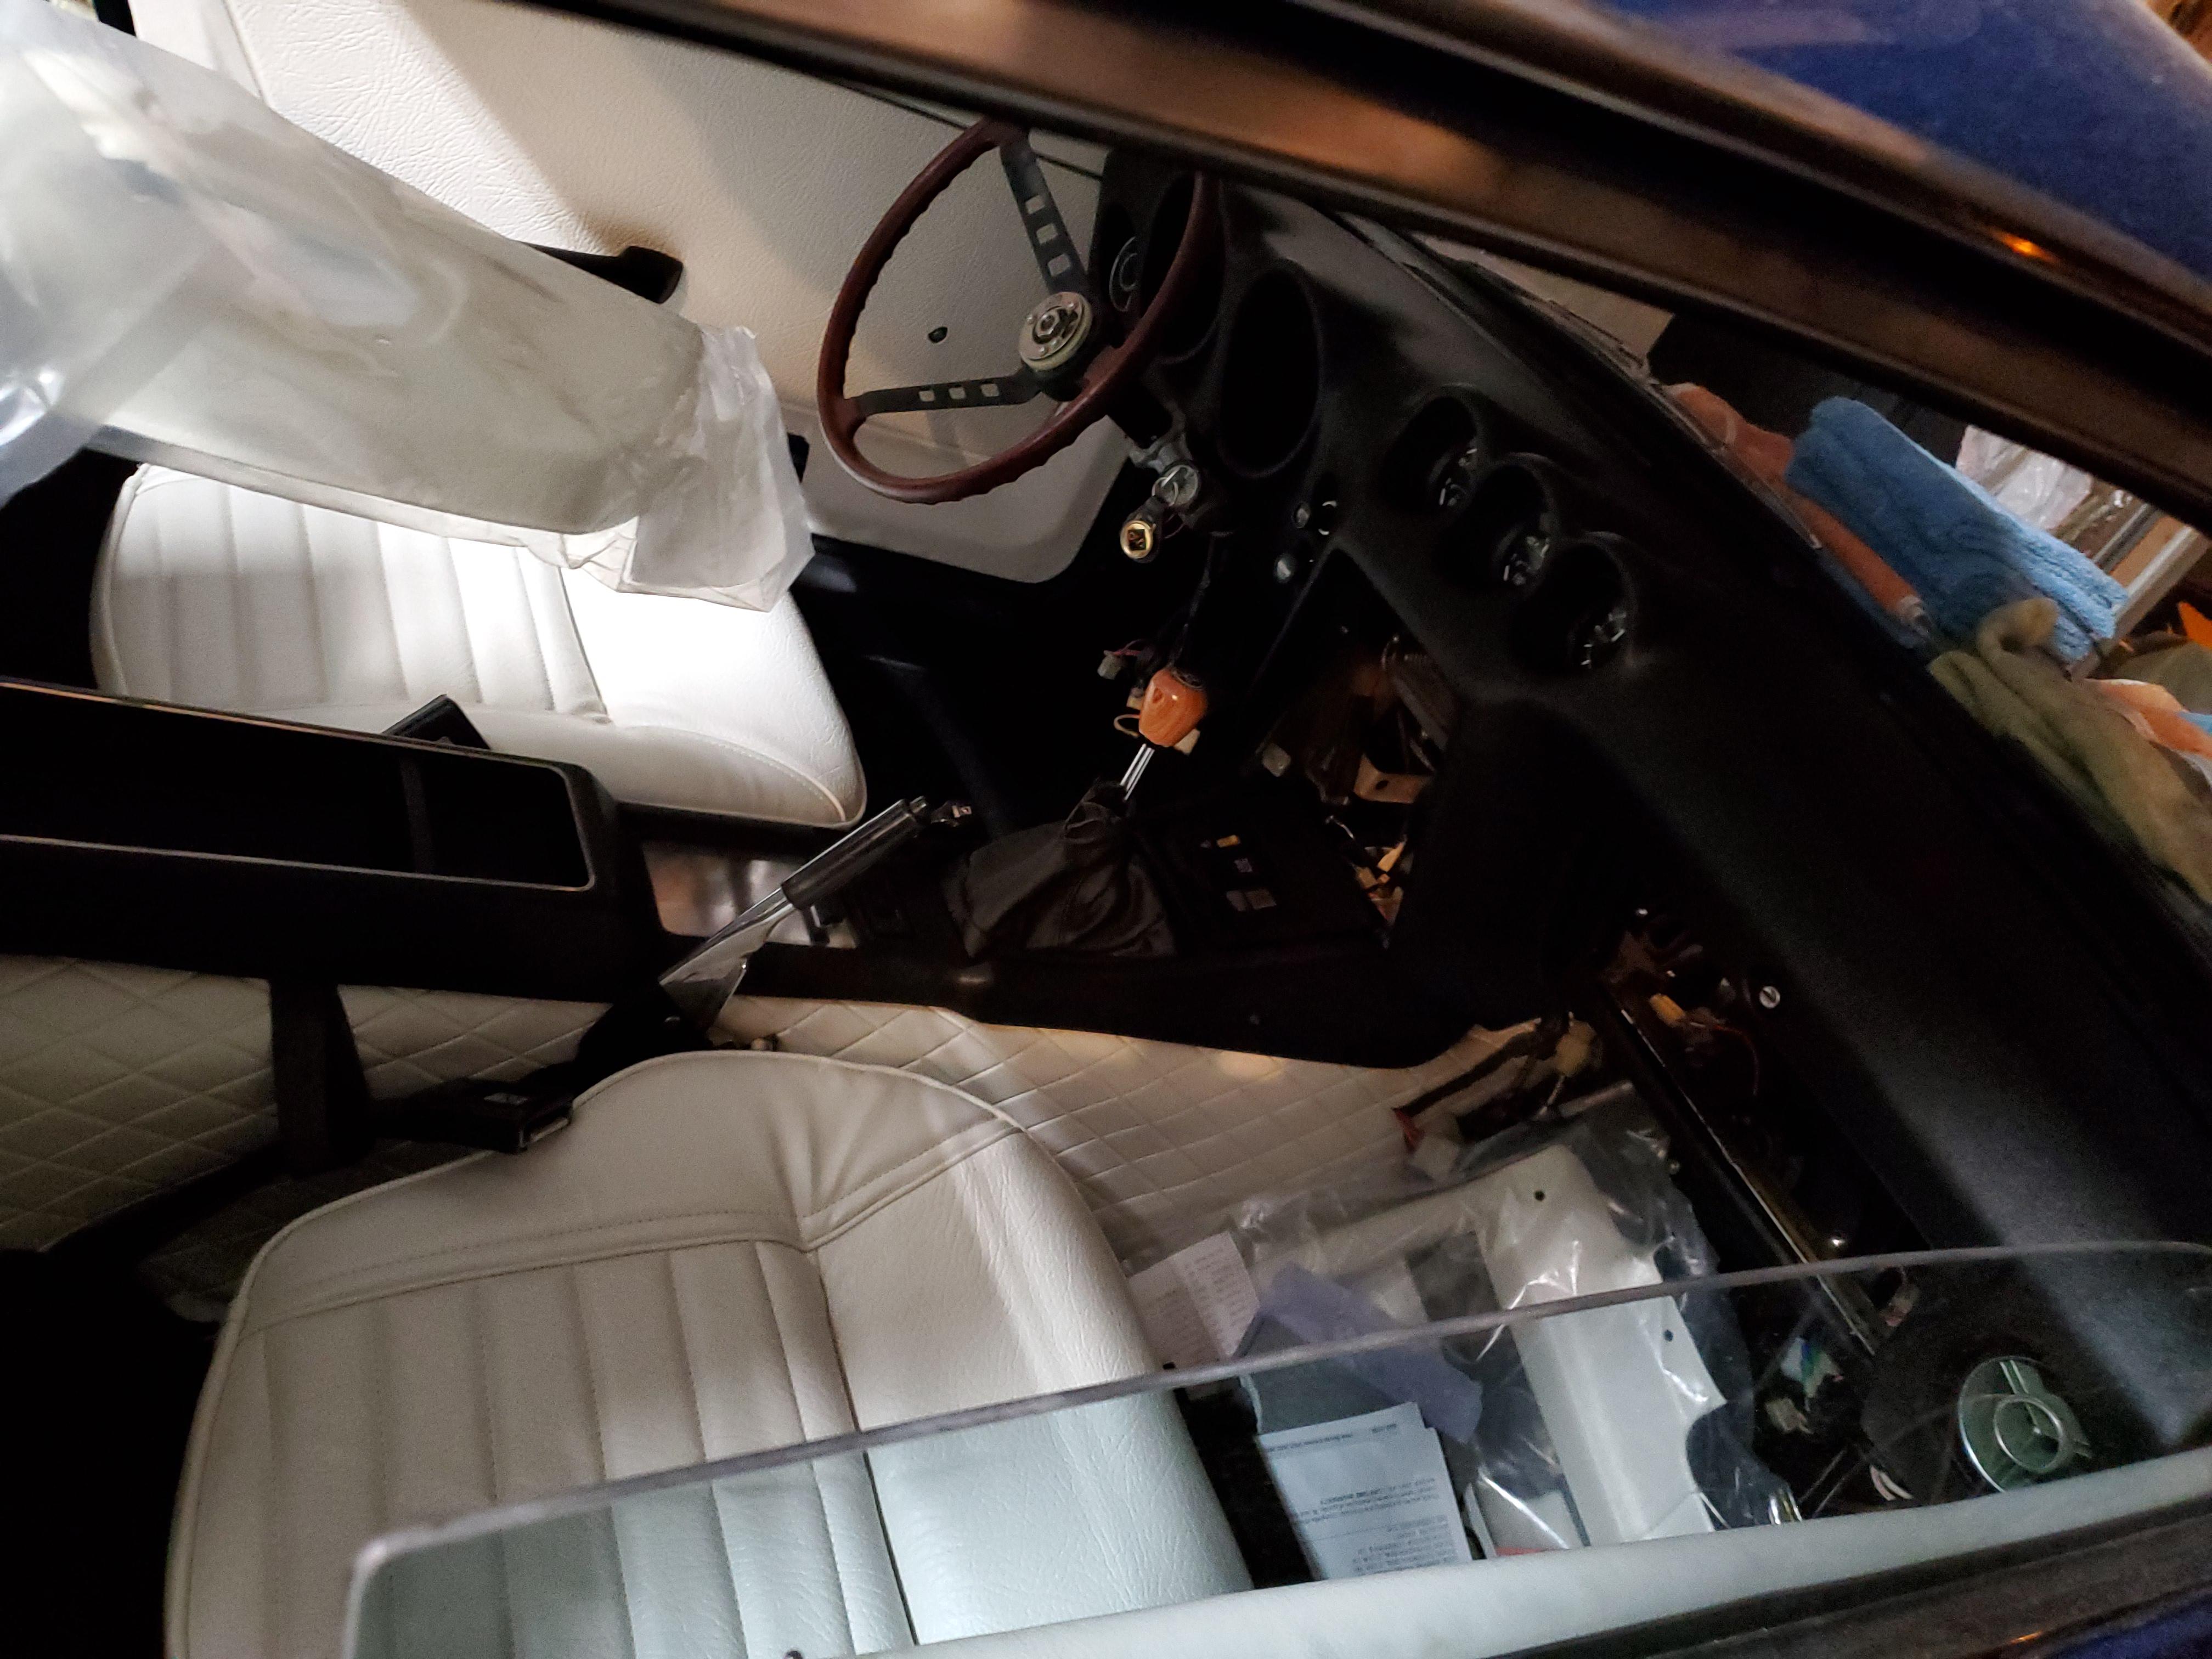
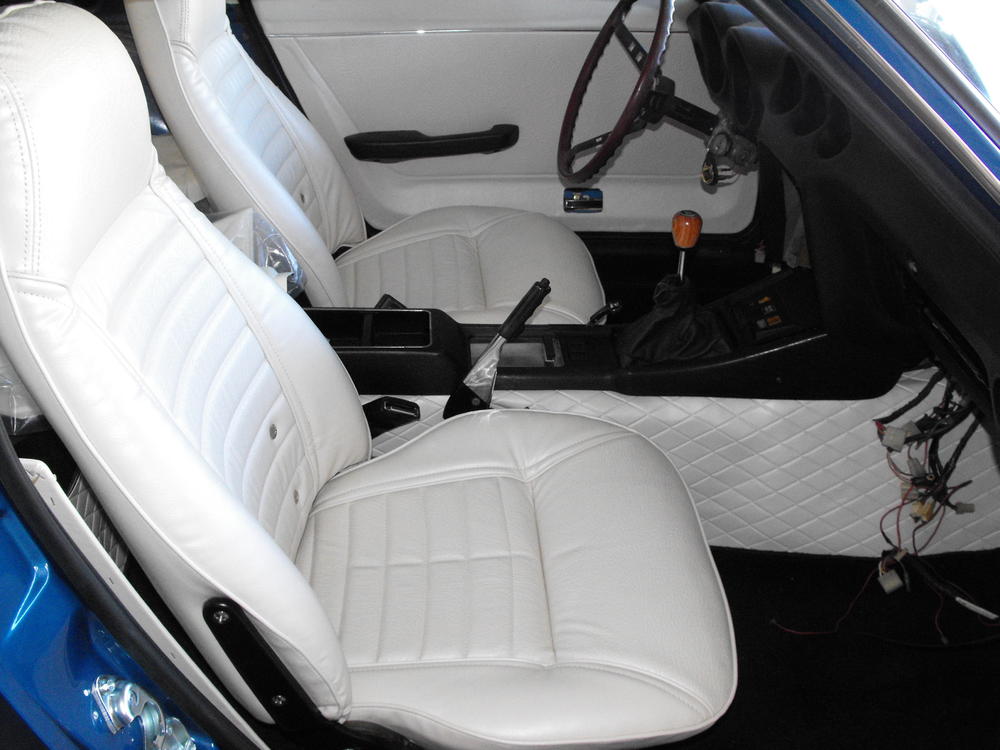
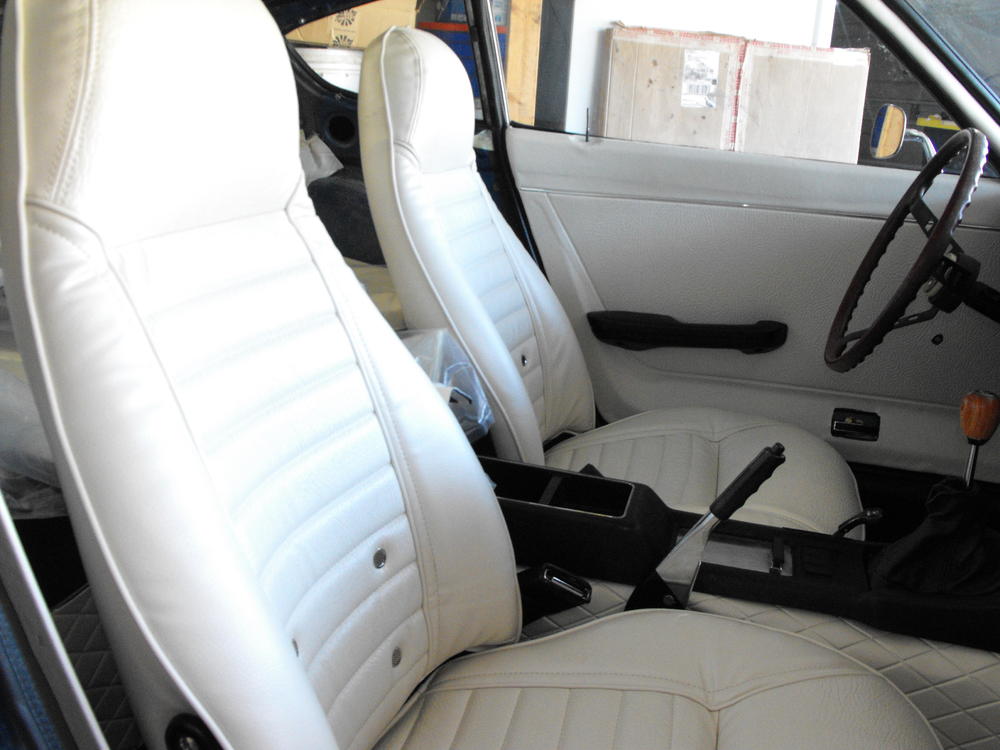
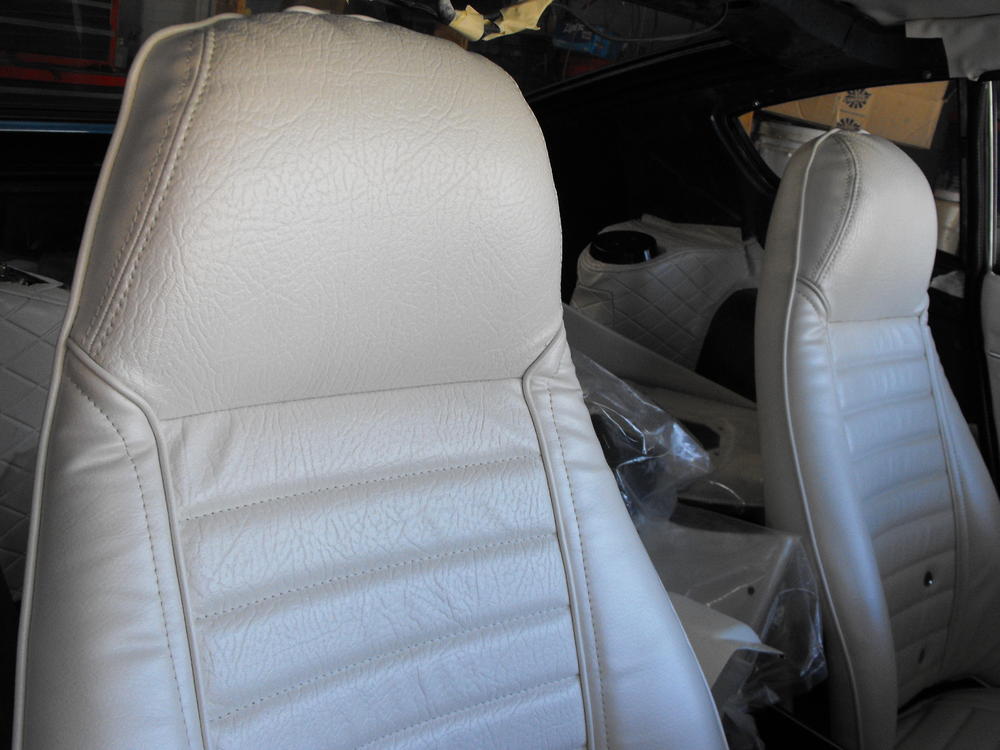
More upholstery pics. Got the seats complete and mostly installed. That white sure is bright .....I end up washing my hands every five minutes to make everything stays nice and clean. I really love the colors and think this area will look pretty nice once I refinish the steering wheel. Need to check with @jayhawk about the seat risers. With the new seat foam, you sit pretty high. I sat in the passenger seat that still had the black plastic risers installed and my head touched the headliner. For the drivers side, I took the risers off of the rear attach point of the seat since @jayhawk is fairly tall. I think his wife is a bit shorter and she may want the risers. Anyway, once we get that figured out, I will secure the seats in. (I had the drivers seat stacked on top of the passenger seat for several weeks and it made a depression in the middle of the passenger seat foam. I am guessing that will fill back out over time or after someone starts sitting in it). Got the vinyl installed on the rear shock tower areas also. That is the difficult section to install. I wanted to finish out the wheel well vinyl, but the factory missed putting in the hems on the ovelapping edge. Wife says she can sew that up for me. It's surprising, as I recently installed a blue vinyl kit from the same manufacturer and the hem was done correctly. This one was overlooked. Got the parts that were sent earlier this week wire wheeled and off to the Plating shop. Also started the evap tank hose install. Will hopefully finish that out tomorrow and post pics.

-
And here are two quick upholstery pics from the camera phone. Should have more to show this weekend.

-
There are a few, but also a few items in which I am thinking that my stuff isn't correct and this one is. It's kind of like a 'Where is Waldo' game to me, where you try and find the items that are not correct. The one item that has me intrigued is the antenna stack. There is a missing black collar that would be in the middle of the antenna stack and it does not seem to affect the assembly. It intrigues me because I have good top and bottom pieces for the '73 antenna, but all my middle sections are severely oxidized. Maybe I don't need it.
-
Datsun/Nissan also had the throttle control knobs on the earlier Roadsters. The knob always required some type of pull force to keep operational, otherwise it would drift back to idle. So, back in the day (late 70's), I kept a stack of popsicle sticks in my ashtray and would shim the throttle control knob so I could cruise at the desired speed for long road trips. Used to drive straight through from San Diego to norther Idaho that way, along with a bottle of No-Doz. No way I could do that now.
-
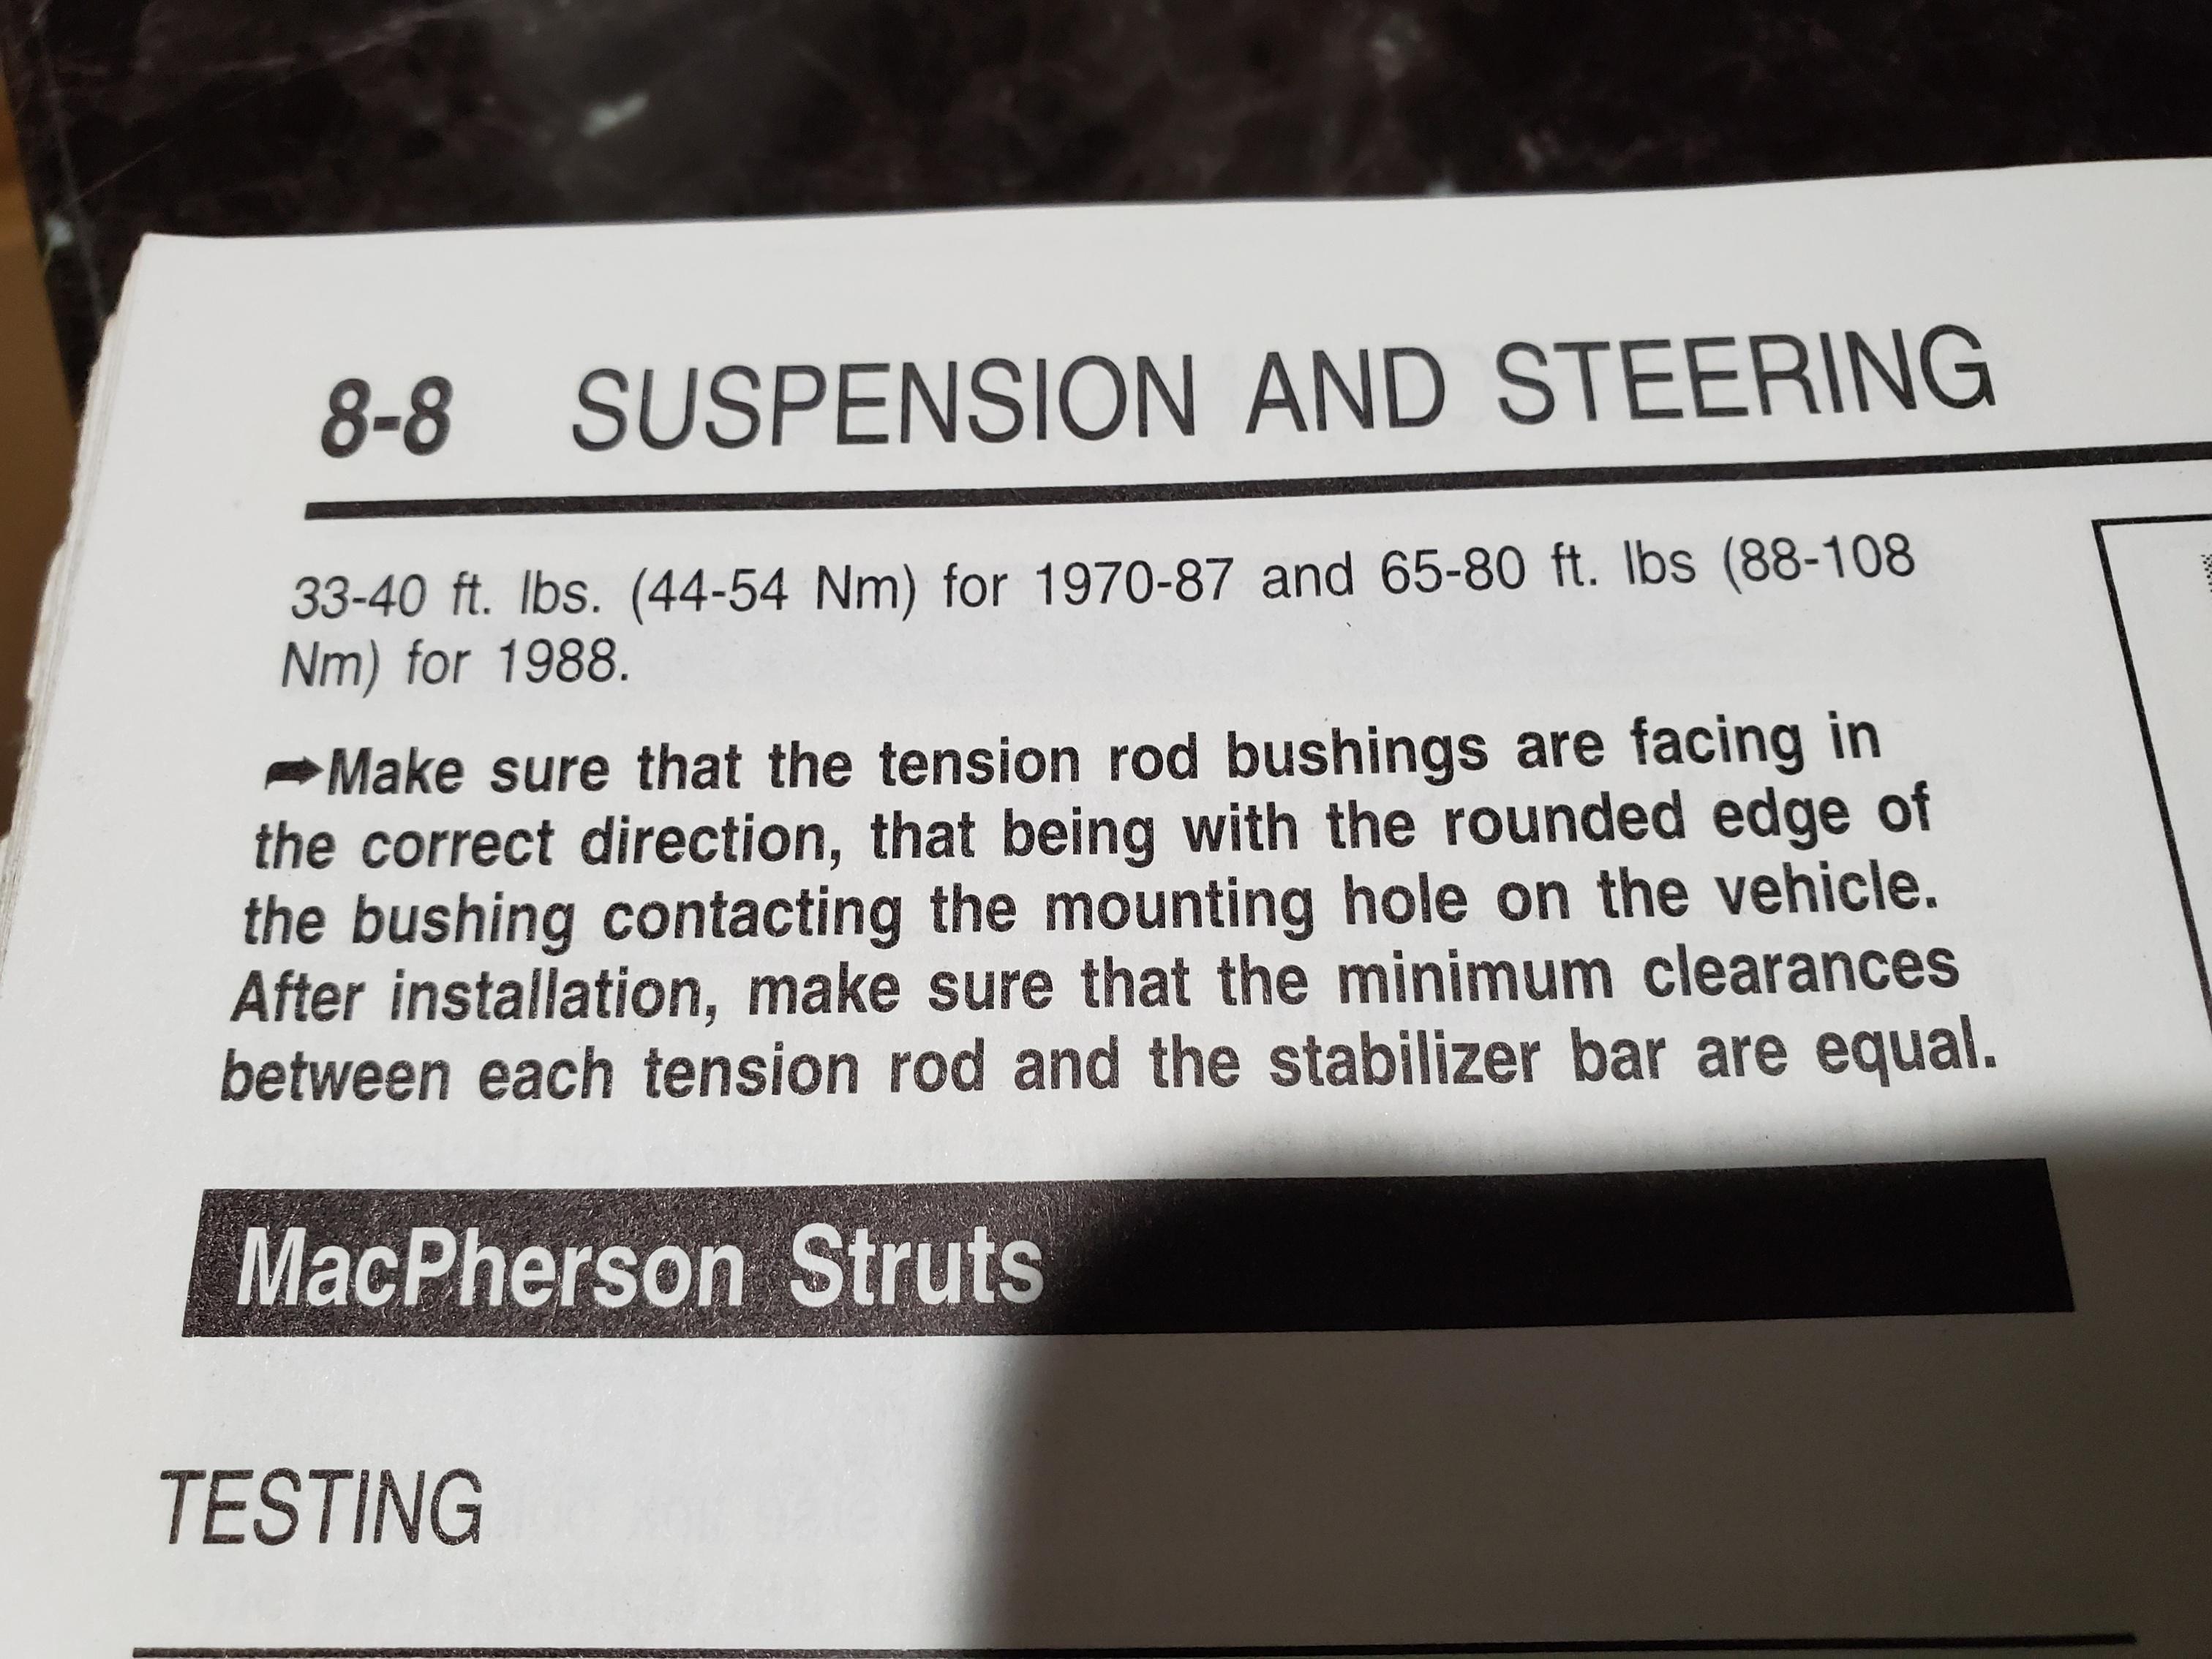
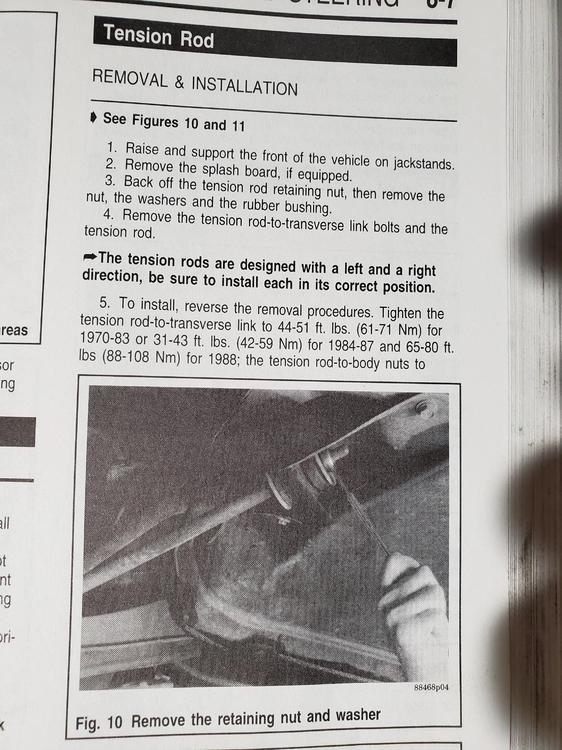
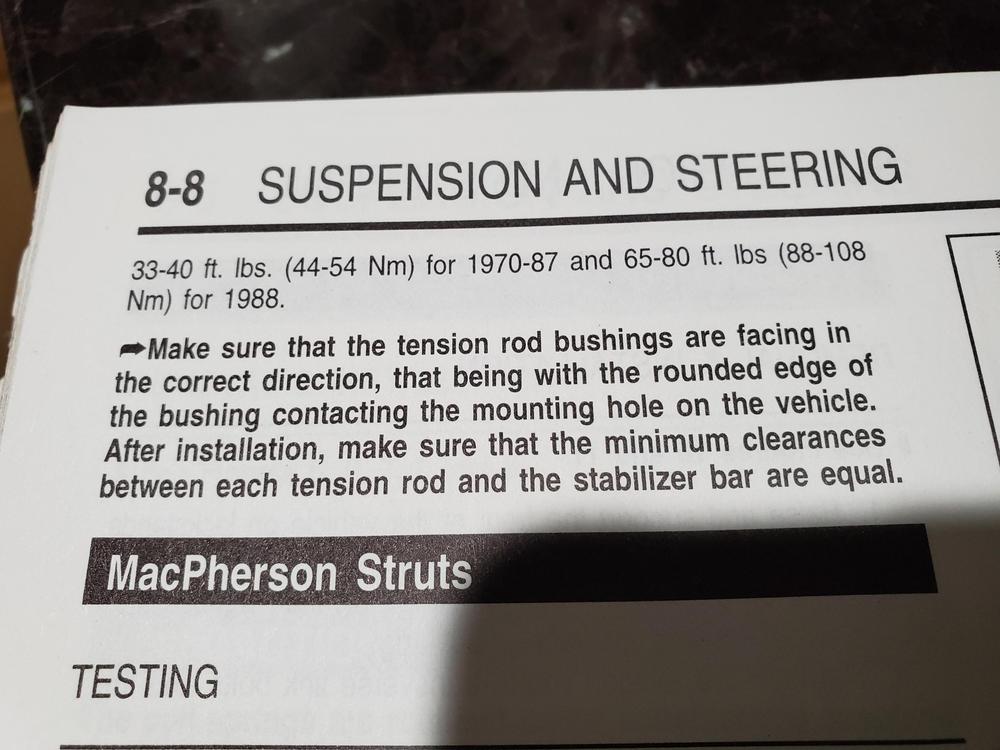
I had to save the pic and blow it up. Looks like they have the rounded edge facing 'forward' and the squarish side facing 'aft' for BOTH bushings. That's weird, but then again it's a 280ZX.
-
Interesting
-
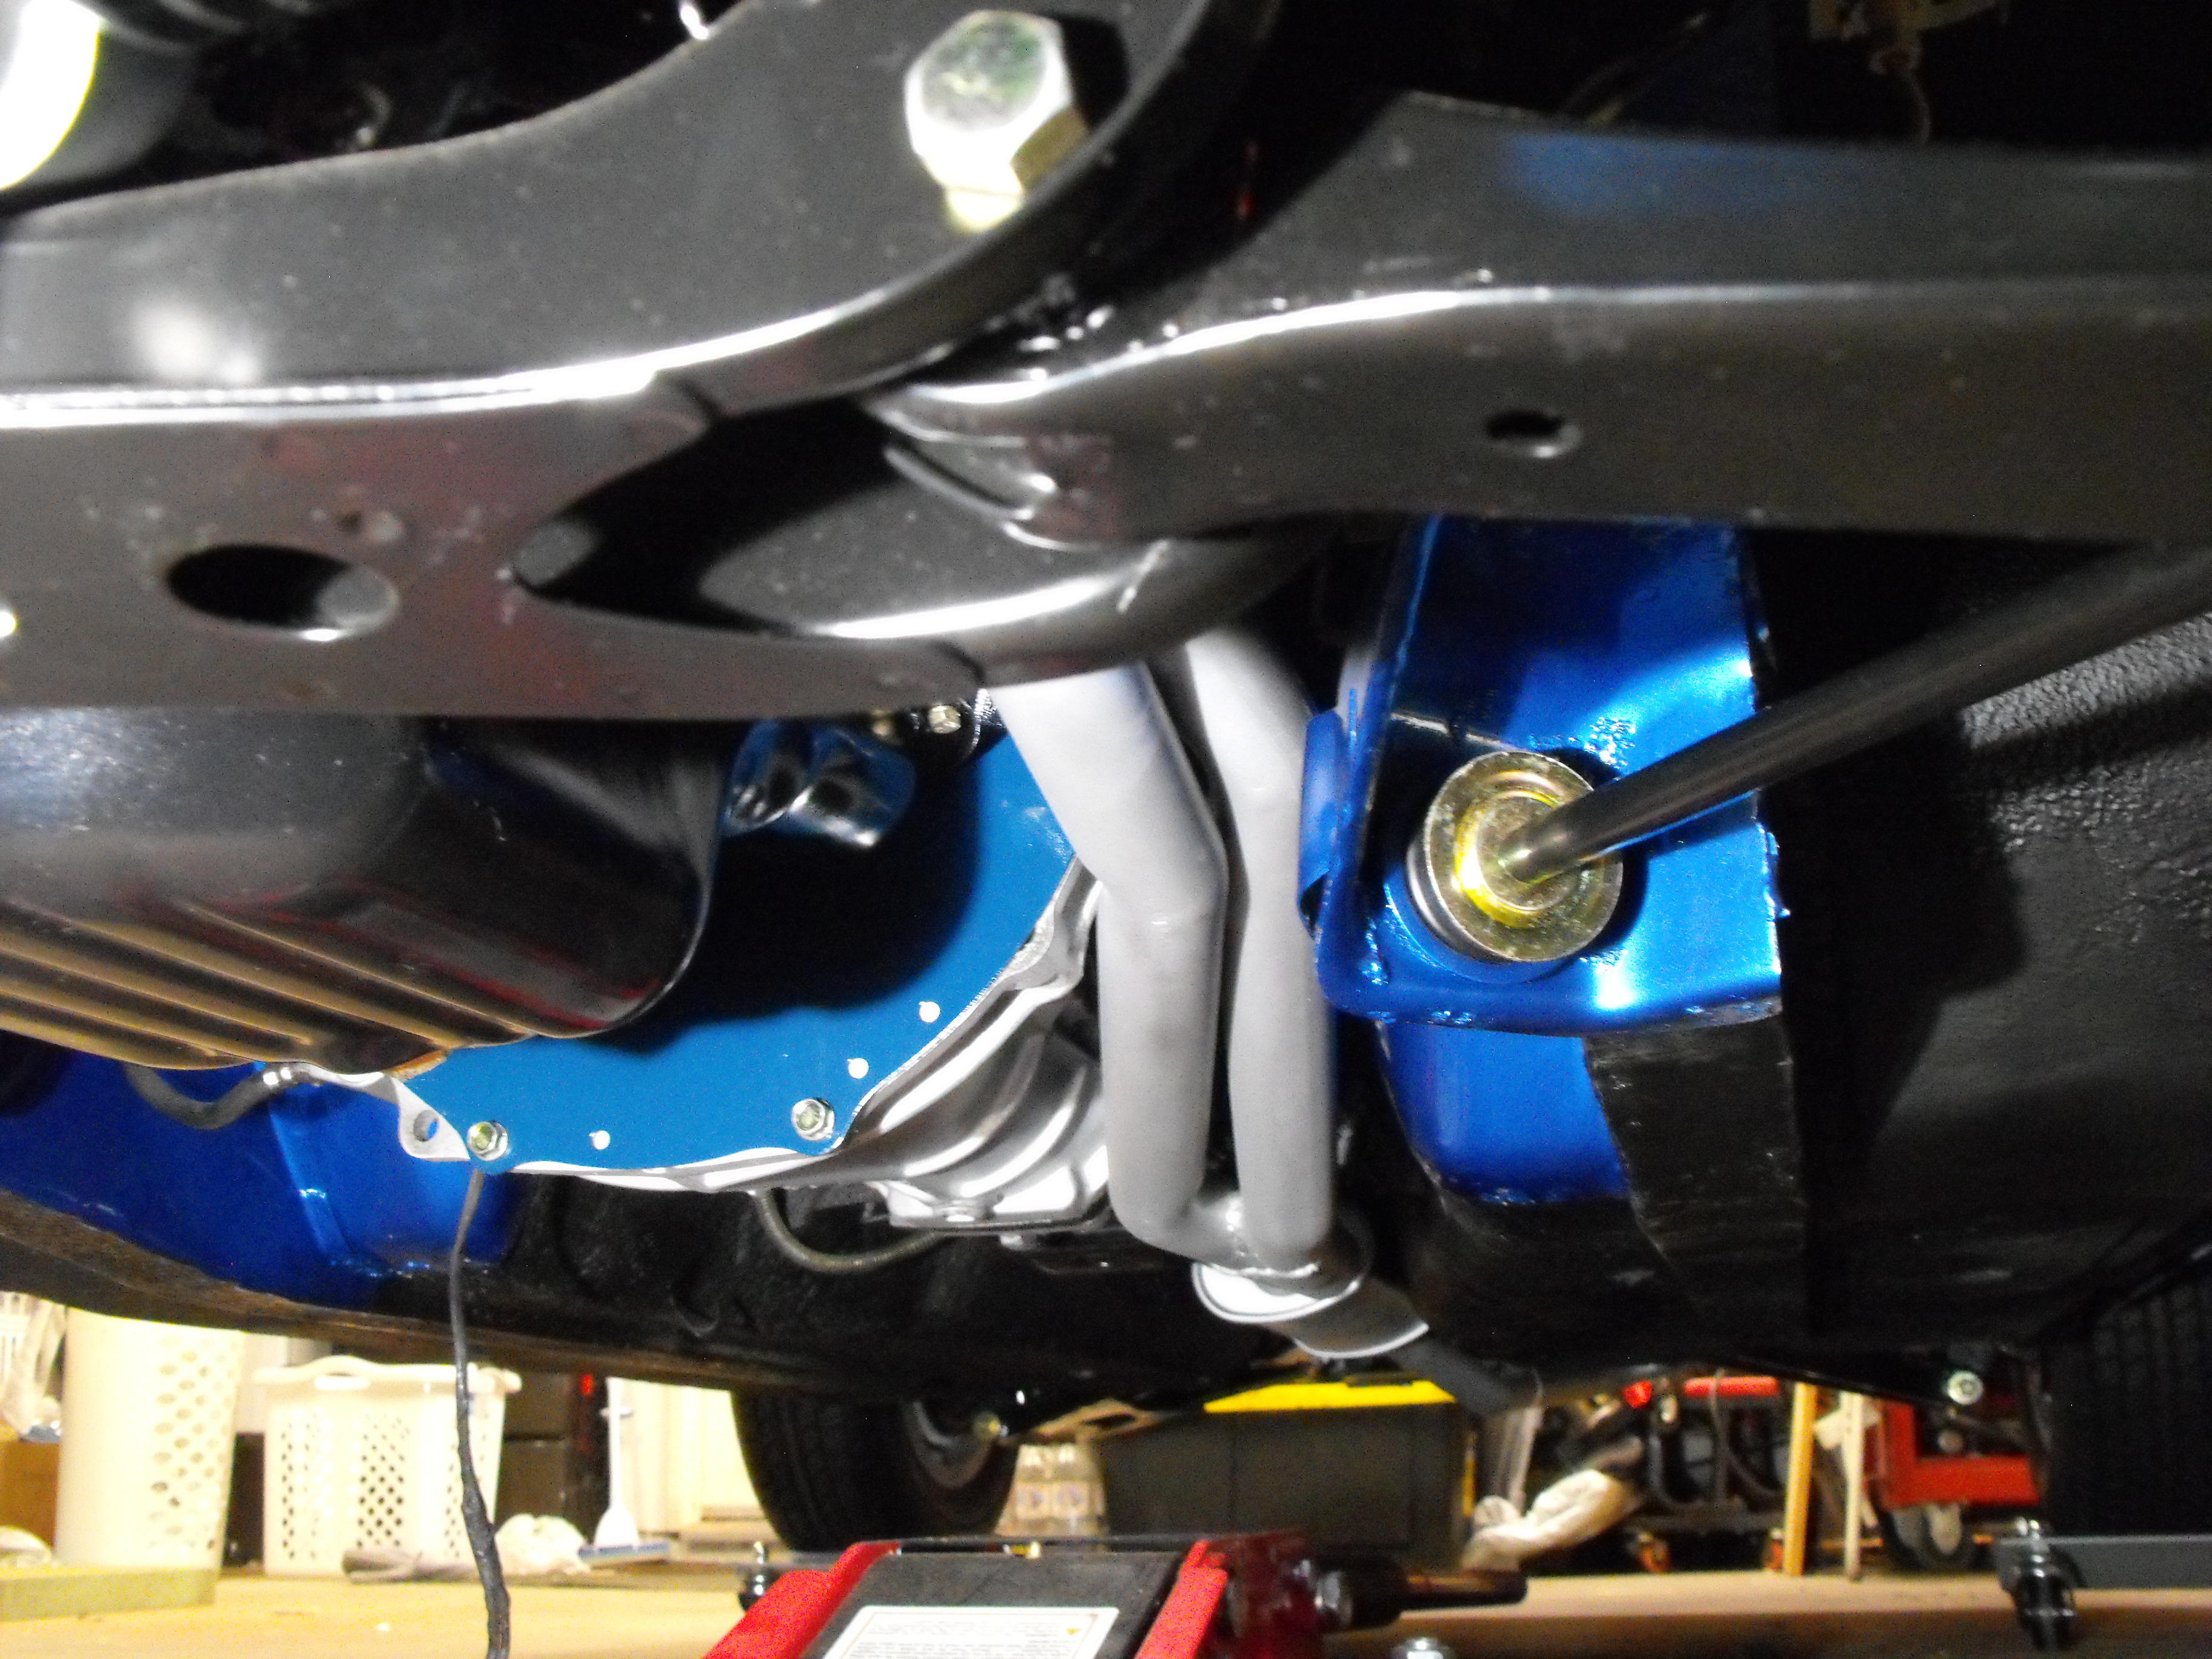
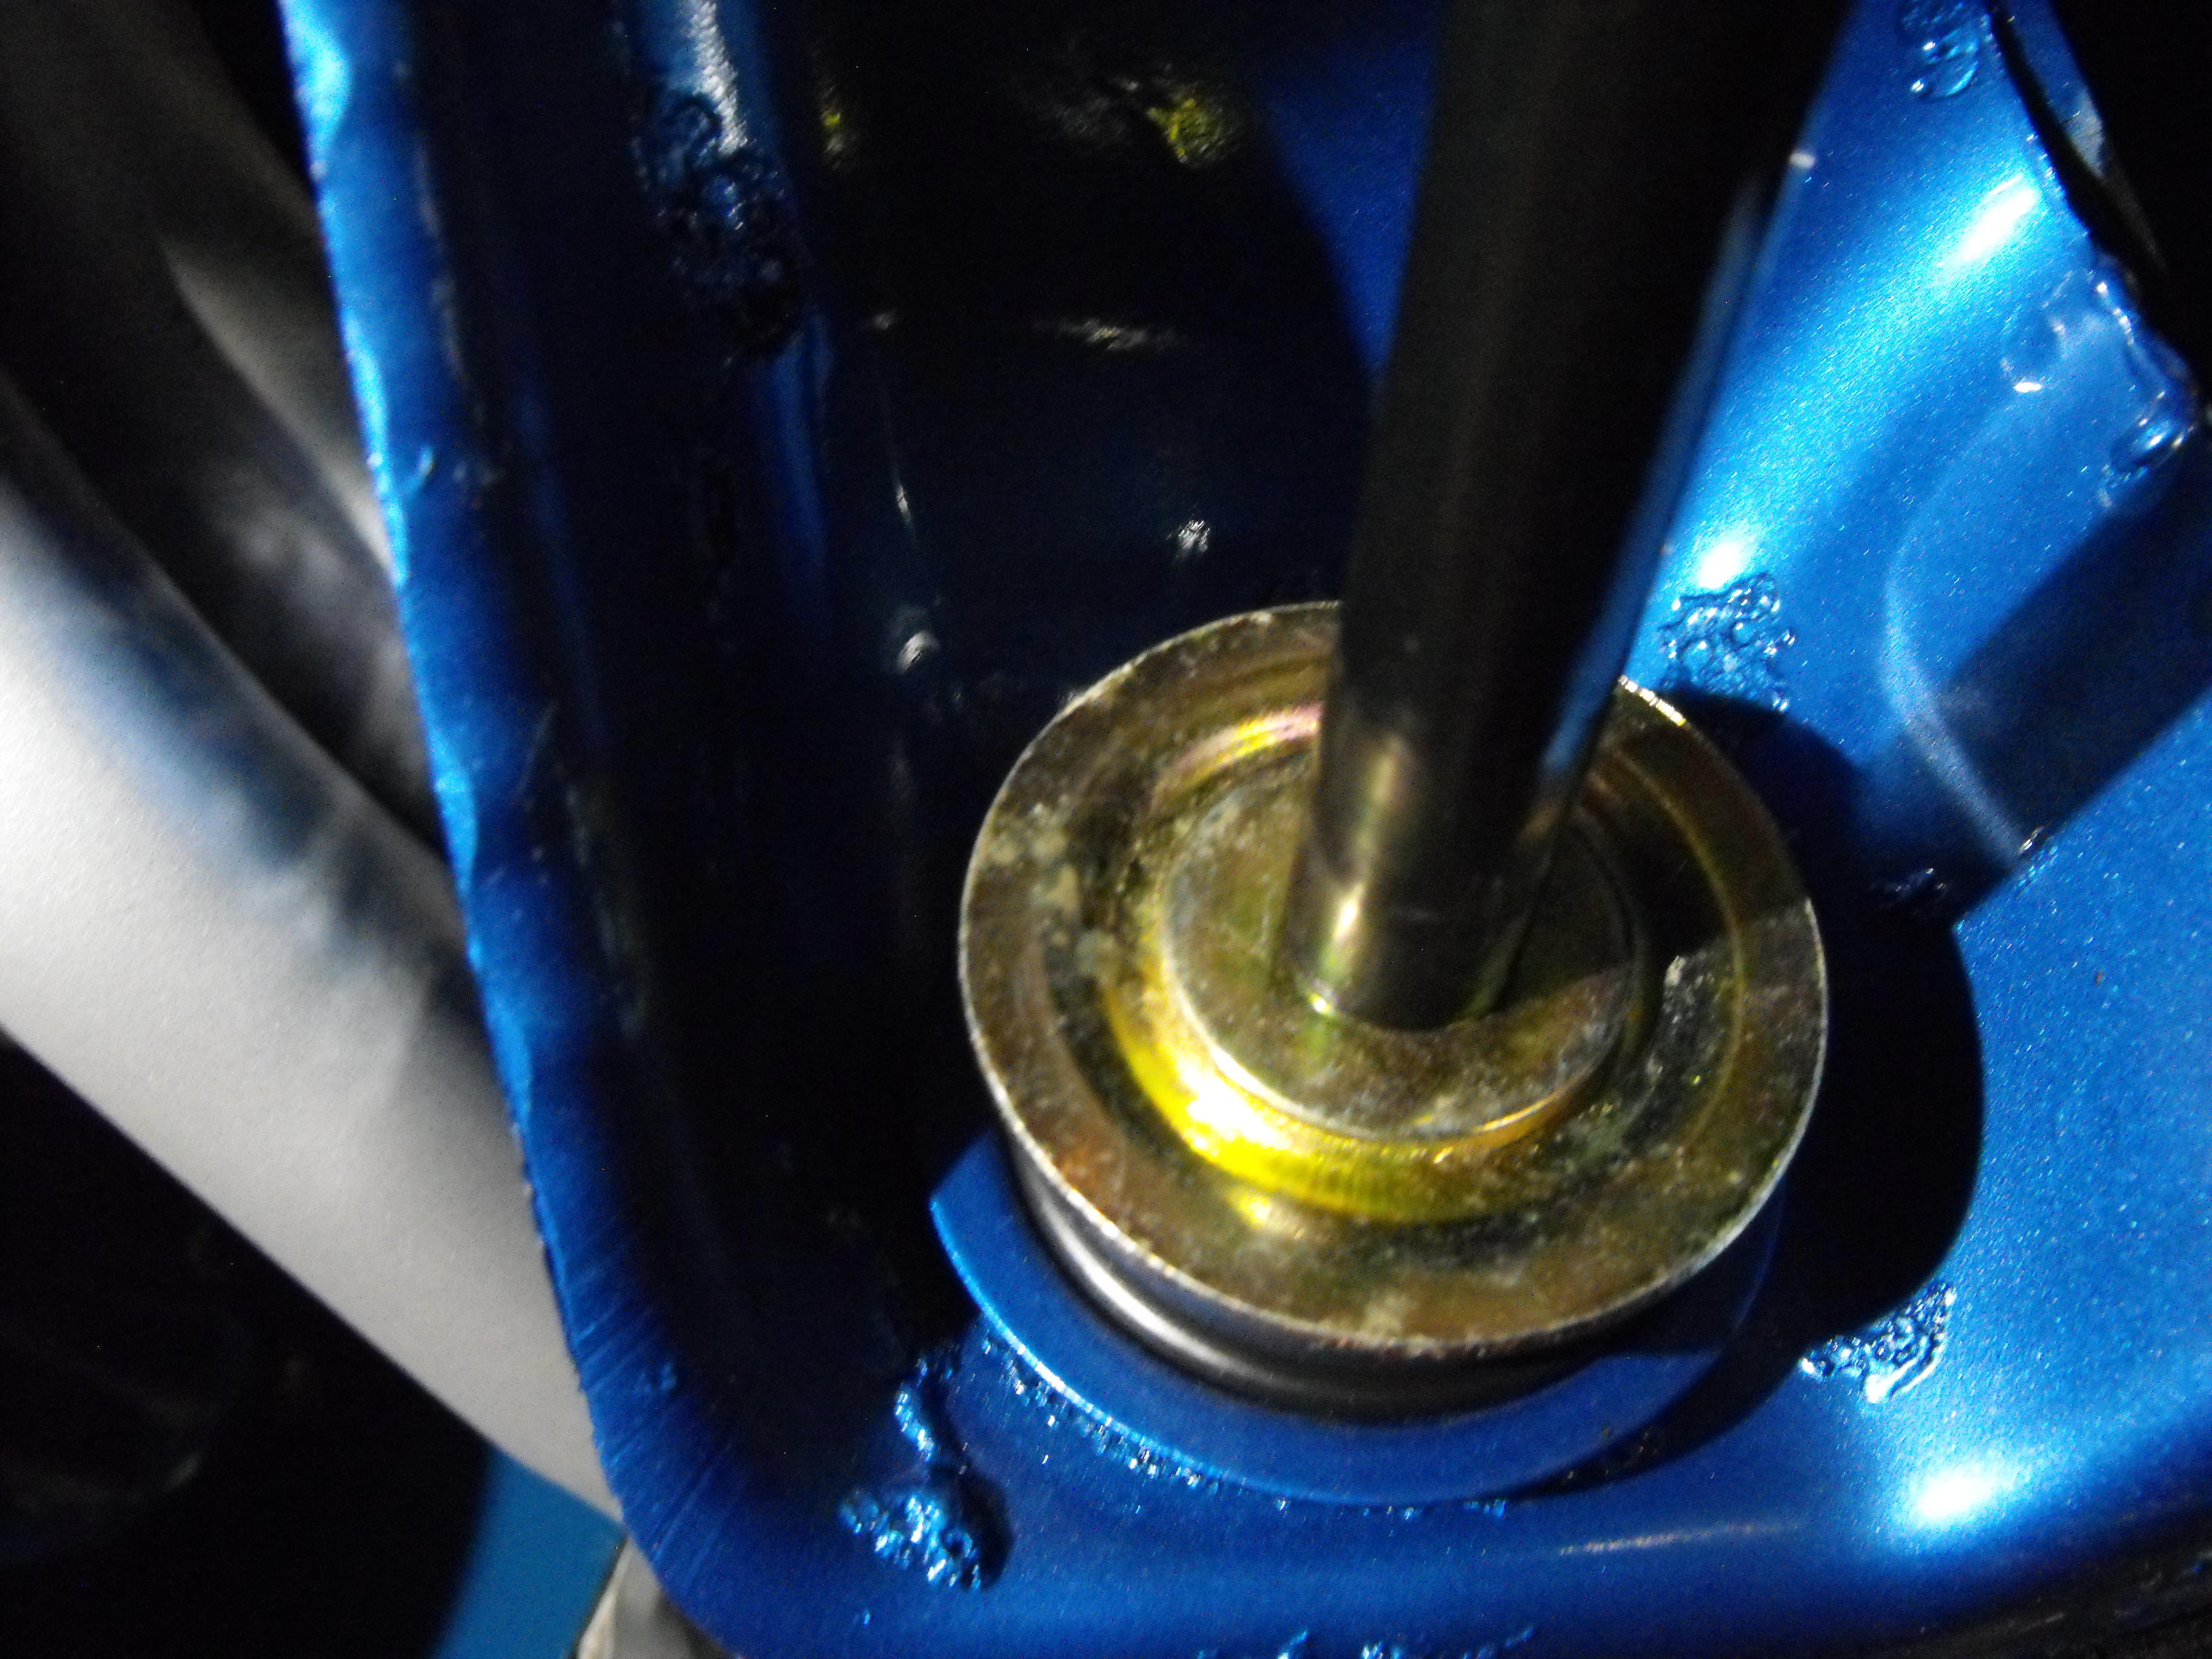
More muddy waters...Another item that comes into play are the mounting features/cups on the body that the bushings insert into. The feature is rounded inside. It would seem odd to put the squared end of the bushing into the rounded cup. The bushings from the energy suspension kit look like the red one in the pic above; rounded on one end, square on the other. Because of this feature, I am going with the rounded side toward the cups.
-
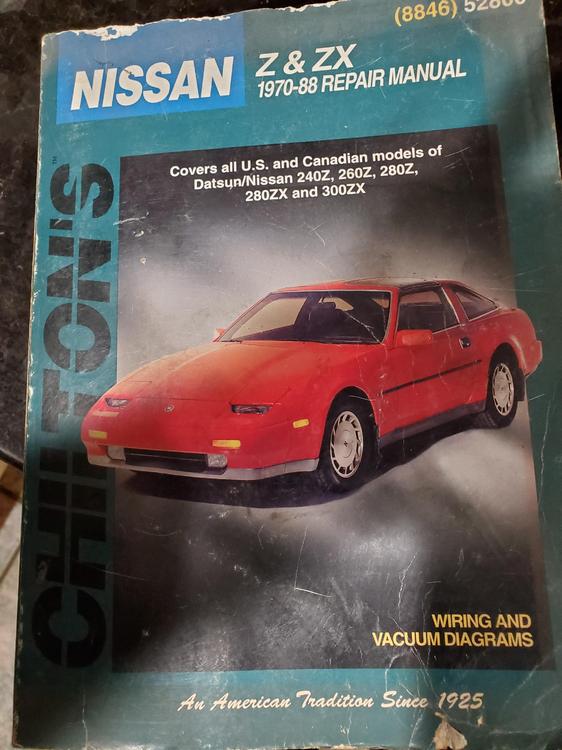
@Captain Obvious here is the source for the rounded side of the insulator to the body. It's the Chilton's manual, bold type on page 8-8. Not sure if it's the best source, but it's all I could find.
-
Yes, will double check the source on the rubber when I get home. I actually had the rubber as shown in your picture above but switched it after reading the manual.
-
Yes, backside washer too...of course. Interesting though, I went through all of my manuals and really could not find a clear picture or verbage of how the washers are supposed to go and unfortunately, my '70 is not available for verification. The only information I could find was to ensure that the rounded part of the rubber was toward the frame. Will have to double check on the source.....may have been a Chilton's. It does seem odd to me that the convex side is toward the rubber. I would think that water would/could accumulate at the interface. Seems like convex side out would reduce water intrusion.
-
Thanks @Captain Obvious...got those washers inverted. Thanks also @Zup and @Terrapin Z for the parts. Things are coming together here. Will get those non-brass/copper parts plated.


-
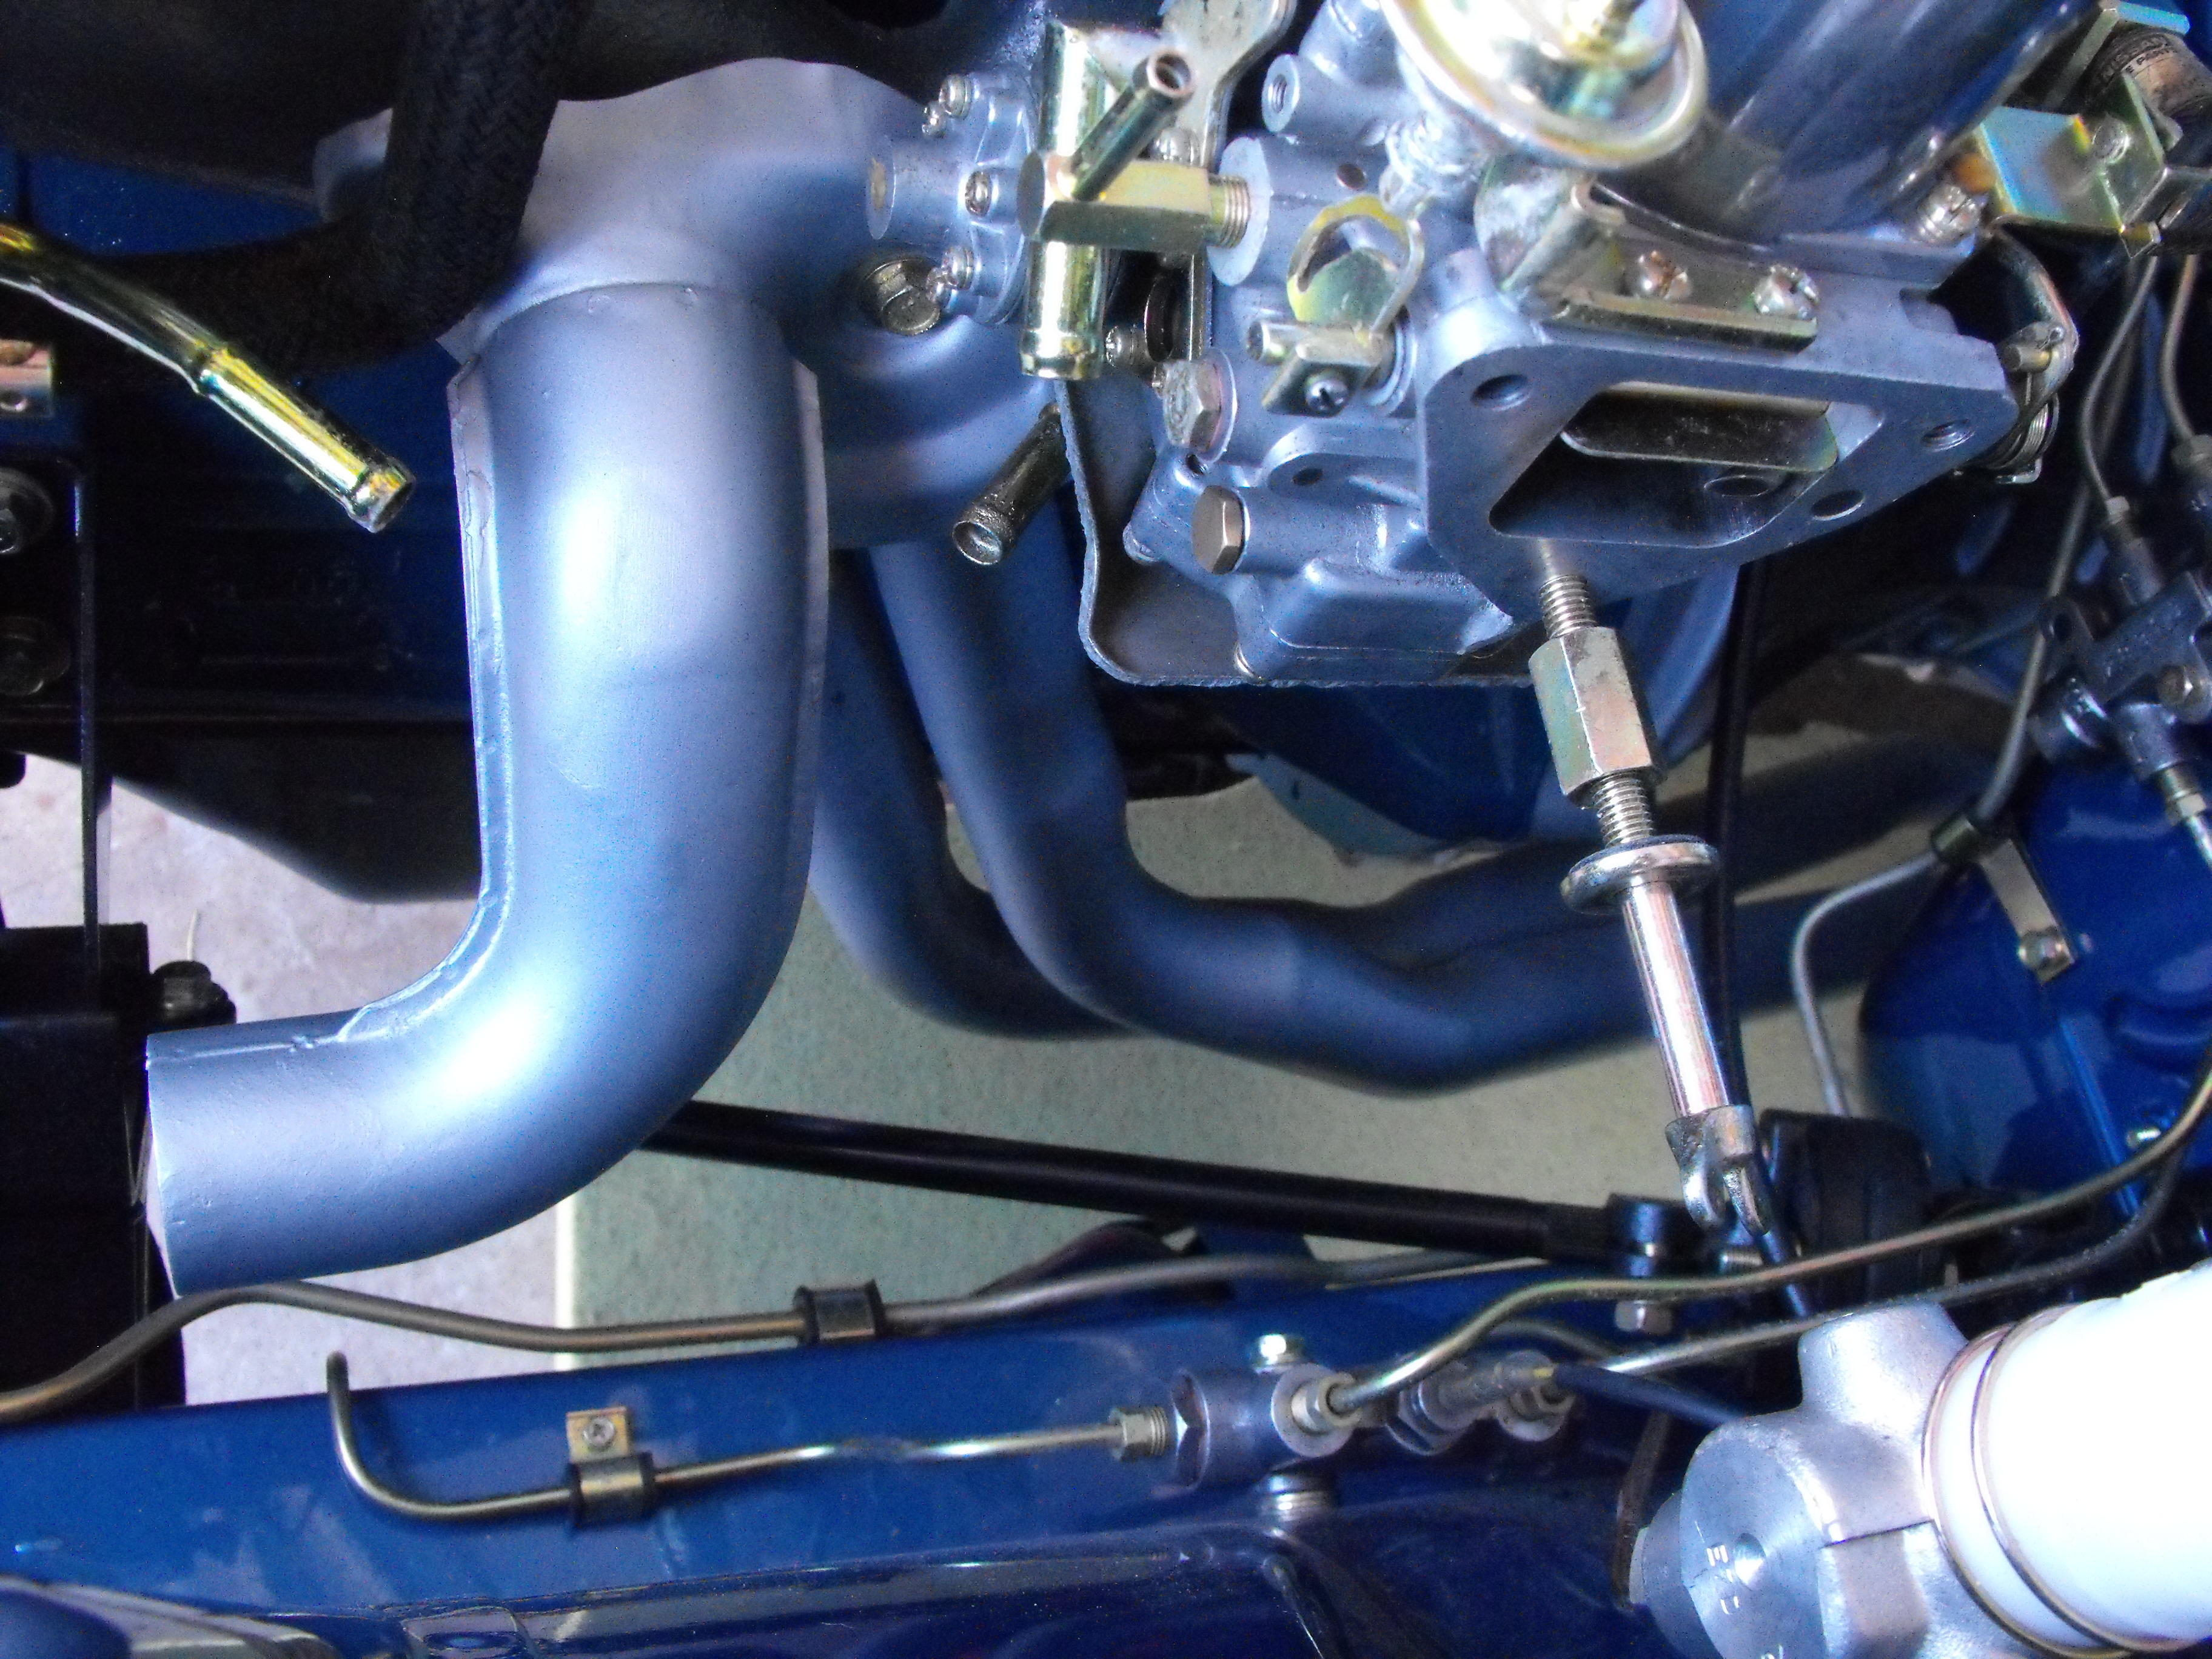
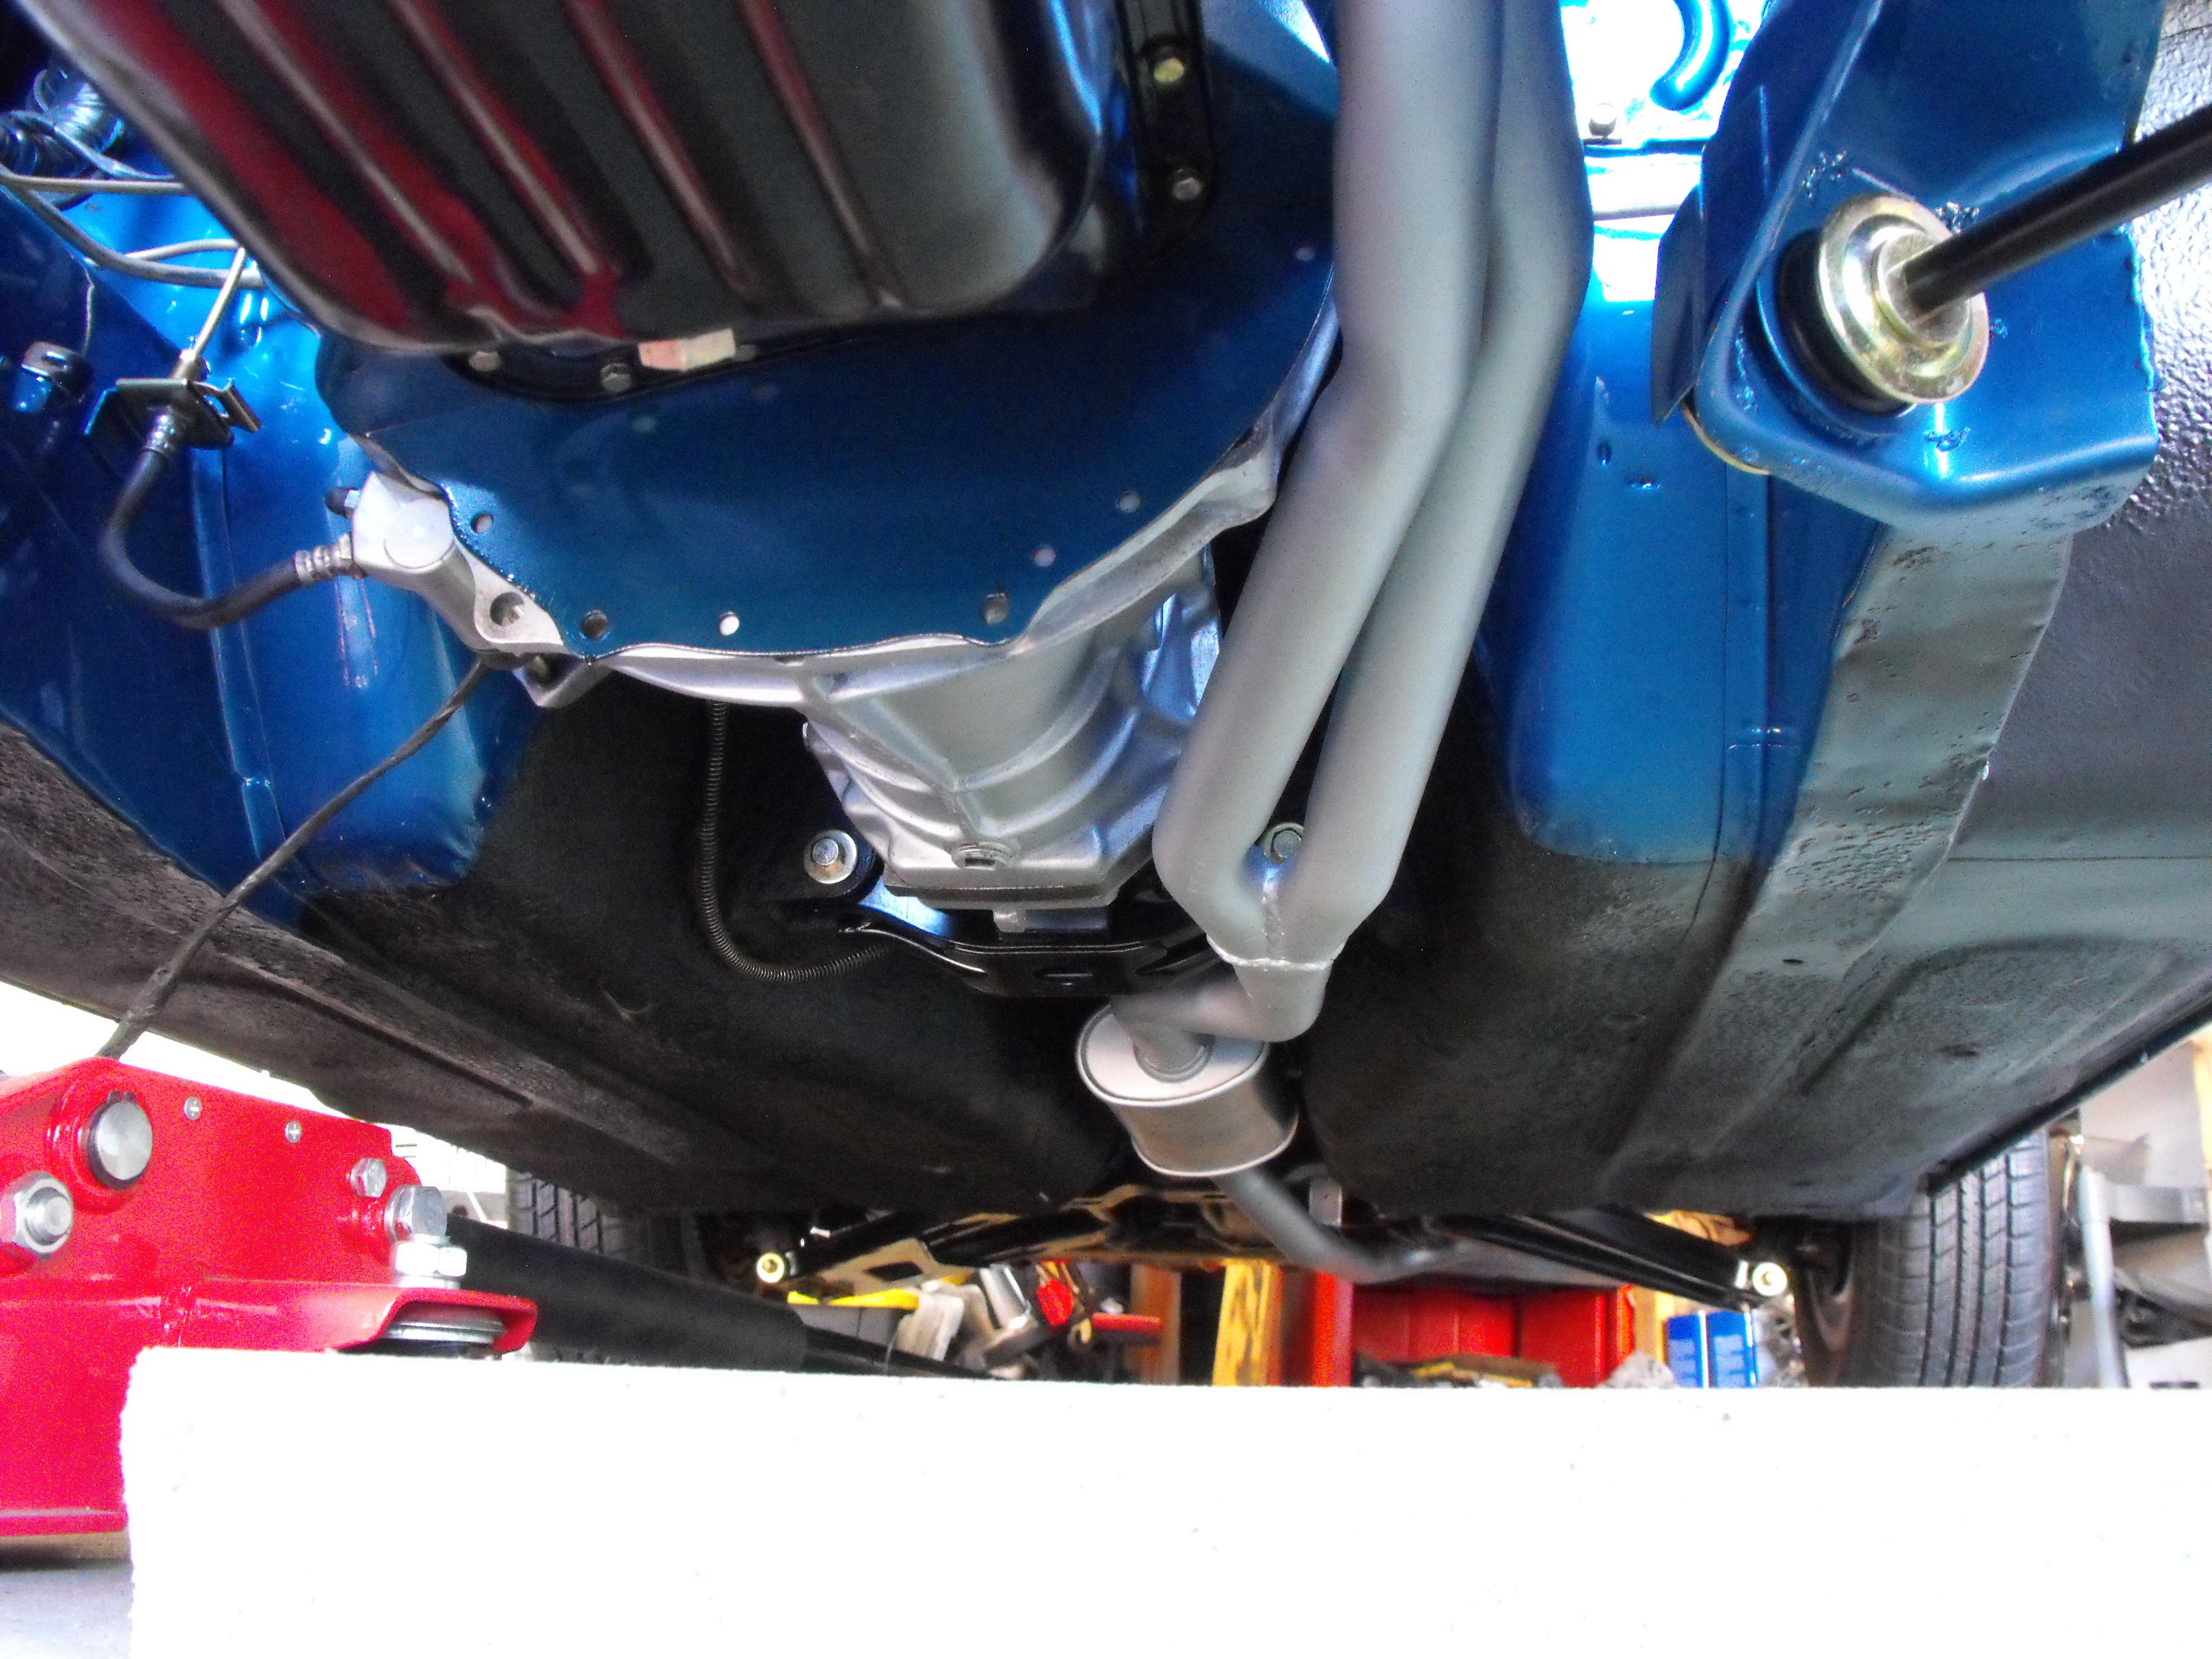
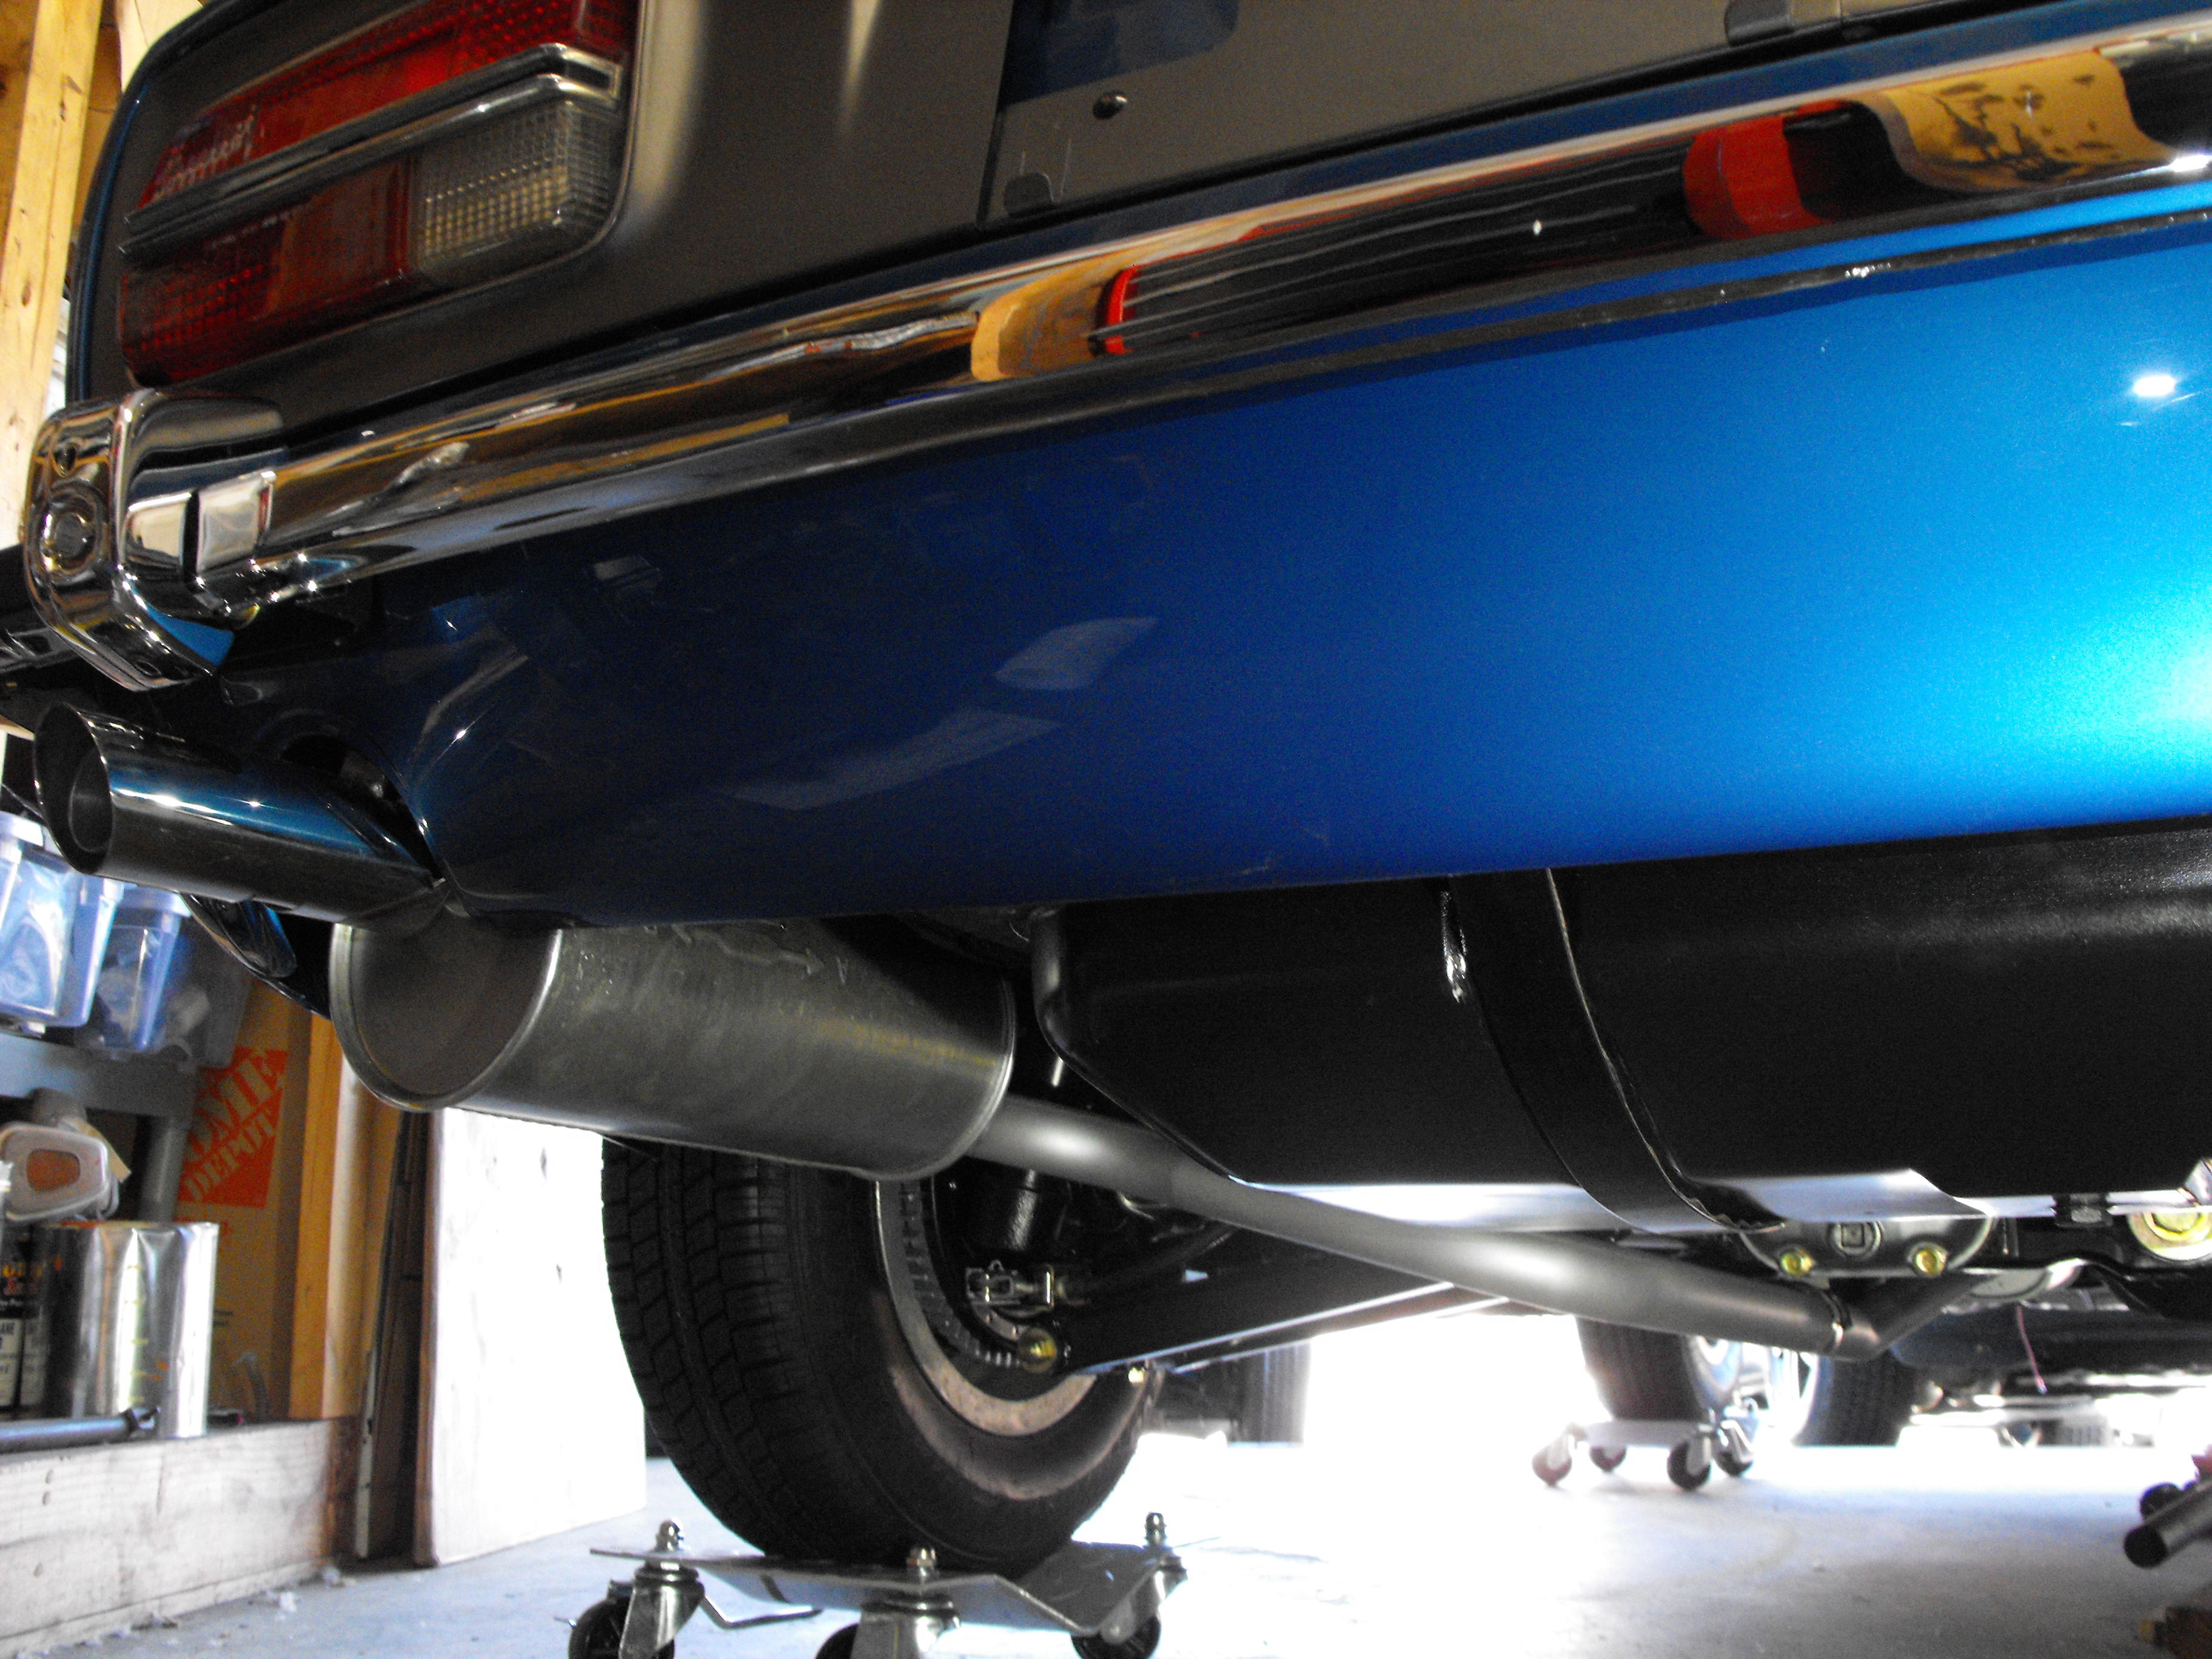
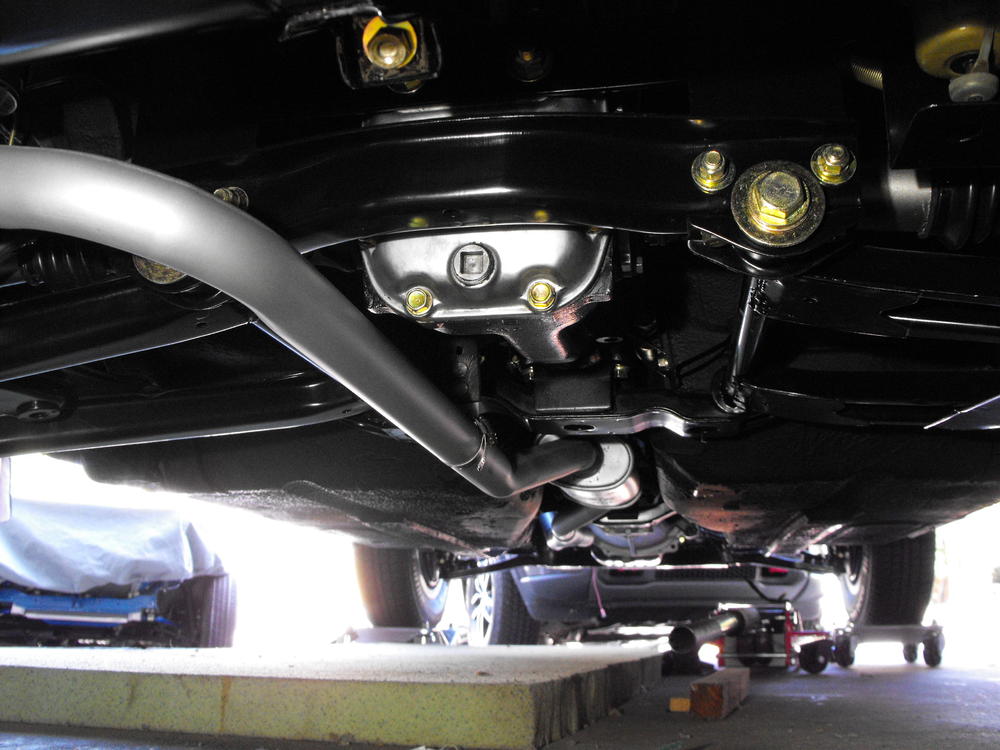
Put the exhaust in this weekend. Need to go the store and get some muffler clamps, used the hose clamps since they were available. Parts to finish out the carbs should be coming in this week. Will need to get those plated, then will install hose. Also, need a little help finding the rear bumperette rubber. You can see it is missing in the last pic. They are different for the '73 than the earlier models and don't seem to be readily available. These ones on eBay seem to be the right ones, but not sure, no part number. https://www.ebay.com/itm/REAR-BUMPER-BAR-RUBBER-OVERRIDER-RUBBER-INSERTS-for-DATSUN-NISSAN-240Z-260Z/132883410645


-
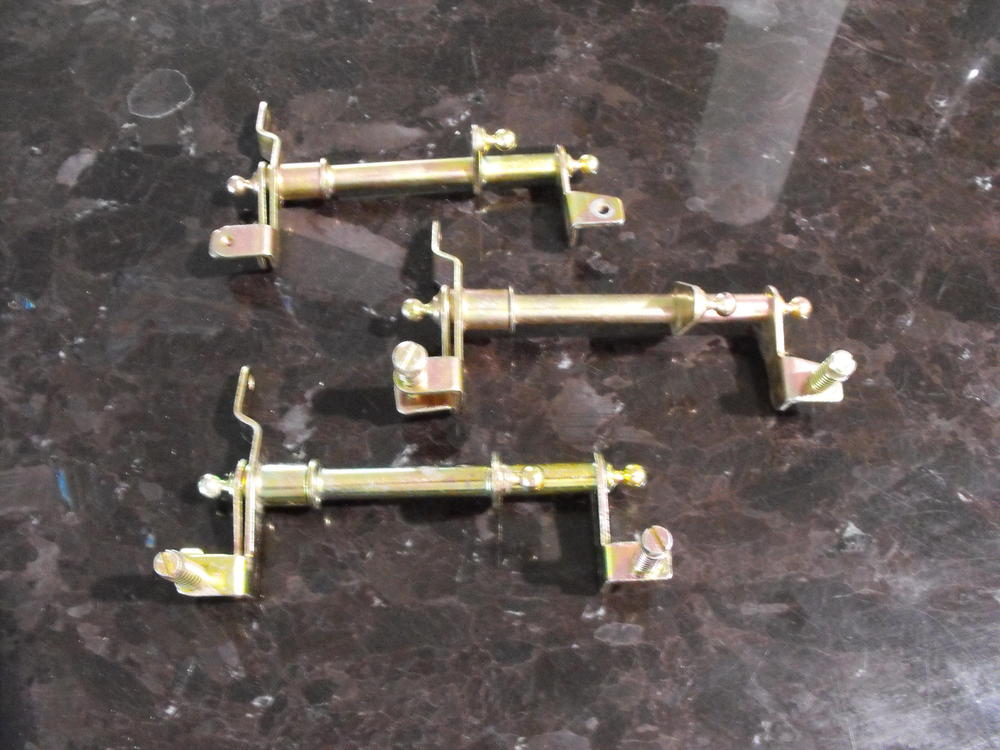
Yes, please send. I can cover you through PayPal....or trade you 2 of my SU linkages for your 1 flat top linkage ☺️
-
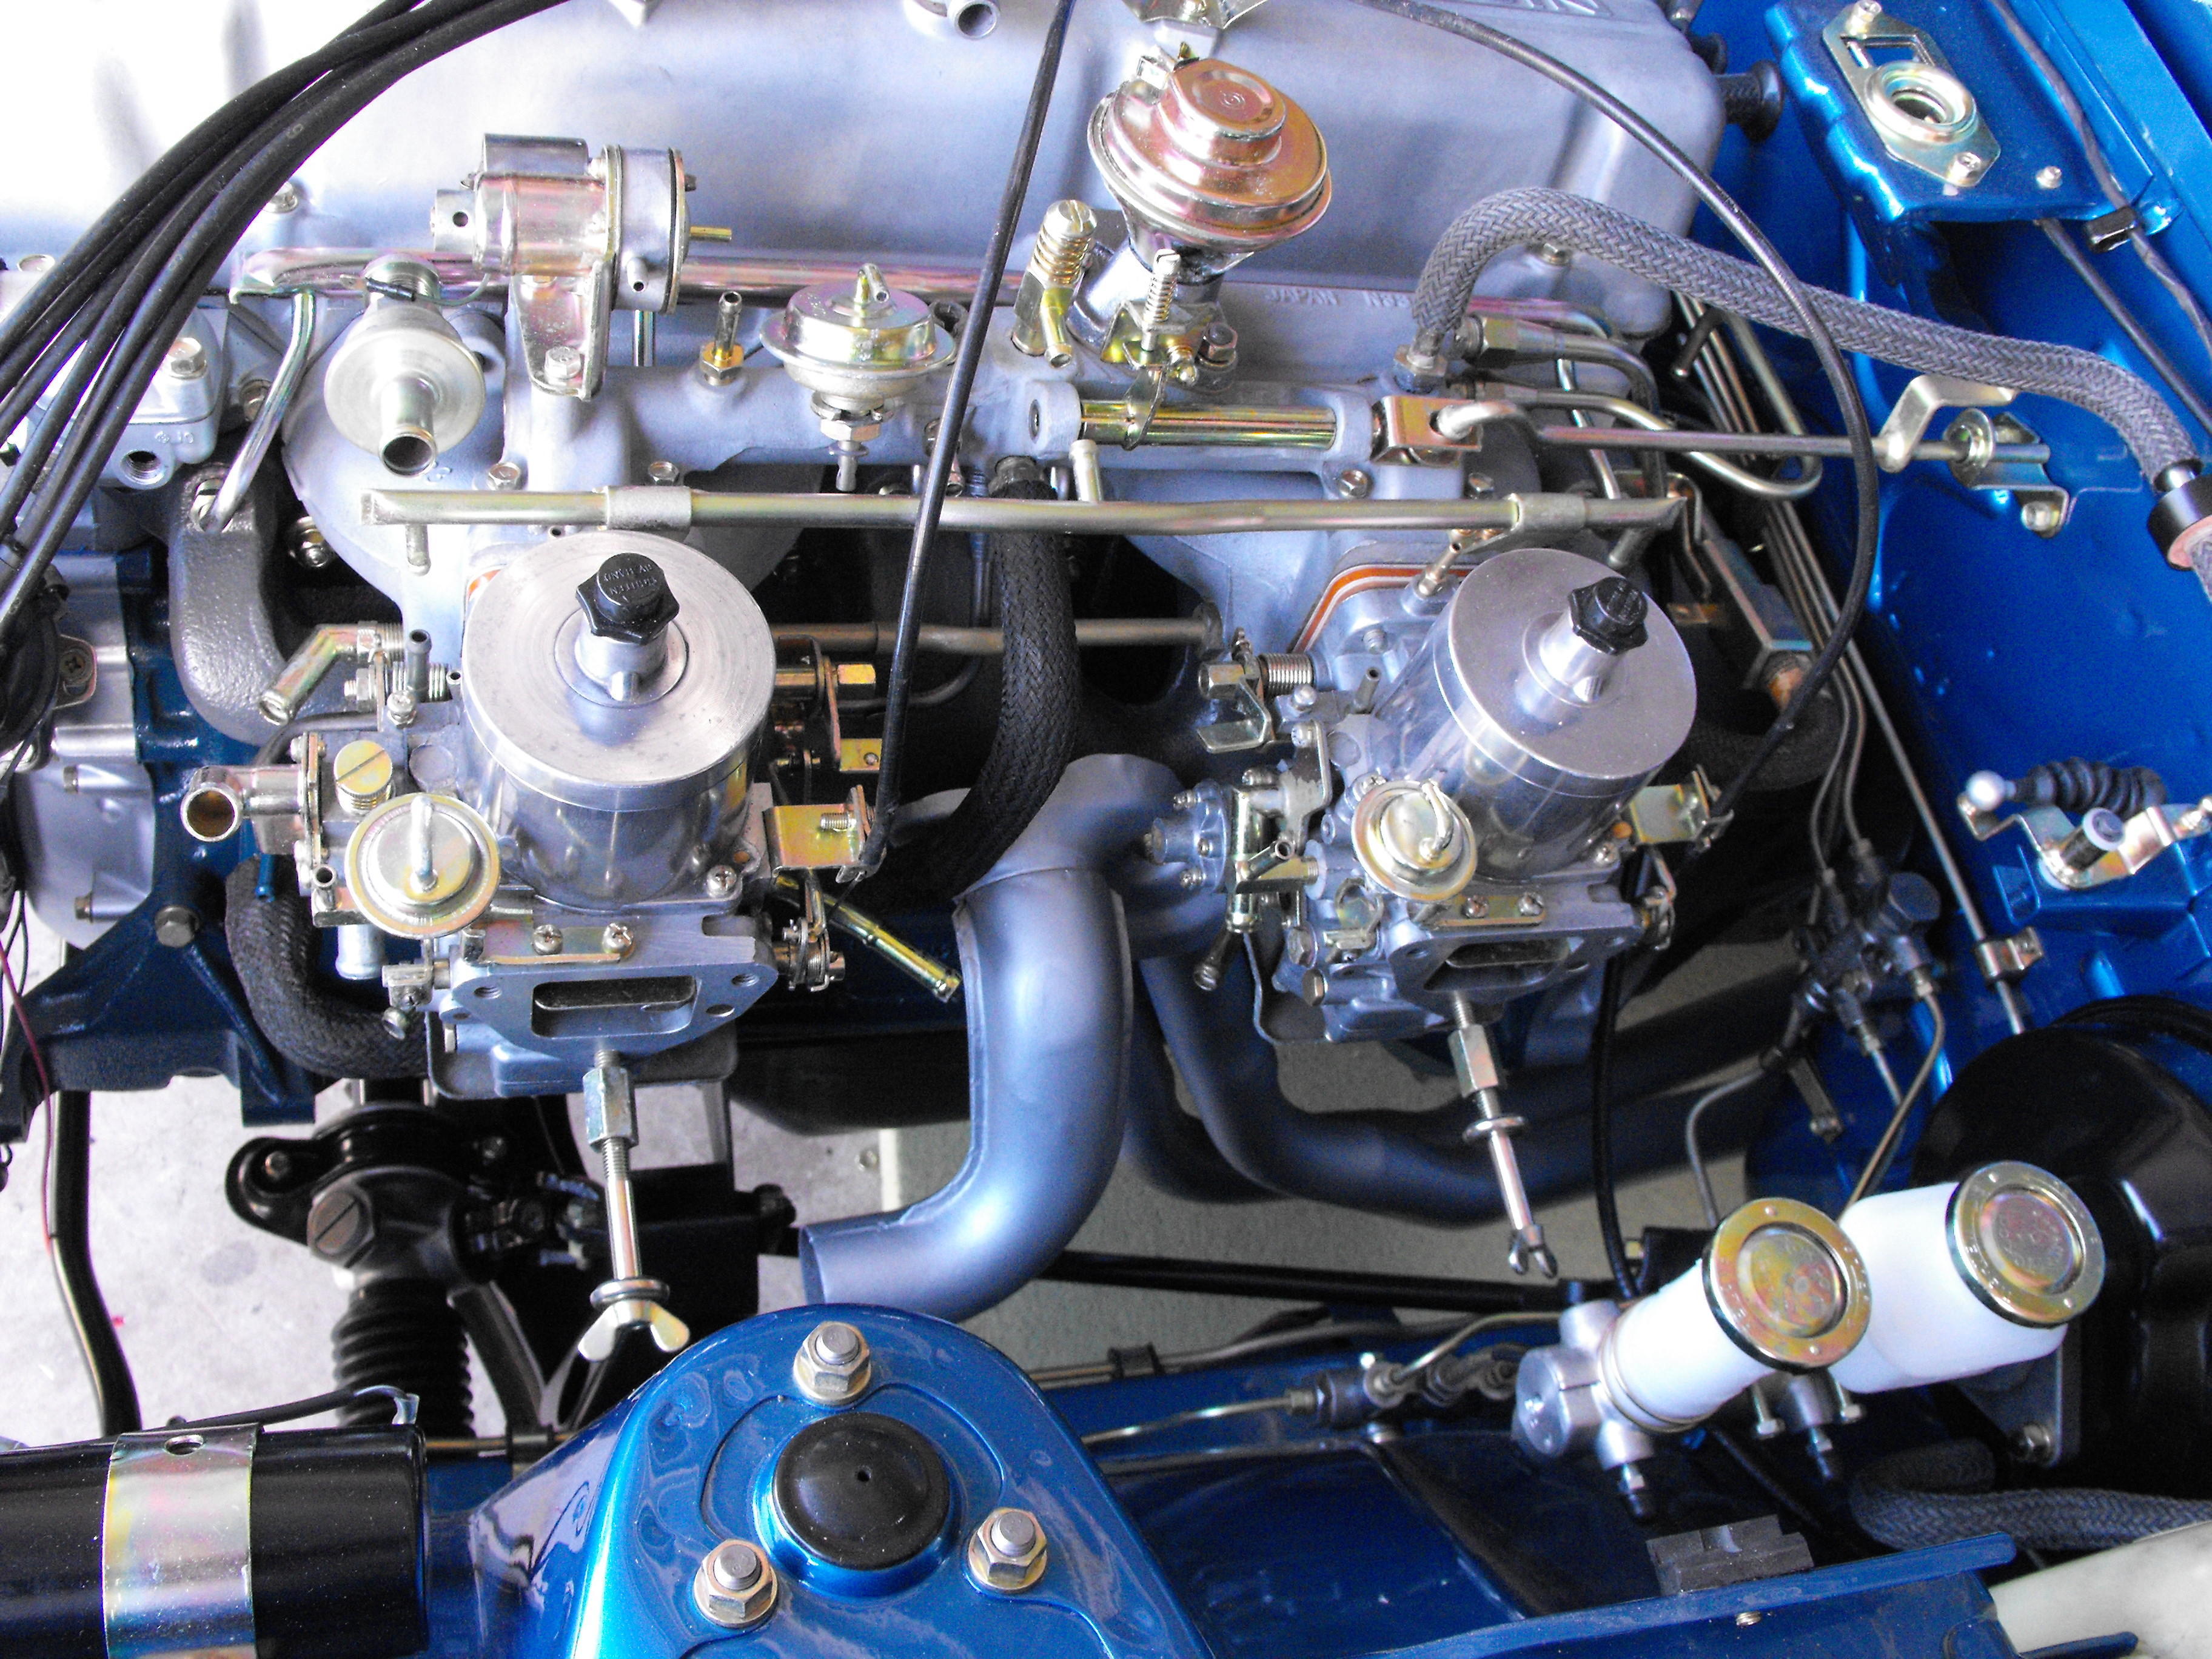
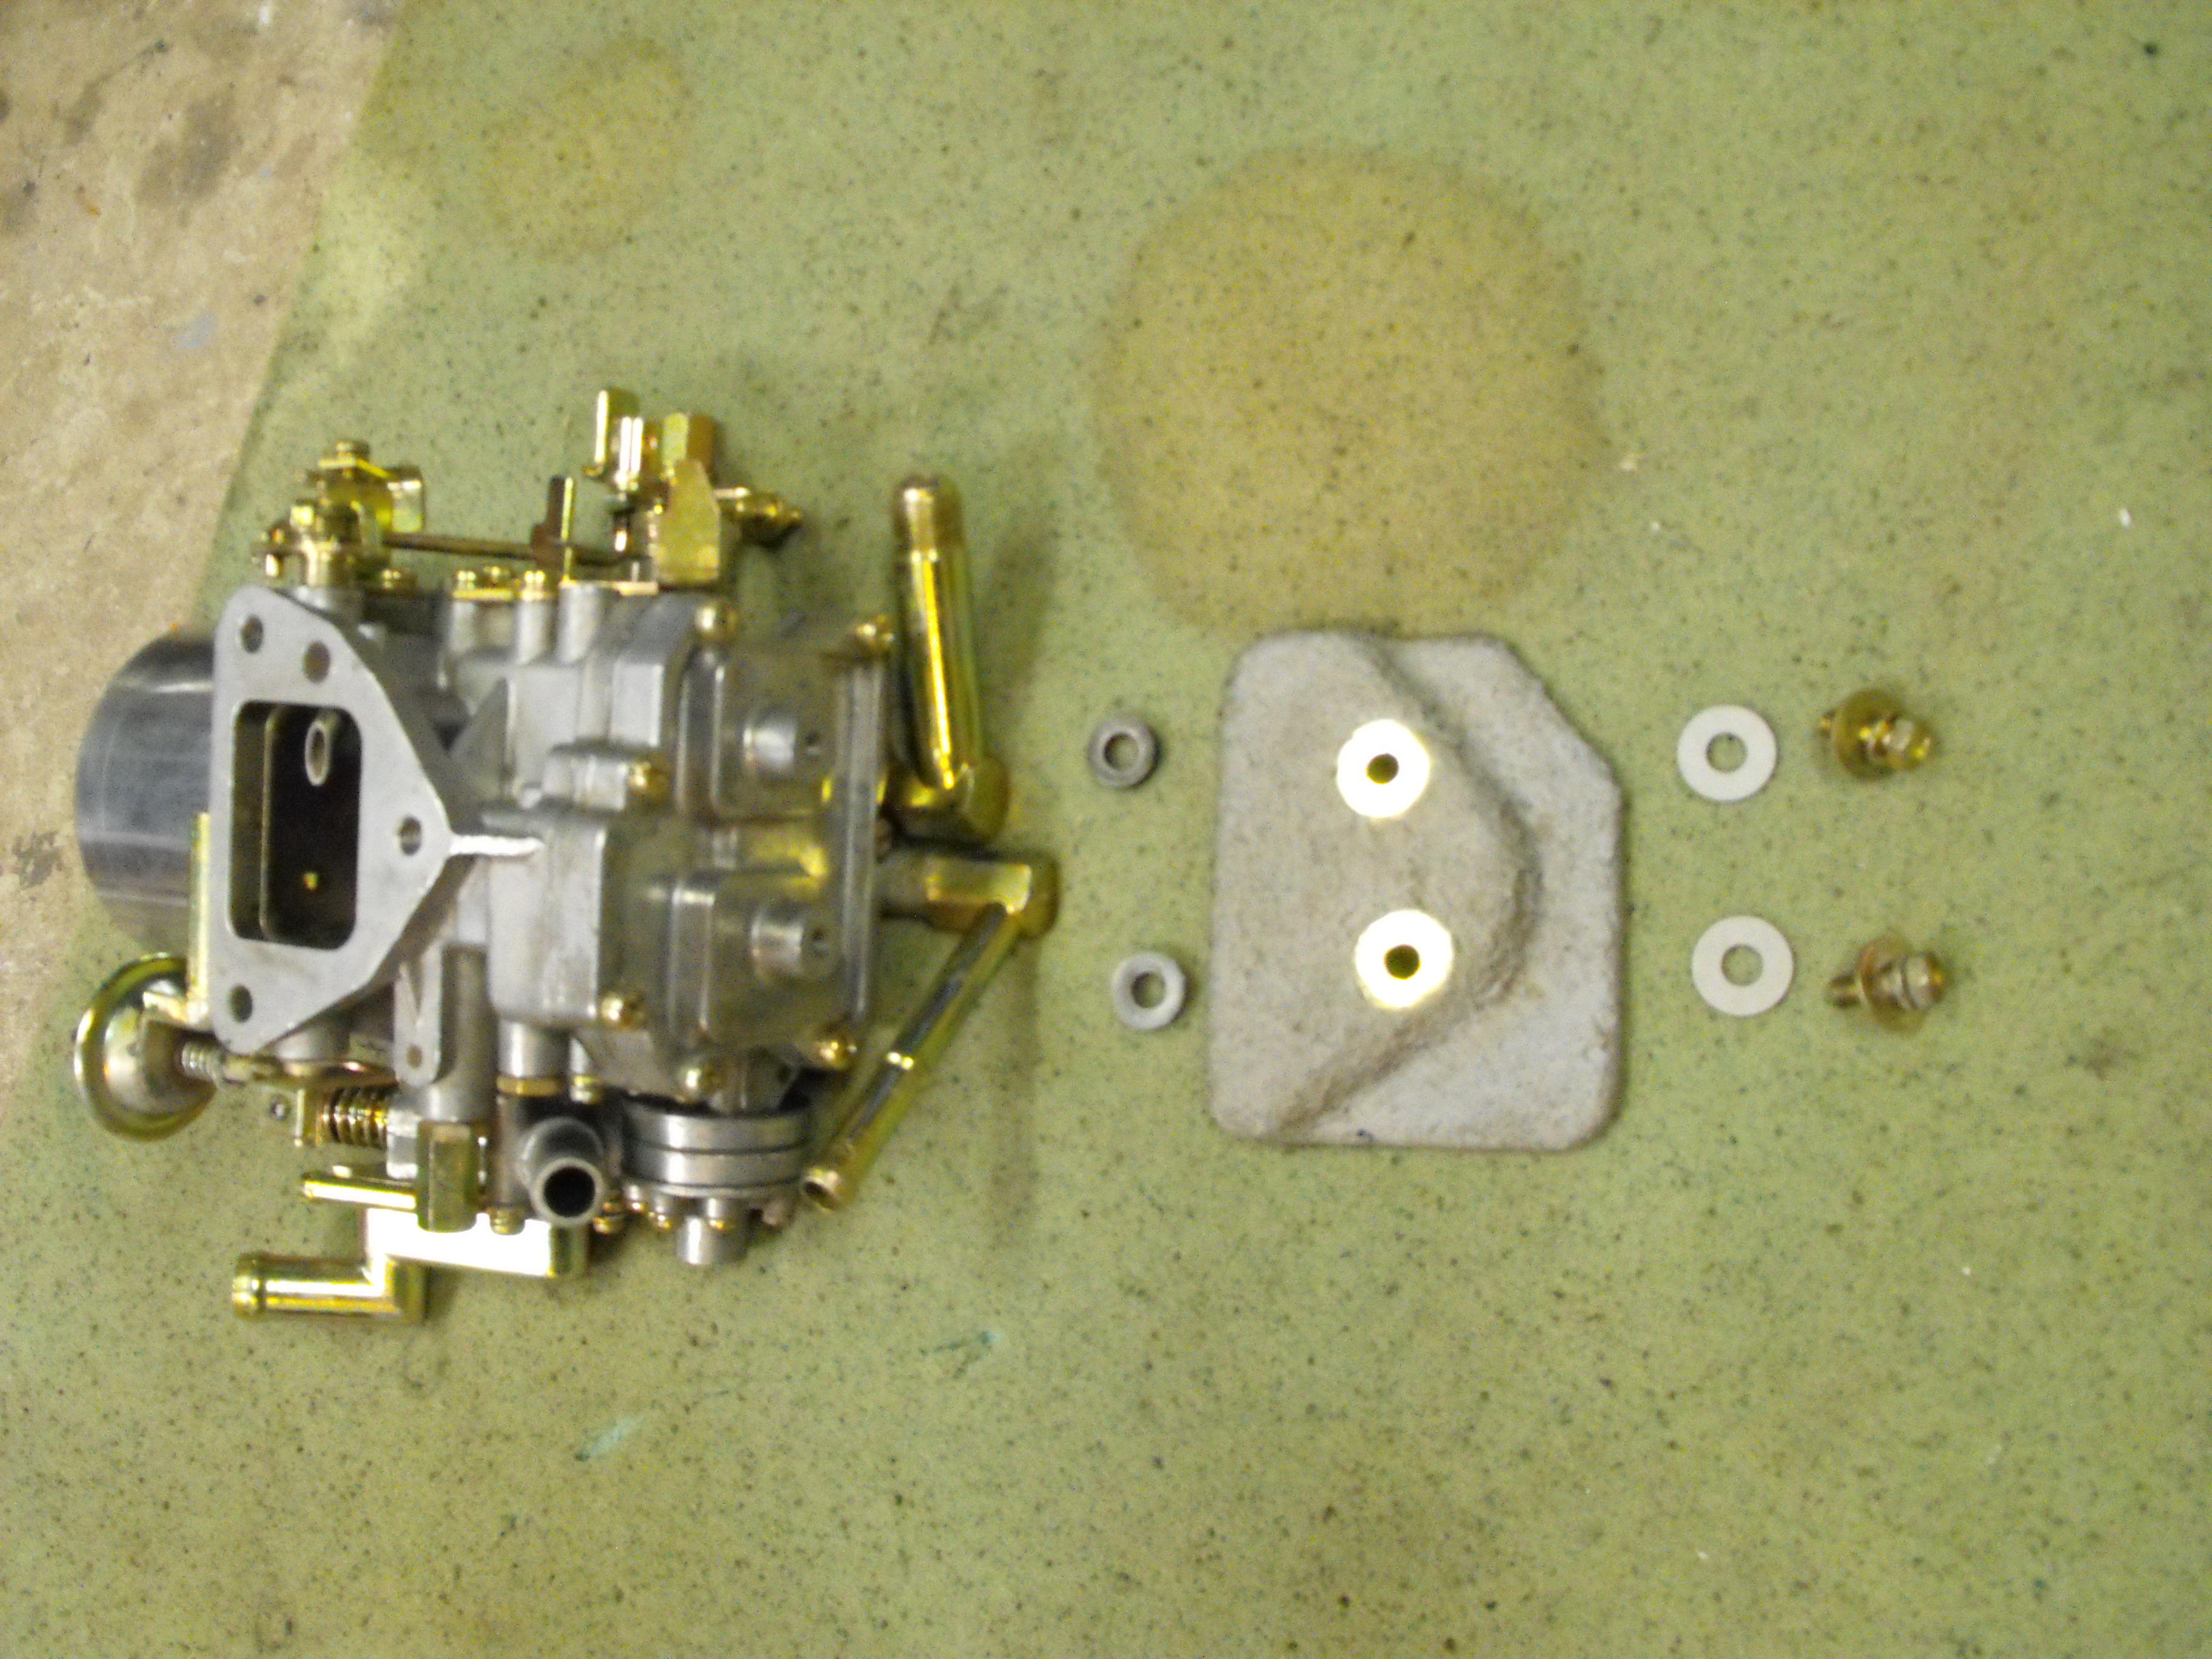
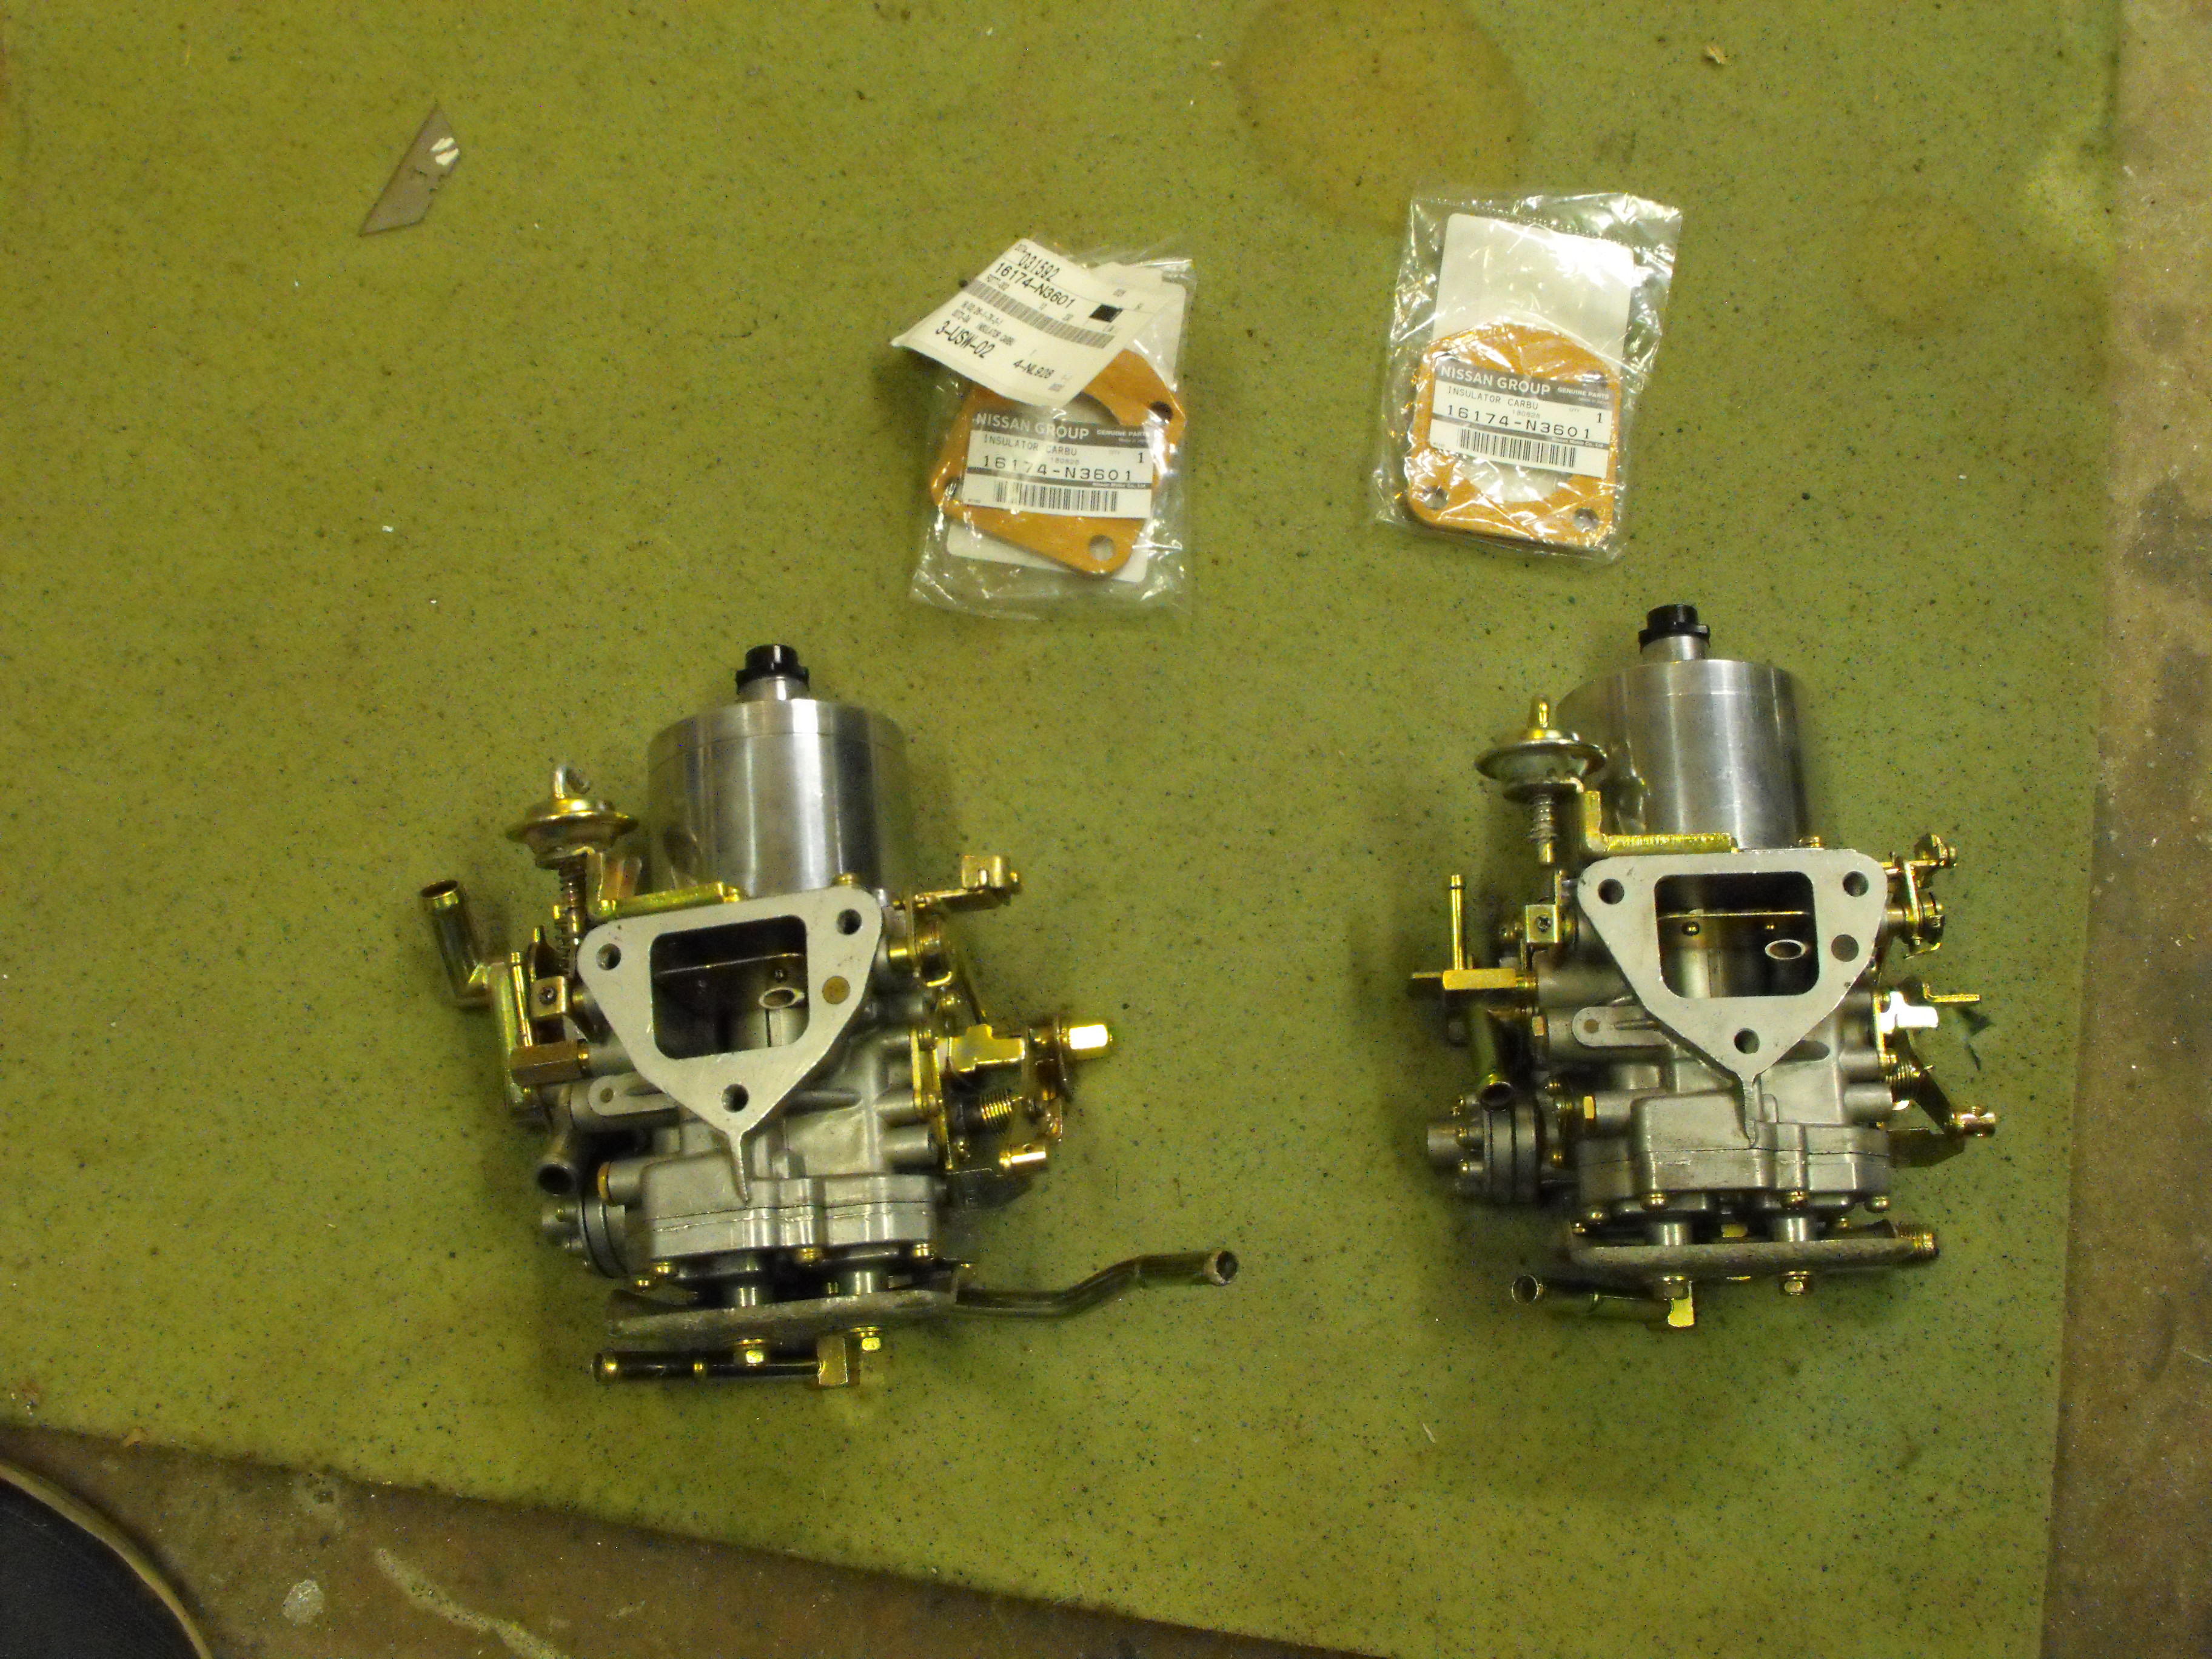
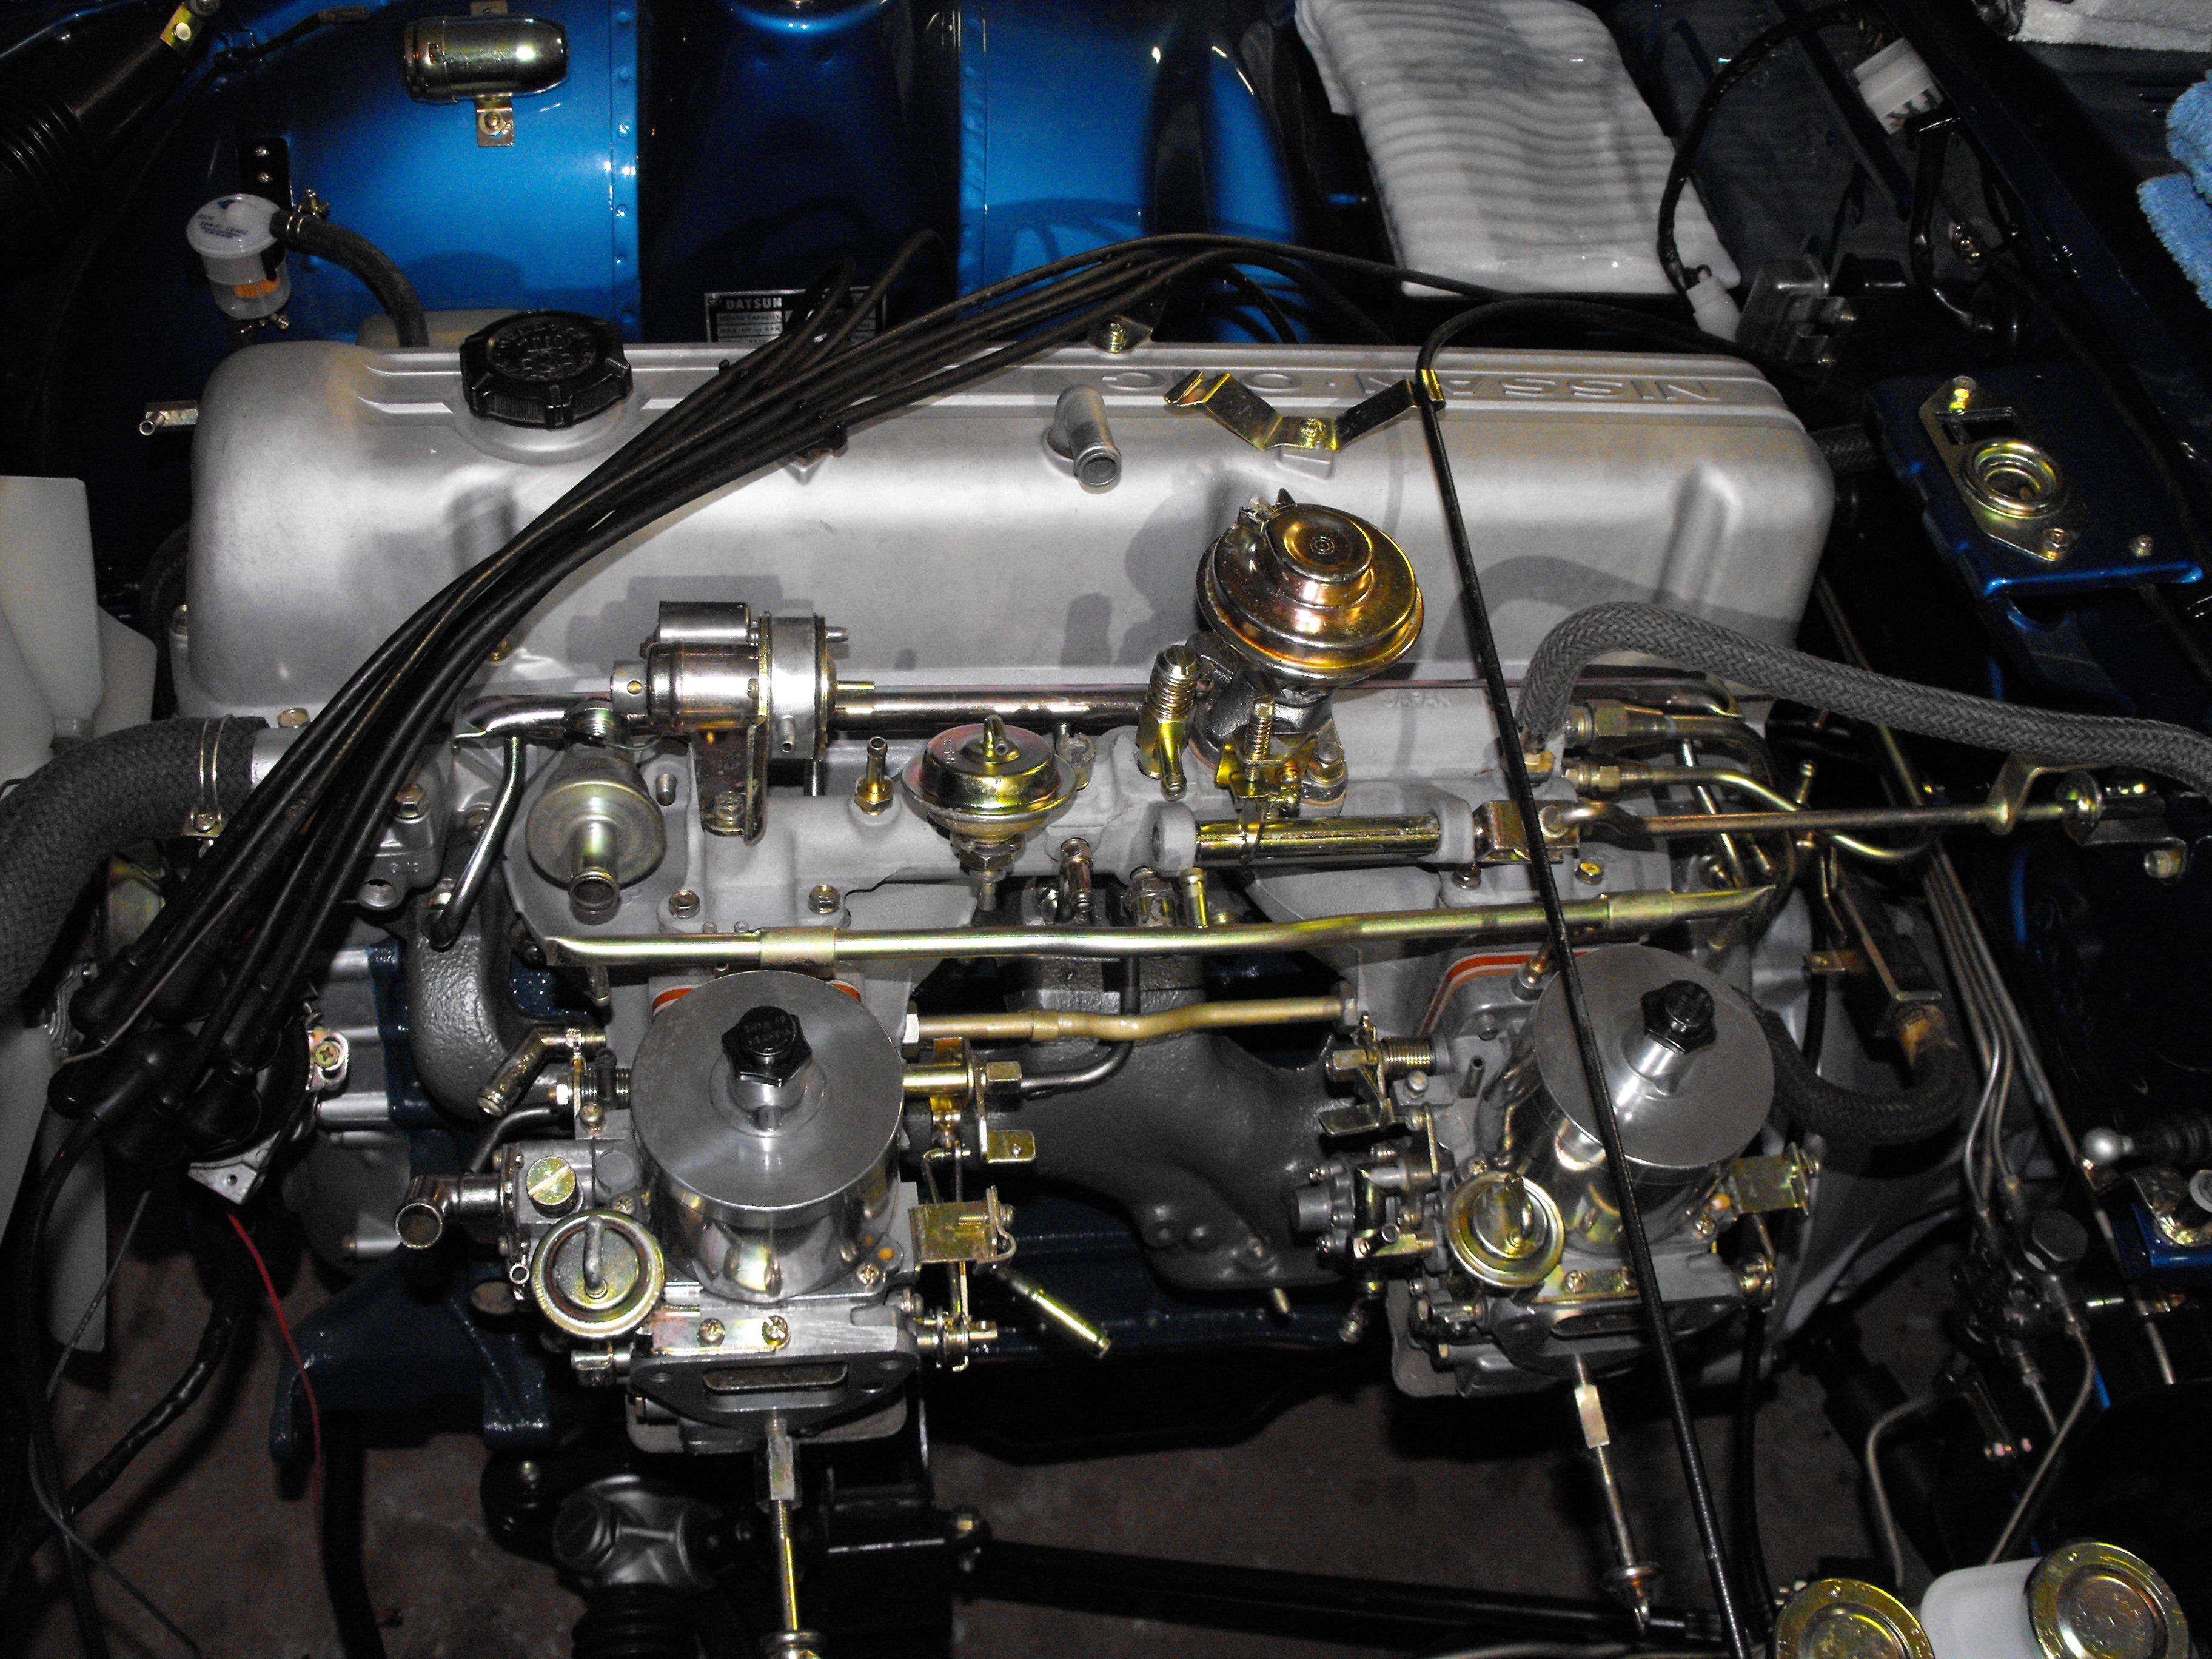
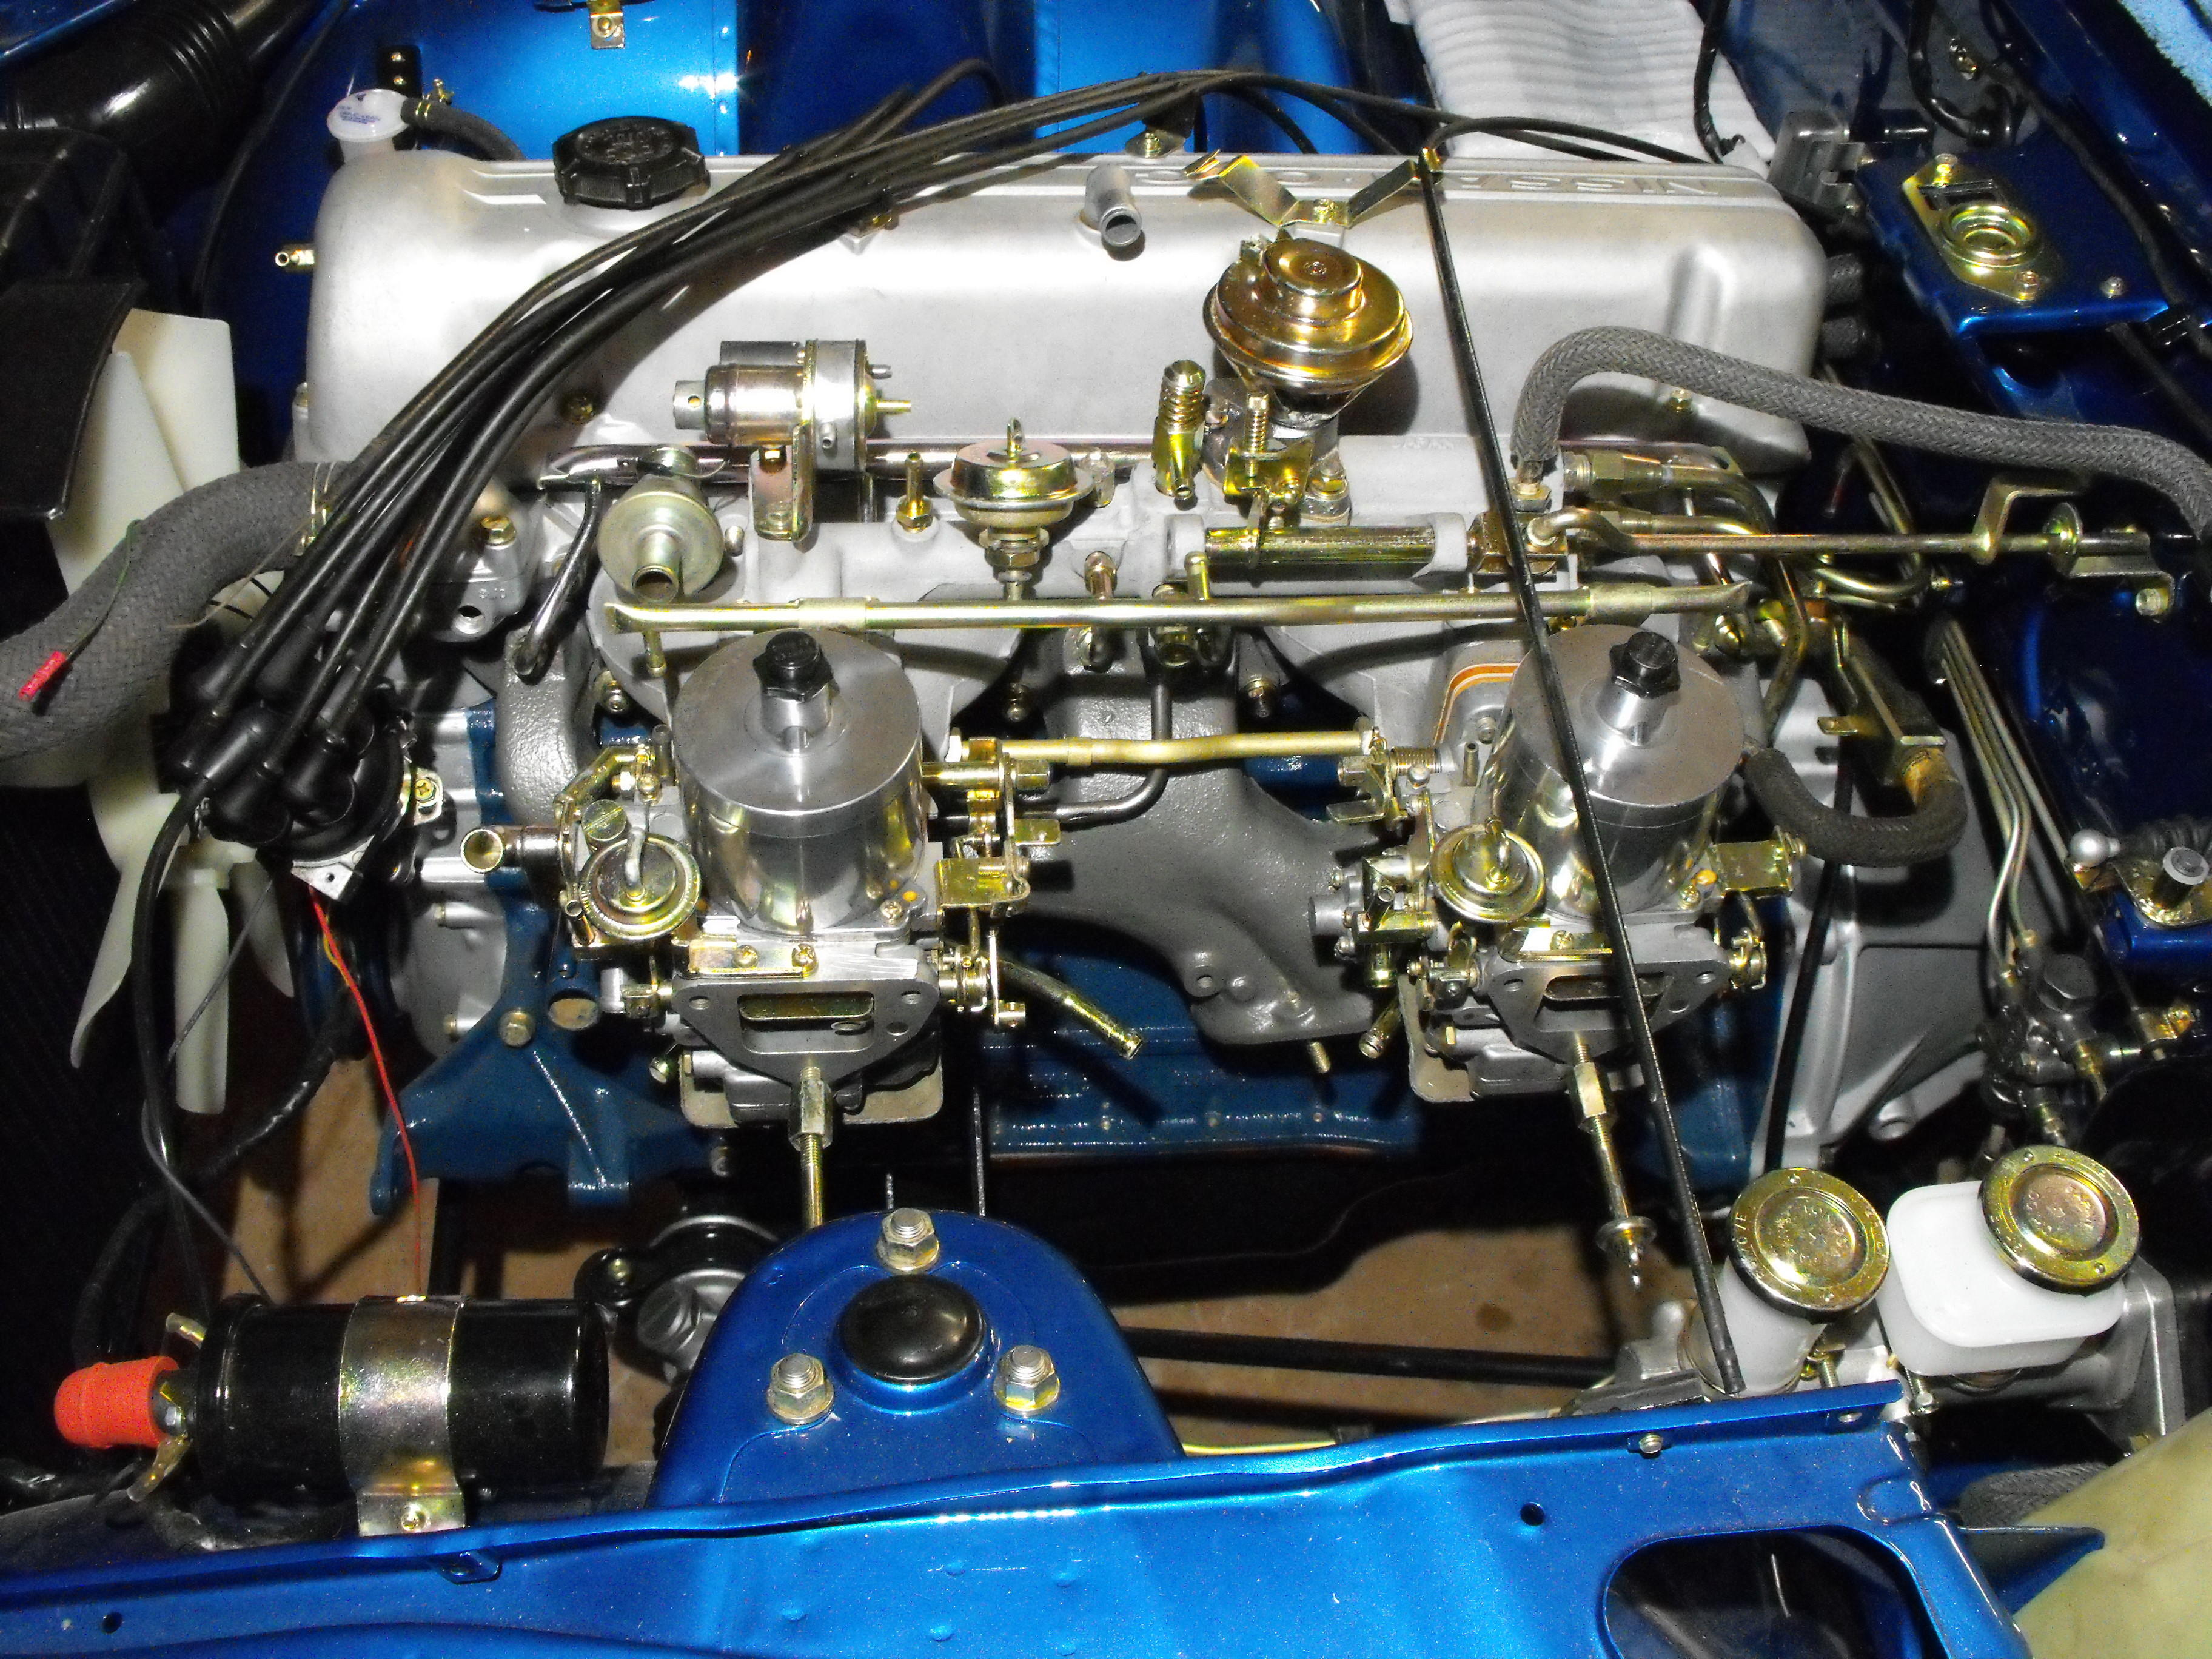
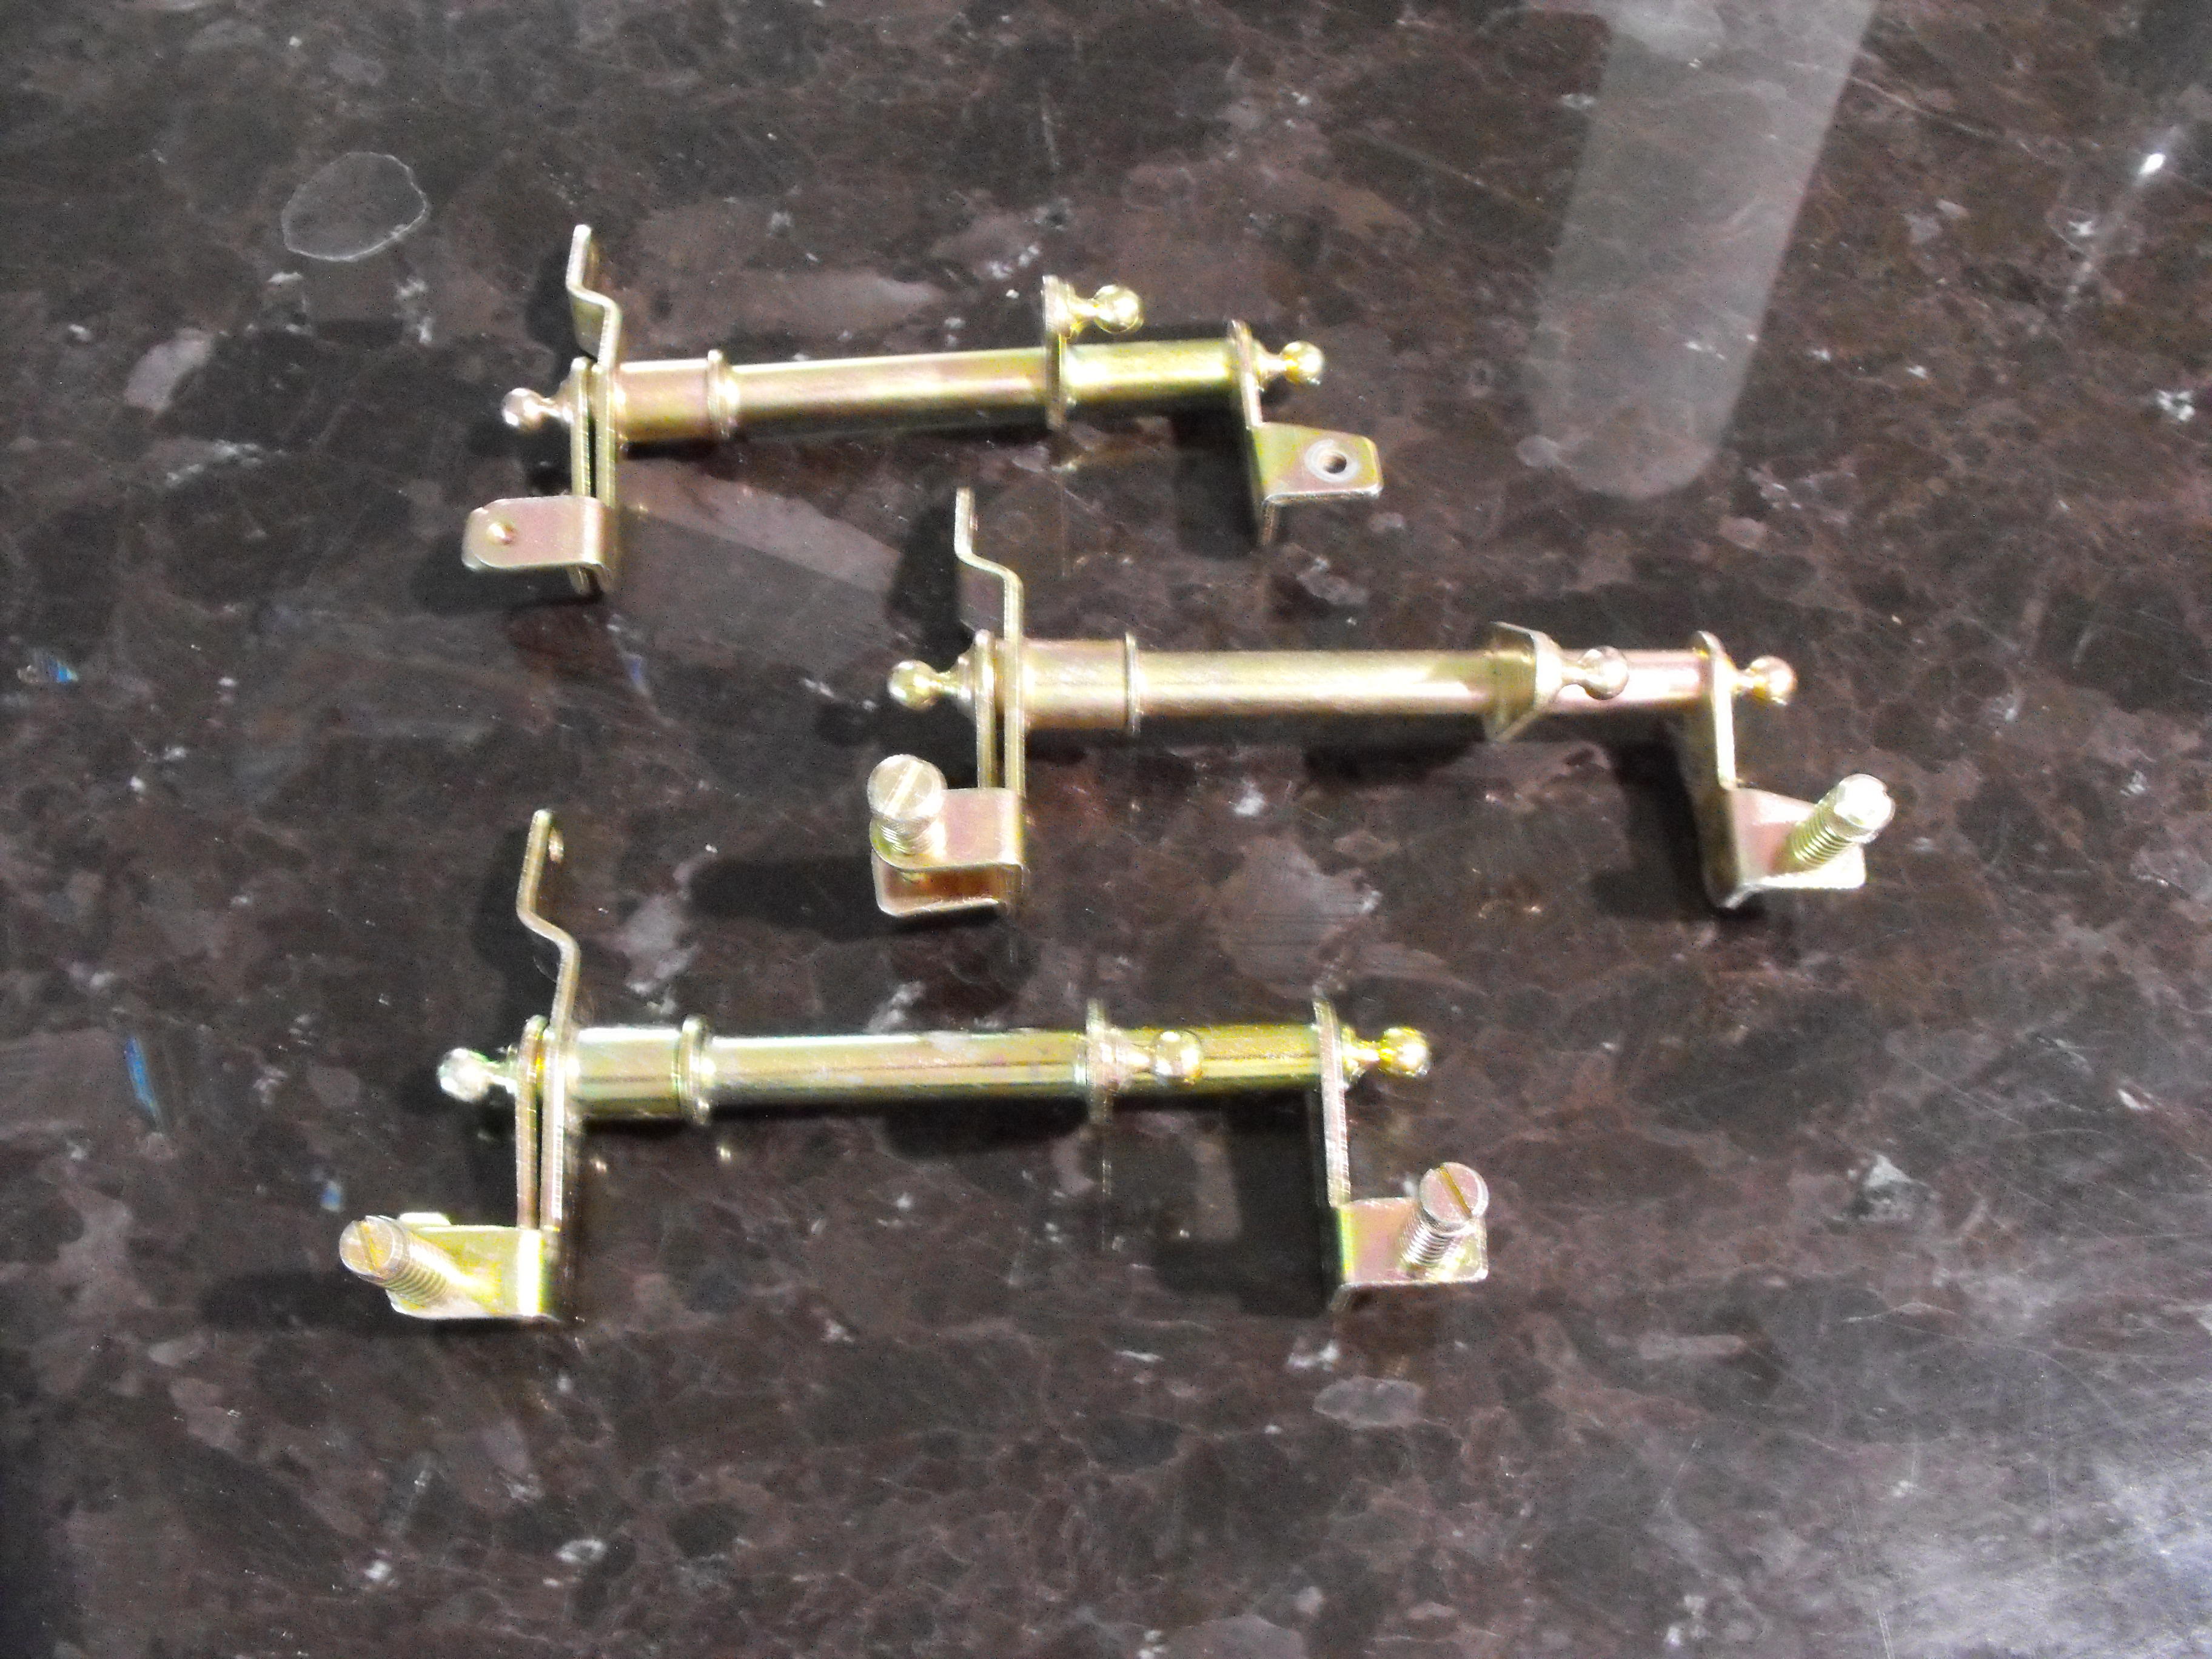
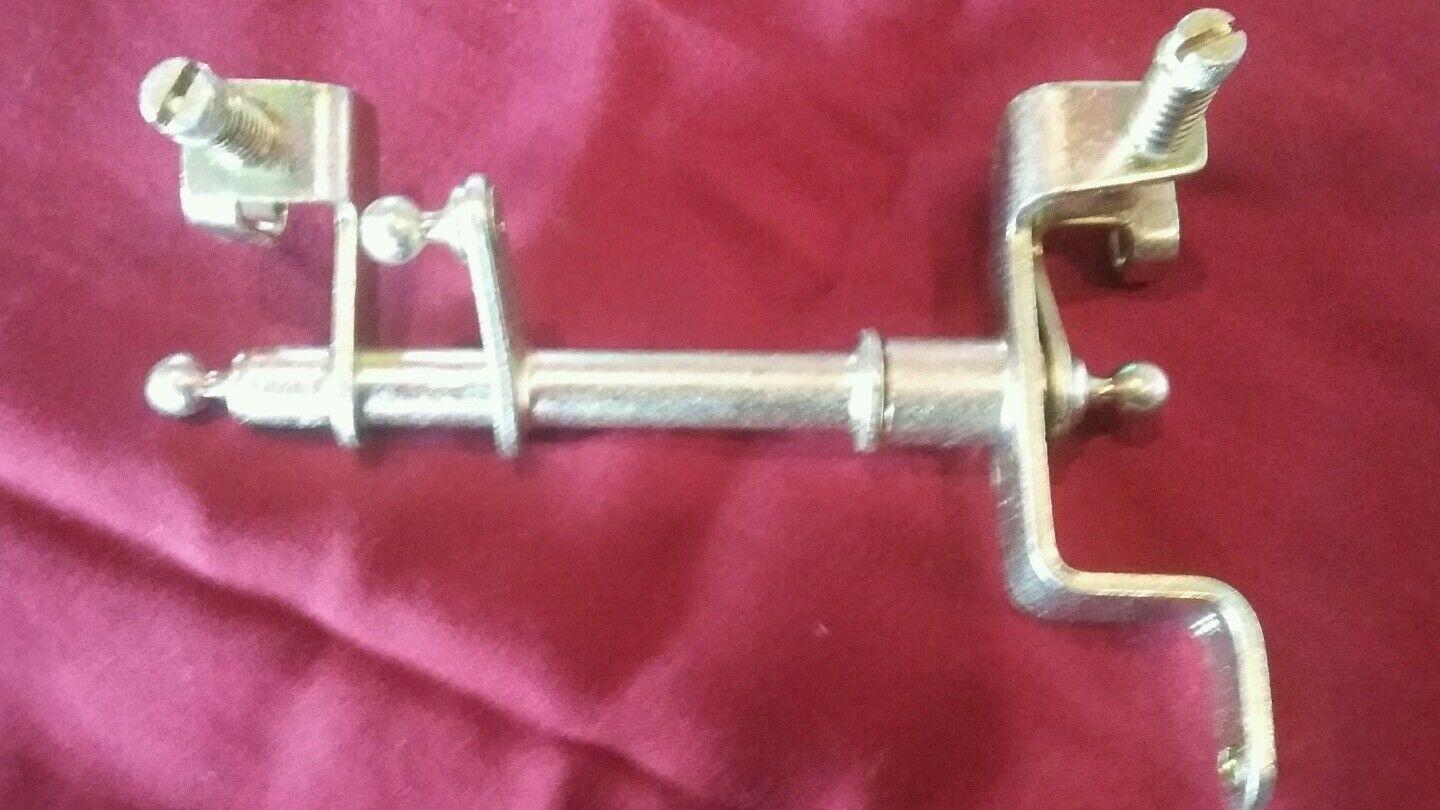
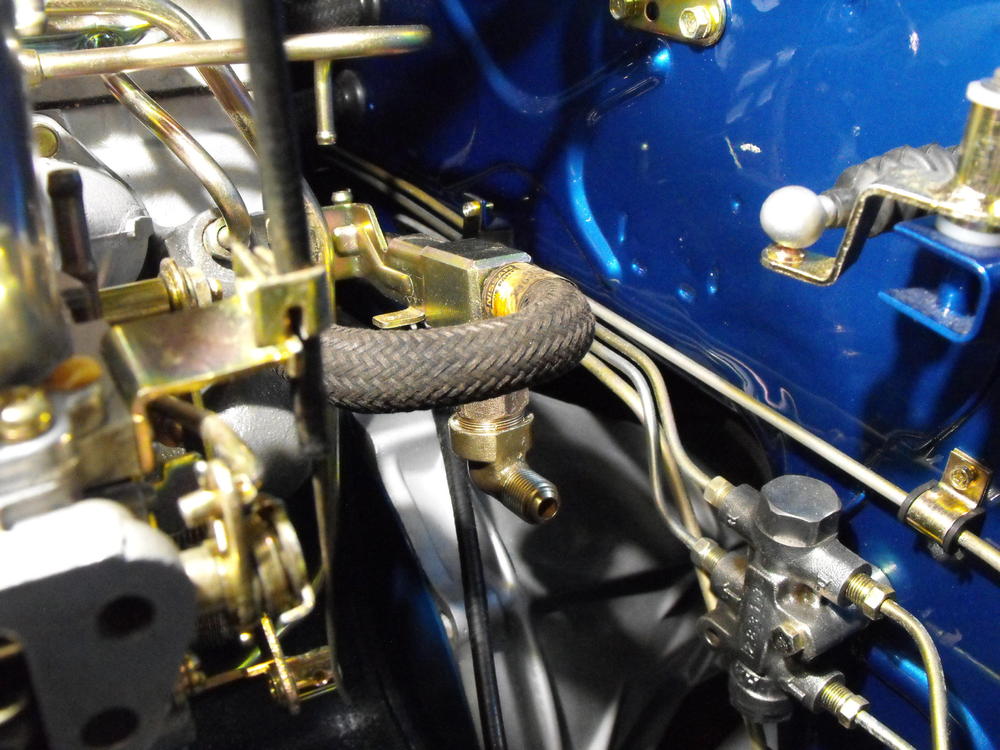
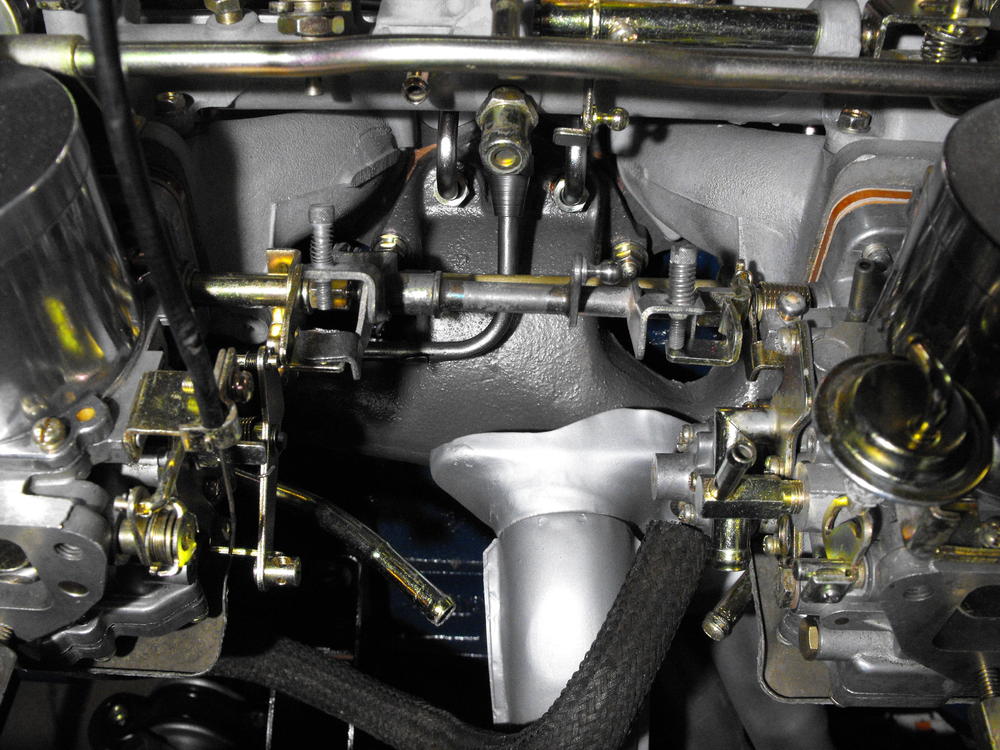
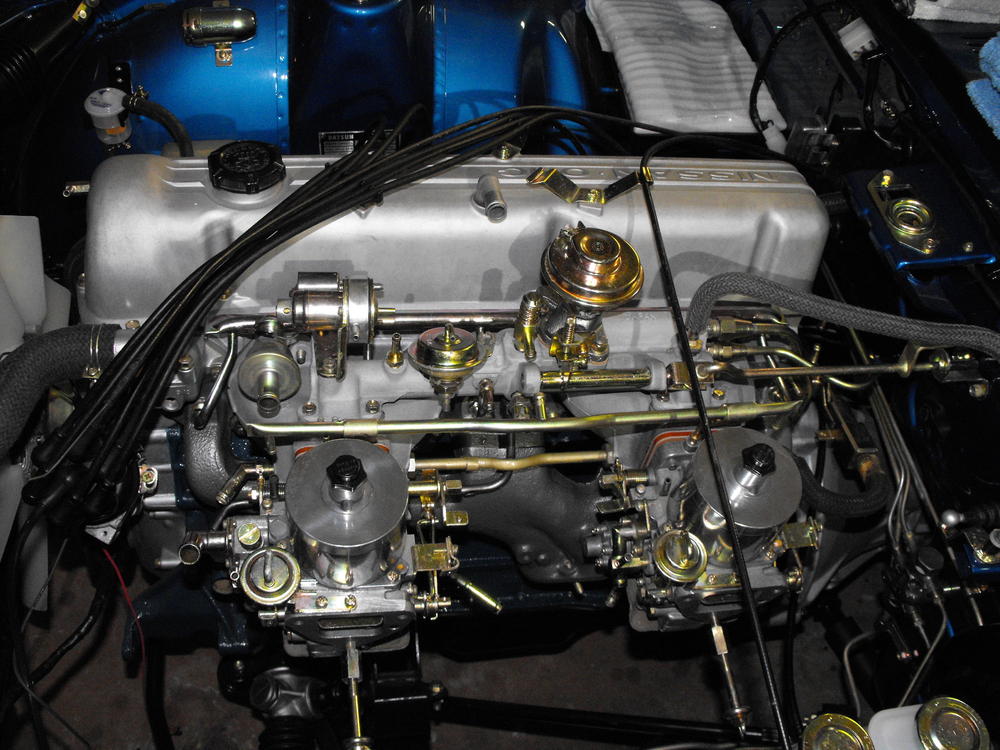
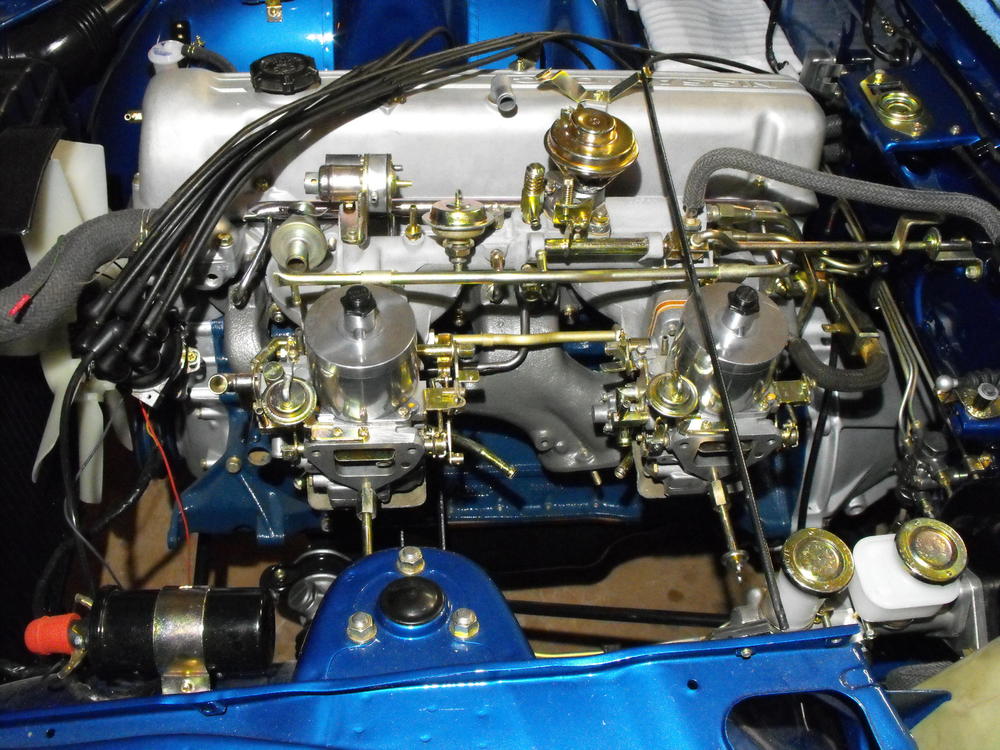
Being an engineer, I have to say that the carb heat shields inherently have a heat transfer issue. There are black insulators between the heat shield and carb float bowl, but the securing bolts on the opposite side directly contact the heat shield and screw directly into the float bowl base. This means that all of the heat that the heat shield is absorbing is transferred through the bolt assembly into the base of the float bowl., which means the shield is not helping very much and the float bowl is acting like a heat sink. So, I added two gray fiber washers on the opposite side of the heat shield (from the insulators) so that the bolts do not directly contact the heat shield. This way the heat shield is isolated and not channeling as much heat into the float bowl. This is pretty much the only mod that i have made to the carbs and hopefully it reduces the susceptibility to vapor lock. I picked up a new front flat top carb on eBay for fairly cheap...couldn't pass it up. I am debating on whether to cannibalize it and put some of the parts on the rebuilt front carb, like the fuel filter, plastic cap and choke diaphragm. Or, just install it on the front. The problem with the second option is the finish is slightly different. I am also considering trying to make the rear flat top finish match the new carb. The new carb has a flat finish, so maybe a light bead blast would do the trick. Still weighing options here. Got some new carb insulators...those look cool. OK, now my latest issue. The throttle linkage that connects the two carbs is too long. I have three sets, and I think all are for SU's. Never realized that the linkage for the flat tops is shorter than the linkage for the SU's. You can see in that second to the last pic that the linkage is too long, my guess is that it is too long by 1/4". Was thinking that maybe I assembled something wrong, but that is really not possible. The carb throttle shafts control the span distance, and the linkage I have goes beyond the throttle shafts. Anyway, will need to research this a little bit. Maybe @Zup or @Captain Obvious can provide a bit of insight. Ahhhh, the '73 linkage is definitely different. Just added pic at bottom


-
PM sent