motorman7
Supporting Member
-
Joined
-
Last visited
Everything posted by motorman7
-
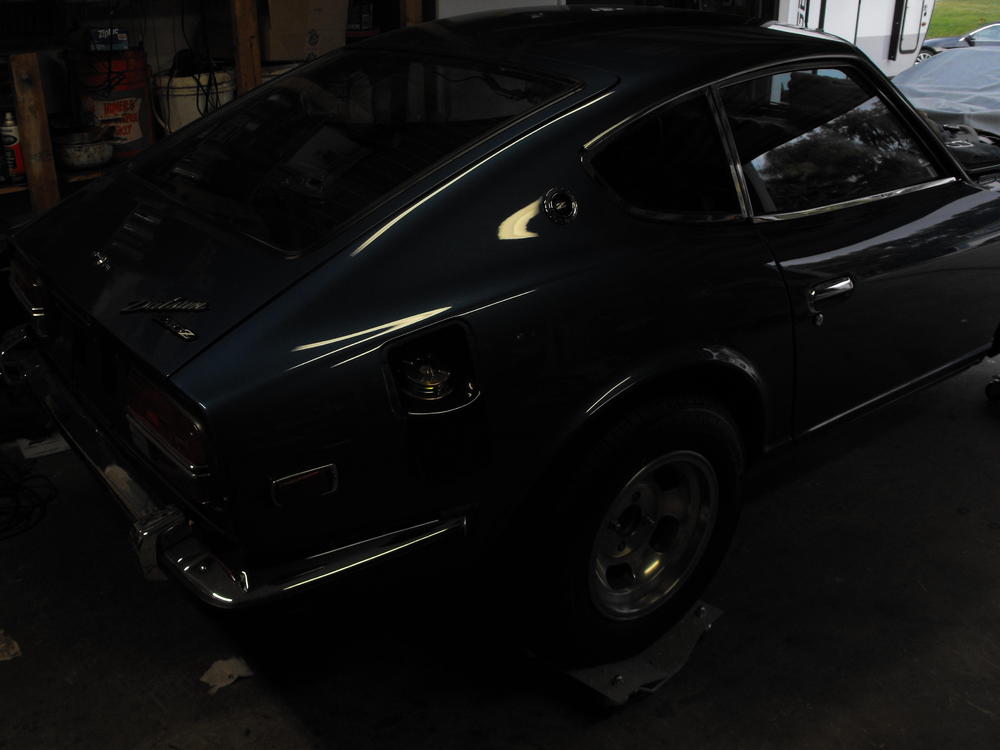
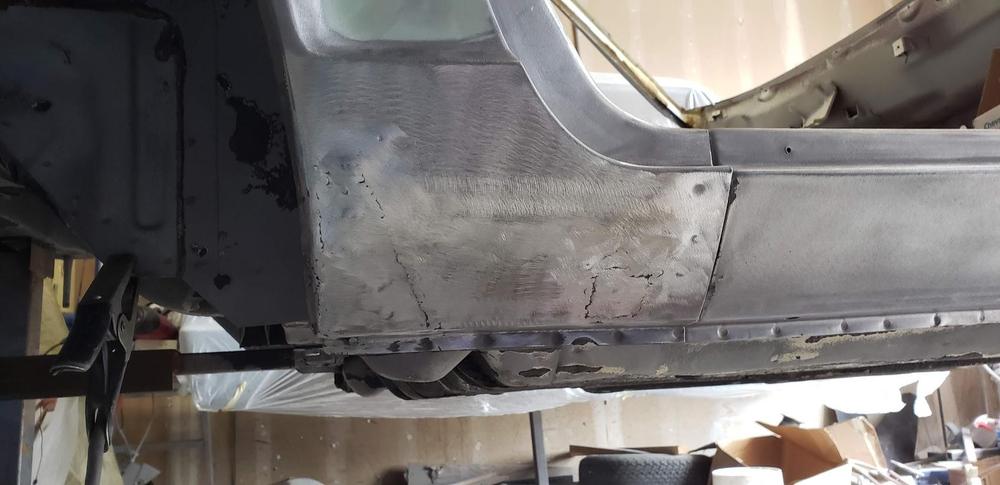
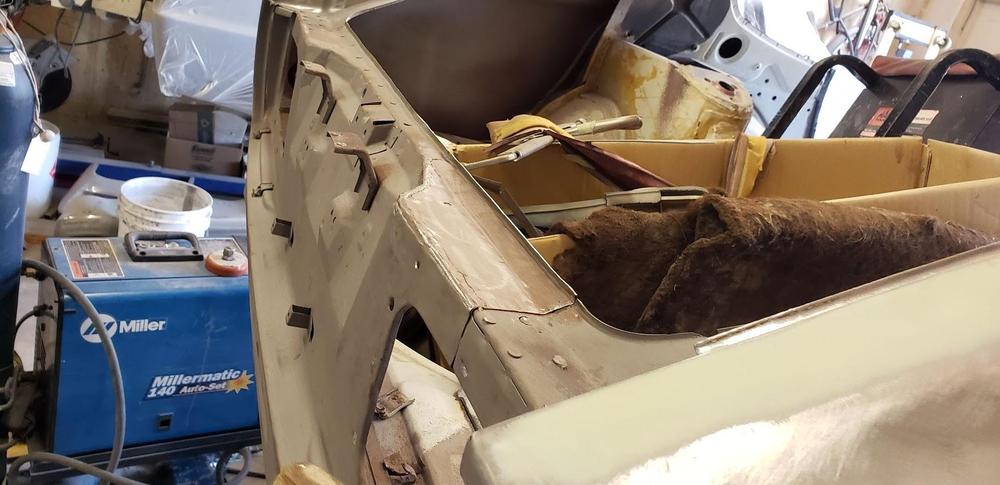
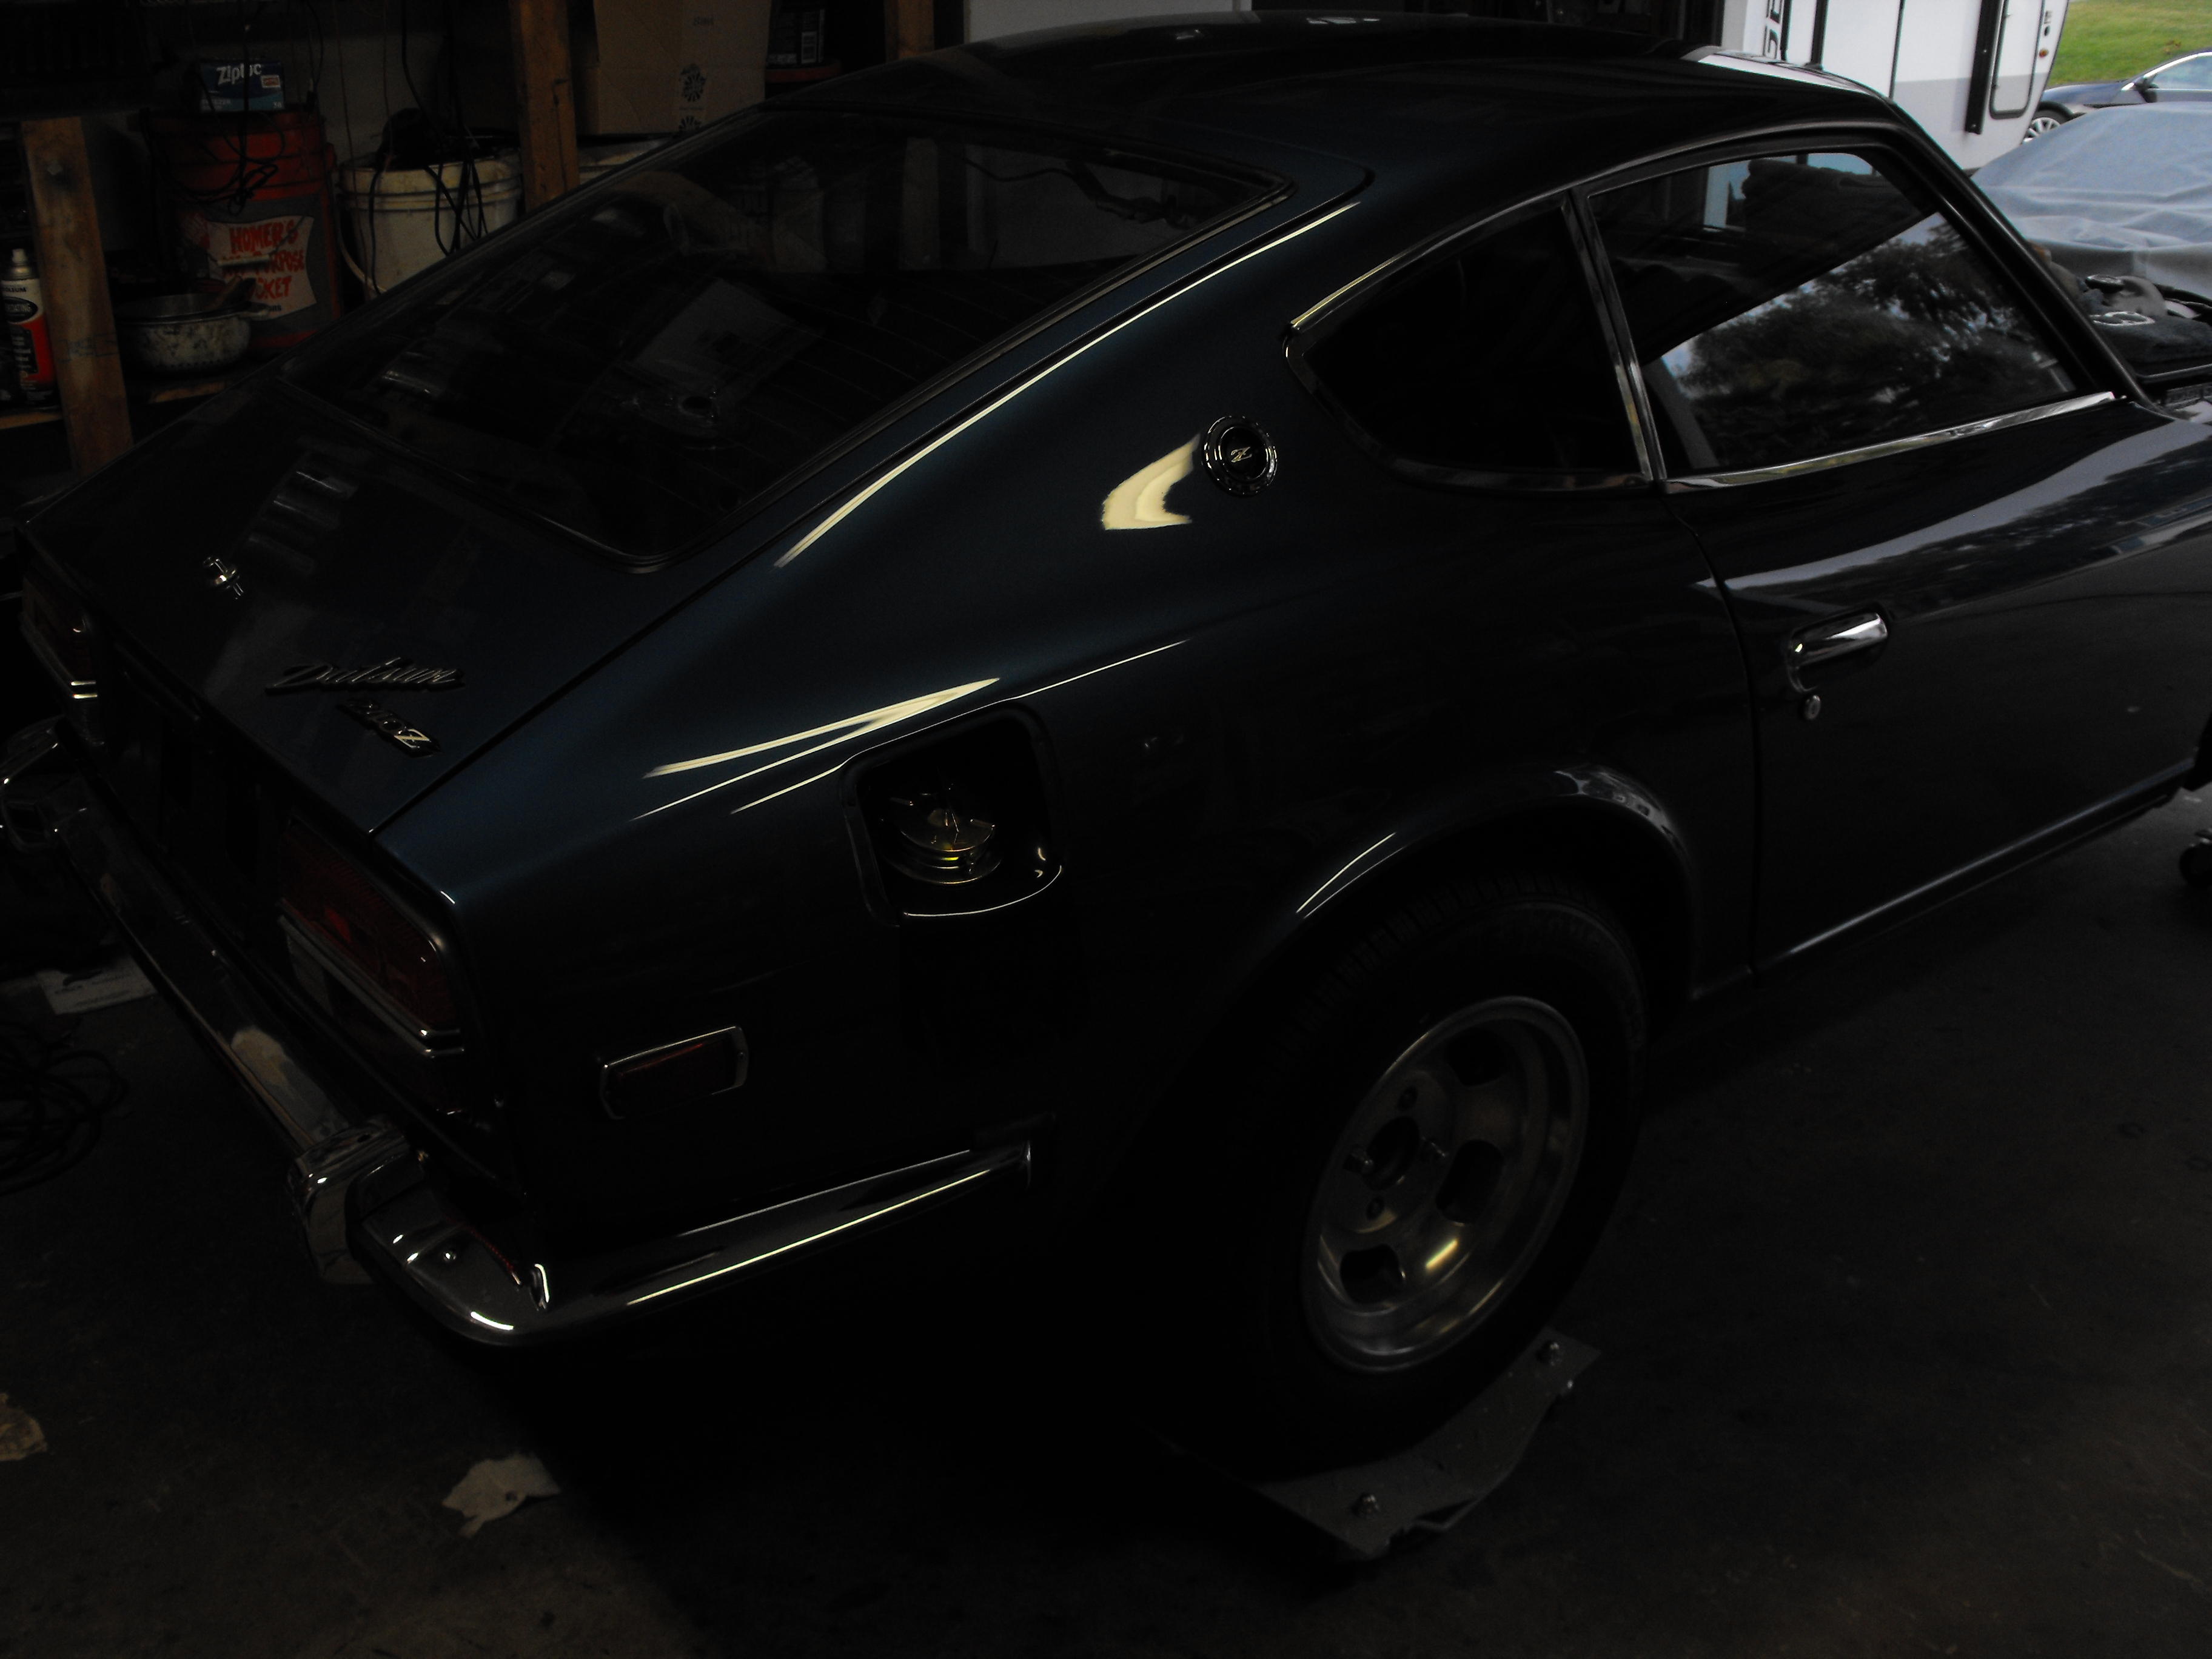
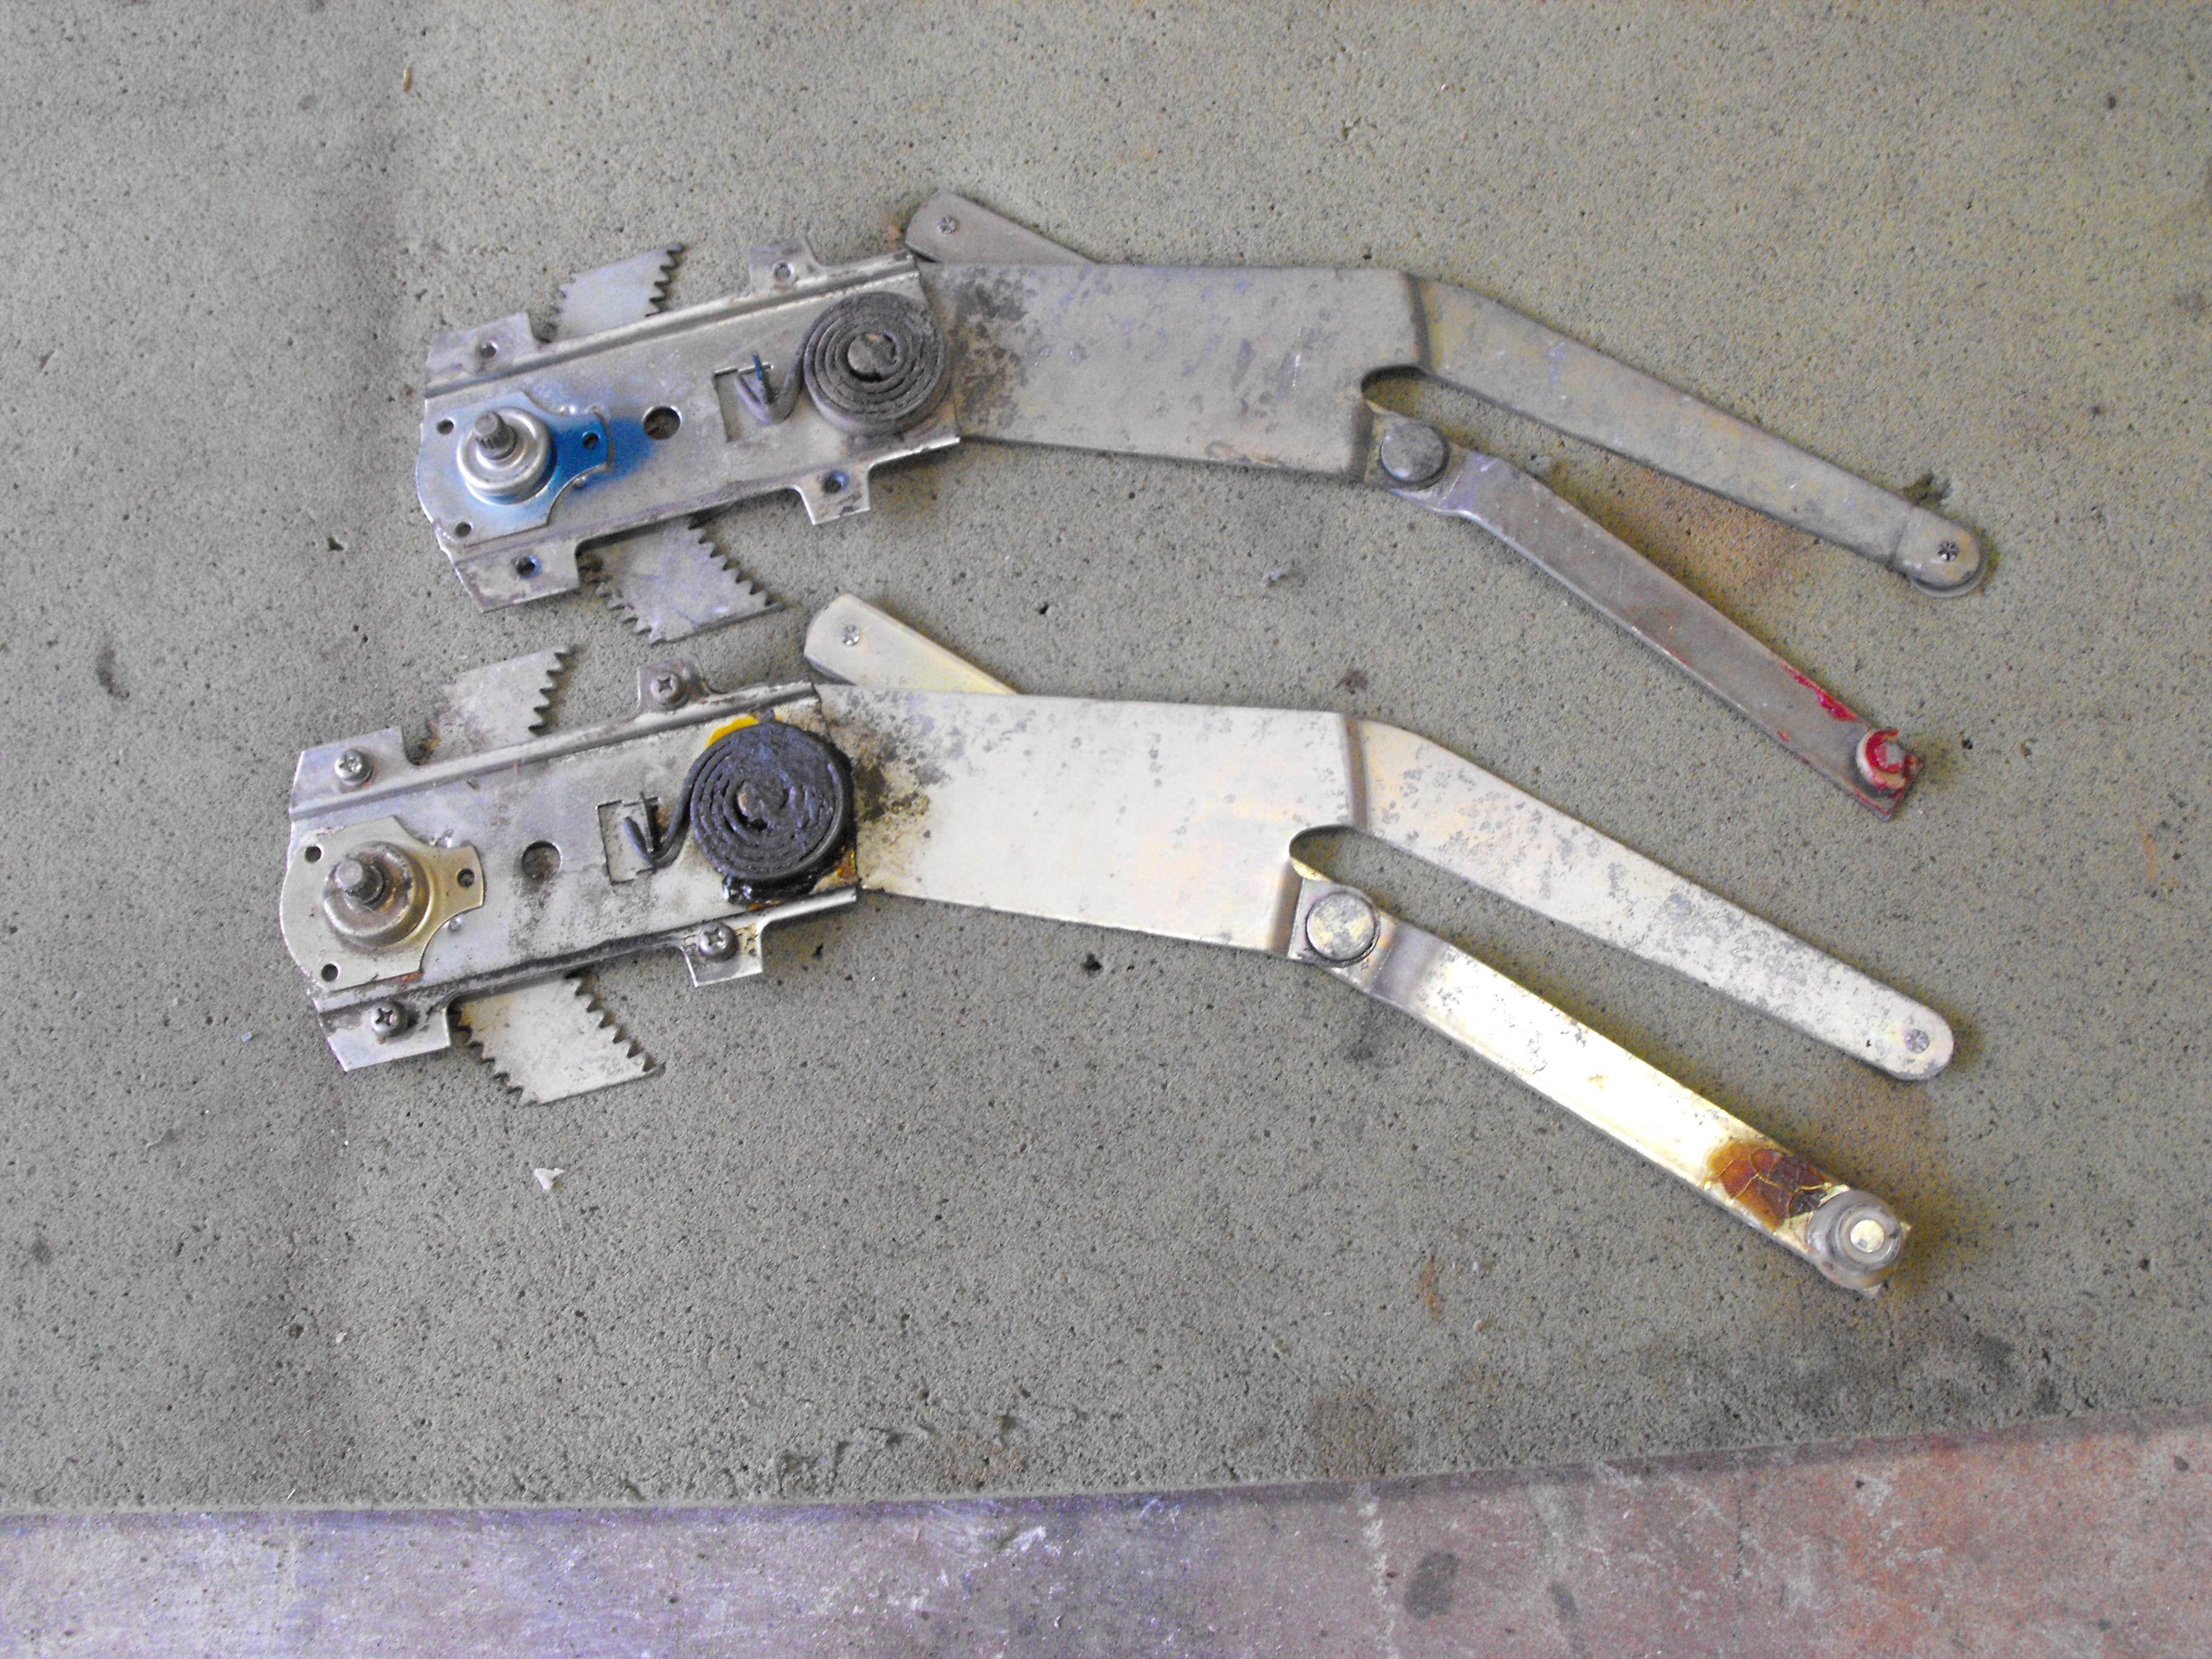
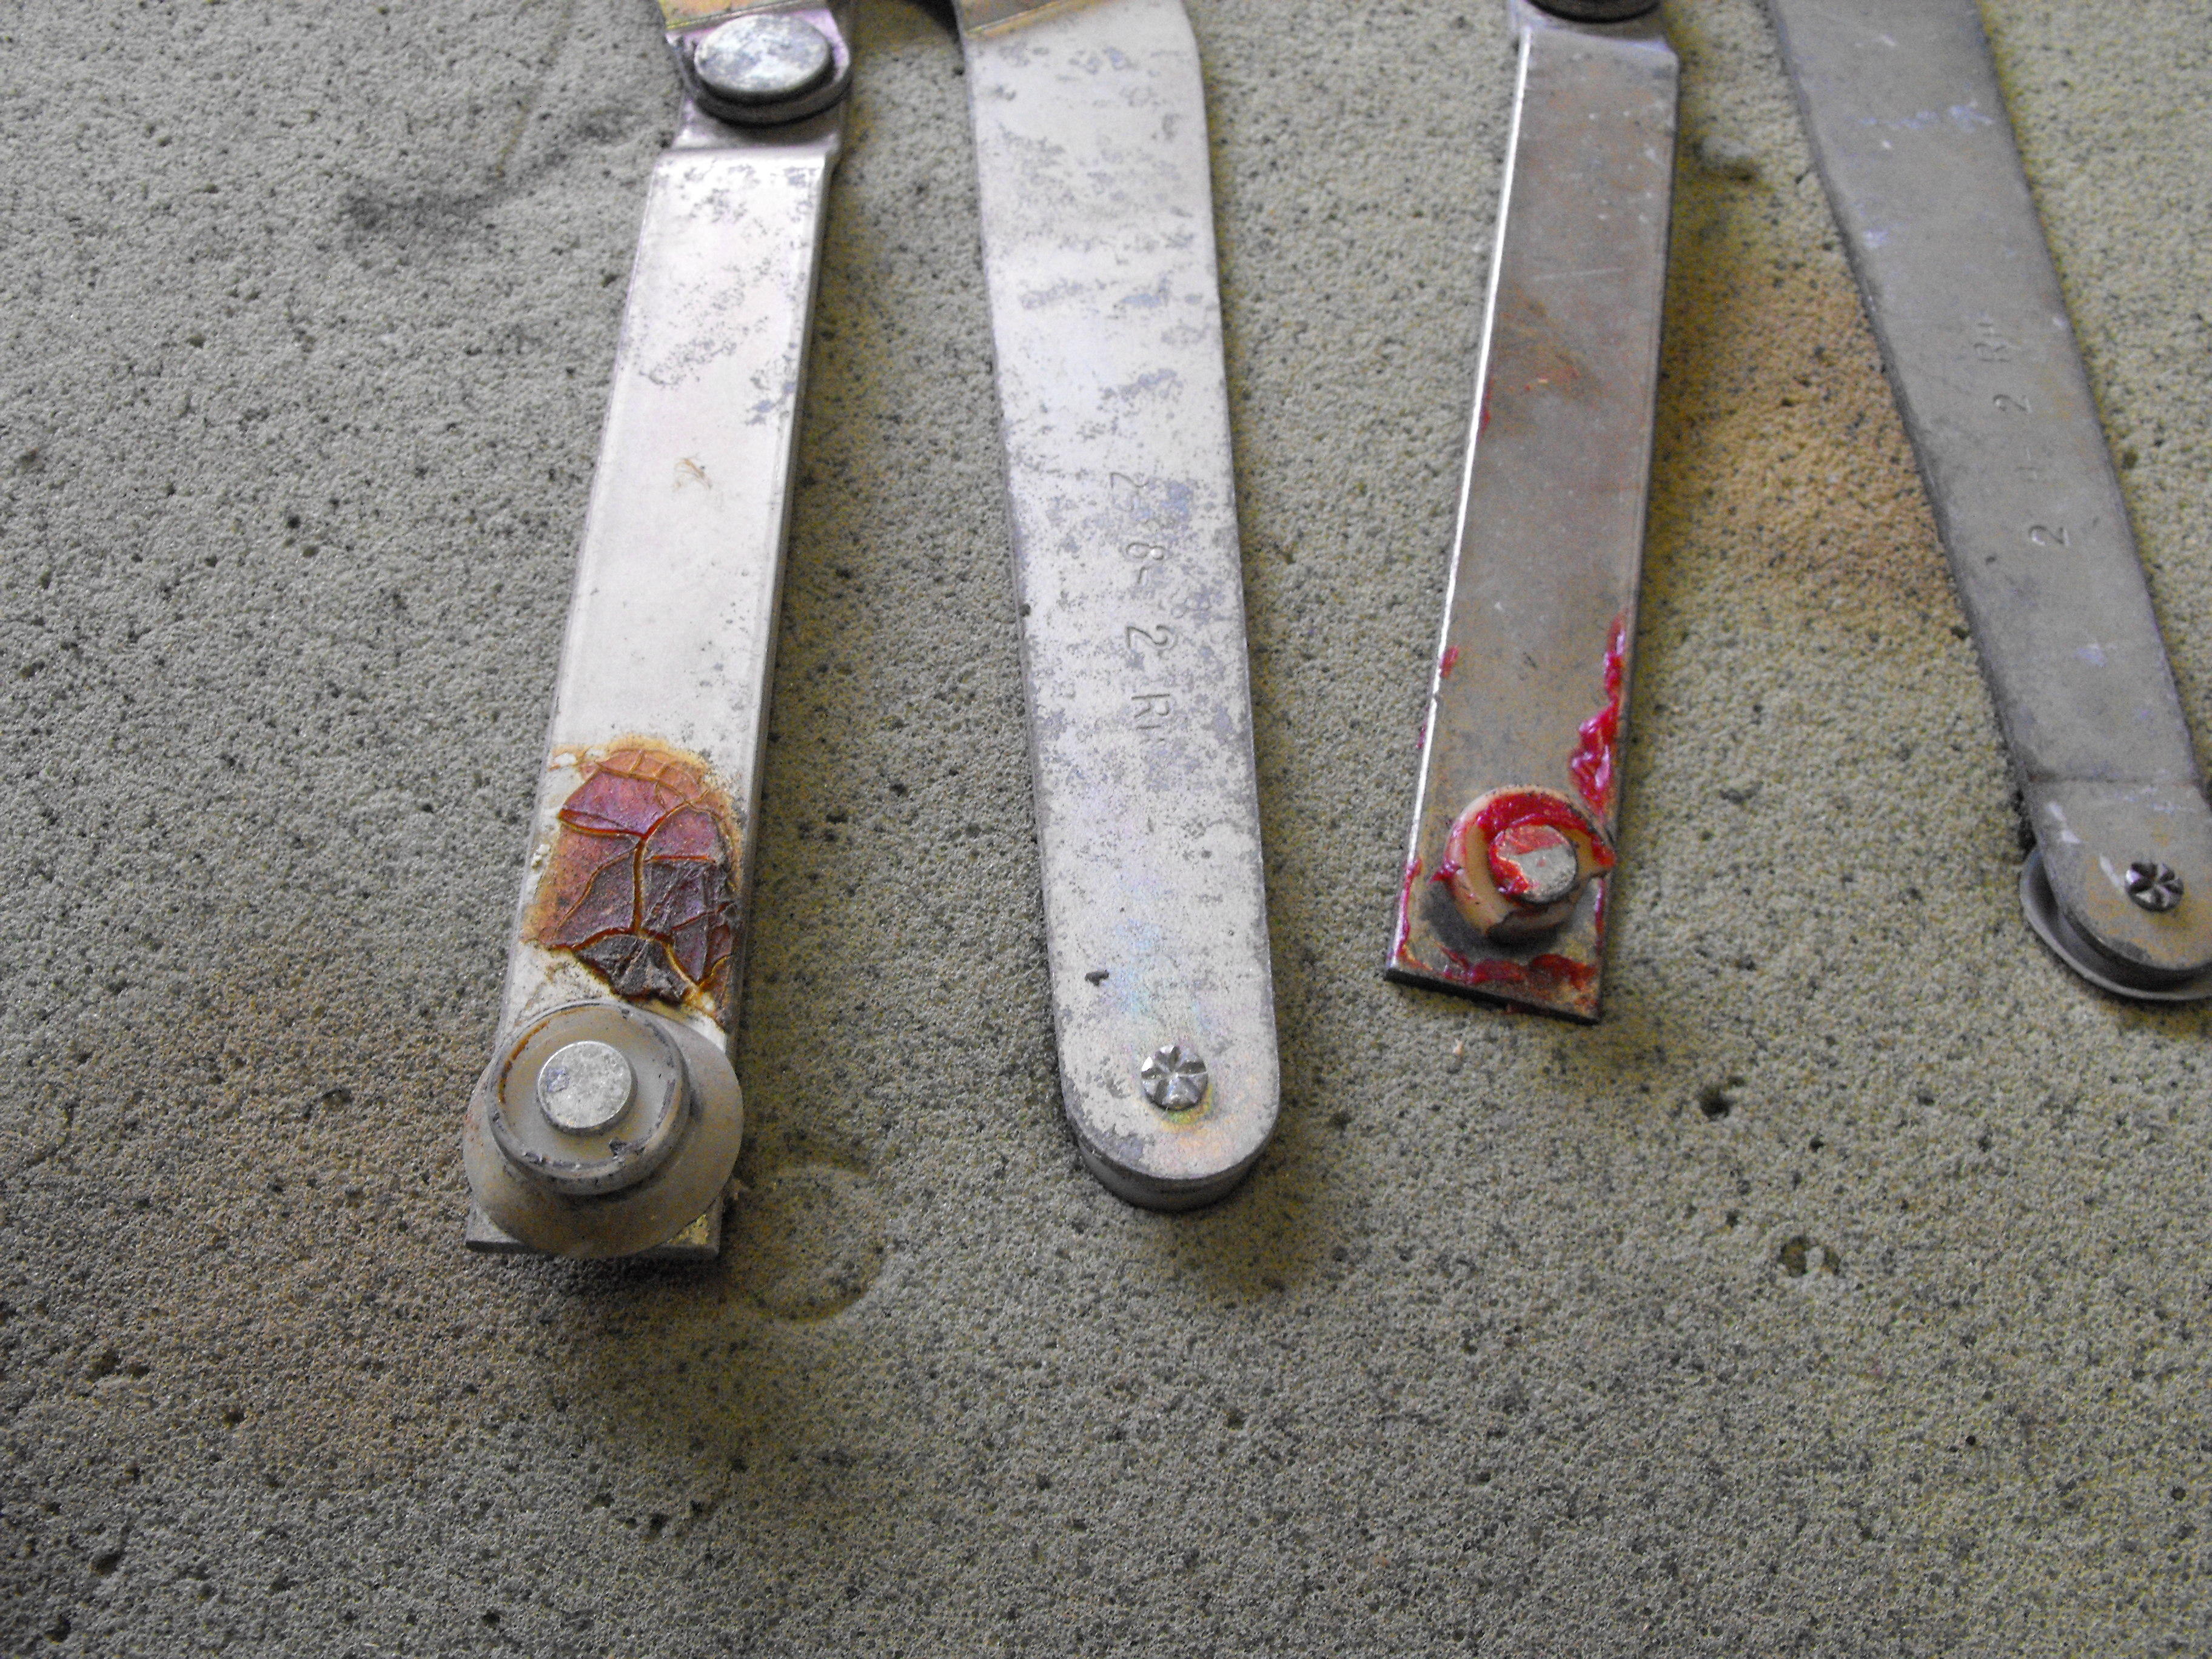
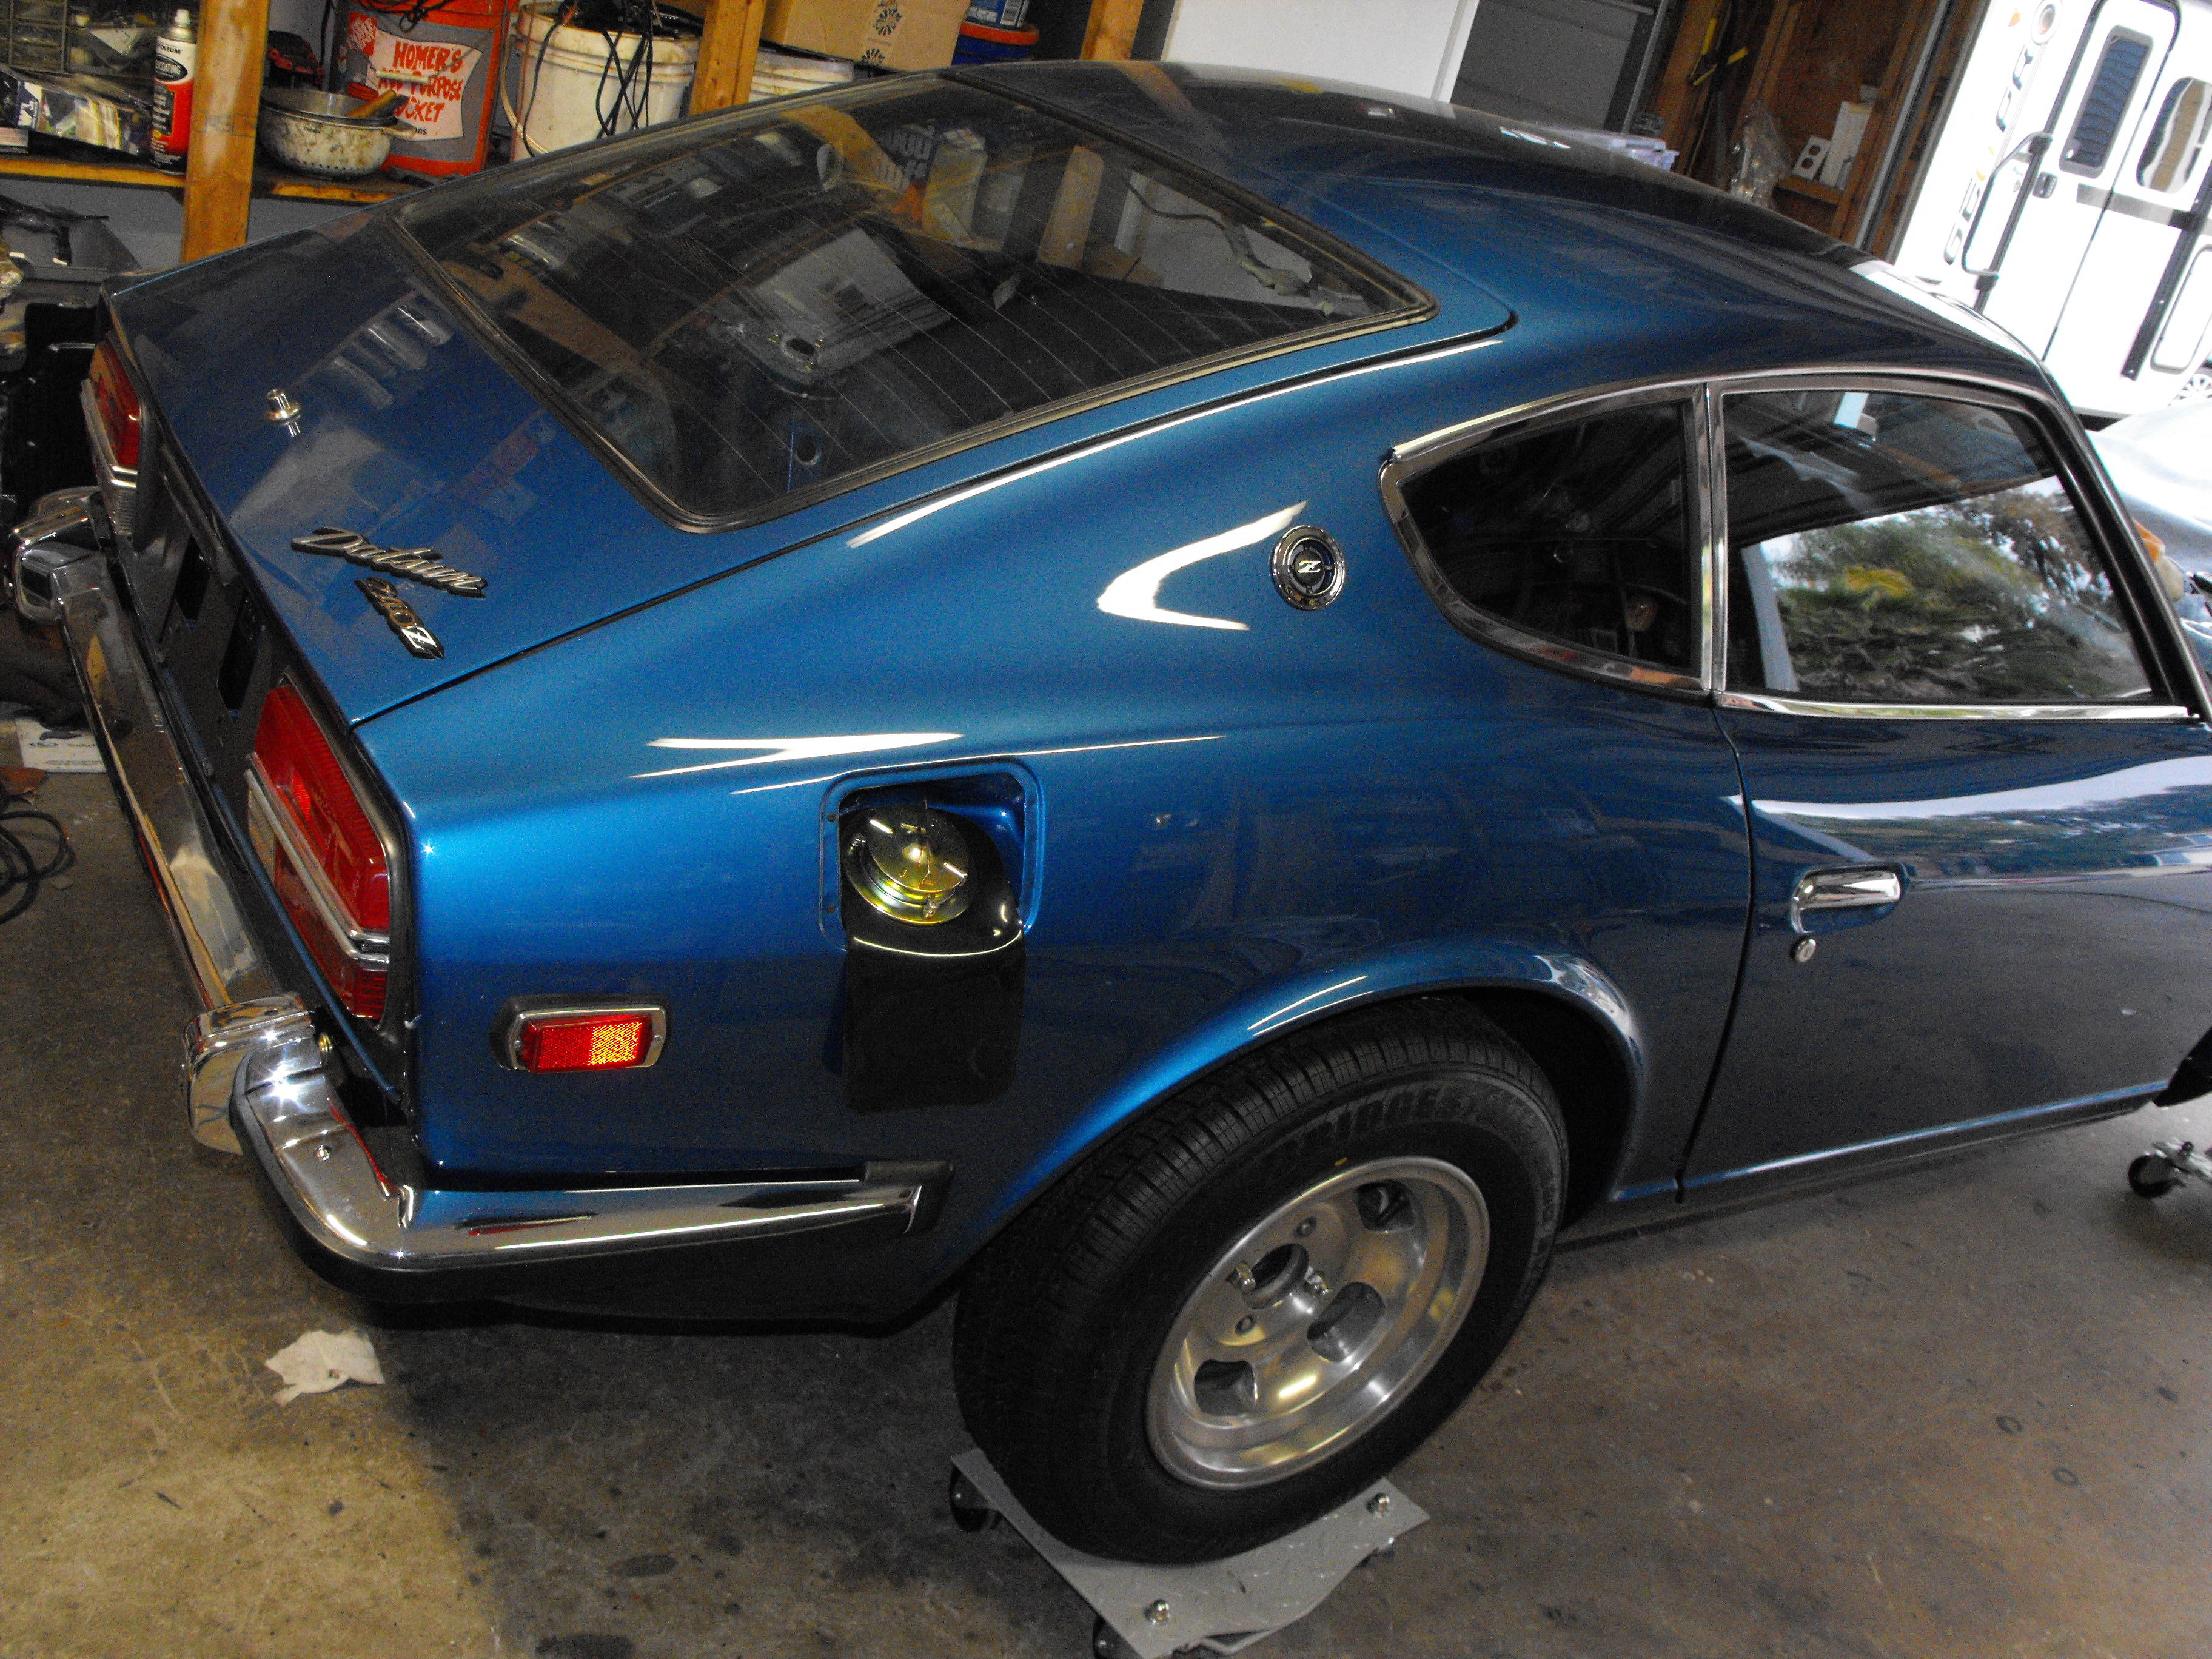
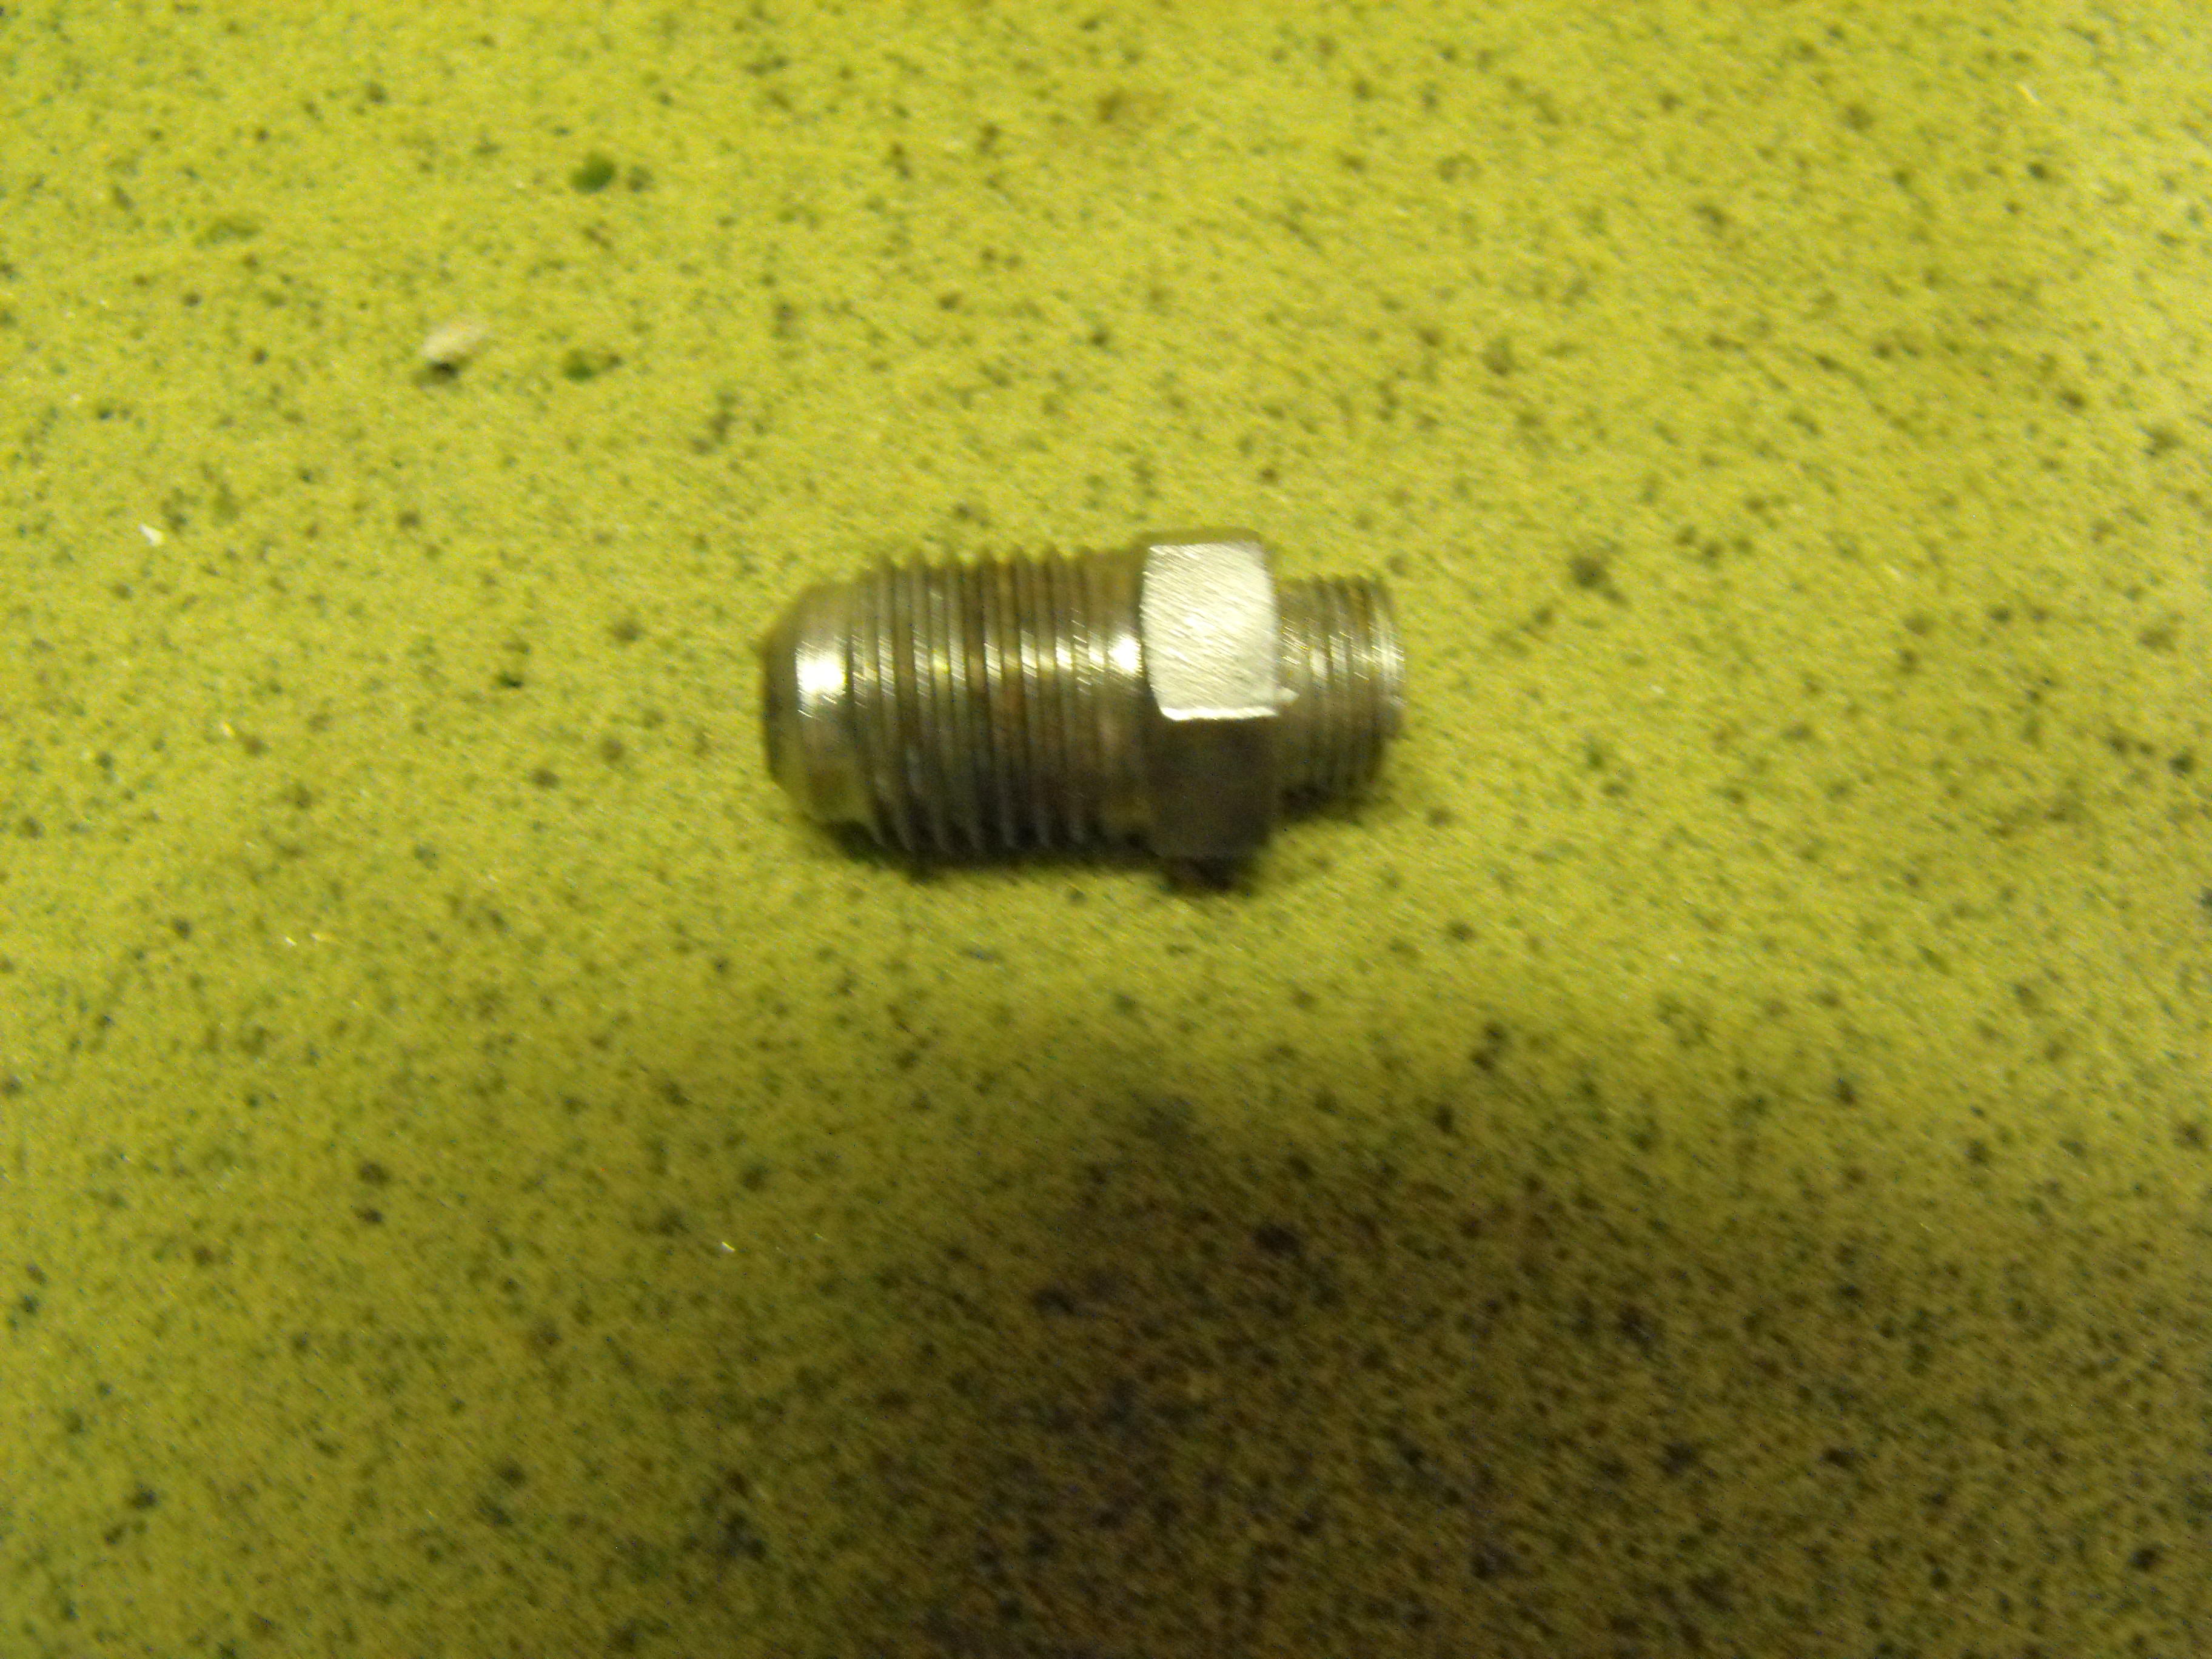
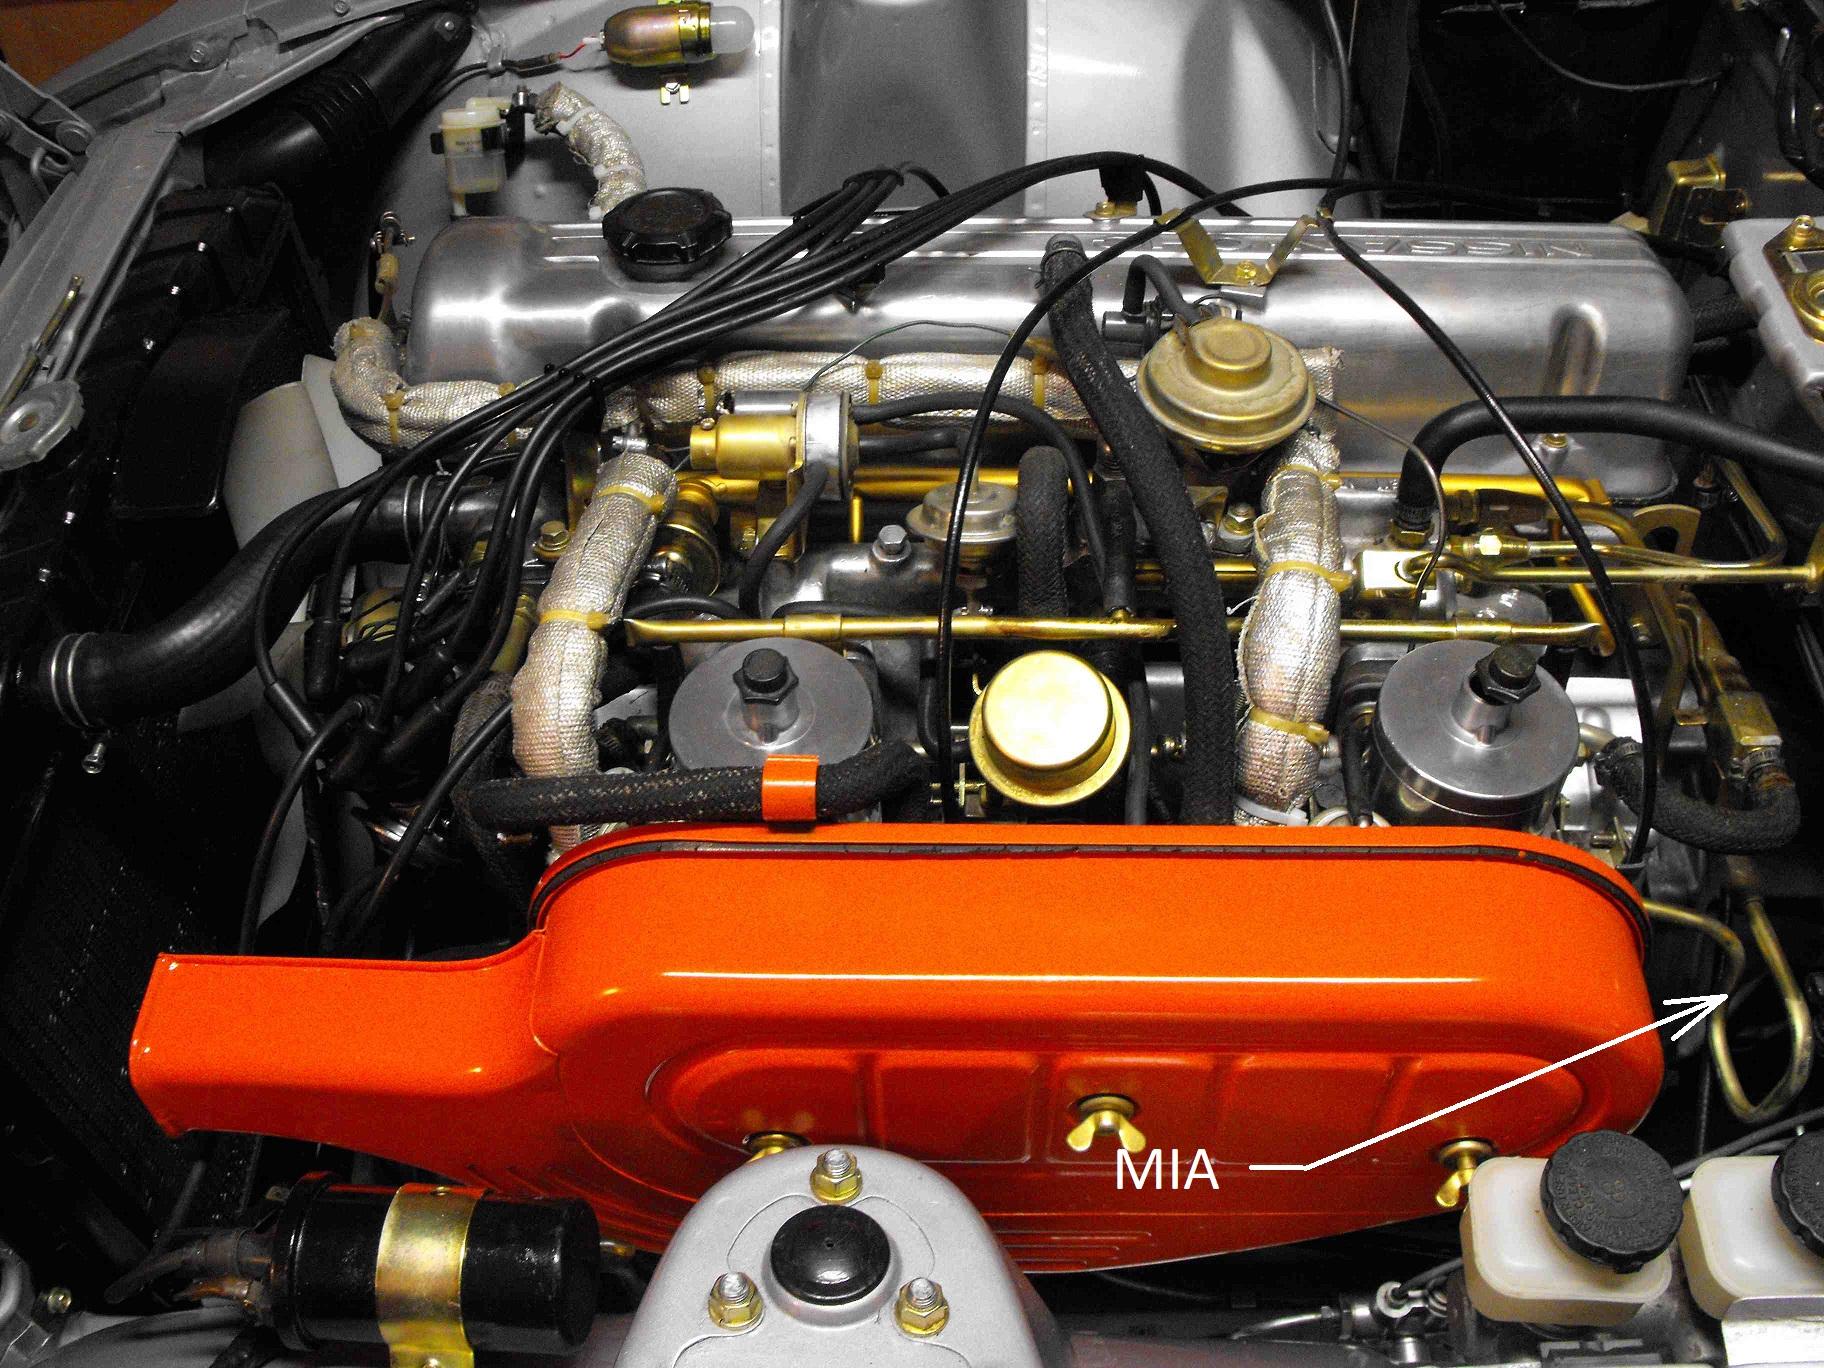
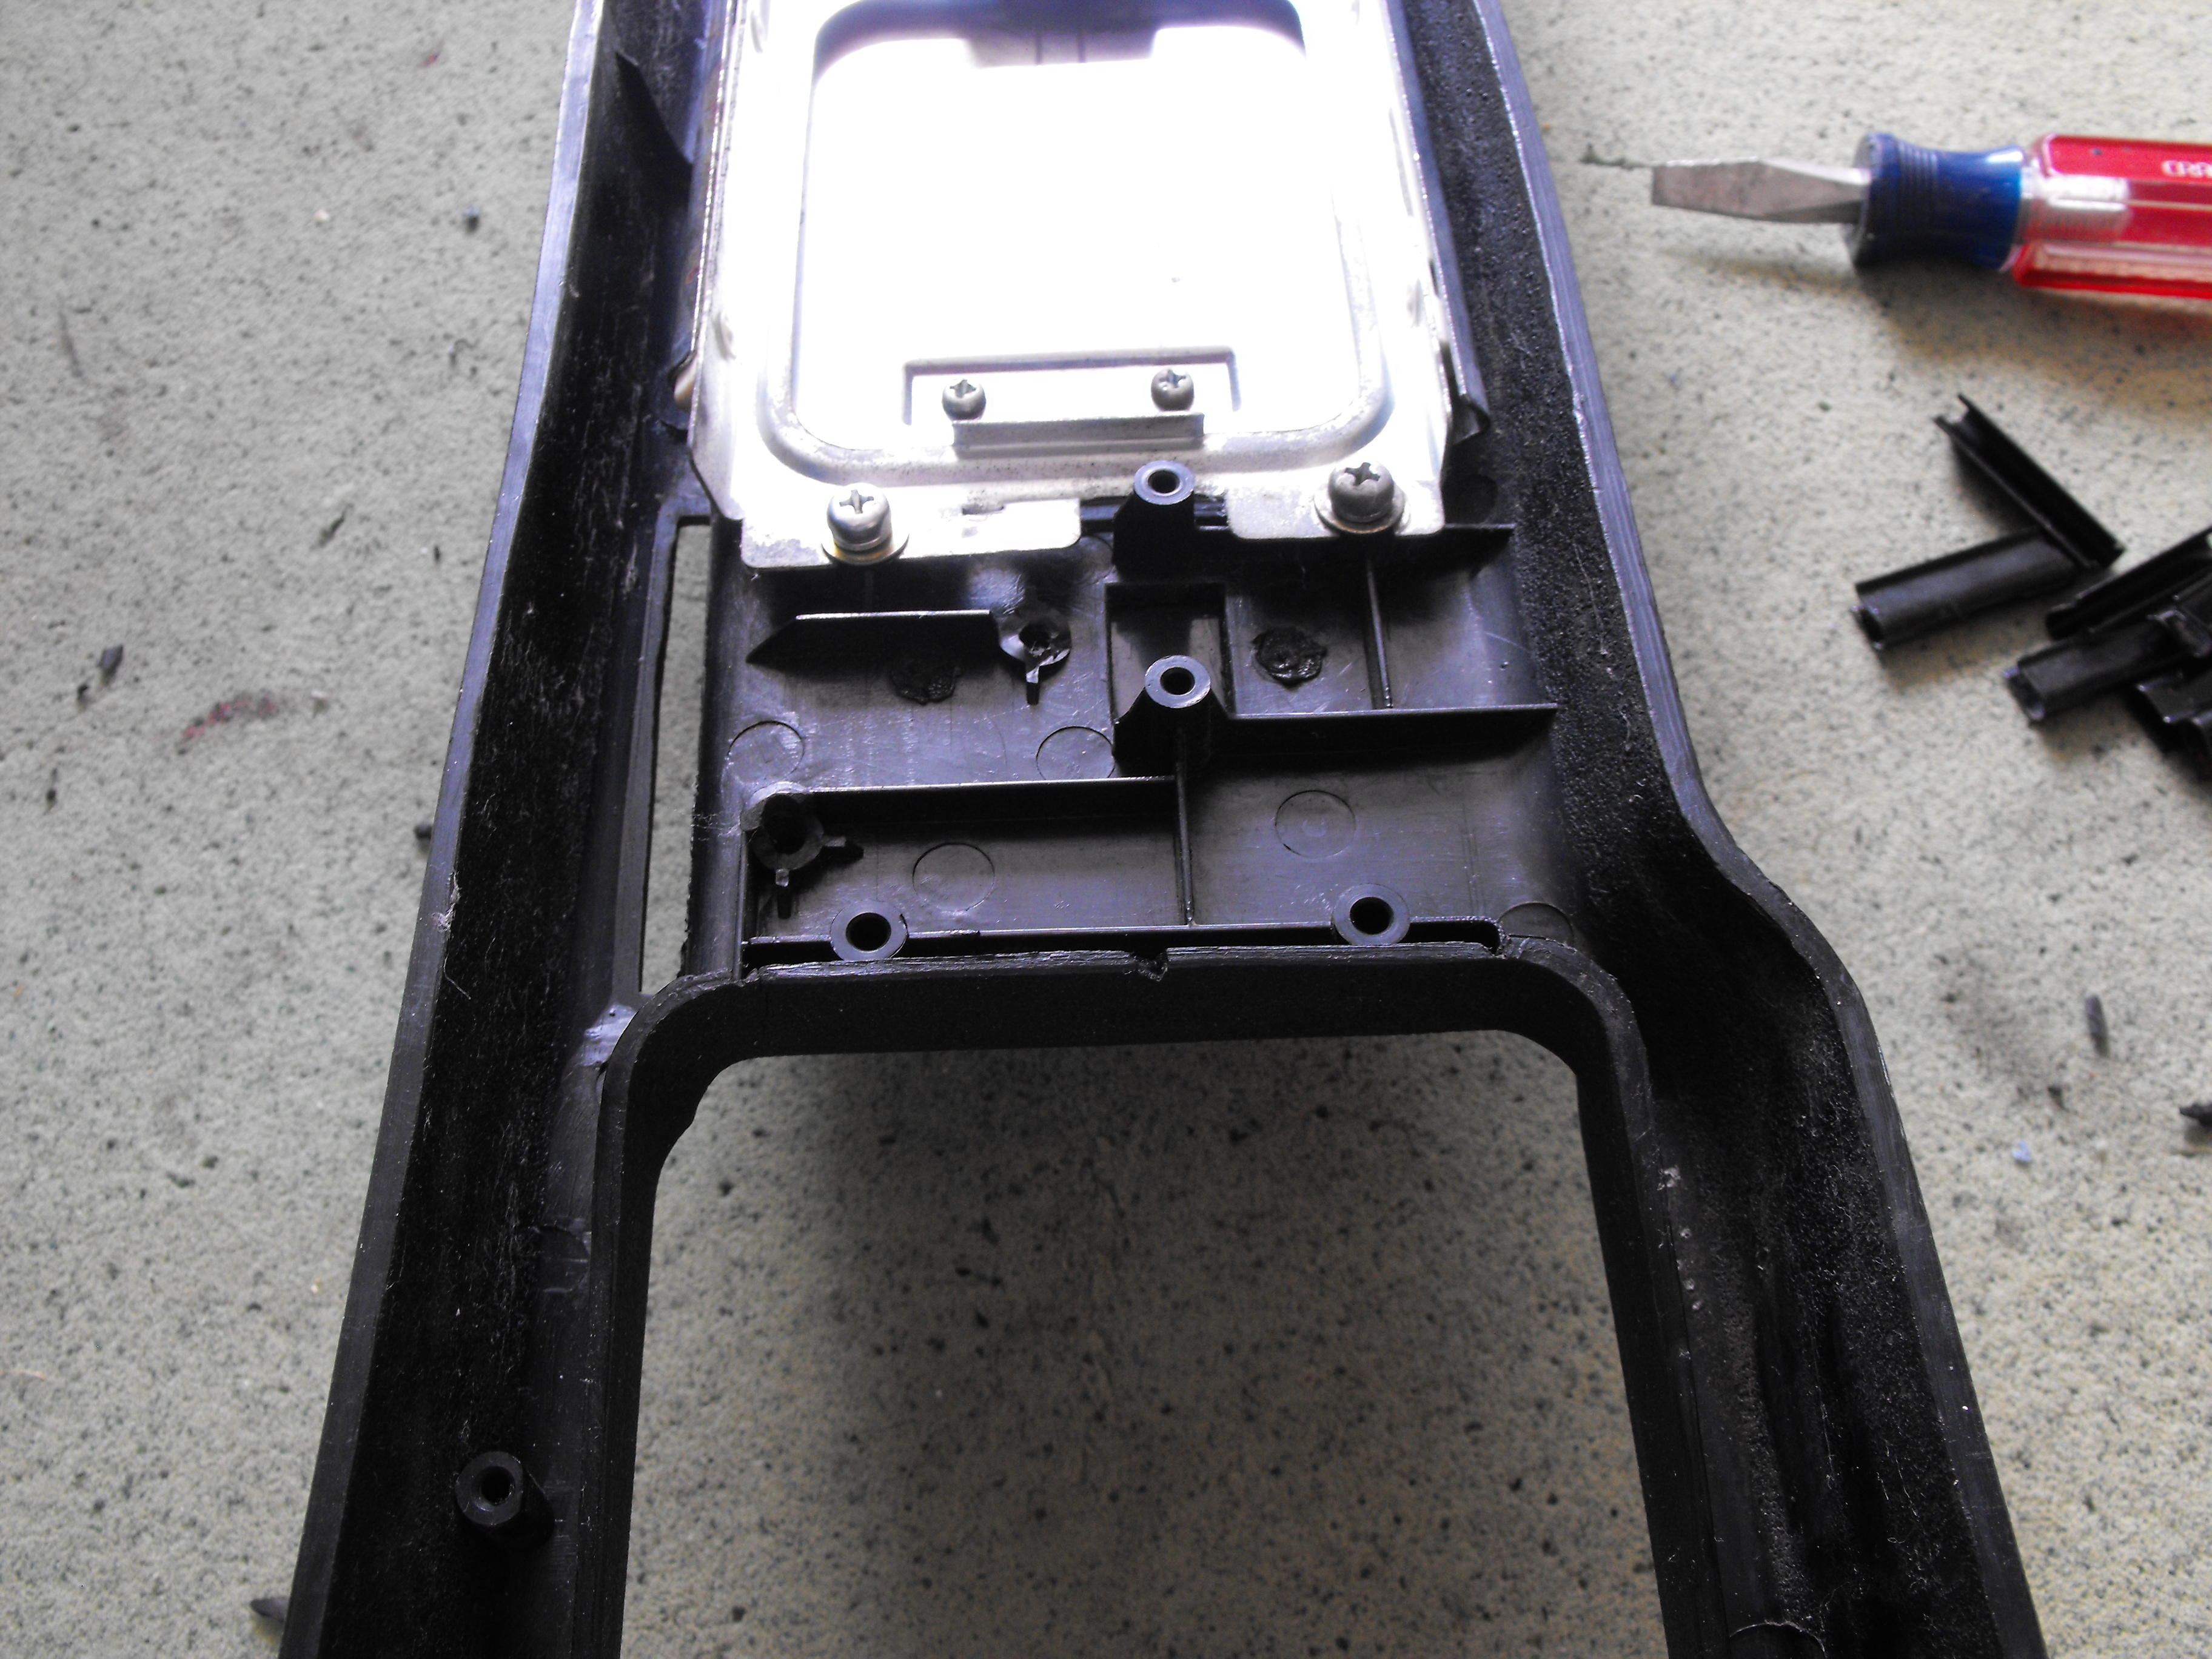
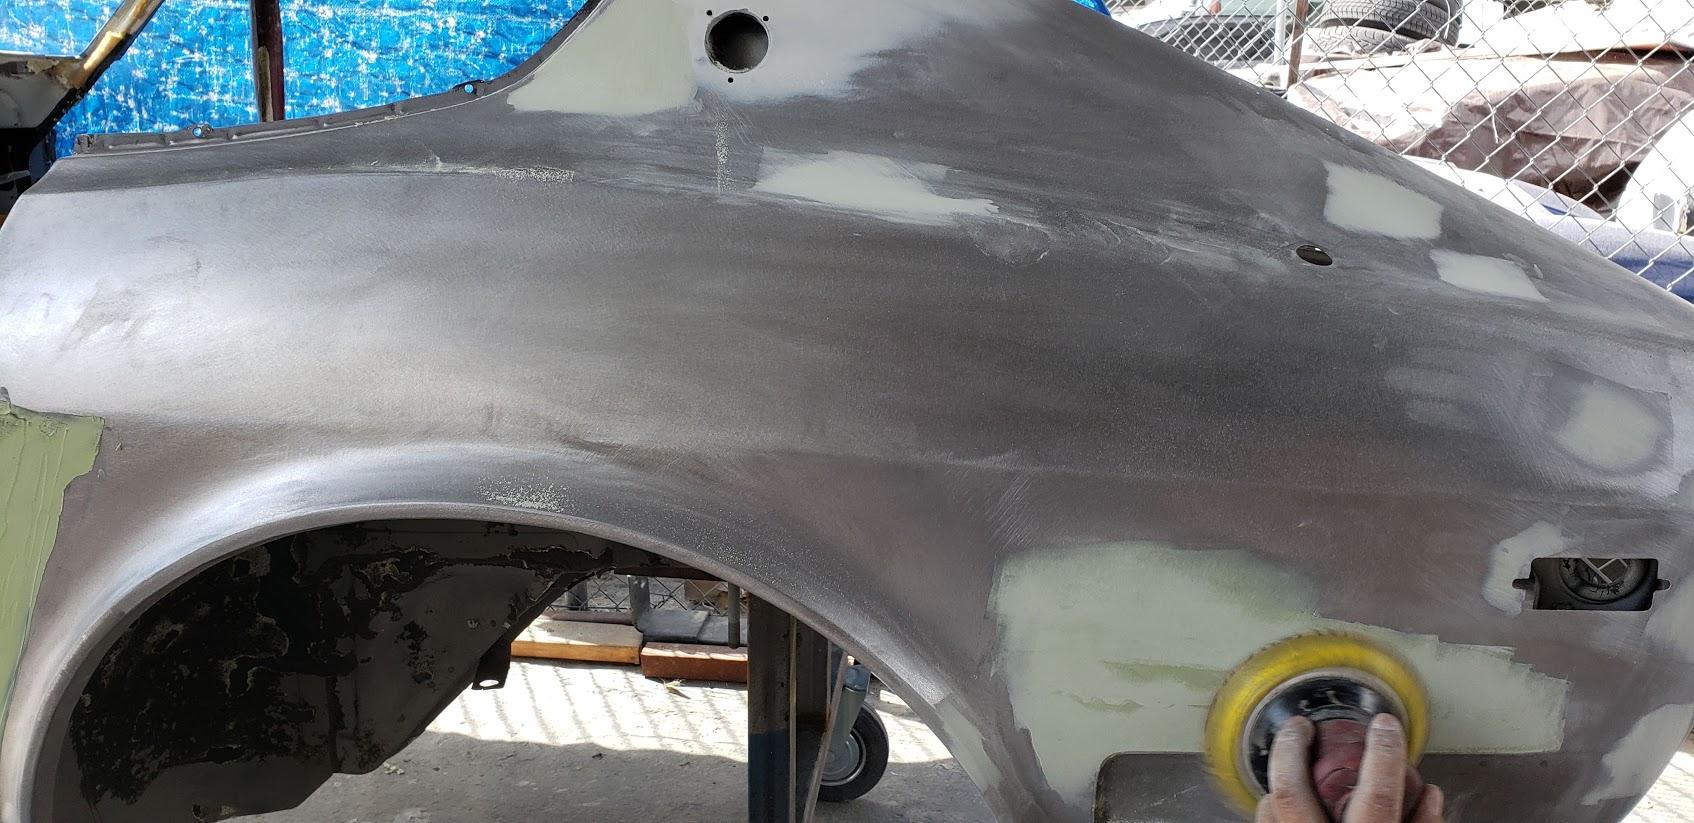
Got a new passenger side window regulator. Original had a broken wheel which doesn't work so well. Installed that last night. Attached an exhaust system comparison. My original is still at the muffler shop since I need another one, but here is the comparison with a spare I had in the backyard (That's a scary place) Worked on the Carb plumbing. I have one partially broken water system fitting that might still work. Will check today to see if I can find a new one. Also, I need the plumbing that goes from the water feed tube to the carbs. That is totally MIA. Will have to put out an APB to see if anyone has those. Will post pics of parts I need later today. Was playing with camera settings on car pic.


-
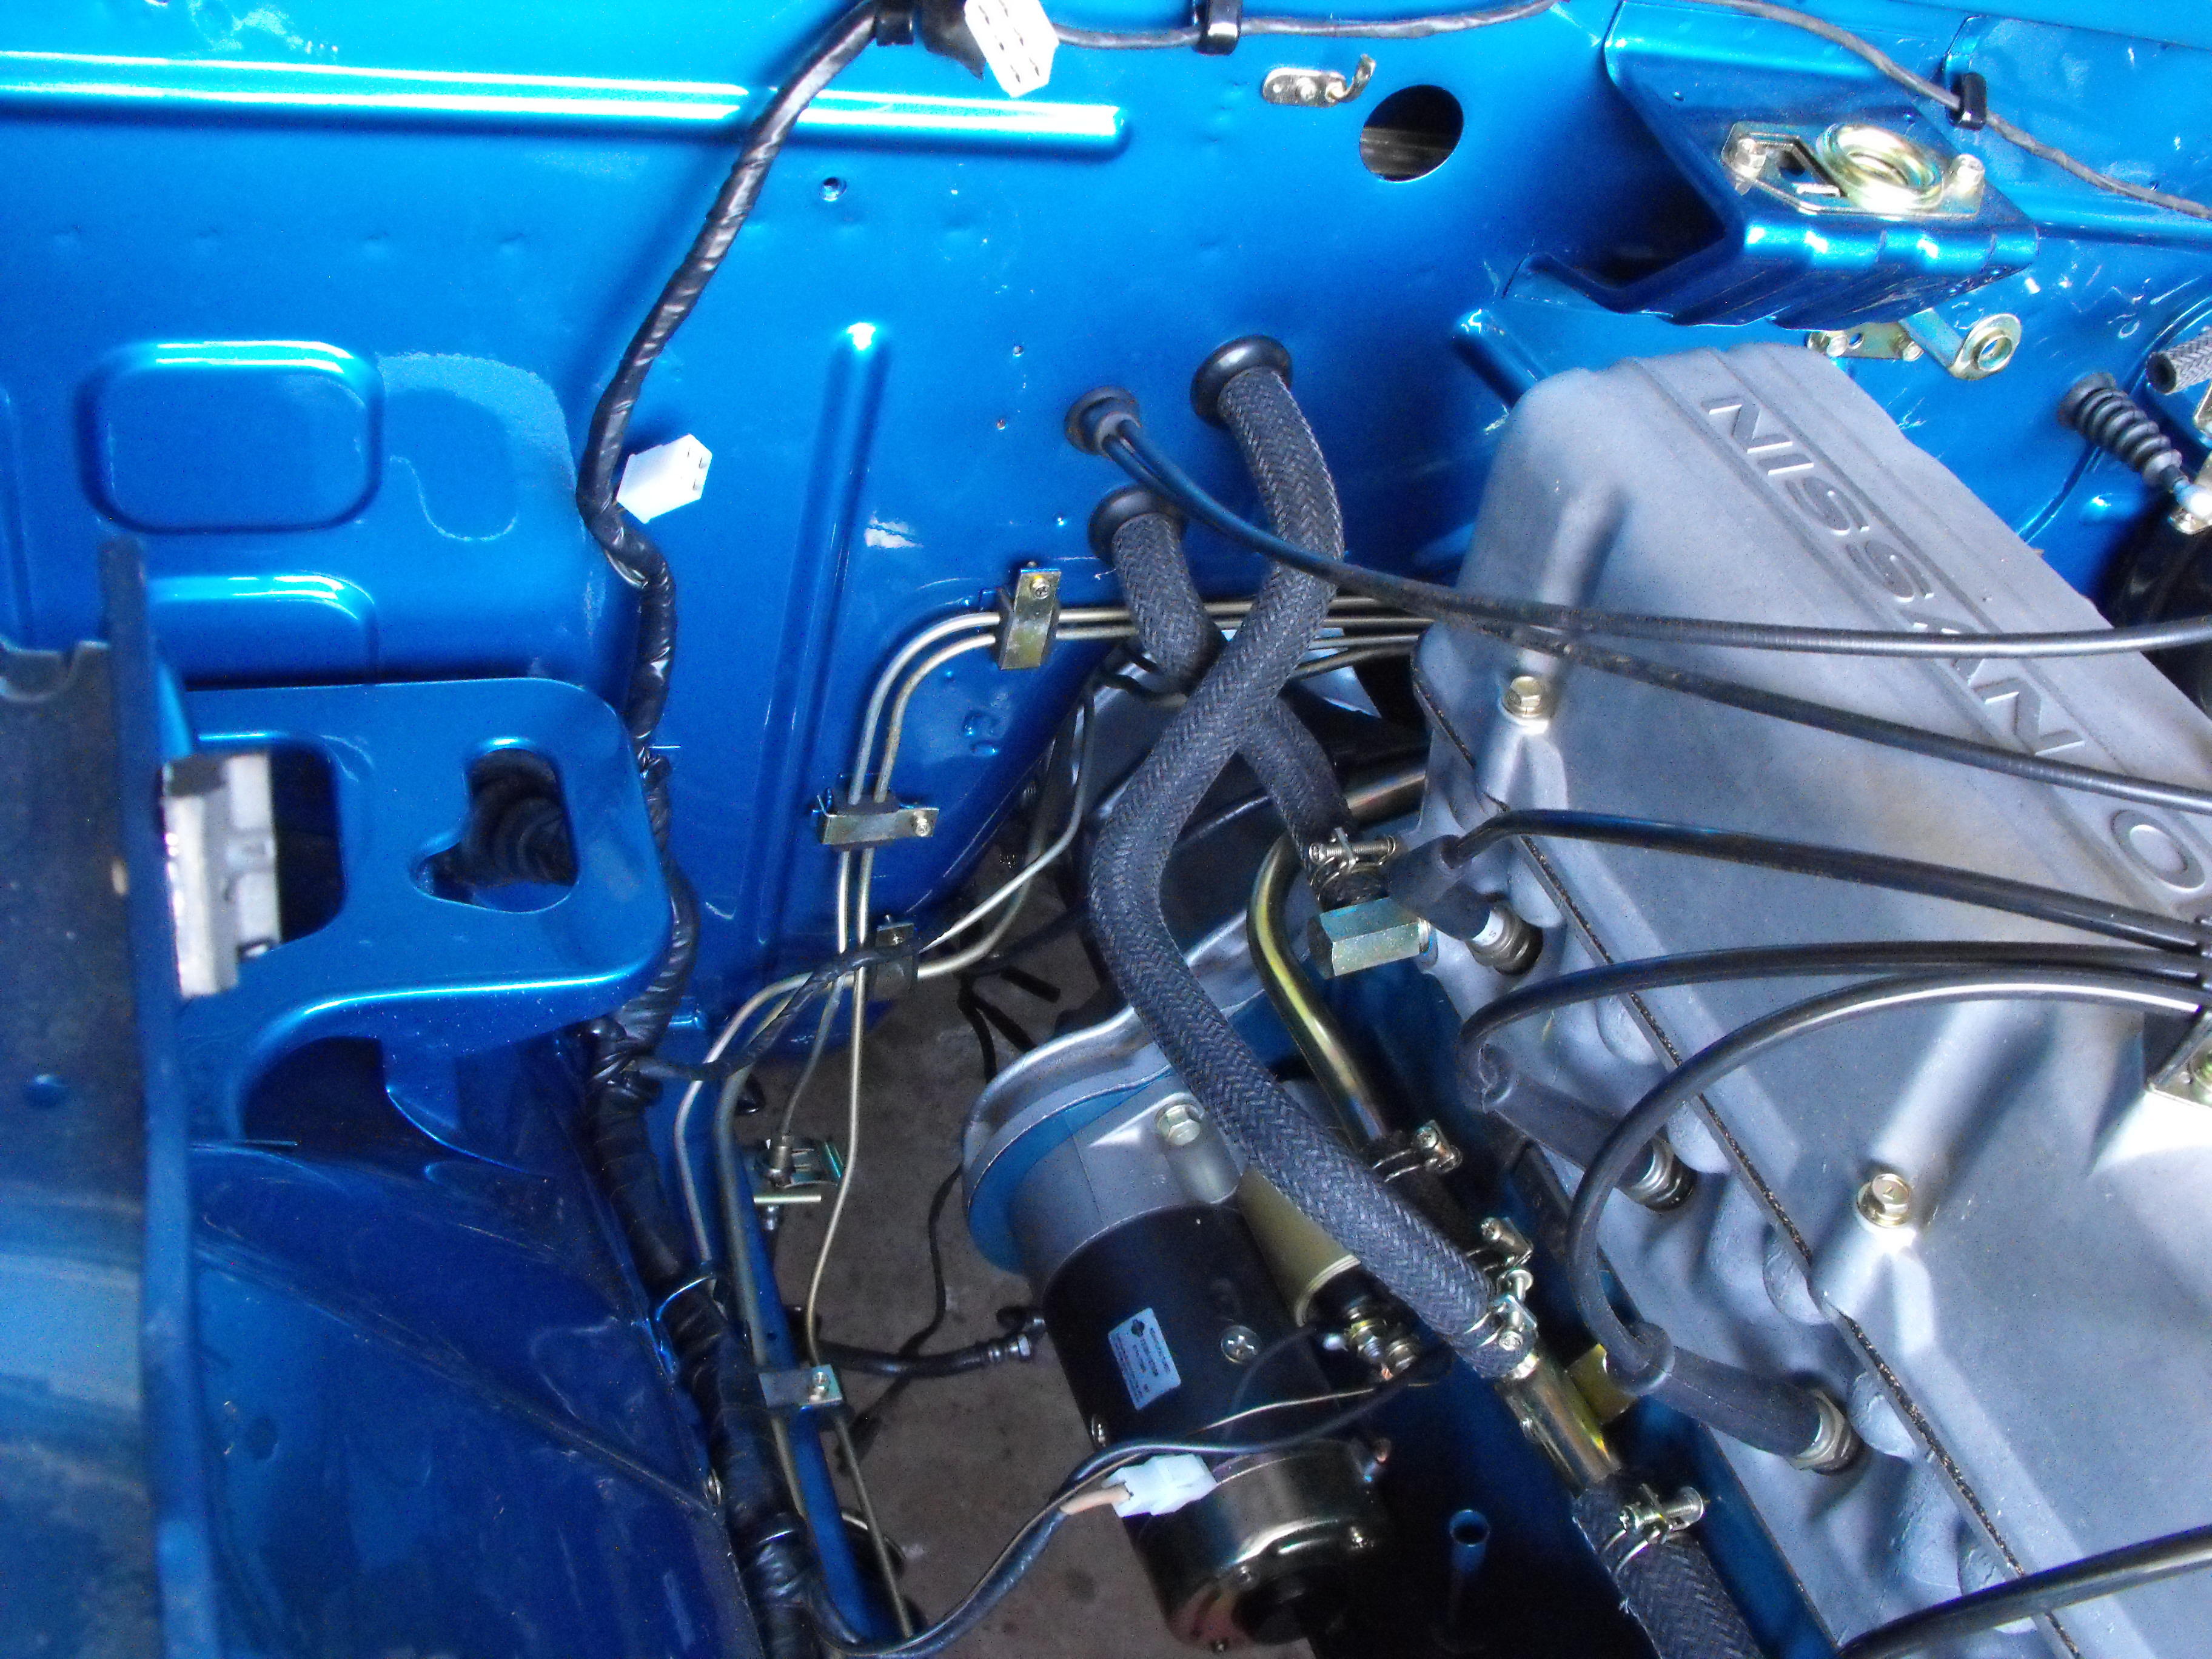
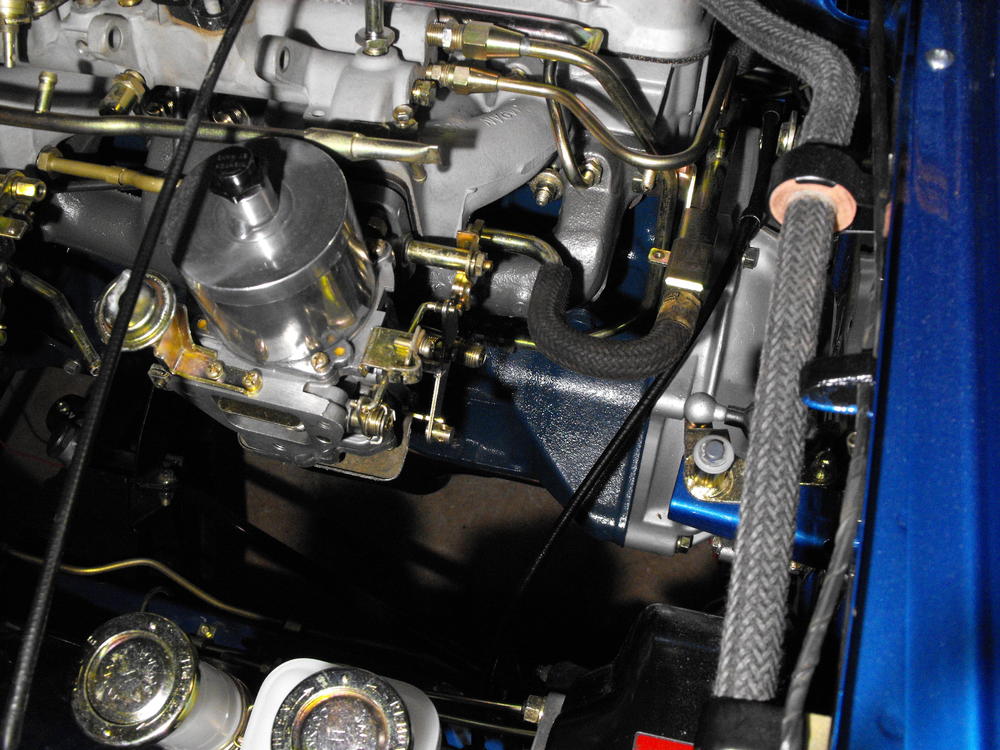
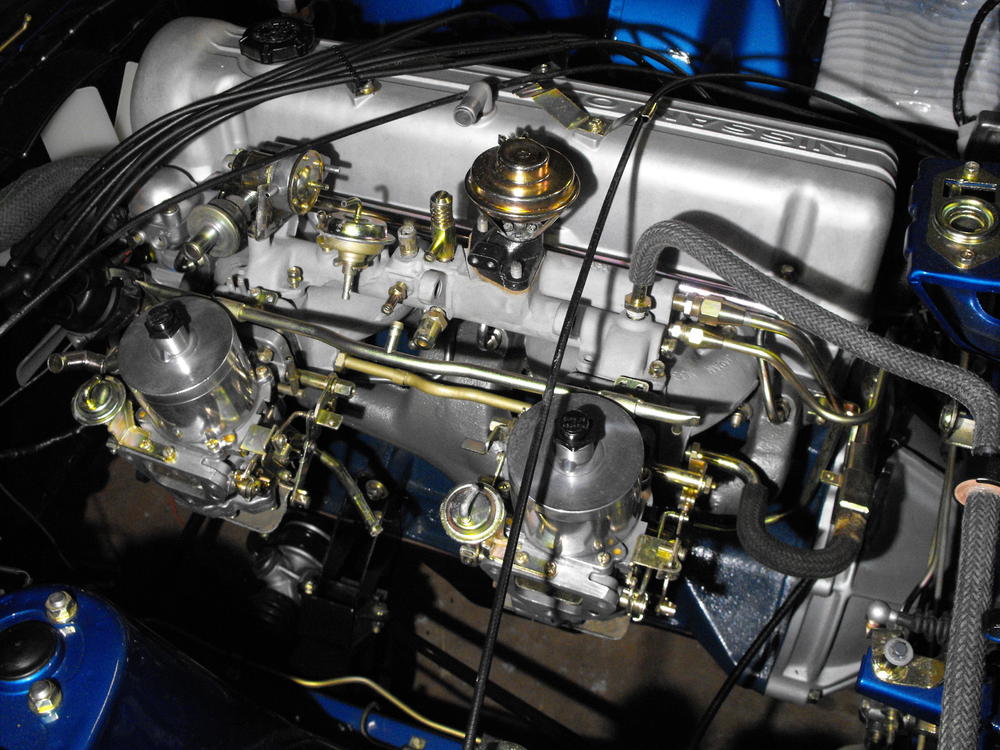
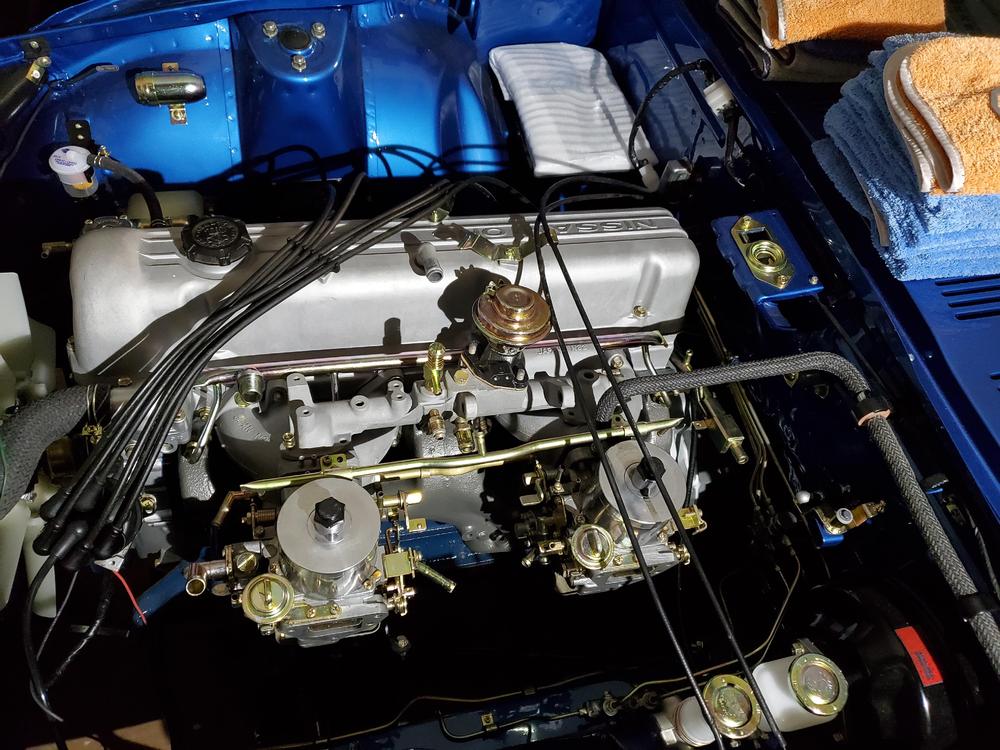
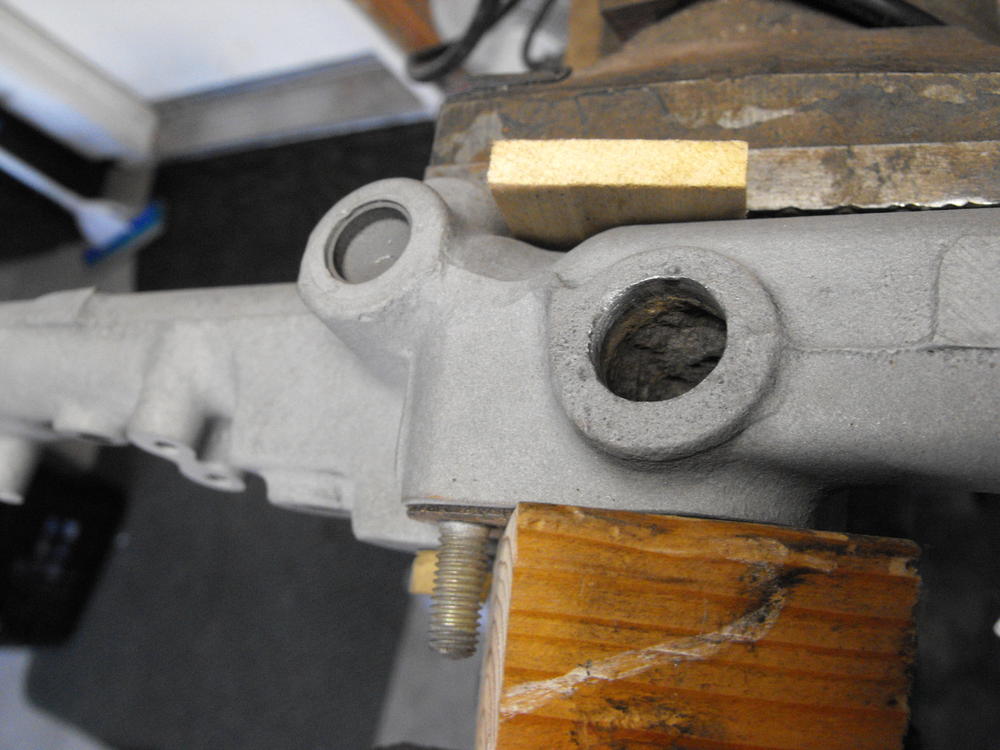
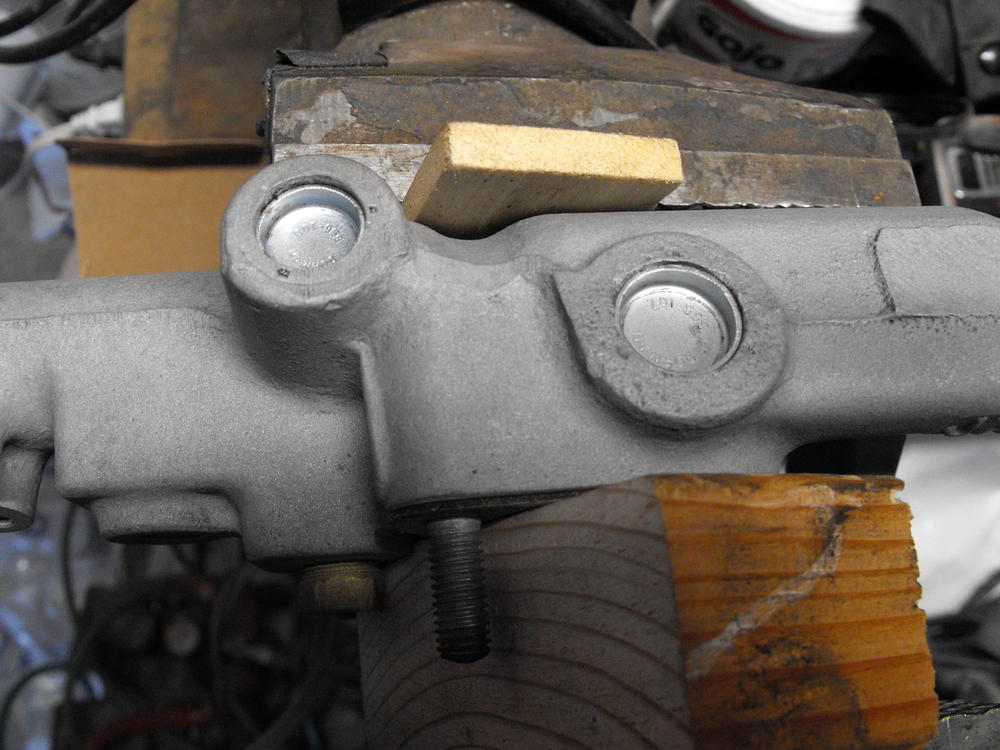
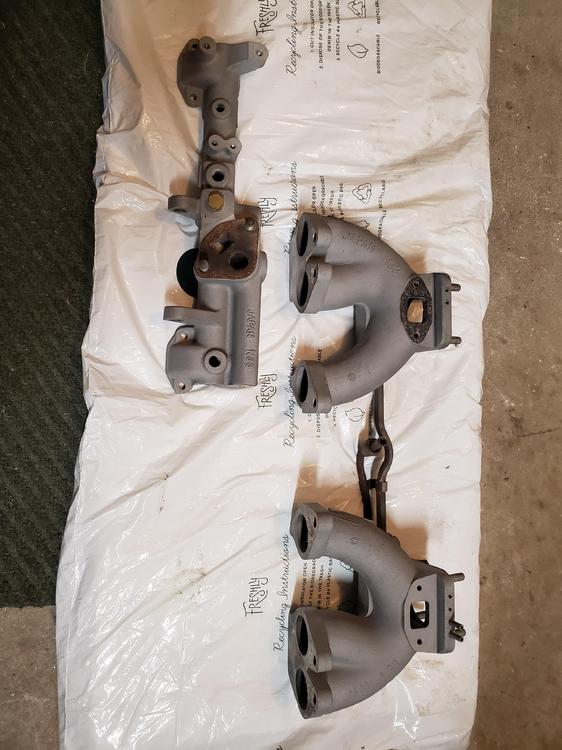
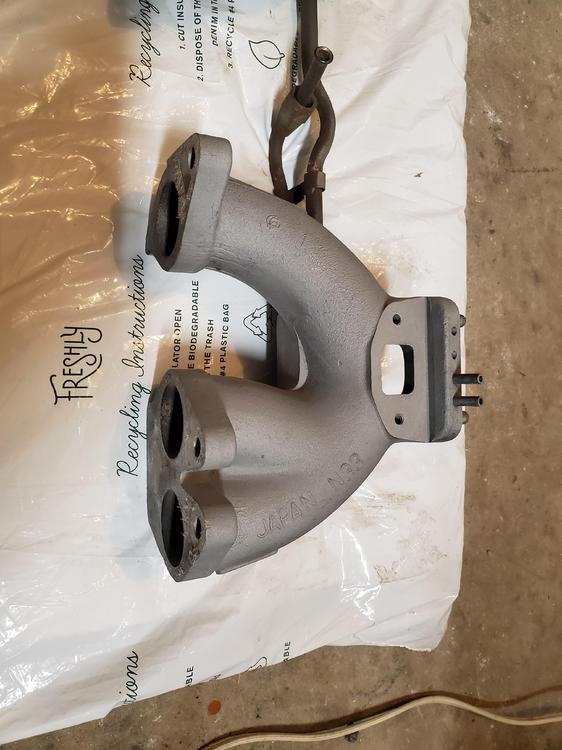
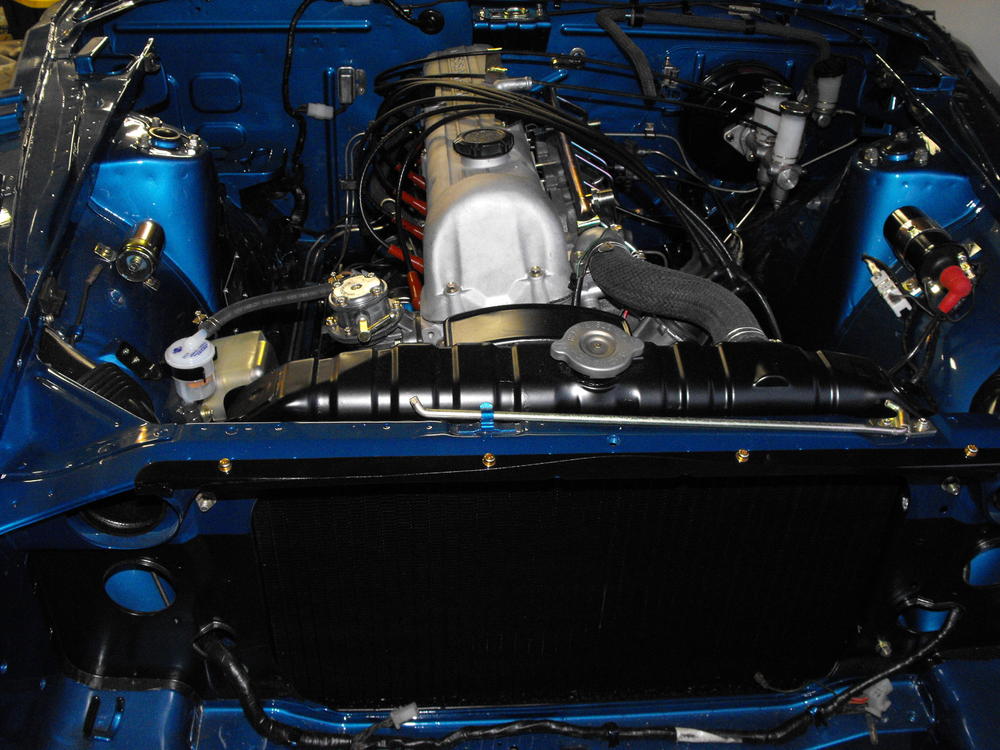
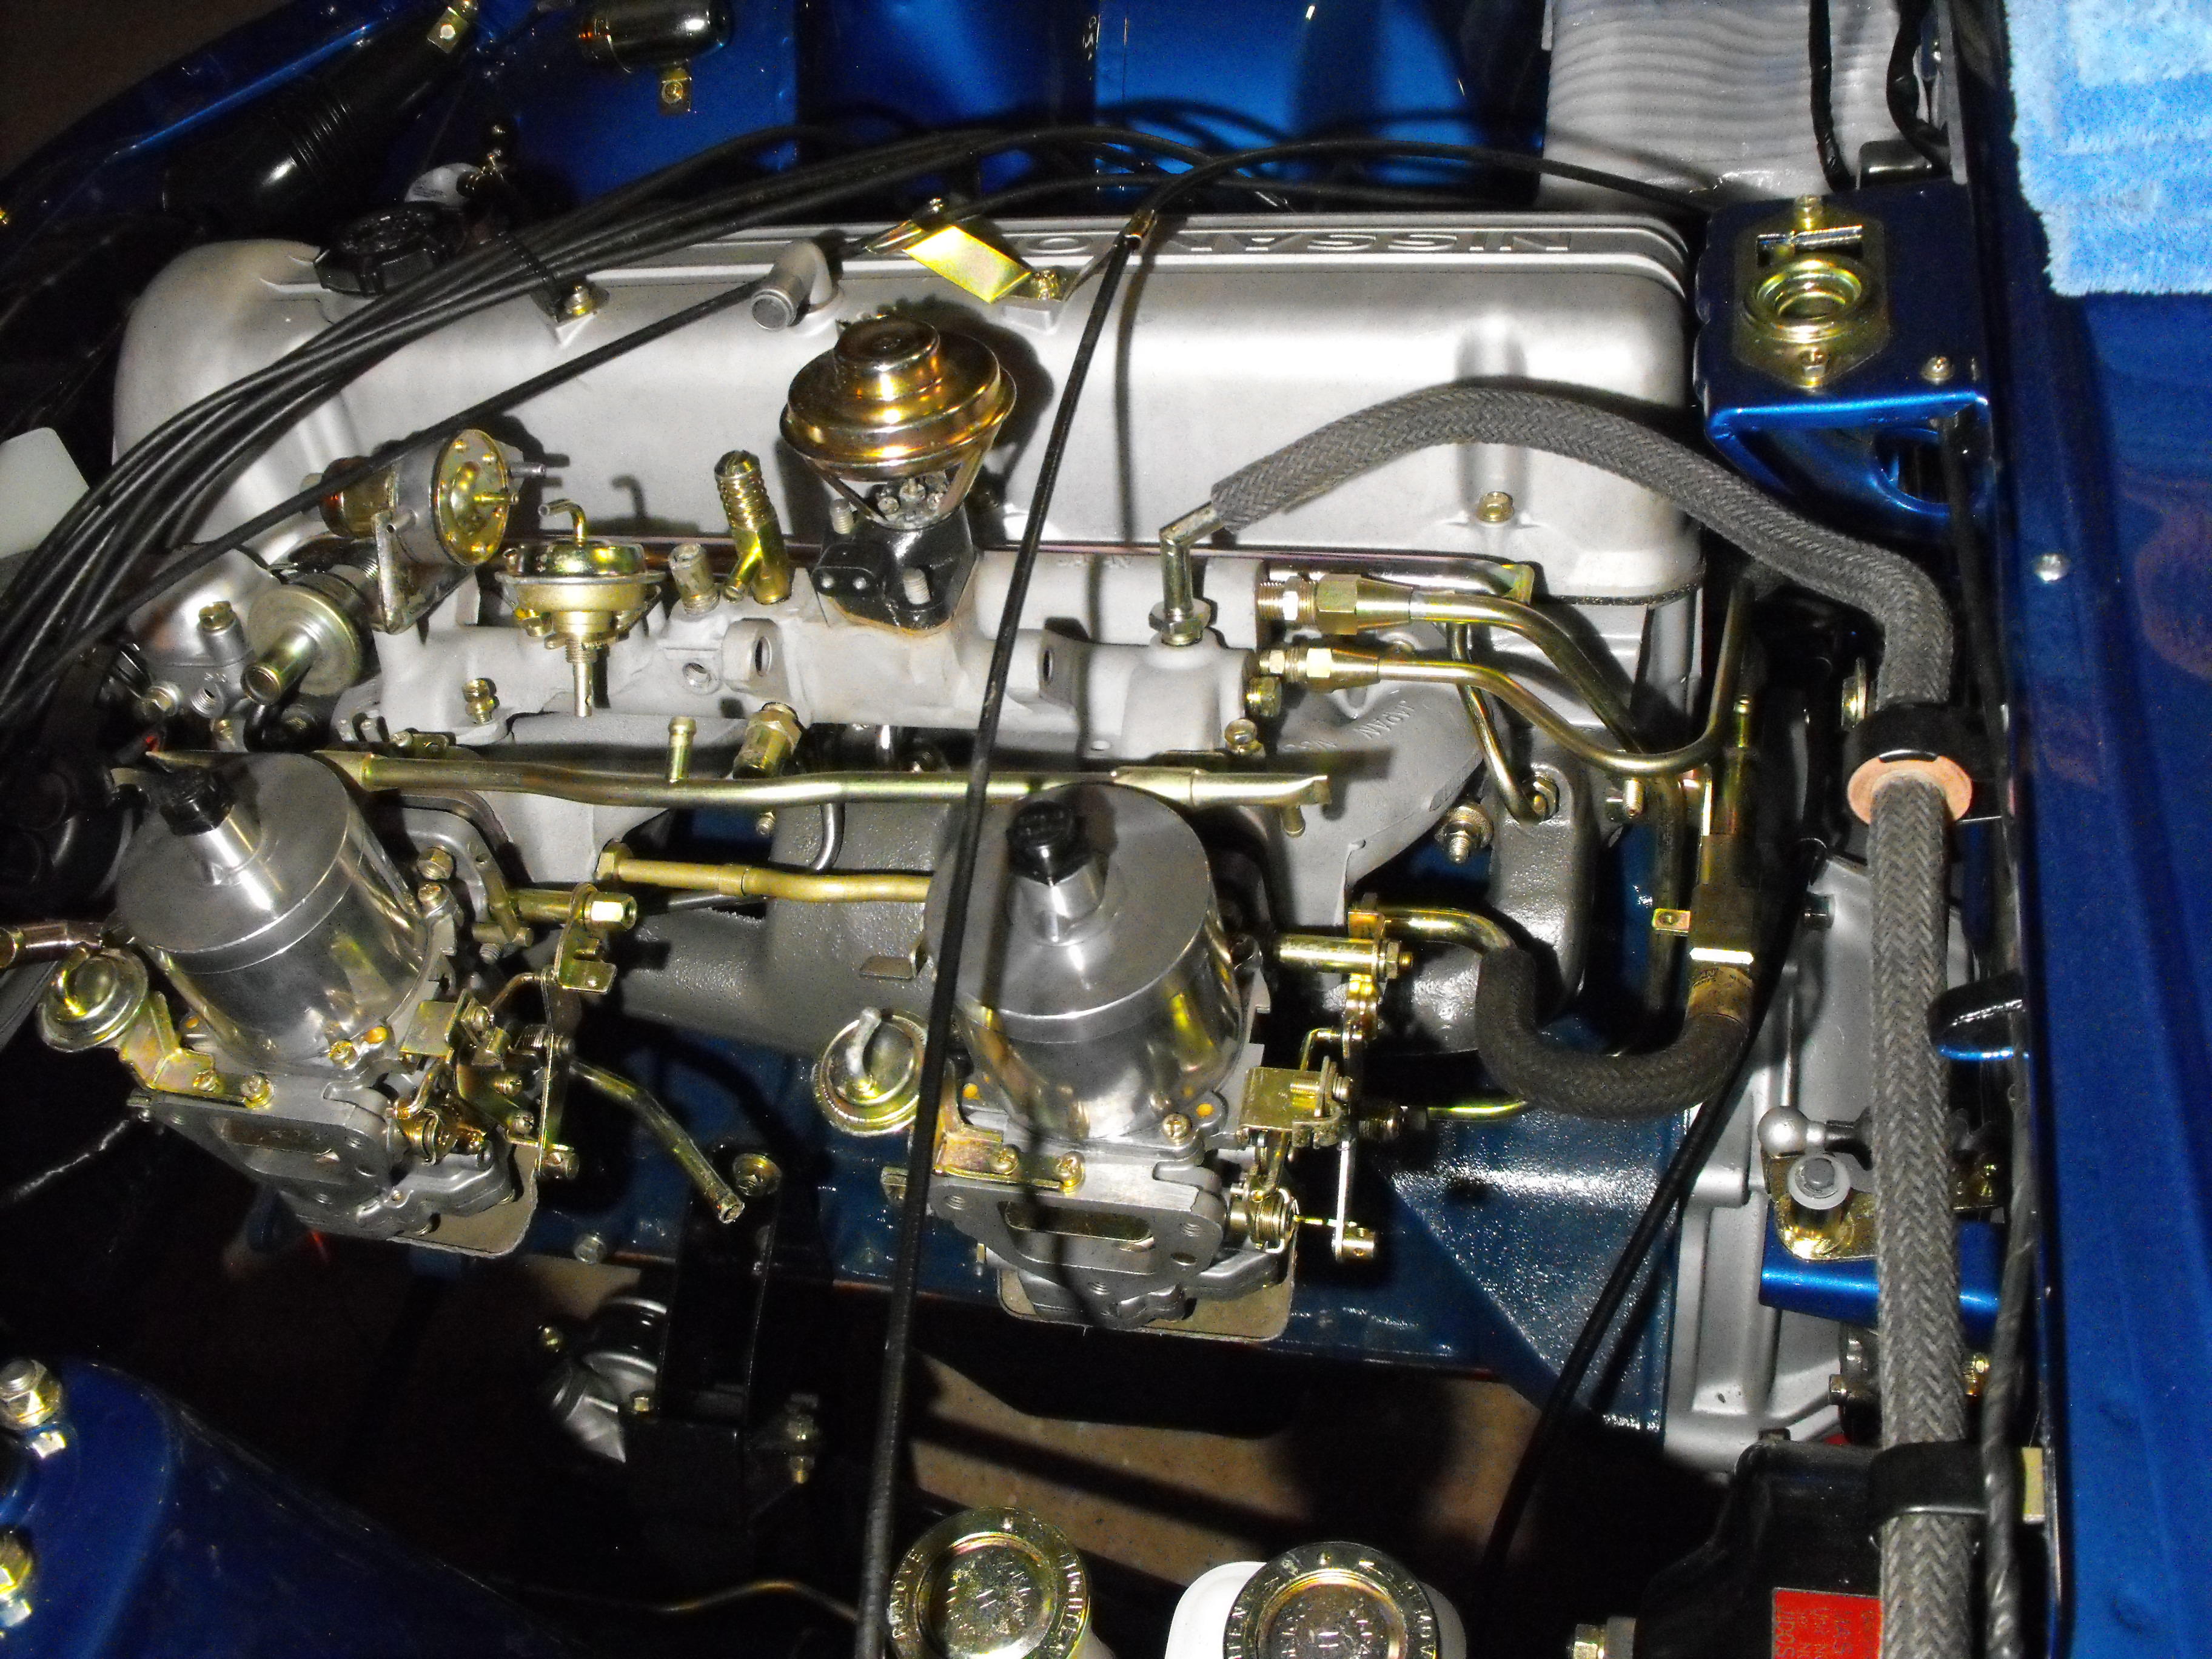
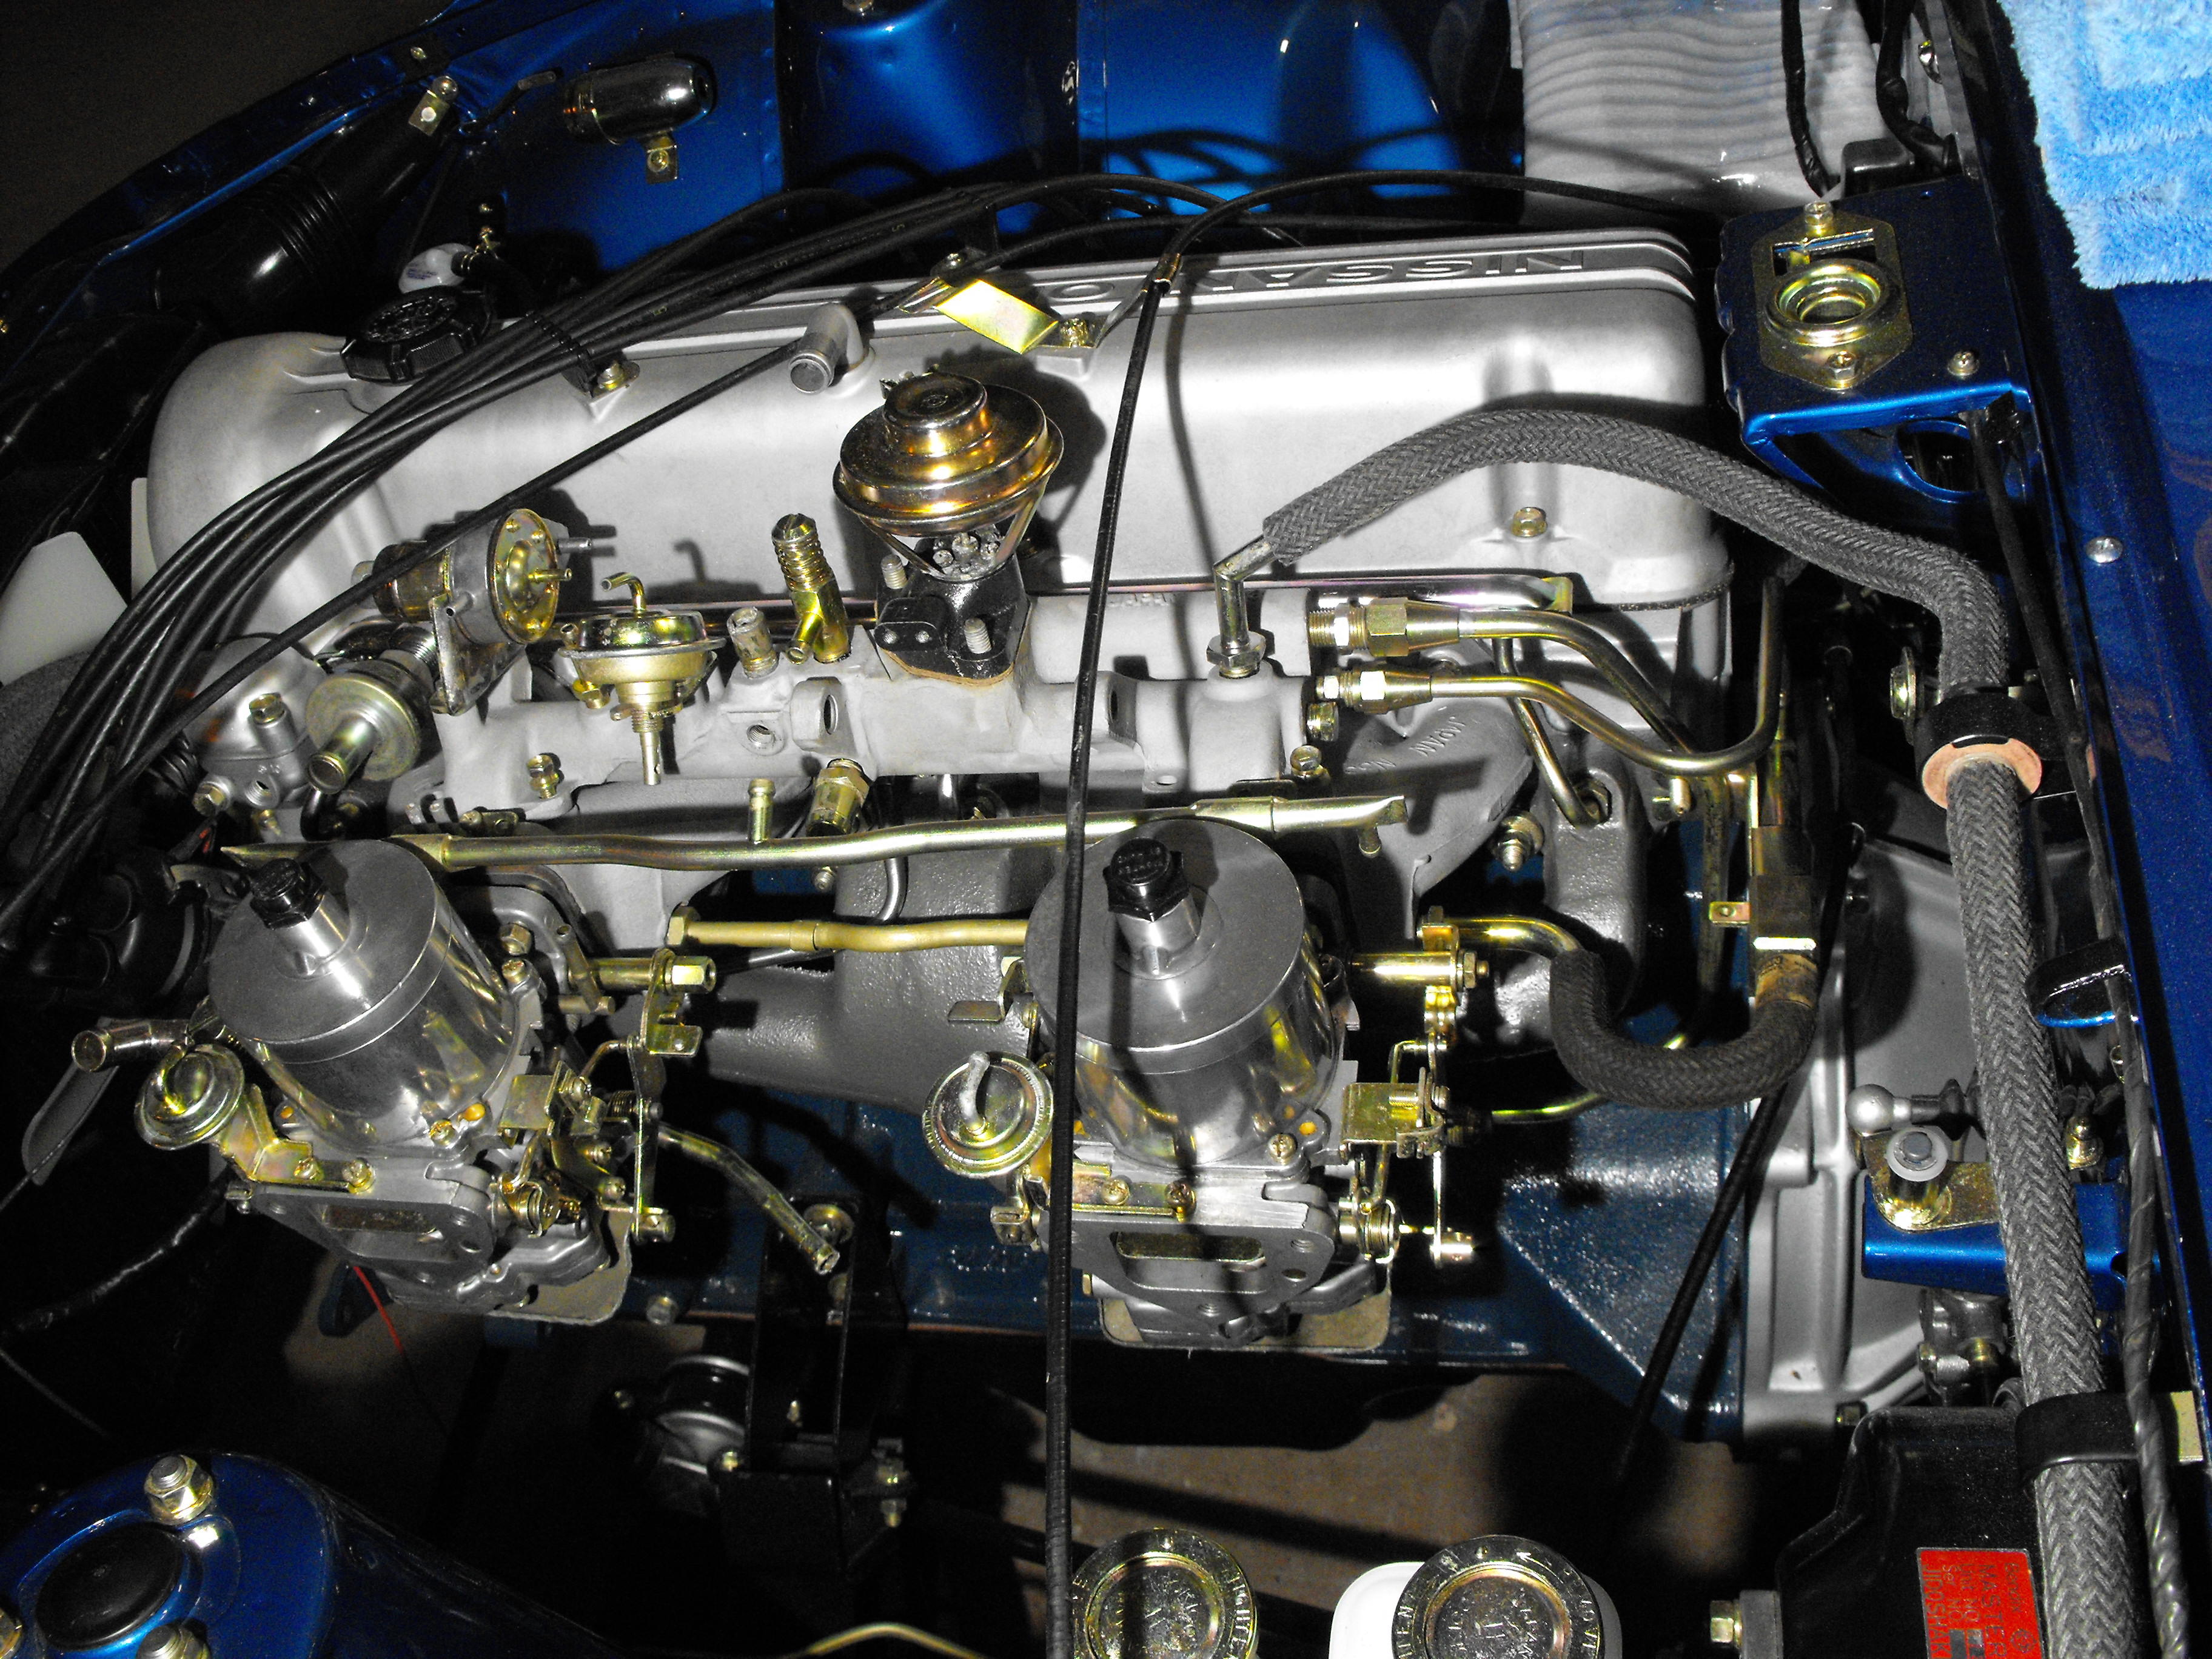
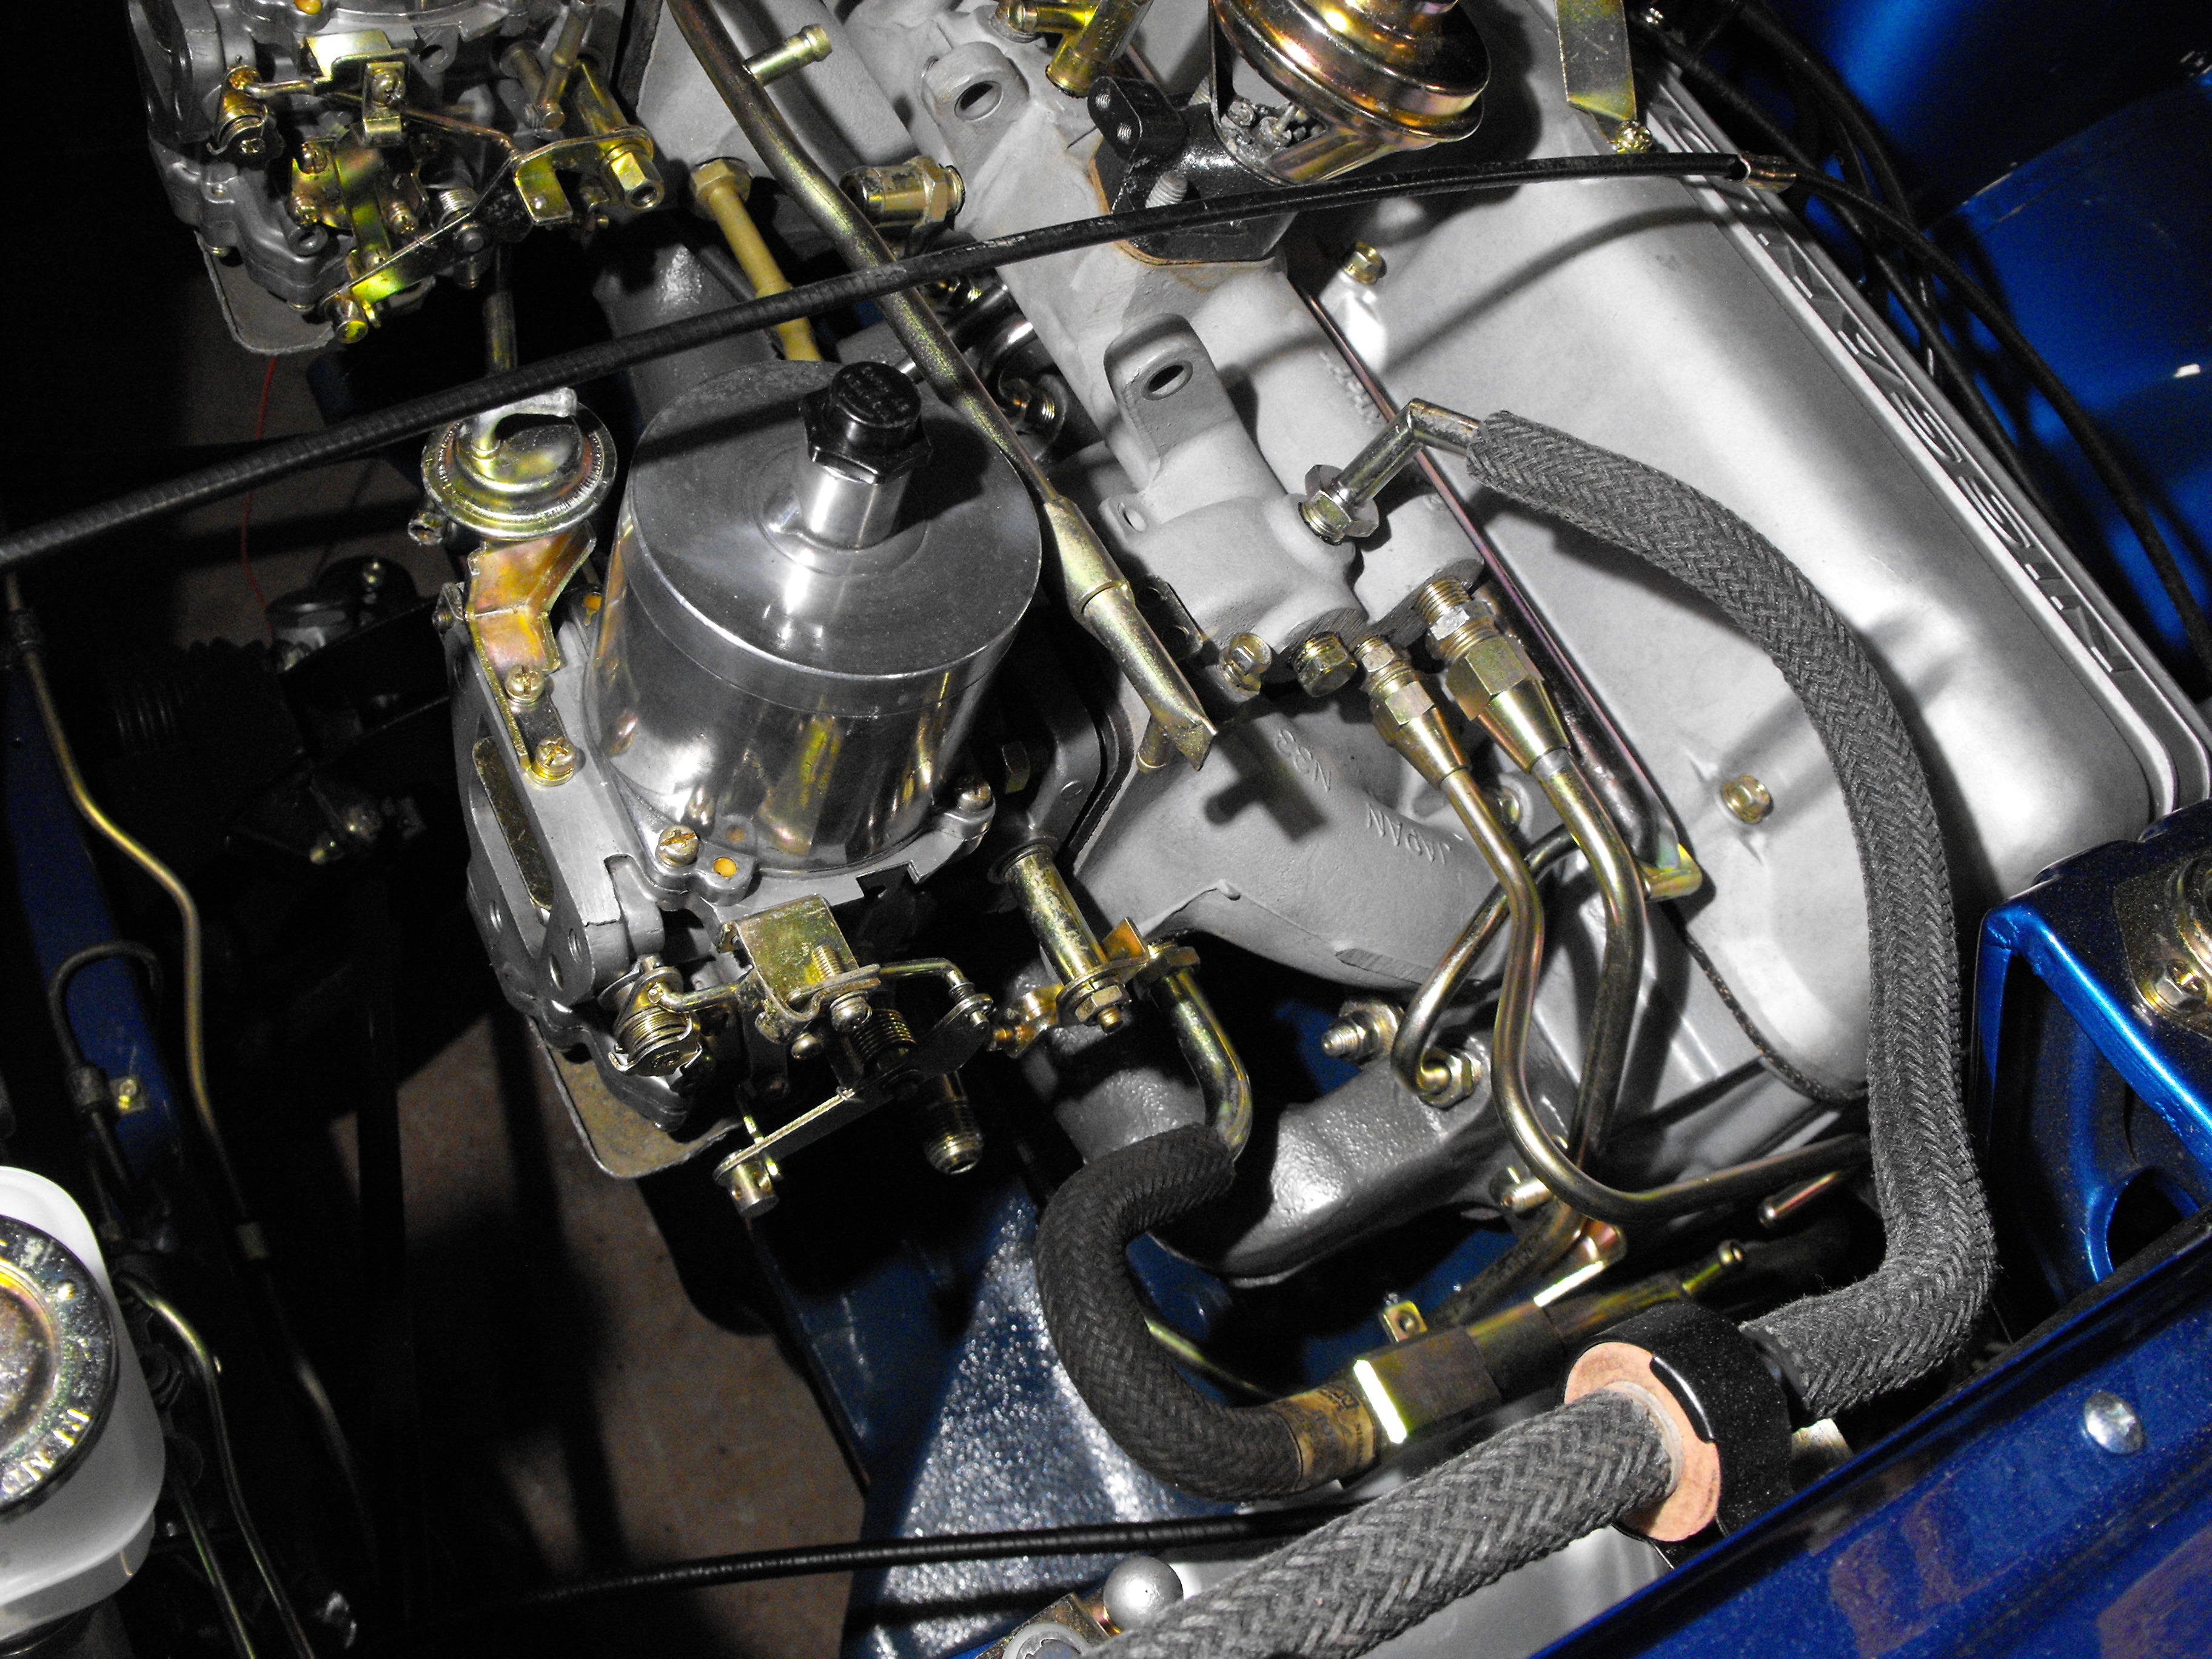
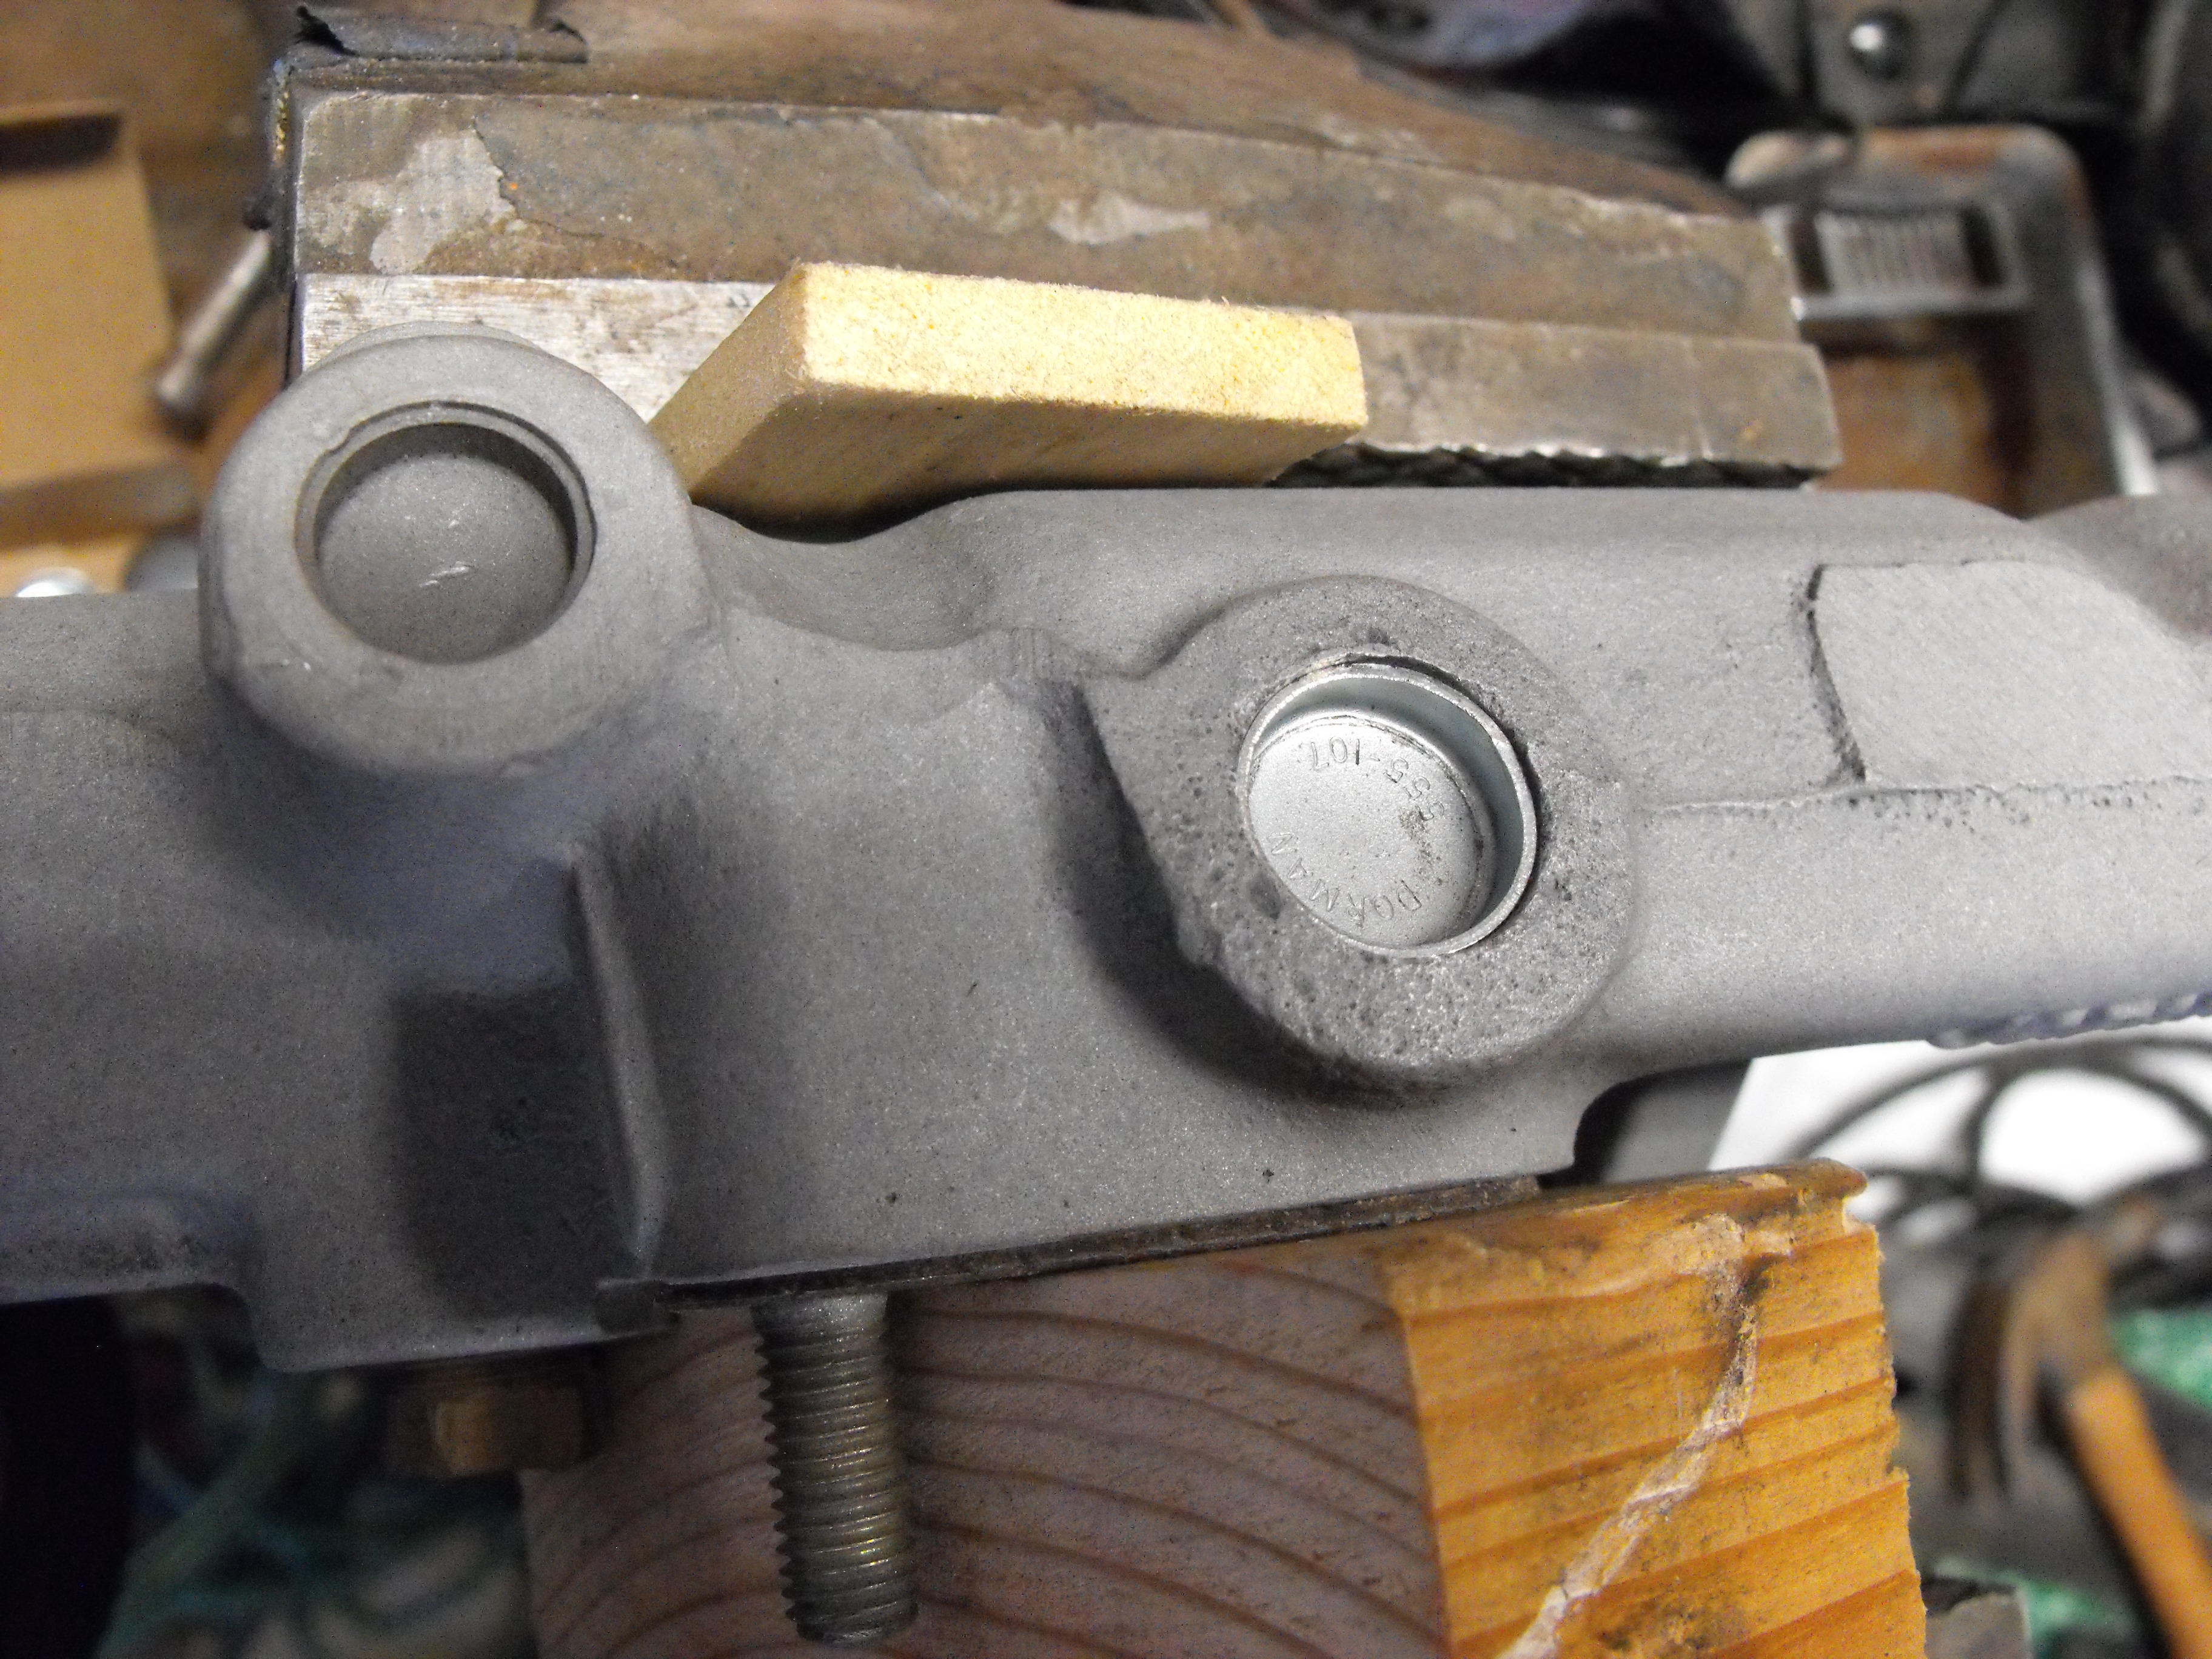
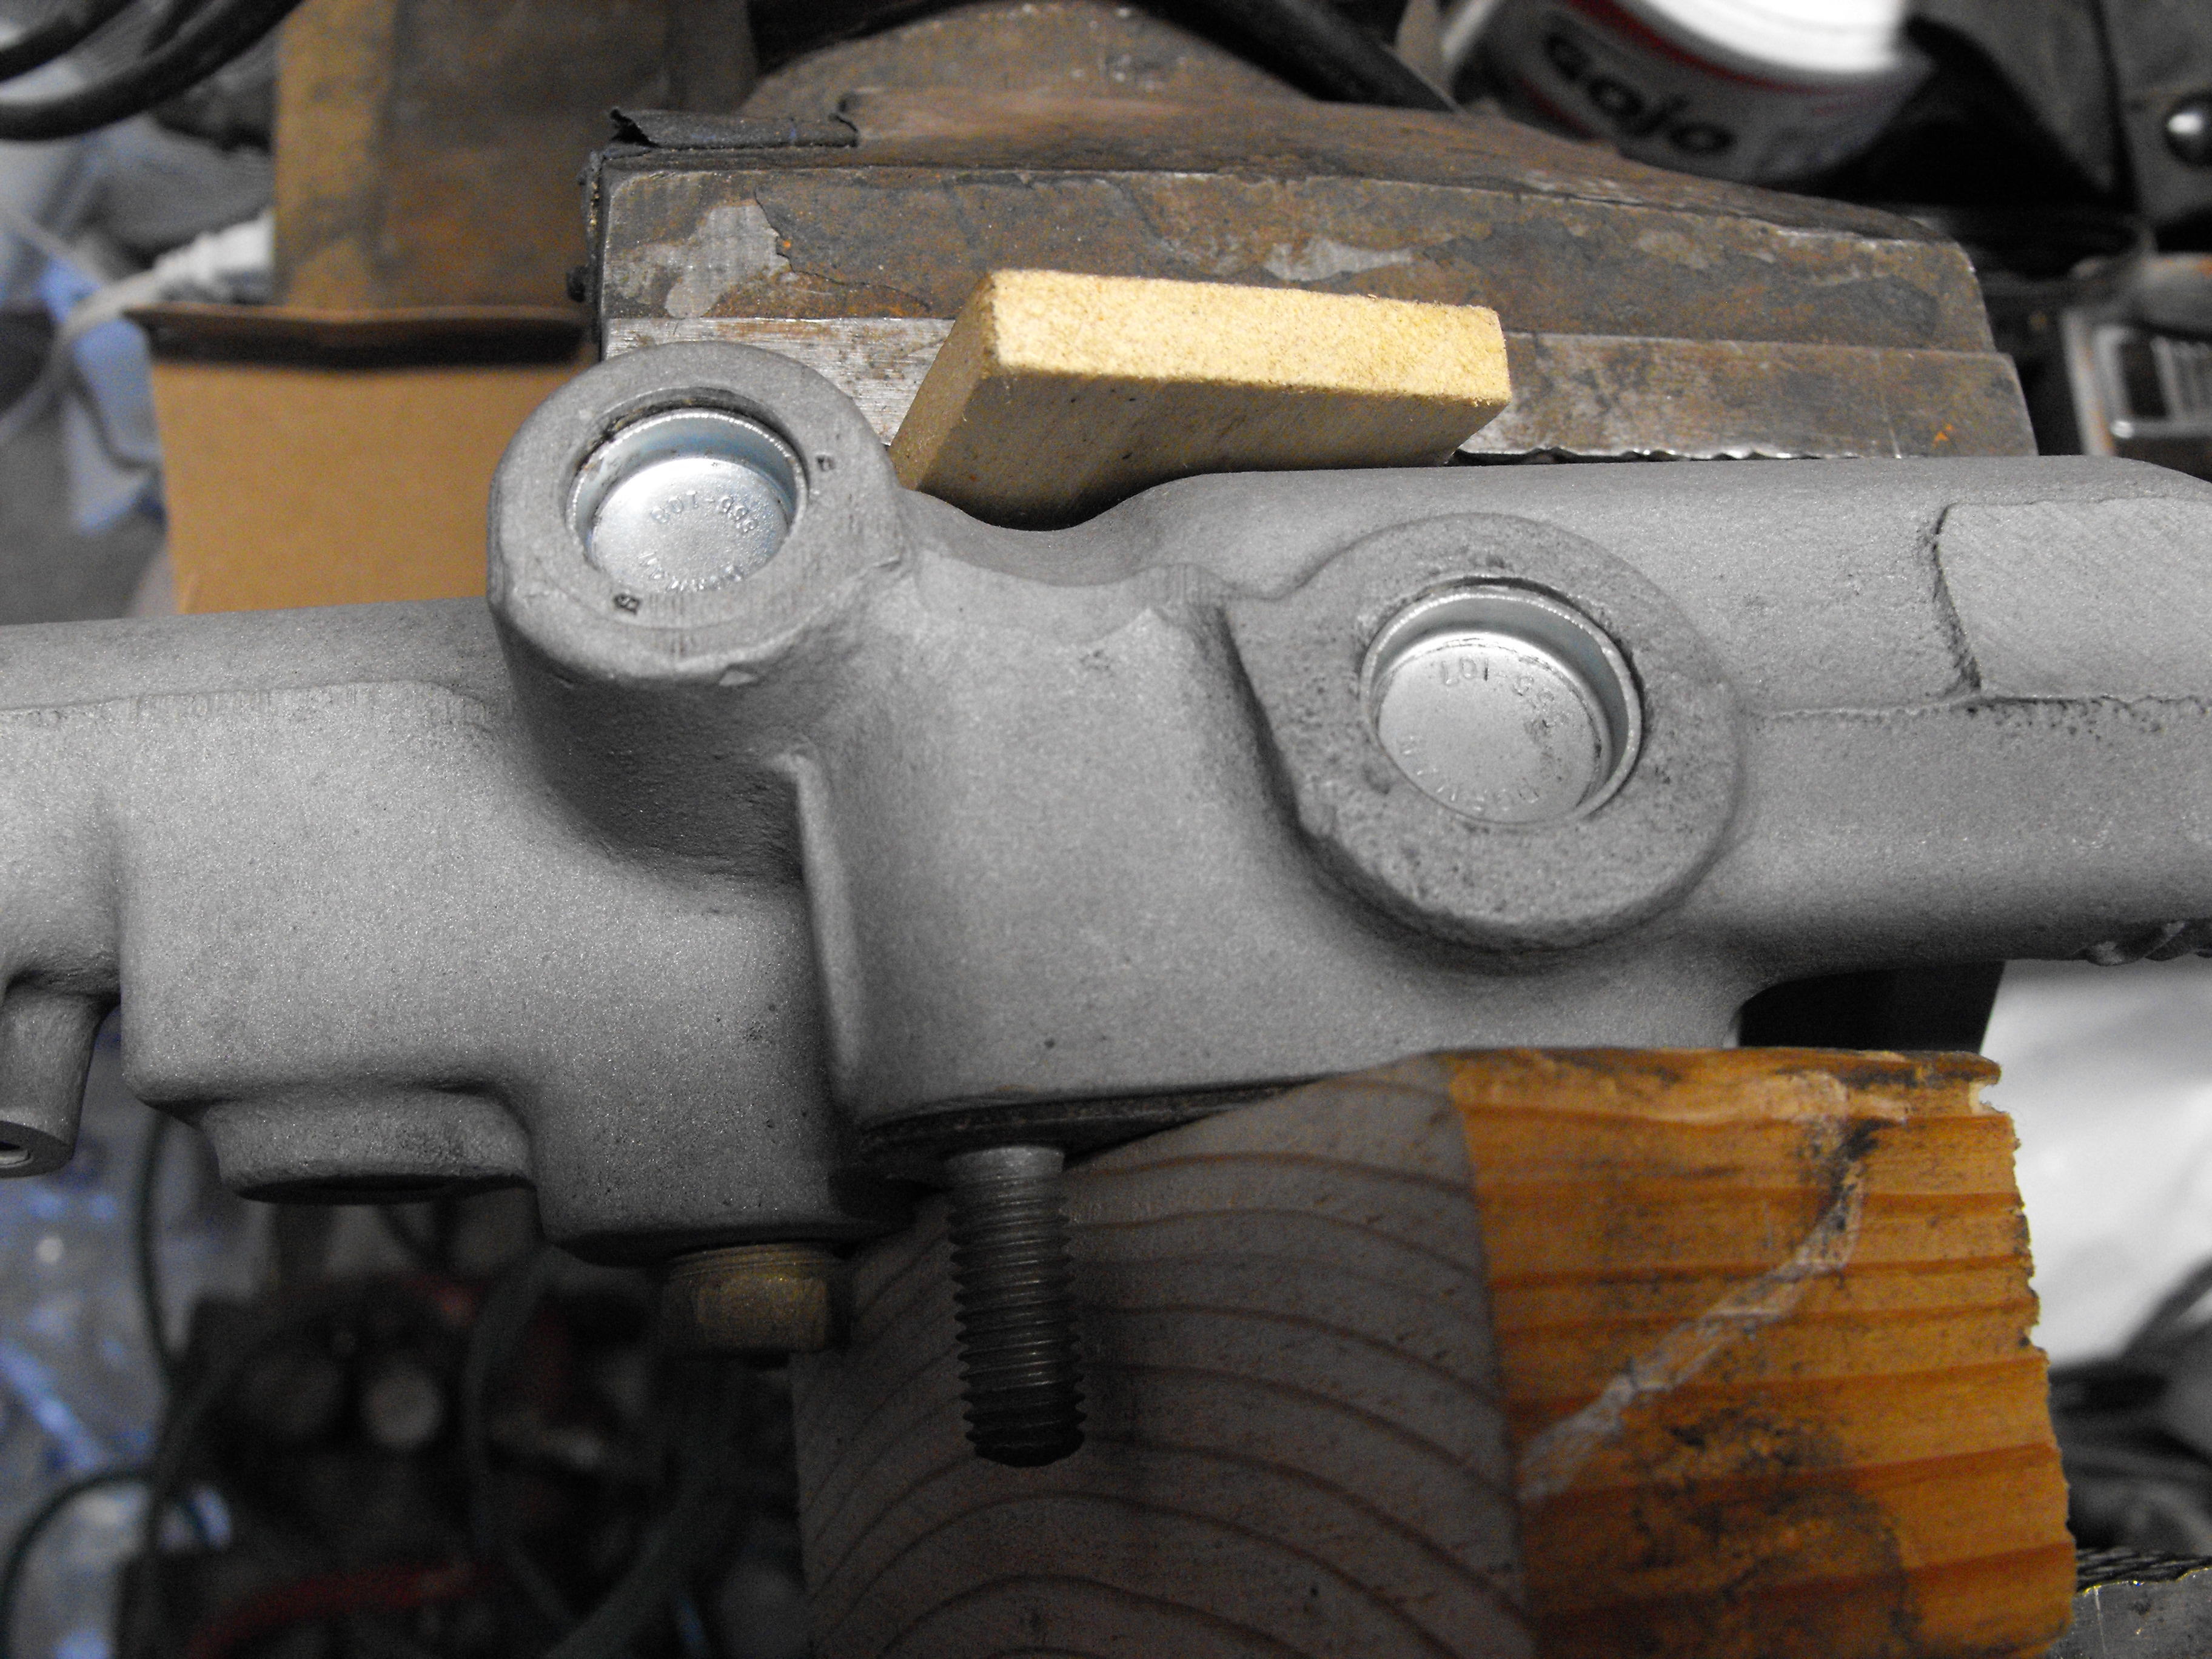
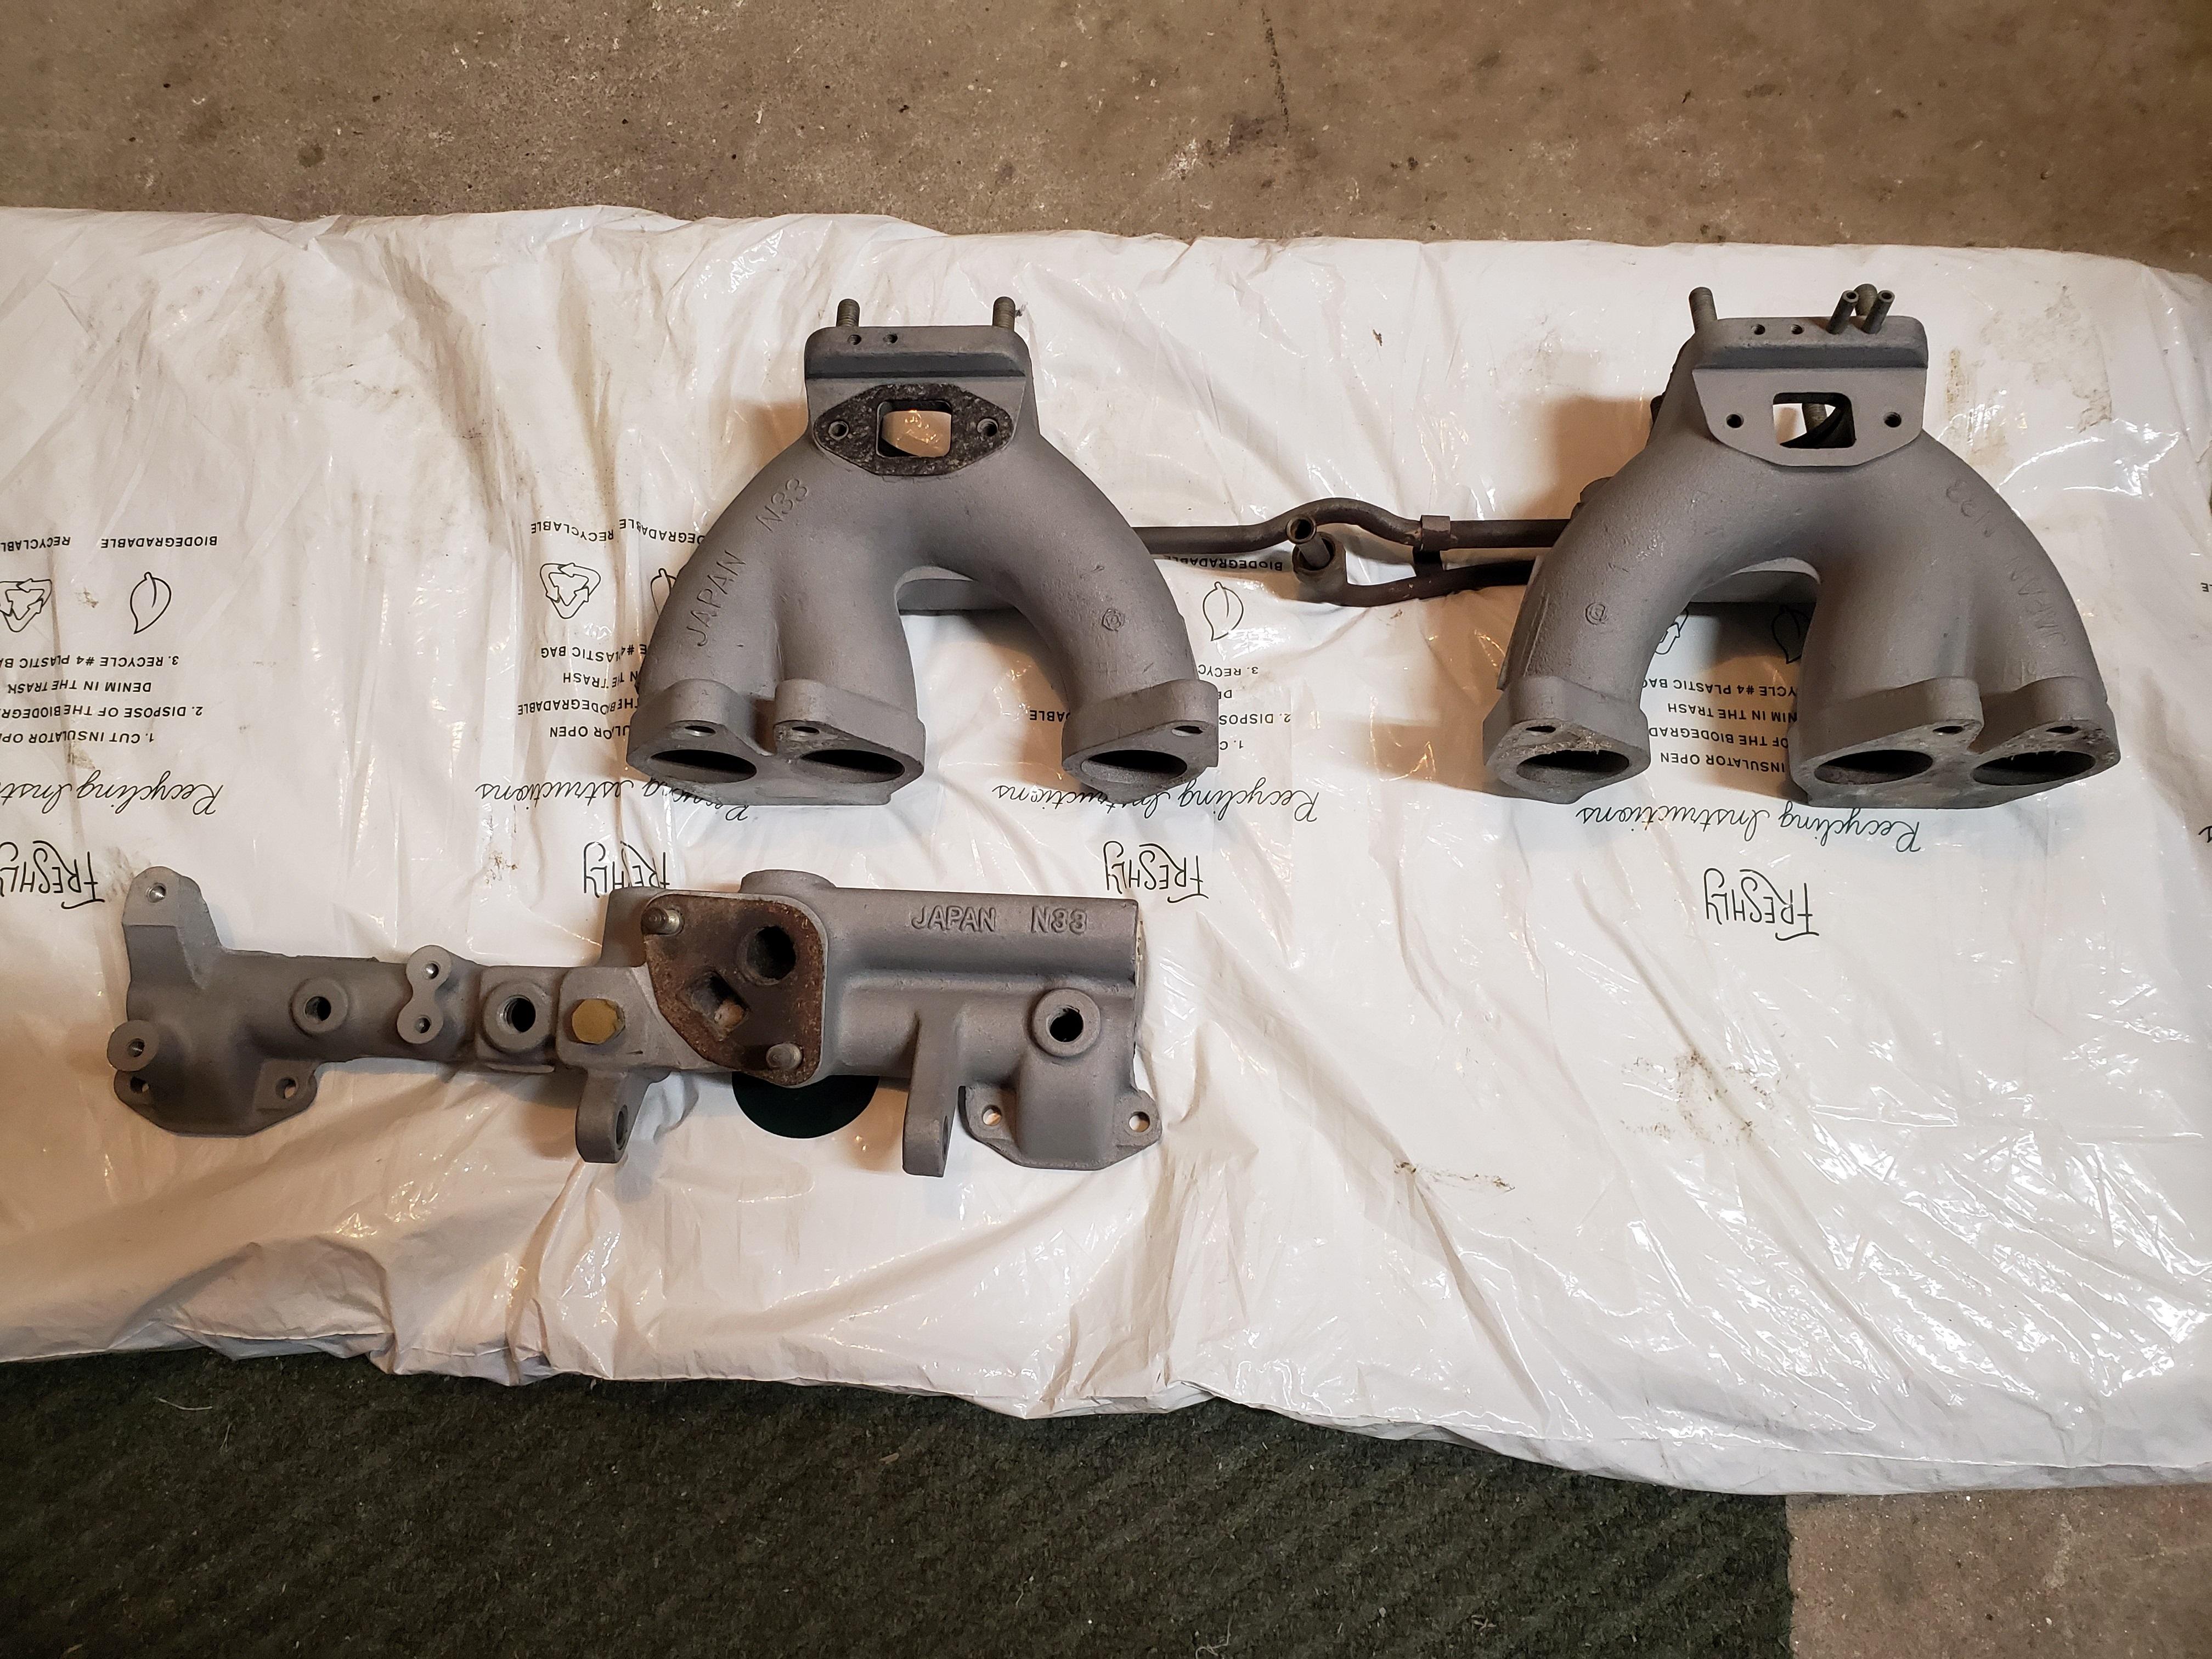
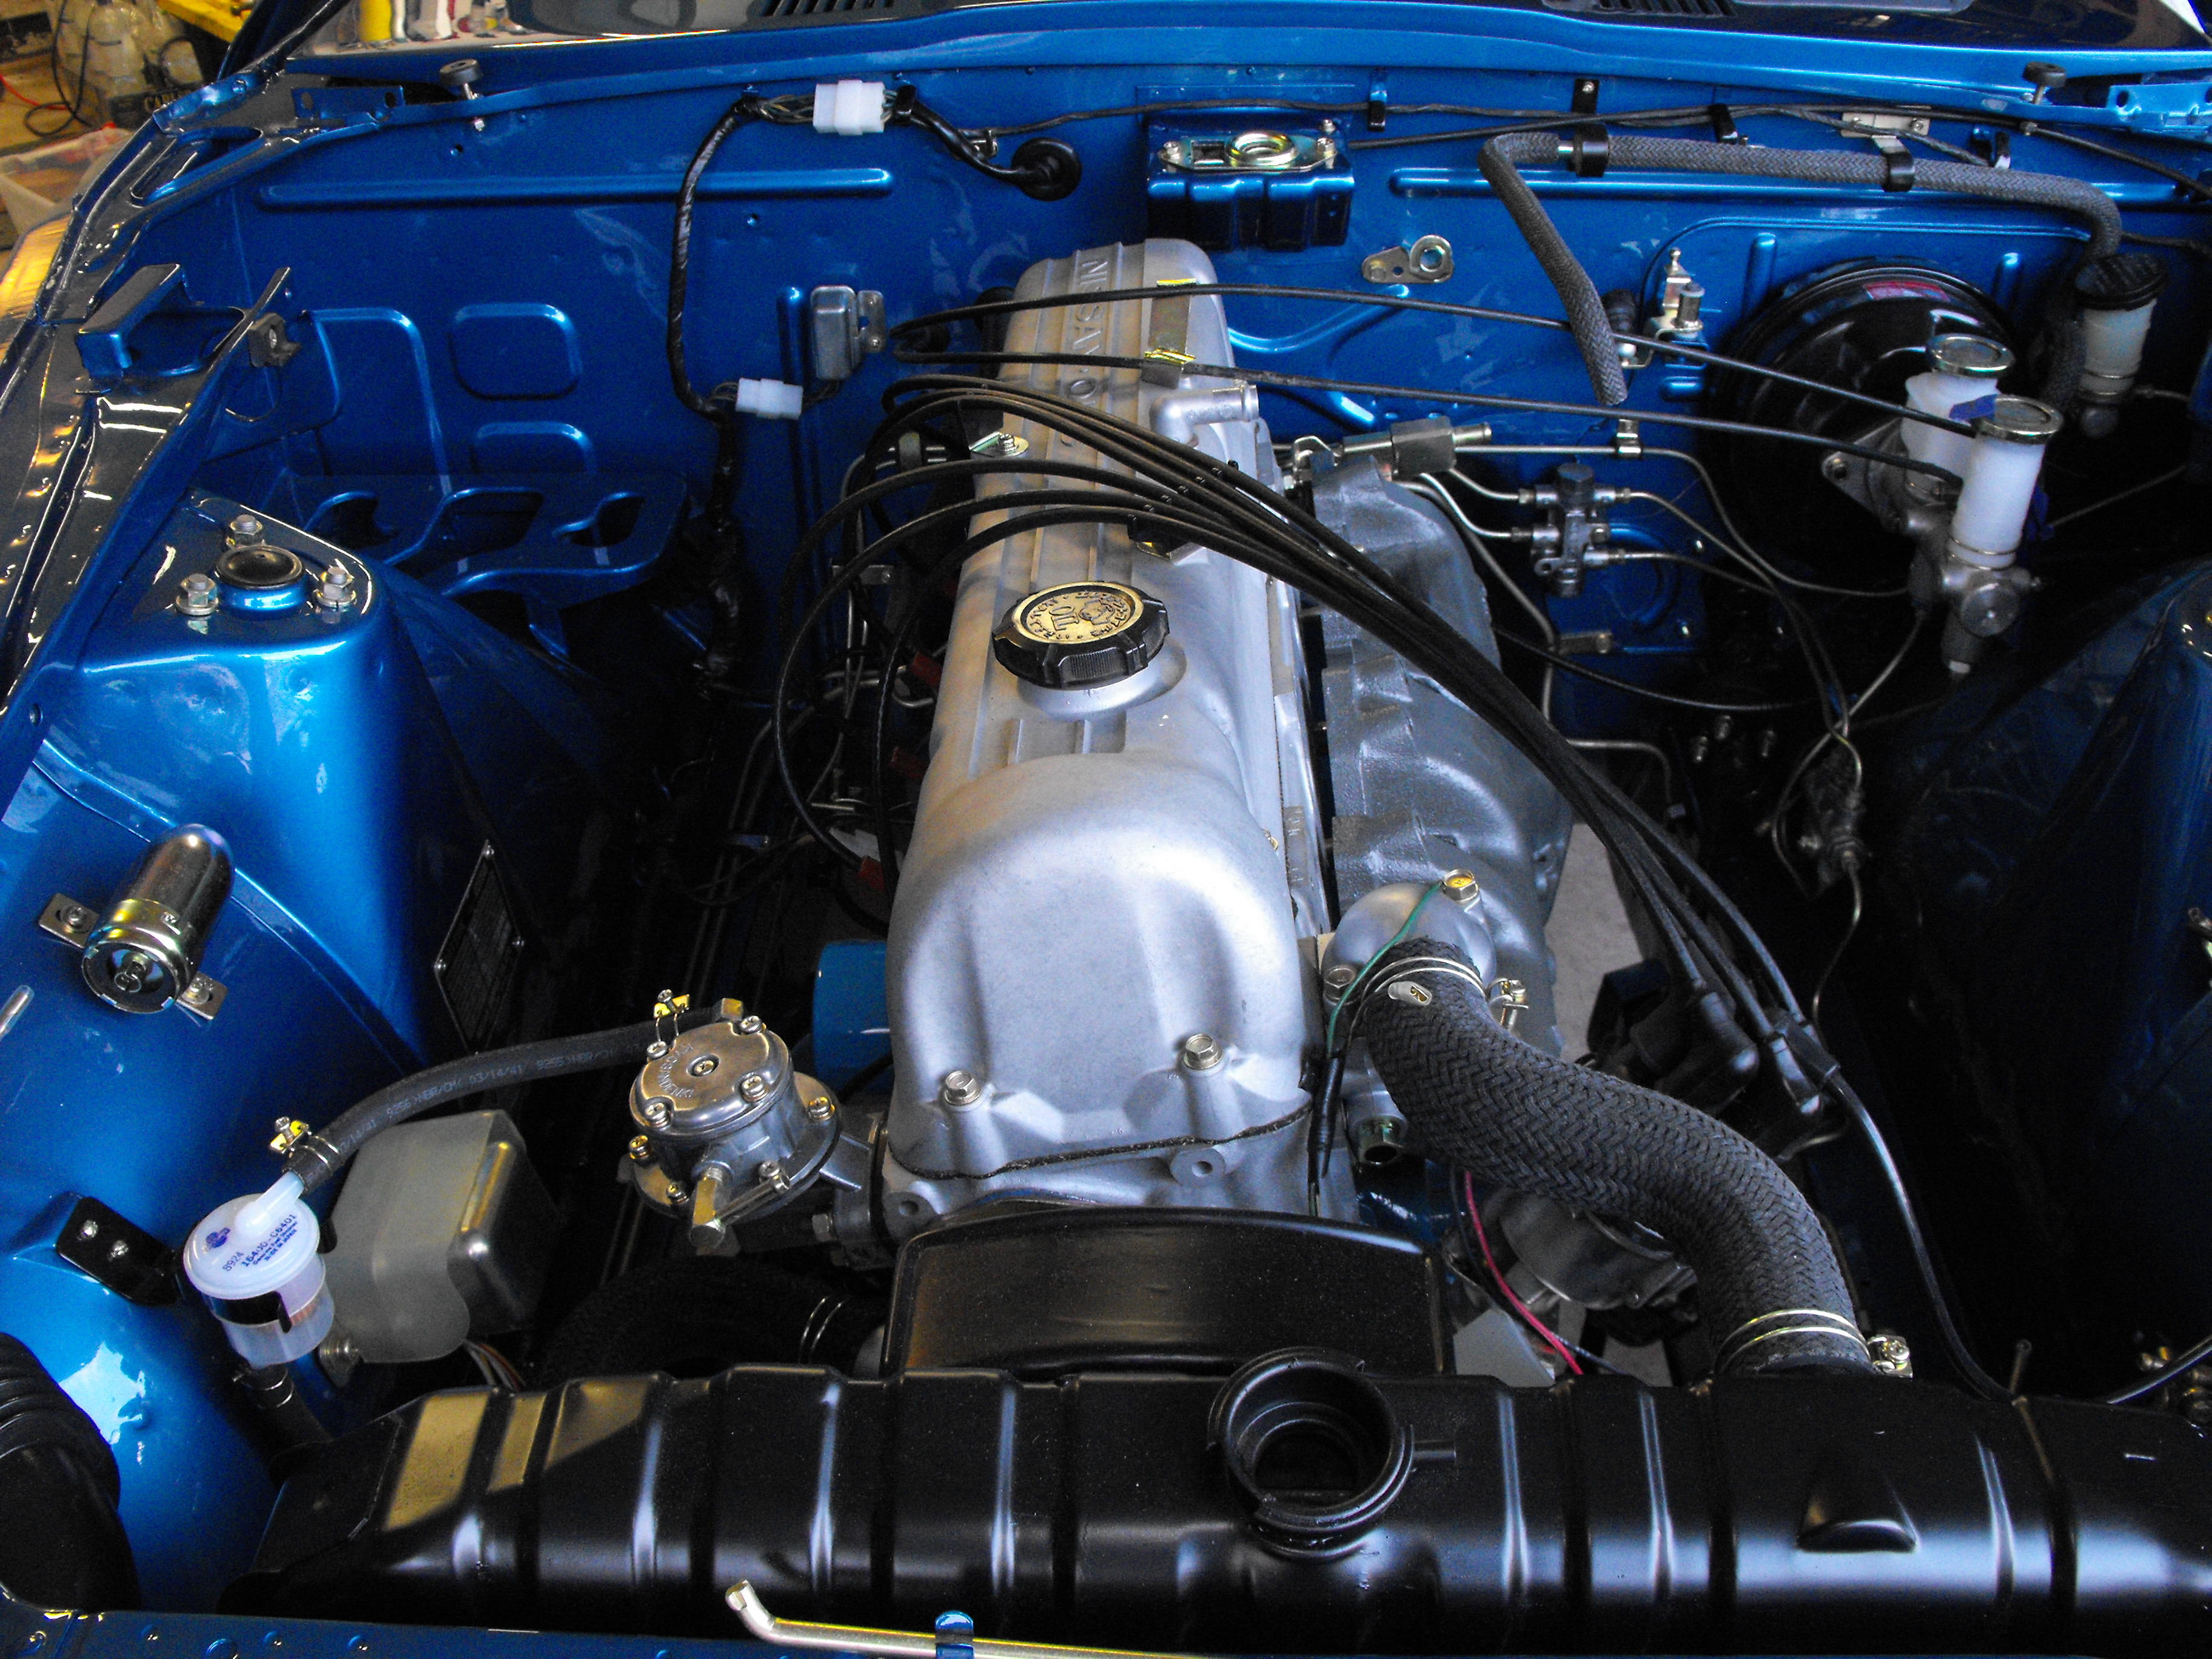
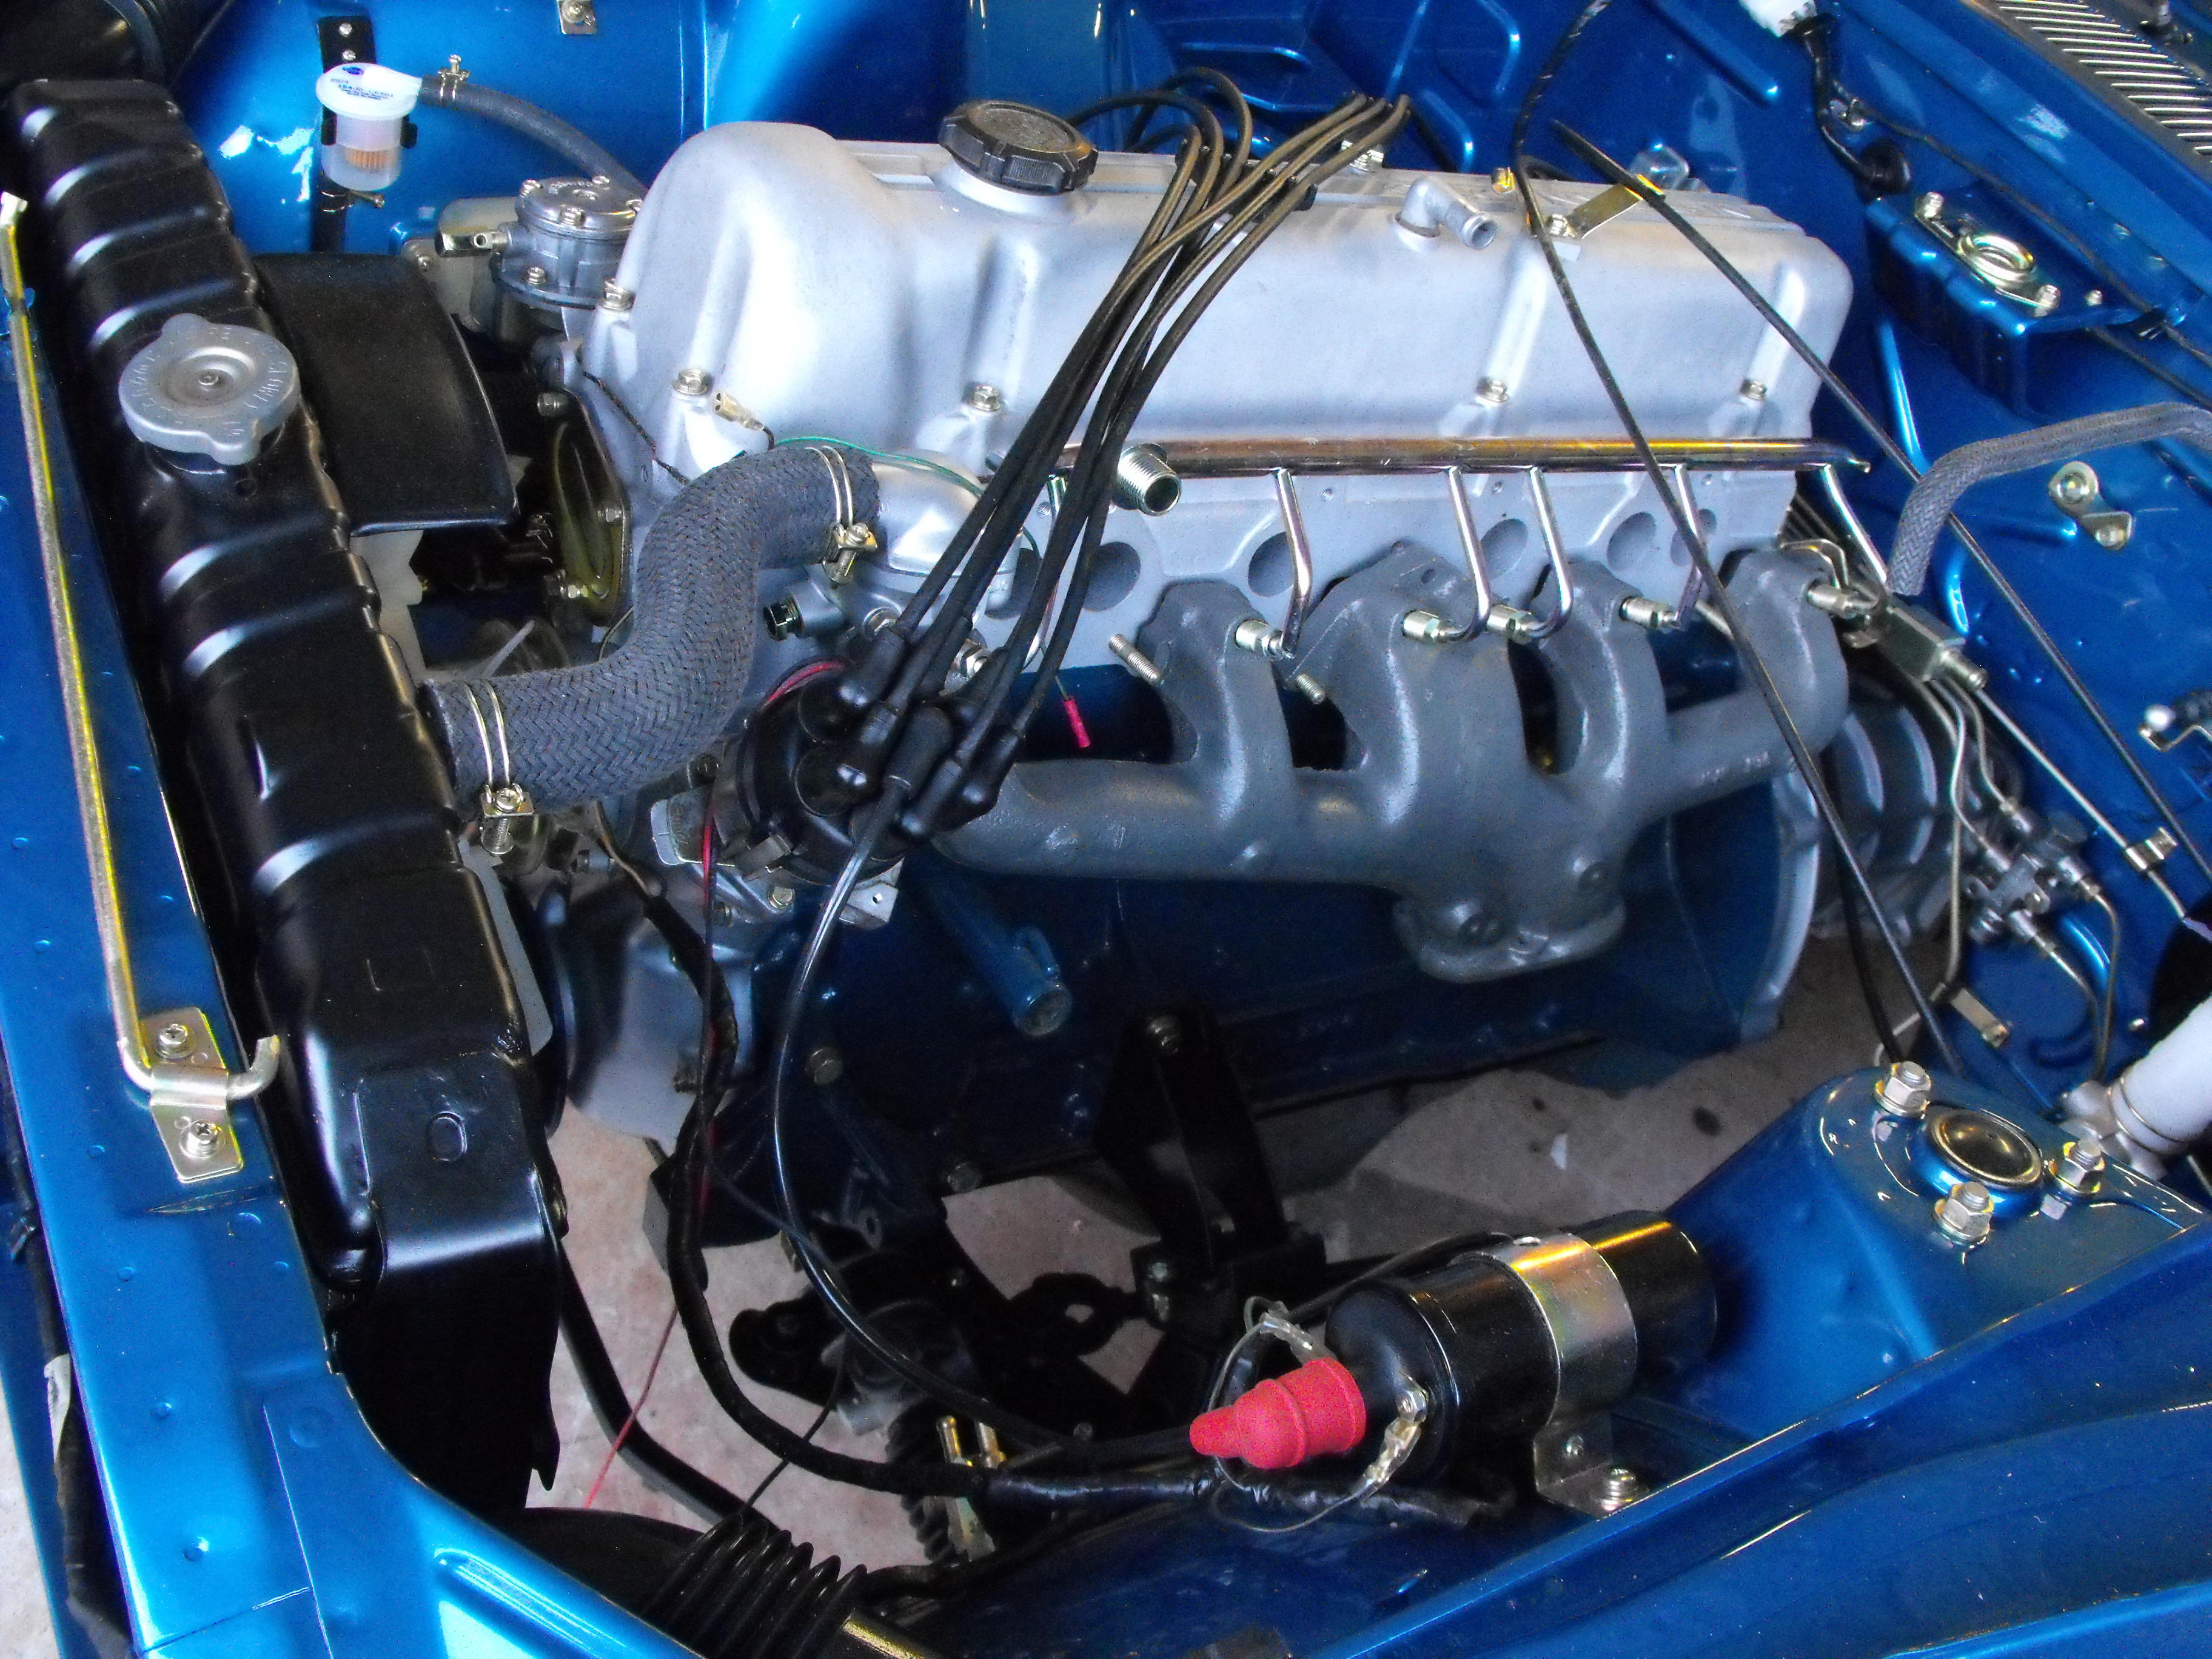
I guess it's a bit of a challenge getting this just right. Can't make it too shiny, don't want it too dull. I did get the manifolds installed last night. Nice to be working back on the engine. I temporarily placed the balance tube and flat tops on just to see what things will be looking like. The balance tube is a bit of a challenge. That brass plug on top is pretty hard to get out....even with the vice grips. Will have to try the fire and ice method on this and see if that helps to loosen it. Also broke off a fitting on the underside of the tube so I will need to drill and tap that out. I had to re-tap the threads for the air galley. Those threads are M14 X 1.5 for anyone interested. The good thing is that my water tube and exhaust tube for the EGR are in nice shape. I did a quick fit check on those. I will install as much of the tubing as I can before I actually install the carbs.
-
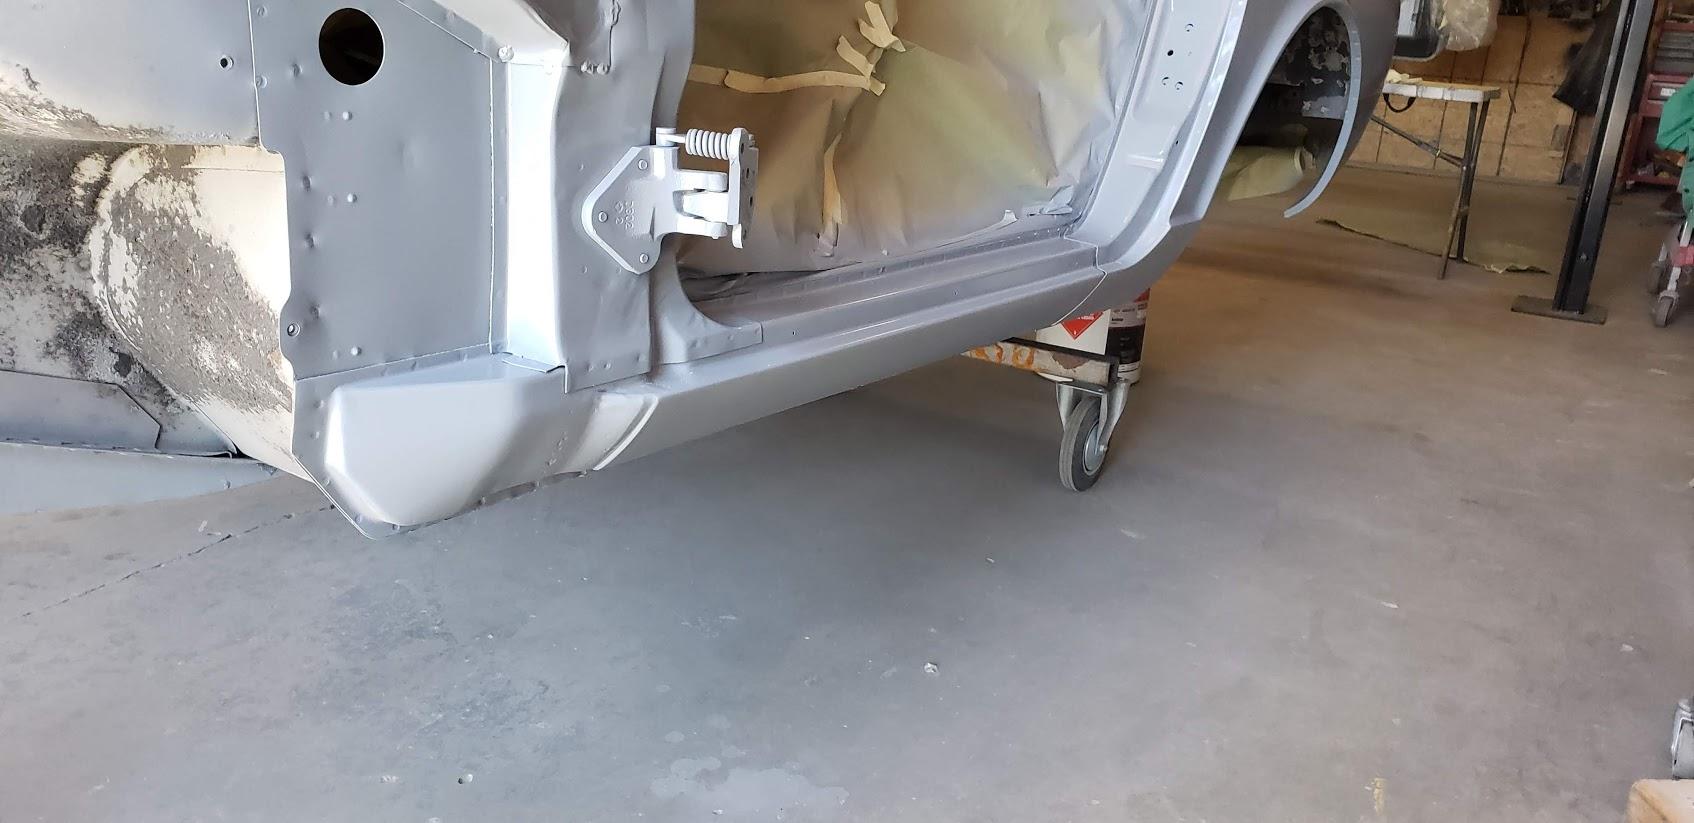
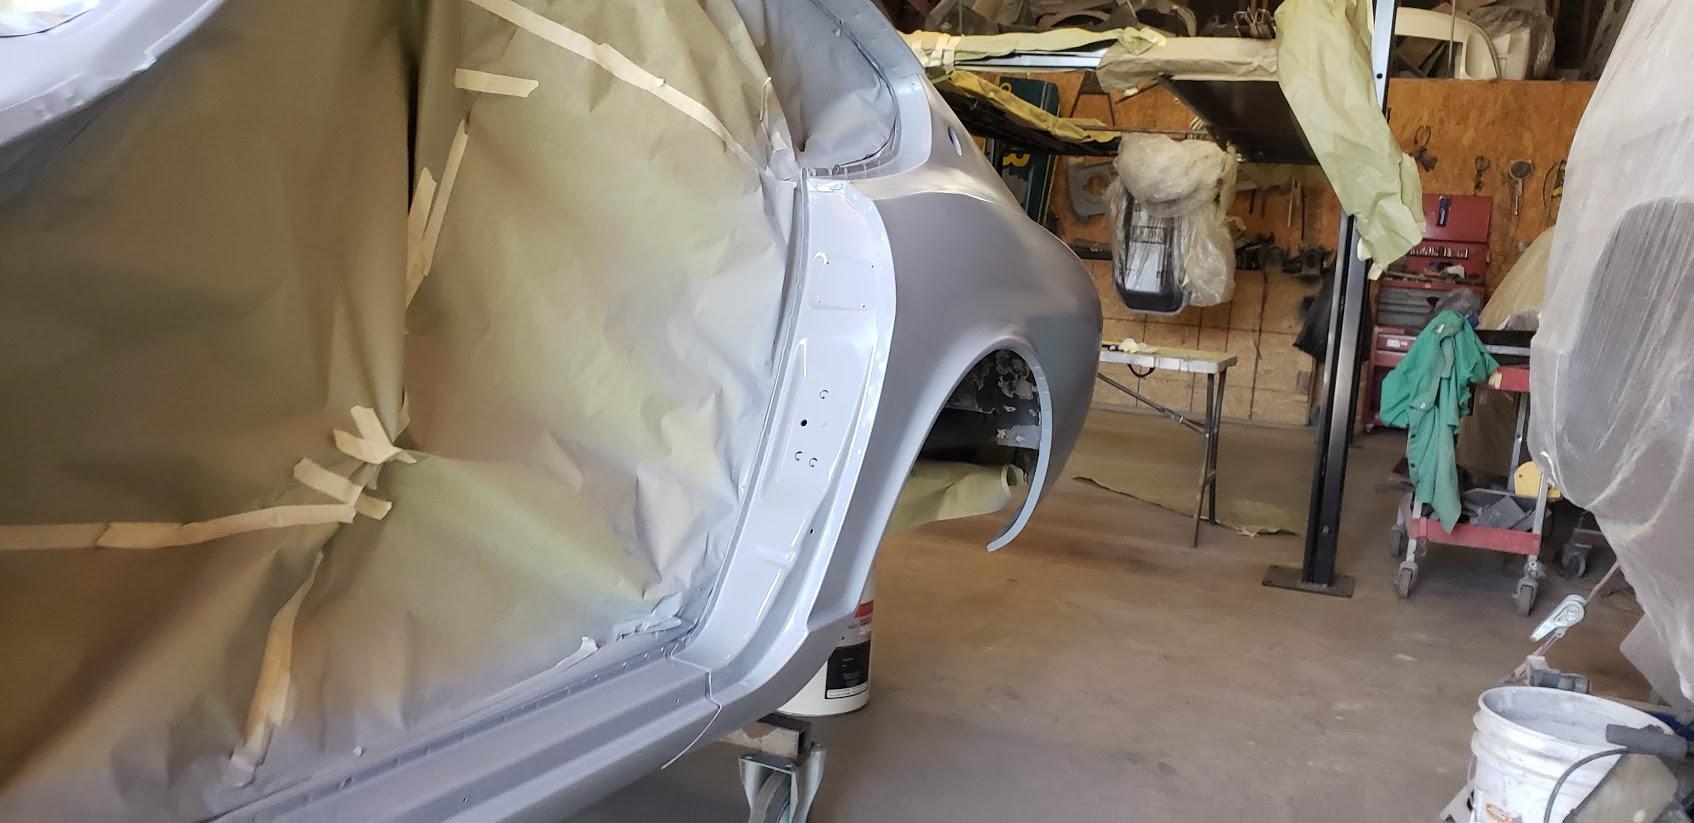
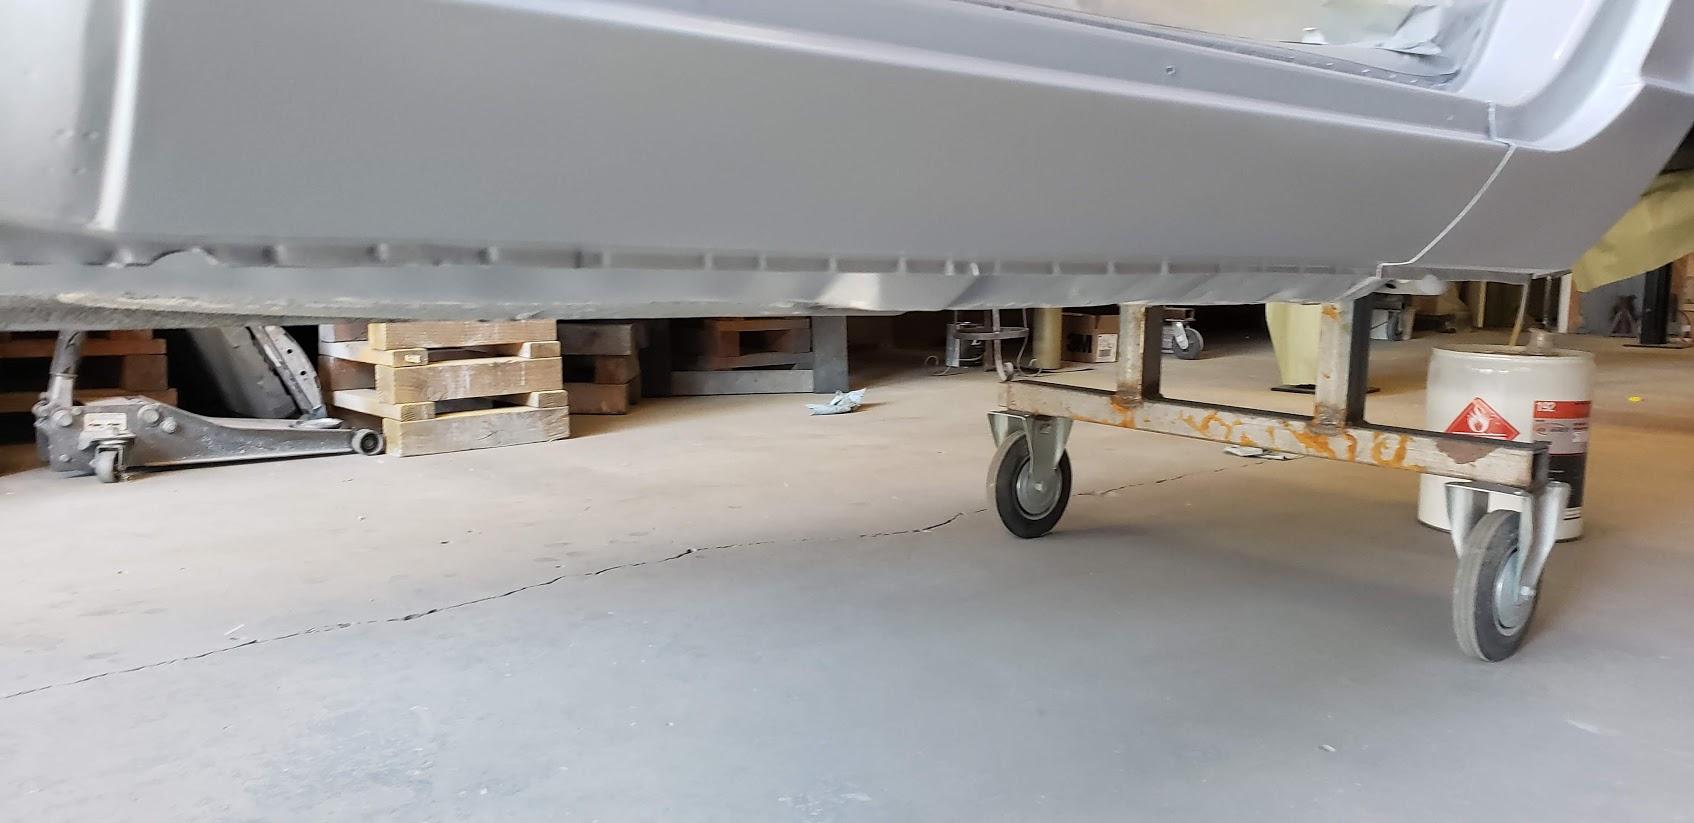
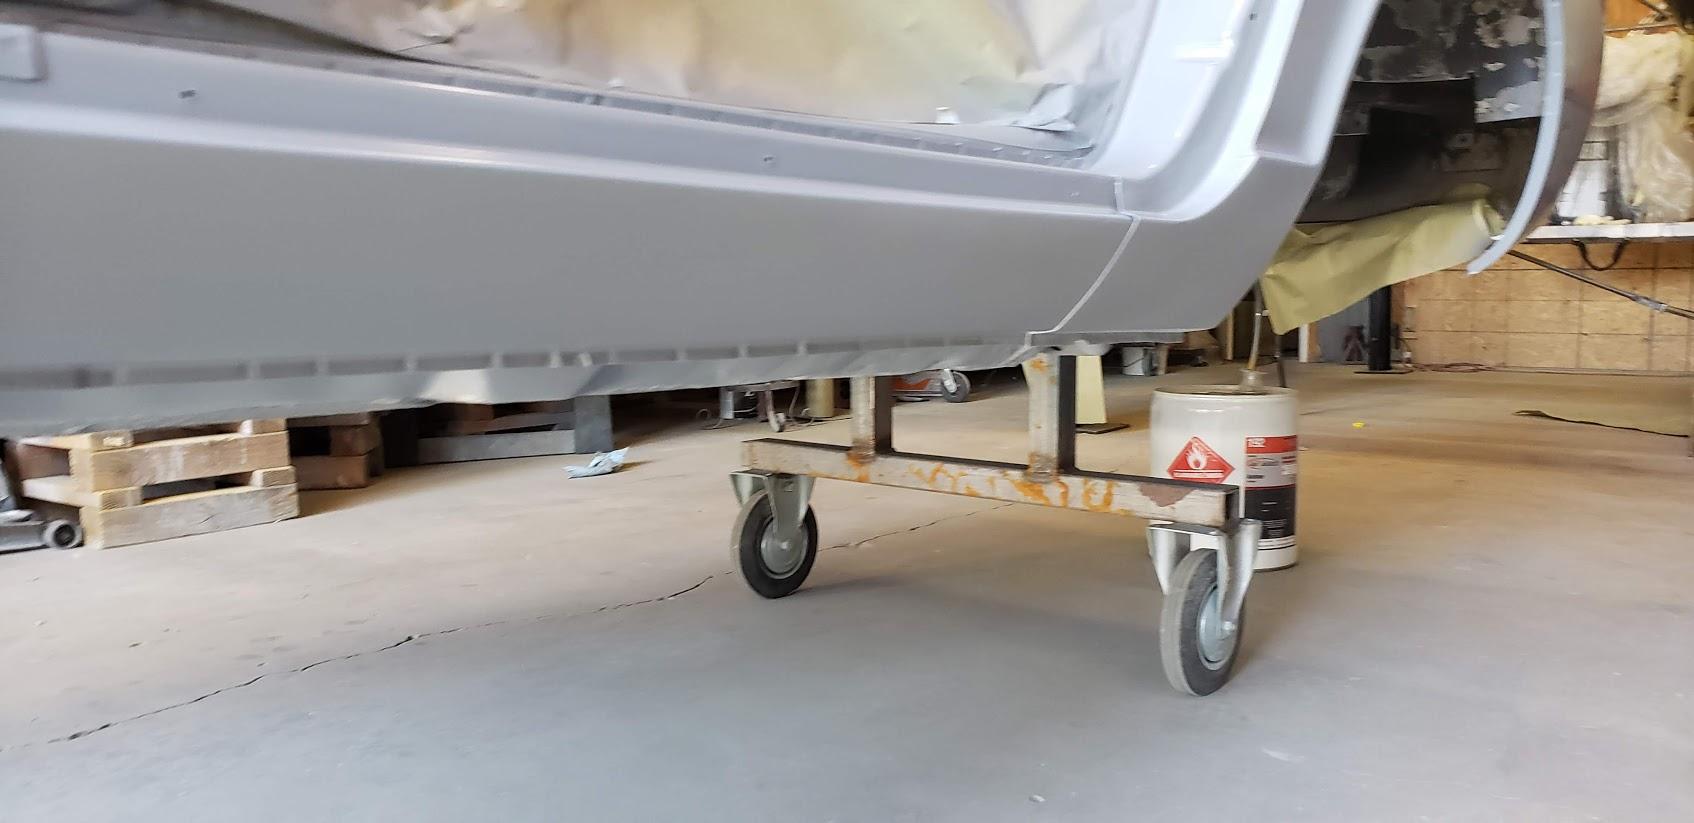
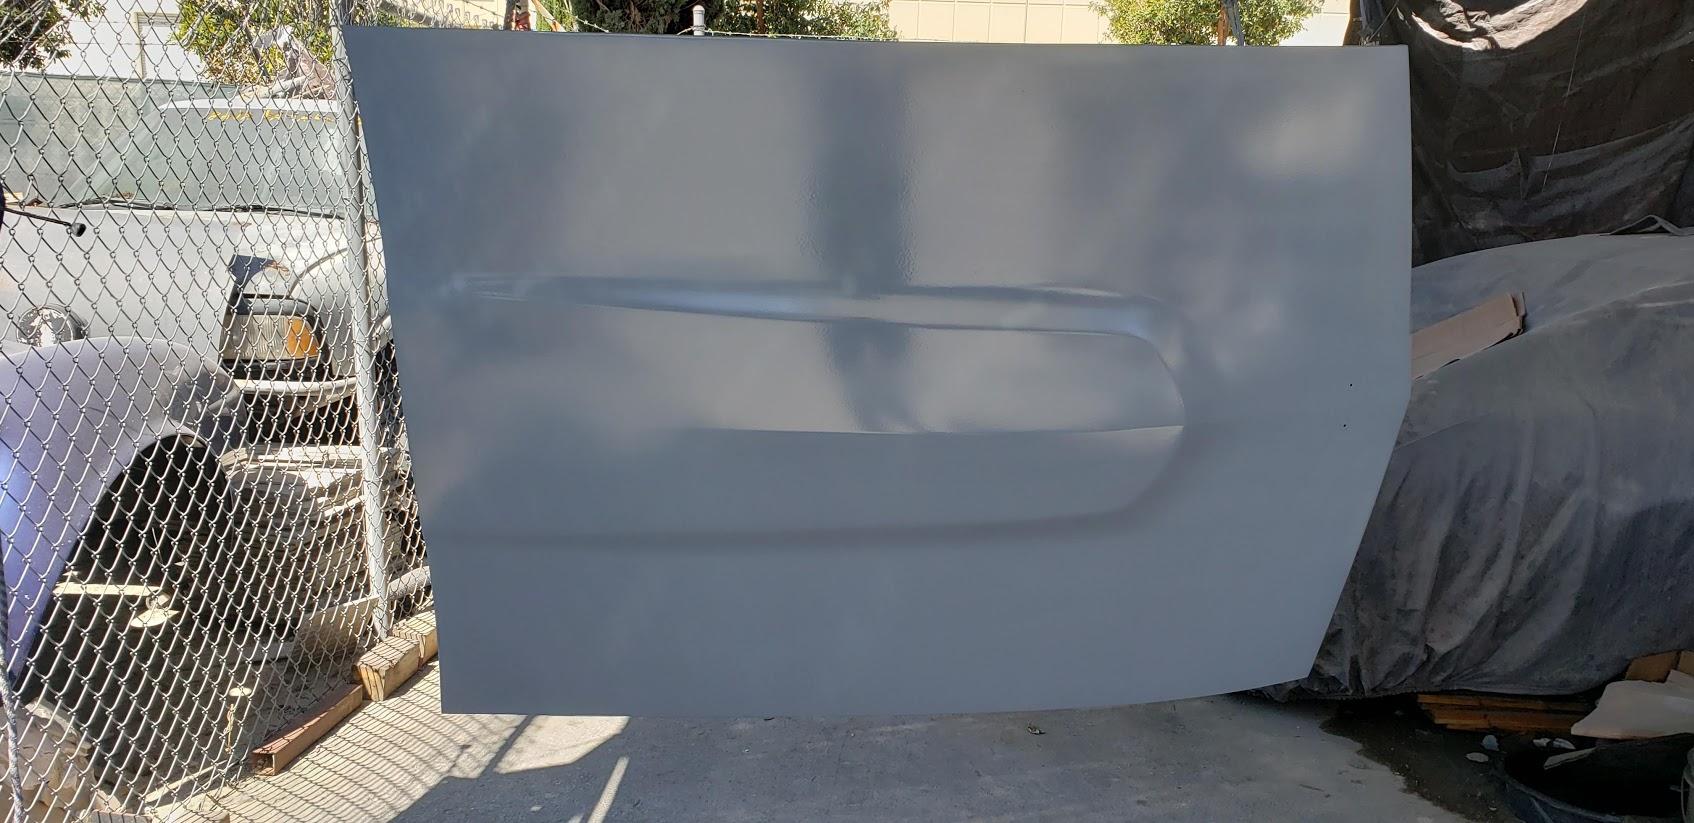
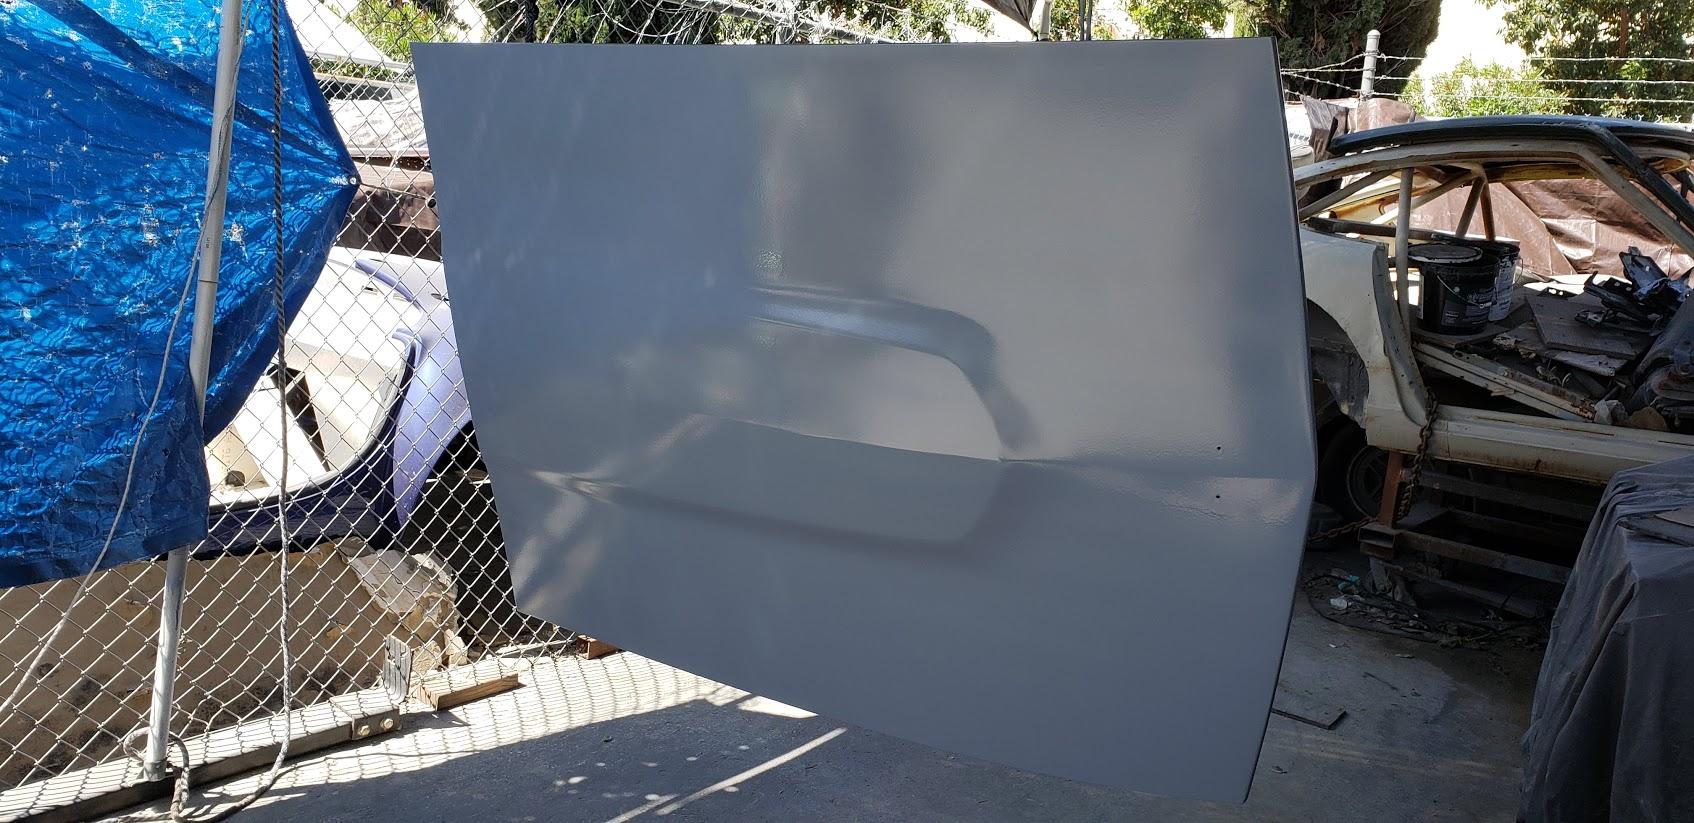
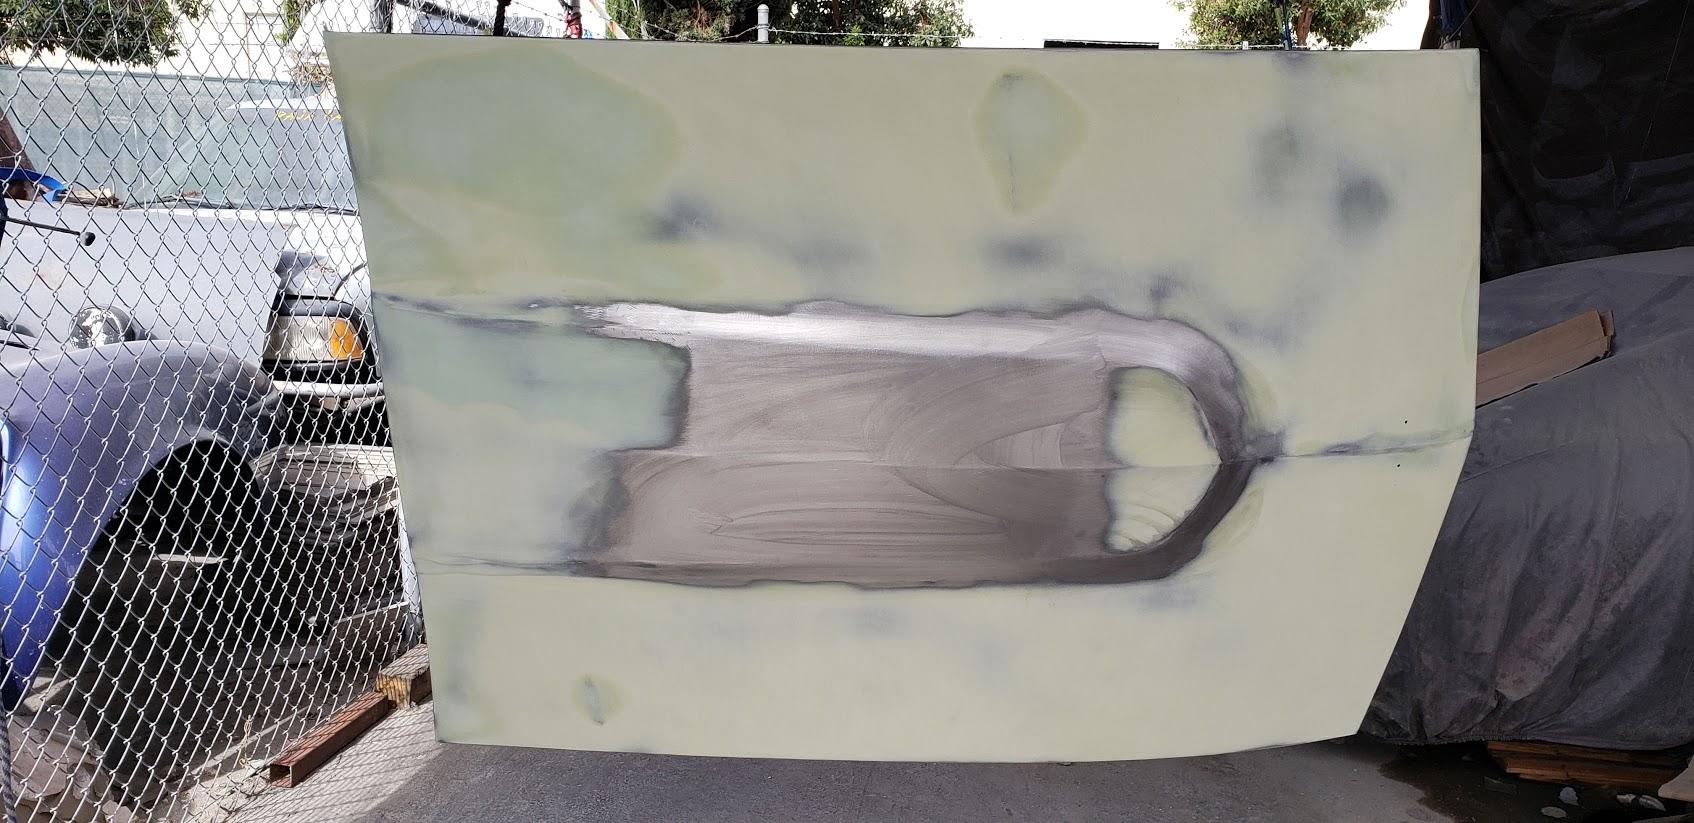
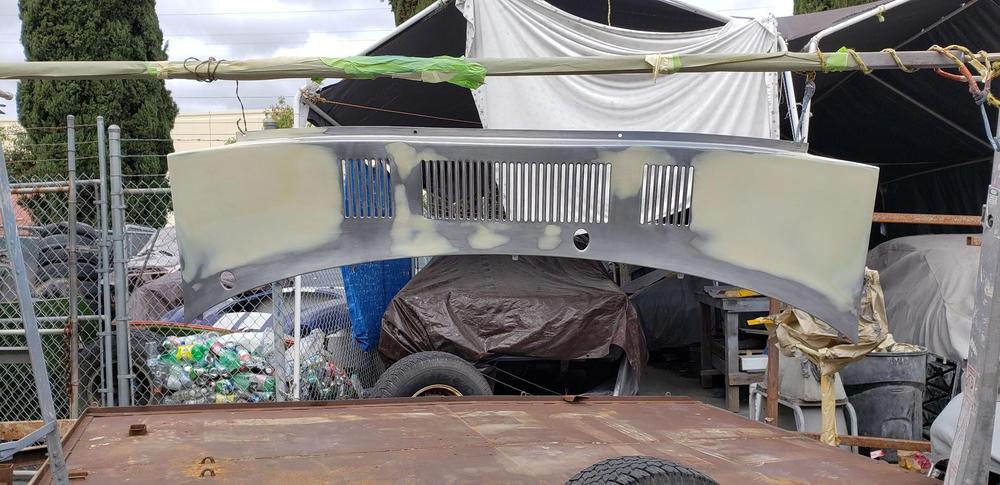
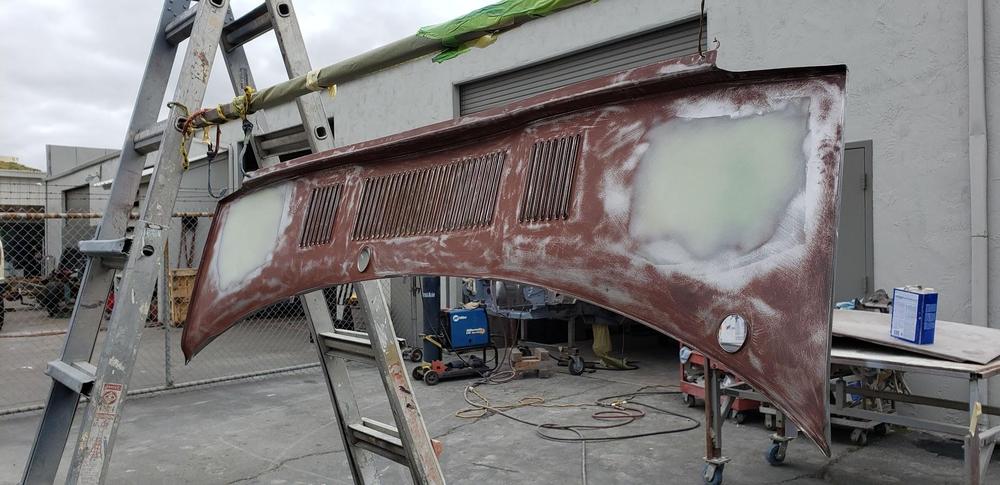
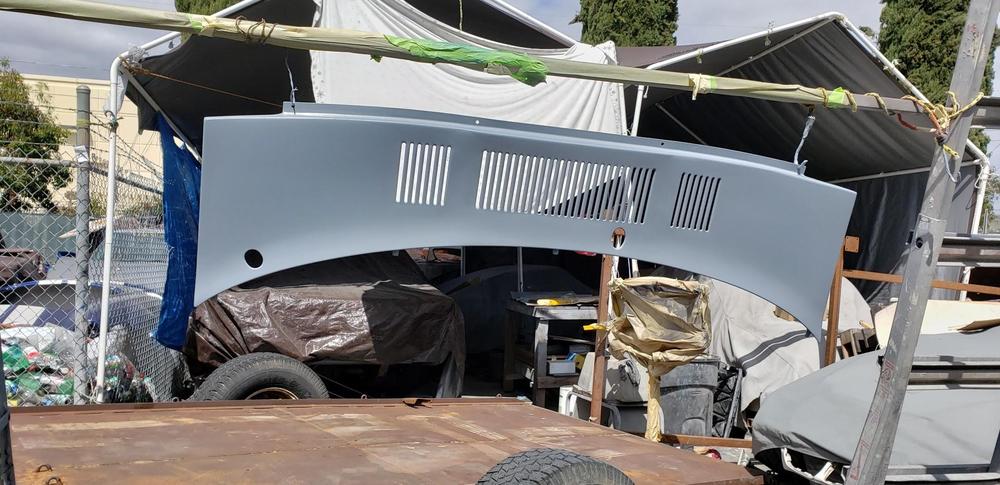
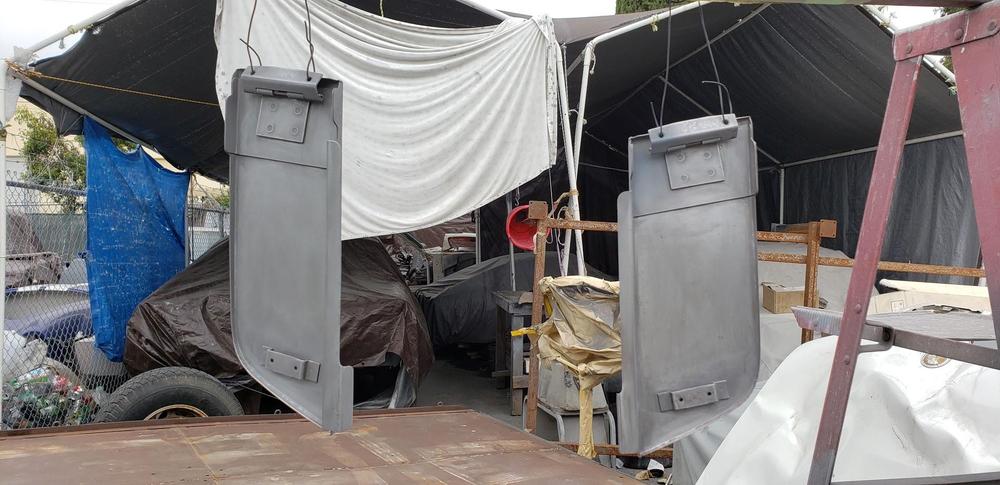
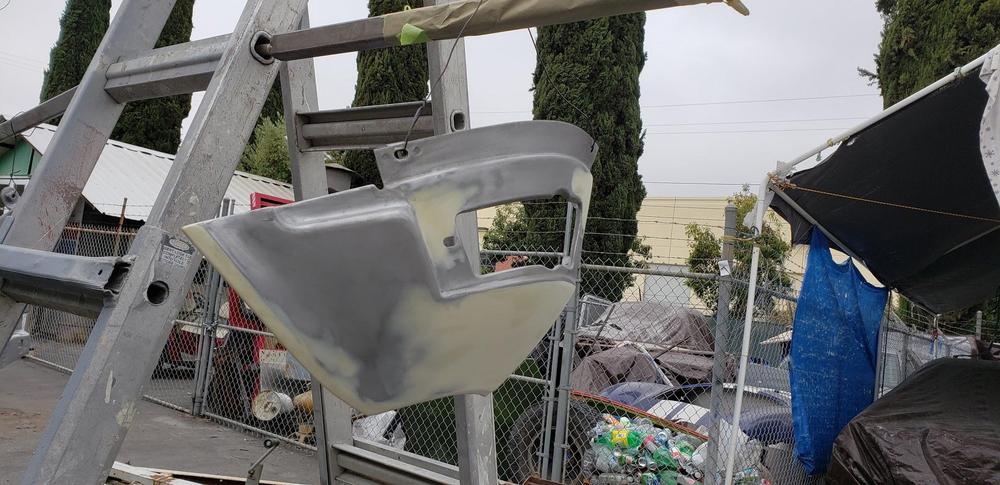
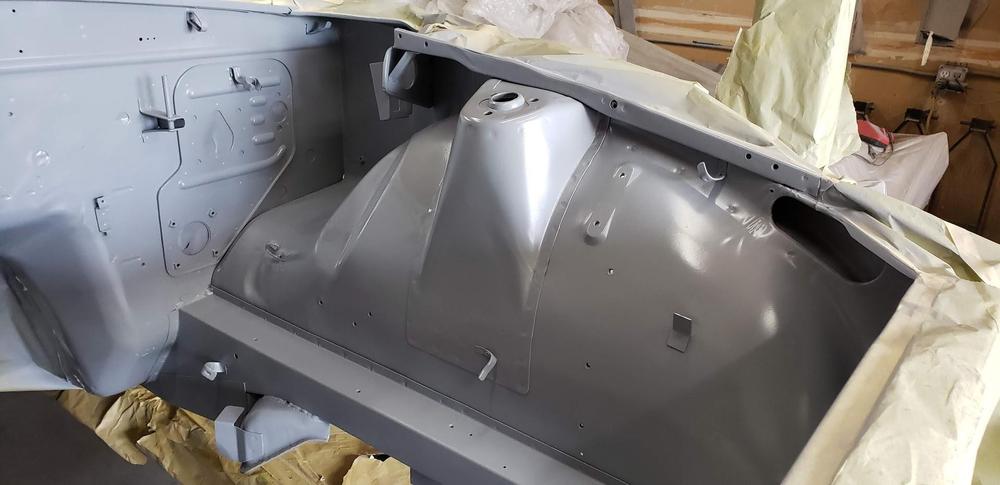
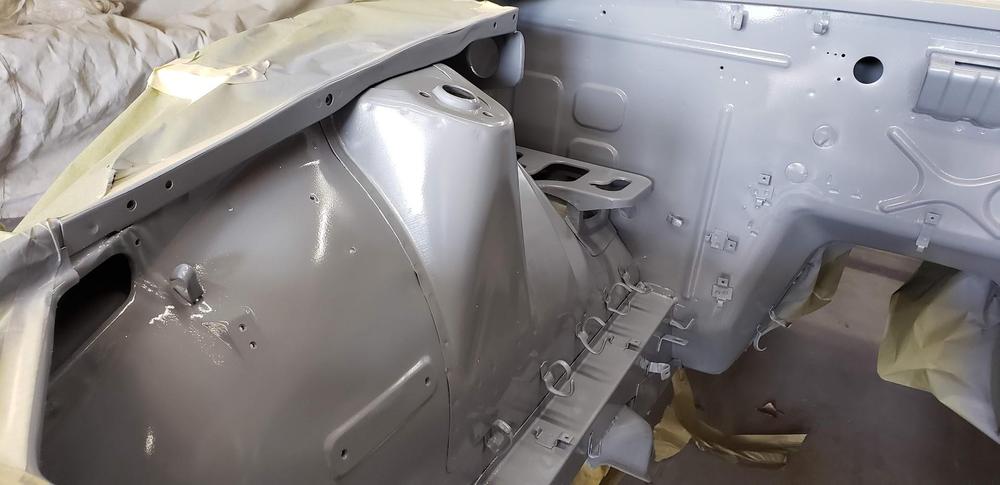
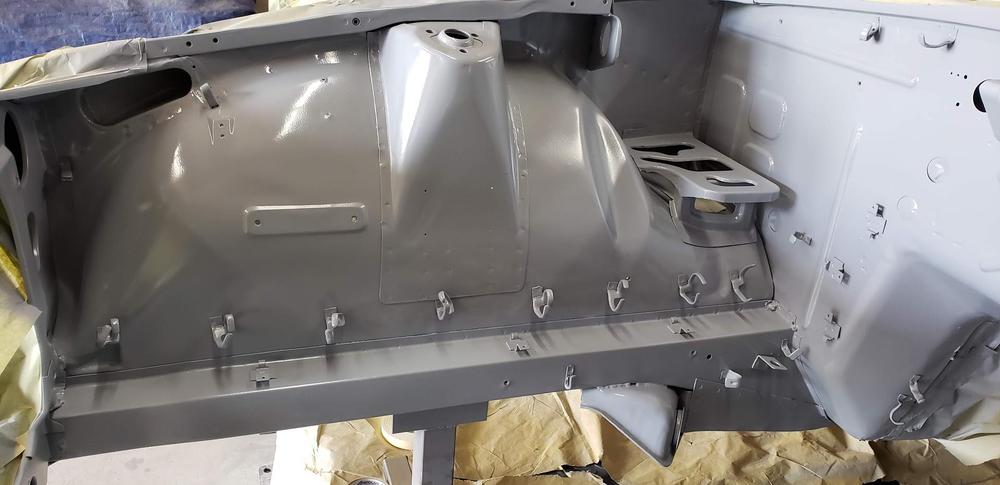
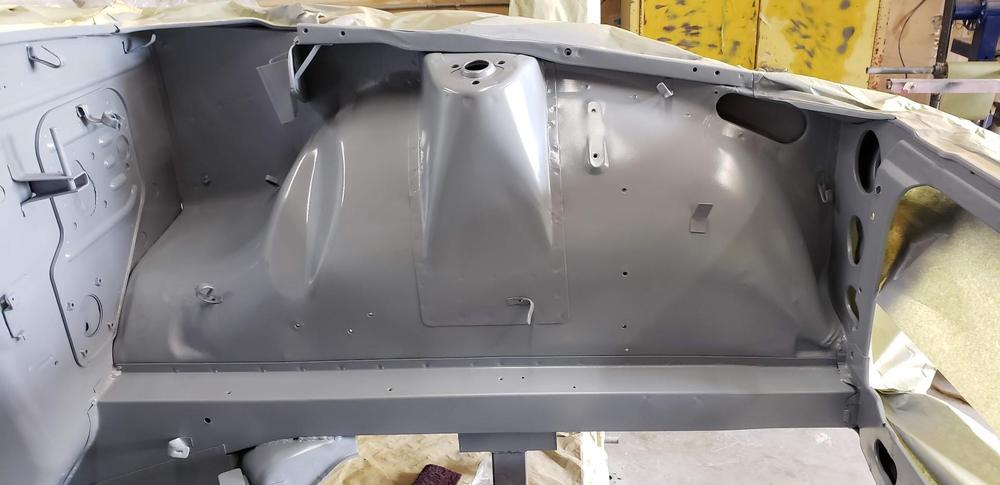
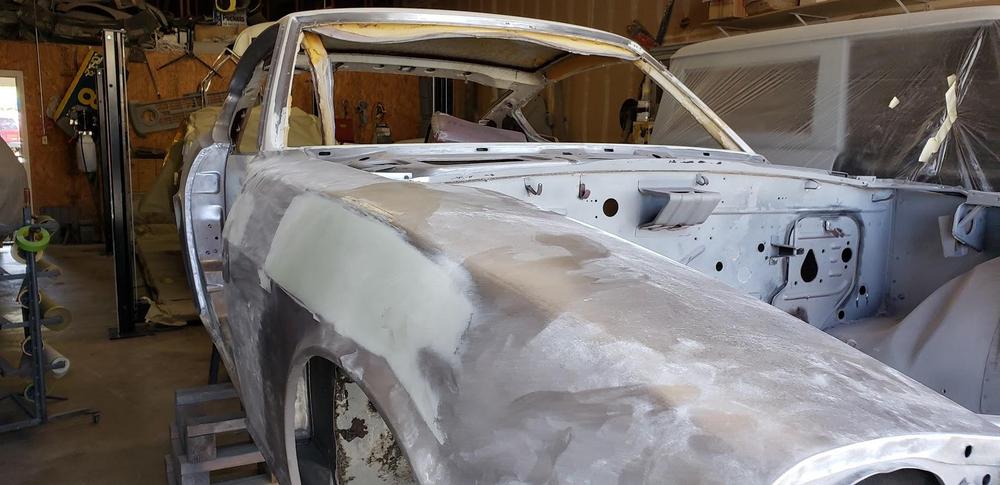
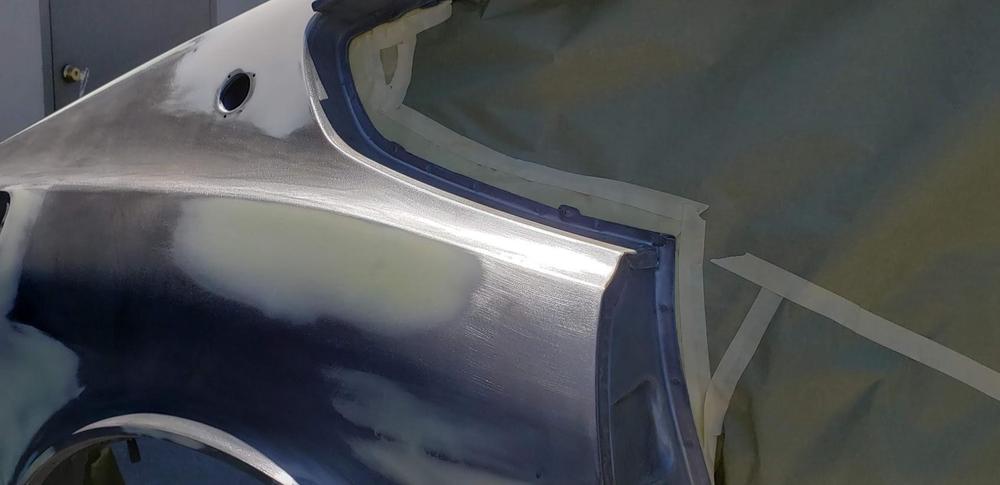
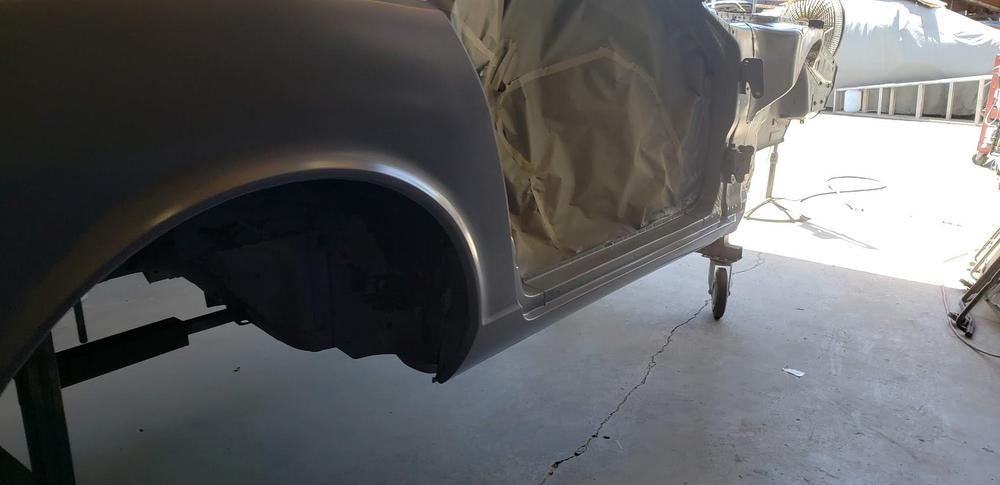
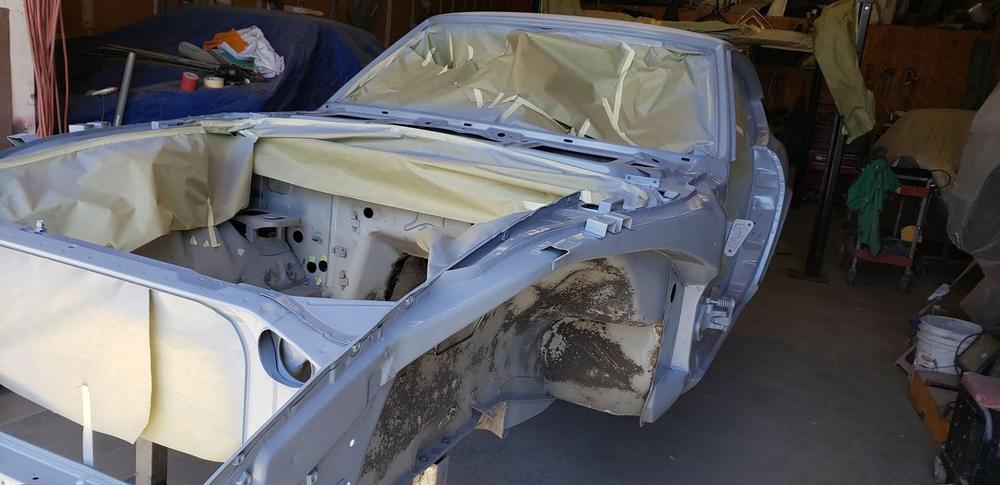
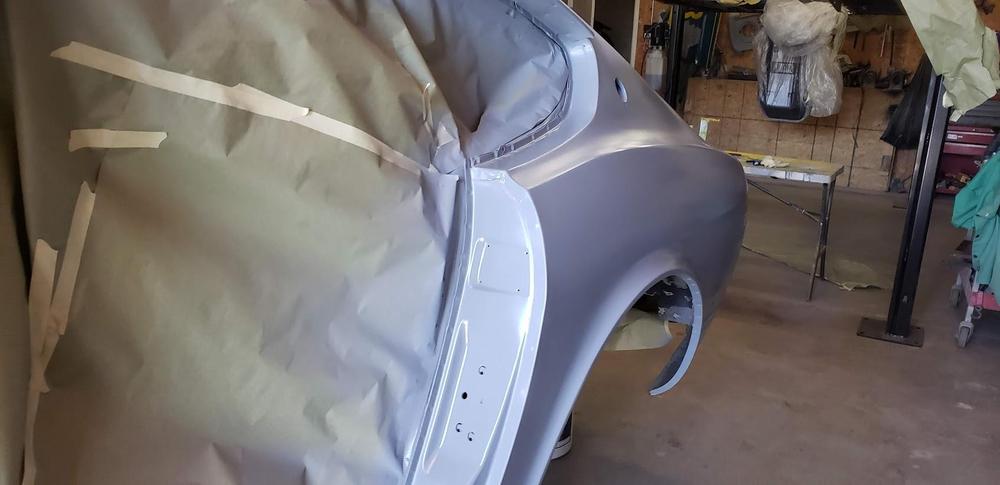
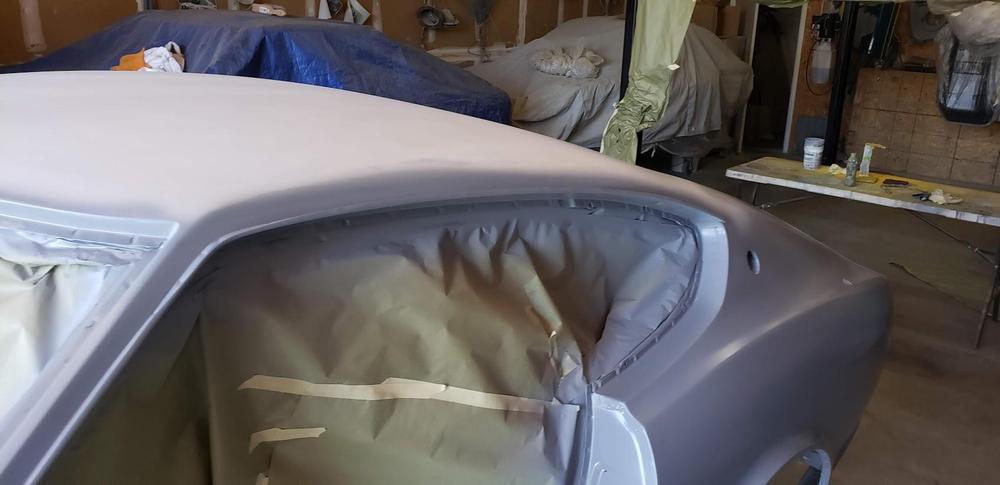
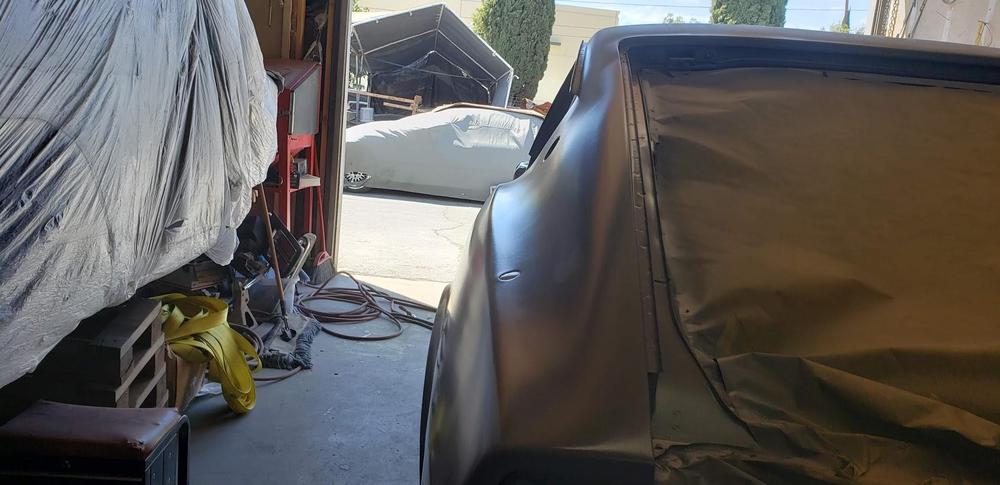
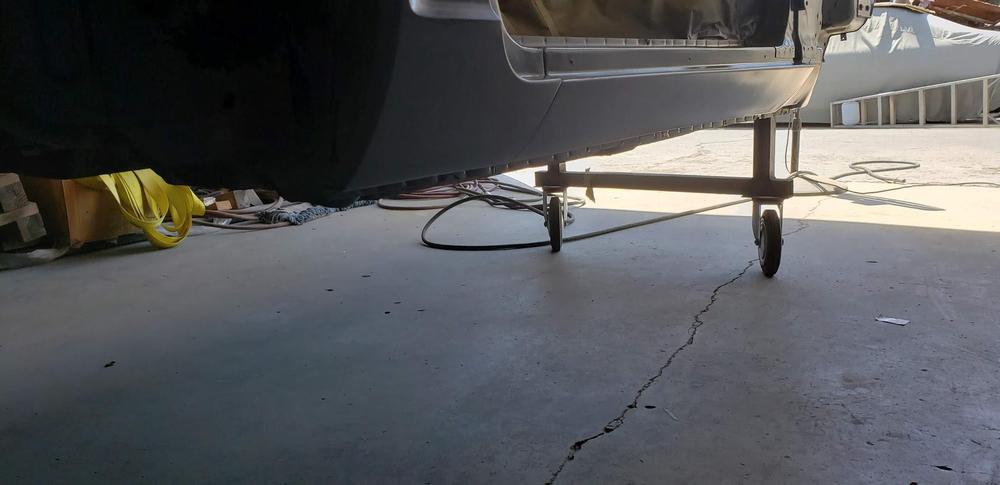
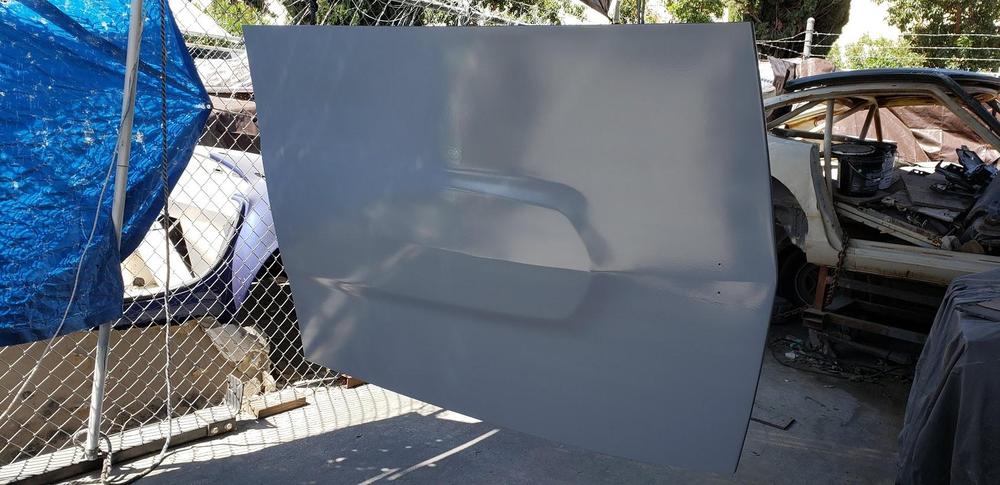
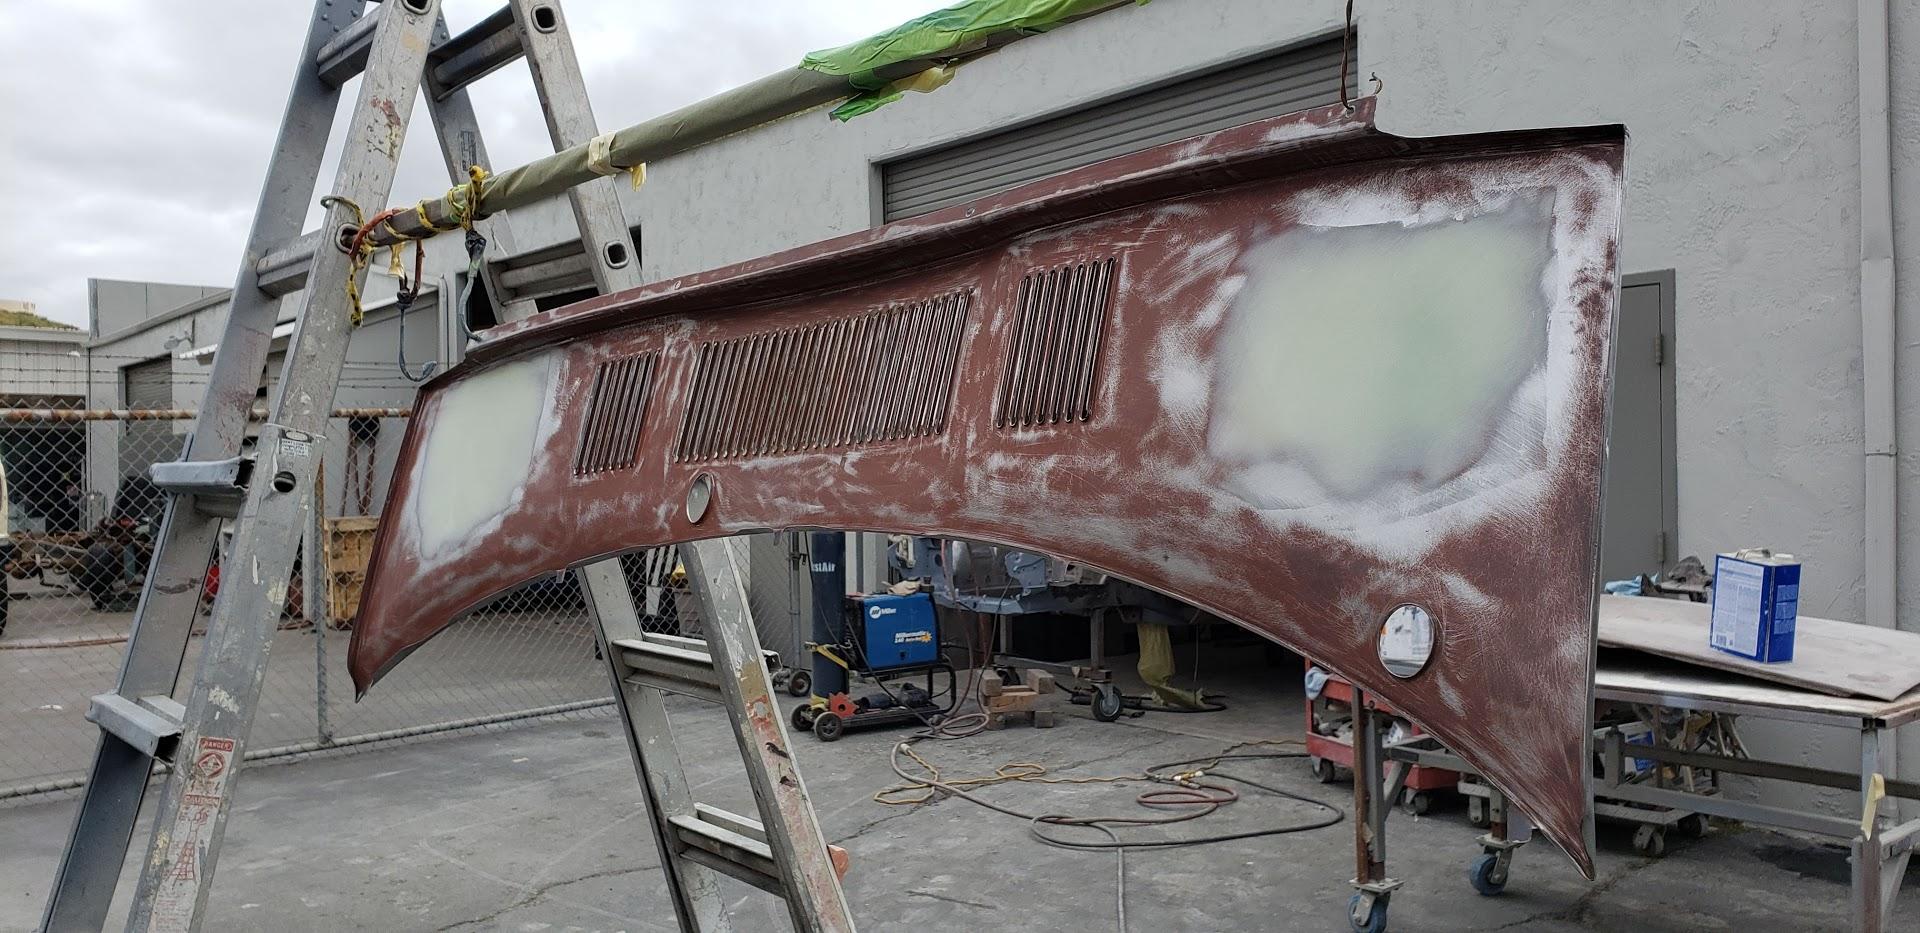
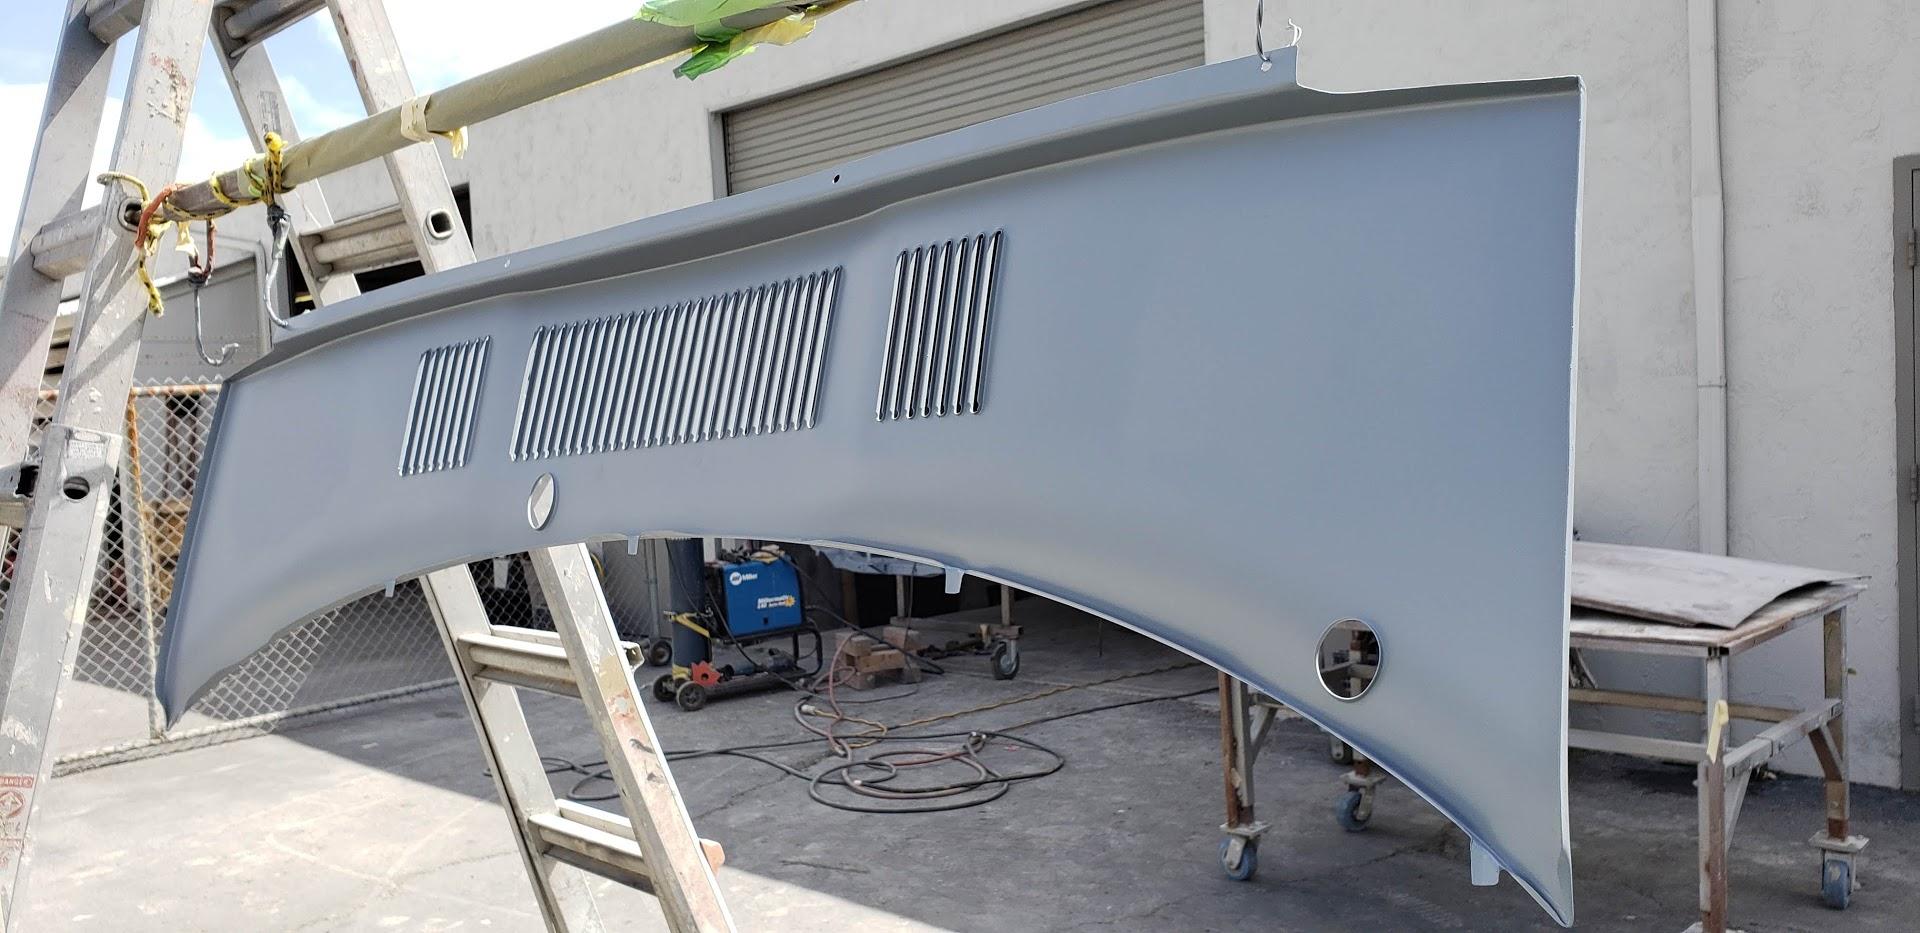
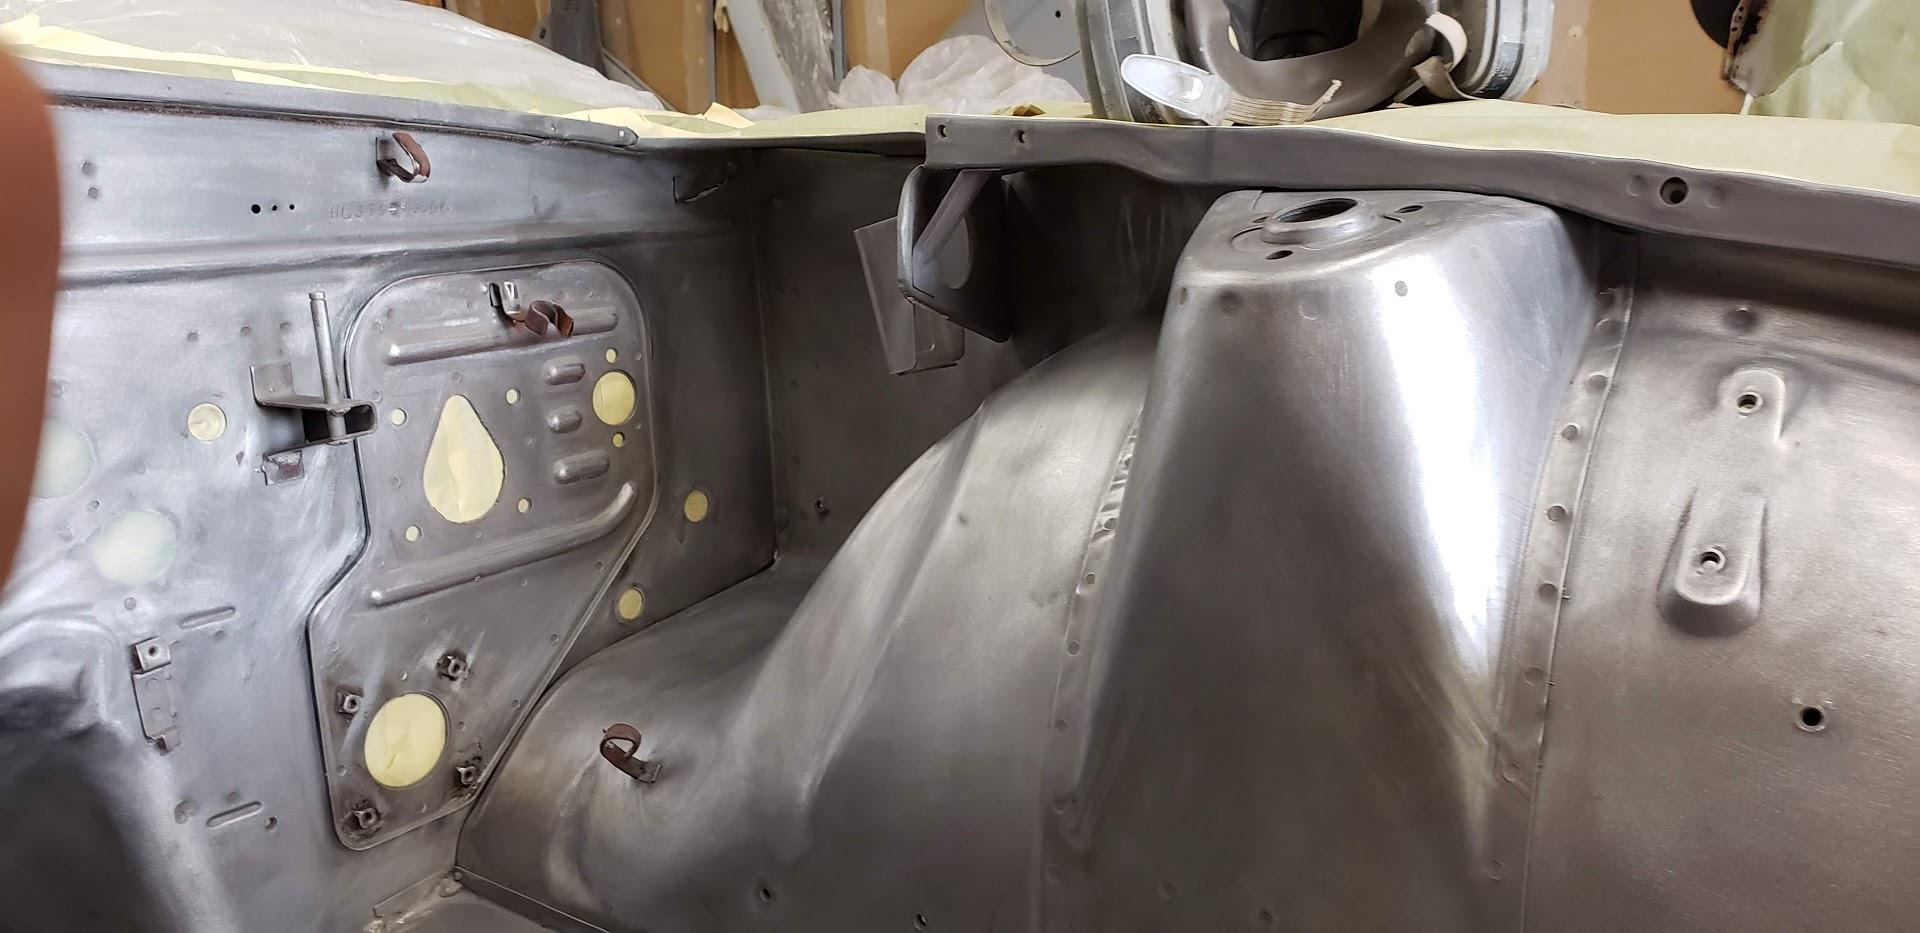
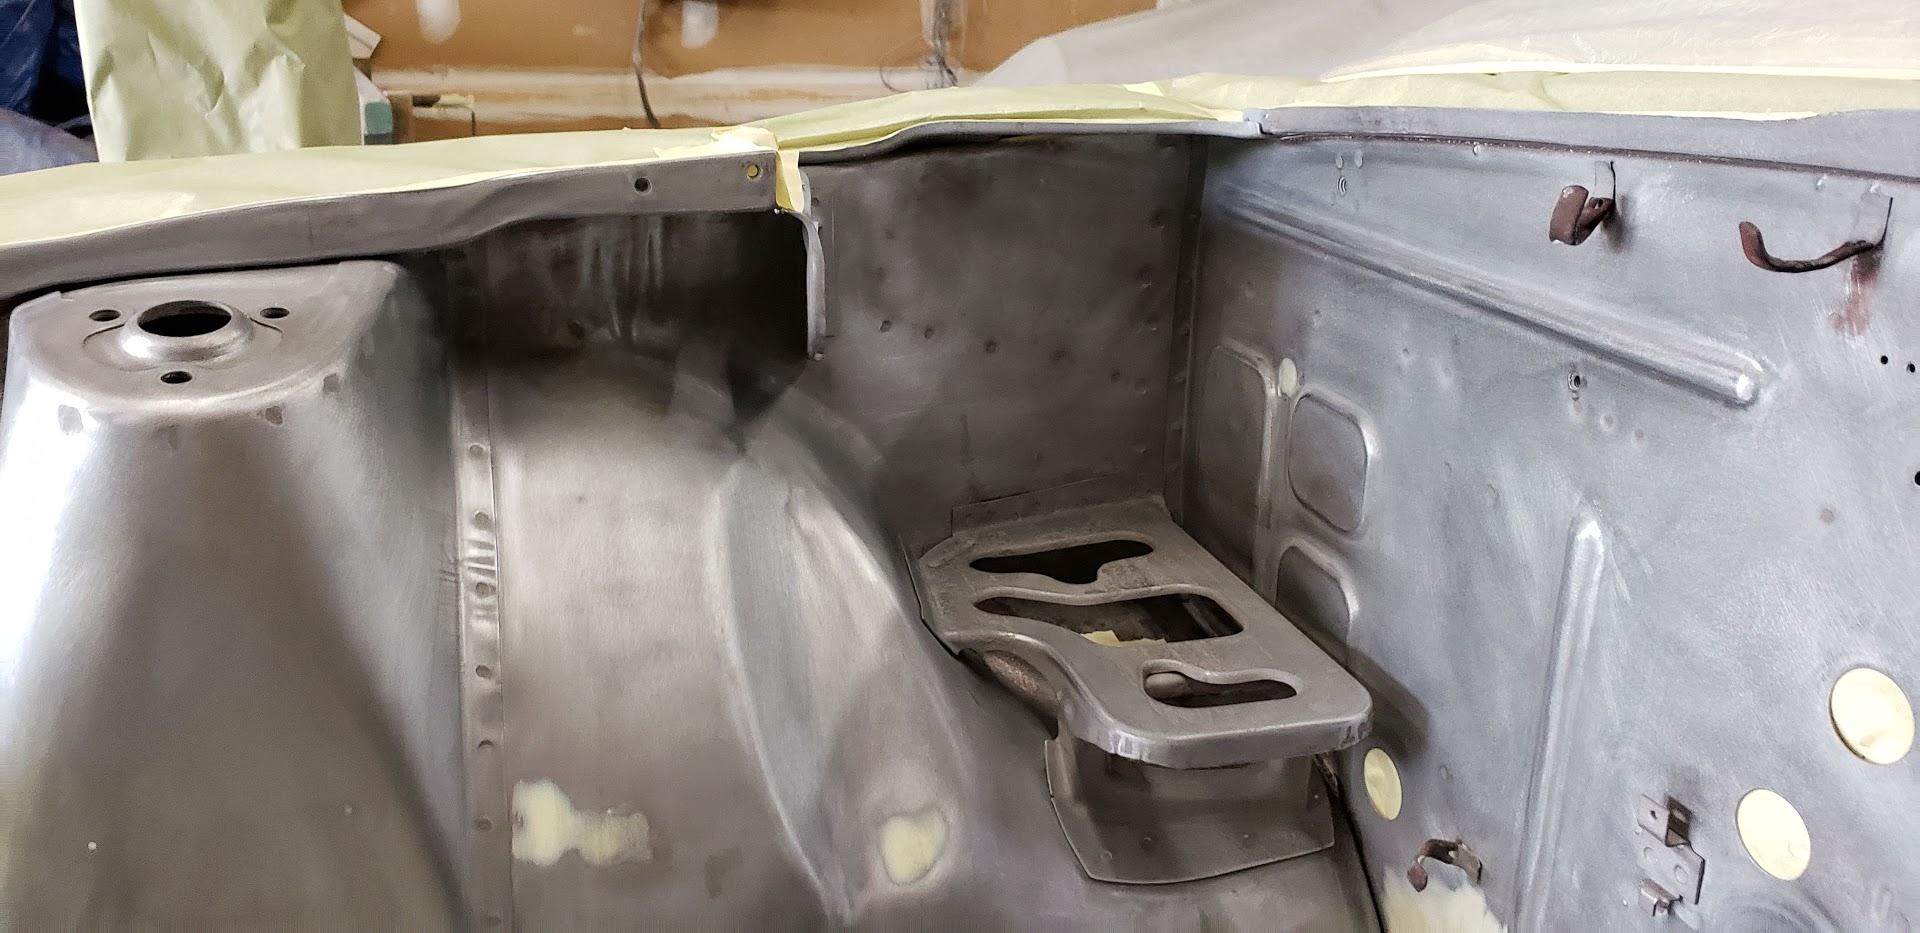
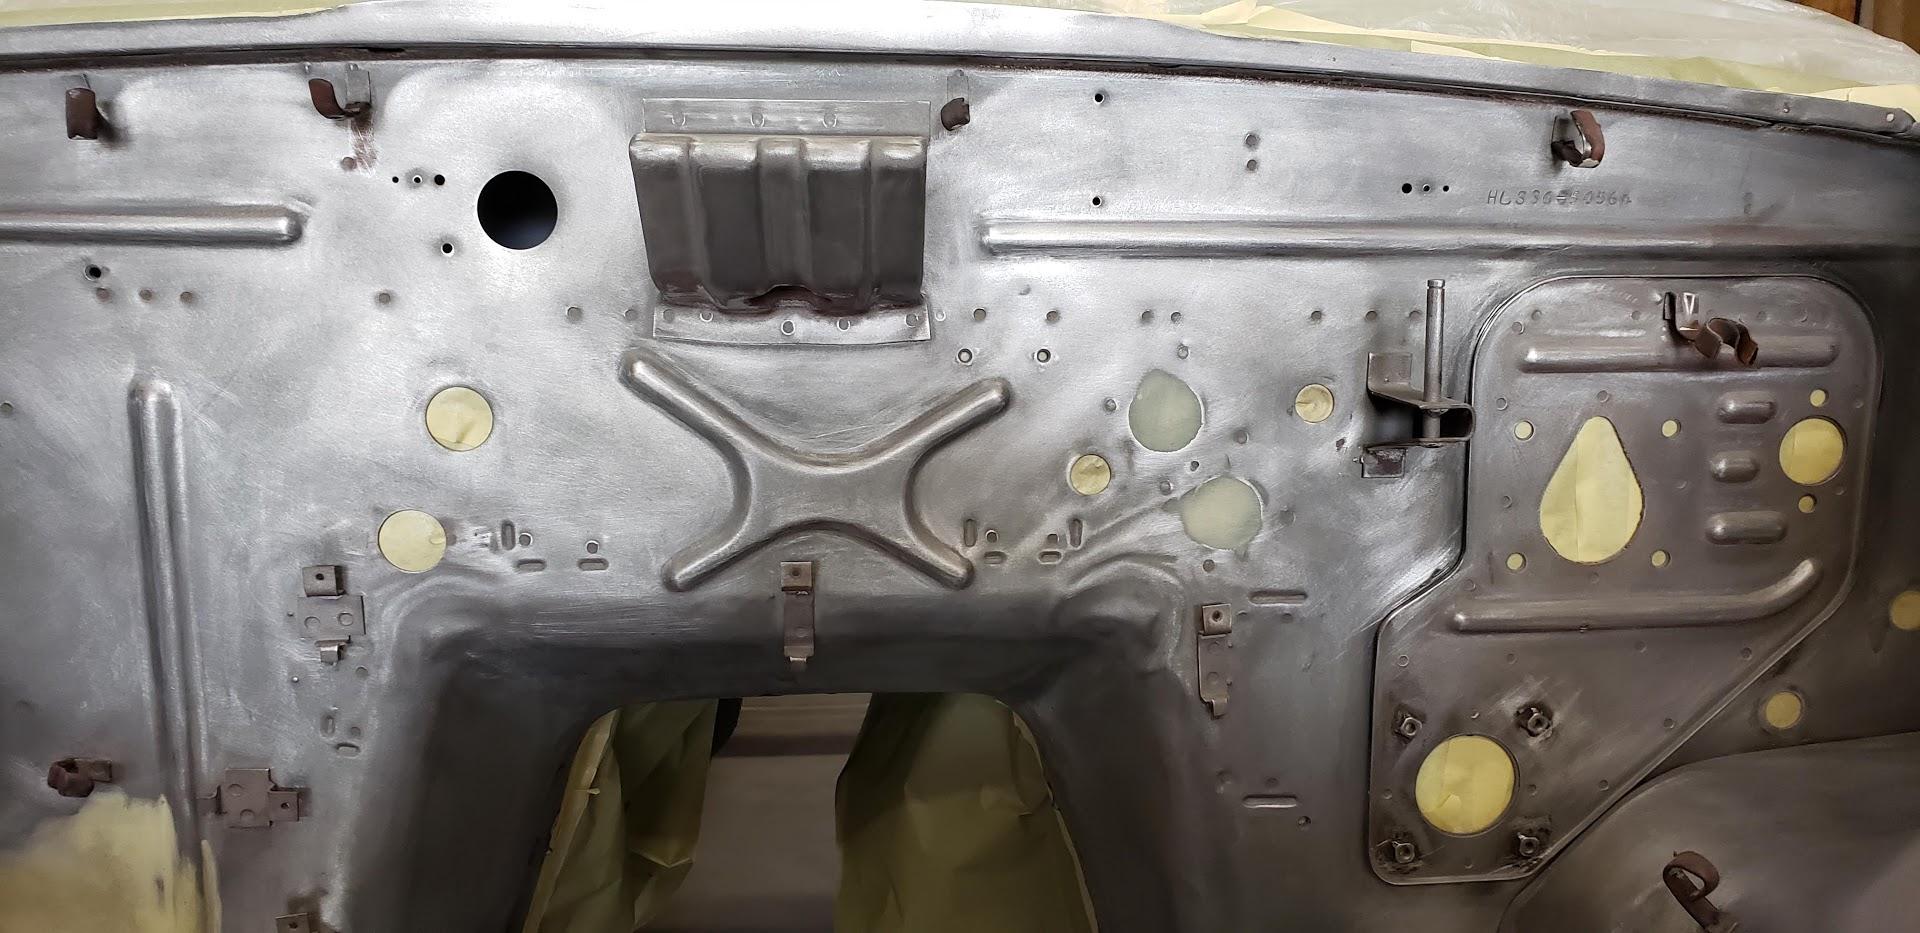
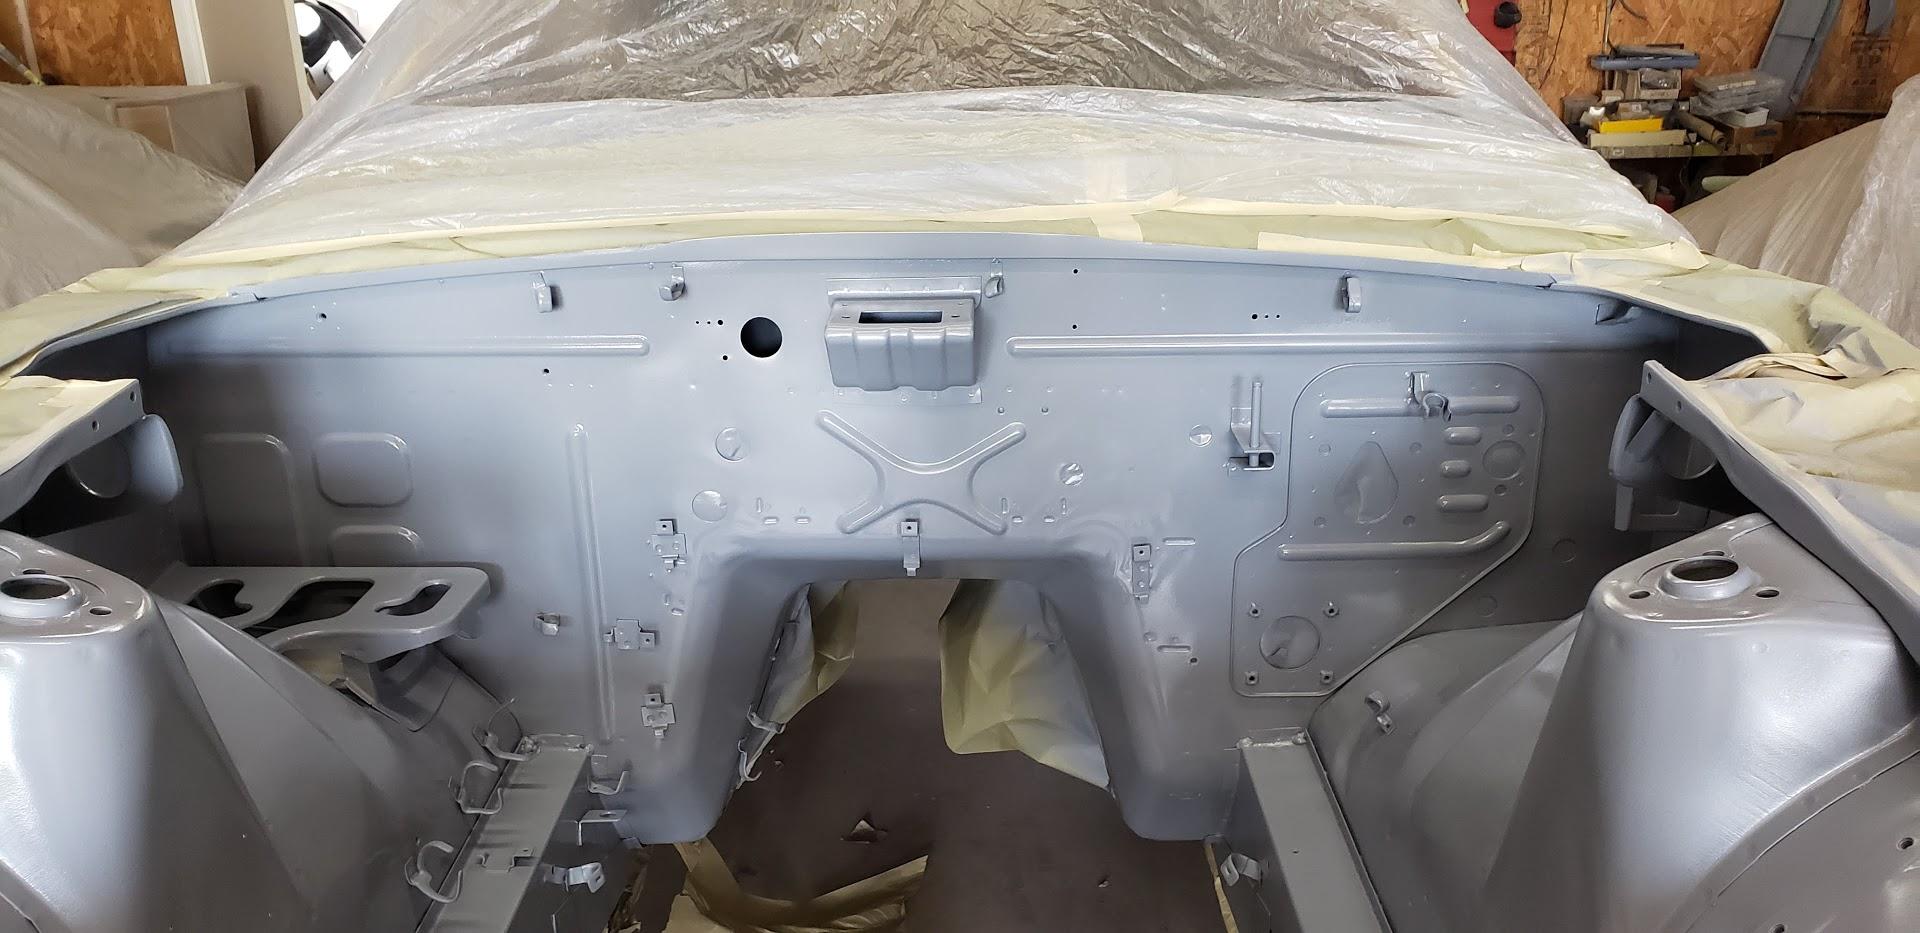
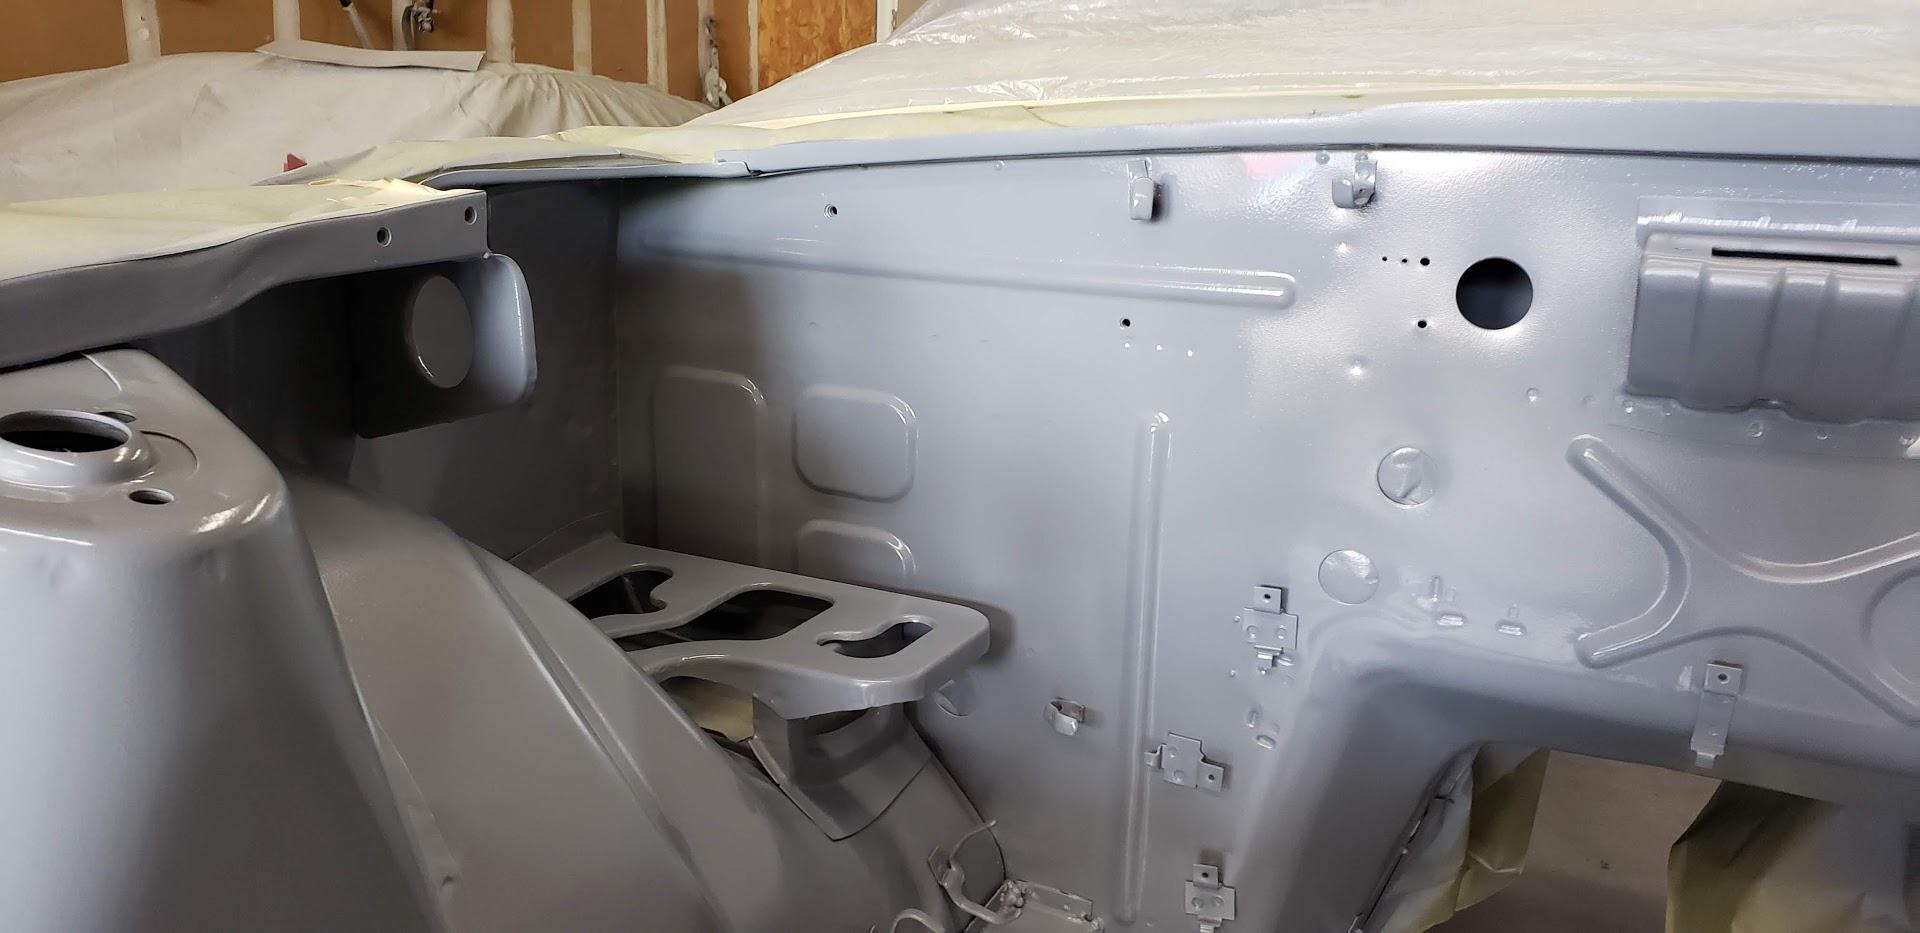
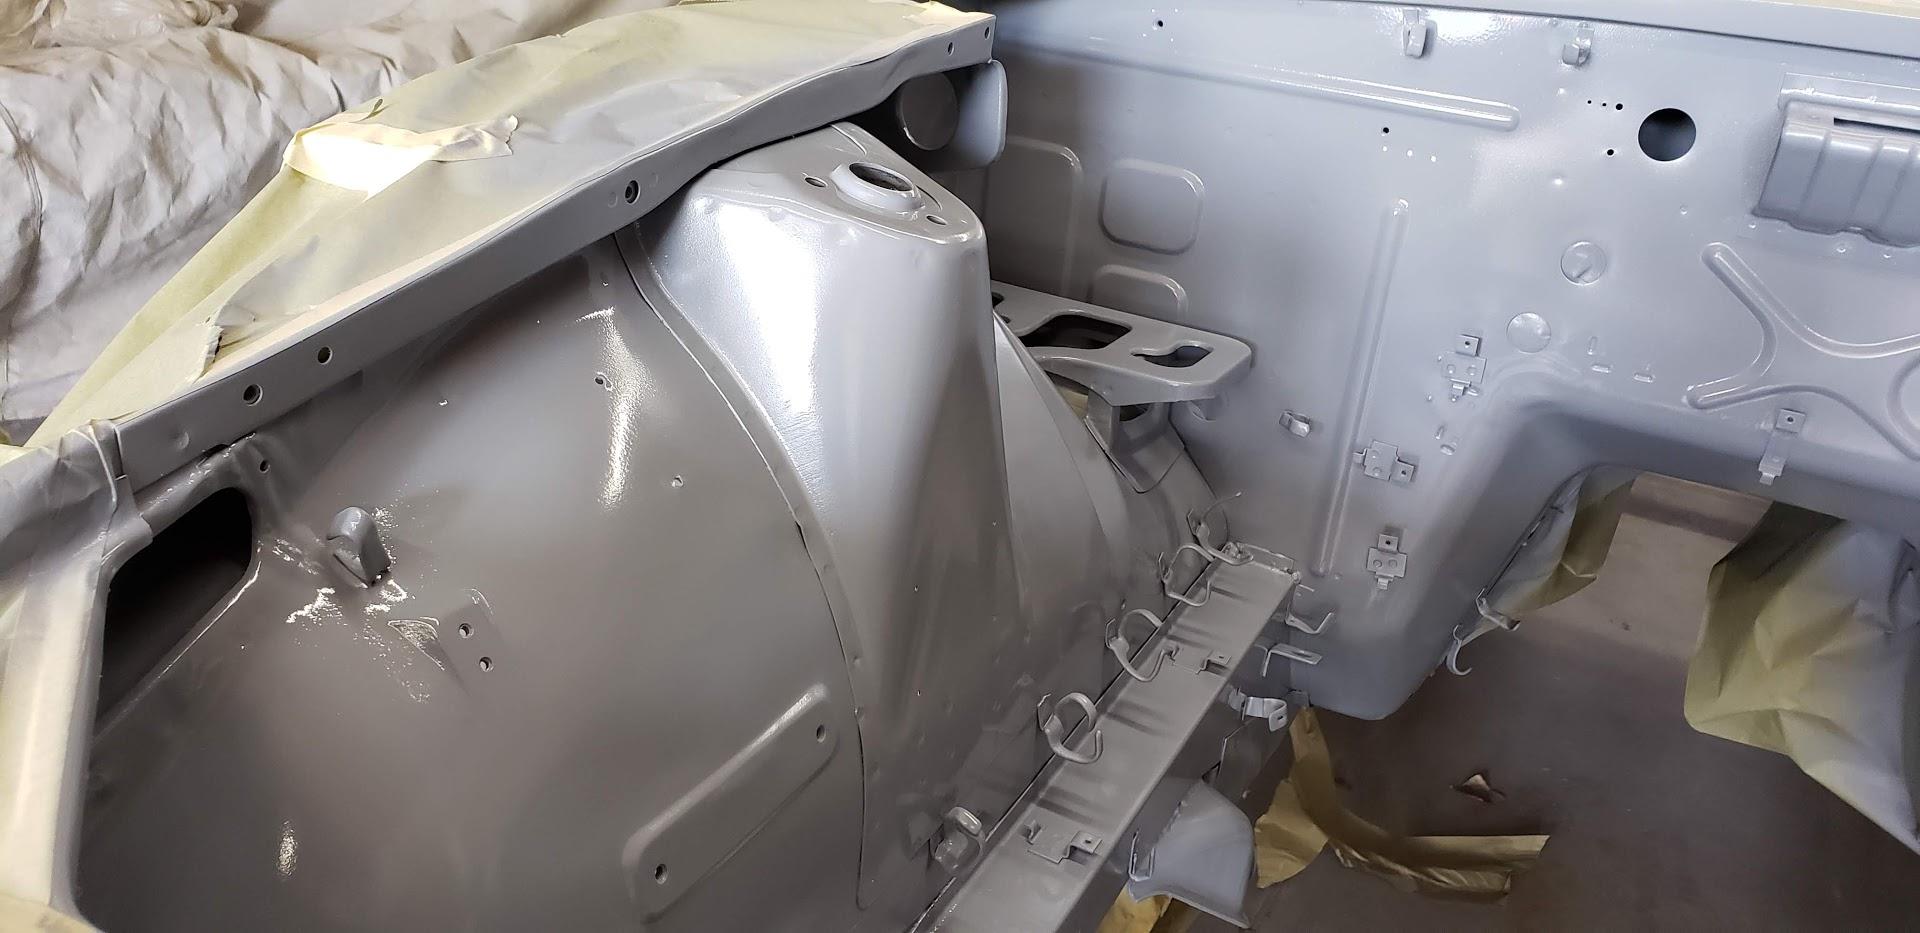
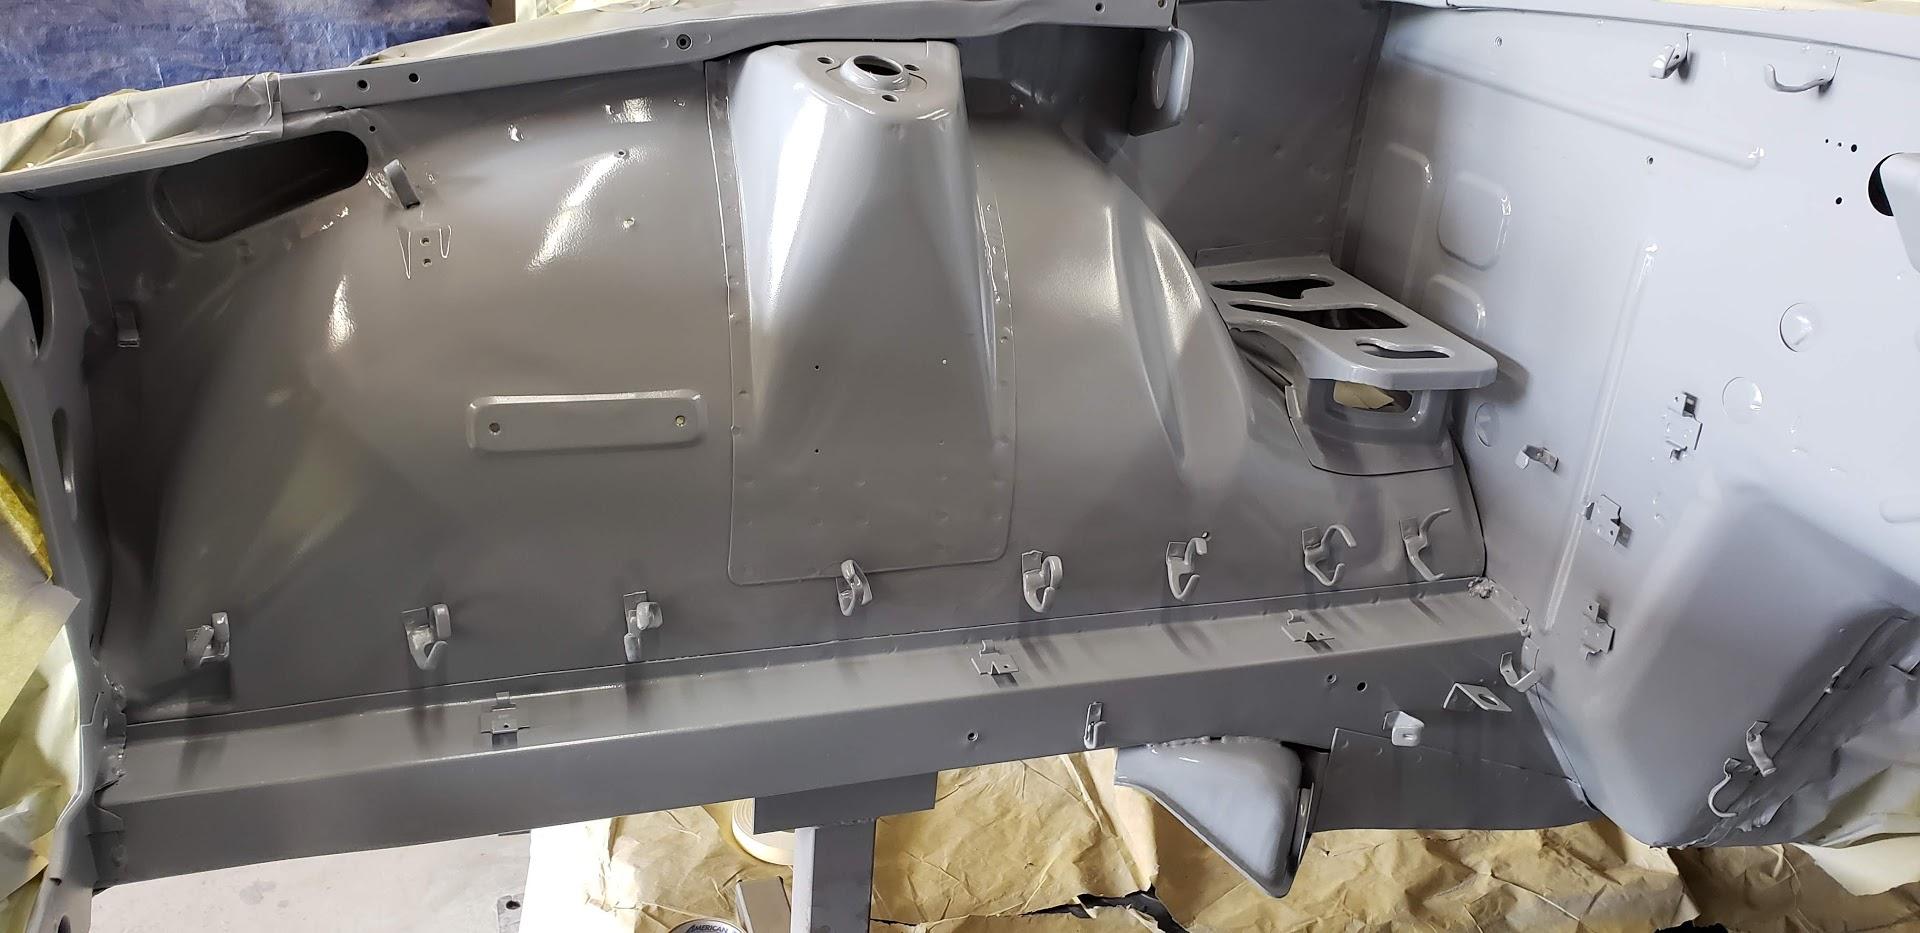
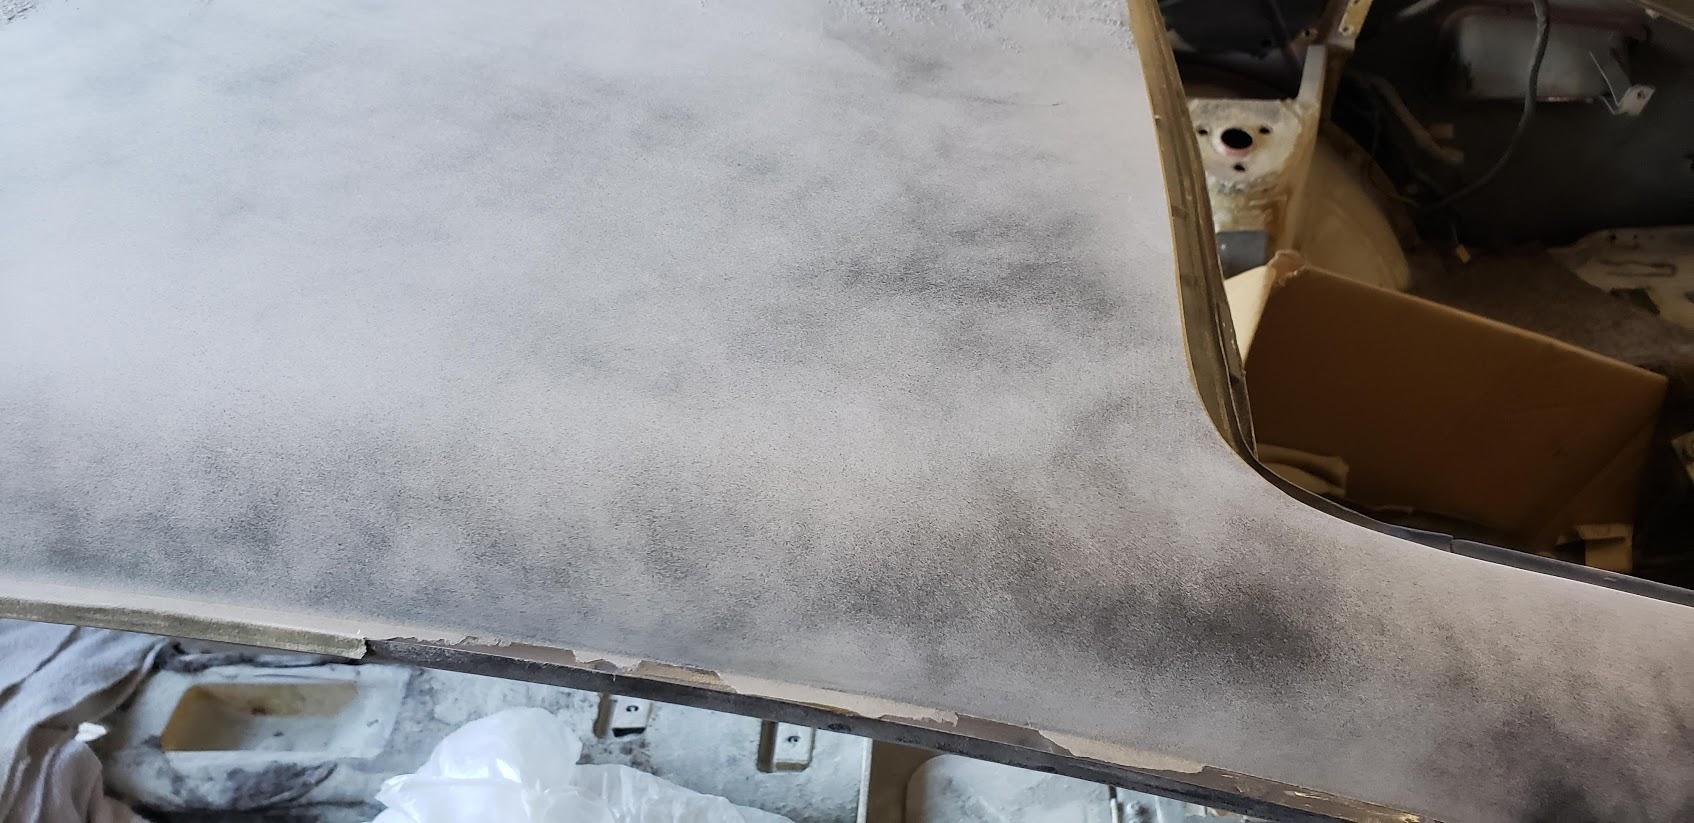
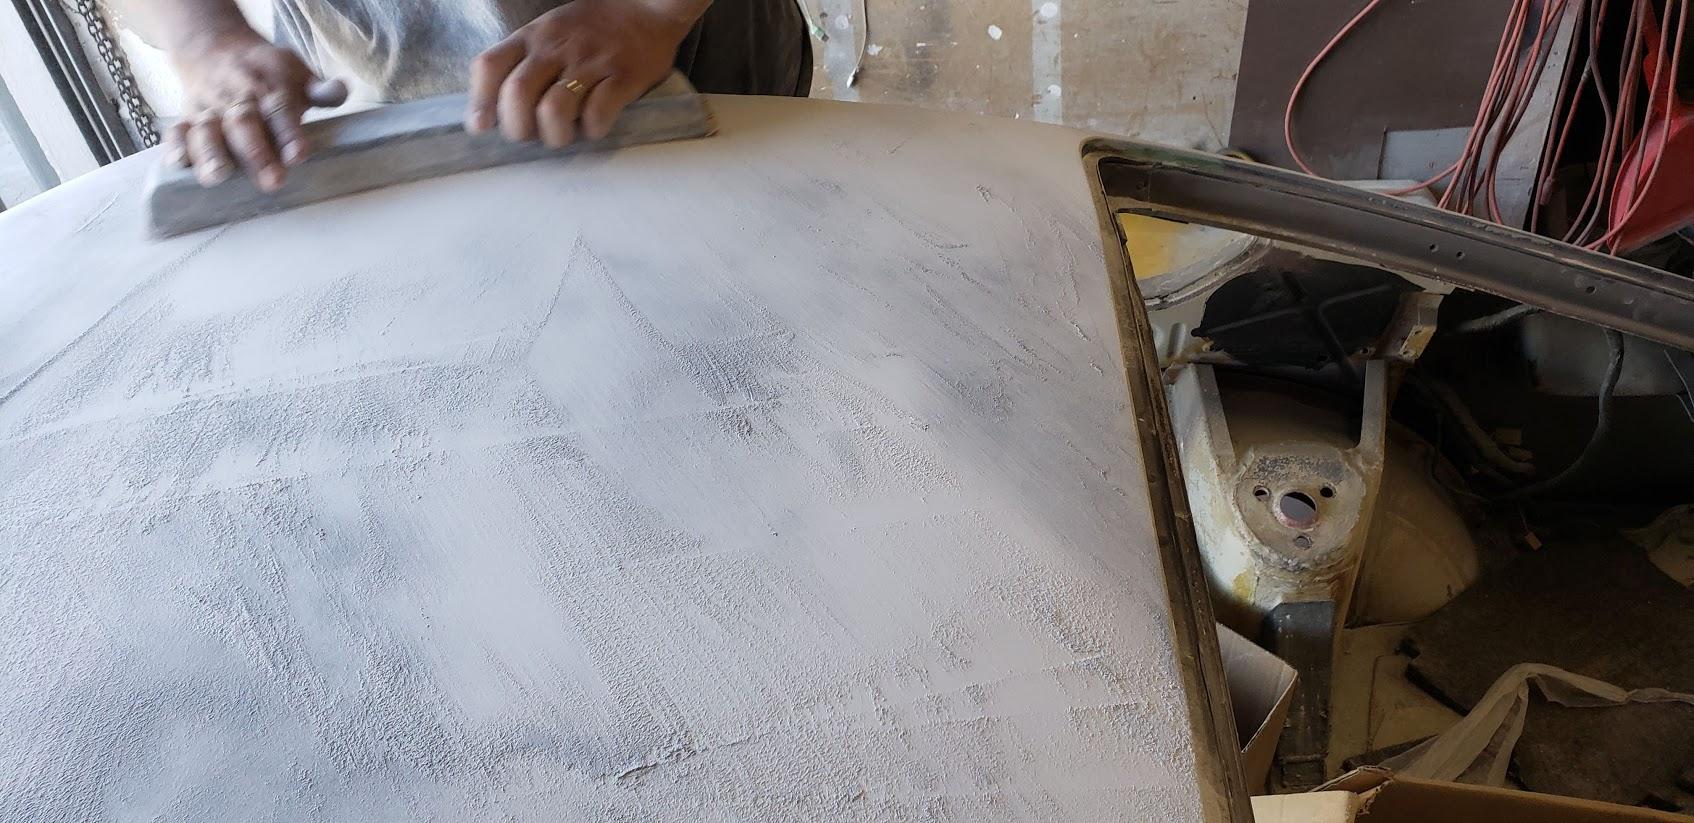
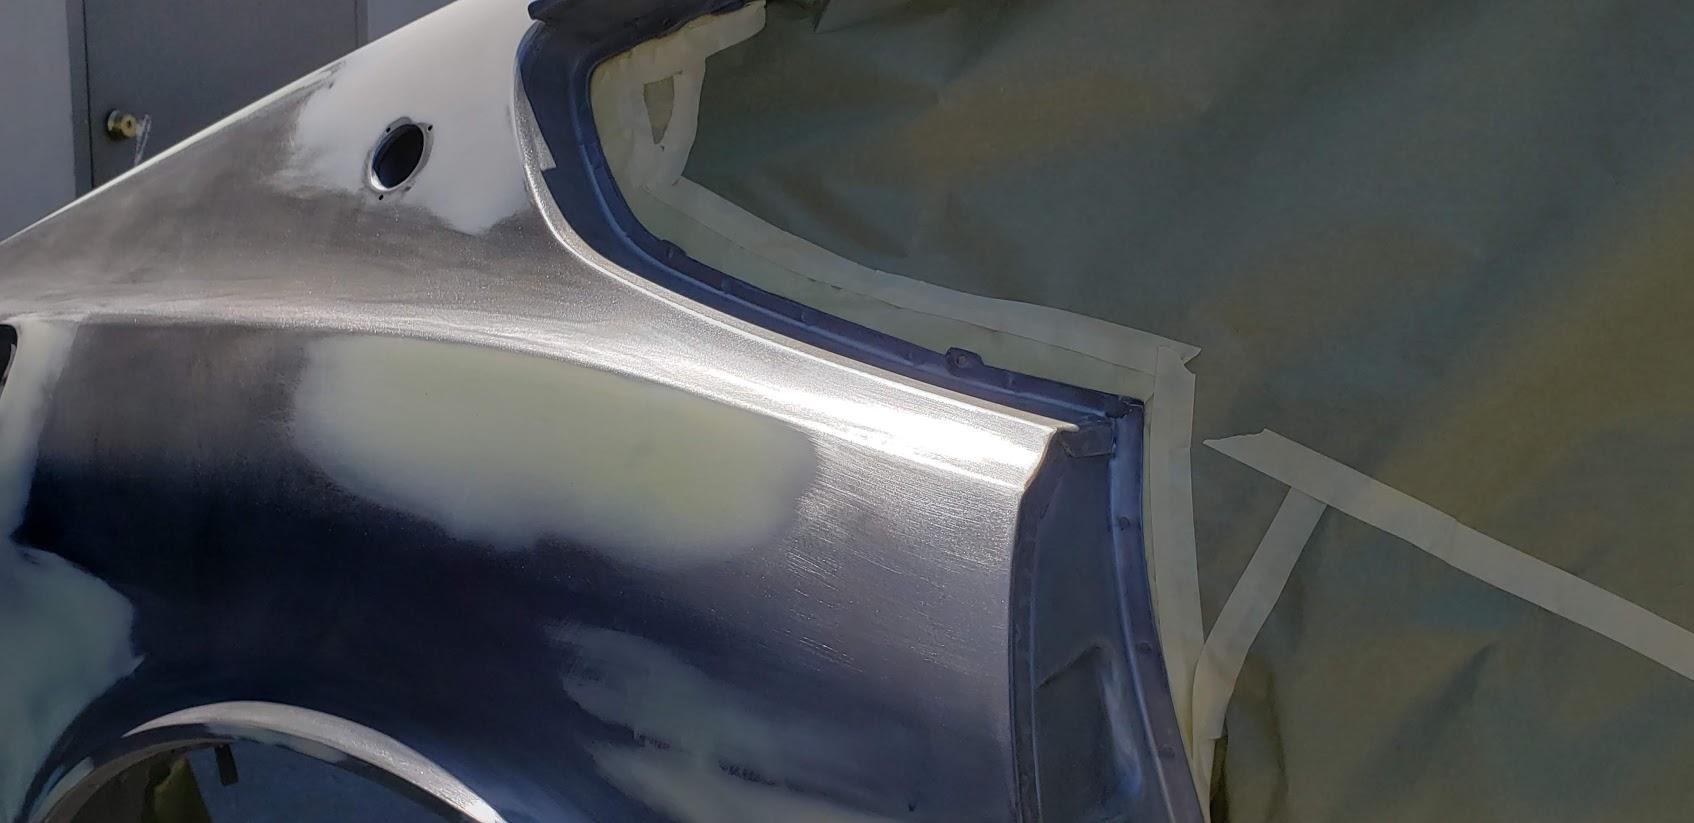
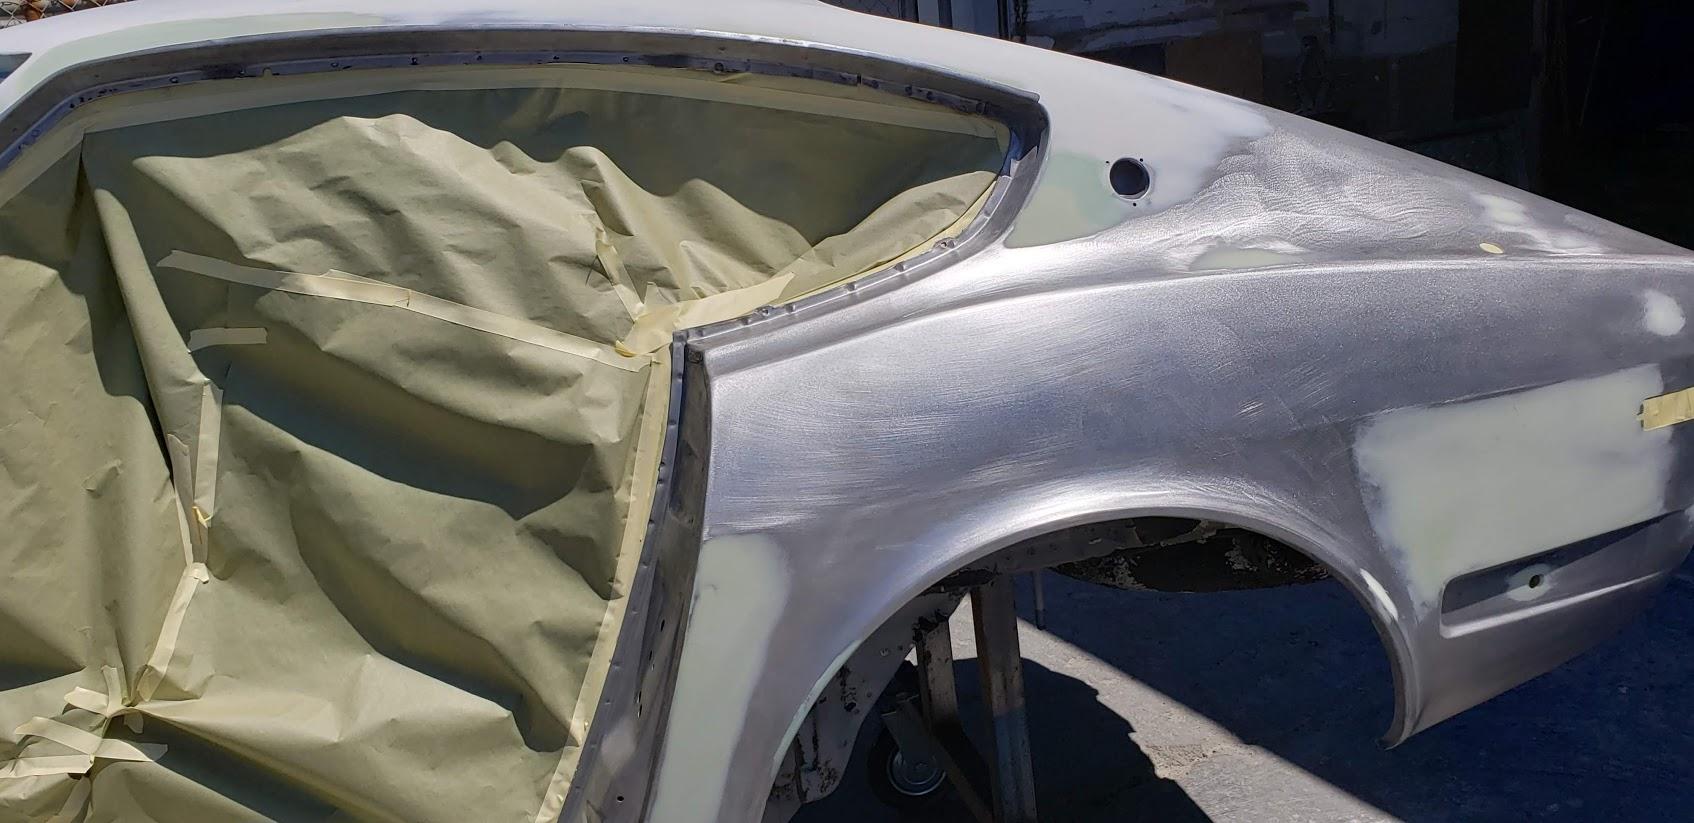
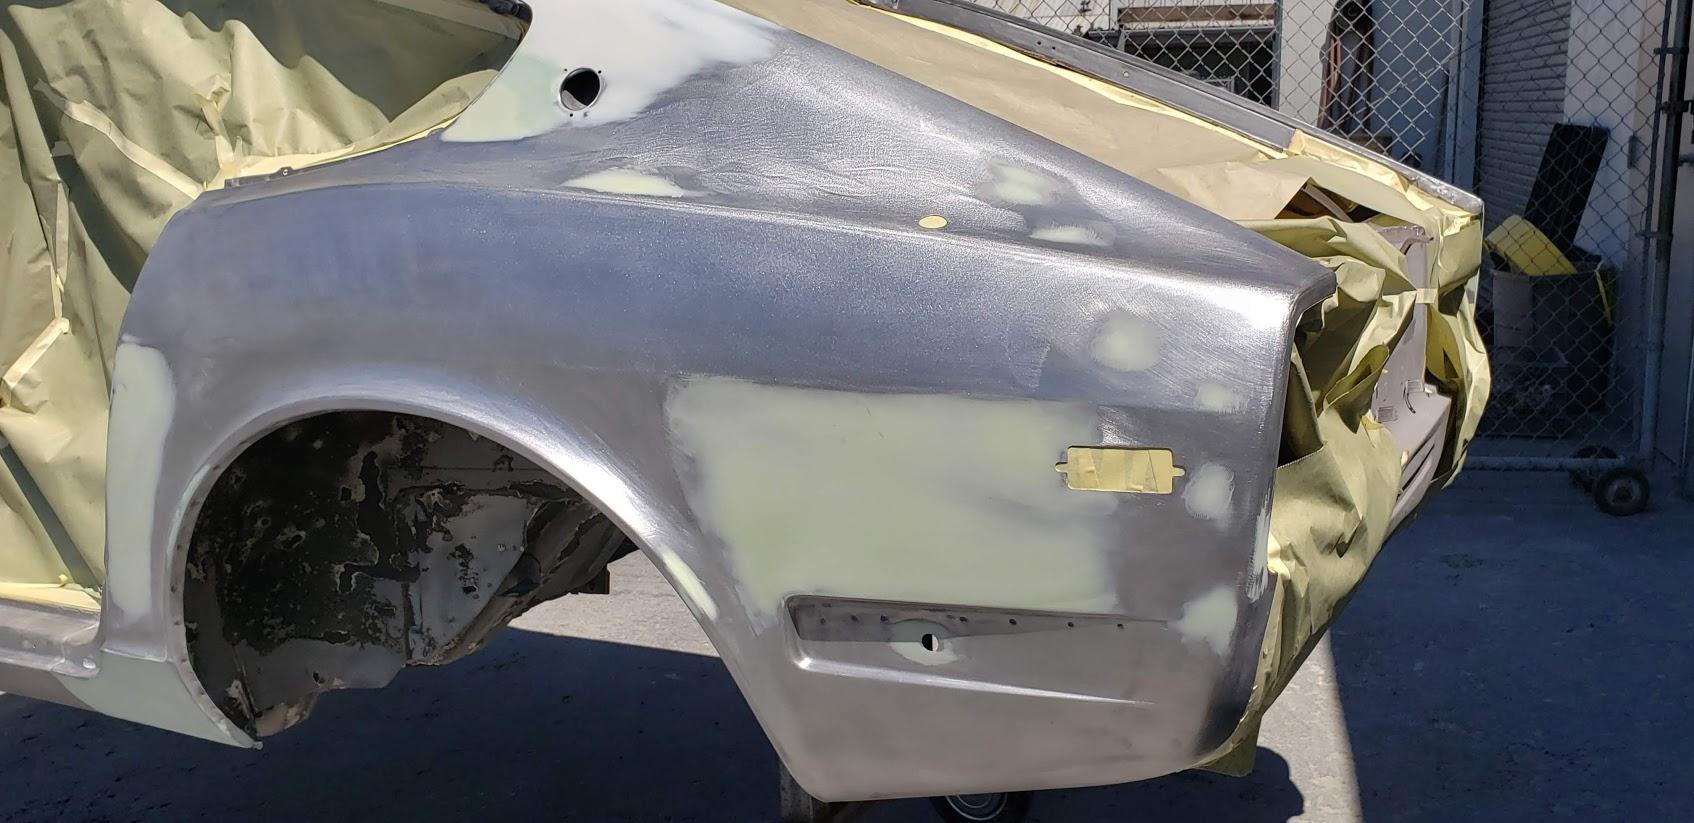
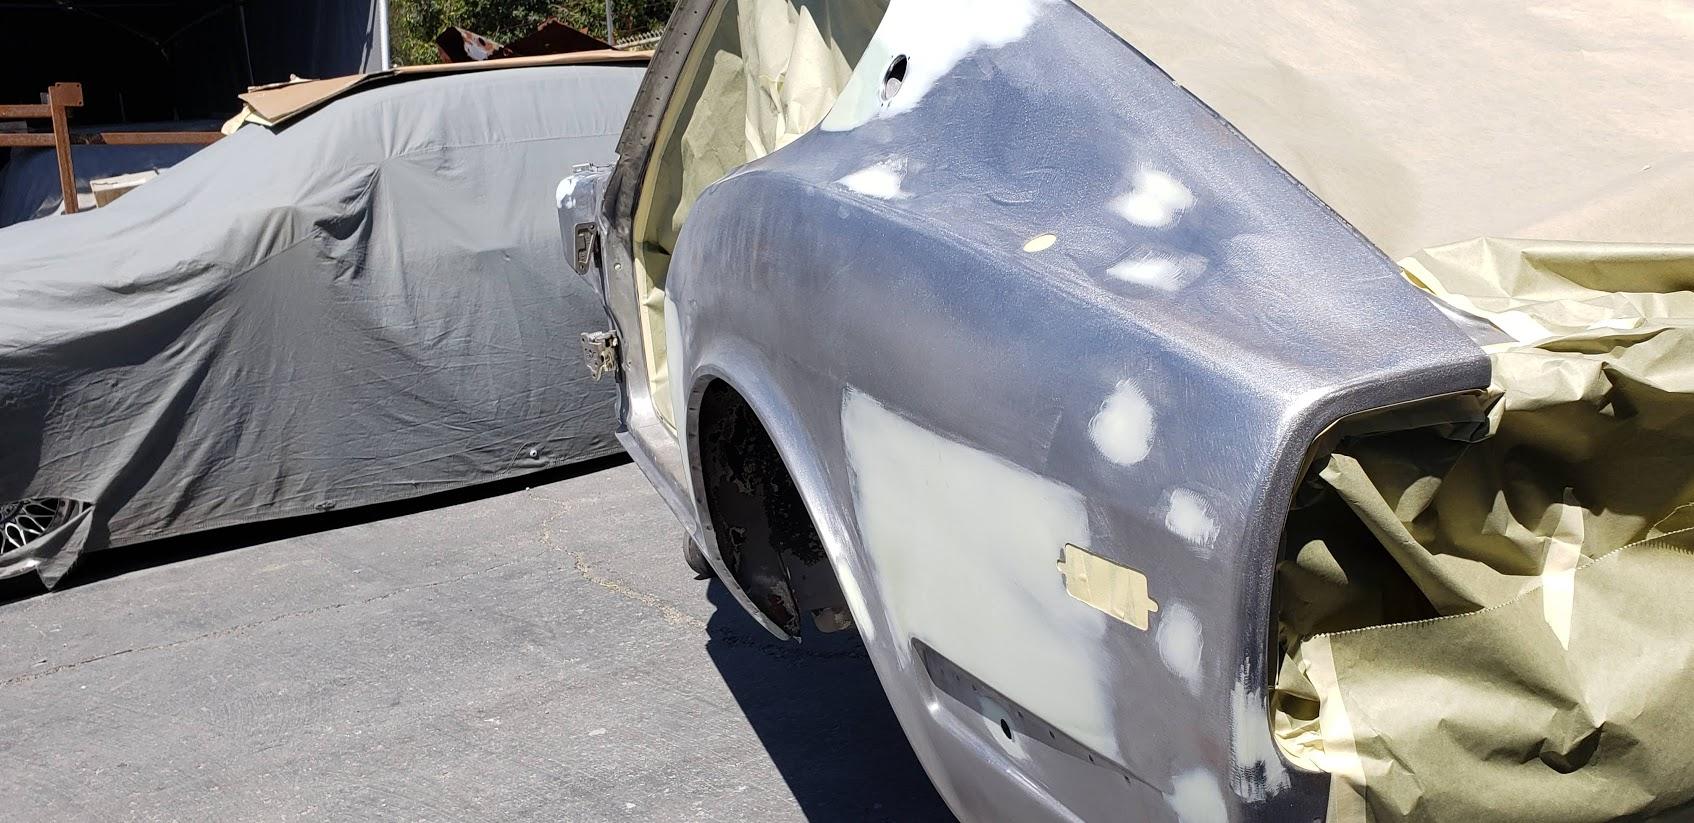
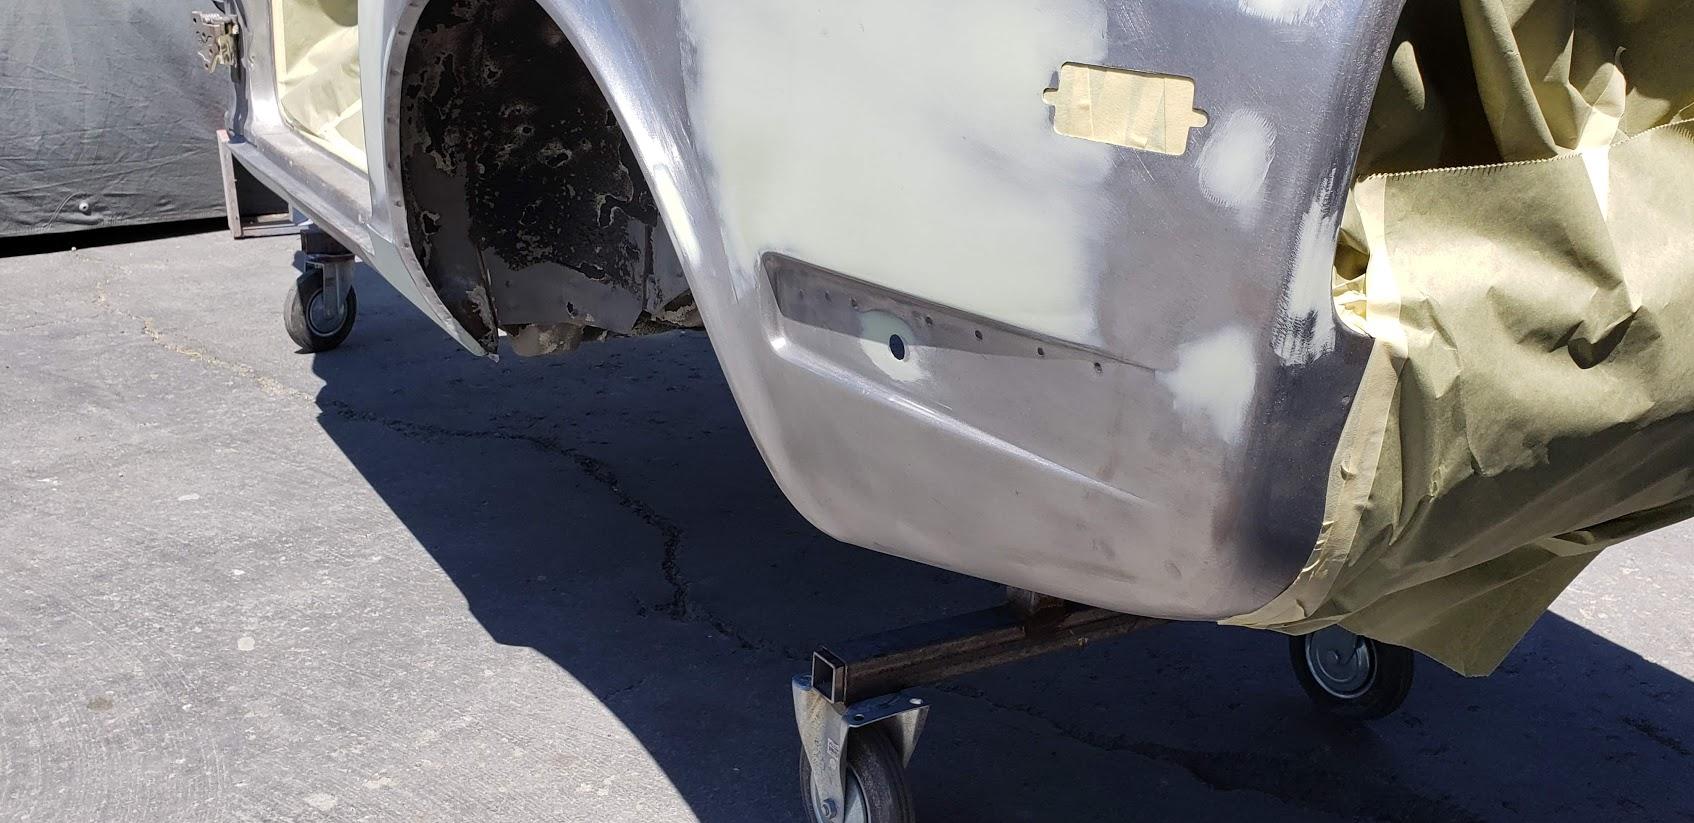
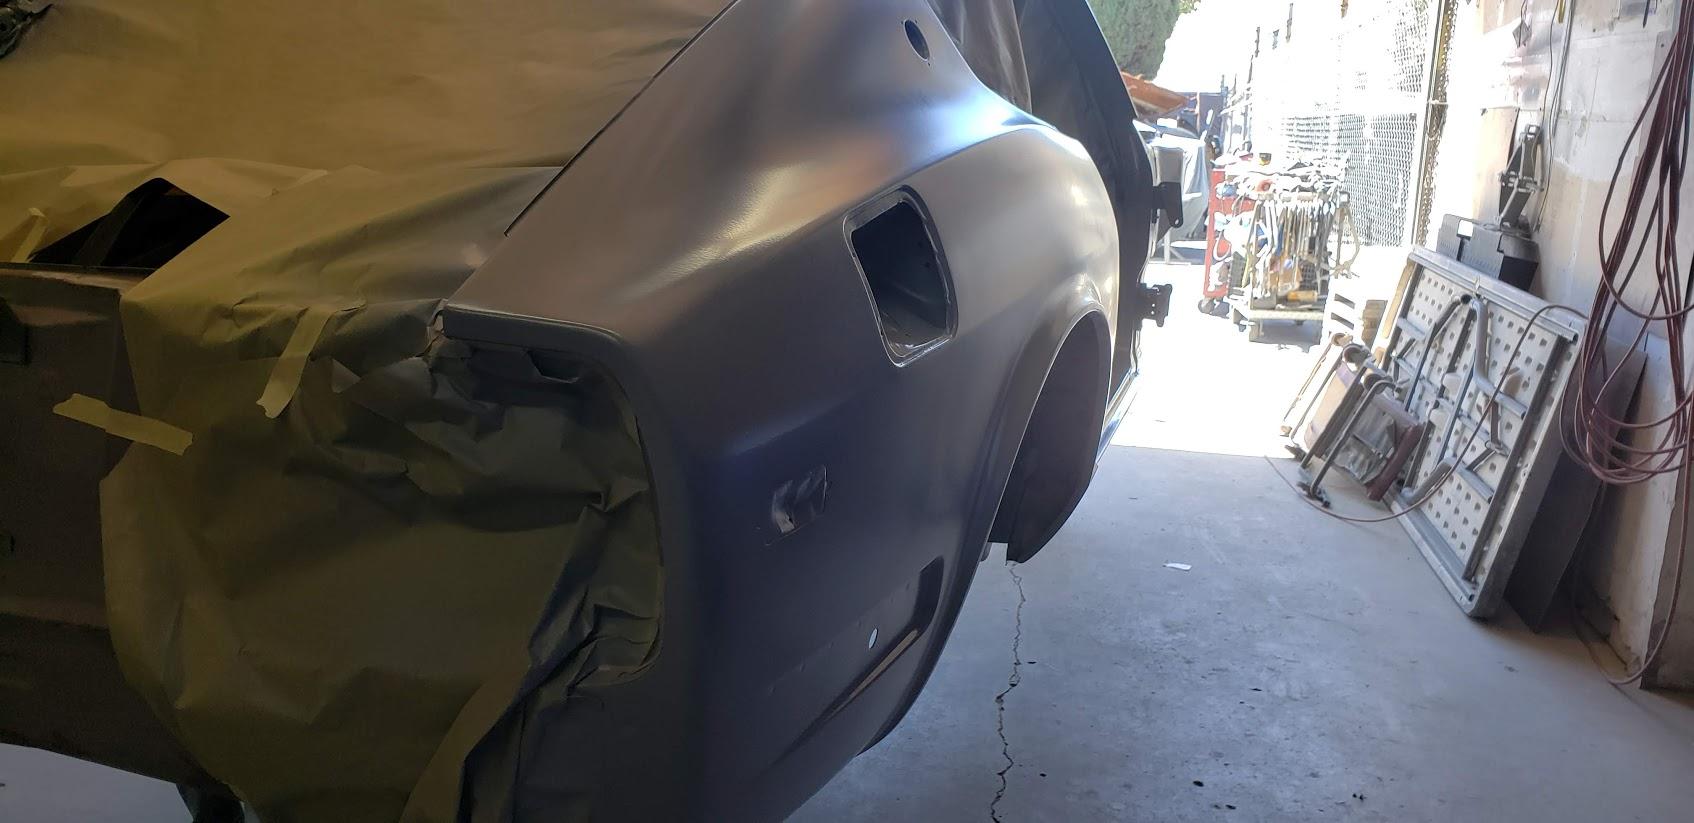
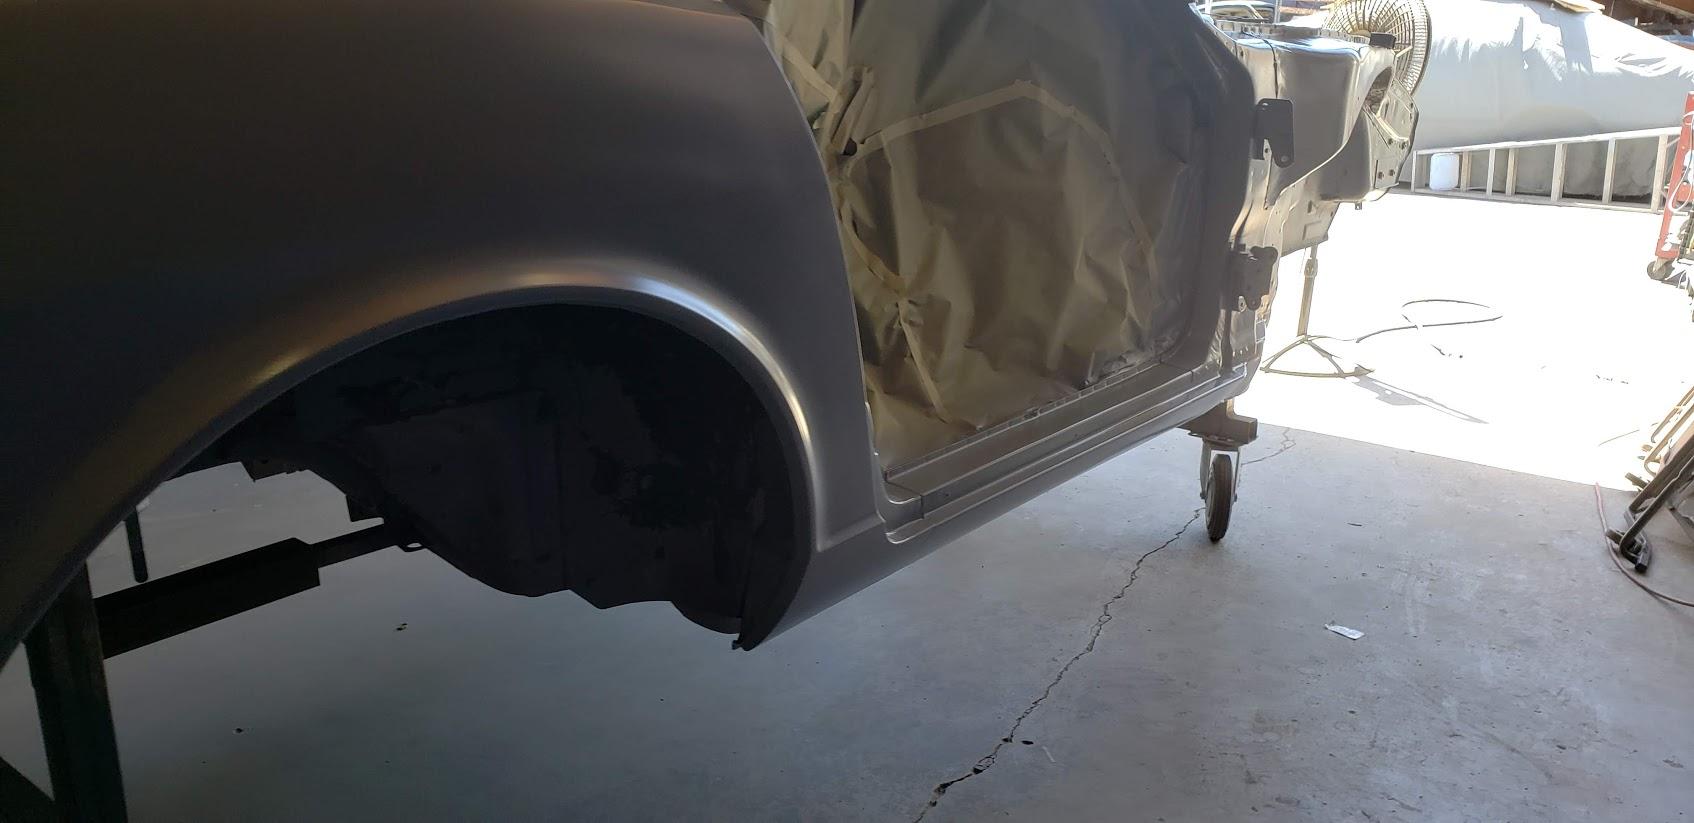
More paint shop pics...little by little.


-
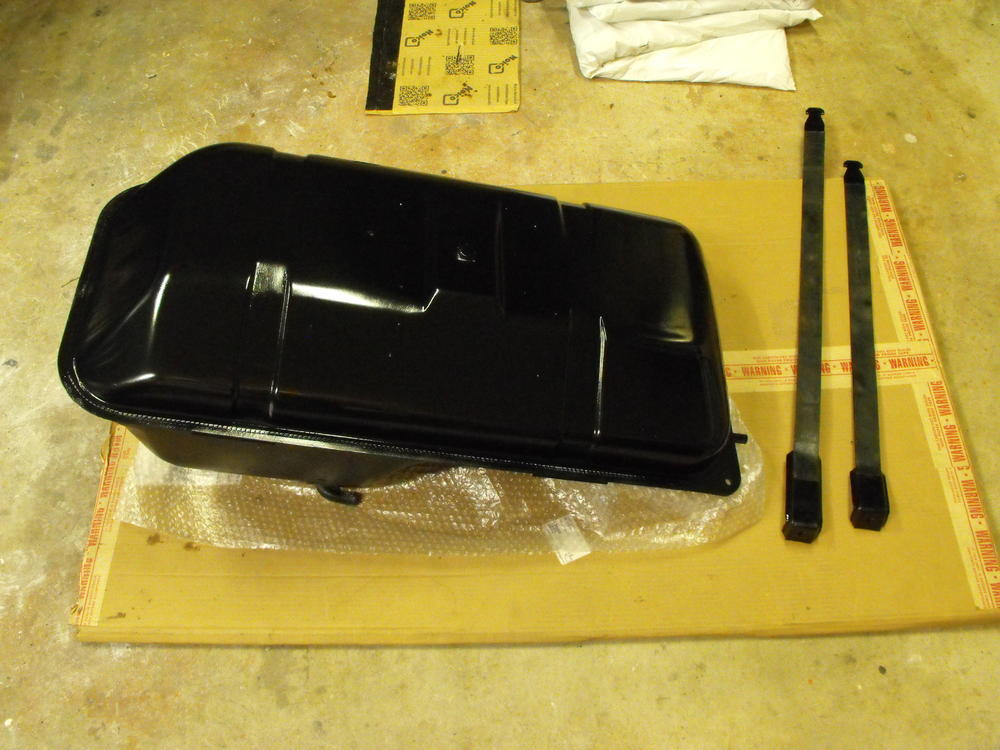
Got the fuel tank sealed, cleaned up and painted. Loosely installed the tank so I can start running all of the hoses. That's always fun.

-
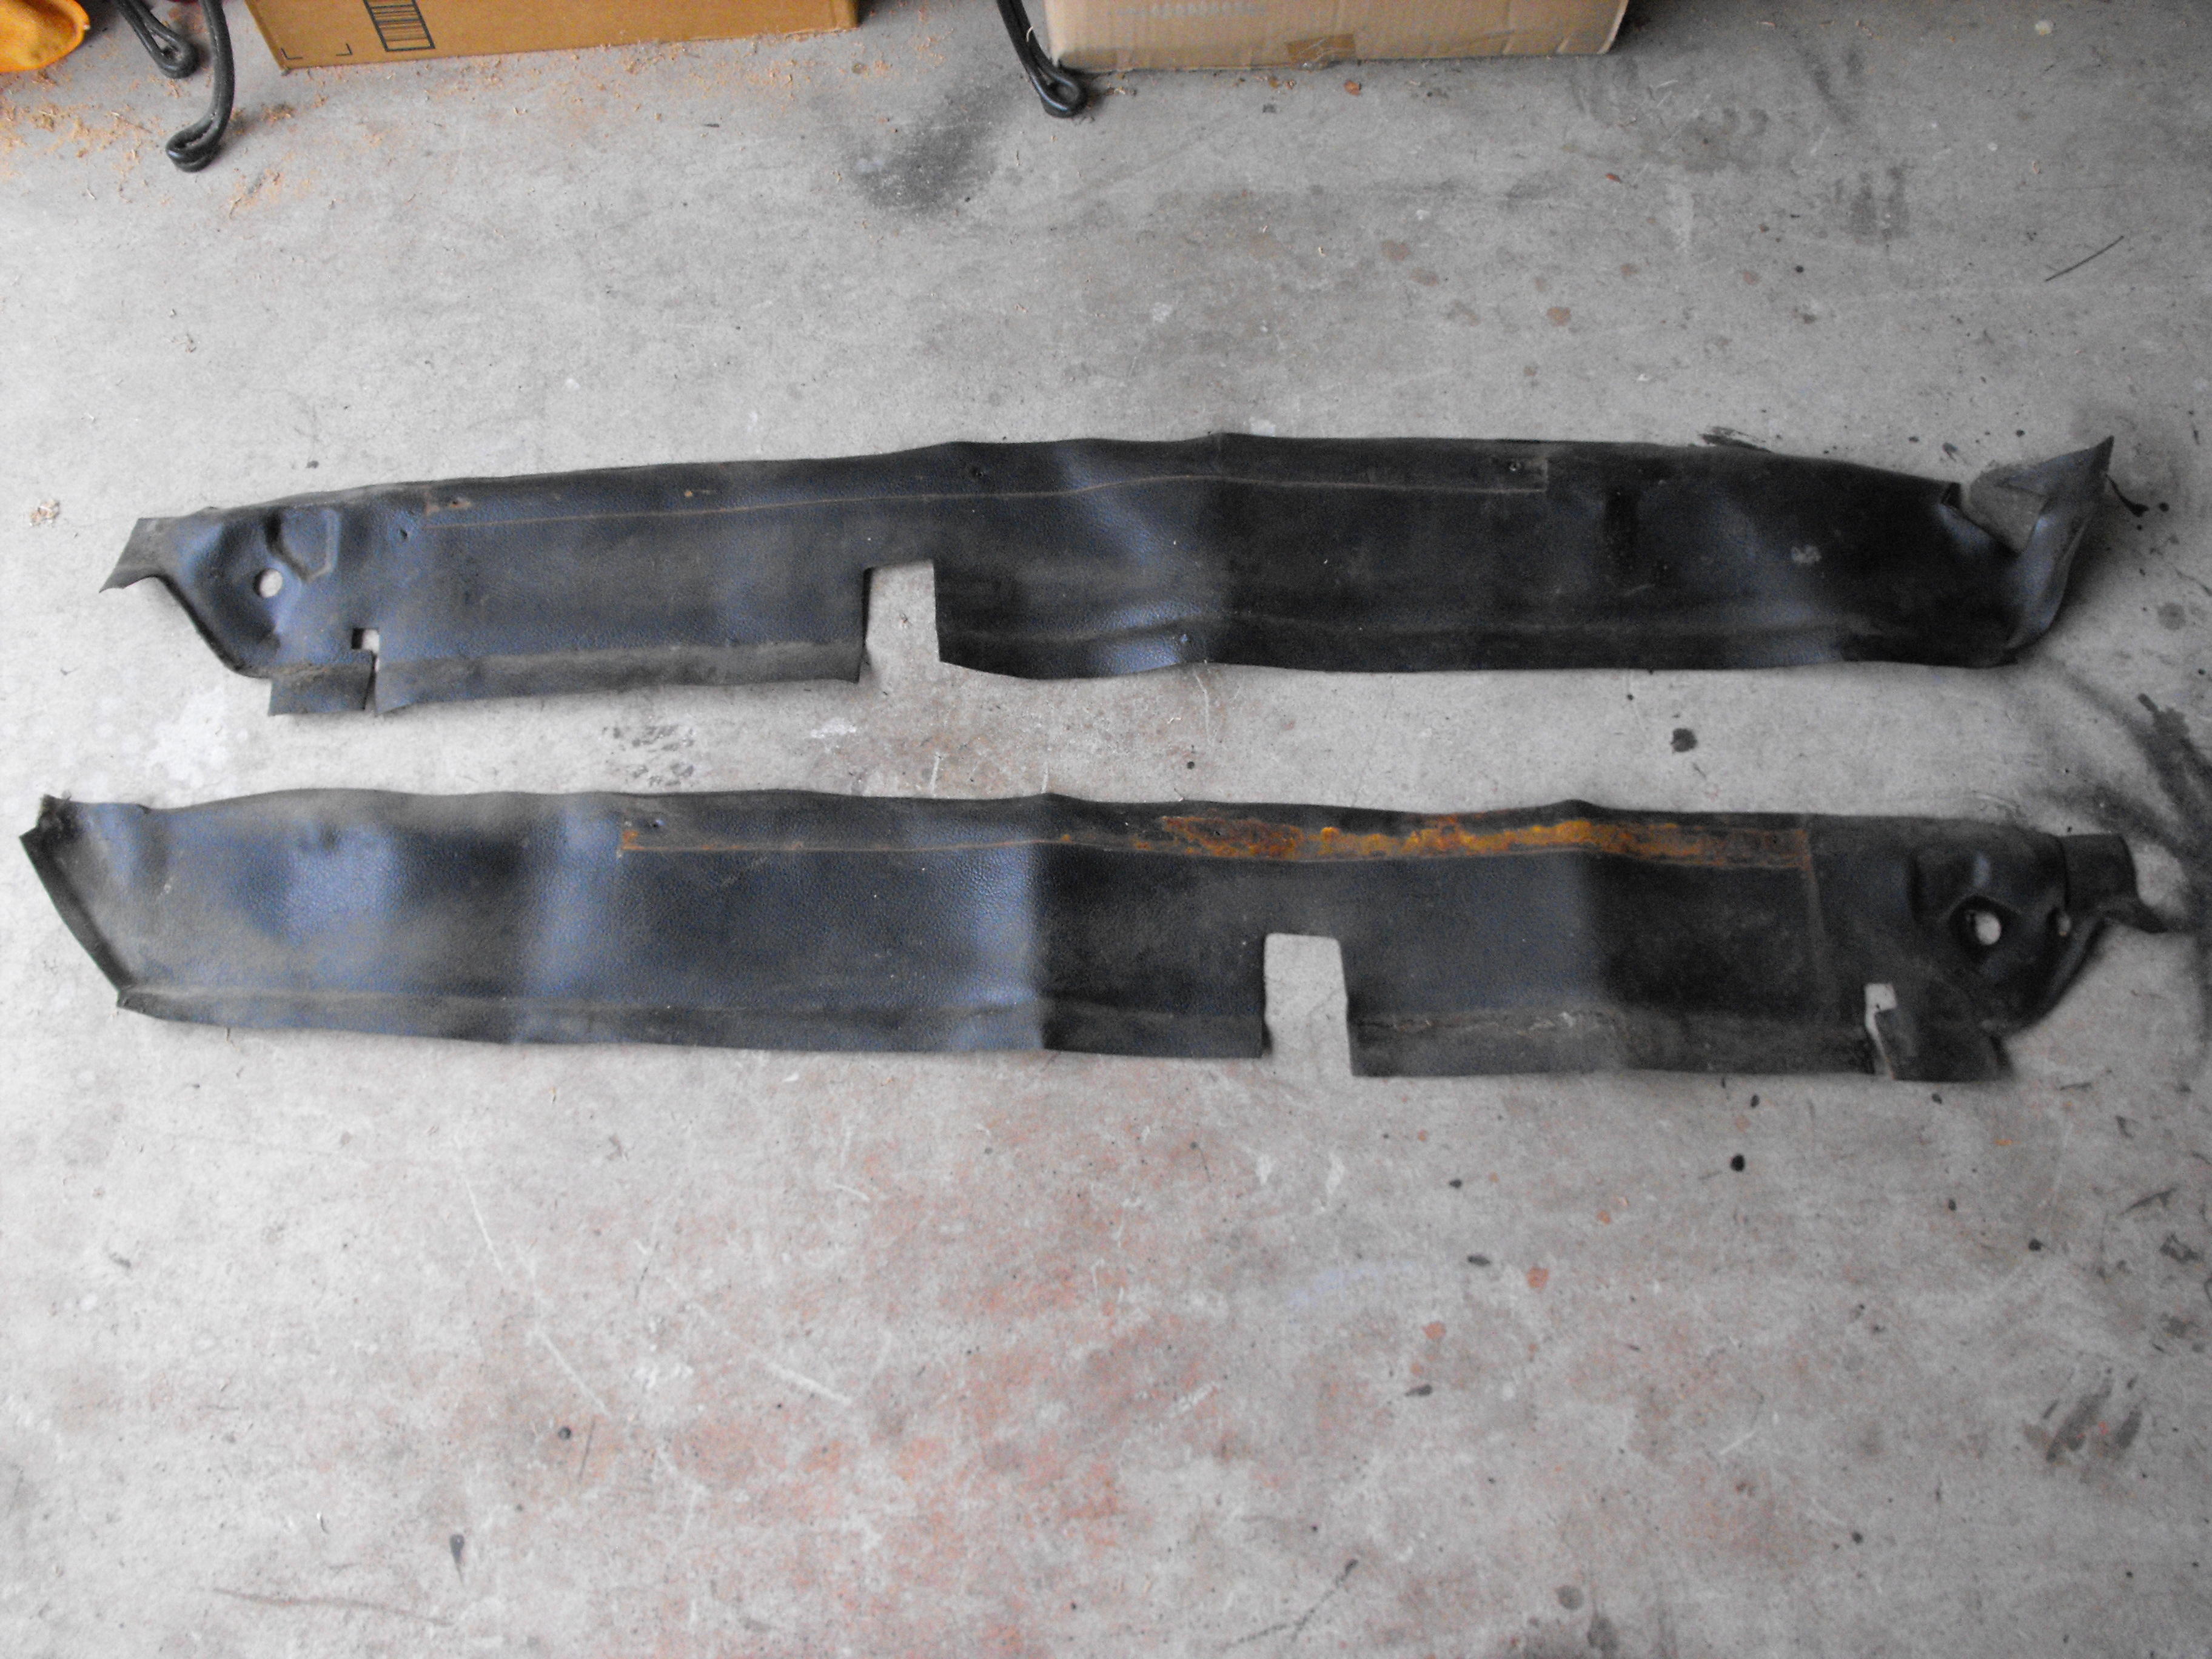
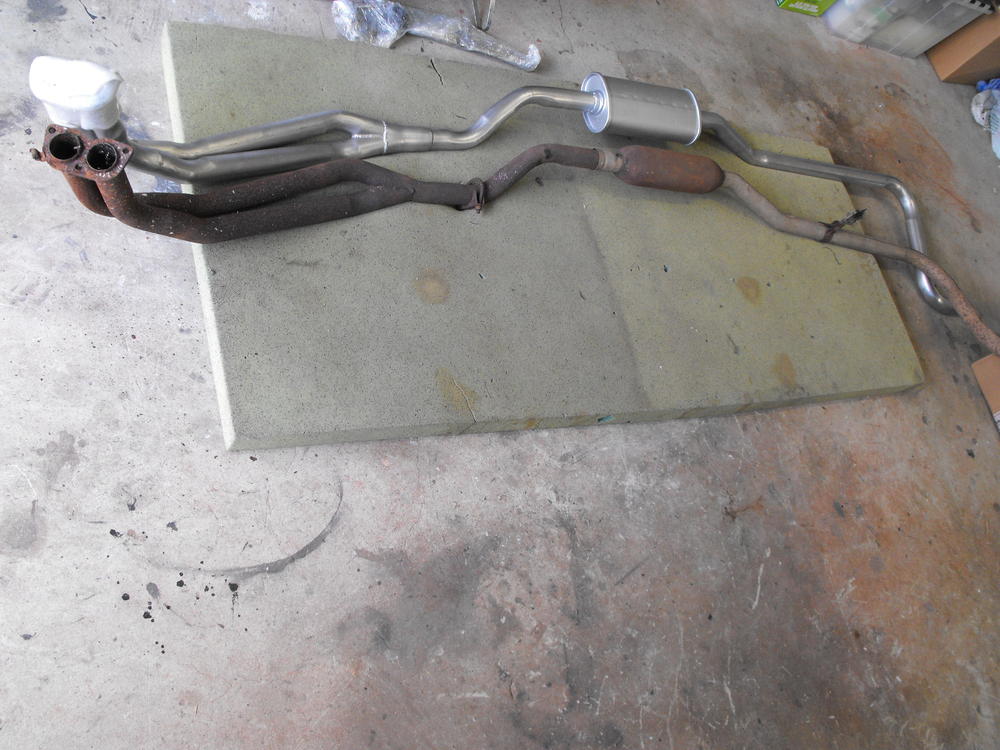
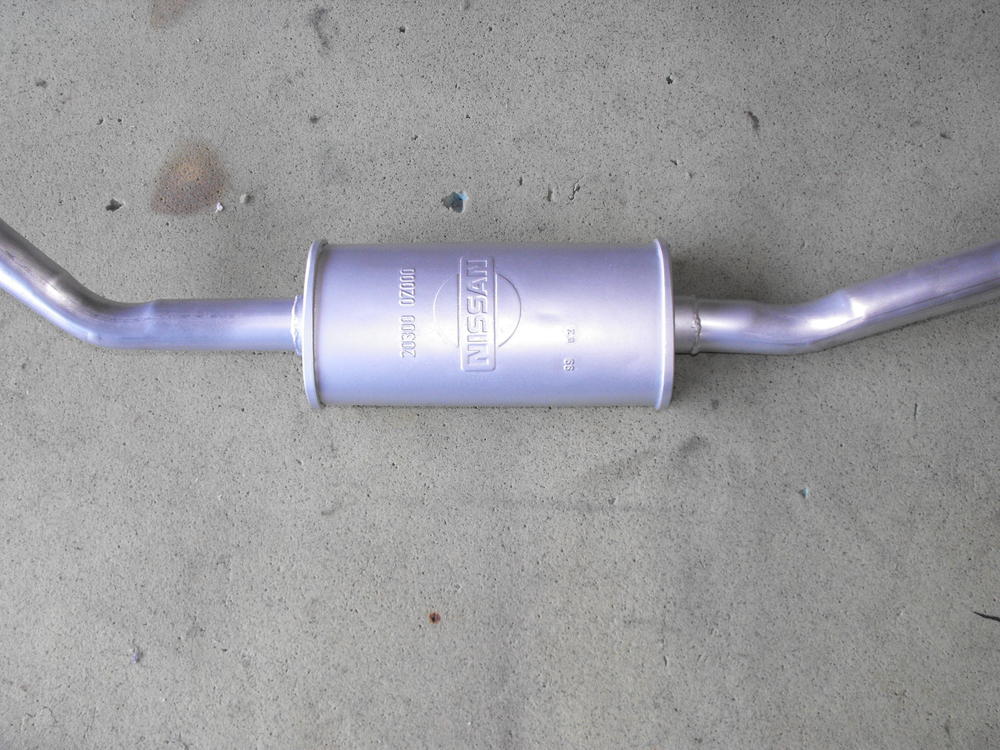
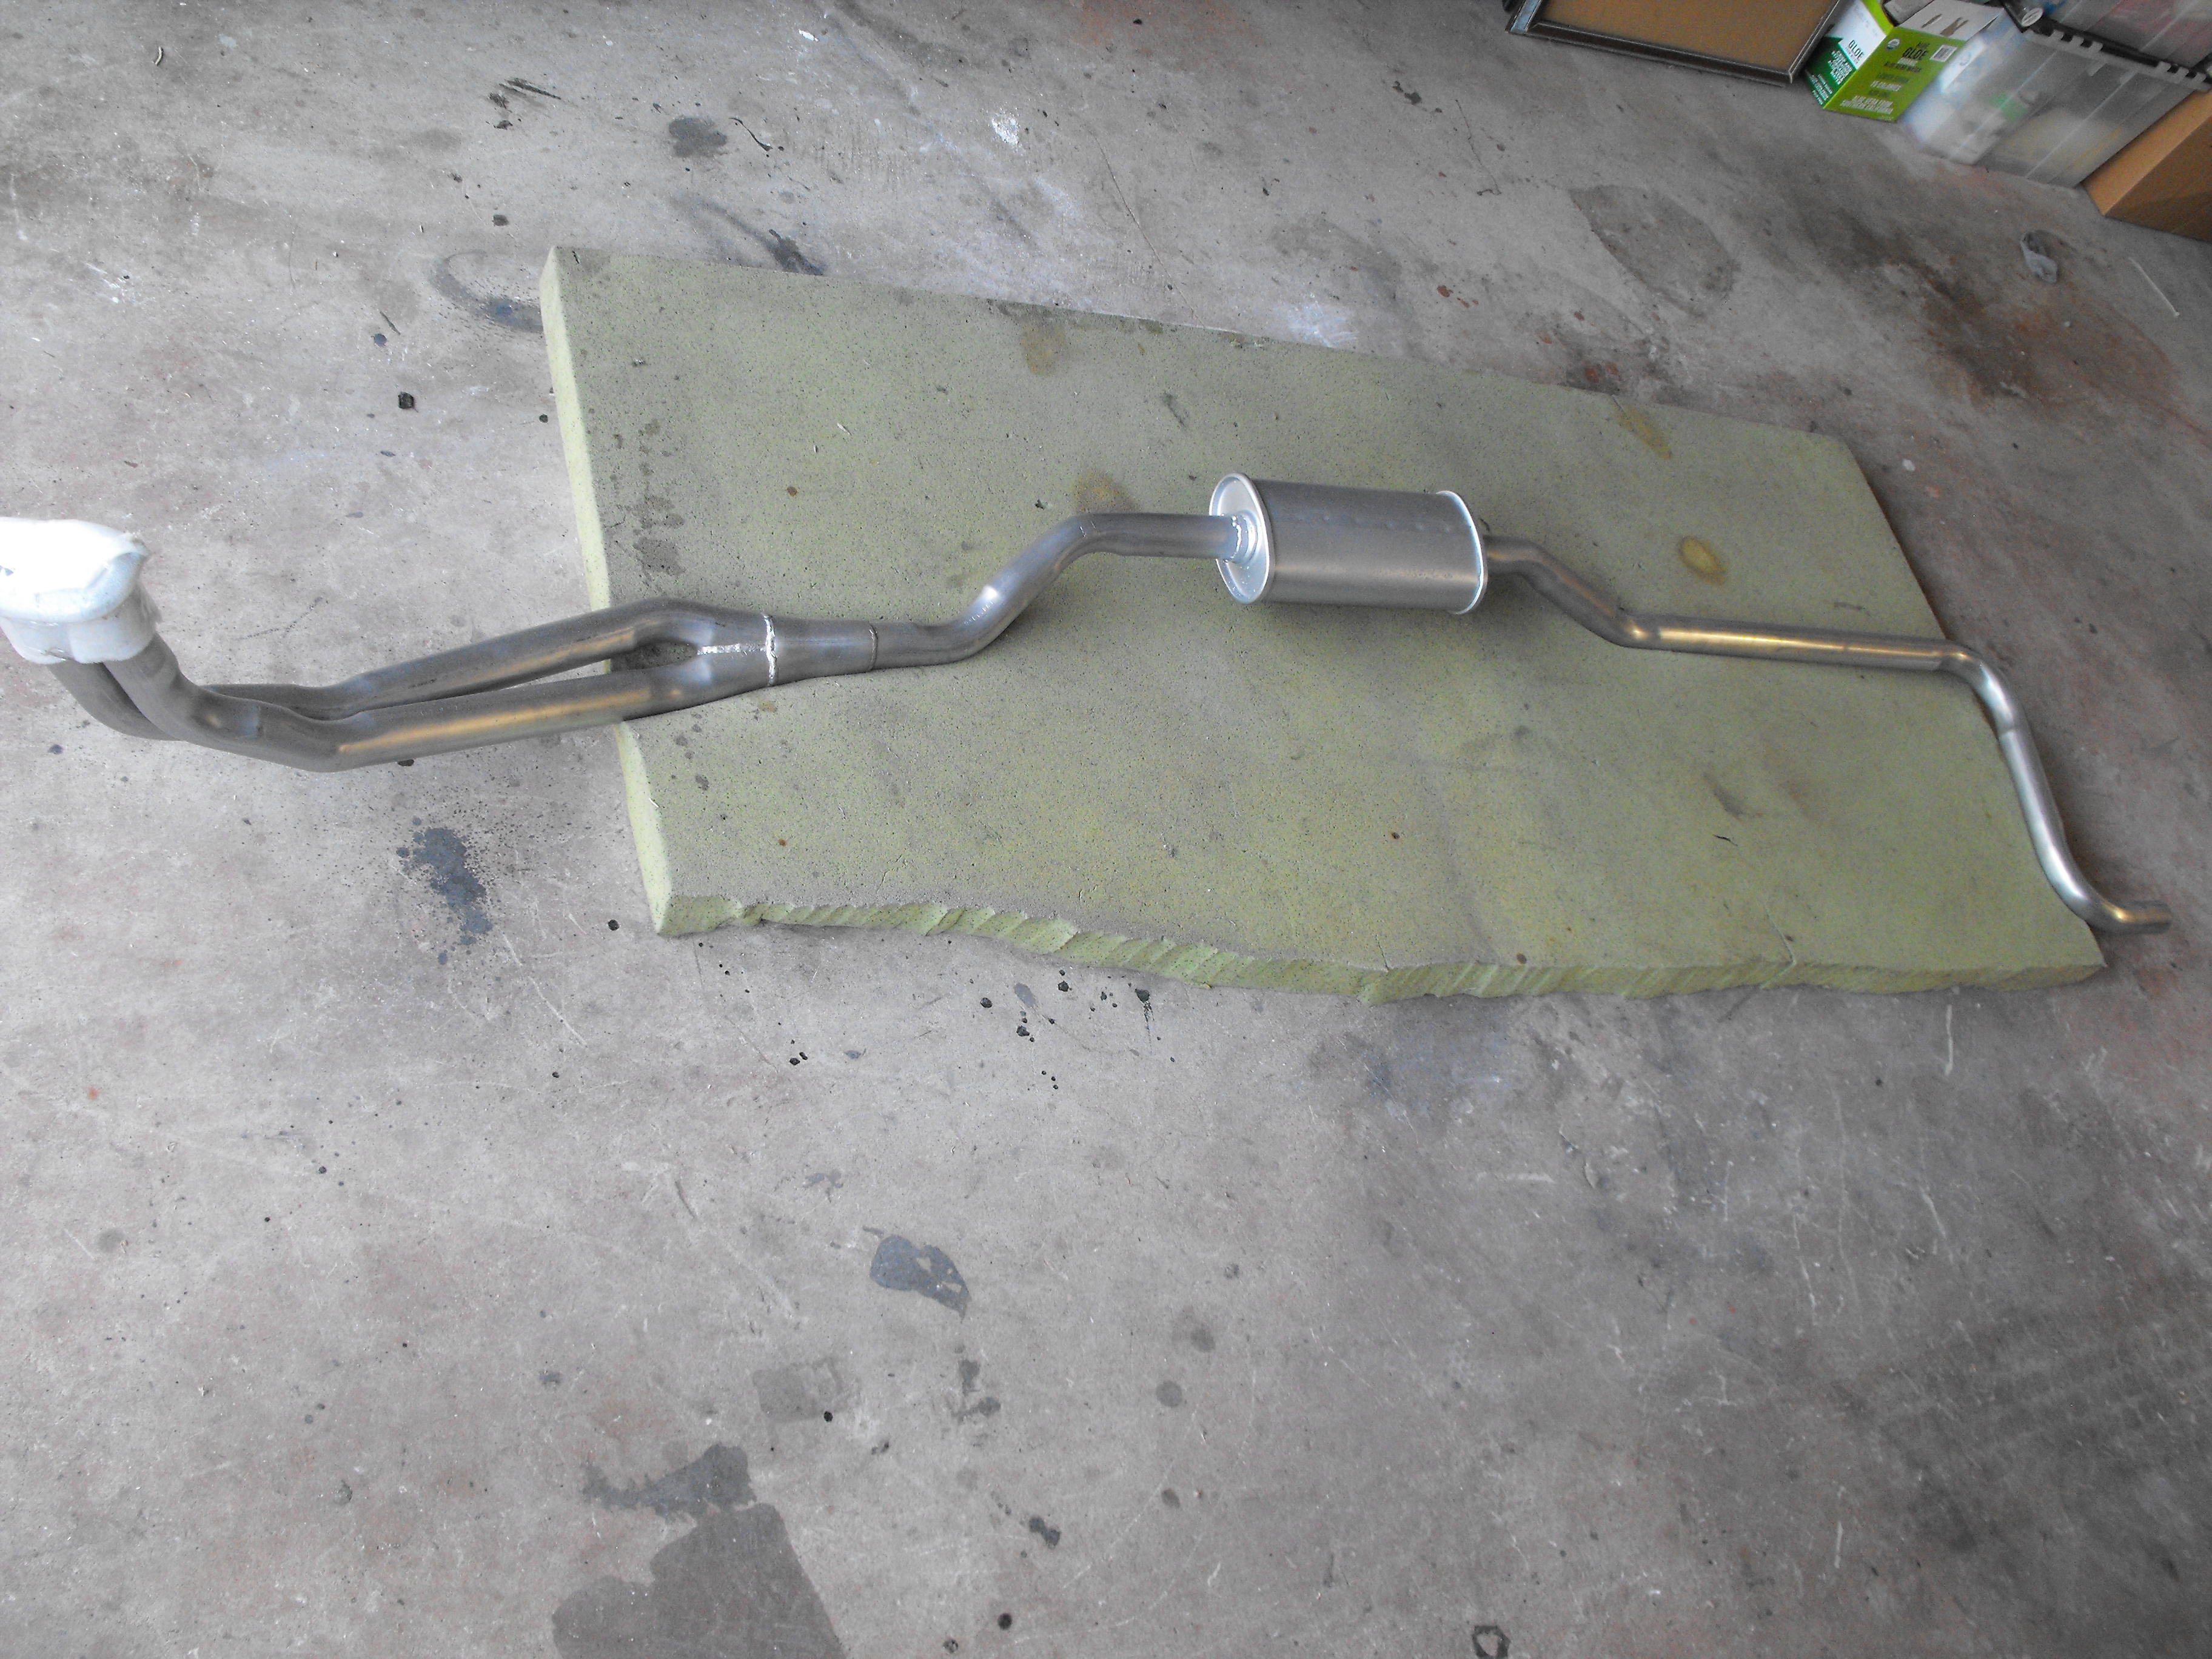
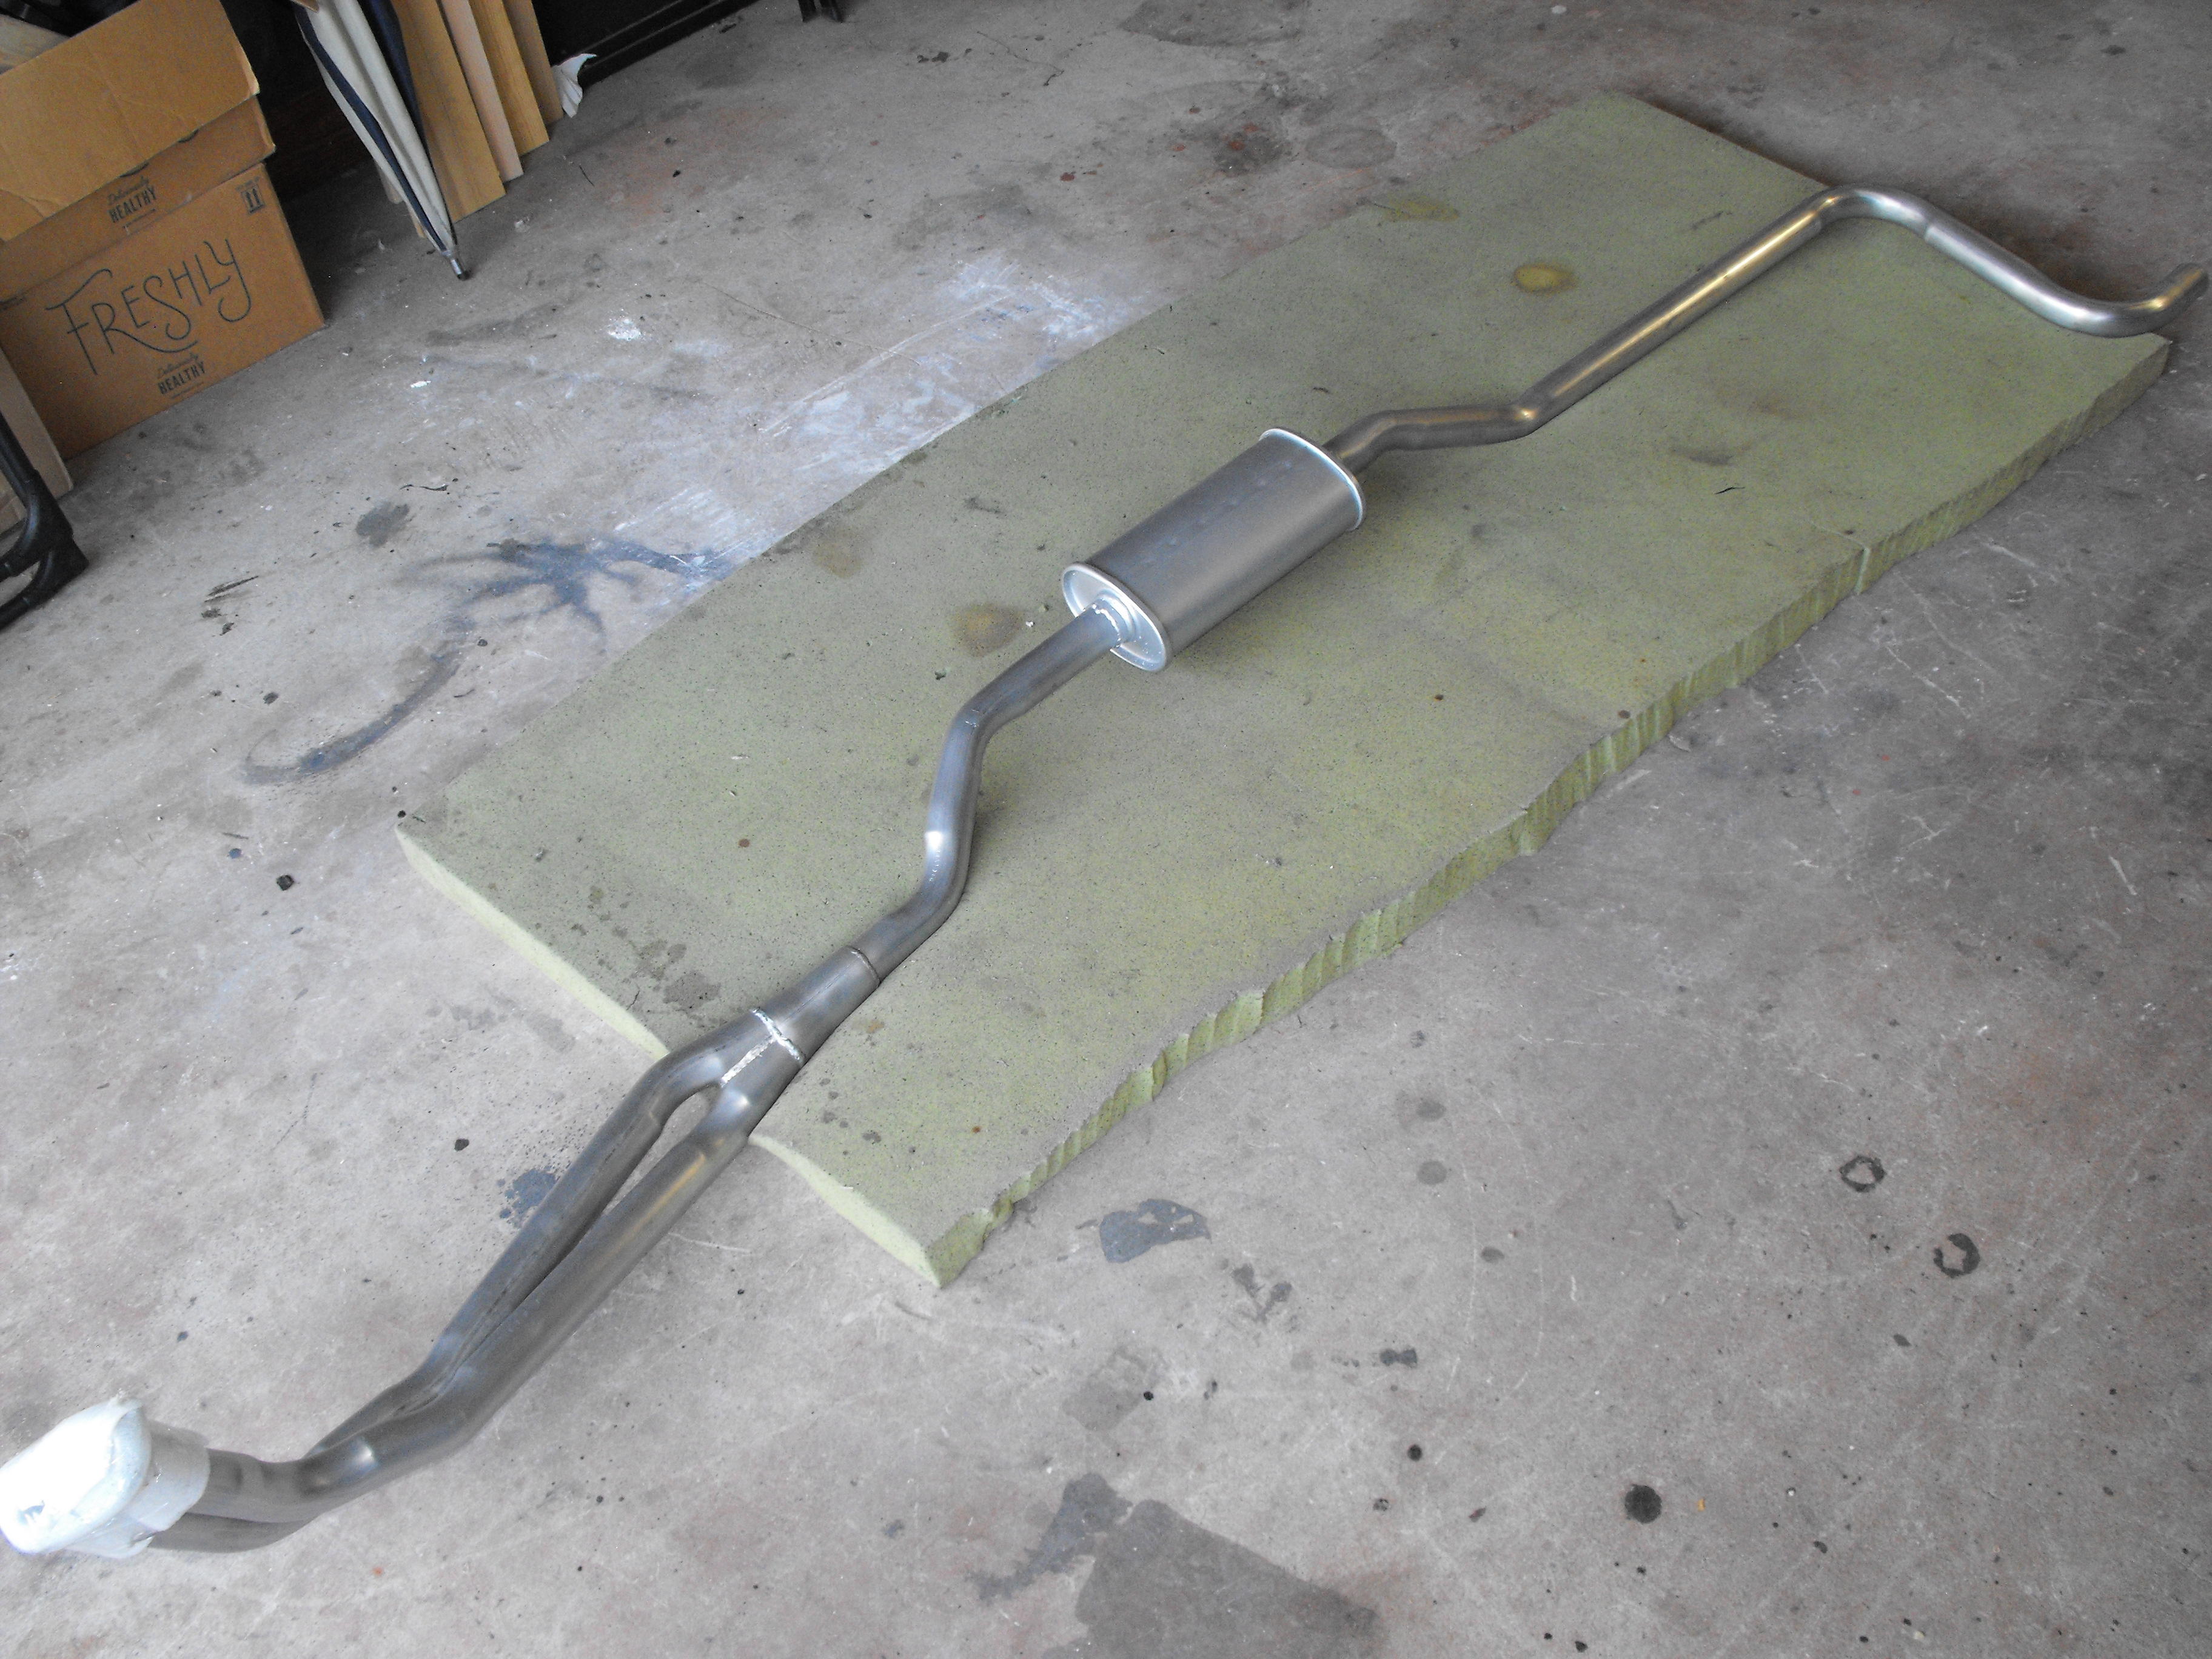
Hi Carl, I will pull out one of my old exhaust systems and put them side by side in the next day or two. My muffler guy has been around for a while and actually had a couple of these Nissan resonators back in his storage. Unfortunately, I think he said this is his last one and I actually need another one made for my white Z. I am not sure what Nissan model they were made for. I think he told me but I forgot. I will save the part number and probably keep a look out on eBay. I am surprised that Jay does not make these. He makes the front and the back, but not the middle section. My muffler guy does a pretty good job with these as the last one went in perfectly.
-
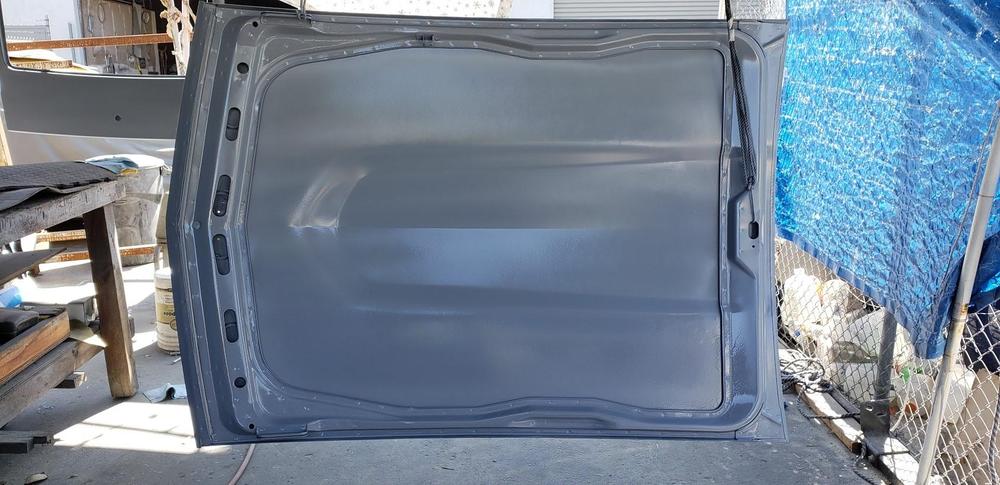
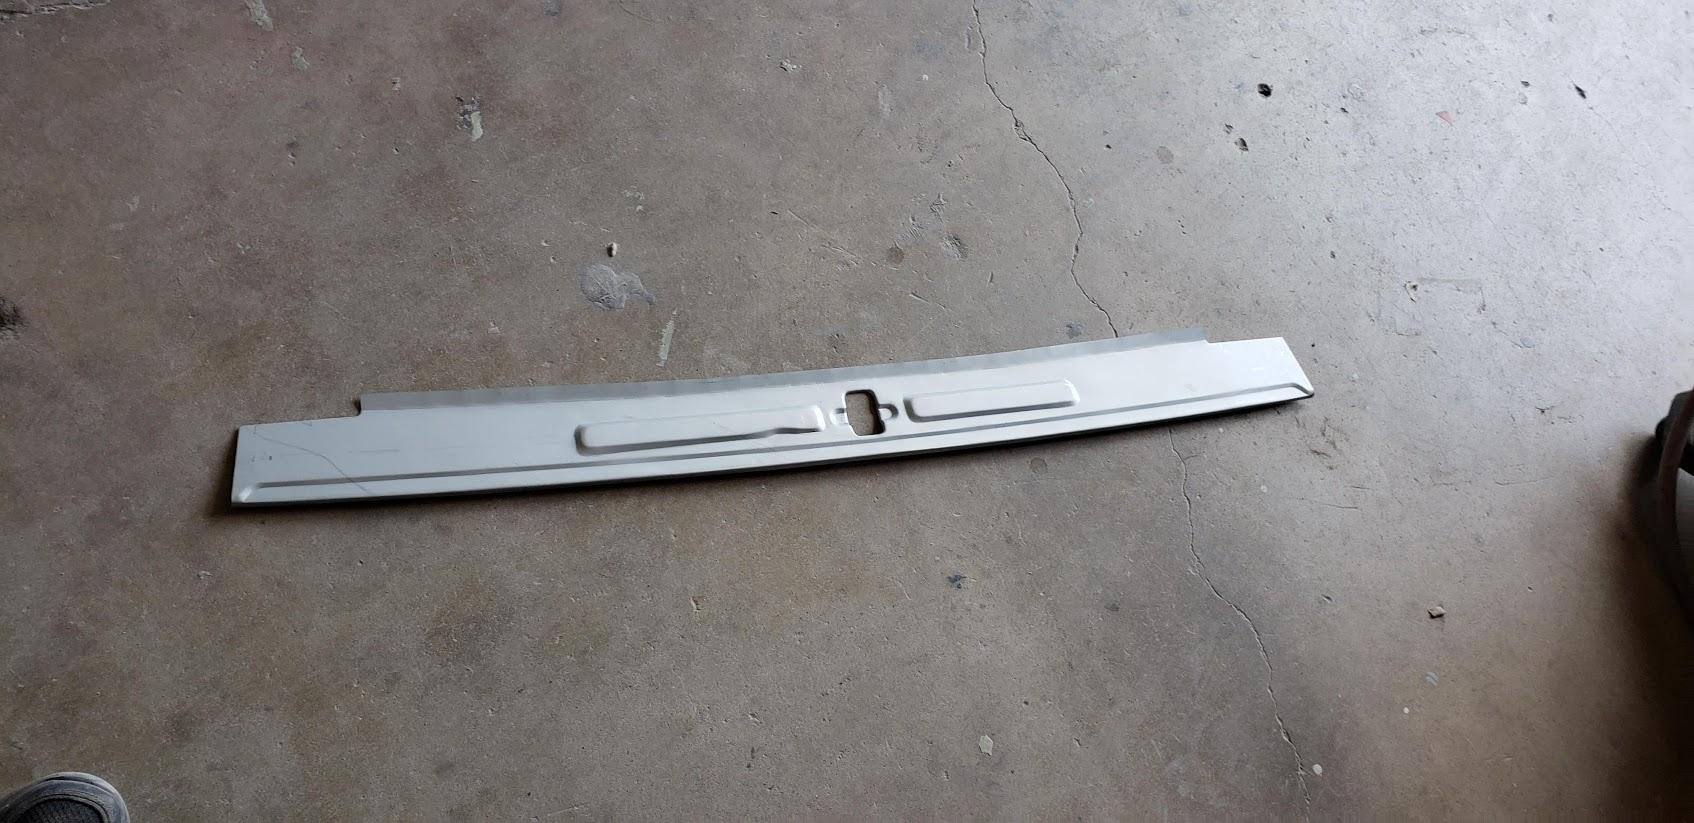
Here are pics of the exhaust system. I brought an original exhaust system to my muffler guy and he replicated it using a Nissan resonator. Downpipe and Rear muffler with tip (not shown) are all from jdm-car-parts.com. This is the same set-up I did on the previous build and it sounds great. Got a couple of the core plugs replaced.


-
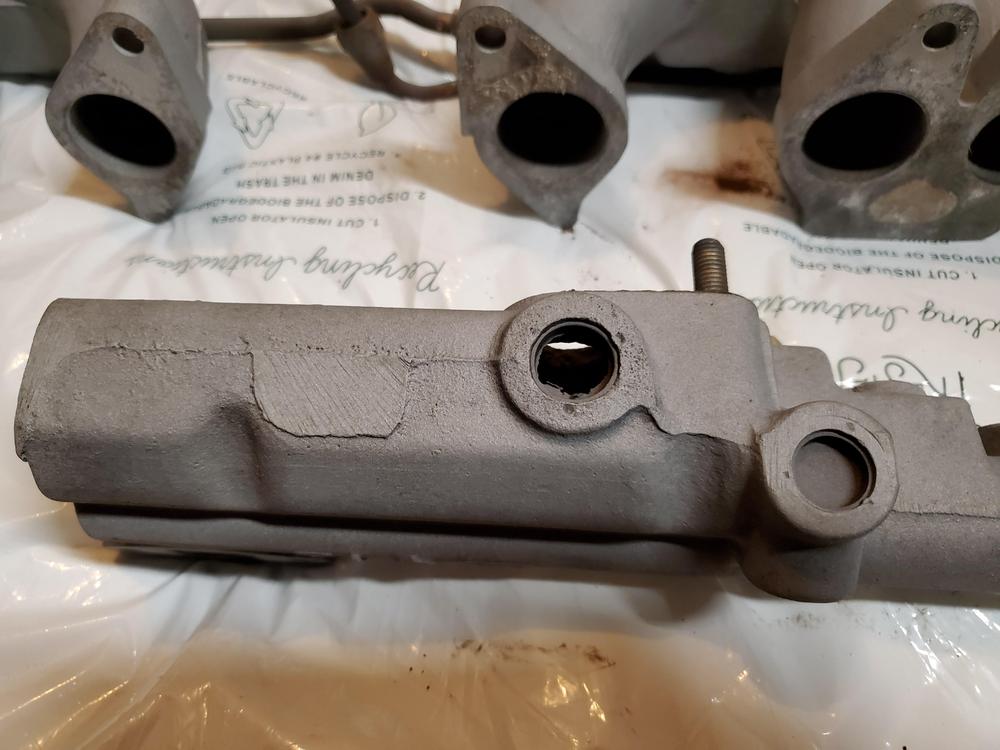
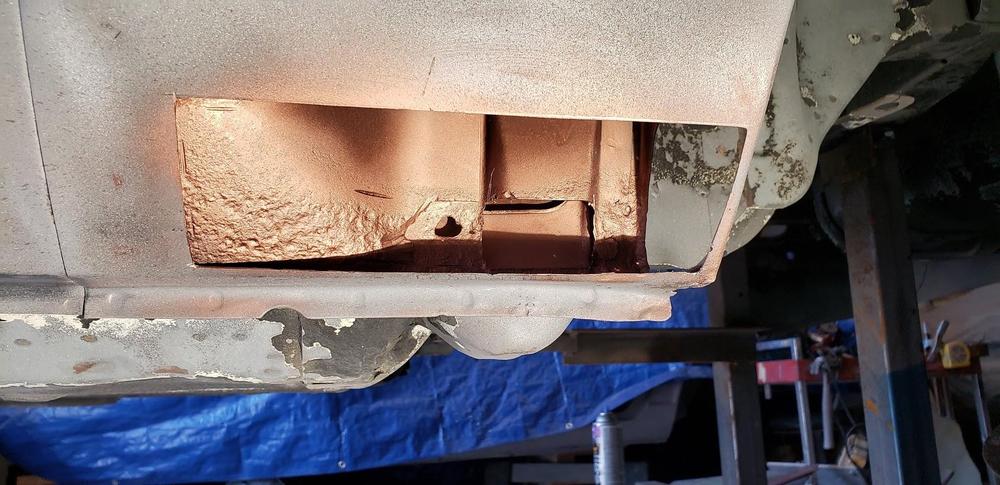
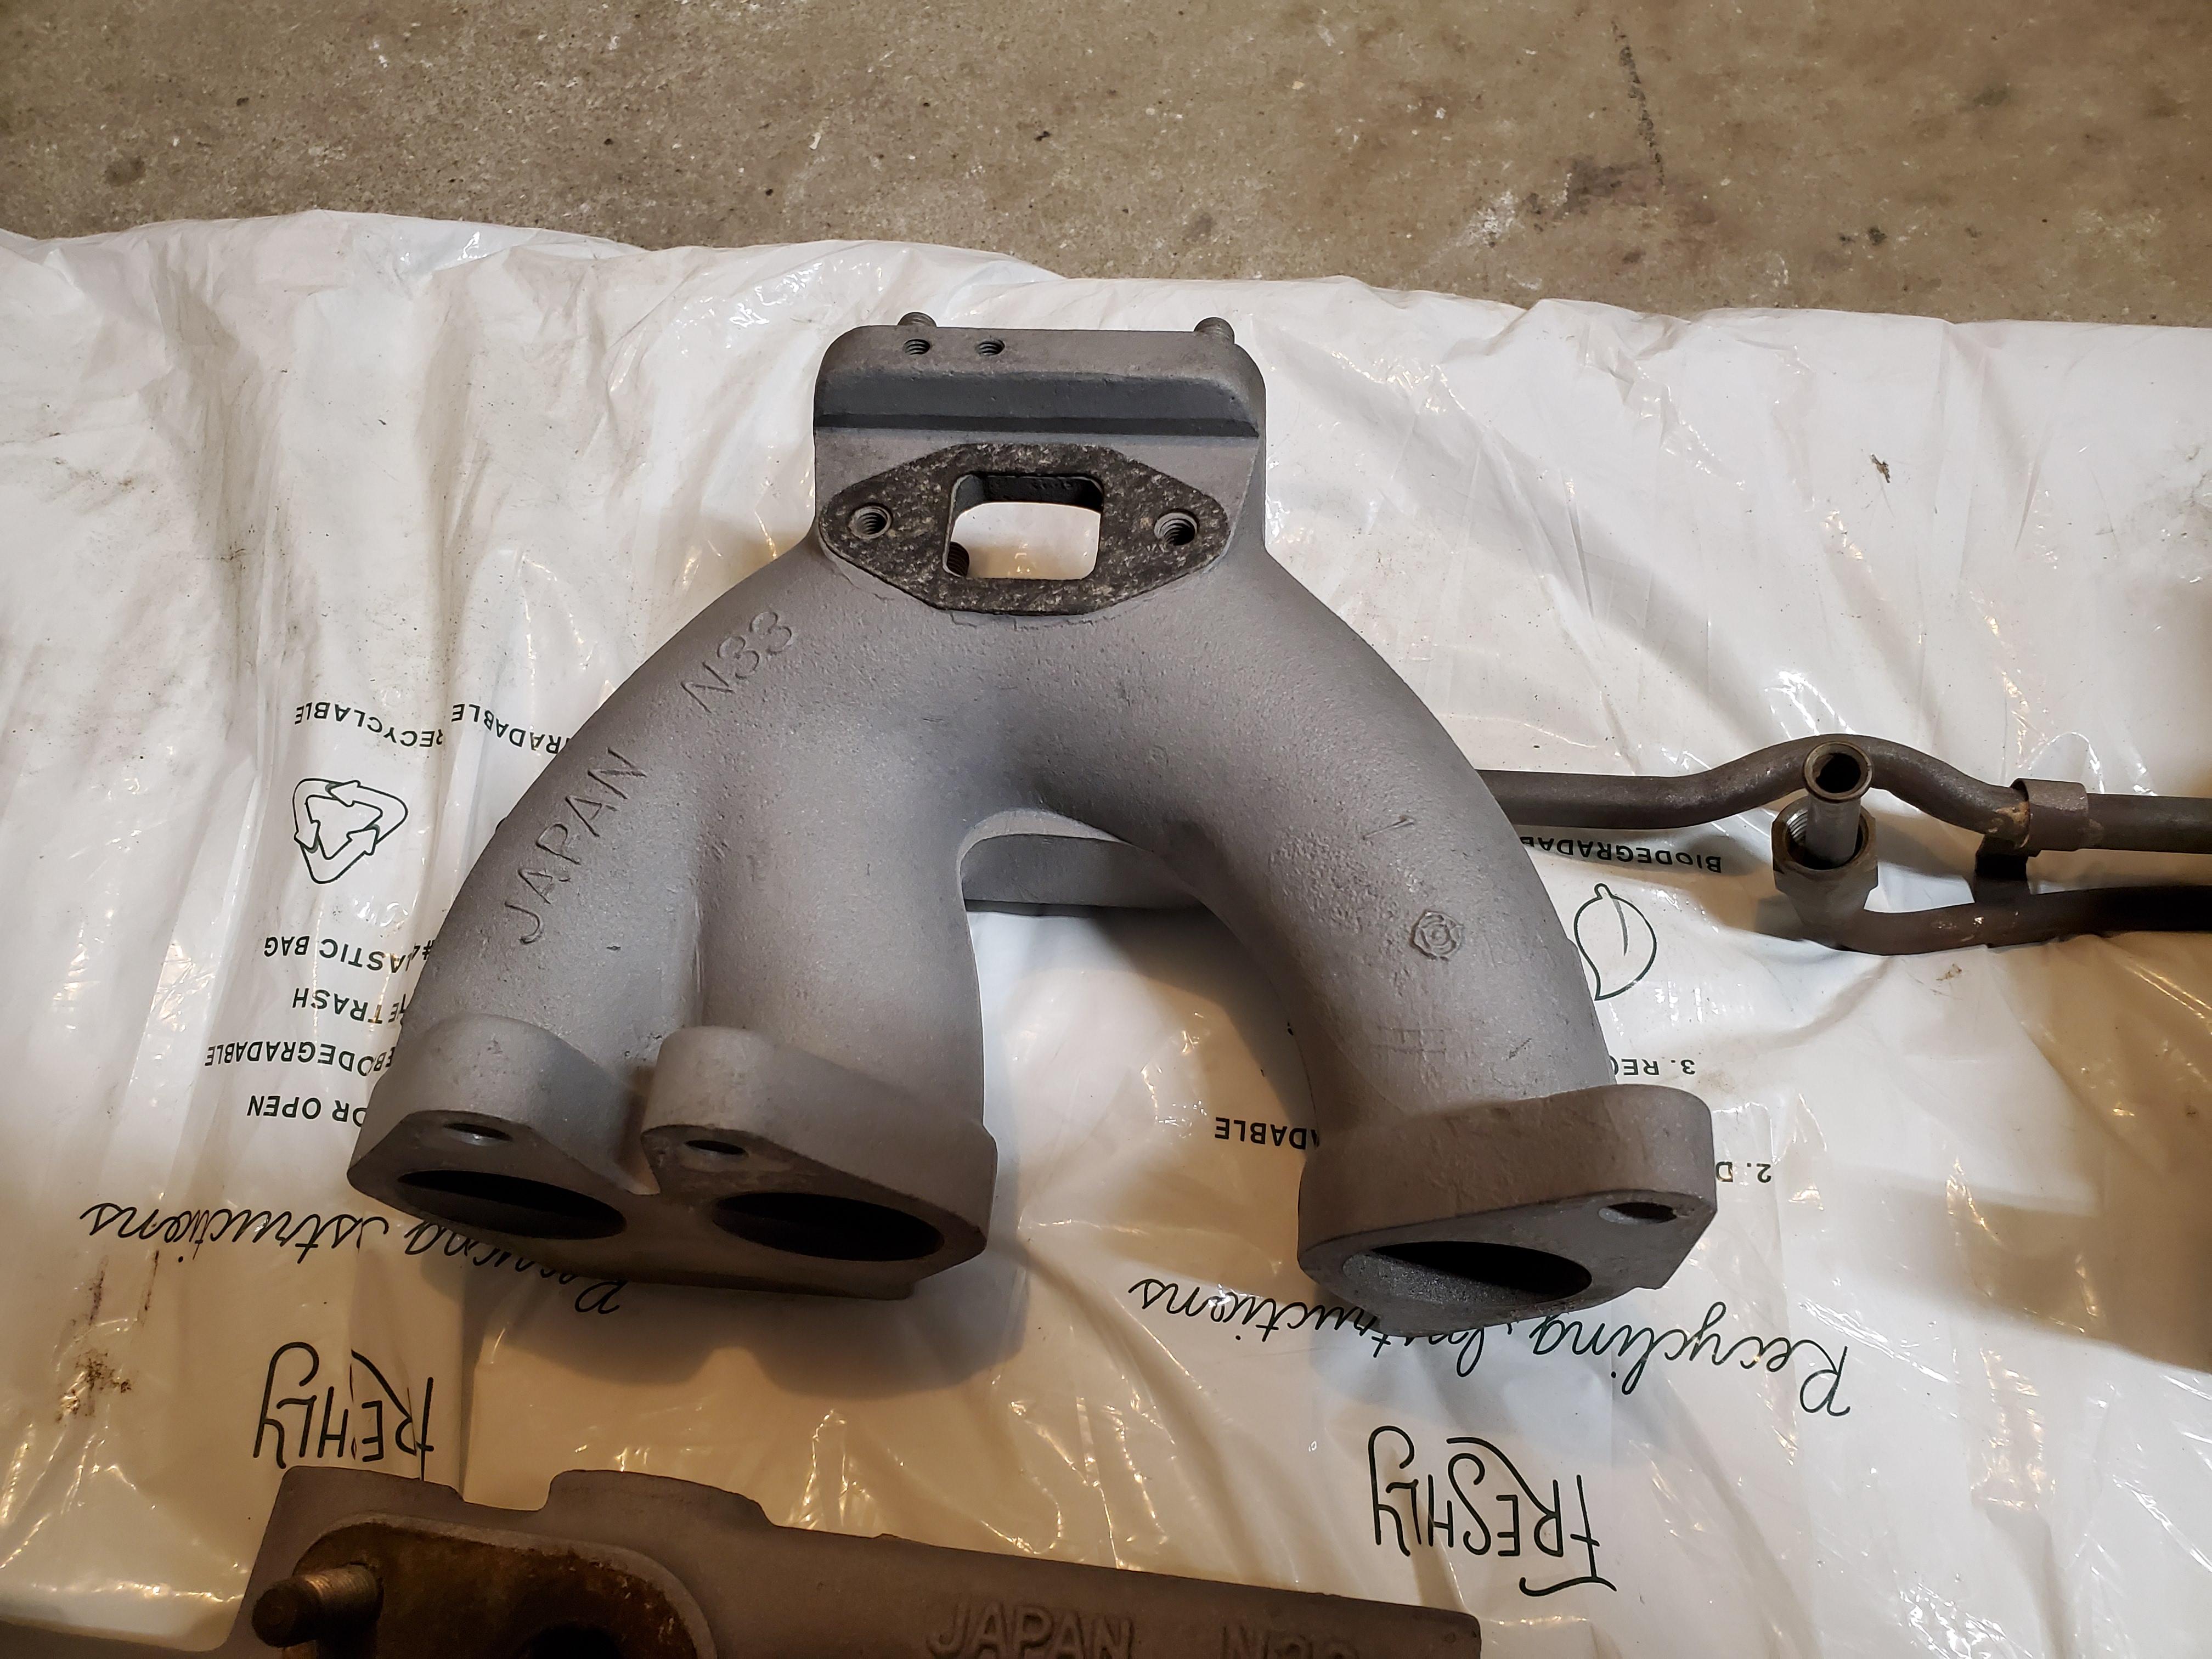
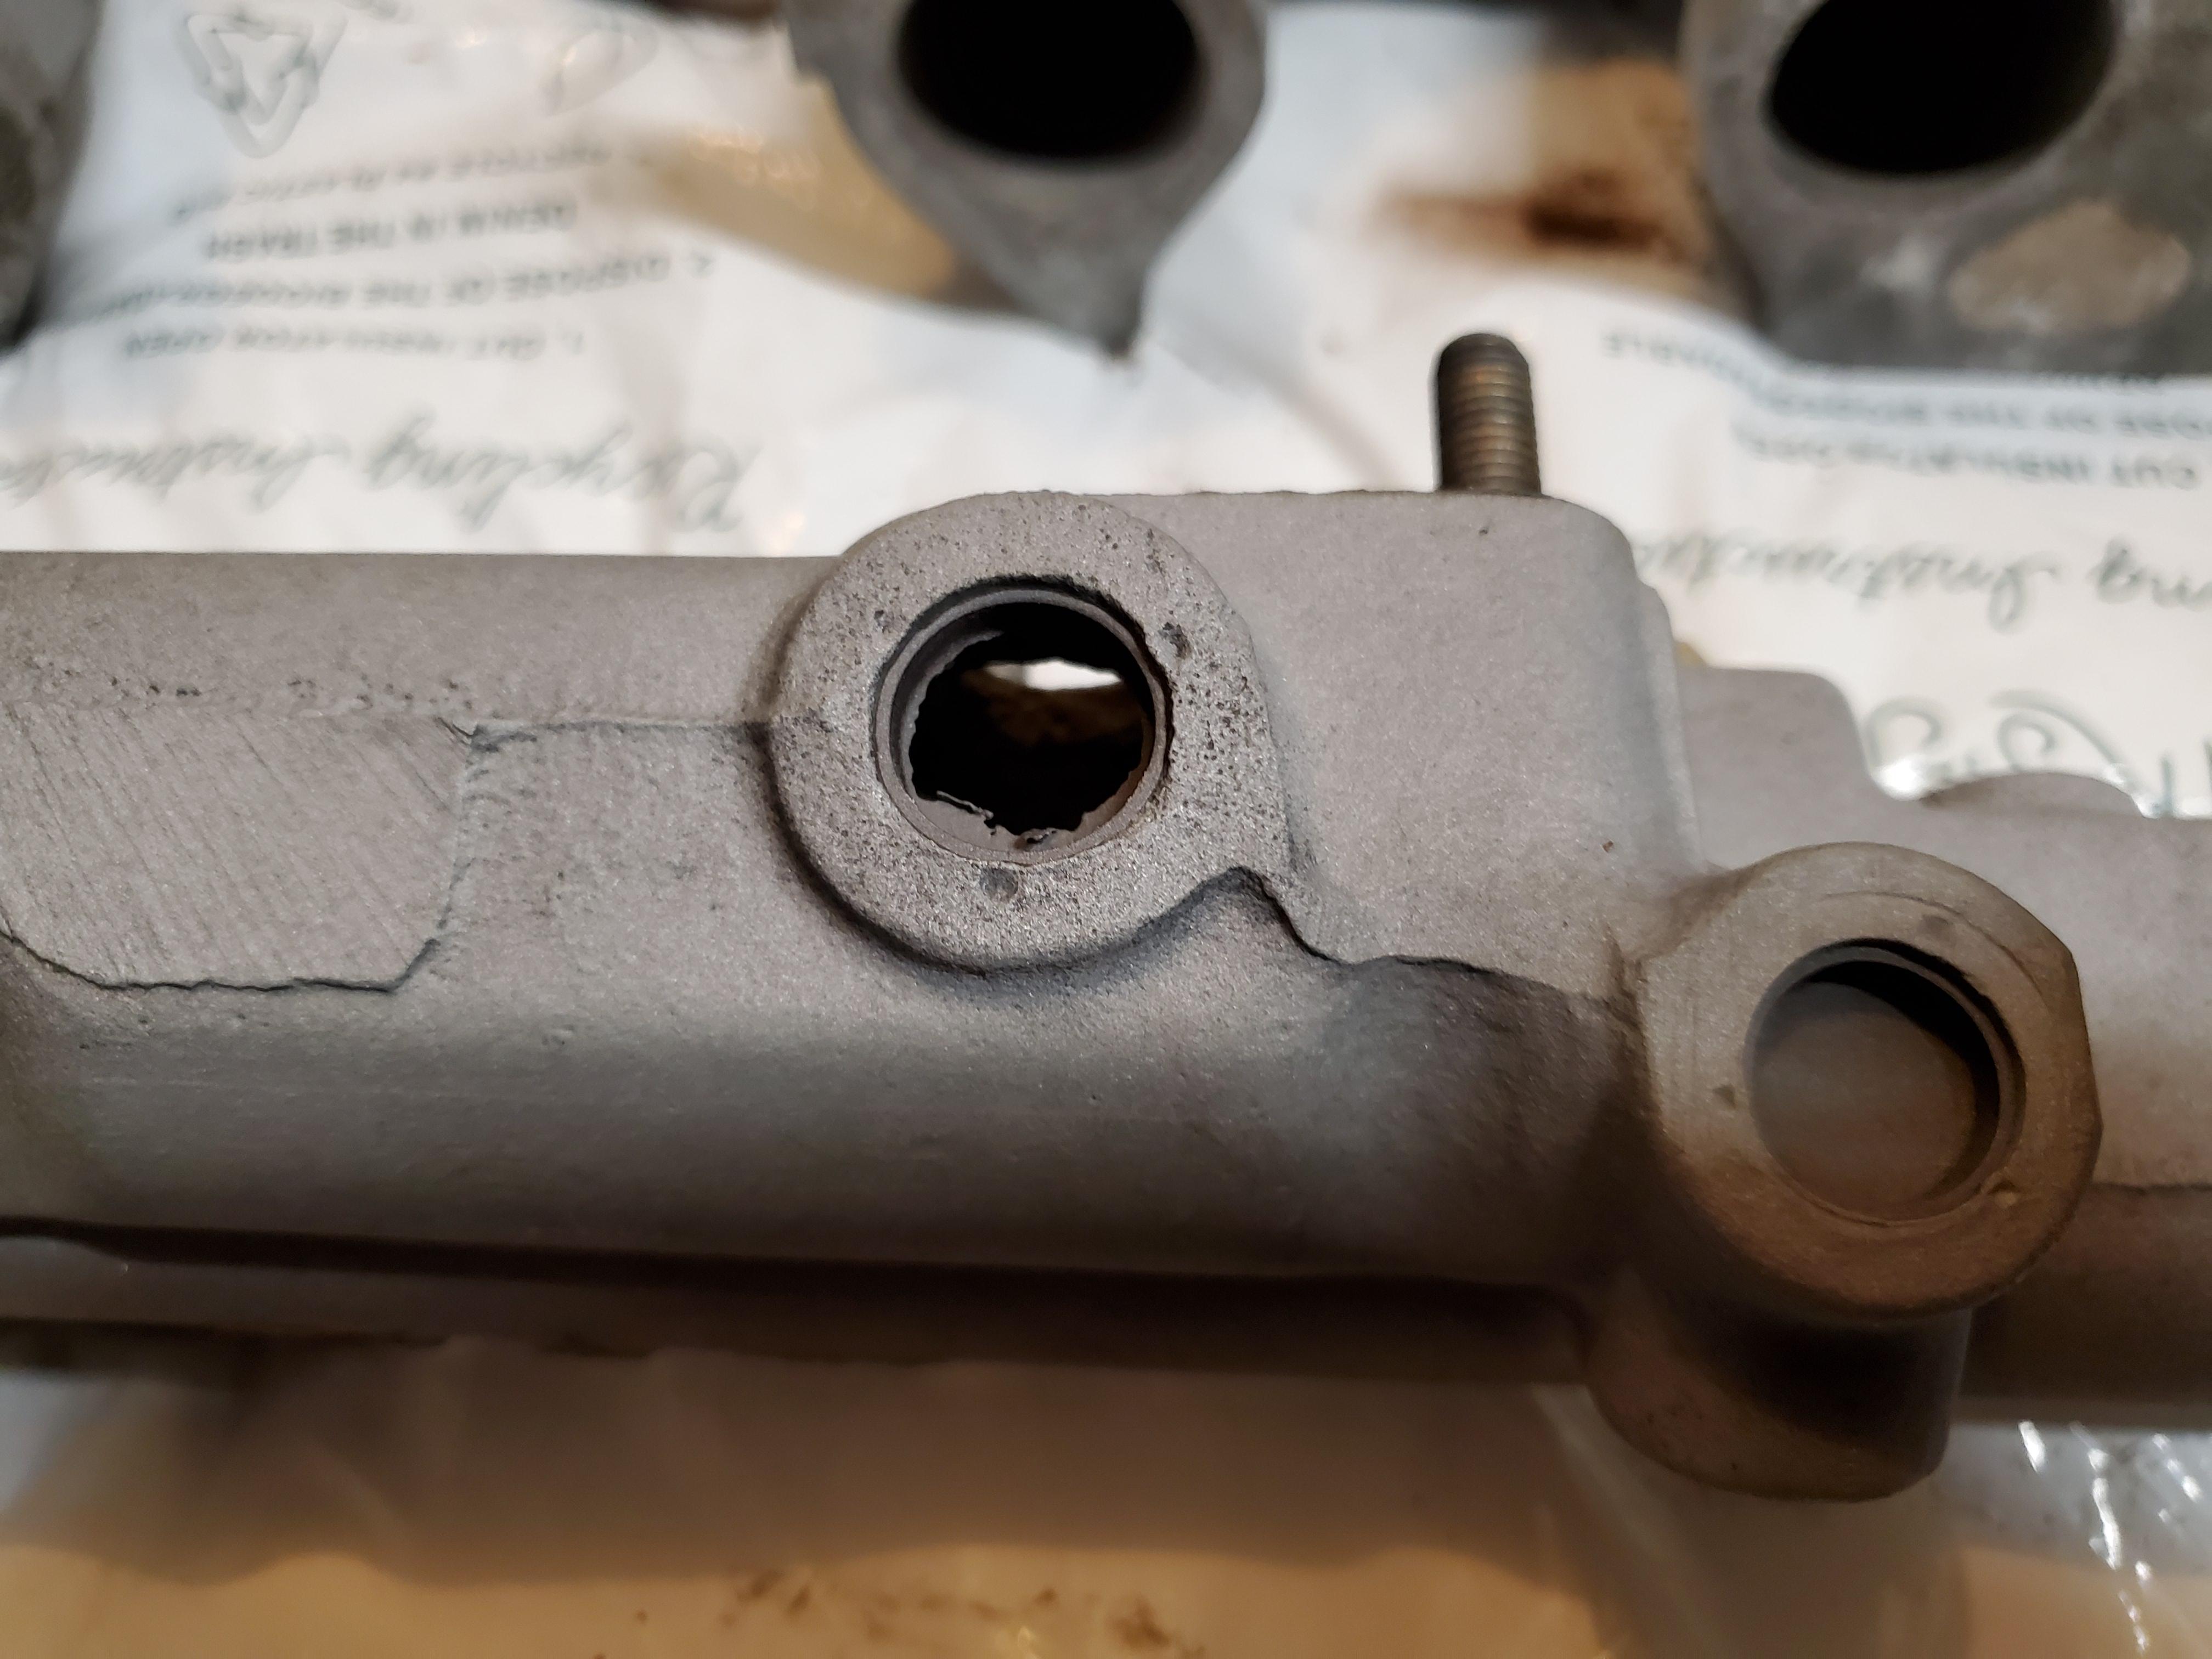
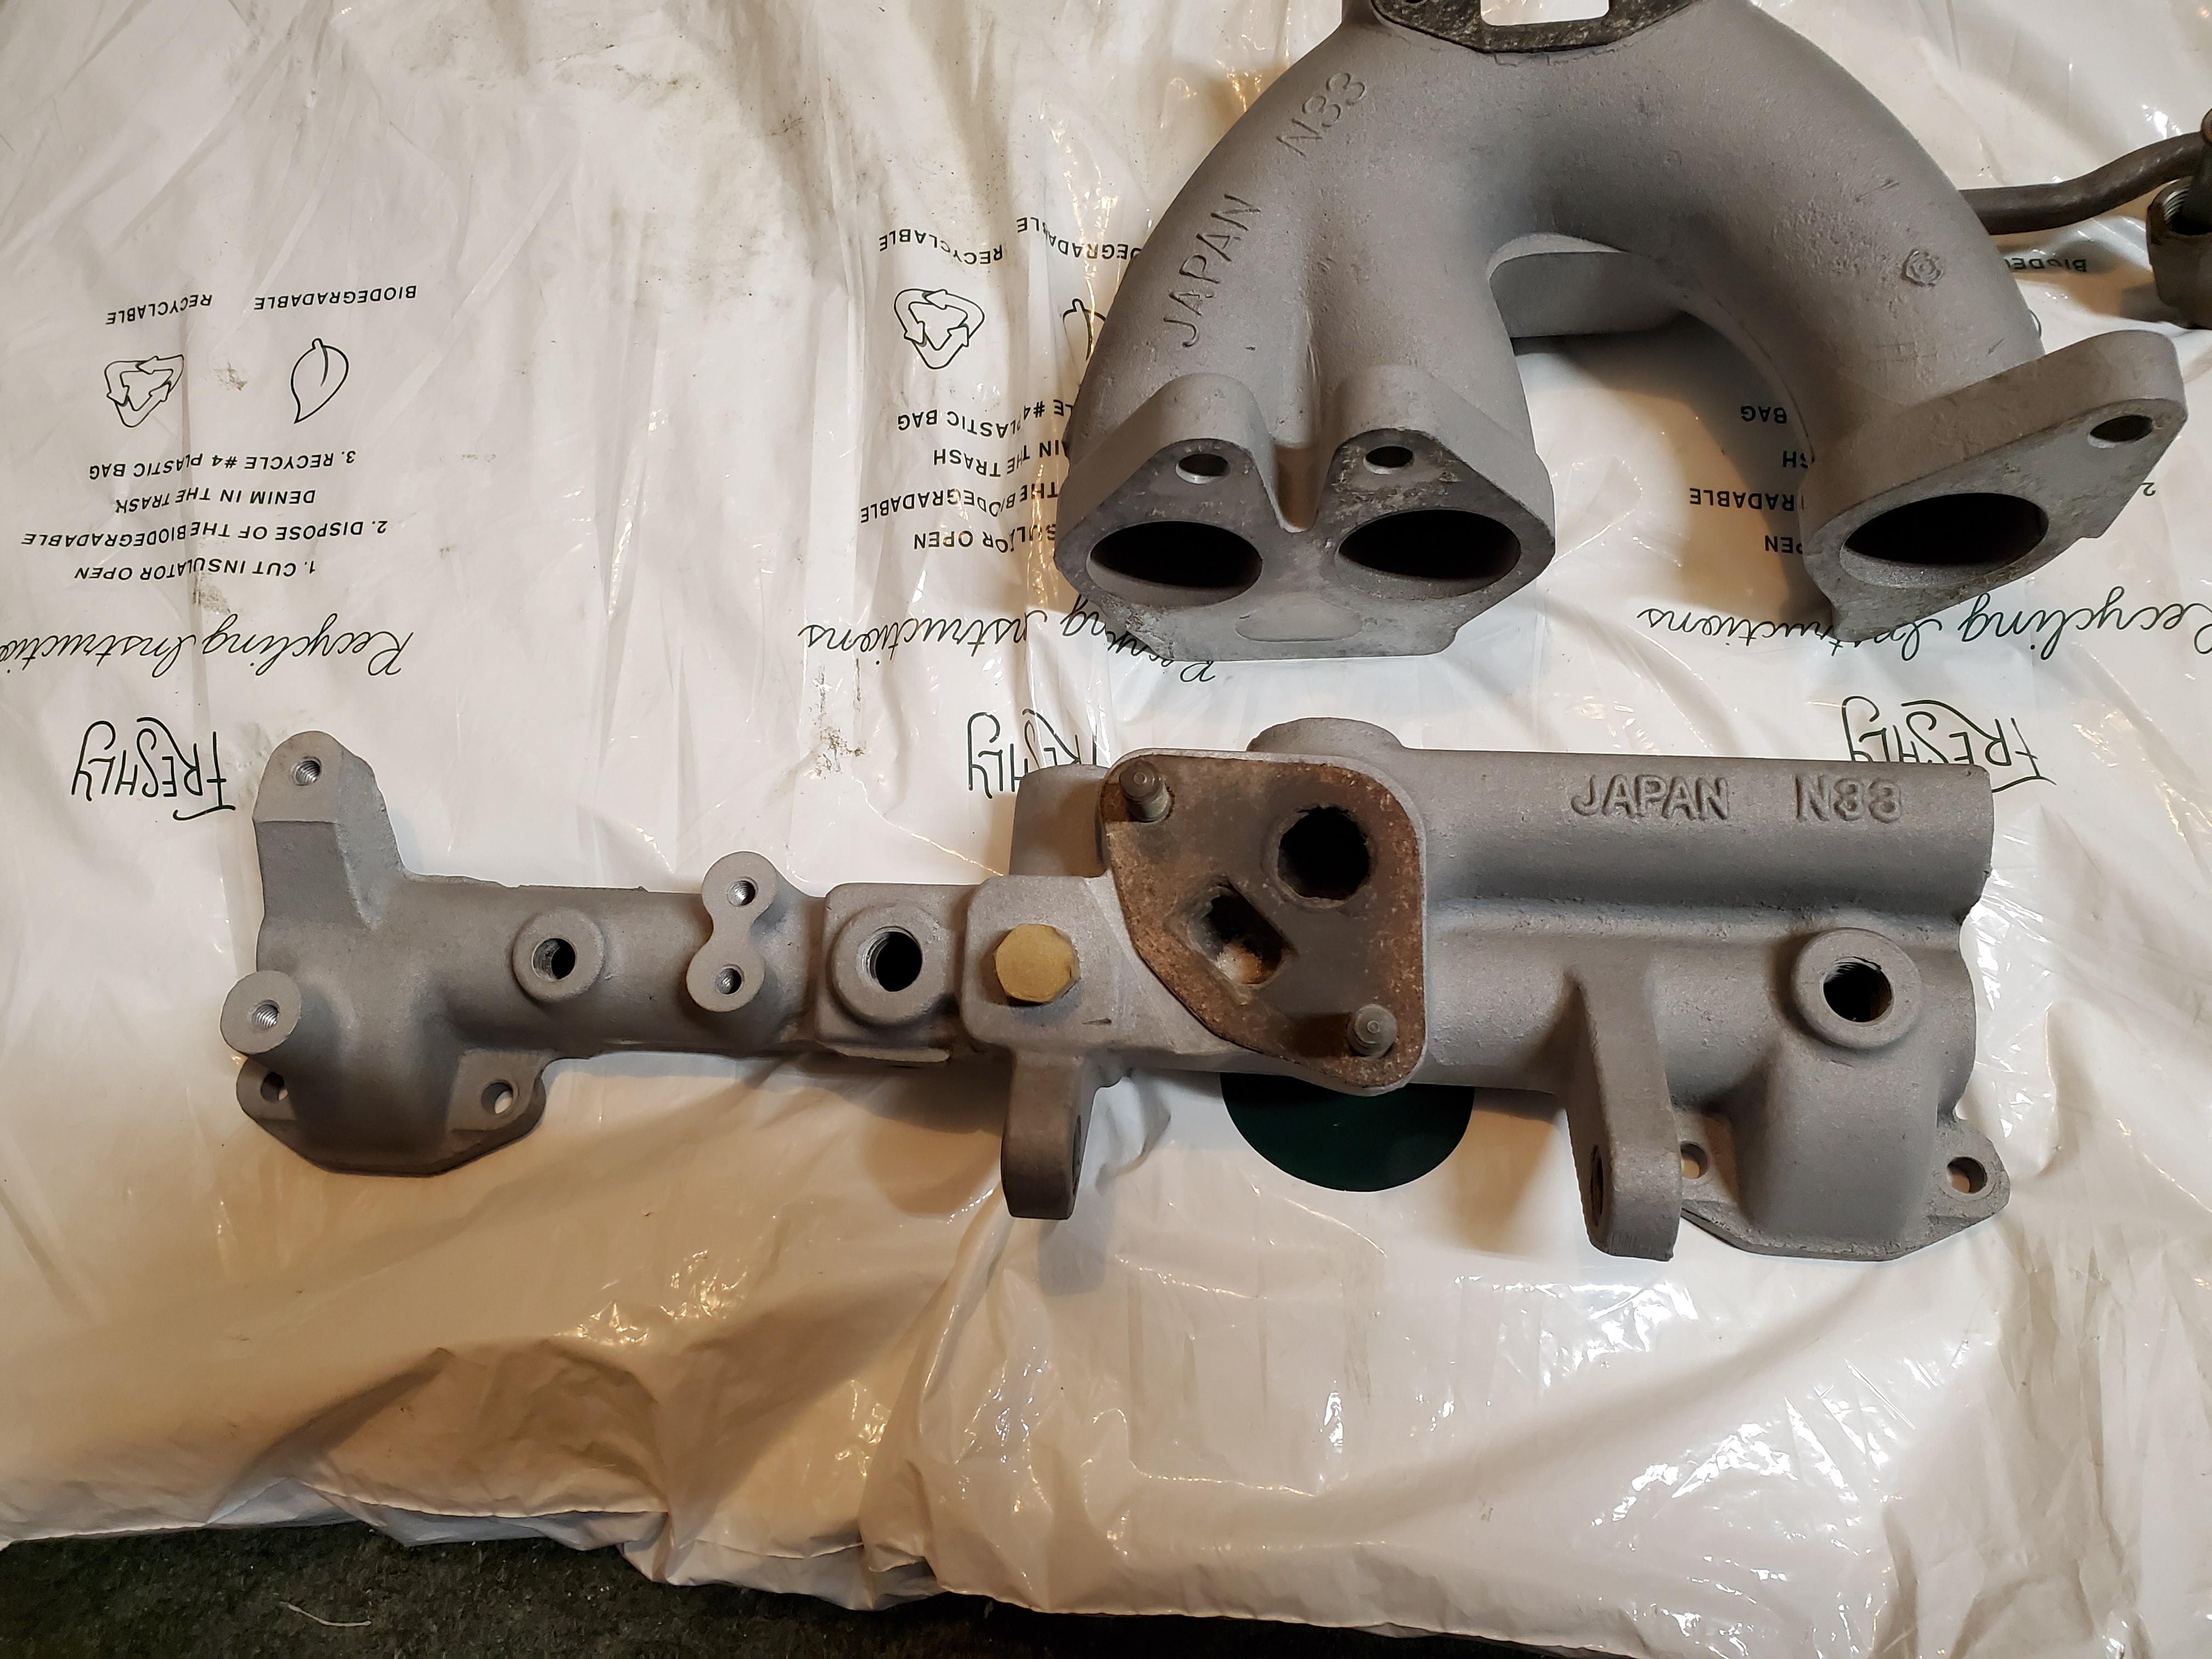
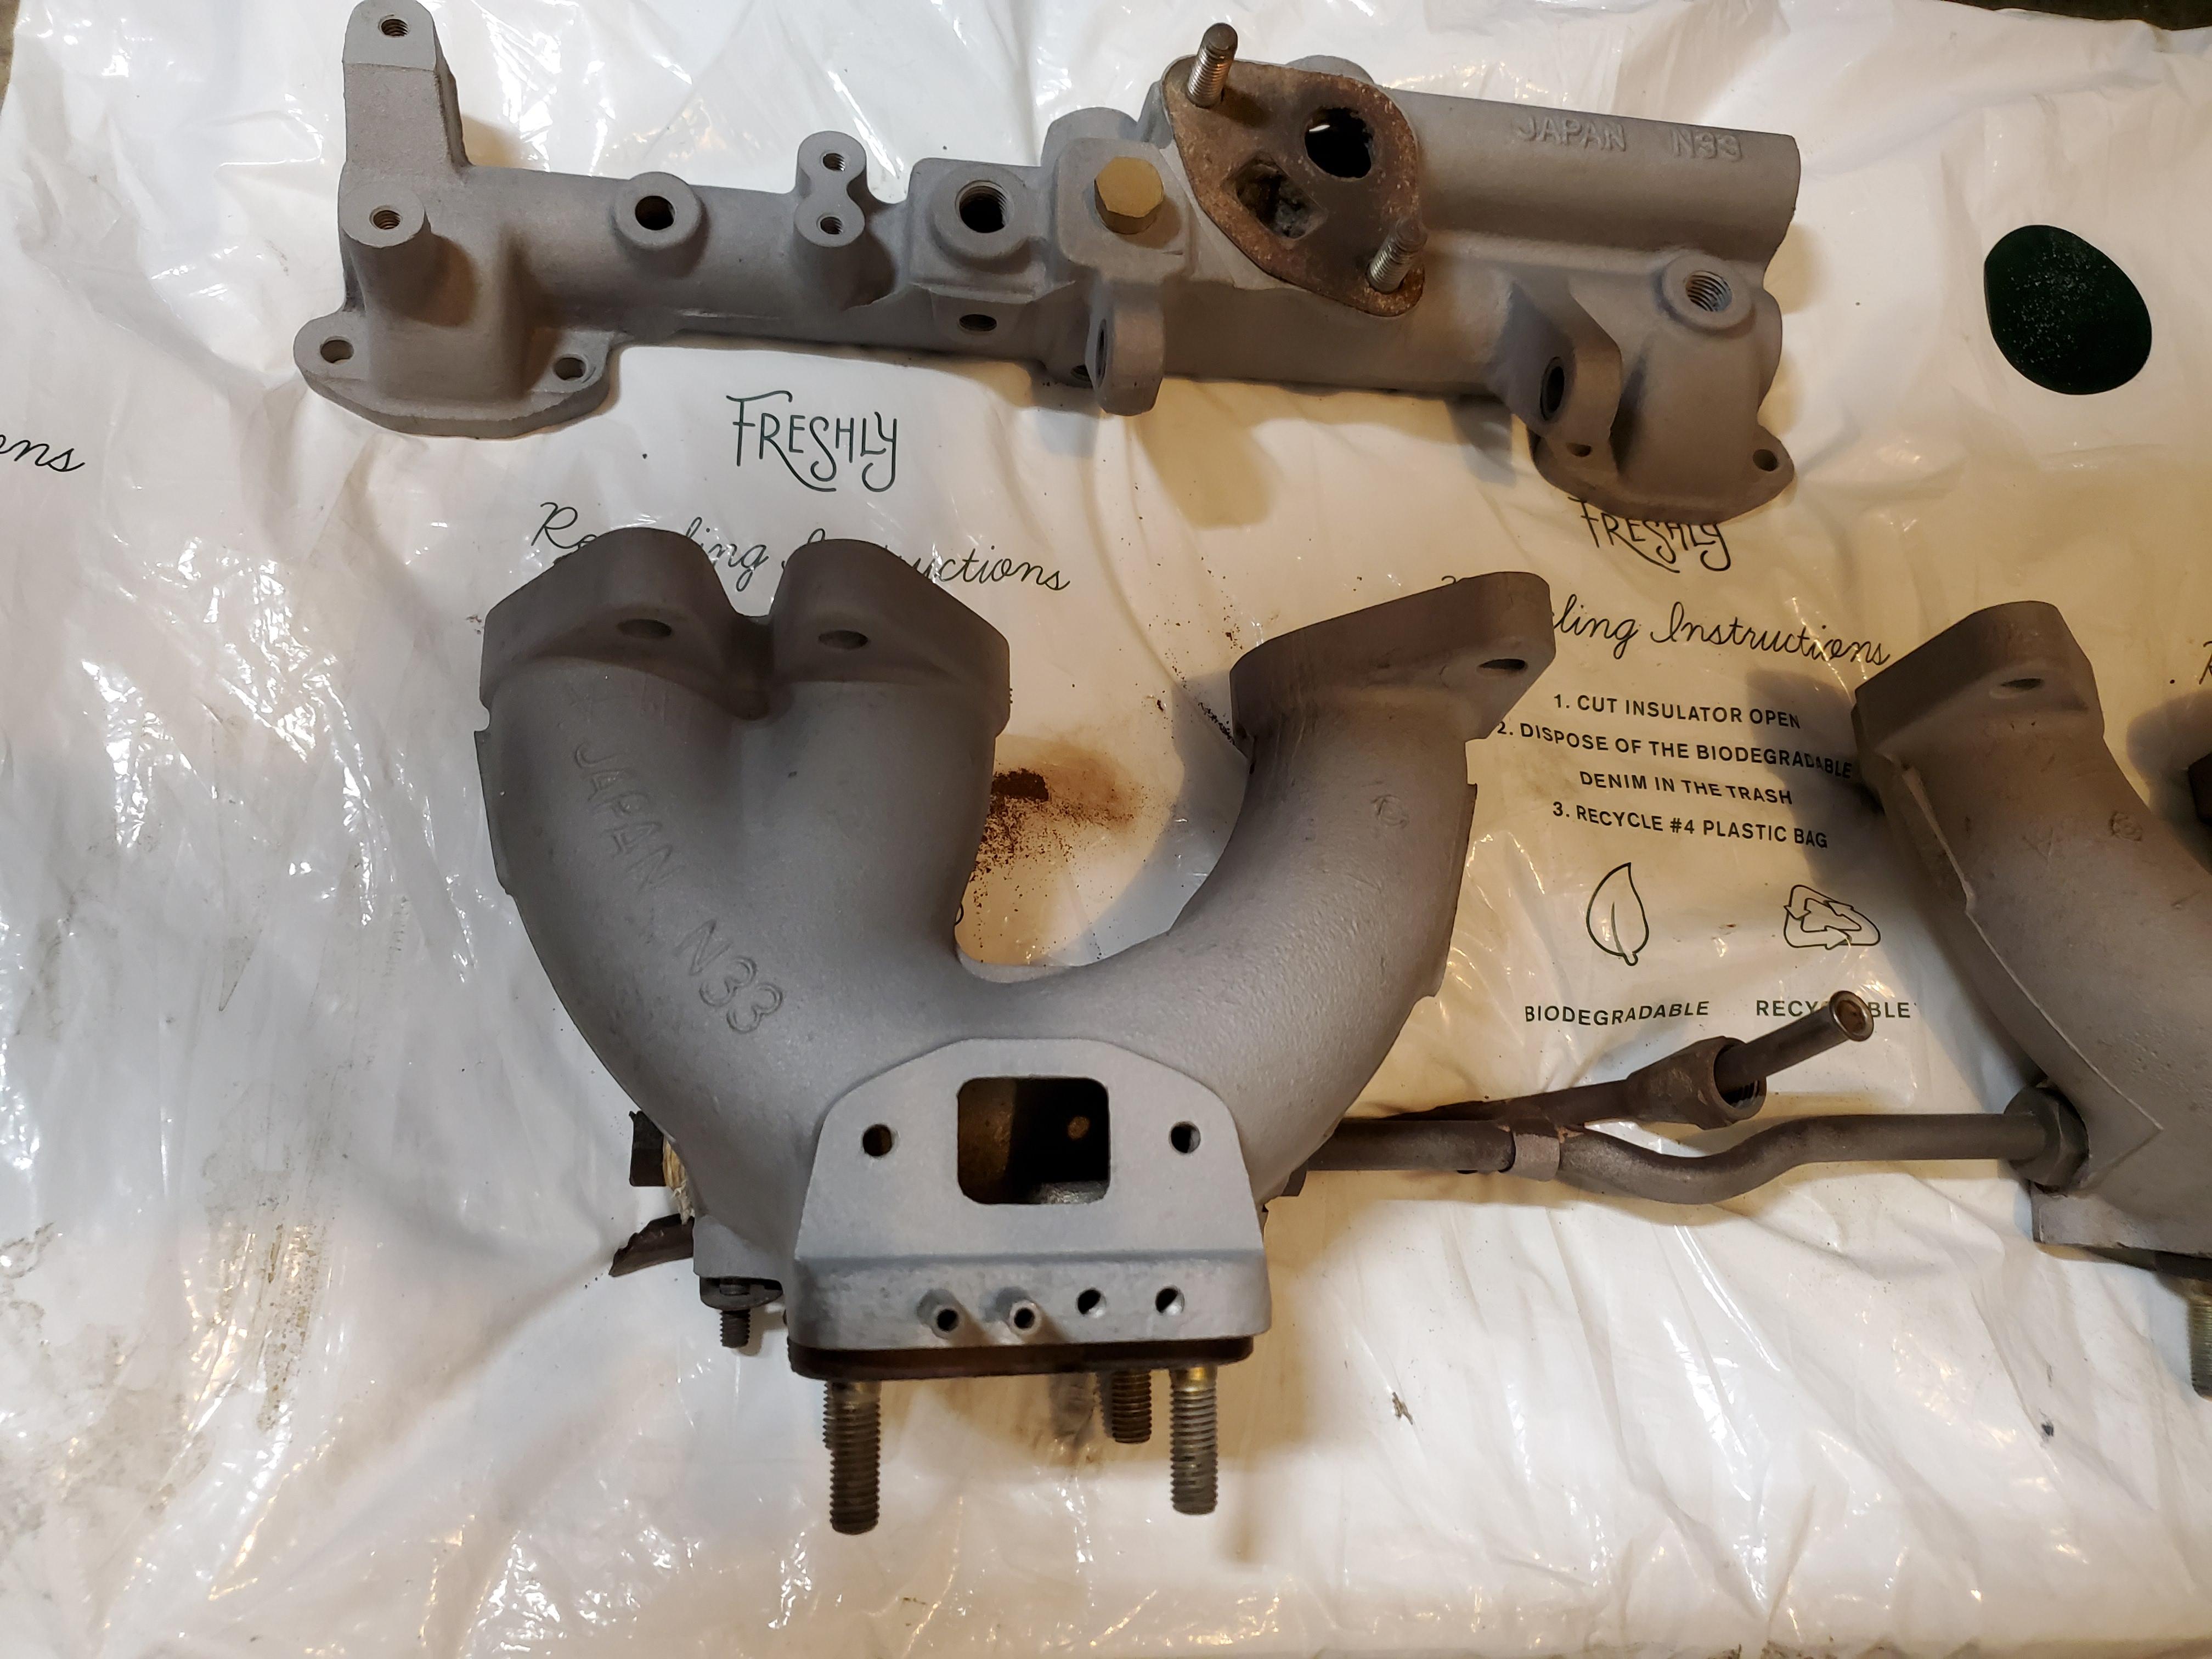
Got the intake and balance tube bead blasted. I finished those off with a coat of matte clear to help with finger print removal. I probably should have removed the gaskets before I had the bead blast done. Noticed one damaged core plug in what looks to be the exhaust port of the balance tube. Working with parts store now to replace all of the core plugs. Also got the fuel tank cleaned and sealed and the new exhaust bent and welded up. Will post pics of those later.
.thumb.jpg.1a540fa6fef4662758700520a47e2d95.jpg)


-
No prob. Wasn't sure. Unfortunately, as I have gotten older, I have also become a bit more opinionated. Not sure why that is. Hair is graying also ☺️
-
OUCH!...Sorry about that. Back to minding my own business.
-
Hi Careless, Send me a link when you get a chance. This is the stuff I ahave been using, which is the closest that I have found to the OEM. http://newcoproducts.com/index.php?route=product/category&path=34_44_304
-
I will have to walk away from the pissing contest about the dashes on this BAT thread. Do not wish to hi-jack it and detract from the auction. For those actually interested in the difference between the the two dashes, other than the huge price difference, my thoughts are as follows. Personally, I believe the exterior plastic is exactly the same for both dashes, and both are installed the same way (vacuum forming). Both have the exact same texture which does not match the OEM texture, but looks good. The difference is the foam portion. The Vintage Dash foam is molded and is a single piece. Just Dashes removes the outer plastic skin and trims the foam where needed and then re-foams and shapes the dash. I think the problem here is that there can be areas of the Just Dashes dash that are not replicated as well. One of those areas is the center cluster where the three instruments are located. You can actually see the difference in the pics below, Just Dashes dash is on orange car, Vintage on the blue. The 'Deja Vu' Dash is from Just Dashes and was purchased, I think, before Vintage Dashes was in existence..or at least in it's infancy. The Just Dashes 'scallops' are a bit fat and rounded, where as the Vintage Dashes 'scallops' are a bit more sleek. I did a visual check with my '70 and feel that the Vintage Dash replicated this area much better than Just Dashes. I did not check other areas of the dash. Instrument fit is similar for both dashes. The one negative for Vintage Dashes is that they omit some of the flaps in the glove compartment area. Not sure why that is as it would seem pretty easy to re-produce. The flaps are not visible once the glove box is installed. Anyway, just my opinion for those that are interested.

-
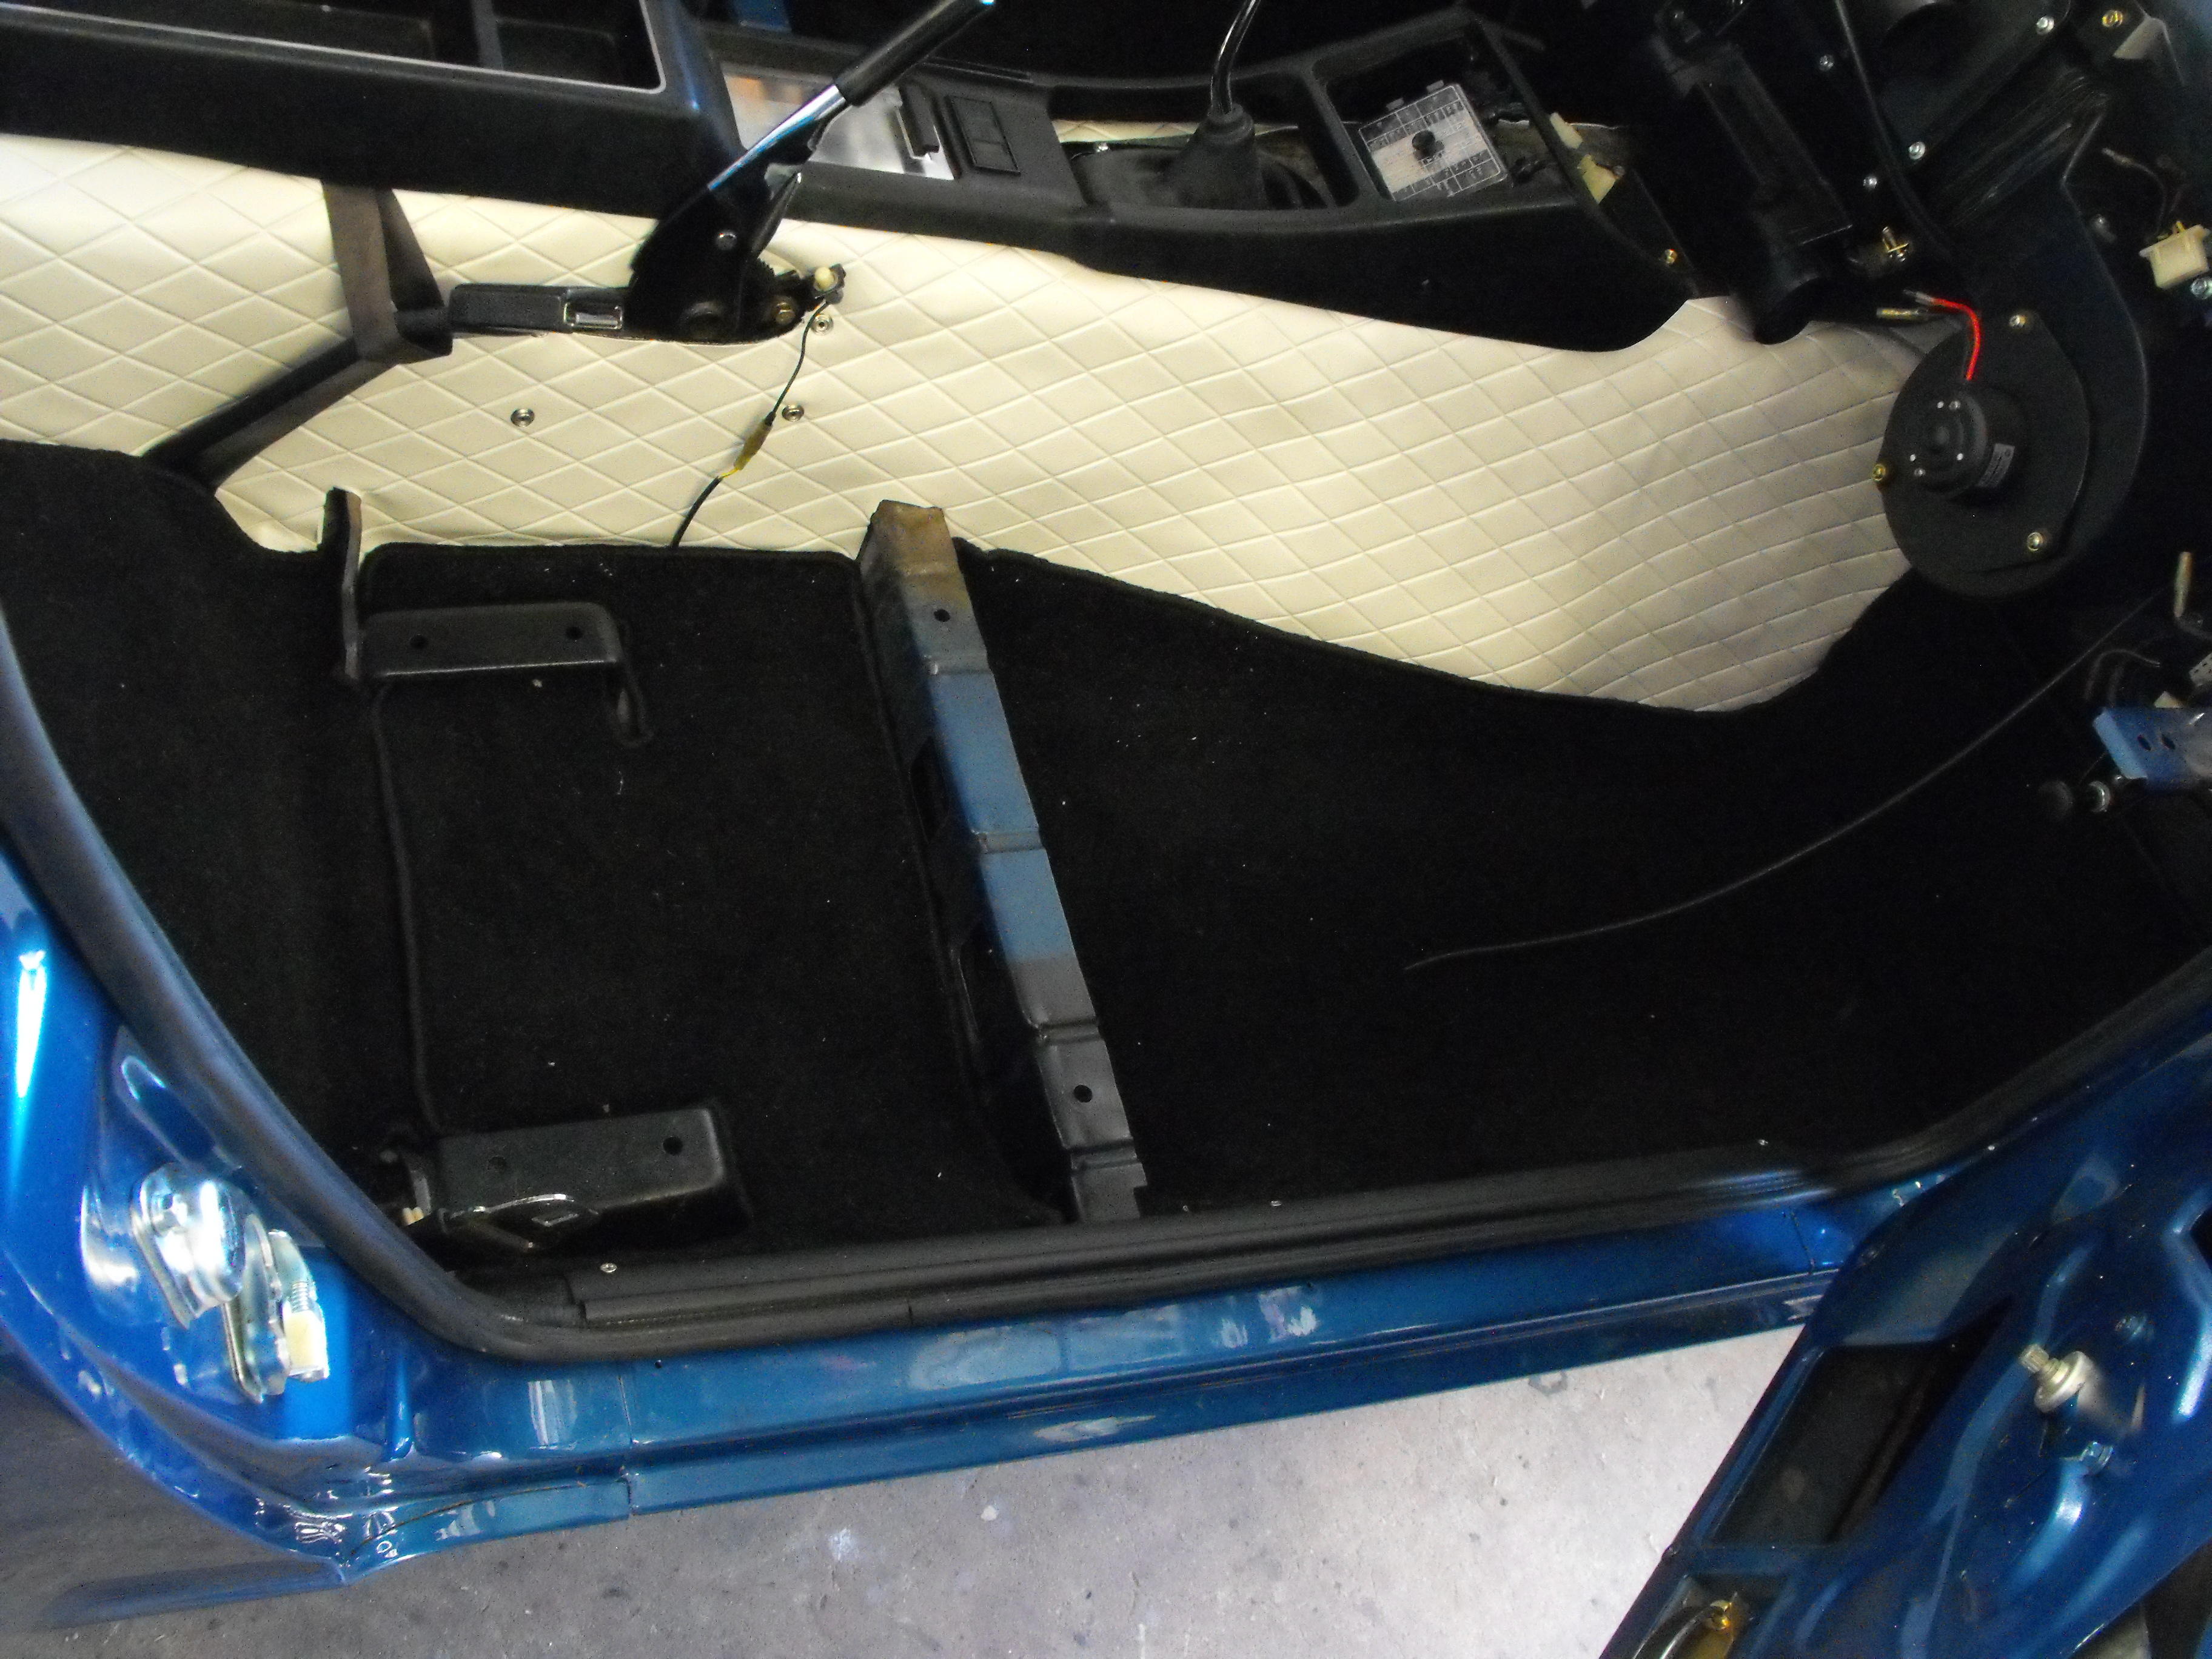
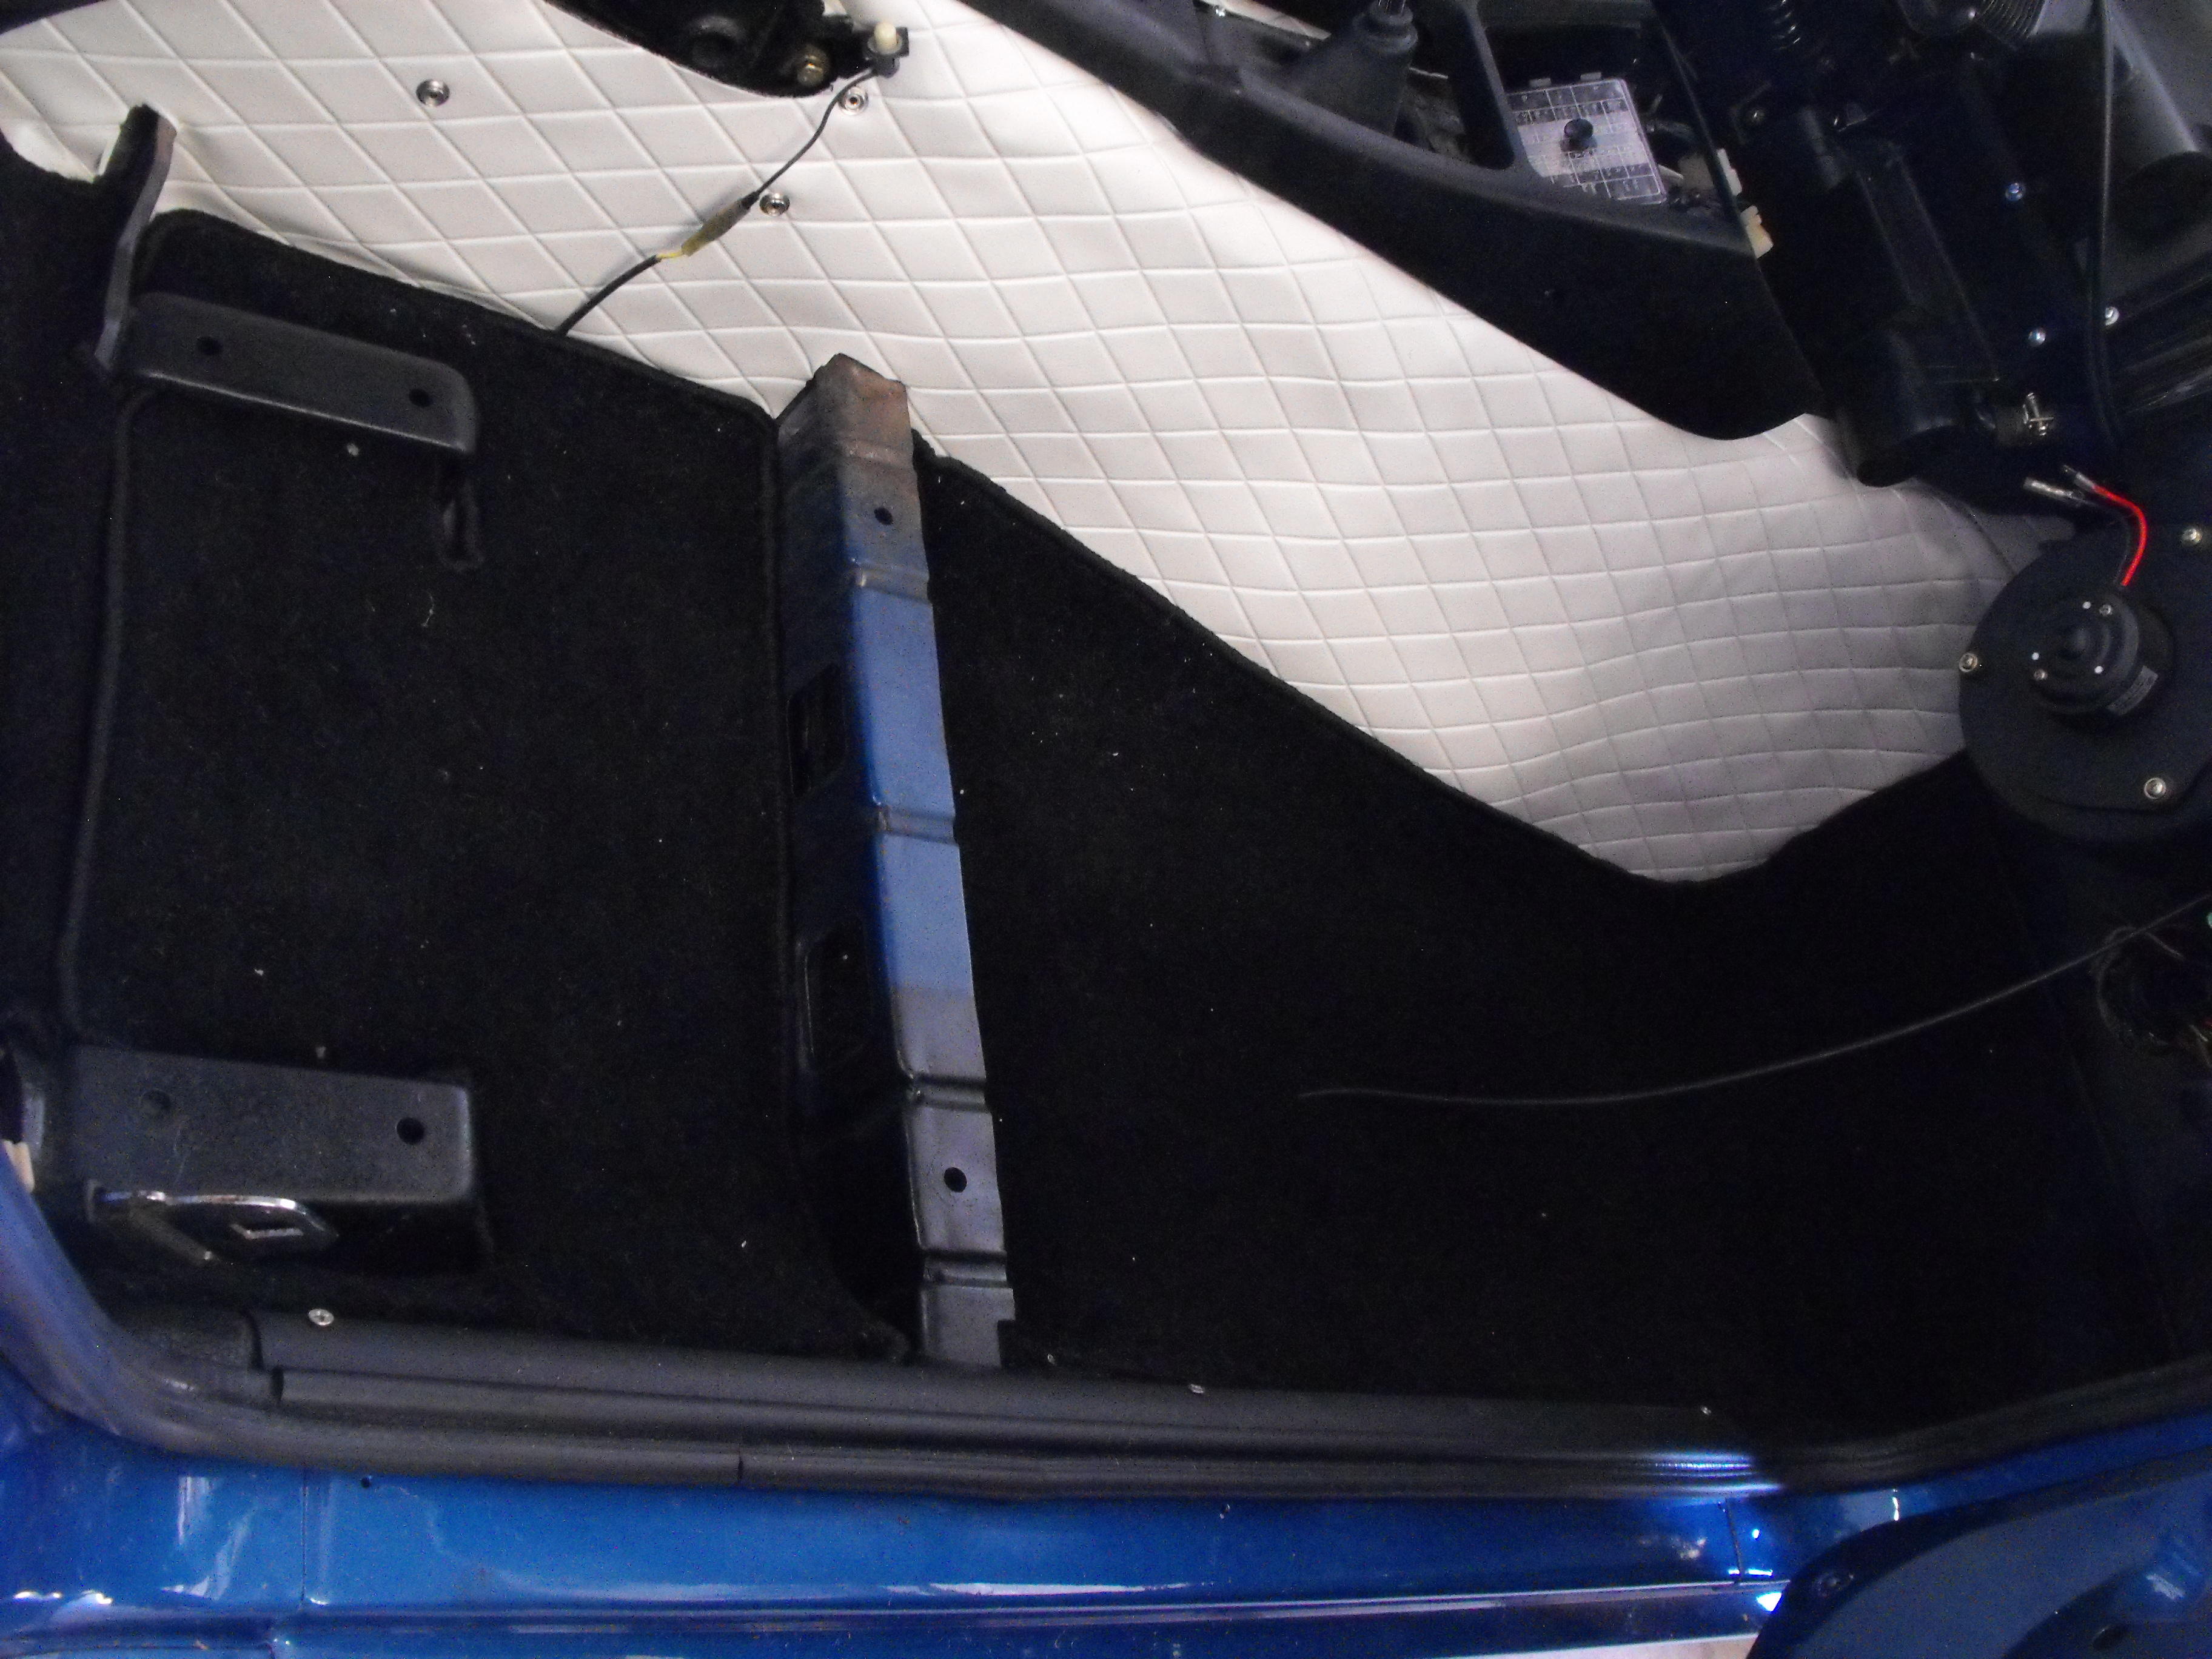
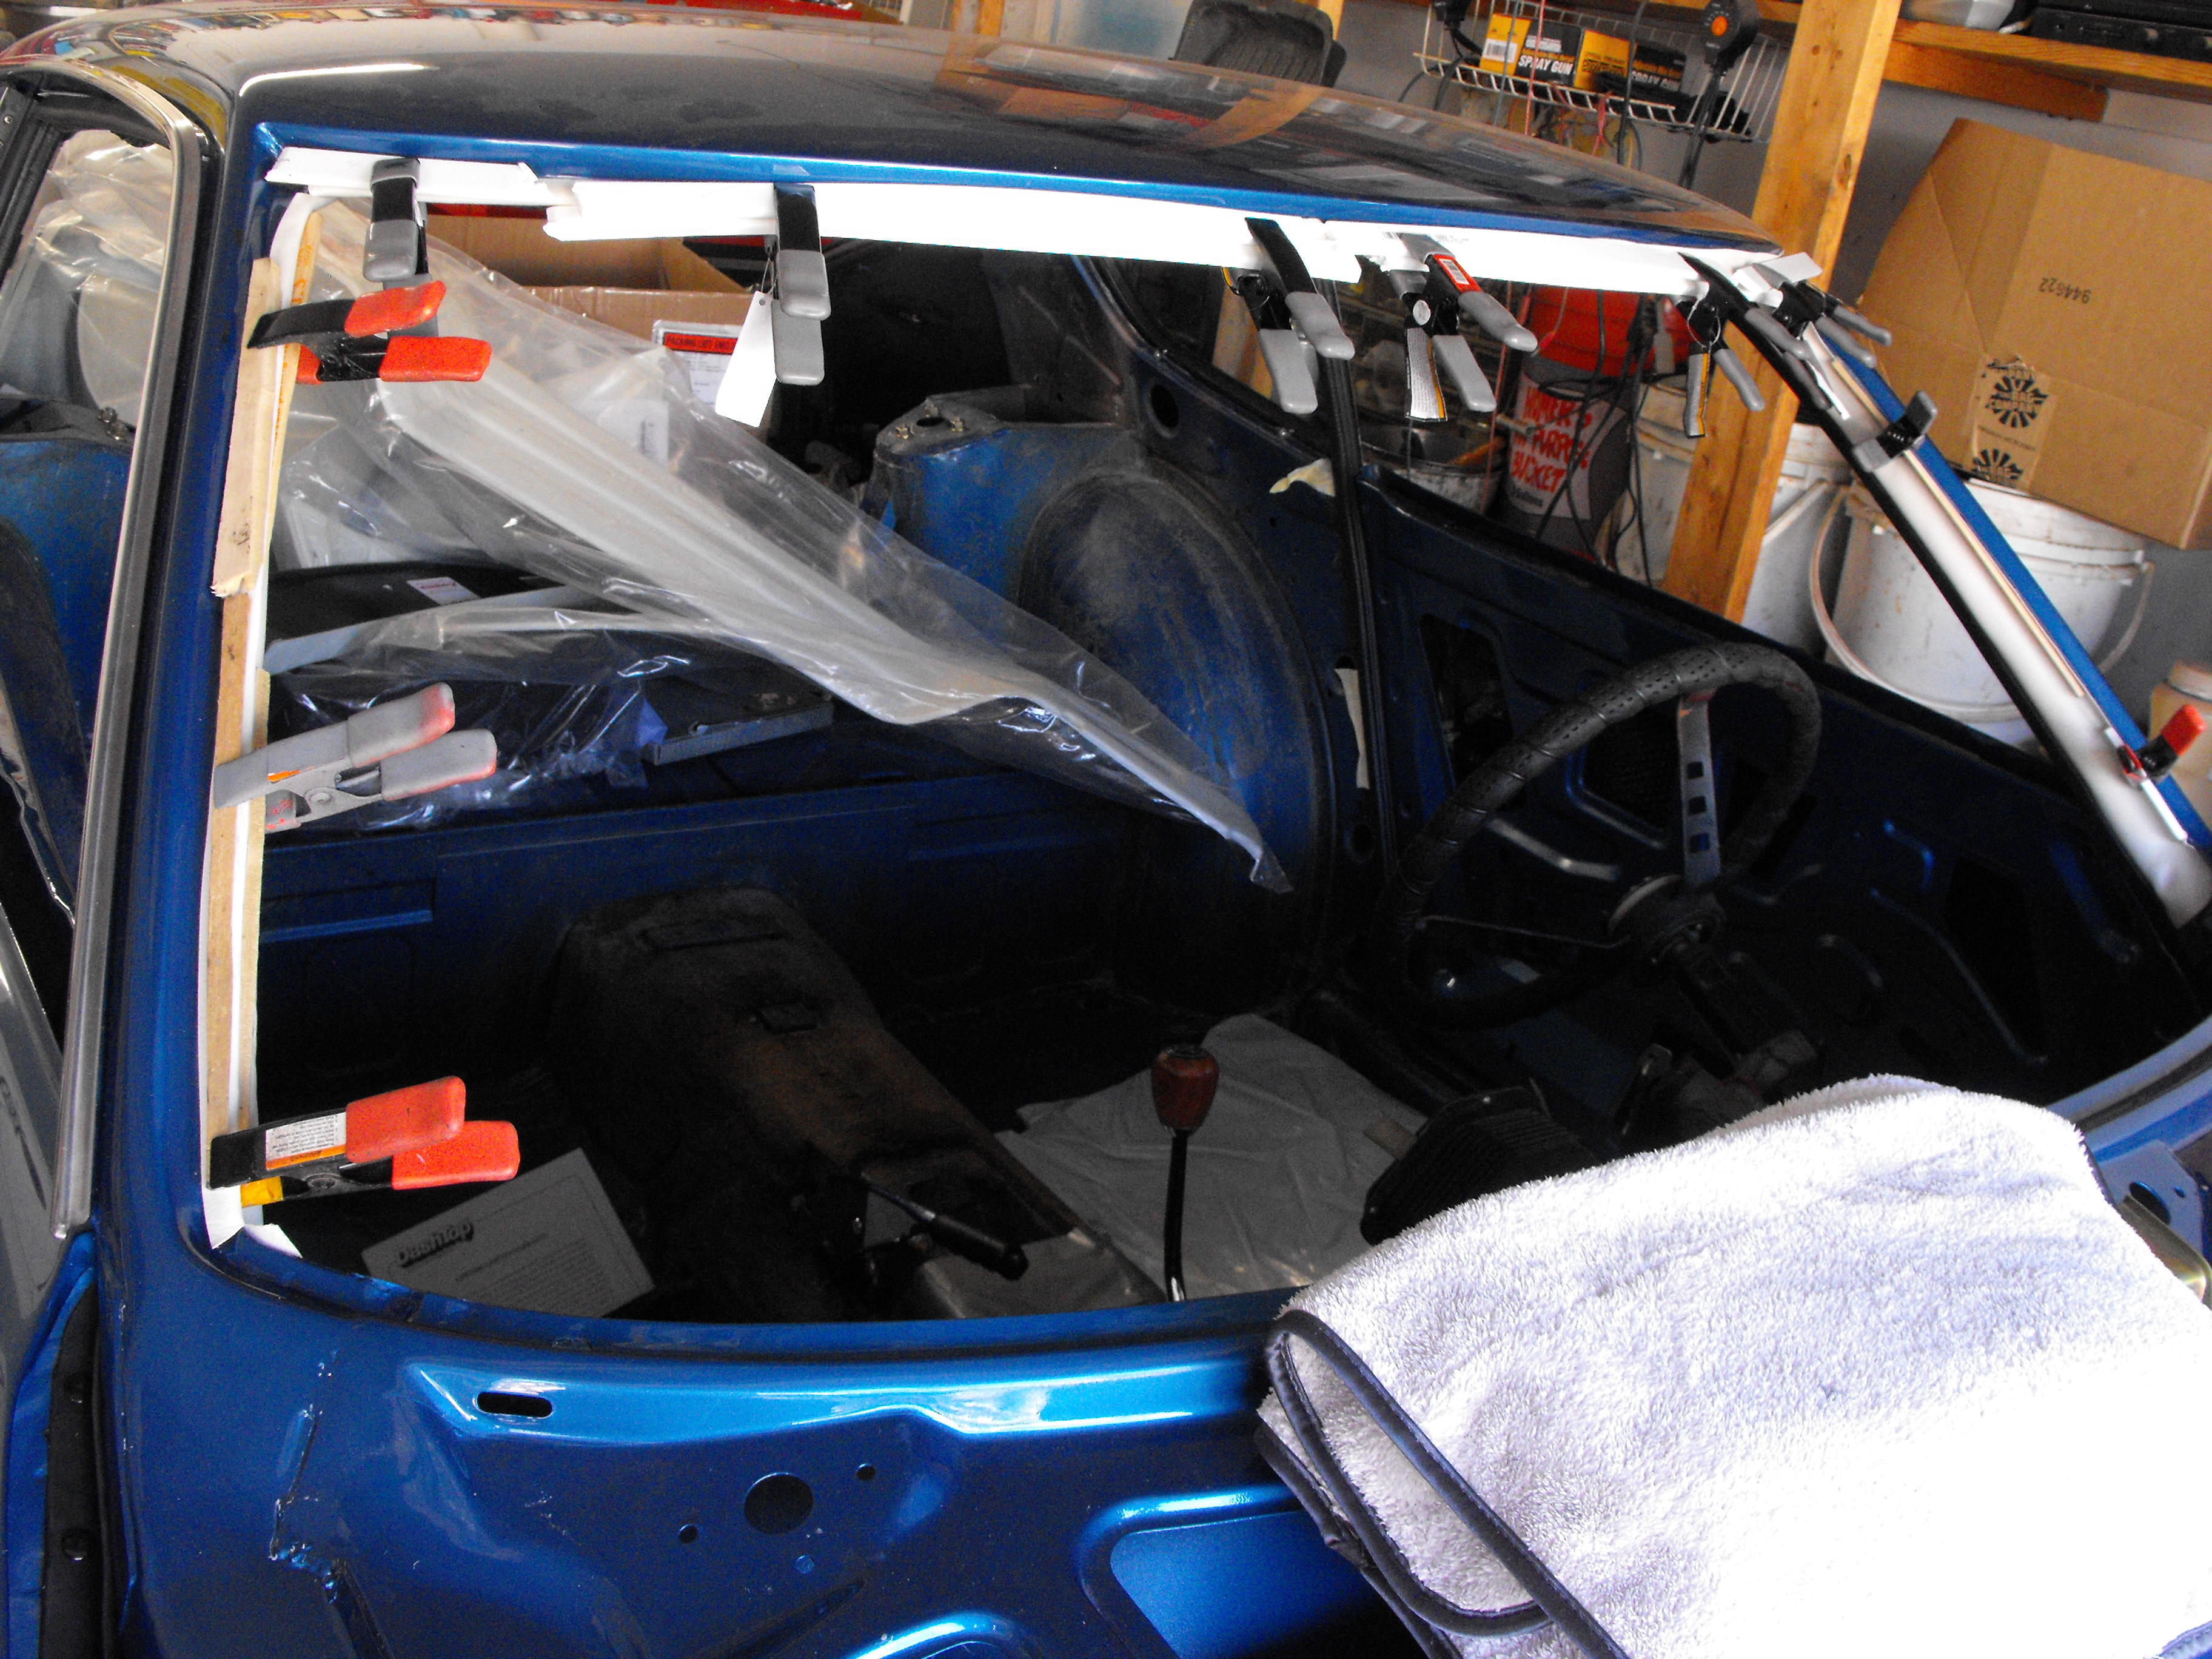
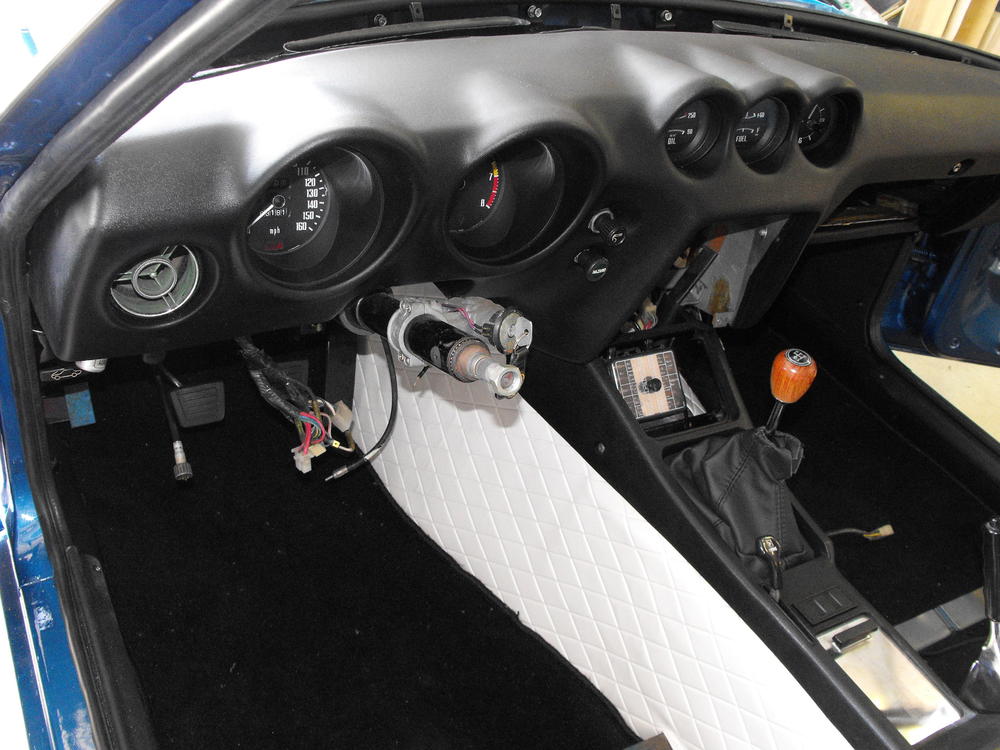
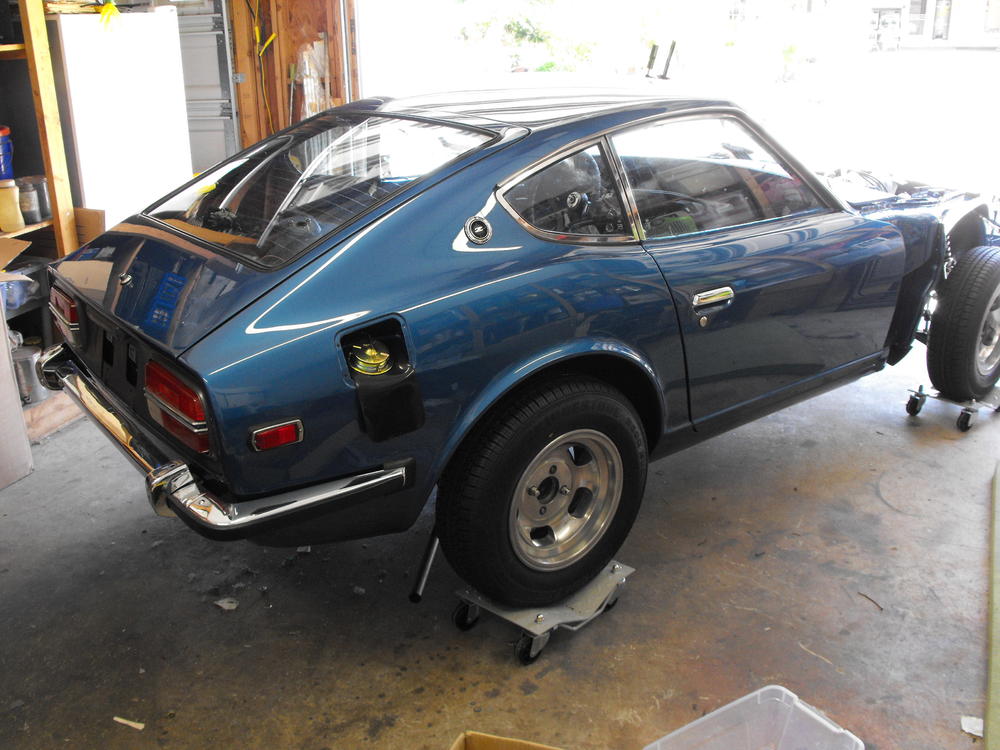
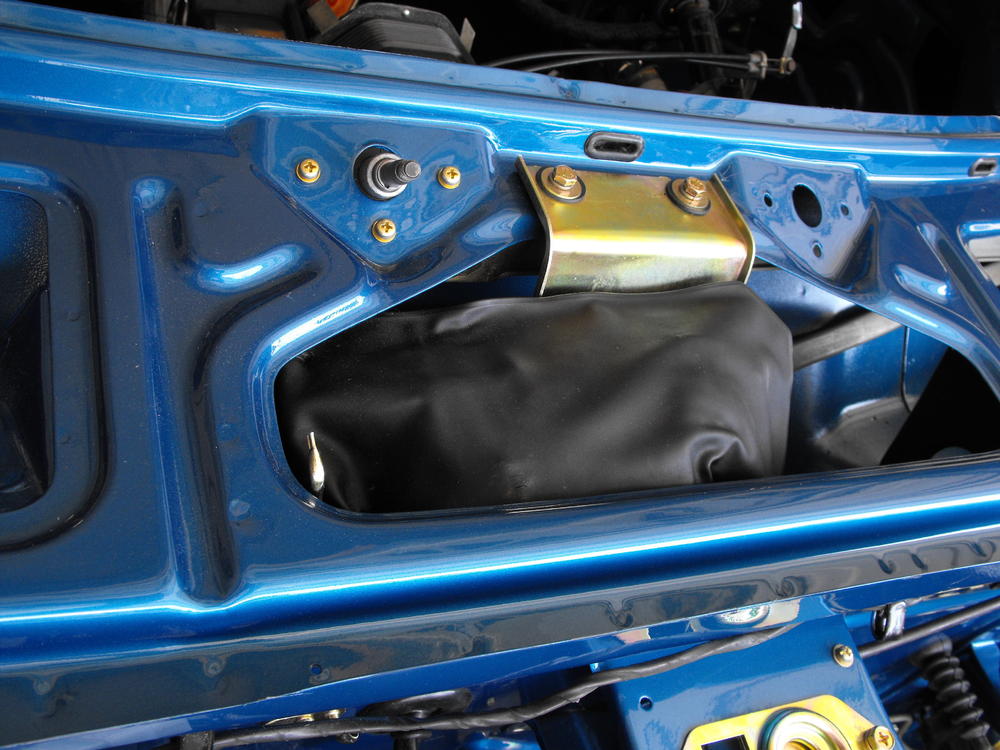
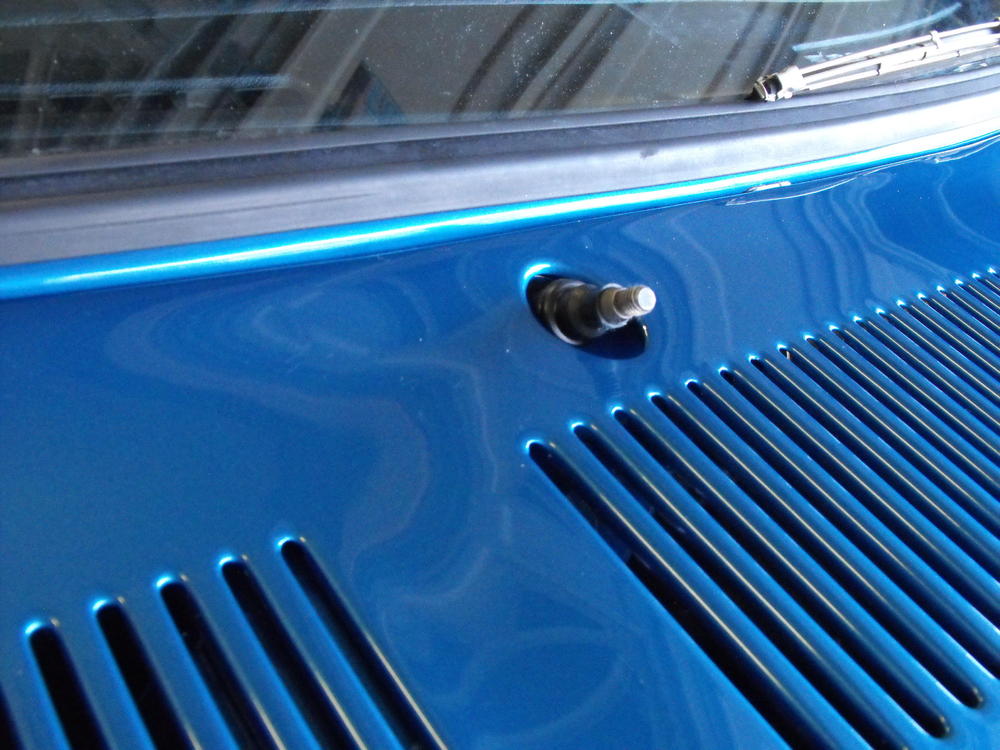
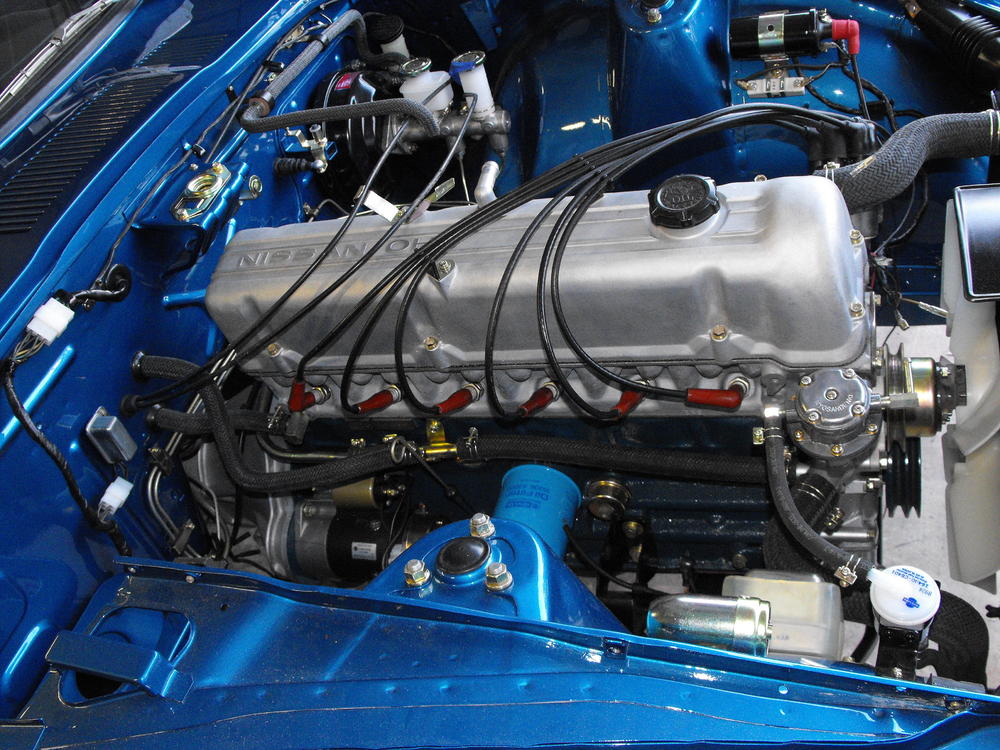
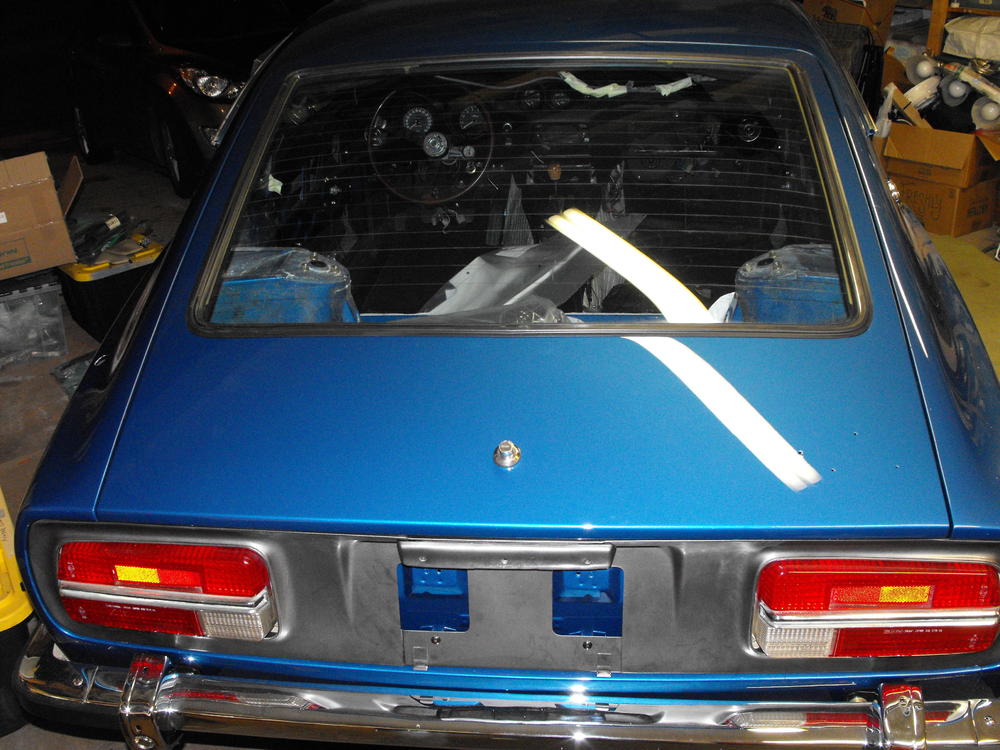
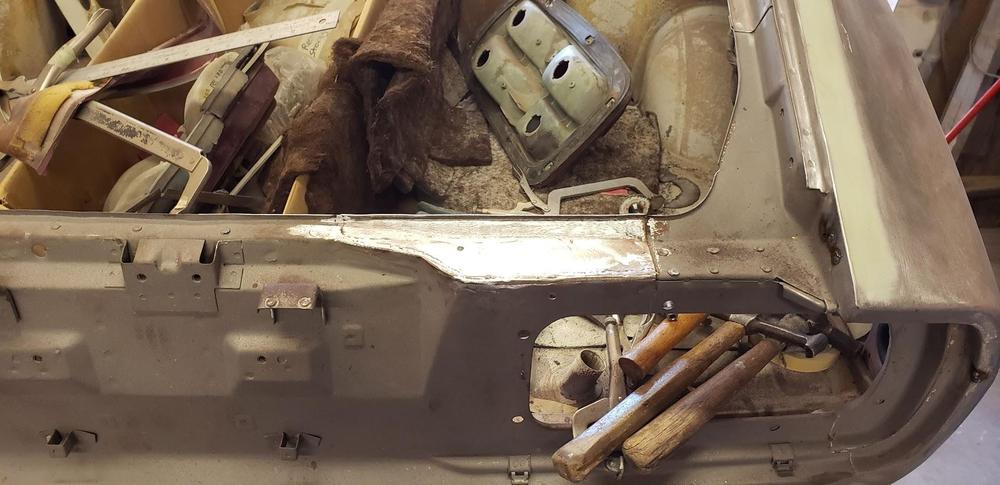
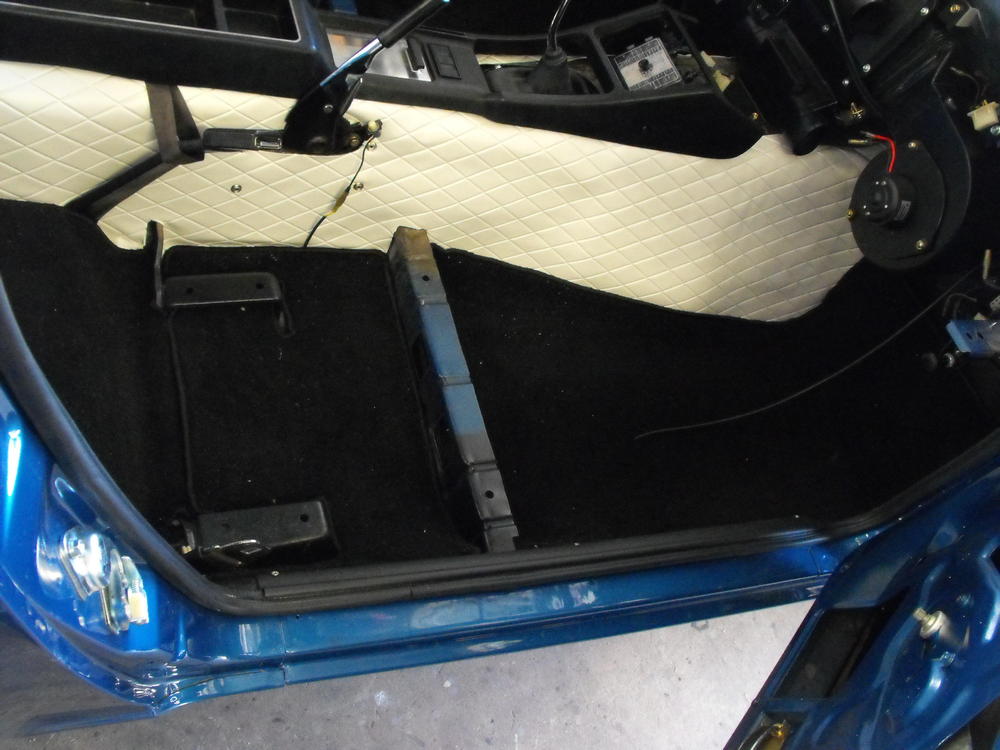
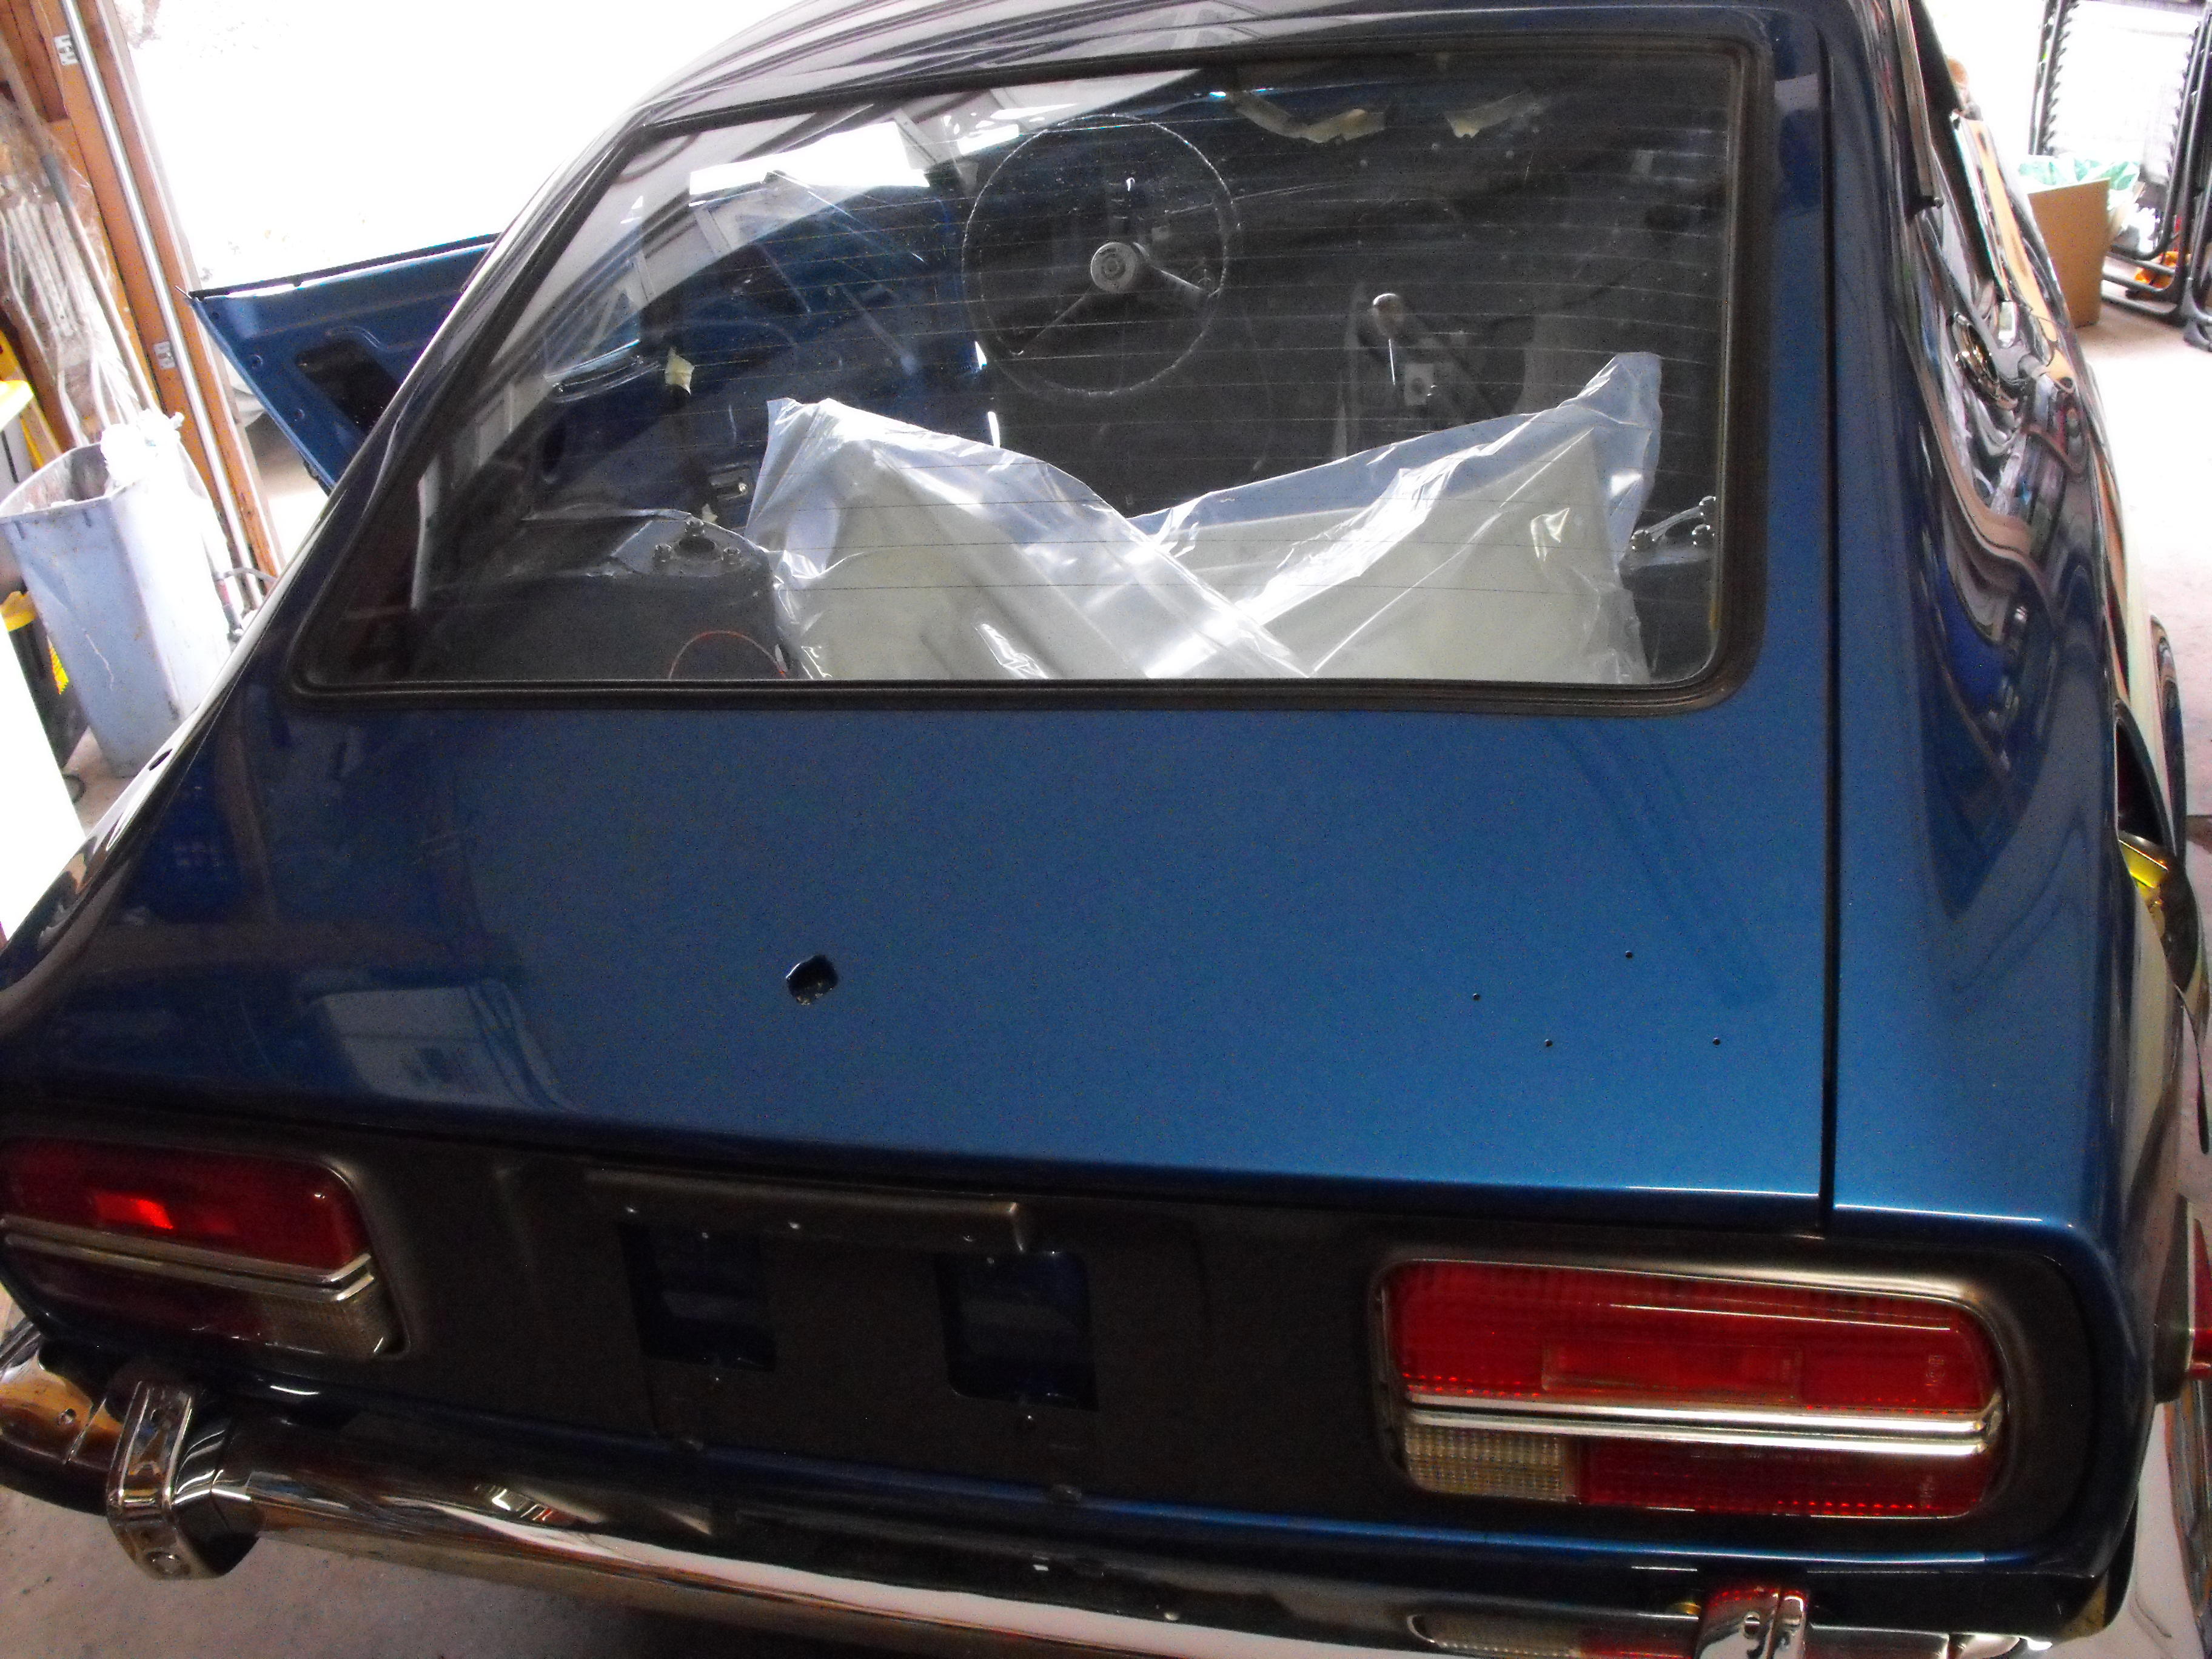
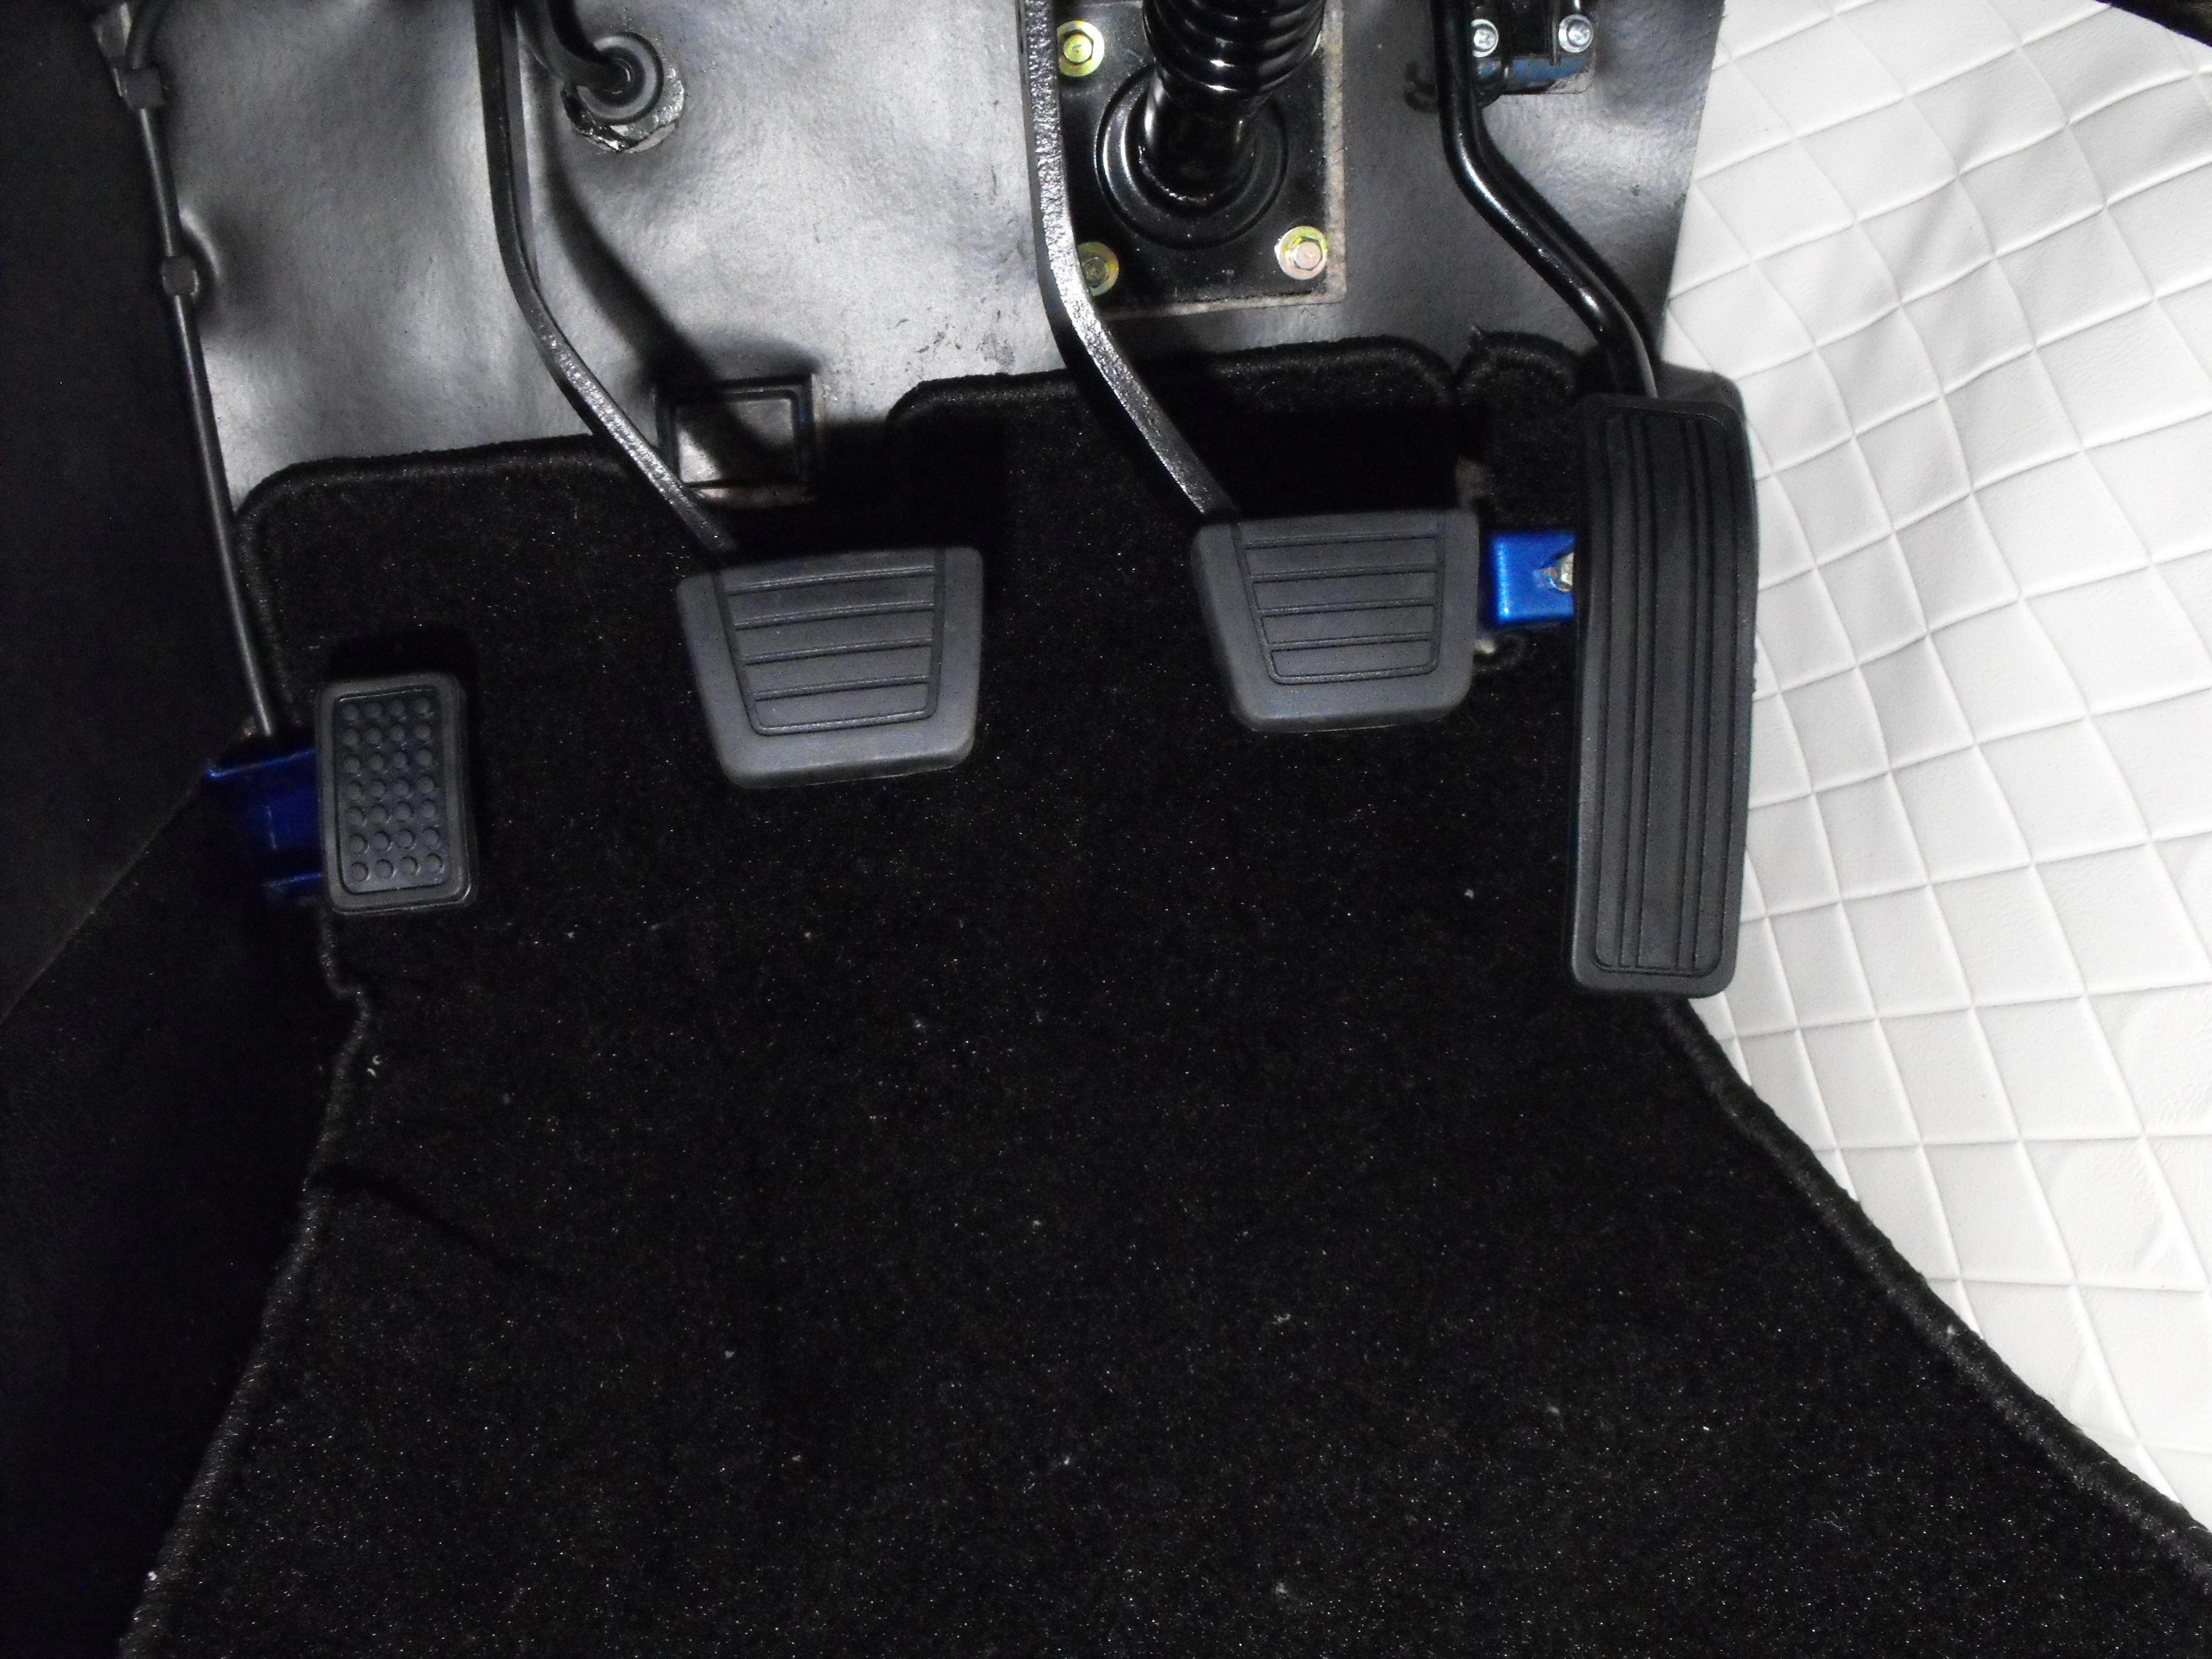
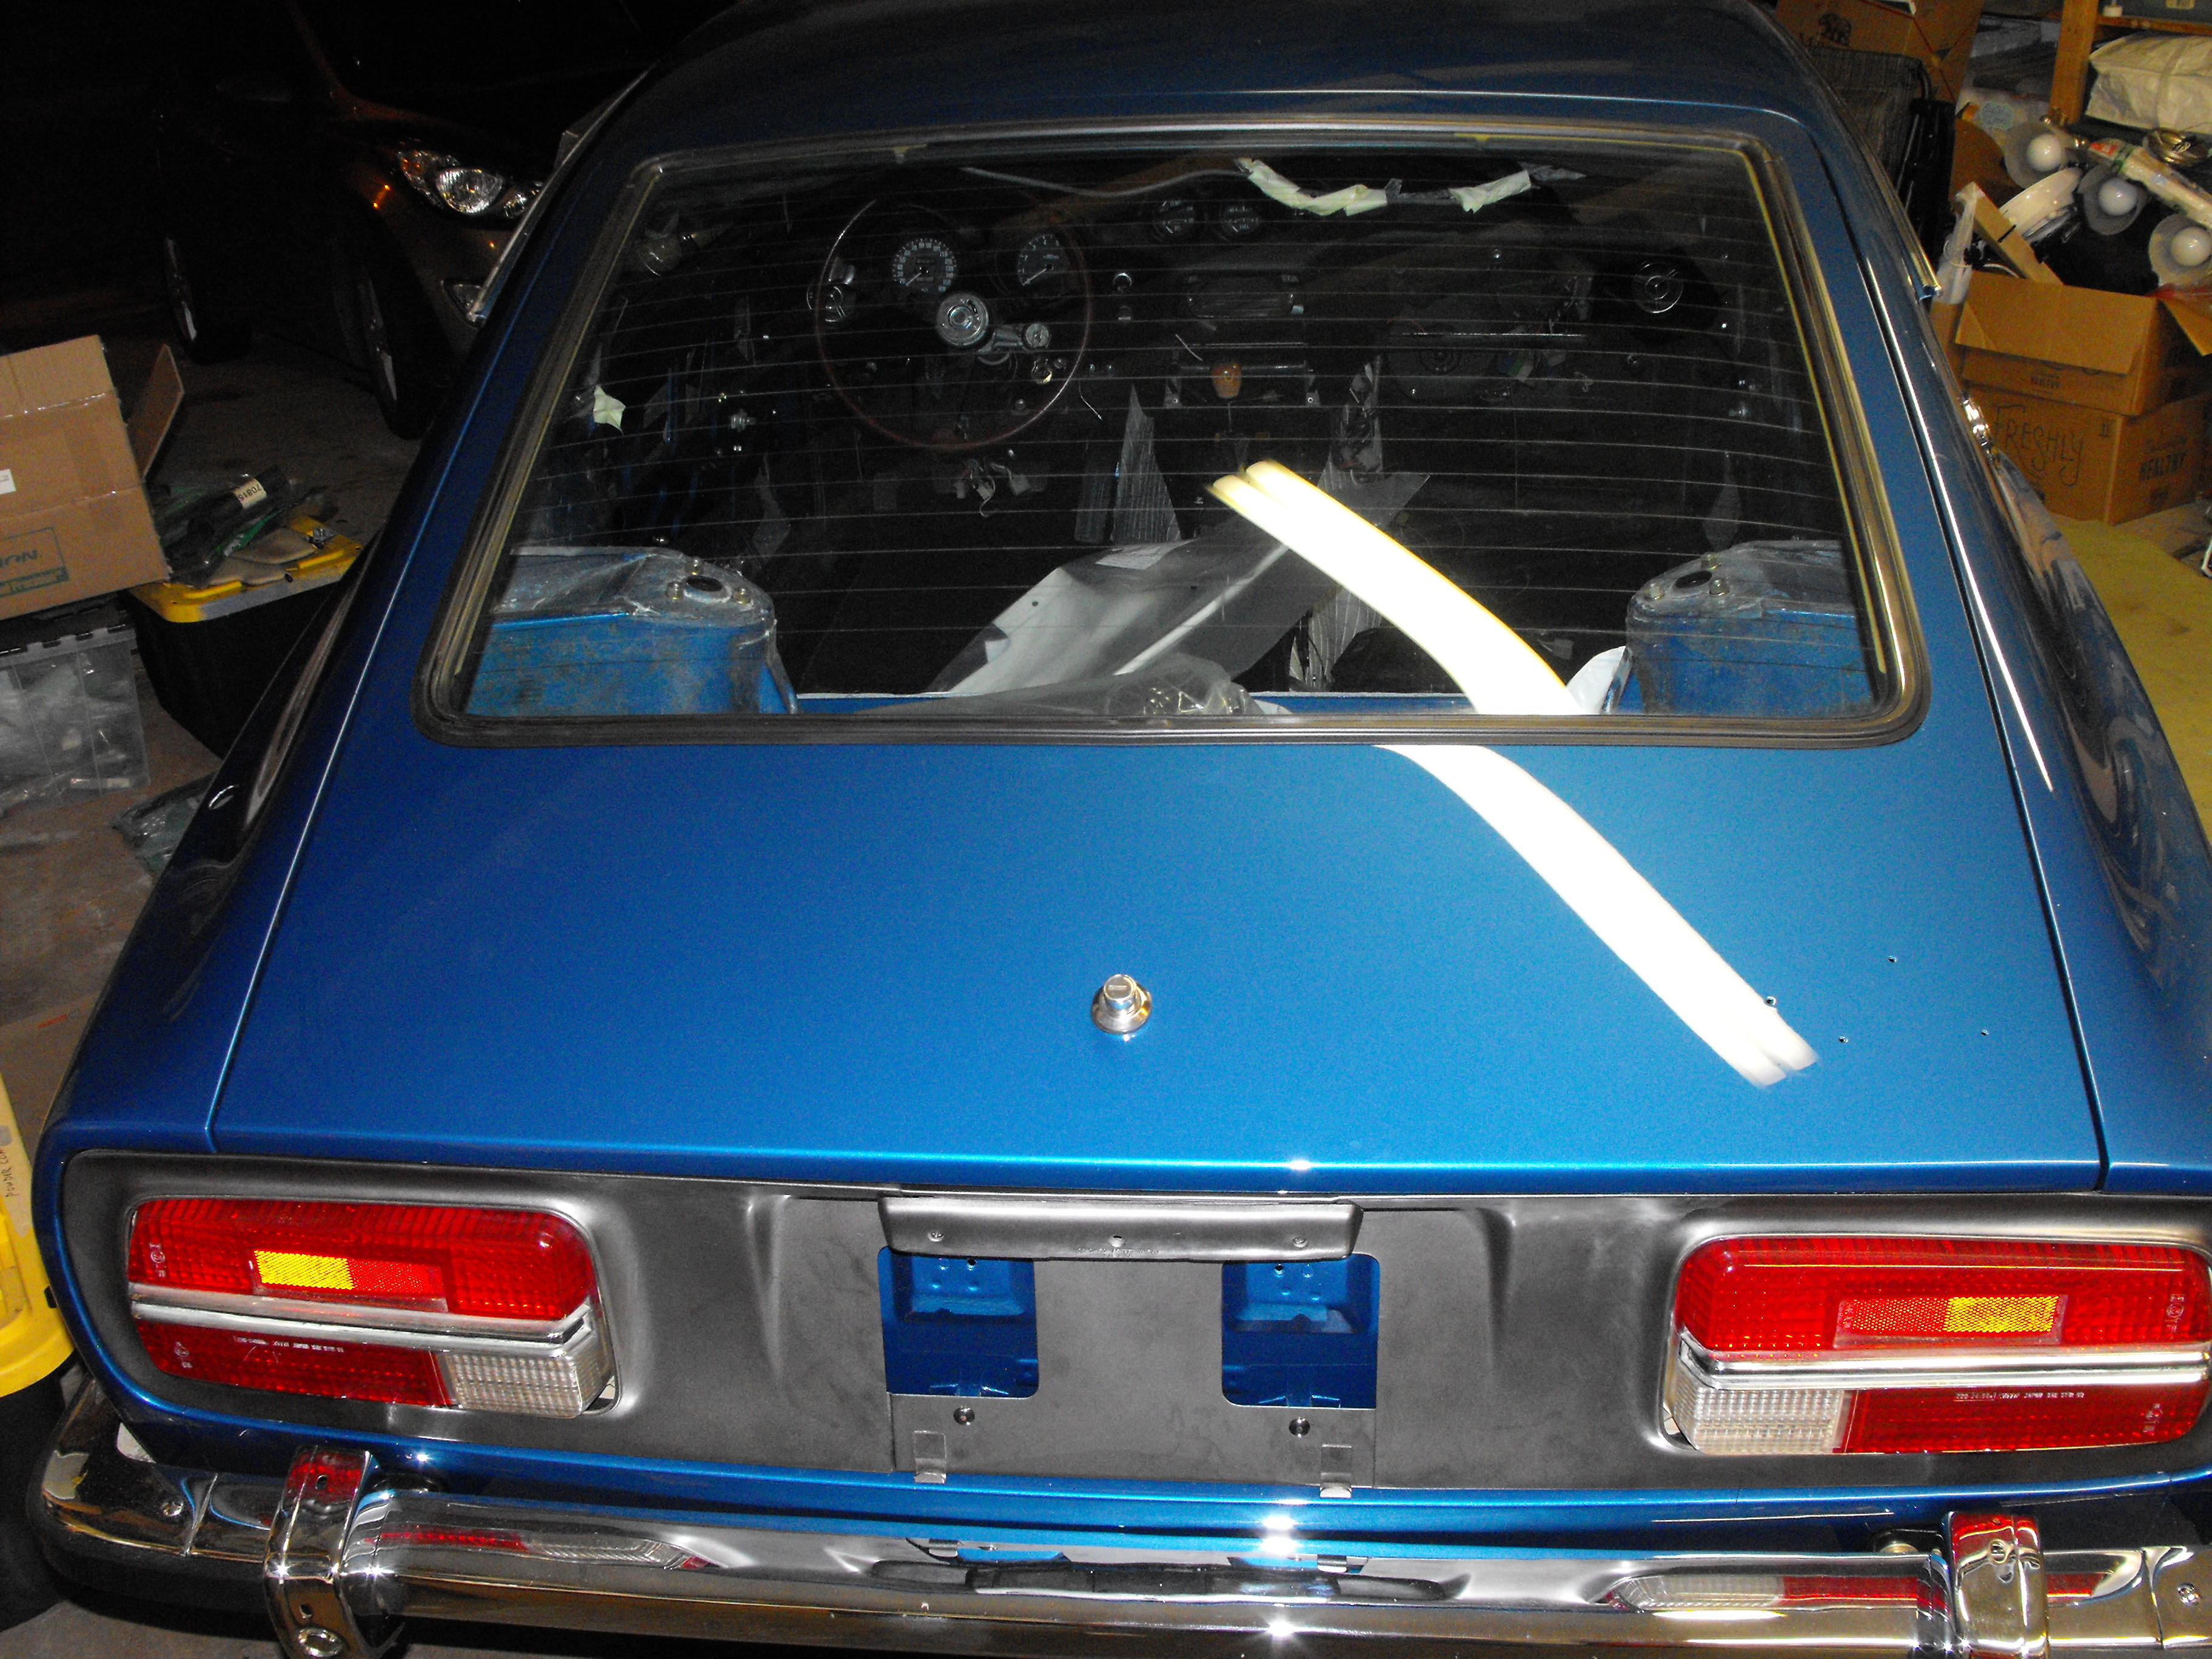
Wife was out of town this weekend. I can get so much done when she is away. It was like Christmas this weekend, woo-hoo. Got the hatch installed, front and rear glass in, got windows in both doors. Put in the choke plate after small mod to clear choke switch screw. Cleaned up floor area, installed kick plates and installed dash. Got wiper system installed. Cleaned up and put the old plug wires on cause i thought they look cool. Still a lot to do but she's lookin' pretty nice. Here are some pics.


-
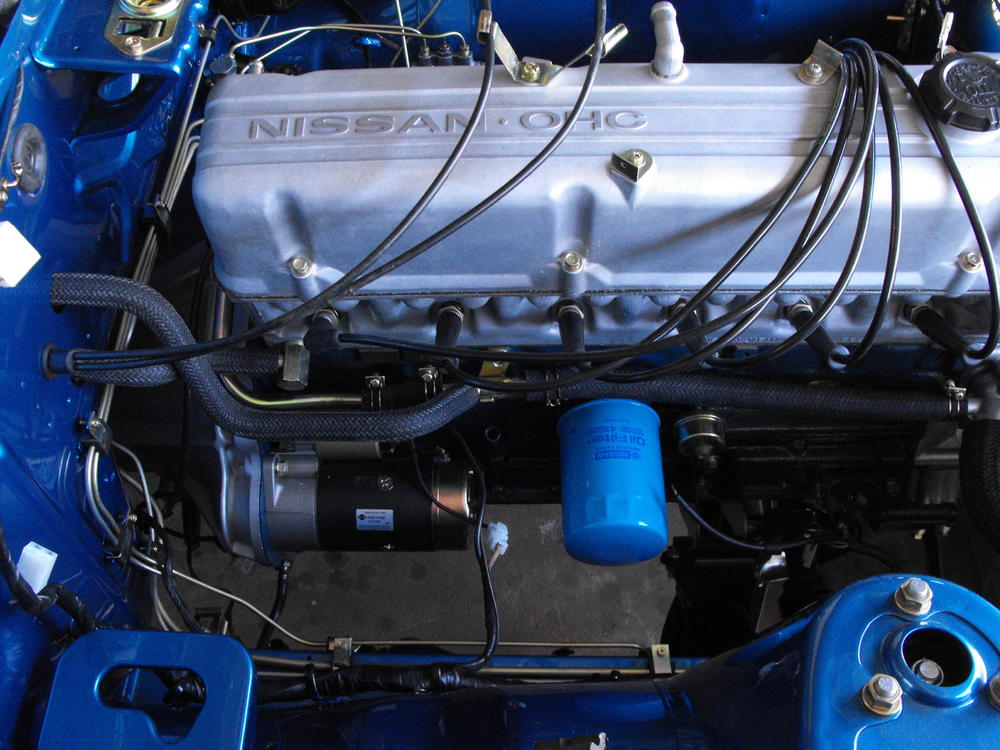
Yes, I was surprised that no one mentioned that. Seems like a much more prominent item than the rear interior panel. Love all the engine shots, but the spark plug wire holder that attaches to the water housing is missing. Though there are other items, those are the two that stand out to me. Both pretty fixable. Personally, I think it is one of the nicest looking Z's that I have seen on BAT. I am predicting an $80K sales price.
-
Yes, decided to go with the one from zcardepot. It's more cost and time effective. Thanks for the feedback.
-
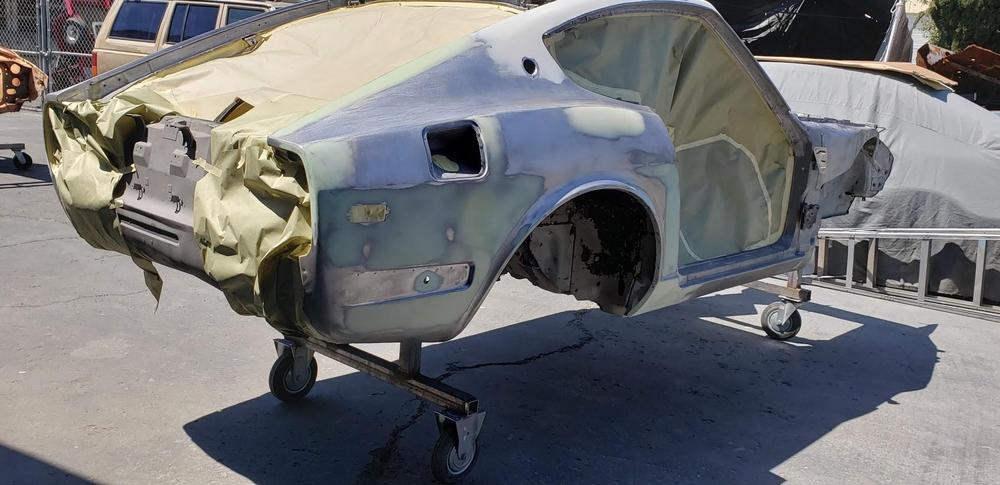
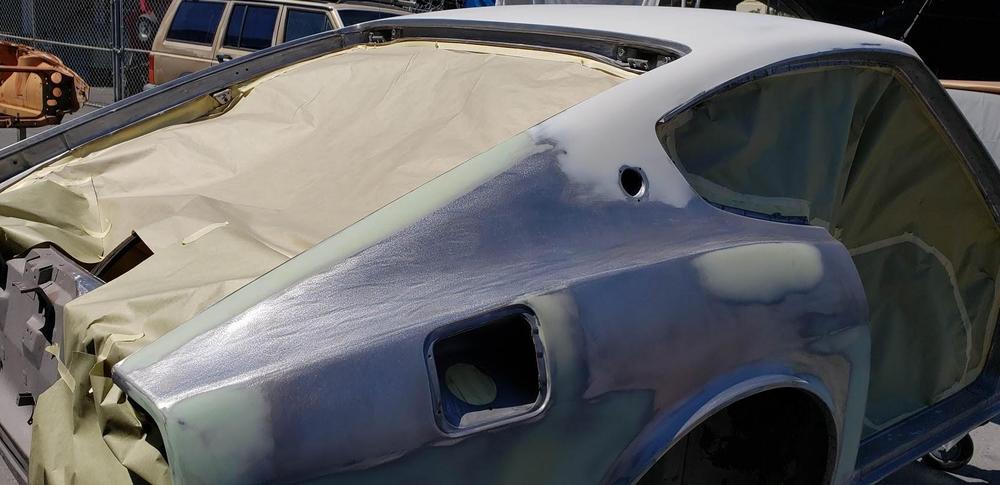
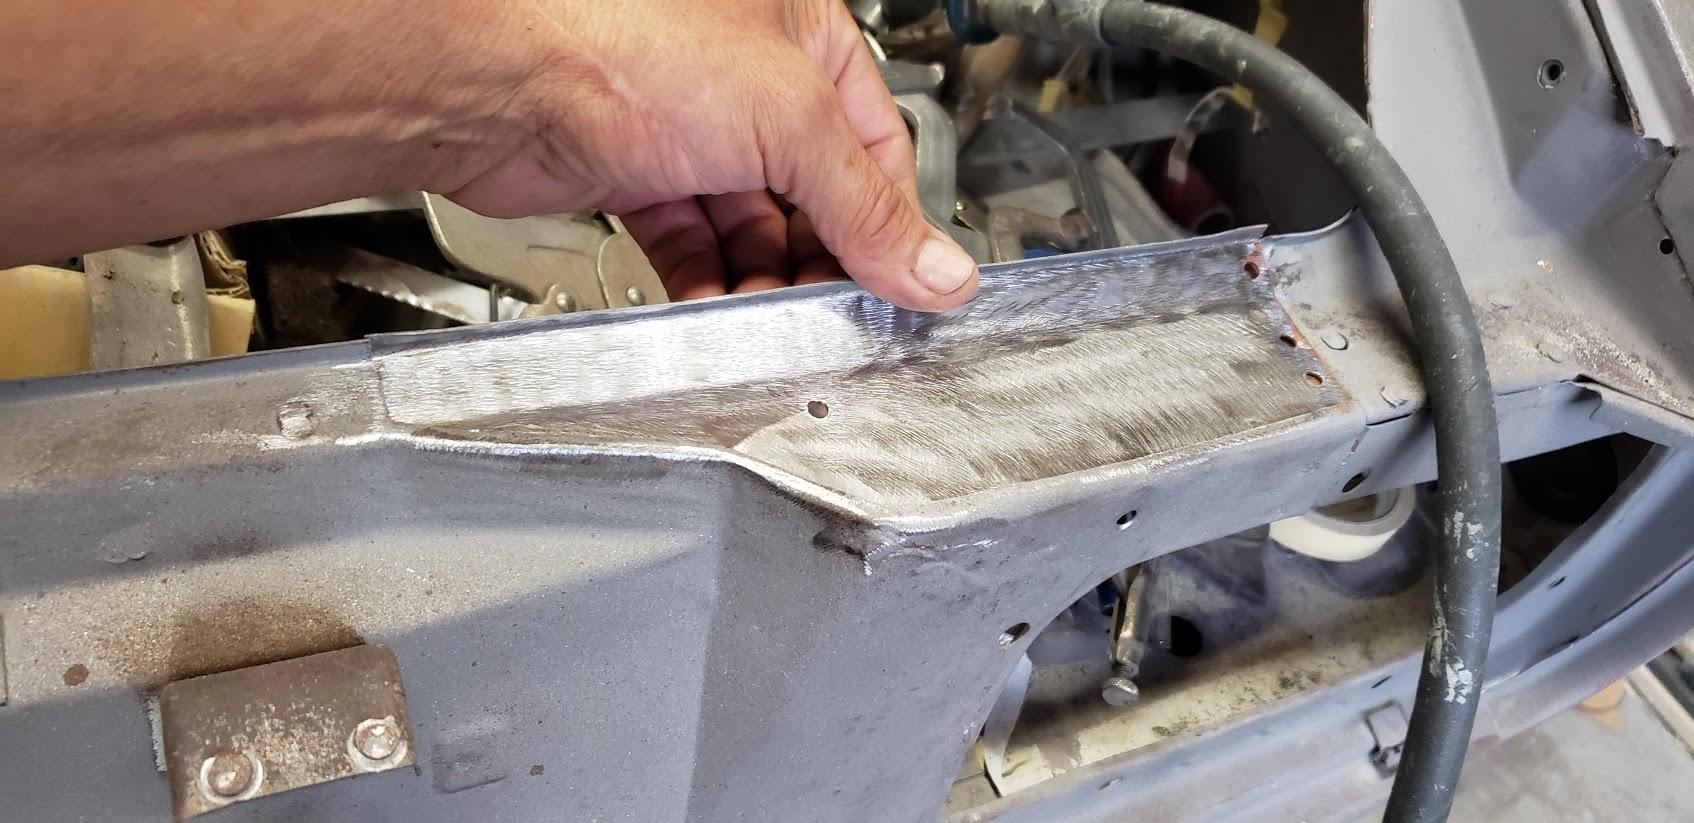
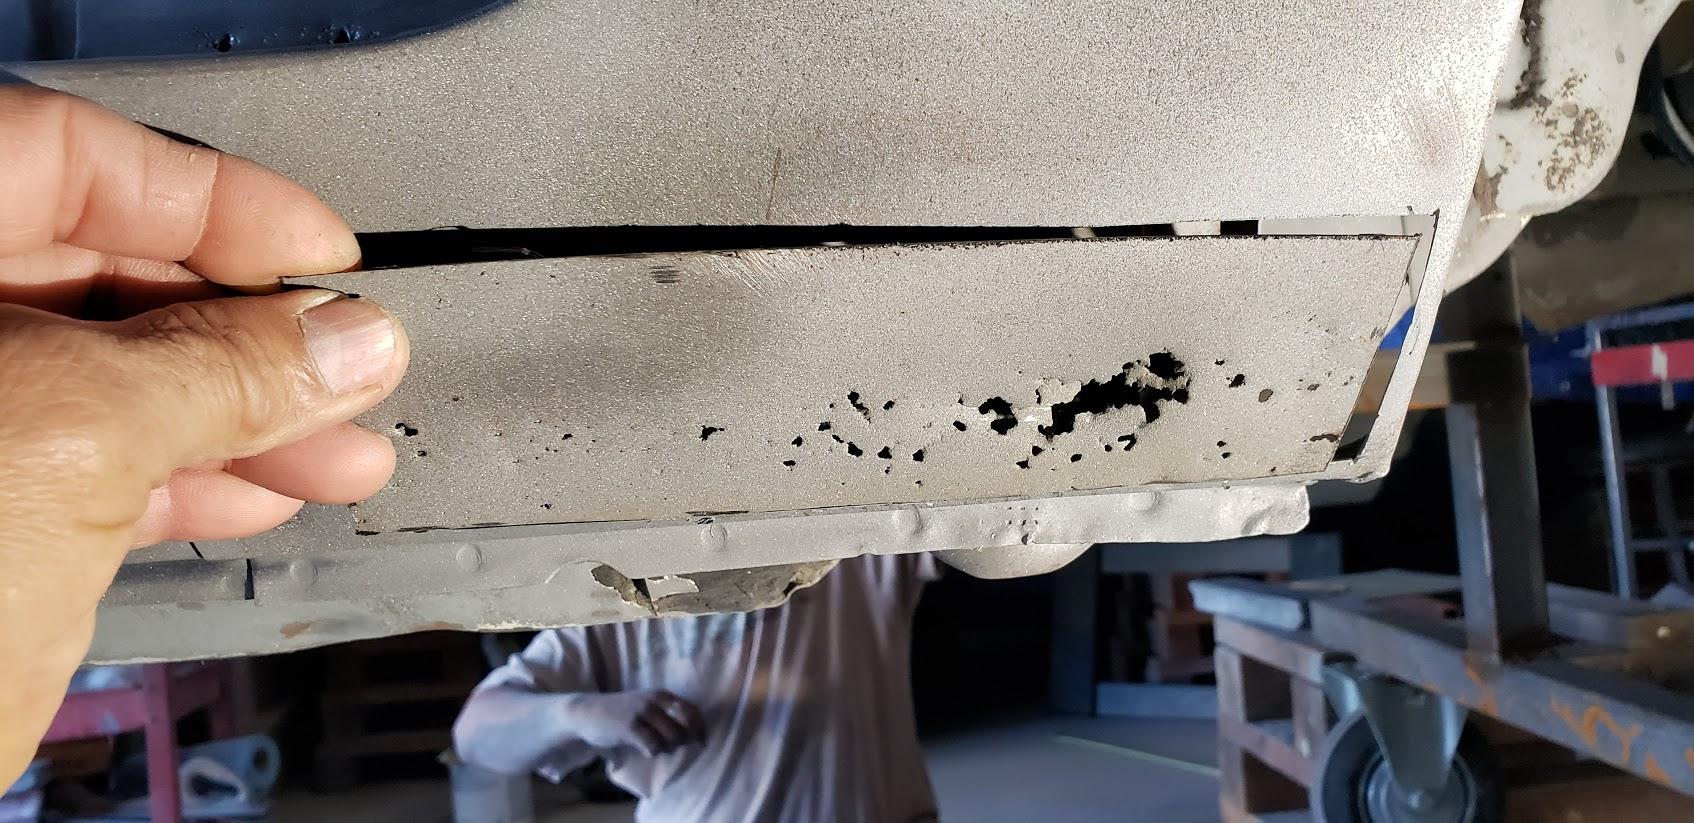
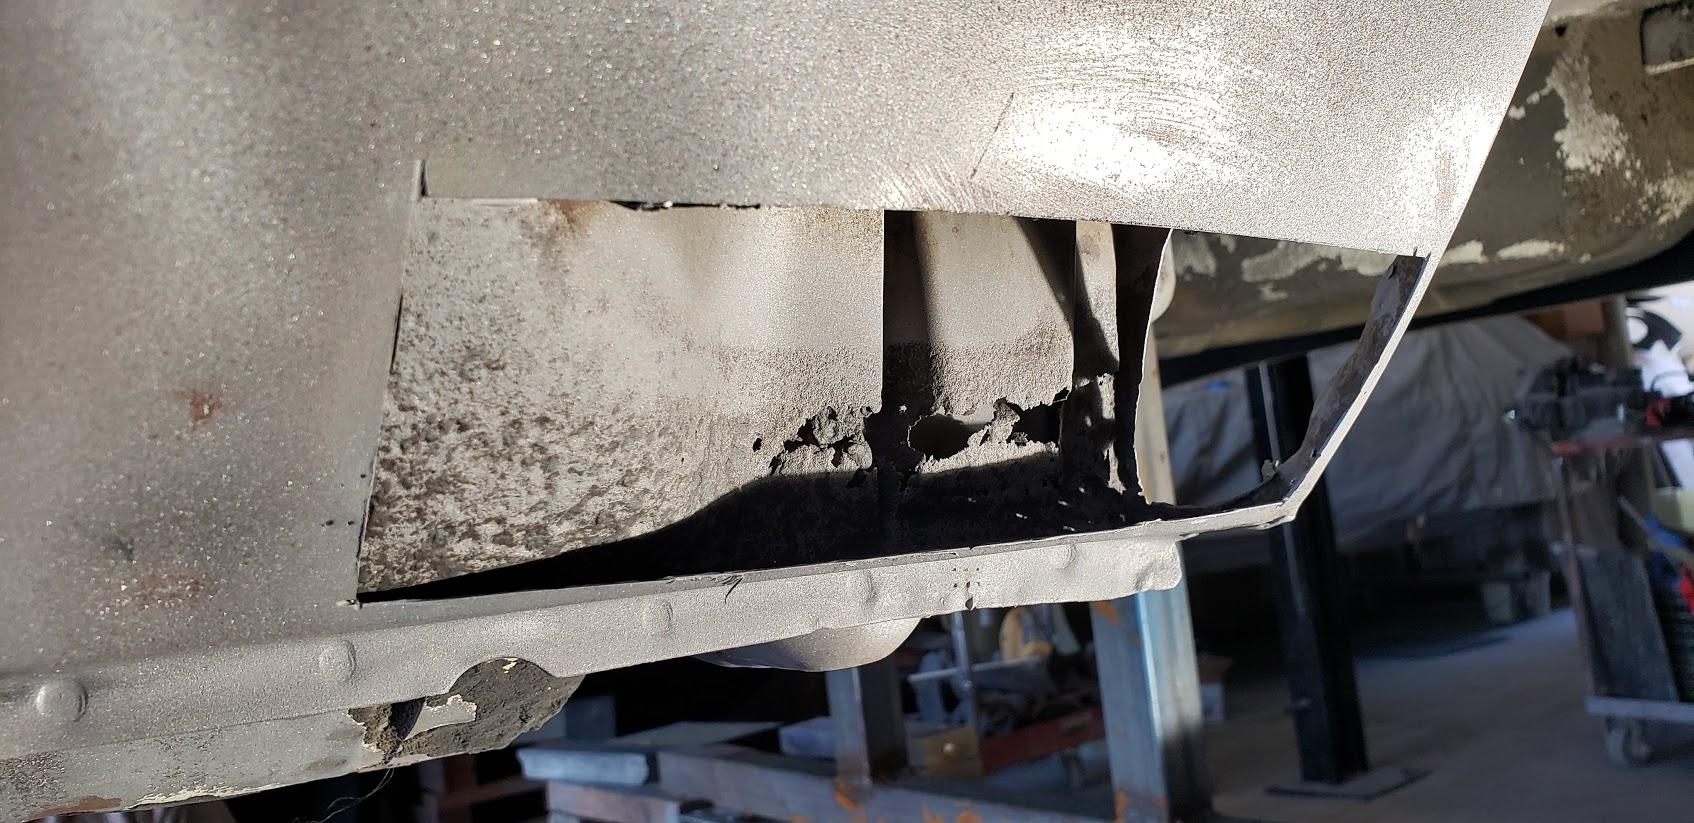
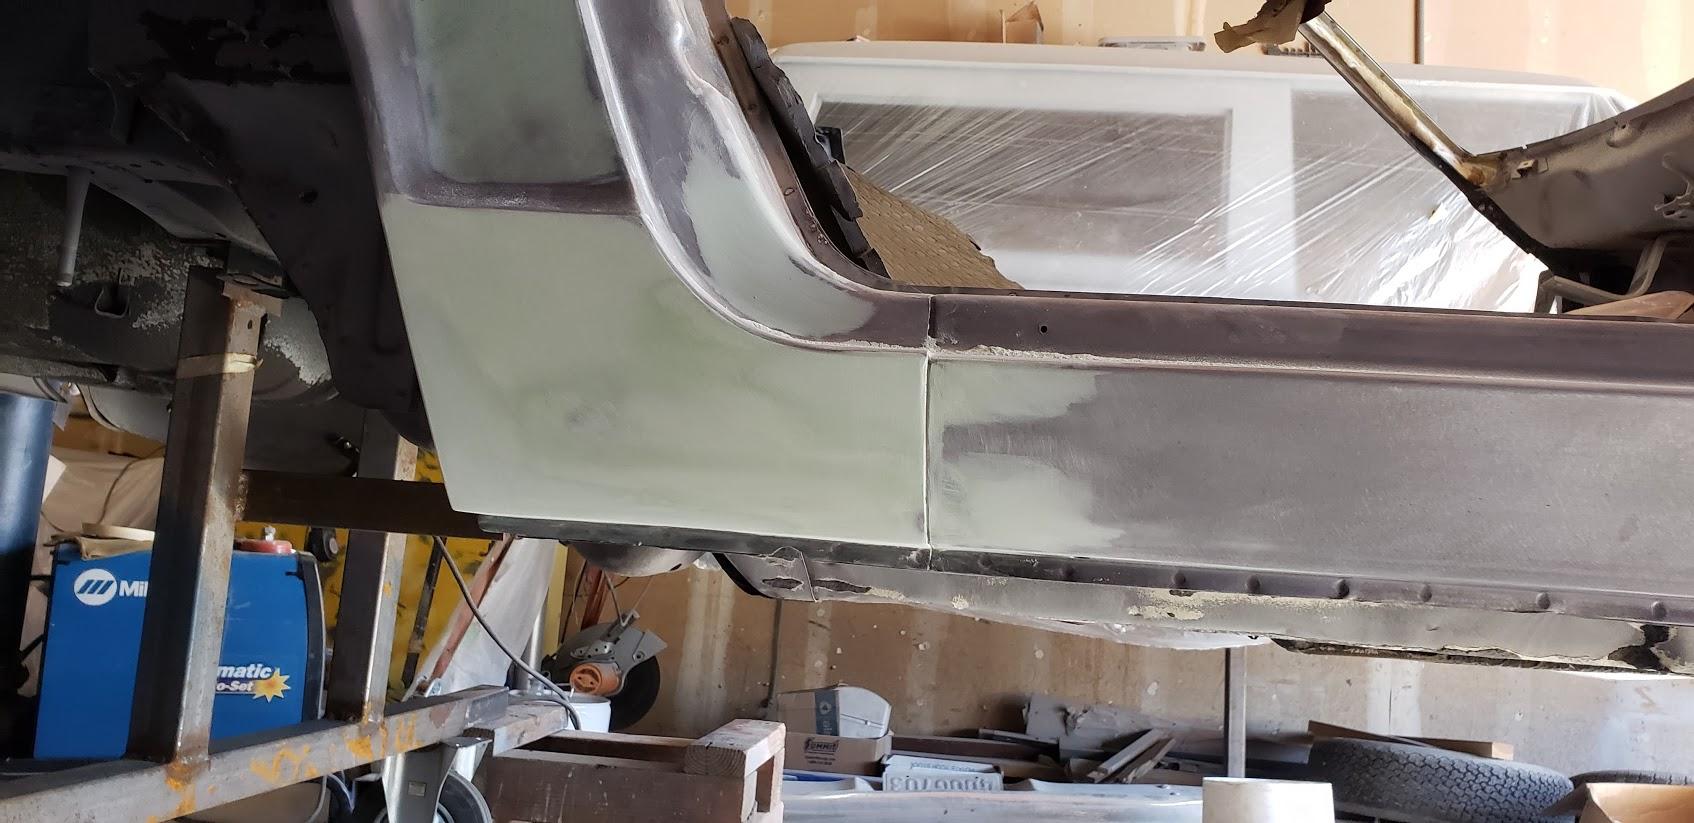
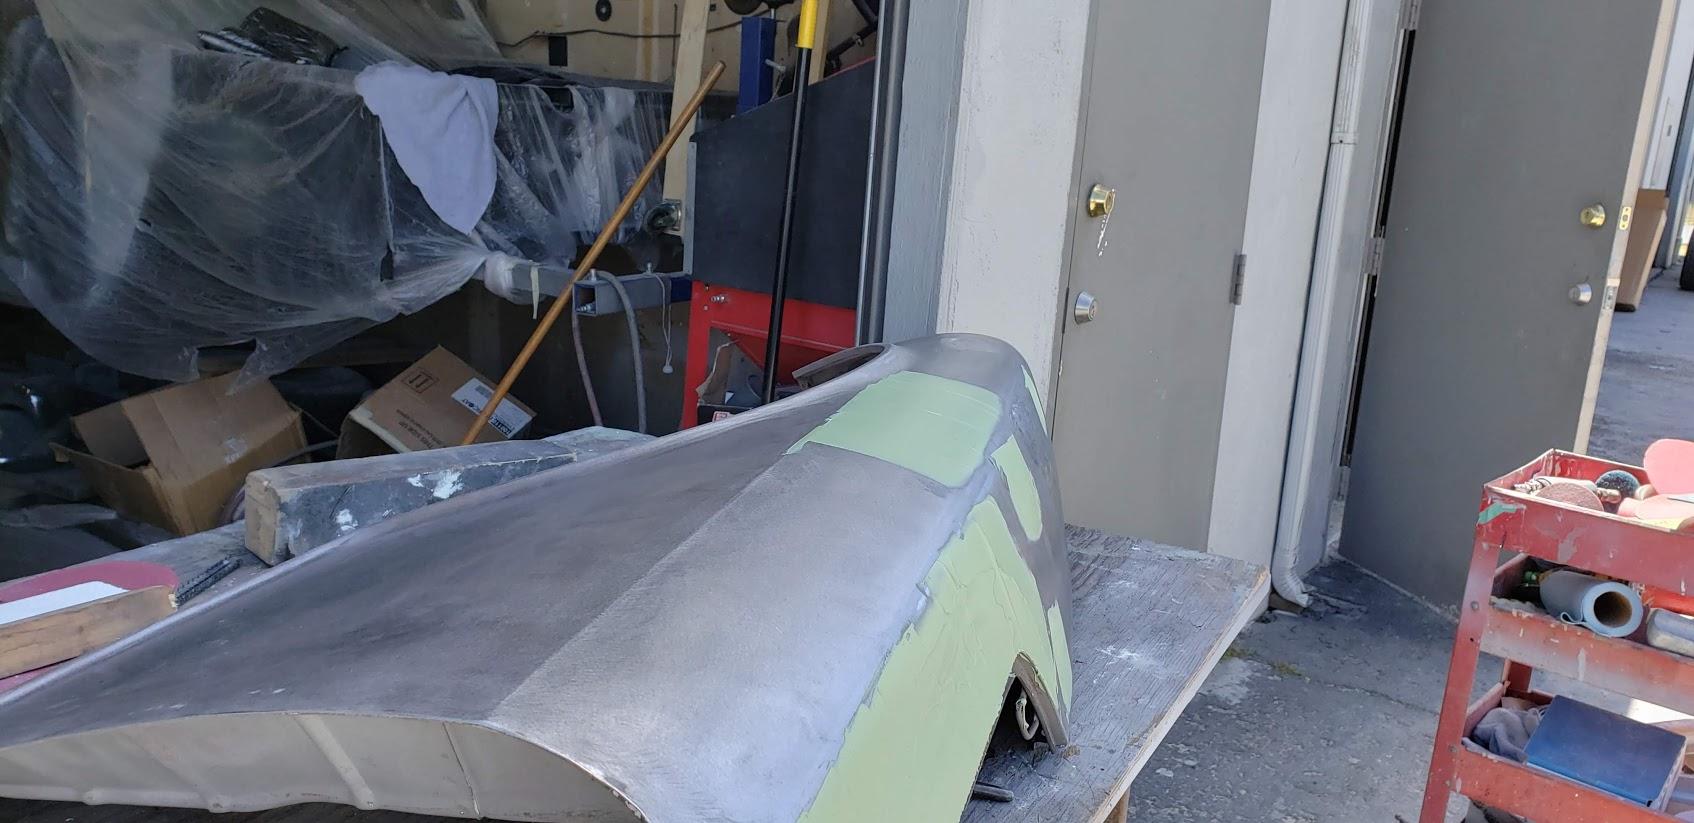
This is the way back burner project, but looks like Miguel has been busy at the body shop. Nice to see some progress.


.thumb.jpg.57fb8636084289e2aab044780d3f8d86.jpg)


-
Not sure I agree. The component that reverses the pendulums fall to the ground is the acceleration of the cart, not velocity. Velocity does nothing for you in this pendulum scenario, it's all about the cart acceleration. With a constant velocity, the mass will always fall. At 45 degrees, the acceleration of the cart will need to be greater than 1g. The greater the acceleration, the quicker the pendulum mass will return to vertical. Also, I think the acceleration of the cart will determine the pendulum period of oscillation. Too early for a beer here ☺️
-
I would Glue the pendulum in the vertical position....or bolt it if I could drill a hole in the massless pendulum arm.
-
Thanks Carl, I knew I had seen something like that. That looks like a pretty simple part. I may just make that at home myself. If I get ambitious, I may even draw up a PDF of the part and post it here or on the thread that discusses this item. I doubt that it is patented.
-
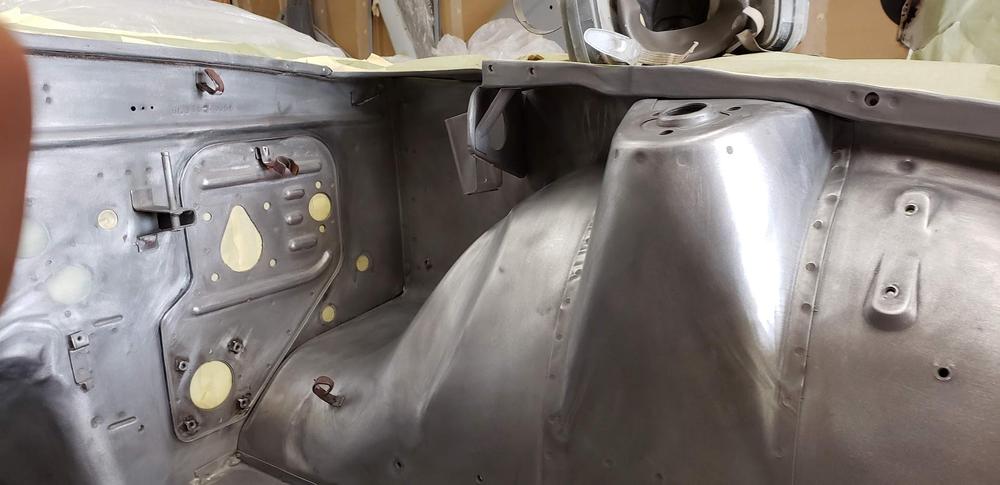
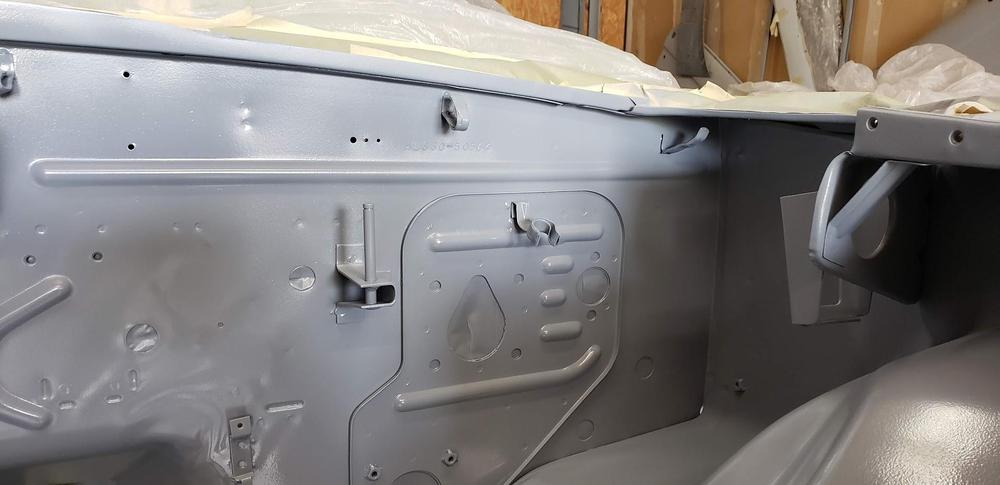
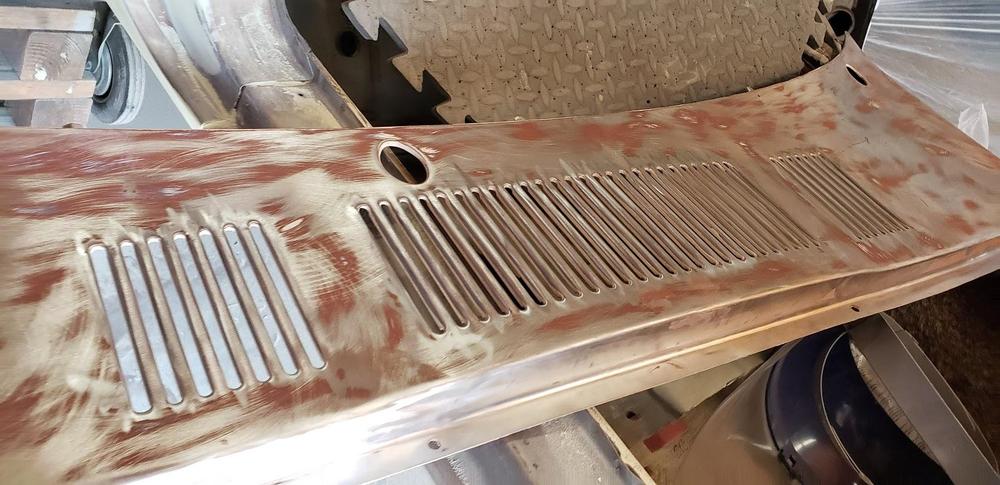
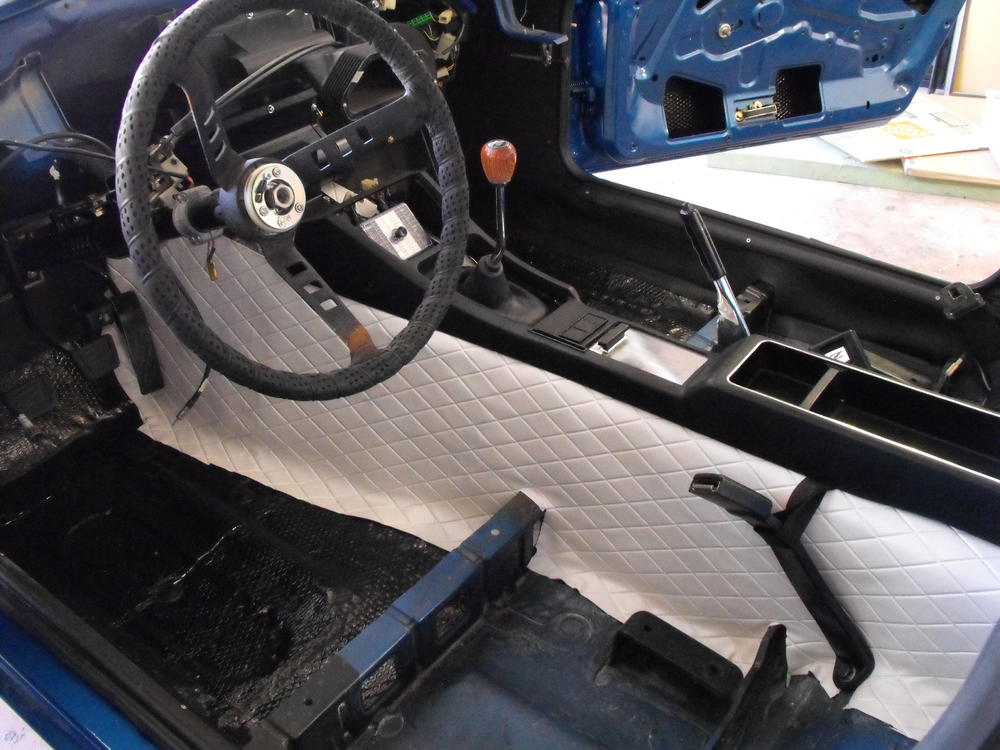
Started work in the interior again. Got the center console vinyl in. Also cleaned up the side black vinyl and got that installed. I cleaned up the center console and temporarily placed it on the center console just to see how it would look. One of the studs on the underside of the console that holds the choke lever is broken so I will need to look for that bracket that provides extra choke support. Also installed the seat belts and put the carpet in place. That forward seat support near the center console looks bad. Will need to clean that up. I also got the heater hose grommets, so I installed the heater hoses with the wire clamps. I think I have the heater system near complete, with all new parts. New heater core and new control/switching valve. @jayhawk tells me that the reason he stopped driving the car was because of a leak in the heater system, so we should be in good shape now. Here are a few pics.


-
That looks quite complex. Been a long time since I have taken a physics class, like almost 40 years. While I have worked extensively with DC motors and mechanical systems, I have not worked at all with control and feed back loops, or servo motors. My thoughts on this are that you would want to set-up the +/-10V potentiometer output (and it's pendulum components) on one side of the equation and the motor Voltage/Torque (and it's components) on the other side. However, they could not necessarily be equal because you would never correct the pendulum back to zero. Seems like you would have to overshoot/exceed the potentiometer output to re-center the pendulum. Perhaps the frequency determines how quickly the pendulum gets re-centered. I would think that the massless pendulum arm would make the calculation a bit simpler, although, doesn't seem to be anything simple about this. That's about as far as I'm going to get on this. Interesting that the damping is a grams/sec value and not a function of the cart velocity, x/sec. Hopefully this is a college level problem and not high school ☺️
-
I am hoping to have this ready for the San Marino show at the beginning of June. I am thinking I might be able to show it, but may be missing some items....we'll see.
-
Yes, @jayhawkand I will both be out there. We are looking forward to the event and seeing you and others from the classiczcars site. Currently we are looking for an enclosed trailer to use to bring it out. And yes, I wonder how many flat tops will be there. We may start a craze!
-
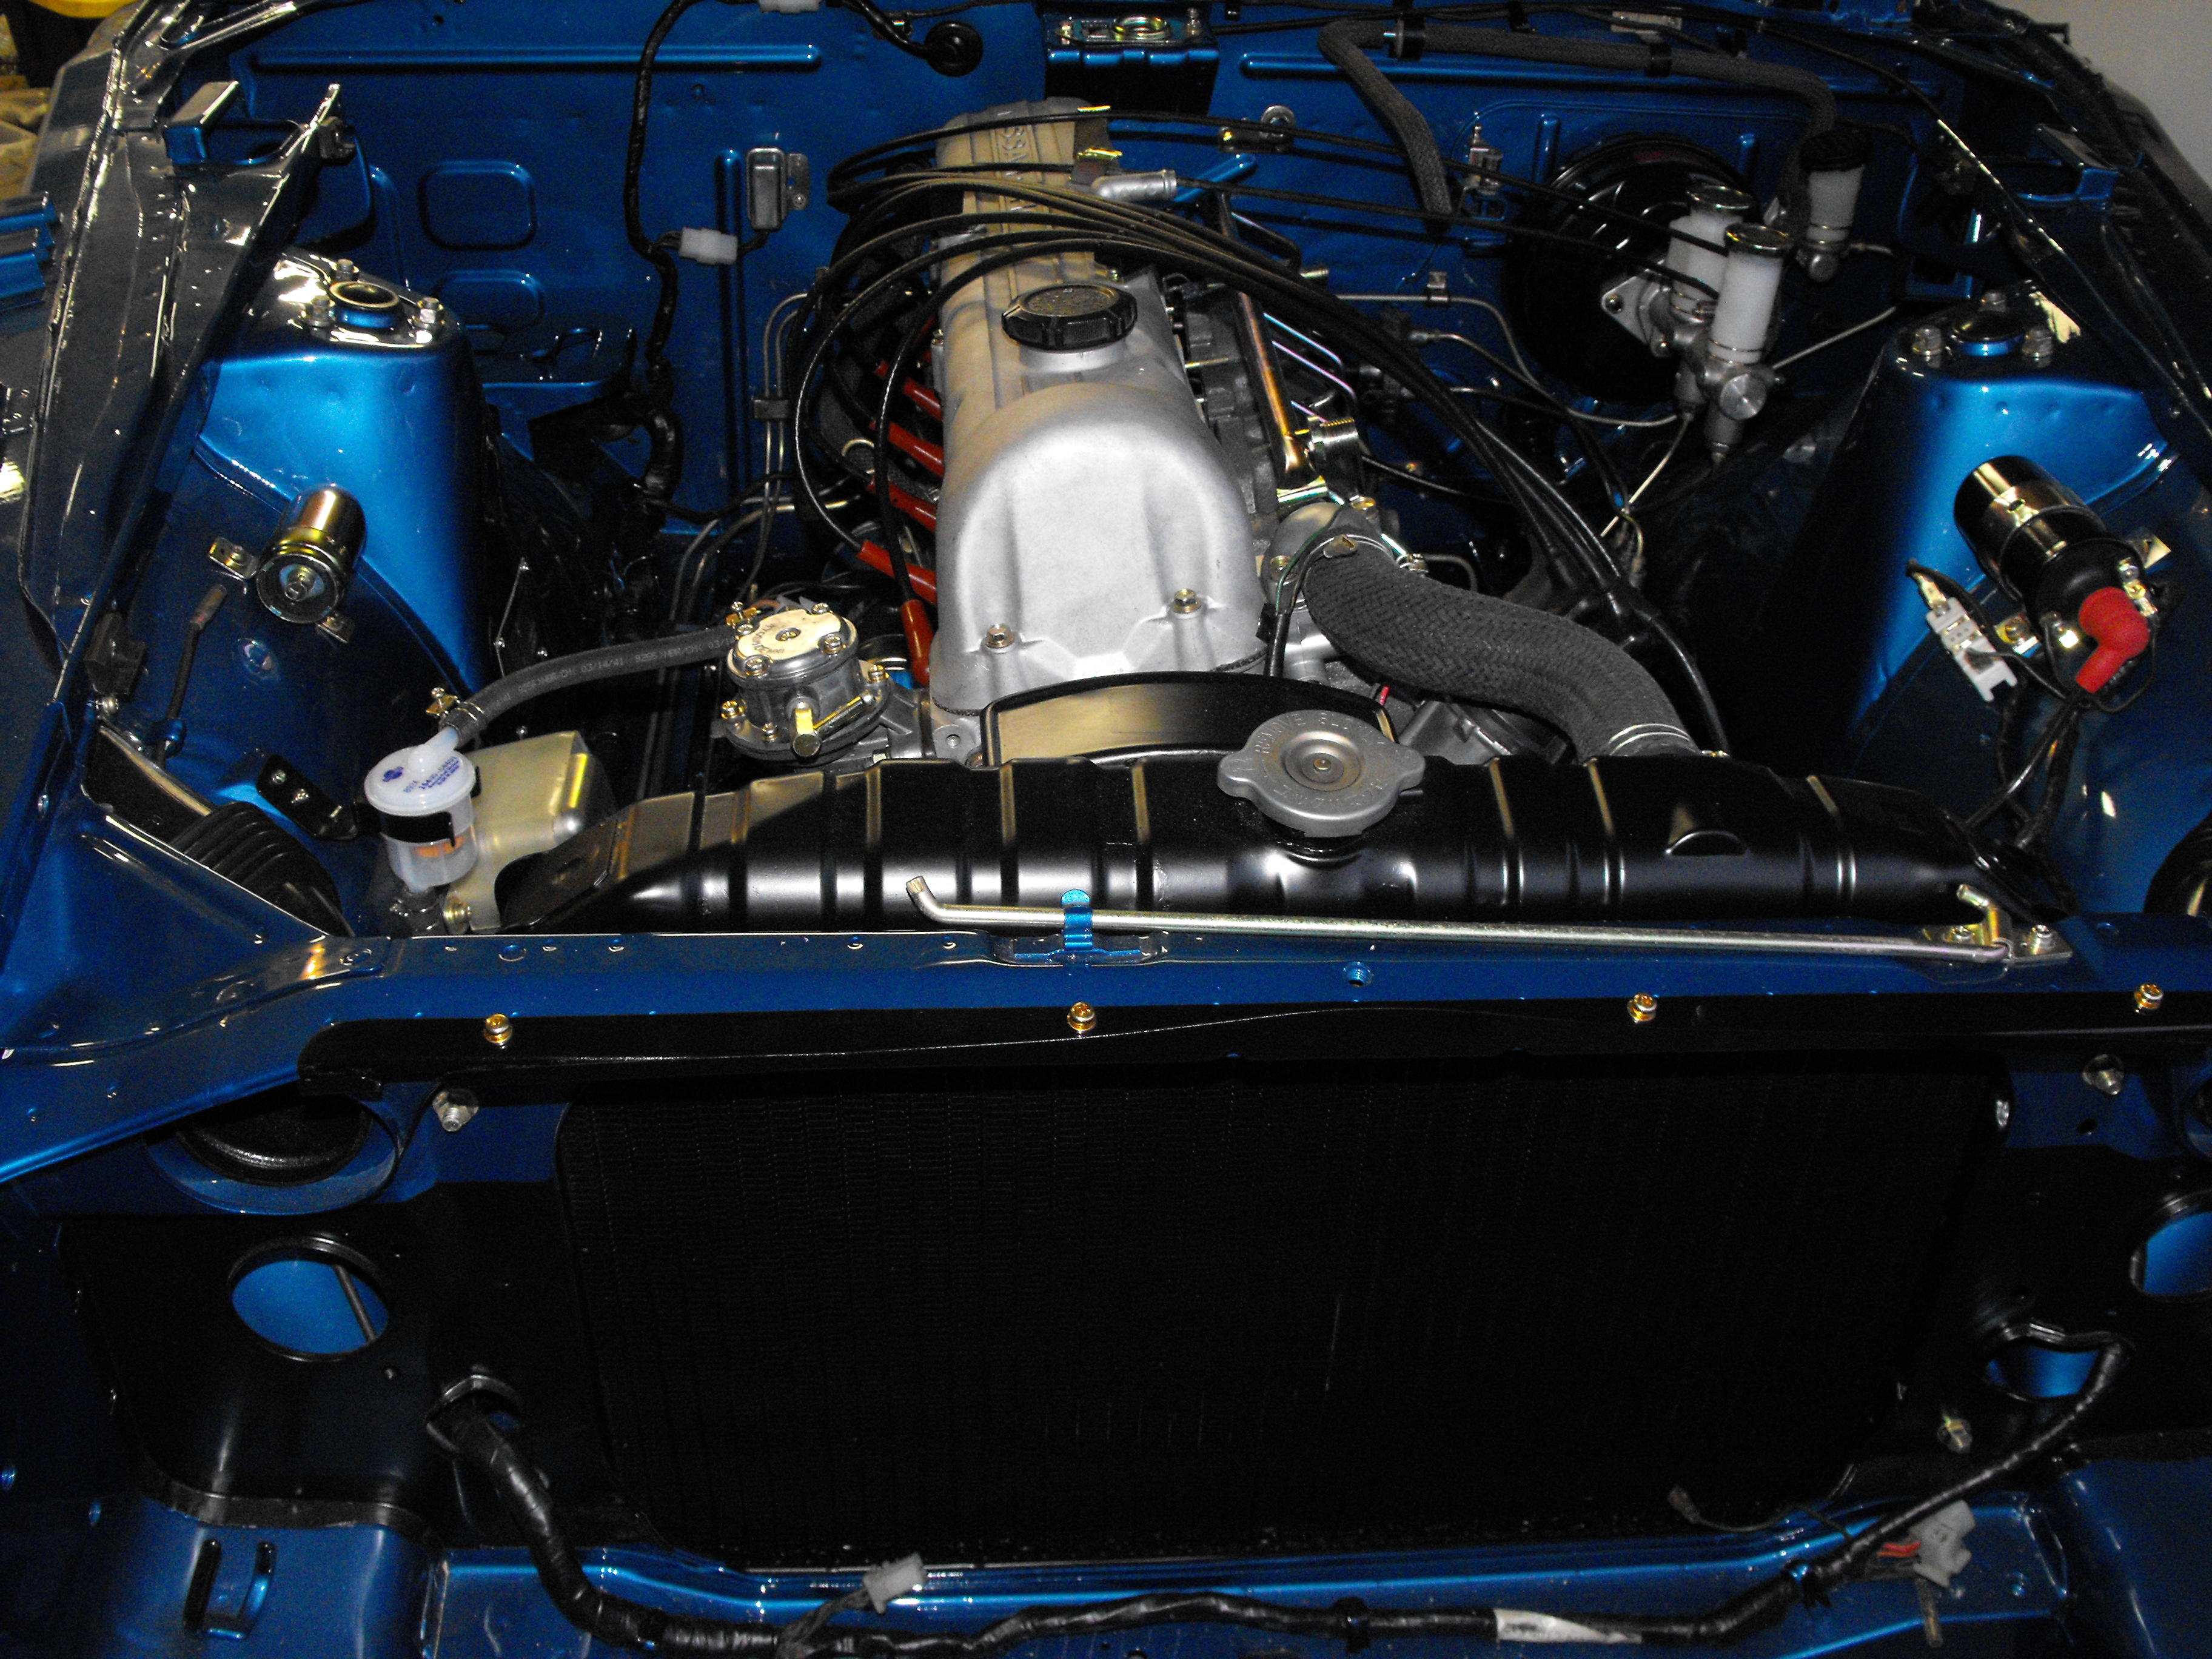
Yes, it's actually getting pretty exciting here. It would definitely look more complete with the fenders and hood, but I prefer to put those on last. They just kind of get in the way. I should be able to get the exhaust manifold ceramic coated this week, then I will get back to the engine work. I am hoping to have it running in early May. My wife will be gone for the first weekend in May so should be able to get a lot done at that time. Also, we are looking at bringing it out to ZCON in Branson. That should be fun. Thanks, looks even better in person. My camera is sub-par.
-
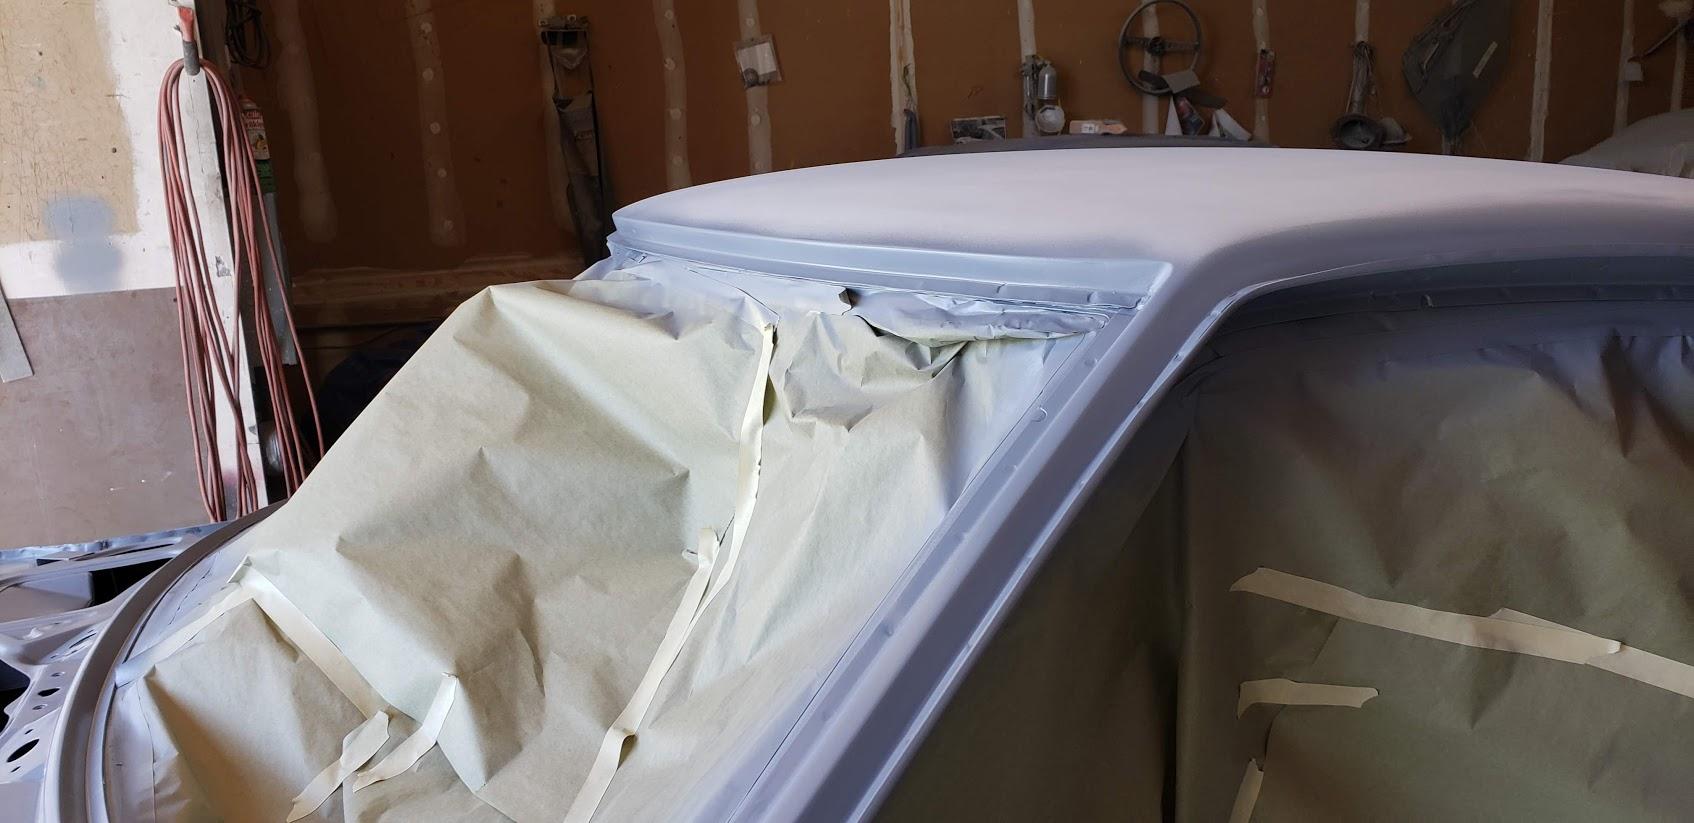
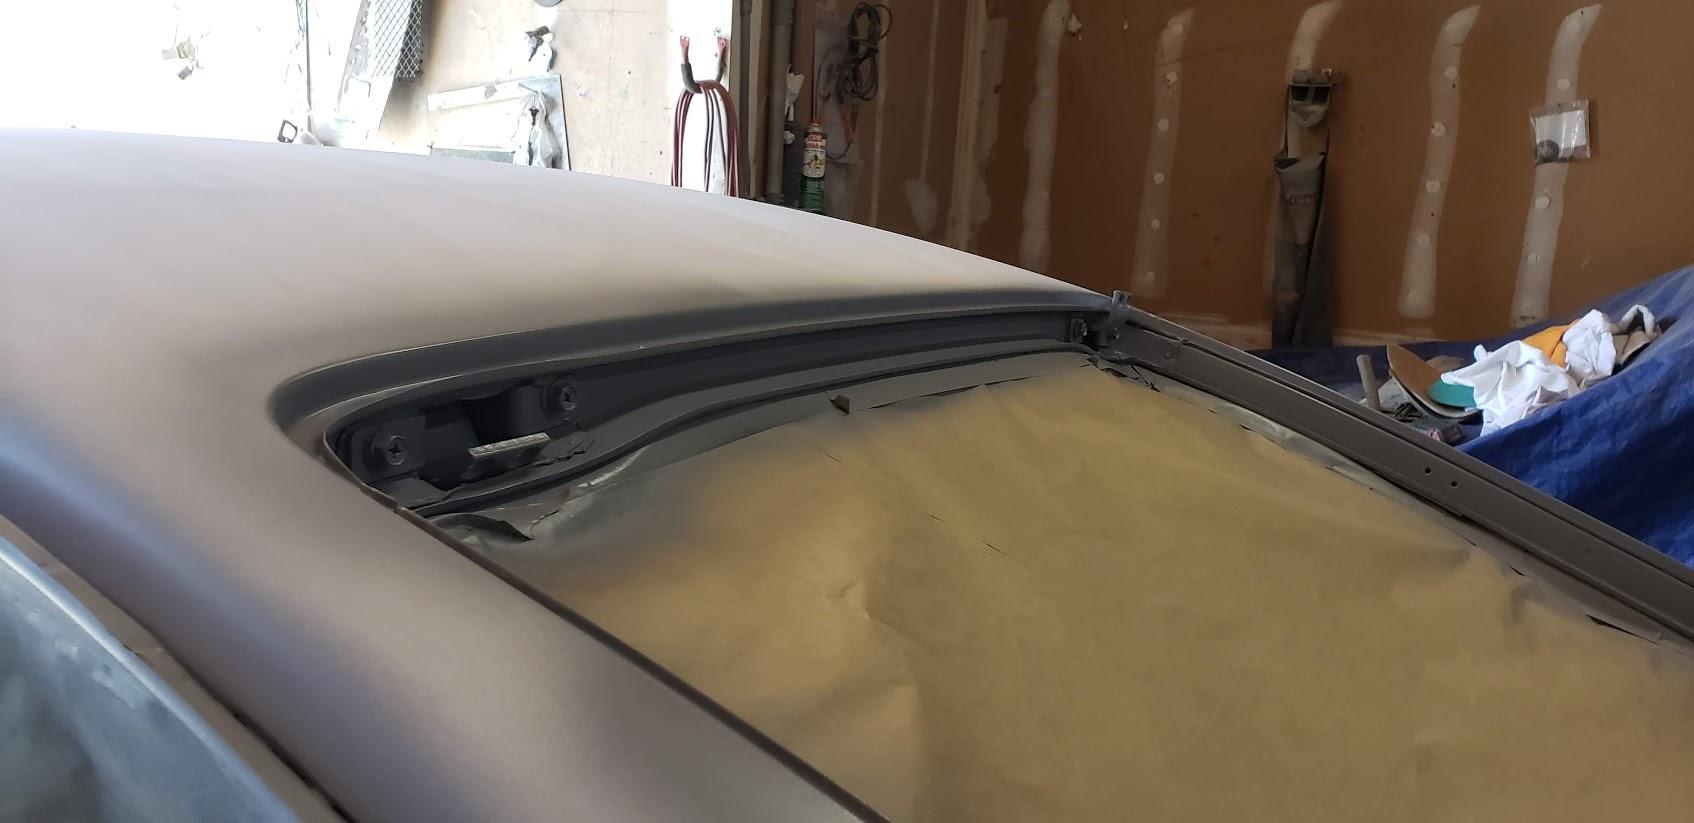
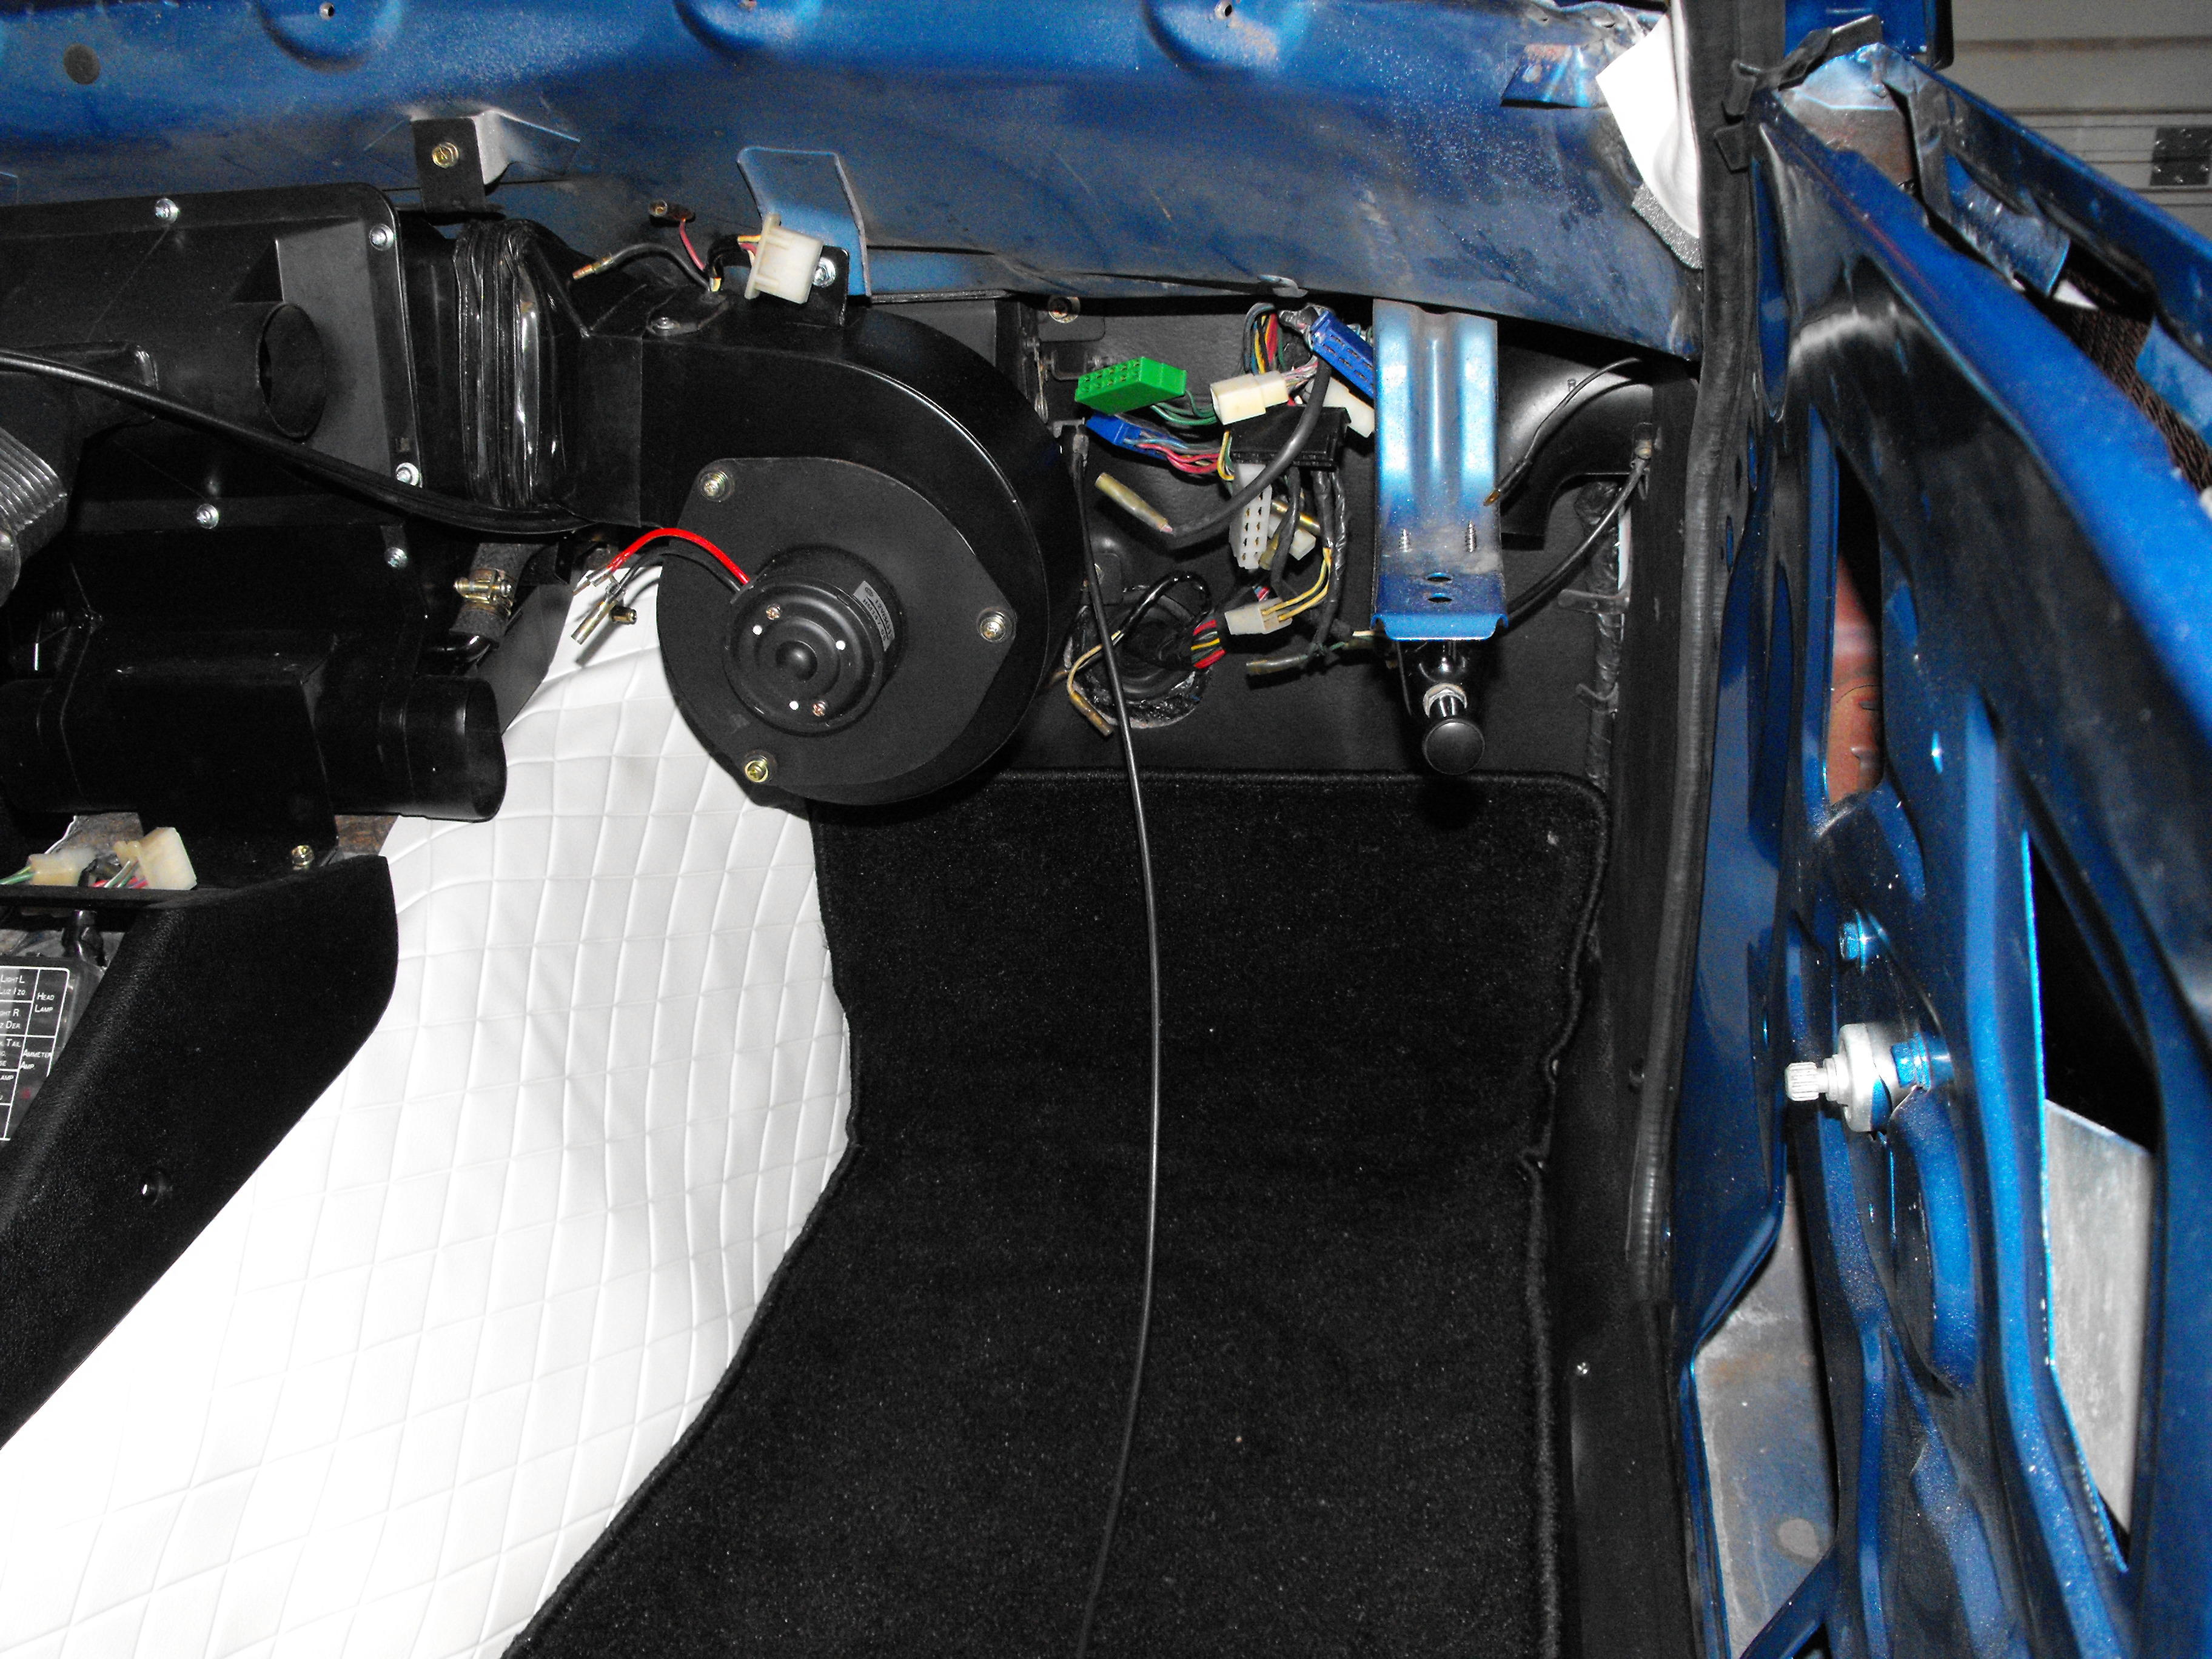
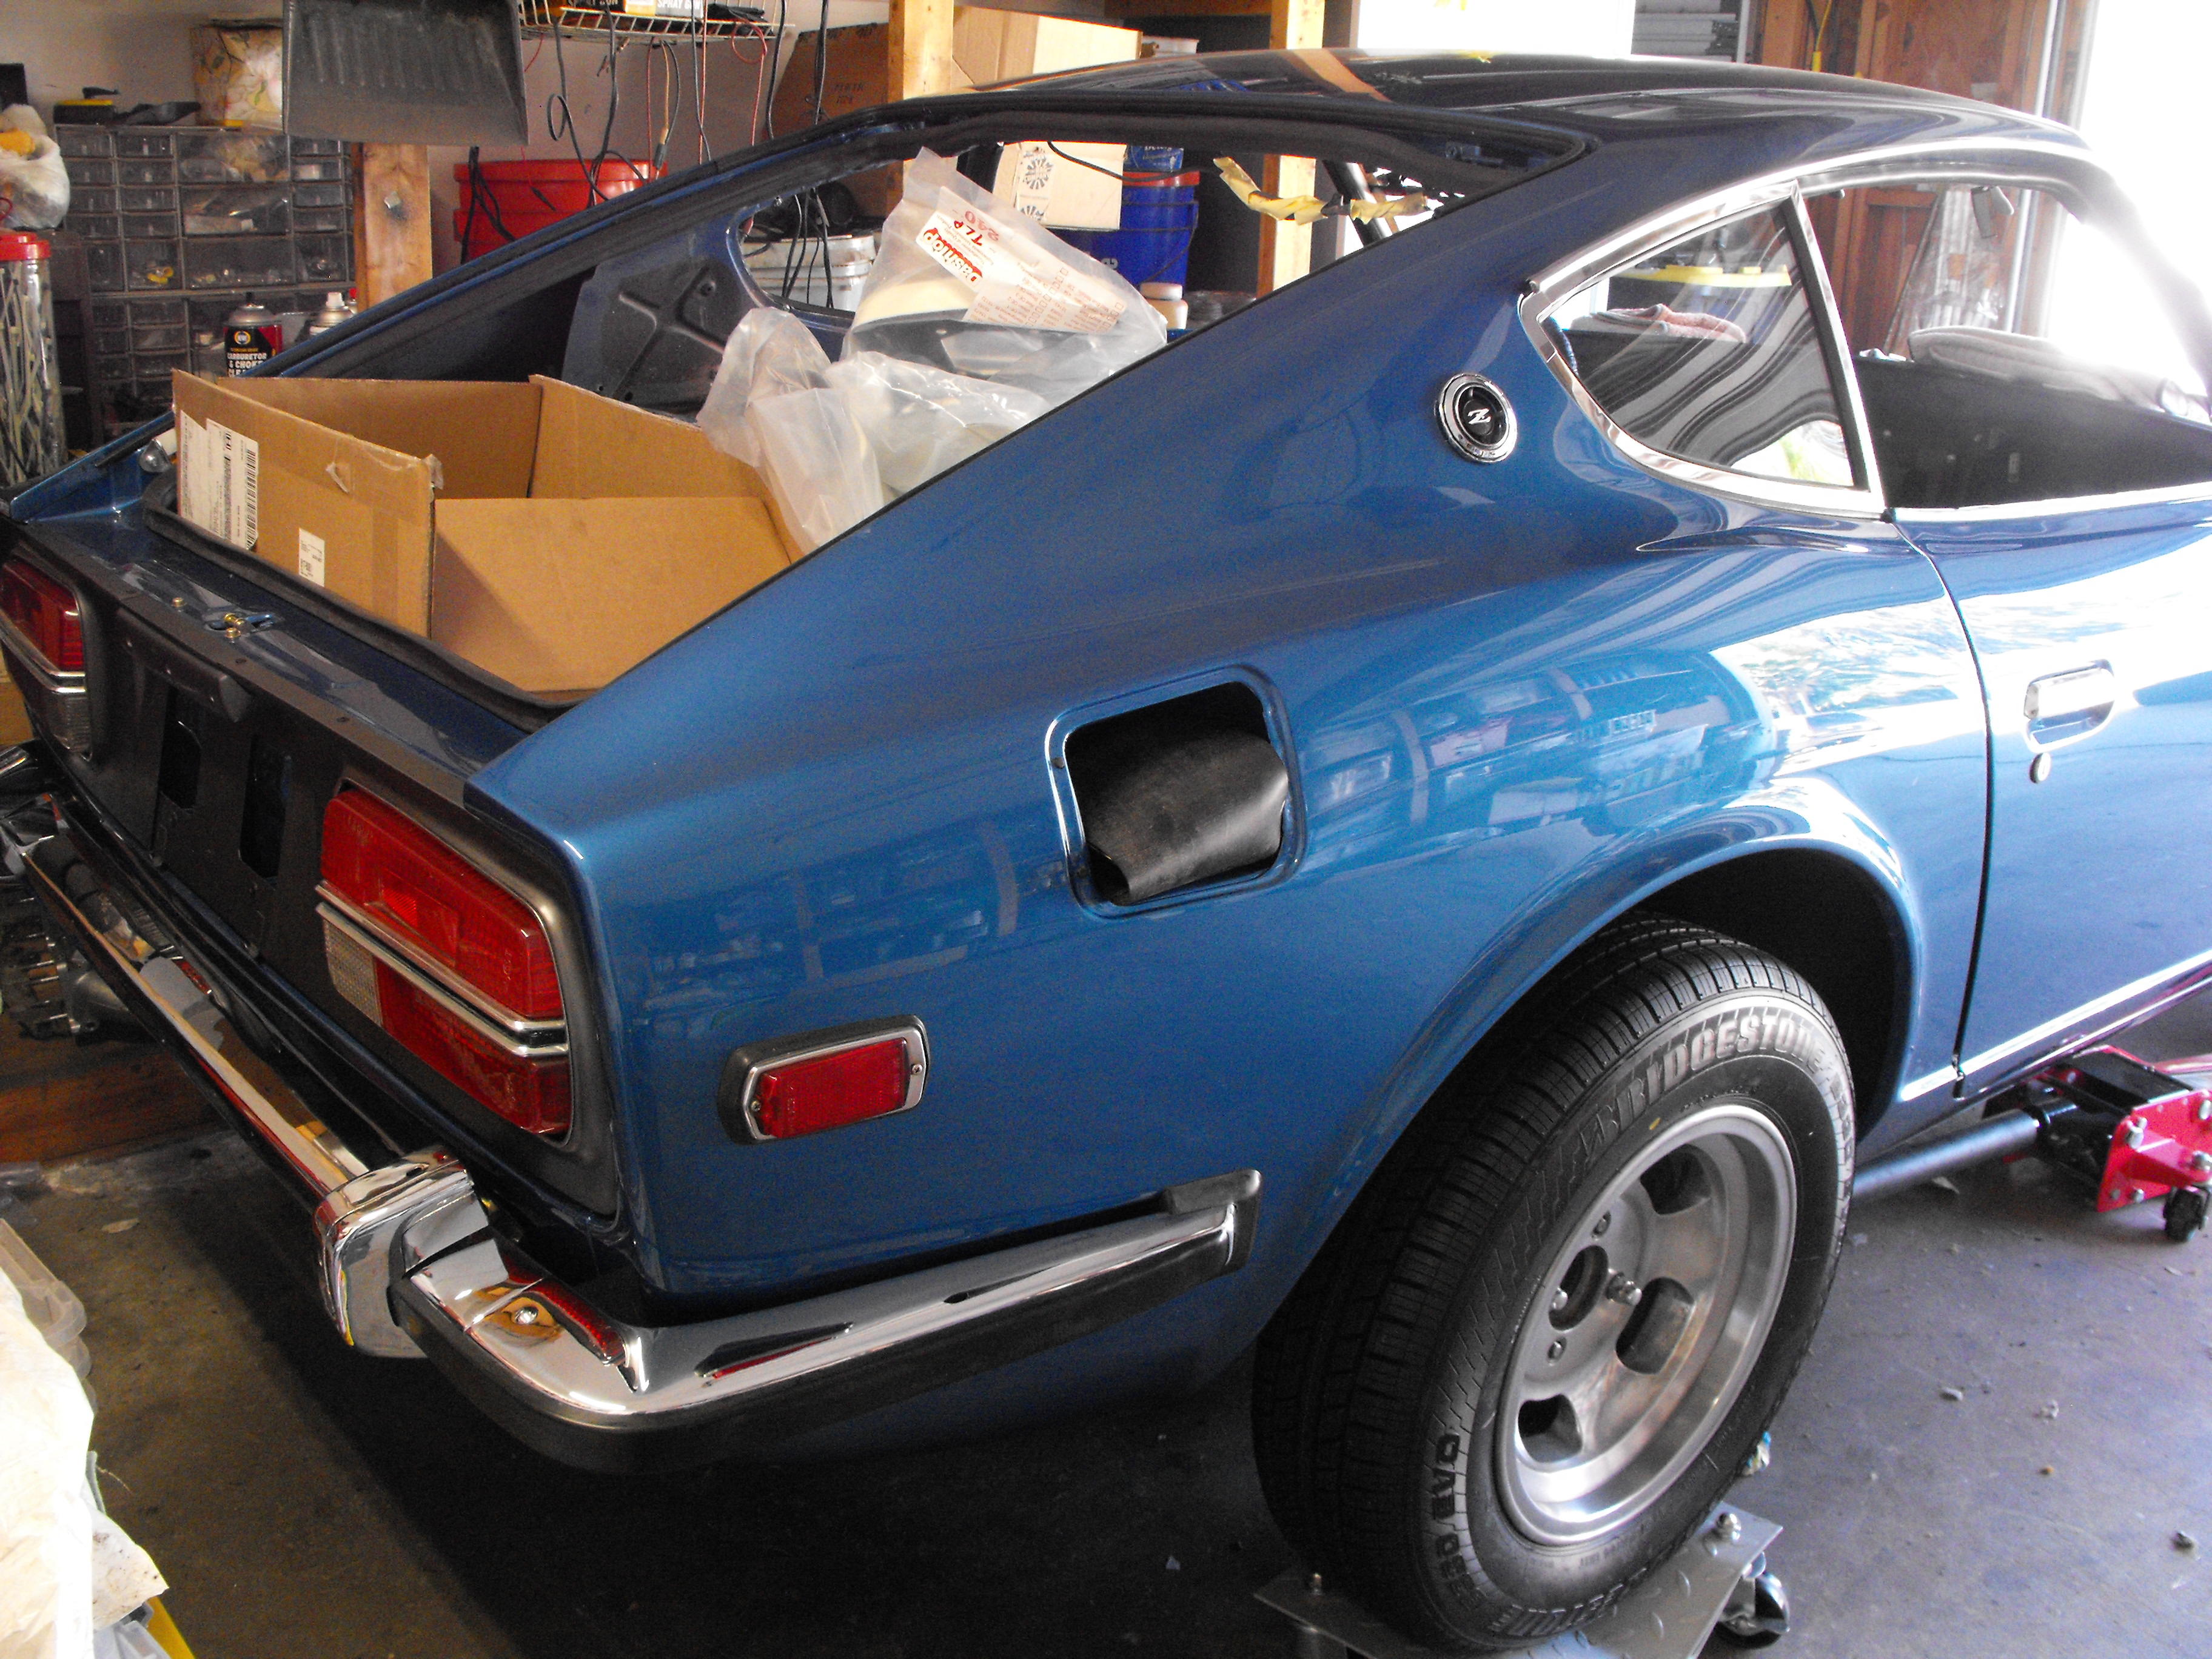
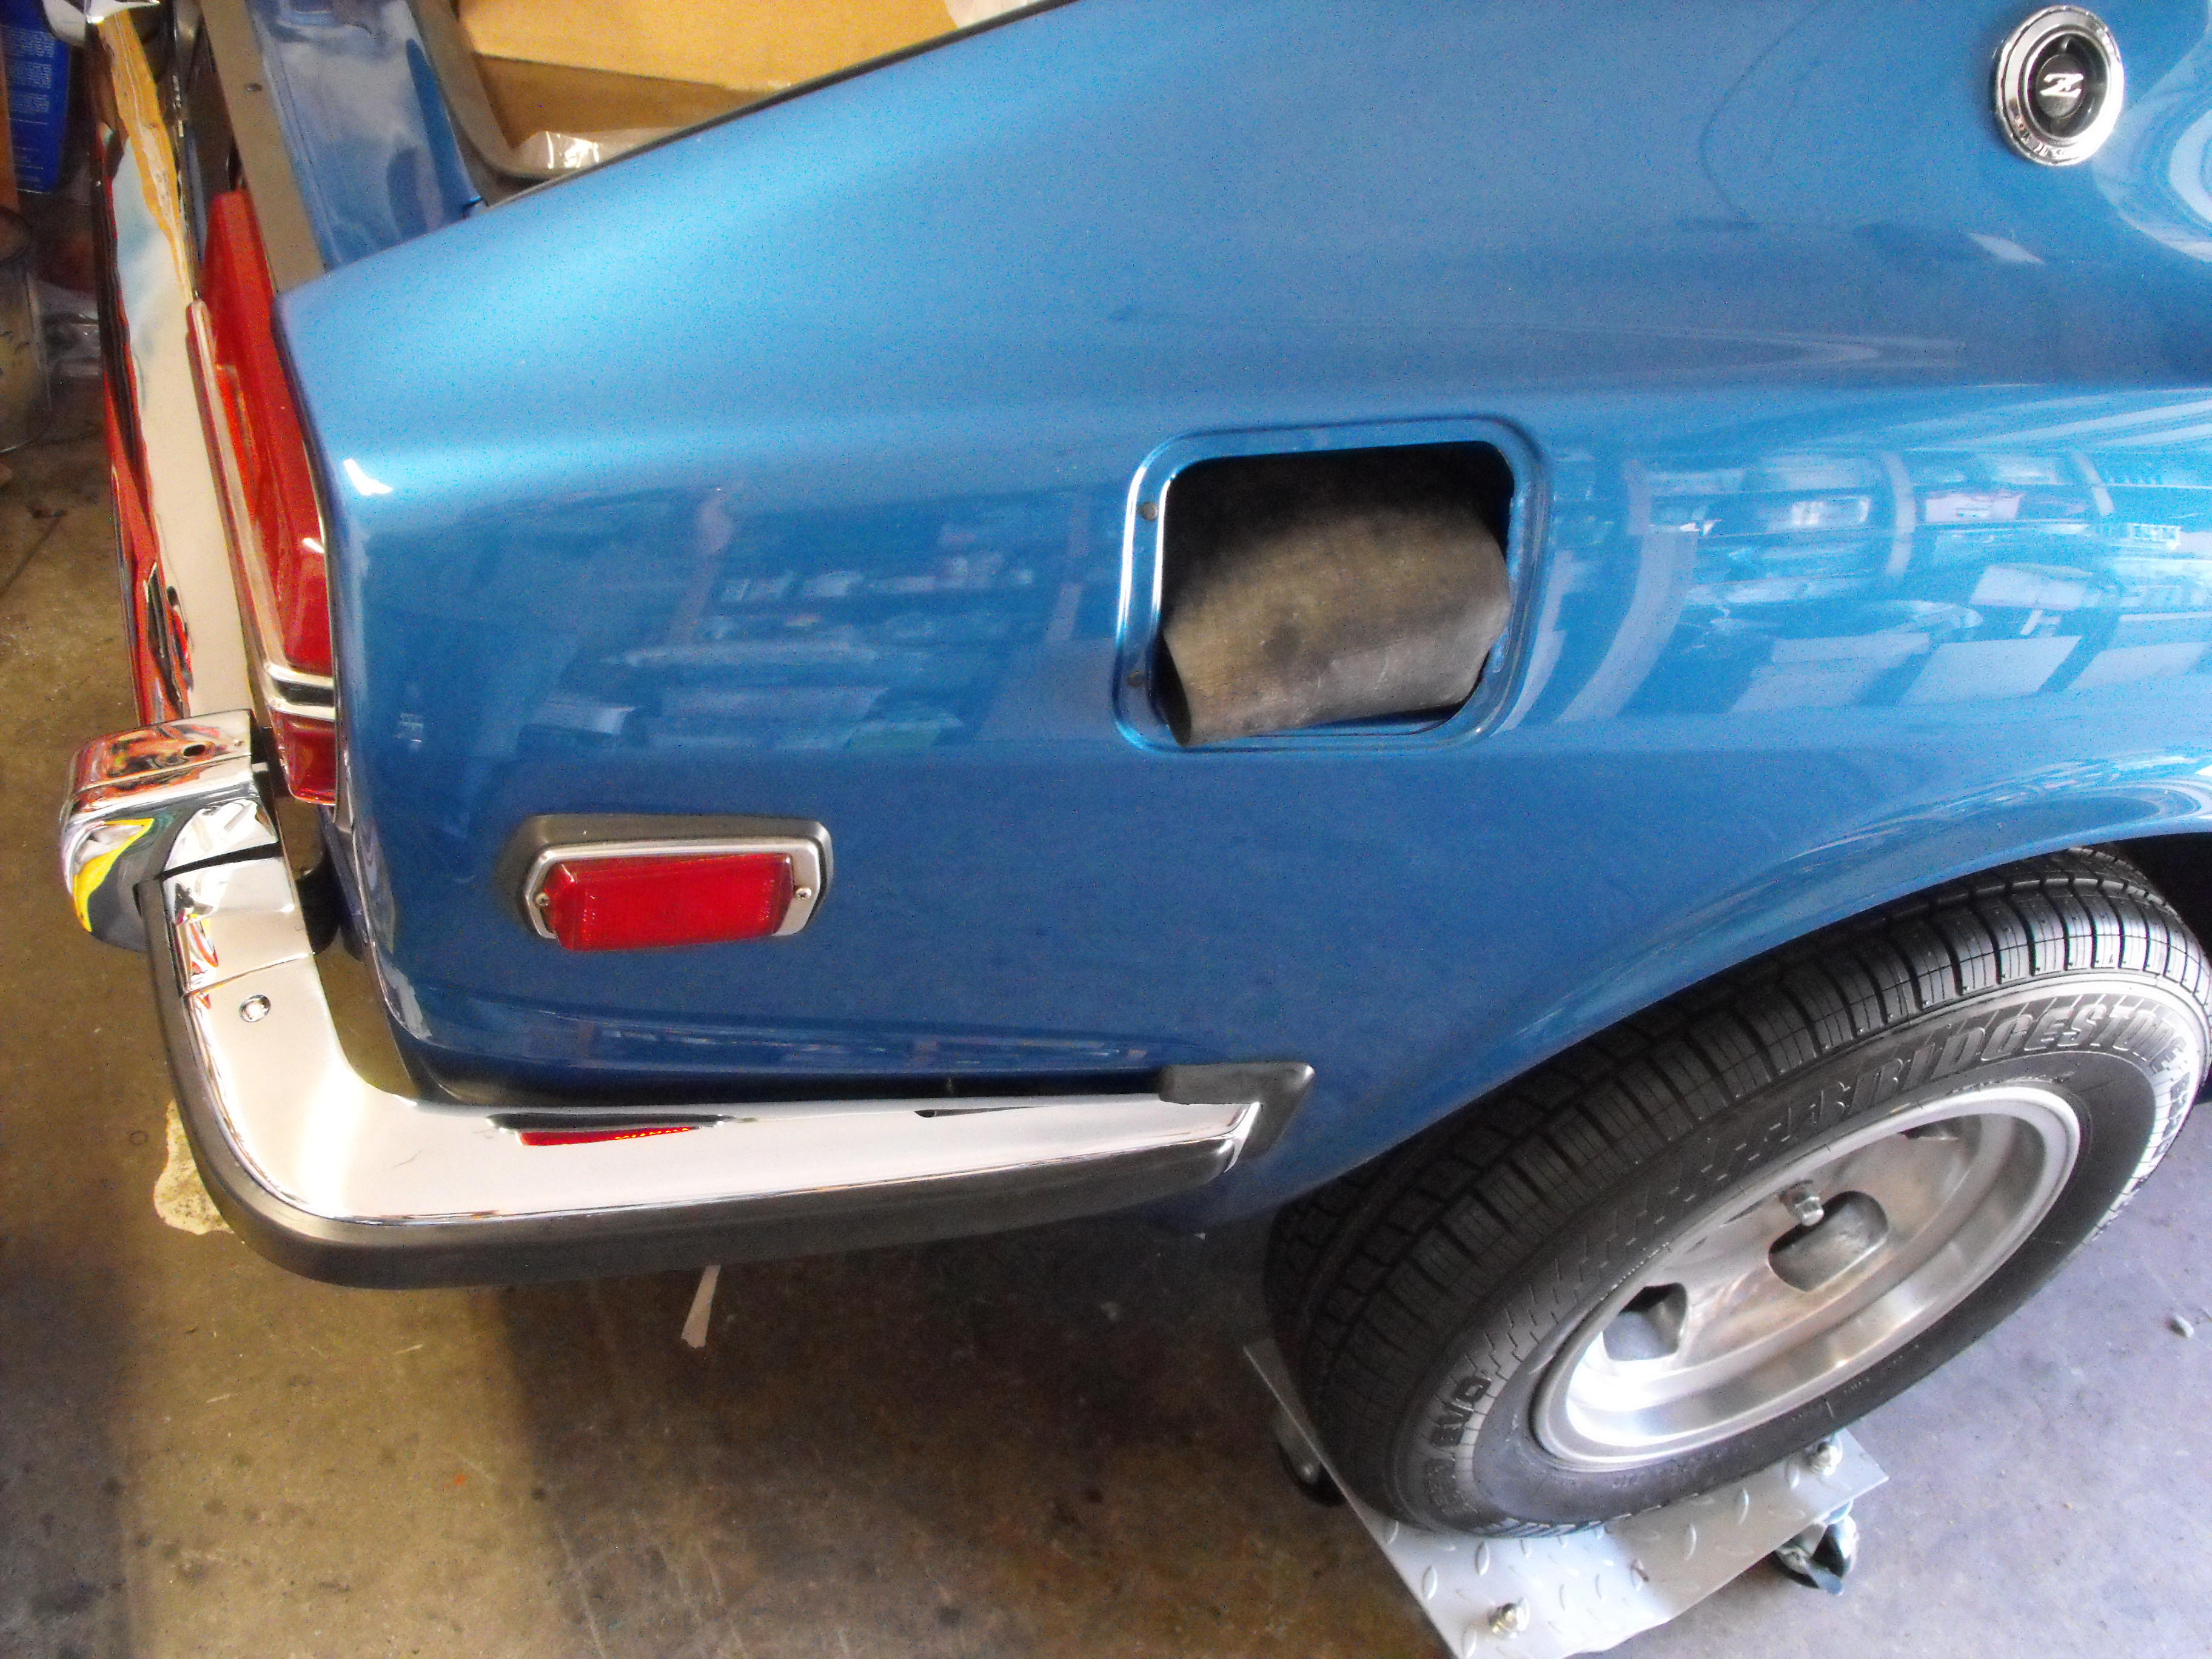
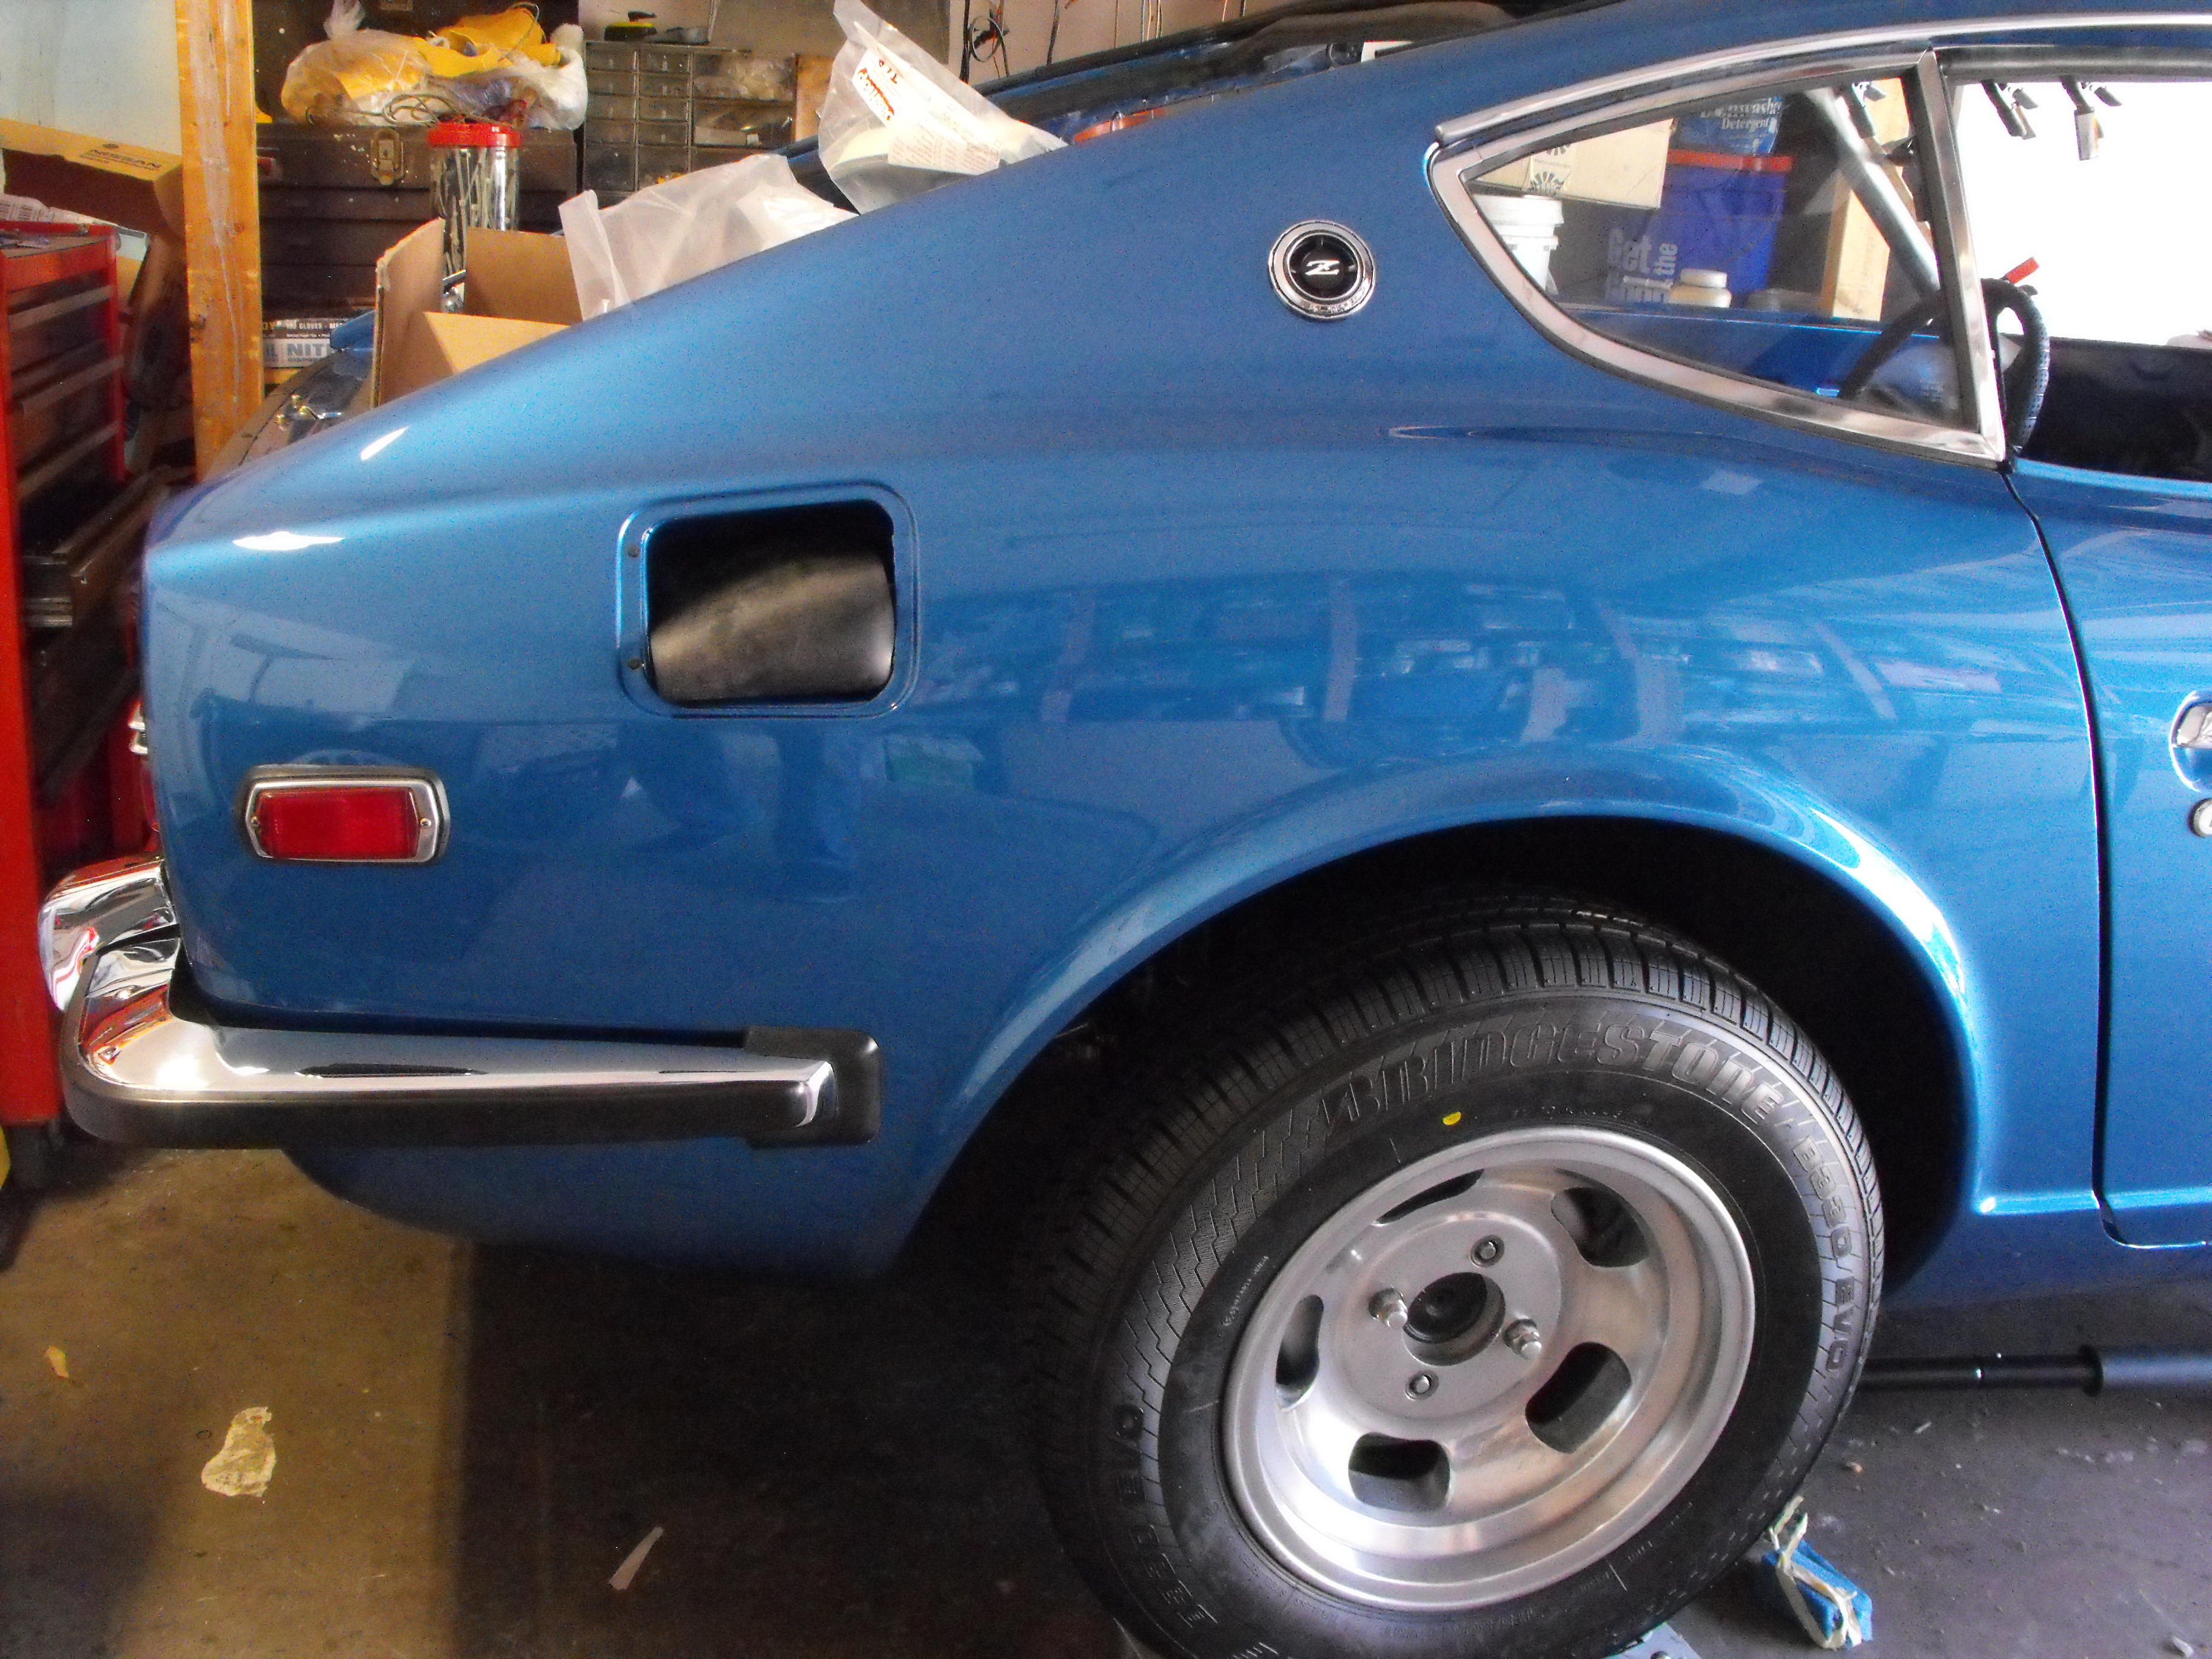
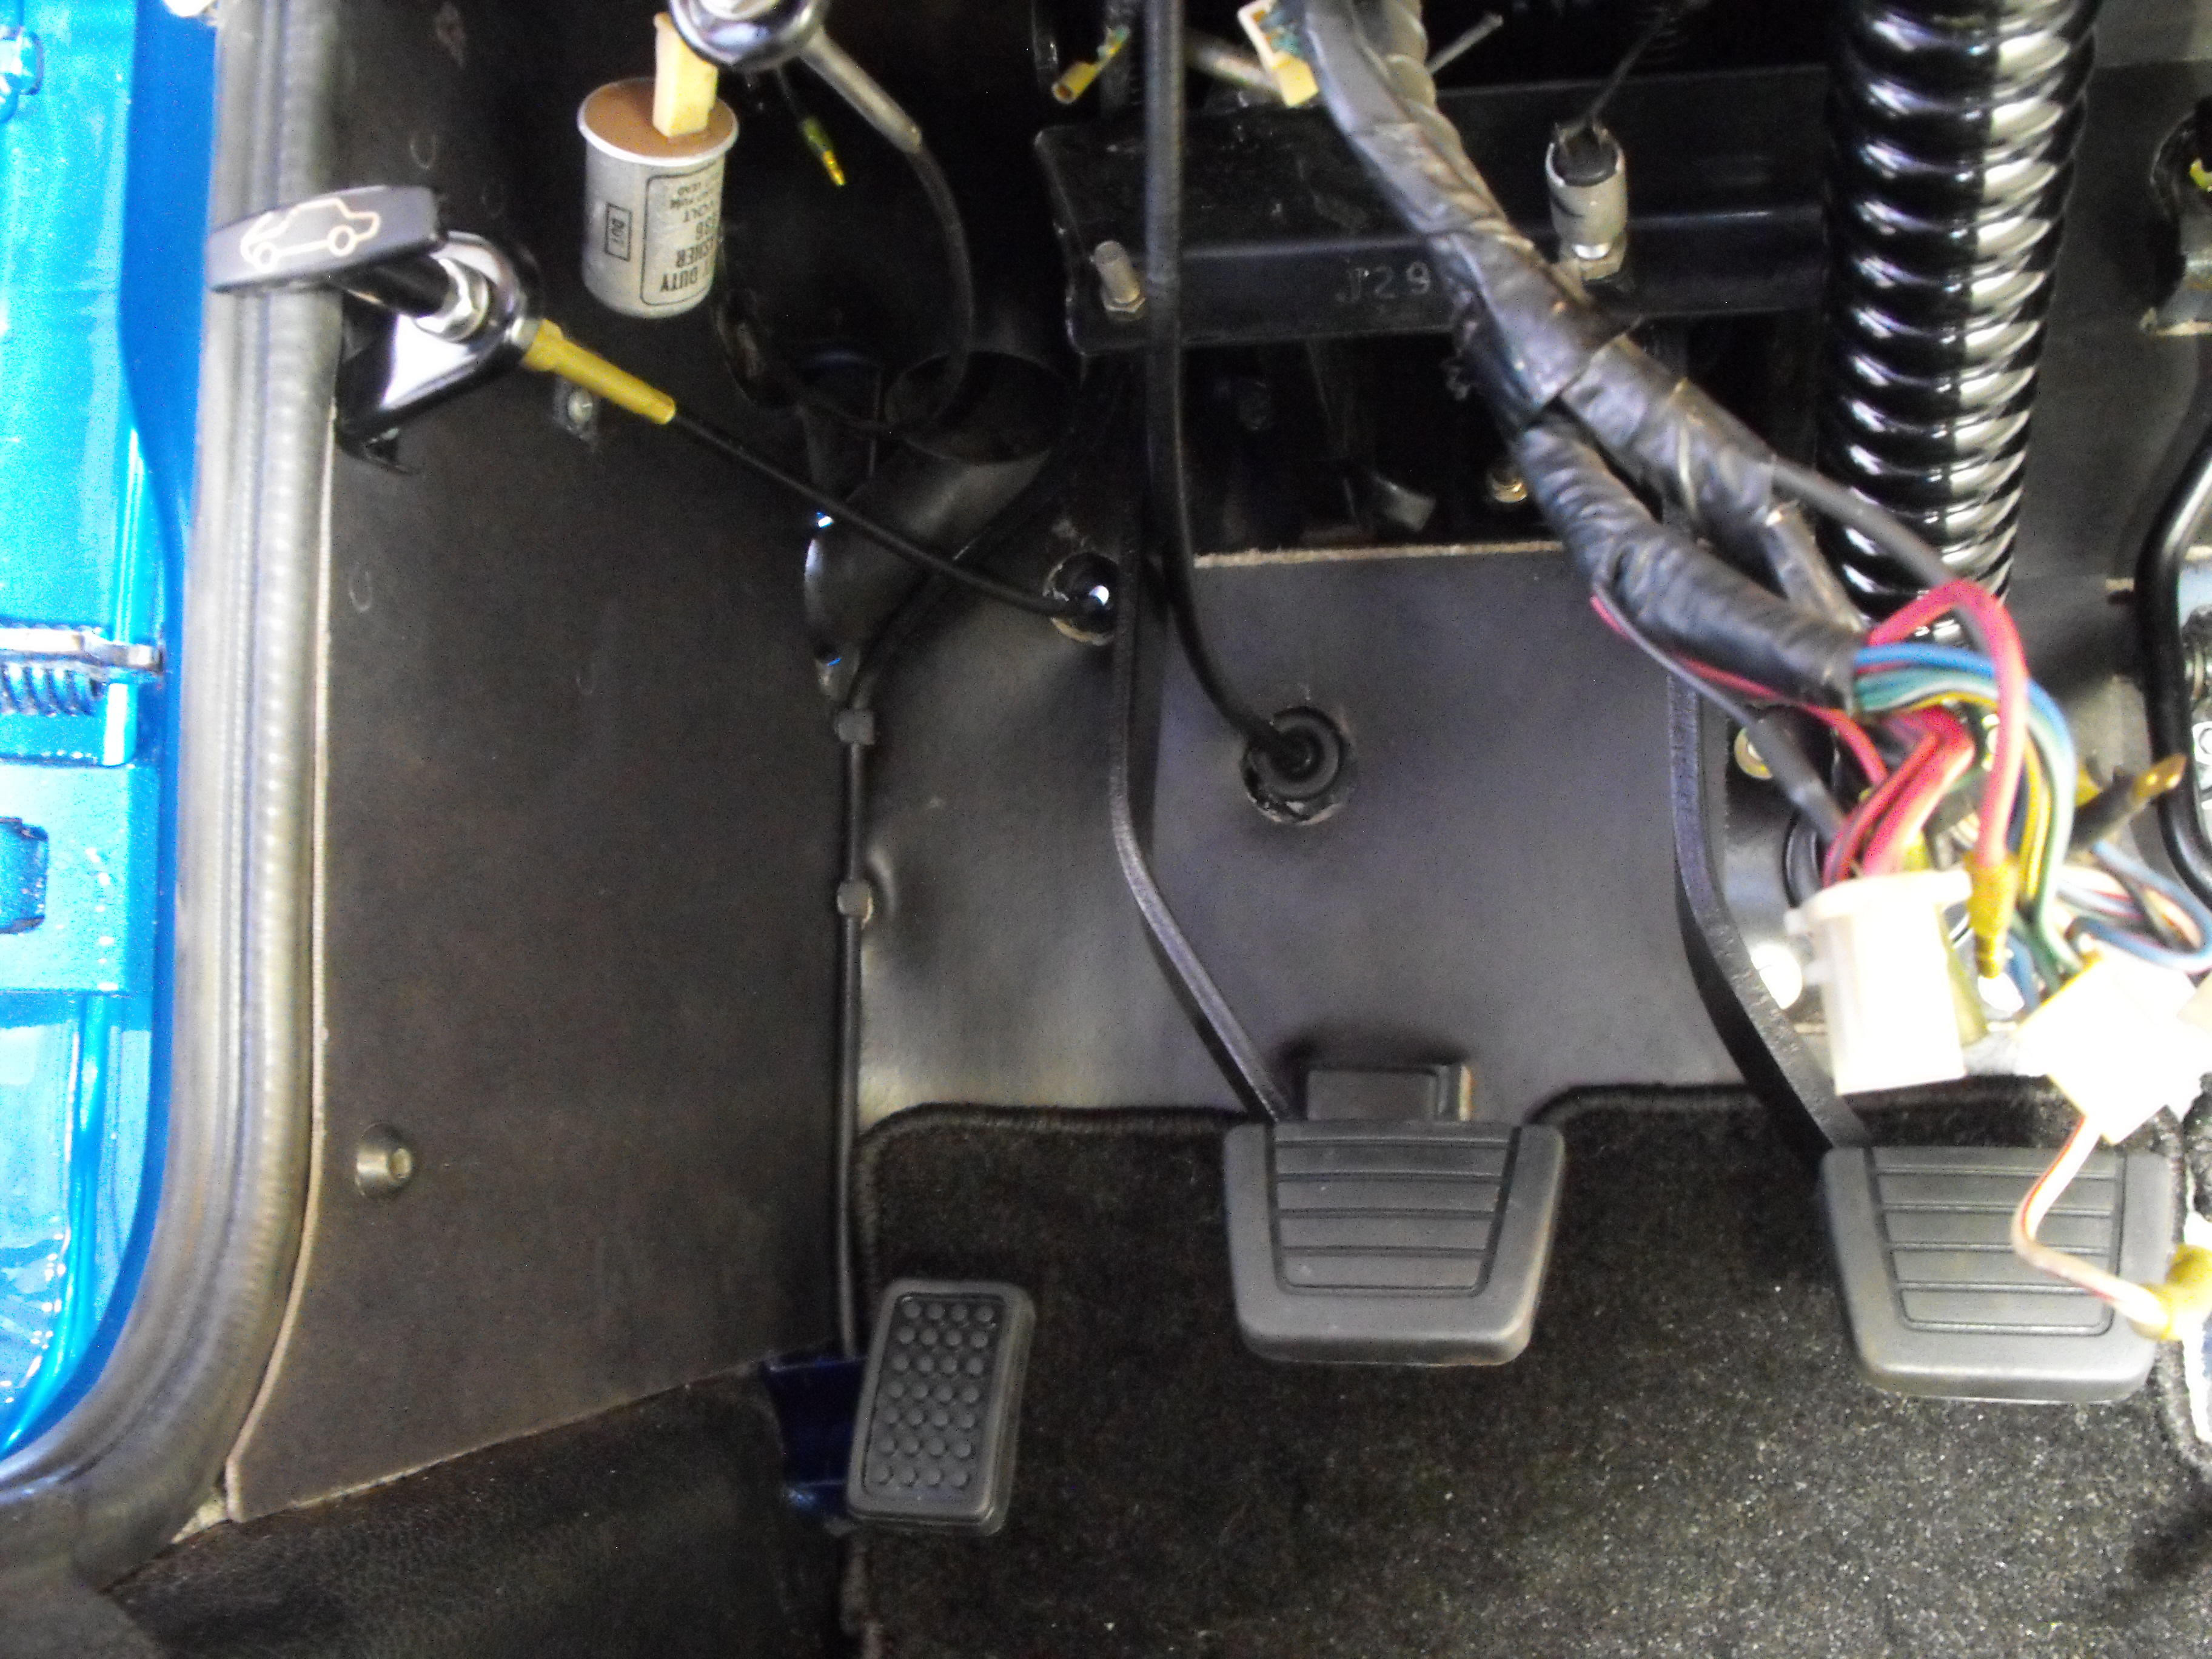
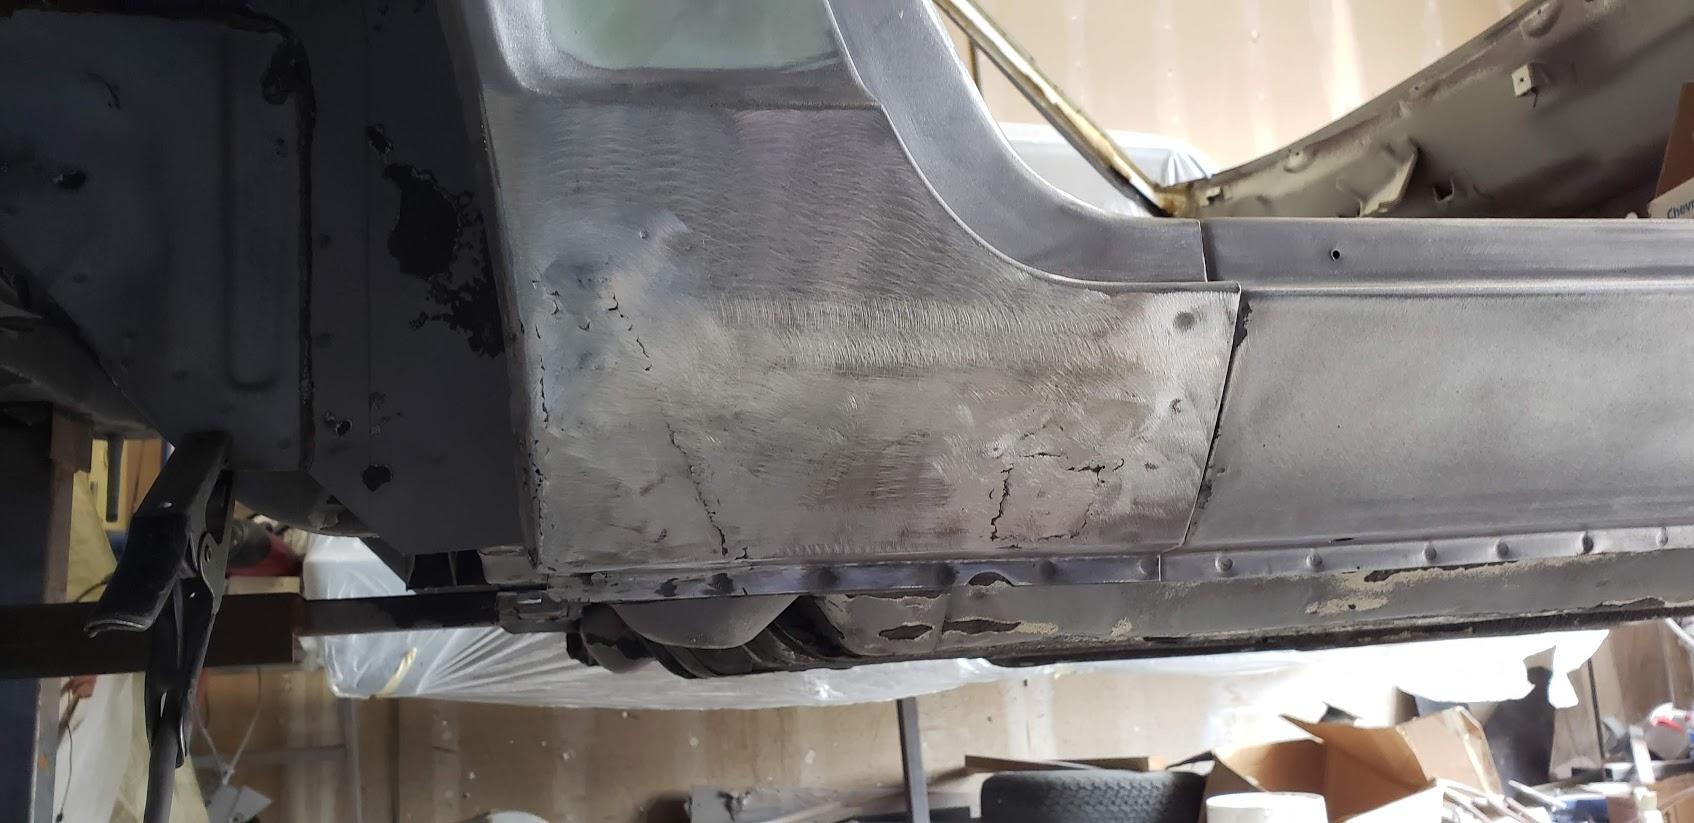
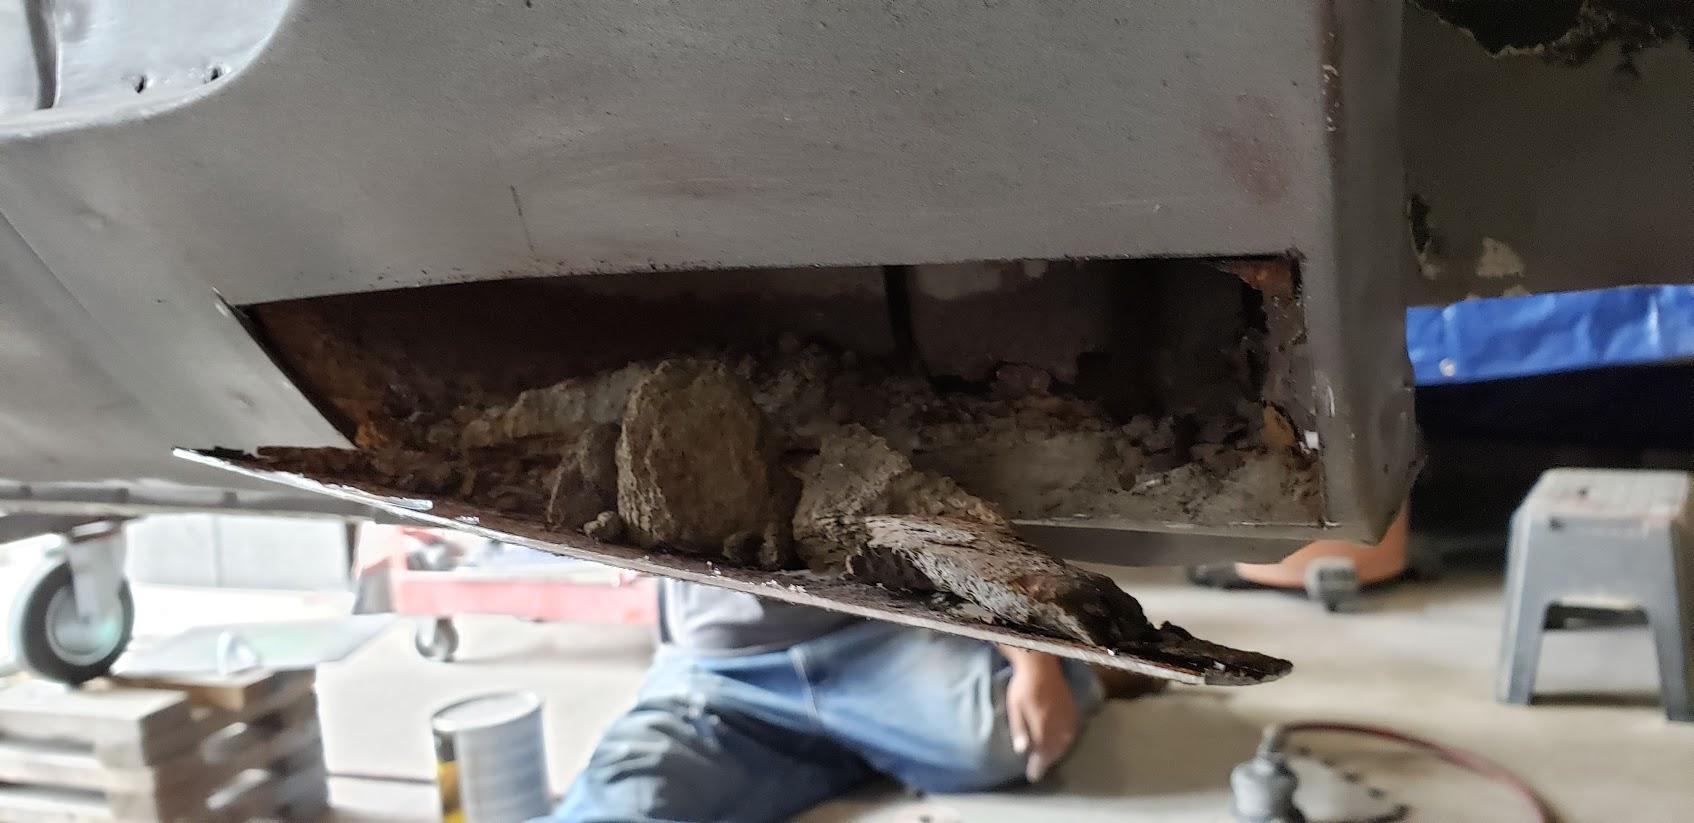
Got the new starter in and put on the rear bumper. Rear over riders are just on loosely for now. Can't remember if @jayhawk gave me the over rider rubber for the front or back, so will need to check through my boxes. Got the vinyl on around the window frame along with the door weatherstripping on both sides, so should have the windshield in by next weekend. Also started cleaning up the fuel tank.


-
Thanks Carl, great information.


.jpg.a9aea7b33104815b94d58747e37f33ab.jpg)


.jpg.6249b55d7379a1b915fd32fda625f4b3.jpg)