motorman7
 Subscriber
-
Joined
-
Last visited
-
Currently
Viewing Topic: SN 00042 Restoration; The Older Twin
-
 I have had bad spark plugs before...brand new ones. Ended up cleaning an old one and sticking that back in.
 -
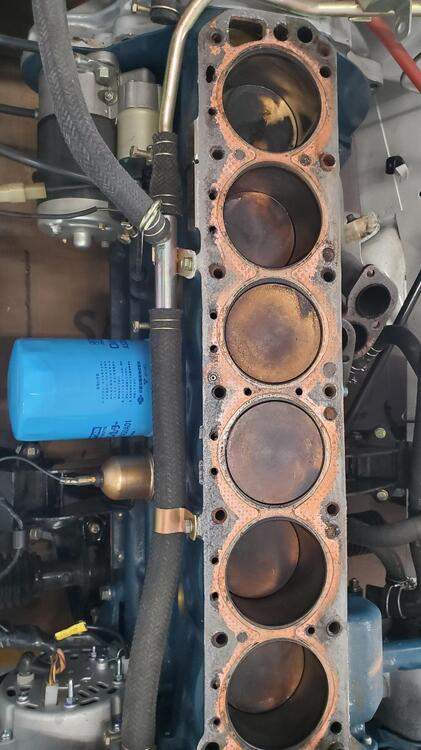
Probably not your issue, but thought I would share. I had an issue with my white Z where it ran great driving to a show 20 miles away and then horribly on the return drive. Cylinders 2 and 3 were bad. I was convinced it was fuel and wasted a couple hours rebuilding and then replacing the front float bowl shut off valve. Eventually I took off the valve cover and saw that the #2 and #3 valve rocker arms had 'relocated'. The end that was supposed to depress the intake valves was no longer touching the valve. Long story short, took the head to the machine shop and was told the valve stems were all gummed up from running old/bad gas. Sadly, I do not drive the cars enough. Anyway, put it all back together and it runs great now. Machine shop cleaned all the valves and guides. Fortunately, no damage was caused to anything except for my wallet. You can see the two valve 'nicks' on cylinders 2 and 3 in the pic.
-
That one is tempting....my favorite color.
-
Pretty happy with how this looks. Sprays on very nicely.

-
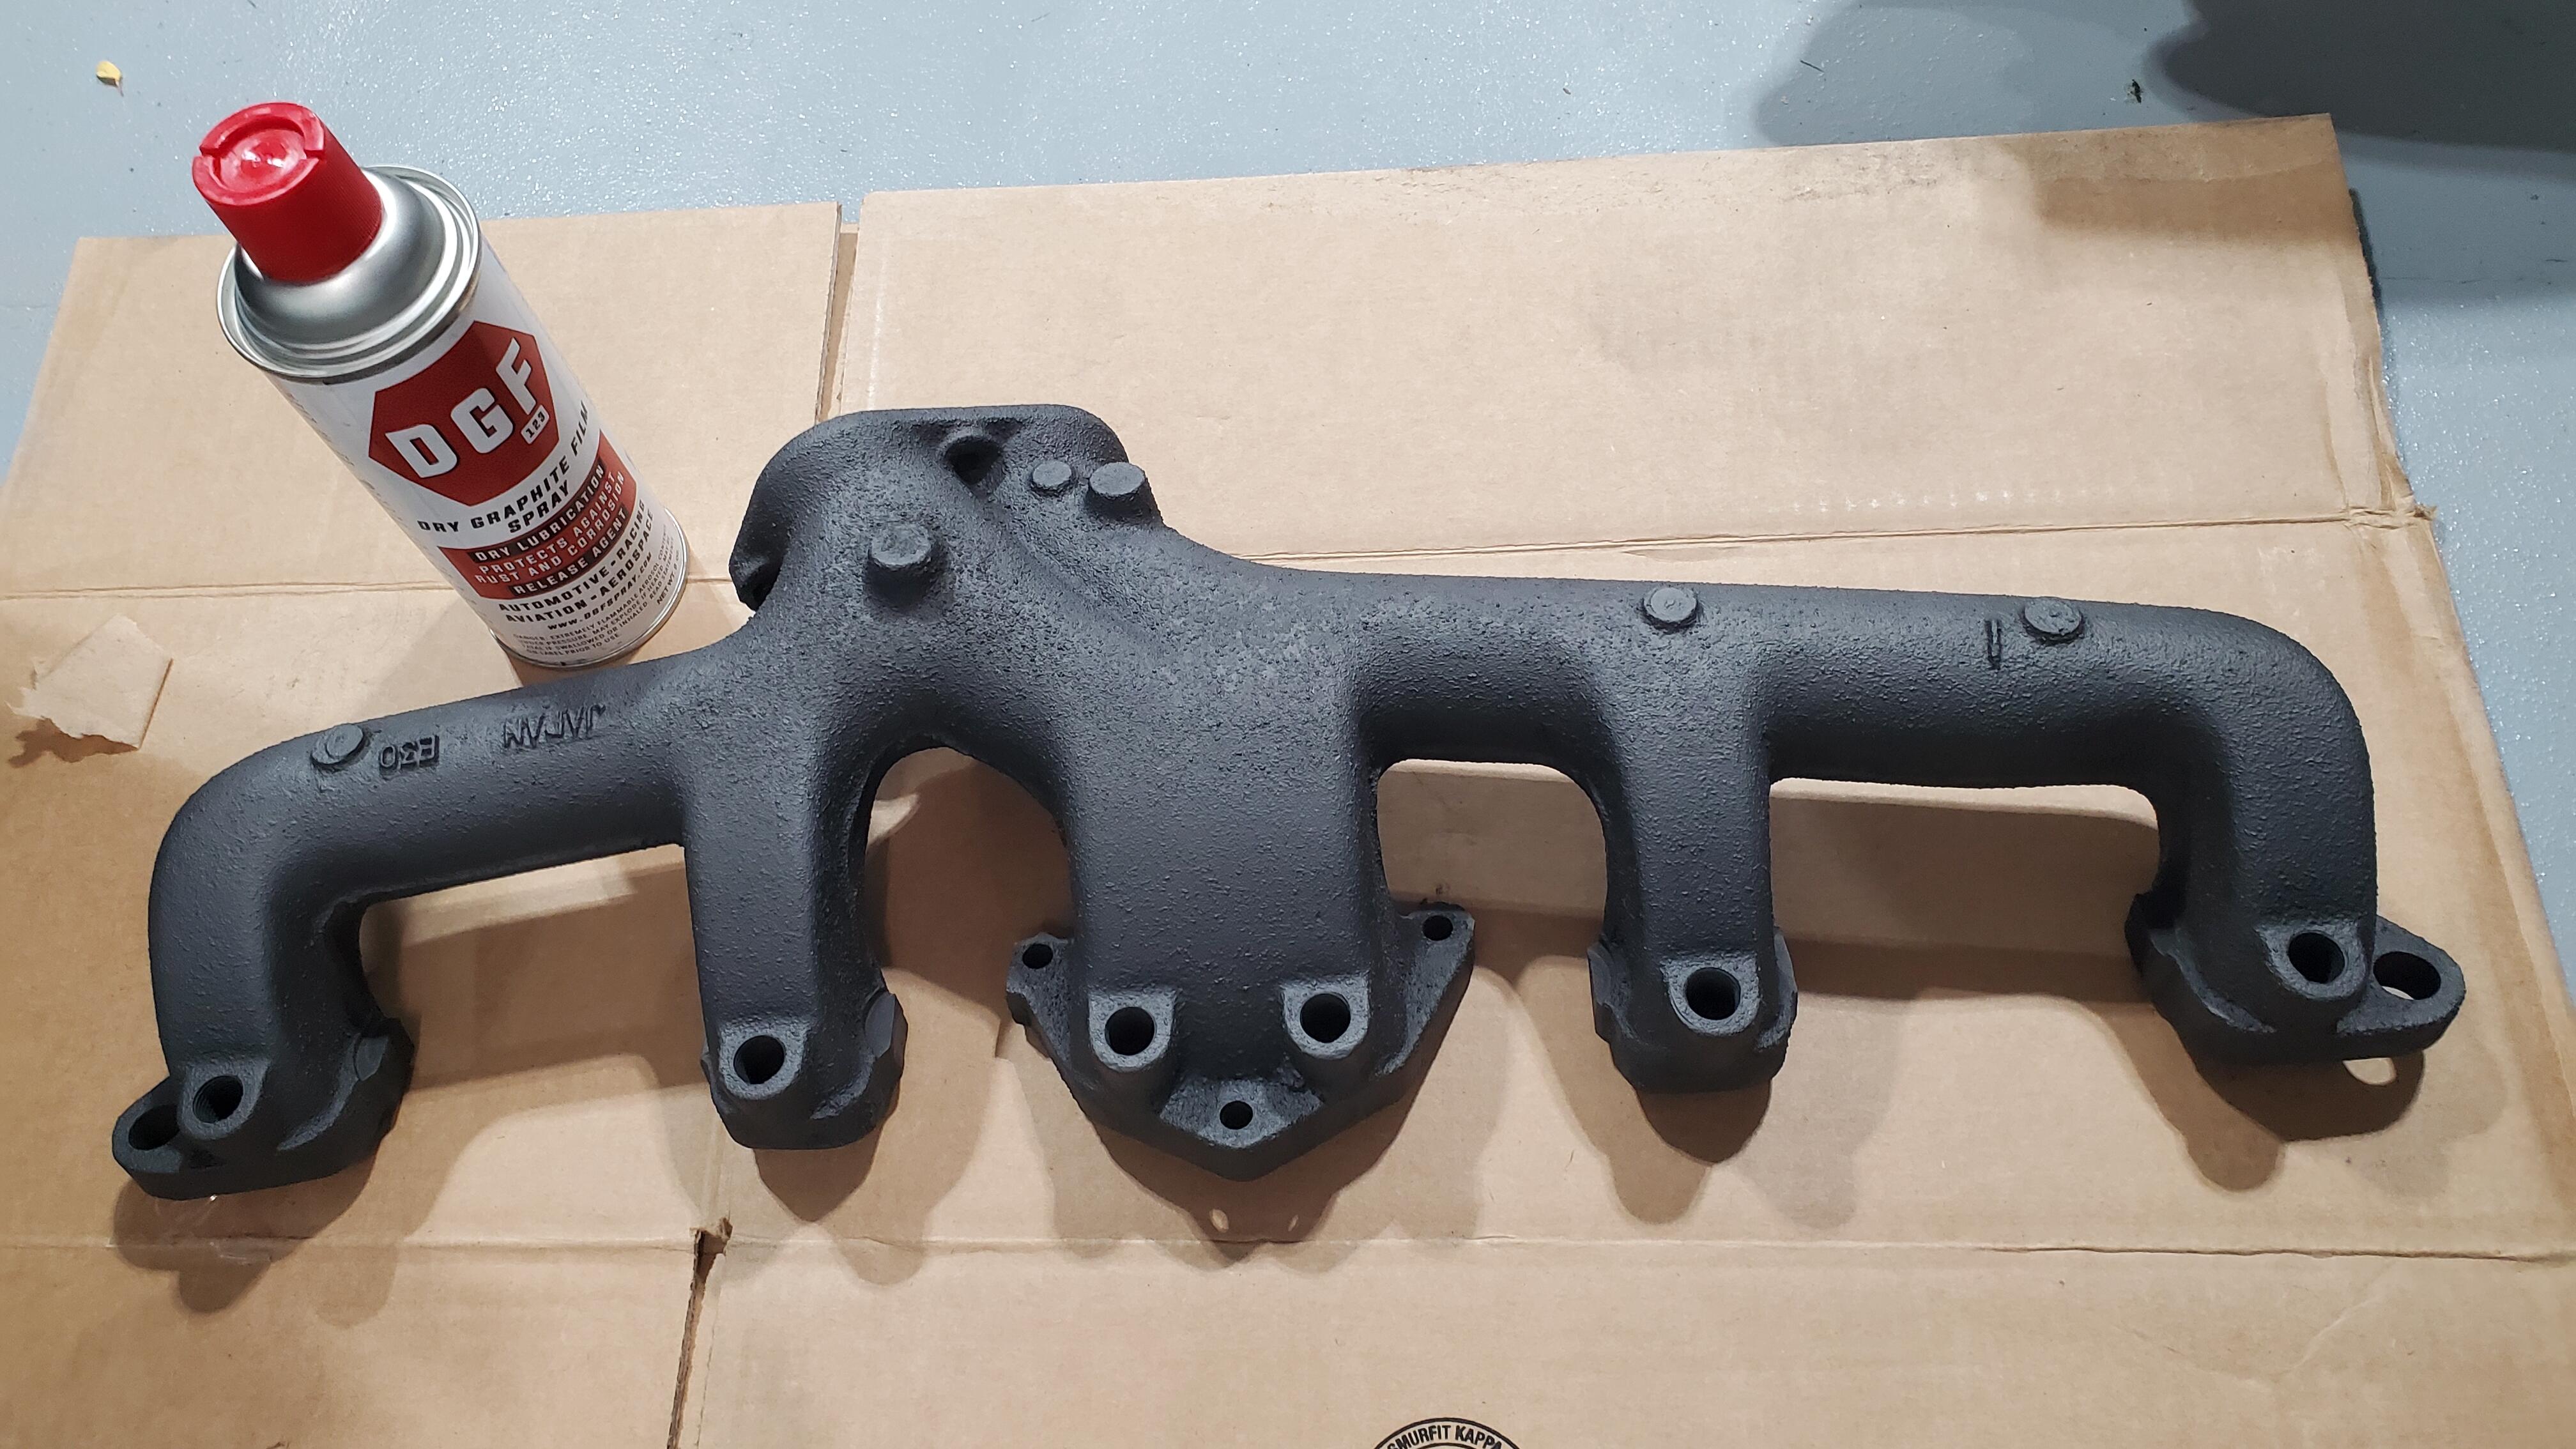
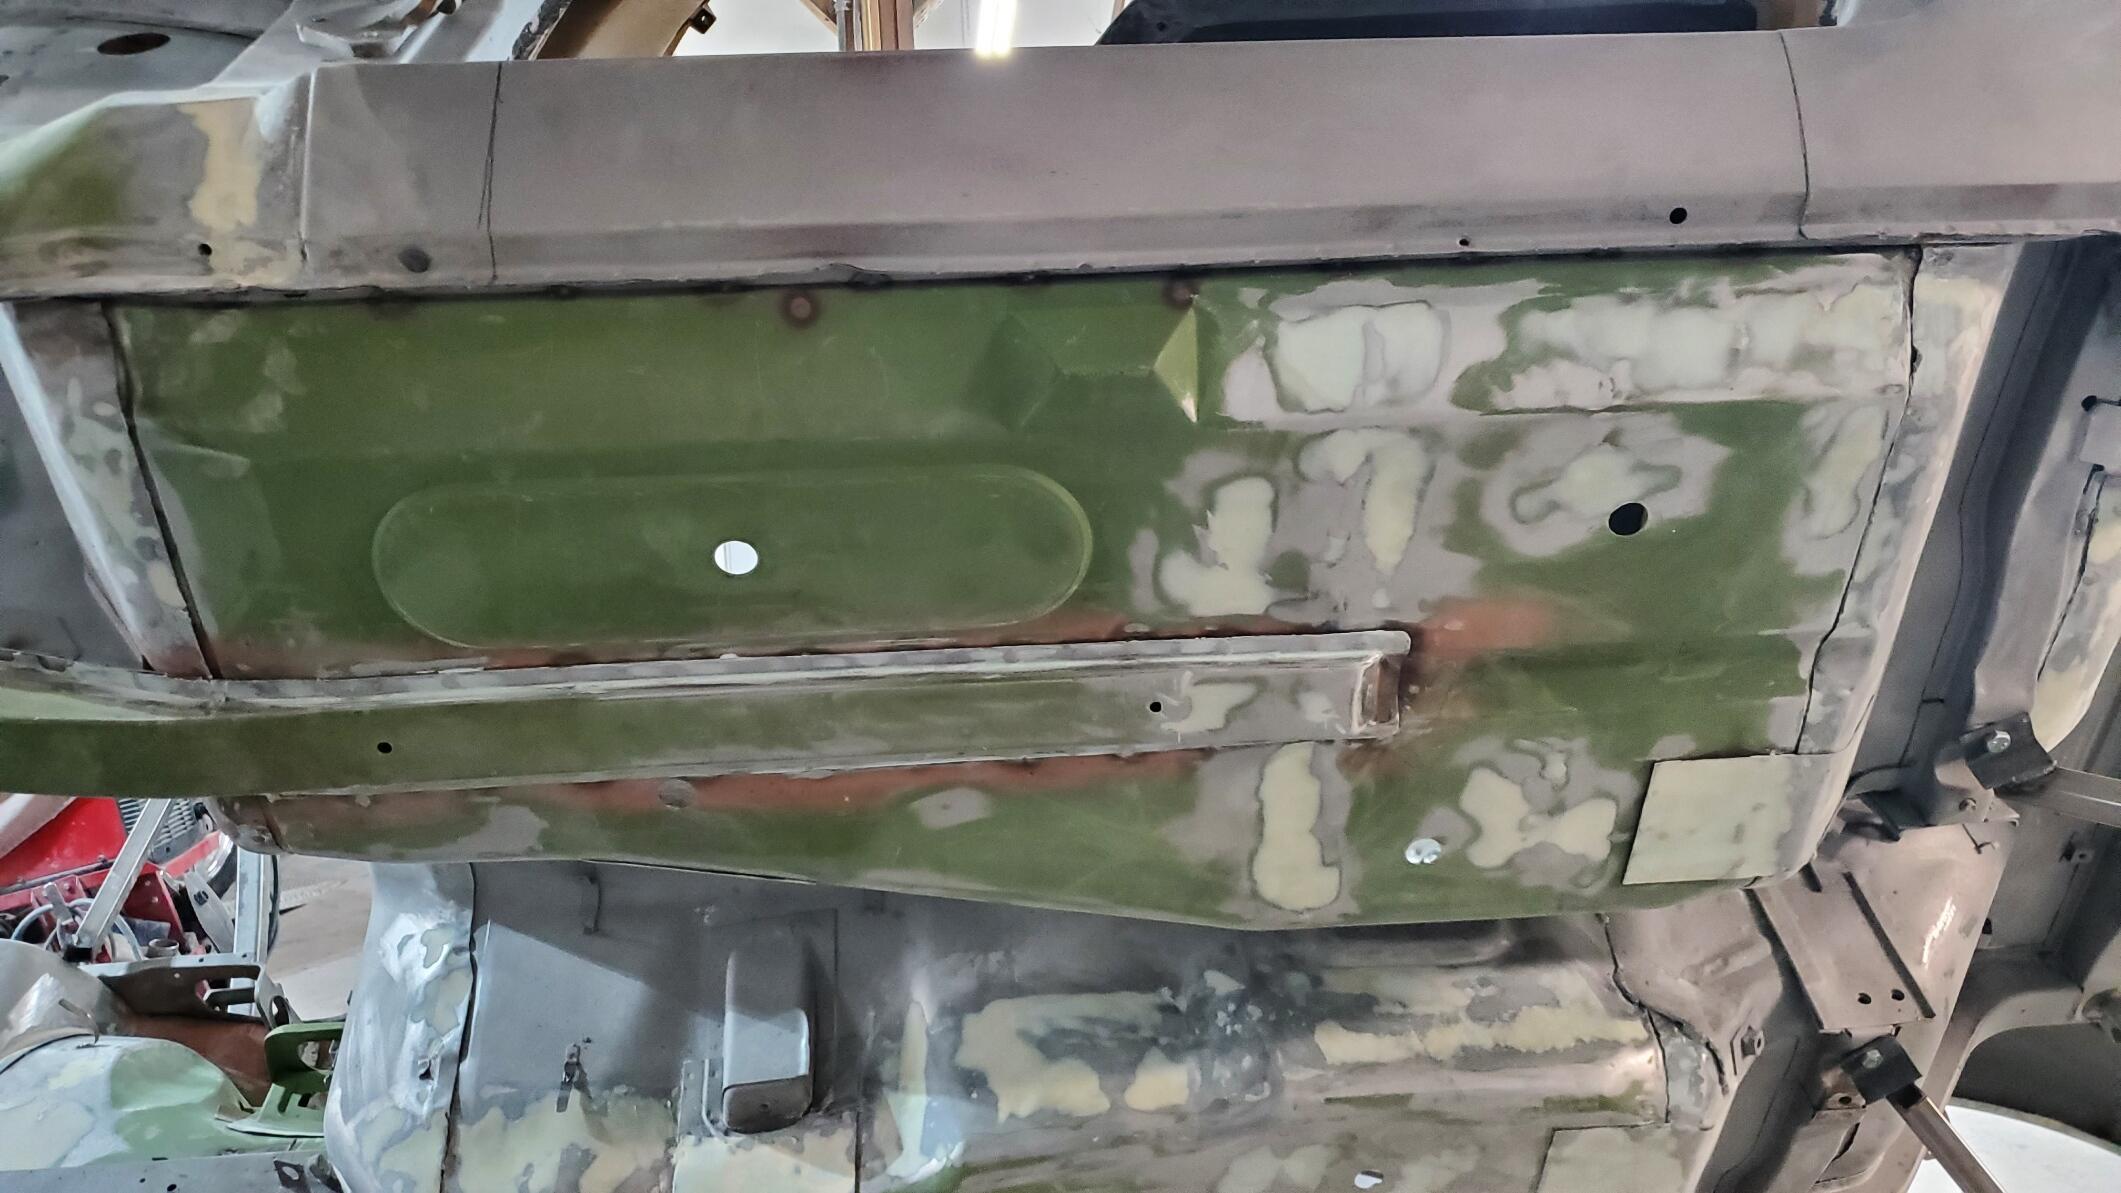
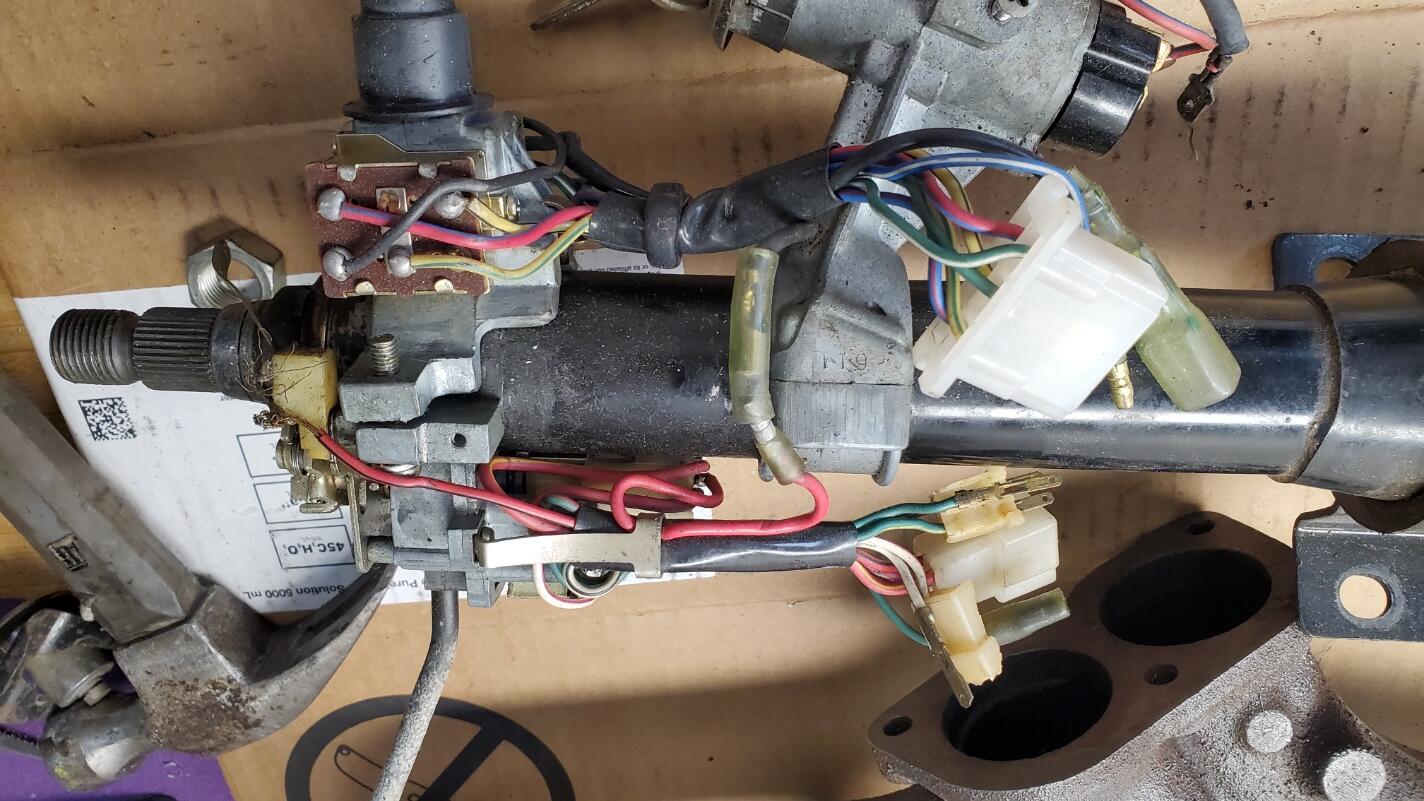
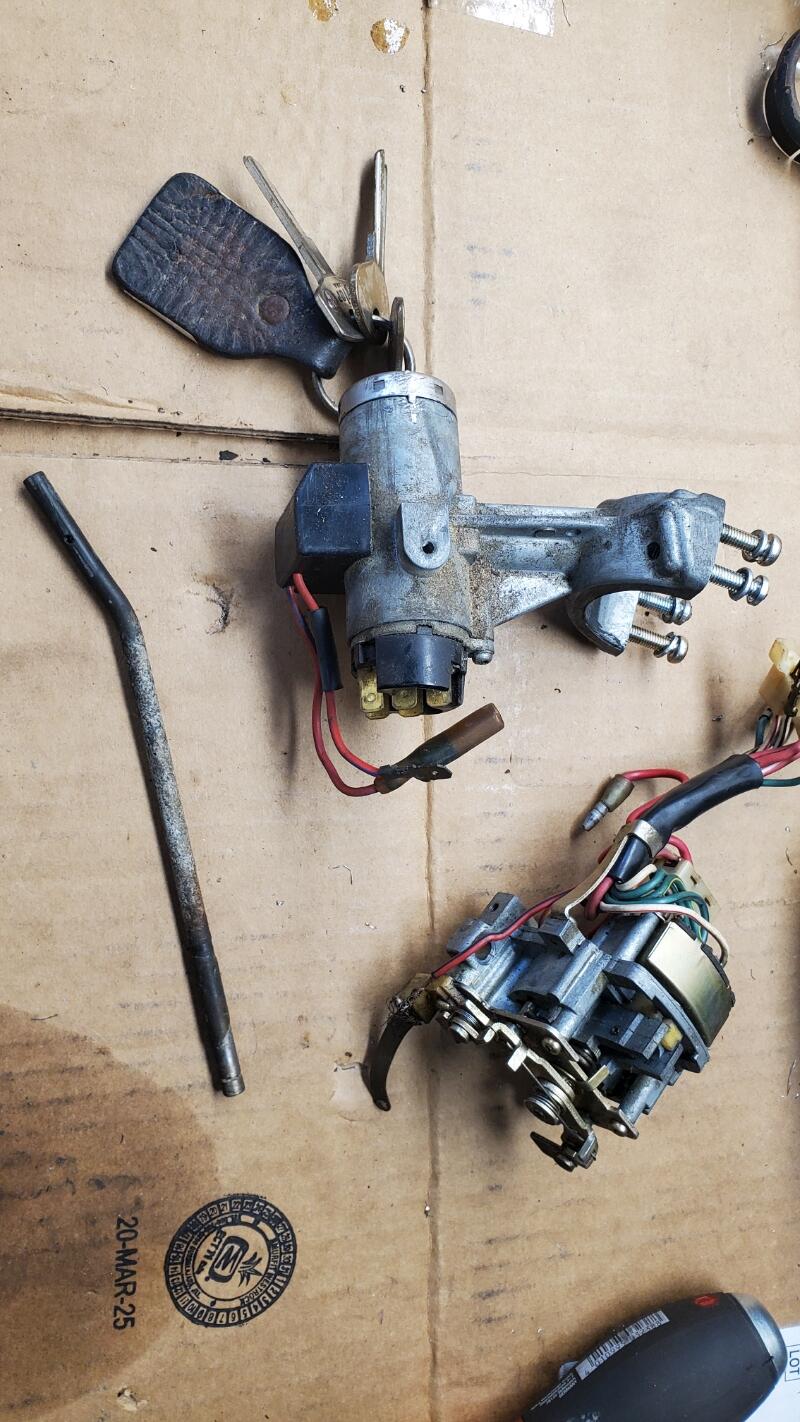
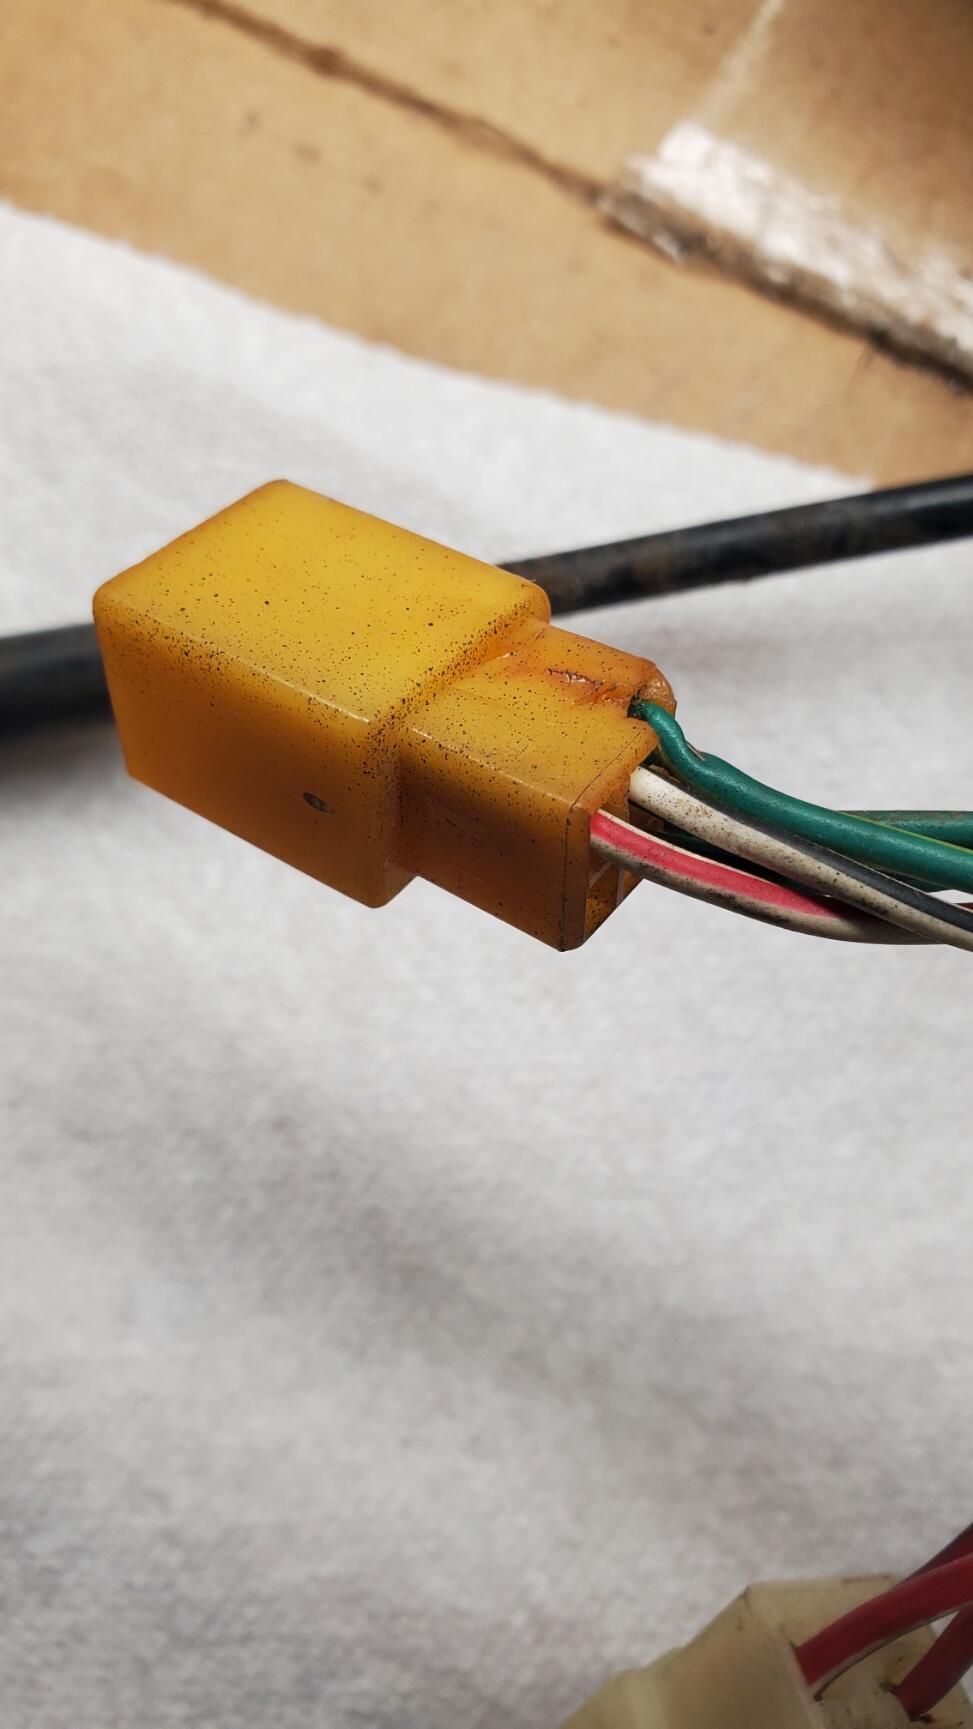
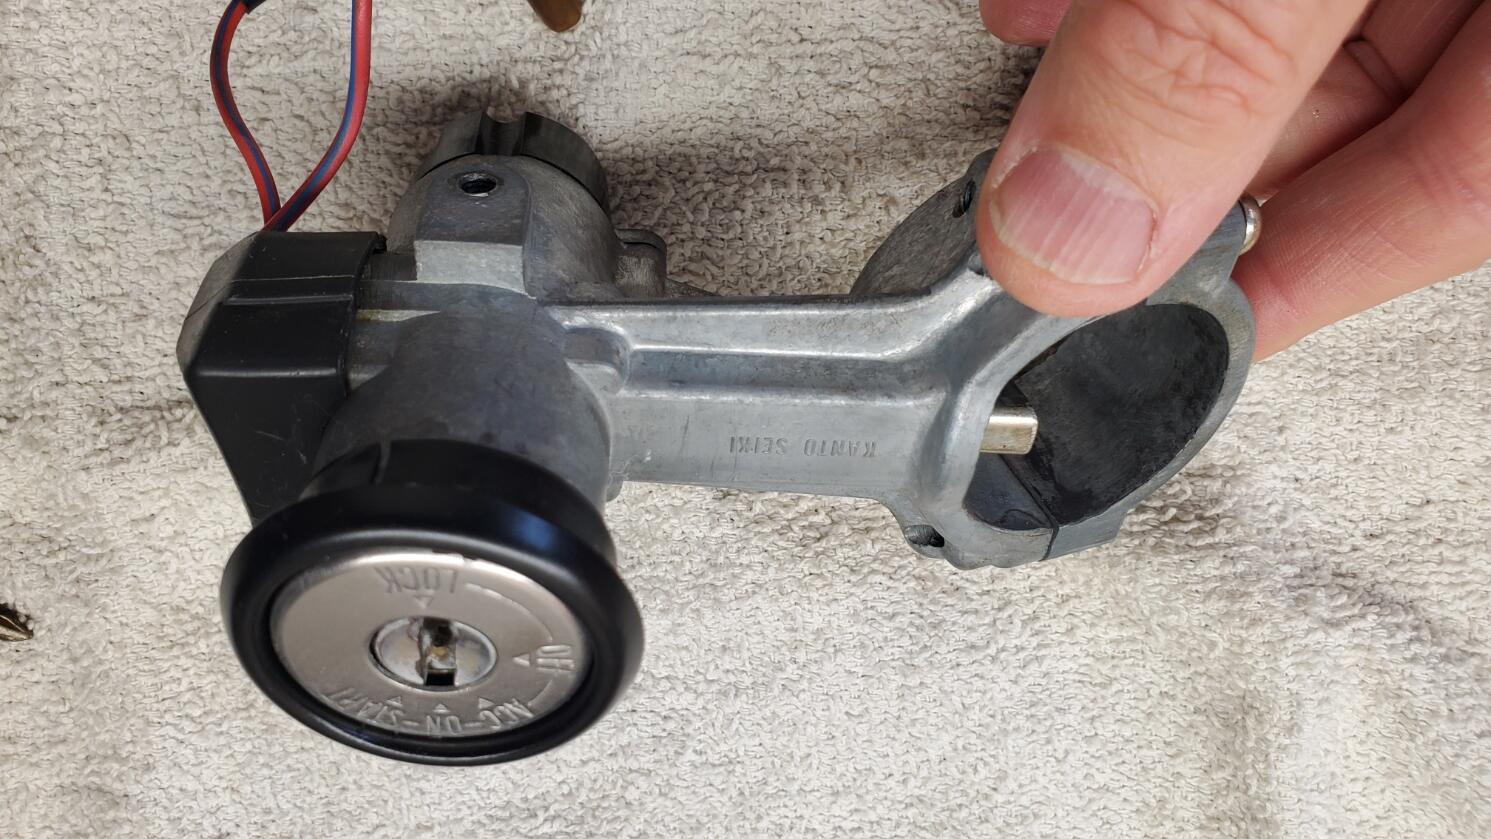
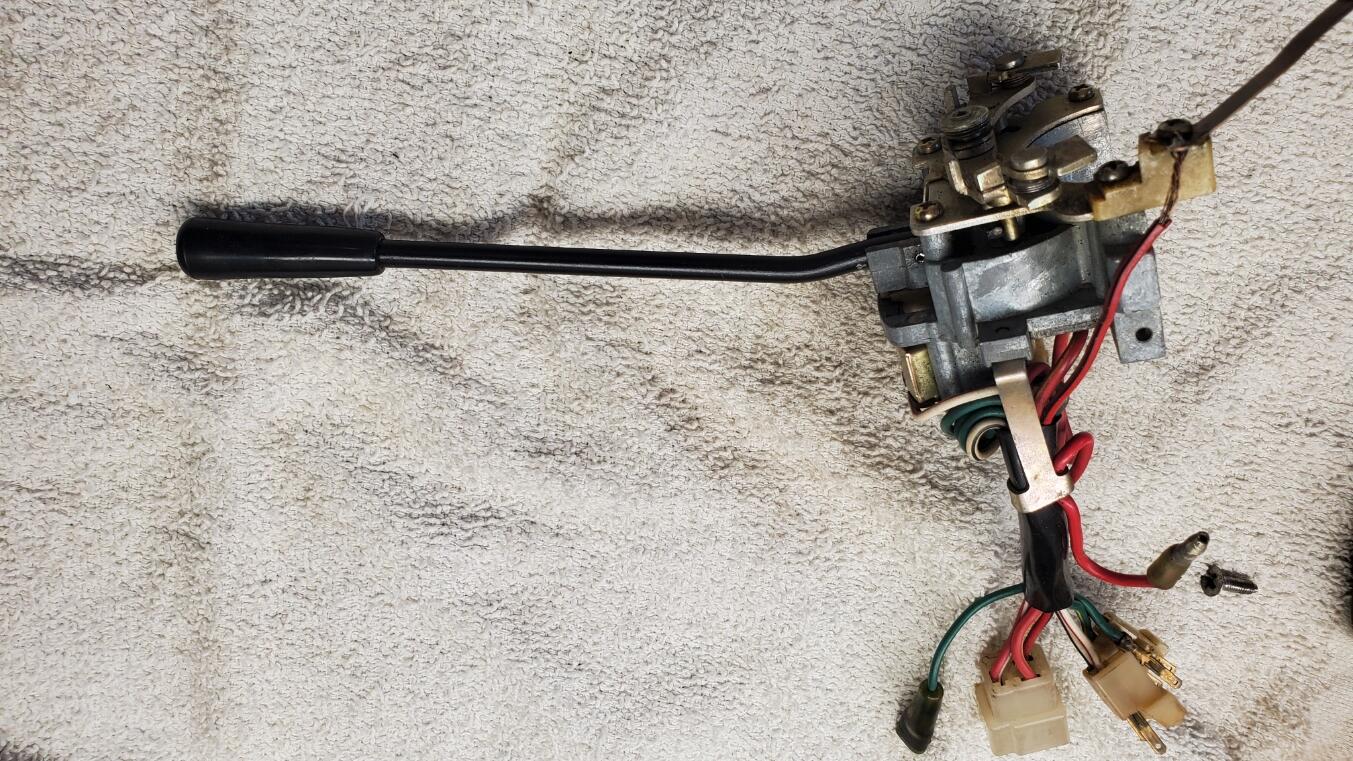
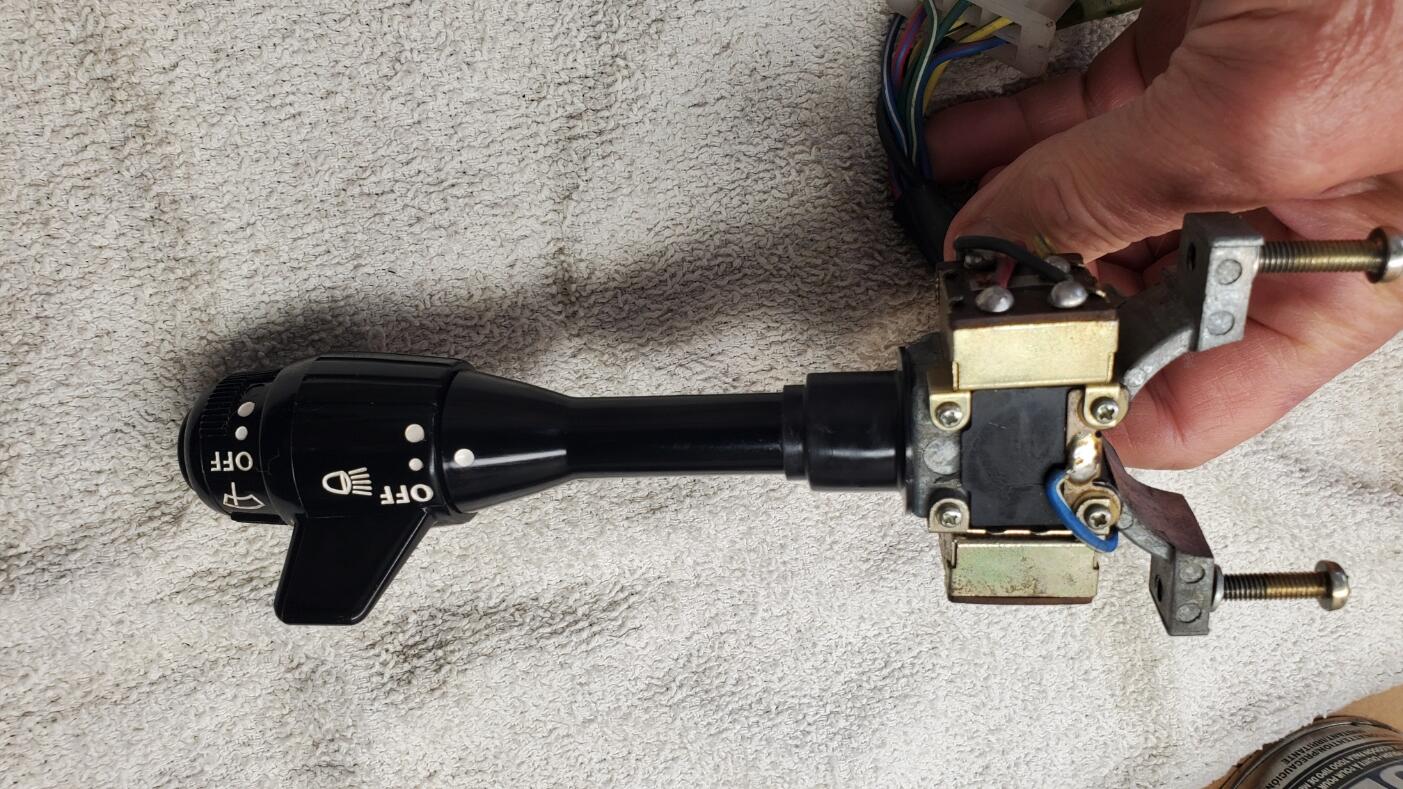
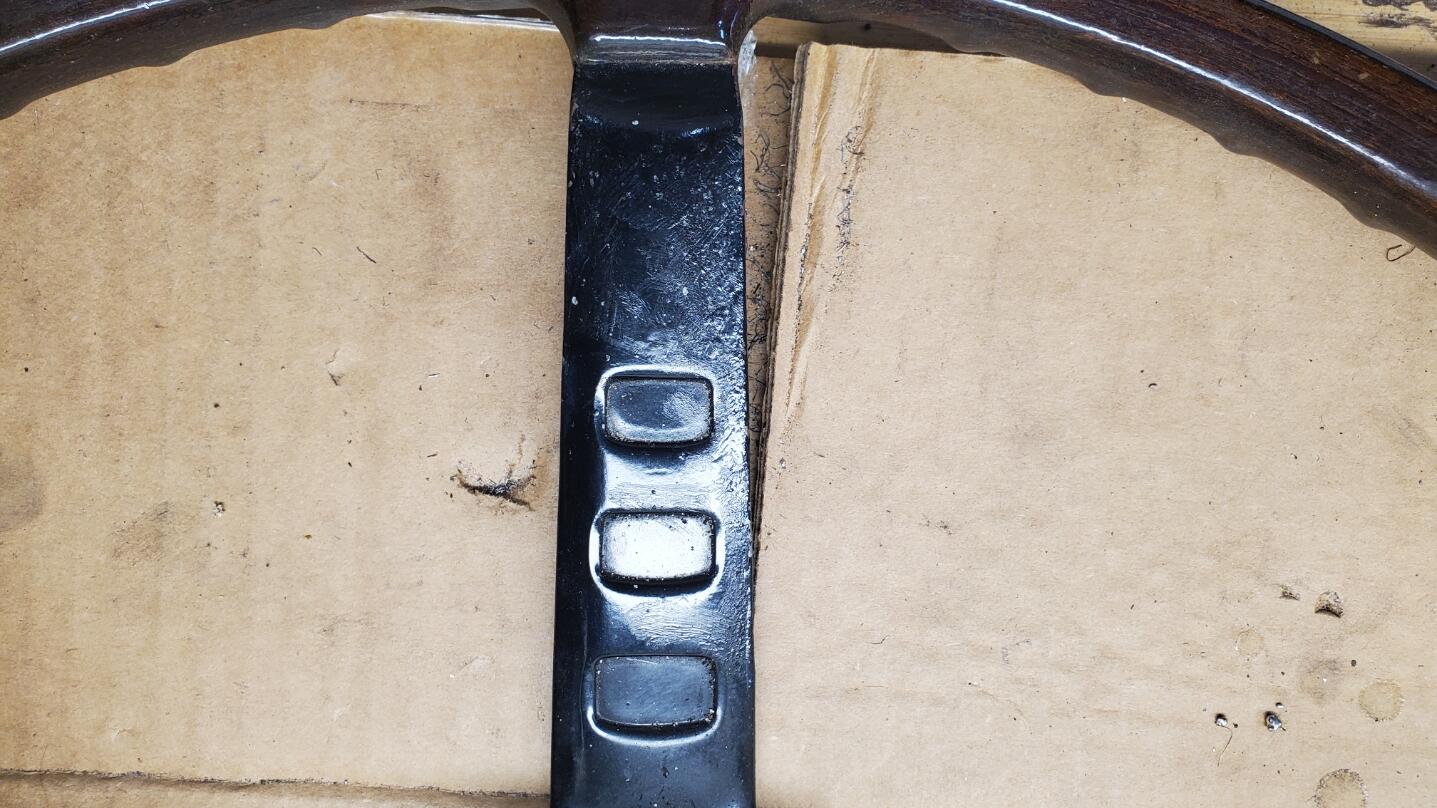
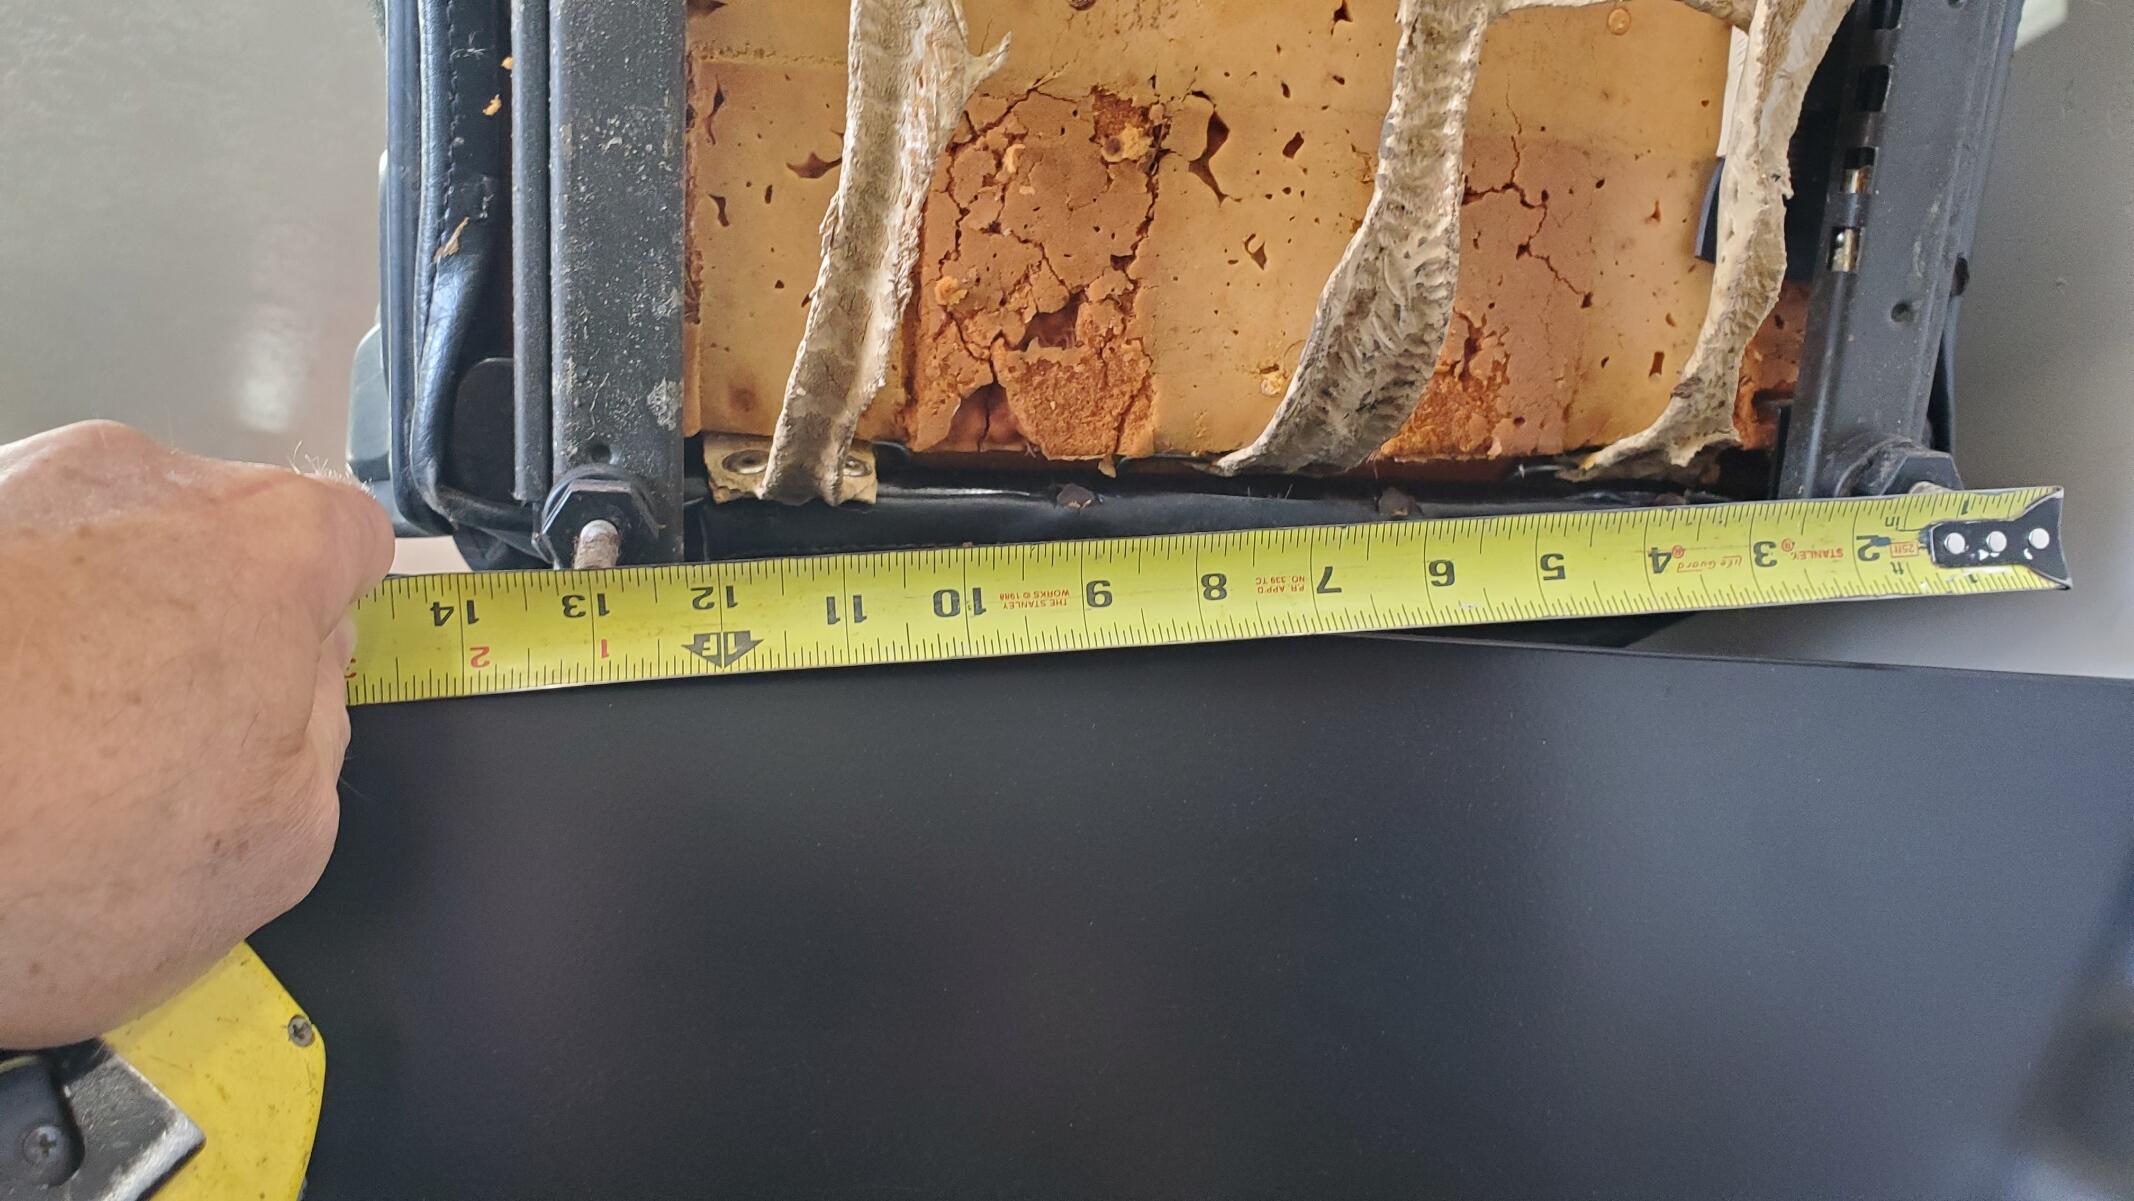
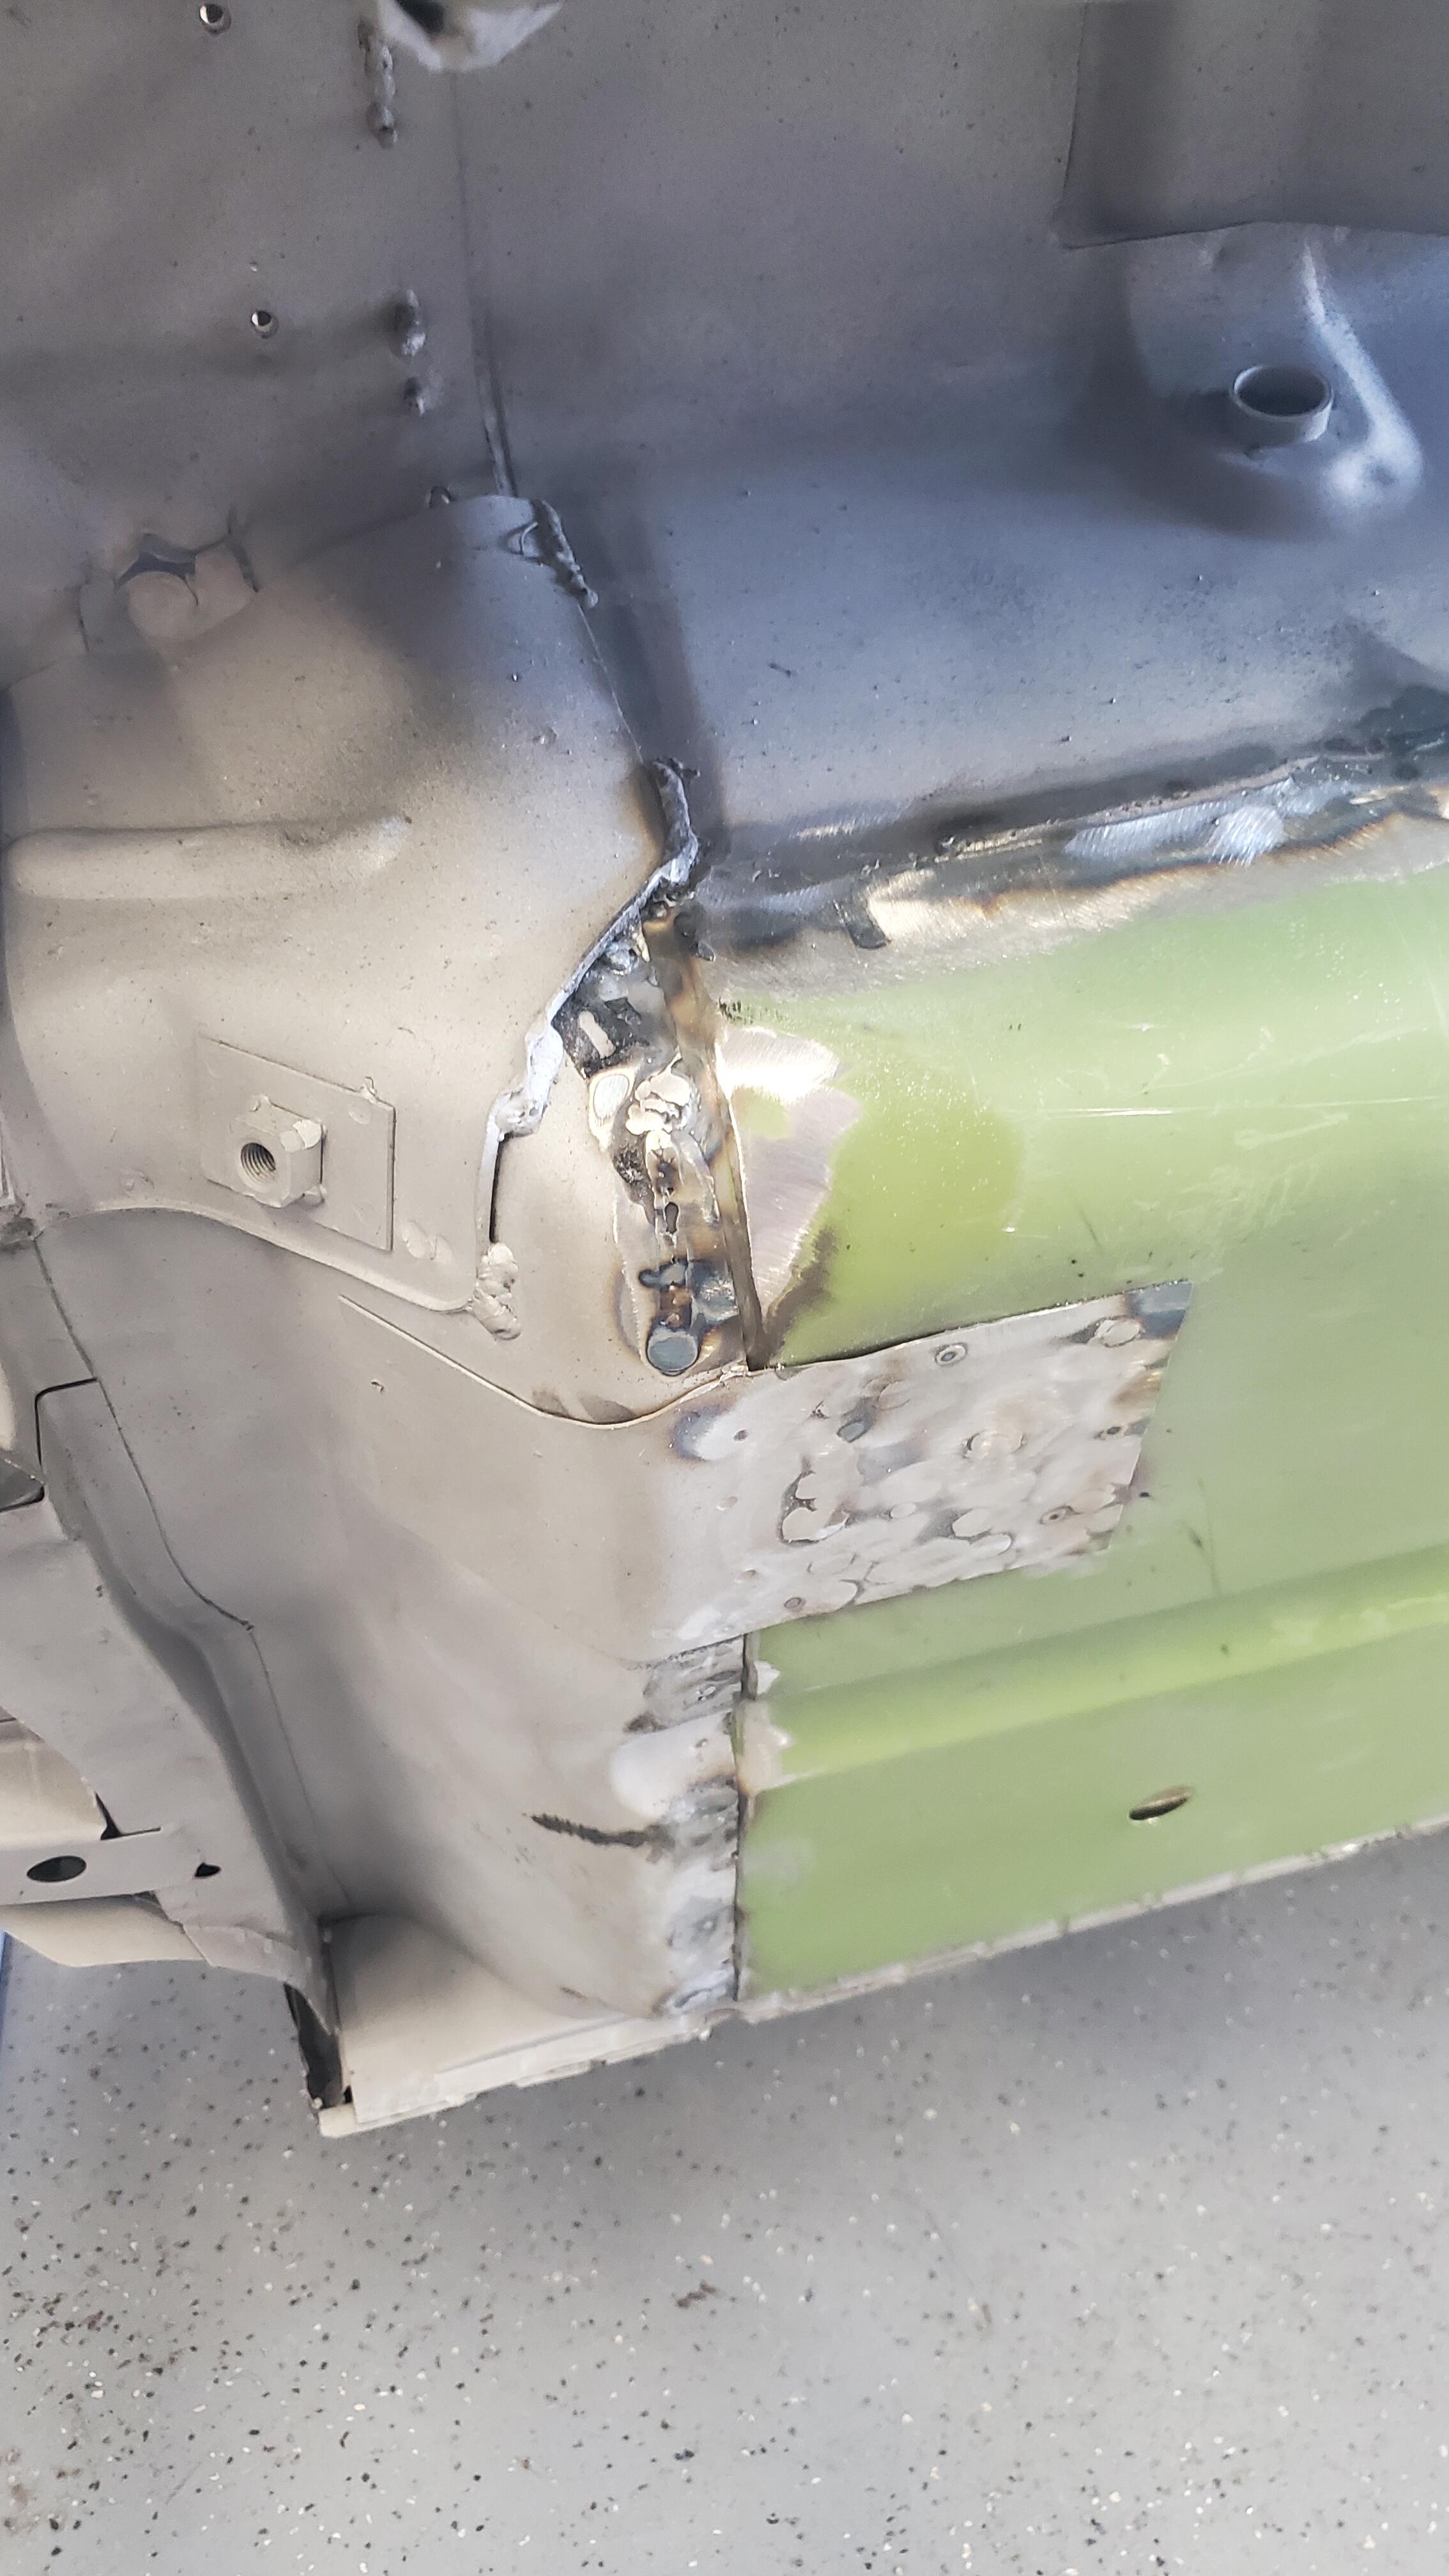
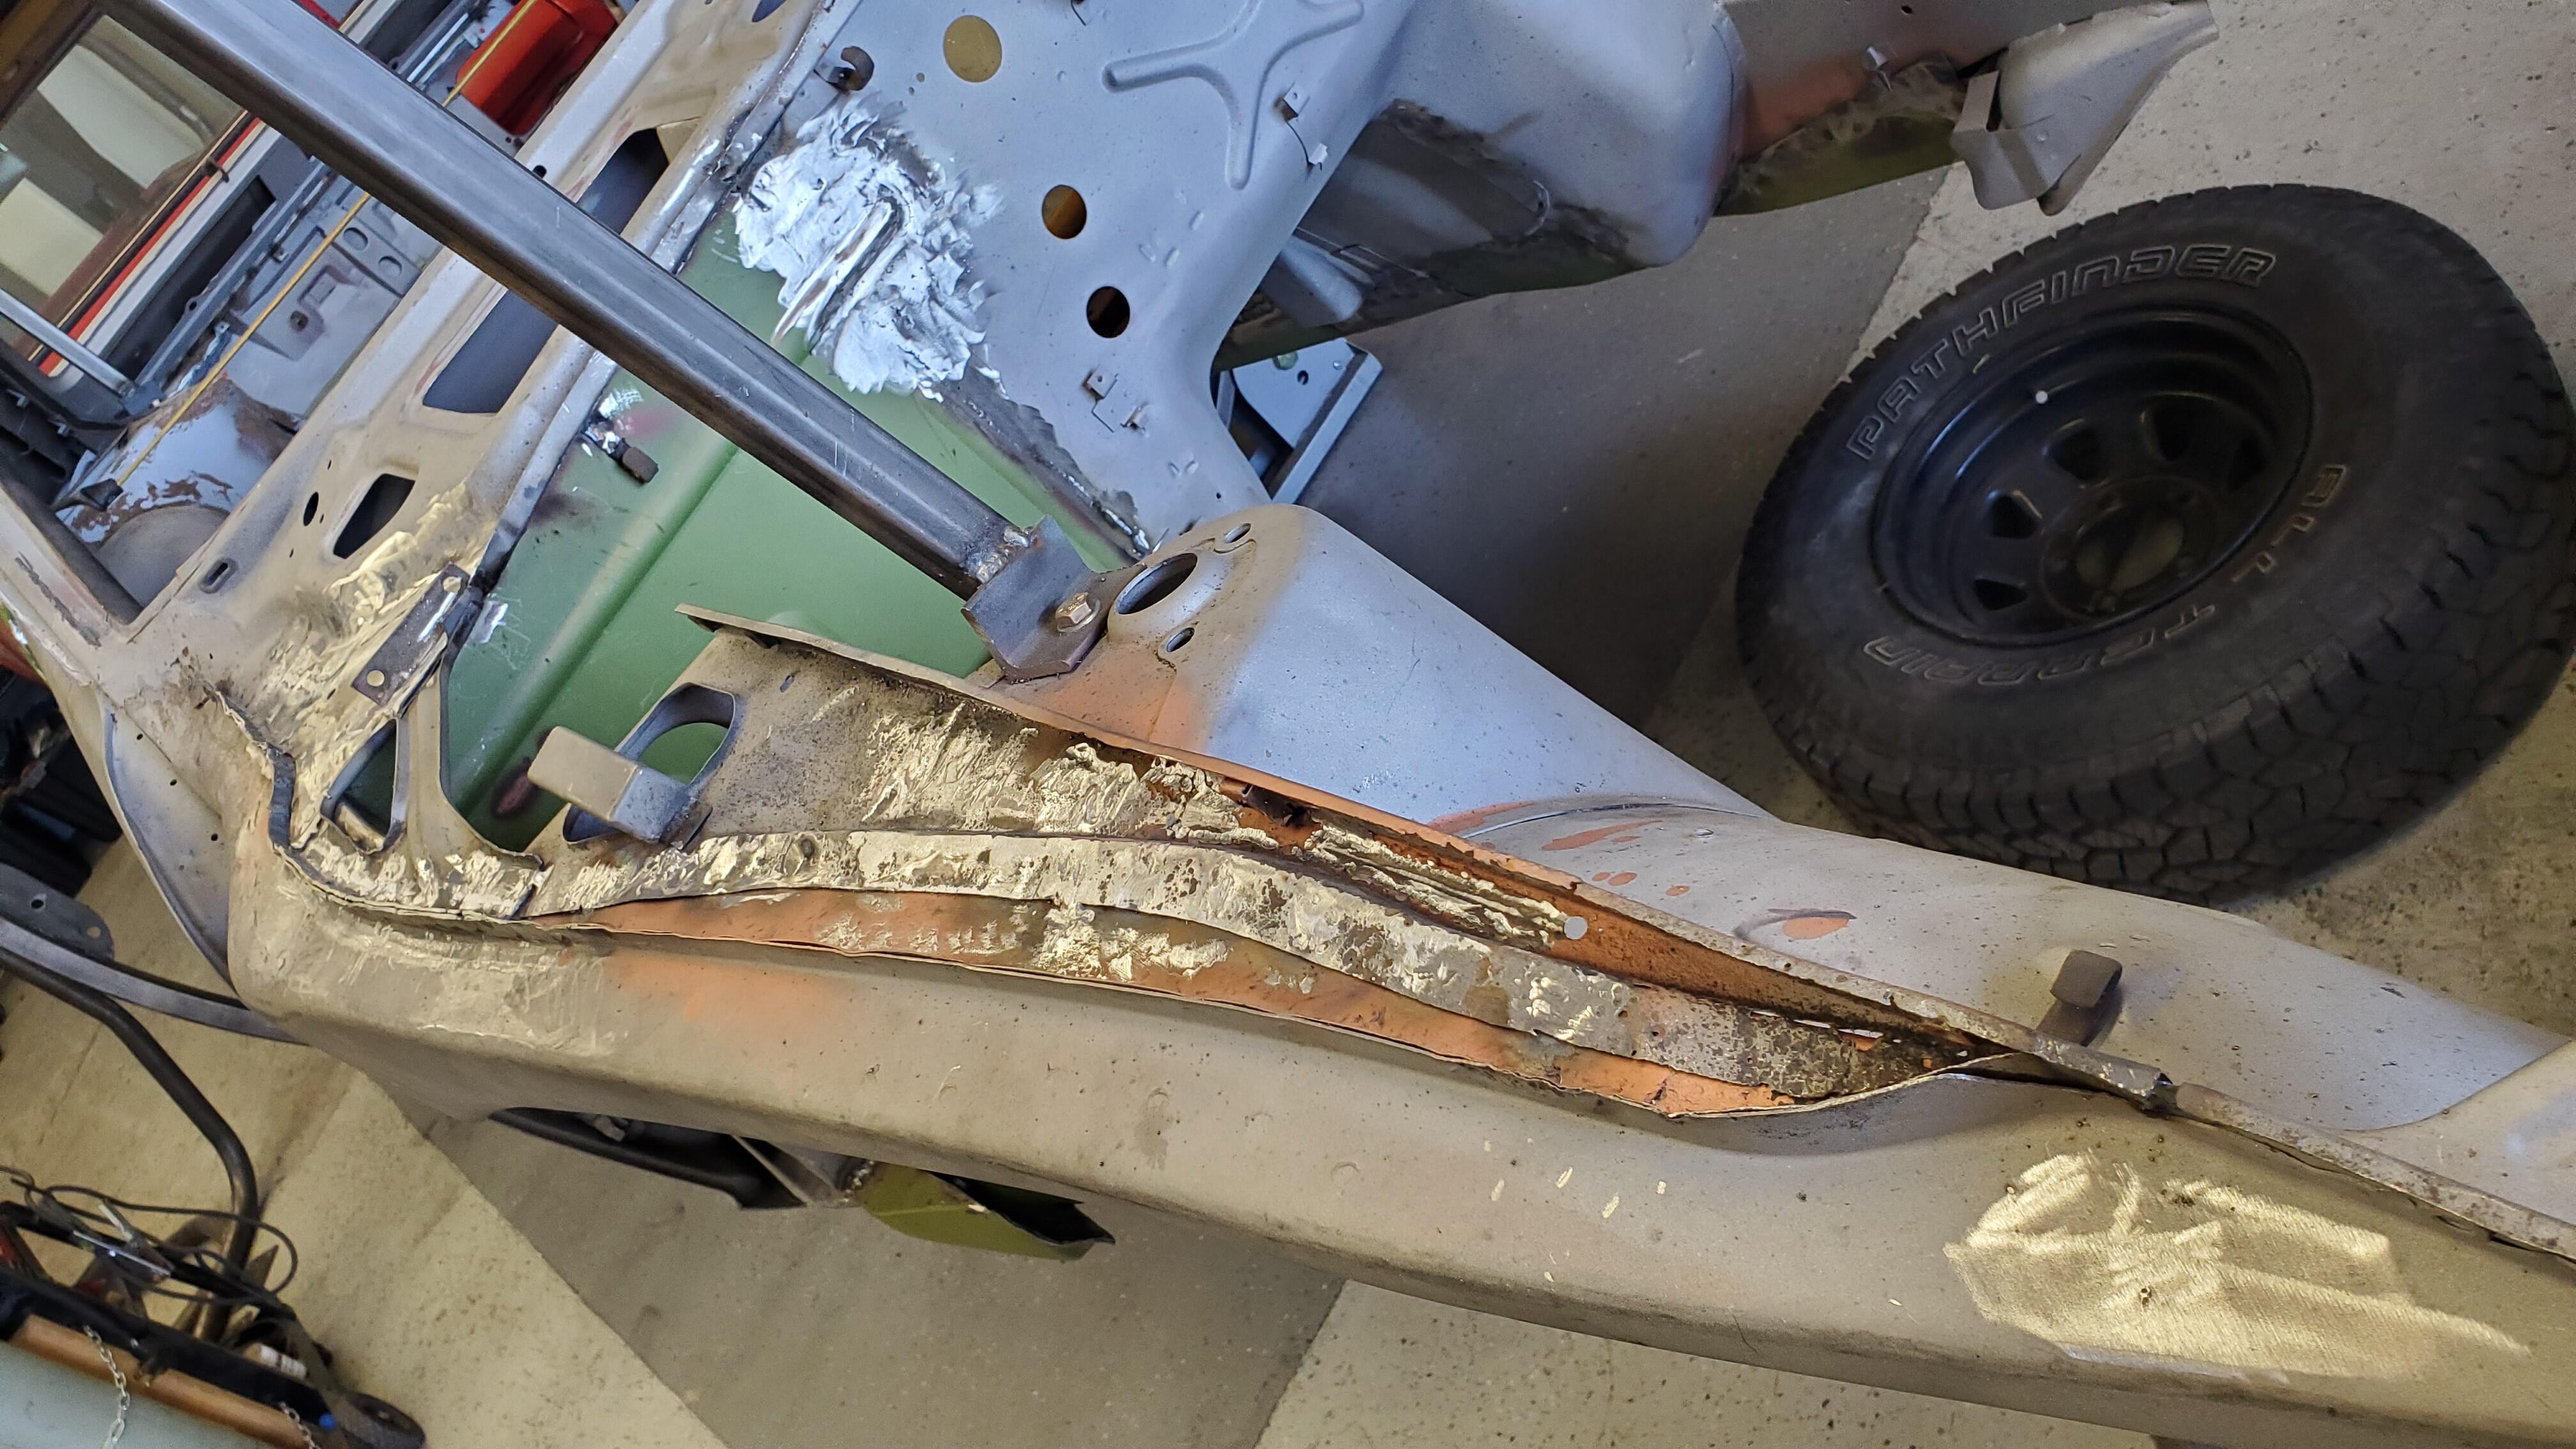
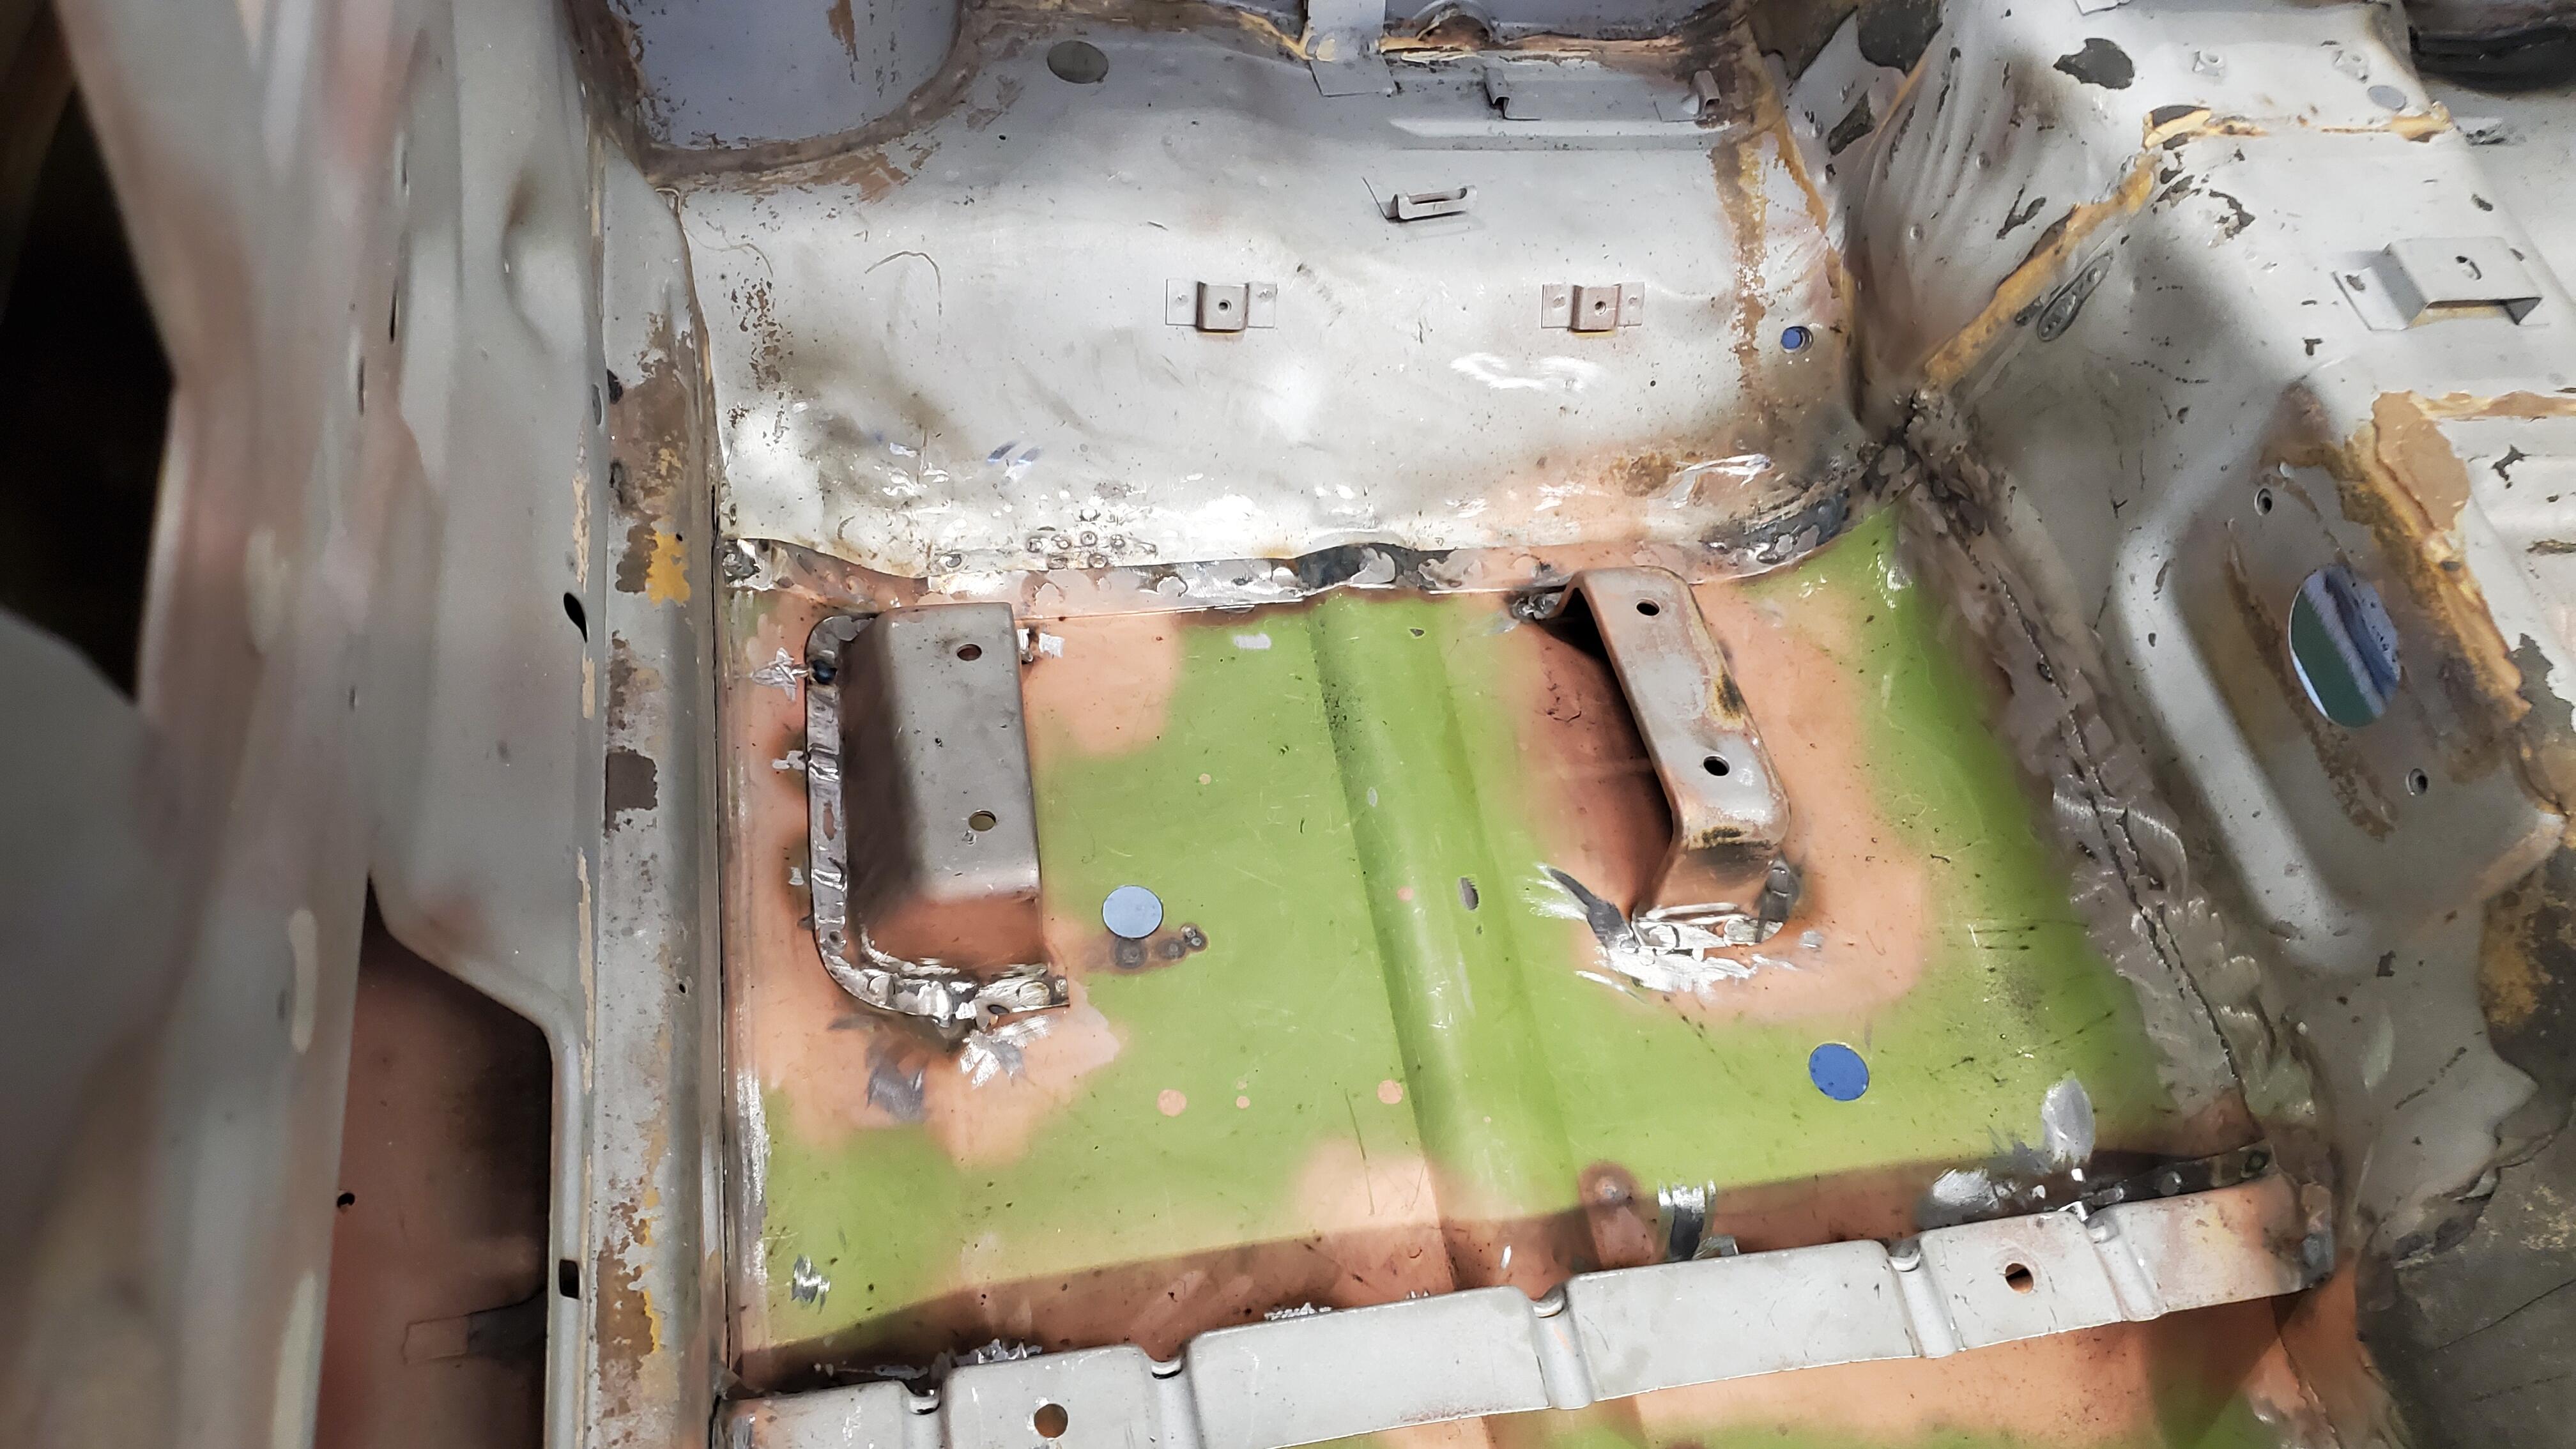
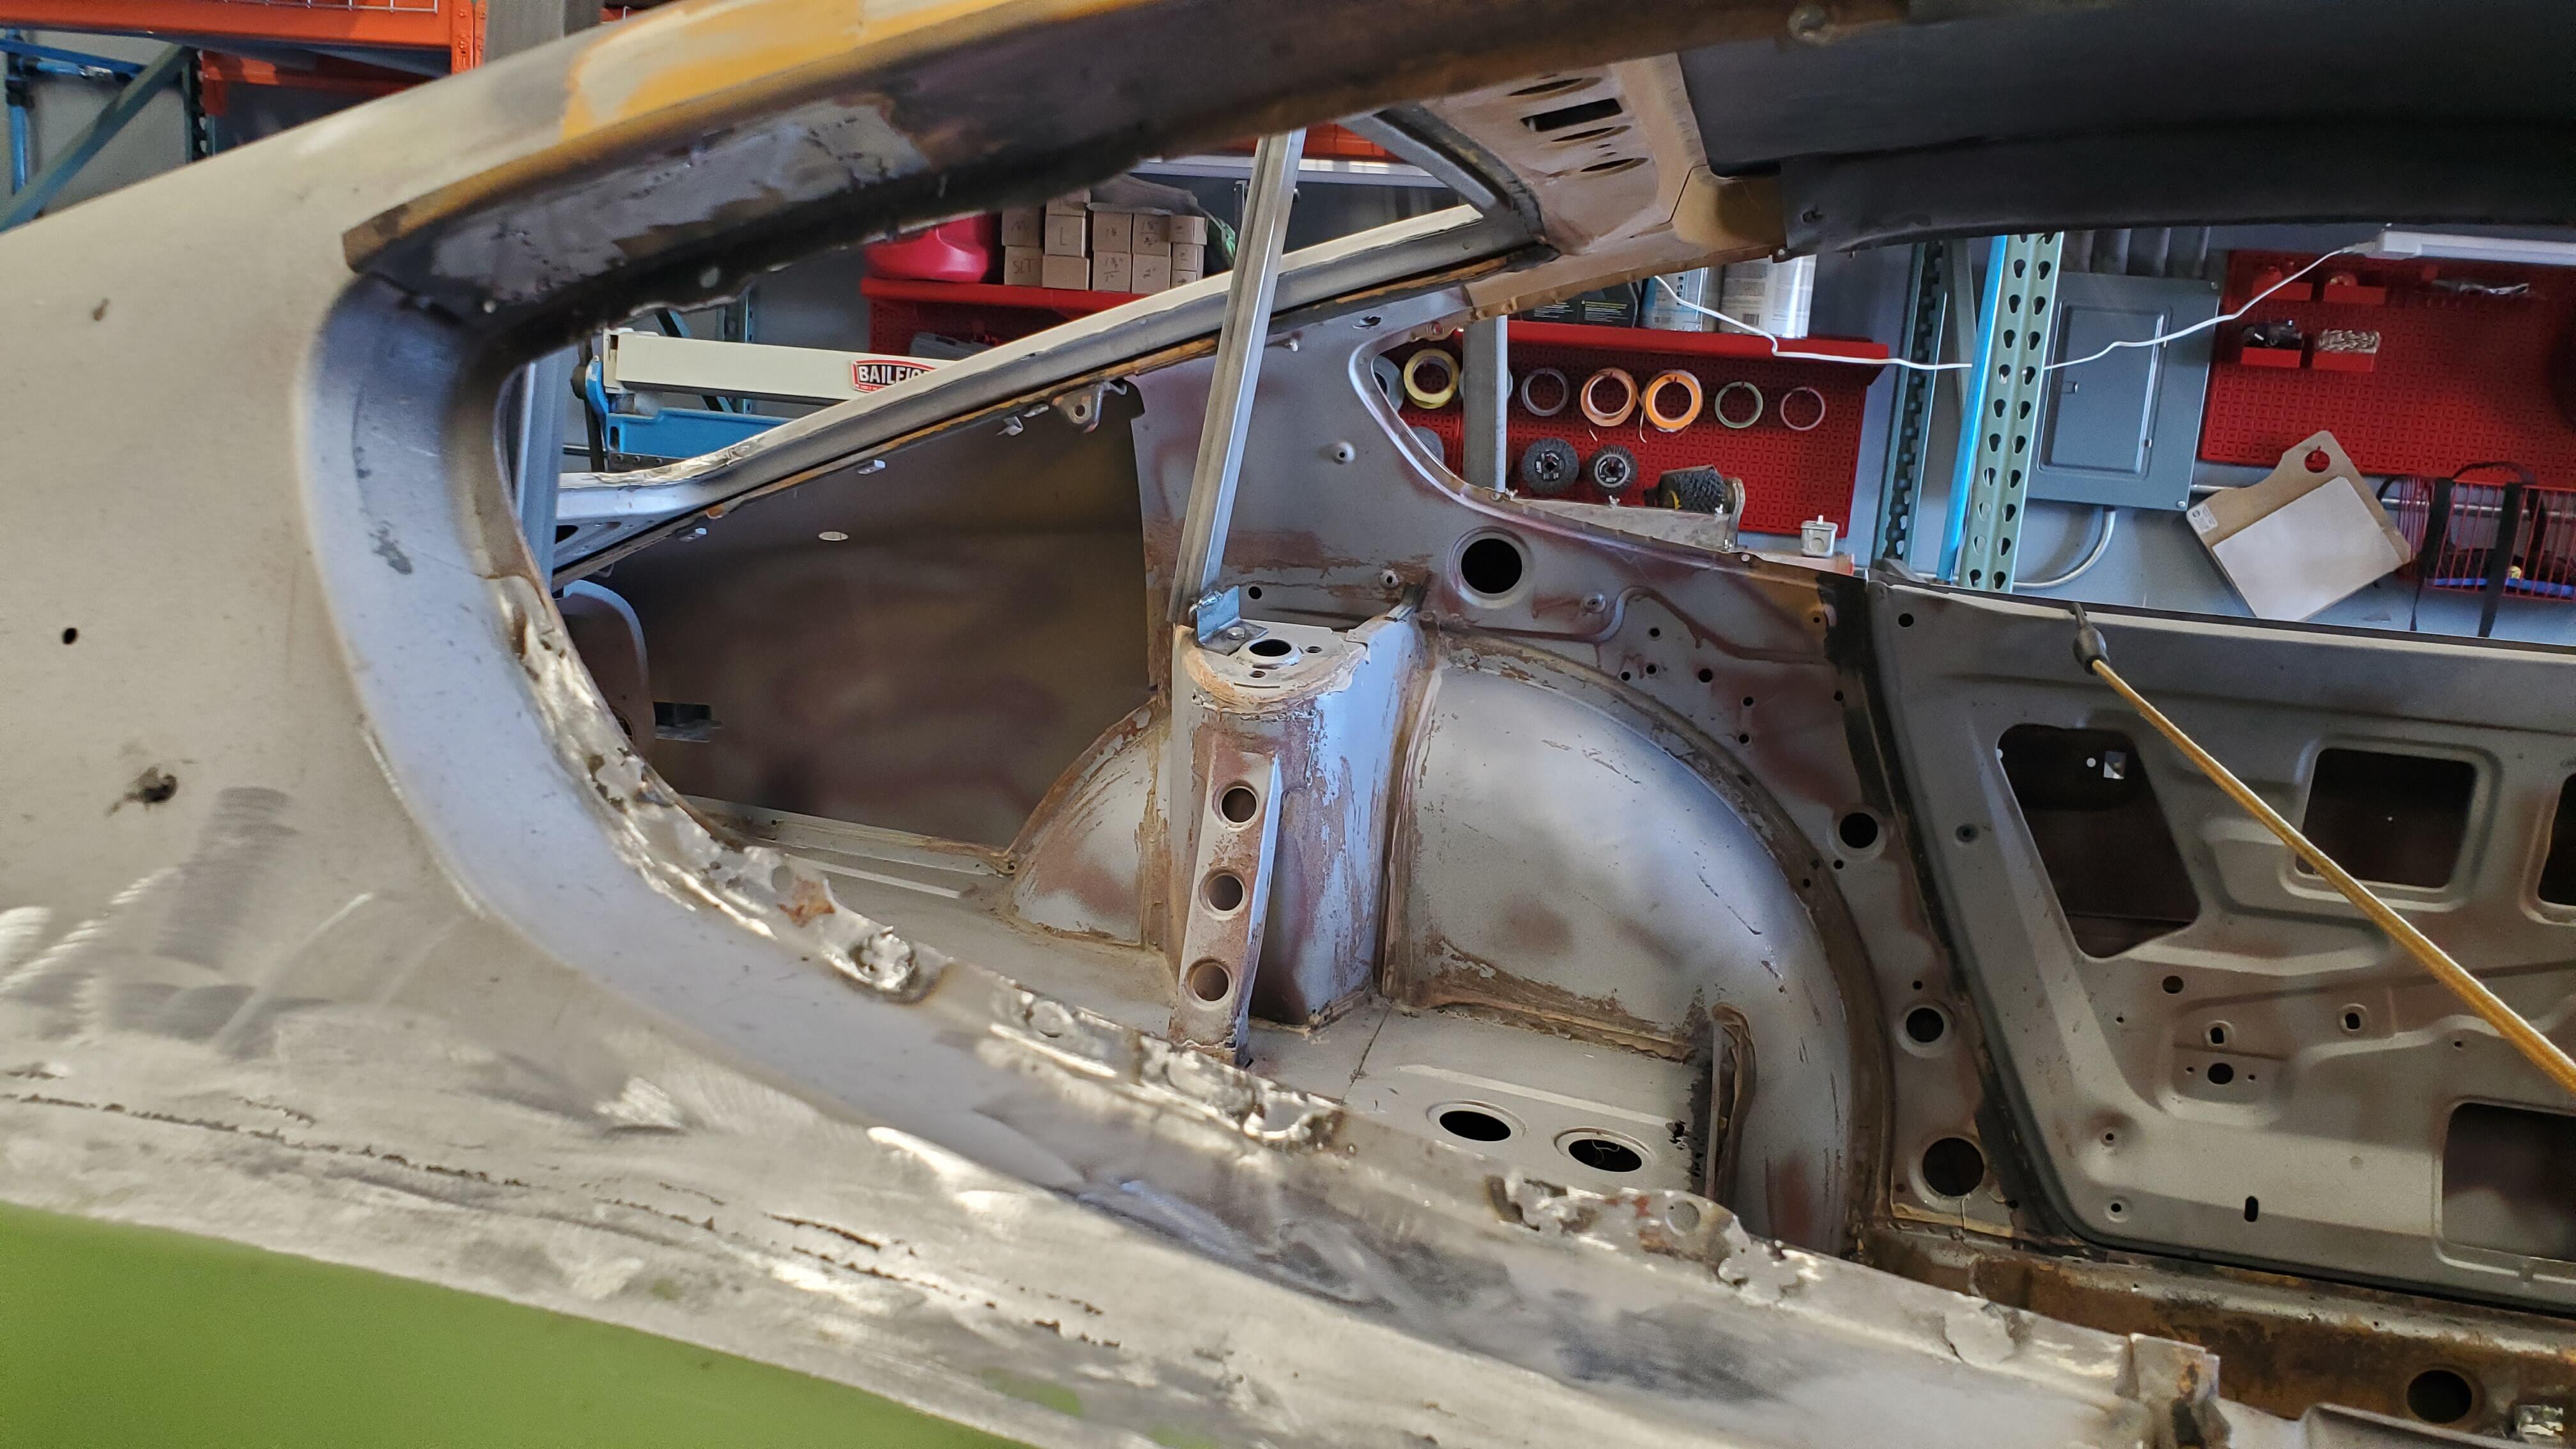
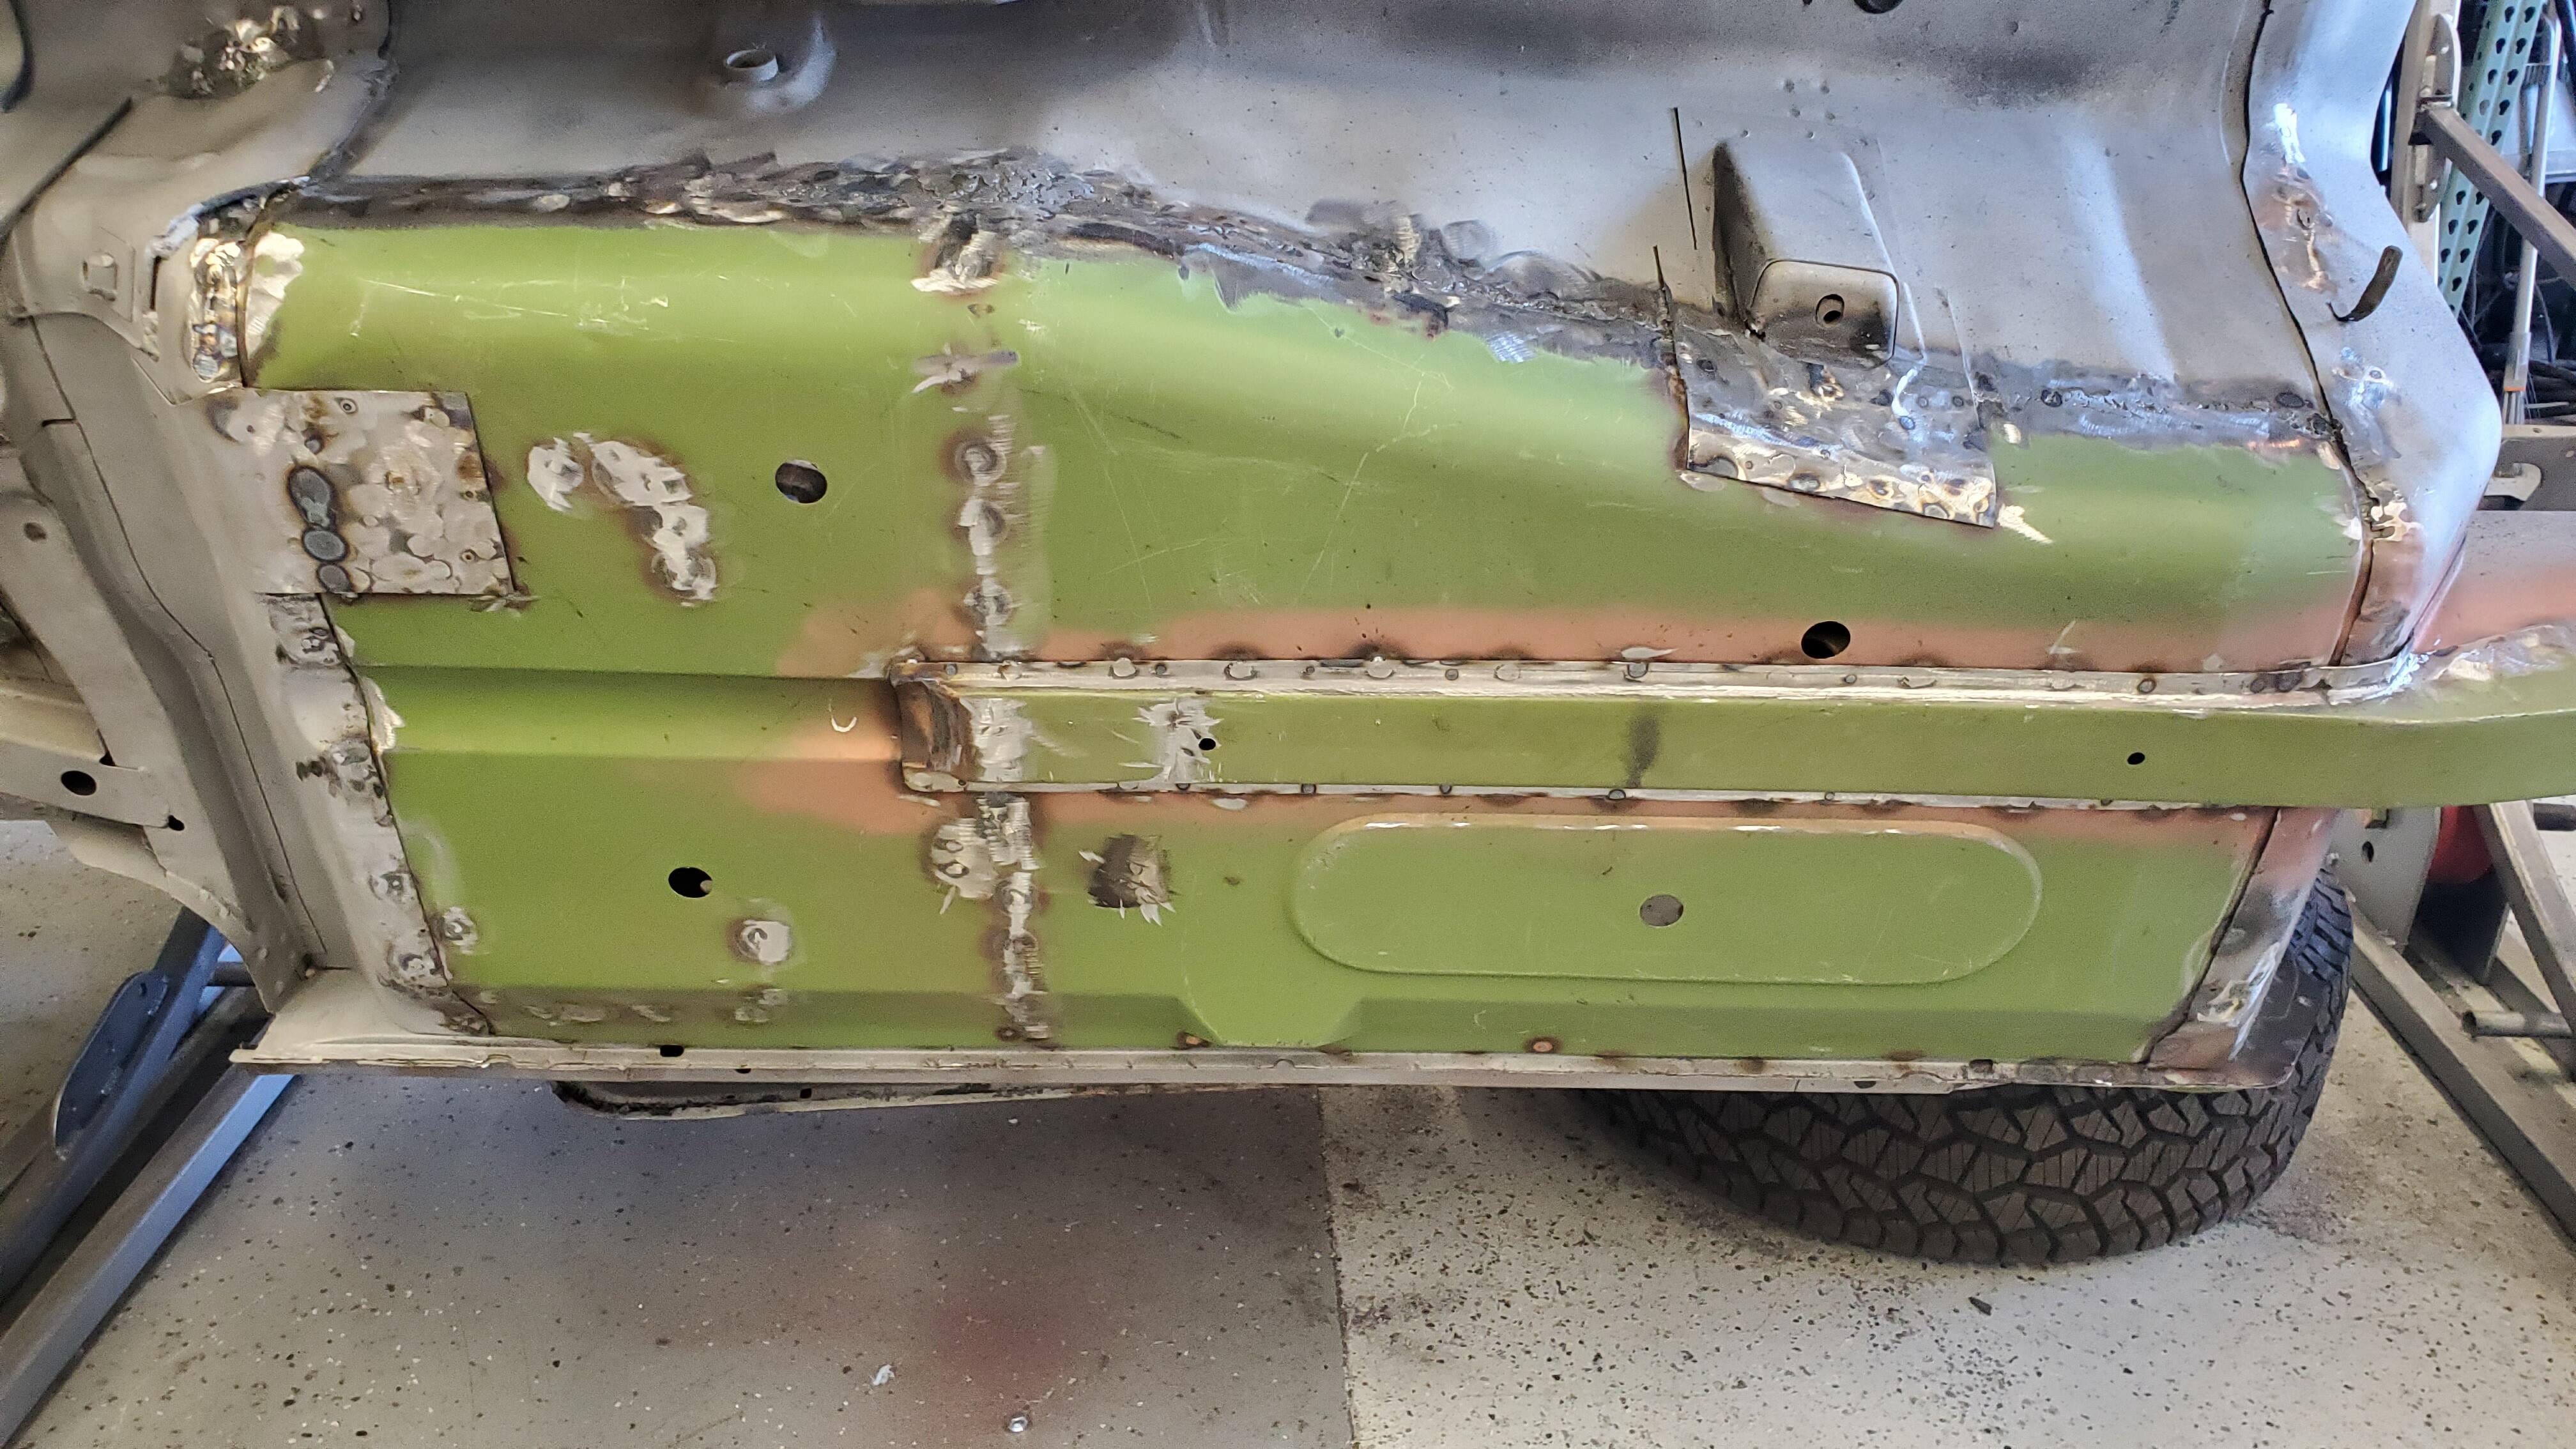
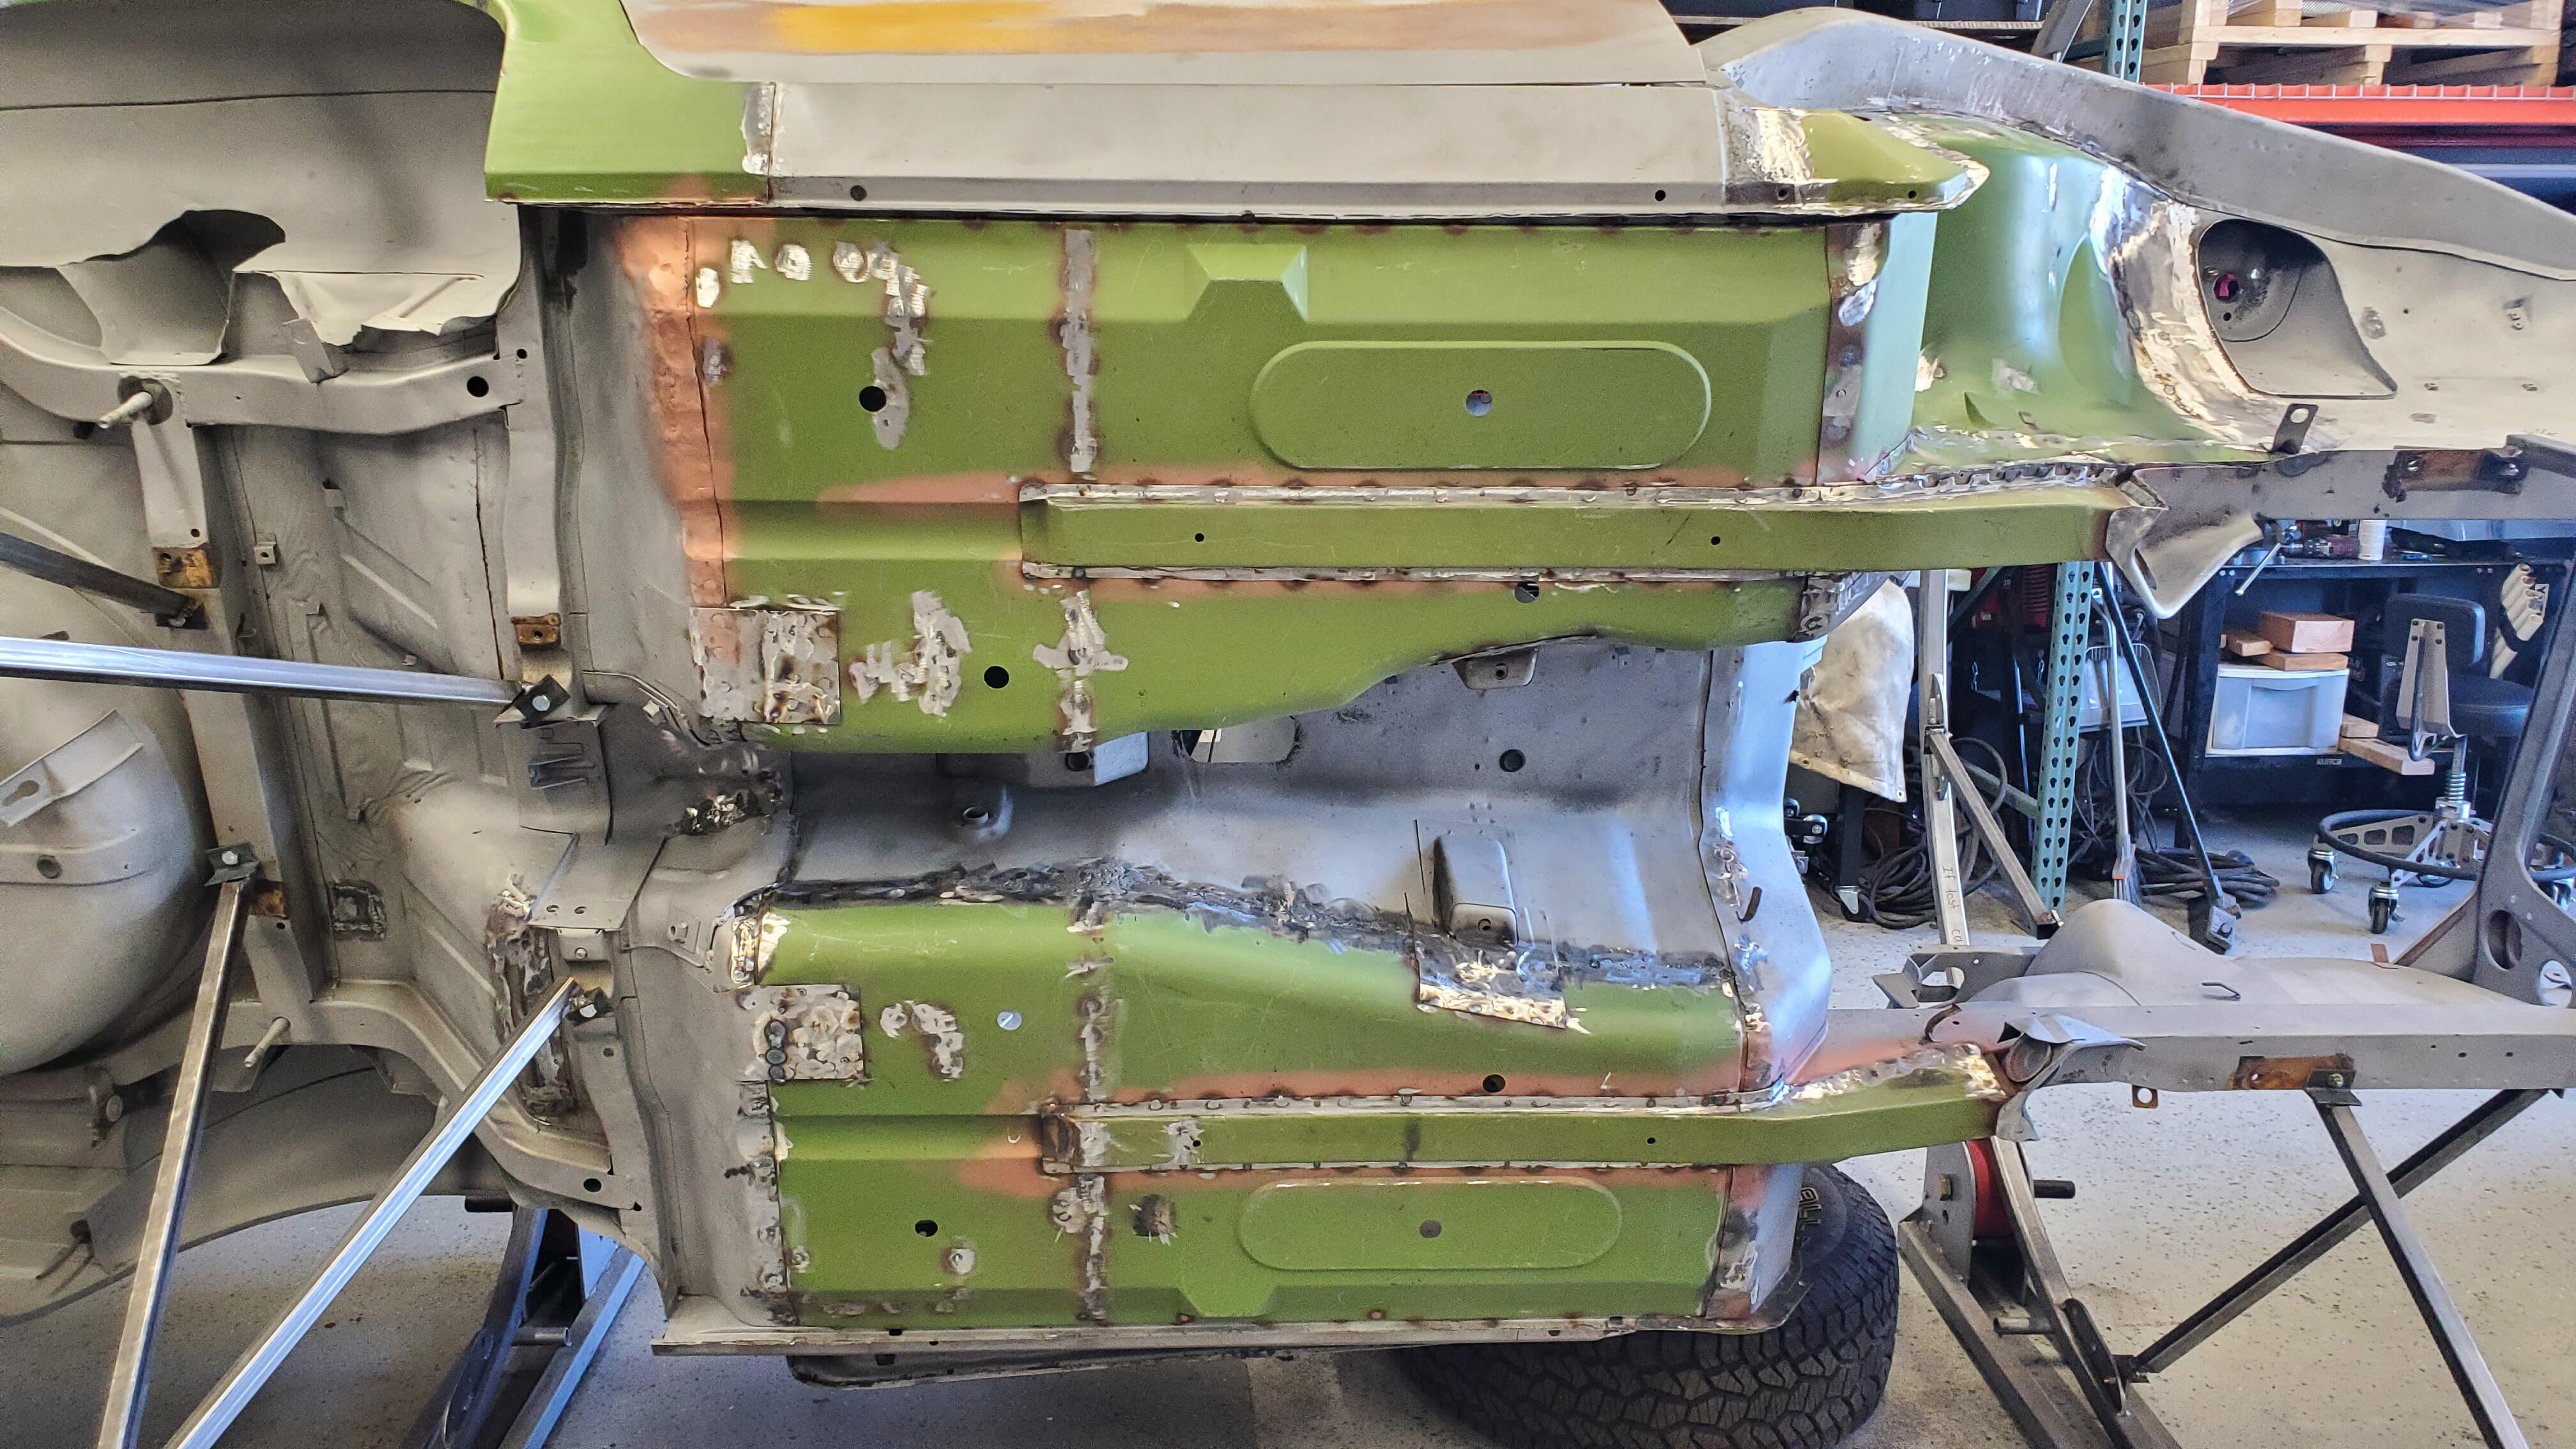
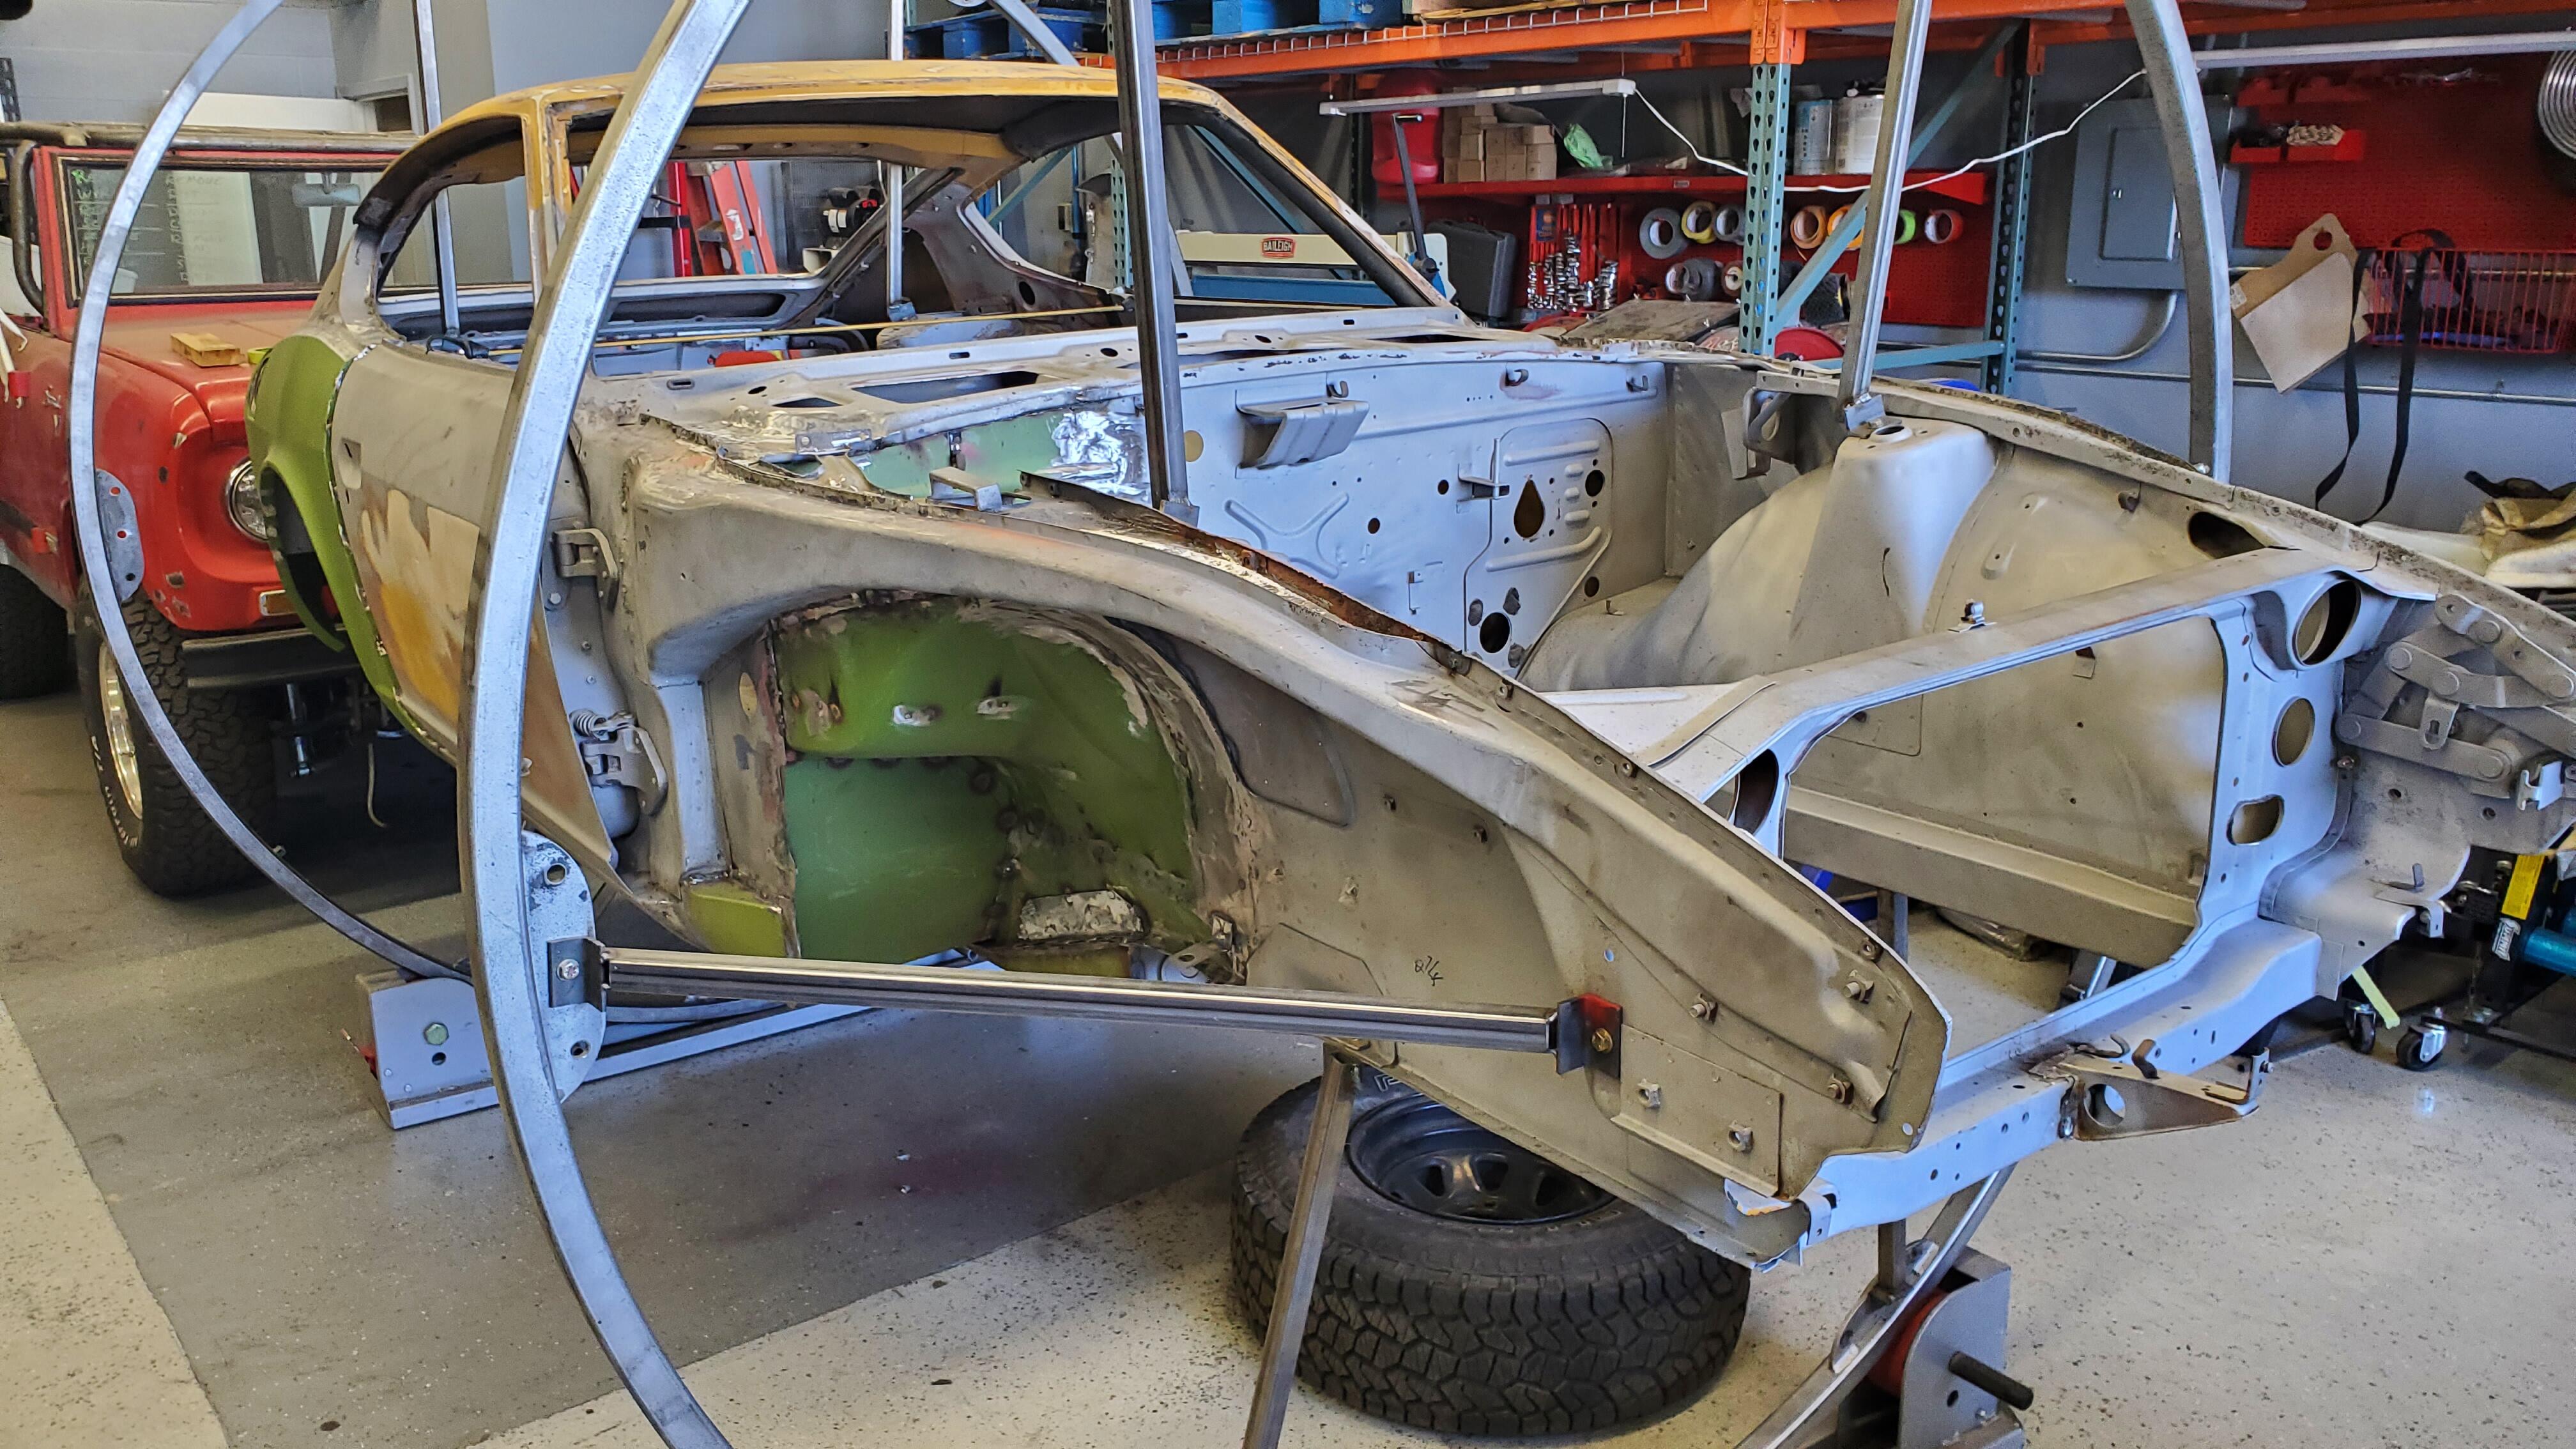
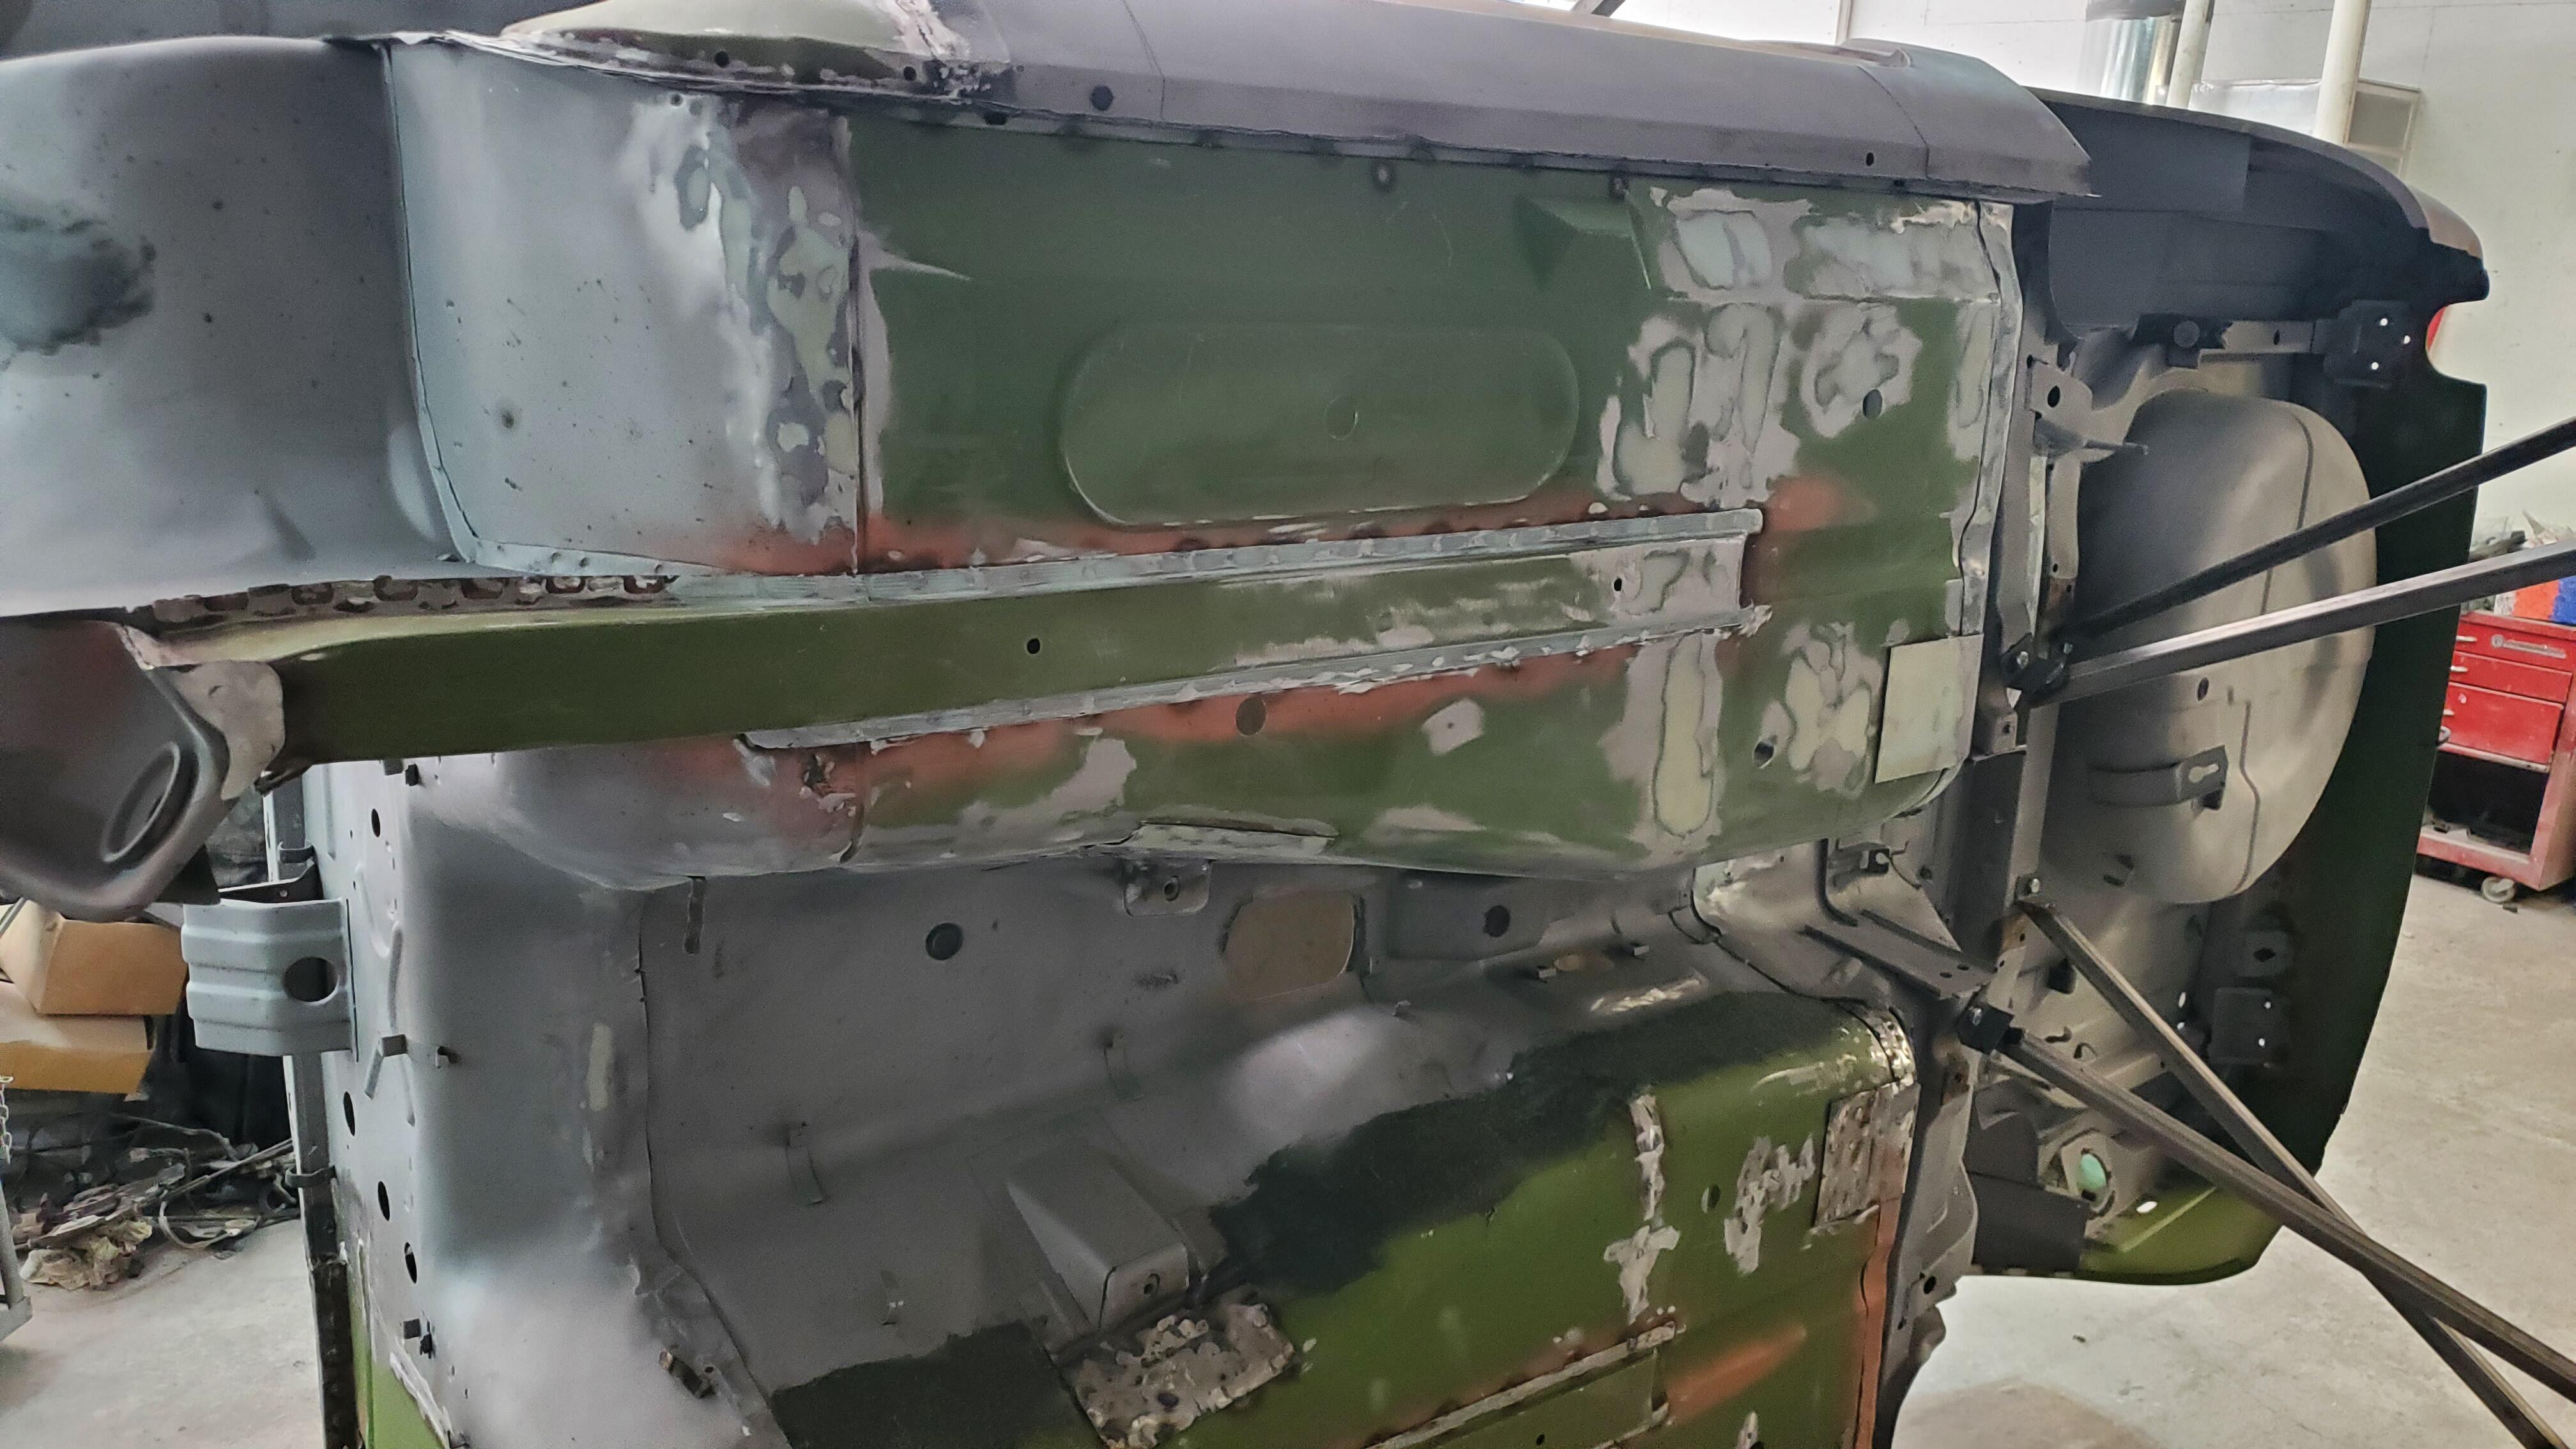
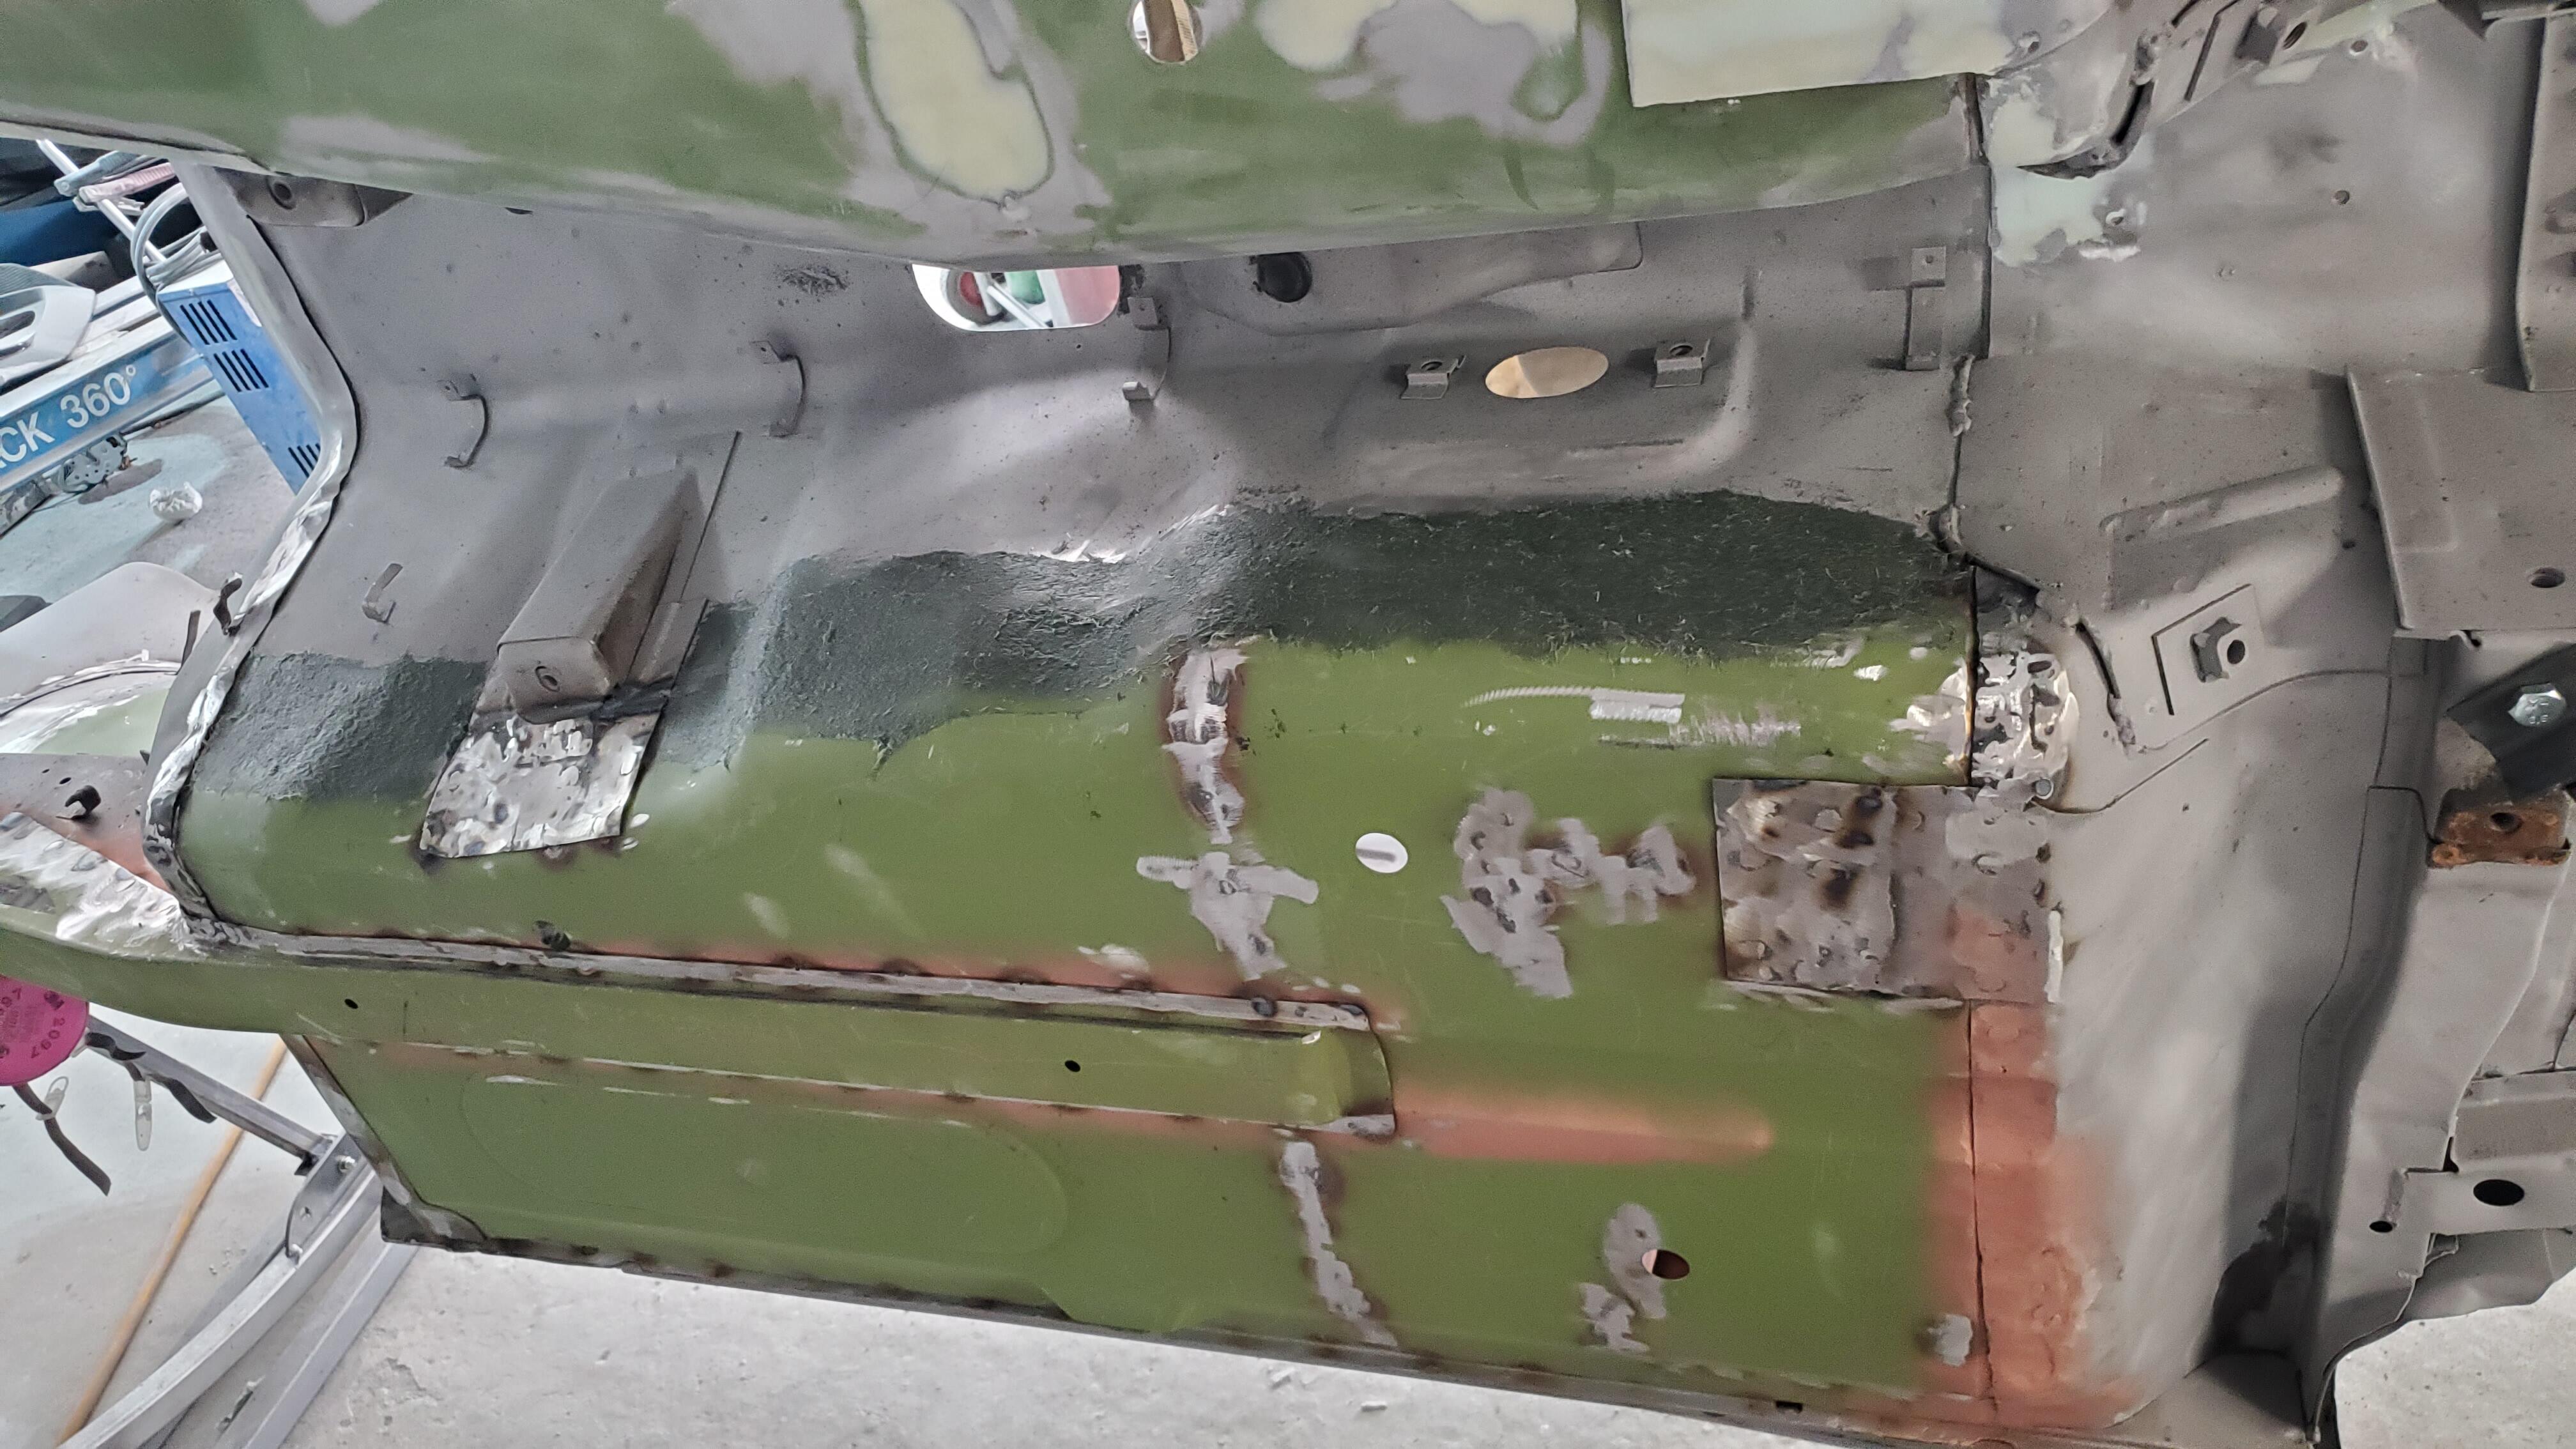
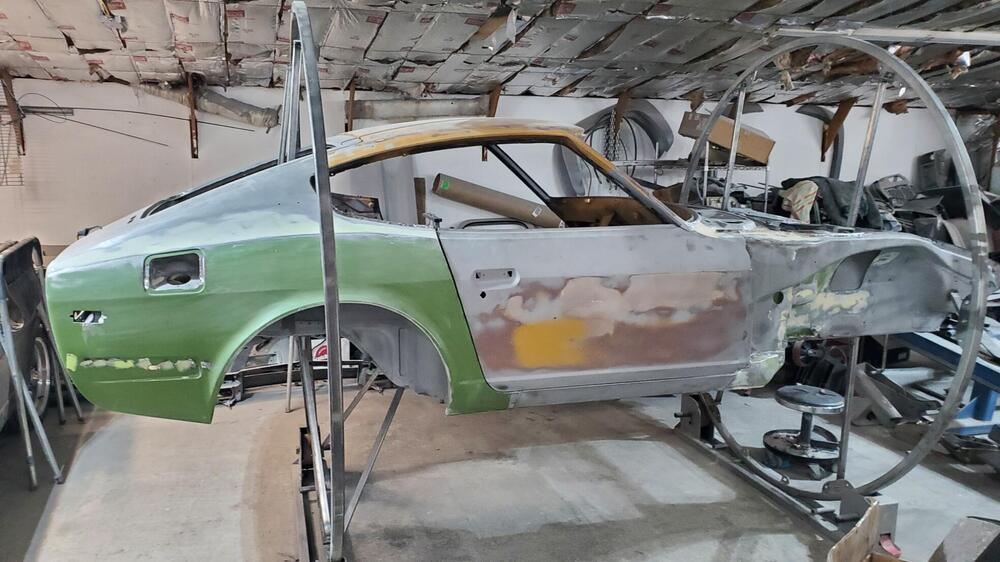
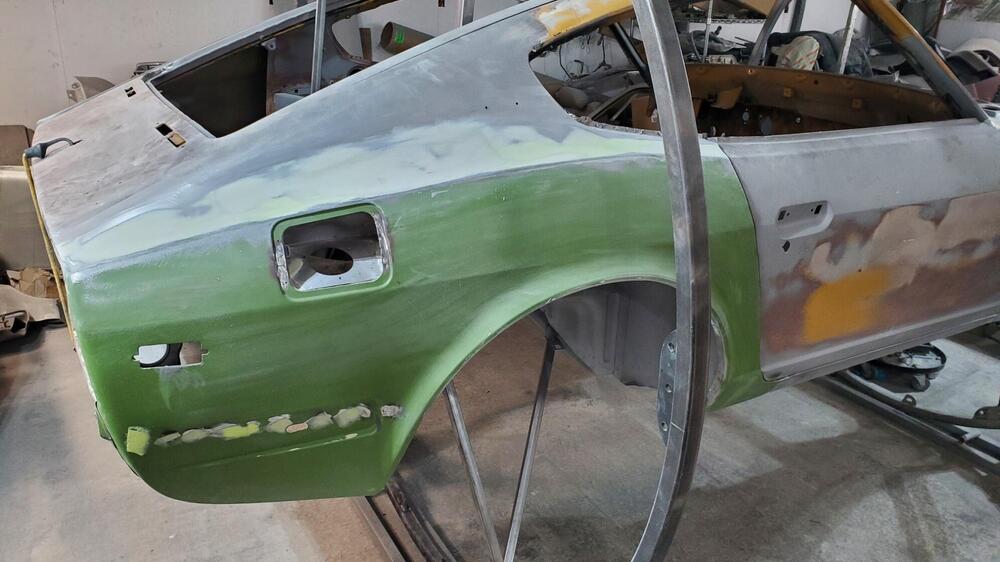
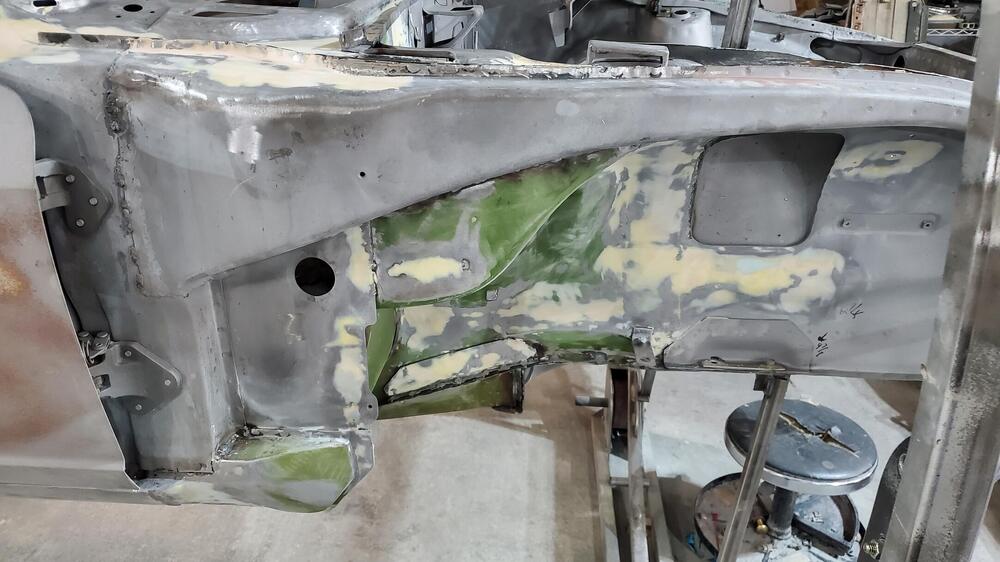
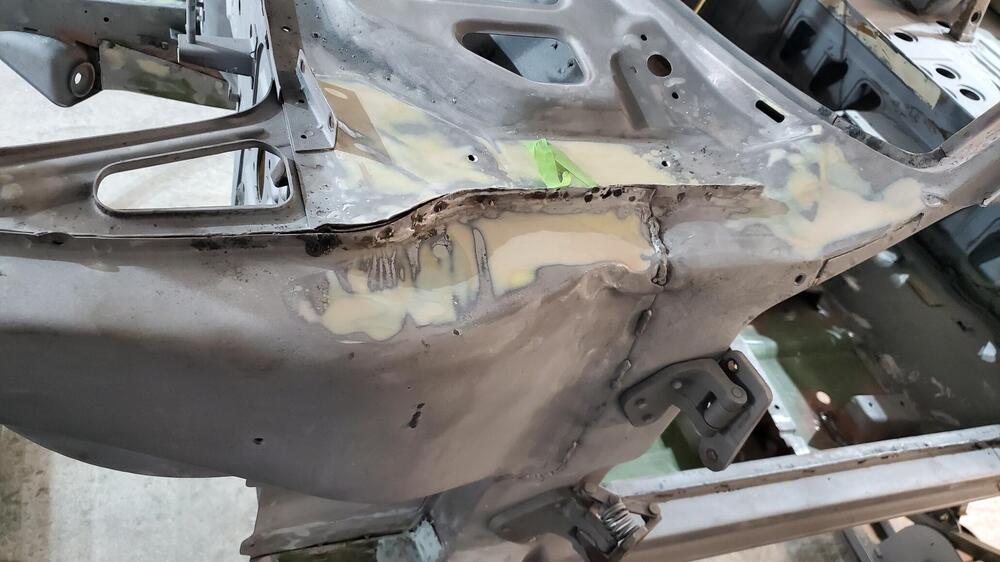
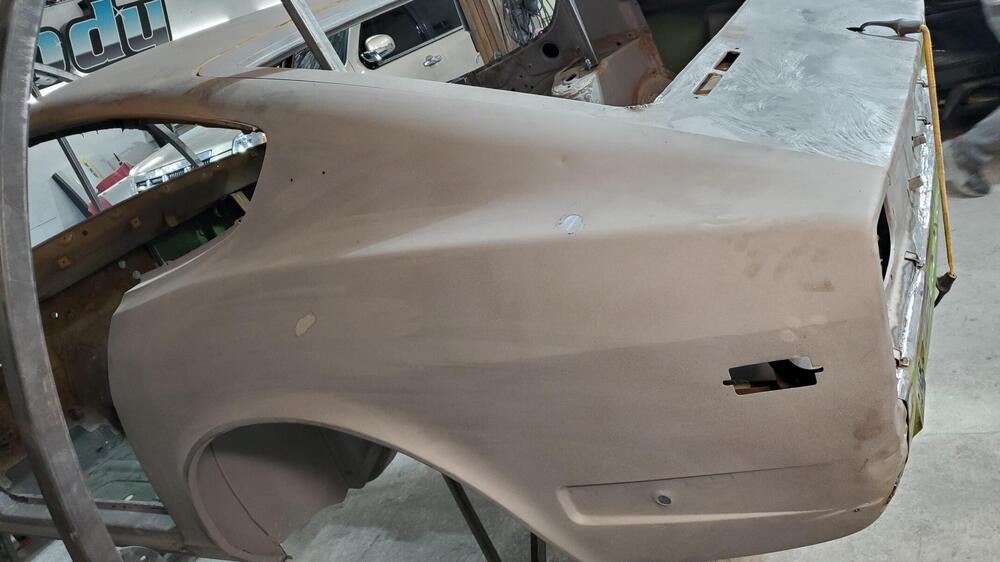
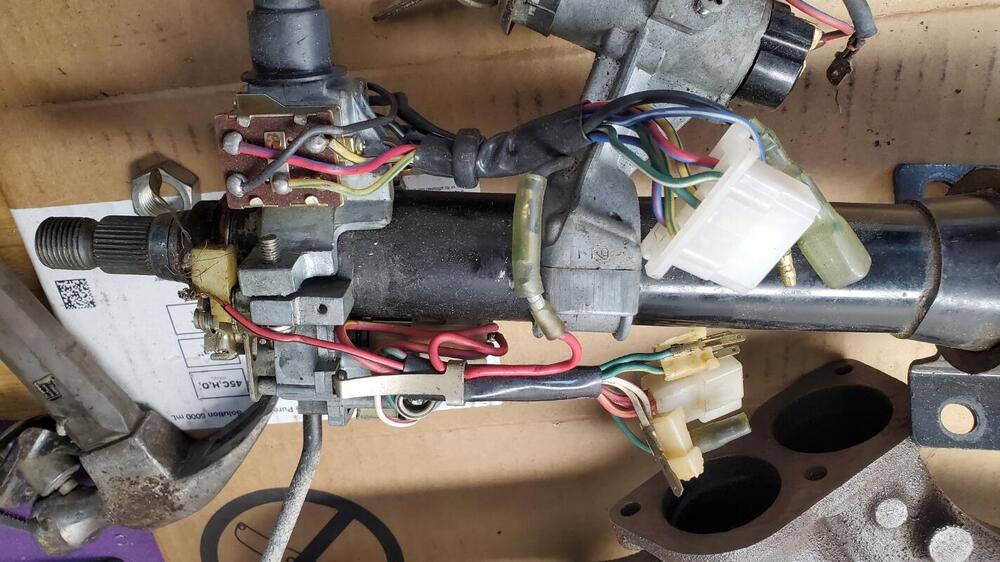
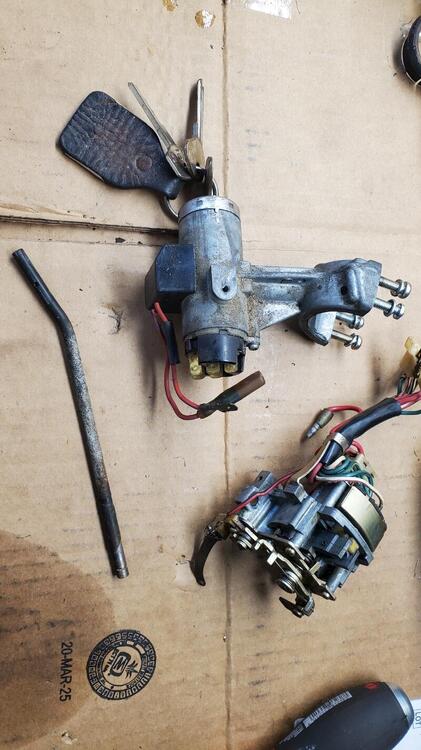
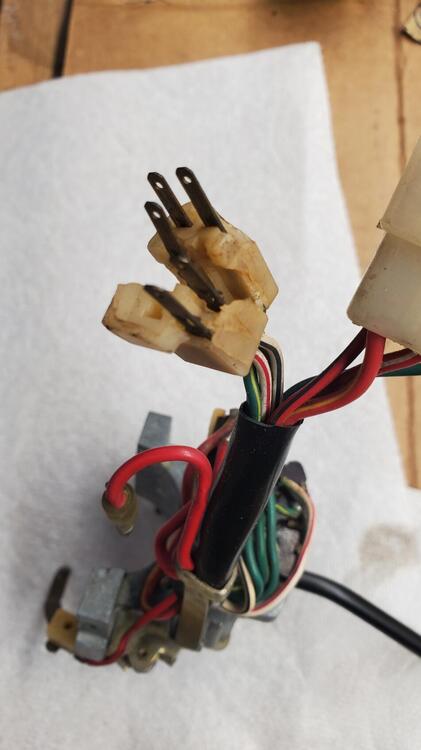
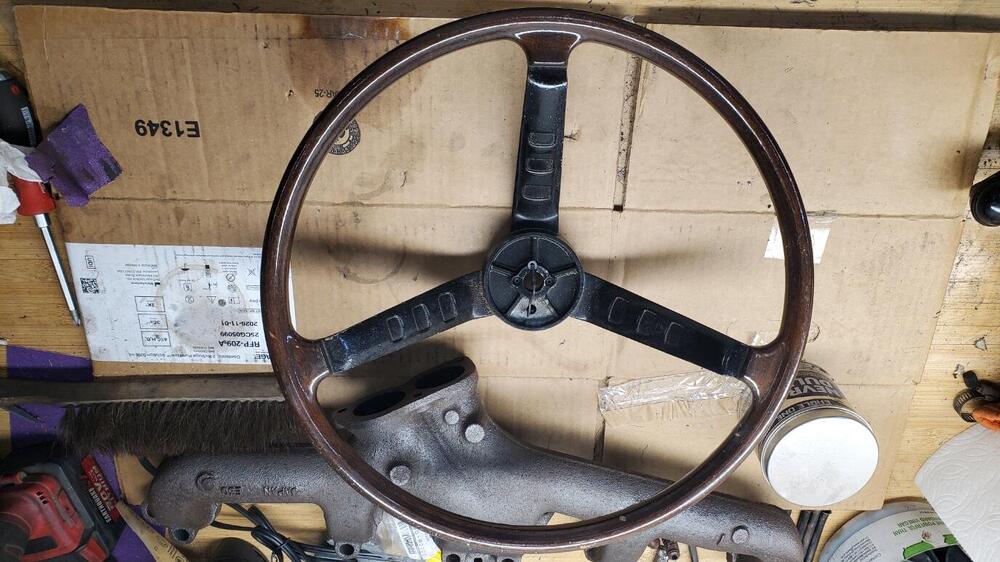
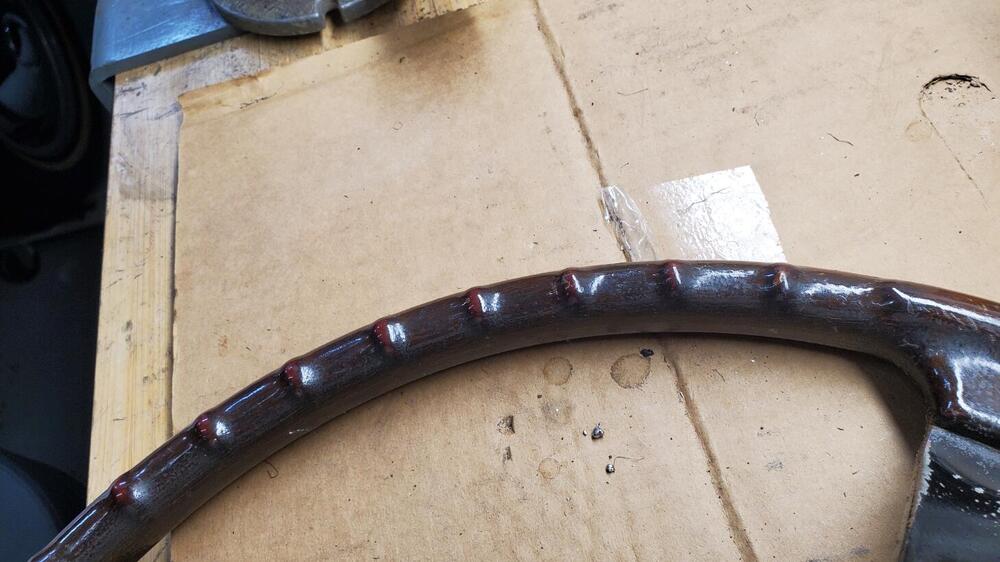
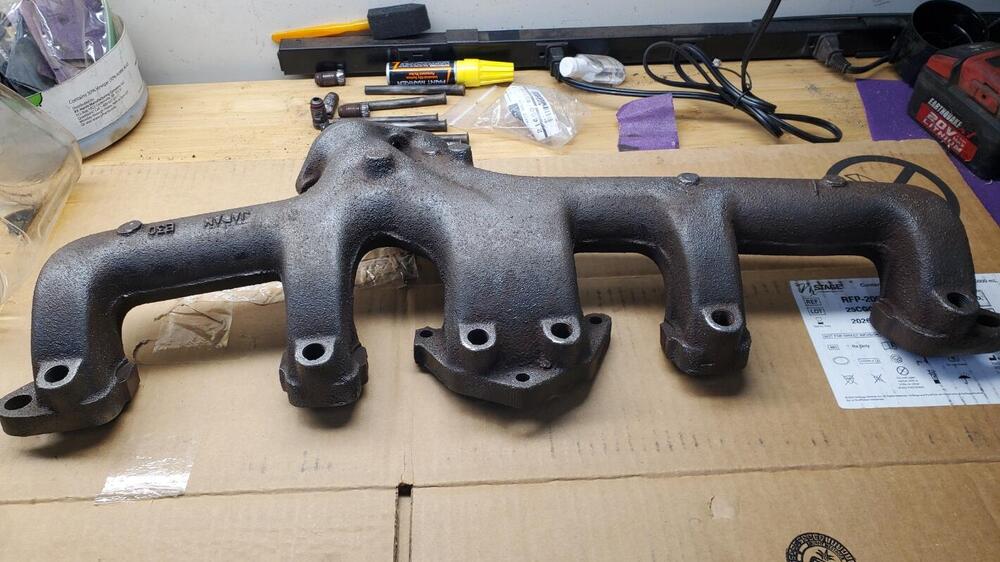
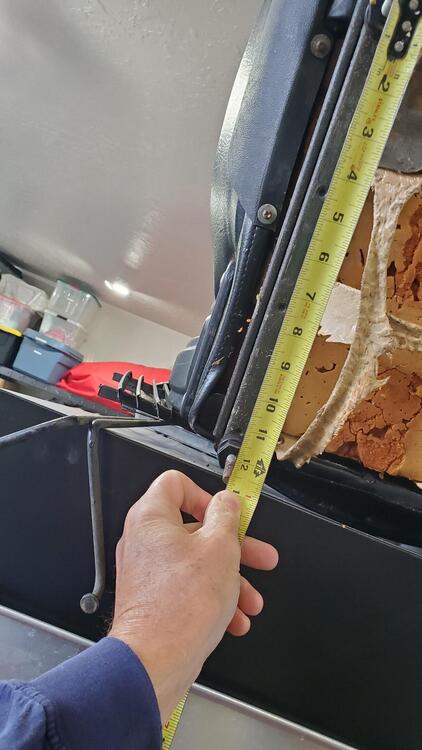
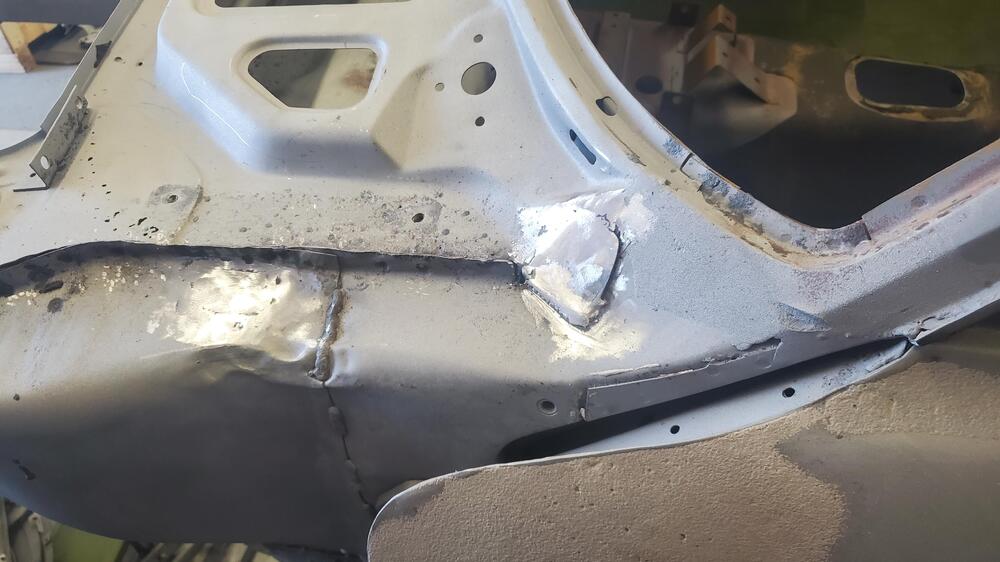
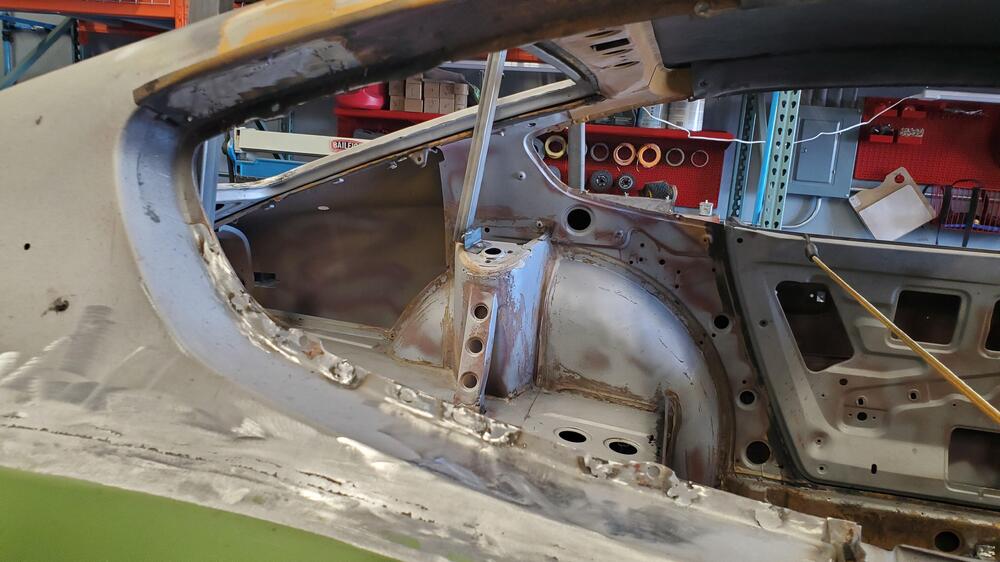
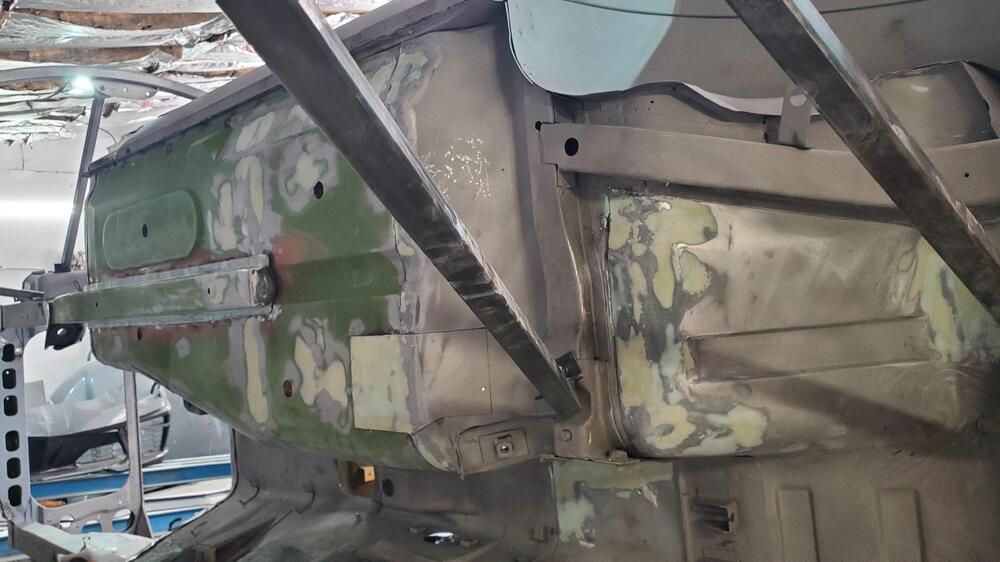
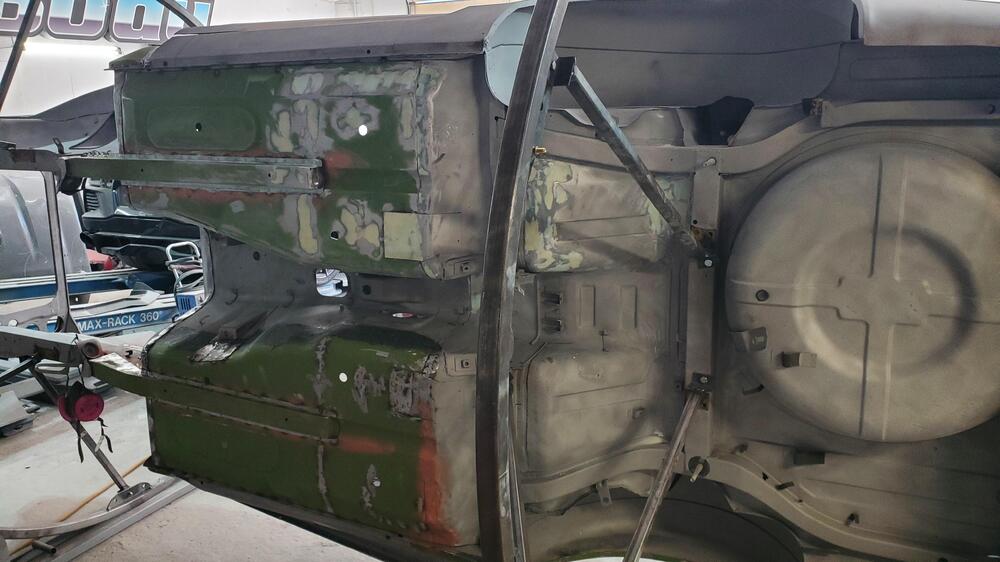
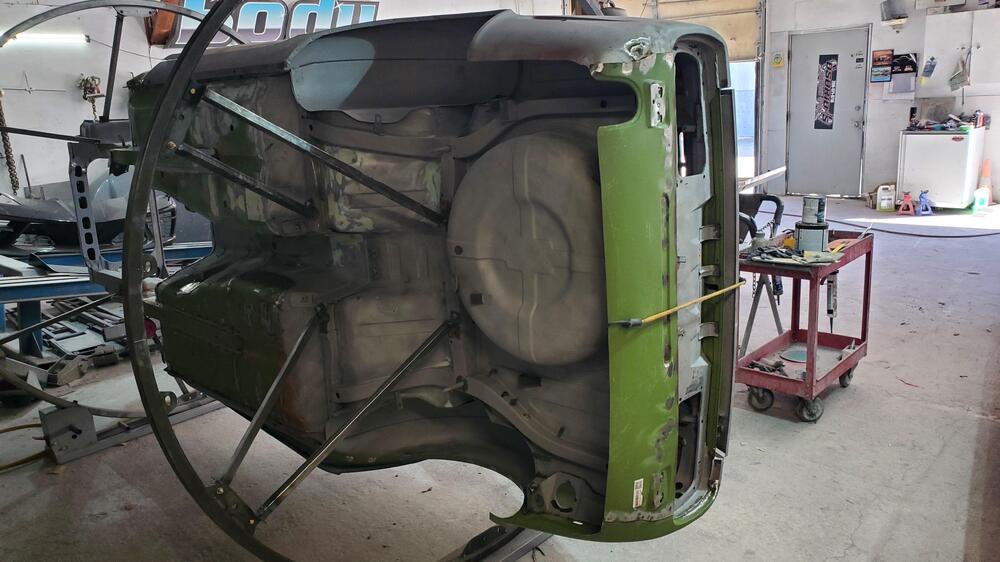
The body shop work continues and looks like things are moving along nicely. I am happy to see that they are being very thorough and even cleaning up areas that no one will ever see. I did check the seat mount locations. The rear inboard bracket on both the drivers and passengers side is off by about 2 inches (both are too far outboard). Carlos has a welder and will do the re-mounting of the bracket. I did contact Larry, the original metal work guy, to point out the error. Looks like we will get that re-mounted for no additional cost. I also sent pics of the dimesnions from the seat rails. The dimensions that I measure are 13.0" wide (330mm) and 12.75" deep (324mm). I removed the air galley from the exhaust manifold, but was not able to salvage it. After repeated heating, cooling and lube applications, I was only able to get 2 of the fittings out. By this time, the hex portion of the remaining fittings were starting to get pretty trashed, so I ended up cutting the tubes on the remaining 4. Fortunately, I did not have to do any re-tapping of the four difficult fittings. I was able to drill away most of the metal in the center of the fittings and sort of peel the threads off of the manifold. This made is easy to save the extension tubes that are secured by the fittings. On all of the previous cars that I have restored, I have always used a gray powder coat finish on the exhaust manifold that Les Cannady at Classic Datsun Motorsports always uses. Since we want to be very exact on the reproduction, I was considering a high temp cast iron paint which would be closer to the original color. However, it was noted that those typically peel even with the best prep and application. POR 15 was recommended, but again, this ends up being a colored paint and softens the texture of the original cast iron and doesn't really replicate the original color. I eventually phoned Rod Schmitt of Rod's Garage (Restorer of the 2025 JCCS Best of Show Red 240Z and John Morton's 1st place Green 240Z in the 240Z category) to find out what he uses for the final finish on the exhaust manifold. Rod says he cleans the manifold well with wire wheel and then uses a couple light coats of graphite spray for the final finish. He says this comes the closest to the original color and finish. It also handles the high temps well. So, this is the current plan for the exhaust manifold finish. I have started cleaning up some of the steering column parts. Some before and after pics are attached. It looks like these components have been accessed previously as the turn signal mechanism had a wire that was just twisted together with an extension on the horn circuit, so I removed the extension and soldered the wire in place. It has a broken connector which I thought I could replace with another signal mechanism that I have but that replacement was just as brittle as the broken coneector, so I just ordered a new one. Also, the headlight mechanism looks surprisingly good, so I am thinking that may have been replaced as it looks virtually brand new. Typically, these are pretty gummed up and the white parts are yellowed and/or dirty. This one looks untouched. I will re-restore the steering wheel as the previous restoration is poor. The black paint is thick and uneven and should be a satin finish, not gloss. The 'wood grain' portion has a heavy gloss finish, should be light satin or semi-gloss, and the back side with the 'nubs' was over sanded so the wood grain appearance is missing on the nubs.


-
Thanks for the heads up. I will double check the seat mount location next time I am out there. I was thinking it might be the picture angle but won't hurt to check. Thanks!
-
Oh, and regarding the dash, it is the original and has one small crack right in the center. There is a local dash repair shop that I will have look at it to see if it can be reparied.
-
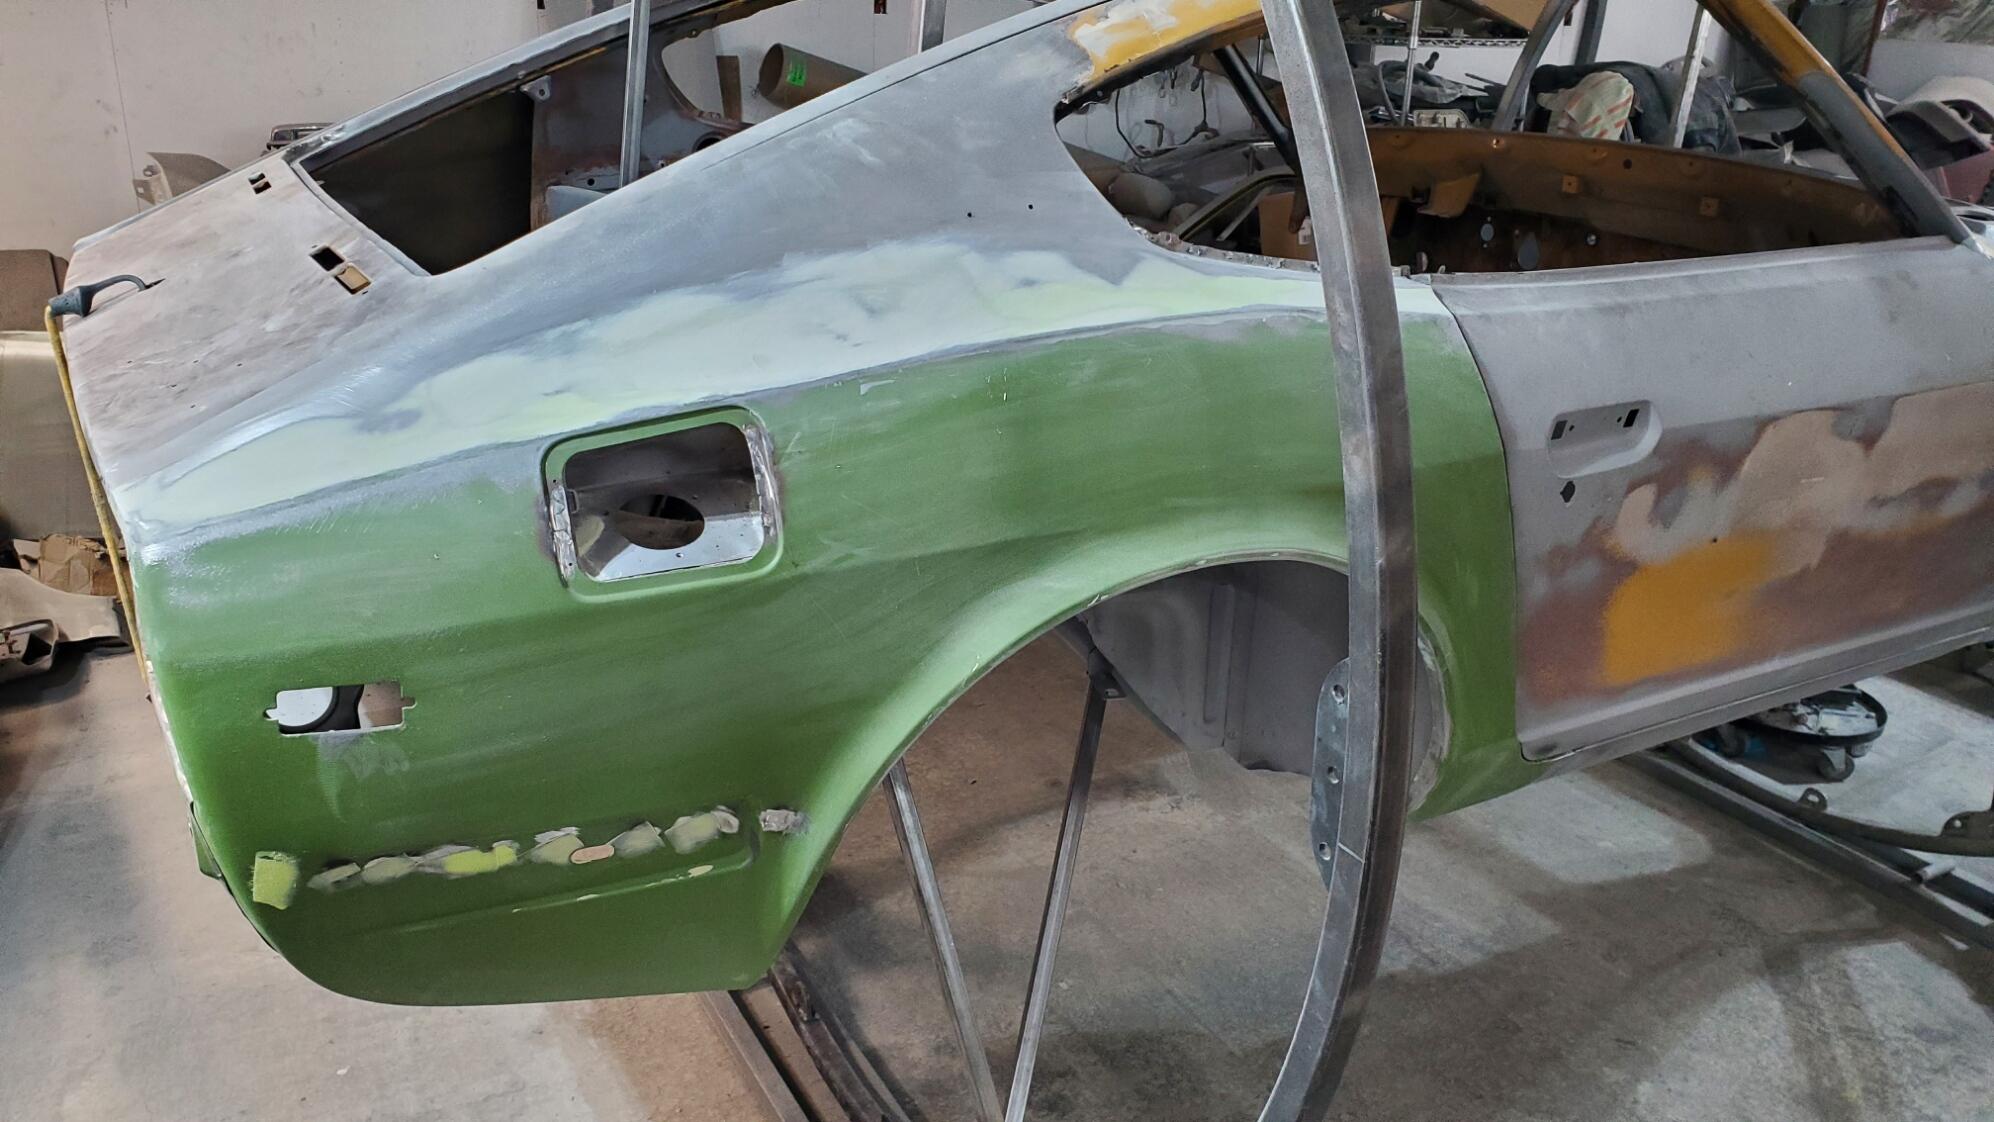
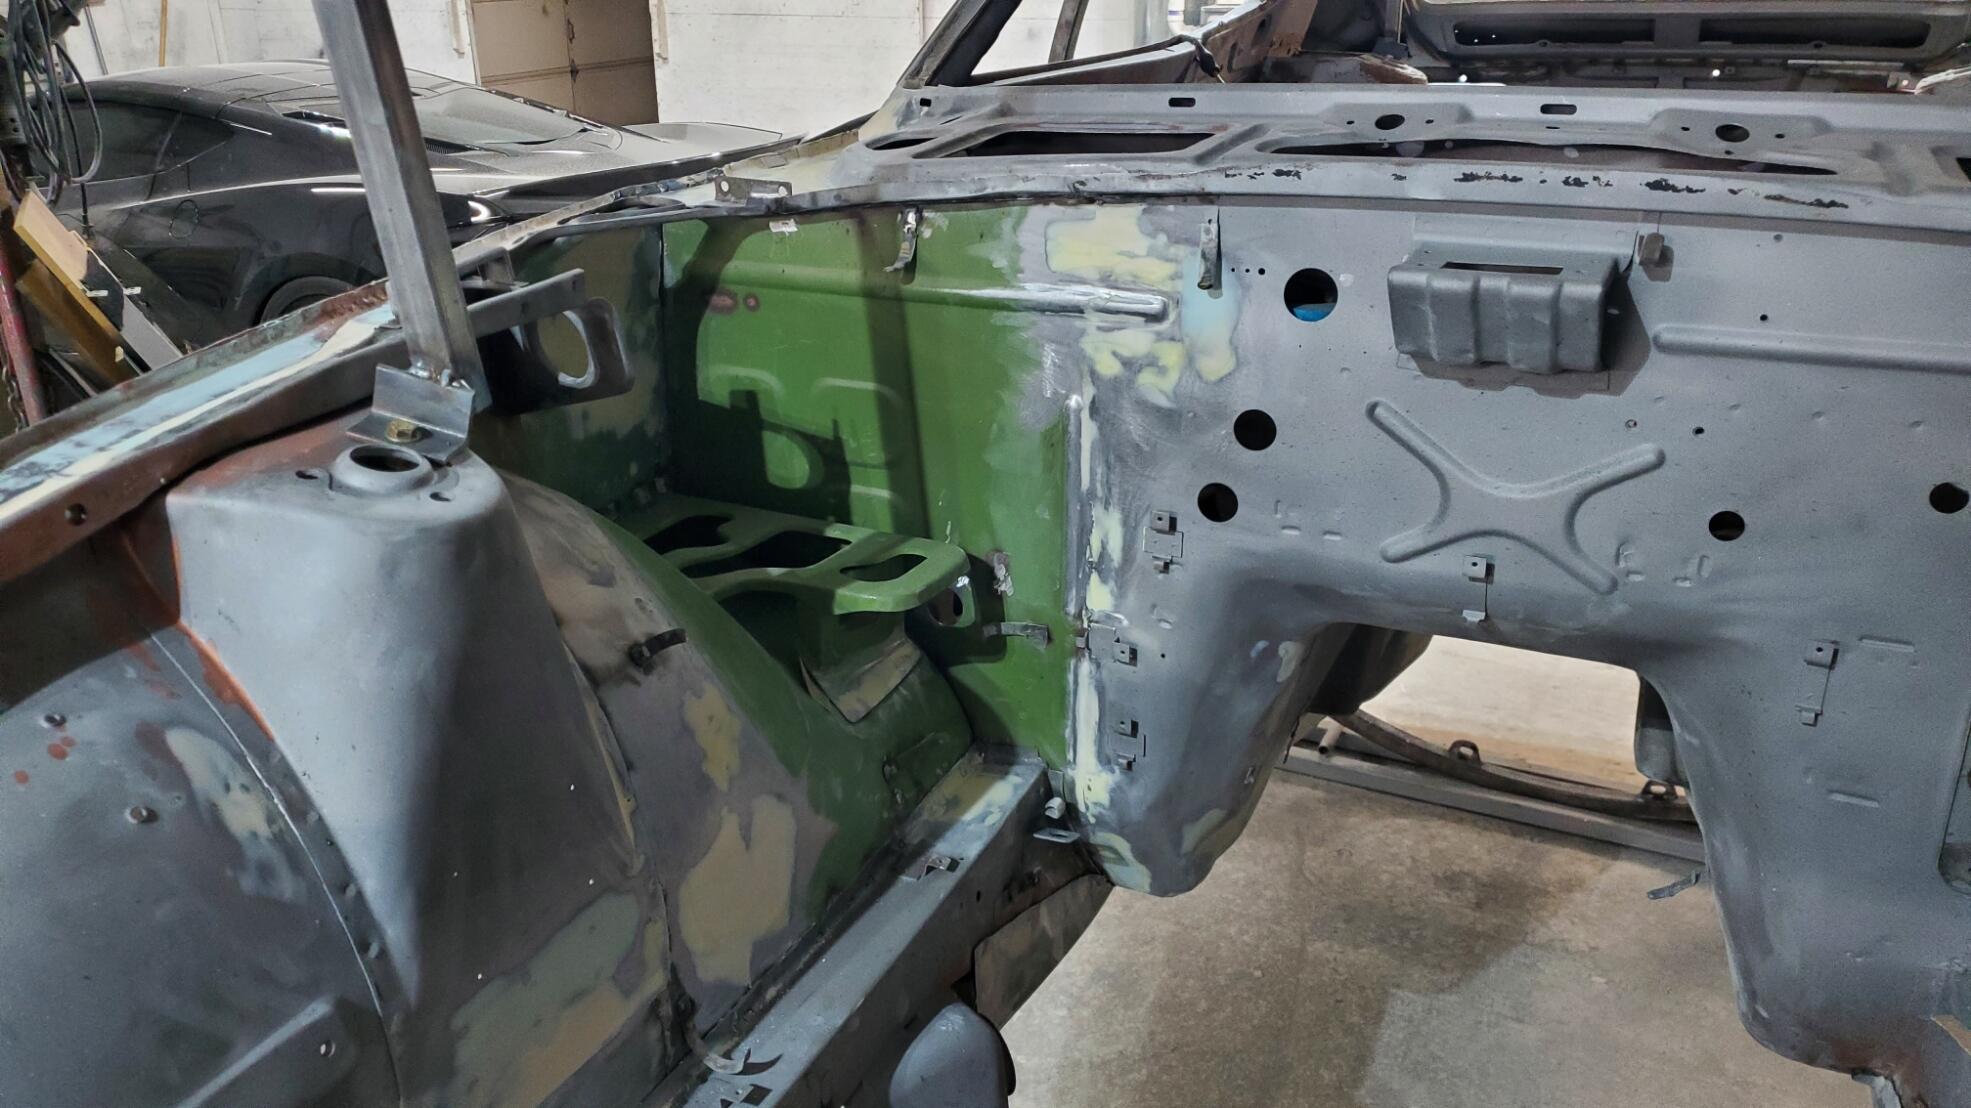
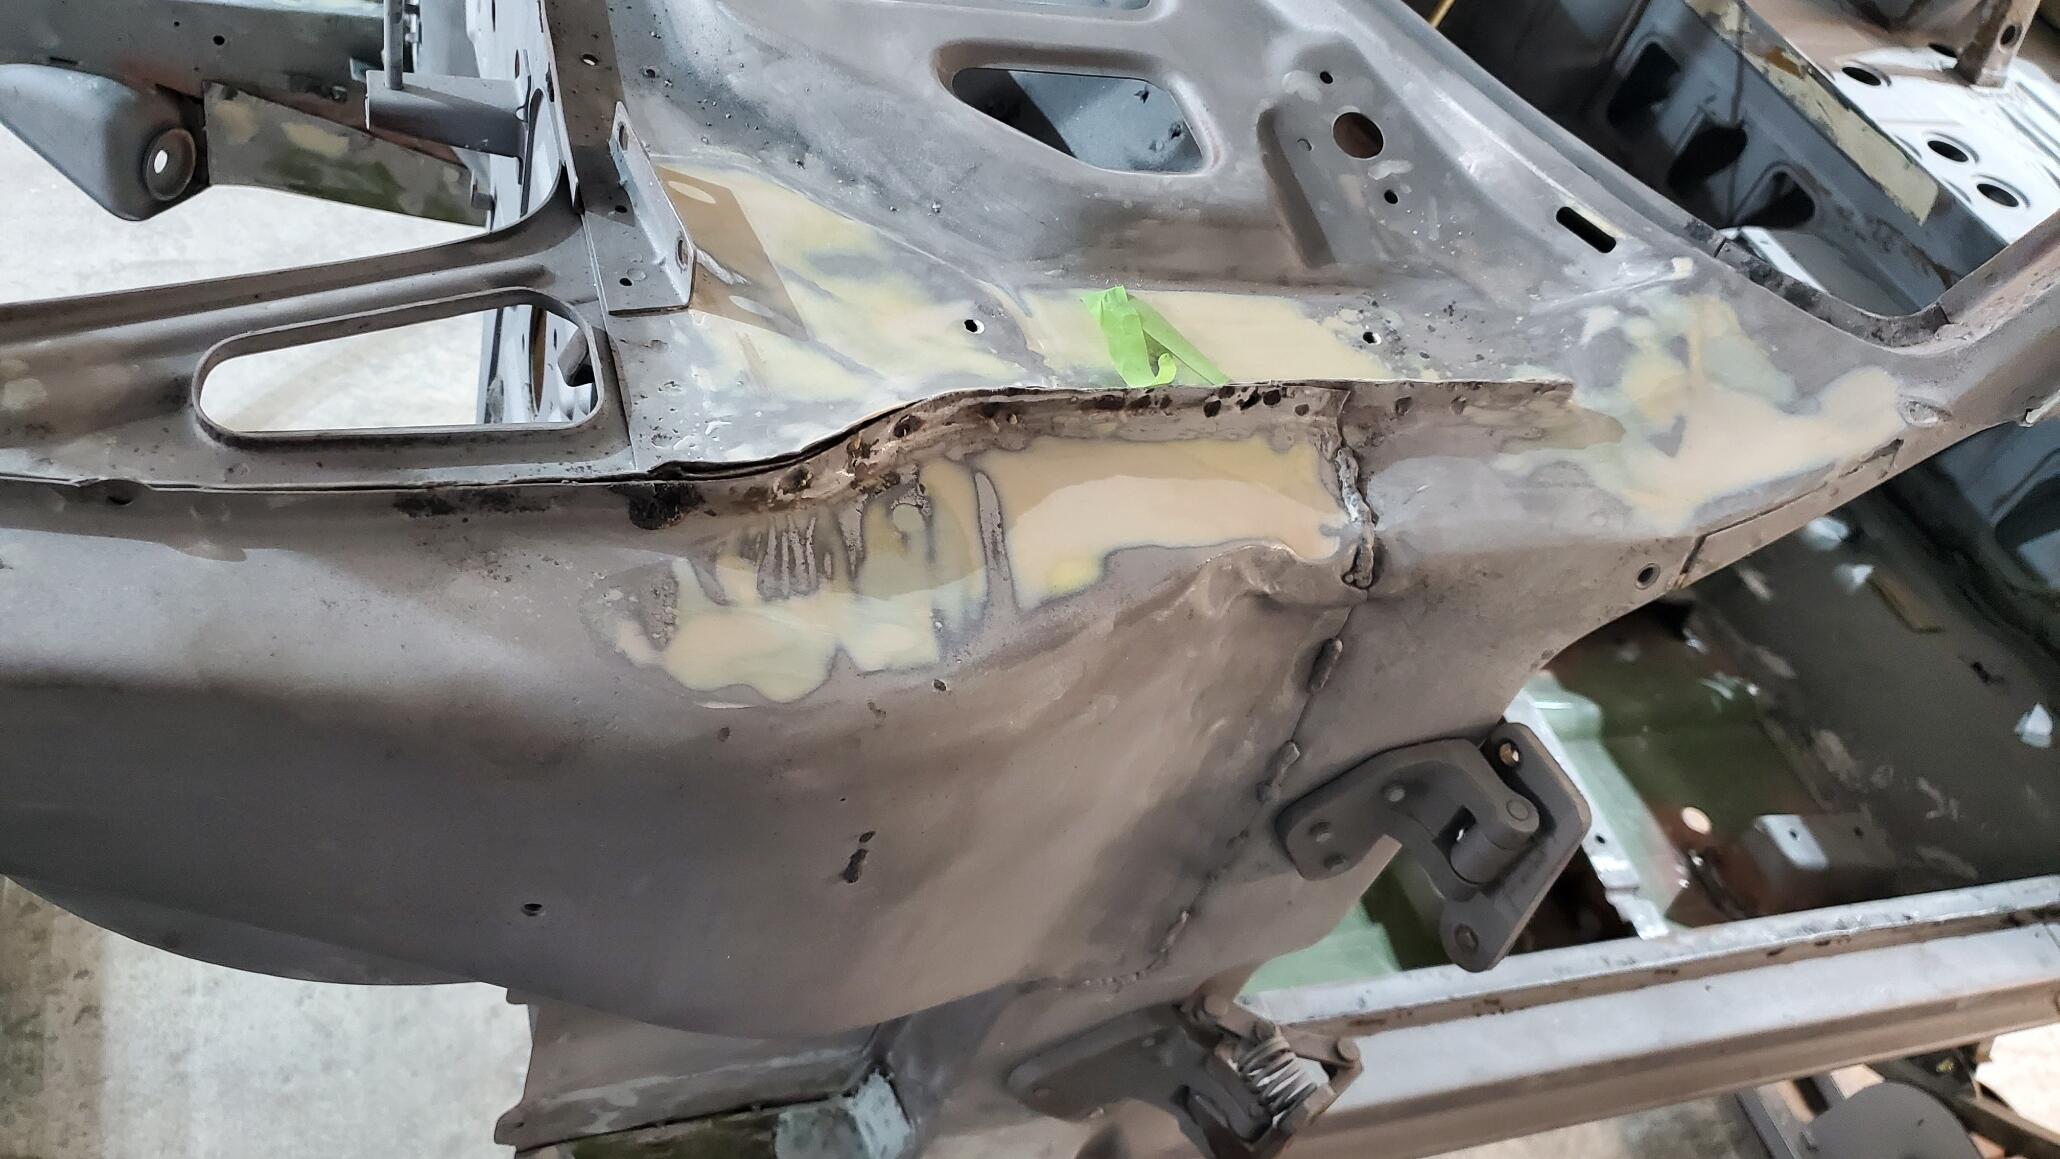
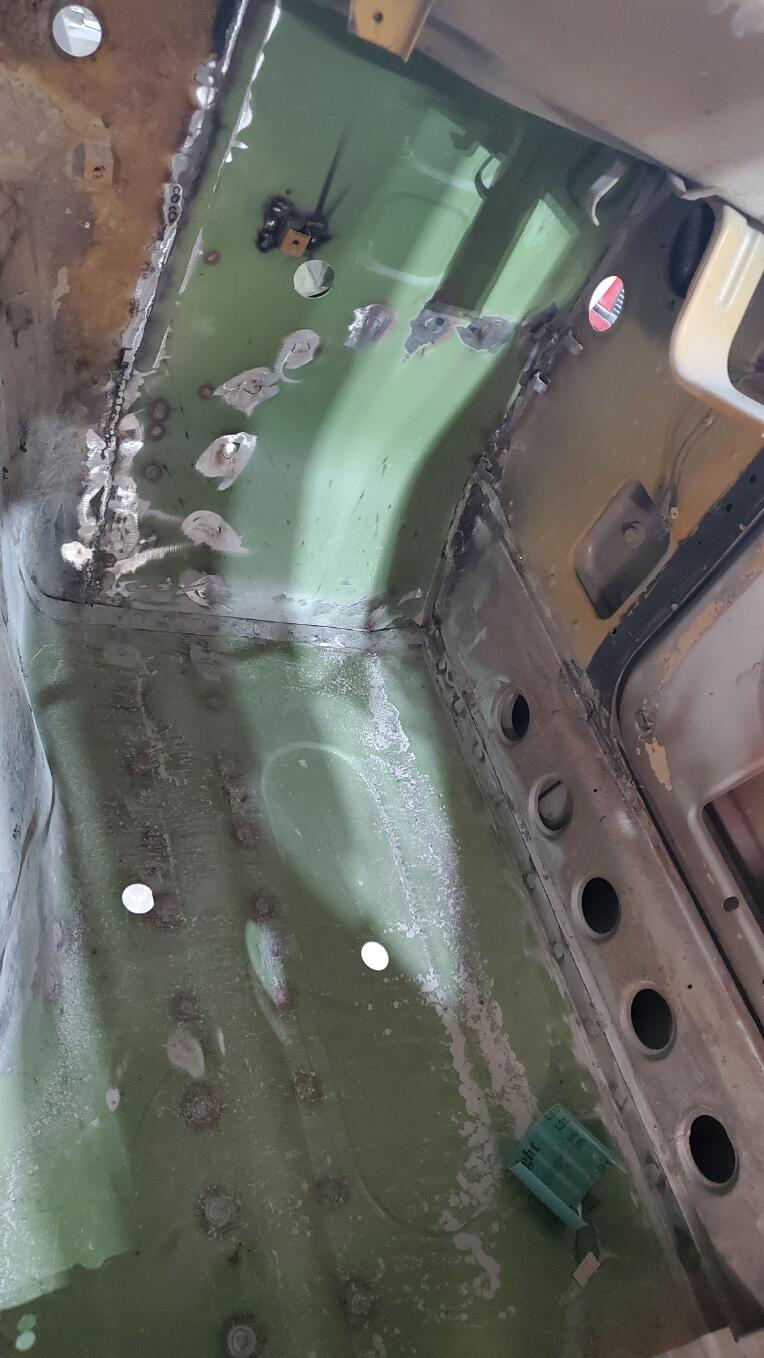
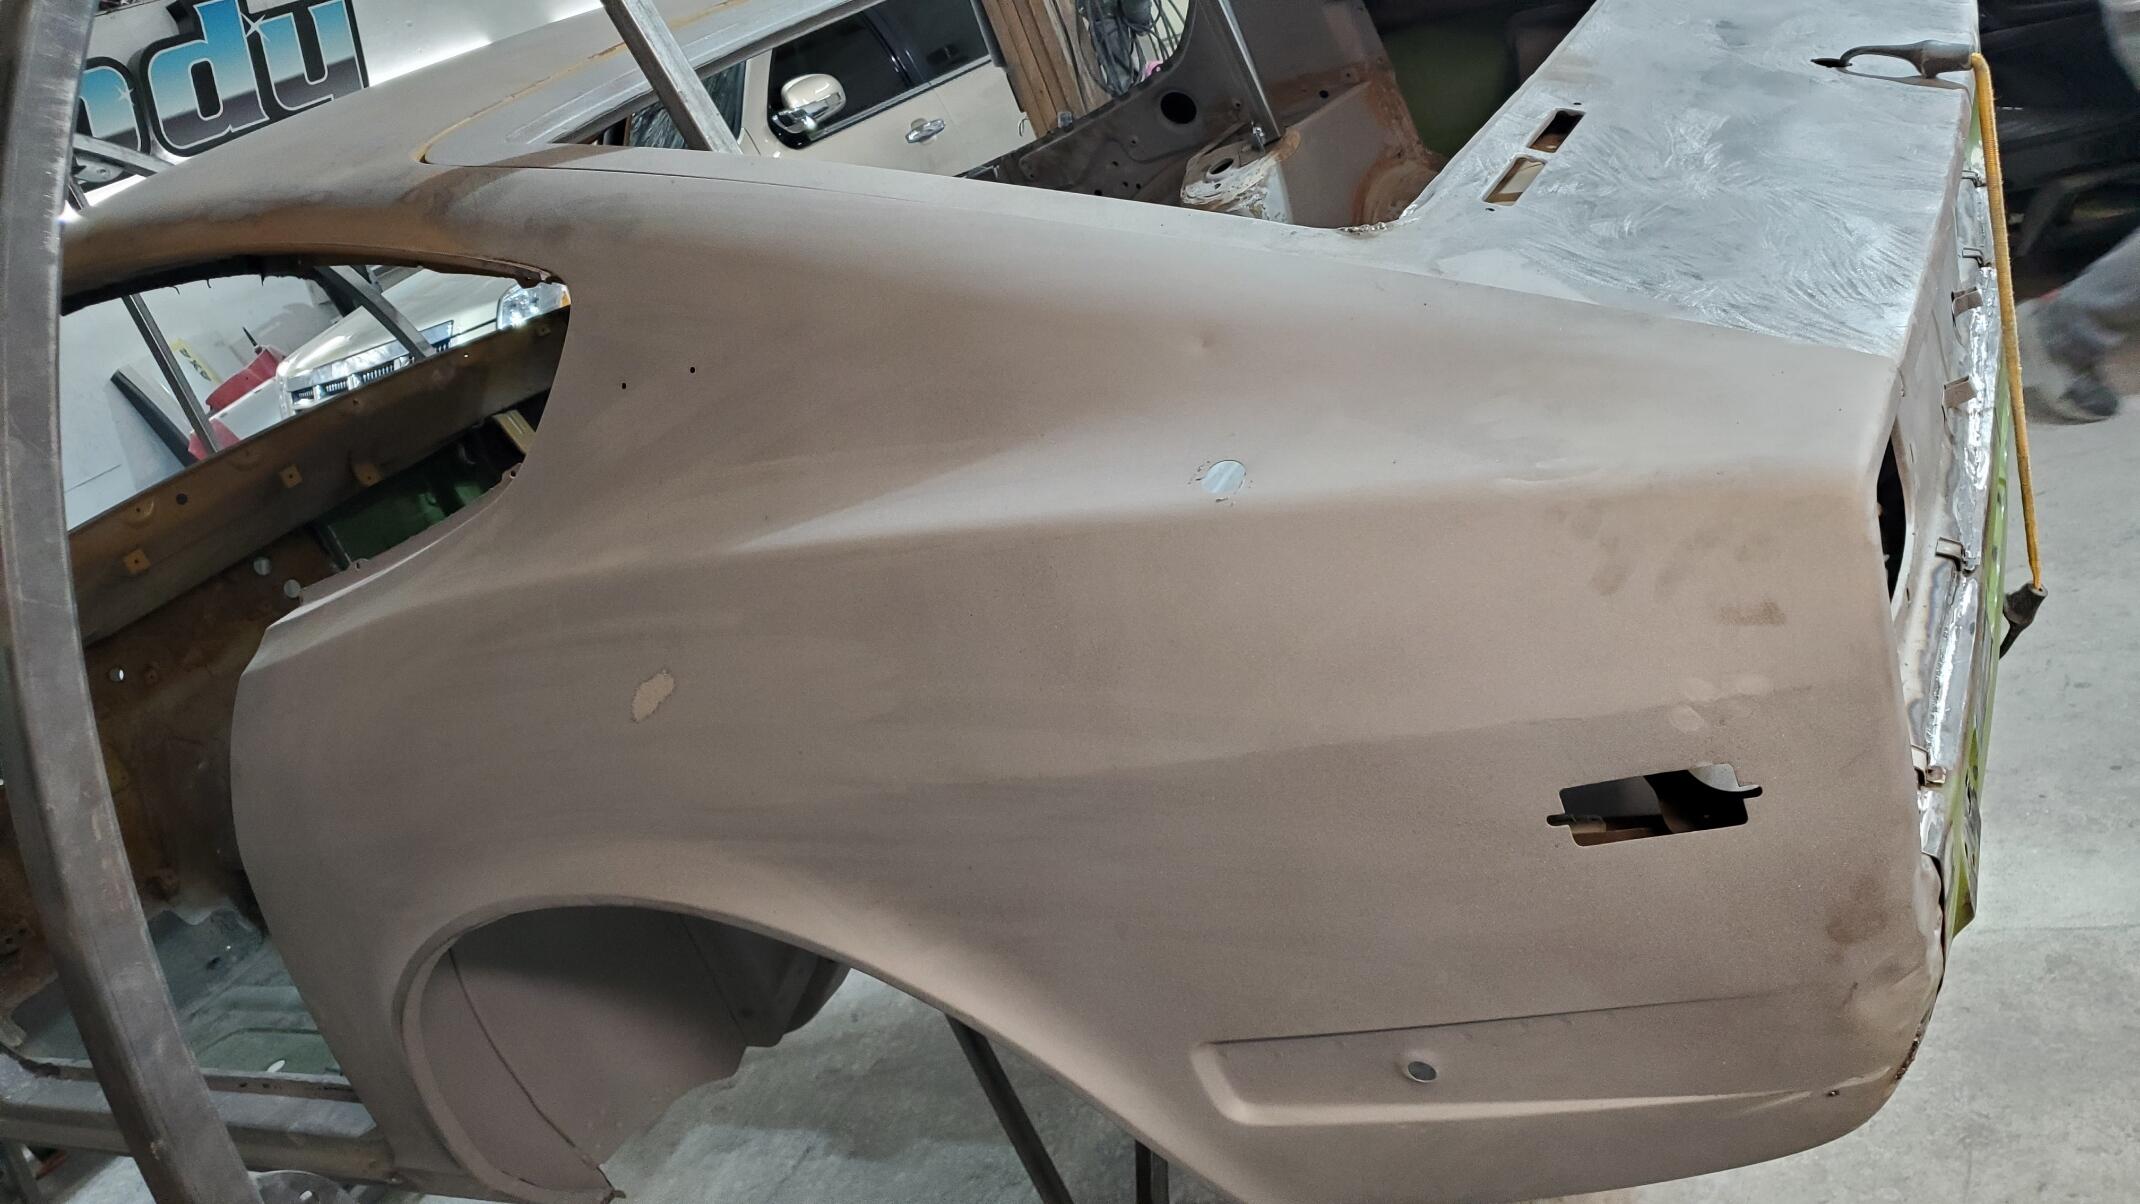
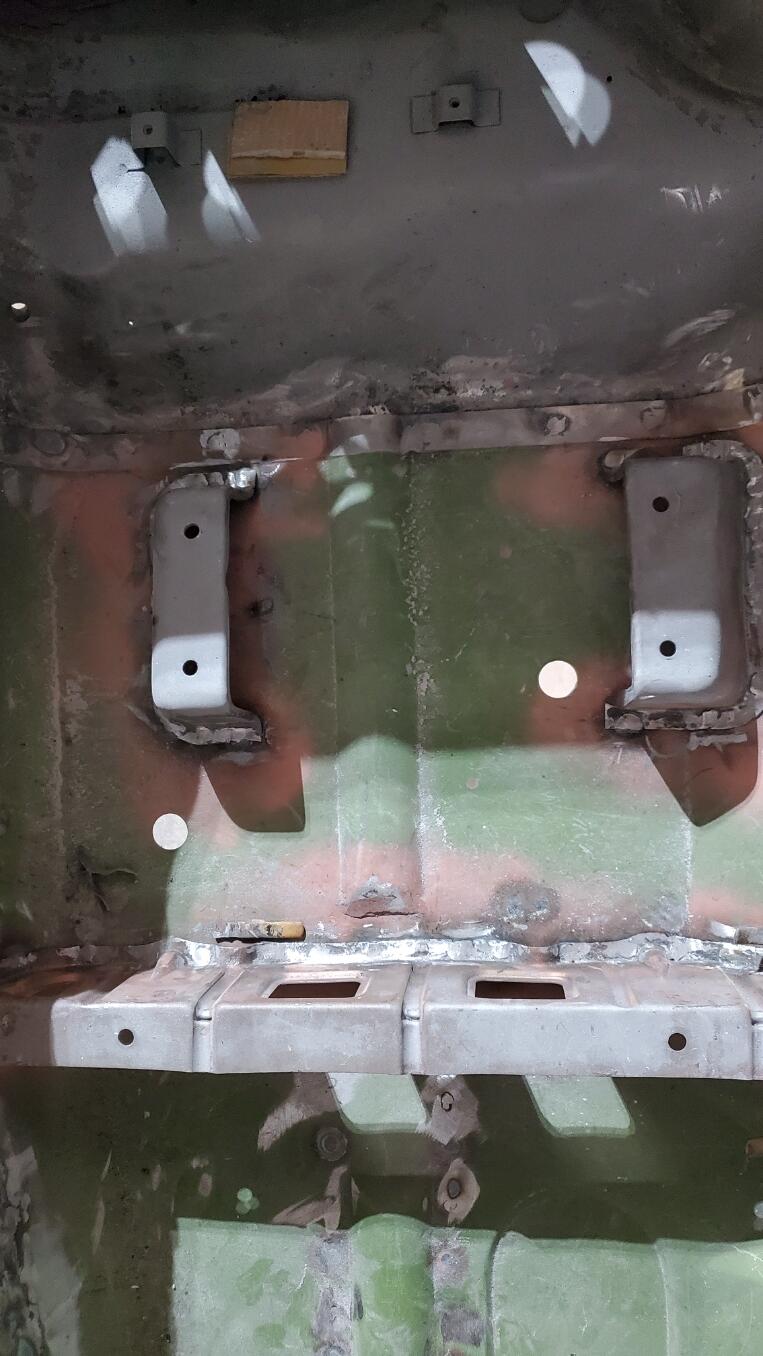
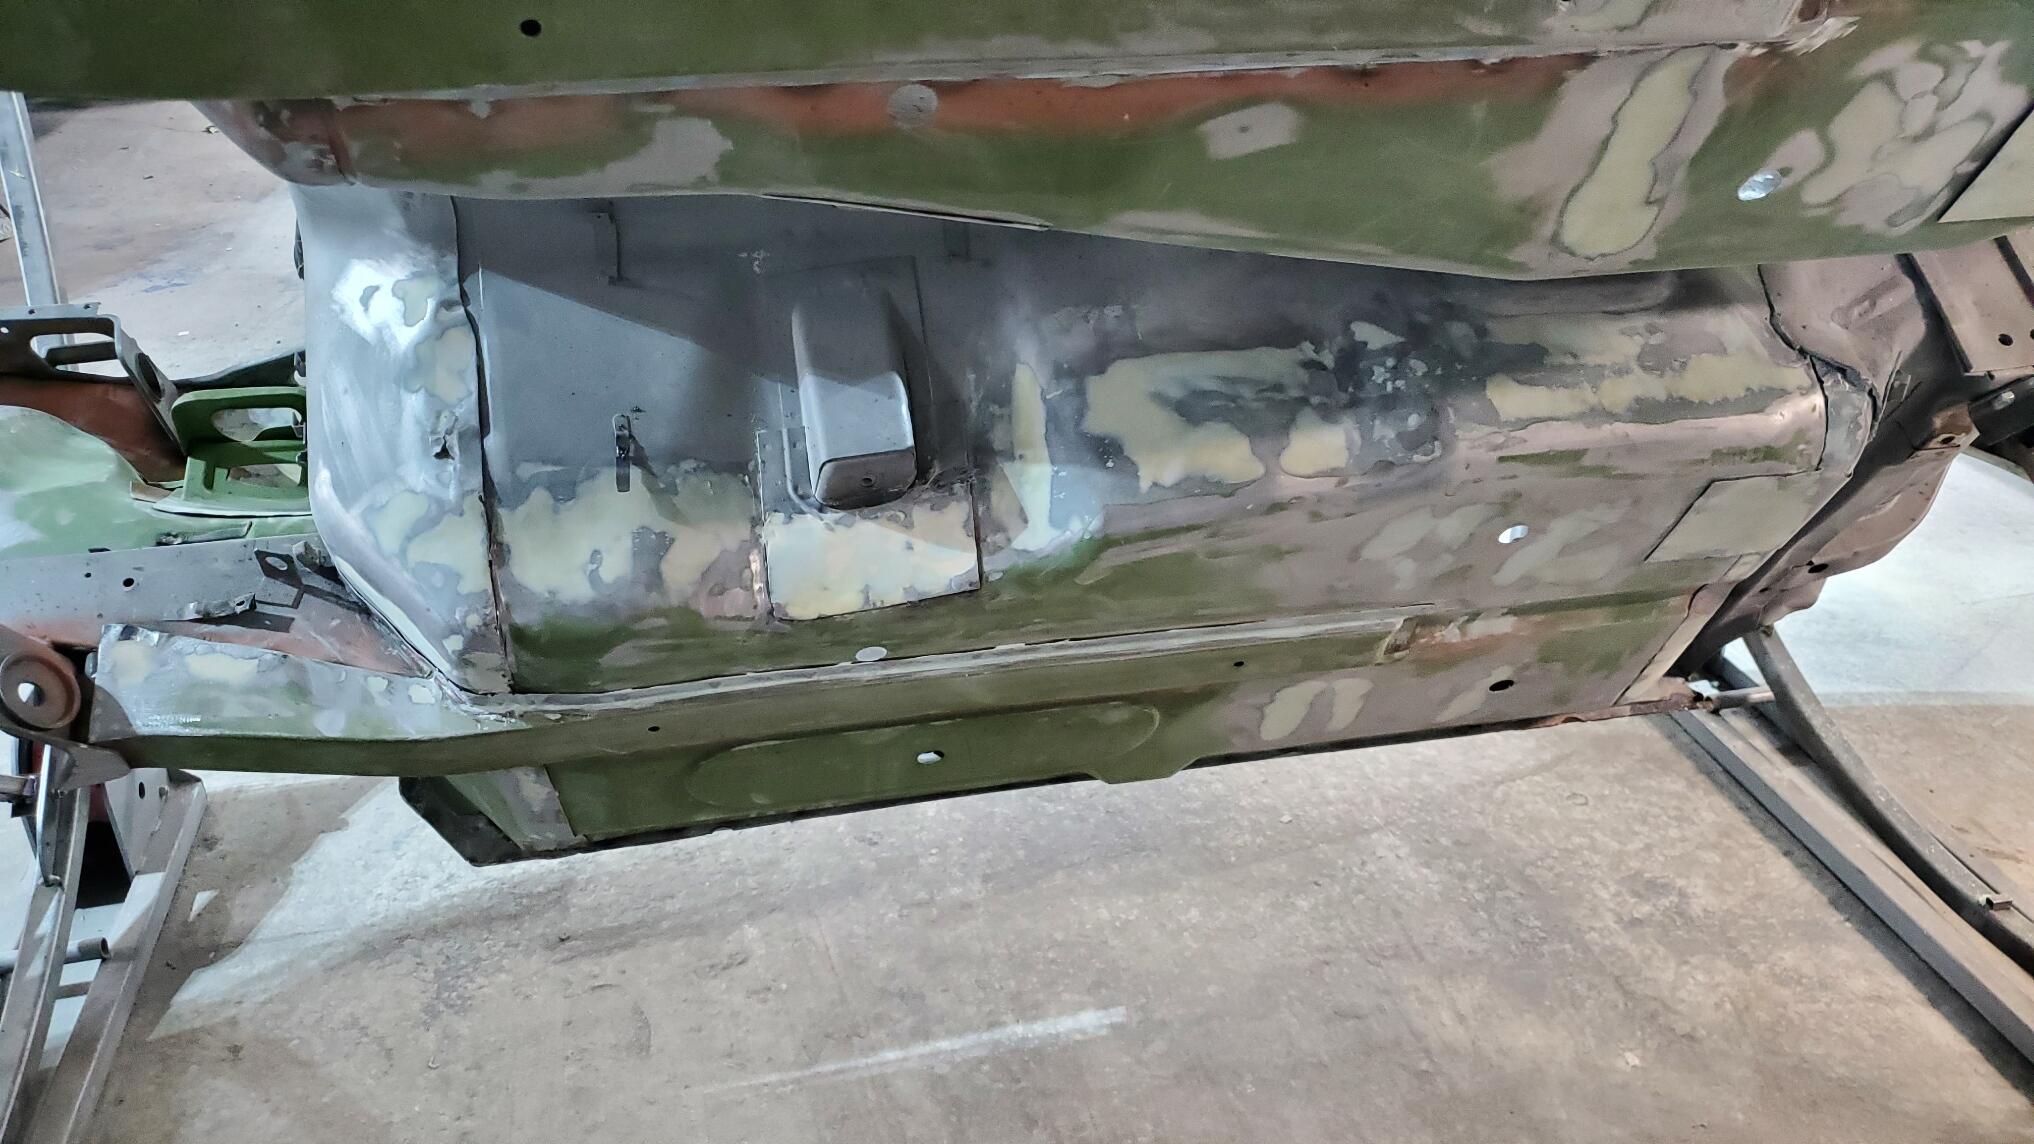
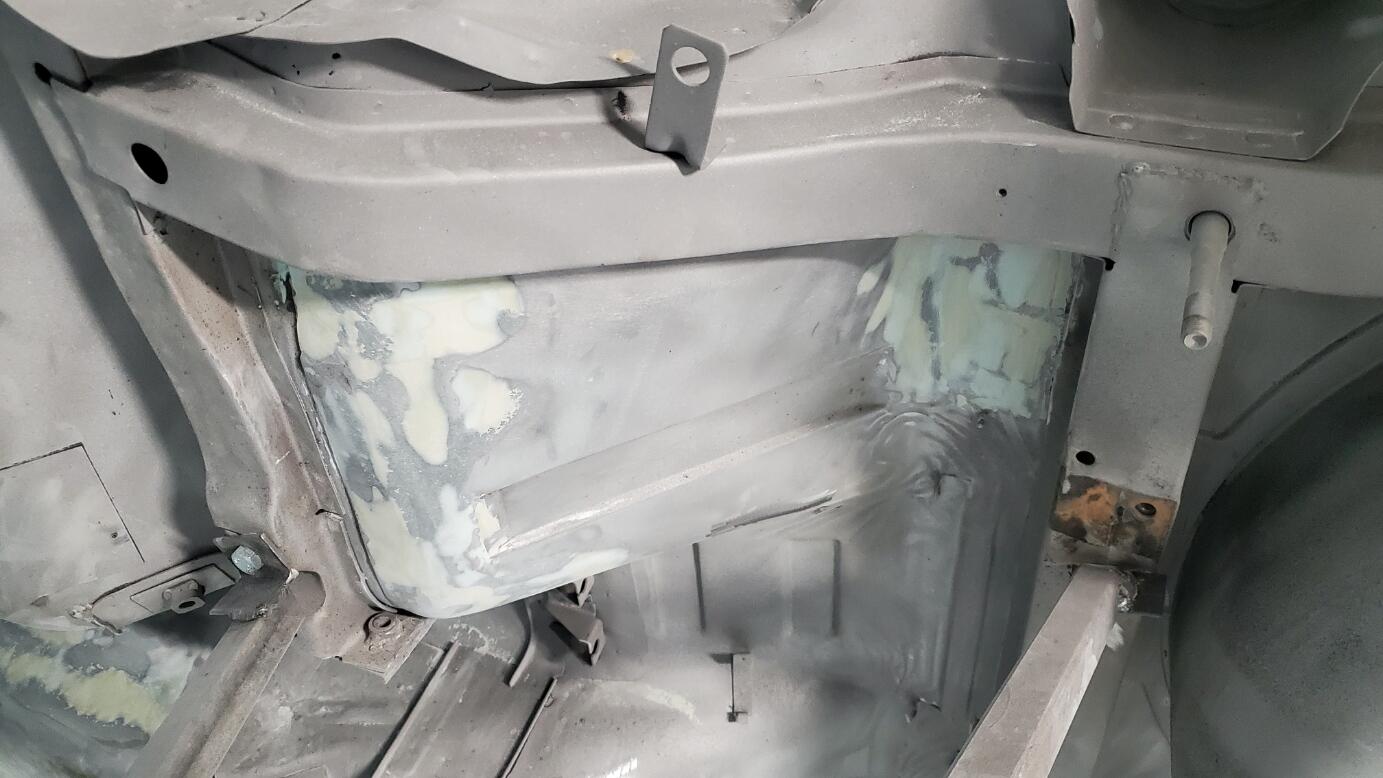
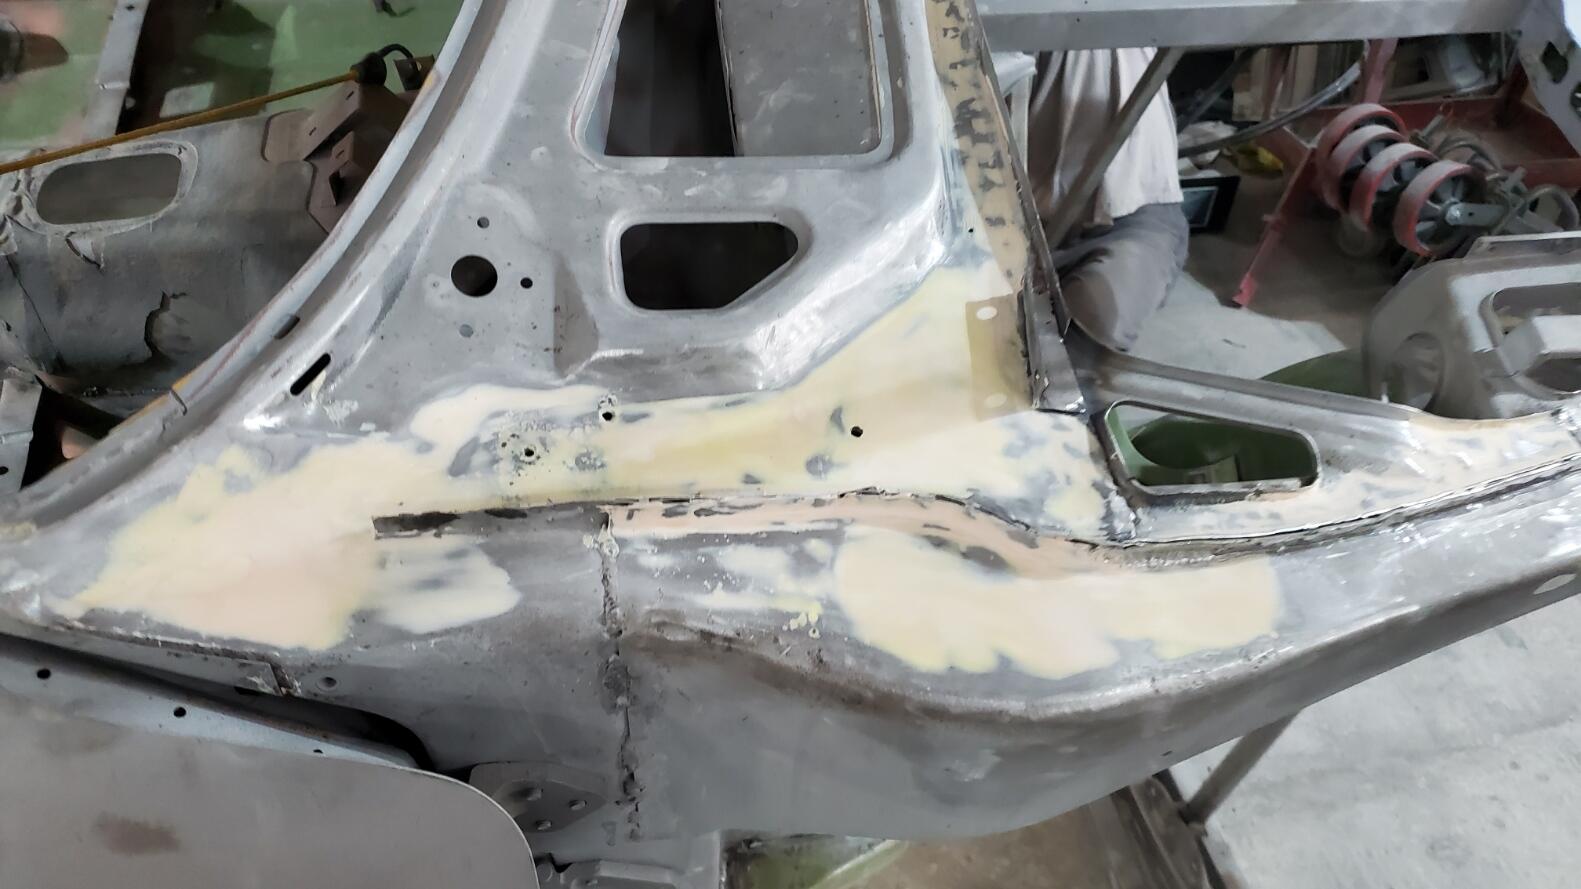
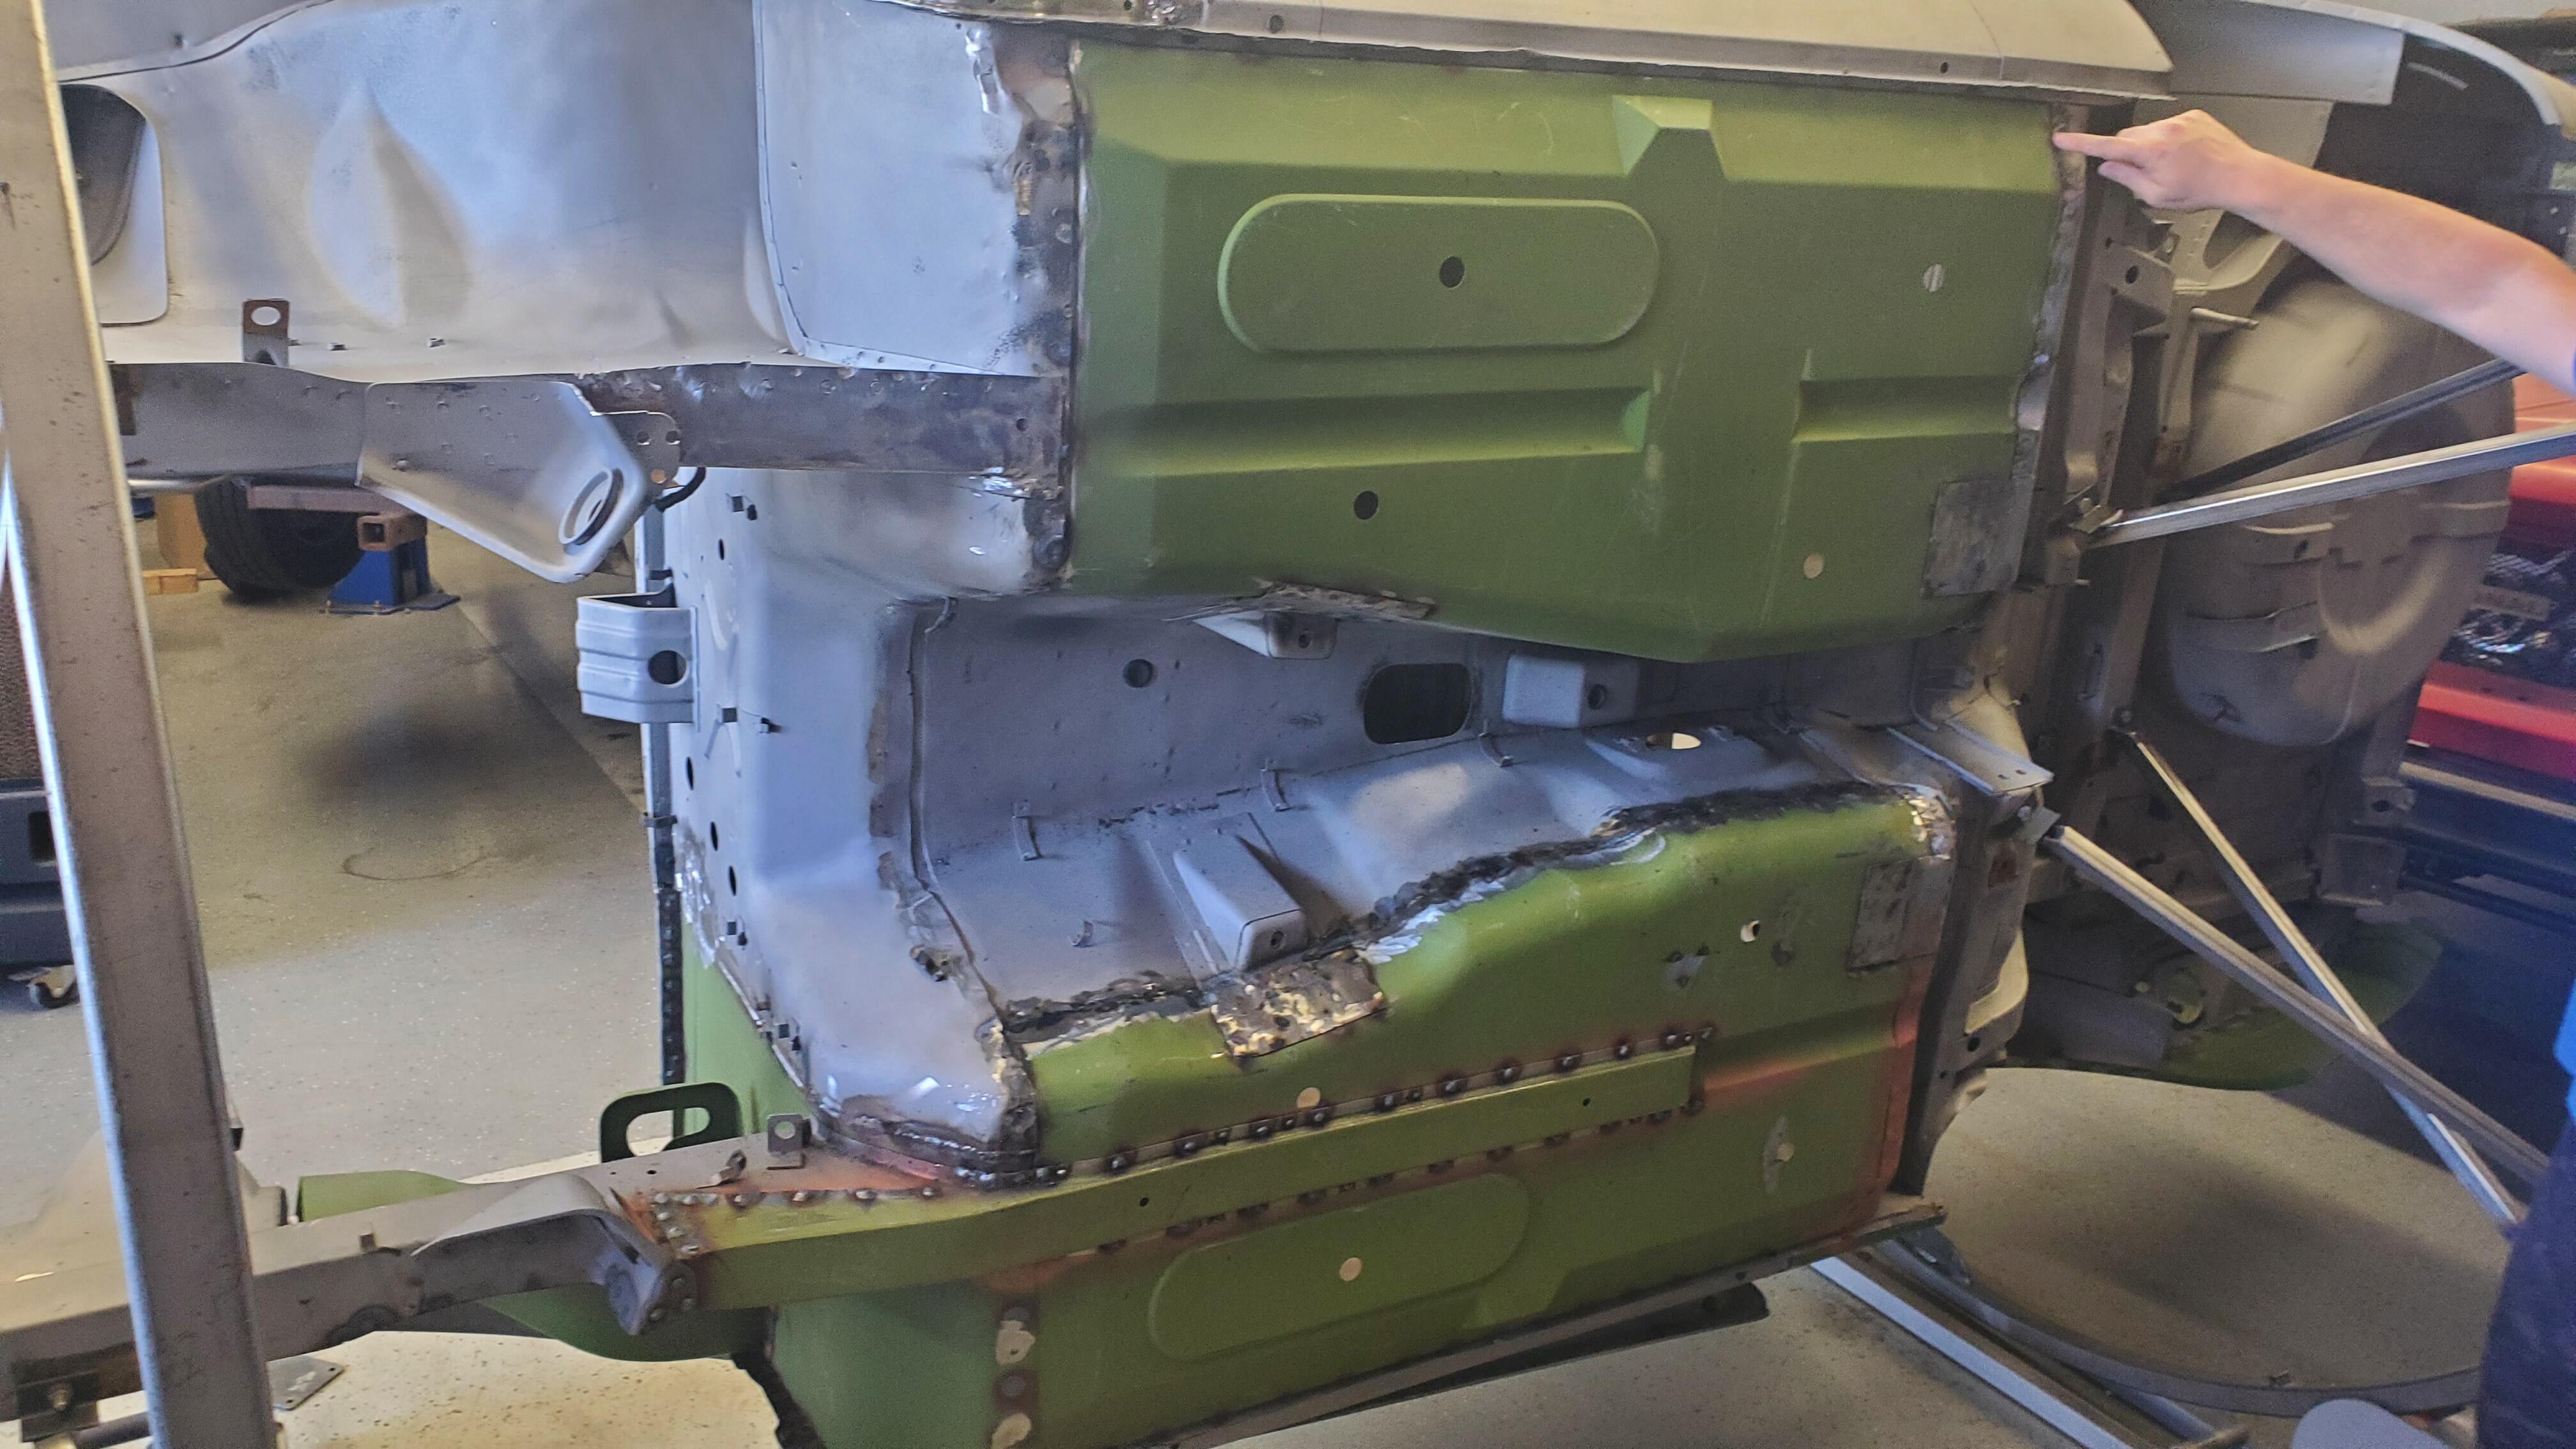
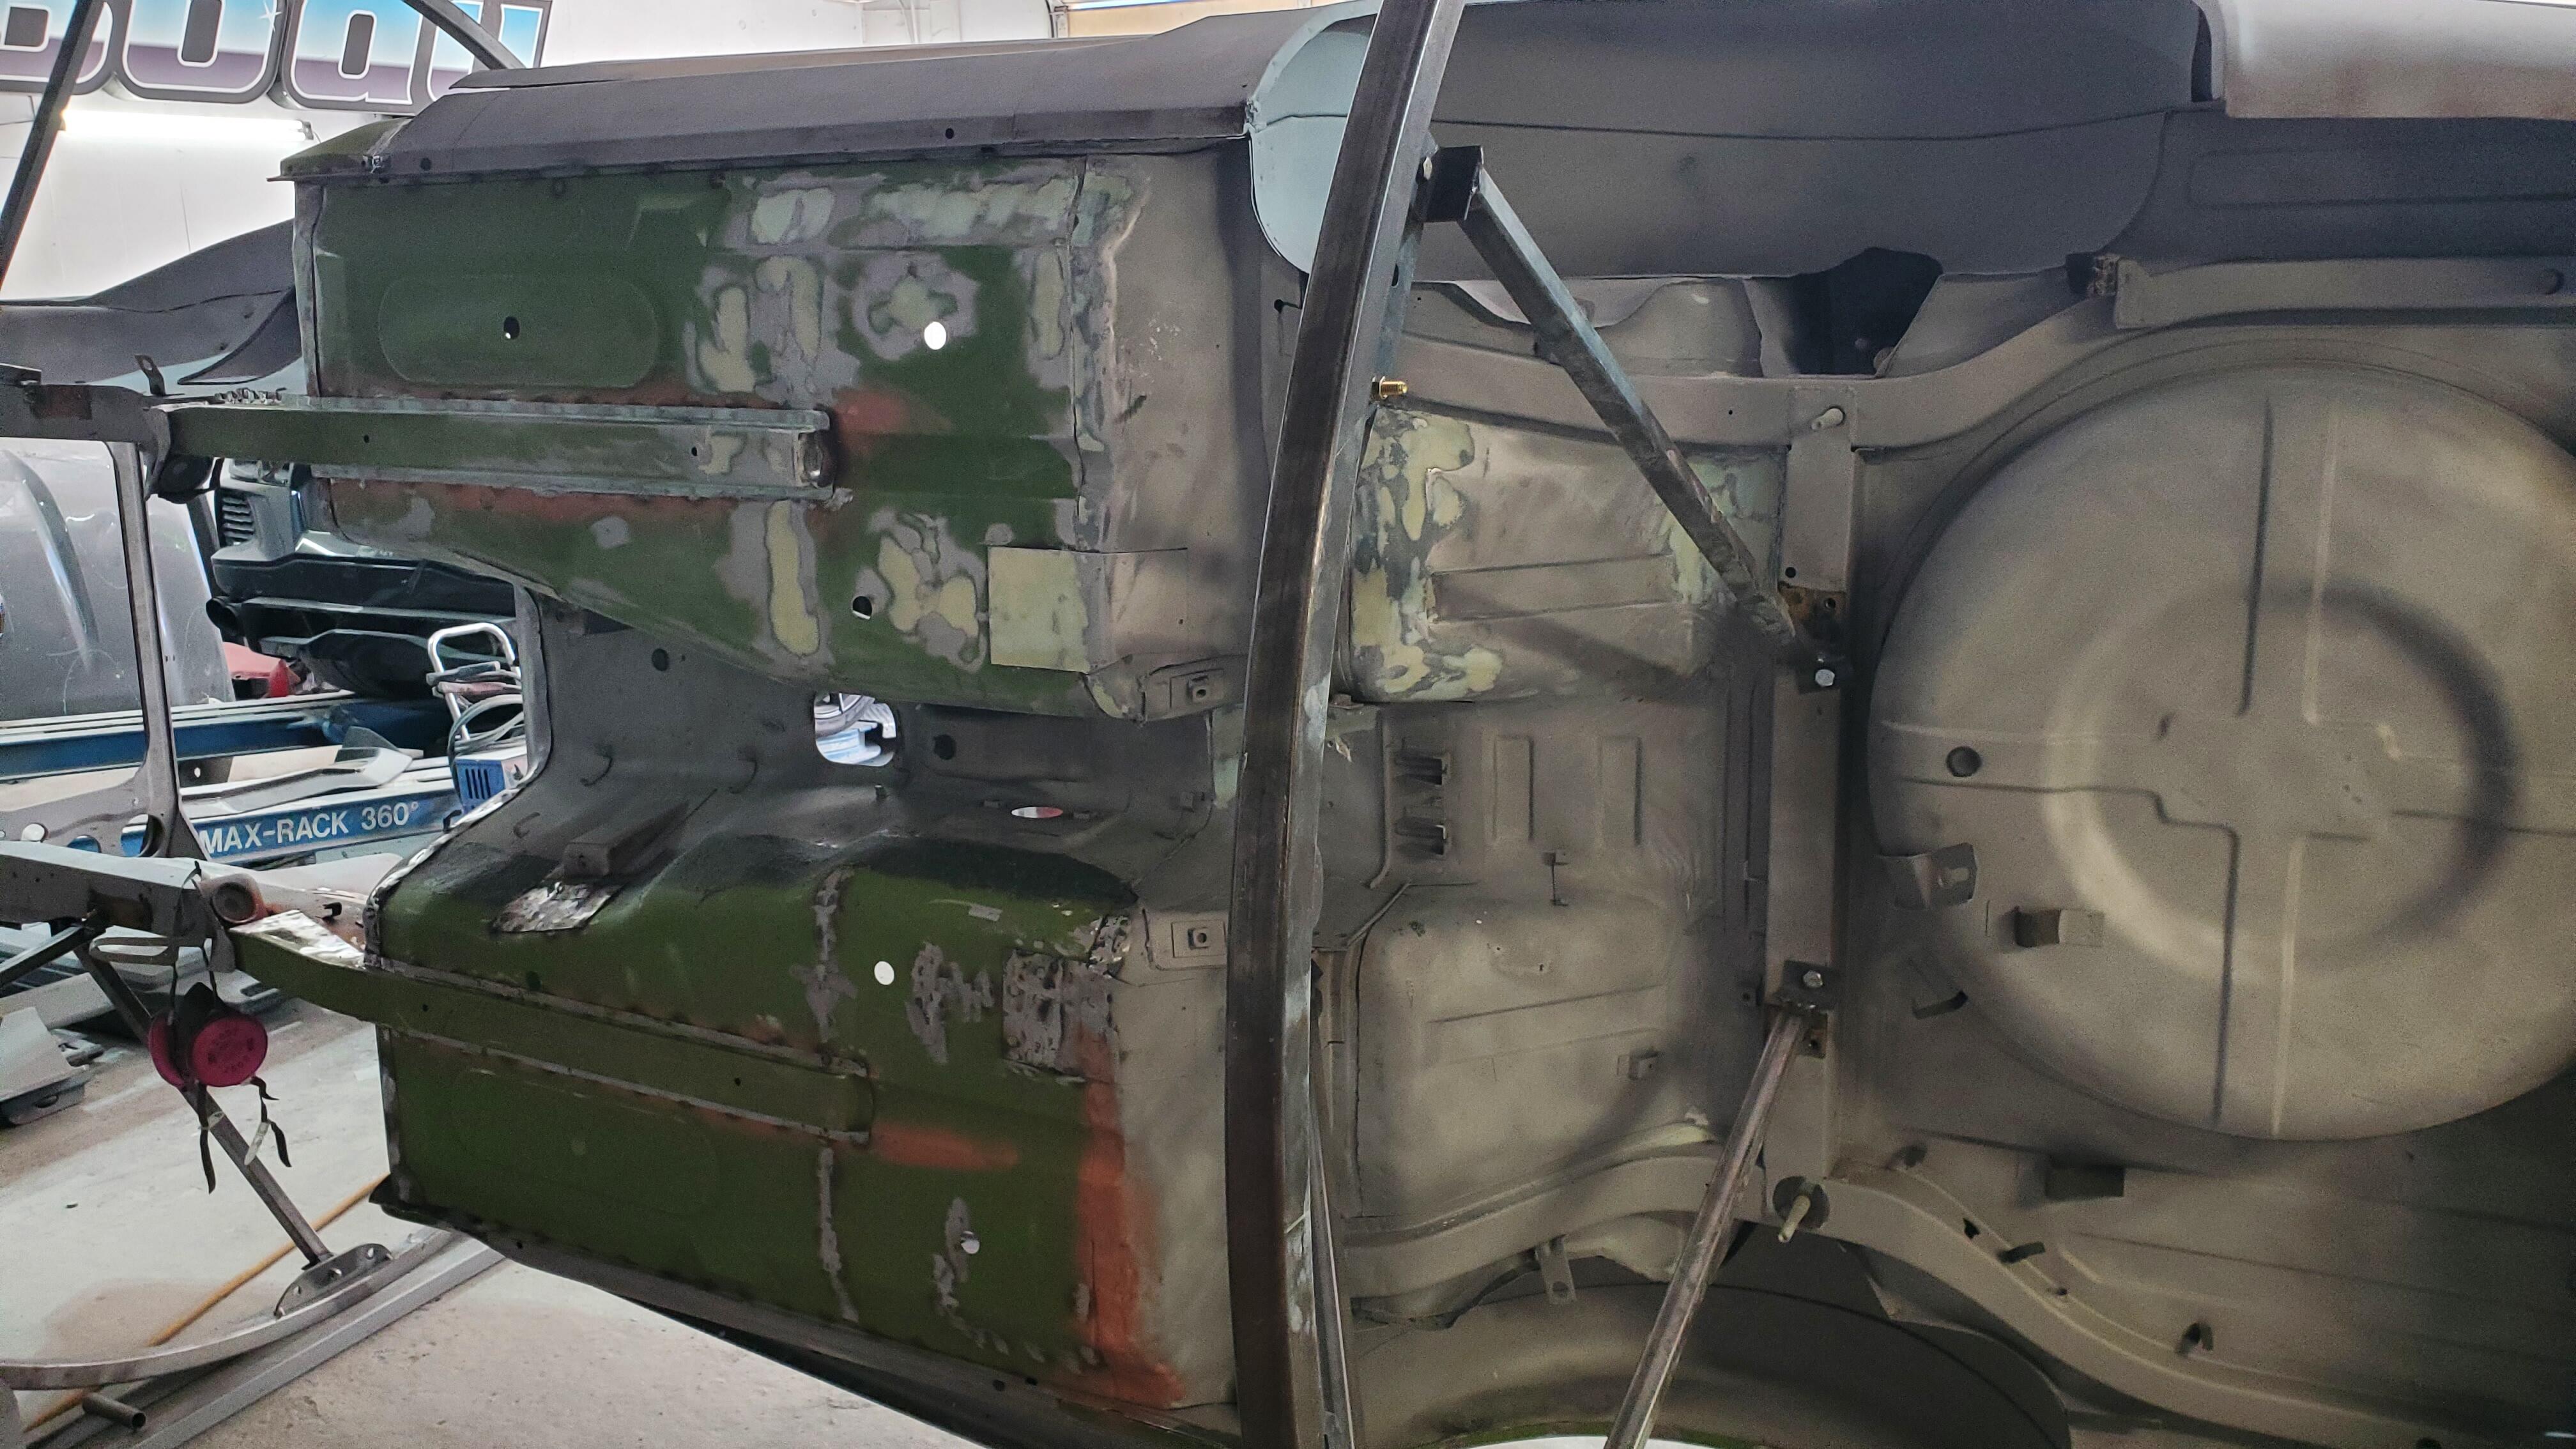
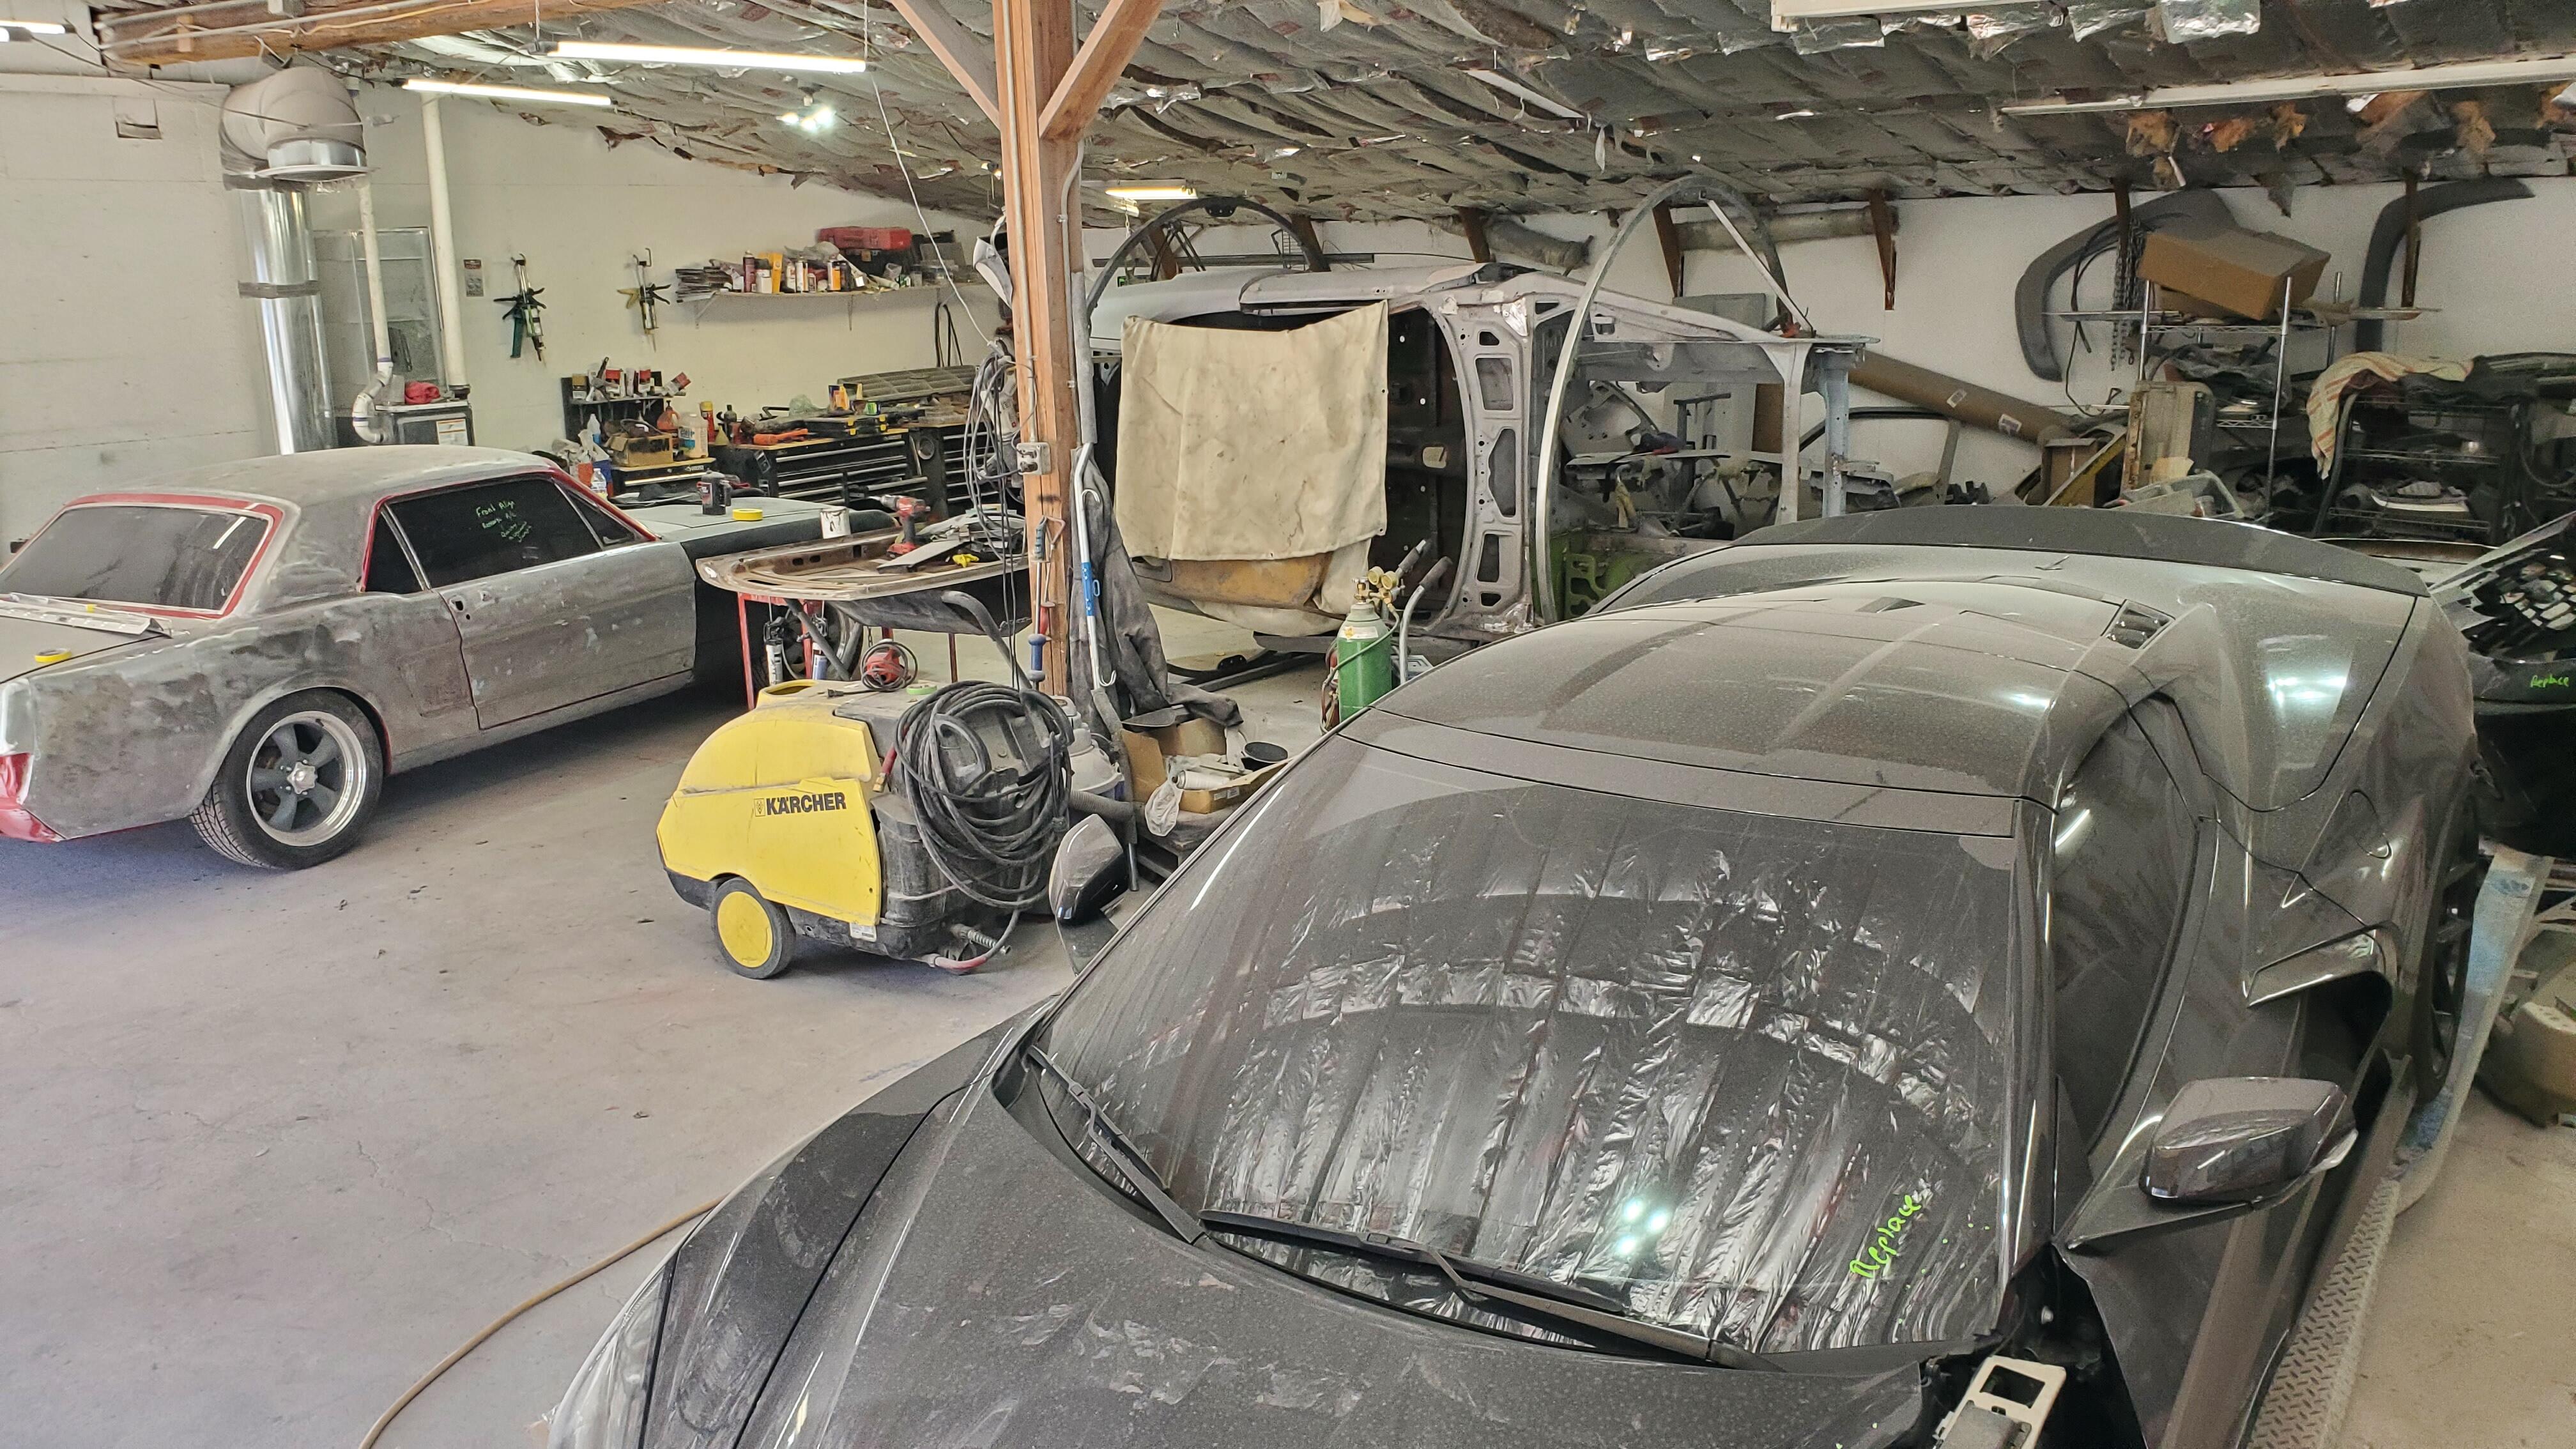
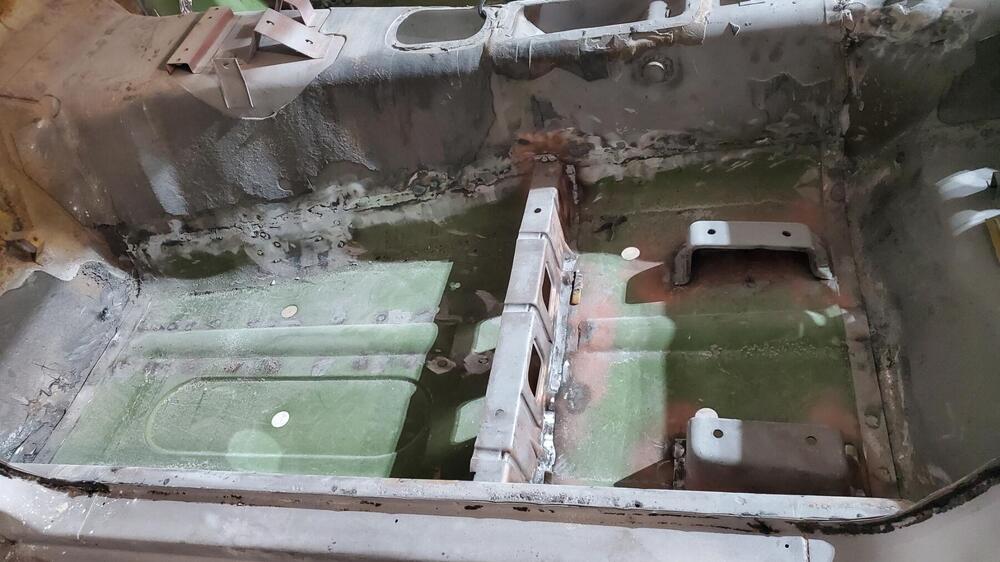
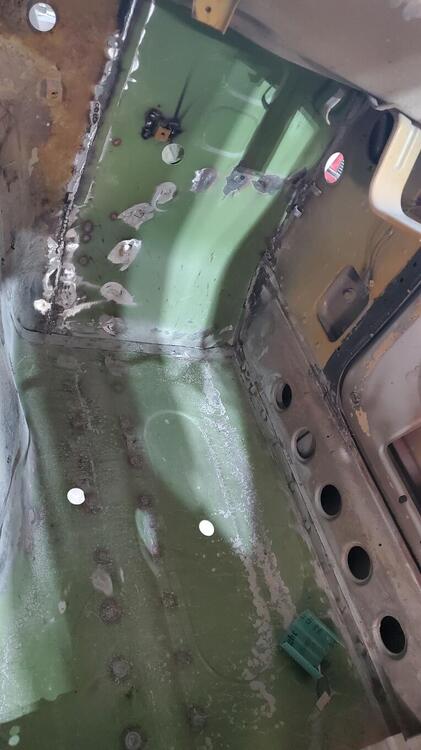
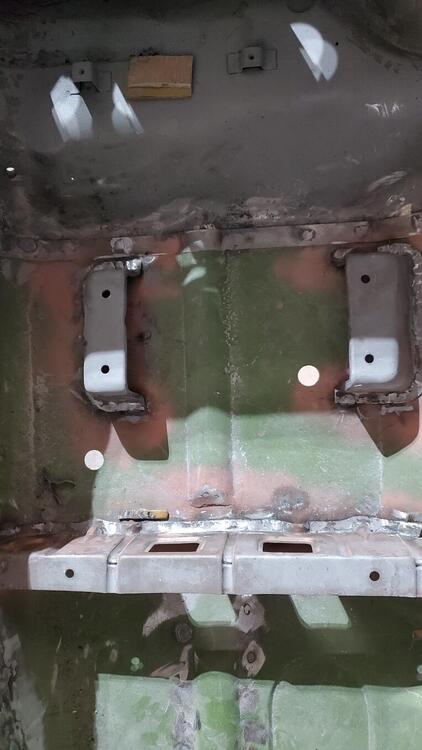
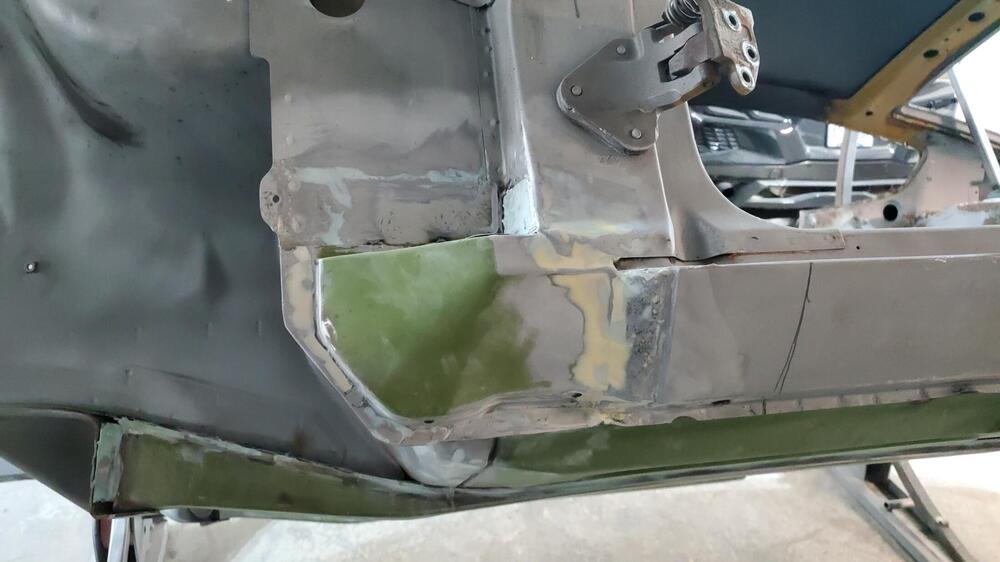
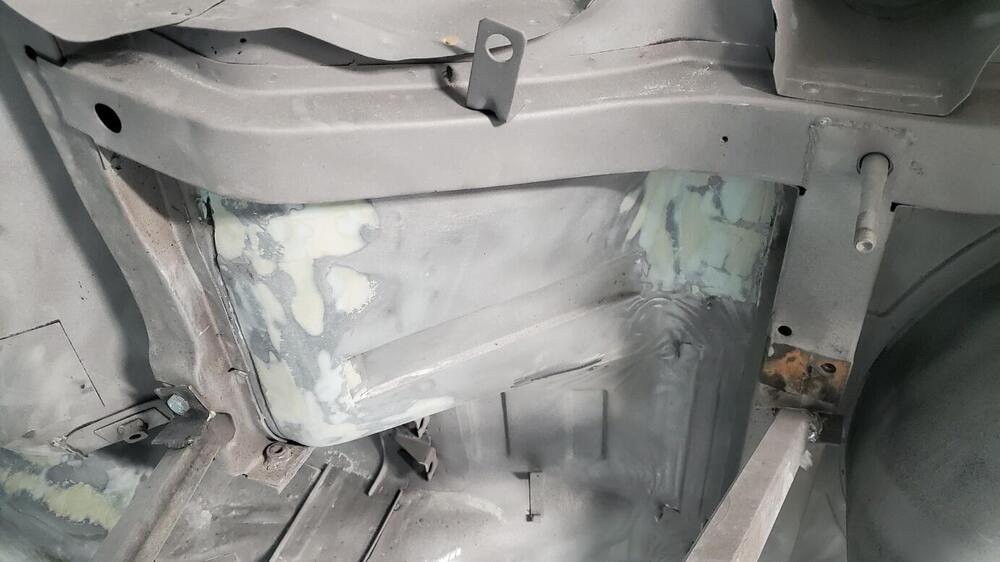
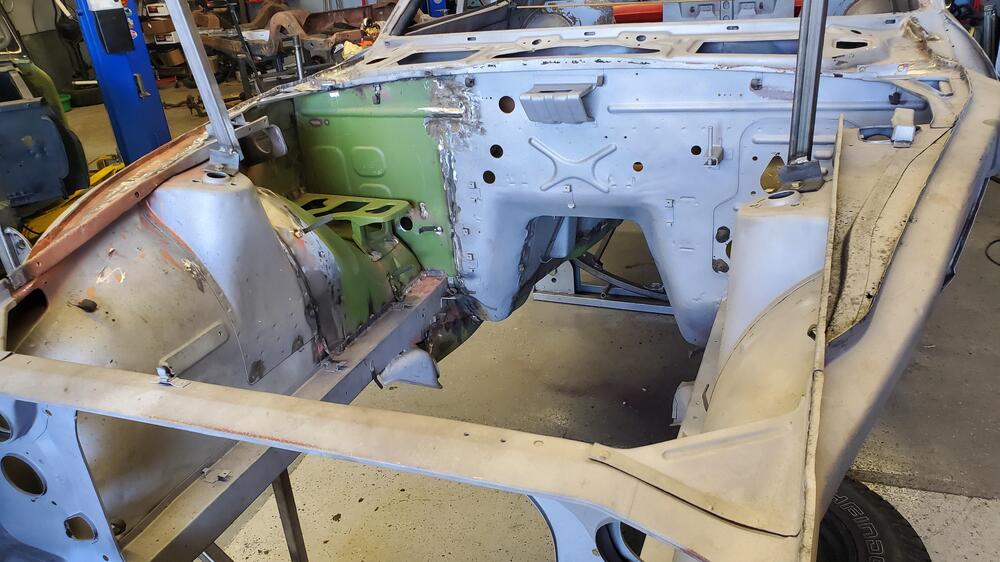
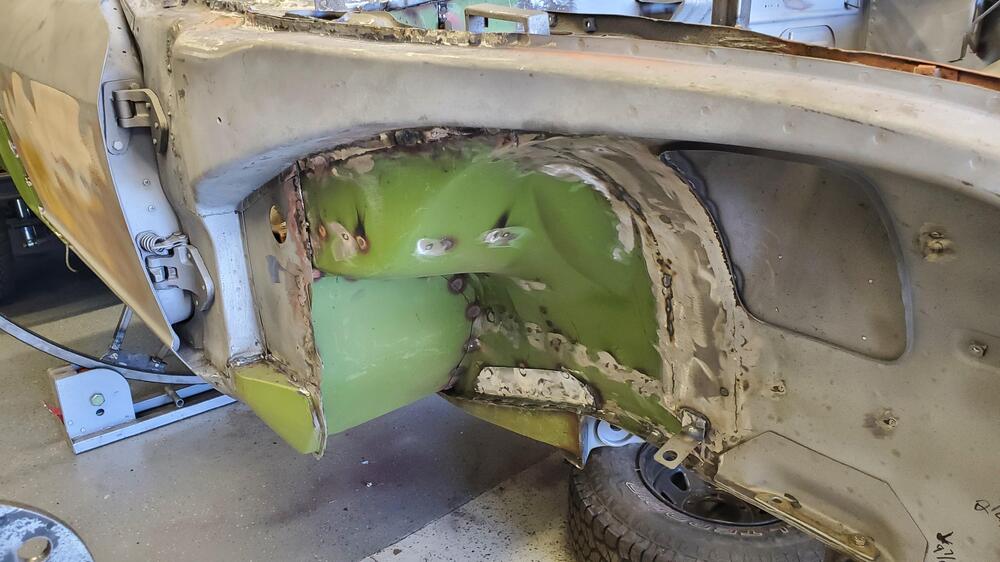
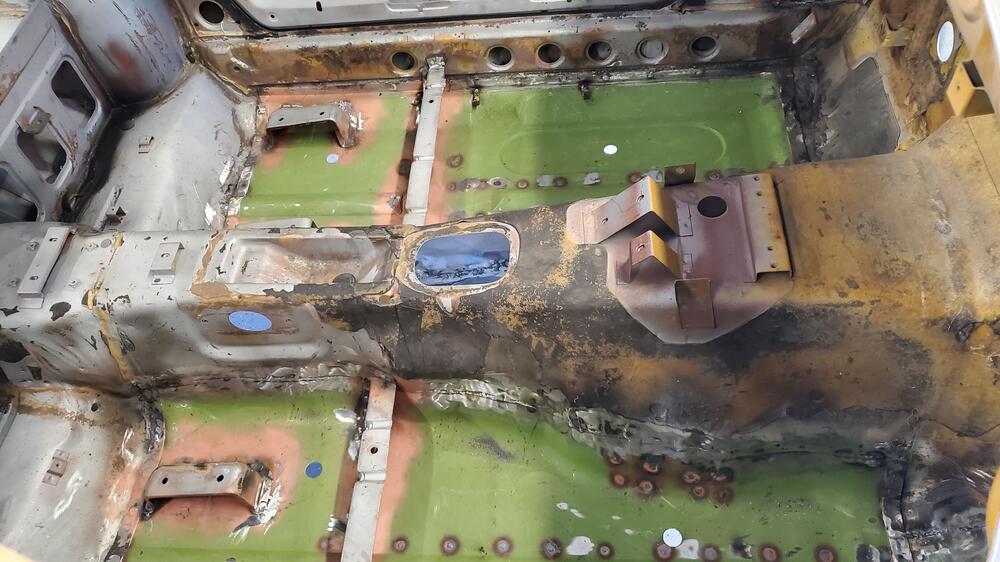
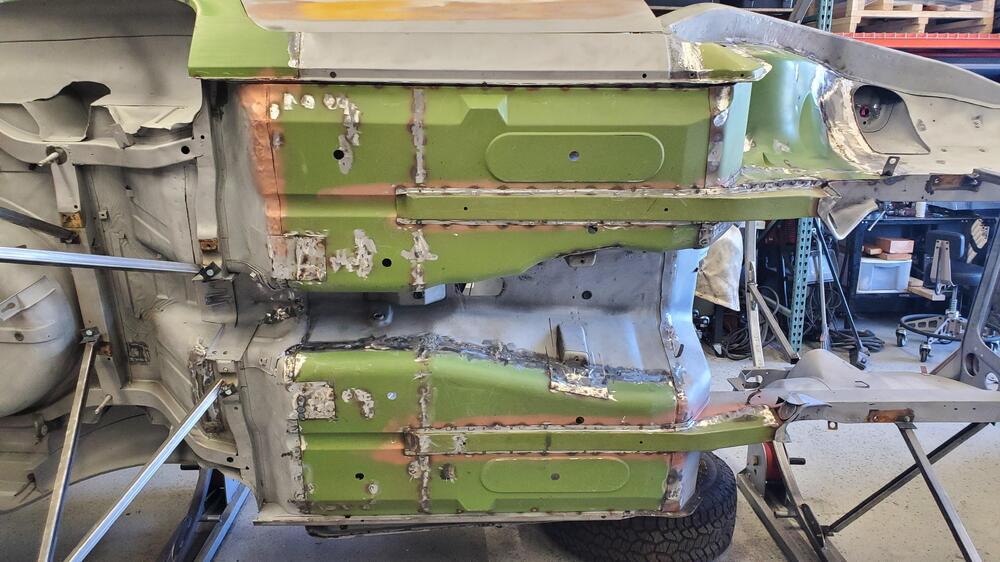
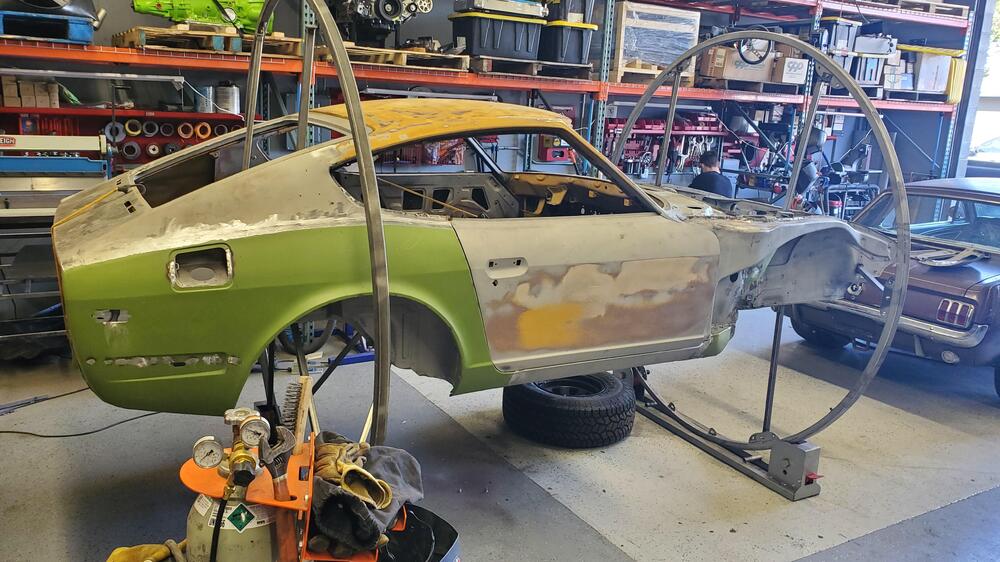
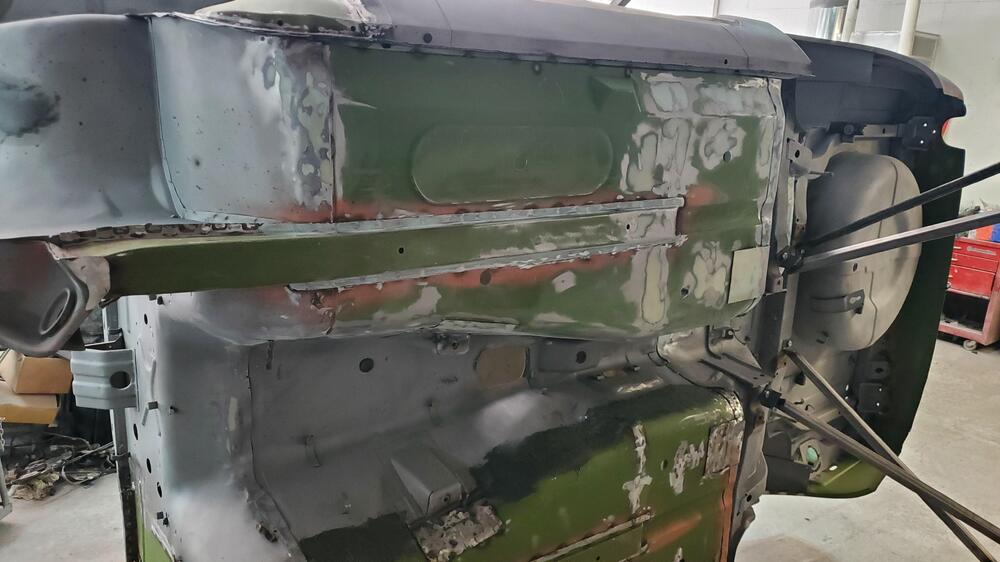
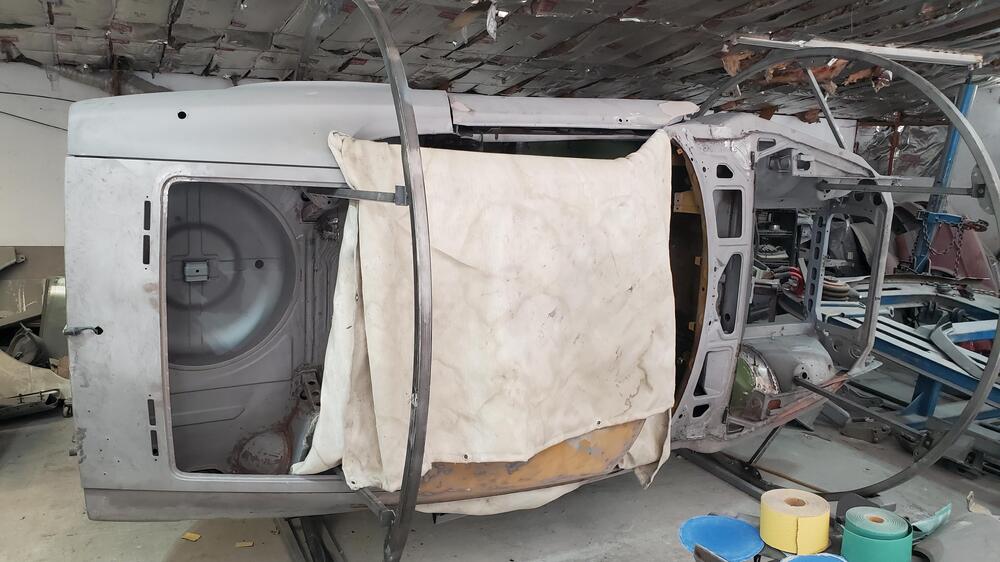
Thanks for the prompt. I have been meaning to update the thread here but seem to have gotten side-tracked. The metal work has been completed on the body and it is now at the body shop. It has been there for about 3 weeks now and work on the underside has already been started. Carlos said the underside should be finished by the end of this week. He estimates that the body work and paint will be complete sometime in December. Would be nice to get this back before Christmas. There was quite a bit of metal work to do as you can see from the pictures below. The battery area was pretty bad as usual, as well as the floors. There were a number of smaller areas that were rusted through, and Larry did a good job filling and/or patching those. I wanted to make sure everything was very structurally sound and that all hidden rust areas were addressed. That being said, I am glad that part of the job has been completed. It is nice to see the body work started. The underside is looking better already. Carlos (the bodyshop/paint guy) stopped by my place and took a number of pictures of 2614 to see how the frame rails and other welded on parts were finished i.e no seam sealer. He also brought a paint camera and took pictures of the car color inside the door jam for color reference. I told him the color was the 920 Safari Gold per Nissan. I asked him to let me know how the colors line up. With 55 years of age, I am curious if the color on 2614 has darkened or developed a patina over time. Carlos has his own mixing set-up so he said that he will set me up with color samples prior to paint. In the mean time, I have been accumulating parts but not much else other than inspecting the body progress on a bi-weekly basis. However, now that my summer projects are nearly complete, I will get back to work on 0042.


-
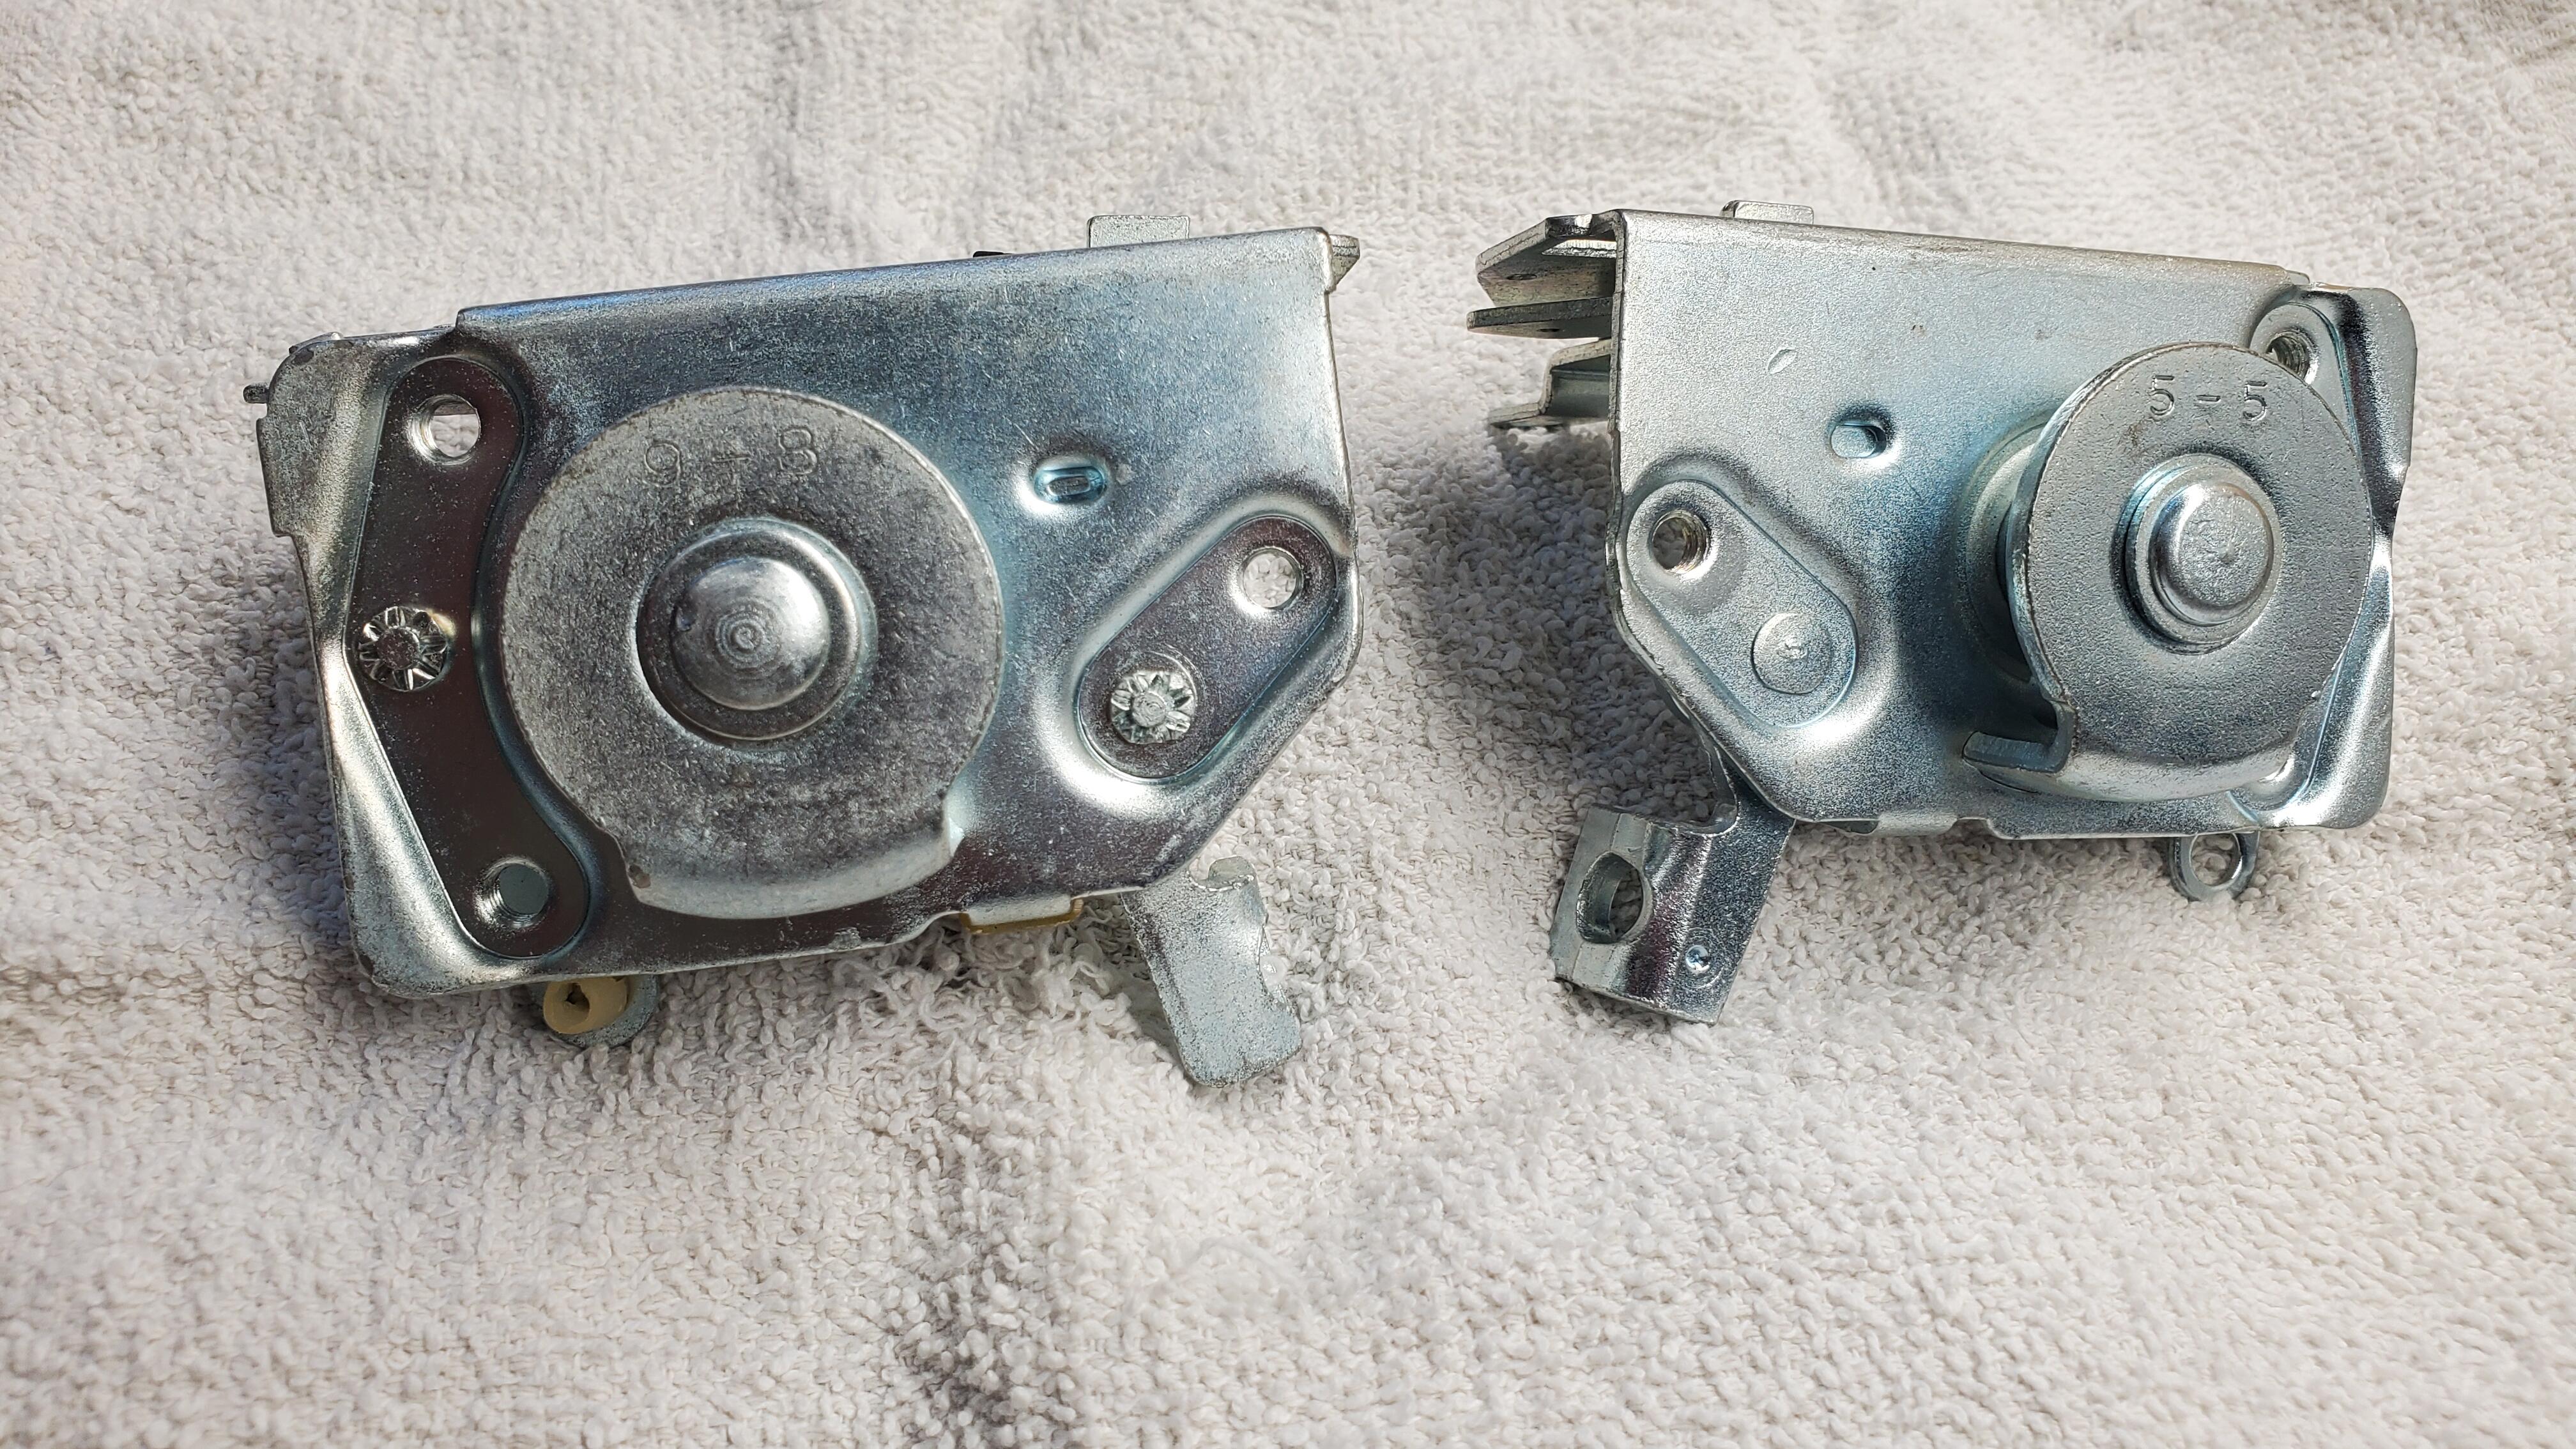
I have no clue what those are. Also, looks like you have 5 of them, which is an odd number.
-
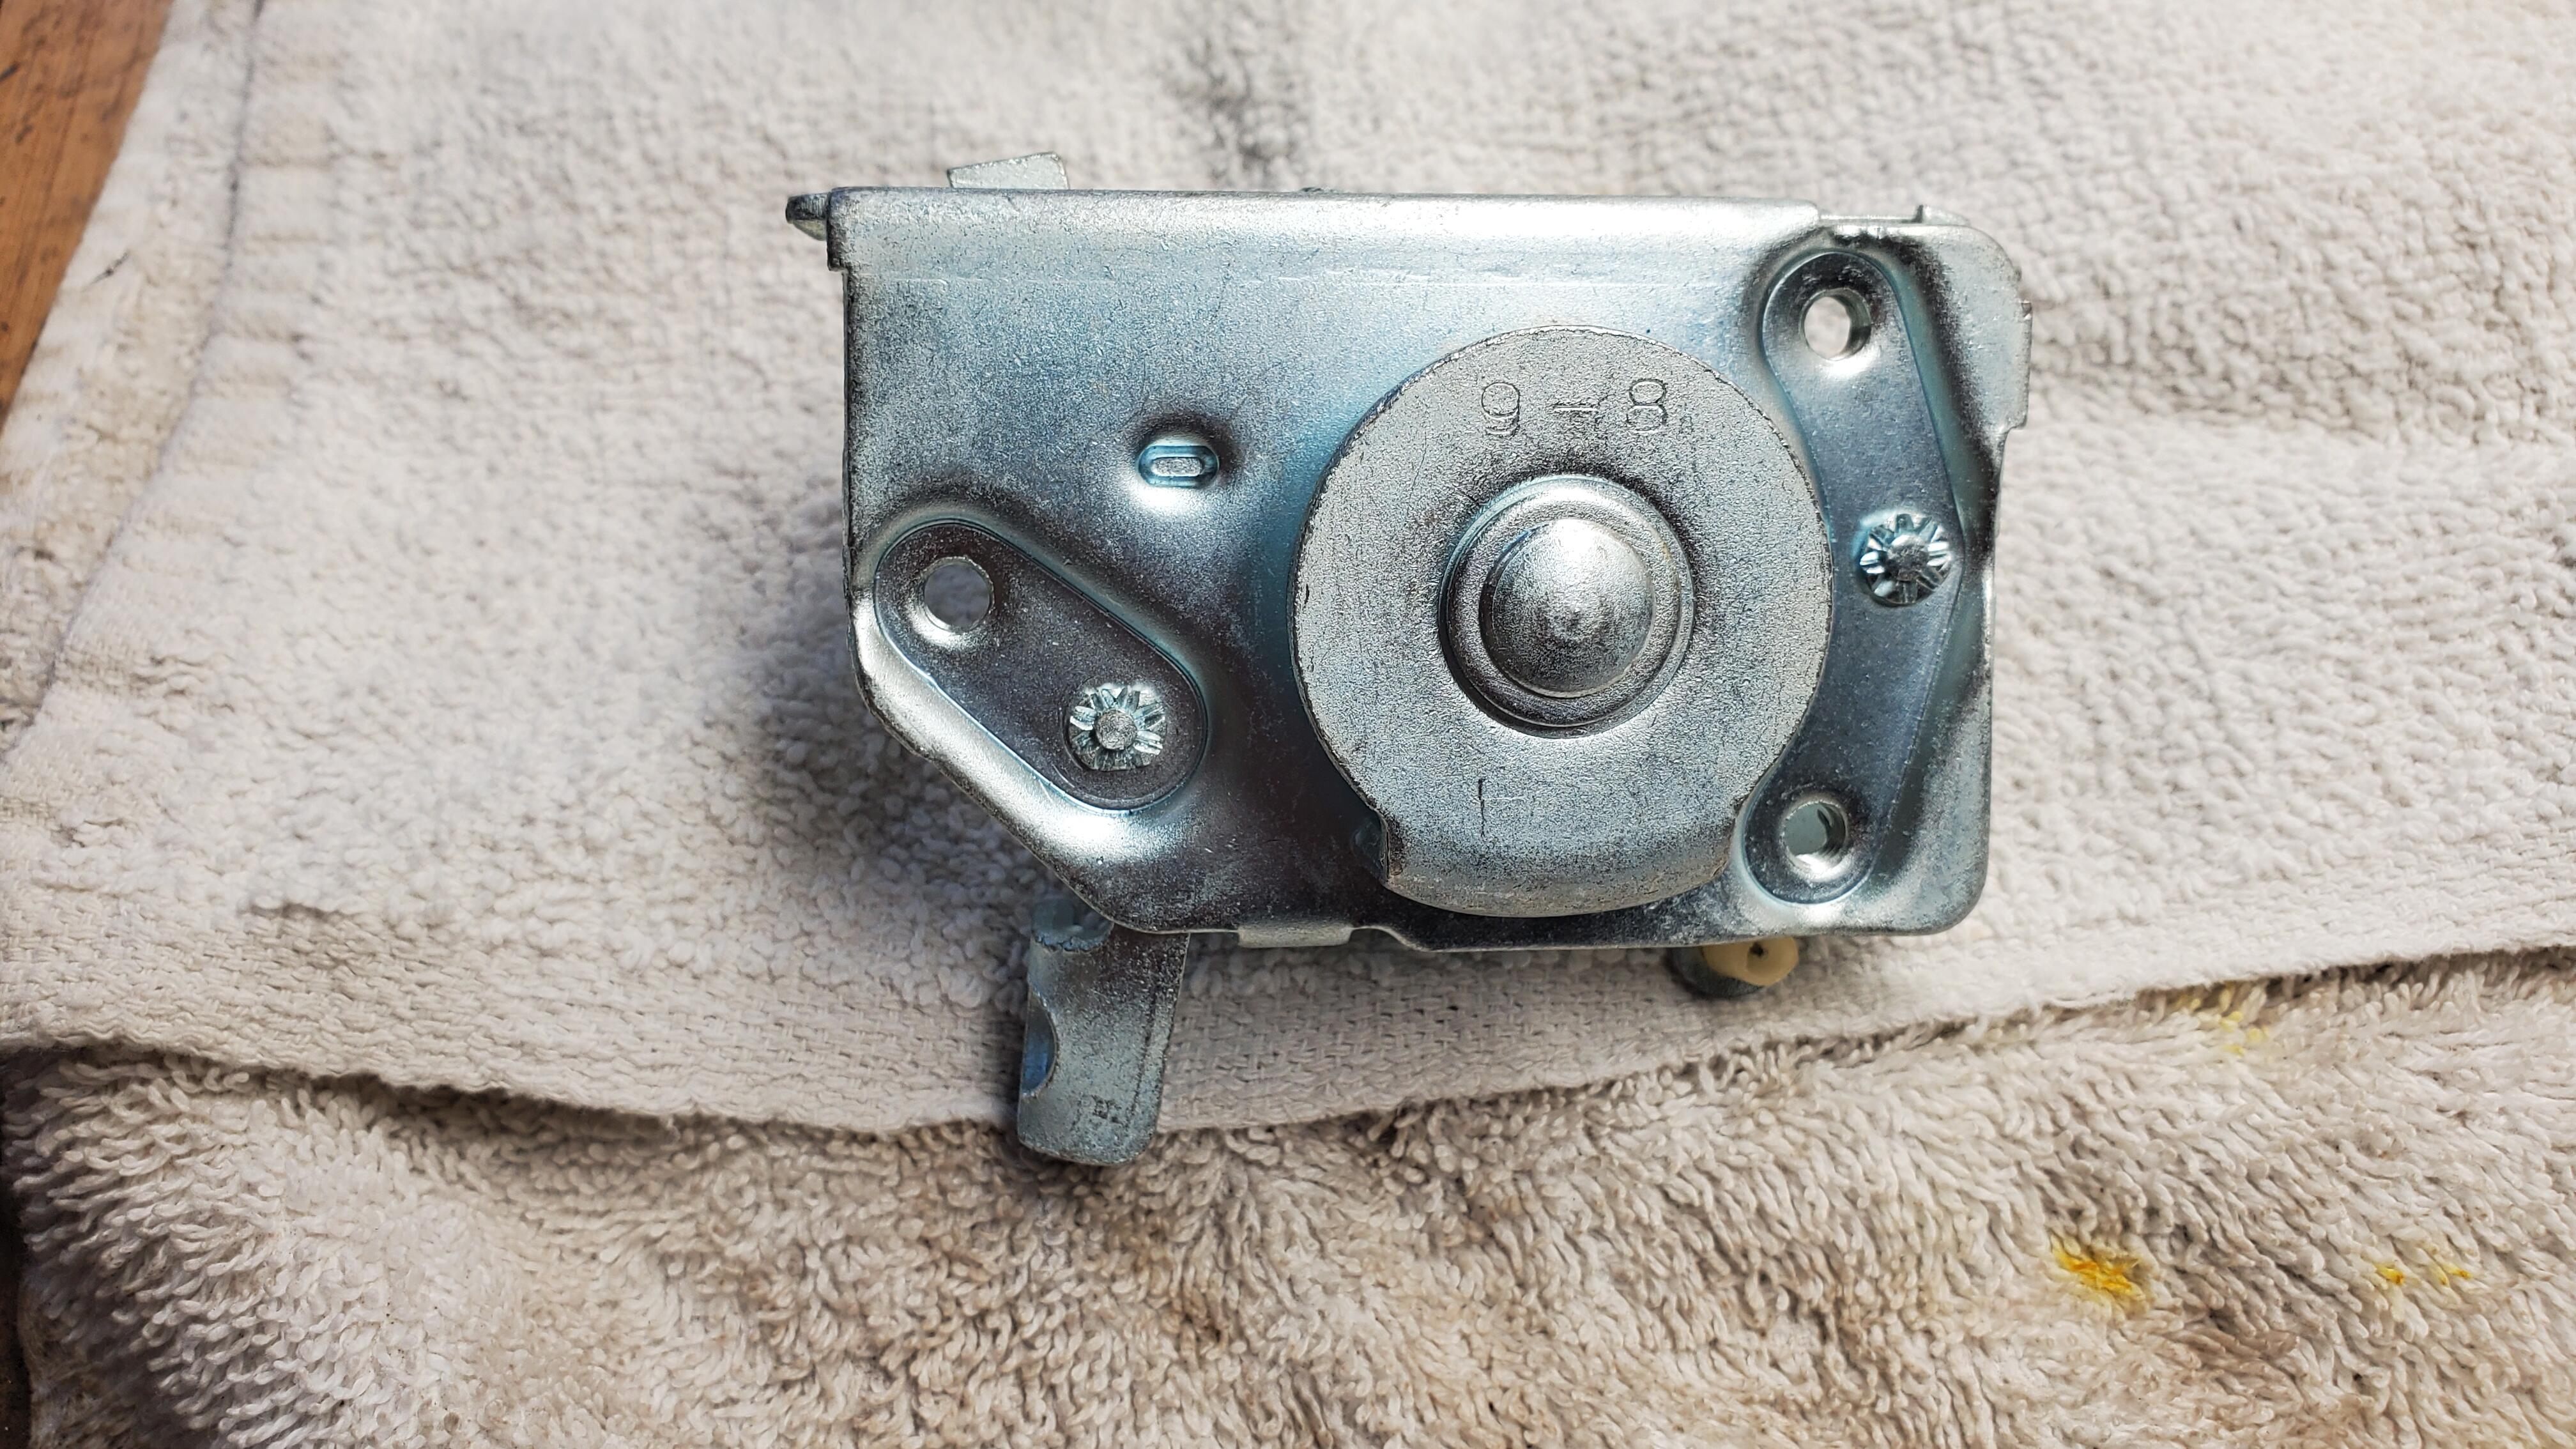
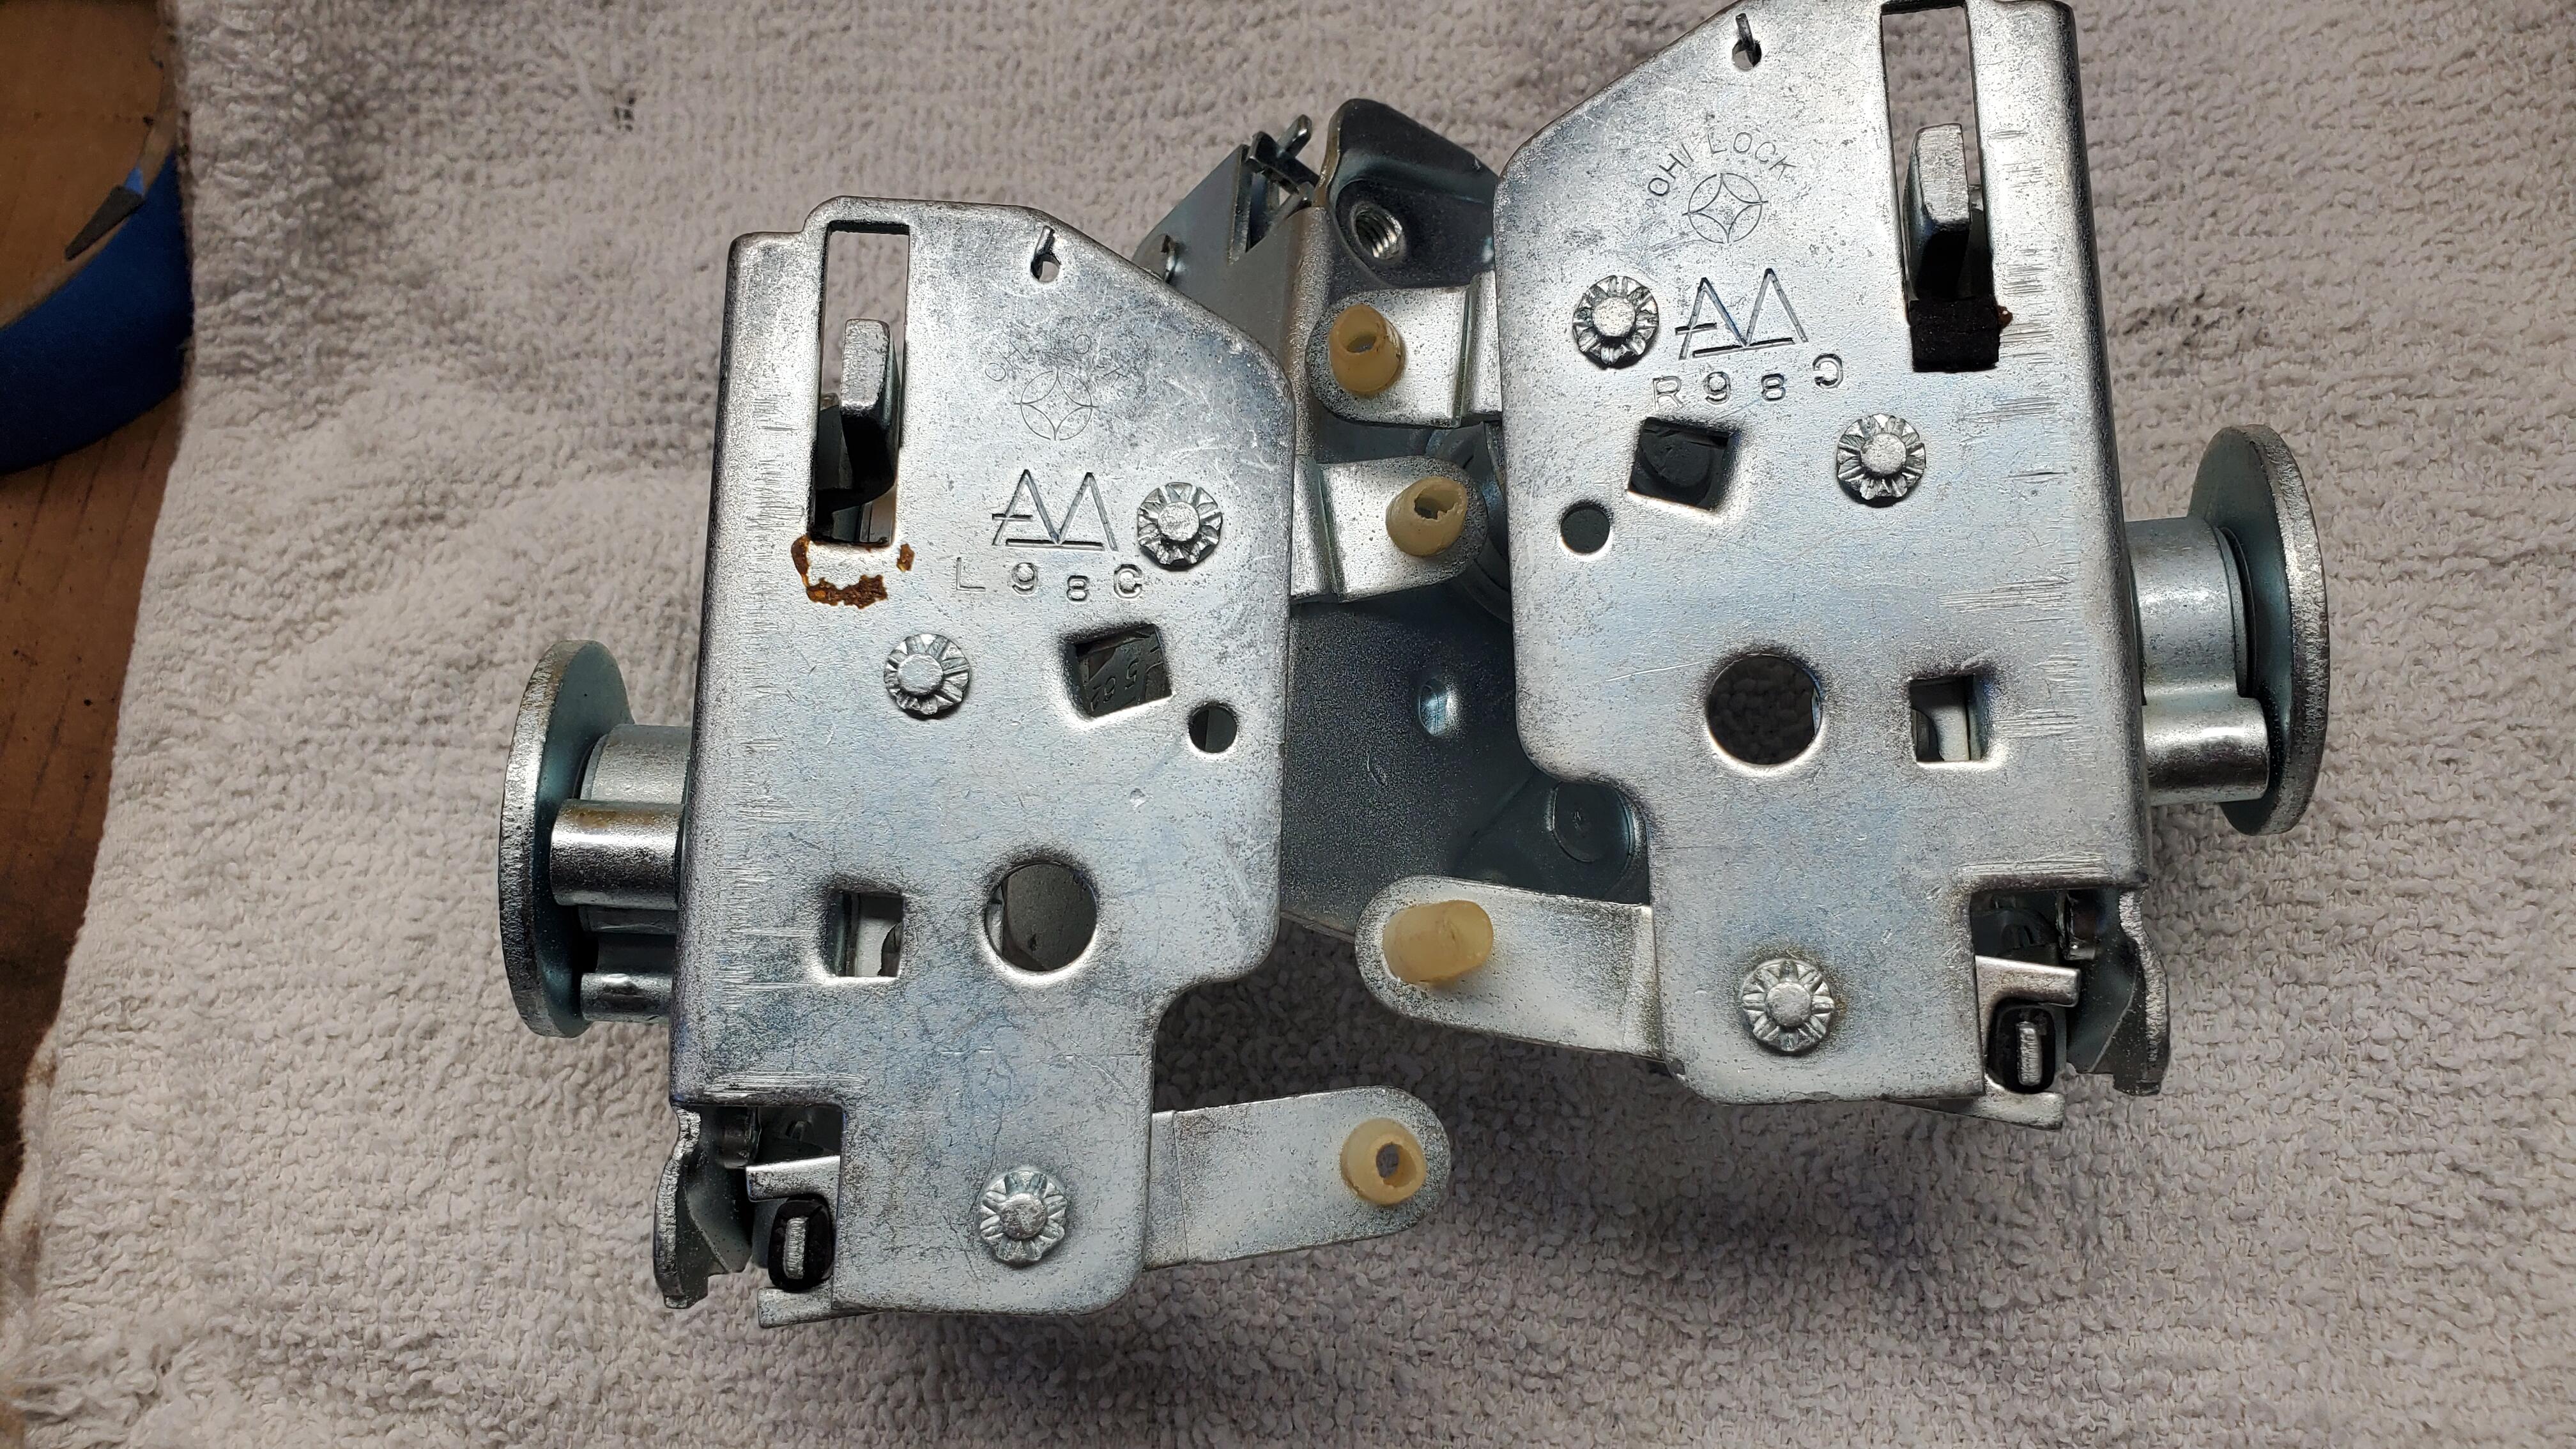
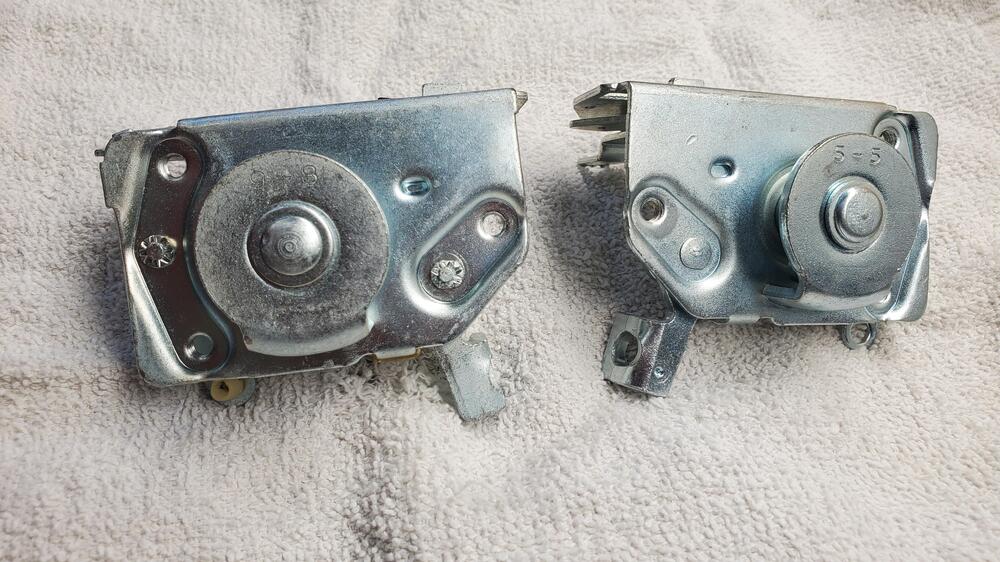
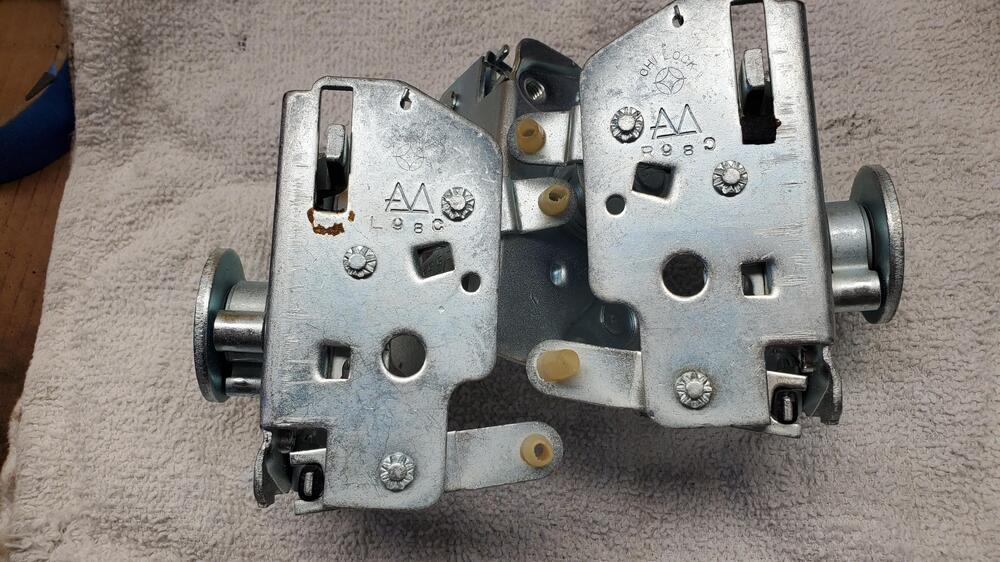
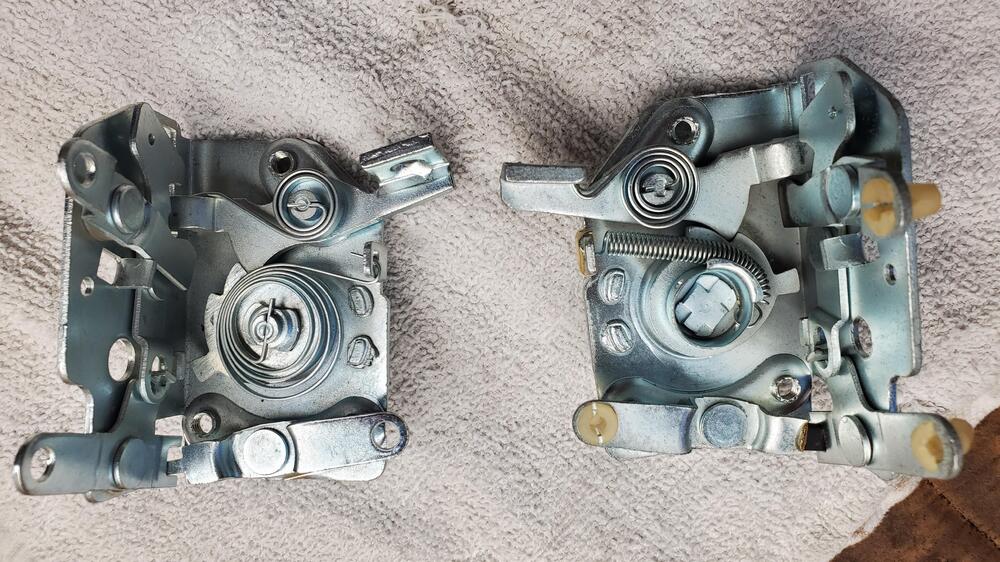
This is all great info regarding date codes. I had to check my parts on this as the drivers door on 00042 was obviously replaced, passenger door is original. Drivers door has a 5-5 date code, while passenger door is 9-8. Amazingly, I checked my stash and I actually have a 9-8 driver's latch. Guess I will swap those out so they both say 9-8 Last pic shows the two spring types


-
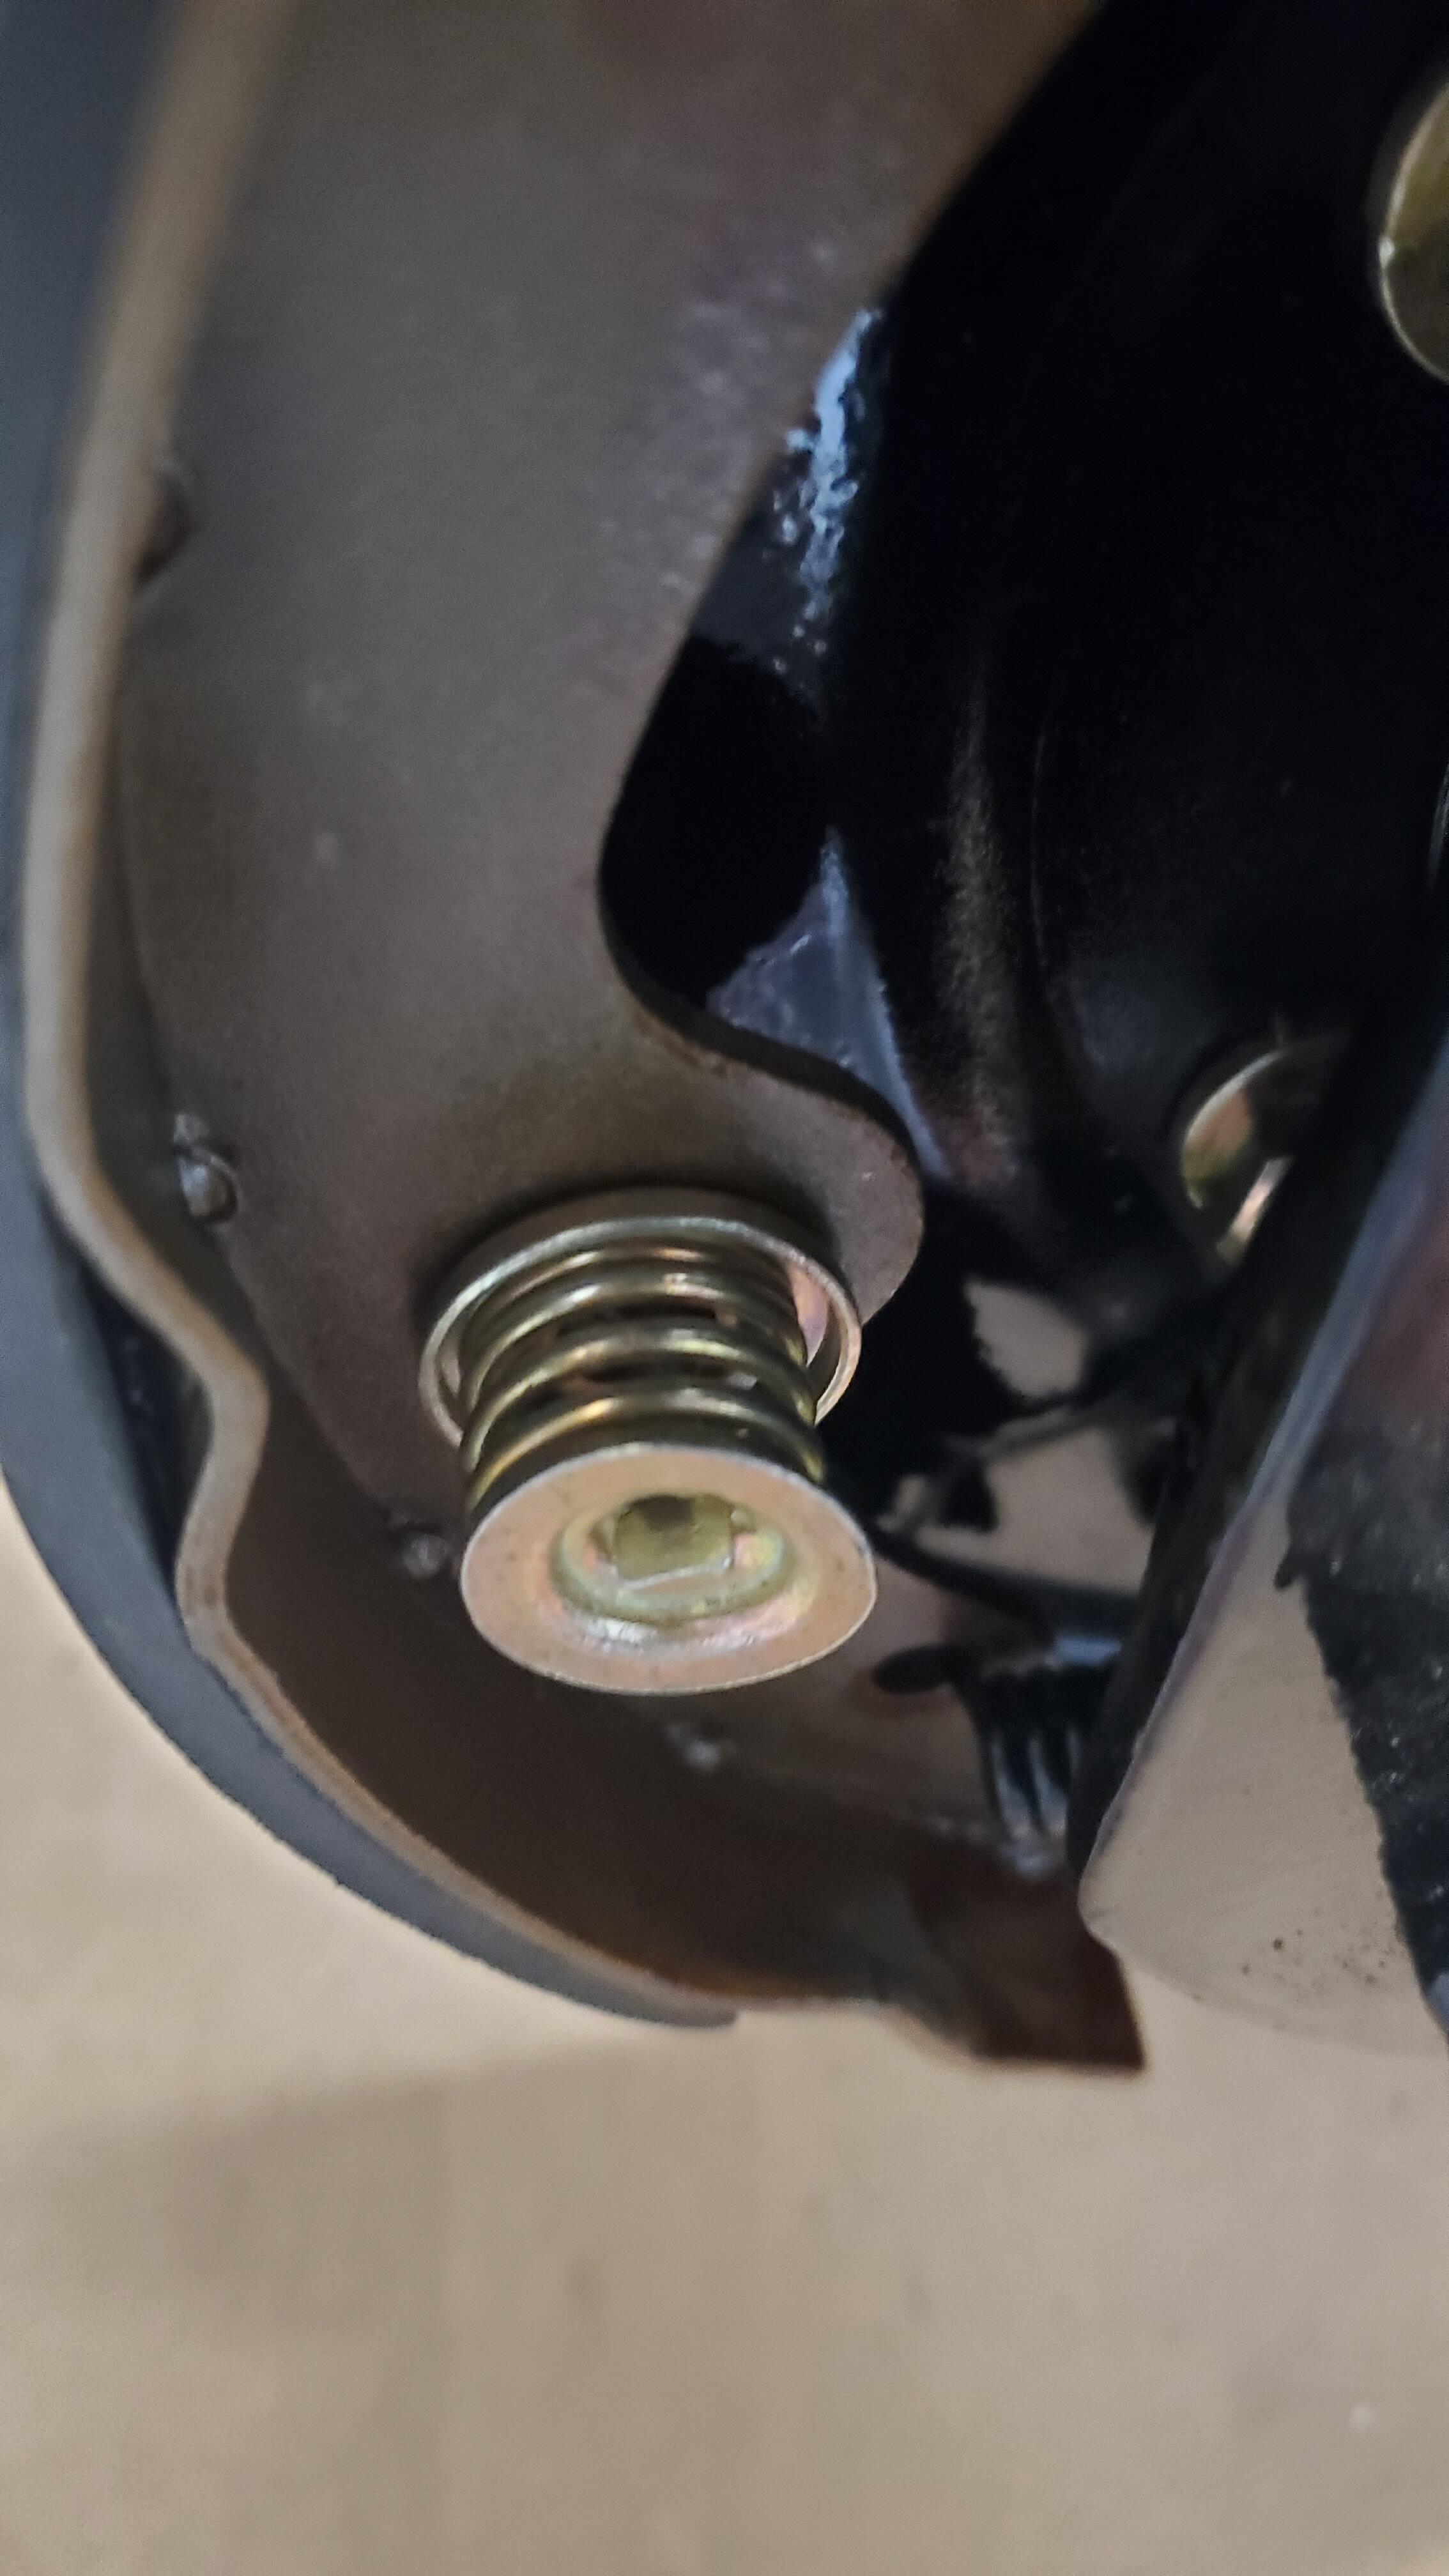
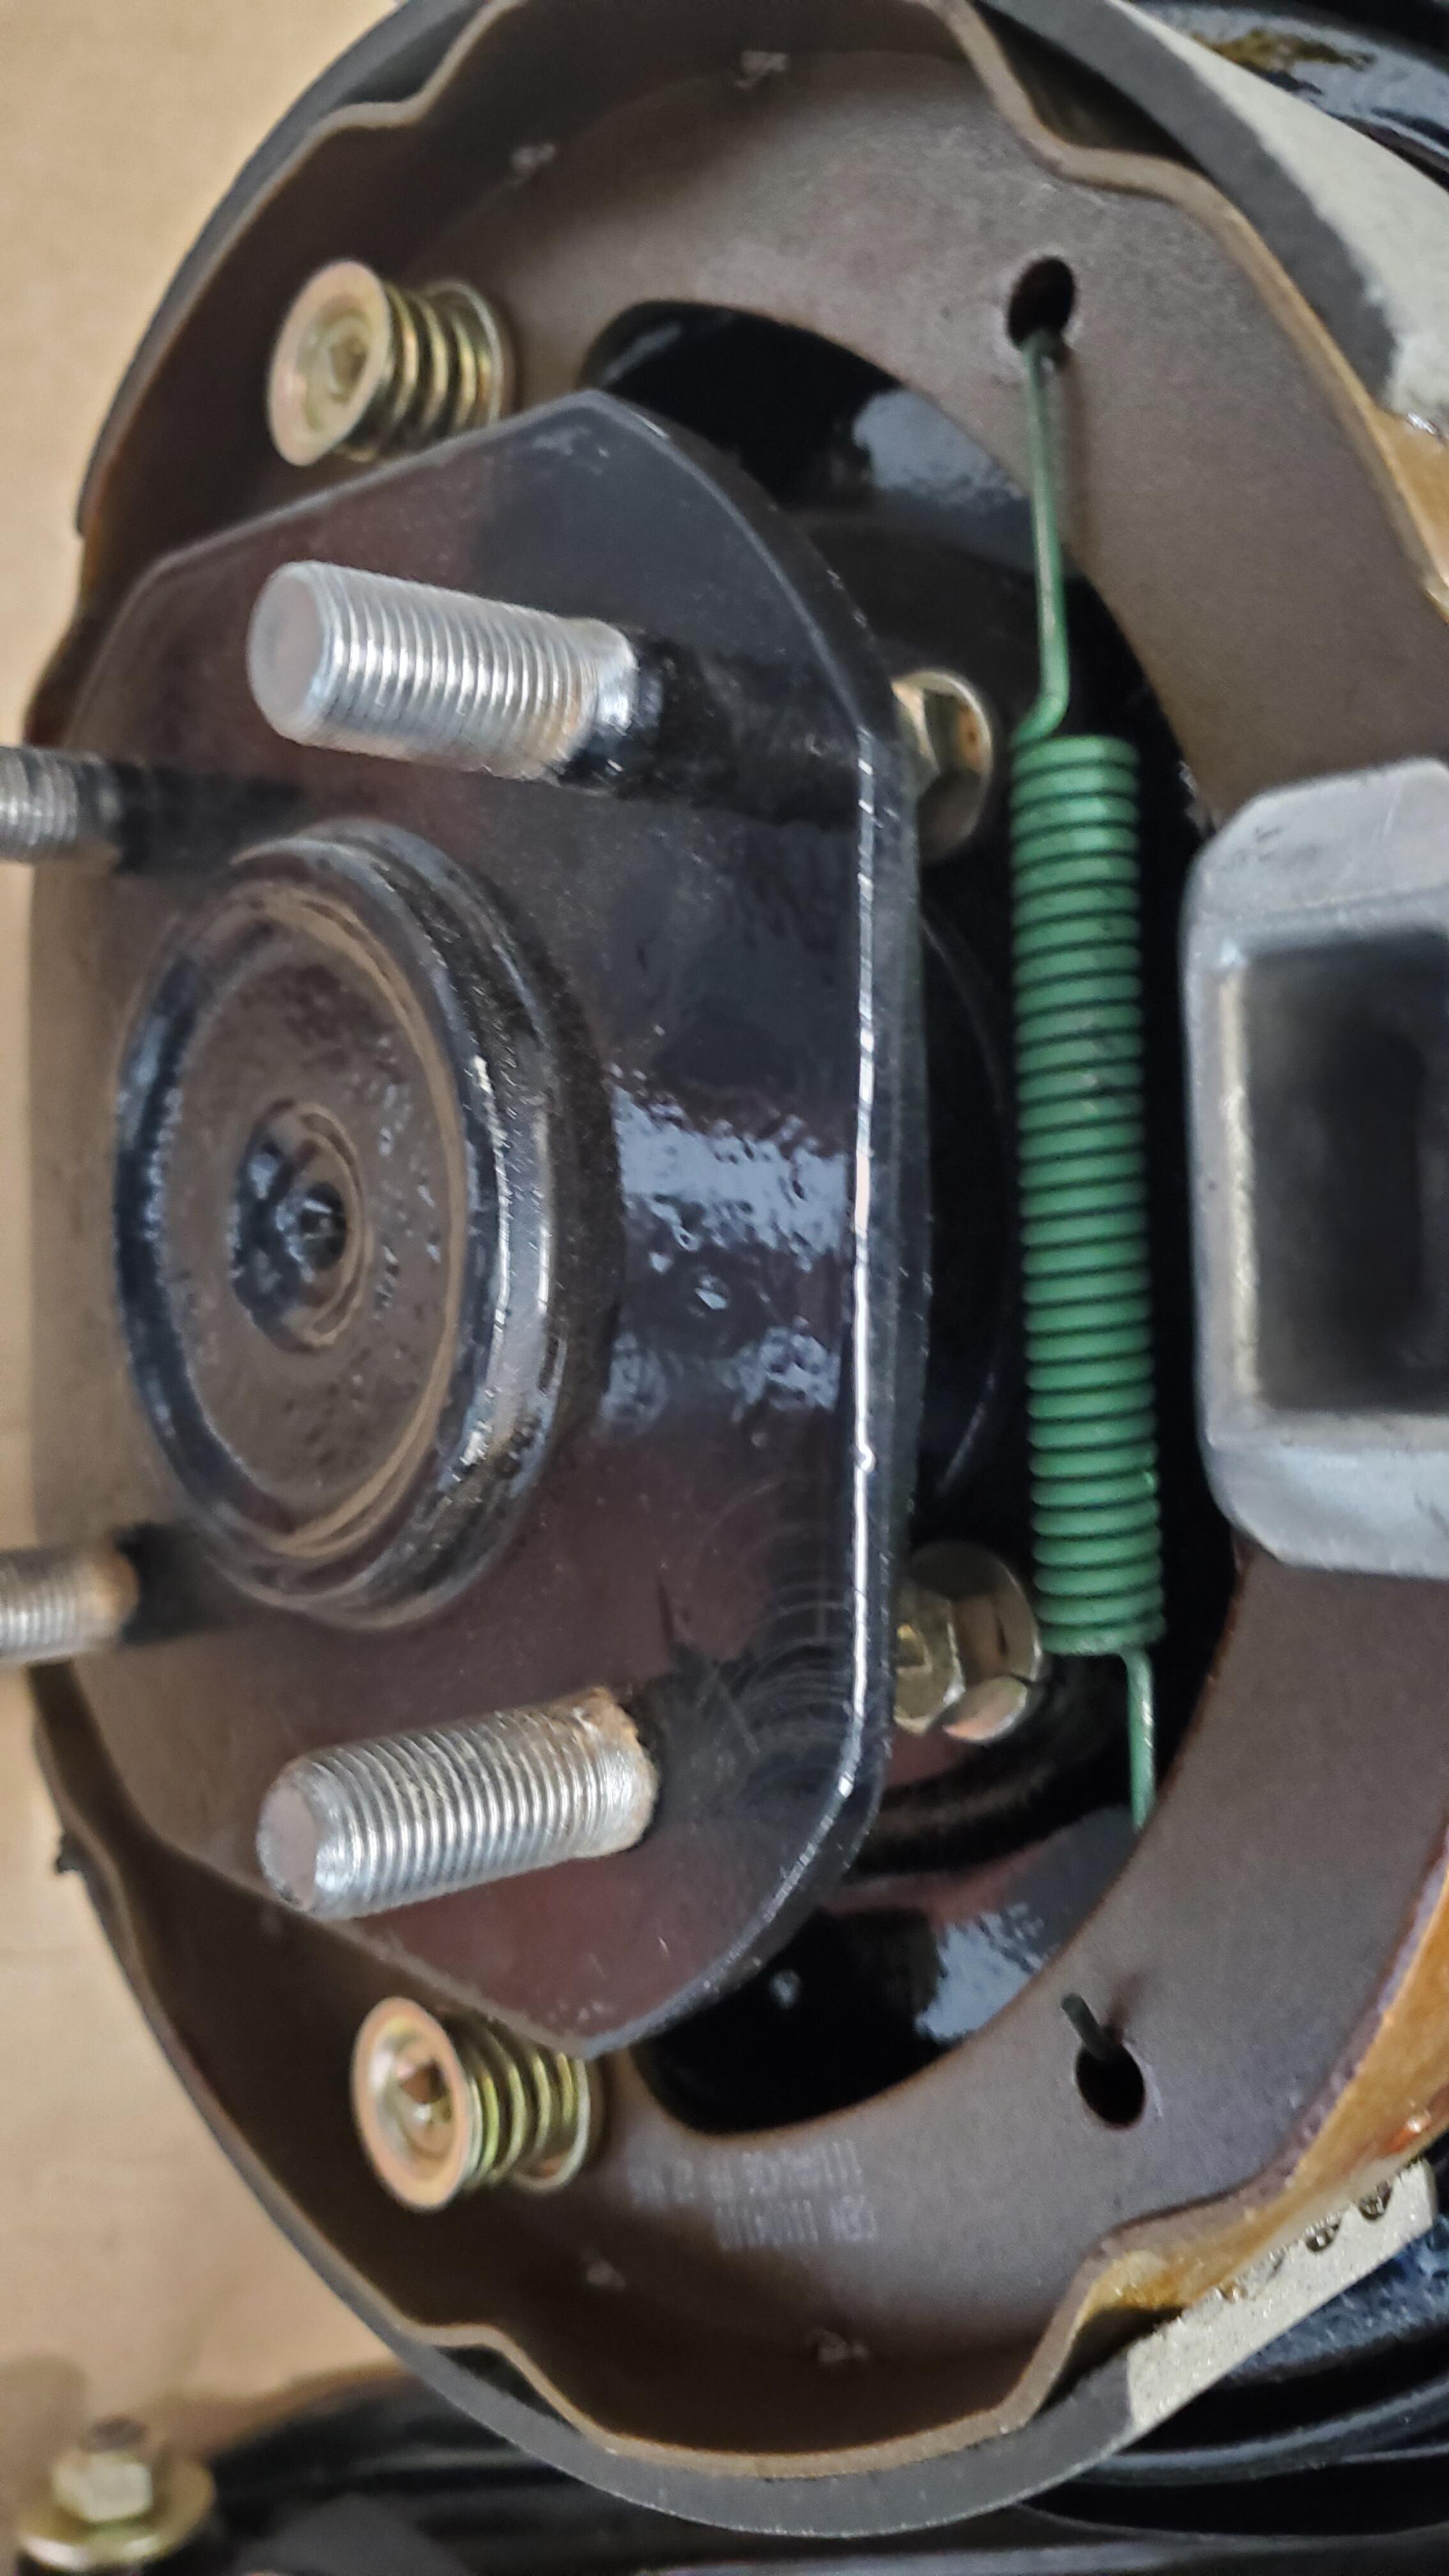
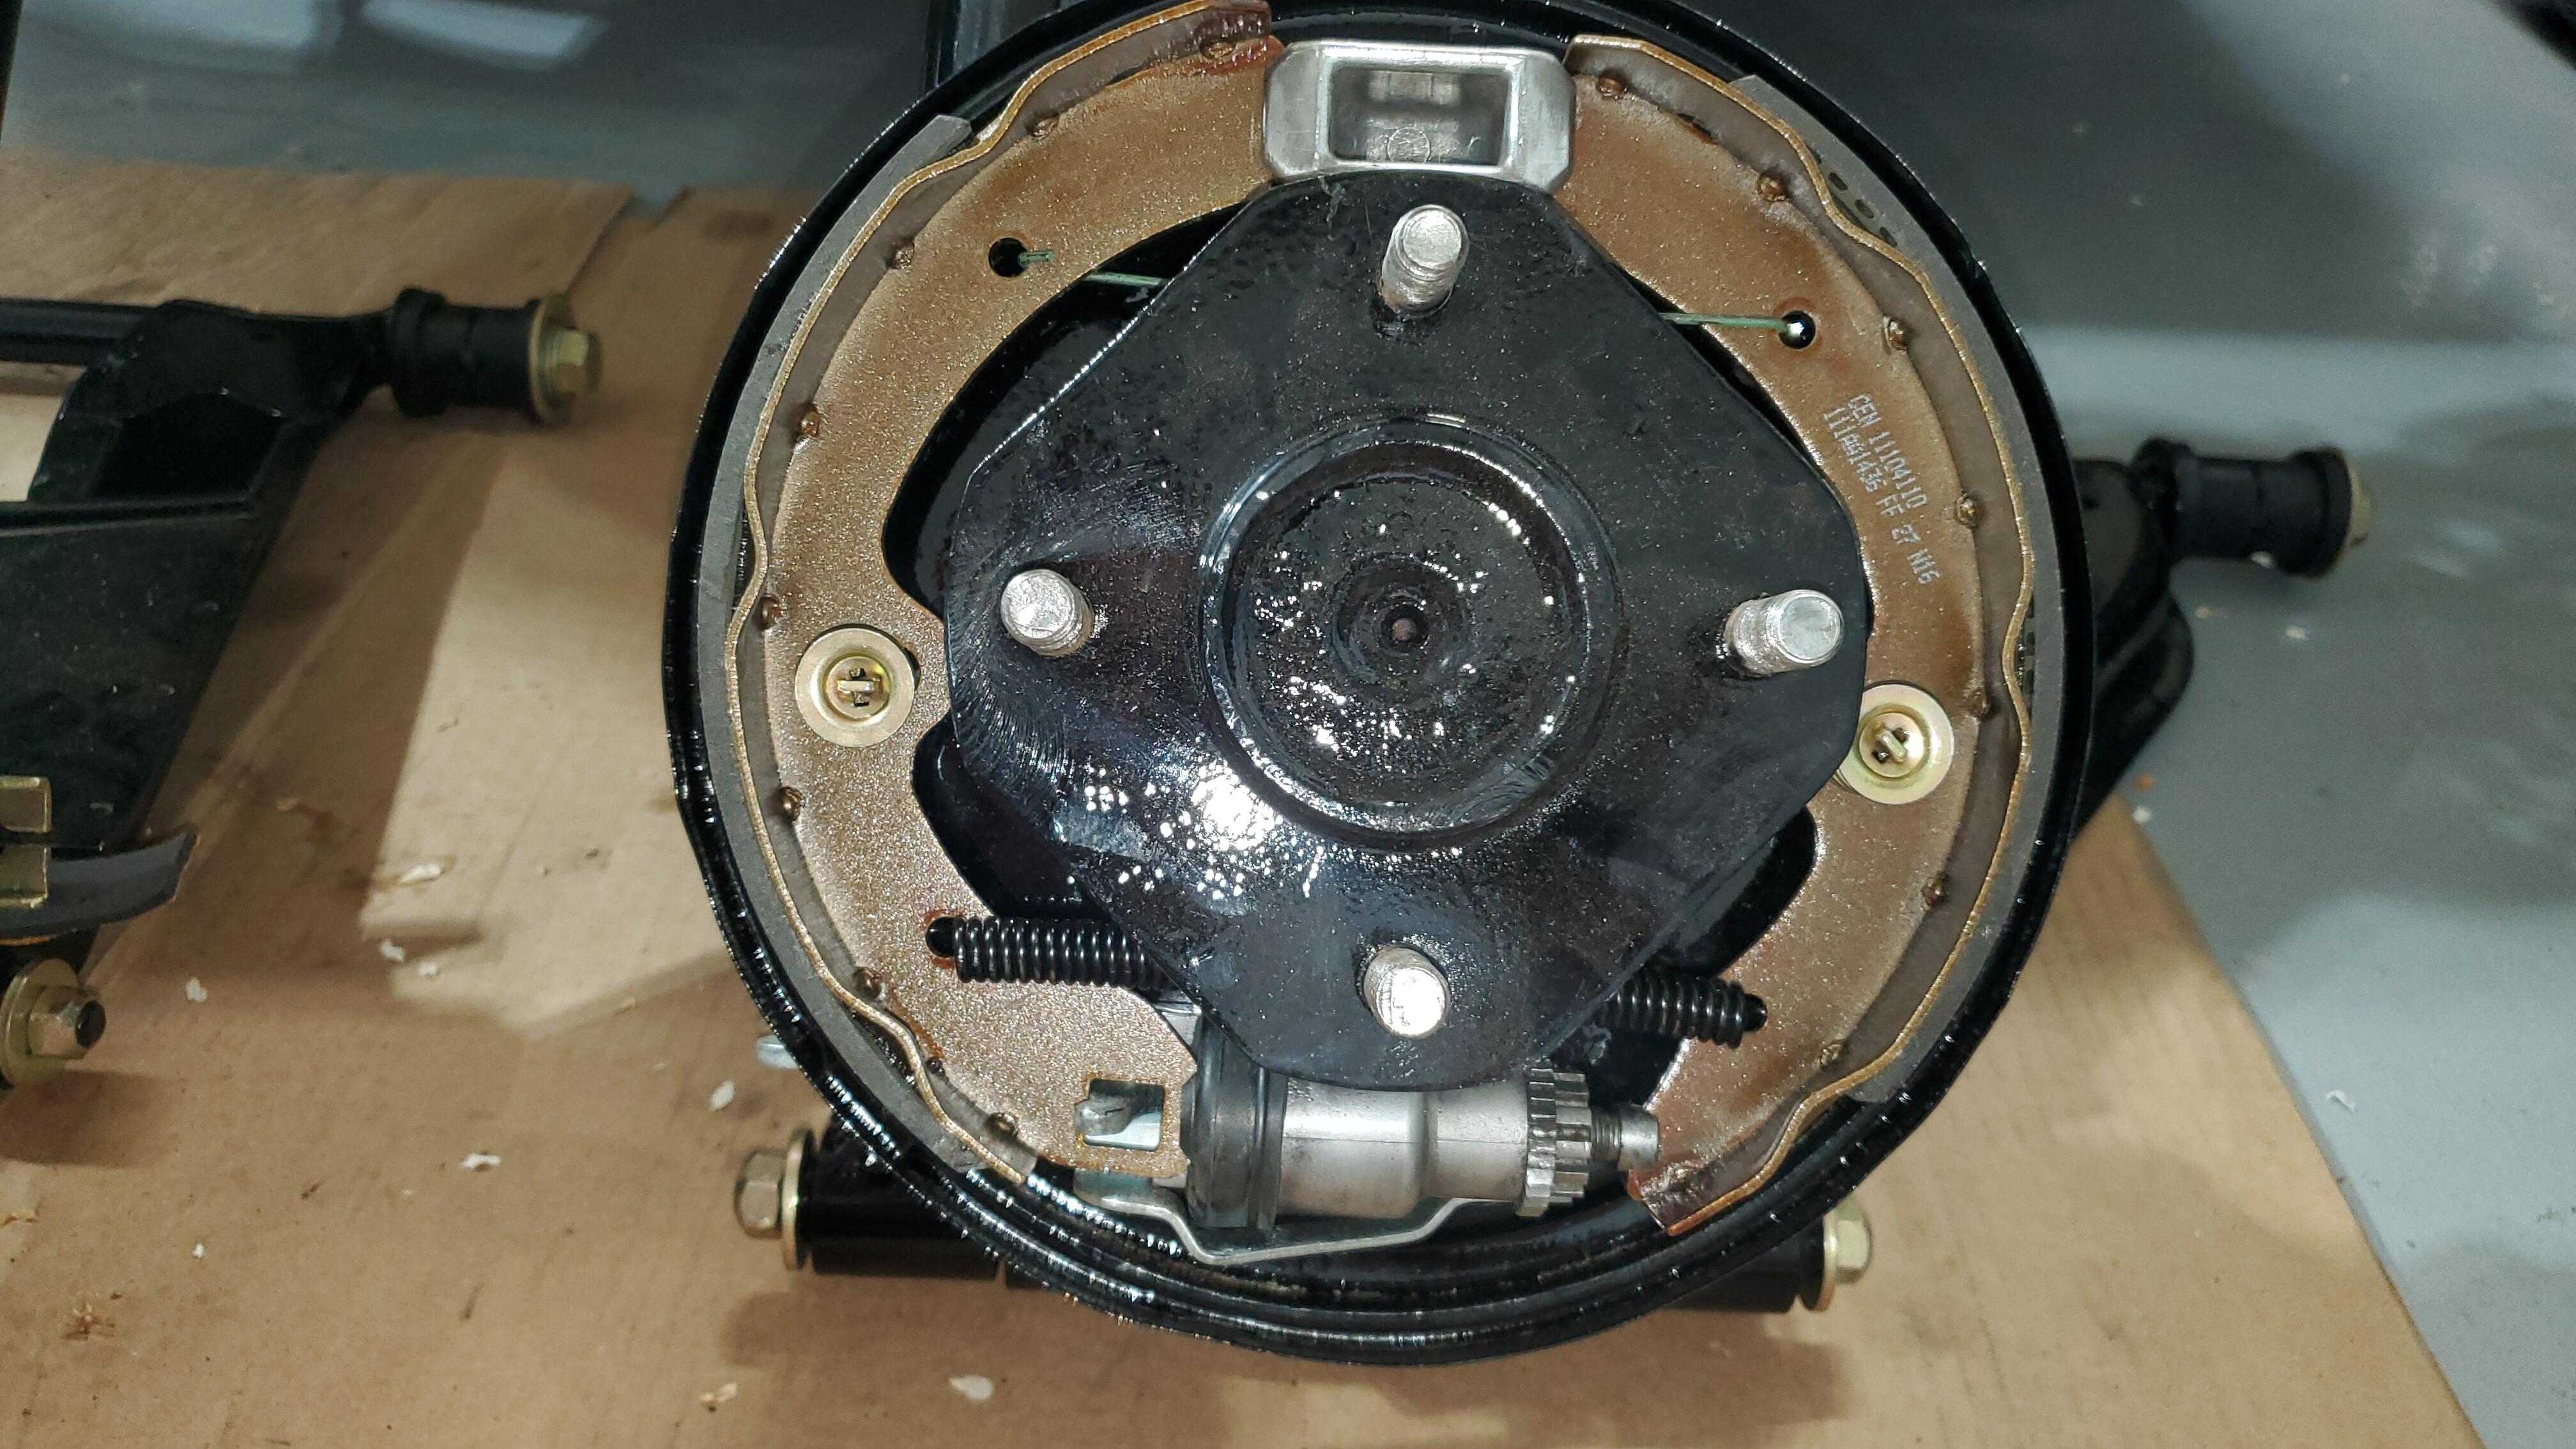
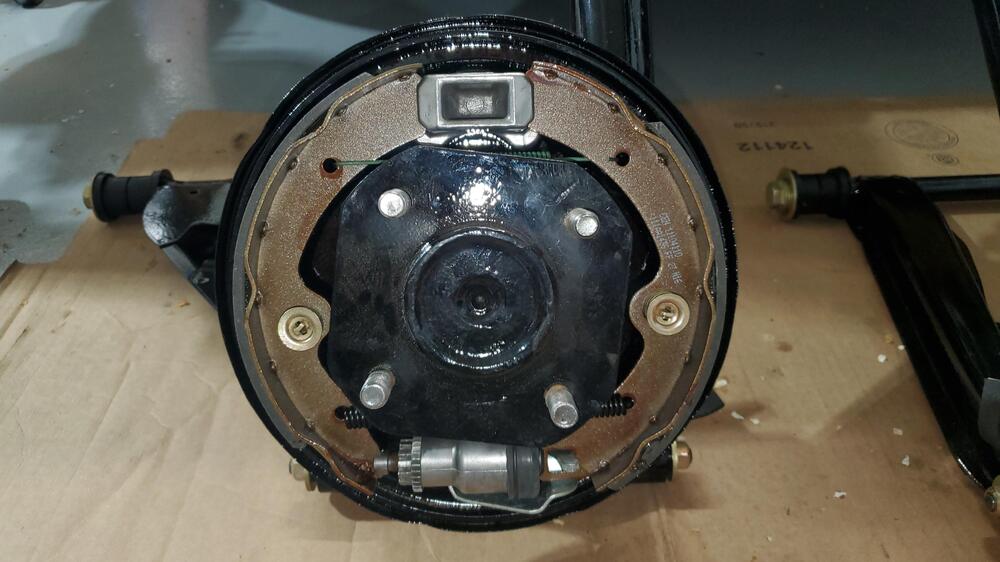
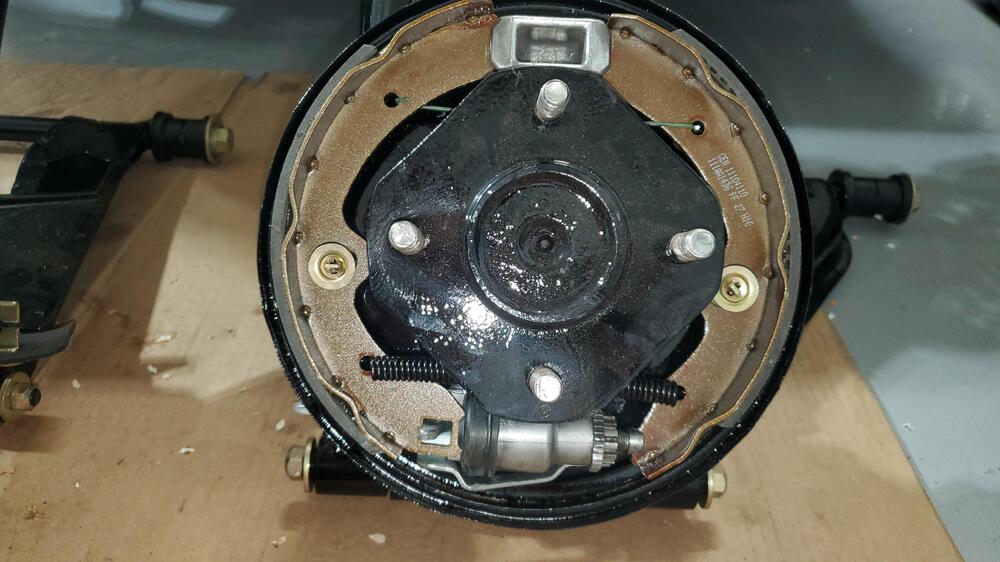
Brake shoe hold down retainer spring pics


-
When installing the door latches, make sure you use the correct length flathead. The lowest screw that attaches the latch is shorter than the others. If you put in the longer one in that position, the latch will hang up. Again, ask me how I know 🤣😝
-
Brake spring installation Rev 2.0. Thanks for the input @Captain Obvious
-
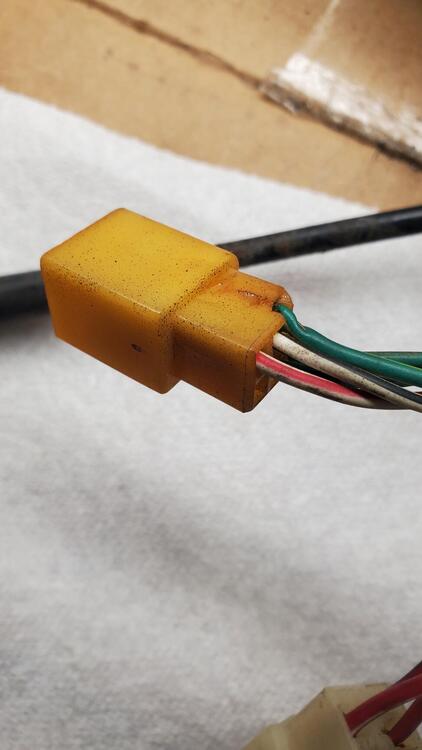
Regarding the spade connector on the black wire, I replaced the original with a new terminal. There is an earlier picture of this section that shows the original, although the cover is so dark that the terminal type is not clearly visible. Typically, I replace all terminals and their respective covers and most connector bodies on all of the harnesses.
-
Thanks for the picture on the spring installation. I will make sure to correct that.