blue 72
Free Member
-
Joined
-
Last visited
Everything posted by blue 72
-
 I had to piece mine together to get the quality components that I knew I wanted. Like beandip pointed out though, sometimes you don't know which parts you need until after the machine shop has checked everything out for you.
 -
You won't find much info beyond that really. You can try looking at the paint code sticker on the upper radiator support to see what color it was originally.
-
What do you mean when you say the flange length is too long? Is the front of the driveshaft lined up with the slip yoke on the rear of the transmission with the splines engaged but it isn't sliding in all the way?
-
Here's a link to a site that has diff ratios and a guide for how to identify early and late US spec 5 speed Z transmissions. http://geocities.com/inlinestroker/ratio.html
-
3 cars and a spare V8 puts me at 28. I guess I'm doing okay for a 25 year old guy. Nowhere near what my dad has though, at least 71 that I can think of while not counting any motors he has laying about (another 28). Another idea would be to calculate your combined amount of displacement. Mine'd be 1,229 cubic inches. I wonder if Joe has an allowance for air compressor pistons?
-
Nice find. A couple of Z parts places to get you started: Motorsport Auto Black Dragon Auto Too Intense Restoration Z Car Source
-
It would be quite difficult to try and title/register this particular vehicle in many other states. Whoever paid their $3550 is probably uninformed of any of these factors. Not all states are so lax with their smog laws. I lived in Arizona for a while, up until earlier this year, and went through the registration process there with my Z. Anything built after 1966 and registered in Maricopa and Pima counties must be smogged. Historic vehicle plates are given to any who carry collector vehicle insurance on the car, and are thus exempt to emissions testing as well.
-
That's amazing. I've driven past that spot literally thousands of times and didn't know its historical significance to Z'dom.
-
Problem is that someone will buy it not knowing much about Z's only to later find out that the previous owner was creative and happened to own a rivet gun.
-
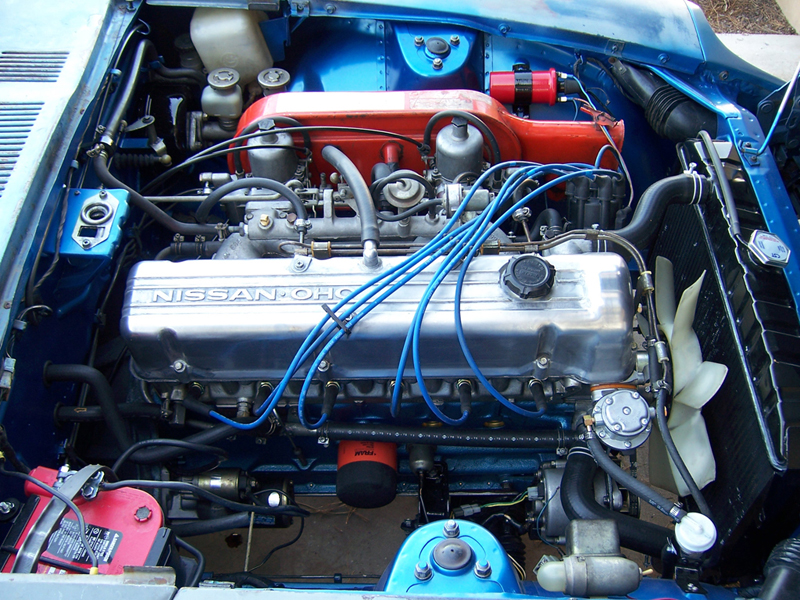
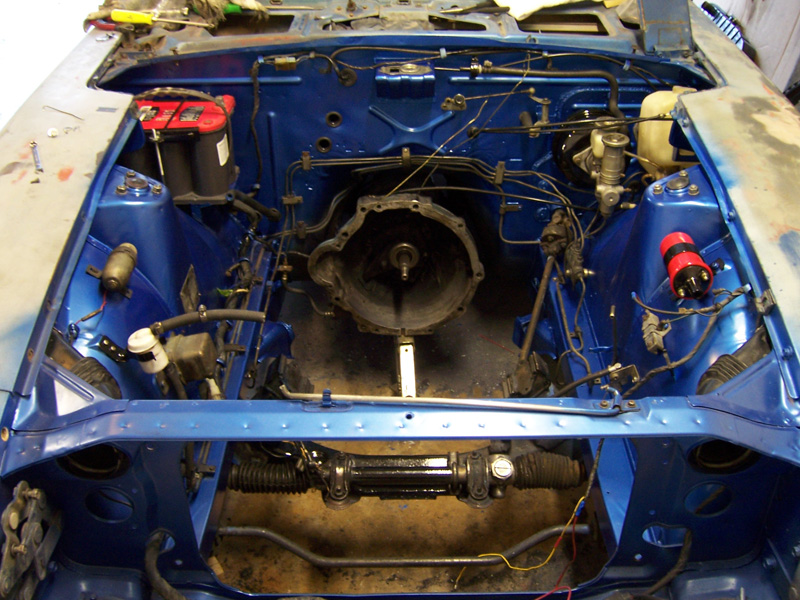
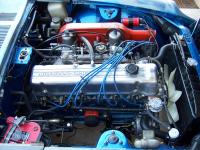
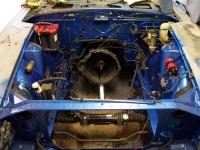
It all depends on how far gone it things really are and how far into the project you are willing to go. When I performed my engine swap I took the time to remove nearly every last thing and respray in sections over the course of a few days. I did all the work myself and had the original type acrylic enamel mixed up in spray cans. Cost me some paint, sandpaper, degreaser, POR-15, time and labor. For as cheap as a few hundred dollars in paint supplies it came out very nice I think. The attached pictures are the same engine bay before the engine swap and after. I also replaced many things with new, good used, and NOS parts and took the time to hand clean every last nut and bolt. That adds to the overall effect. I will tell you now that the corner behind the brake booster would be a very tough spot to paint without removing some of the surrounding lines and componentry.

-
You've got a lot of reading to do. Every last one of your questions has been answered either here or on Hybridz.org. There are many other sites on the 'net that can explain things very well and a few books pertaining to the subject at hand. As far as exterior parts, most everything is interchangeable on the S30 chassis. Some exceptions include doors, side window glass and taillight panels. Suspensions, interior, electronics, transmissions and rearends changed more radically over the evolution of the cars. Most popular engine swaps are Chevy small blocks, ford small blocks, Nissan RB 20,25,26,30 and SR20 plus the VG30 engines. That's all I'm going to help right now because you've got lots of reading and researching ahead of you still.
-
zbane pretty much answered it all. Just be especially careful of the rust and corrosion that will likely be on those old bolts, and reinstall them with some Anti-Seize after running a tap through the old threads to clear out any other leftover gunk. I've just recently installed a new valve cover gasket, but it was a cheapie cork style. I simply coated both sides with Gasgacinch, let it dry to tacky and installed. I haven't had any problem with uncoated valve cover gaskets made of more conventional gasket material though.
-
Unfortunately, mine spends most of its time outside in the driveway under a tree. At least now the birds have moved away for the winter, but I still have to put a tarp over it any time it rains or snows.
-
From my '72: Pizza toppings, miscellaneous pvc piping, combination wrench/screwdriver, mysterious pink substance that would not dissolve with any known cleaner, pizza receipt, various screws, fasteners, kid's play jewelry, expired insurance papers. There was more, including one piece of the original carpet, but none of the rest was very memorable.
-
I recently had my front cover off (let the chain slip without the tool in place) and took a picture or two. This shows the tool in between the chain, but not pushed down all the way to the lower chain sprocket yet. You want to make sure it is pushed down all the way, or else the tensioner is still likely to come out (like you can see in the photo). When I had everything reassembled and timed correctly I shoved MSA's little tool all the way down in the middle, between the chains. This kept enough tension on the chain and separated them enough that the tensioner couldn't slip out of its holder again. I made sure to leave it in place until the cam sprocket was bolted on and tightened down this time.
-
Hmmm.... I can't tell from looking at an online photo of the float, or from your pictures exactly how the float sits on the pin. There is a small note on the bottom of the page EF-28 in the 1974 FSM that says "Note: The float and needle valve parts cannot be removed." Since replacement floats are available, there must be some way of replacing them. I'm wondering if there is a possibility that the pin stays in place and the float comes off some other way, but by the look of the photos that would seem impossible without mangling the float beyond recognition. Otherwise I'd agree with geezer that it's got some wear groove, or it's slightly bent somewhere along its length. Does the pin wiggle back and forth at all? I'm afraid I can't be of much more help beyond that, and these carbs aren't frequently dealt with.
-
Whoops, guess I got the wrong information. Curse you not entirely 100% accurate internet. Were these boxes Nissan Comp only, or standard on some overseas models?
-
Does this post help? http://www.classiczcars.com/forums/showthread.php?t=32212 If you need any other help, I've got pictures of my FS5C71A taken both inside and out.
-
I had the same problem in my '72 a while back. Thought you might be able to glean something from my story. My clog was self inflicted as I'd dropped a piece of duct tape in the tank and hadn't bothered fishing it out. The adhesive disolved and the individual fibers sloshed around forming little balls of fuzz that would occasionally plug my fuel line. I, of course, didn't know this at first and wondered what was causing my car to suddenly die at random intervals. I tried the same stuff, new fuel filter, swapped fuel pumps, etc... I finally narrowed it down to either an obstruction at the tank end, or in the hard line between tank and fuel filter. I tried blowing compressed air through the hard line from the back to the front, and that solved the problem for a few days, but eventually another little piece of fuzz clogged it up again. If it stopped running, then all I had to do was pull off to the side of the road, unscrew the hose from the intake side of the filter, blow on it to clear the obstruction then reattach it. Needless to say it wasn't the best solution. Finally I got the car up in the air to take care of the problem once and for all. I had already had the tank out in the past, so I knew it wasn't rusty inside. I took off the gas cap (to relieve pressure) and blew compressed air through the hard line from the front then drained the tank. I replaced the drain plug and filled the tank up with the same gas, but this time I strained it through a rag. This only got some of the fuzz so I did it a second time. I made sure to blow some more air through the line to swirl and mix the gas throuroughly. When I drained and filled the second time I got even more fuzz, and two big fuzzballs which stayed behind in my plastic gas can and had to be fished out with a coat hanger. Expensive lesson to learn, don't let stuff fall in your tank, and if you do then fish it out immediately.
-
If you want do do it right, then you will replace all of the rusty metal that is too far gone to be of any use as a structural support. Weld in new metal in its place, then POR-15 over that and you will be set for a very long time.
-
Silvia CSP311. I'd love to buy the 510 from my dad, as he hasn't done anything to it in the past 5 years or so he's owned it. I also wouldn't mind a few others such as the 810 2 door, or an SR-20 powered roadster, perhaps a Prince Skyline too.
-
Yes, more pictures please.
-
Either the brake system needs to be bled, or I'd check the reaction disk. There could be other causes, but those are probably the most likely.
-
I had that exact same problem in my '72, and mine turned out to be the distributor.
-
My Z came with some droopy aftermarket mirrors, and I had to weld the extra holes shut and pound that area of the door straight again. The original side mirror I snagged from a '71 in a junkyard was easy to put on after that. Hold it in the left hand and fish the nut that holds it on from the inside with the right hand.