zKars
Supporting Member
-
Joined
-
Last visited
Everything posted by zKars
-
That’s excellent feedback. Good to know that check valves are a problem too. \Sorry I mistook it for an OEM. I’ve never dug one out of the body. With those stamped in valves, how did you get it stay in after you removed it?
-
Exedy has yet to disappoint. Definitely my goto.
-
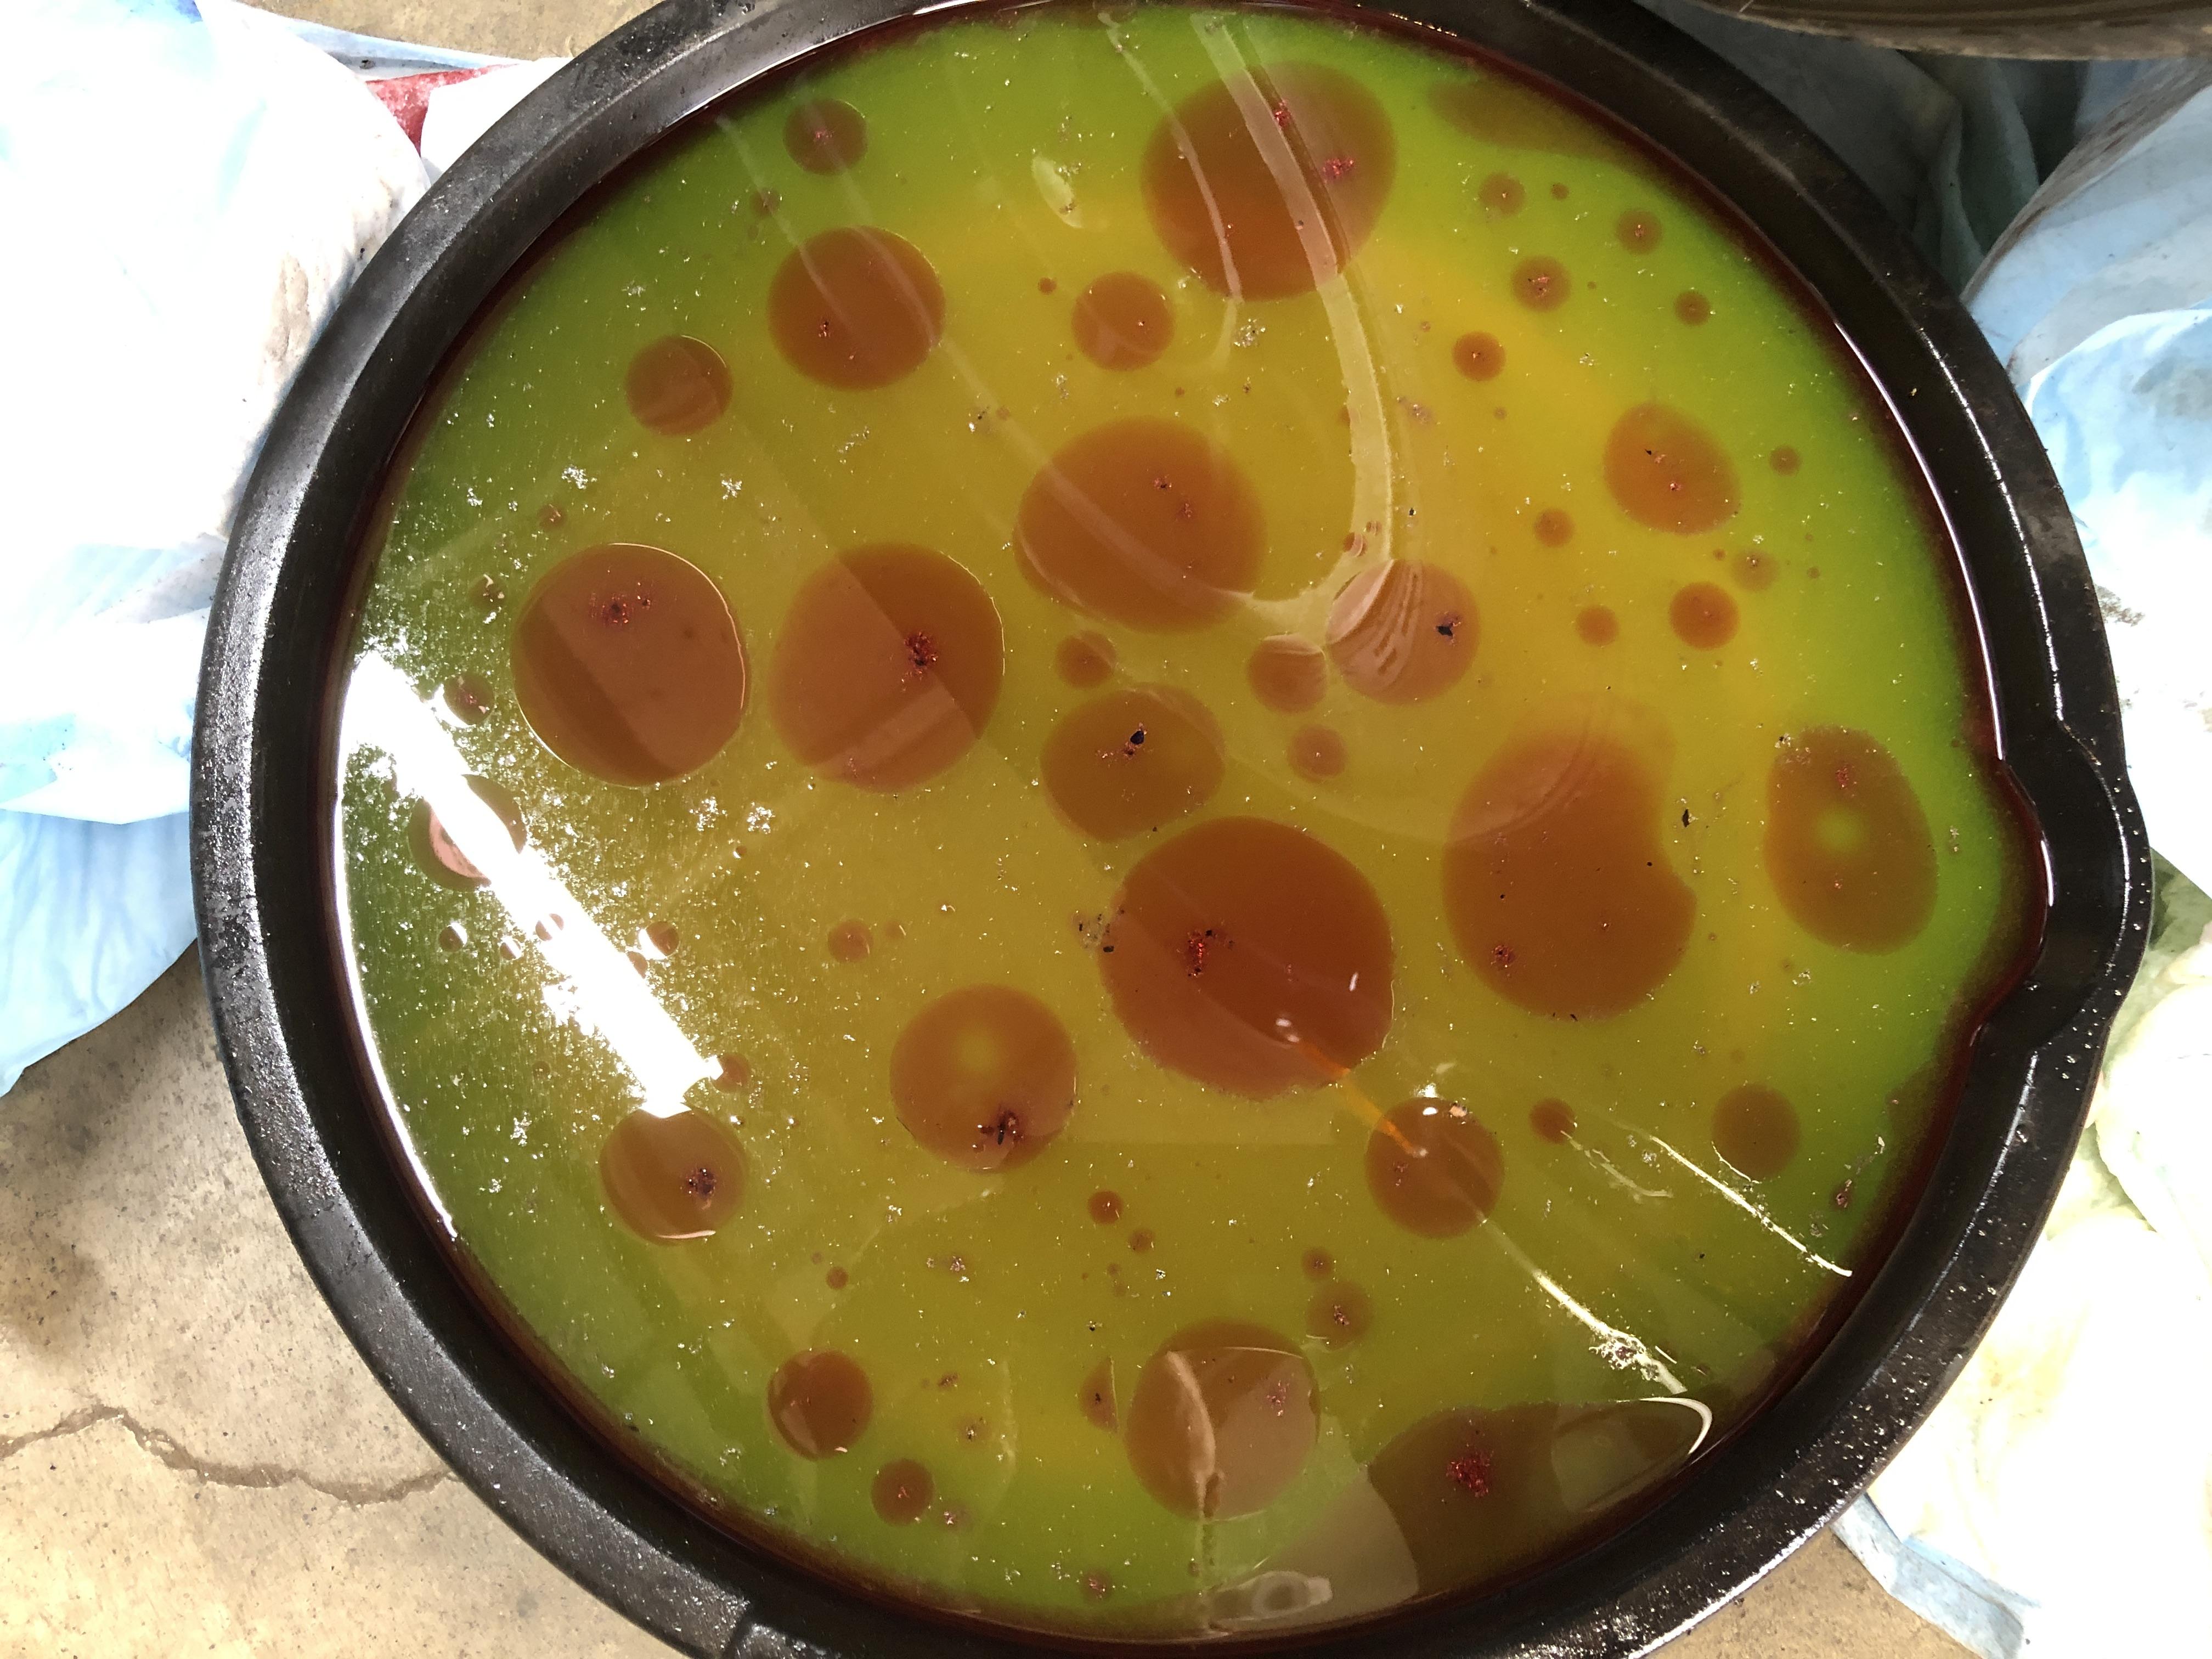
Well glad we had some fun. Thanks for the contributions. It was just antifreeze and ATF. I hoped the relative rarity of automatics in Z’s might make this a bit more of a puzzle. It was the first auto equipped Z I’ve actually done more work on then just yank the auto trans and recycle it. Spent a fair amount of time swapping rad’s in this late 71. This involved the joy of removing and replacing the auto cooler lines so the inevitable dribbling of ATF into my coolant recovery tray resulted. The pattern was interesting and a bit artsy so I had to take a couple of pics. Learned alot about the thread specs on the stock hard lines and the rad fittings. AN dash 6 thread on the rad was interesting realization. The hard lines and soft lines are a very curious mix of metric fittings. The hard lines are 5/16 or 8mm. Glad no one went to the blood and coolant guess..... yuch.....
-
That’s something I haven’t seen before. That’s an OEM check valve isn’t it? If you poke the valve disk, can you get that disk to reseat or is it deformed and stuck like that?
-
Was there reason to believe it was giving problems before? Is it new?
-
Just for grins, I checked a new equivalent Spectra pump for a 510 that I have in stock. Popped it’s cap and it’s assembled right. I just put an electric pump in this Z, so I’m going to get the owner to run it with the fuse pulled for as long as he can stand it, and let the “fixed” mechanical run and see if it quits again. Easy to get back on the road if it does with a simple fuse insertion. At this point, knowing this pump can run at full pressure and flowrate after having failed, the only other failure mode might be heat related where maybe the check valve flaps stop sealing well after a period of time, then re-form and work again after they cool off?? The main diaphragm is just fine,
-
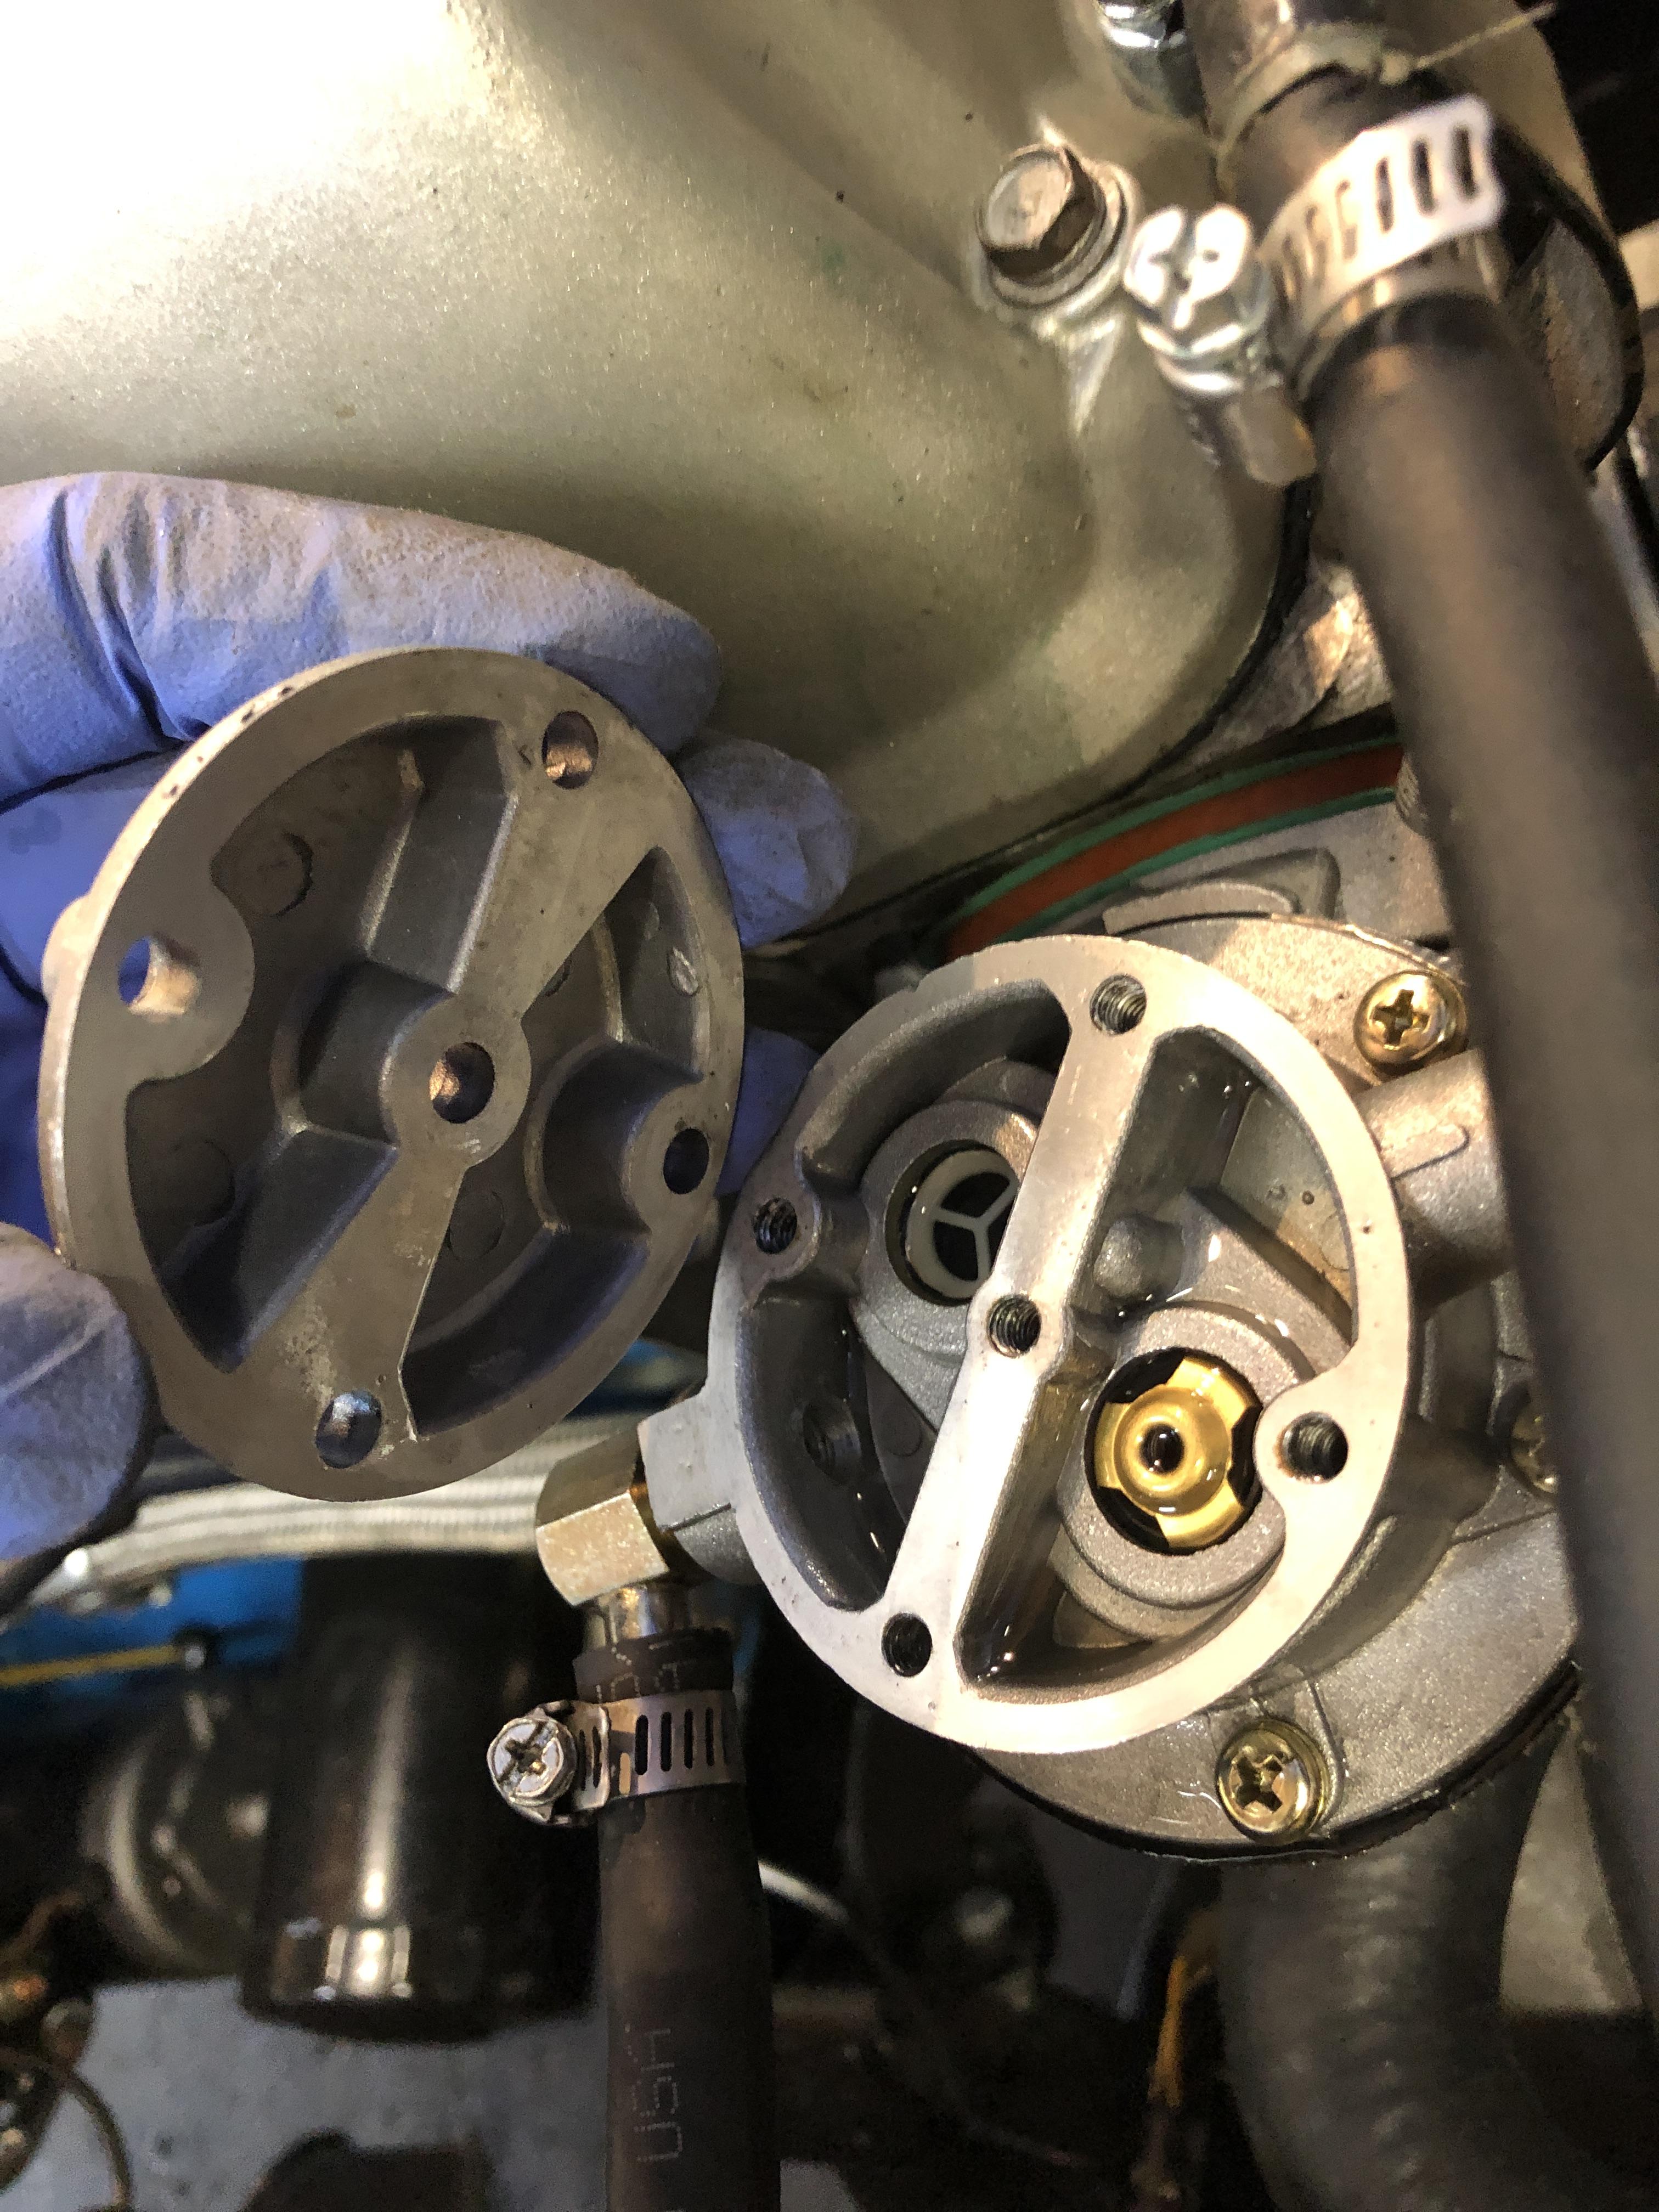
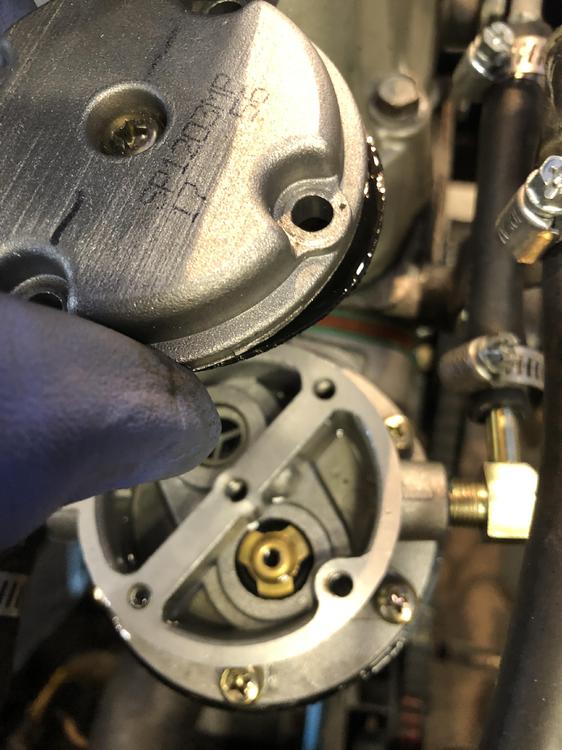
Here are a couple of pics “under the hood” so to speak on the Spectra pump I’m testing. Here is the internal divider wall between the intake and output check and here is the cap showing its internal divider wall in line with the lower one. When I first opened it the cap was 90 deg out. I tried putting the cap back on “wrong” this morning to see if I could get it to run for a while then quit, but no such luck. Pump output, as seen by taking a hose off the carb, was 0, nadda, szilch. Switch it back and boom, perfect working pump.
-
Identify the fluids in the bowl and win a prize. Speculate on how they came to be together and gain additional notoriety. Explain the reason the red stuff forms nice circles in the middle and a thin film around the edge for even more points.

-
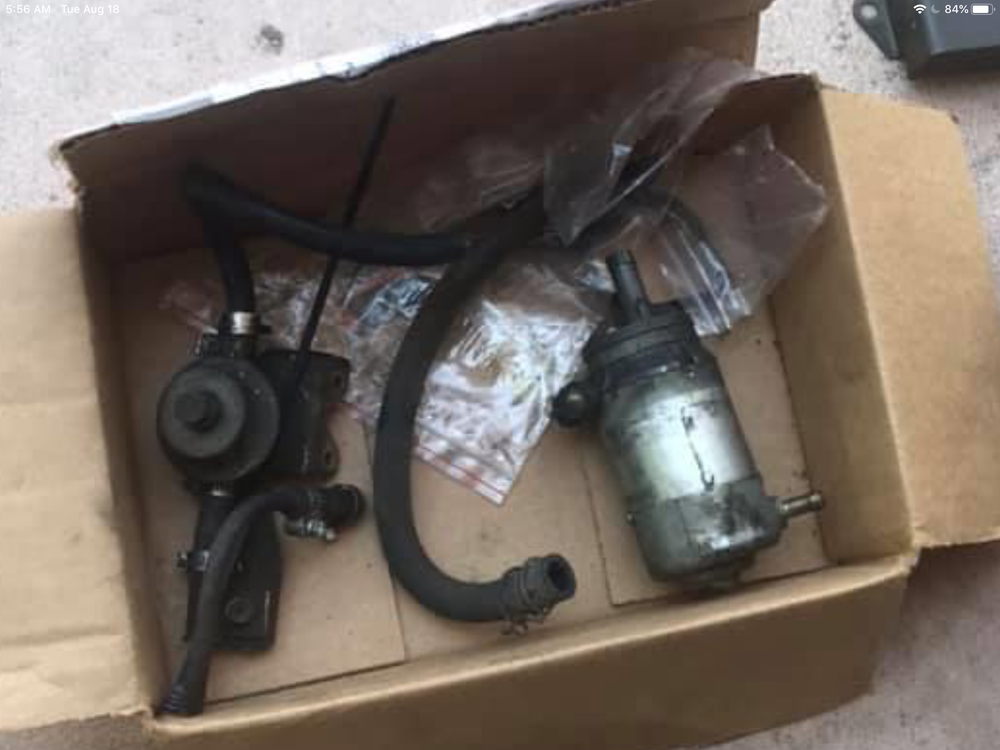
https://www.facebook.com/groups/1822782428004038/permalink/2836027283346209/?sale_post_id=2836027283346209 Guy names Chris Myers has a box with fuel pump goodies including the elusive bracket for sale
-
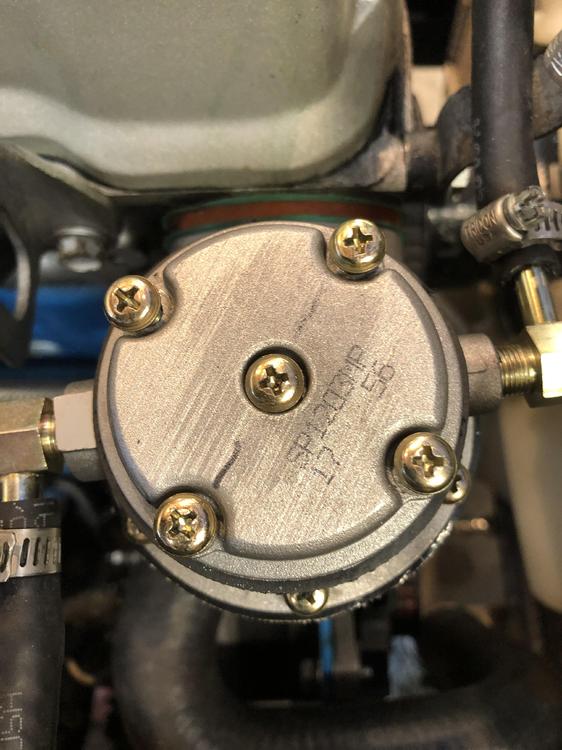
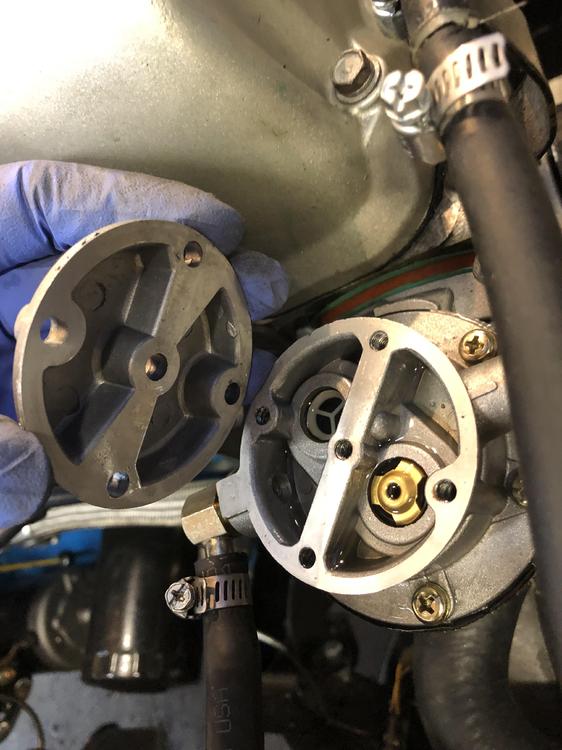
Ok, what I think the issue is that the top cap is installed at the factory 90 degrees wrong, The internal center rib on the cap MUST be aligned with the mating center rib between the two check valves. Having the cap on with the ribs crossed allows flow to sneak through that upper diaphragm. This was the case with the one I looked at today. Turned the cap 90 and put it back on, and boom. Perfectly functioning pump. I wanted others with failed pumps to take the top off and see if the factory has the ribs aligned or crossed. My guess is that from the factory, the diaphragm is sticky enough in some way to limit the leak, but eventually and quickly the dam bursts and that’s it No more suction. At least that’s today’s theory. I need someone else to find the same flaw. Secretly I ordered three more GMB pumps from RockAuto today (can’t beat $17.83 CAD each!) to see if any or all have the flaw. Is it random or is the assembly line guy/robot slapping them together. however they like?
-
Ok, I have a clue! Highly unexpected, but true. What I need is someone with a failed Spectra or GMB mechanical pump that is willing to take the top cap off and tell me what they see. Don’t take it off without marking it’s position relative to the body first!! Very Important!!!! Anybody?
-
Pictures are back.
-
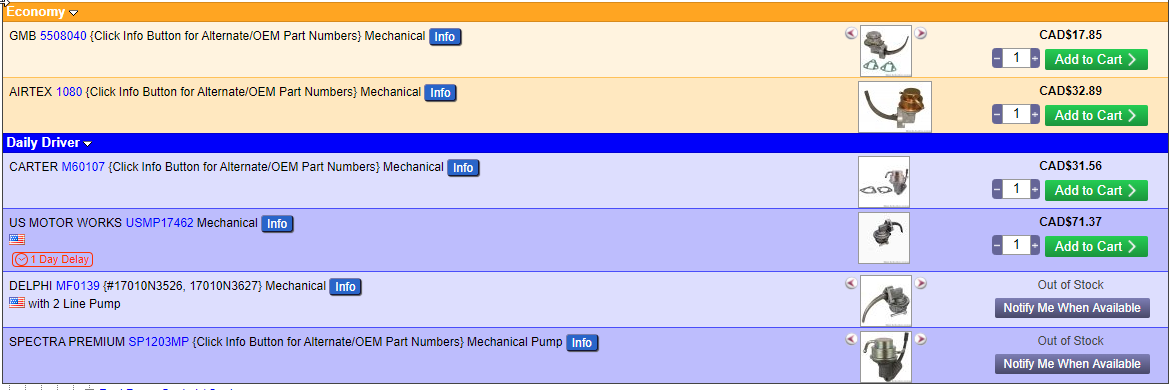
The pictures are on my phone somewhere. I'll do more to spruce up the thread when I find out details on this pump tomorrow I was doing a bit of research again on what's out there, and wanted to share the current status of what RockAuto sells. The GMB, US Motor Works and Delphi are shown as having the OEM look, but look at that price difference! GMB is free is $18 buck, where as the USMP is $72!! Maybe it has quality innards. yeah, right.....

-
I have another case reported today from a local customer with a <100 km use new Spectra pump that failed. Fortunately it was initial warm up in his garage, not on the road, but that was just pure luck. He was on his way to a wedding (not his at least) but was anxious to show it off to family members. Very disappointing. I'll have that rotten pump and the Z in my shop tomorrow. I will thoroughly diagnose the issue with the pump and let you know what I find.
-
Somewhere, somewhere......
-
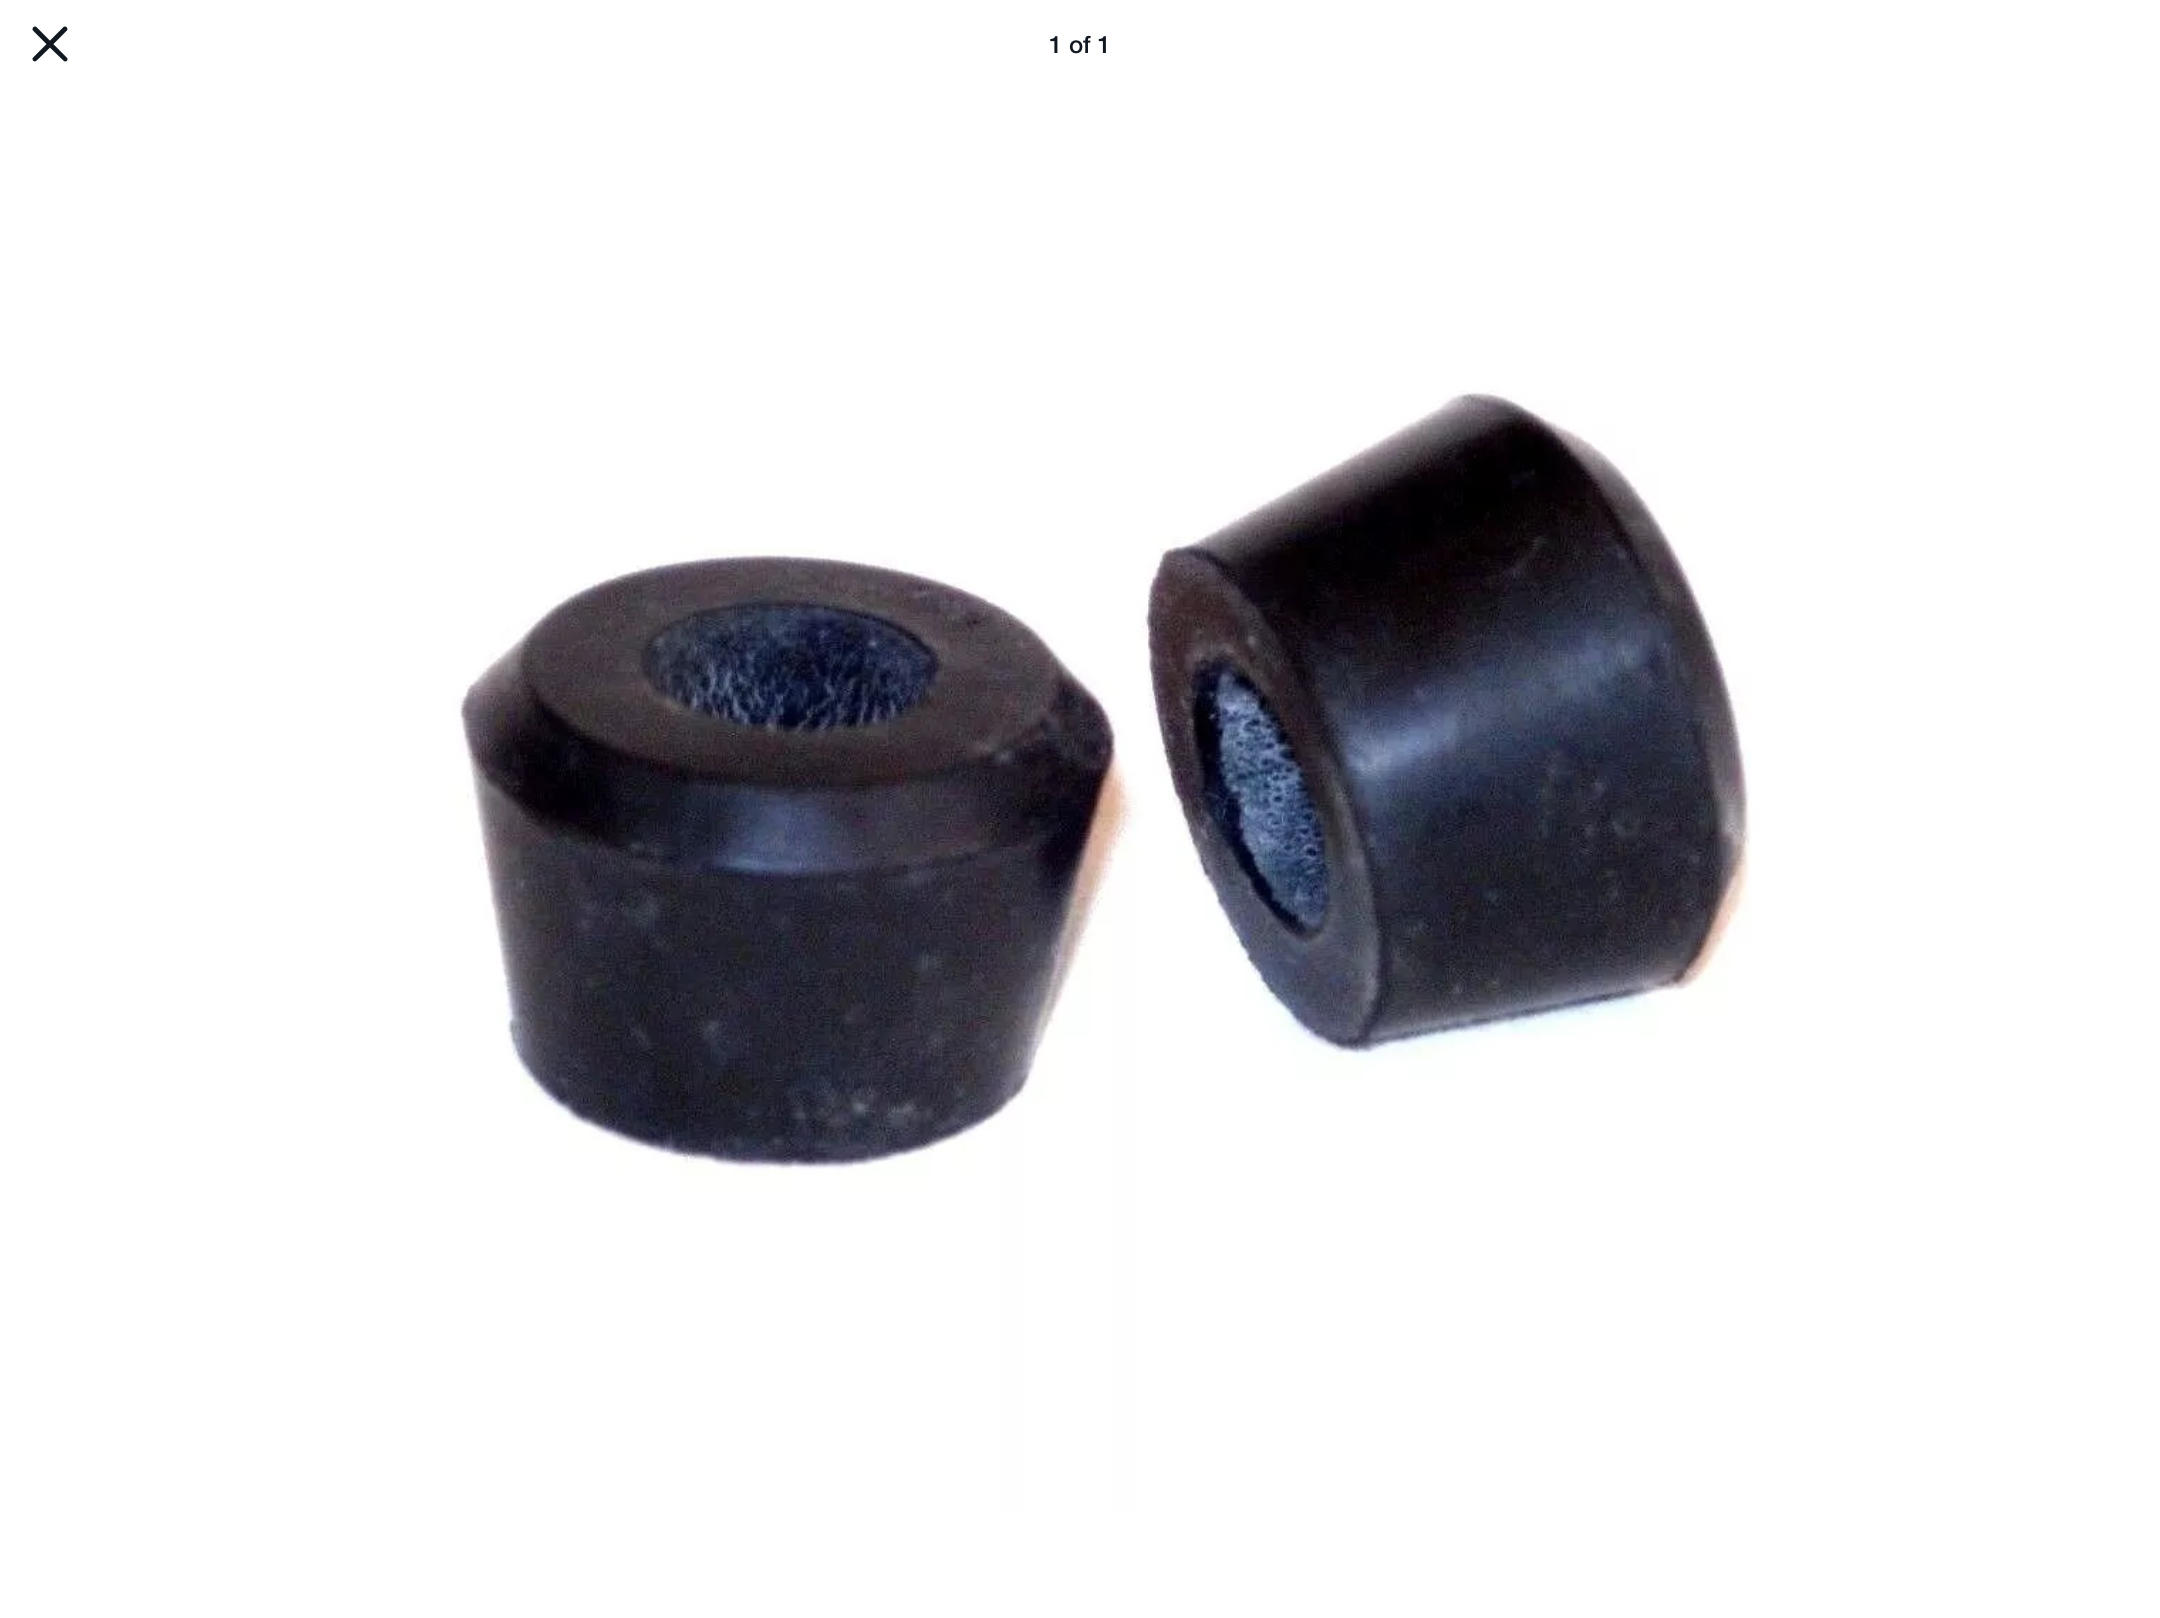
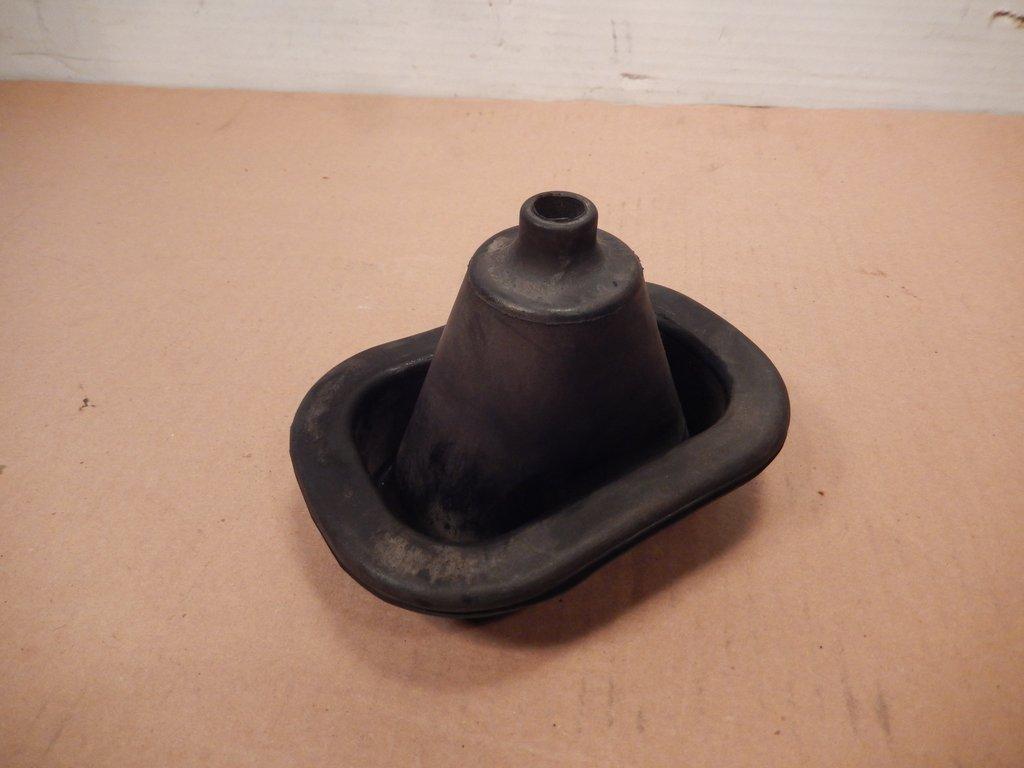
Here are the bushings you need for the “A” type transmission that you have. Search for Datsun 510, there more people supplying them for their “A” type trans that is the same (shifter mount at least) as the early Z trans. Found these on ebay. This is the shift boot you need, that fits the trans tunnel. It has a groove that fits on the trans tunnel cut out.


-
Same check valves. Fuel pressure on a z is controlled by an orifice in the return line of the fuel rail.
-
Looks Peachy! I mean really nice. And; peachie...
-
Welcome and my condolences as well. Interior looks like a 72, has the early bat handled hazard switch. But I’d like to know the story about how it acquired 260/280 tail lights. That bumper and the spacer between the body and bumper on the rear is an early 260 thing. 73’s didn’t have a rear spacer, just on the front. So the question might be, where does the 240 end and the 260 begin?
-
All the problems I have seen in stub axles has been related to worn/spun/bent/ovaled bearing seats. And a few bent axles naturally and I guess a few snapped ones. As long as I can torque it properly and have the axle turn smoothly with some resistance, A micro amount of end play is far from a problem you need to worry about. IMHO When I torque and then the axle spins but has tight spots as you spin it, just disassembling, cleaning seats AGAIN, and re-assembly usually results in a nice consistent rotation. Dem bearing have to seat “just so”
-
Just thinking about things to remember when doing this swap. I’m about to do the same on a 510. Don’t ask... Did you remove the pilot bushing from the crank? The auto doesn’t use it. I’m thinking you did, as I doubt you could get the trans on far enough to bolt it up, but there is a chance....
-
A combination pin puller and bushing press would be a great tool. Fantastic idea. Finding just the right socket is the trick.
-
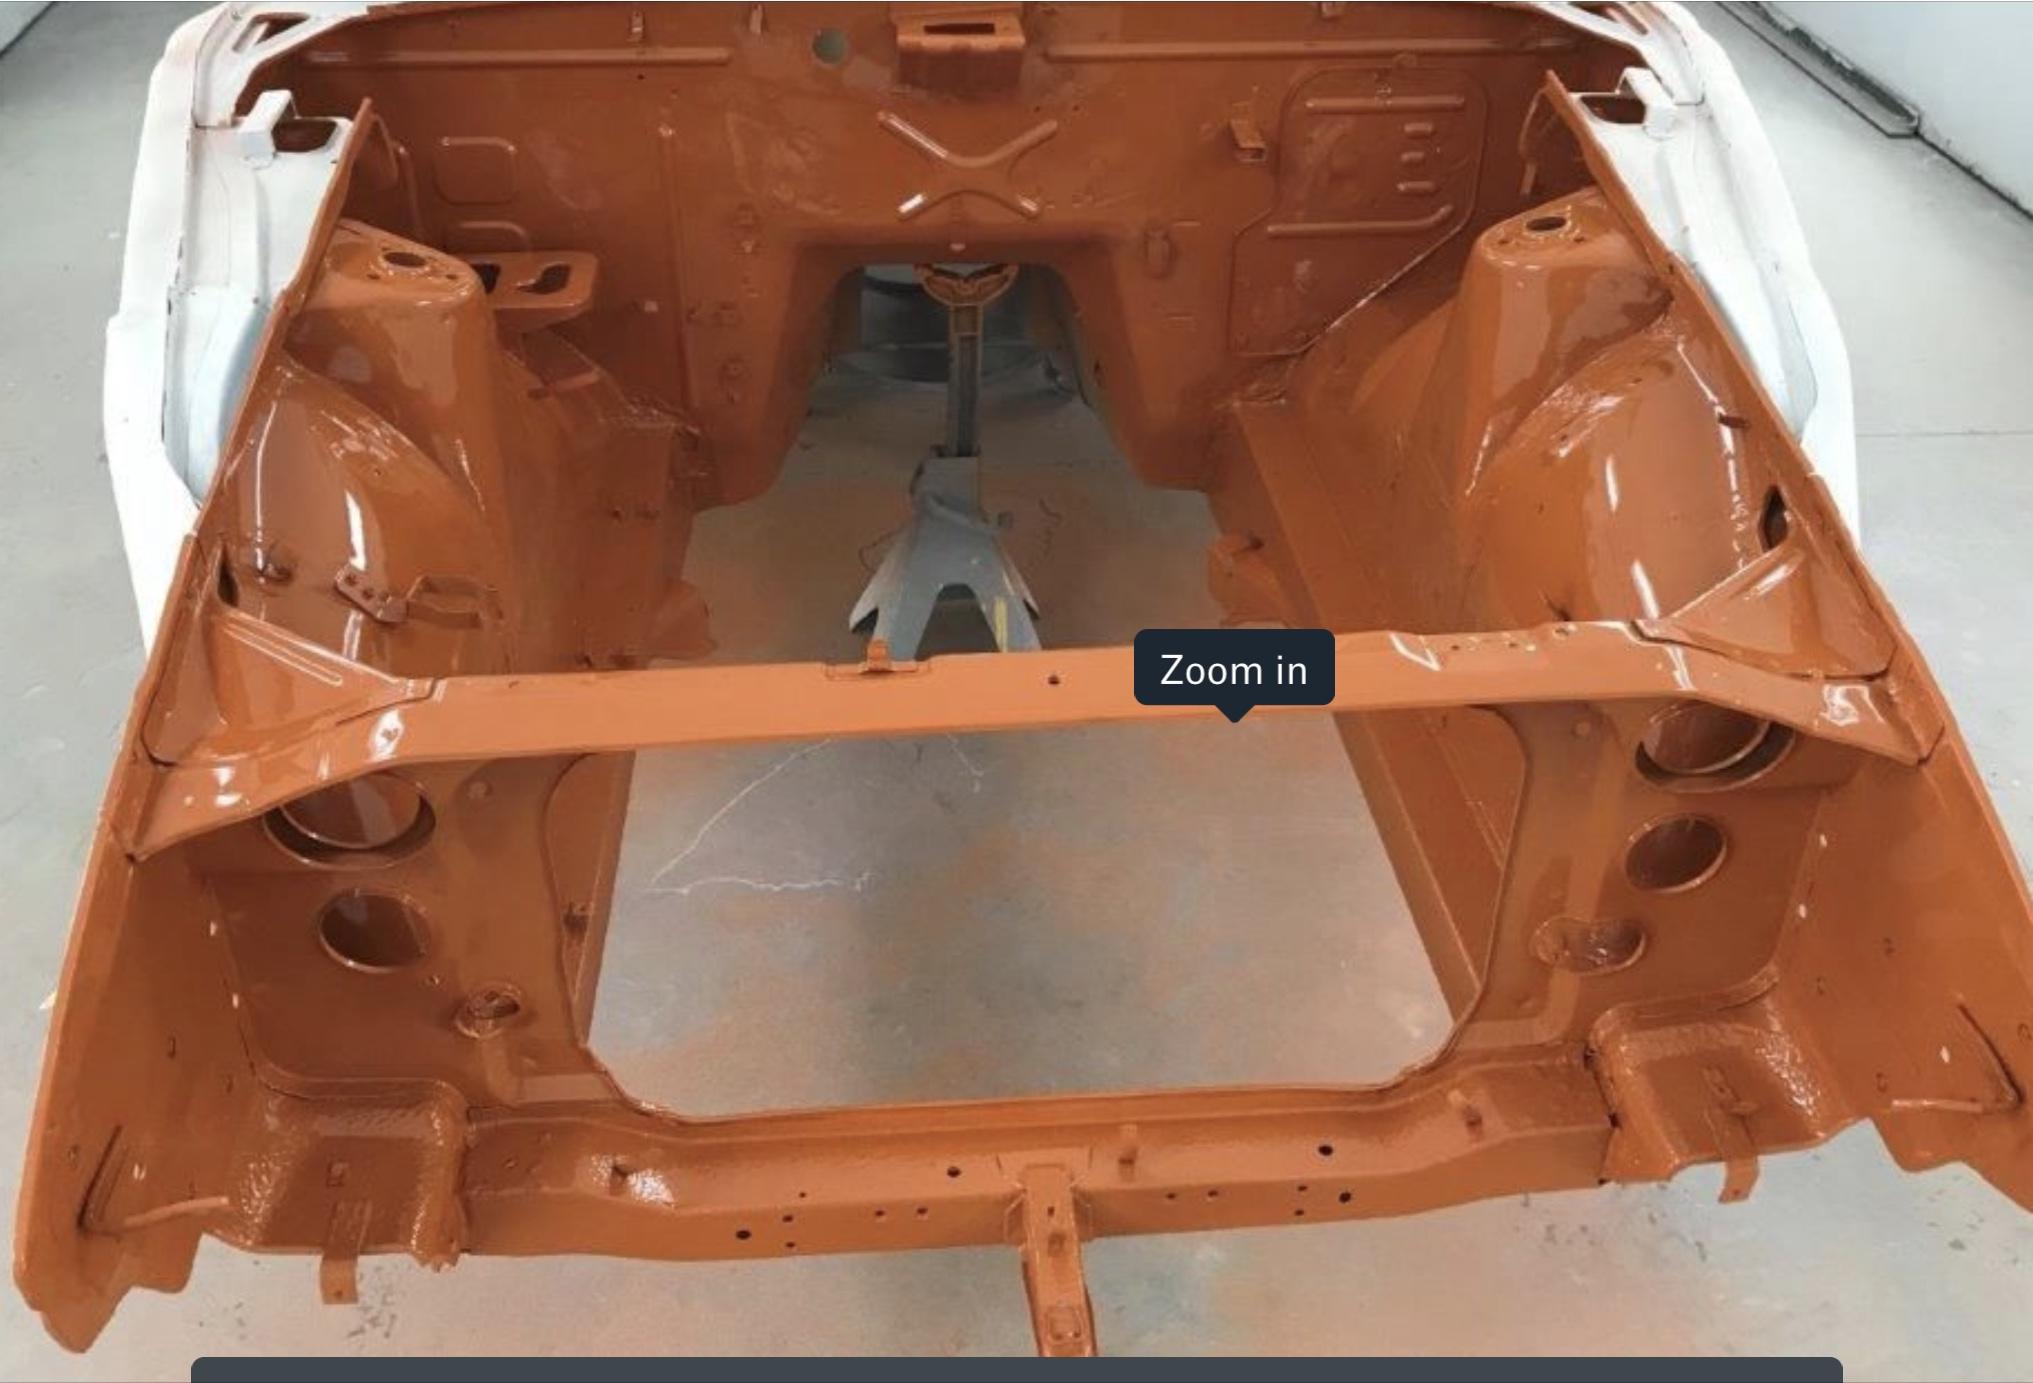
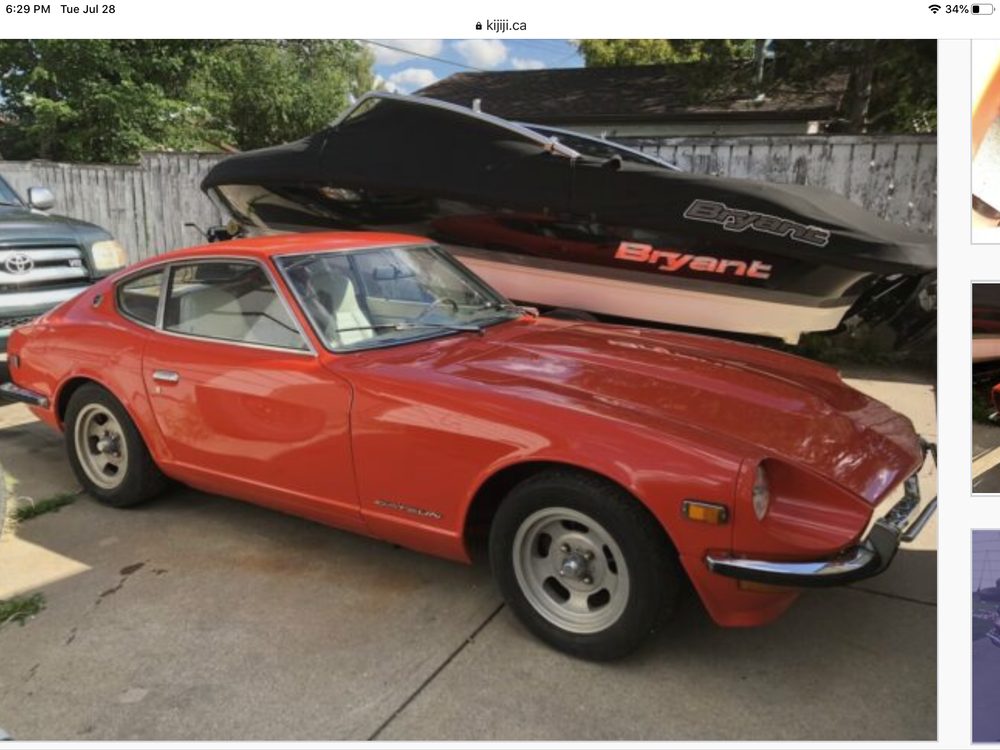
So I went to visit a new customer today to talk about a restoration. Nice little 70, VIN around 2600 or something. He is having the all too common “body Shop hell” problem, and he’s moving from one to the other right now. The old shop partly painted the fenders and the interior, the underside, engine bay. All 918 orange. I went to see it today with him at the new body shop and have the “talk” with the proprietor. You know the one. Anyway.. Heres my problem. I walked into a bay with the door open, bright sunny day, And there was ANOTHER 918 Orange paint job that did not look right to me. It looks distinctly PEACH hued, not really the vibrant orange I’ve come to expect at all. here is an engine bay picture that has the best example of what my mind/eyes see. Peachy, right? Bleaccchhhh! I only have one other real original paint 918 orange on a 1973 in town and that thing is ORANGE. Nothing peachy about it. There is also another one, a 72 for sale on-line locally, with 918. The pictures look exactly Like the 73 I know, and it is ORANGE. Here is a screen grab from kijiji.ca So this dang 70 makes the third such 918 orange car that I’ve seen In the last 10 years with a fresh paint job that is this lousy peachy color that I say is wrong. One of them was painted in the US, the other two here in Alberta Recently. Now this car had repair and paint 20+ years ago, and the owner swears its the same color now, as he had the car painted back then, and he’s ok with it, but I’m trying to get this right. So all you people with 918 orange, would you call it peachy in any way?? Ever see one with the peachy hue and said “that ain’t right” Opinions?

-
Not sure what is up with the pictures. I uploaded to the site, they were not on some other service or web site. @Mikecan you have a look and see what might be up?
-
Well currently you are out of luck short of going electric. The hot tip at the moment, assuming your diaphragm was the failure, is to put the top half (6 bolts) of your old OEM pump on top of the new Spectra body. This gives you the likely still good OEM check valves and a new diaphragm. About the only other way people are getting by with is using new OEM pumps for 510’s and such, sometimes available on ebay, as donors for the diaphragm and check valves.