zKars
Supporting Member
-
Joined
-
Last visited
Everything posted by zKars
-
I’ve been involved in the purchase and installation of 1.5 of Hung’s dashes. They are faithful reproductions and good quality. Hung is always great to work with.
-
First, I am very impressed at your ambition trying to renew the harness. I have re-furbished many harnesses, but tend to just replace pins and sometimes connector shells, never all the wire as well. Rarely is the wire compromised unless I find corrosion in the strands as I replace terminals. High current wires, (ie the fat white ones) I commonly replace entirely including all ring and connector terminals. These fancy colored 10 pin 73 specific connectors have the same 6.3mm spade terminals as the other 2/4/6 pin connectors, so just remove each terminal, inspect clean or replace it, and snap it back in the housing. No need to replace the housings, which you can’t do any way, they are not available new. You can use Weatherpack or Deutsch connectors (DTM for 14gage and higher, DT for 10-12). Steve’s suggestion for 10 pin connectors are fine, but I’d just do terminal service and retain the stock housings.
-
Extensive roll bar additions throughout do all the strengthening needed in a race car. I would add strut tower/firewall bracing to an auto-cross or weekend racer first before these chassis bars. None of the above are necessary or will provide any noticeable difference to a street driven car. Spend your money on stickier tires.
-
There has been a couple of times I almost purchased an induction heater for stubborn things but never found one that was both economical and had lots of options. This one looks reasonable. Having an Oxyacetylene setup is handy, but expensive and bulky and storage is an issue. Let us know how it works on control arm casting heating.
-
It would seem I can’t upload video’s or images, as others have noted. I will try again when the issue is resolved. As they say, it ain’t real without pictures.
-
Ah yes my little jewel that is the Kardashian of the Datsun world, no real talent but having insufferable beauty, gazed upon lustfully these many years with no real contribution to society, now has to earn a living by vile hot sweaty noisy labour under the hood of an un-remarkable 4 door sedan in the middle of nowhere special. Poor thing. Is the value of an object defined by rarity or desirability? Or it’s ability to bring joy to it’s owner and those that share in the ensuing reverie? I prefer to believe the latter. Well this thing is now nothing but a (slightly) used L18. Never again will it be NOS. It has 15min of break-in time on it. I speculated that if I dared to declare that I had something no one else had, many others would come out of the woodwork and proclaim they have not one but two hiding in their basement. Thus I have not shared up until now. At the very least we will likely descend into the hell of arguing how real and accurate all the bits are to the SSS form. Or I may be scorned for committing heresy by putting such a rarity into a stock North American 69 4 door with no SSS heritage and slapping false declarations of SSS-ishness (which I fully intend to do BTW) upon its body? Well I have earned with age the privilege to do what I hell I want with it and enjoy the hell out of it, and just enjoy the slight smugness that no one, at least near me if any luck, has one (or two) just like it.
-
Ah, thanks for the Nis-62 info. Omega has $56 bucks UPS as the cheapest shipping option to my remote location in the wilds of western Canada. $20 for the bushing. Just how bad do I want it….
-
There seems to be no end of lessons to be learned around here. Seems it is in fact NOT a good idea to heat up the end of the extension housing to soften it to help straighten out that ding. It was not the aluminum case that suffered, it was the bronze or whatever it is bushing inside that literally melted. I found a puddle of what I would swear was solder on the bench where it had landed. And the no one on earth seems to have any NIS-62 bushings available. Out of Stock is the key word of the day. And full circle, I am now onto option 4 as above, go get a real 5 speed with the right bell housing and just put it in. Humph.
-
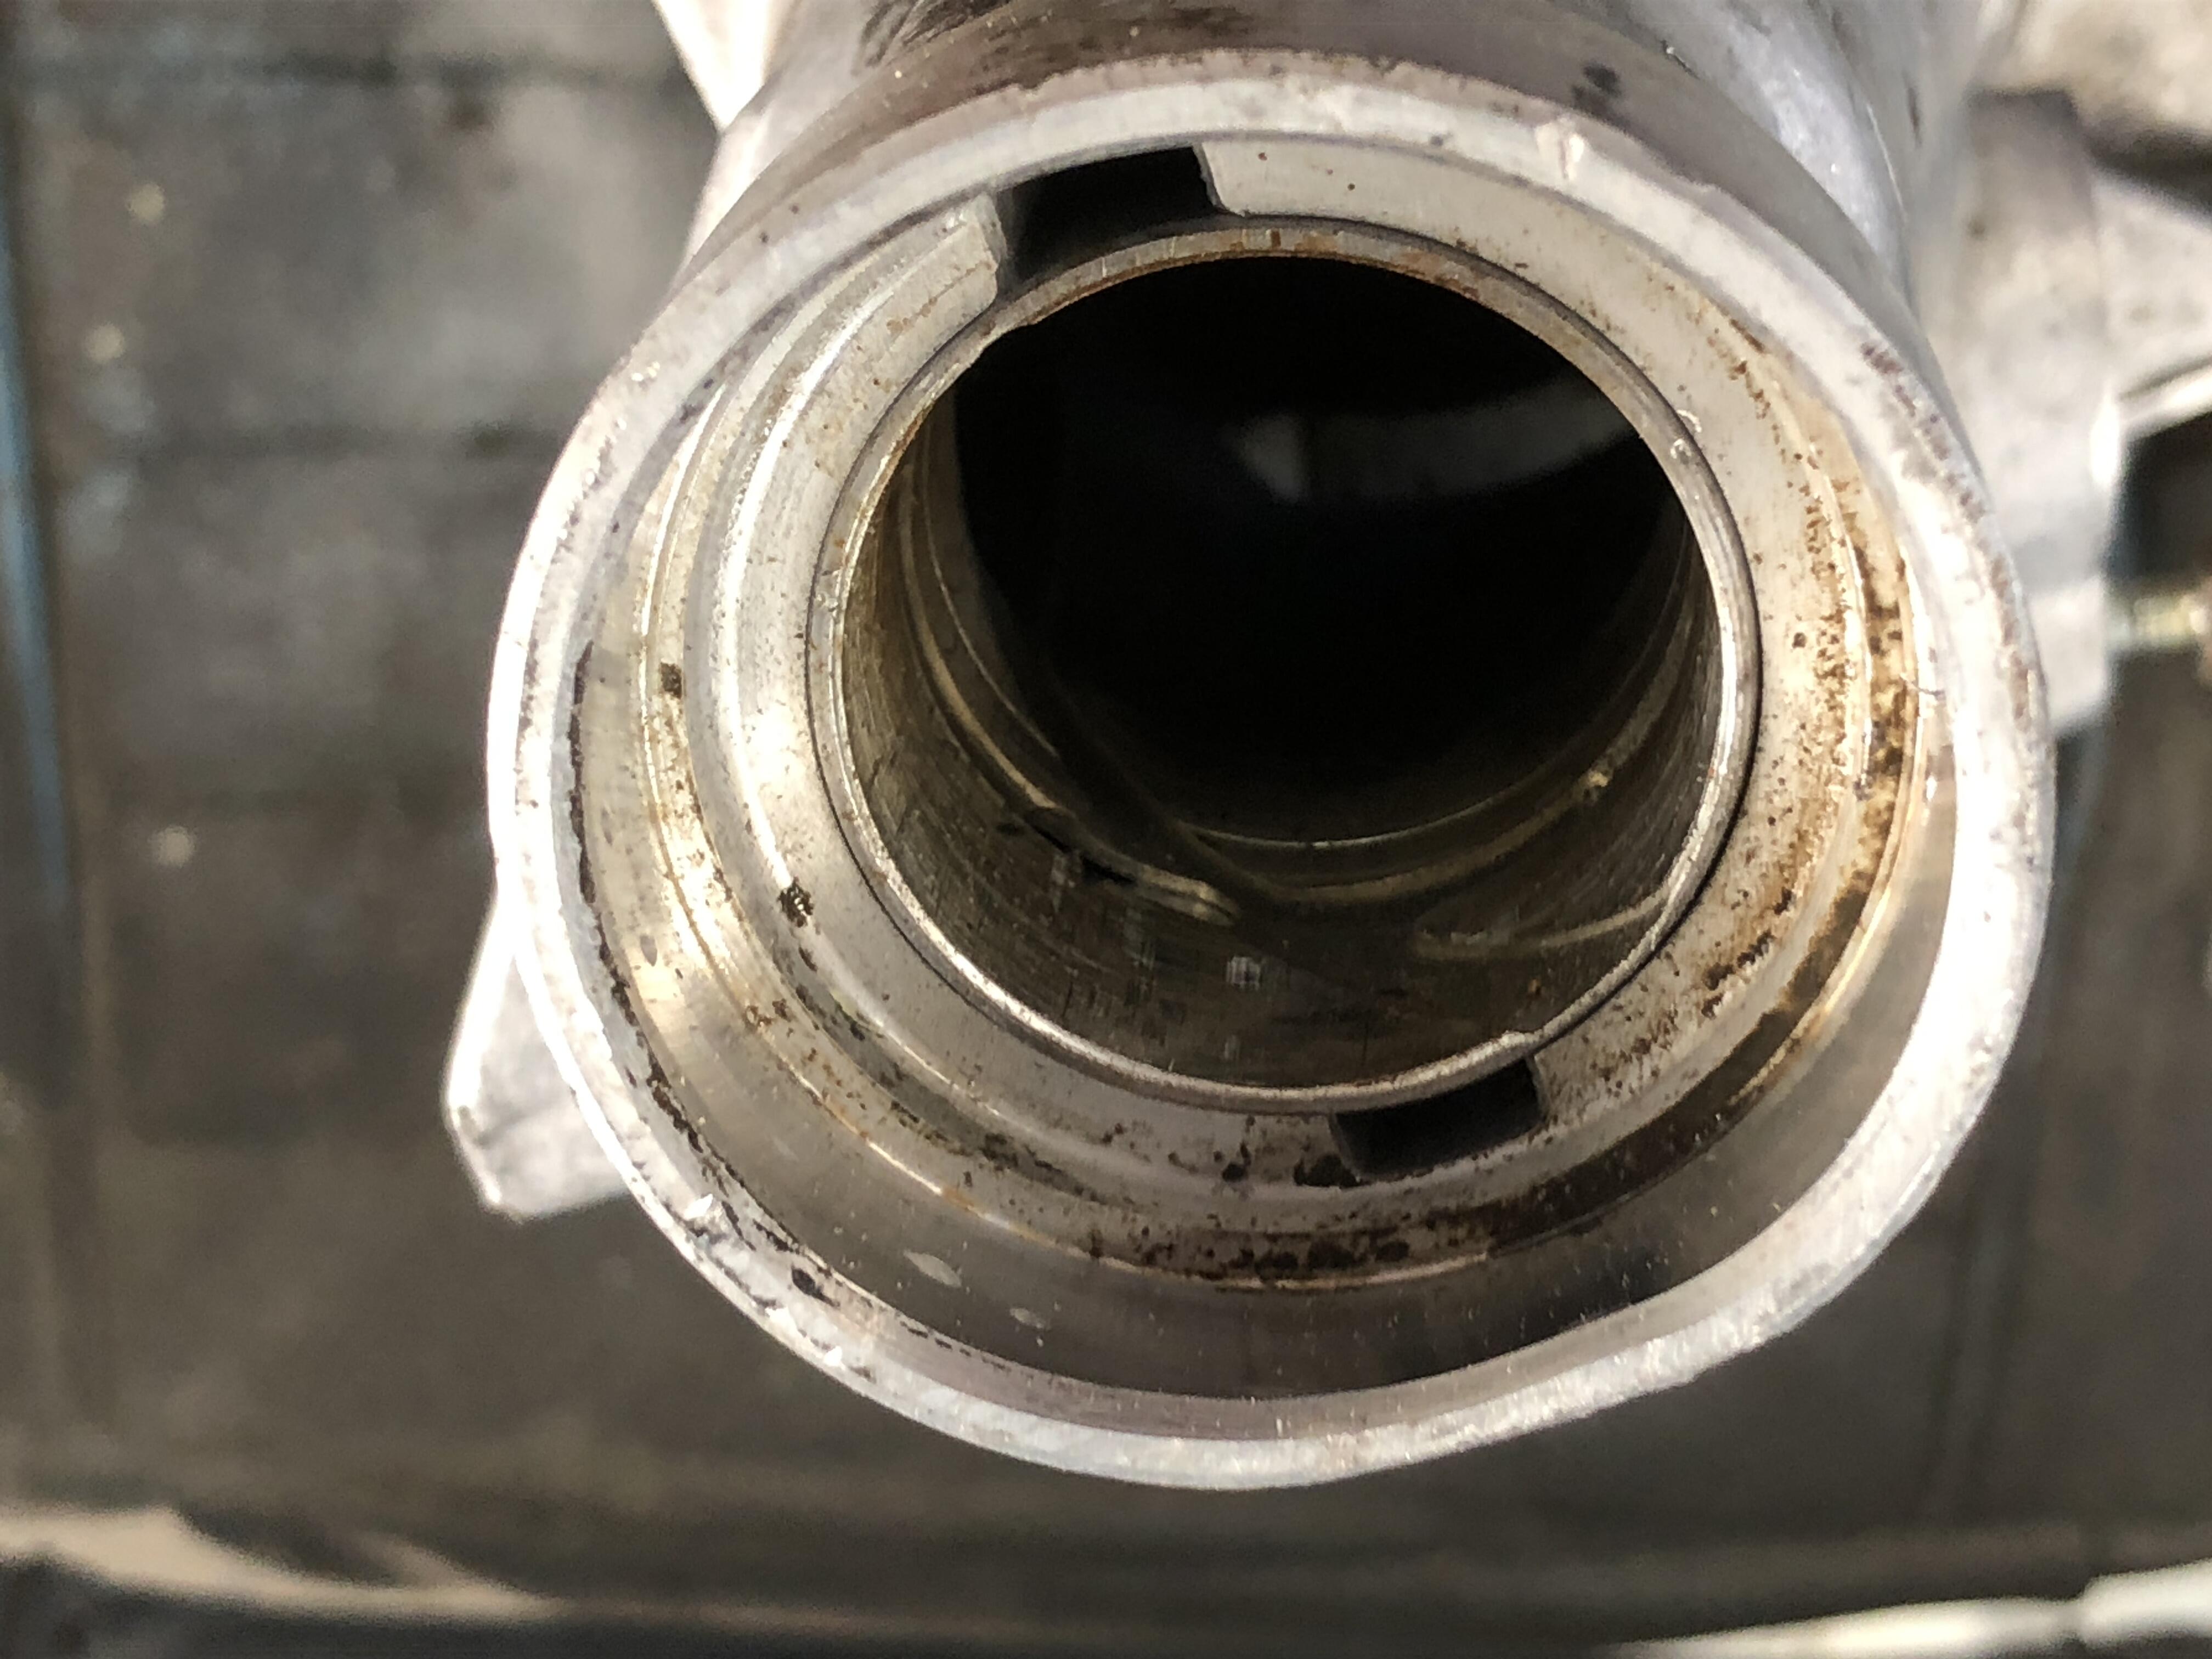
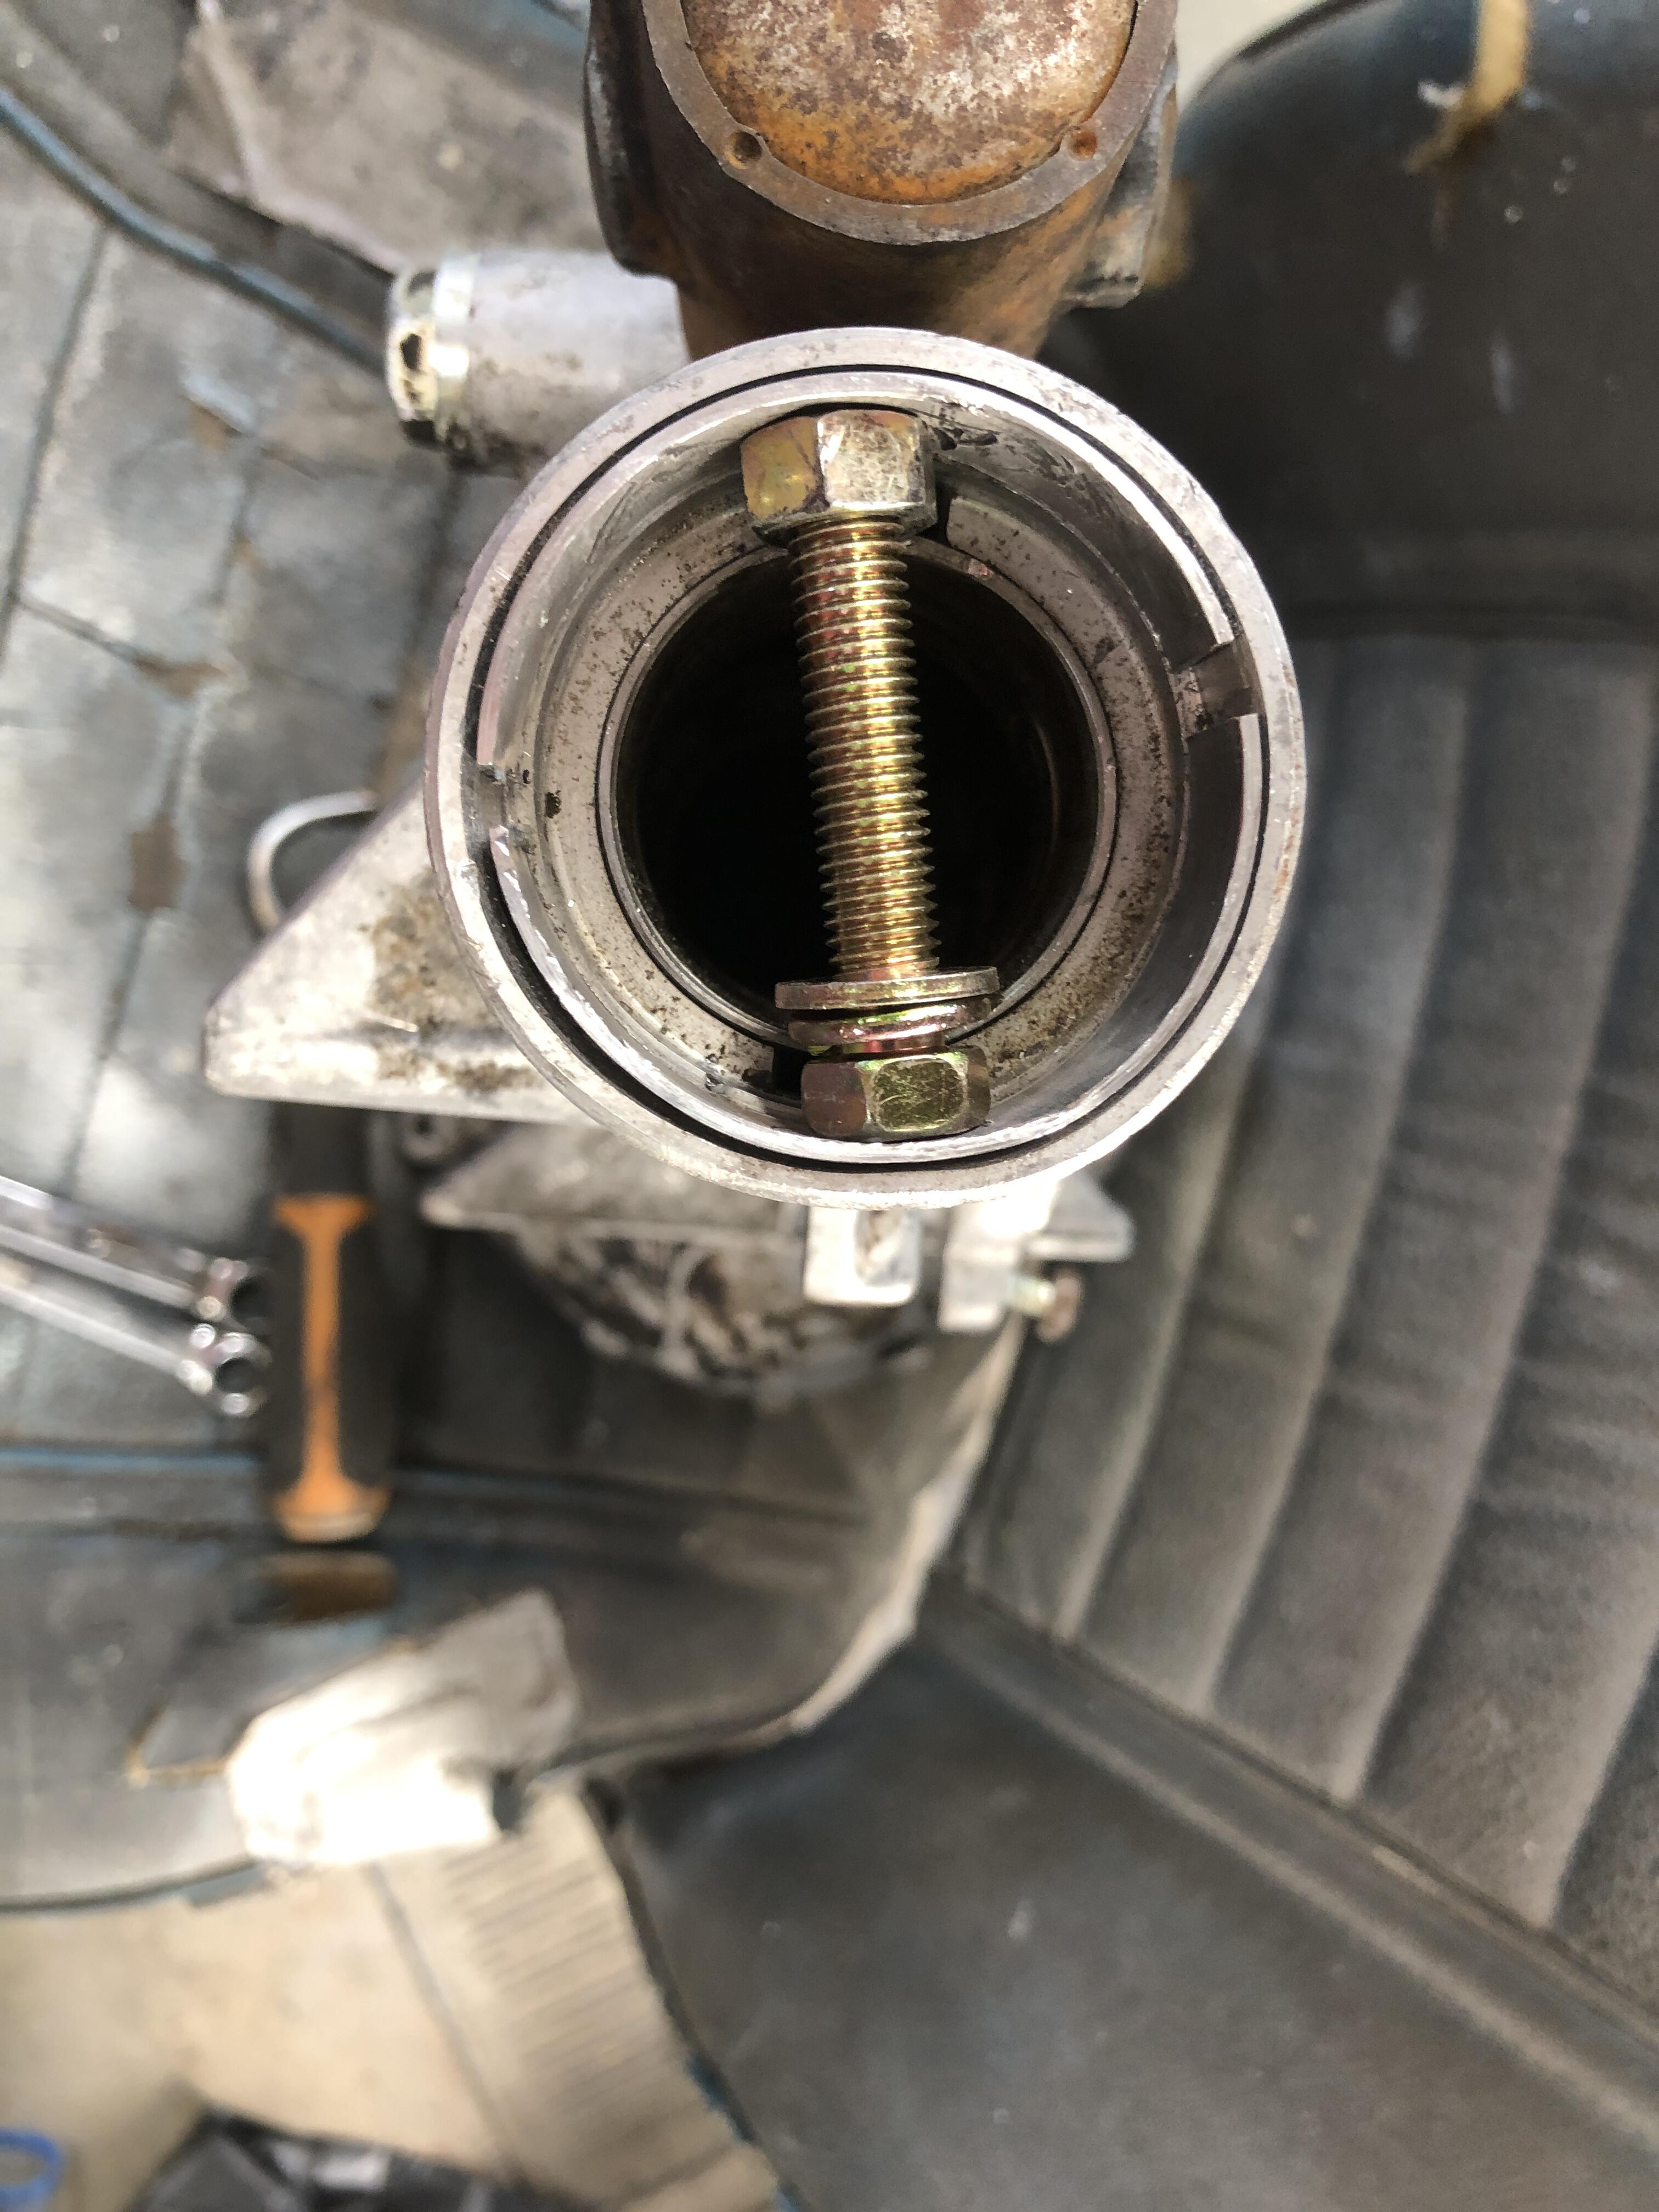
Then when cleaning the rear housing, I discovered the end isn’t exactly round anymore. Used a bolt and nut and some force spreading rings and got it better. Bit afraid to push to hard and crack the aluminum casting. Mind you it dented pretty easily without cracking. Might have to warm it “slightly” to increase ductility. Nice that the opening is just a hair under 2.00 inches (1.97), I have some 2” pipe I use as backups and support.


-
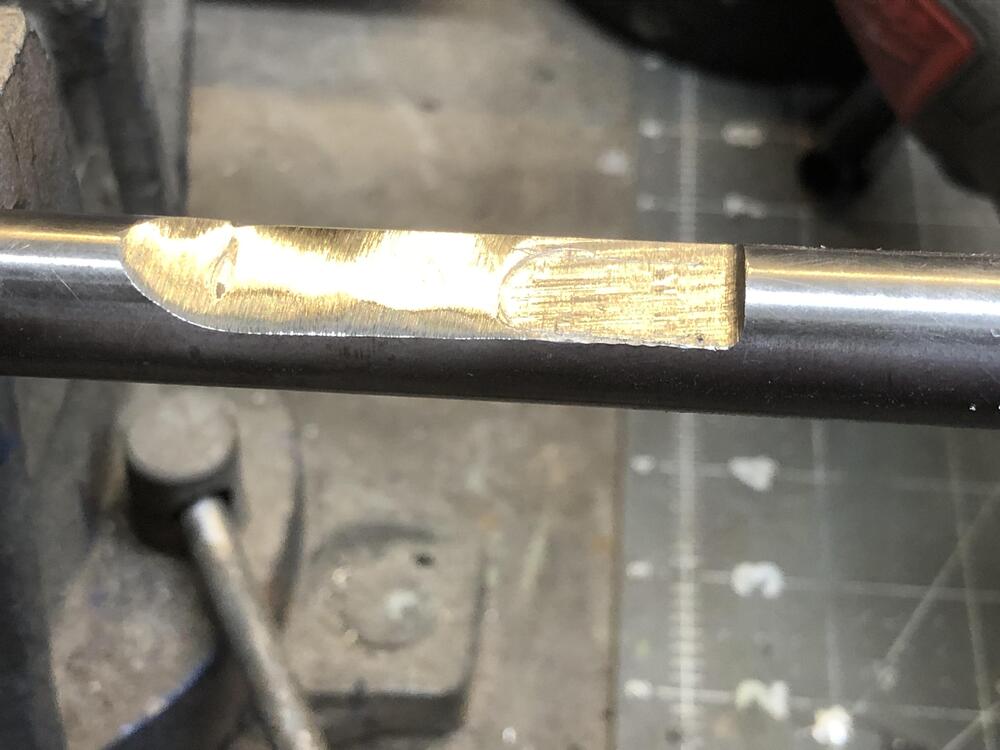
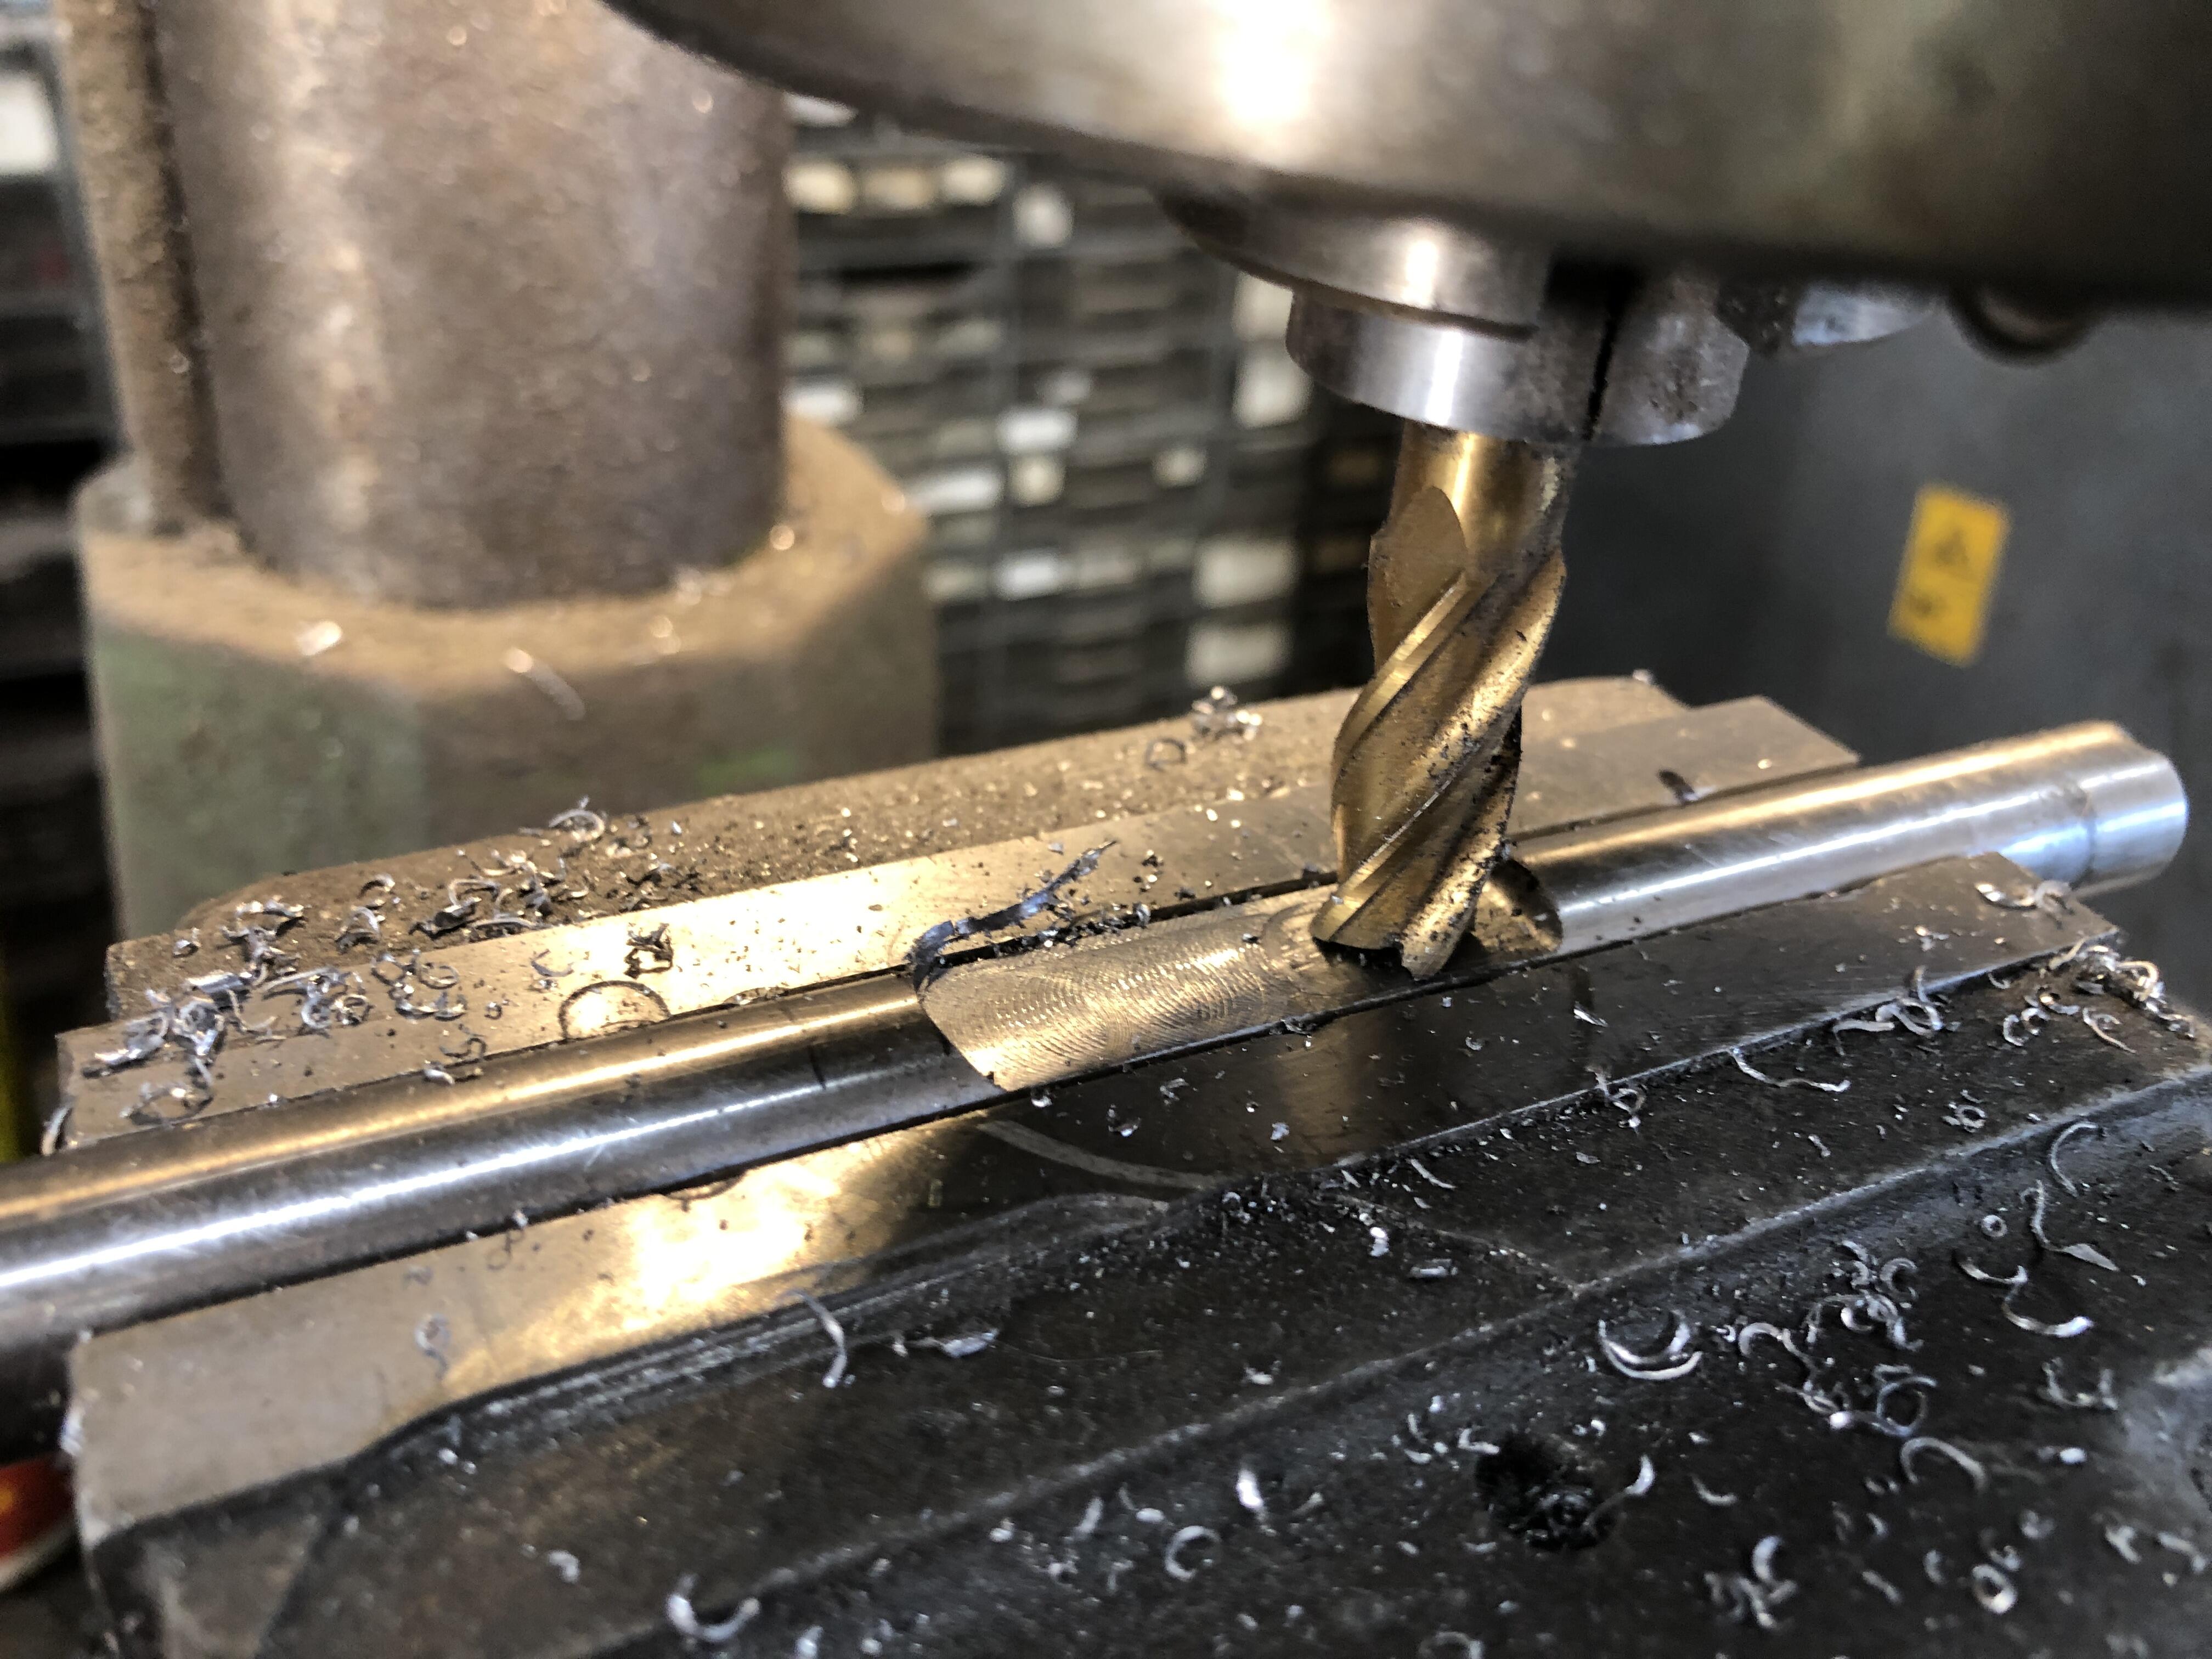
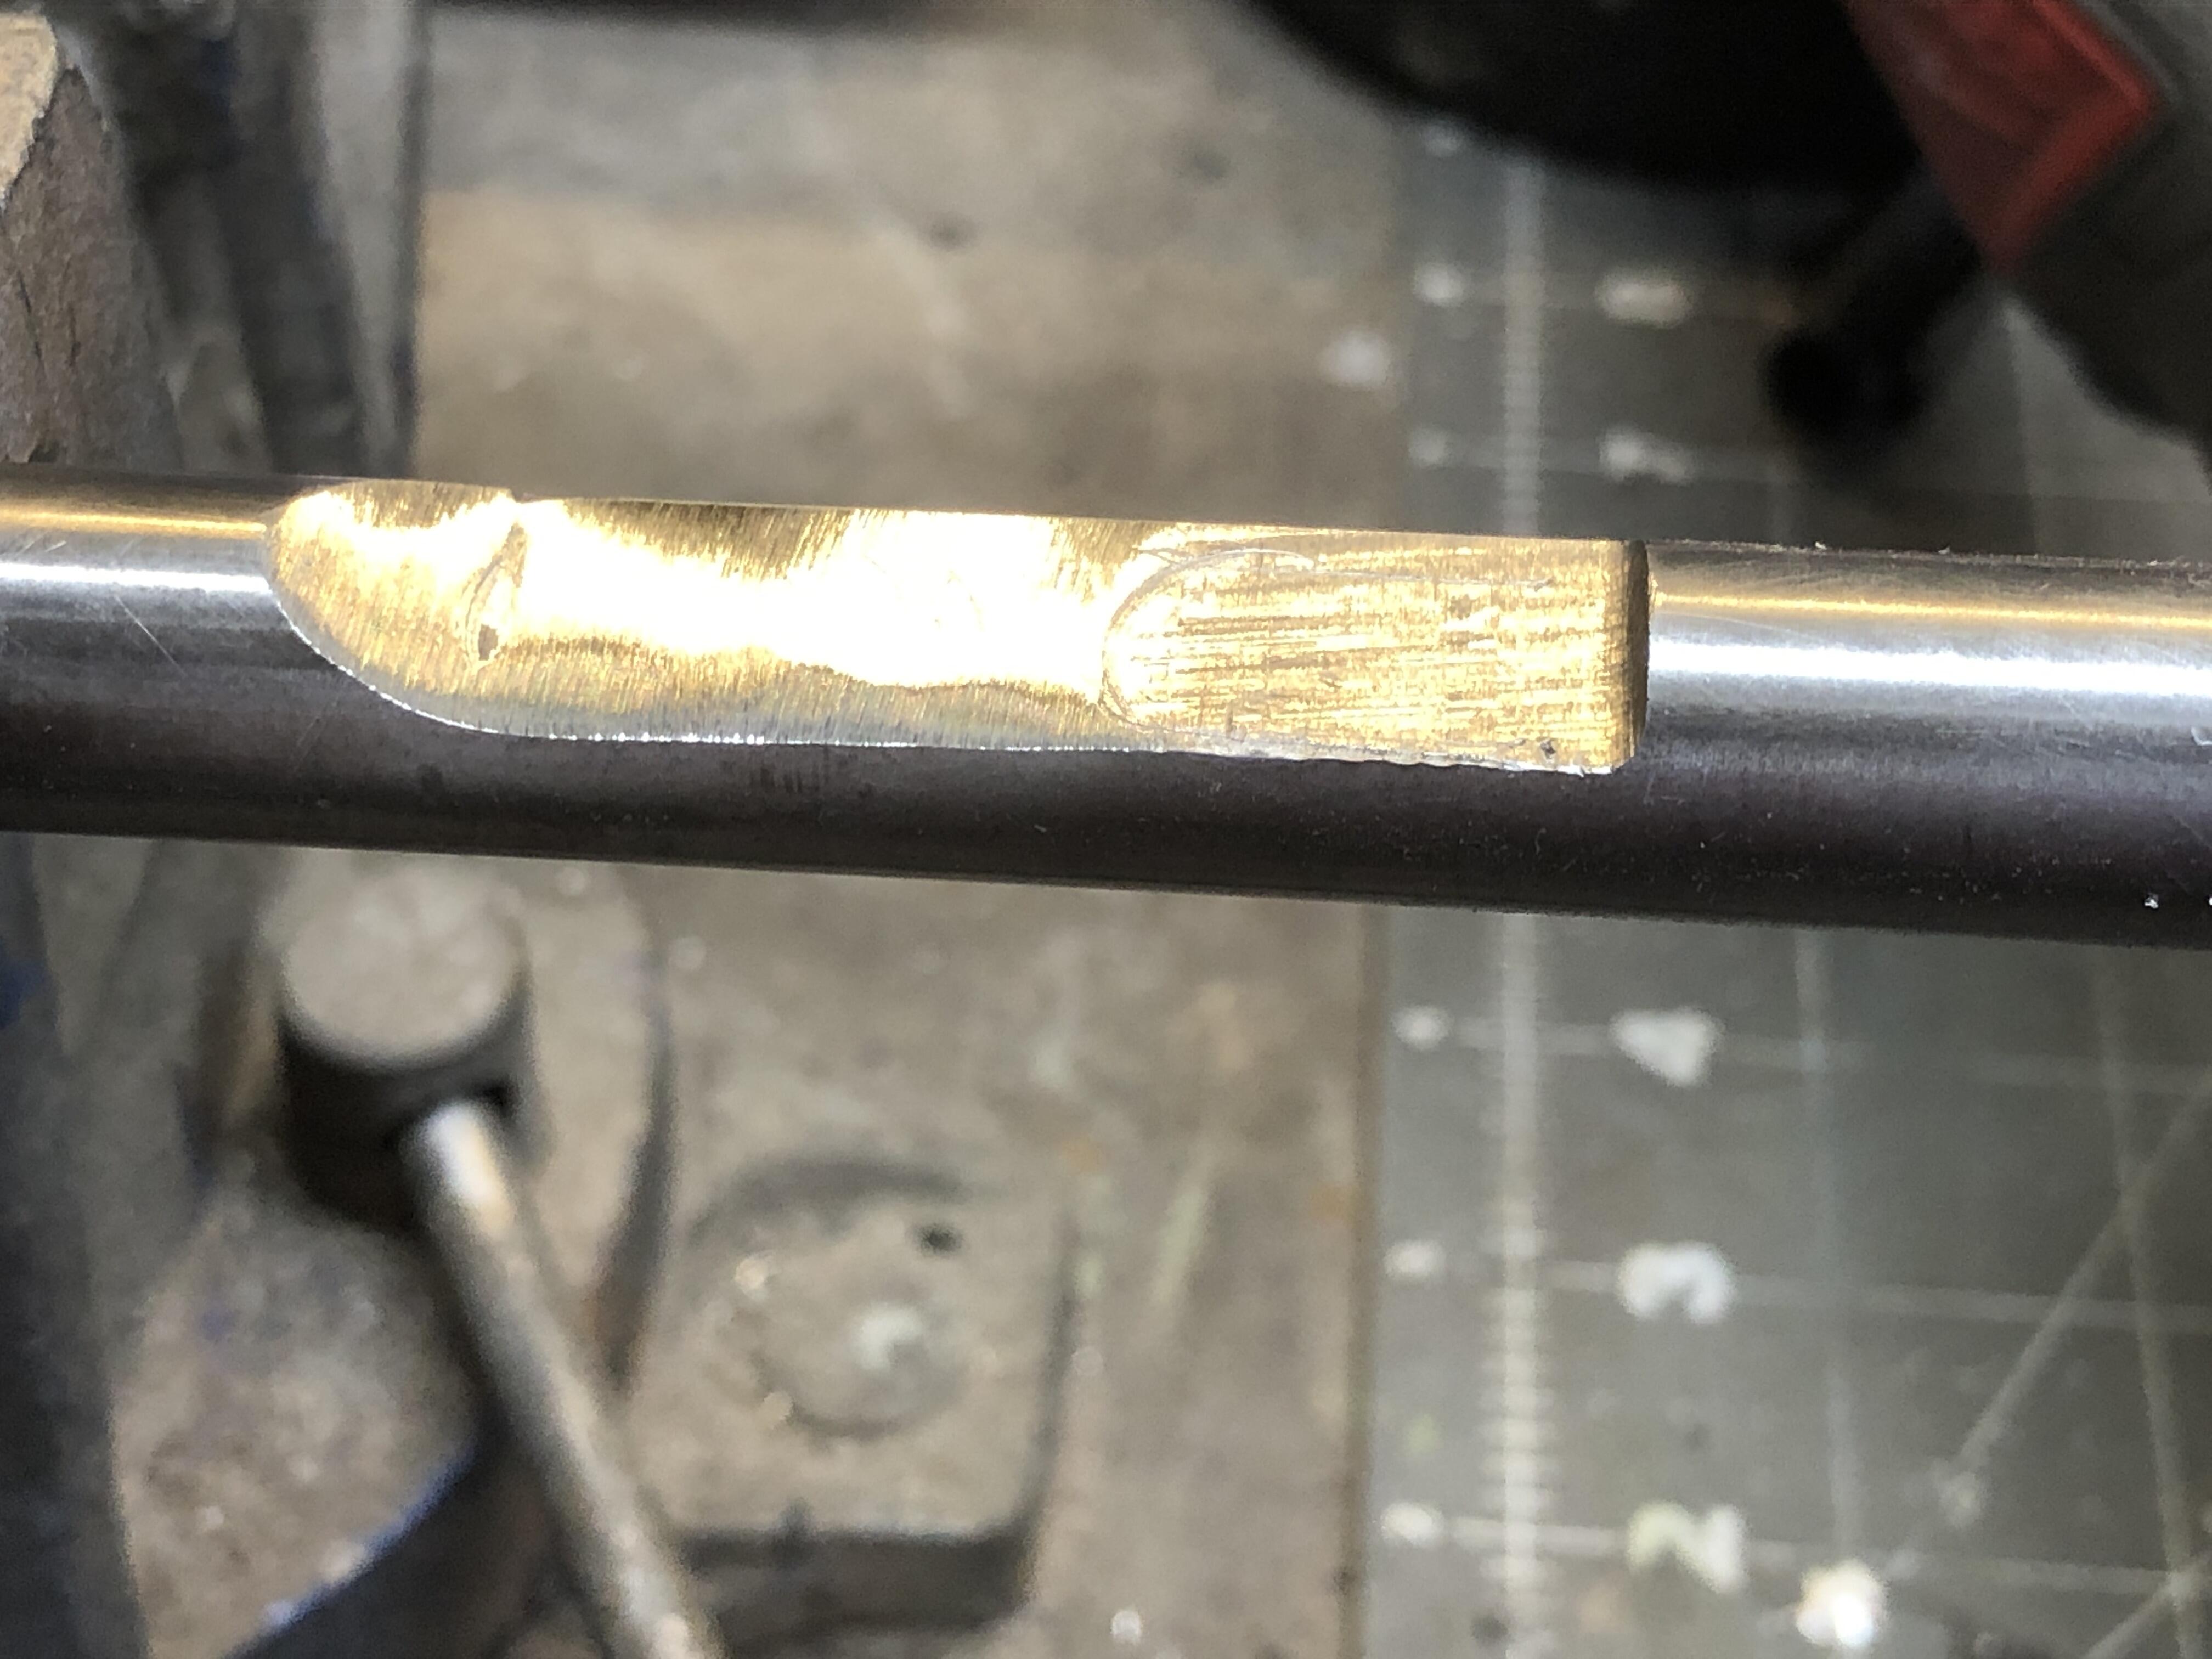
Had a chance to take that shift rod out and make the changes to it. Cheated a bit and used a mill to extend the flat area, then used a flap wheel on my angle grinder to create the ramp at the end.


-
225mm Z clutches use 6 bolts, 240mm clutches use 9. What is the diameter of the friction surface on that flywheel? Is it stock? Can’t say I’ve ever tried to put a 225mm pressure plate on a 240mm flywheel to see what bolts line up. Should go do that
-
First column is this trans, next 3 are 81-83 close, 80-81 then 77-79 3.321 3.062 3.062 3.321 1.902 1.858 1.858 2.077 1.308 1.308 1.308 1.308 1.000 1.000 1.000 1.000 0.833 0.745 0.773 0.864
-
Regular length, I did count teeth and computed ratio’s, will post. Doesn’t match exactly any of the ZX usual 3 suspects.
-
And for you wussies that are afraid of weakening that rod by grinding it down, just stop those slam shifts while into 5th and reverse. The shift fork for 5-R is in behind the center plate, and all the rod in front does is support it straight in the front housing. I'd be shocked if you could break it. All the fierce shifting in the world won't bend that rod.
-
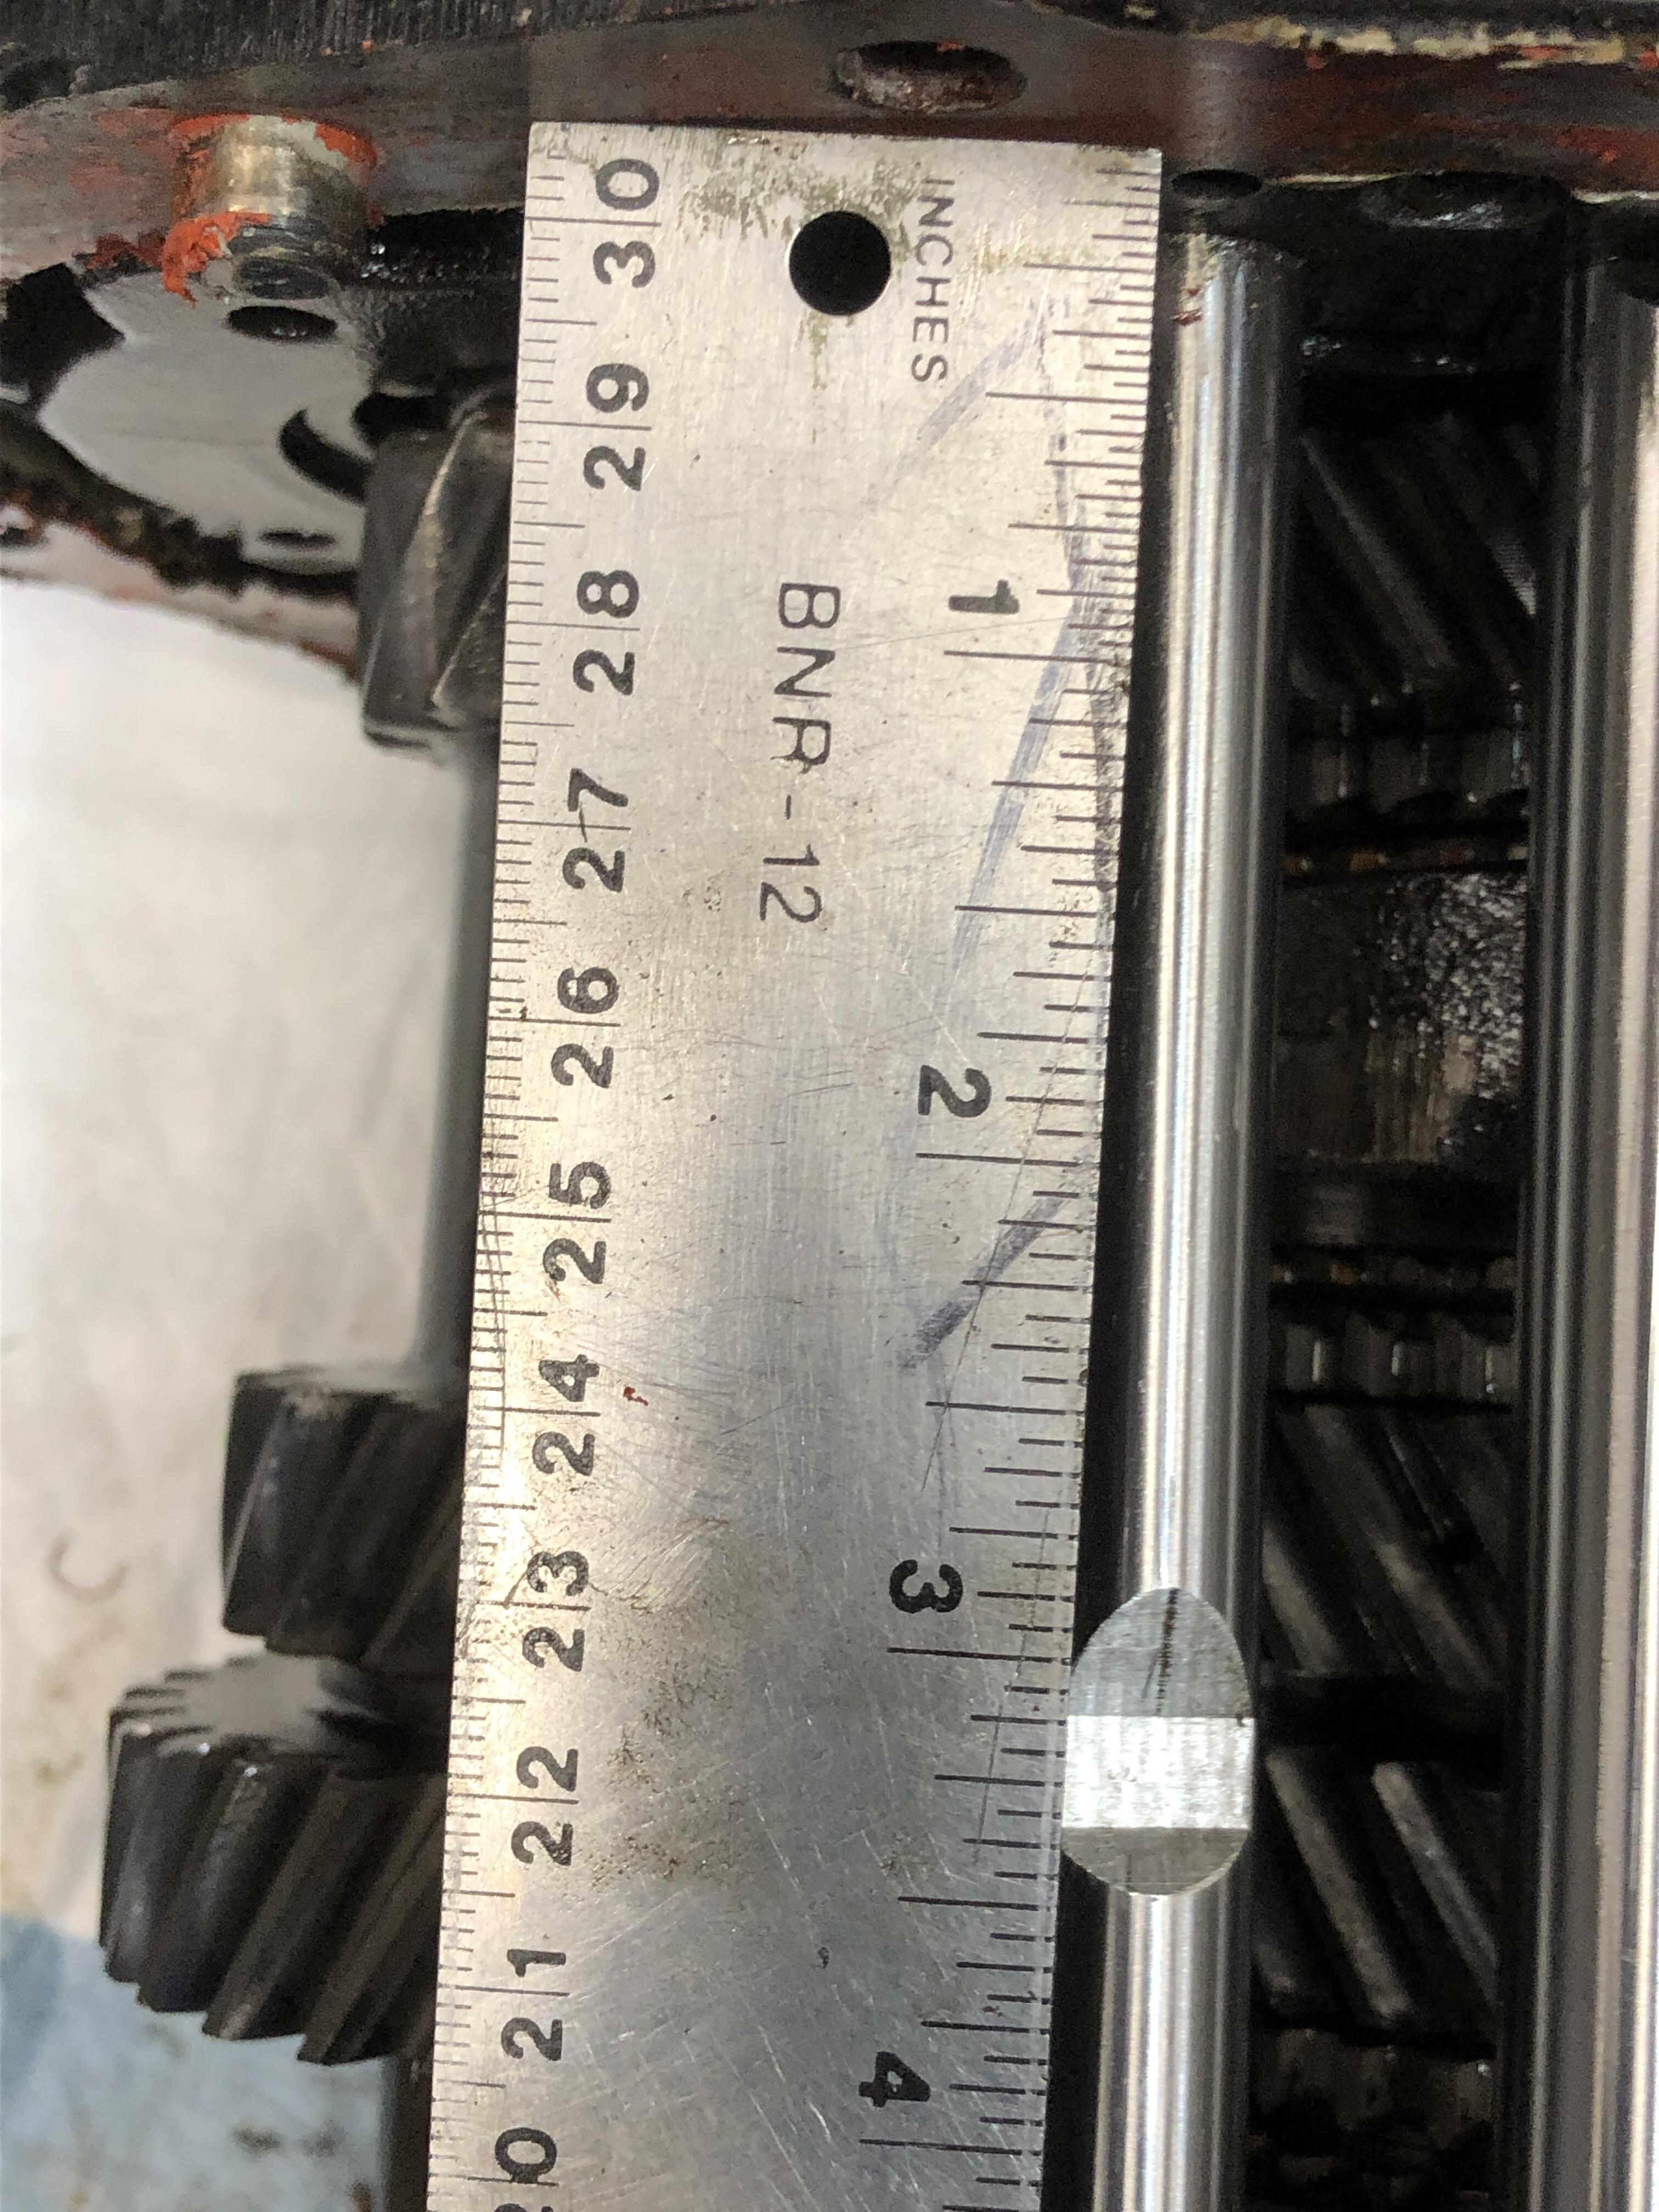
So what do we have to do to modify the shift rod? Simple. Here I have sharpied-in the location of the depressed/ramp area on the 4 speed shift rod, onto the 5 speed shift rod. And cleverly spliced and sized a little picture of the 4 speed slot so can visualize how it has to look. If you just duplicated the 4 speed slot you'd leave an untouch area between the two where the rev lights would be turned on for a second as you shifted into 5th. Would give following drivers pause no doubt "did he just shift into reverse for a second there!?!?!?!" so So what you need to do, is recreate the "ramp" end where shown, and grind the rest of the meat to the right of that, to be just flat to meet the existing flat area. To say another, just keep grinding the existing ramp away until you have moved it to the left to the left most sharpie line, ie where it is on the 4 speed. Get your dremel, or your angle grinder, or your carbide tipped grinding burr, and get removing material. I'd start by cutting down at the far left edge of where my new extended flat is going to be (right most sharpy line) and then remove material to the right to create the new extended flat area. Then cut my new ramp. Clearly you will want to thoroughly wrap the entire guts of the transmission with something like saran wrap or palette wrap or tons of shop towels so that nothing but that short area of the rod is exposed. Chips in here would spell disaster. You can take the rod out of the transmission of course and remove all that "shavings everywhere" risk, but it means removing the 1-2 and 3-4 rods first, seven little balls and three springs to loose, three cotter pins to punch out and put back, so do what you're comfortable with. I'm going to go do this work and report back with a picture of the finished modified shift rod. Precision is not important. The flat part does not have to really flat, the ramp can be smooth or lumpy, it just has to END (get back to un-reduced OD) 2-15/16 ( 2.9375) 74.5mm in front of the center plate with the transmission in neutral. And the flat has to start at 3-3/16" from the center plate so the switch is fully extended (off) when the trans is neutral. How do you know you are neutral? All three shift fork channels are lined up with each other perfectly.

-
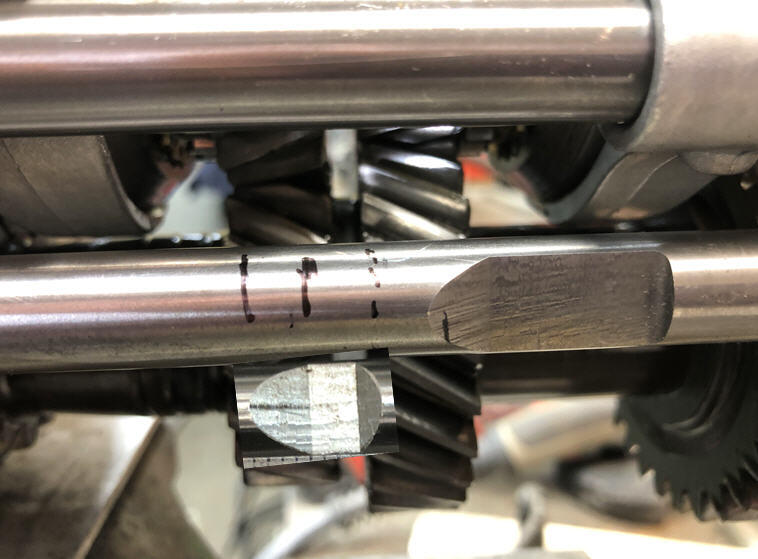
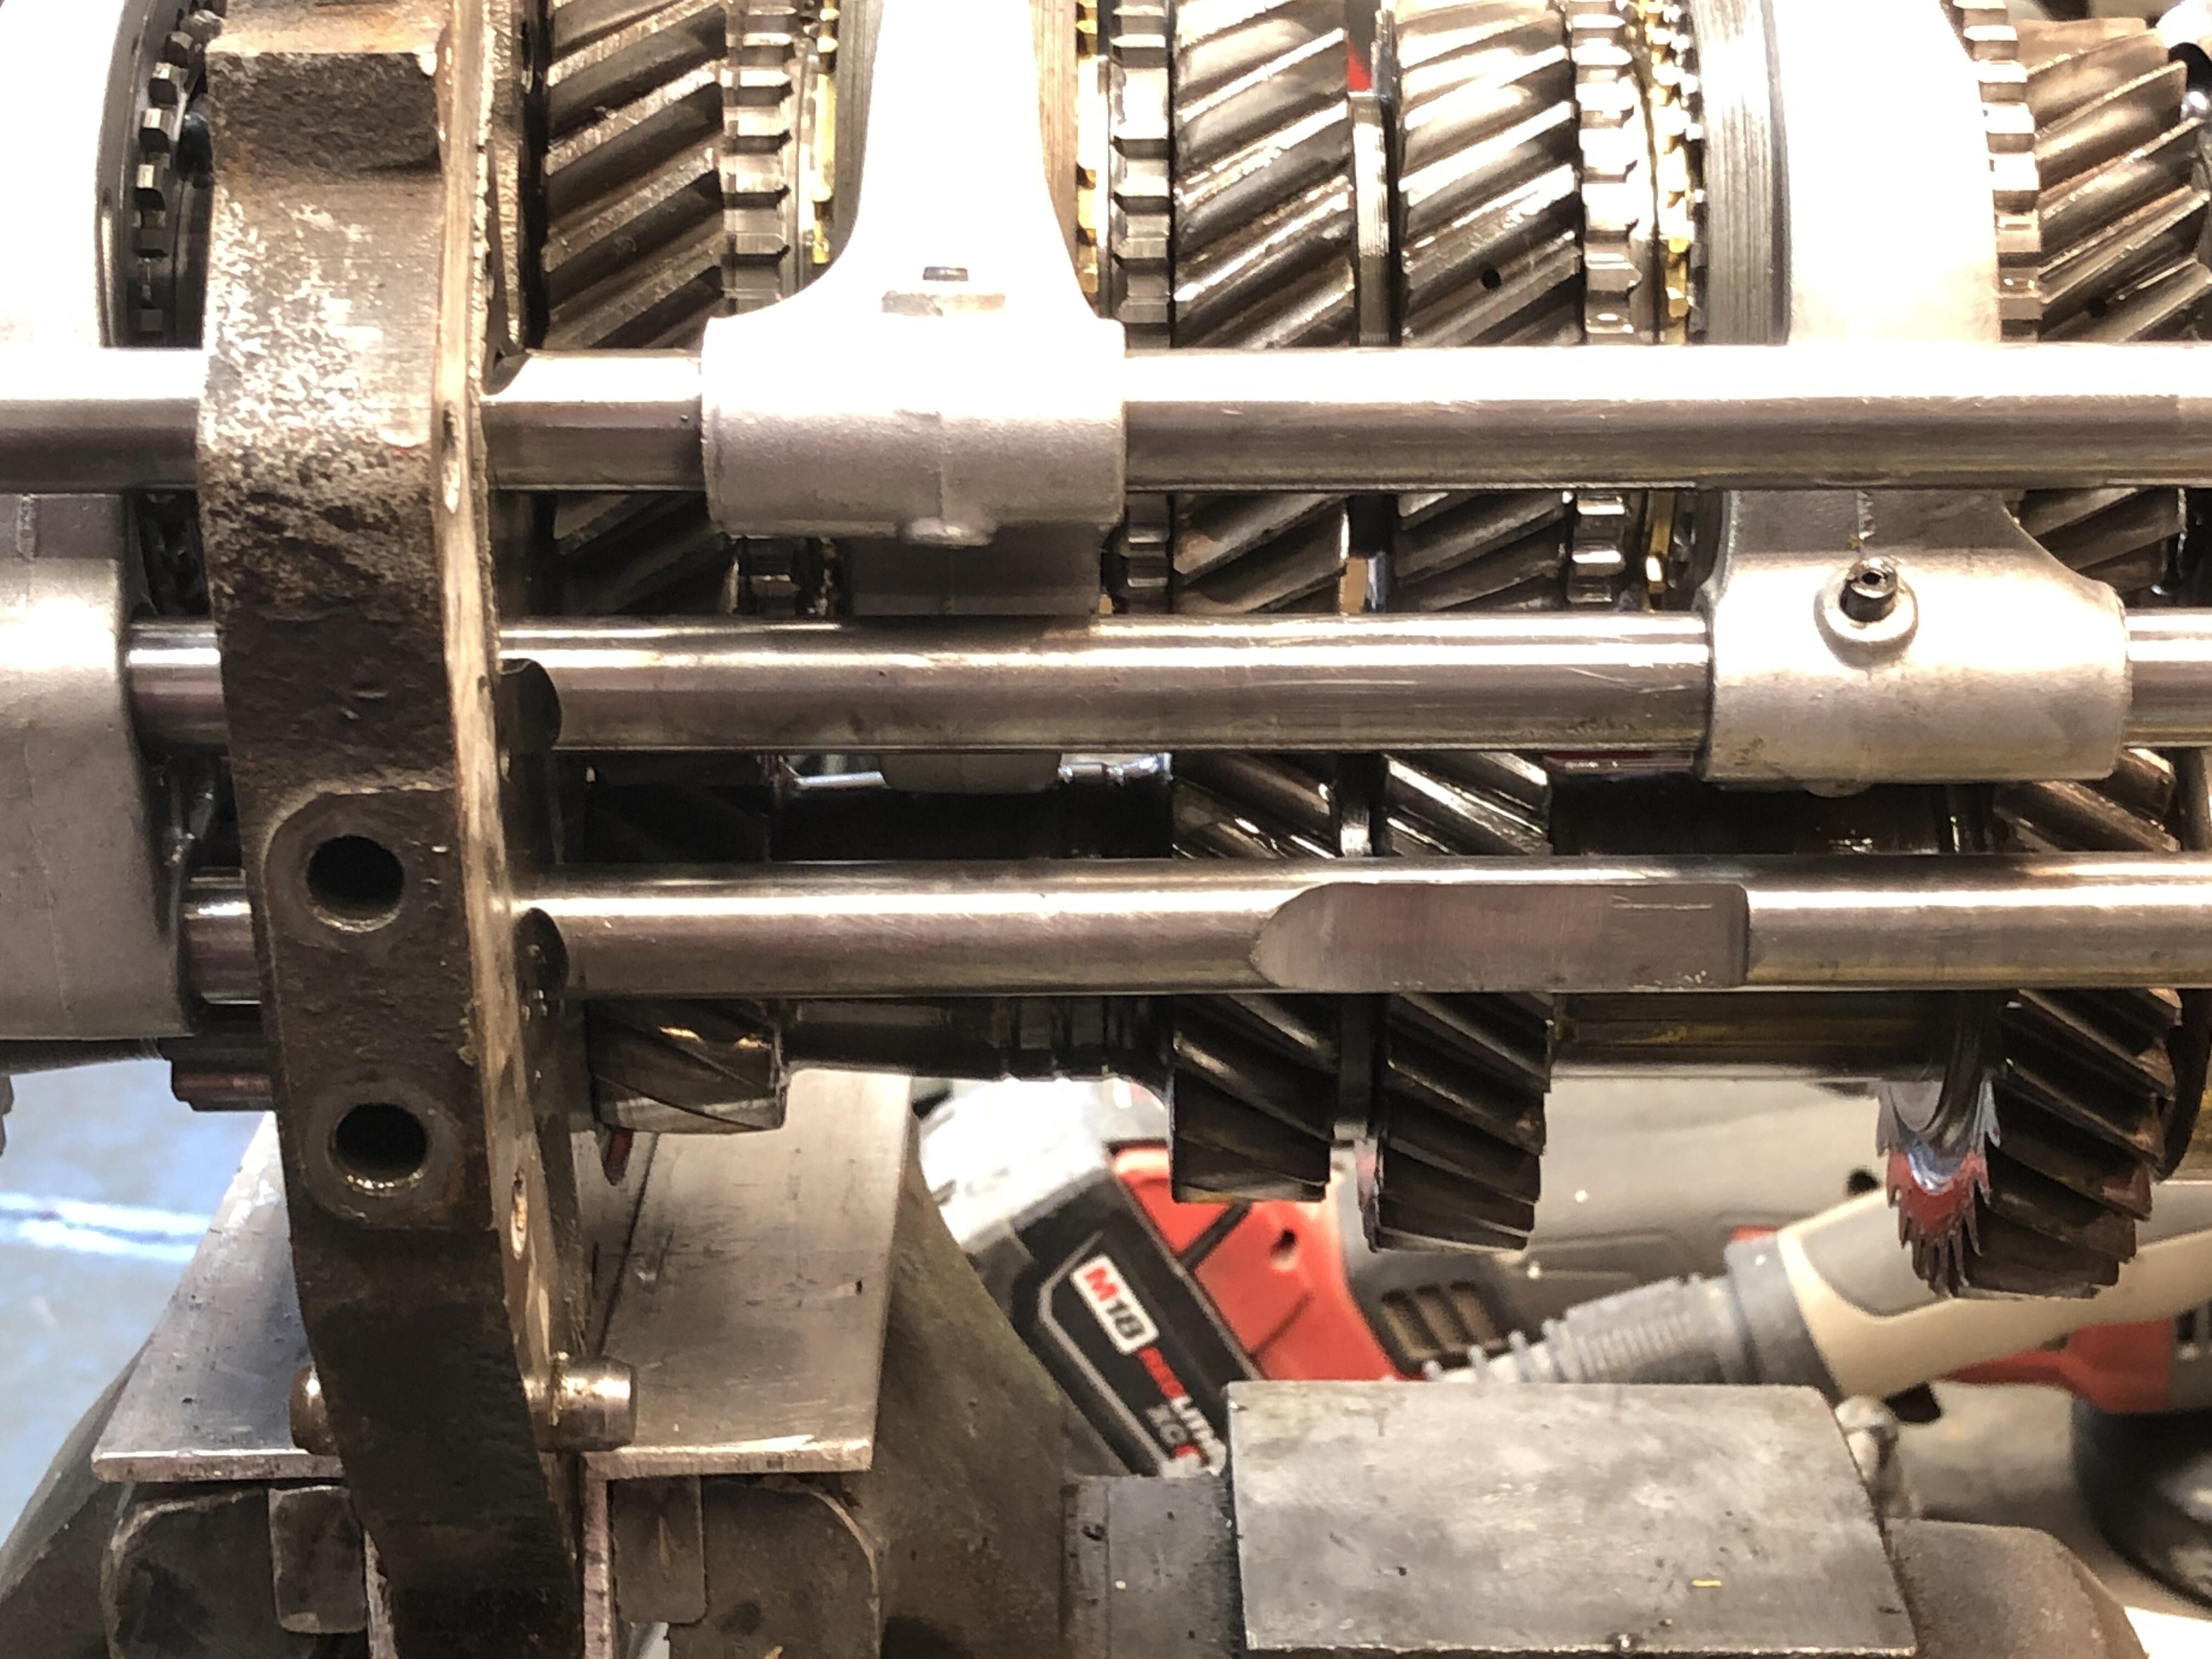
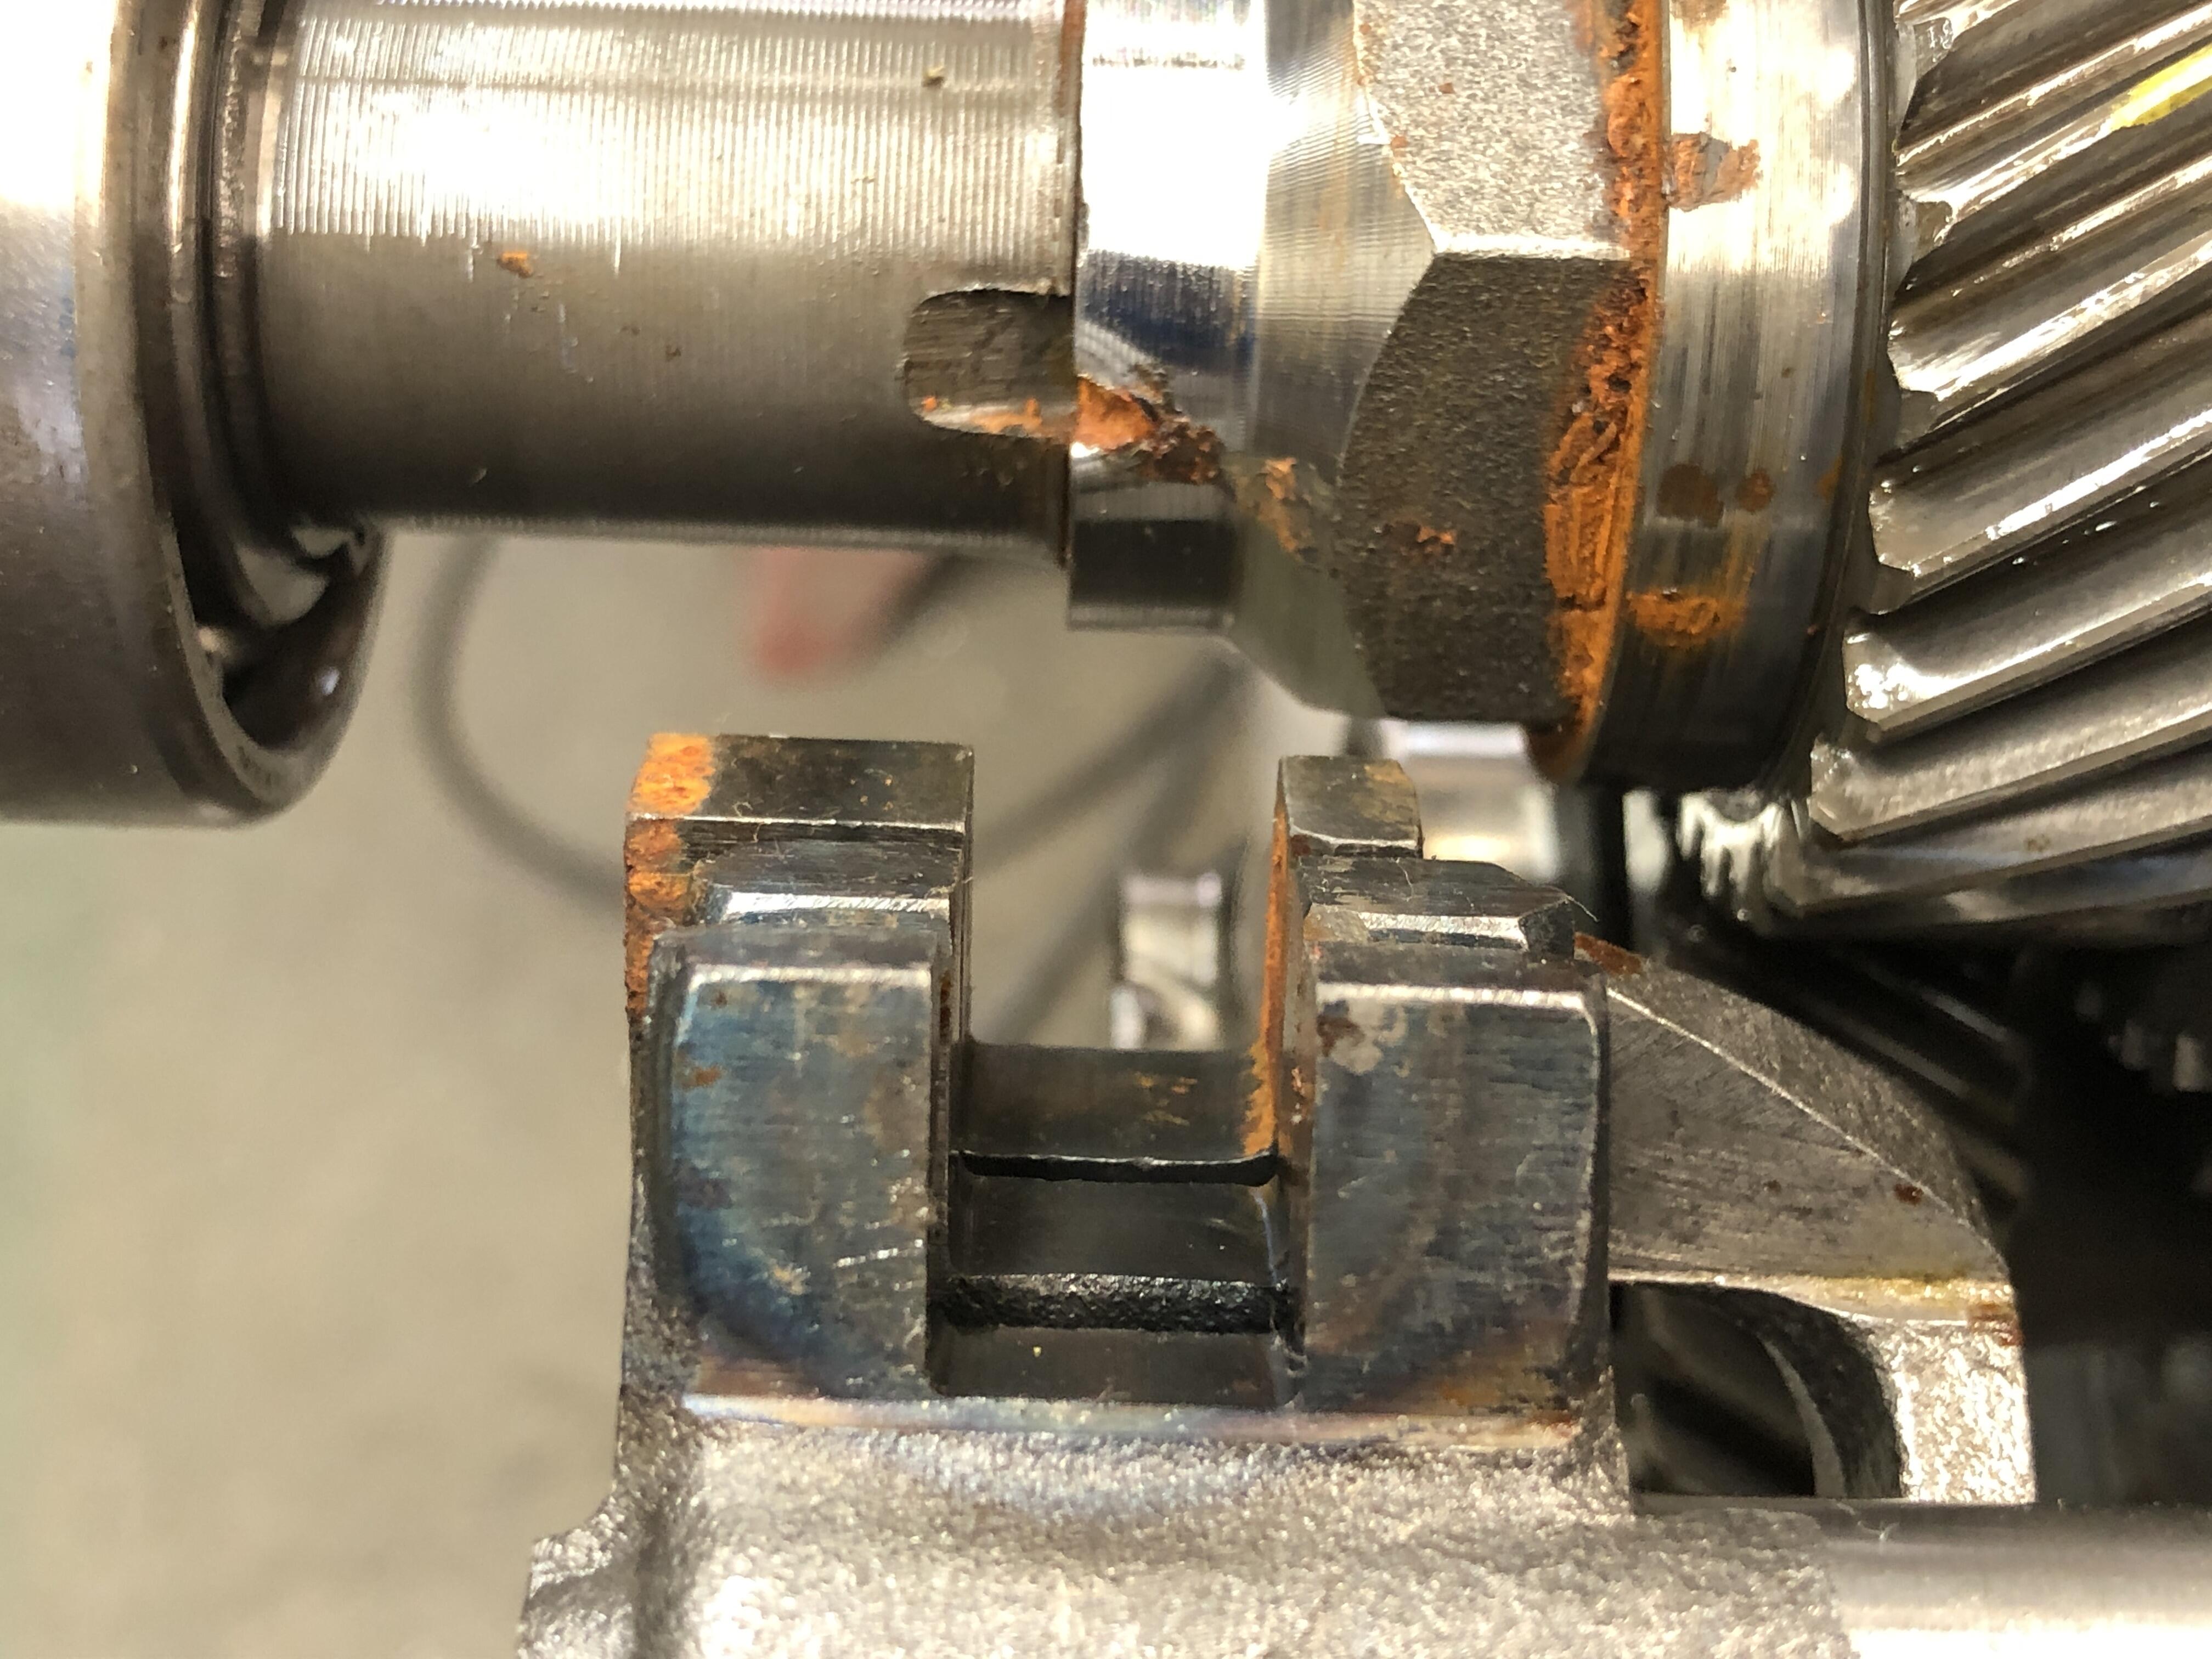
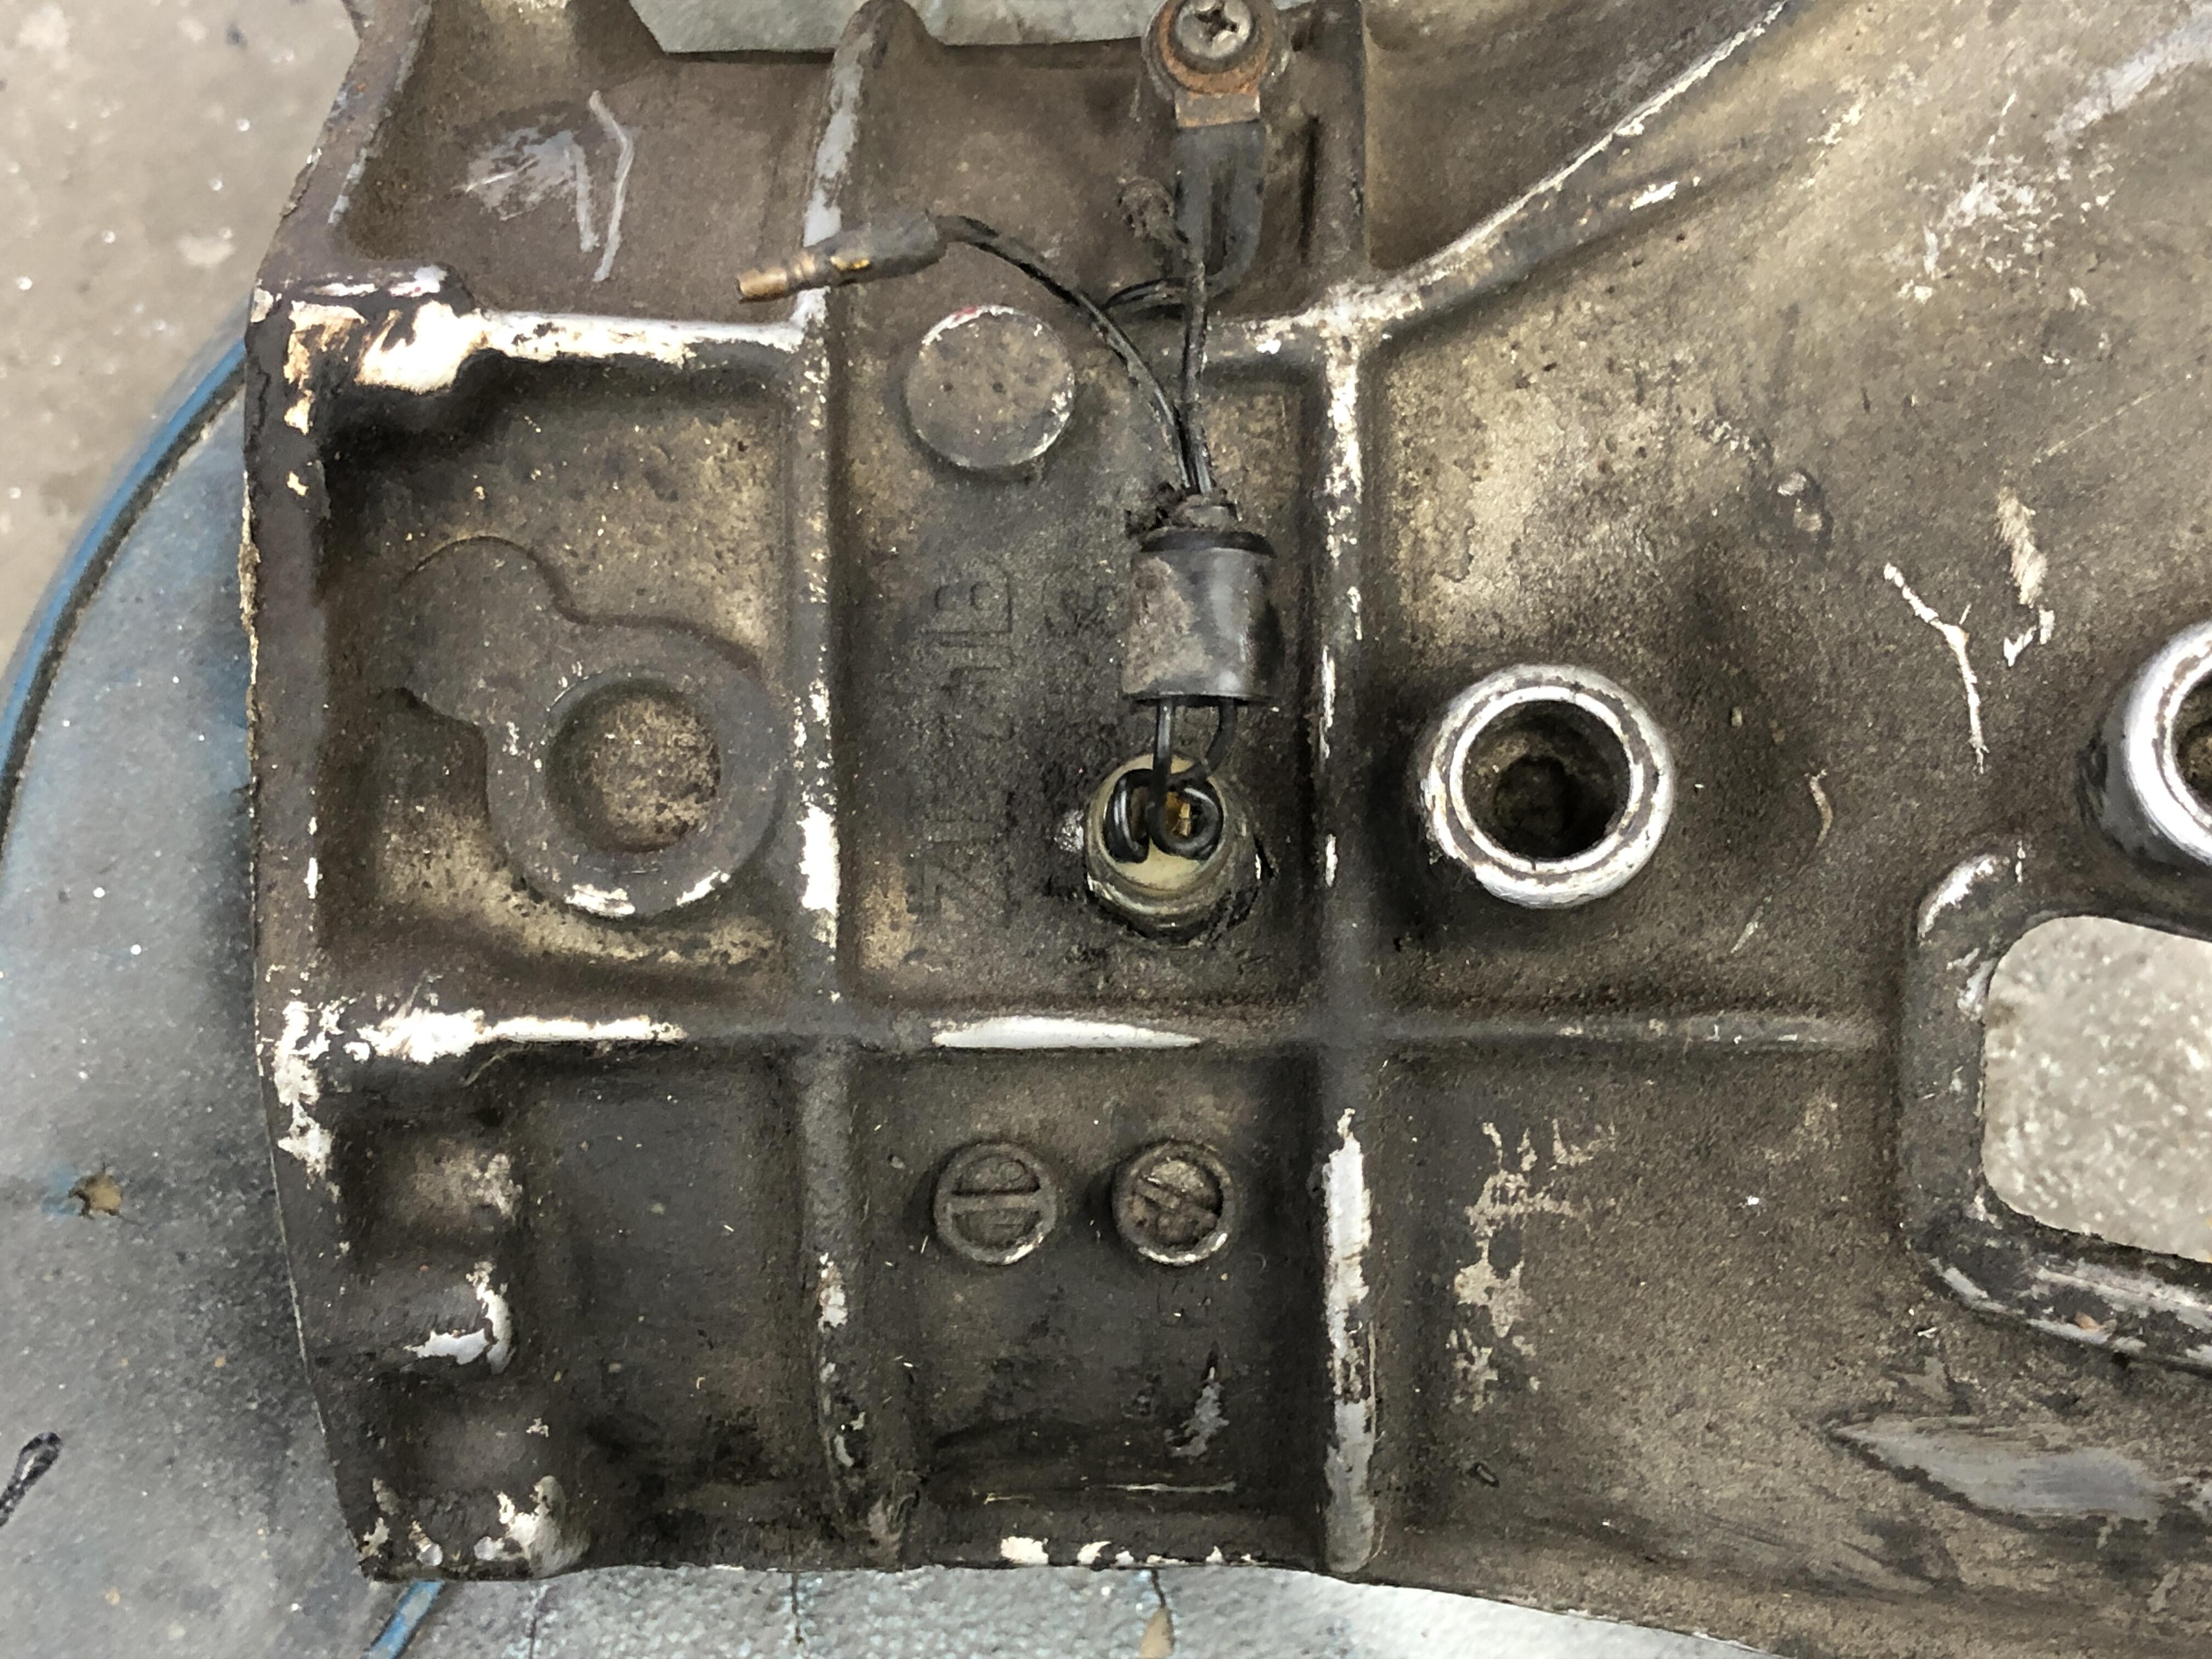
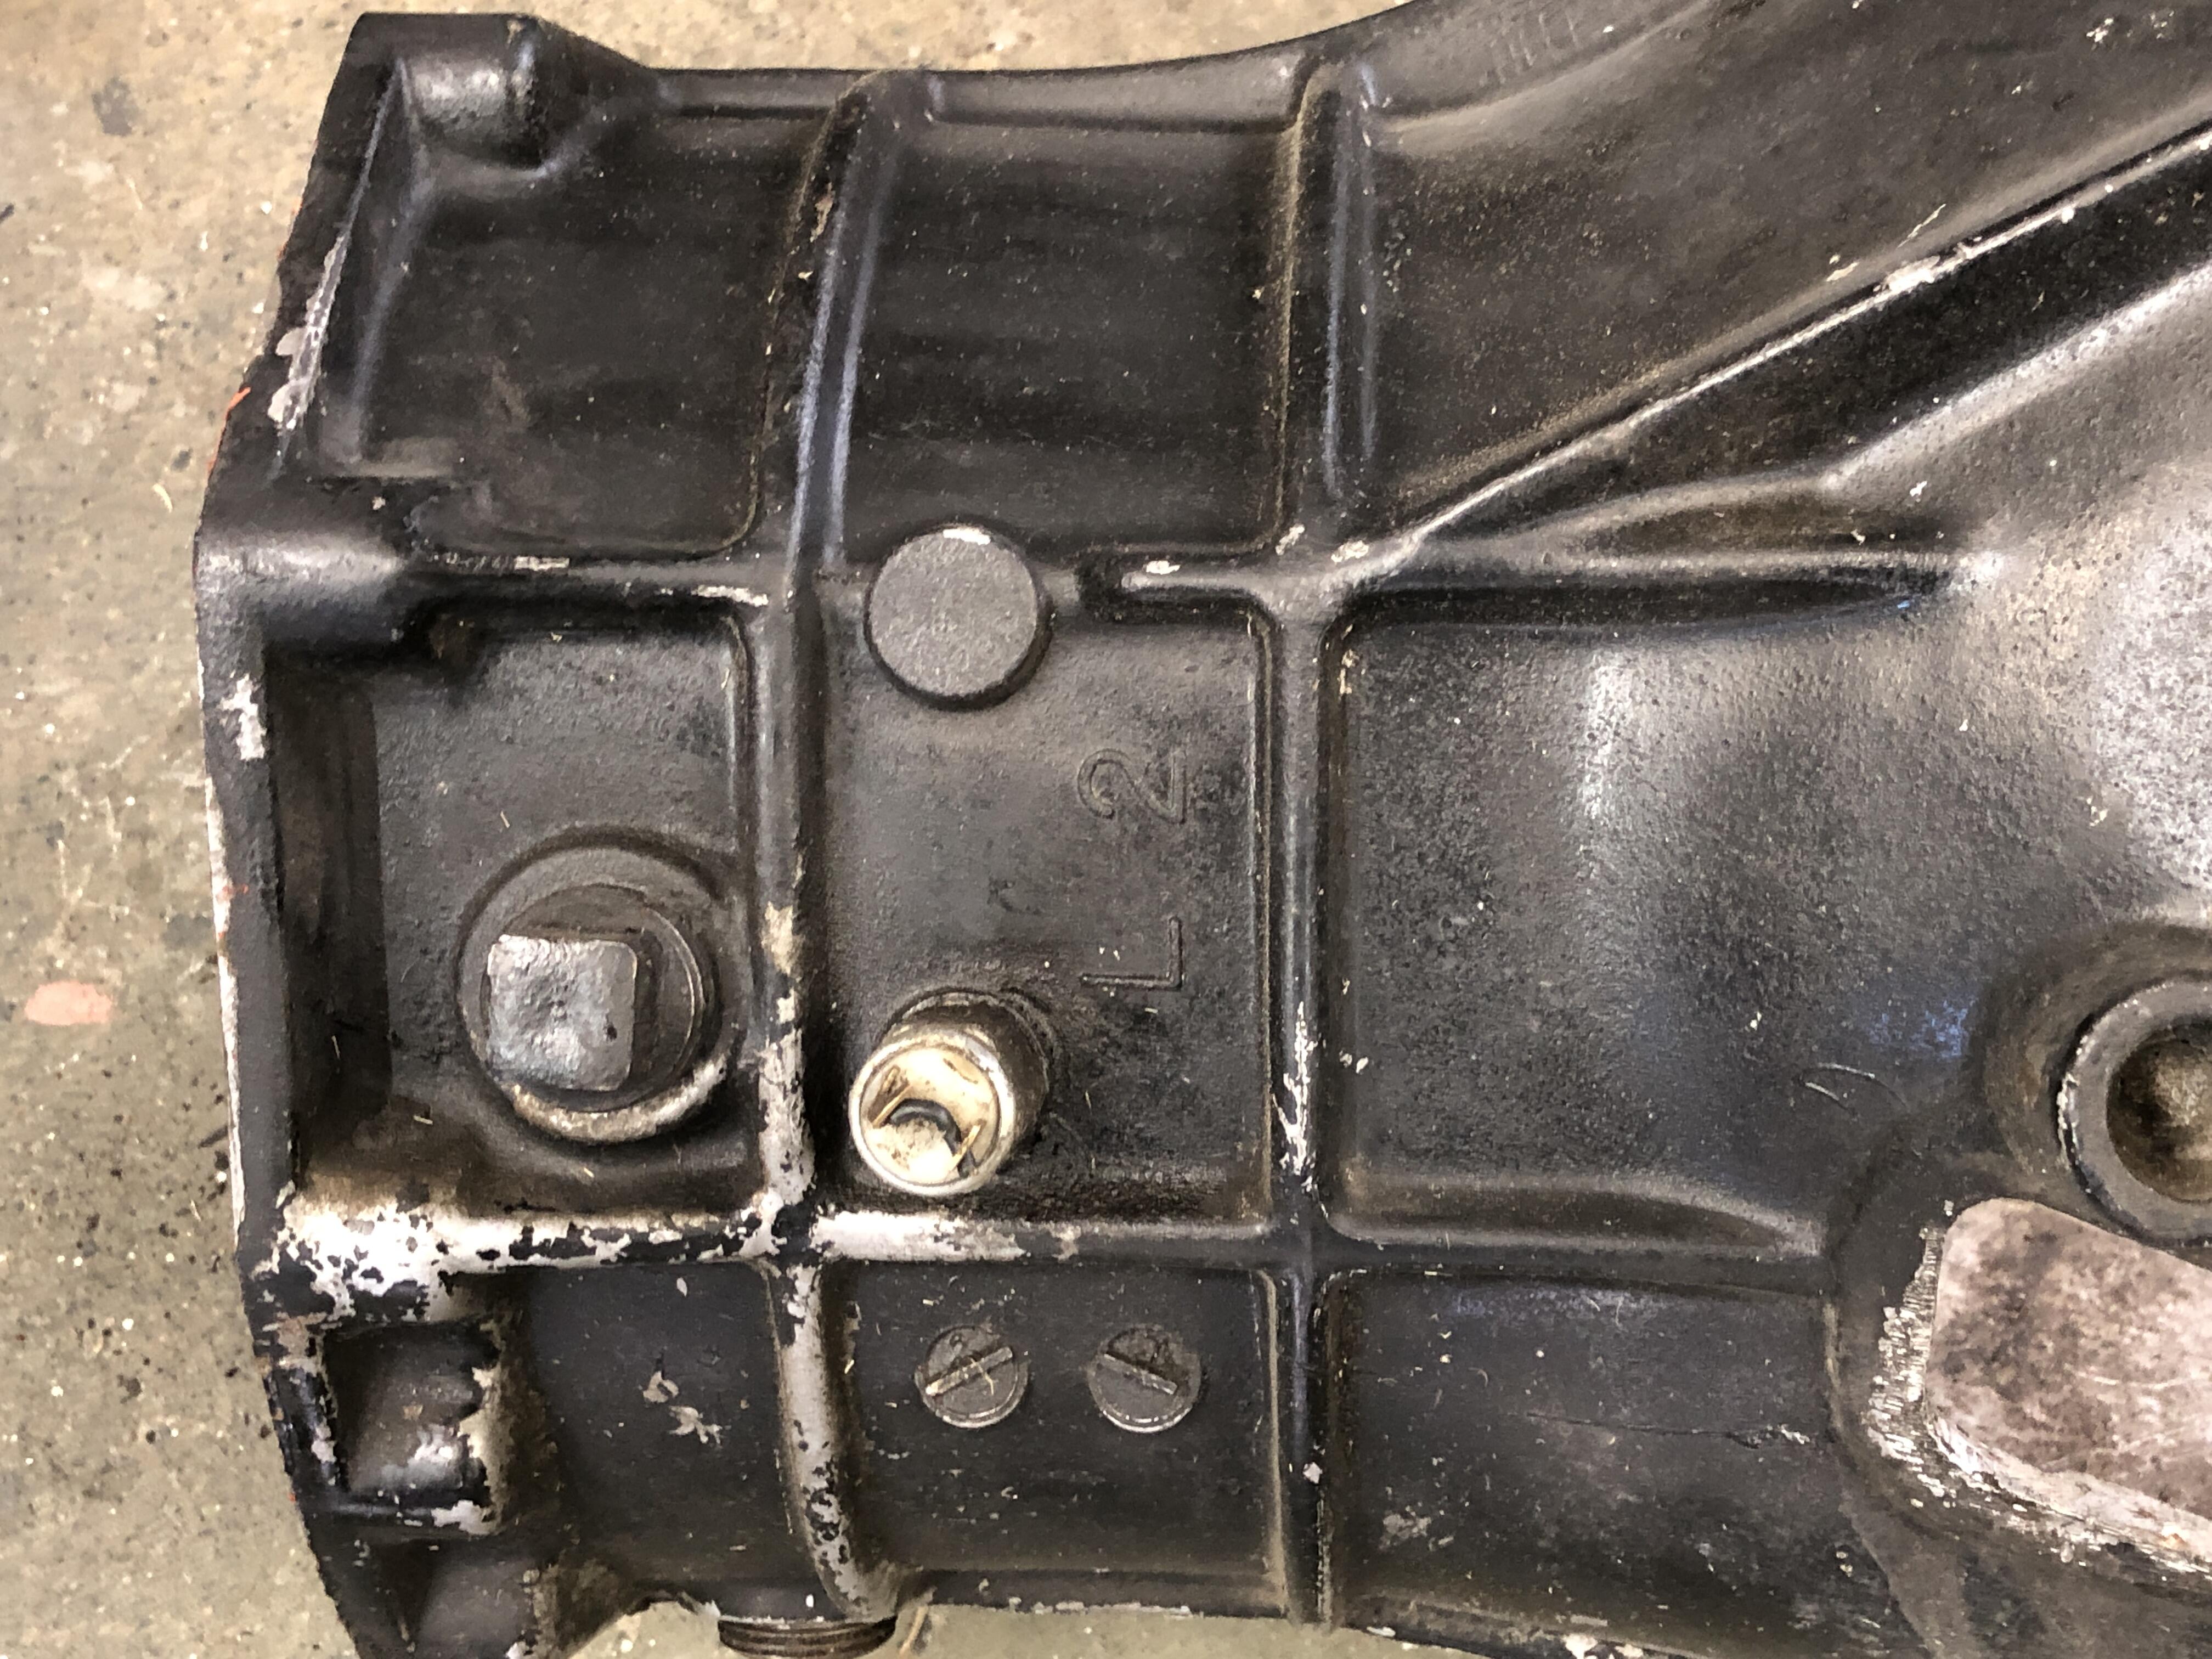
Here is the visual on the switch locations Four Speed, Five Speed, further forward. 7/8 further forward. Inside, here is the 4 speed reverse shift rod with it's indent and here is the 5 speed reverse shift rod with it's indent. Switch tip sits where the blue line is in neutral, then as the fork is pushed forward as you go into reverse, the switch plunger tip climbs that ramp and depresses the switch turning on the reverse lights. Note the longer flat part to the right of the tip. This allows the reverse switch to remain OFF when the trans in 5th as the rod is pulled back. Handy.


.thumb.jpg.9b58746cdd059b3c846a862cab047a98.jpg)
-
Let's review pro's and con's: 1. Do without reverse lights. Well if you left the switch in and hooked up you'd have reverse lights all the time. No. 2. Drill a new hole in the 4 speed case 7/8" further forward, plug the old hole. Sounds simple enough, you have to have the right size tap and drill bit, and if you look closely, that dang thing is not 90deg to the case, it's kinda angled. The nose of the switch has to be in the JUST the right spot. And you'd have to experiment with spacers since there is no raised area on the case like the stock one, and it might leak, and ..... No. 3. Modify the shift rod to move the indent where it needs to be to activate the reverse switch in it's current 4 speed location. This is my choice. The rest of the thread is about how to do this easily. 4. Go choose a 5 speed with the right bell housing to begin with, dipstick.... No fun just doing the simple thing is there?
-
Today's little task is to choose a 5 speed to add to my latest 510 project. Decided on one that is a bit of an un-known. It "looks" like the 82-83 ZX close ratio trans case, long ears, one exhaust hanger, reverse lock out blah blah blah EXCEPT it has a front case that has the rotated clocking for an L motor that would be mounted vertically rather than at our 12 degrees CW slant. Big deal, I've been hoarding 4 speed bell housings for various swaps, so I'll just go get one of those. Quickly it reminded me that while it bolts right on, the 4 speed housing reverse switch is in different spot than on the 5 speed housing. Well the only difference is that it is pretty much 7/8" farther to the rear. What to do. There are only these options: 1. Do without reverse lights. 2. Drill a new hole in the 4 speed case 7/8" further forward, plug the old hole. 3. Modify the shift rod to move the indent where it needs to be to activate the reverse switch in it's current location. 4. Go choose a 5 speed with the right bell housing to begin with, dipstick.... Enny meany miney moh...
-
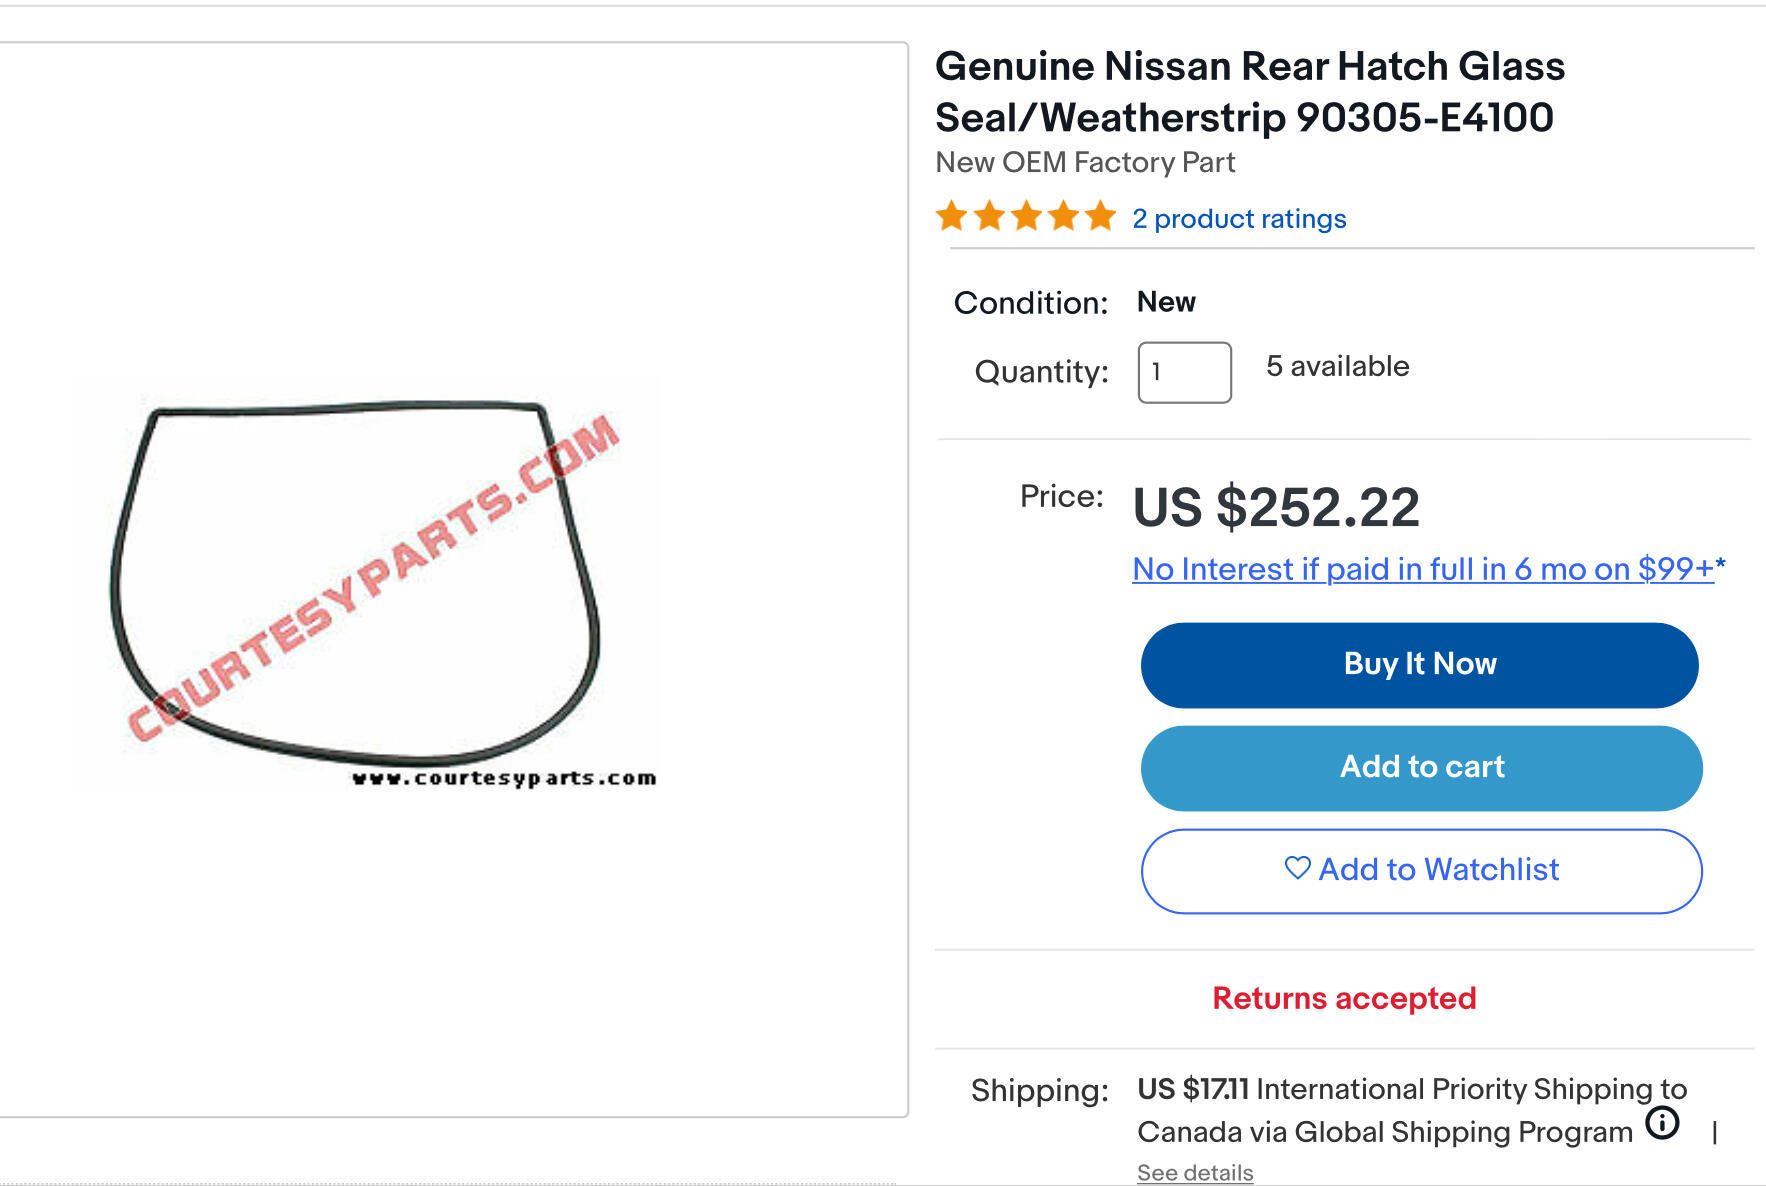
Check with vintage rubber and see if their seal is any different. I’ve only installed one of those and don’t recall if the seal was molded more in those lower corners or not. I get your frustration. Just looking for an OEM gasket. Courtesy Nissan on ebay? https://www.ebay.com/itm/275142887420

-
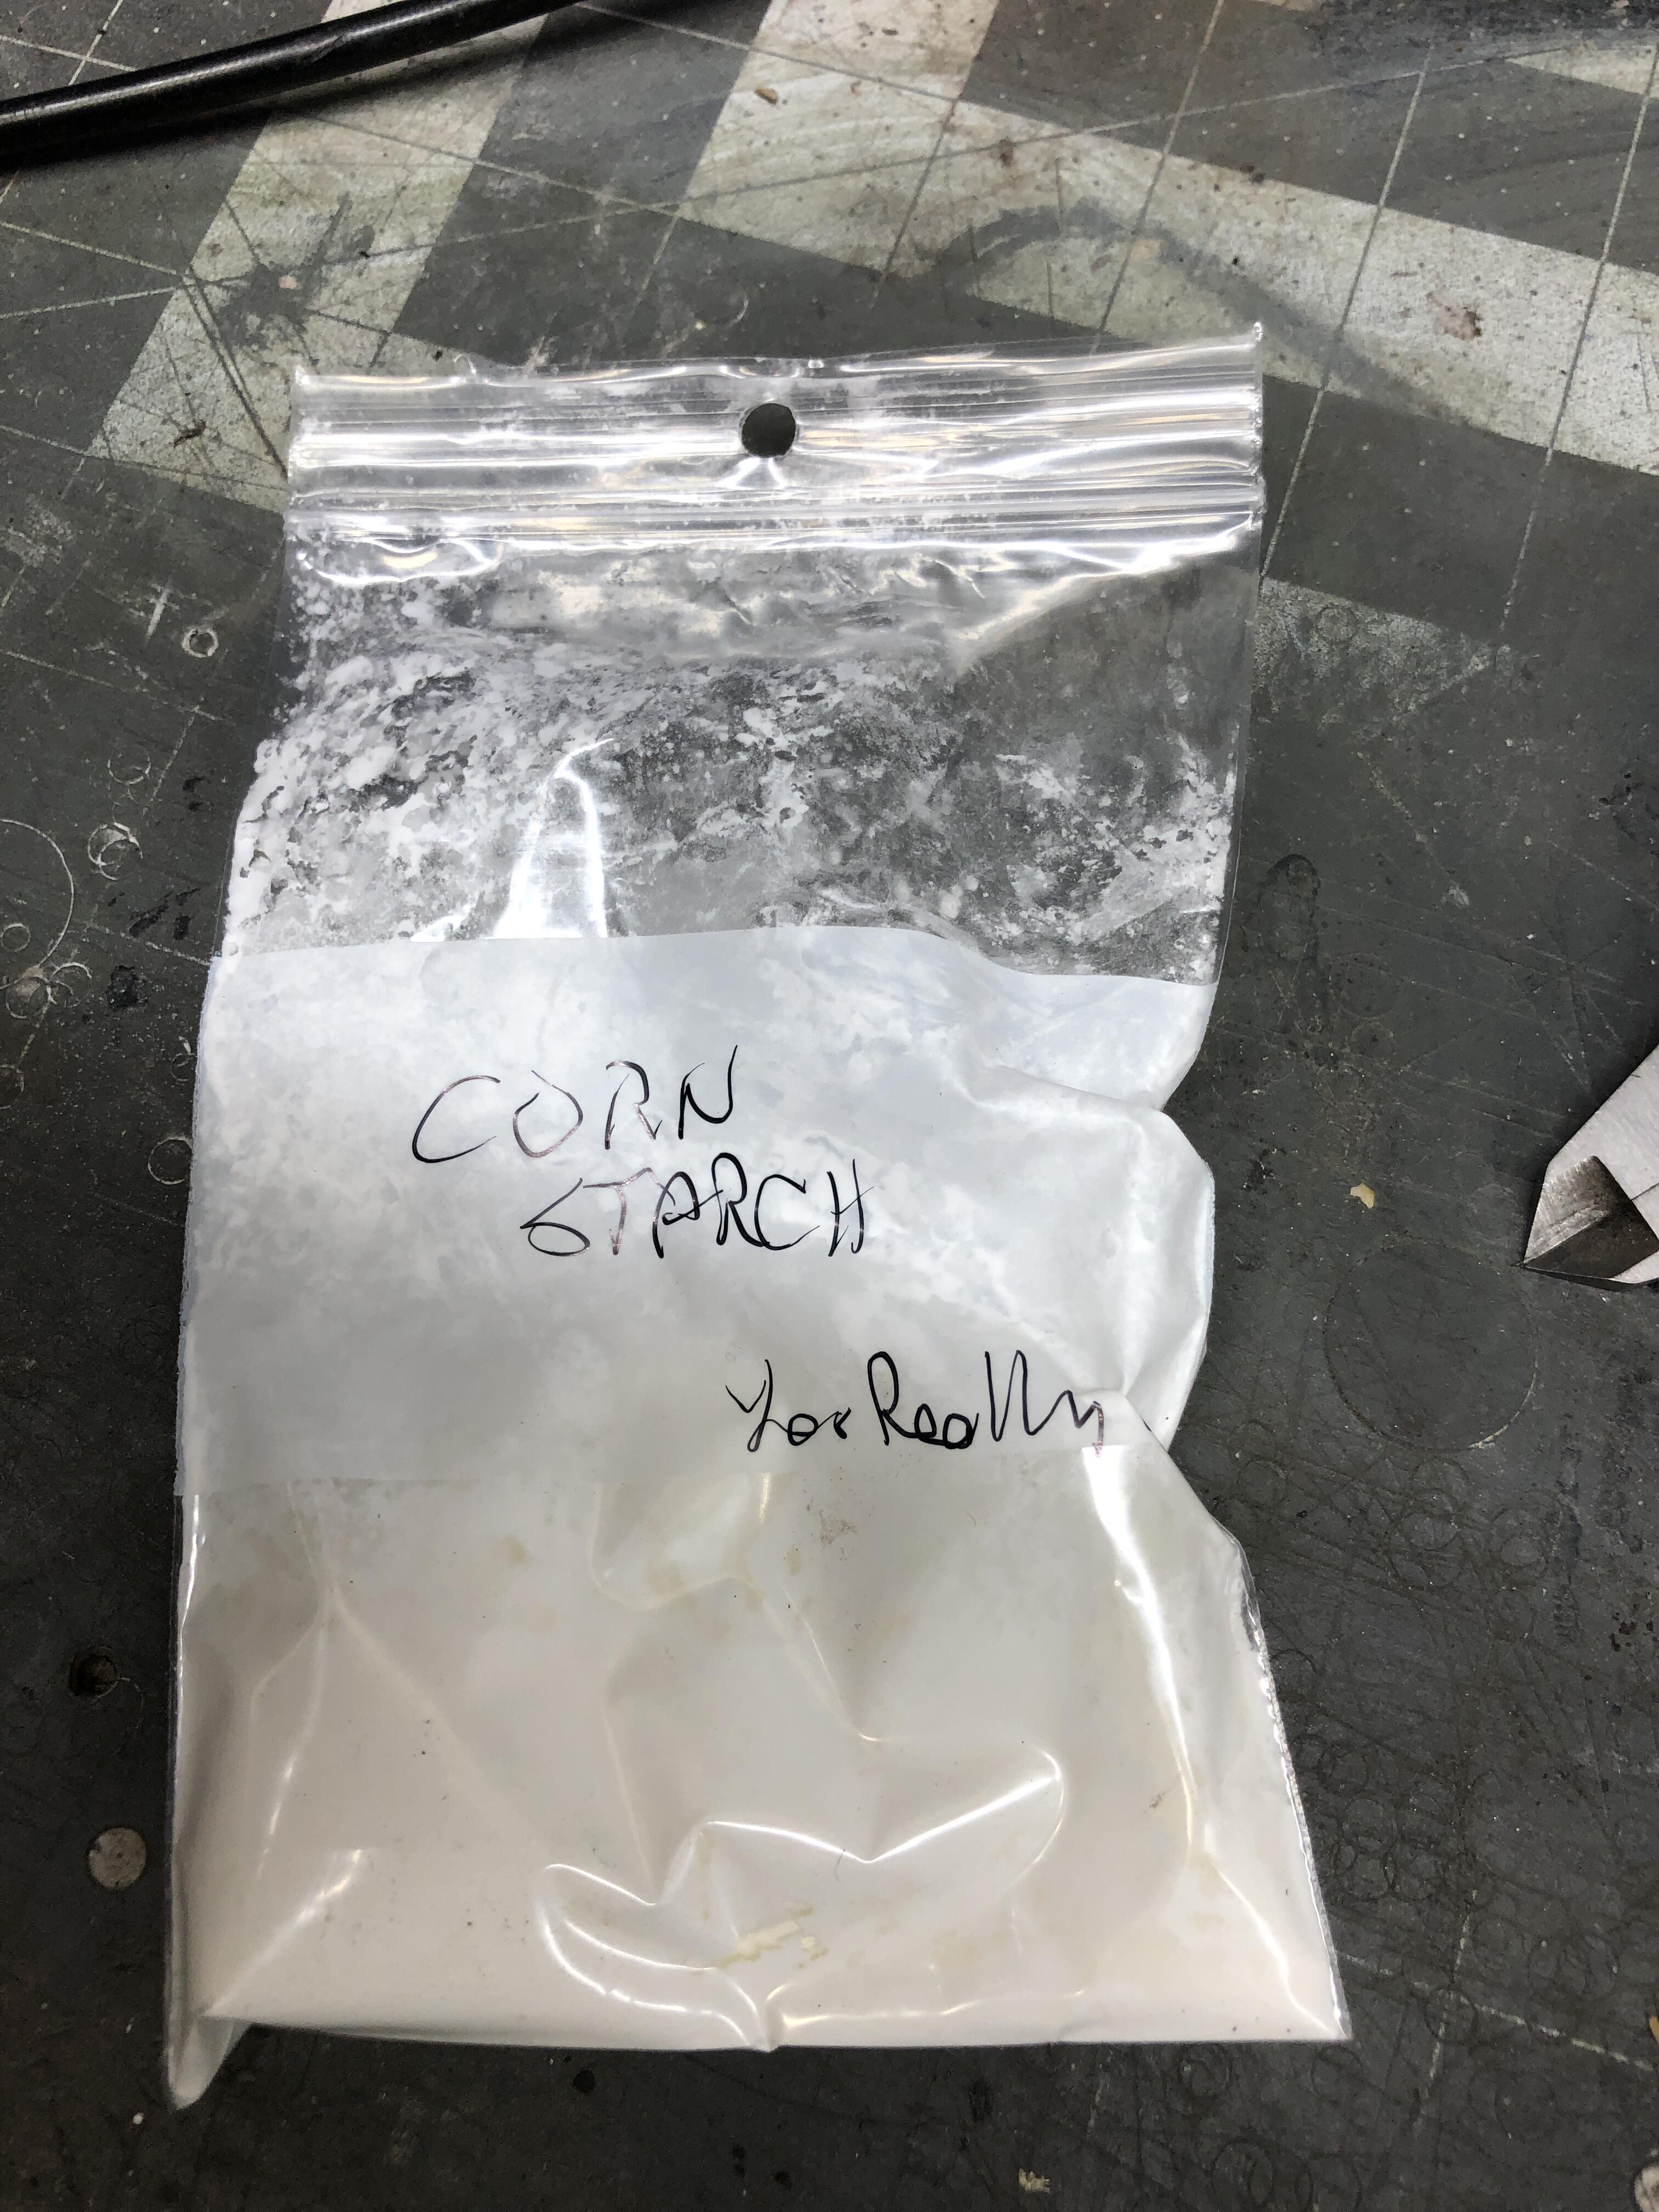
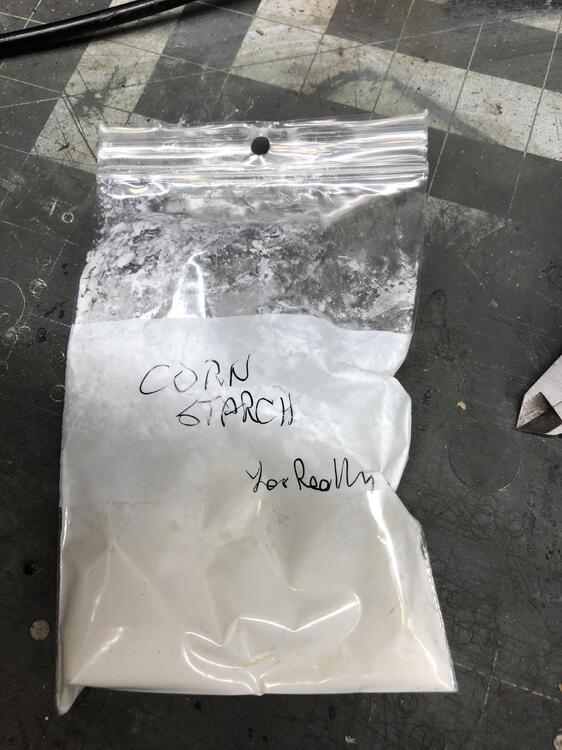
I know you can’t have anything in backwards, the seal has molded corners at the top and you just make it fit around the lower corners, which is why it doesn’t worth a good gal darn….. That is one nasty seal for sure. Does that seal have four molded corners? I just pulled three precision rear window gaskets, all are top corner molded only. The OEM gasket has 4 moulded corners, which I feel you absolutely need to get those bottom corners to fit right. You might have to glue those corners into the curve of the hatch somehow. I’ve had this issue too but never this bad. BTW. Corn starch is now my absolute favorite rubber lube for window seal installs. And it works on putting the trim in the groove afterward too. So slick, so dry, so easy to clean up, so cheap.
-
Tool #4 More of a technique. Pulling the rope around the corners. That top corner on an S30 is real pointy. But all you have to do is make circles with the rope as you pull it. Move in as big a circle as you can with about 2-3 inches of rope between your finger and the rubber. Rotate in the direction that moves the rope along the easiest. Watch the rope where it goes into the rubber to see which direction I mean, generally CW if your moving right to left at the bottom left corner for example. Keep making circles while you pull. And tool #4a, wear a leather glove while pulling rope, takes the pain away from the rope ripping into your delicate little patties with the rope wrapped around the digits and palm. You can concentrate better and whine less.
-
Tool #3: Lubricant When I first starting doing my glass, I followed almost all the on-line advice and used soapy water and / or window cleaner spray (windex or Invisible glass) to lube the rubber to help get it on the glass to start, and to get the gasket and rope to slide and slip easier during installation. I quickly found this was a messy and relatively in-effective thing to do. Both evaporate quickly and are never where and when you need them when you need it. I went dry from that point on. For one thing, keeping the gasket on the glass and having it stay there while you work on getting it all on the glass is someplace I want MORE friction to keep it in place, not less. And I have to problem pulling rope out of dry groove and if I spend time getting the whole thing settled into the window opening BEFORE I start pulling (see above about pinch weld distance) then being dry is just fine. BUT, that said, if I found a “better” lubricant, I’d use it. I think I have my holy grail on this as well. Baby powder. Well, actually Corn Starch. Dry, cheap, stays in place, wipes, blows or washed away when you’re done, and most importantly, takes away all rubber tackyness. A little goes a long way. Dip a finger in the powder, rub it on the rubber to leave a very very thin white dusting of powder where you want it. If you want to use Baby powder go for it, but you better be able to explain that pretty smell to your significant other… I’m looking forward to using it on the SS trim groove as well, to help get that nasty stuff in place a little easier.
-
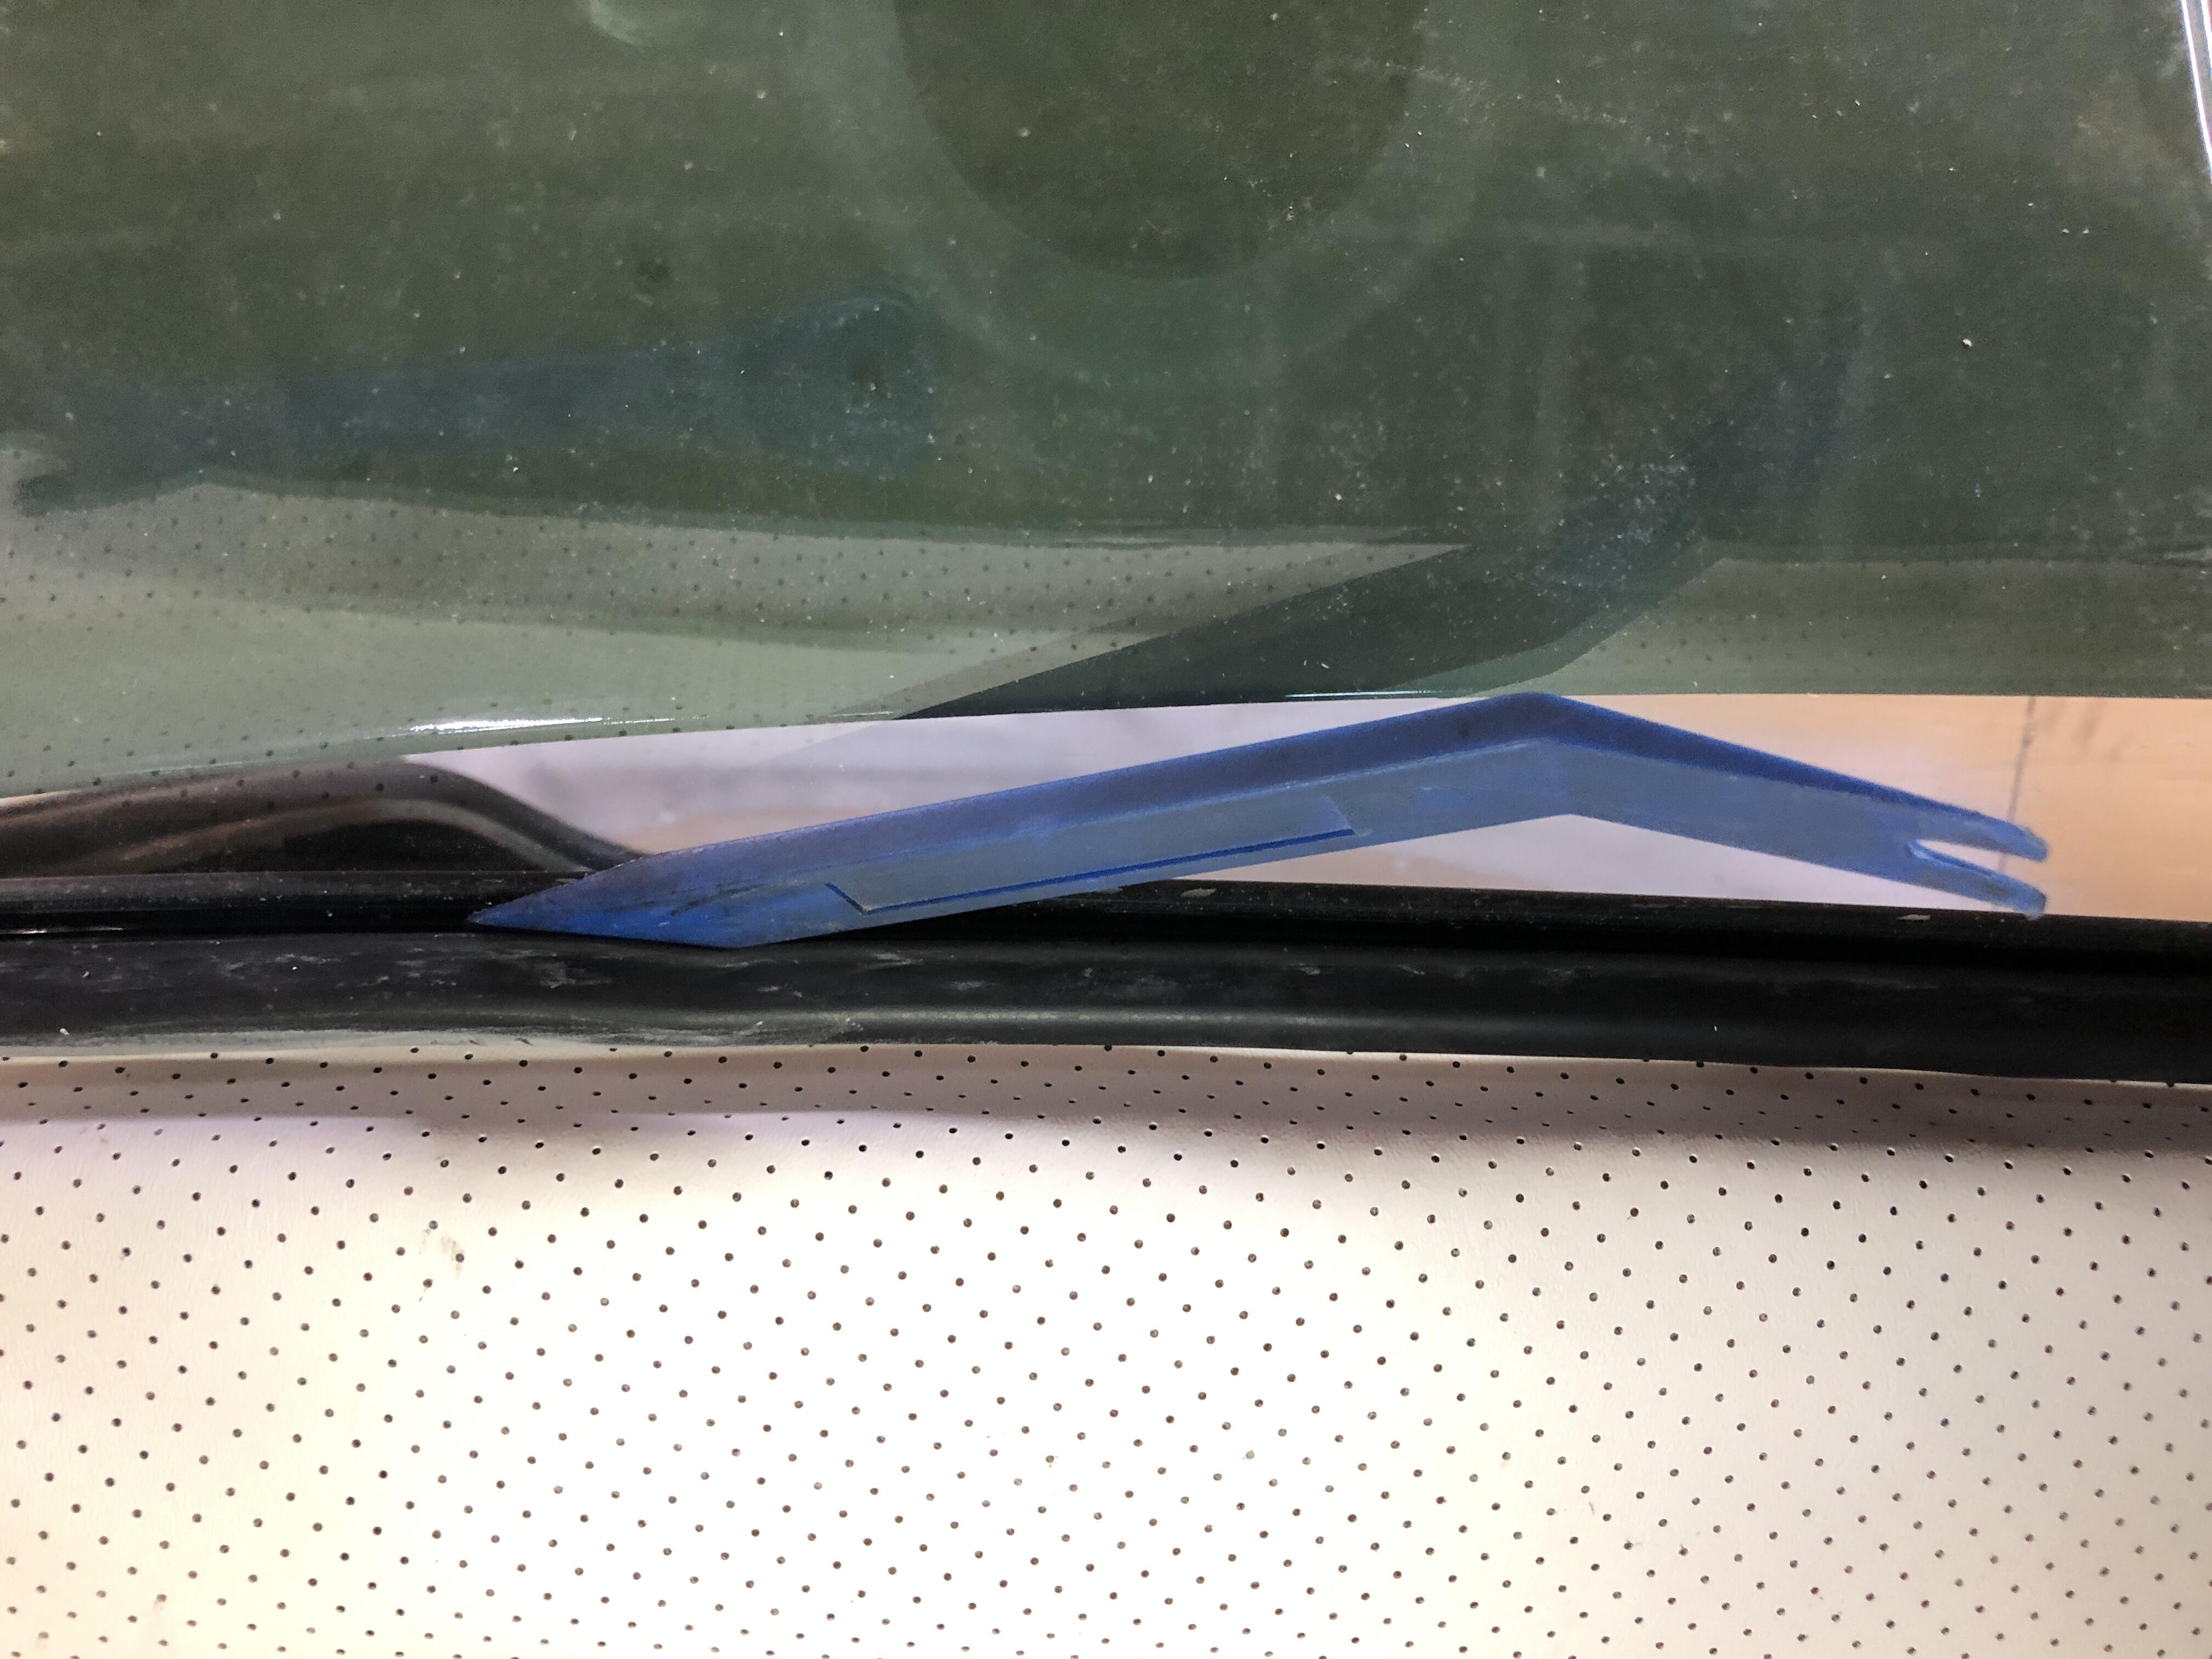
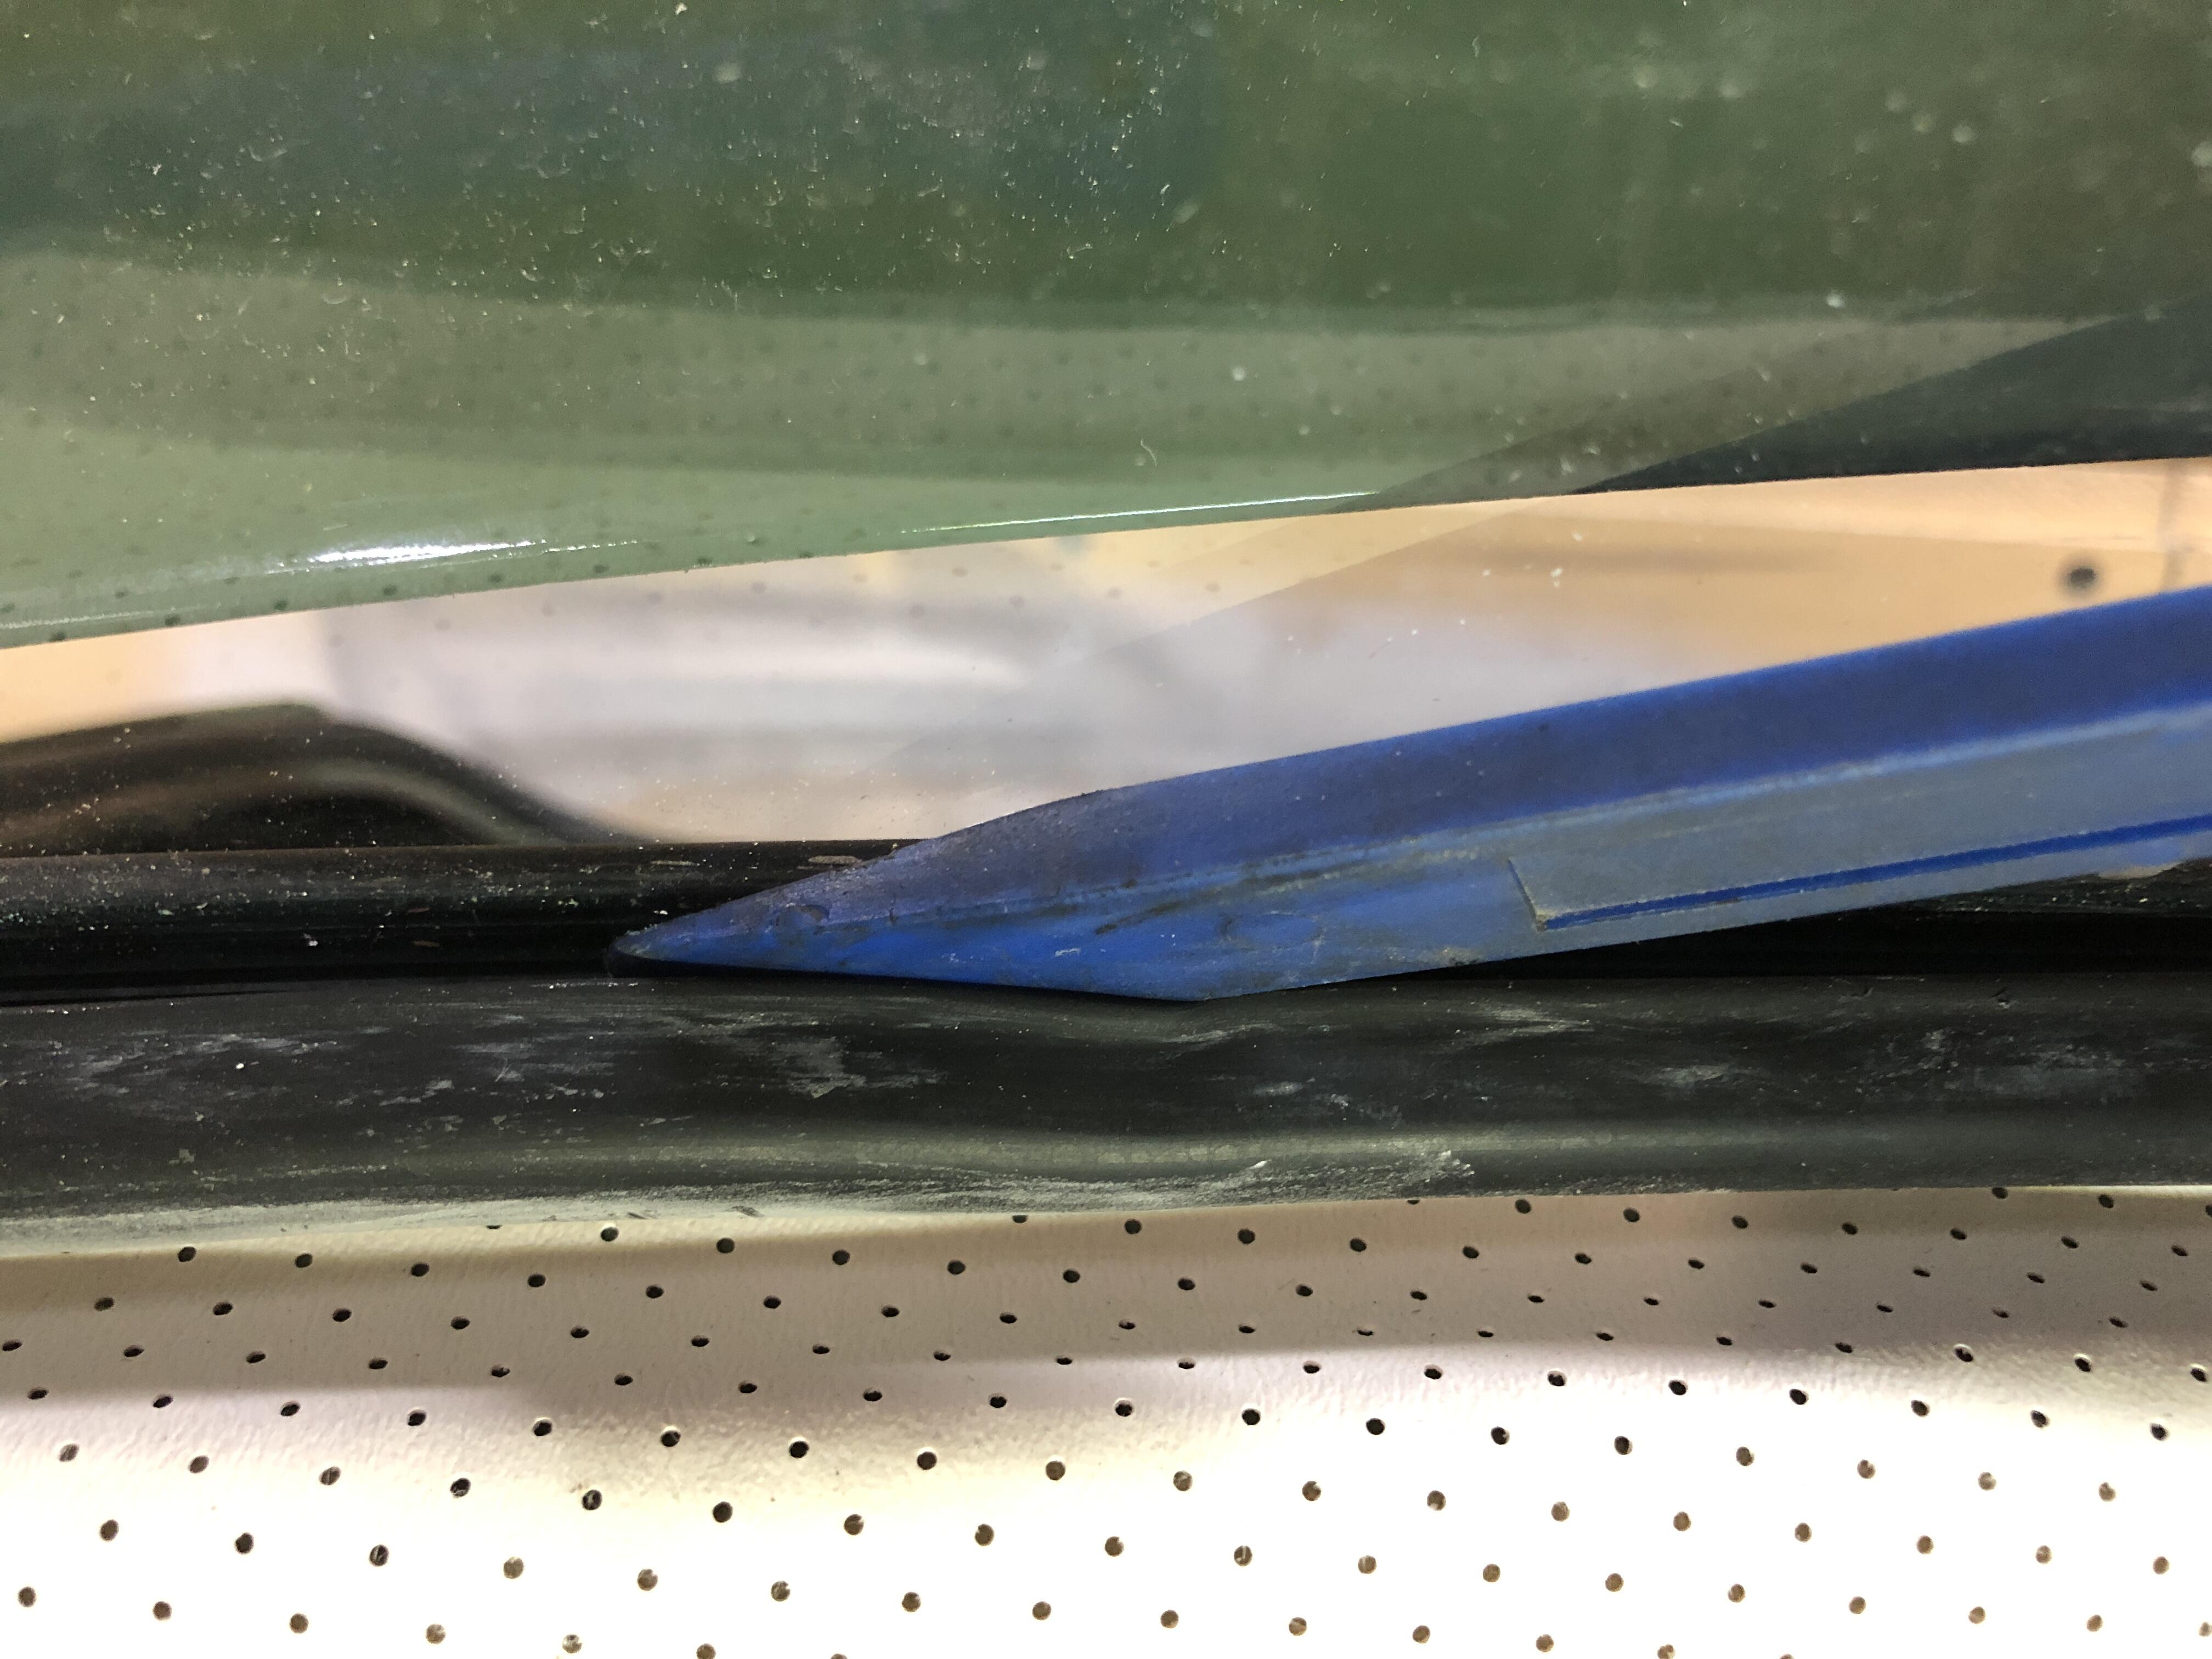
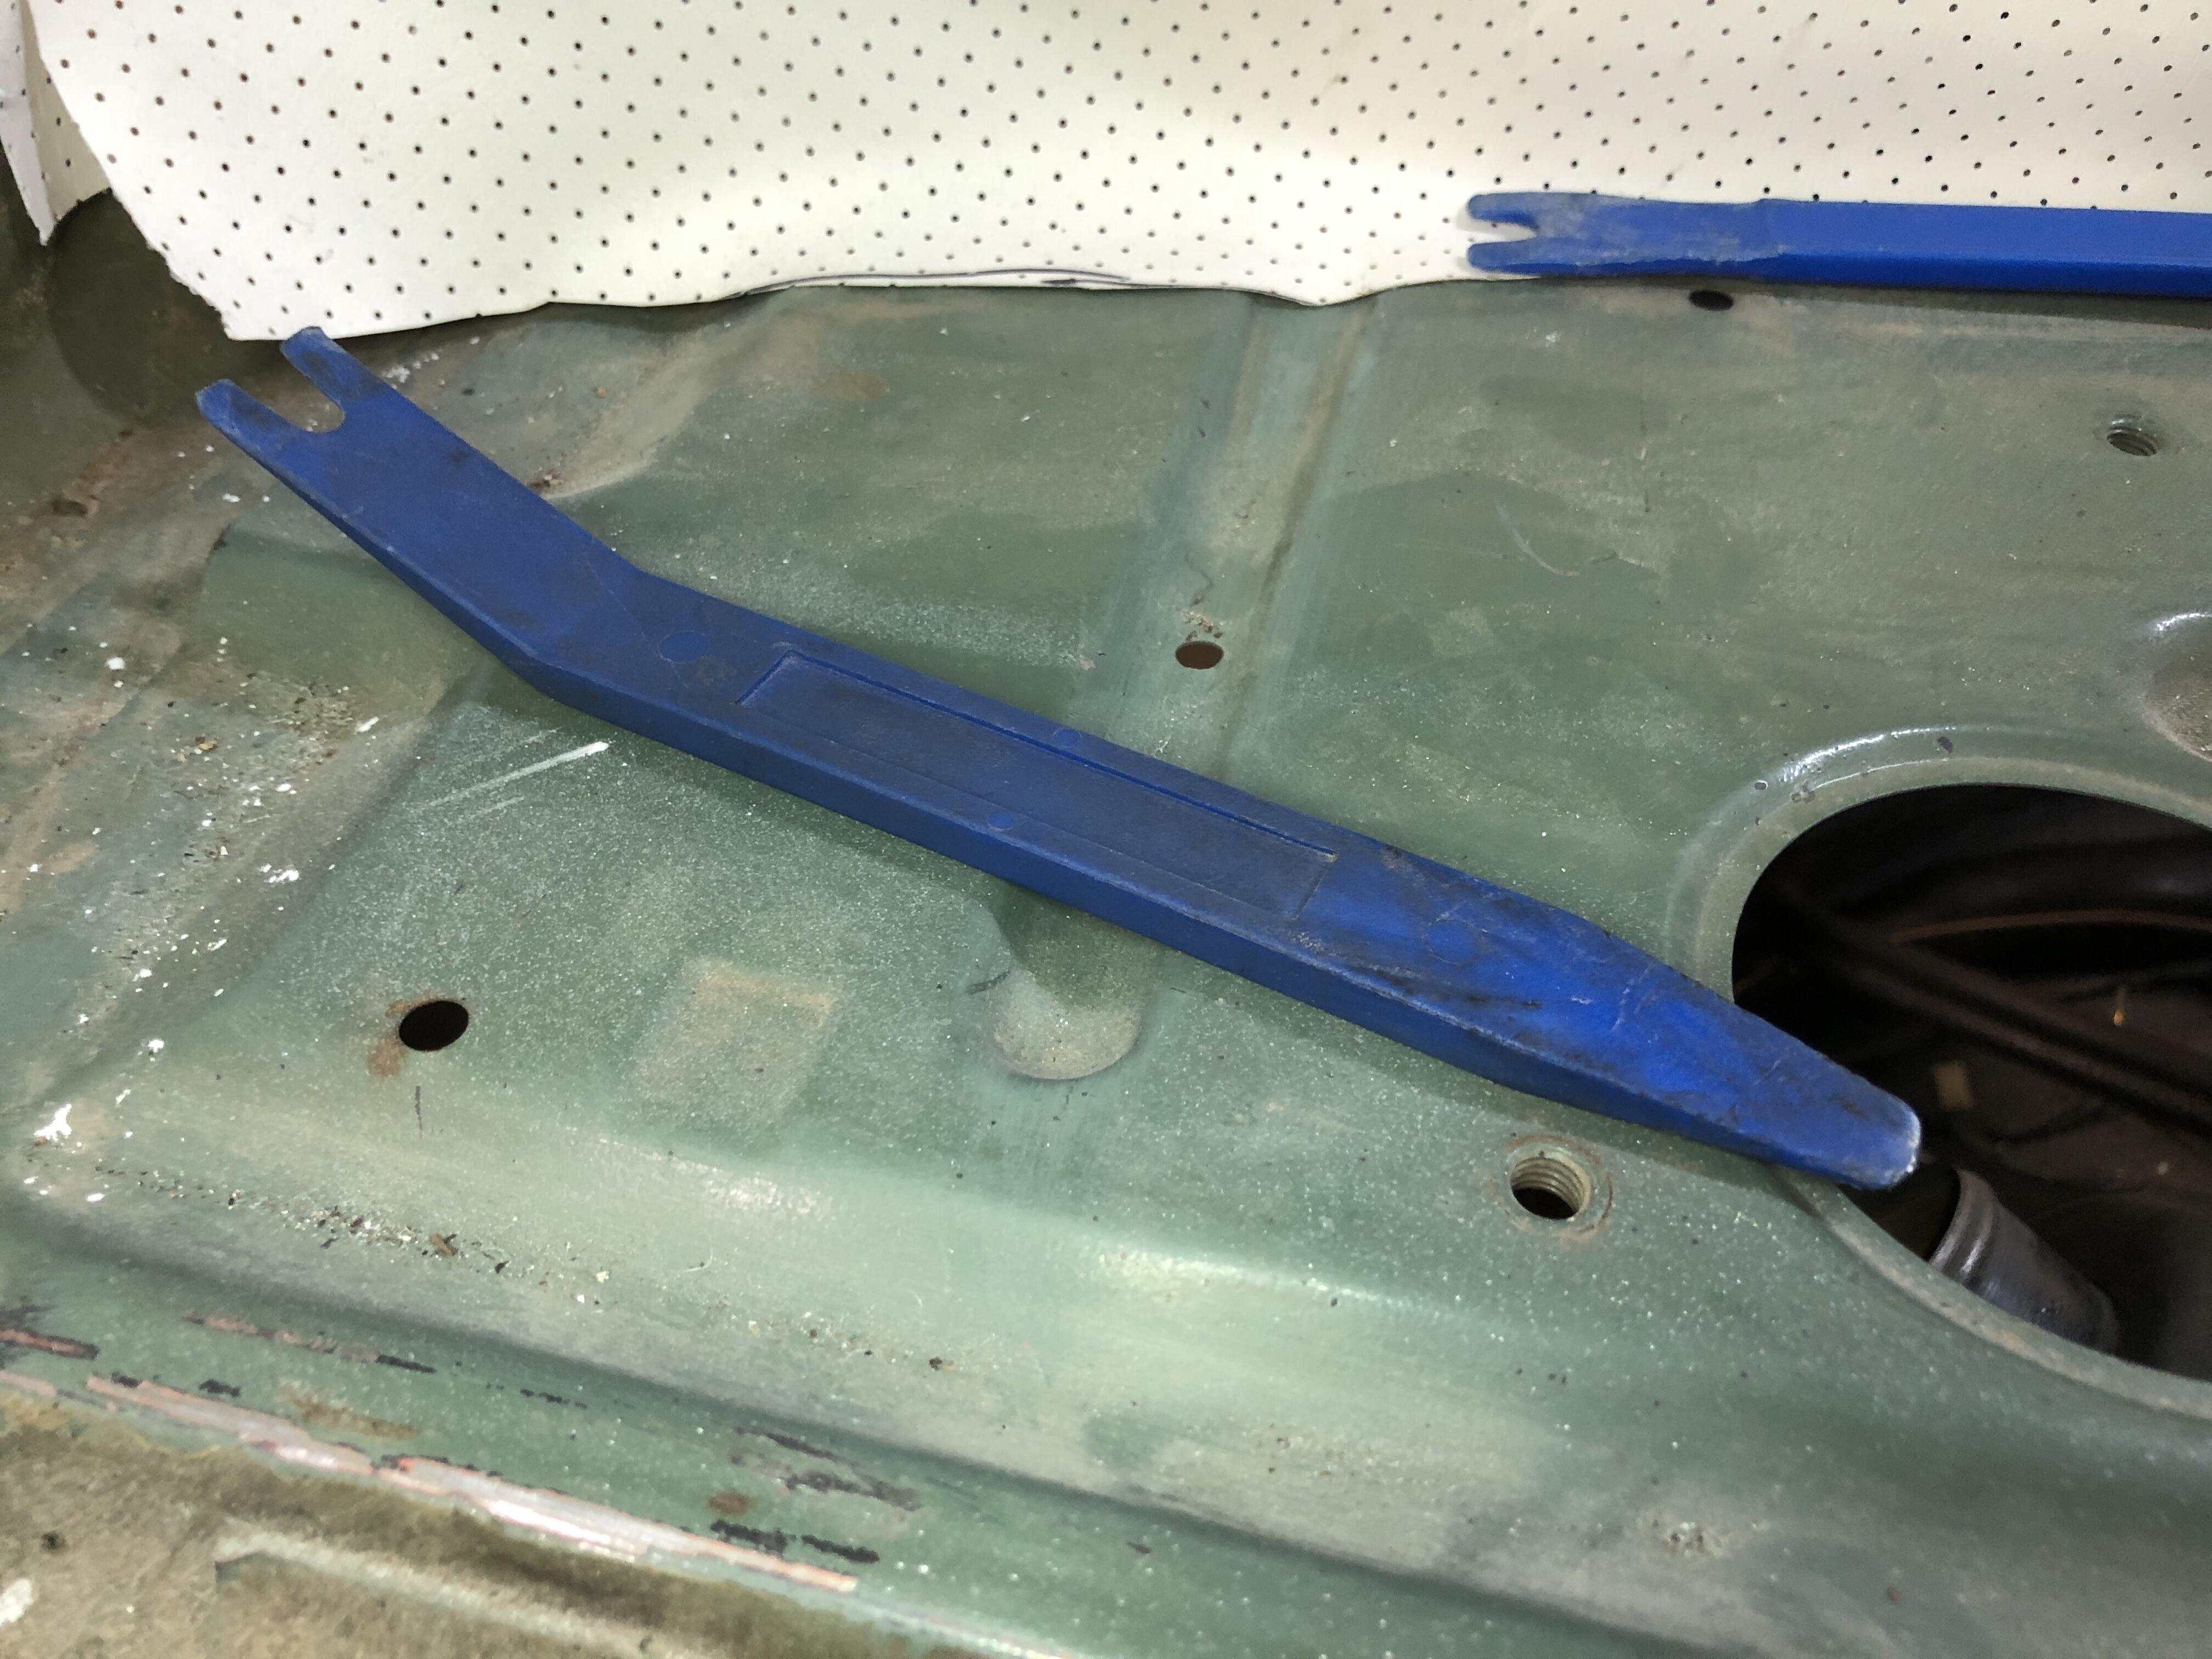
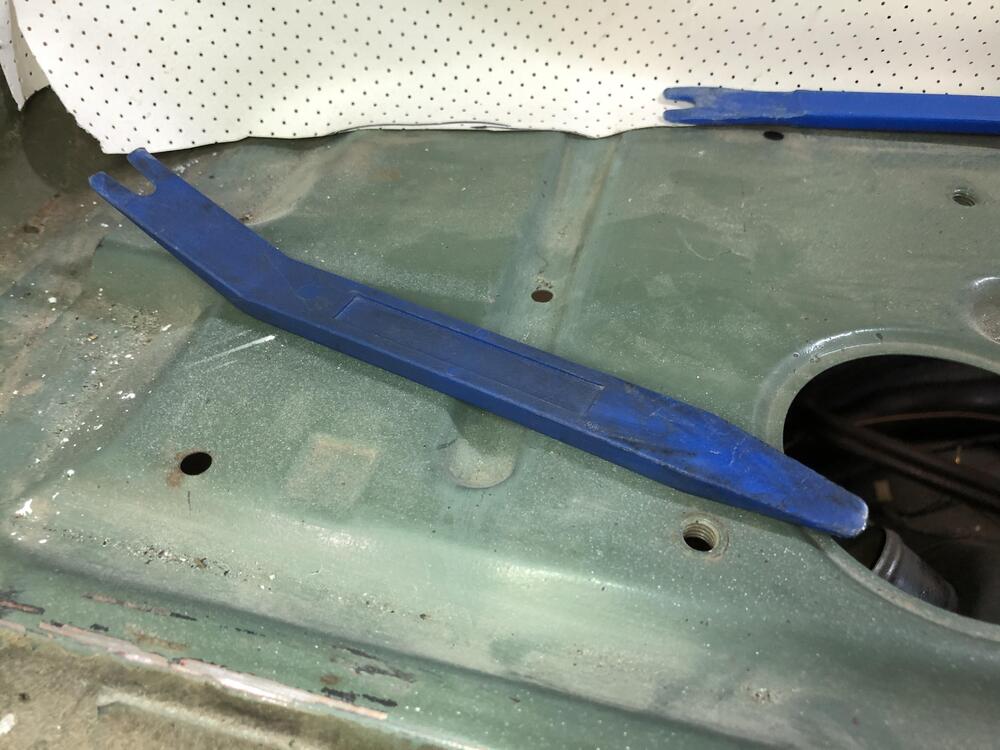
Tool #2. Using a rope to get the rubber lip over the pinch weld as you pull the rope out, is the secret to the rope trick of course. As long as you have the glass and gasket pushed as far down into the window opening as you can, the rubber lip will be as close as it can be to the pinch weld. Then when you start pulling the lip over the pinch weld, there will be enough lip to get over the pinch weld and stay there as you move around. But still, the initial “get the lip over” is rarely ALL the way over the pinch weld and down as far as it CAN go, and MUST go to get the whole thing properly seated. If the glass and gasket are not down in the opening as far they can go then the lip is too far away from the pinch weld and very little if any of the lip is going over the pinch weld when you pull the rope out. If you find this to be case, don’t bother going ahead, take the glass back out and re-set from the start. If you have replaced the vinyl trim on the top or sides, and have it lovingly glued to the pinch weld, and have used modern replacement vinyl, chances are that stuff is thicker than the original stock vinyl making the pinch weld even thicker and tougher to get the rubber over and seated. Get a buddy to push in the gasket/window from the outside at the place you pulling rope, to KEEP the thing in down and in place as you push the rope out to keep the gasket and pinch weld as close as possible. You can lube the gasket so slides closer easier. More on this later. Assuming you get the lip over the pinch weld enough so that it stays, I immediately starting pushing it down over the pinch weld further using my flat plastic stick. THrough experimenting, I don’t just push on the rubber to force it down over the pinch weld, I stuff it between the glass and lip pointing nearly down and flat, pushing it along flat tip first, right behind my rope pulling, which forces the rubber lip downward further over the pinch weld as I go. I’ve never felt like I’m pushing hard on the glass or in any danger of breaking it. Almost all the force is parallel the glass surface and downward onto the rubber lip. This tool and others are part of a generic set of plastic clip and panel removal tools you can get from many auto stores and Amazon and such. Anything long and flat and tapered will do. And Plastic of course.


-
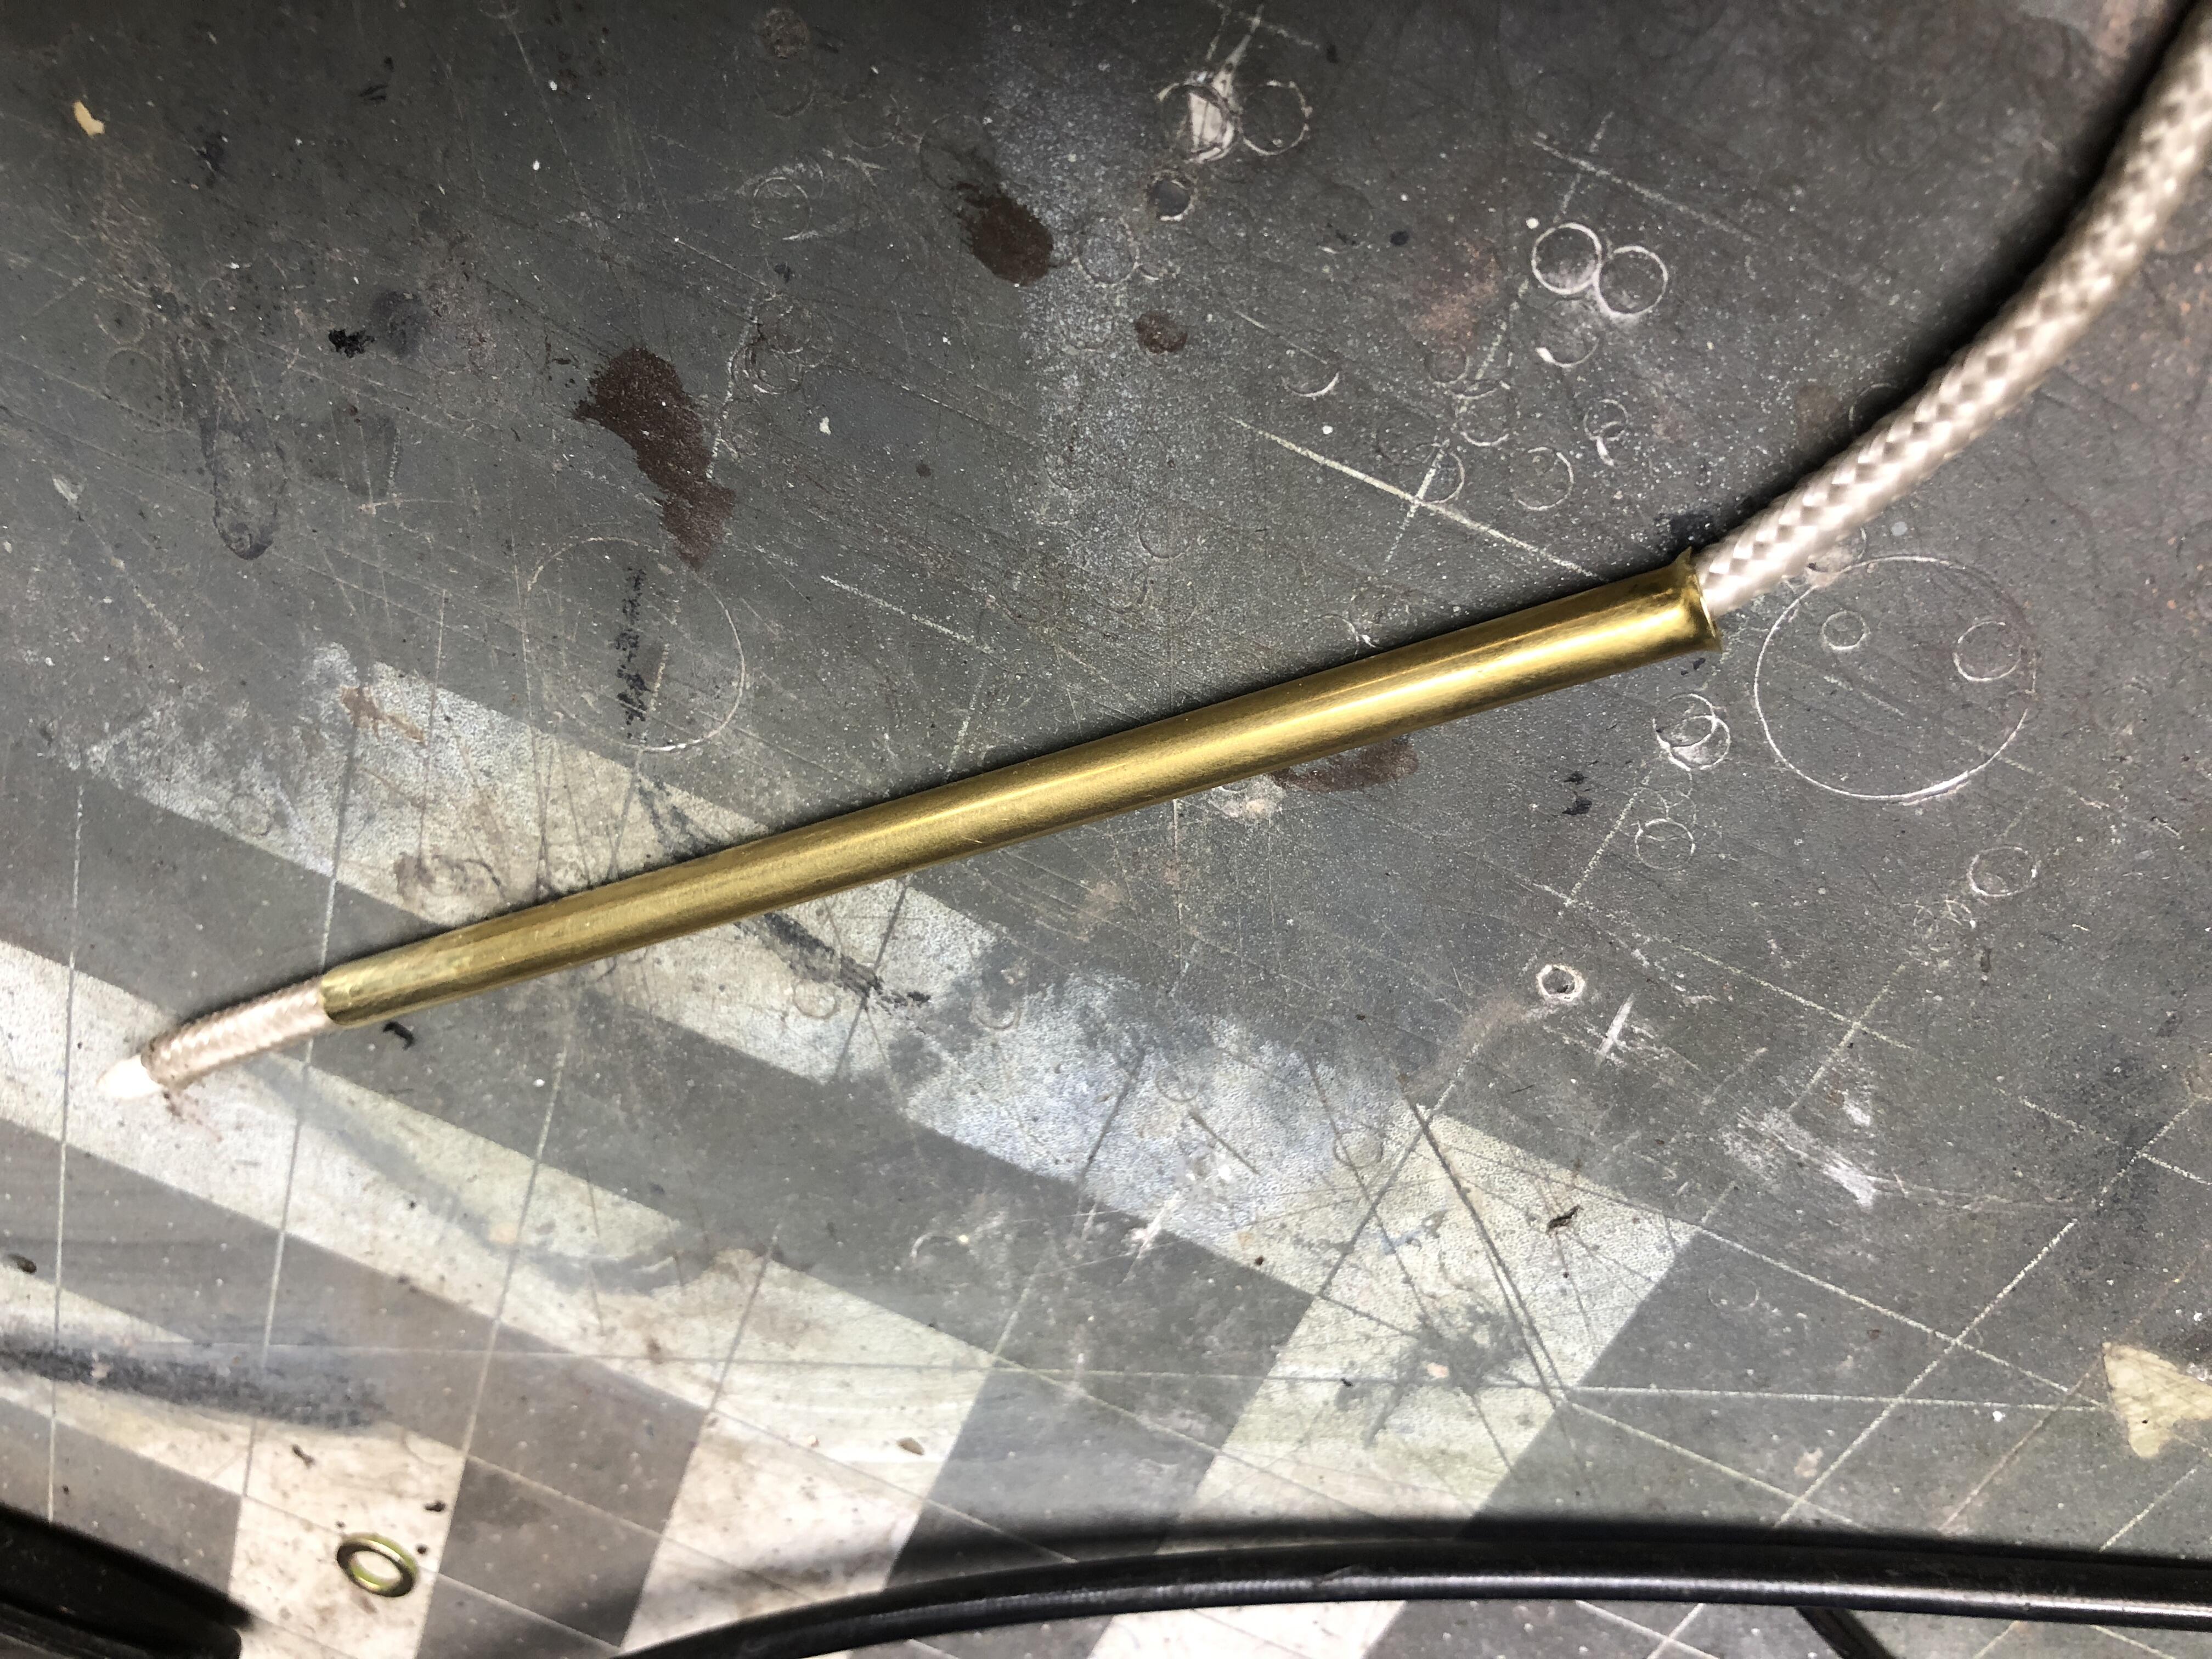
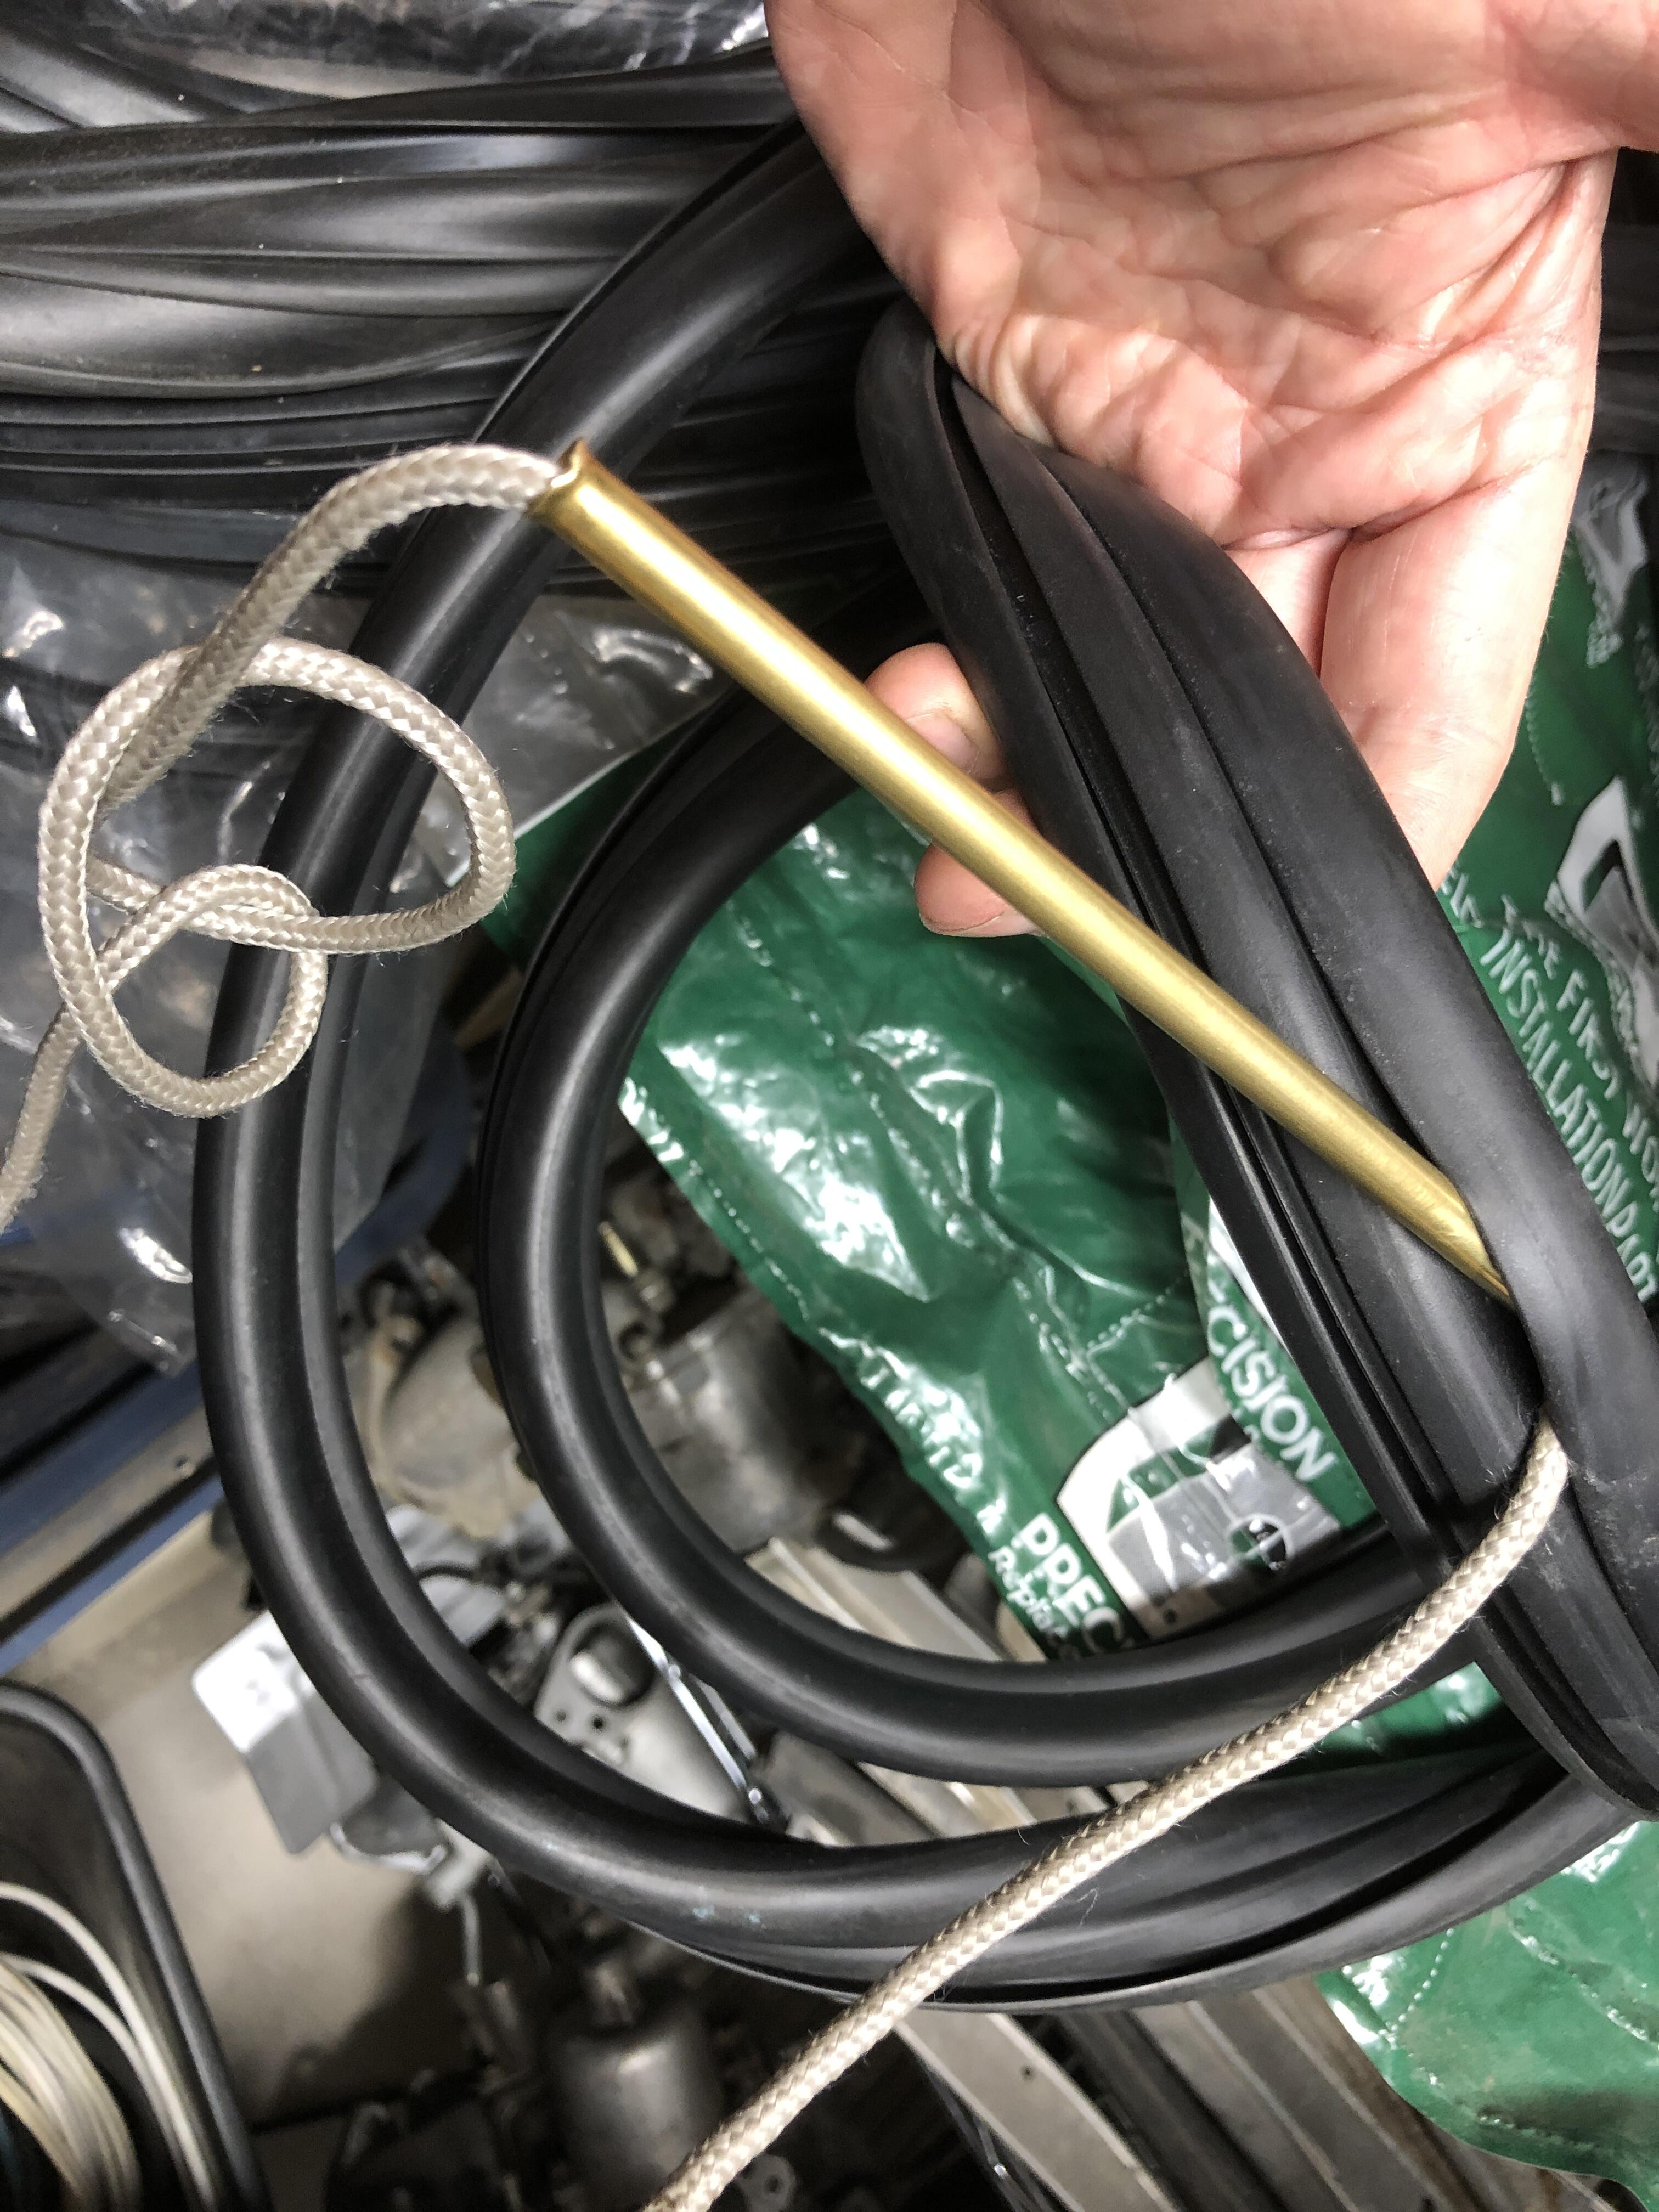
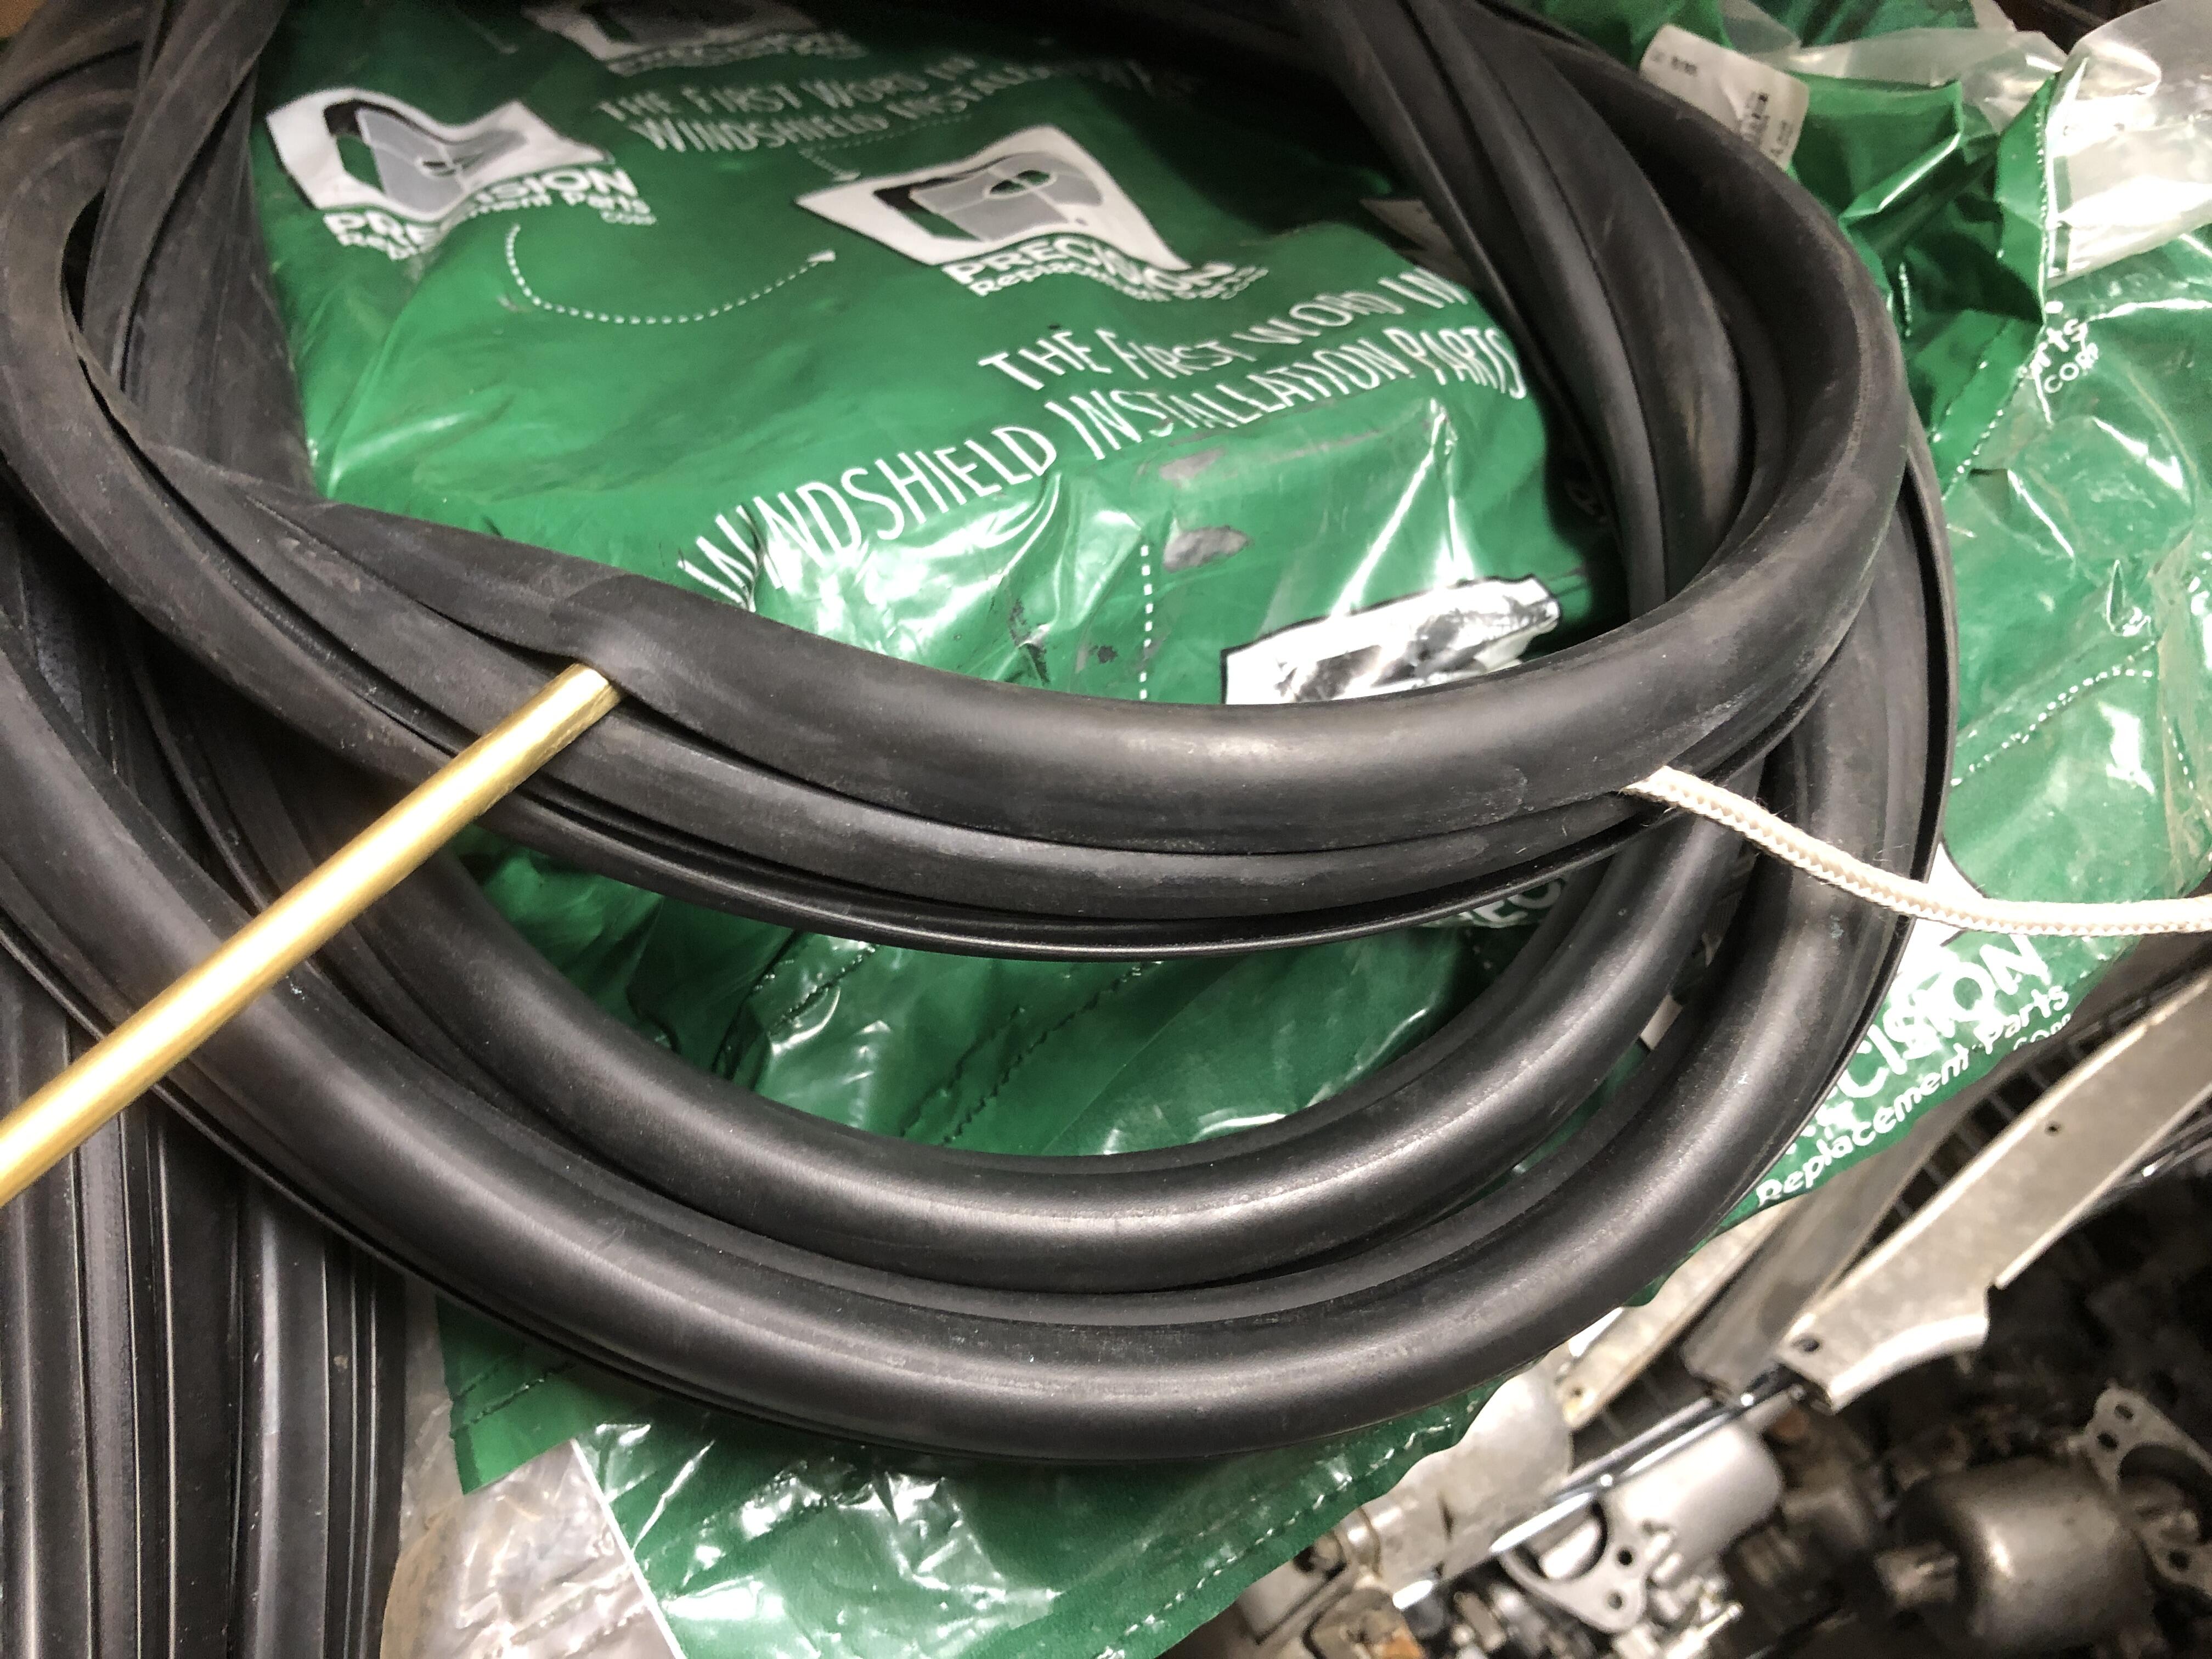
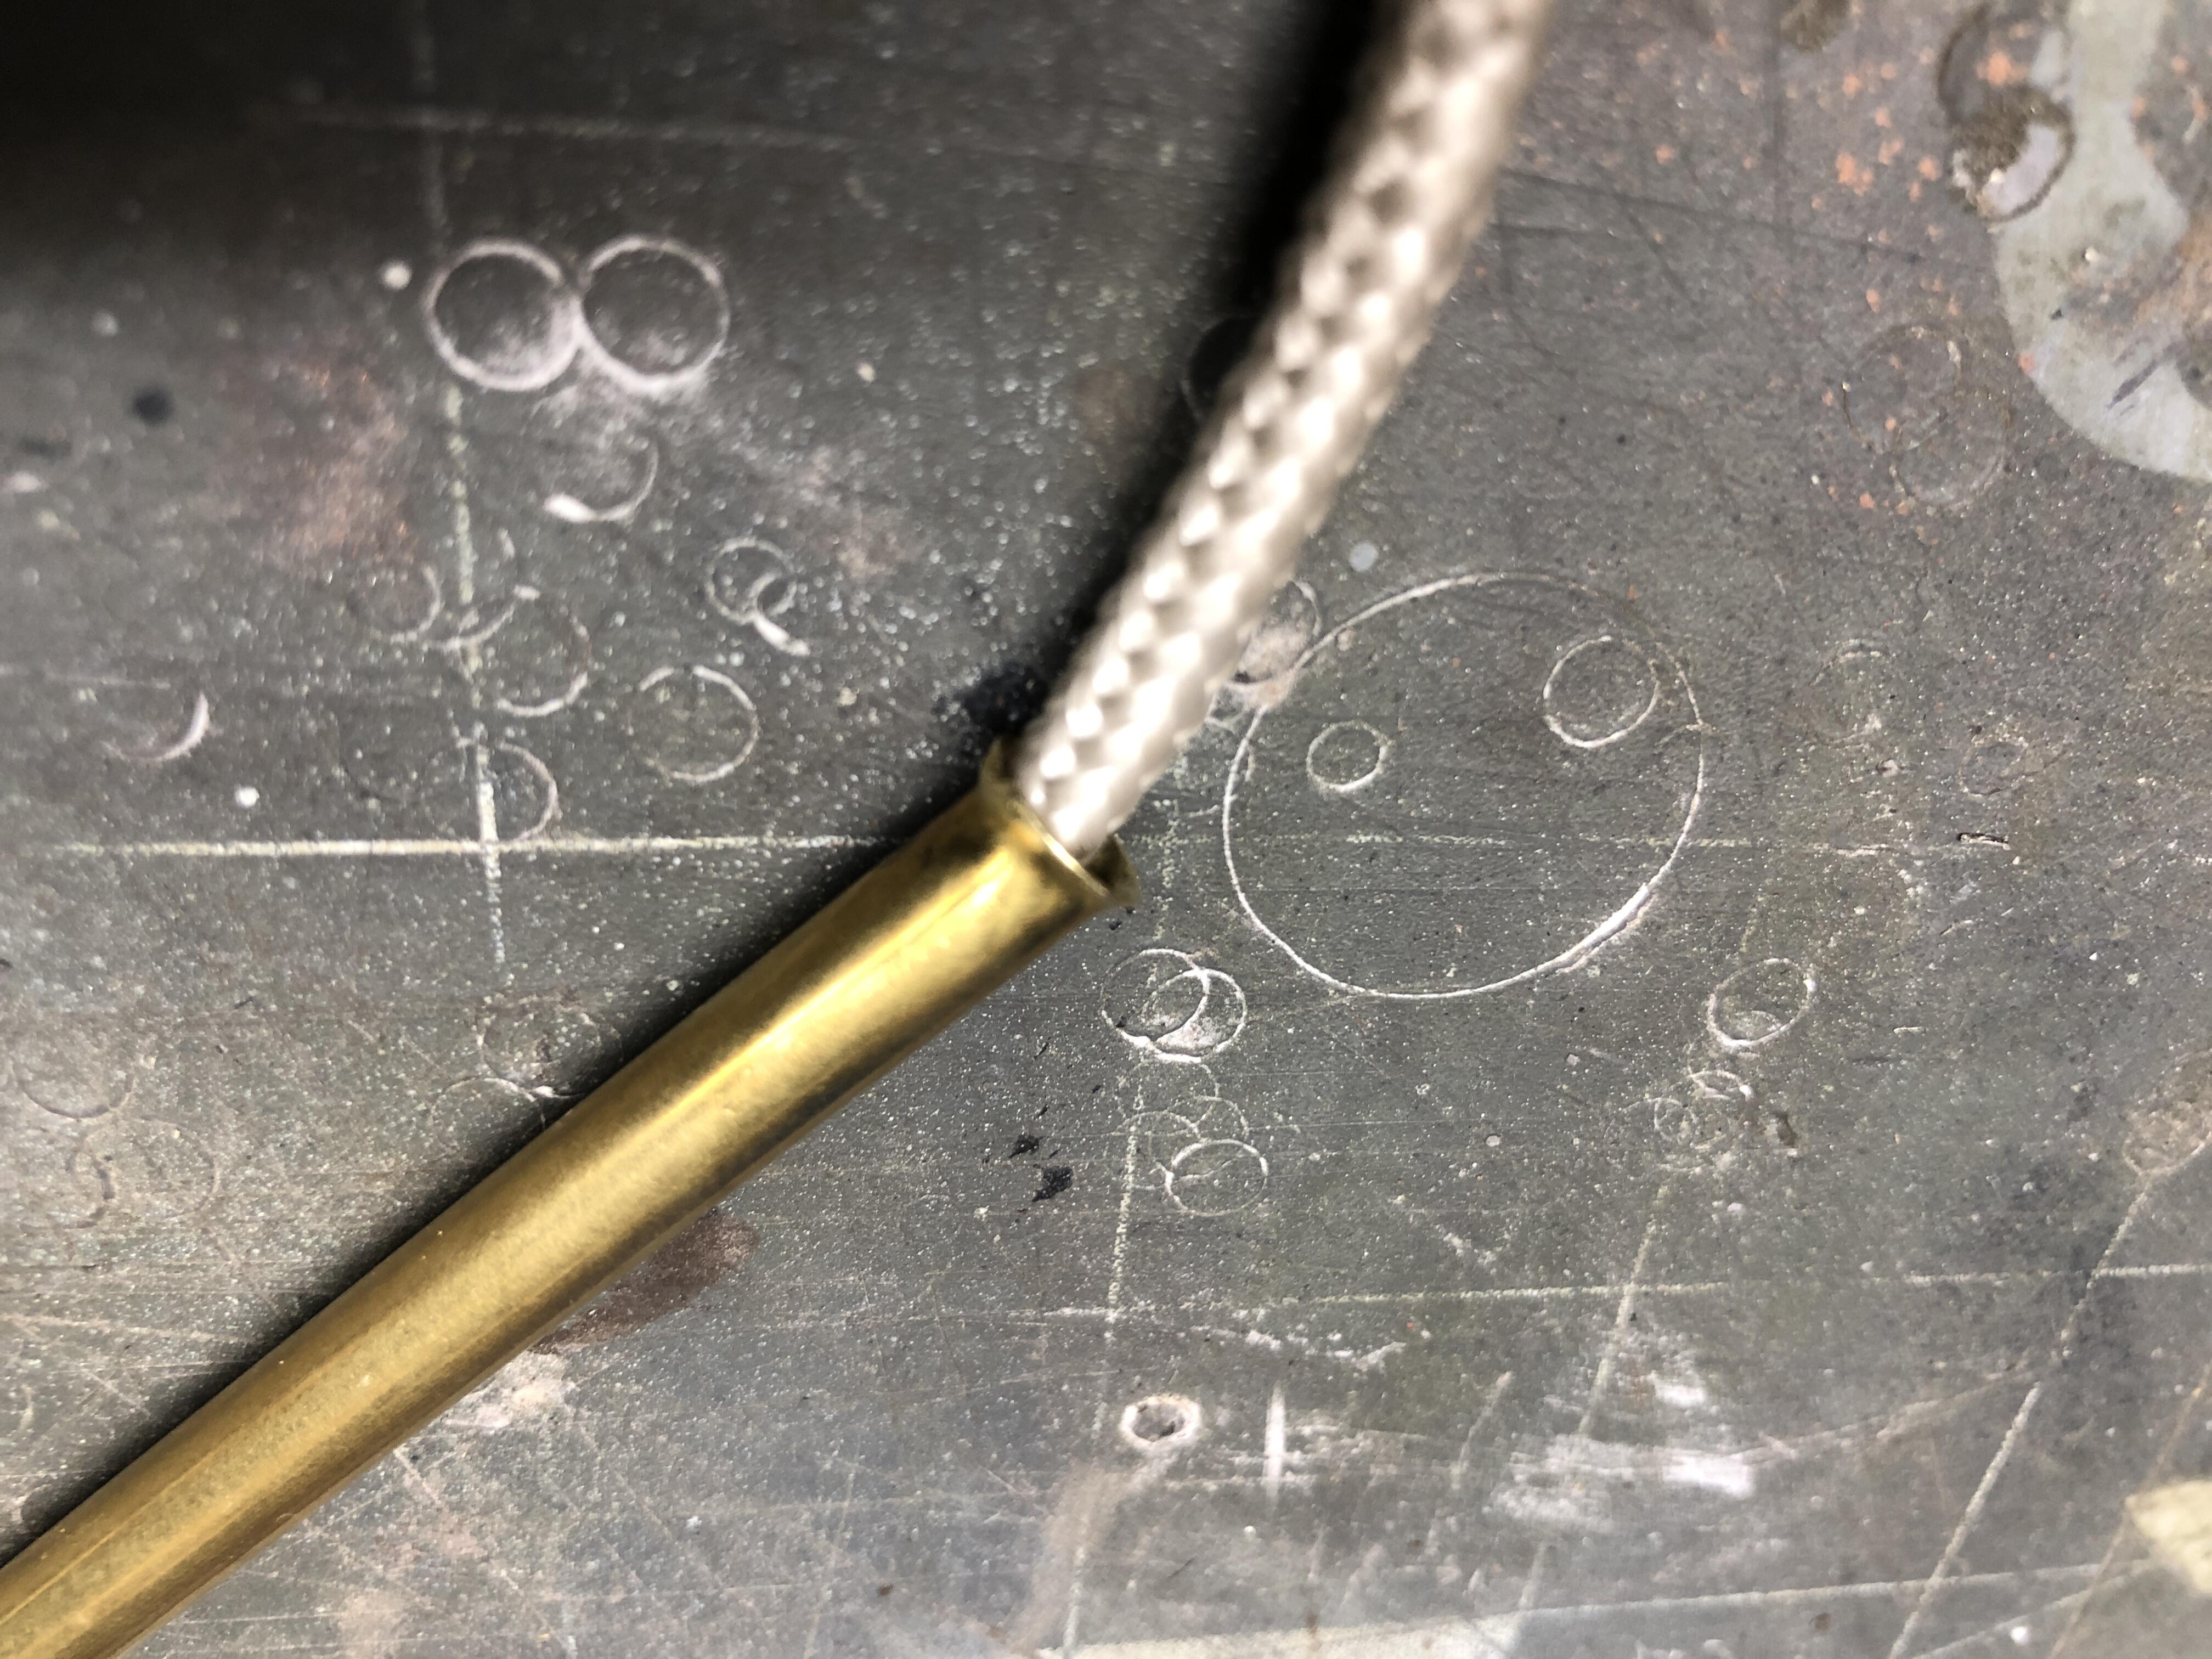
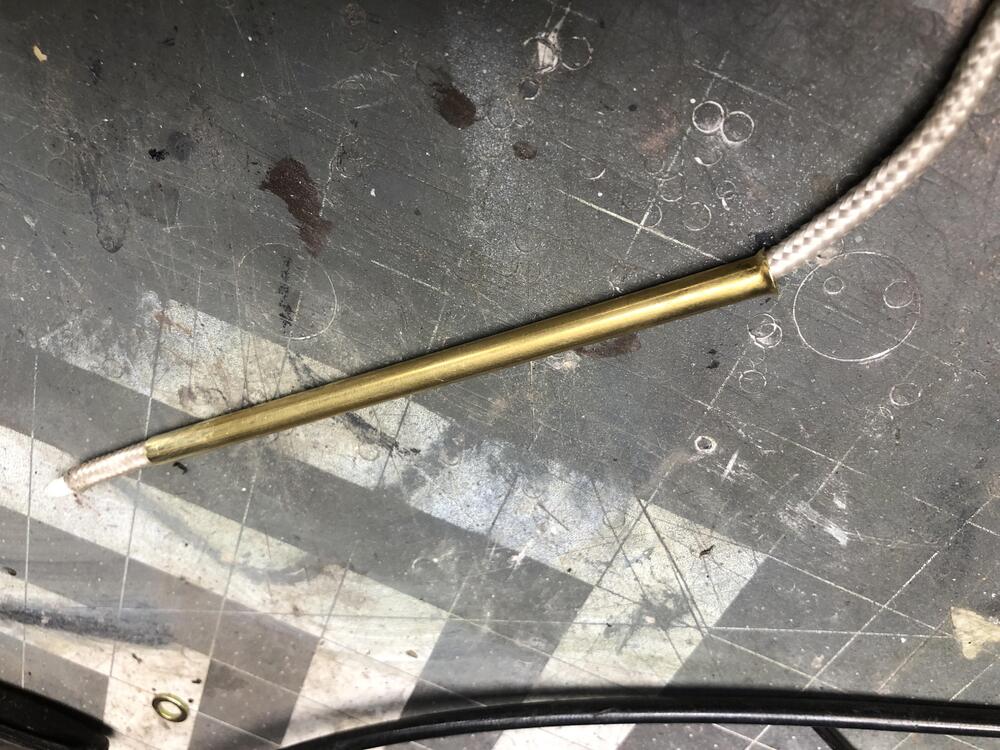
Just to add a couple of details that make this job easier for me. Tools. 1. Getting the rope in the groove. If getting one rope in the groove is tough for you, and my suggestion of using two ropes gives you the willies, then use this trick Go buy a 6 inch piece of 1/4 OD brass or aluminum thin wall tubing from a hobby supplier. Stuff your 3/16 rope through it (I flared one end to make it easier) and use this stiff piece of tubing to poke the rope into the groove (use the un-flared end), then just draw the tubing along the groove feeding rope into it as you pull it along. Keep it poked deep in the groove as you go. Should take you under 60 sec to get the rope all the way around and tucked in real pretty.


-
Oh wow, that's neat! Sorry, no can do. That Z passed on a few years ago, don't even have one at the moment. Dang picture makes me a bit misty, sniff..... You-all have fun this year! Drool over the new Z for me. I'll show up again next time the show is bit closer to home.


.jpg.9d8e483bdb154fa56d1534562020e3c7.jpg)