zKars
Supporting Member
-
Joined
-
Last visited
Everything posted by zKars
-
Blue if you really want a set of flat tops, let me know... Guess what showed up just last weekend. Very low km's....
-
Well, all the rubbers seem to be in Alberta!
-
All these z's and none with a dang fender off... The biggest grommets I have laying around look right, they fit 50mm holes. Need some?
-
The only place for slop in the system is either VERY worn gear on the crank and/or spindle, or something broken in the oil pump that has allowed the end of the drive to fall slightly back into the pump, allowing it to disengage the spindle when the gears mesh and the spindle rises, or a combo of the above. Just can't imagine there is enough room for movement anywhere in the system to allow this, but its the only thing I can think of...
-
Try these guys: vintagerubber.com
-
yep, it will be just fine. Same same. Yours can be disassembled and cleaned if worse comes to worse, depends on how much corrosion there is as to whether it is worth it.
-
Totally custom. And beautifully done. That is very hard to do well. Nice.
-
Oh, thanks a lot. Now how the heck am I supposed to get any work done with that sweet sound in my head??
-
Partschick: You're right, this is the wrong way. Well partly, your story about restoration issues fits ok, but you should start a new thread related to your issue about whether a 260 bumper is a reasonable replacement for your 71. Please research the forums to understand which sub-forum would be appropriate for a thread about bumpers. Oh and welcome to classiczcars! Folks here will be real helpful about issues related to your project. Jim
-
See, I knew there would be MANY similiar stories, thanks for sharing. I may just have the highest concentration of crazy issues one one car that I've ever seen. I'll share them as I have time. Oh heck, here is the one about the down pipe studs. Ok, its leaking, on inspection the rear stud is gone, I can't feel the nut. I take off the other two nuts, remove the down pipe, and take the exhaust manifold off. I drill and tap the broken bolt, and put a new stud in. I reassemble the exhaust manifold onto the head an try to put the down pipe back on. Its the MSA replacement, the one with the complete flanged exhaust system. Anyway, the dowpipe won't go back on, my new stud won't go through the flange. What the heck now?!?! Well as most things go on this car, this one has an answer you could not imagine. "They" had MIG welded the flange stud hole closed at the broken stud location! Did they think the flange would leak through that hole because the stud was missing or what? ARGHHHHH!!!!
-
Just had to share this. I'm working on a friend's 72 at the moment. Several issues have cropped up after a recent "restoration" (I use the term lightly...) and I was asked to resolve them. The list is long, but many of the problems I have found are just down right shocking. This is the story of the latest discovery that is my favorite so far.... Yesterday I took the SU's and intake off to do a repair on a busted exhaust manifold down-pipe stud causing a leak. No biggy. I'm leaning over the fender at one point laboriously removing a nut a little at time, and my eyes start to wander over the exposed engine block. I spot what looks like a black battery cable. "Now what is that doing over here on this side", I ask myself? I put down my wrench and grab the wire. Sure enough, its a #4 battery cable. The ring lug on the end is bolted down to the upper right air pump mounting boss on the block (no air pump, its long gone). "Oh, its just a ground strap", I say to myself. But now I have to know where the other end goes. My curiosity must be satisfied. I start following it. It goes forward, and through the lower hole in the rad support, where the coil harness passes. Ok....... From there I follow it forward where it disappears down under the rad support, kinda where the headlight wiring goes and seems to go backwards again. I have the driver side tire off, so I peak into the dark wheel well with a trouble light. Yup, there it is, running BACK toward the strut... And guess where it ends??? They've used one the two K-member mounting bolts as the termination point. Well, yes, it is the only large bolt in the area other than what is on the strut, so I guess its a logical choice . I remove the cable. Its five feet long. There is, after all, no shorter path between the block and the k member bolt, now is there? Not only that, the K member bolt they used for the lug is barely tight..... That is just a taste of the several dozen "issues" that I've found with this car. I'll be sure to share more. This car is the source of an entire season worth of episodes of "things you must never do to a car" sit-com. Maybe Adam Corolla could use it to make his show more interesting. There is a great story about the broken down-pipe stud I was fixing when I found the mystery ground strap, and another about the broken off engine mounting bolt (the lower one on the block) that will make for good reading later. Oh and the drivers seat held down with a couple of #10 machine screws (they were loose too), oh and the ..... Now, back to work....
-
Does the oil pressure vary directly and perfectly with engine RPM? ie does it read like a tach? If so, you may have a stuck relief valve in the oil pump. Likely just gummed up, or the spring broke. Good thing the oil pump is on the outside!
-
availability is down, hence the price goes up. There is a recent thread about this. Just search for lash pads. There is a guy making custom ones to your spec. Brian at zccjdm.com I believe. Just checked the classifieds, never guess whats for sale...
-
It is 1/8" BSPT and it is the stock location for the electrical oil pressure sending unit. There is a yellow/white wire with a female bullet connector that connects to it from the harness across from it near the pass. side wheel well. I a bit confused by your need to plug it as it sounds like you'll be left with no oil pressure gauge. Do you need a stock dash gauge as well then?
-
The real long term rust problem is in trapped moister in the crevices where you cannot clean. I had a really nice rust free 240 door once, that I decided was an excellent skin donor to a later 280 door. I carefully ground off the edge all around, the skin popped off nice as pie. (The skin is wrapped around the door frame, then spot welded on the inside surface). Guess what I found on my "rust free" door trapped between the skin and inner door frame surface, all the way around.. Significant, penetrating rust...... Enough that it was iffy if I could weld that back on without making a nasty mess.... Moral of the story? Best you can do is dry it, and try to get as much penetrating fluid like John C suggesting into every corner rather than trying to paint anything over it. Its a lost cause, only delaying the inevitable if anything.
-
Should be easy to check run out with the tire/wheel mounted. Jack it up so you can spin the wheel by hand. Rig up a stationary stick with a pointy tip that is sitting on the ground (fixed point in space) that JUST touches the outside of the wheel rim at one spot (not the tire), then rotate the wheel by hand and watch the spacing between the stick tip and the wheel. It may take a few attempts with the tip starting at different spots until you find the "high" side, but it will become obvious if that space doesn't stay constant all the way around that you have a bent axle. It might also be a very bad bearing that is not supporting the axle allowing it wobble as it turns. THe above measurement may not show that up. Take care, if the axle is bent, it may be close to breaking.
-
The head is usually the first thing that needs work (can anyone spell valve seals??), well before the block, which is very very strong and long lasting. A compression test and leak off test will tell many tales. If you put most of those miles on, and did proper timely maintenance throughout, its got a long life yet. If you just can't resist, refresh the head and leave the bottom end alone.
-
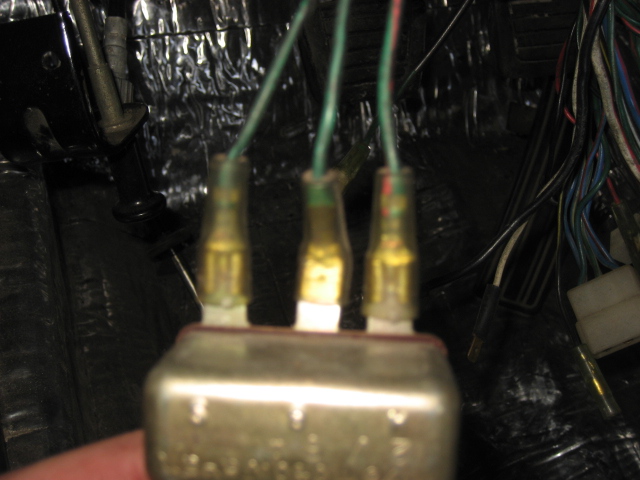
Green/black on the left, Green center, Green/Red on the right. Hope that clears it up.

-
This the correct location of the filler flange for 240.
-
I have used #6 wood screws, 1 inch long as a good replacement. They are the correct diameter, ie they will not split the fragile plastic posts, but the thread pitch is more coarse than the stock screws. A sheet metal screw of the same size woukd be a better choice. Take the top half with you and find a screw size that seems to fit.
-
Makes me want one of those stick-on sun visor strips that Arne had made a while ago, but an extra long one, with Squinty eyes on it rather than "240Z" or "DATSUN"!! And a smiley mouth mask for the rad opening/valance too! Pixar is working its marketing magic on me apparently.... MUST GO BUY 'CARS' merchandise NOW......
-
Holy smoke! Jim here from the Calgary Z club! Michael, we have to get together and see this thing! Congrats on the find! Send me an email to z240@shaw.ca and we'll exchange phone info. I can help with all your mechanical issues too. Lots of experience in town to help with just about anything! Any chance of bringing it the Edmonton Z club show and shine this weekend on Sunday? http://www.edmontonzcarclub.com/pages/main.html
-
Take yours apart and clean it. You'll be amazed at the crap in it. If that doesn't do it I have a couple of spares.
-
MSA has them. Bit pricey. The center pin is 1/8 in diameter, hobby stores have plastic stock. I'm a fan of replacing them once and for all with insert nuts and 8-32 machine screws. Mcmaster Carr has black ones with big heads. Cuts down on squeeks and never lose those rotten pins again!
-
One important detail is the cleanliness and smoothness of the surfaces where the o-ring seats, and the oring itself. Do all you can to clean everything and inspect the o-ring for damage. No power tools, just fingers and sandpaper or steel wool. Next is the pressure applied by the ring, and the centering of the ring as you tighten it. Is the ring rusty or corroded?