Leaderboard
-
HusseinHolland
Free Member4Points1,031Posts -
conedodger
Free Member4Points12,513Posts -
Patcon
 Subscriber
 3Points11,142Posts
 -
Captain Obvious
Free Member1Points10,081Posts


Popular Content
Showing content with the highest reputation on 07/02/2024 in Posts
-
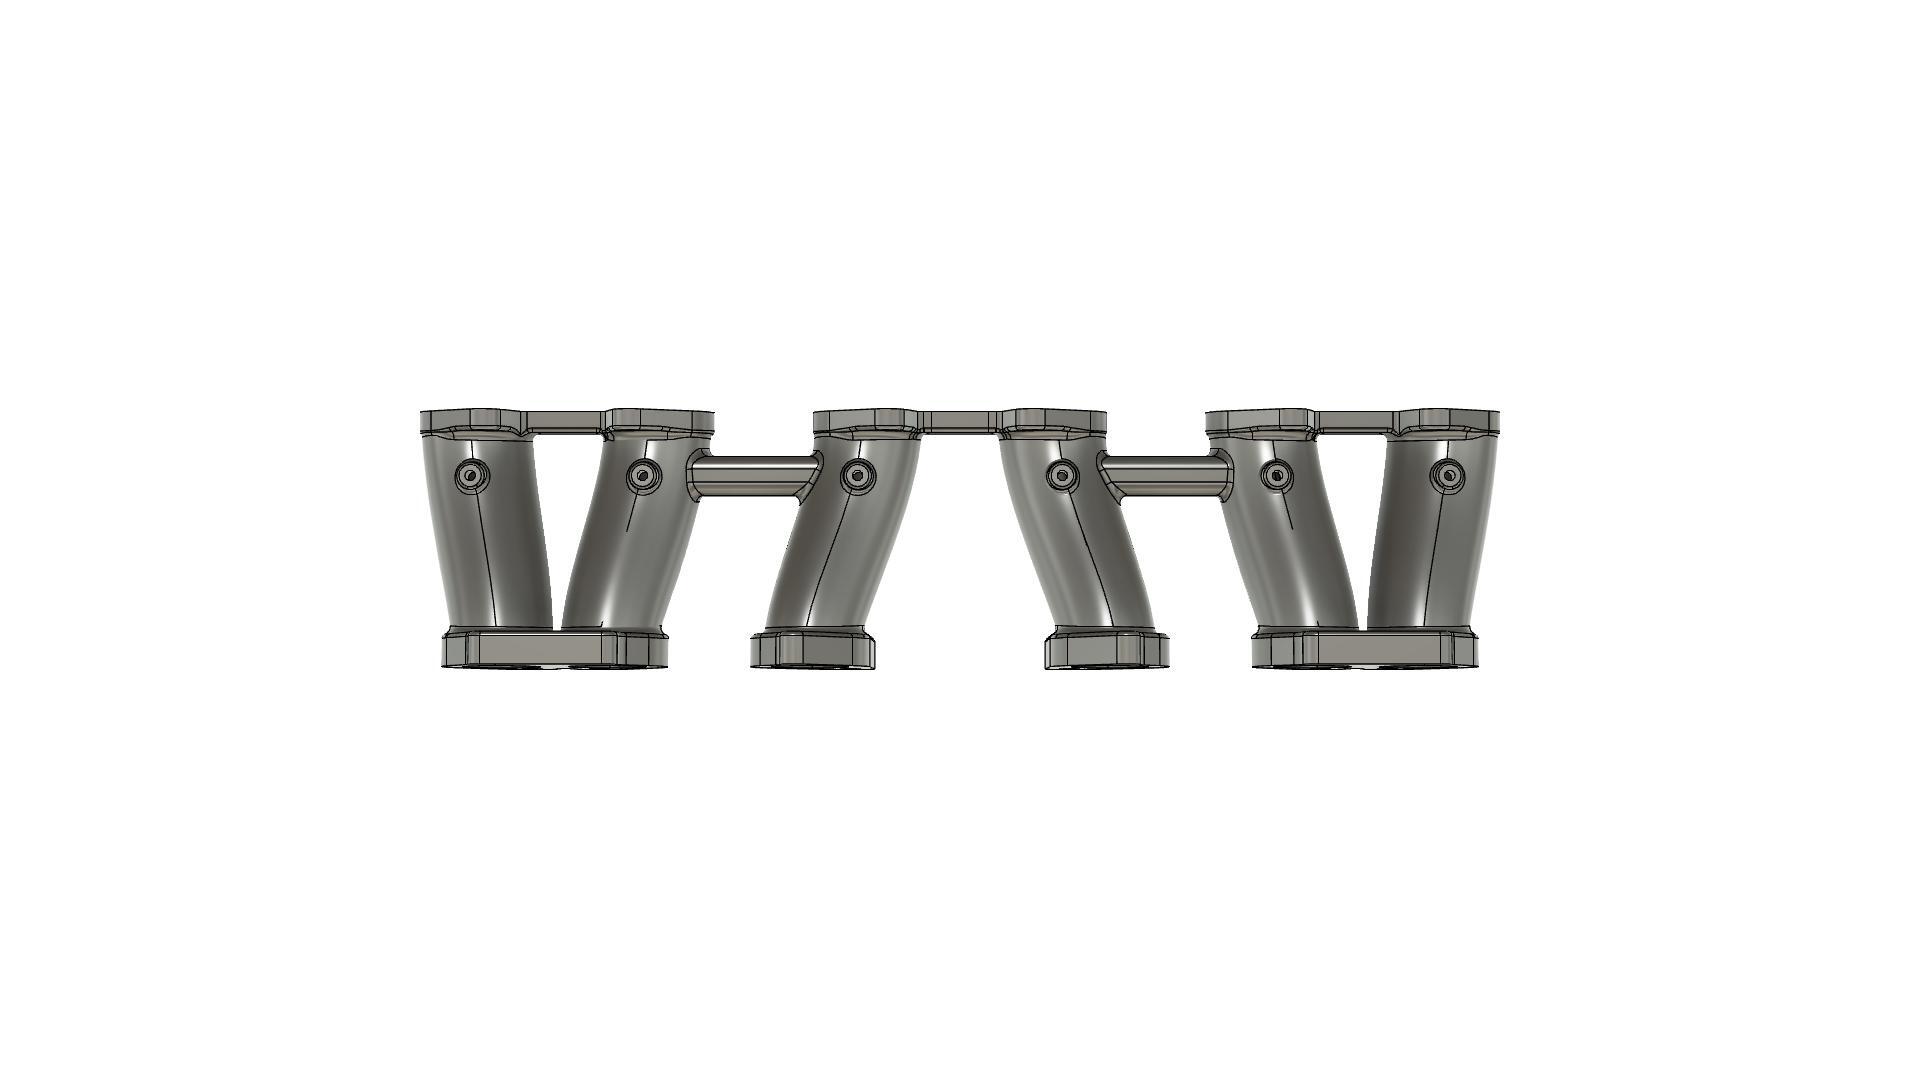
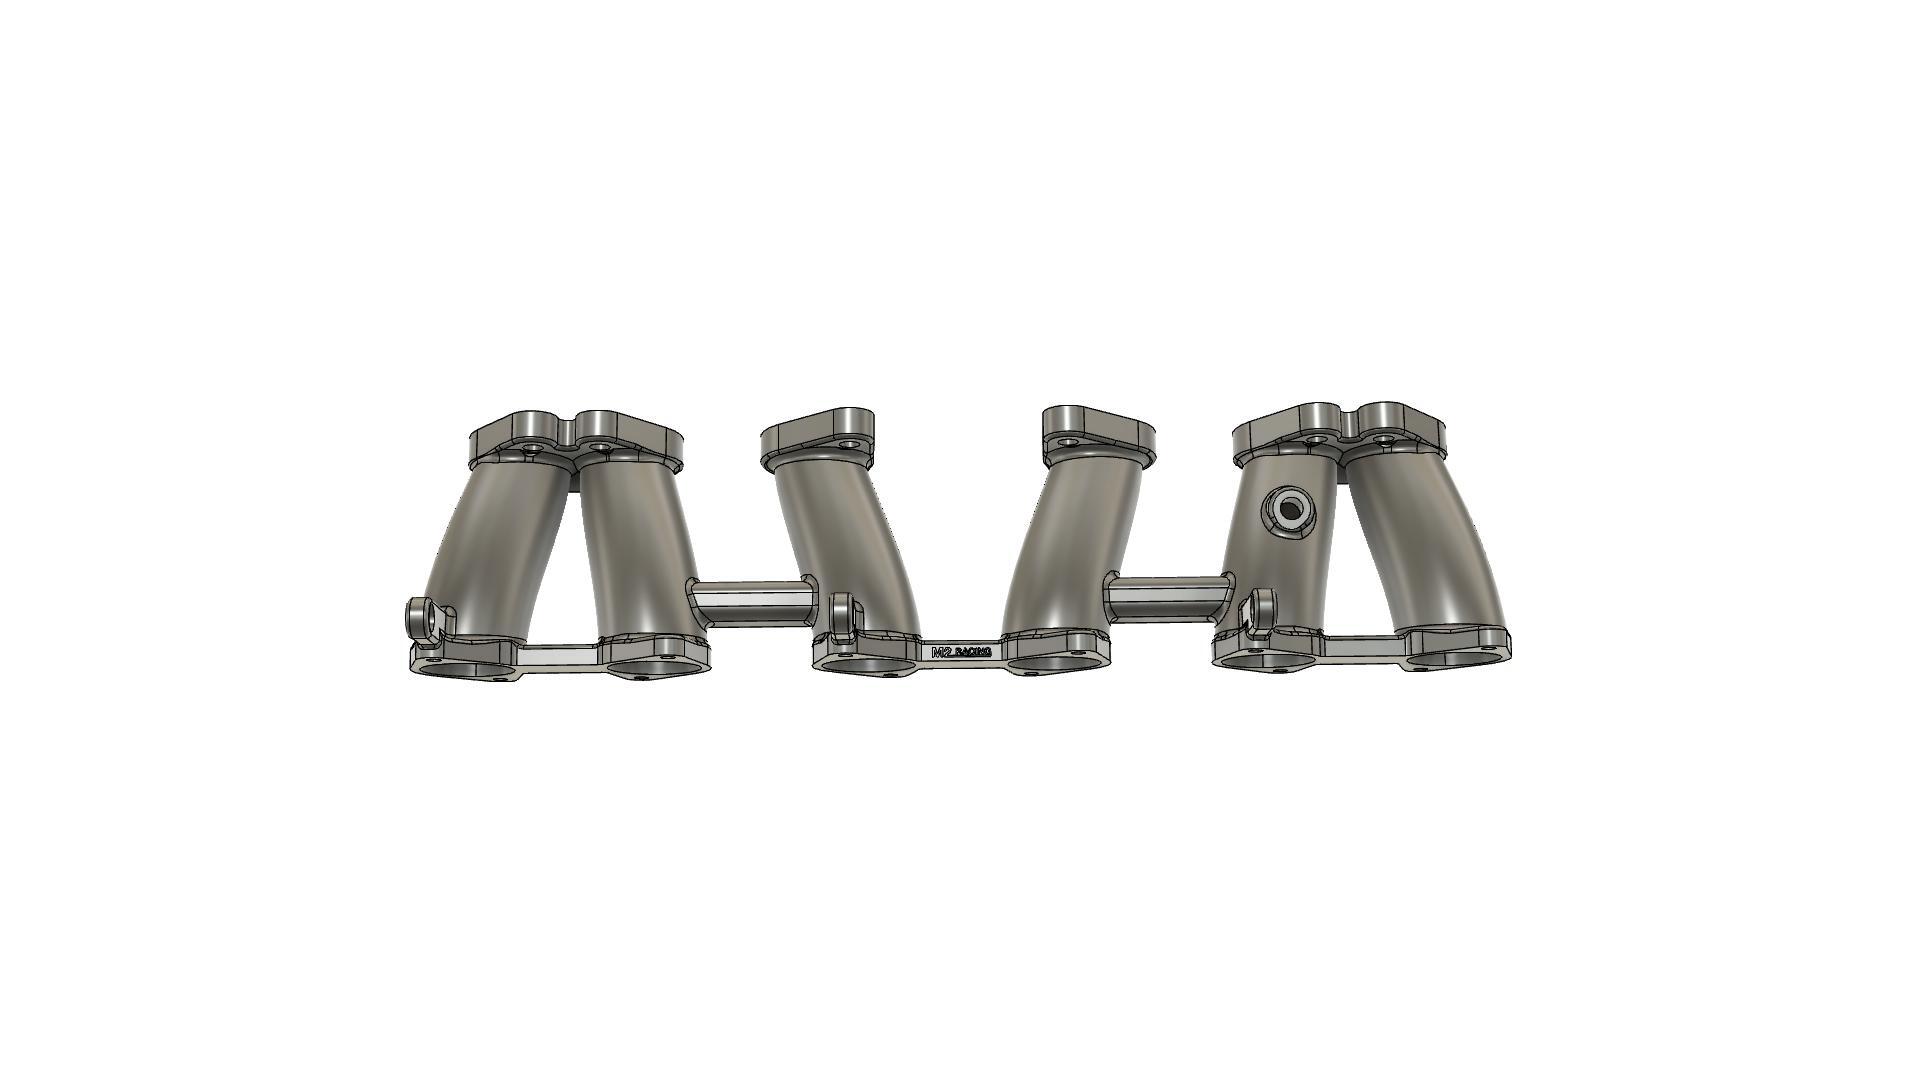
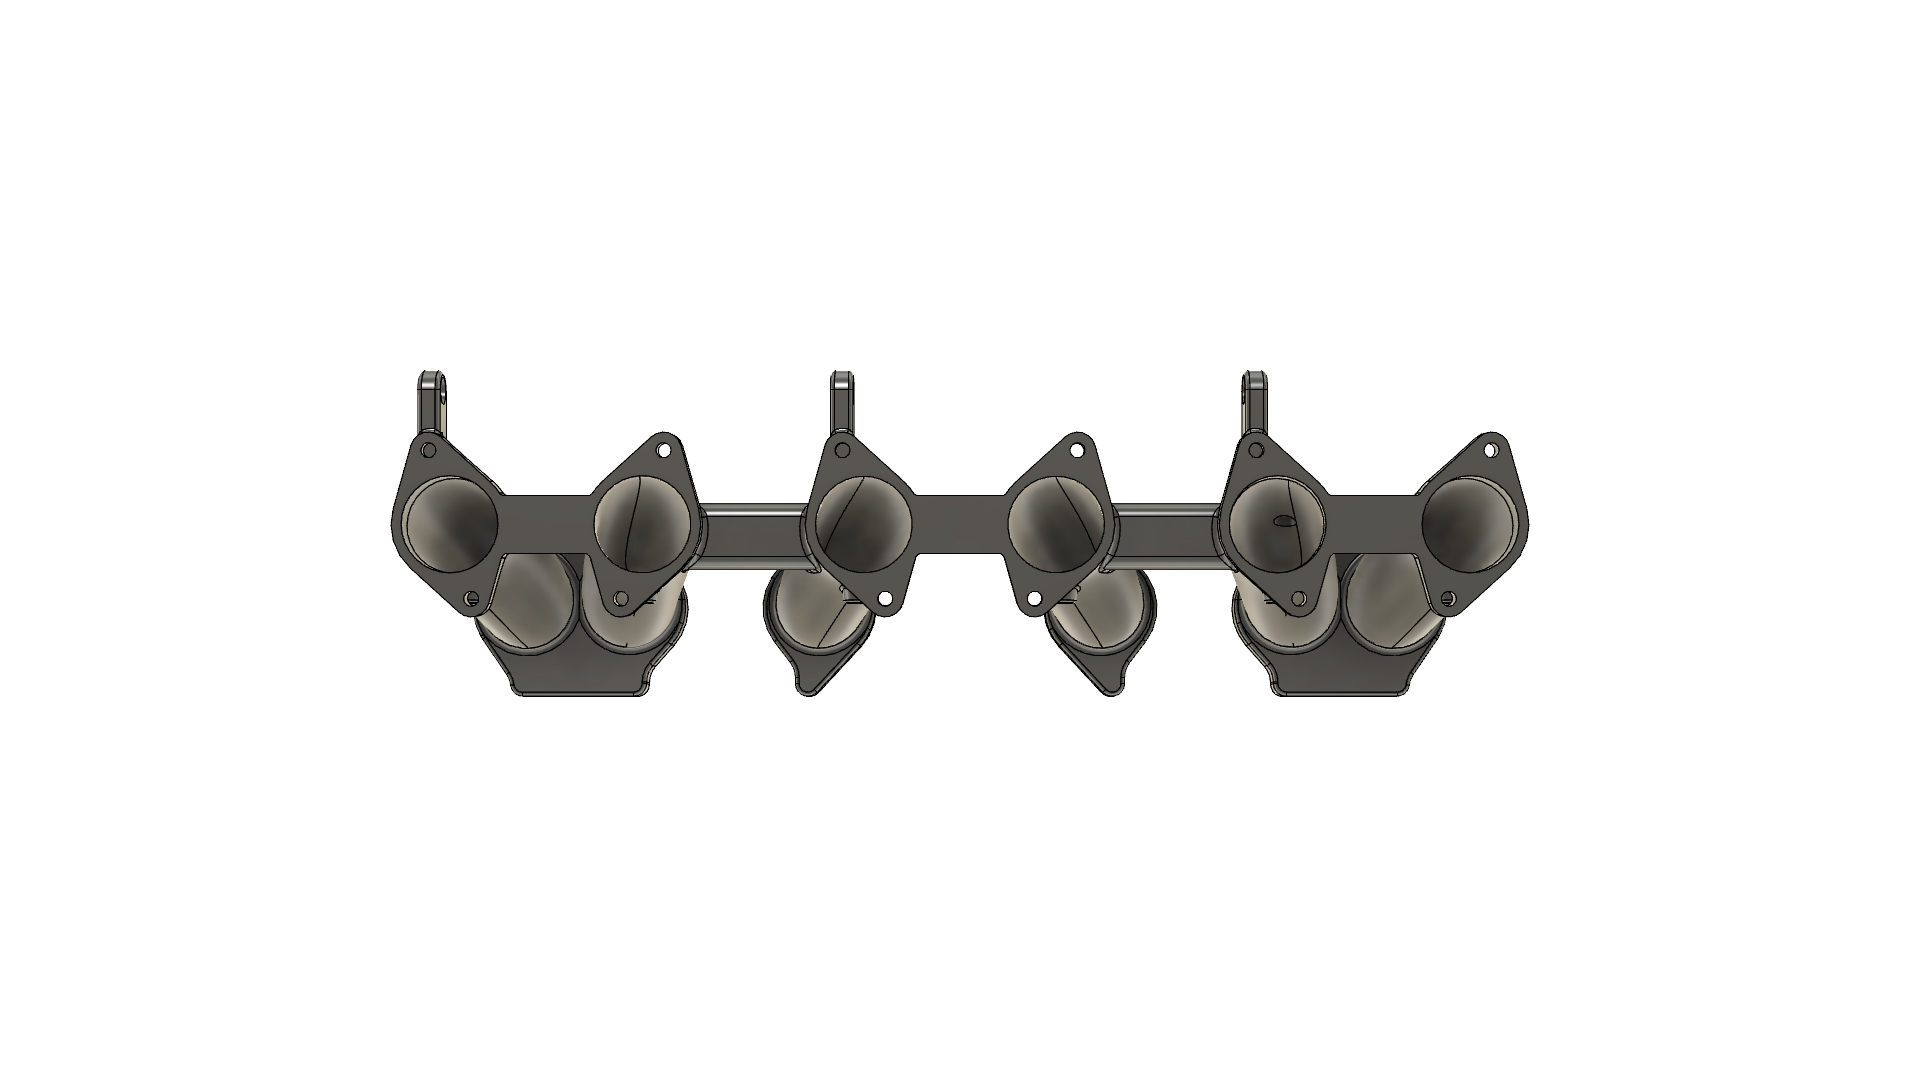
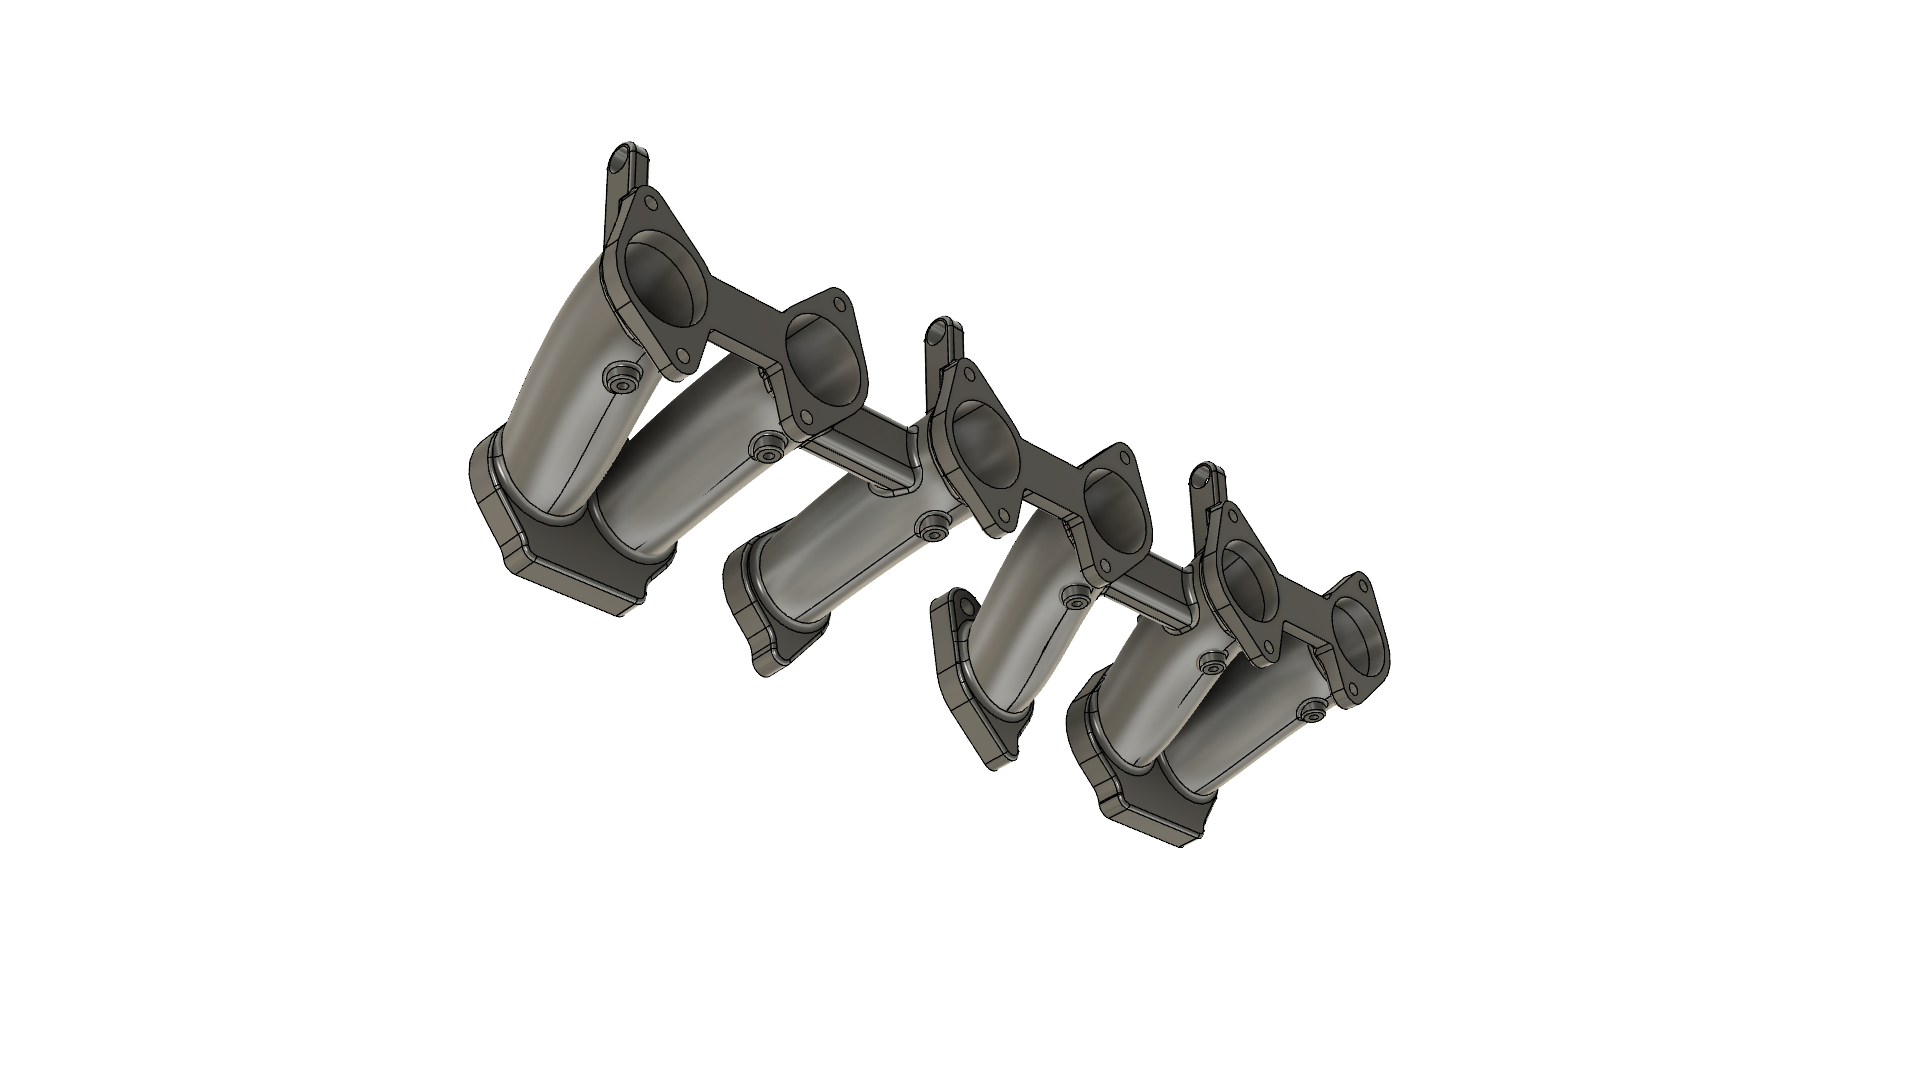
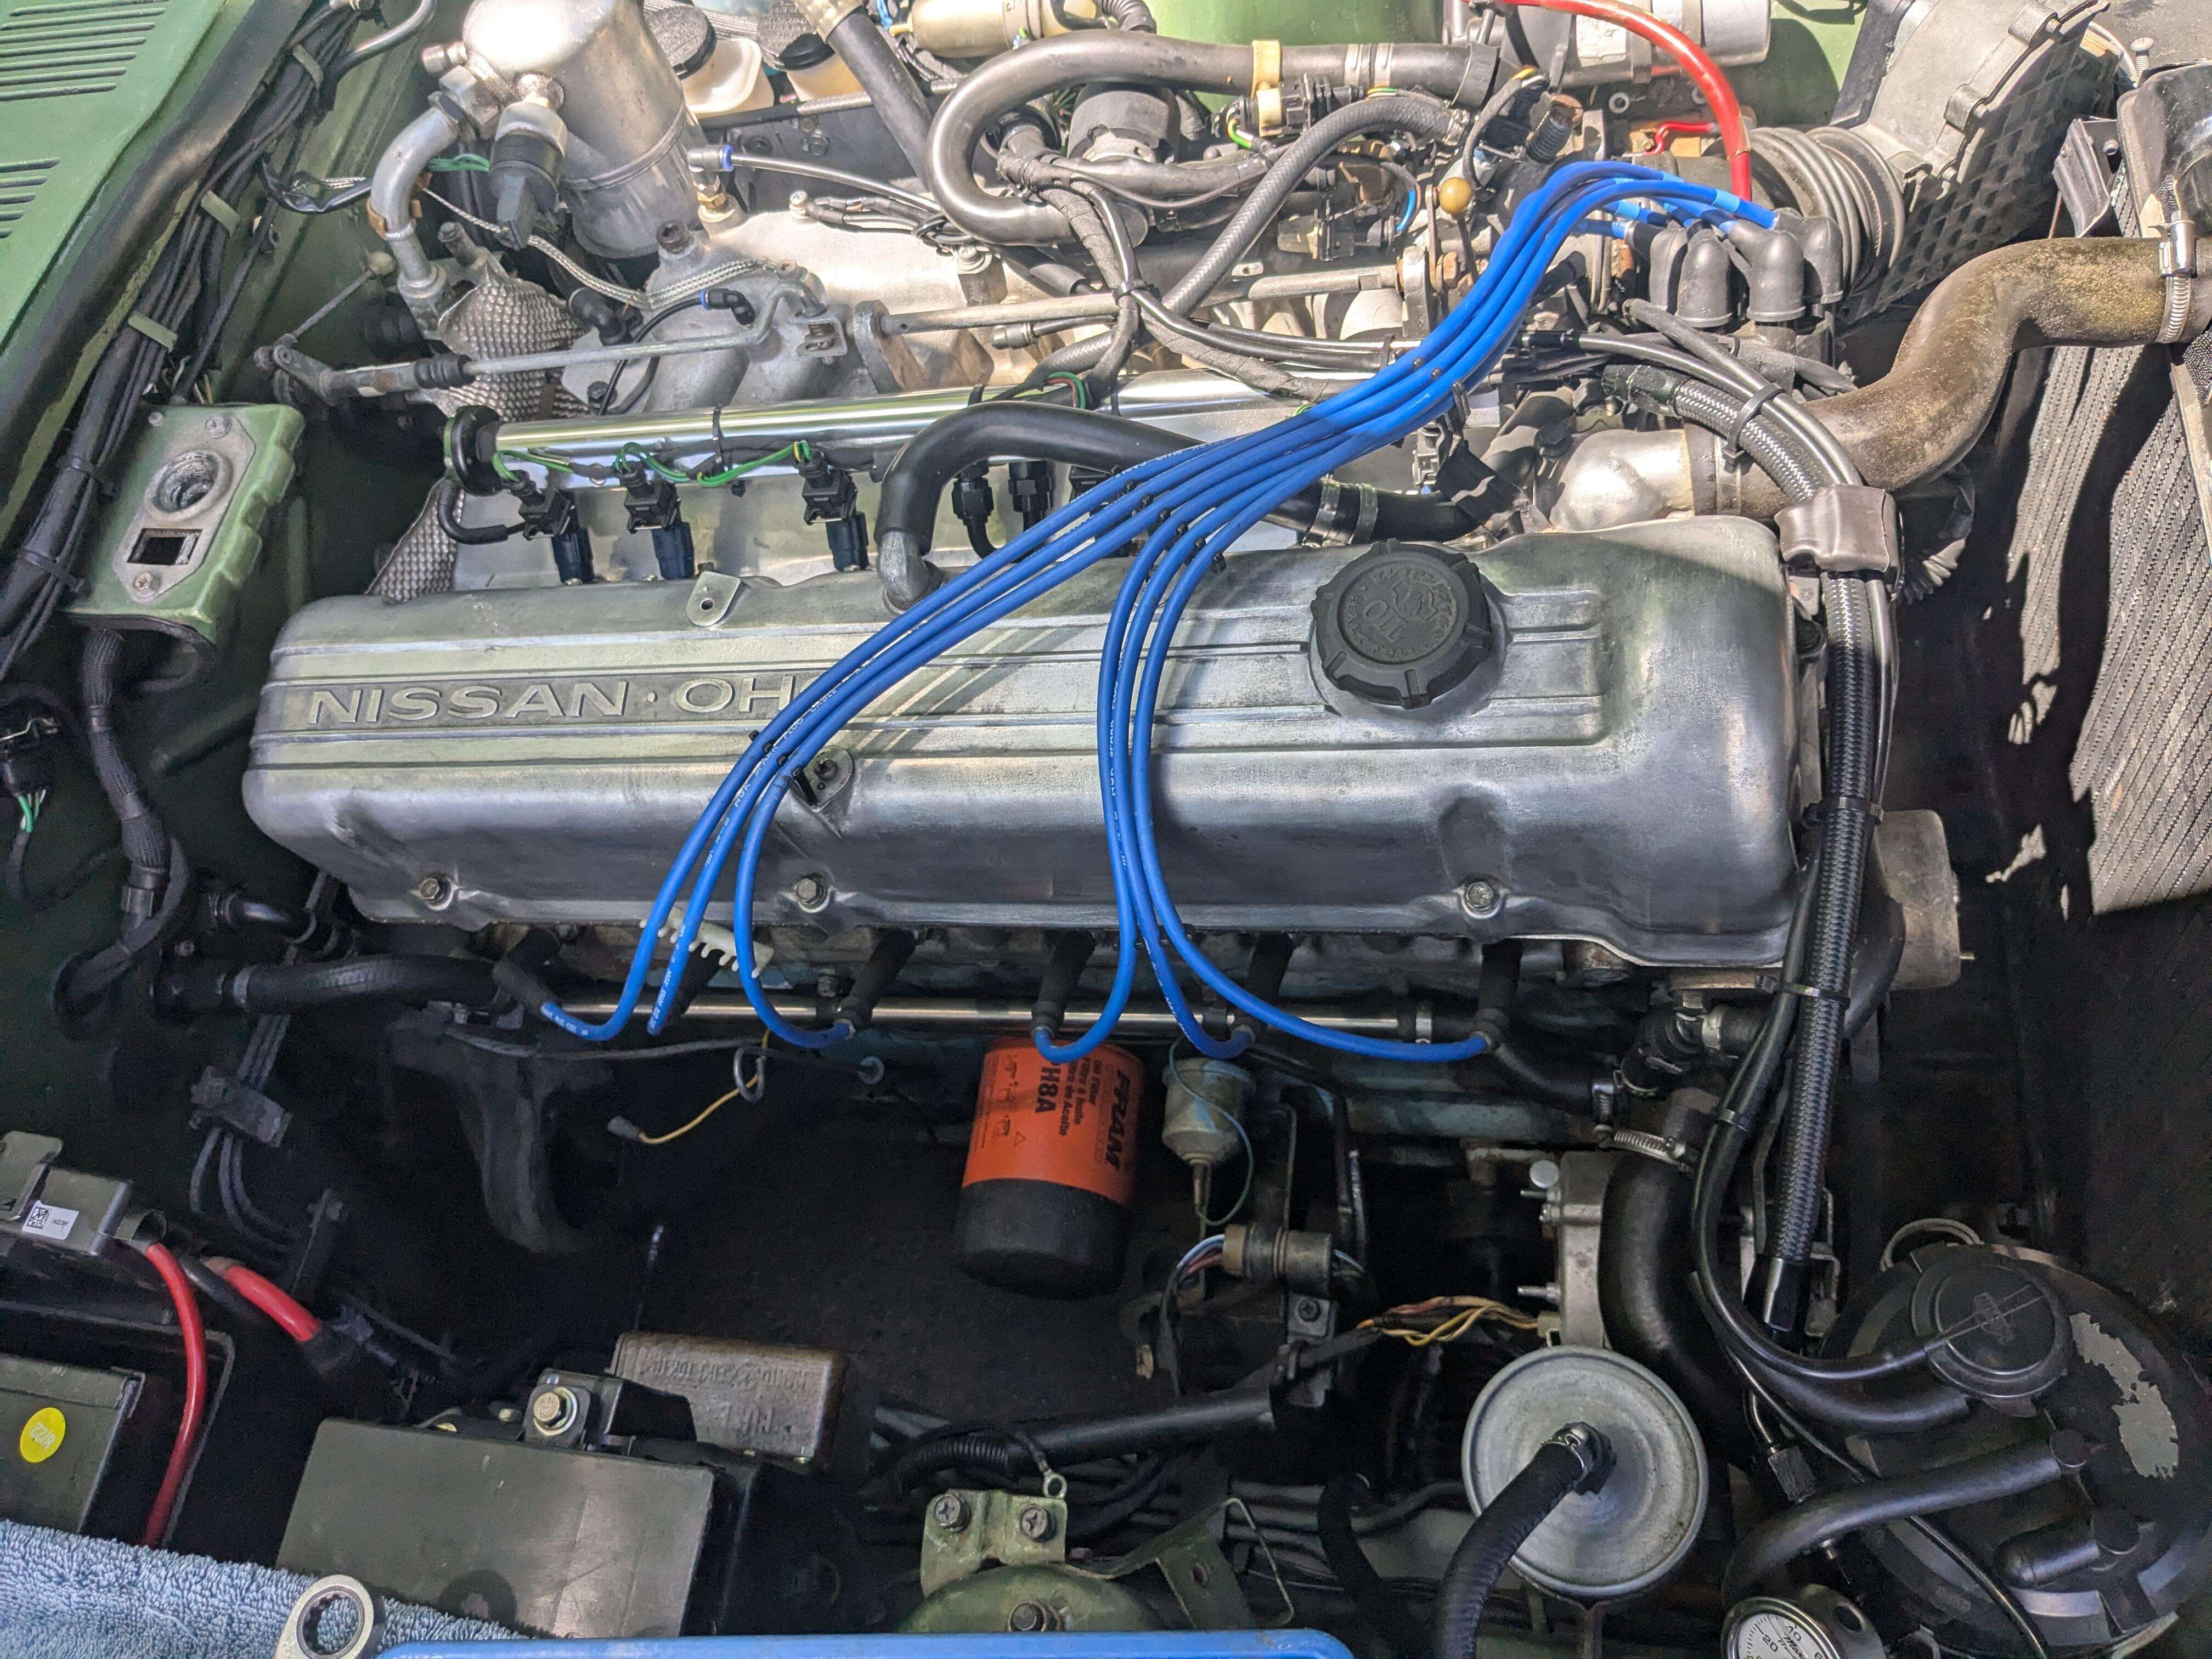
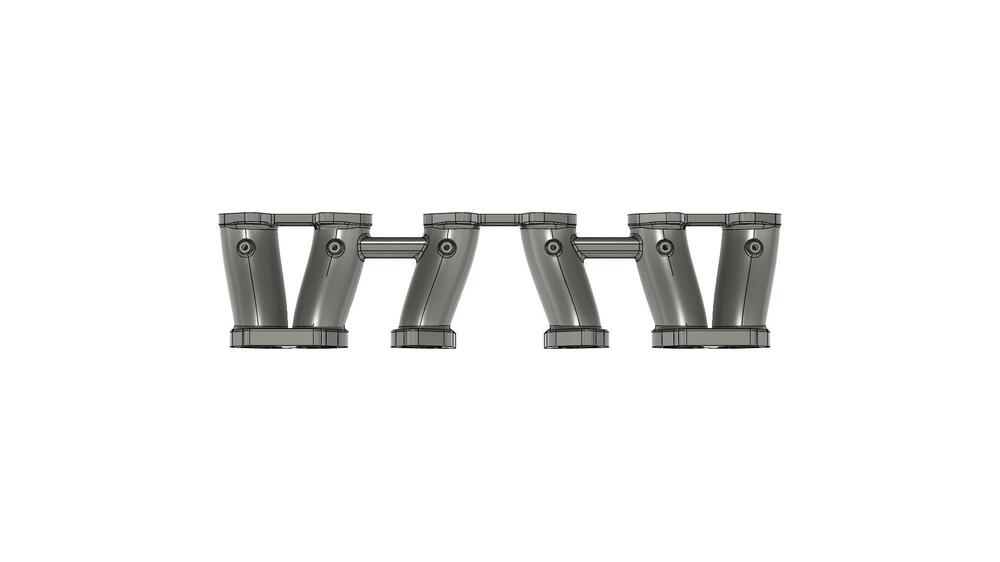
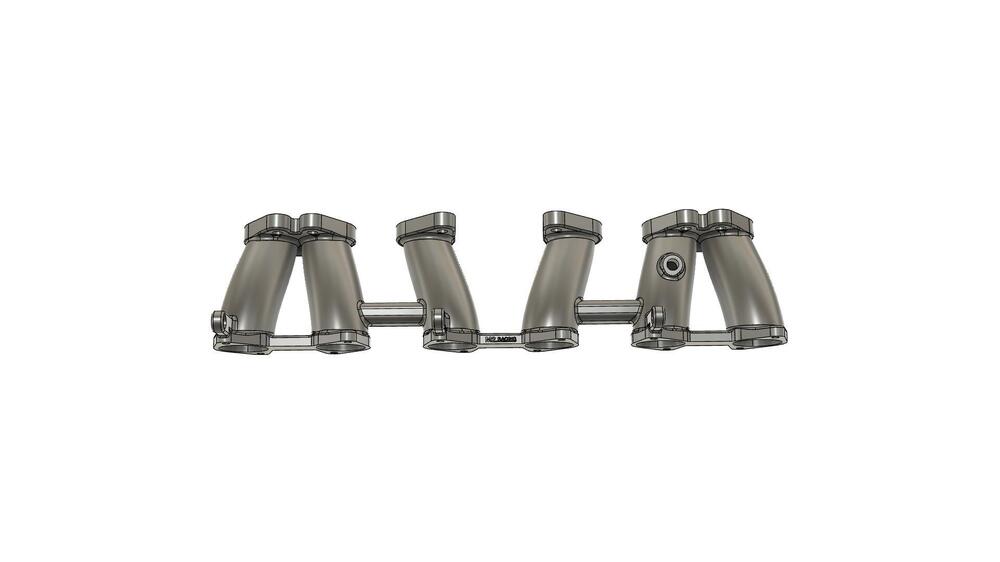
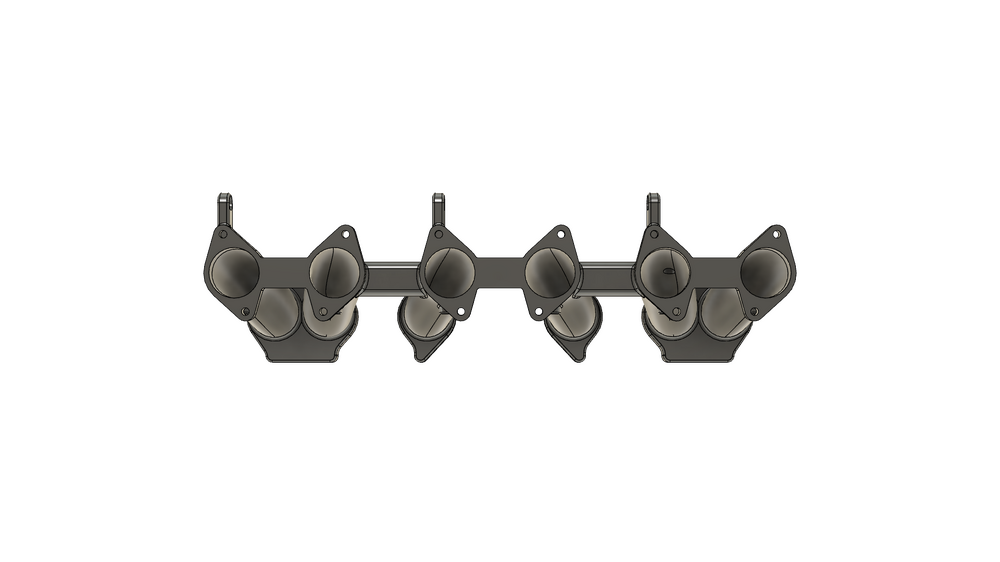
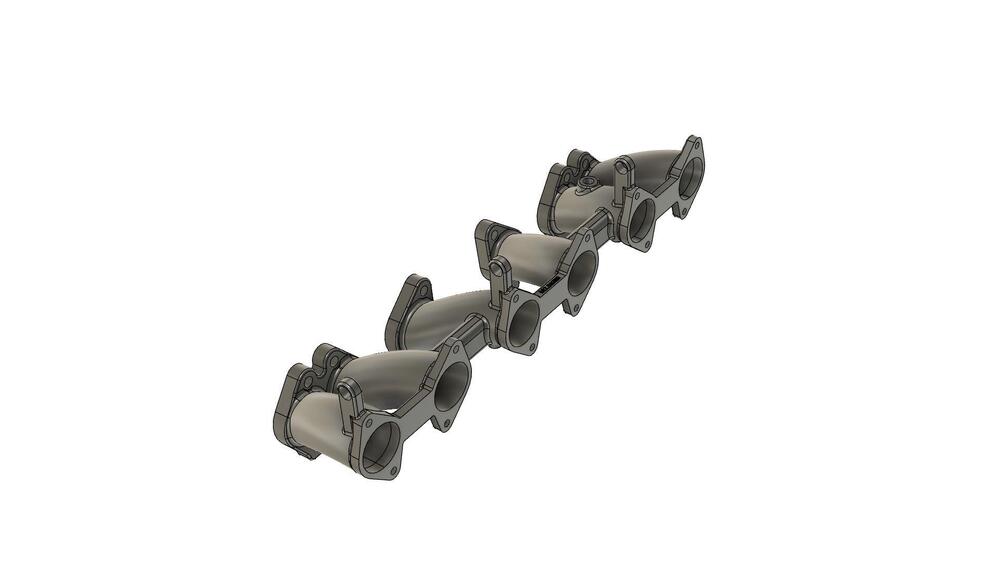
1 pointNew ITB intake is getting sent off to China to CNC cut! This fixes a few mistakes on the first version and also gives me the stock J-hook pivot as an option. It will feature a bolt on banjo balance bar and ideal injector angles. It's slightly longer then the last version as well.

 1 point
 -
1 point
-
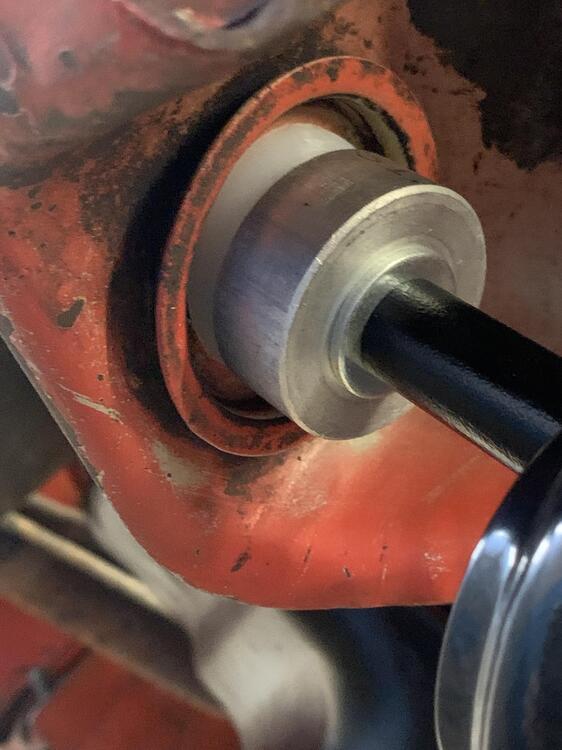
Here's a pic and instructions. You'll still need a rubber bushing on the rearward side. TensionRodKit.pdf
 1 point
 -
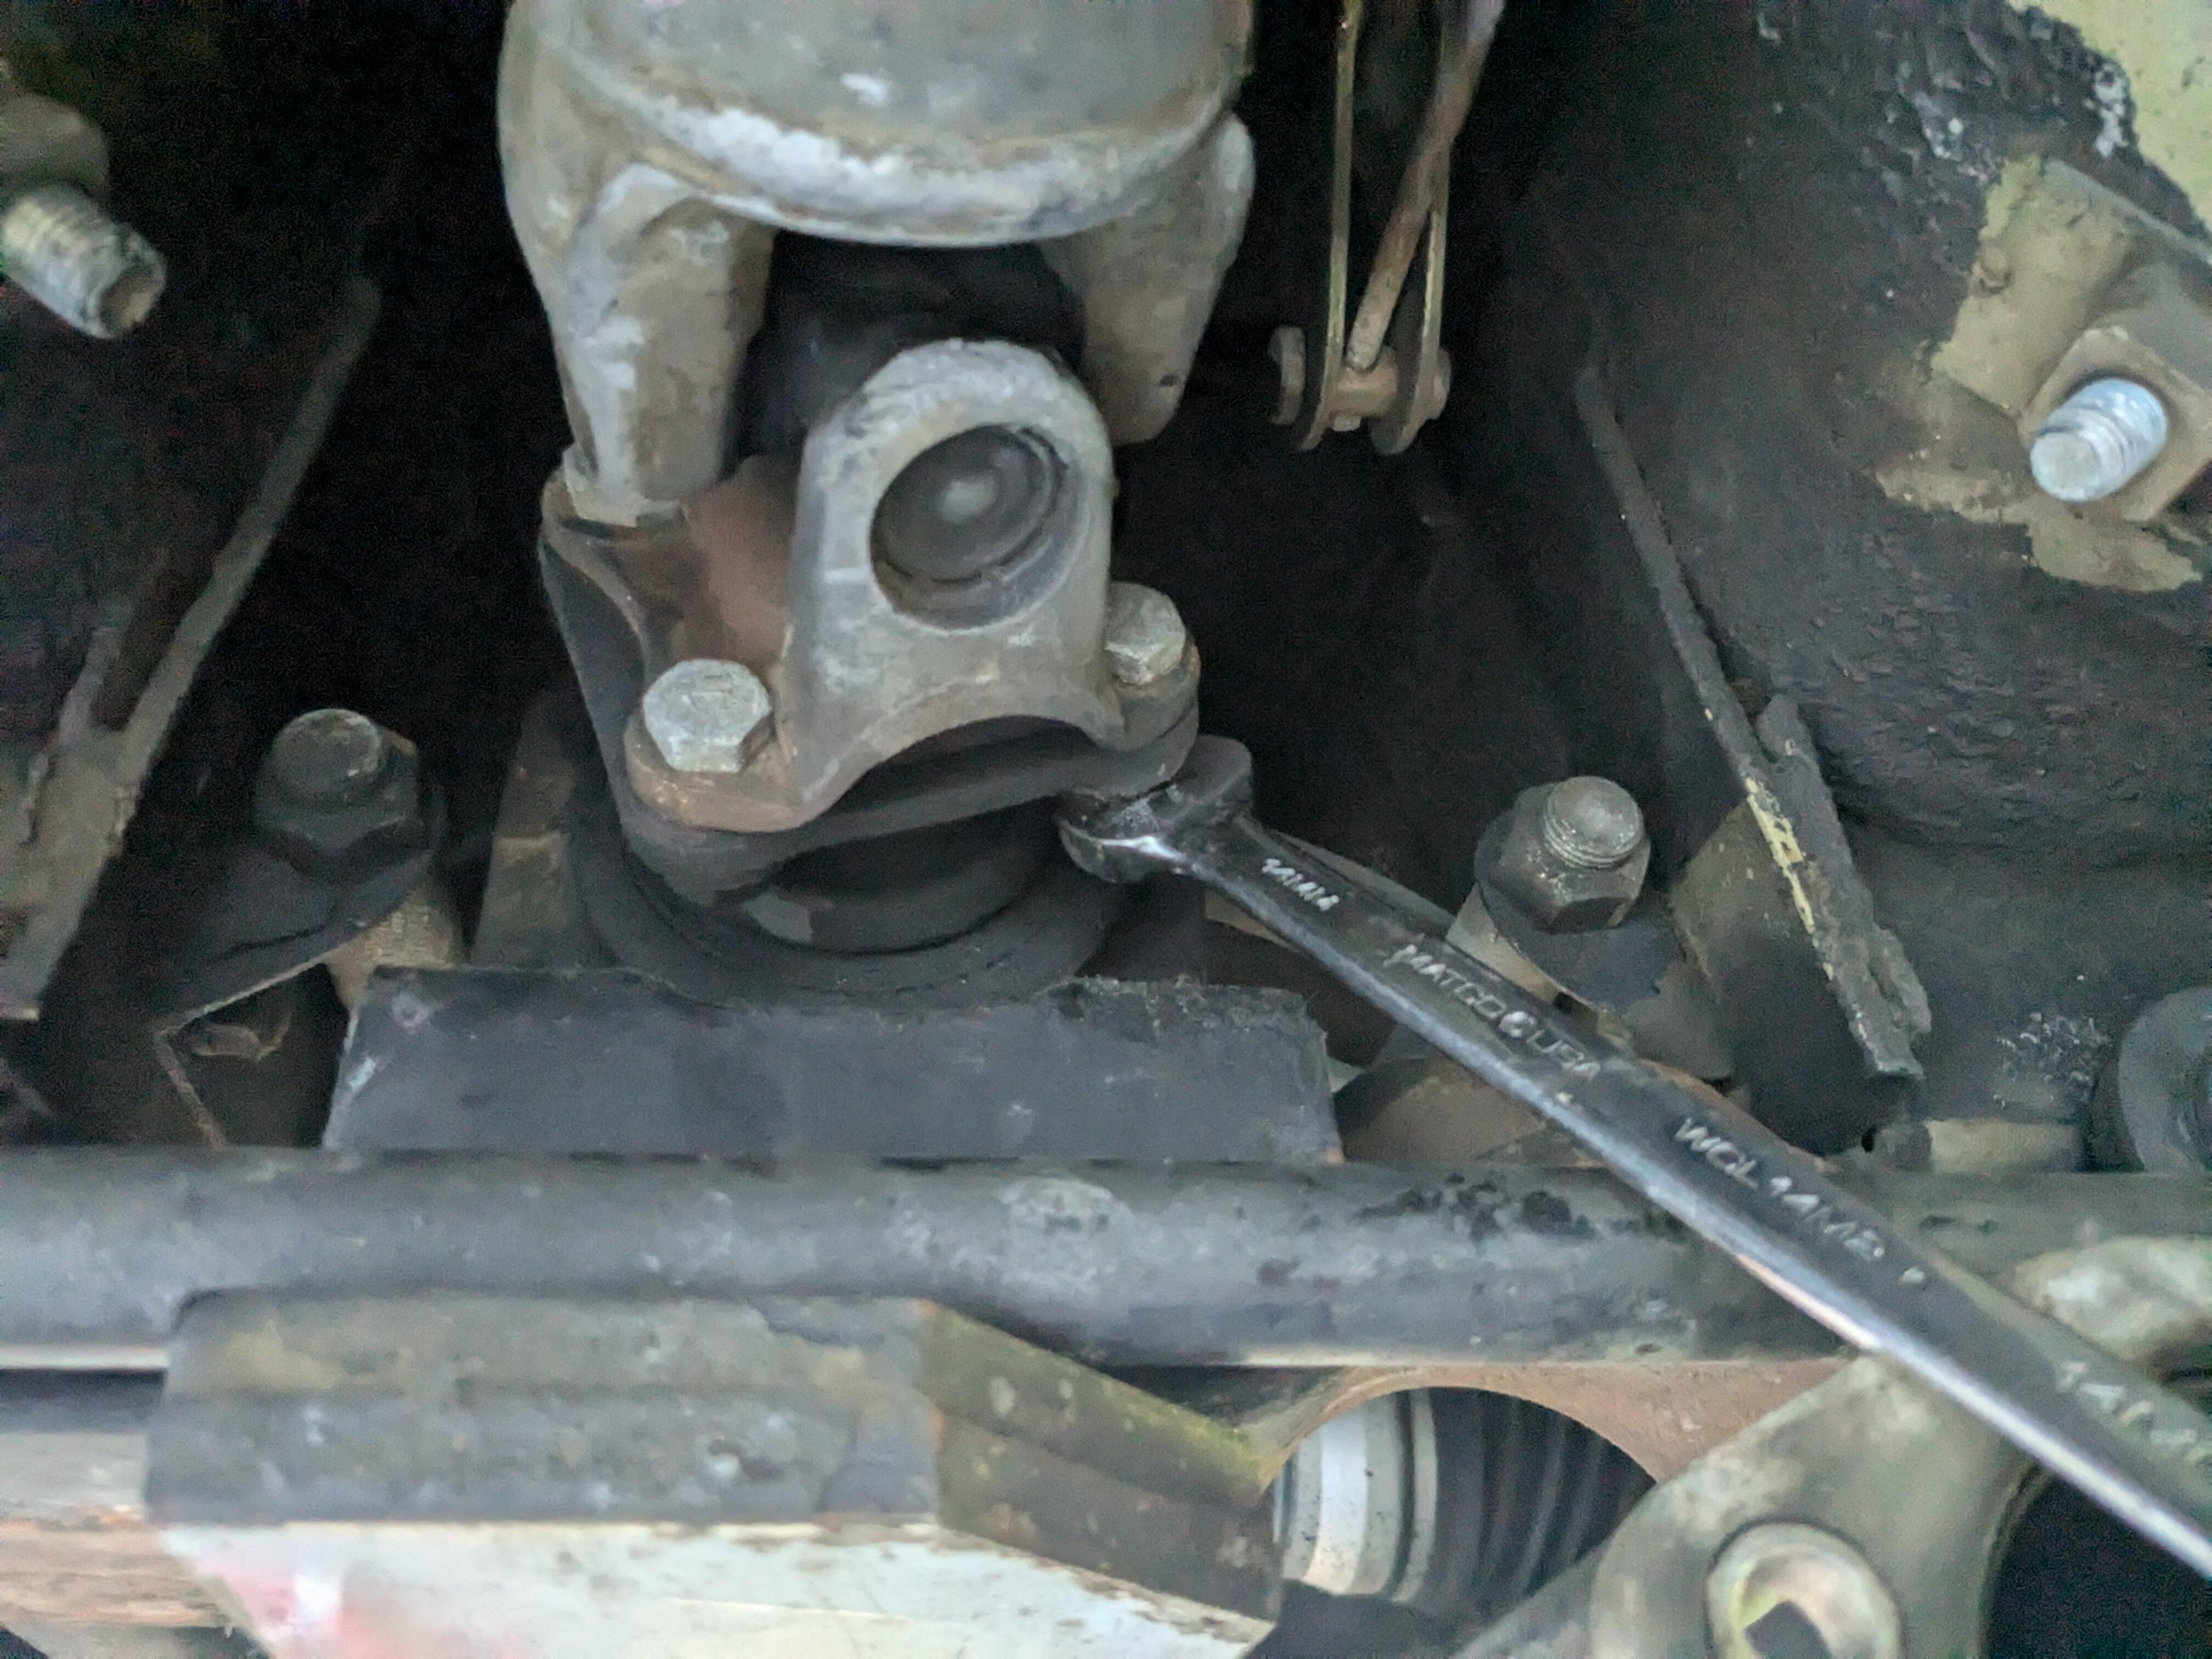
To rotate the bolts on the back side you use a smallish wrench fitted up in the tunnel area, the spin the drive shaft. the wrench gets caught, and then turns the nut as you rotate the drive shaft. It really goes a lot quicker than described. Just remember you don't have to twist the wrench, the movement of the drive shaft does the twisting, while the wrench stay stuck in place. You just have to crack them off, from there you can finger spin them off. FYI you can tighten the same way.1 point
-
1 pointLily has the later bars and an R200 diff. I think the main interference comes from the size of the CV boots compared to the Ujoint and the fact they extend further under the car than the Ujoints do1 point
-
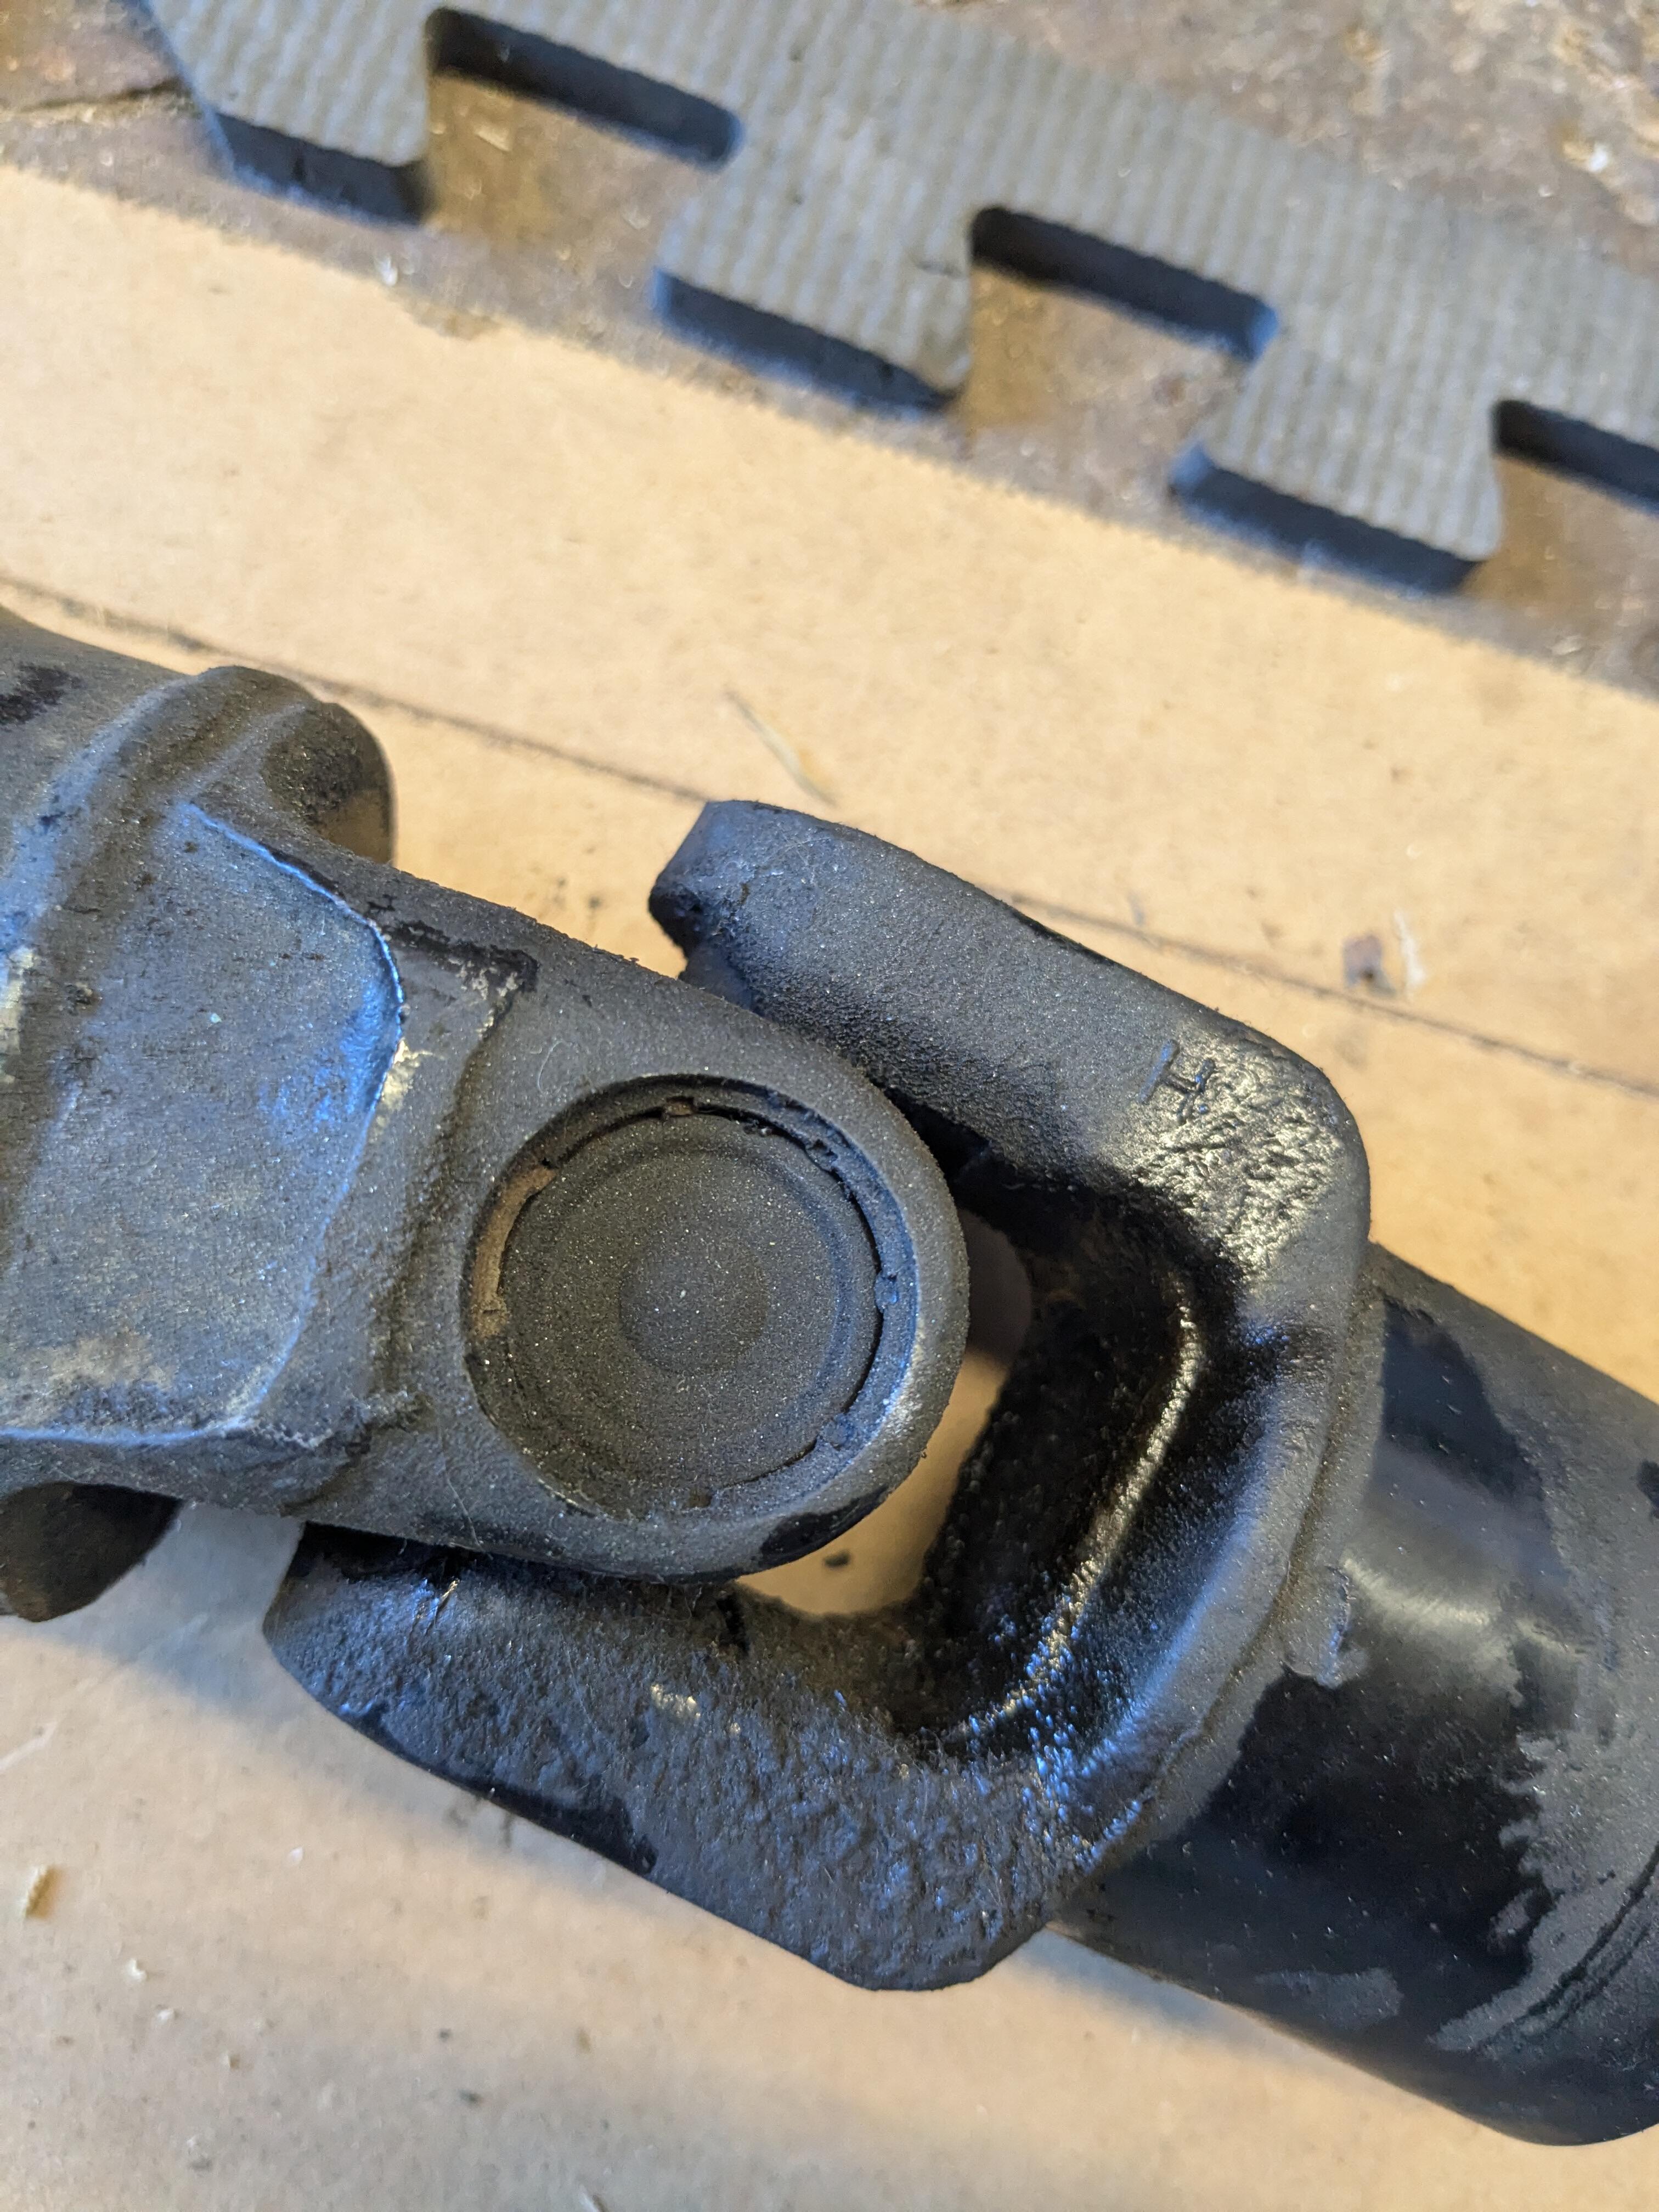
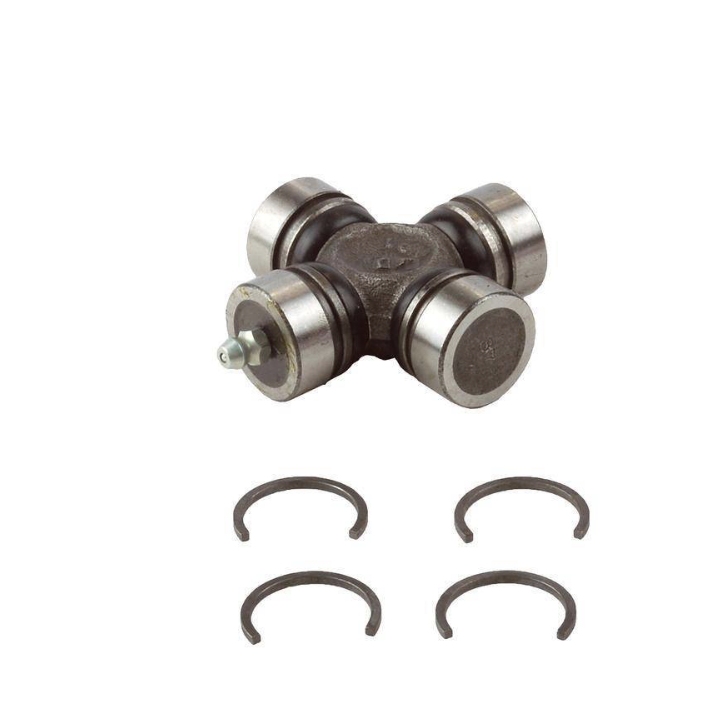
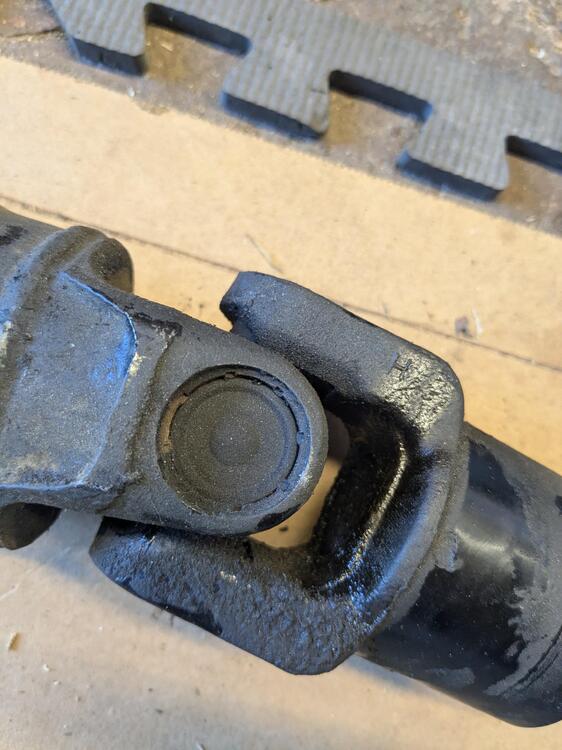
I see. I missed your second reply (above) with the link to examples of the Nissan setup. I have never seen such a complex setup for installing a UJoint. Typical Domestic & EU Spicer joints rely on a recess groove in the outer portion of the yoke, which the retaining ring/clip will seat in once the UJoint is placed. There is no adjustment - that part is quite confusing, given that Nissan seems to be a stickler for precision. Having so many thicknesses of clips implies that the production tolerance margins for the yokes (and/or the joints) must be pretty loose. I have replaced many a standard U-Joint in the past - Volvo used 2-piece driveshafts with 3 1140 or 1310 joints on all their RWD models, and worn joints was a pretty common thing. in my experience it's mostly been a question of tapping the cross back & forth a smidge to get the right 'feel' in the joint before installing the clips. With the provided info you have given, I will have to pay close attention to the fit.1 point
-
I really did not like the experience dealing with the stupid propshaft hardware on the diff. Personally if i had to do it again I would send it in to get fixed from a shop as they have the shims, and are gonna balance it on a machine. I think MSA used to sell a new aluminum propshaft as well... (I think they call this learning 😂 )1 point
-
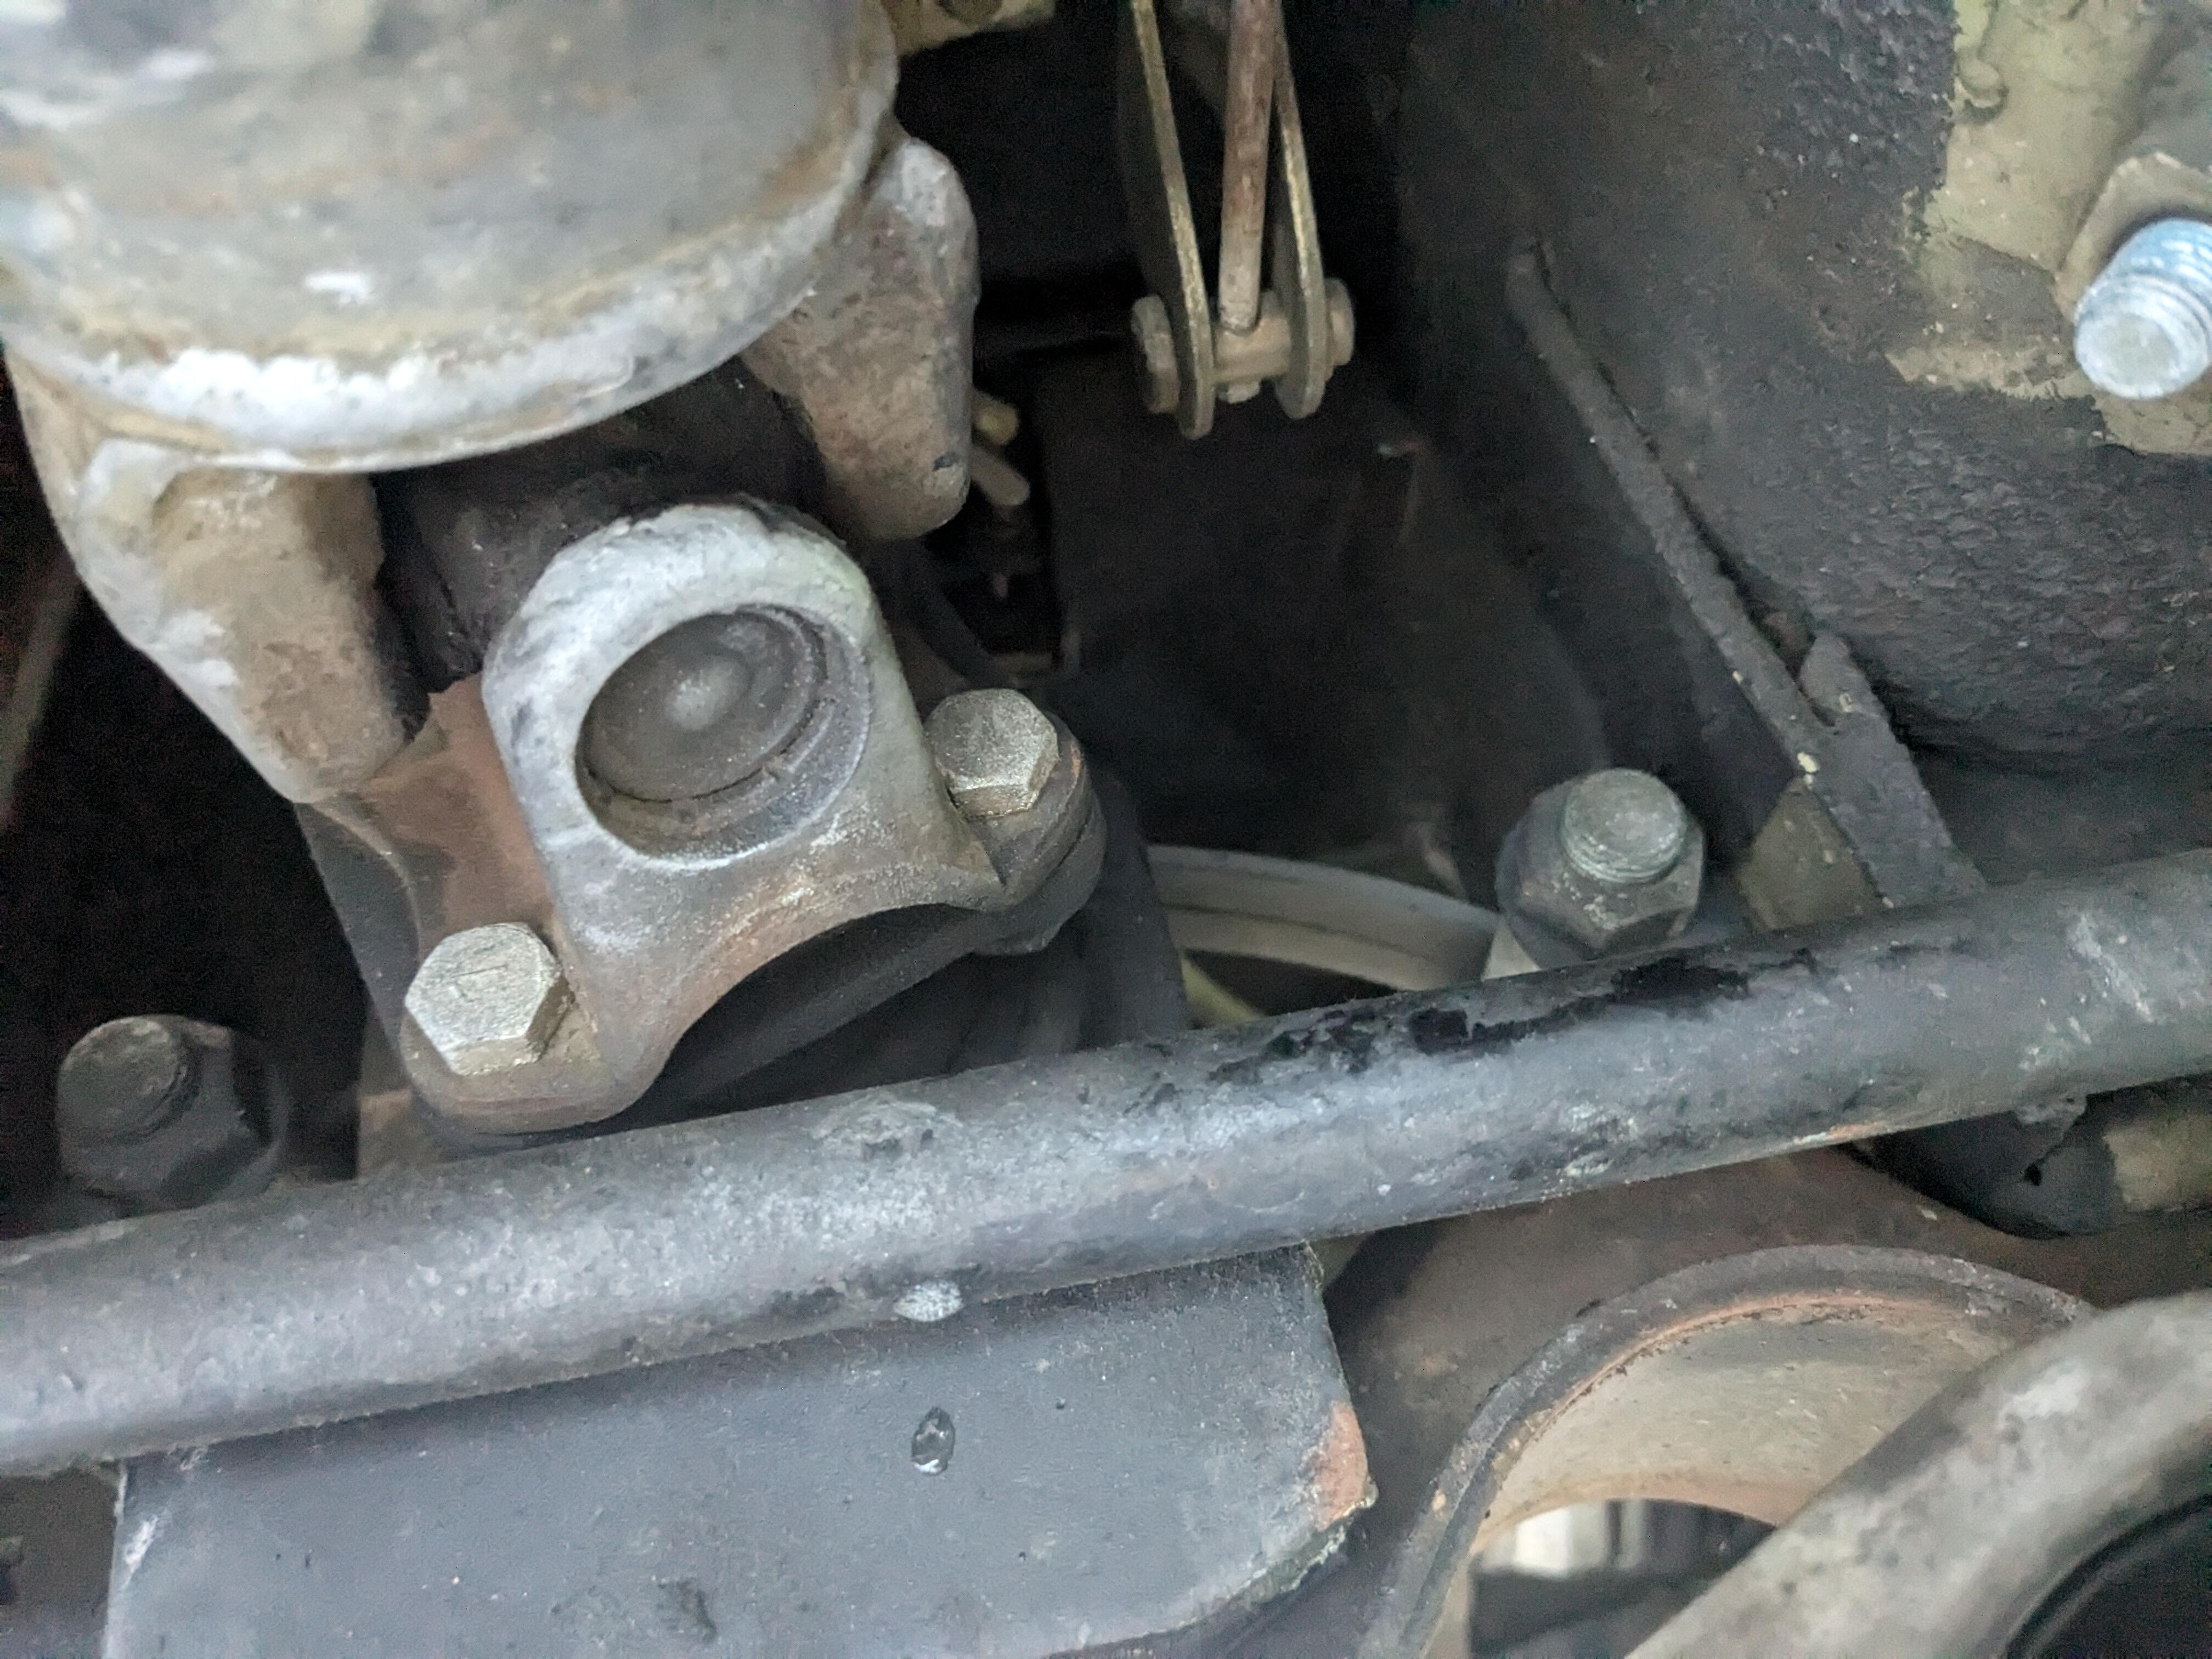
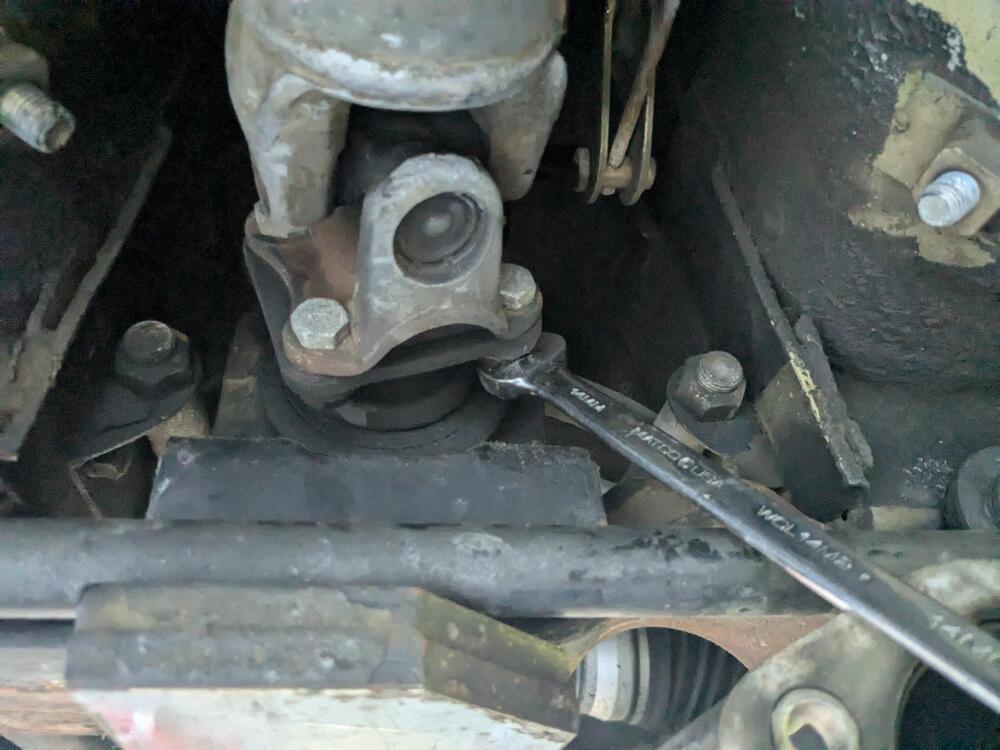
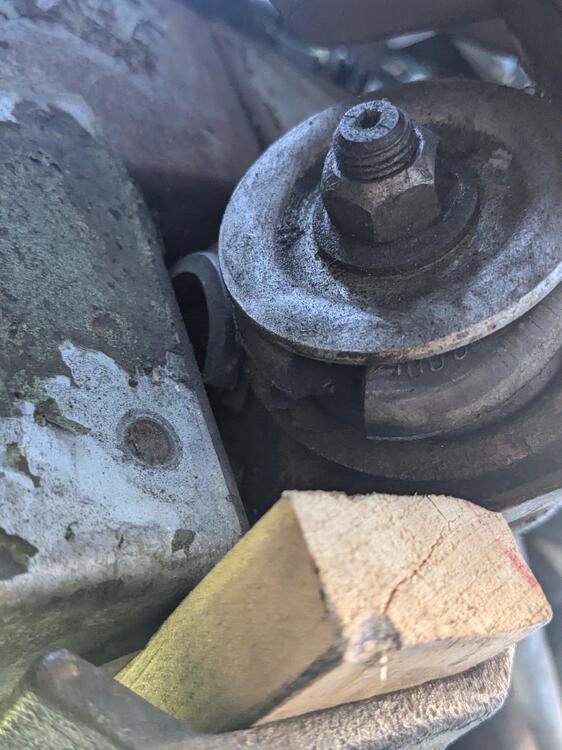
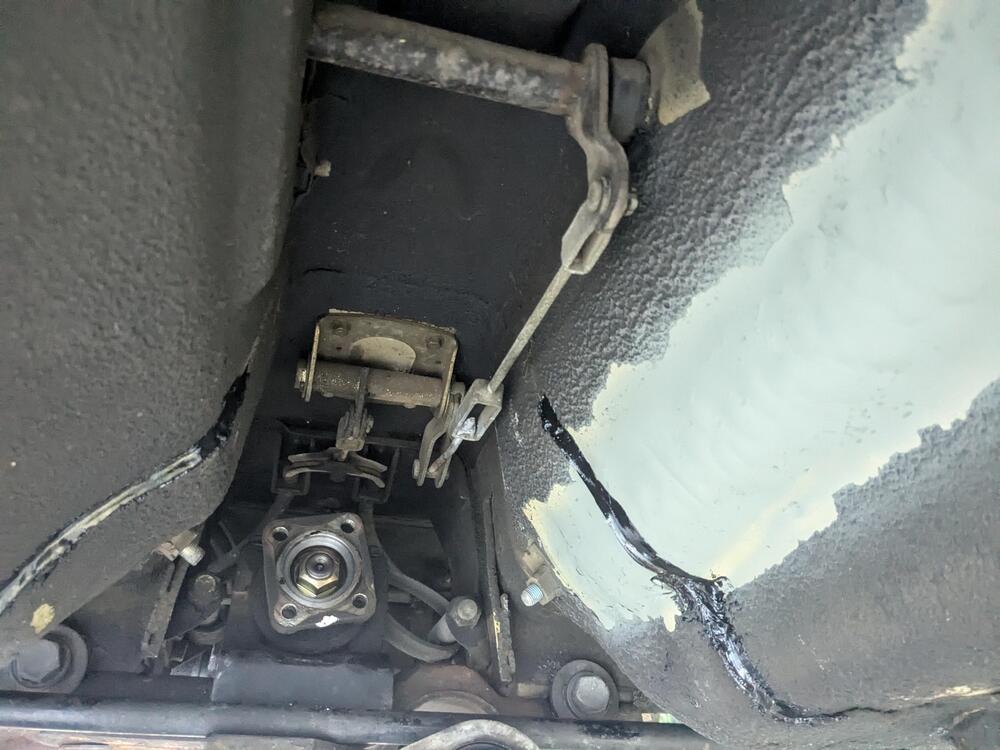
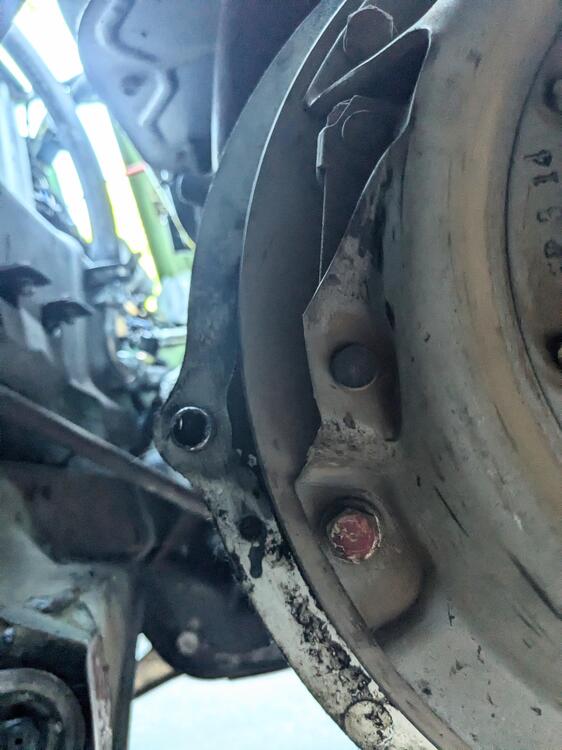
Interesting. The bolts in there do seat against the flange lip - there is no way to rotate the bolt. Perhaps they swapped out the factory bolts when they did the clutch at some point in it's life. Couldn't recall the Datsun name for the part - Volvo used a similar design, just called it a caster rod, since it affects the caster 🙂 I've found that Rockport 430-10 is the replacement U-Joint, I just ordered the Dana version off RockAuto as it will get here much quicker than the other options I could find. Apparently the replacements use a C clip that locates on the insides of the yoke, rather than the traditional clip in a groove on the outside of the cap. Stakes have to be removed first, of course.
 1 point
 -
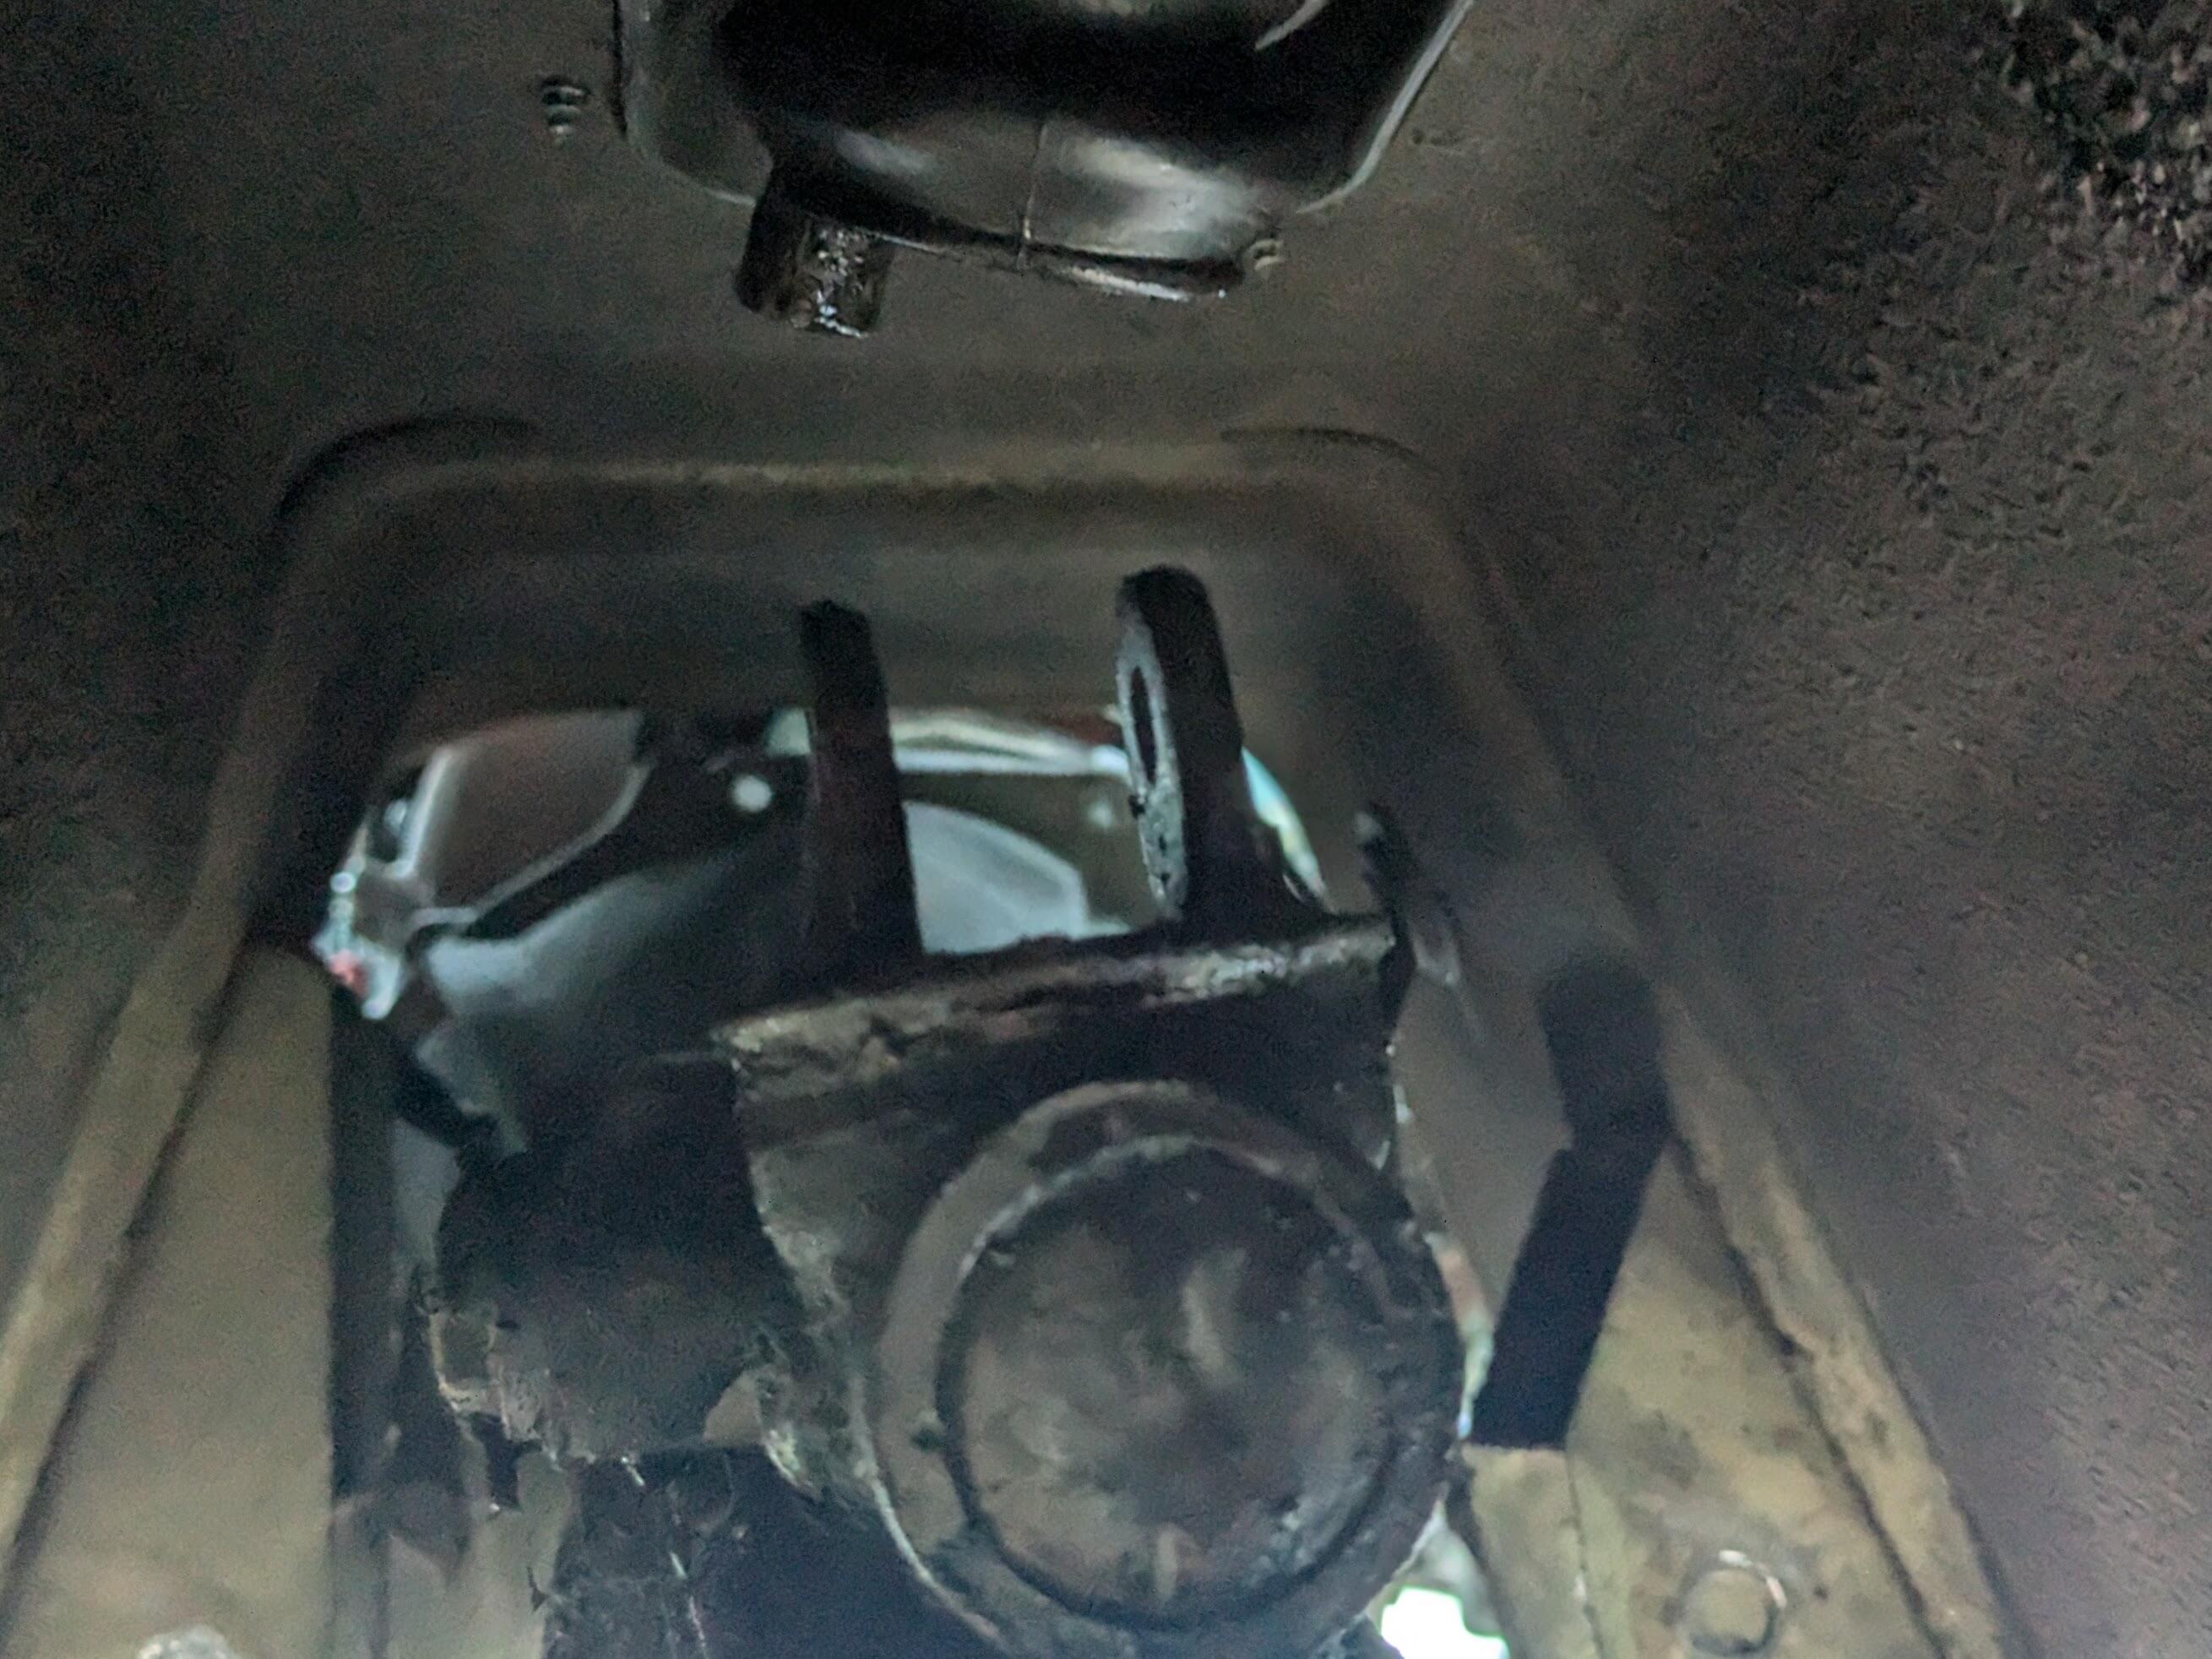
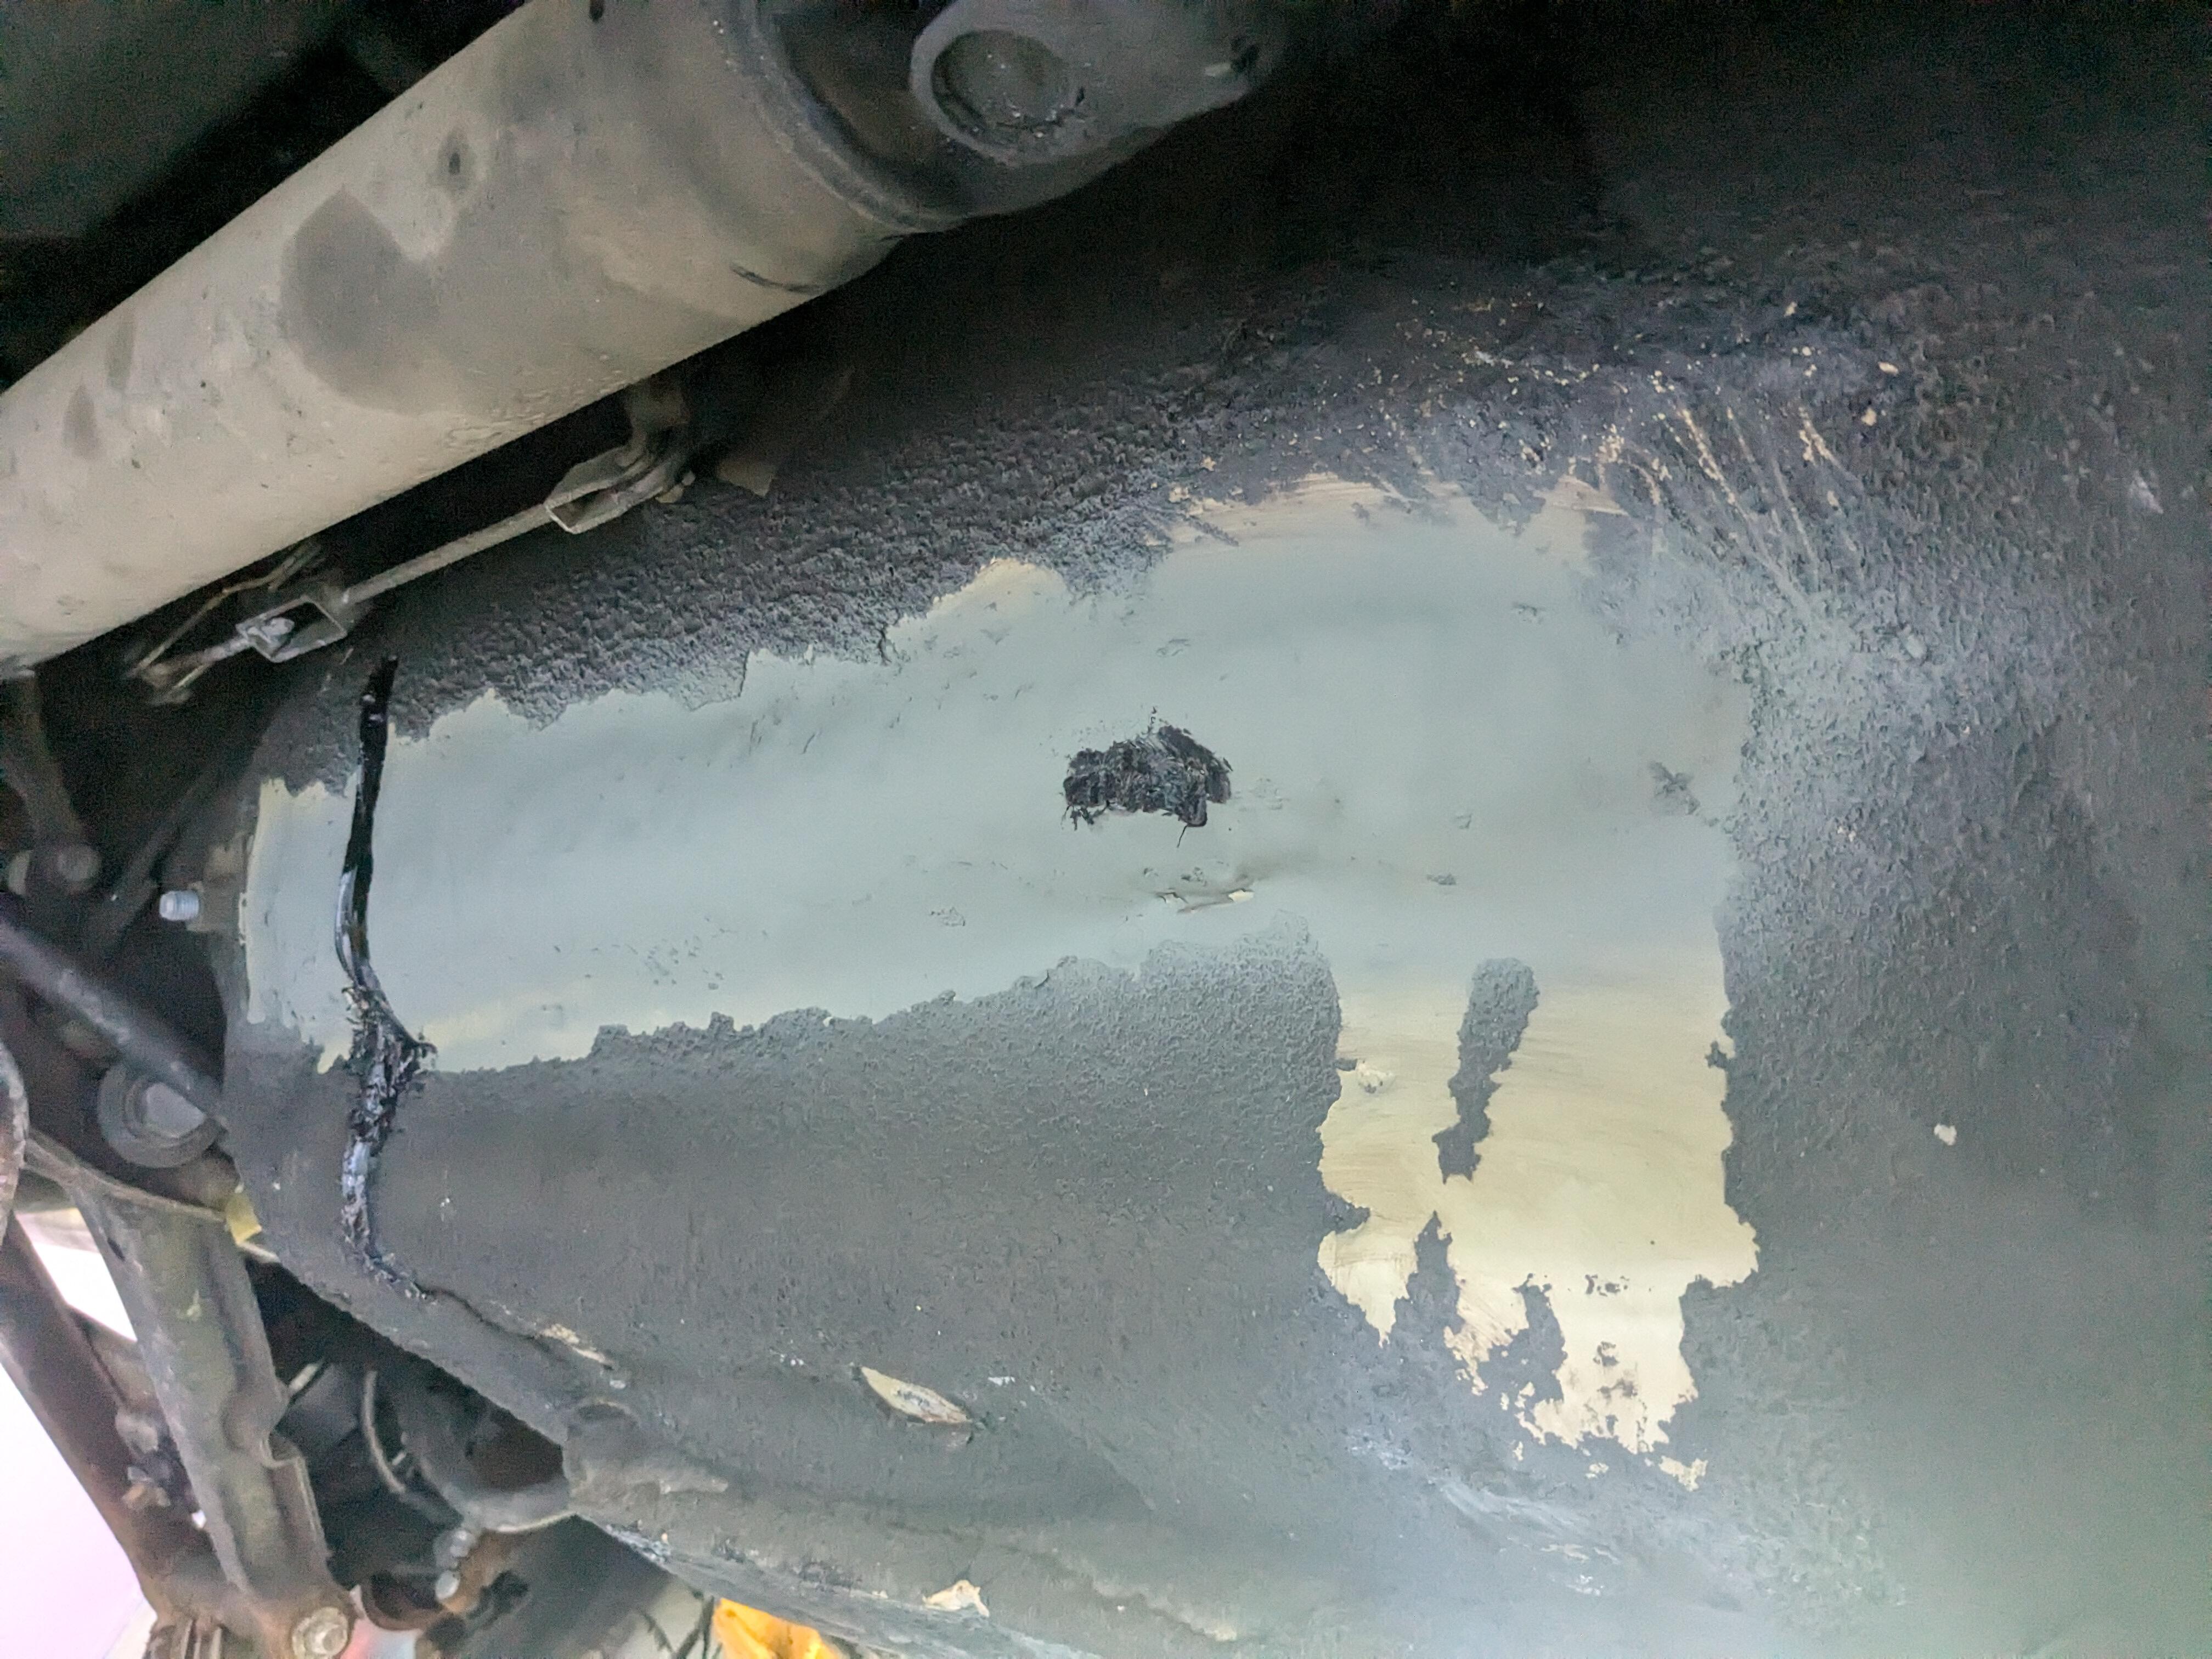
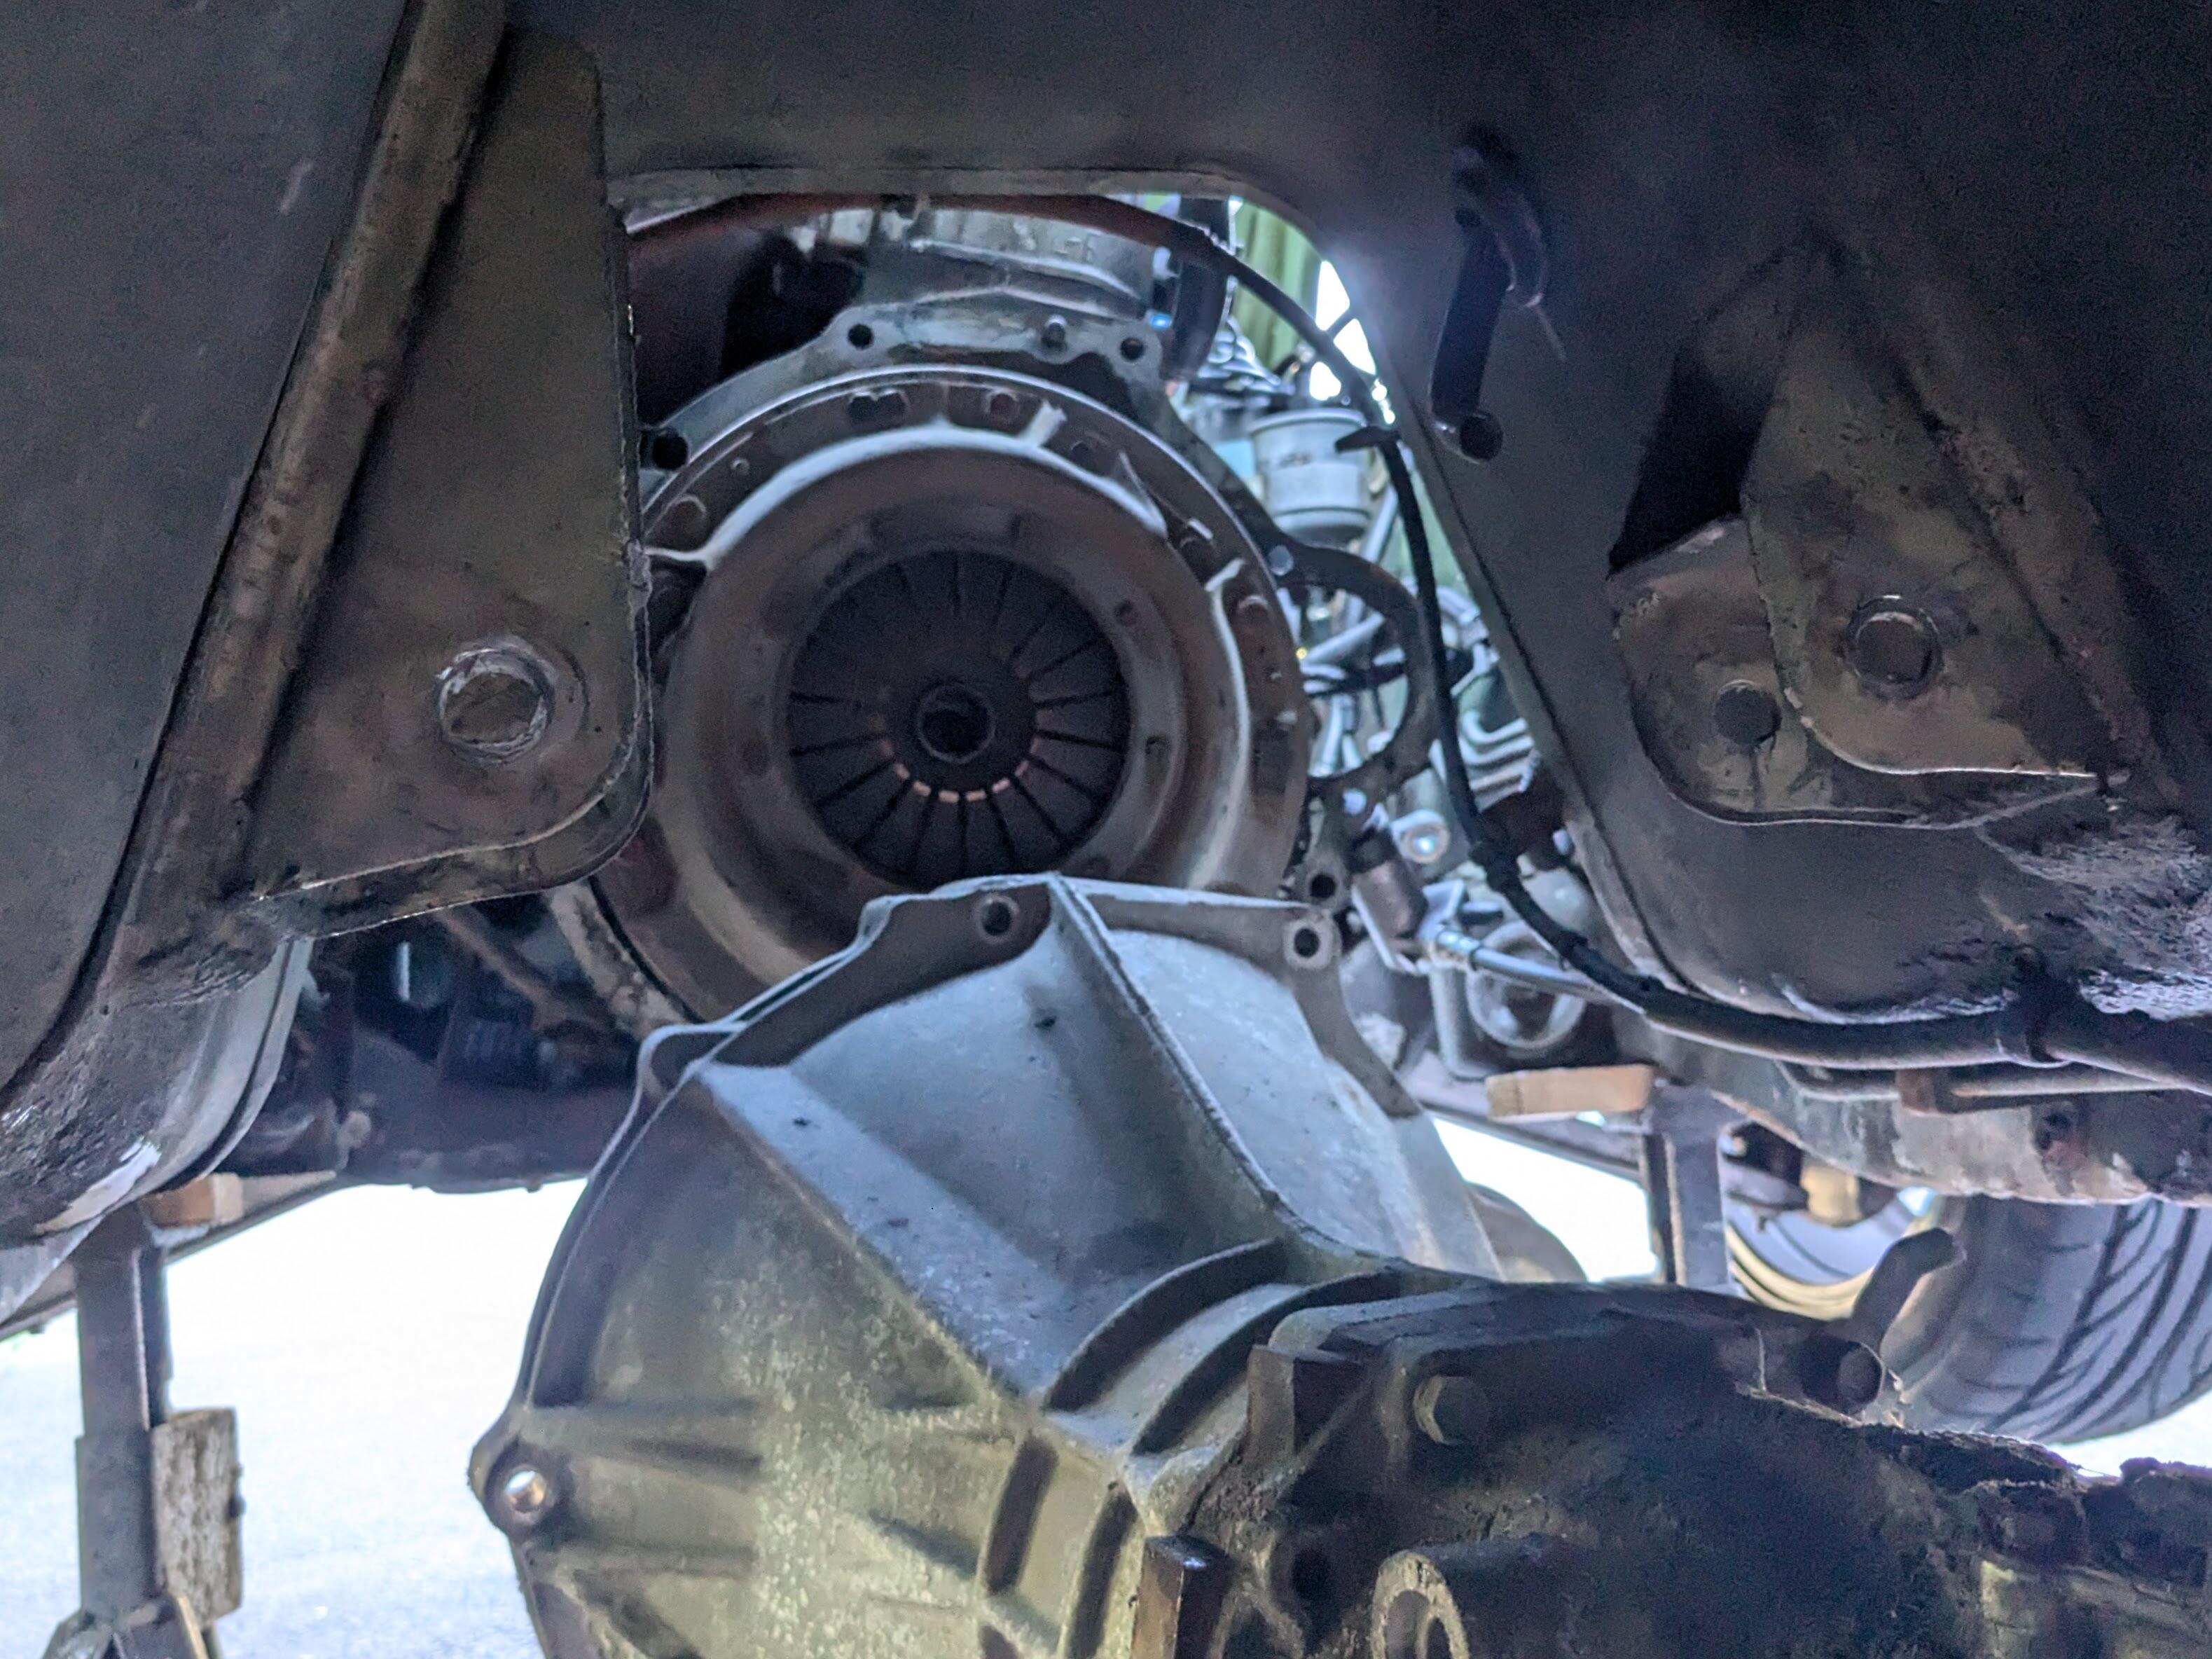
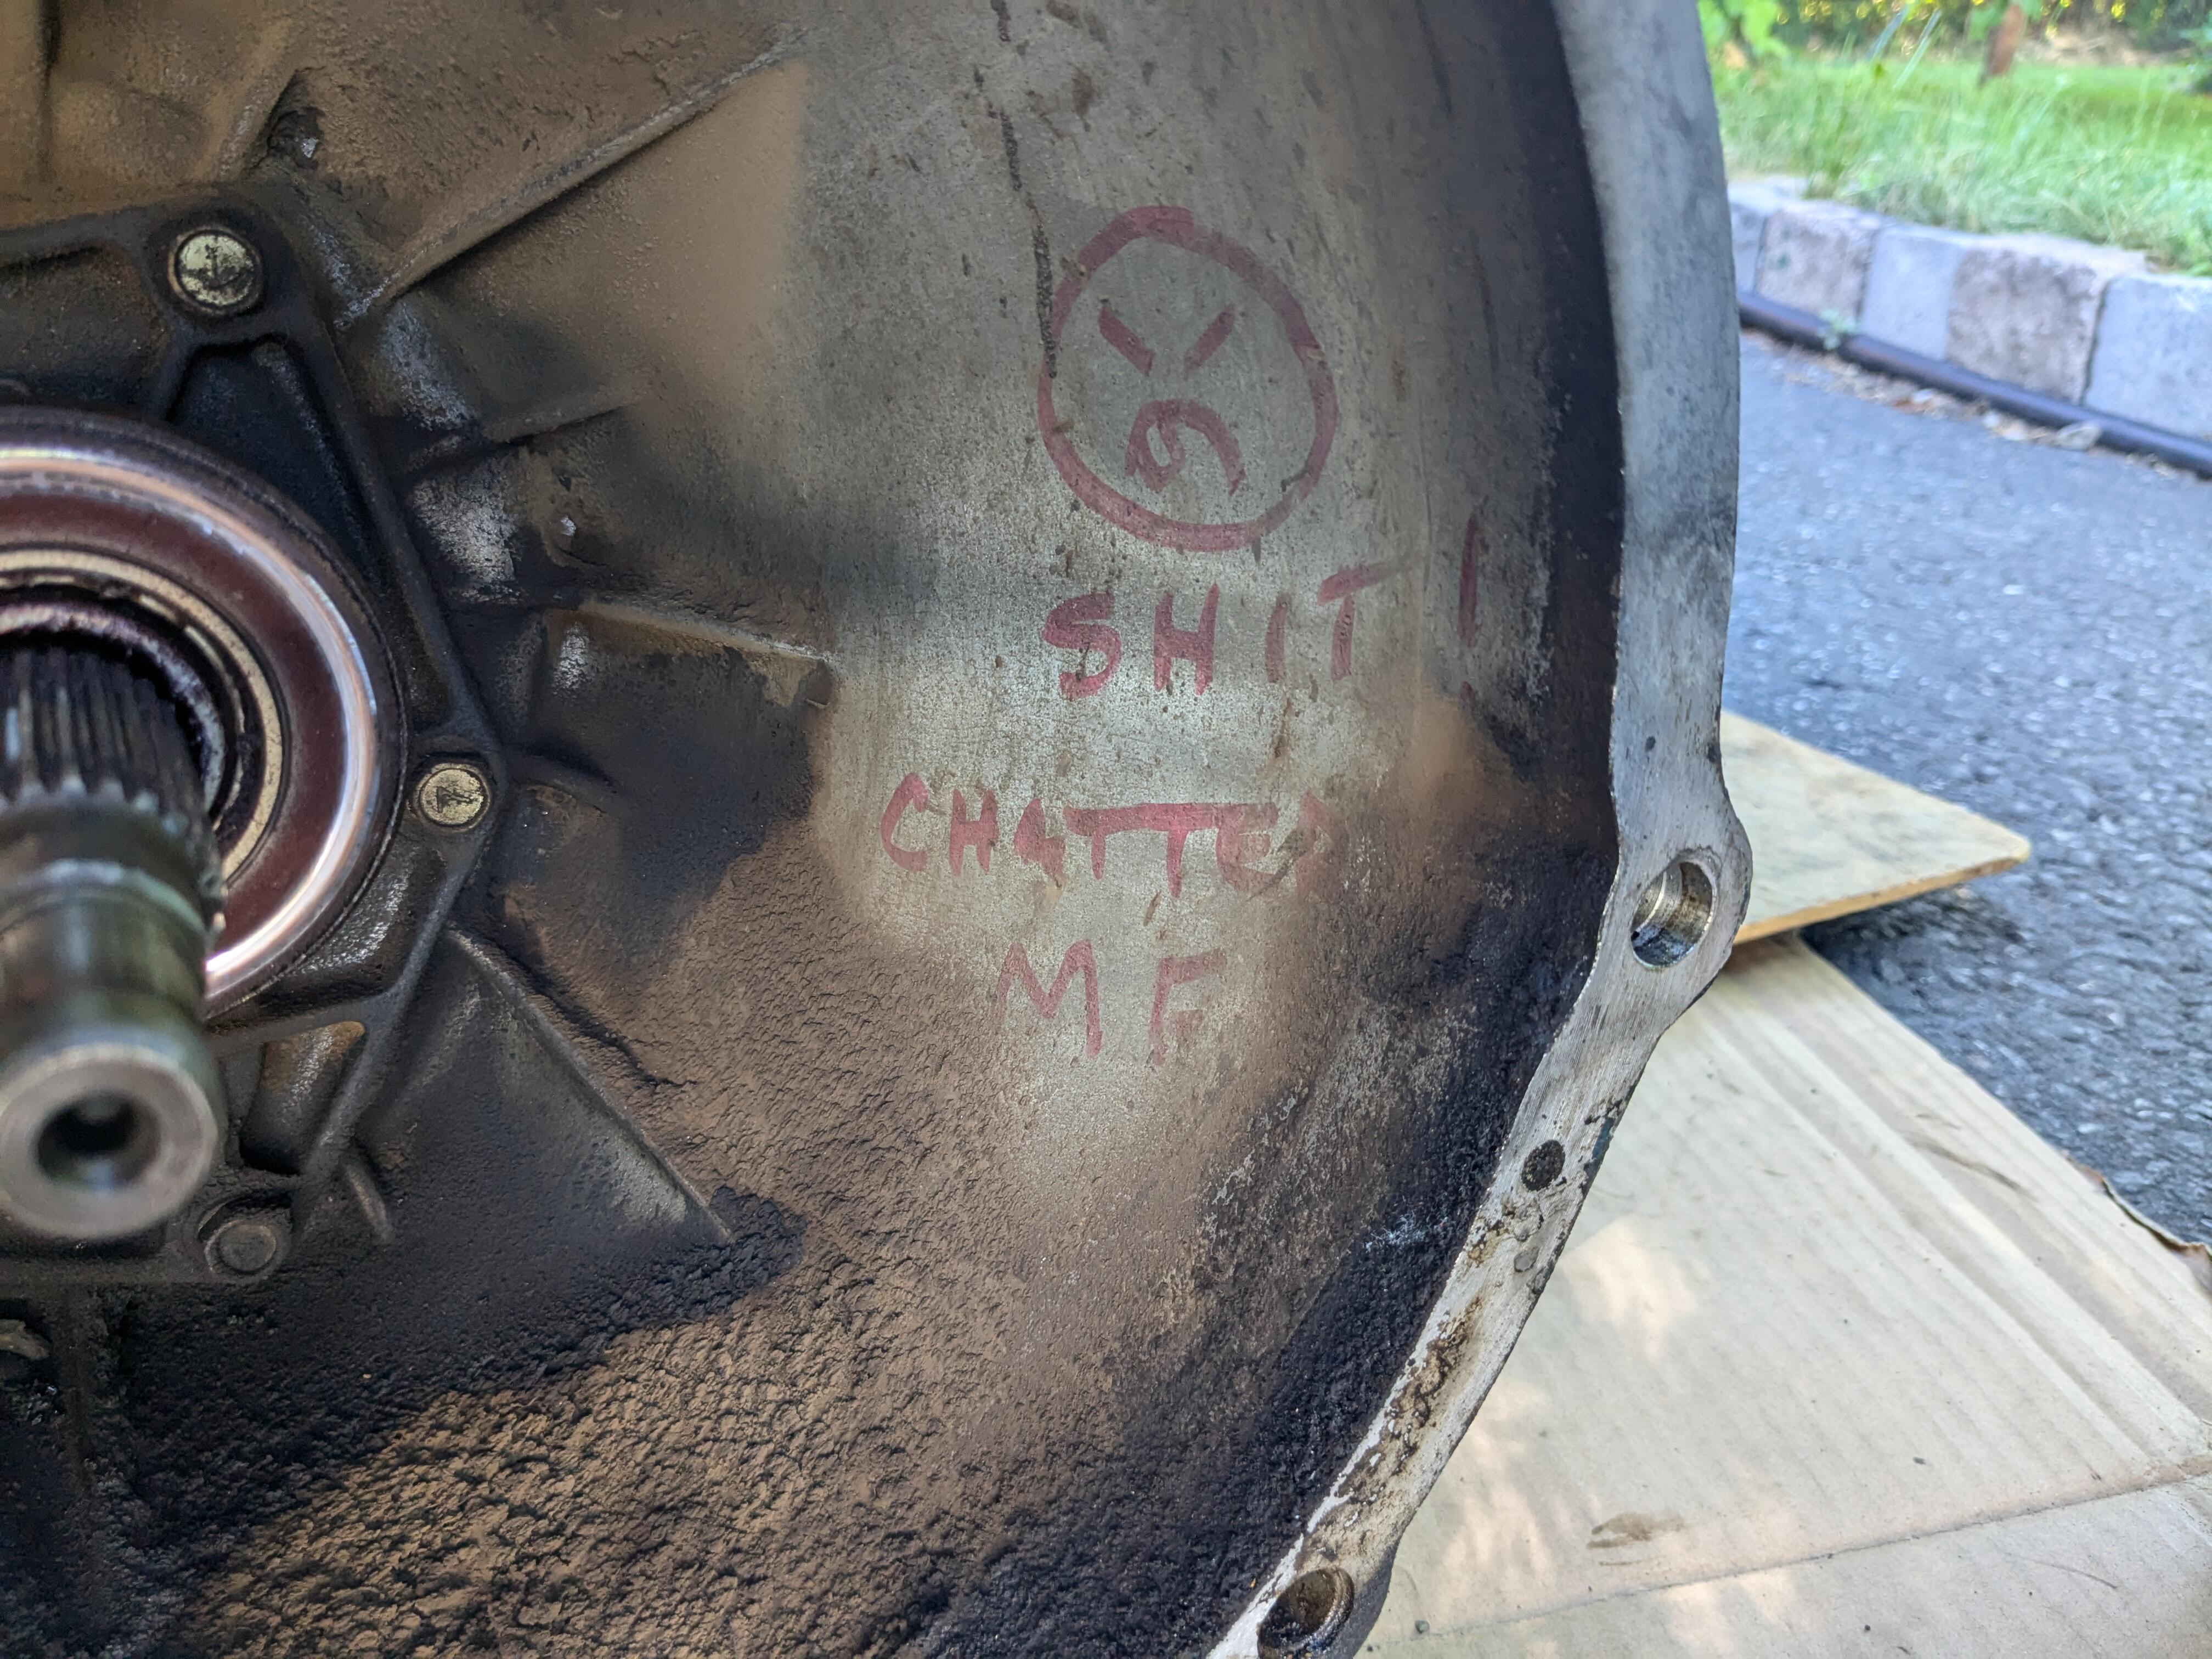
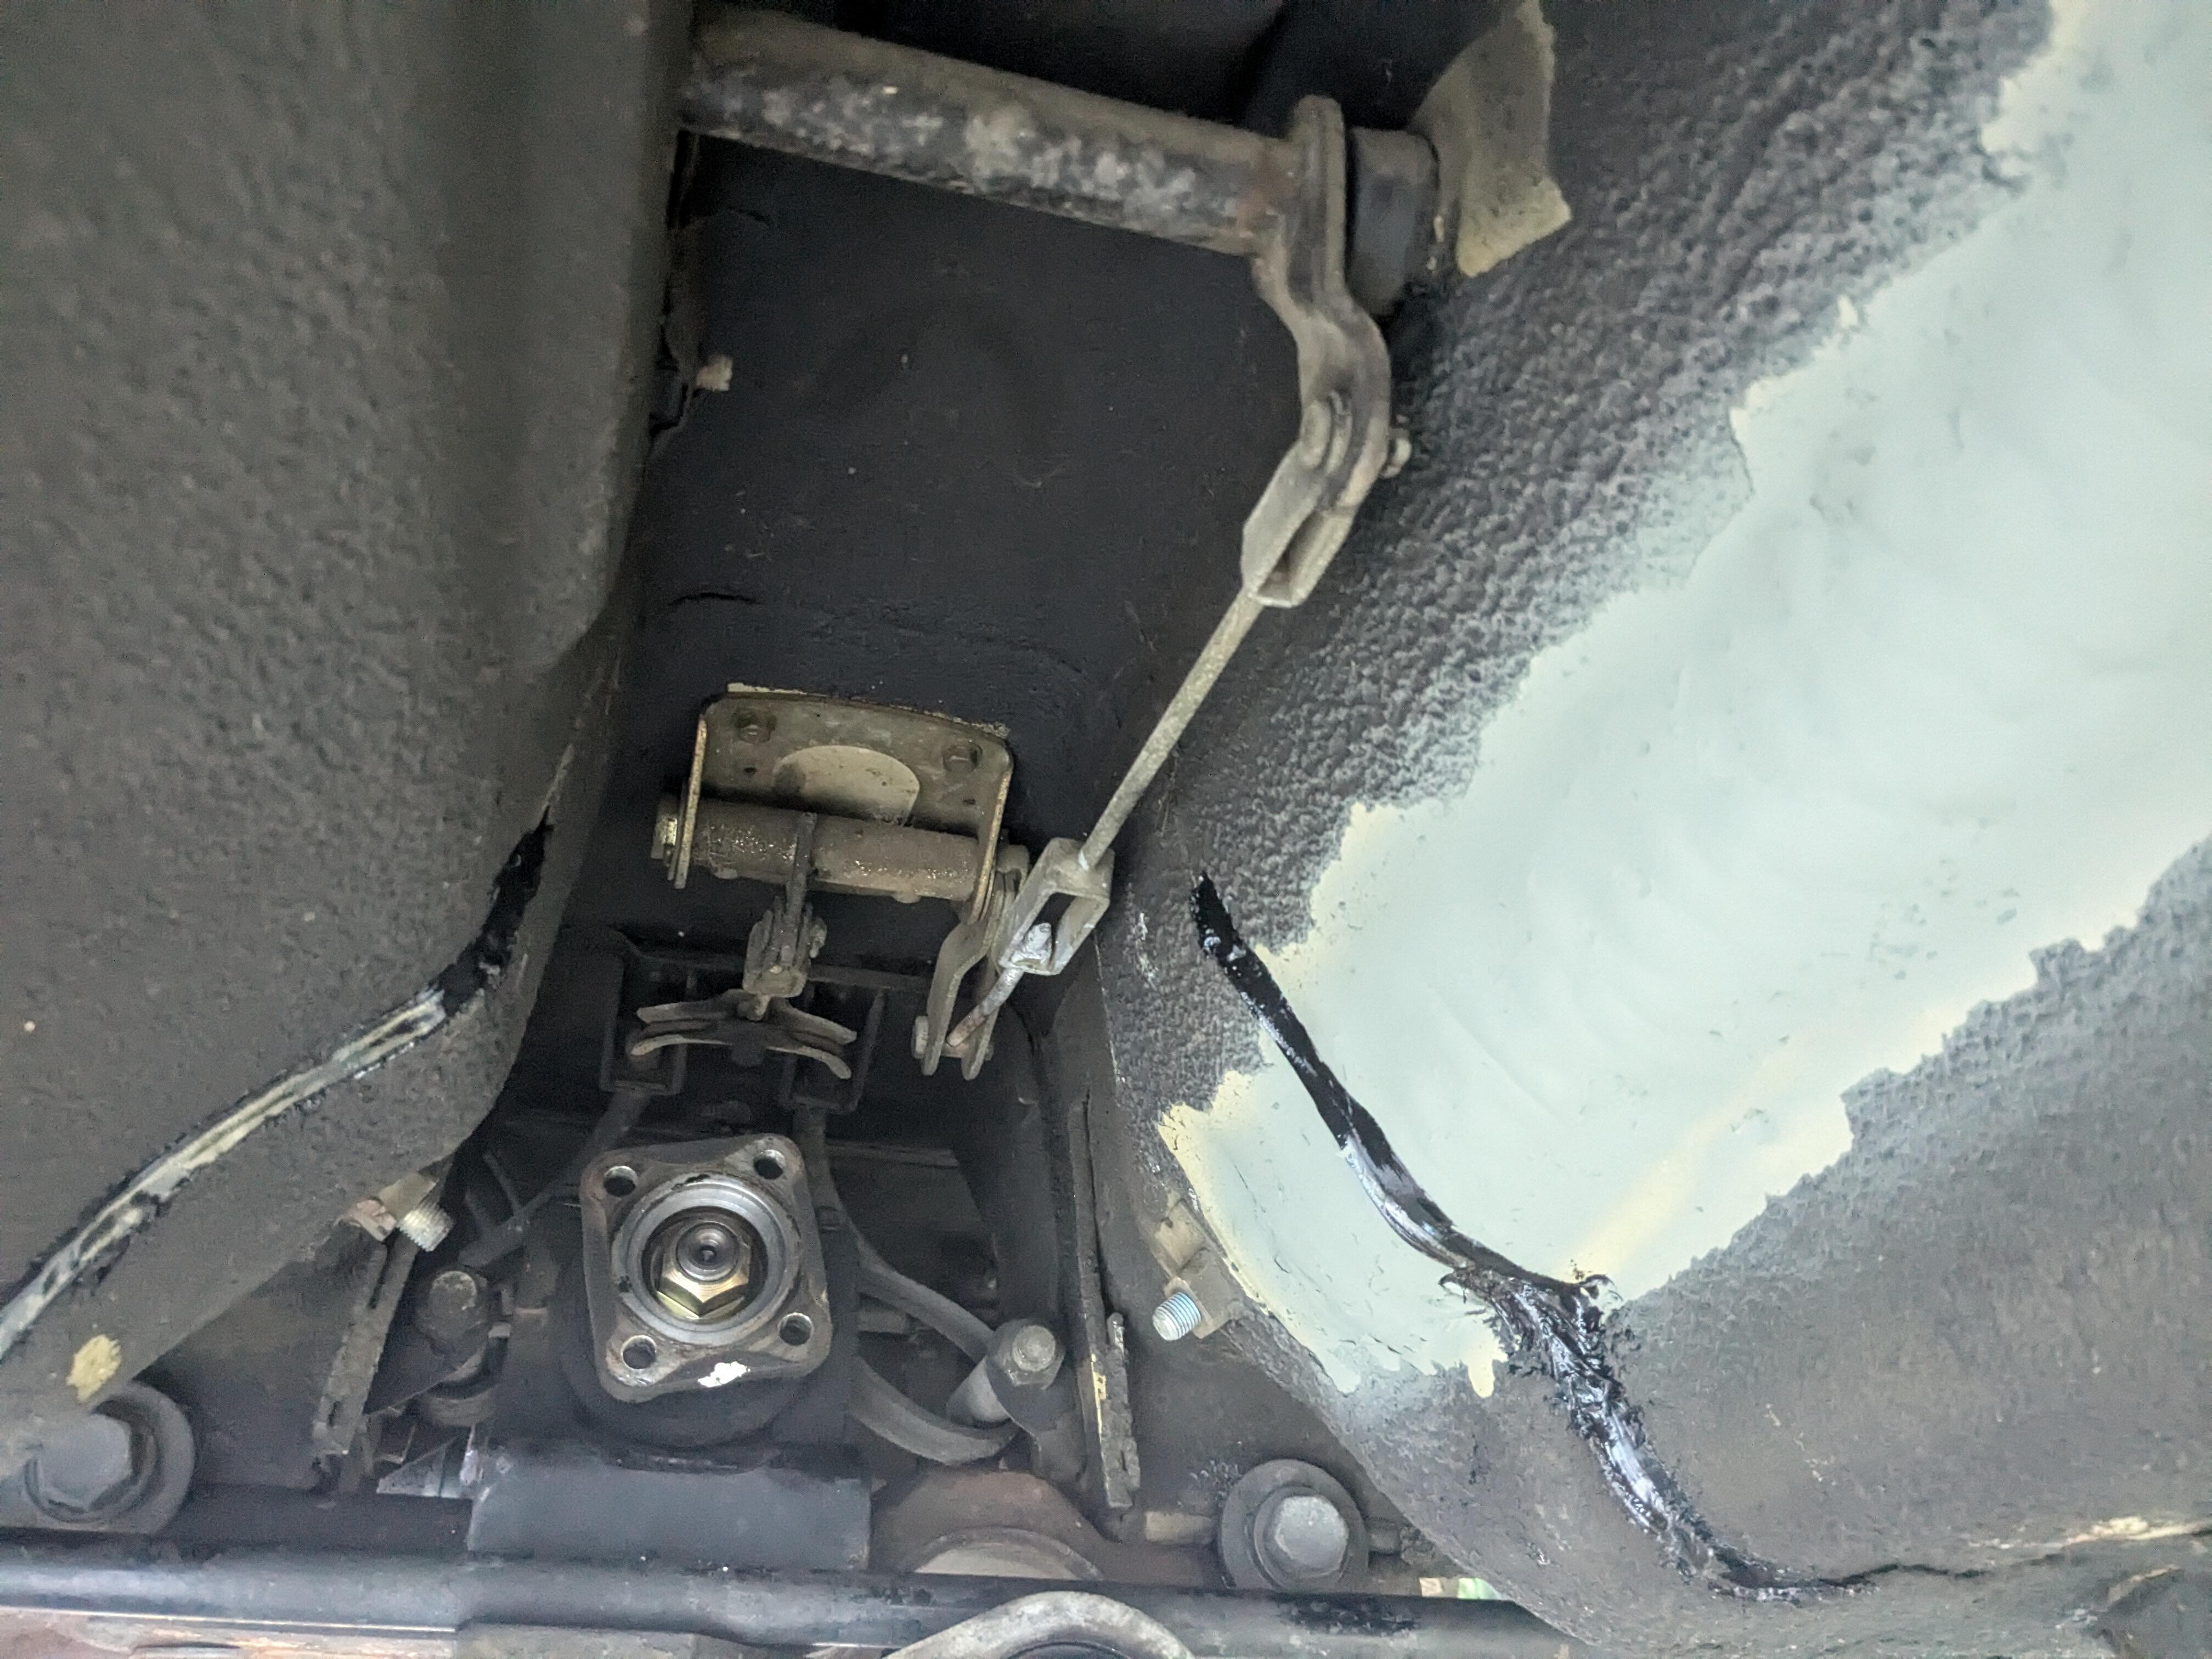
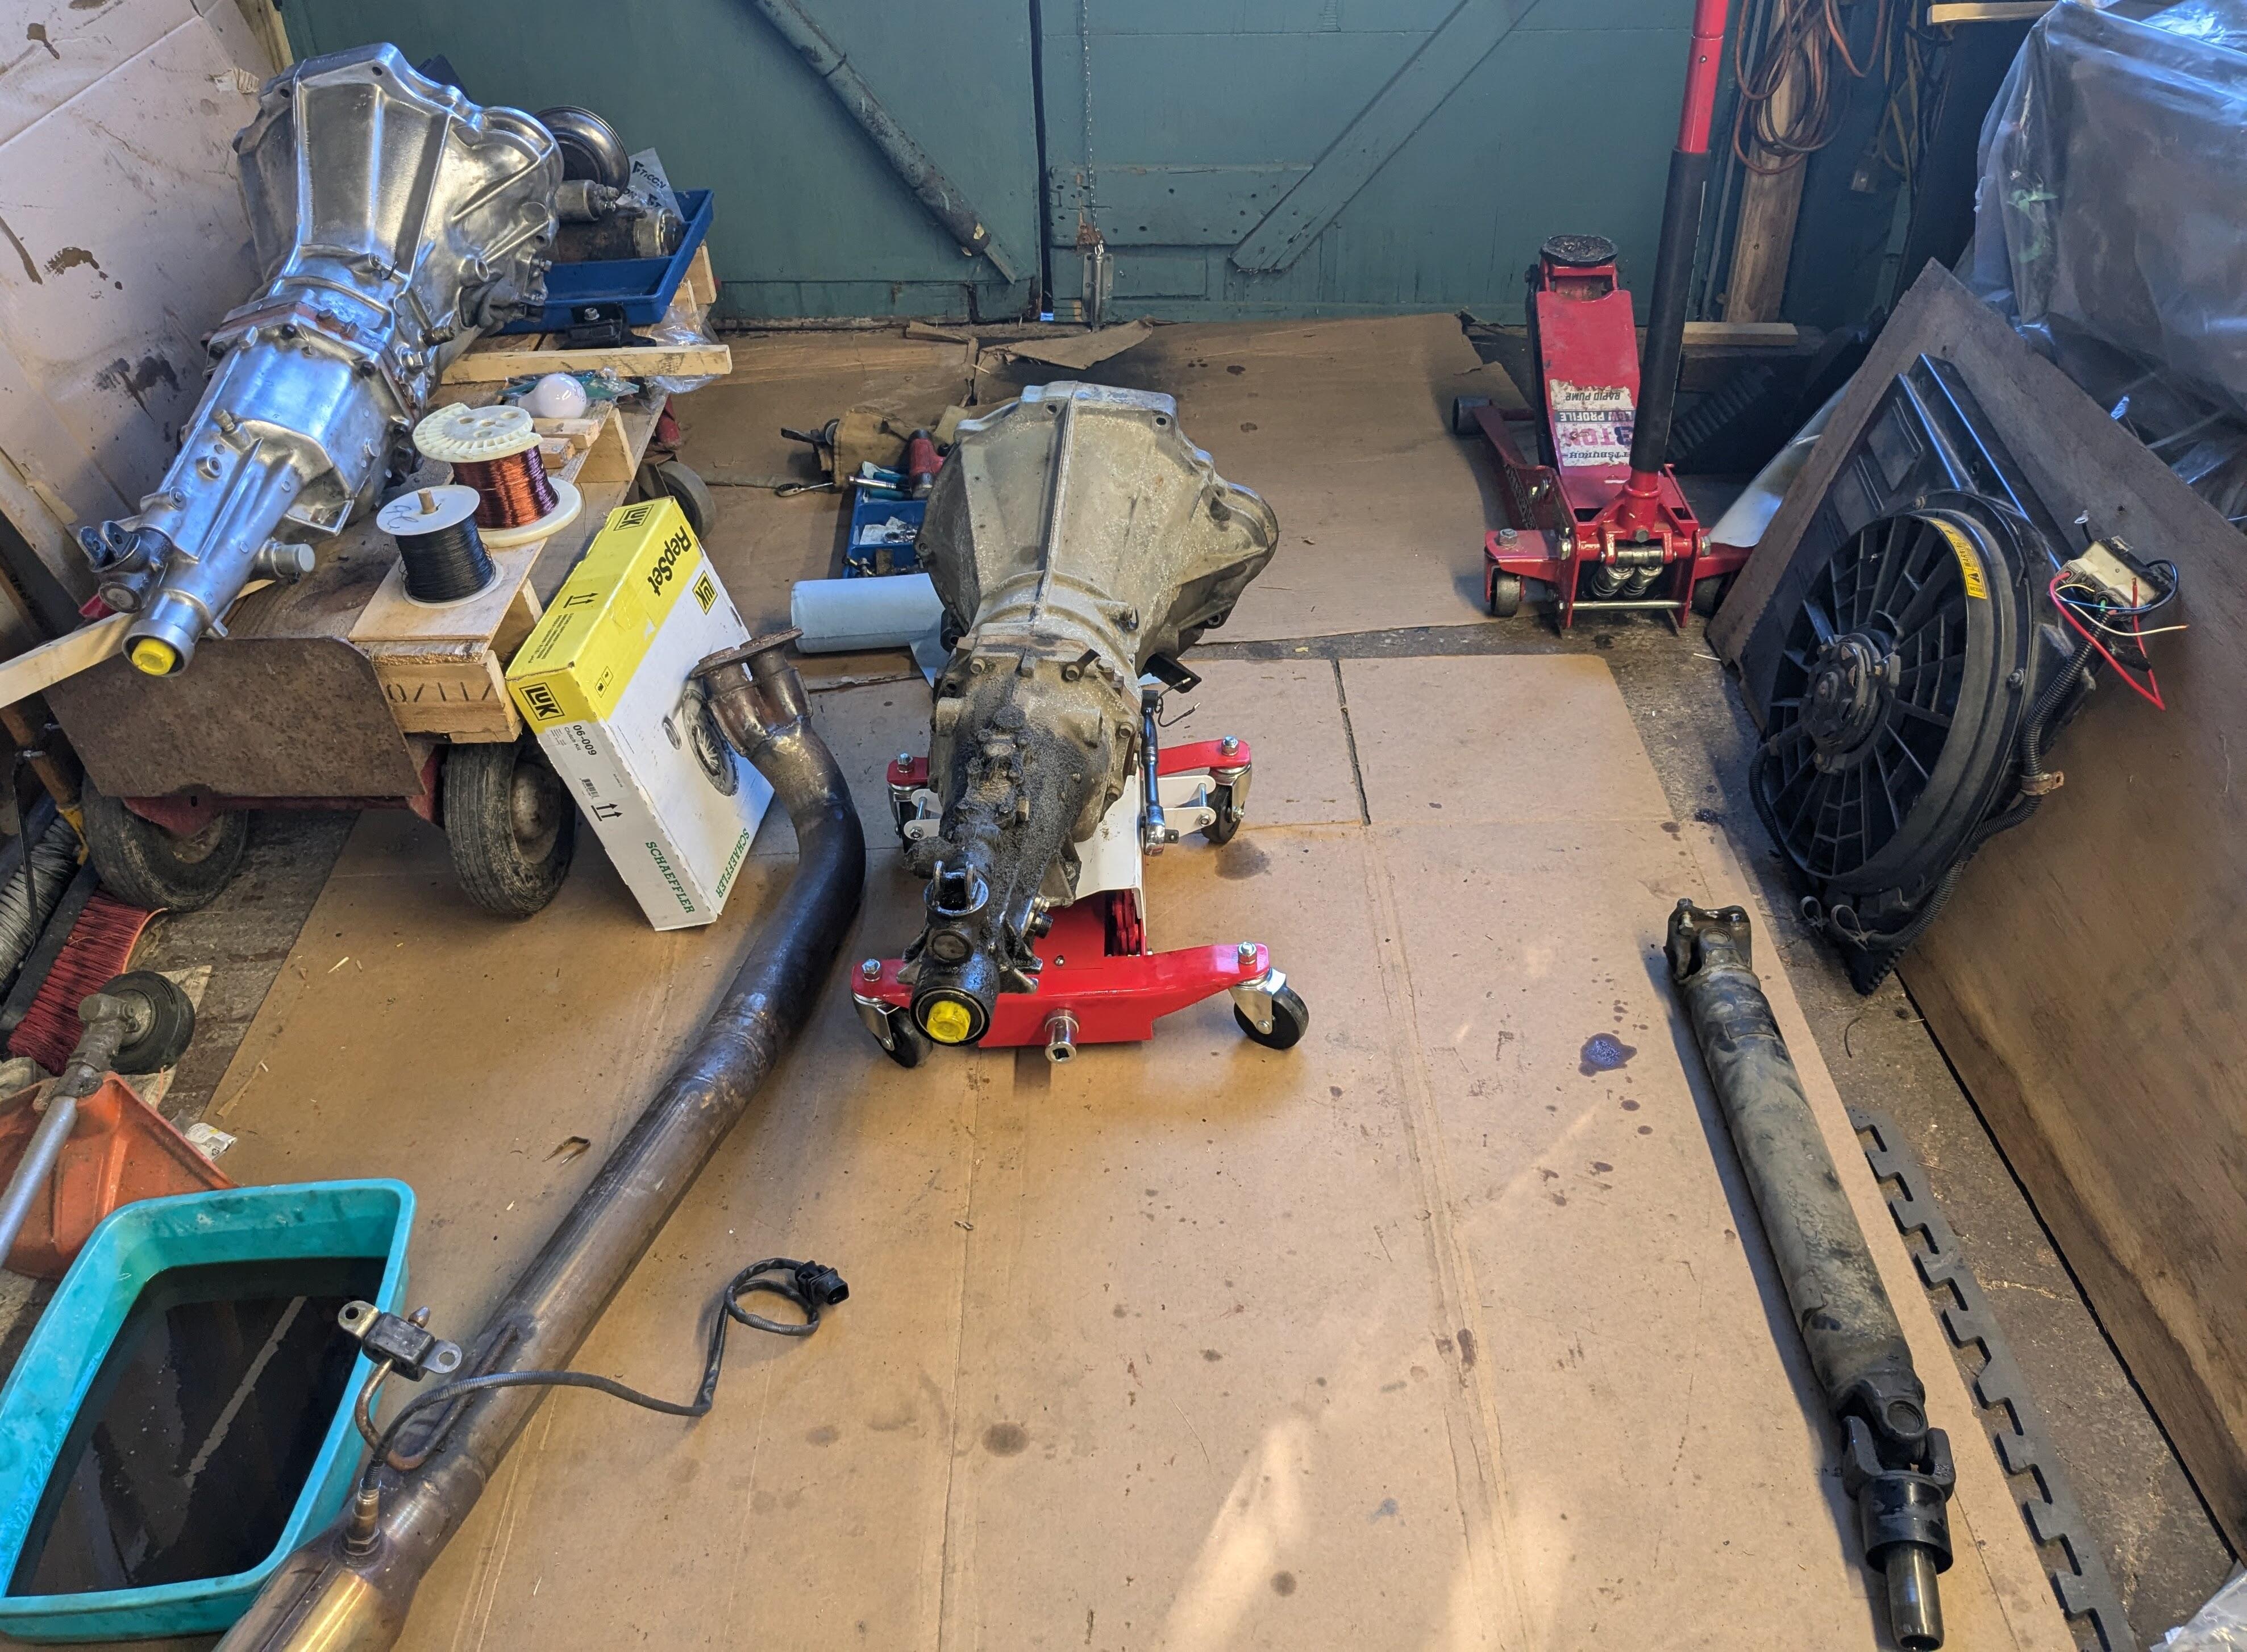
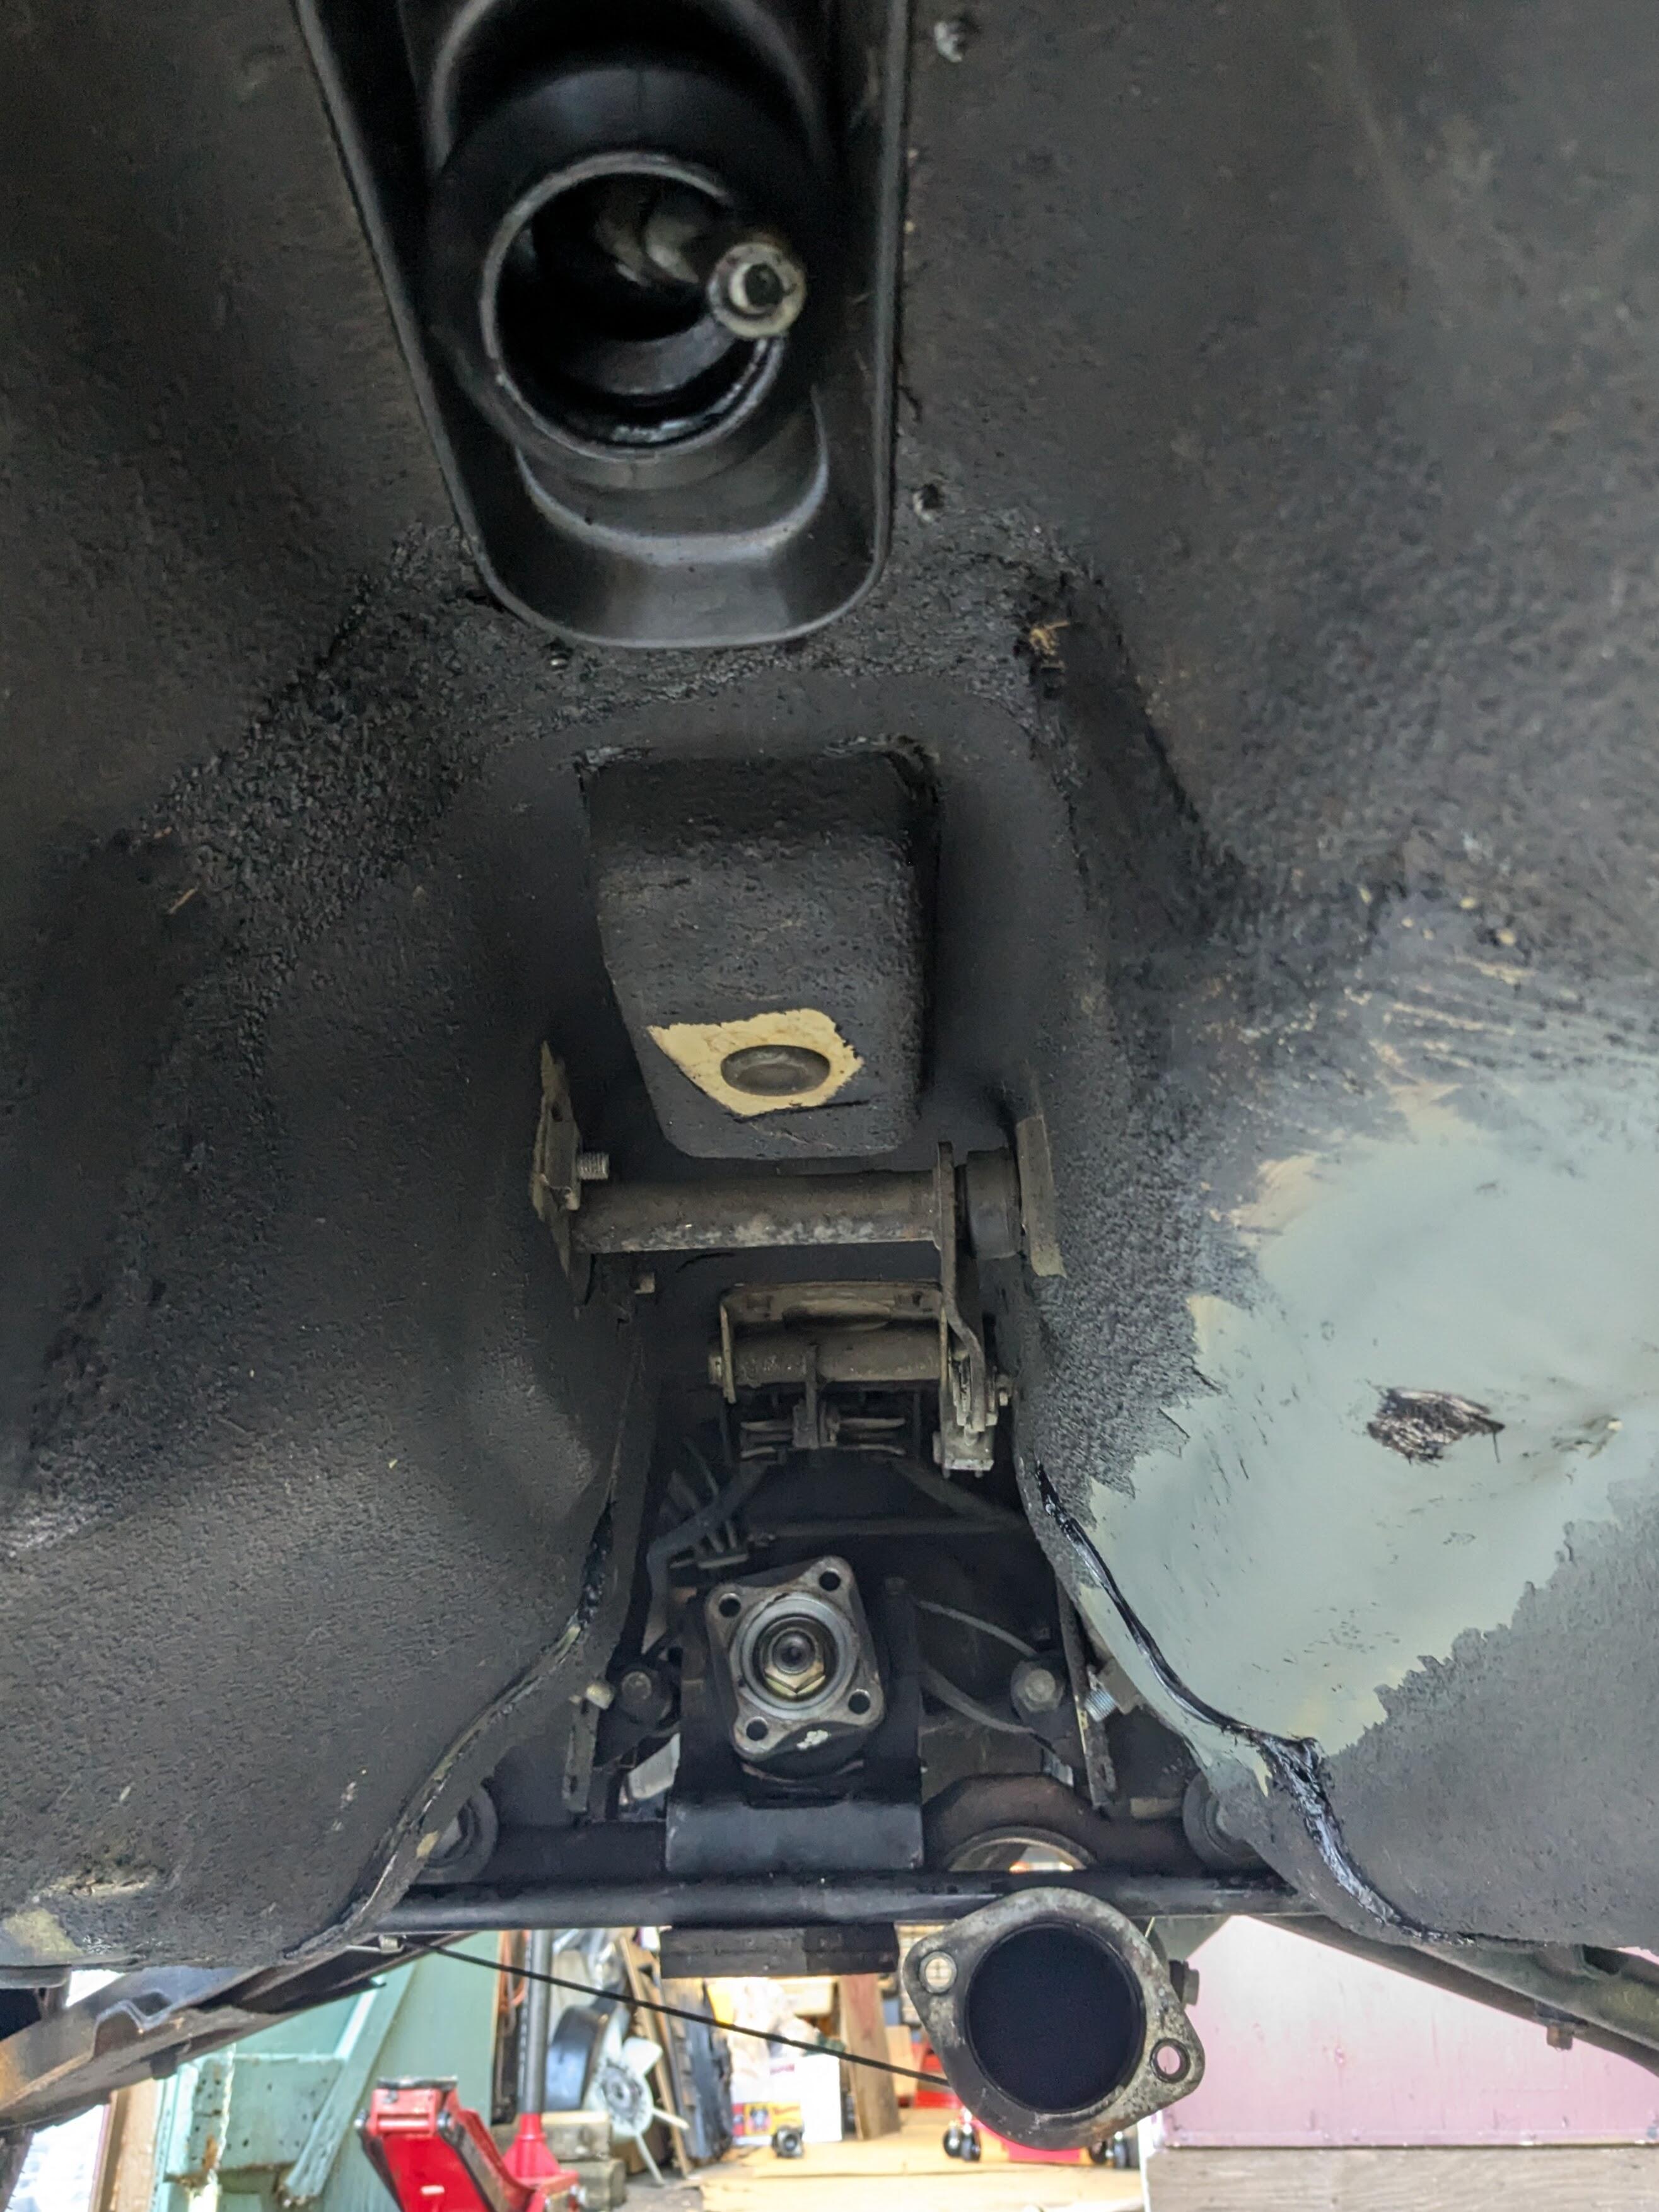
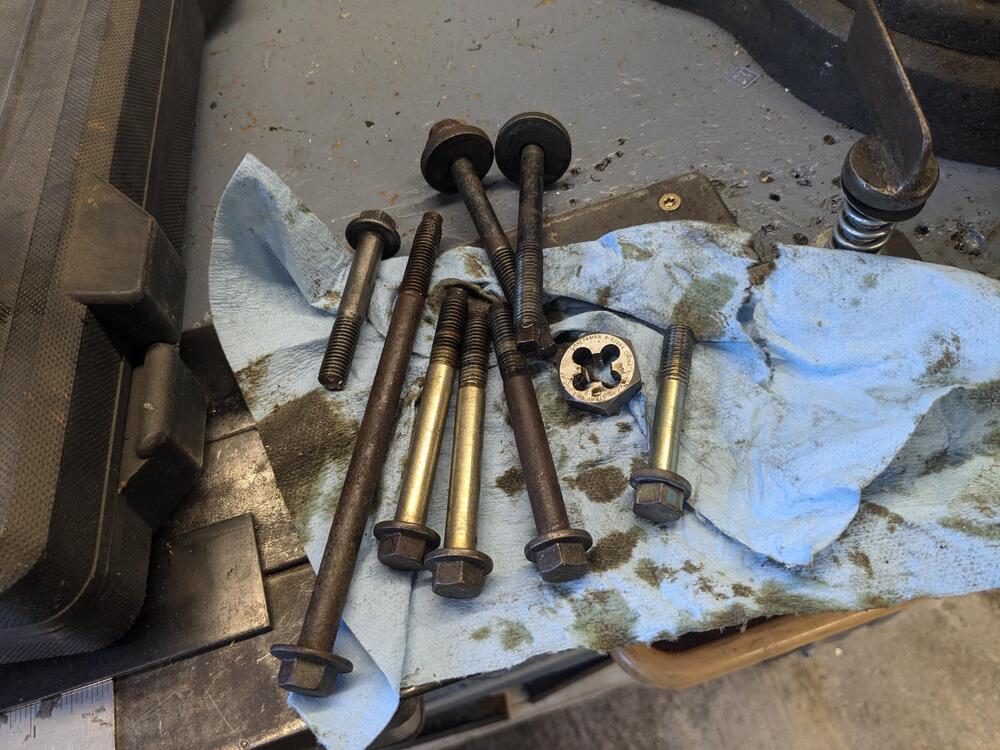
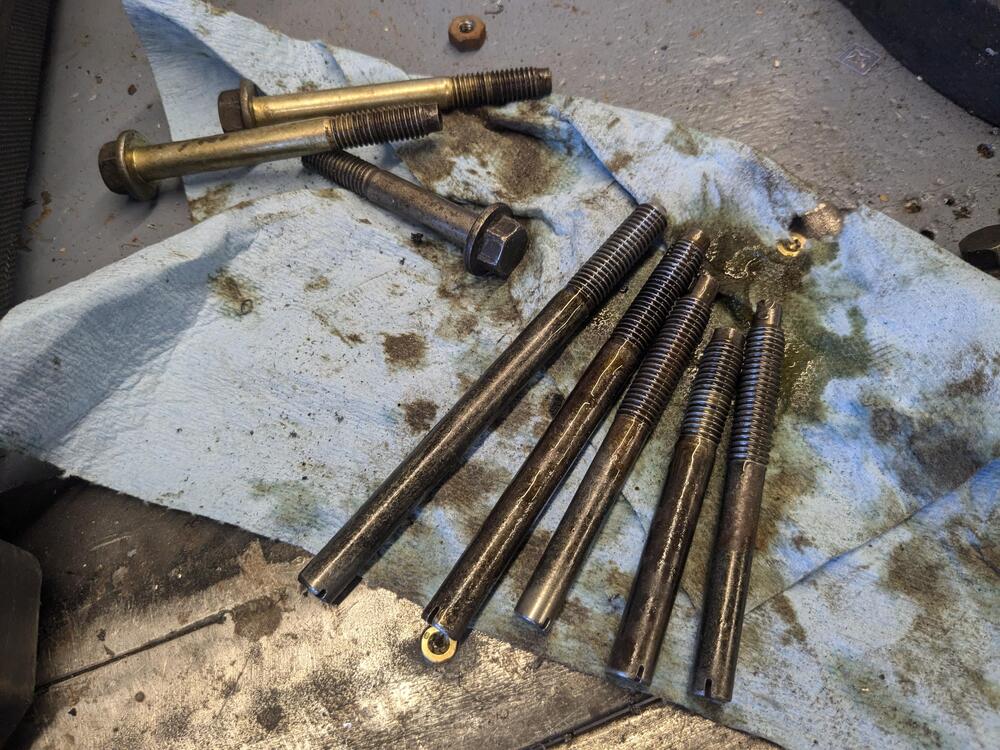
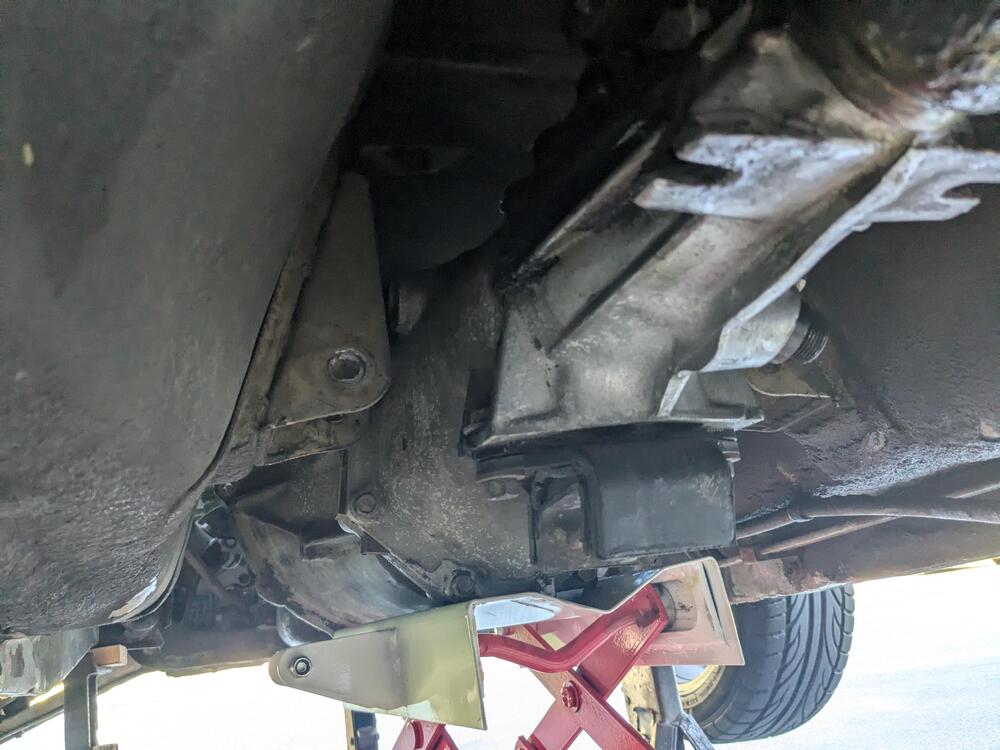
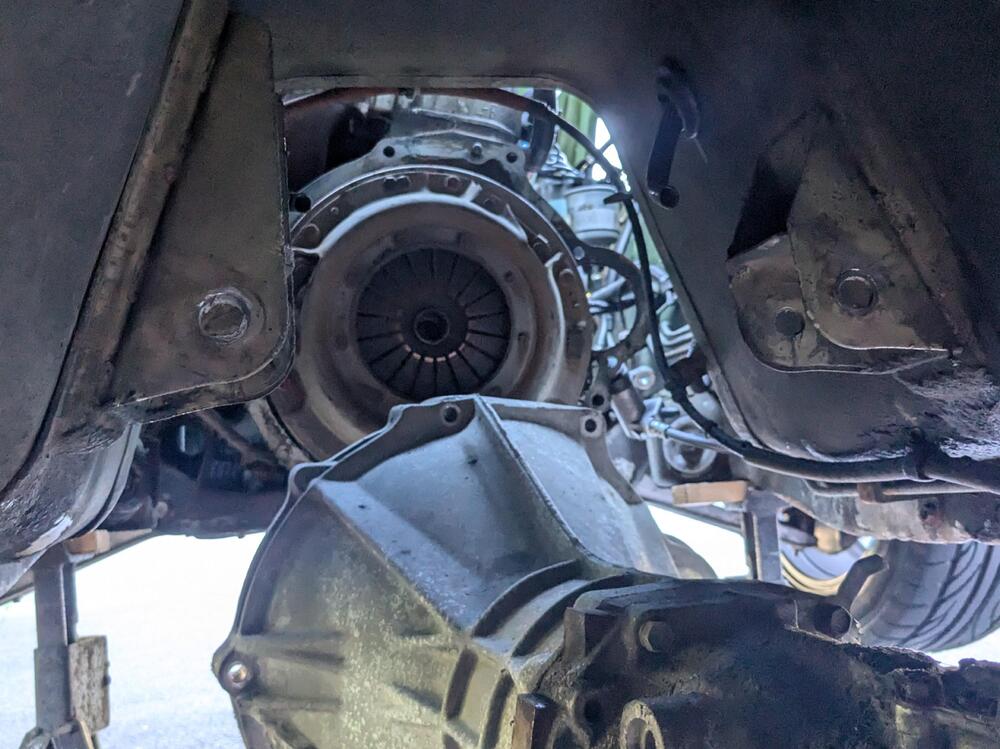
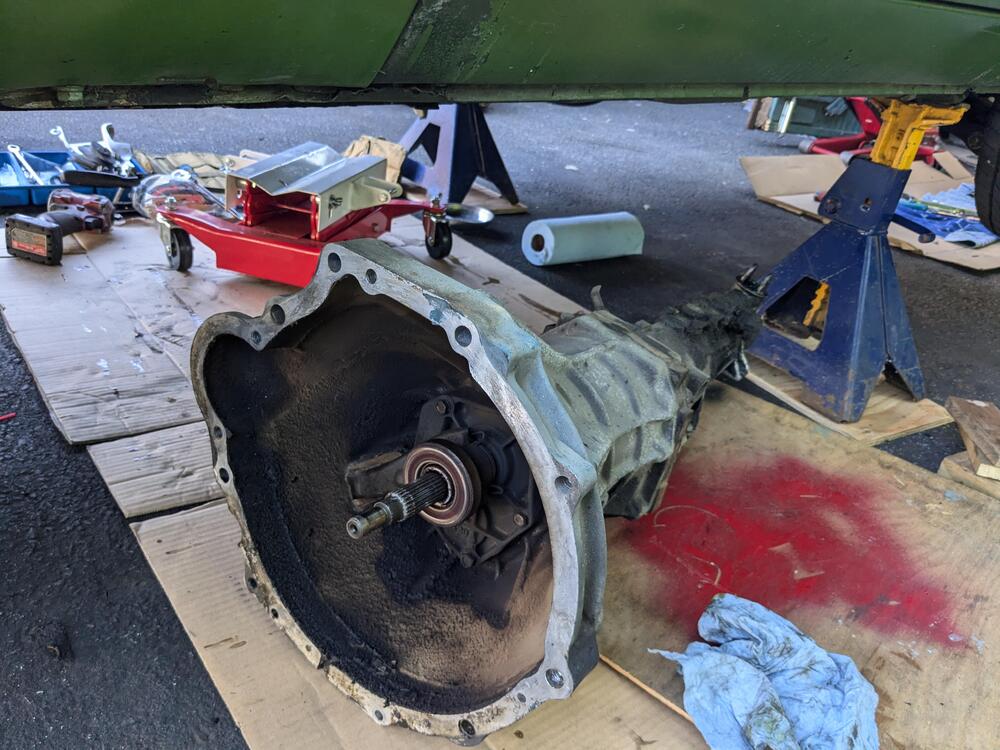
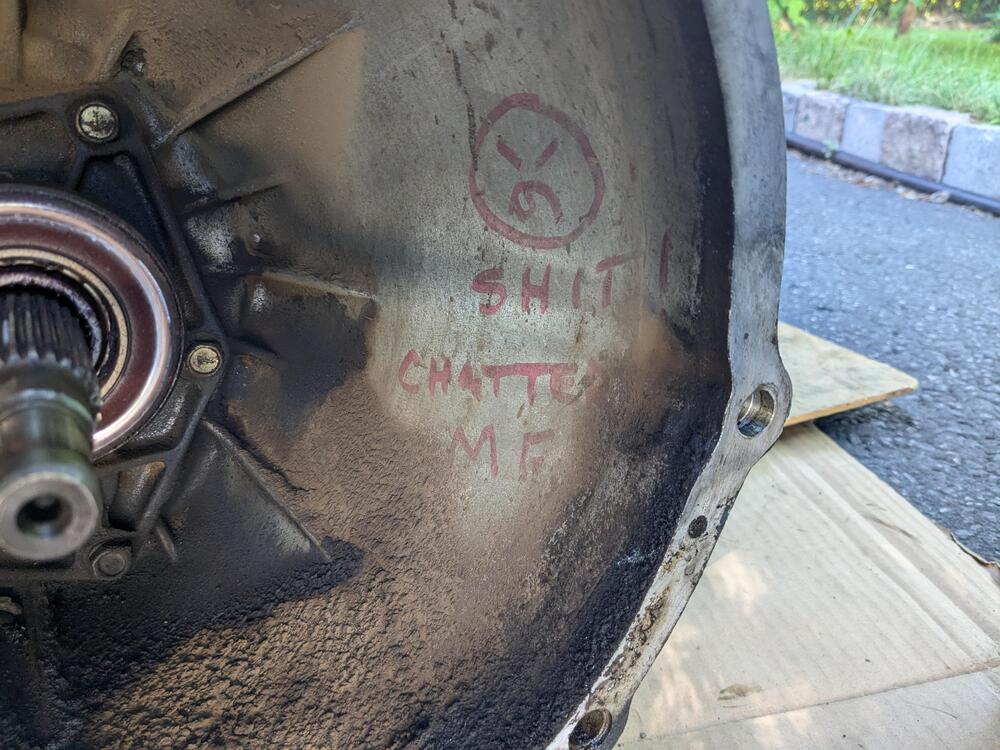
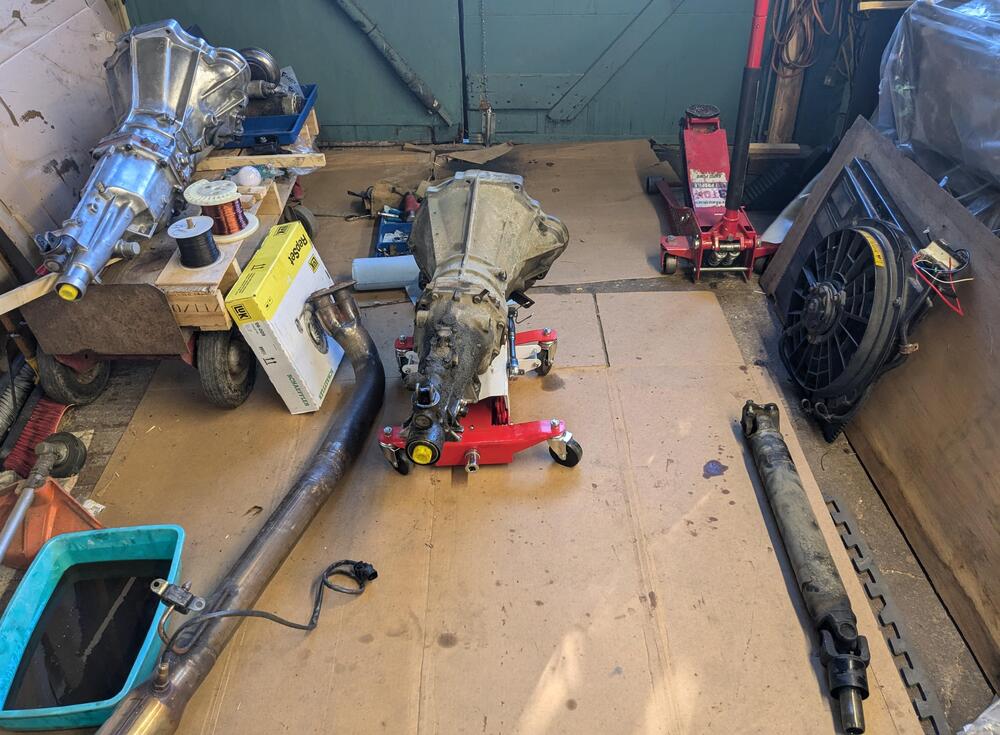
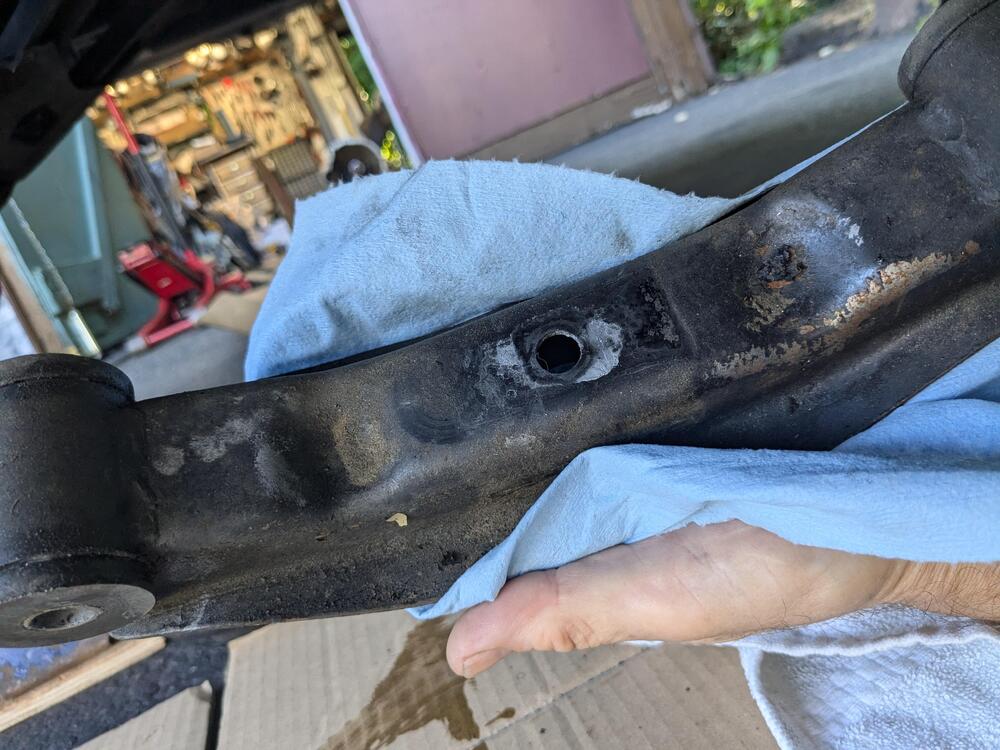
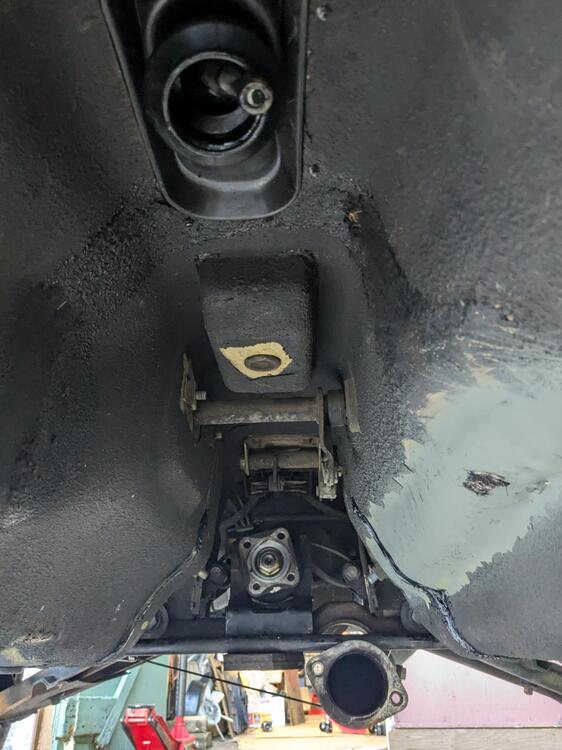
Finally got to pulling the transmission. Removed the fan clutch/blade, and disconnected the throttle linkage at the firewall. Removed the 2 upper bell housing bolts, and removed the starter motor Removed the front exhaust pipe and heat shield. Manual doesn't say to remove the rear swaybar, however there is no access to the driveshaft flange nuts with it in place angle is all wrong, until I dropped the sway bar. Made guide pins to ease the re-install . M10x1.5 threads cut a screwdriver slot in the ends got the shifter pin/clip out cleaned up the area where I had pounded the tunnel to fit the 350Z seat Tranny jack in place Out. Took some leverage between the bell housing & engine to free it. I'm gonna say the last tech to work on it (new clutch at some point) was not happy with putting back the worn trans Only one sleeve guide on the lower left guide pin on the upper right Found that the relatively new caster rod rubber bushings are already toast. Other side is the same Also found the forward U Joint is binding - it doesn't look like it is serviceable. Have to look into that I didn't note which way round this was installed - has two notches on one side


 1 point
 -
1 pointAfter looking at the transmission going in, I believe it is a FS5W71B close ratio gearbox. So some cutting will seem necessary...1 point
-
1 point
-
1 pointSorry for my poor English skill, I was trying to say the same like you. The only thing I would like to tell you is there is no difference between Japanese S30 and all the other export S30 in terms of the opening of the tunnel. I don’t know what kind of 5 speed Patcon is going to install, so all I can say for now is if it is a FS5C71A then he doesn’t need to cut the tunnel. FS5C71B or FS5W71B, he needs to cut the tunnel like you said. Kats1 point
-
1 point