


Leaderboard
-
jfa.series1
 Subscriber
 3Points2,734Posts
 -
Matthew Abate
Free Member3Points1,204Posts -
duffymahoney
Free Member3Points961Posts -
Captain Obvious
Free Member3Points10,081Posts


Popular Content
Showing content with the highest reputation on 09/22/2022 in Posts
-
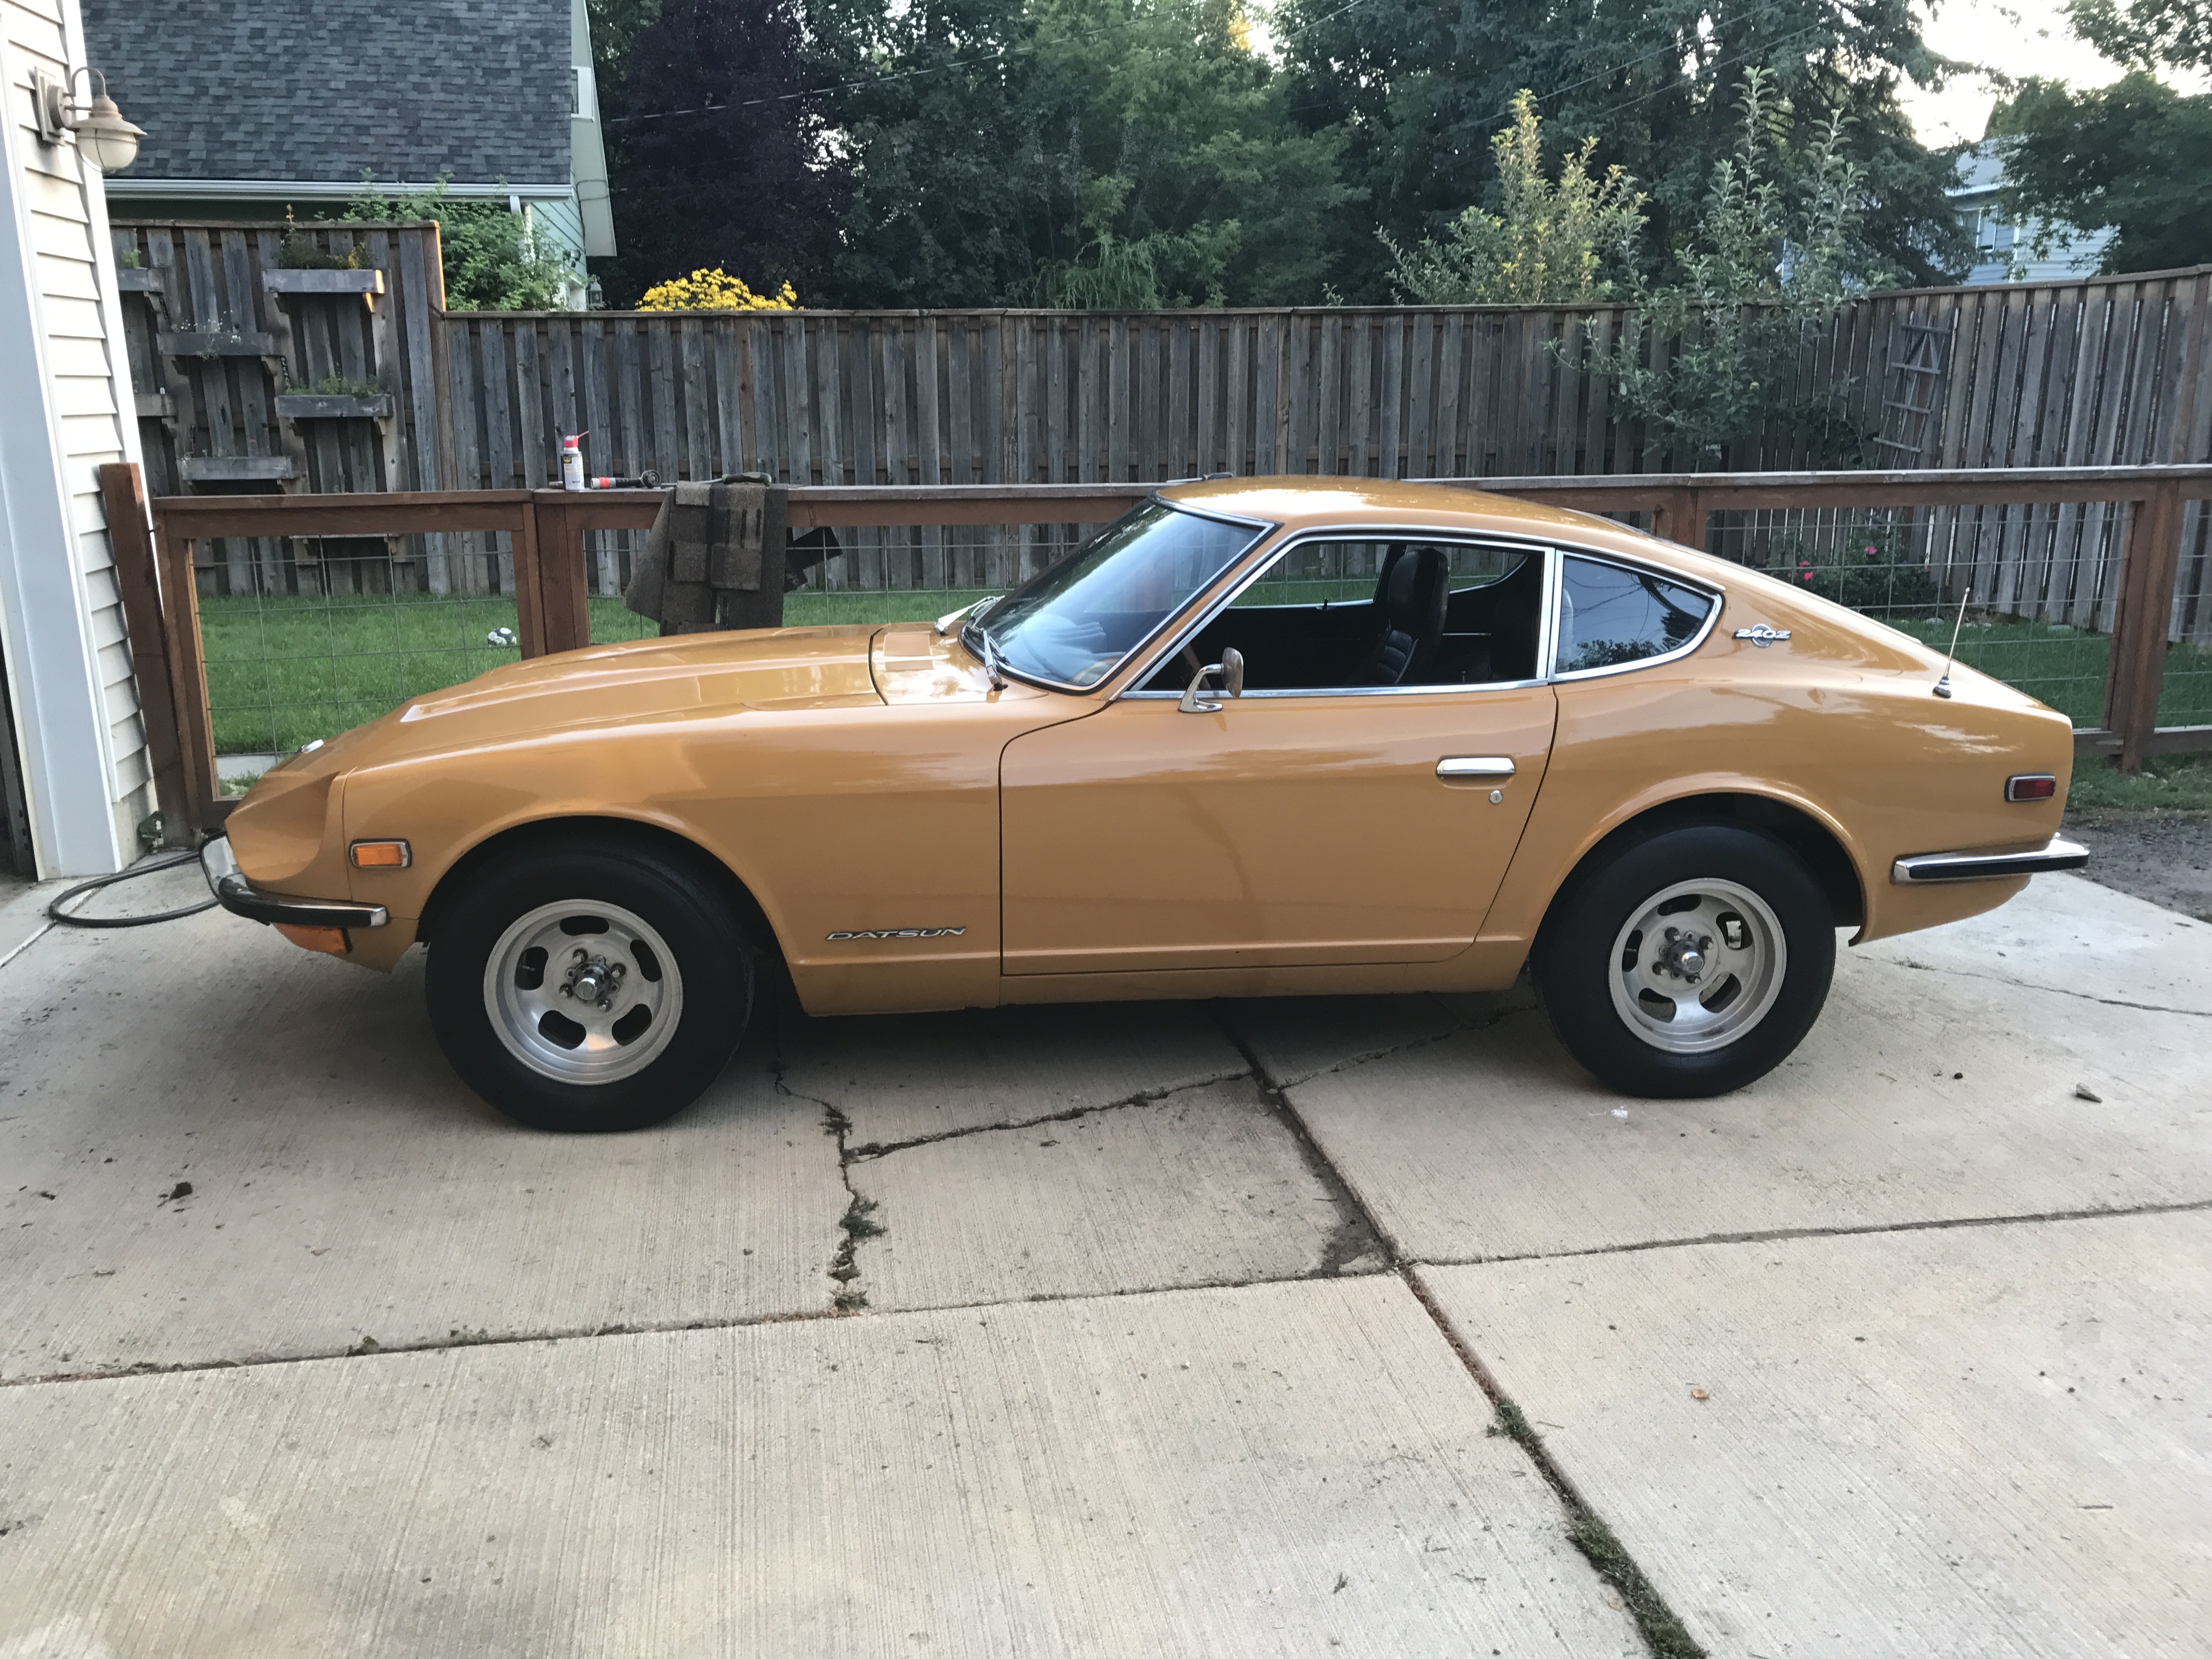
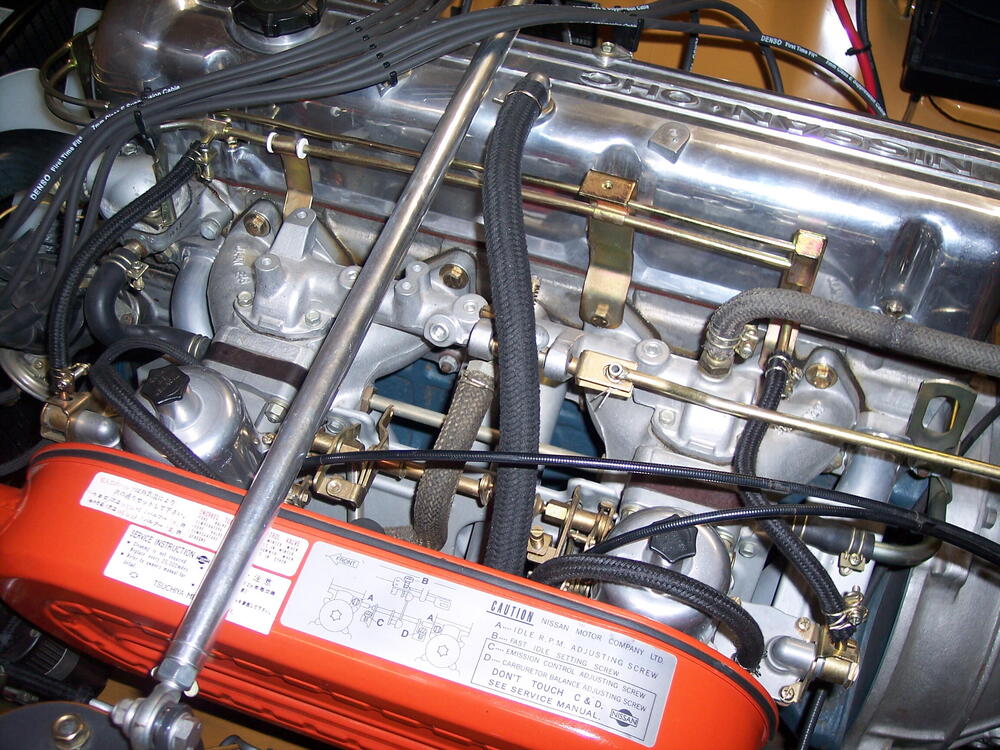
I've been replacing all of my 11 year old fuel hoses with braided cover hoses and decided to do the flow guide valve vapor hoses for a consistent appearance. My valve cover breather hose was already a OE braided unit but I gave it quick inspection. Uh Oh - big crack at one end, time to replace it as well. A visit to MSA showed me a repro unit for (choke!) $90! 😲 So it was back to Belmetric for possible options. The valve cover fitting is 16mm in diameter but Belmetric only has 14mm and 17mm hoses. The breather hose is about 14" so I ordered two feet of the 17mm hose at the most attractive price of $7.15/ft. (today it is $8.01). At 1mm oversize, obviously it is an easy fit but the OE circular spring clamps hold it securely in place on the valve cover and air filter box. All of the hoses at Belmetric are from Germany and are typically marked so on the hose. If you don't want the word Germany on your Japanese car, the markings can easily be removed with a vigorous rubbing with mineral spirits. I really like the feel of $75 still in my pocket! 😁 https://belmetric.com/m17x21-braided-continental-hose-rh17-n203701/
 3 points
 -
2 pointsThat answered the question! Thanks @Racer X “Early R180's measure 110mm inside the ring gear. 77 and later model year R180s measure 115mm inside the ring gear. This minor change means that the ring and pinions won't swap between the early and later models. If you have an early diff you must use an early carrier, and if you have the later diff you must use a later carrier. It is possible to use a early carrier on a later ring gear with a spacer…”2 points
-
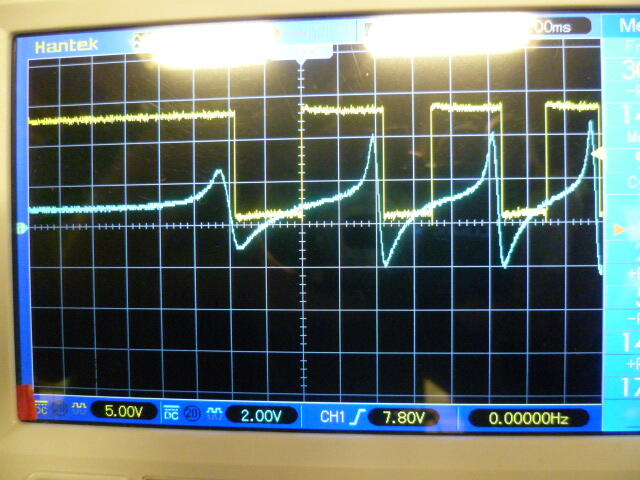
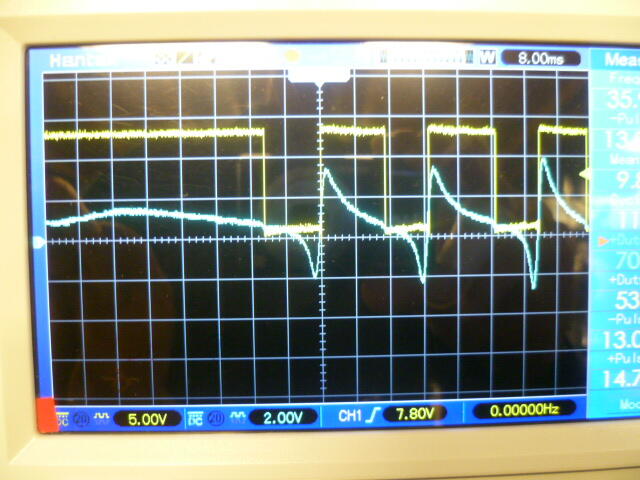
2 pointsAnd for discussion, here's what happens if you get the distributor input to the module reversed somehow. Note that the module still fires a spark on the negative to positive transition, but the slope of the input signal at that time is very gradual. Not good for spark scatter and consistency:
 2 points
 -
I finally got my car remote tuned. I had a few settings I didn’t understand, totally wrong, then my biggest issue is my iac. The haltech ecu doesn’t like my balance bar setup. I won’t give up. But I ended up plugging it for my road tuning. First impressions is wow. The car feels so fast. Even peels out a little, which seems crazy for a bone stock 2.4L. Wot passes sound magical. I ended up using Animal Tuning, who works for haltech and tunes on the side. I have dual o2 sensors, 1-3 and 4-6. 1-3 needed about 5% more fuel to obtain the same afr. Which was a pretty cool feature. Next is more wot passes and making sure AFR is on to protect the motor.
 2 points
 -
2 pointsSorry I don’t recall a reference. I read this more than two decades ago when I was trying to figure out if my 95 Ford engine needed the injector cleaning that my Z got. The 95 went well over a 100,000 miles and never needed the injectors cleaned. The 76 Z couldn’t pass our Phoenix, AZ area emissions test if the injectors weren’t cleaned more frequently. It would run too rich. Nothing that was noticeable in performance, just failed emissions on high HC. Sometimes as an old guy you wonder why you remember certain things with great clarity and are vague recalling things of far more importance!2 points
-
1 pointI've been poking around with the ignition electronics on and off and there seems to be some interest in getting into some of the details of how things work. So here's a place to start. Here's a pic of the ignition module signals. The input signal from the VR distributor is in blue, and the output signal that drives the coil is in yellow. Note that when the yellow output signal is low, the coil is charging (dwell), and when that output signal goes high, the coil would fire a spark. Spinning the distributor (by hand) the signals look like this: First think to note is that the ignition module (1977 style) fires the coil on the negative-to-positive (N-P) transition of the VR input signal. Also noteworthy is that the triggering N-P transition VR signal is a steep, almost vertical, slope. This is important because the steeper the slope here, the more consistent the timing will be with less ambiguity and spark scatter.
 1 point
 -
1 pointI finally got my car remote tuned. I had a few settings I didn’t understand, totally wrong, then my biggest issue is my iac. The haltech ecu doesn’t like my balance bar setup. I won’t give up. But I ended up plugging it for my road tuning. First impressions is wow. The car feels so fast. Even peels out a little, which seems crazy for a bone stock 2.4L. Wot passes sound magical. I ended up using Animal Tuning, who works for haltech and tunes on the side. I have dual o2 sensors, 1-3 and 4-6. 1-3 needed about 5% more fuel to obtain the same afr. Which was a pretty cool feature. Next is more wot passes and making sure AFR is on to protect the motor.1 point
-
1 pointAre you taking questions or will you just be adding things as you explore? You had more in Av8's thread, with the Z wave form, compared to the ZX. Still wondering why this forum doesn't have Stickies. So many good discussions are buried back in the past.1 point
-
1 point1 pointBoth options (professional repair vs do-it-yourself) have their good and bad considerations. The do-it-yourself option requires much attention to detail in order to create a good and lasting result. There are two or three good threads available on CZCC that will provide you with a list of recommended tools, materials, and procedures. Based on my own experience, the main limitation is that the final exterior finish -- typically accomplished using texturized 'bed liner' paint -- has 'look' and 'feel' that is different from the original textured vinyl. Although a casual observer would not notice the difference, a knowledgeable person will see it very quickly. I found some upholstery vinyl (long sheet with 1m width) that had a texture very close to the original material used by Nissan. Unfortunately, it was only available with a bonded fabric backing. Despite the use of a heat gun, it would not stretch enough to follow the contours of the S30 dash surface (those contours become quite extreme around the openings for the instrument pods. If you can find a suitable vinyl that does not have a fabric backing, you might be able to achieve a successful result. I look forward to reading about your dash restoration. There may be materials available to you in Japan that we in North America have not discovered.1 point1 pointNot here to debate whether or not someone should do these things. I’m here to understand IF it can be done because this information is not findable on the internet and there is a lot of bad info out there. For example, I didn’t know that the R in r180 stands for “Rear,” that there is an f180 that was used as the front differential in trucks, and that f180 gears are cut in the opposite direction, meaning you can’t use an f180 as an r180. I also didn’t know that the ring gear inside diameter changed from 110mm to 115mm at some point in the evolution of the r180 family. Pinning down when that happened would be worthwhile, as would when they switched from 100mm bolts to 12mm bolts and finding out if 9-bolt rings are standard or if there are others. I would also like to know if any manufacturers other than Subaru and Nissan used r180 differentials with the same case, as that would open up parts availability and swapping potential. While I appreciate that the complexity of messing with a differential may or may not necessitate caution, wether or not one use the full assembly or chooses to fine tune their differential with internal parts is up to them. Part numbers, years, models, measurements, and side by side comparisons would be very useful. (edit: the first question these technicians asked when I asked about putting 240z R&P in a Subaru r180 was what I asked in my first post. They are not parts experts across manufacturers, but people working in Subaru service stations. They know how to do it but know whether parts will swap.)1 point


Important Information
By using this site, you agree to our Privacy Policy and Guidelines. We have placed cookies on your device to help make this website better. You can adjust your cookie settings, otherwise we'll assume you're okay to continue.