Leaderboard
-
JSM
Free Member7Points1,253Posts -

Sean240Z
Free Member2Points355Posts -
Joseph@TheZStore
 Vendor2Points105Posts
 -

240260280
Free Member2Points4,442Posts


Popular Content
Showing content with the highest reputation on 11/08/2017 in Posts
-
5 pointsAfter nearly 50 years of marriage, a couple was lying in bed one evening, when the wife felt her husband, begin to massage her in ways he hadn't in quite some time. It almost tickled as his fingers started at her neck, and then began moving down past the small of her back. He then caressed her shoulders and neck, slowly worked his hand down, stopping just over her stomach. He then proceeded to place his hand on her left inner arm, working down her side, passing gently over her buttock and down her leg to her calf. Then, he proceeded up her thigh, stopping just at the uppermost portion of her leg. He continued in the same manner on her right side, then suddenly stopped, rolled over and became silent. As she had become quite aroused by this caressing, she asked in a loving voice, ‘Honey that was wonderful. Why did you stop?' To which he responded: 'I found the remote.'...5 points
-
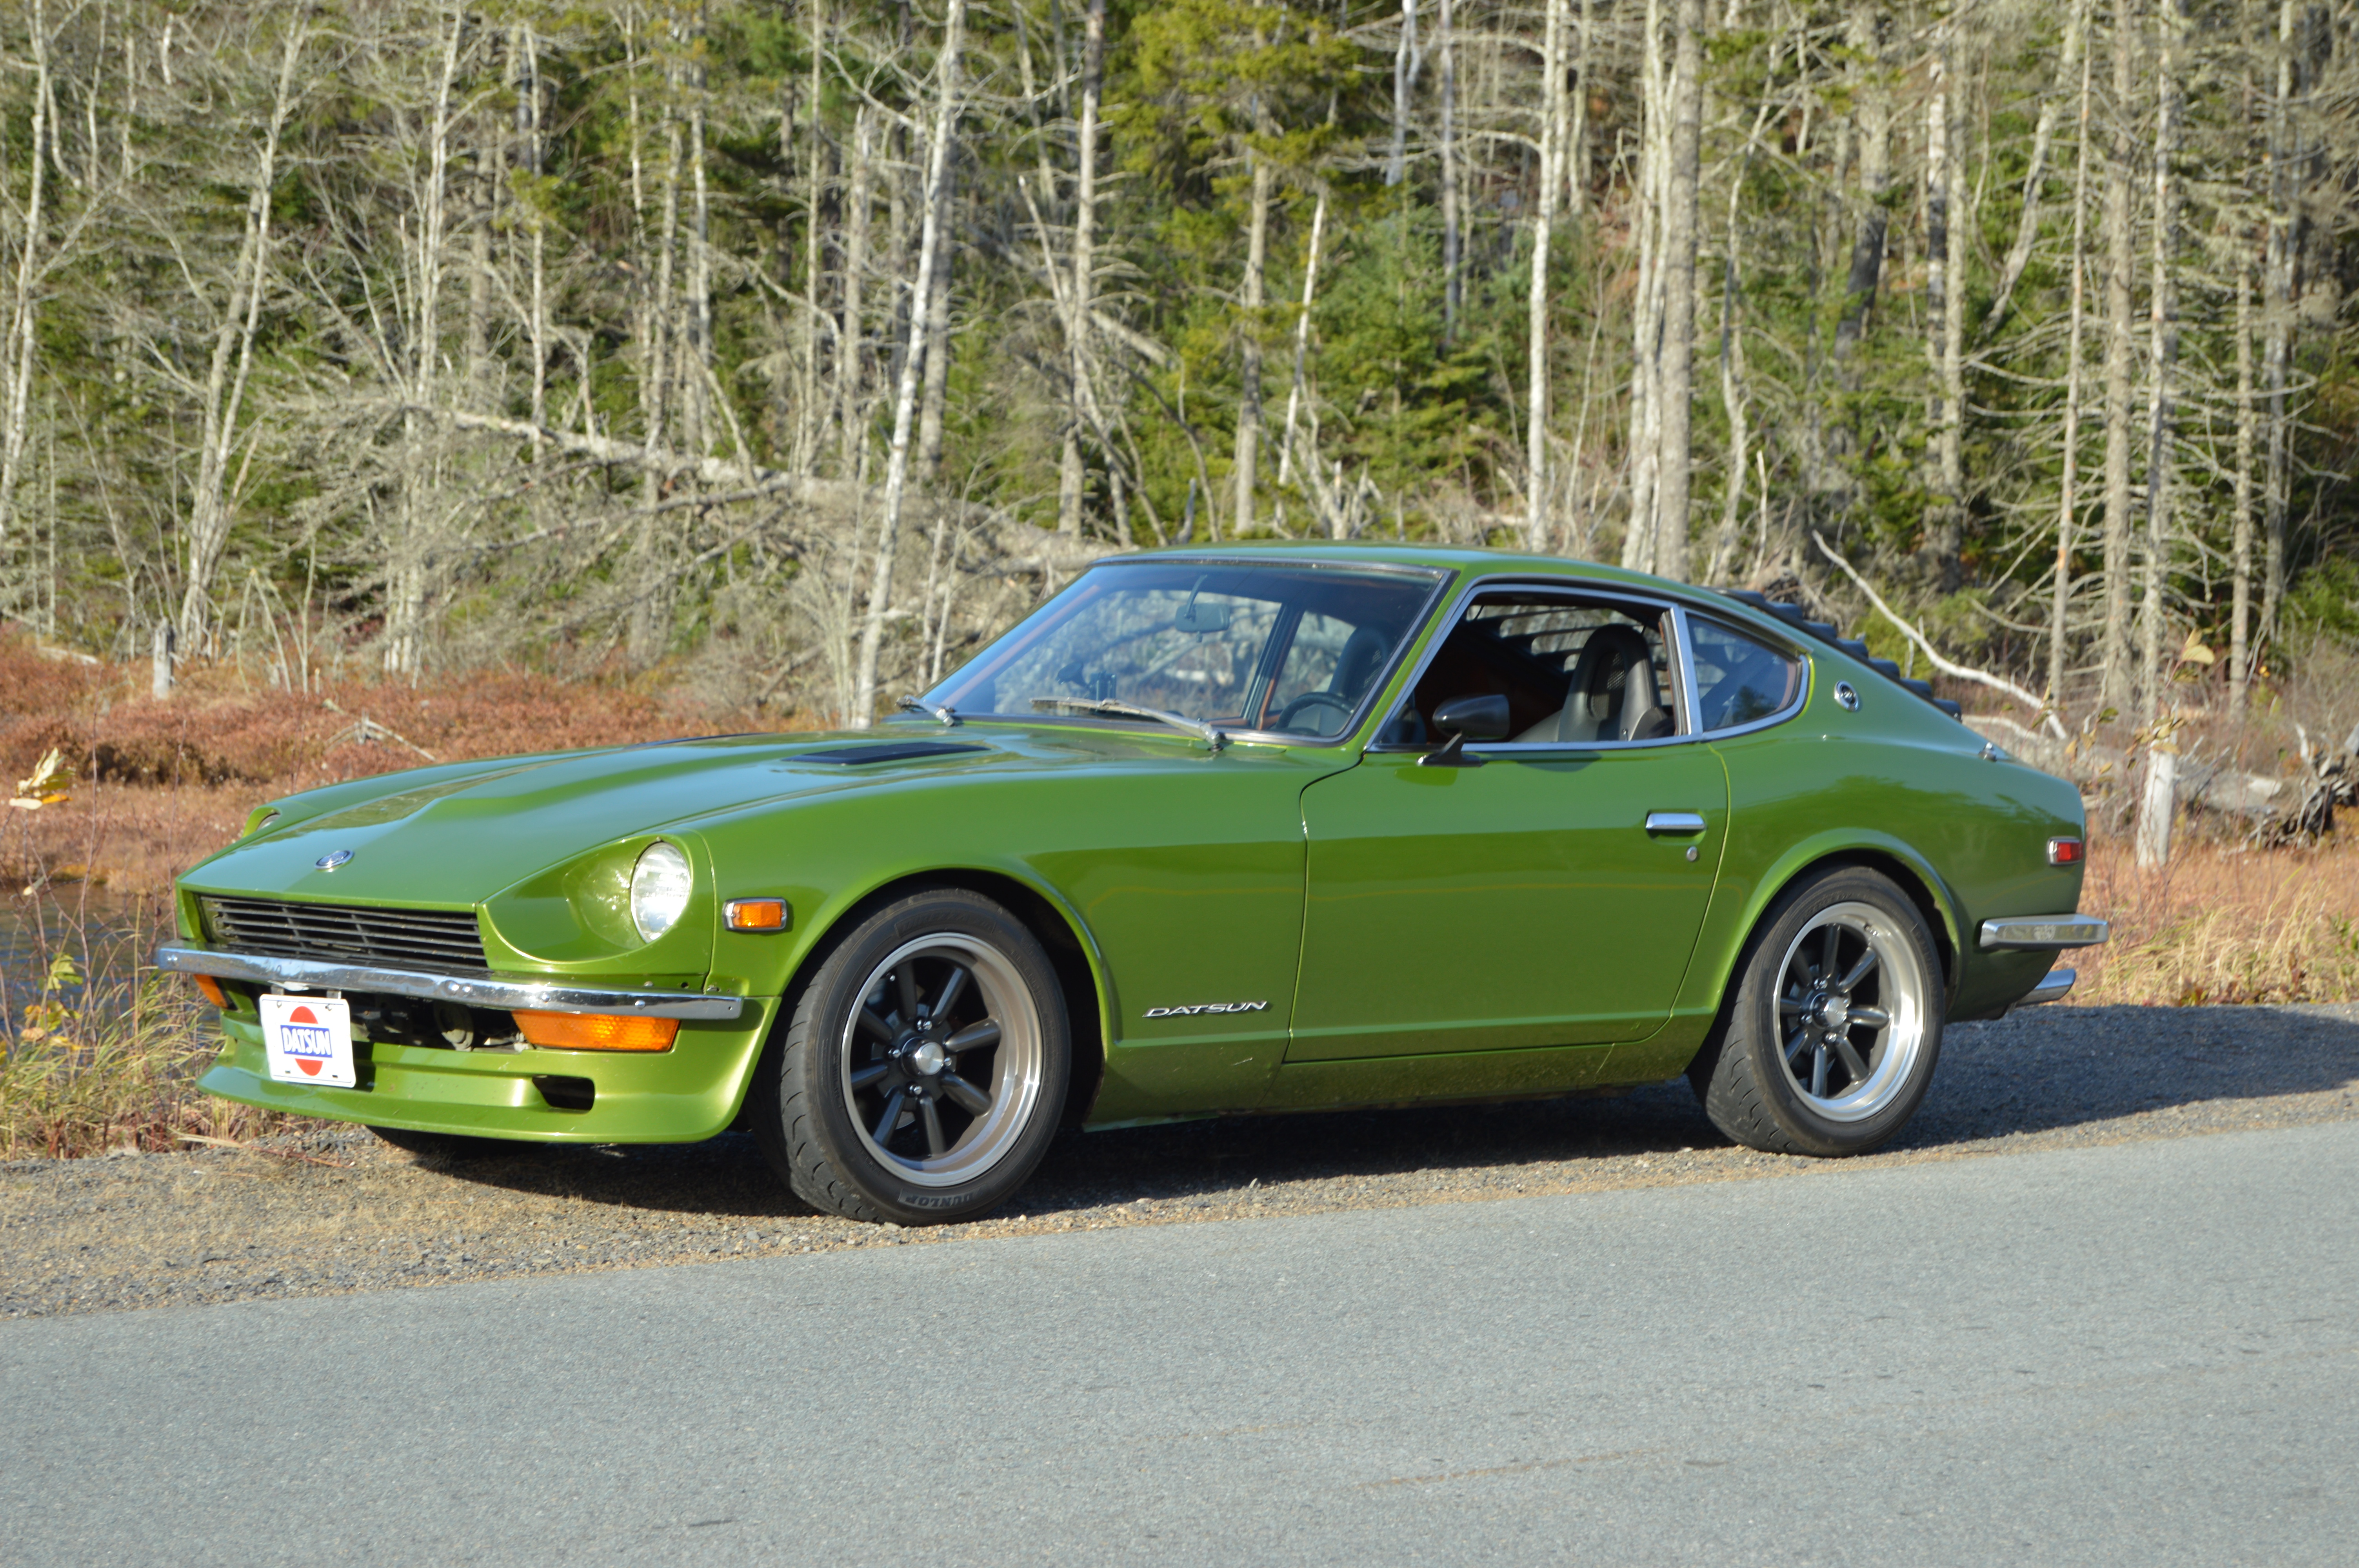
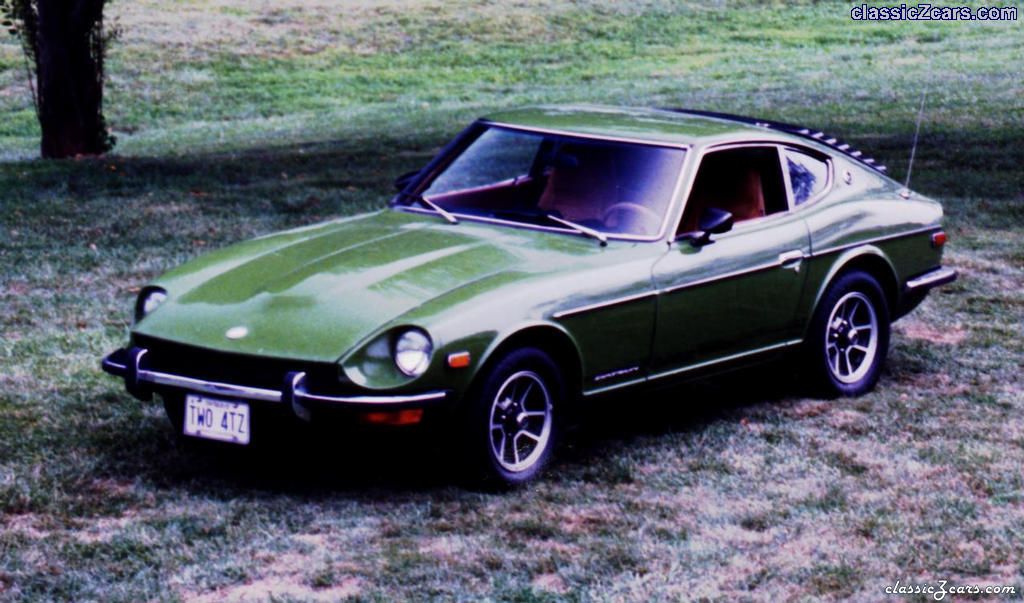
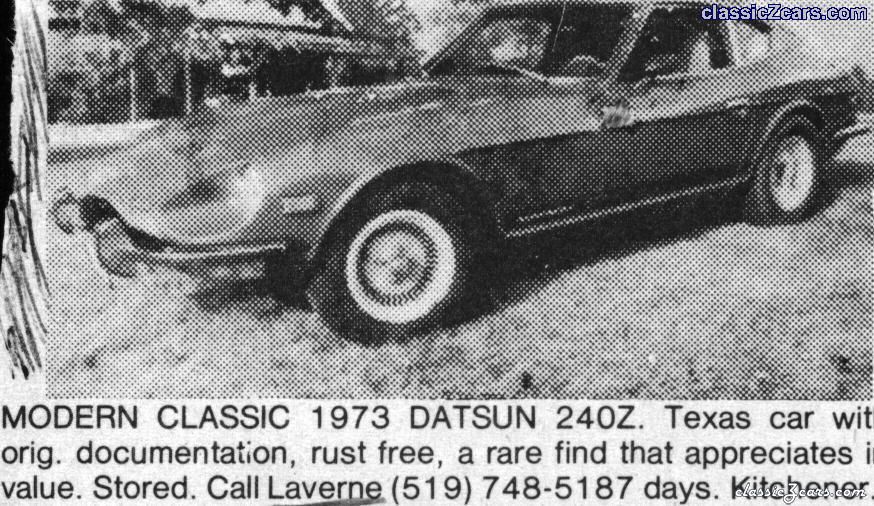
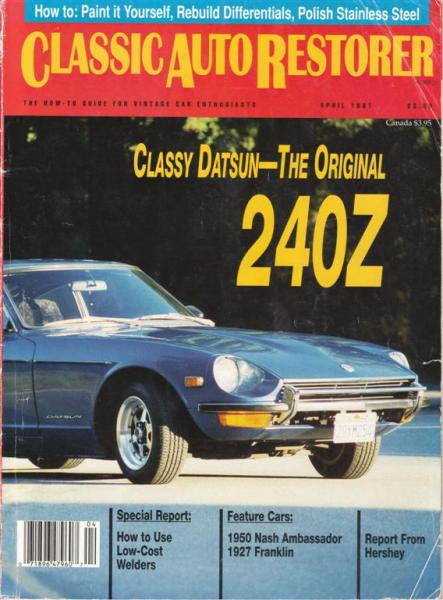
2 pointsWhen I bought my 1973 240z in 1991, it had 72,000 miles. This weekend, after 26 yrs, I surpassed 172,000 miles in my Z (I wanted to pass the 100,000 mile mark in my Z, before I put it away for the winter). This got me wondering how many other Z owners have driven their Z car more than 100,000 miles? It also got me thinking about how my journey with my Z started (see pics below): The article that introduced me to the 240z: The Auto Trader ad that led me to my Z: A pic shortly after I bought my Z: A recent, and my favourite pic of my Z:


 2 points
 -
2 points
-
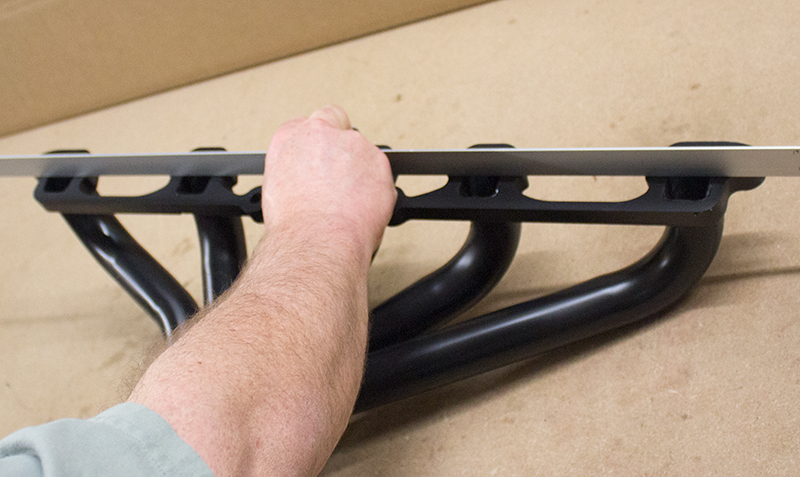
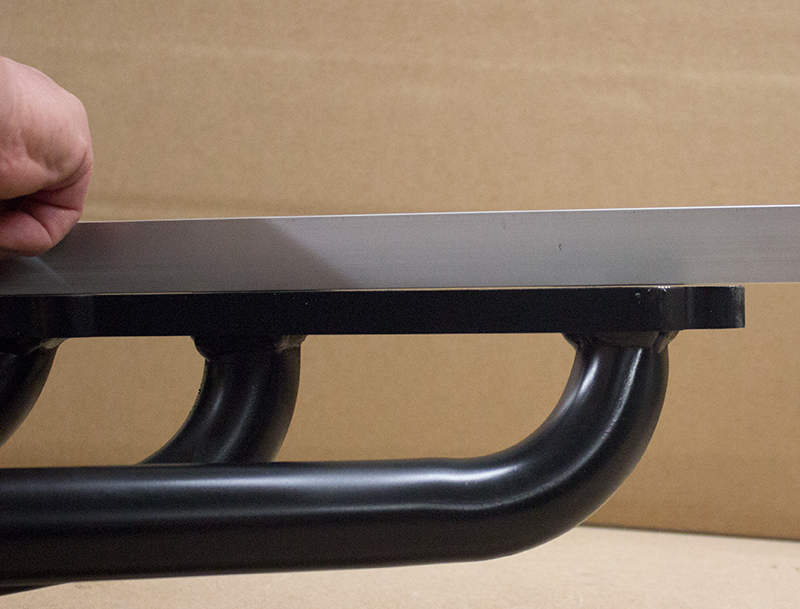
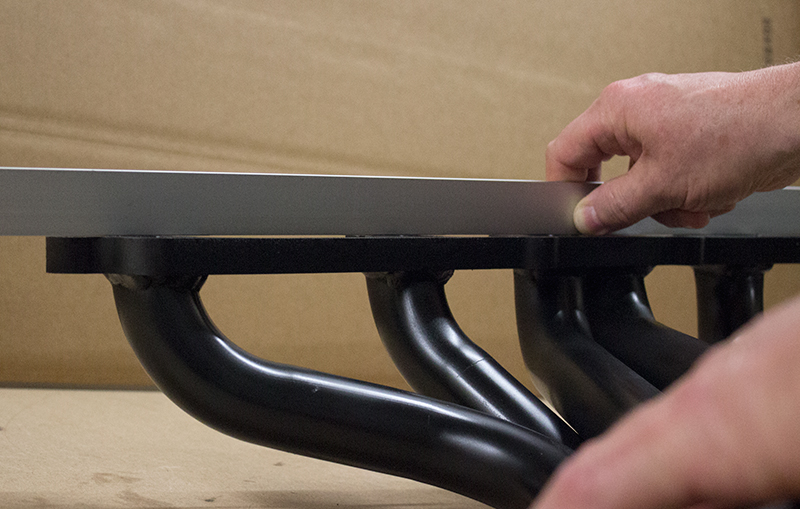
2 pointsOur apologies for the slow response. James is off this week on a well-earned vacation, and I’m detached as usual, off trying to build and fix computer systems and such (which is why James is normally your first point of contact). Sorry about that. Certainly, if what you said is accurately what our representative told you, that was completely incorrect, and we apologize for that response. You have every right to be upset. We will review with that individual specifically what needs to be corrected. If a Header is out of tolerance, we will always do everything we can to help fix the situation. Since you mentioned mileage, the only place mileage comes into play is that the Header must be re-torqued at 200 miles, and that must be done while HOT. If you followed correct installation procedures on your Header, and the tolerance when measured is greater than 1/8 inch, we hope you give us an opportunity to rectify the situation. Just let us know. Even if something wasn’t done exactly as listed below in the installation, we still want to work with you to take care of it. Just reply here and I'll see it (had to edit this post as our Sales Manager will be on a project out of the office and didn't want you to call and him not be here for you. But I'm always here (lol)). You can also call me if you prefer at (800)633-6331. James will be back next week as well. I’m also going to look at a few more headers tomorrow just to confirm I don’t see any inconsistencies, but wanted to reach out to you without further delay. (Wednesday Update: Didn't find anything out of tolerance in what we currently have, so if there is a tolerance issue with yours, hopefully it was isolated) Joseph. The information which follows is written to all forum readers: When Header flanges are welded up, there is always going to be a degree of variance (flex) in the flange. This would only be avoidable by leaving each unit in the jig for 24 hours, which would likely double the cost of the Header. The tolerance that is acceptable, when measured with a straight edge from the center of the flange outward on either end (NOT held at one end and measured at the other), is 1/8 inch. See the attached images we took of a Header we had in stock with the proper use of the straight edge. If anybody reading this has a Motorsport Auto Header that is beyond this 1/8 inch tolerance, please contact us. Within that 1/8 inch tolerance, the proper torquing by pattern will rectify the flange variance with 100% certainty. The torque pattern is always from the center to the edges, in proper steps. When the Header is at 1/8 inch or lower tolerance, and the Header is torqued in this way, and then re-torqued after 200 miles when HOT, you should never have a leaking issue. Our flanges were redesigned over a decade ago and made significantly thicker (to the same height as the intake manifold), so the “shared” stud positions (those which utilize spacers) line up equally for proper torque on both the Header and the Intake Manifold. In addition, the thicker flange better resists flex while welding, as well as the effects of old studs and nuts, or improper installation/torquing procedures. Now most of you on this forum know the proper installation procedures for a Header, so please don’t be insulted that we are adding a basic version here for reference. Many will read this post just from a search engine link, so it needs to be included. 1. The Cylinder head must first be completely cleaned of all gasket or other materials. 2. The Cylinder head must then be checked to make sure it is straight. If it is not, two gaskets, and possibly sealant, will be necessary. 3. The Header flange should be confirmed to be in tolerance (this should always be the case, as they are checked at the manufacturer, but unfortunately odd things can happen during shipping). 4. The condition of all studs and nuts should be checked. We recommend replacing current studs and nuts with new ones, as older studs and nuts are much more likely to lose torque over time, resulting in leaks. 5. The included Header Gasket should be checked for shipping damage, and then installed on the studs. 6. The intake manifold and Header should be installed, with spacers where needed, and the nuts finger tightened. 7. Starting from the center bolt and working outward, while alternating in both directions, the nuts should be slowly tightened, in multiple torque steps, until all are at torque specifications for your Z. 8. When all else is back together, including your exhaust system, start the vehicle and check for any issues. 9. After driving the vehicle for 200 miles, re-torque the Header, following the same pattern, while the engine is still HOT. 10. It is a good idea to re-torque these, and all bolts on your Z’s engine, periodically. The only time we may recommend two gaskets is if there are inconsistencies in the Cylinder Head, or if because of improper installation or torquing and re-torquing the Header flange is beyond the 1/8 inch tolerance. The two gasket solution is industry standard for those situations. If the header arrived to you beyond tolerance, we won’t ask you to “fix it” by using two gaskets. Also, since it was mentioned in the post, we recommend against “resurfacing” of any header flange, since then you would have variances in the thickness along the flange, which not only can affect spacer torque, but can itself end up causing leaks after high temperature metal flex.
 2 points
 -
1 pointey guys. i've been looking at google for some time for the original 1970 240Z rim, but i keep seeing different ones. so can u guys tell me and show me the original rims there's used on the 1970 240Z?1 point
-
I agree with SiteUnseen, once they are blasted you need to get some primer and paint on them sooner than later. Depending on your tool setup you may not be able to use a HVLP gun. Not only do you need a good compressor but you need a good air filtration system to keep water out. Besides the wheels, how many other parts need to be refinished? If you just have the four wheels, a rattle can will be the most affordable way to go. If you do it right they will come out looking good. If you have suspension pieces and other stuff you plan to do, then investing in a HVLP gun and the equipment to support it is worth it. Additionally, powder coating is done by the lot so if you do everything at once the cost per part goes down significantly. I used satin Rustoleum spray paint when I re-did all of the suspension components on my lime green Z. Even with no primer and using a wire wheel to clean everything, all the parts came out really good. Check out my lime green machine link below for lots of pictures.1 point
-
1 pointHere is power supply Dr.meter 4.2 out of 5 stars 189 Reviews Dr.meter 30V/5A Single-Output DC Power Supply 110V/220V Switchable with Alligator Clip included, US 3-prong Cable,PS305DM I thread all polished hardware on to 18g brass wire. I found that other materials are unpredictable and left pieces in the same soak dull Then dip in muriatic acid 50/50 distilled water until it quits fizzing. Rinsed in distilled bucket Let hang into degreaser at 120 degrees until ready usually about 15 min. Rinsed in distilled bucket Load into zinc tank. Which is constantly heated to 75 degrees with one of submersible heater for fish tank. Loads were calculated to run at 5 amps the max my rectifier will do, for 15 min. Trying to remember to rotate in middle of load became challenge. Rinsed in distilled bucket Dipped into Blue Chromate for about 5-10 seconds Rinsed in distilled bucket Dipped into Yellow Chromate for about 15 seconds Rinsed in distilled bucket Yellow chromate I mixed myself using 10 oz of sodium dichromate which I bought cheaply on eBay and 1 oz sulfuric acid ( battery acid) to one gallon of distilled water. All other products were bought at Caswell Hope this helps. I really noticed the difference in the properties of the zinc by adding brightener at the beginning of each day I was going to zinc. Noticeably different outcome when I didn’t add it in the beginning of my day. Here are some pics of the set up. It is not much to let look at but it works for me. Sent from my iPhone using Classic Zcar Club mobile1 point
-
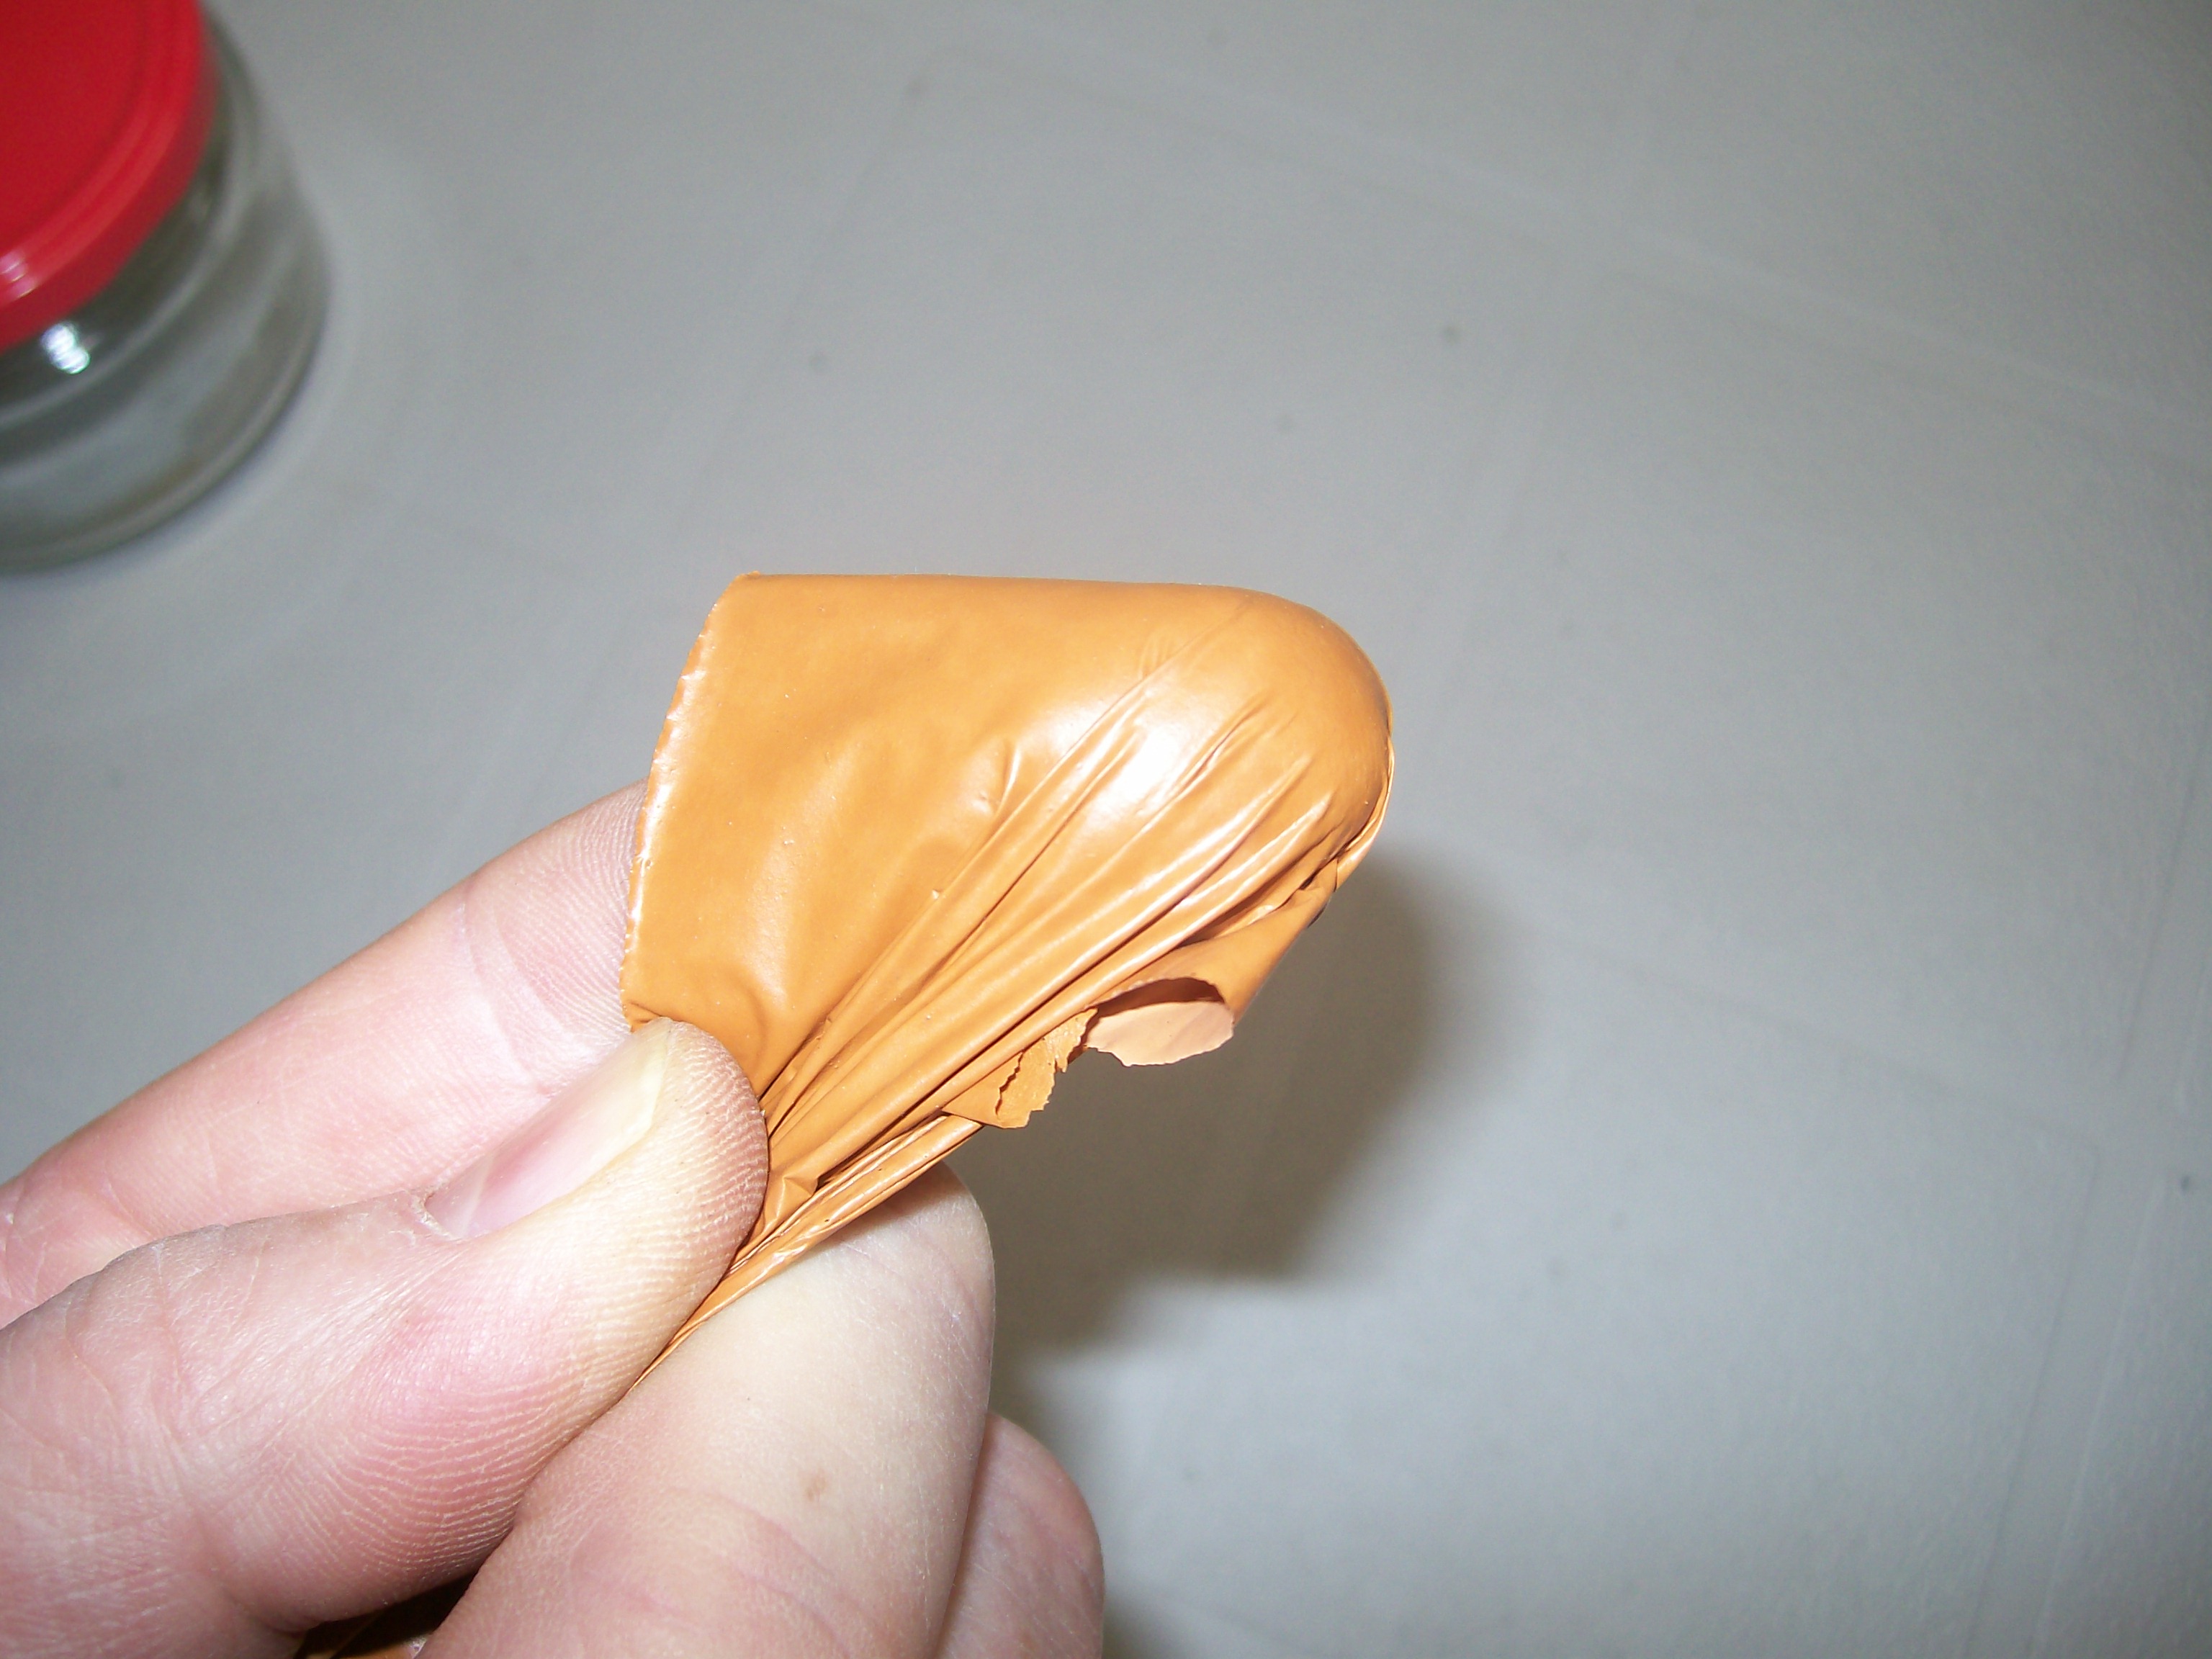
1 pointThere is a specialty paint supplier based in Toronto -- Parasol Paints ( www.parasolinc.com ) -- who will custom-mix vinyl paint ('dye') to order, based on a material sample or paint chip supplied by the customer. One-week turnaround. I sent them a swatch from the butterscotch seat covers I bought from Banzai Motorworks and found that their color-matching was spot on. This stuff is not what I would call a dye (to me, a dye is something that soaks into a porous surface). Instead, it's some kind of plasticized paint that creates a flexible colored skin that bonds to the substrate. From the can, it has the consistency of water, so its sprays very nicely with an HVLP gun. It begins to set up about 30 minutes after application and is essentially ready for use after 24 hours. It bonds very nicely to both hard plastic and soft vinyl, and -- as others have noted for SEM's rattle-can products -- it's remarkably durable. I've observed no tendency whatsoever for it to lift or peel off. The only application I might be a little hesitant about would be the seats, just because they're subjected to so much stretching and abrasion. Here's a picture of a sample of the paint after curing (I did a test shot on a shiny surface where I knew there wouldn't be a good bond). This was after two or three coats, IIRC. As you can see, the paint is stretchy and very skin-like... x The prep steps are the same as for the SEM products and are well-described on the Parasol website. Different prep chemicals are used for hard plastic vs. soft vinyl, but the same paint is used ('VaraKolor'). The main challenge in the prep is getting all of the ArmorAll-type silicone off the surfaces. The diamond-textured soft vinyl used on the Z is a challenge because it's hard to get all the silicone out of the grooves in the crosshatching. Here are some of the panels and covers after re-installation in my '70 Z. Apologies for indifferent focus (cheap, garage camera). The color register may be a little off, too (varies, depending on whether I'm using the flash or not). BTW, all of the panels and vinyls were originally black... ... x

 1 point
 -
Awesome. Simple after all. This is a Good lesson to remember.1 point
-
1 pointYup. Pretty sure those are it. Heck I may be wrong which is why it is good to go by the FSM. I'm going from memory and sometimes it's not great! And I'm working on 3 cars at the same time. So stoked I got my 300zxt parts car running today.1 point
-
1 pointSEM makes some wonderful vinyl dyes that let you change your plastic and vinyl color to the original stock color if you feel that's important. Originality only really matters when everything is truely original, not restored in any way.1 point
-
1 point
-
1 pointHere's a link to the thread where we were discussing such matters. My photo links are dead because Photobucket SUCKS!!! but there are some other pics in there that still work: http://www.classiczcars.com/topic/56185-how-do-i-hate-rebuilt-components-brake-booster/1 point