


Rob
Community Member
-
Joined
-
Last visited
Everything posted by Rob
-
In case it helps, I just put two jpeged wiring diagrams for a '75 260 on the thread "AMP meter off the scale".
-
And here's the one for the rest of the world that knows which side of the road to drive on zwiringrhd.zip
-
Well done! I had just finished scanning these so here they are anyway, just in case anybody wants them... Here's the one for US (LHD): zwiringlhd.zip
-
Wow! a nice '89 GTR for $NZ30K! http://www.autopoint.co.nz/marketplace/UsedCarDetail.asp?ID=1976390&Criteria=%40Make%3D%27NISSAN%27%2C+%40Model%3D%27SKYLINE%27%2C+%40OrderBy%3D%27P2%27&NoOfRecs=165&PageNo=1&chkRows=500 I'm off to check on import laws... Don't really want to part with my Z but I have got to get one of those Skylines! As an aside, apparently a good 240Z is worth more than a good R32 GTR in Japan. Maybe I should see if anyone over there wants to swap...
-
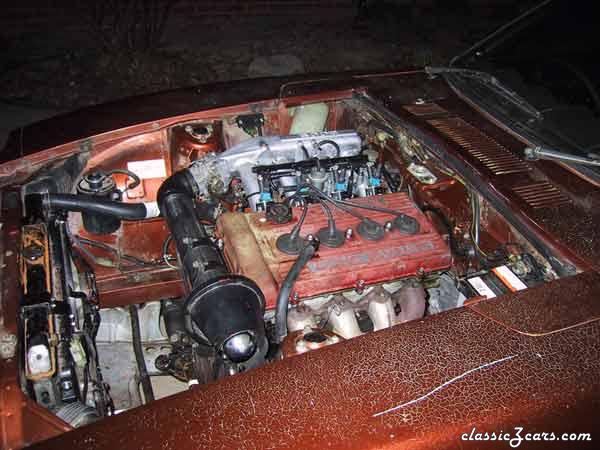
Hello everybody I've been meaning to post this for a while, just in case anybody is interested. As a result of coming across a crashed Silvia (200sx) cheap (US$50), I found myself with a spare FJ20 driveline. As the old L26 in my Z could easily be beated off the line by a good pushbike (no joke - it actually happened!), and the Silvia was a pretty quick car before it was crashed, I figured why not make the most of what I had! The swap wasn't hard, took about 8 weeks of nights and weekends, and included: * making engine mounts * gearbox crossmember * wiring the ecu * cutting into the tank to fit a submerged fuel pump * making mounts to fit the Silvia radiator * putting the workings of the Silvia tacho into the Z housing Since I wasn't convinced this swap was a good idea until I finished, I did all the above without even drilling a hole in the original Z, so I could put it back the way it was if I wanted to. The entire cost of the conversion including a new exhaust was US$300. Now the Z goes about twice as fast, uses half the fuel, starts every time, and if I need more power I'll get the turbo version of the fj20 and bolt it straight in! Here's some pics: I'll fix the paint when I can afford it!
-
OK I'll post it tomorrow. I took one look at the external regulator wiring in my Z, got confused, and fitted an internal reg alternator out of a Nissan Silvia (200SX). Much simpler!
-
I have no idea where that wire goes but I found a wiring diagram for my 75 260 in the owners manual (those were the days!). I don't have it with me right now but I'm guessing it would show how the VR is wired. Let me know if it would help and I will scan it and upload it.
-
According to the guy I bought my Zed off, the original owner said that the dash started to crack after only about two years of Australian South Coast sun (which isn't that harsh). The dash I had recovered (for a Ford Escort) is still going strong five years later. So assuming that any dash you would buy from Nissan is new old stock, it probably wouldn't last long. So send it down under!
-
zep; Trade you my Z for a Skyline GTR? I'll pay the freight!
-
Nice work What's the story with the boxes? Do they somehow let you into the cubby holes they sit on top of? Good idea to put the speakers there, as the ones in my car are right at the back and you can't hear them when you are going on a trip and the hatch is full of gear.
-
Those Japanese carbs drove me mental so I tore them off about 12 months after buying my Z, so I don't have actual experience, and I'm not sure what you mean by 'idle limiter cap'. (Could be an American/Australian terminology difference) Assuming you mean the idle adjustment screw, you just turn it until you get the idle speed you are looking for. If you mean the idle mixture screw, use 1.5 turns from seated as a start, then wind it out until the motor starts to stumble from being too rich, then wind it in 1 turn. Don't know if this helps but good luck.
-
Probably doesn't need attention unless your brakes are feeling really hard. As it's such a simple device it doesn't usually give trouble unless brake fluid from a leaky master cylinder has gotten inside it. So I reckon you'd be better off leaving it alone. If it is broken I think you can open it up yourself and service it, but I have never had to work on one so I can't really help you here. Hope this helps Rob.
-
Injection is great, especially on a Zed, as those wacky Hitachi SU things don't seem to work (they didn't on my 260 anyway!). So definately go to injection, but you are probably better off using a 280zx / Skyline manifold than grafting injectors and throttle bodies on to a stock manifold because: * It's a lot less work * The standard computer will be tuned to a standard plenum chamber manifold. Admittedly this shouldn't make too much difference as they use an air flow meter instead of a manifold pressure sensor, so you may get away with it, but don't be too surprised if it's out of tune. * Having driven my Westfield (kit car) with both the standard manifold and then with quad throttle bodies, I can say that having a plenum makes stuff all actual difference to respose (On a Toyota 1600 anyways) Note: If you decide to use the Skyline/280zx manifold, you will have to cut injector scollops into your ports and drill and tap four extra holes into your head. (Cylinder head that is ). Best of luck with it!
-
 Yup, it's mine. I'm not sure whether to call it a 200Z or a Zilvia.
 -
OK here they are... The speakers under the seats... The tweeter stuck (with double sided tape) to the windscreen... The rear speakers (the panel is held in by the original luggage straps)... I reckon the sound from this set up is great and I didn't have to drill a single hole in my Z! Hope this helps
-
Pics are on their way... I'll get the digital camera this weekend!
-
I didn't want to cut my door either when I put speakers in so I made up panels and stuck them under the front of the seats. This worked great but the sound seemed a bit 'low' so I stuck tweeters in the lower corners of the windscreen. Now it sounds fine and I didn't have to cut anything! I can post pics if anyone is interested.
-
Before I discovered the angle iron + big hammer trick I tried prising the halves apart with some sharp screwdrivers but I was chewing up the aluminium (and my knuckles:() too much. The thing I liked about the angle iron + big hammer trick was that it didn't chew up anything (except for the angle which looks a bit second hand now)
-
This one was! It was like they had used araldite instead of sealant! I'm glad to hear they aren't usually that tenacious but I'm keeping the angle iron just in case!
-
Get brutal! The only way that I could get mine apart was to cut an 18" bit of 2" x 2" angle iron, drill two holes in it so I could bolt it to where the mount goes, hold the bell housing and belt the bejesus out of the bit of angle iron with a big steel mallet. The box came apart fairly easily with no damage. If you do this make sure the bolts you use to hold the angle iron are REALLY tight.
-
Yeah I've done it to my 260Z. I used a 180B gearbox (I had one handy and by the look of the gear sizes it wouldn't be much weaker than the six cylinder one, and it has now lasted two years with no probs) I also used the clutch and flywheel from a four cylinder, as I had these lying around. They have also lasted fine. (of course, if you are going out and buying stuff, you may as well buy the six cylinder stuff, but if someone gives you the four cylinder stuff, don't be afraid to use it!) I found the pedal boxes themselves were identical, So if mine was still OK and not cut up for a disabled driver mod I could have used it and just changed the pedals, which would have saved time as it was a full mornings work swapping pedal boxes. I got a second hand master cylinder which worked fine, and I found it cheaper to use a bit of dash 3 braided line for the plumbing than to buy factory rubber brake hose. The great thing was that the tailshaft, gearbox crossmember, and speedo cable all bolted up! Oh and I used the old auto console with a boot grafted on to it. Looks fine! Costs: gearbox: free (probably would have been $100) clutch and flywheel: free (probably would have been $50) pedal box & master cyl: $50 slave cyl (new): $25 braided line: $30 gear oil: $20 Time: fit pedal box : 6 hours fit gearbox and get running: 5 hours As you can see, it was no big deal really. Hope this helps.
-
suntadz, I have tried a rotisserie built from something like two engine stands and caused a fair bit of damage to the Ford Escort that was attached to it, as one stand tipped over :eek: (I didn't take any pics - I'll leave it to your imagination) While surveying the damage and feeling fairly depressed (and very dumb), I concluded that: The track width of an engine stand is'nt wide enough to be stable. For a rotisserie to work properly there needs to be a full frame underneath for the wheels to attach to, to stop them going in different directions. Phred, That thing looks like a great idea! How hard is it tip on its side with a Z body bolted to it? Can two peple do it?
-
I've got a book that is nothing but magazine road tests of Zs. Can't remember what it's called but the same mob do books like this for all sorts of cars. I'll dig it up and post the title if that helps.
-
Sounds like the earth wire isn't connected. When this wire isn't connected the headlight bulb seems to earth itself through the high beam filment which makes both high and low beam glow dimly. Easy way to check this is to run a temporary wire from the earth pin on the bulb (not sure which one it is - anybody know?) and touch it to a good earth - the front bumper comes to mind. If I'm right the headlight should glow brightly. Then it's just a matter of figuring out why there is no earth to that headlight, or cheating and running a separate earth wire to the body
-
geevum, Was there a happy ending? I would have taken the car for sure but I'm a bit too far away!