EScanlon
Community Member
-
Joined
-
Last visited
Everything posted by EScanlon
-
The definition of a classic is similar to what one of the Supreme Court Justices said regarding pornography, paraphrazing as I don't have the original quote: "I can't give you a definition of what constitutes porn, but I know it when I see it." There are hundreds of vehicles that came out in the late 60's, 70's and early 80's that will be considered old, and maybe qualify for a license plate that denotes them as being older than 24 years. But they would never be considered Classics. Now, I know that some of them would elicit pangs of remembrance and even a desire to sit in it, but not the yearning to drive it and enjoy it again that a true classic evokes. Consider: The Pacer The Hornet The Pinto The Chevette The Fiesta The Citation The "K" cars The Fairmont As the years go by, some of these will gain collectability as their numbers go down, and seeing one is a visual treat. Yet, you still don't purposely go out to find one of them until many more years have gone by. Then you buy it just because it's an antique. Some people would then call them "Classics". I think I'll just enjoy my Z and let others determine whether they think mine is a classic. Enrique
-
The top car definitely needs something in front so it doesn't appear to be popping an eternal jump start. Or you can lower the front end. The bottom car definitely needs to lose the whale tail. See if you can find something that isn't so drastic. A spoiler wouldn't look bad, but just needs to blend into the body lines better. You're also thinking of blacking out the chrome around the windows. If you do so, consider either black anodize on the bumpers or go with the shortened front in fibreglass and the back molded into the body. Enrique
-
DO NOT USE RAIN-X INTERIOR FOG! I used some in my Acura, and the only way I finally got it off the windshield was to have the windshield replaced. Don't try to drive into the sun with this stuff on, you will NOT see through the windshield. All you are going to wipe on is a horrendous snot film. It smudges and catches dirt and dust, God forbit you smoke in the car. Using it for Headlight covers? I would stick with their original Rain-X formula for EXTERIOR surfaces (YELLOW BOTTLE). Regarding the 280, it is very possible that by then they added a splash pan underneath the headlight scoop. In the 240's that is not the case. It is a PITA to get up there to work those things. Enrique
-
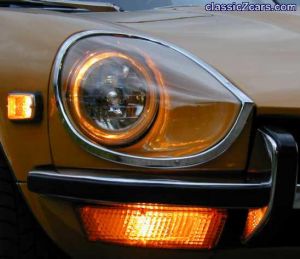
The main reason that your headlights are getting fogged up is that the area around the headlight bulb itself is open. There is no splash guard around the bulb lens to the "scoop" portion of the headlight opening. As you drive along the mist from the front tire splashes in front of the tire which then gets sucked up to the front part of the fender and hence into your headlight scoops. Add that your headlight cover has a couple of drain holes and you are causing a small vacuum INSIDE the headlight scoop area. This further sucks in the water. How can you fix this? Look closely from underneath the car, just in front of the front fender support where the headlight scoop attaches to the fender. Have someone shine a flashlight around the headlight bulb and you'll see the light! (no pun intended, but what the hell.) You could seal this with duct tape, but be careful as you don't want to inadvertently affect the position of the headlight bulb in relation to the car's general axis. You'll end up with misaligned headlights (Vern, there's a squirrel in that thar tree!). Also, make sure you don't make it impossible to access the alignment screws, should you bump it a bit. The other way is to either get some foam tape around the opening. Problem with this method is that there isn't much to stick it to. I reduced the problem I had with this by wrapping a 2" wide piece of squeege blade rubber (check with a window washer, that's where I got mine.), that in turn is zip tied around the tube of the headlight scoop, so that there is about 7/8" protruding past the tube of the scoop. Look closely and you'll note that when you mate the scoop back to the front fender / headlight assembly, it just barely touches against AND around the complete headlight bulb / ring assembly and gets very close or if possible touches the inner fender support. You CANNOT seal it to be pressure proof, so the best you can do is to limit the amount of air to be pushed through it. By sealing the back you eliminate the major source of air. The very front portion of the cover is the only spot you should need a drain hole. Typically this is at the seam between the two ends of it, but it shouldn't be a requirement now. If you do leave a small gap, realize that air and water can get pressured into it by the force of the air against the front of the car. With the OEM covers, there IS a hole in the gasketing around the cover. The difference with those headlight covers and the standard ones you can get from VB & MSA is that the OEM's actually fit on the OUTSIDE edge/lip of the sugarscoop. The aftermarket ones are expected to rest INSIDE the edge of the sugarscoop. That's why they have an edge gasket. Personally, I would not leave a gap, and WOULD seal the back portion as best as I could. 2¢ Enrique
-
Actually Mike is buying it so he can restore it. With all the combined knowledge about the engine, suspension, paint and bodywork available here it is actually an advertising campaing in the works. He'll post the picture as shown on the auction and then show the AFTER shot. When people ask how he did it, he'll tell them that it was due to the help of the club. THEN he'll start charging the new guys $15 a pop and.......SHHHHHH :dead:
-
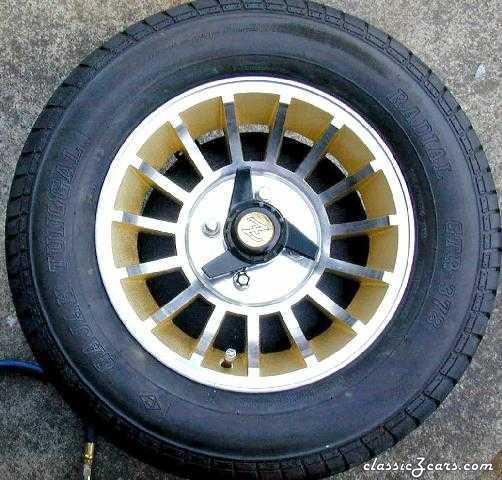 The Hub was a generic hub from your local wheel dealer. In my case Les Schwab. I say generic because it will work for 4 and 5 bolt wheels. The key was to get the hub to fit through the hole in the wheel. The "spinner" part of the knock off was also bought at Schwab, but they are Coyote brand spinners. They had them in 2 "wing" and 3 "wing" models in both anodized black and chrome. The Center Cap Logo was also obtained off e-Bay.
 -
 I bought both the front and rear set from MSA. They fit quite well, and although a bit of forming will make it better, I can't argue with the design. If I recall they were about $40 per set.
 -
 Sadly that is the donor car. She has graciously donated her dash, seat reclining mechanisms, and a few other parts in order to make Z-Oro the car she is now. The donor car, is a terminal case. She has major MAJOR rust. I would be afraid to ride in it if it were to be pulled with a chain. Enrique
 -
-
-
-
-
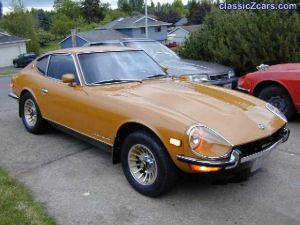
There she is in her full glory!
-
 The red switch is the current switch for the fog lamps, however, thanks to Kats and Alan, I was able to get the proper switch for that panel, which is a Parking Lamp Switch. That switch operates additional bulbs in the front and rear but only on ONE side at a time (not blinking). This is to highlight your vehicle when parked on an unlit road. (Japanese Market Requirement)
 -
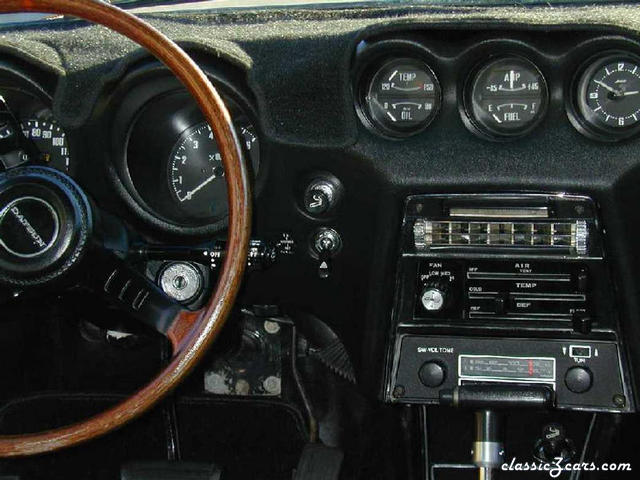 Also, if you'll note, there are 2 Cigar Lighters. That's because the center console is a Series I (as we refer to it in the USA), and the dash is from a 72. Since I plan on adding the fog light switch later, I filled it in with the lighter instead of a gaping hole.
 -
The "fuzzy dash" is NOT the way I run the car, just when I expect the dash to be exposed to the sunlight. As expensive and difficult to find good dashes is, I'll be darned if a bit of vanity is going to make me get a new dash sooner than I need to.
-
 If you note the "foggy" look of the black paint, that is what POR will do when exposed to UV light (sunlight in my case). The uneven cut-off line to the right was to minimize the amount of visibile POR when you have the door open and the fender on.
 -
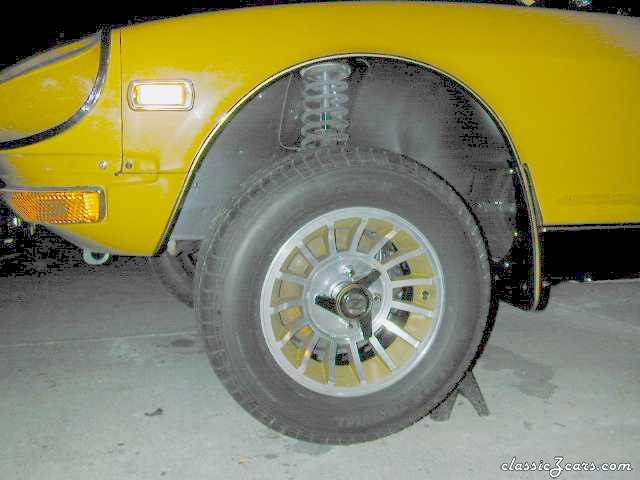
 This shot shows how neatly the PVC hose will fit in the opening between the rocker, the fender and the splash guard. This is important, because although Datsun did expect this opening to be the drain hole for the cowl, they forgot about leaves and other debris which eventually clogs it and causes the fender to rust. By directing the cowl drain tube to drain out, you minimize the amount of water / debris to accumulate back there.
 -
Actually the car was so eager to get OFF the jackstands that it was doing wheelies. The car had been on and off jackstands for at least a couple of months by this time.
-
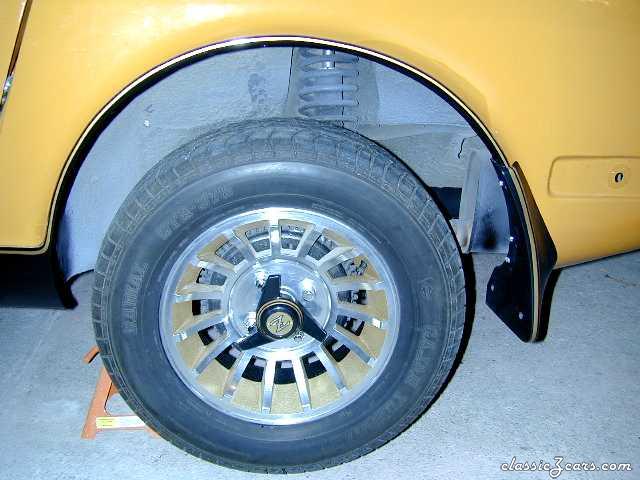 Look closely at the fender lip and you'll note the pinstriping that was added to set off the black rocker panel and splash guards.
 -
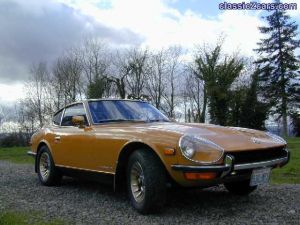 Thank you, this is one of my favorite fotos.
 -
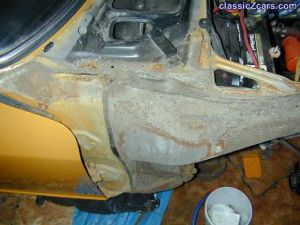 If you look at the pattern of the dirt and rust, you'll note that it is exactly where the tire flings dirt, mud etc. The outer boundaries of it, show the rust forming.
 -
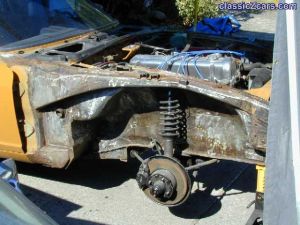 This shot is actually after I'd started removing undercoating and other loose debris. Look just below the front end of the valve cover and you'll note the tell tale color of rust, that was from the clogged fender drains.
 -
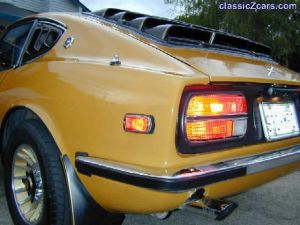
 The quarter window louvers were an aftermarket option that I discovered on e-Bay. Since I wanted the back end of the car to be covered up, so as to not fade the carpet, I thought it went hand in hand with the hatch louvers. Both louvers are painted in Metallic Black and pinstriped to match the car.
 -