HusseinHolland
Community Member
-
Joined
-
Last visited
Everything posted by HusseinHolland
-
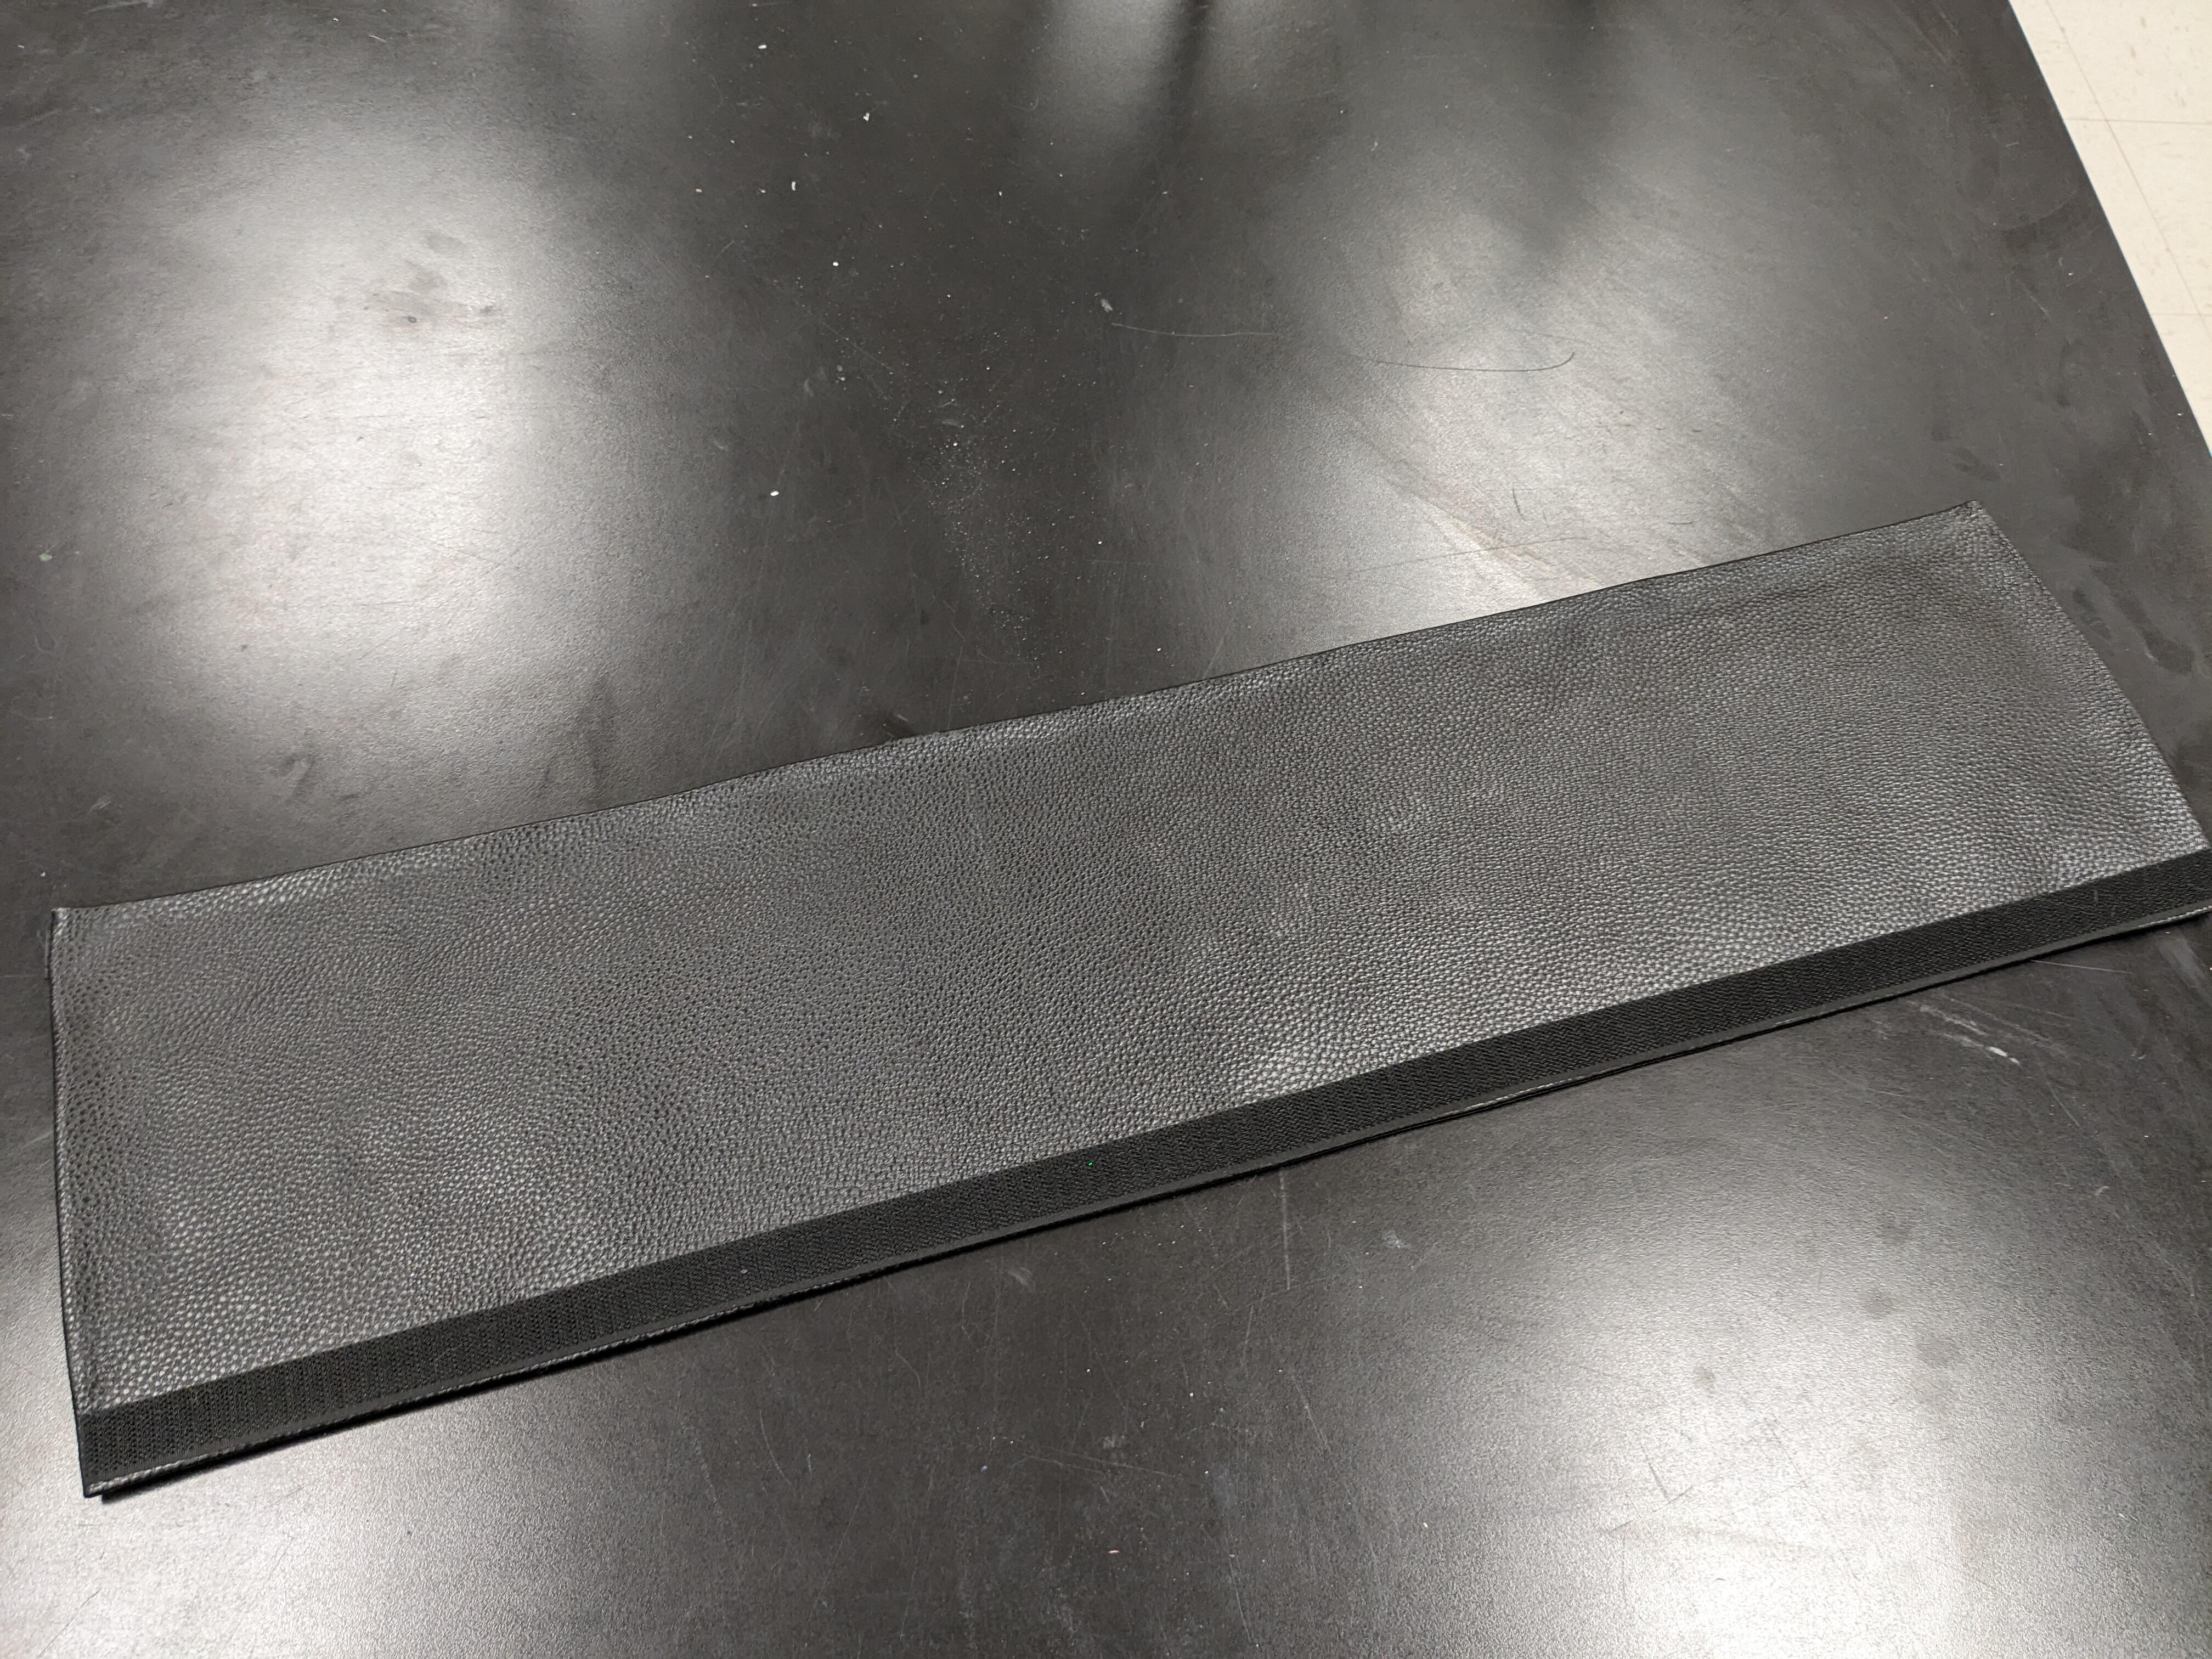
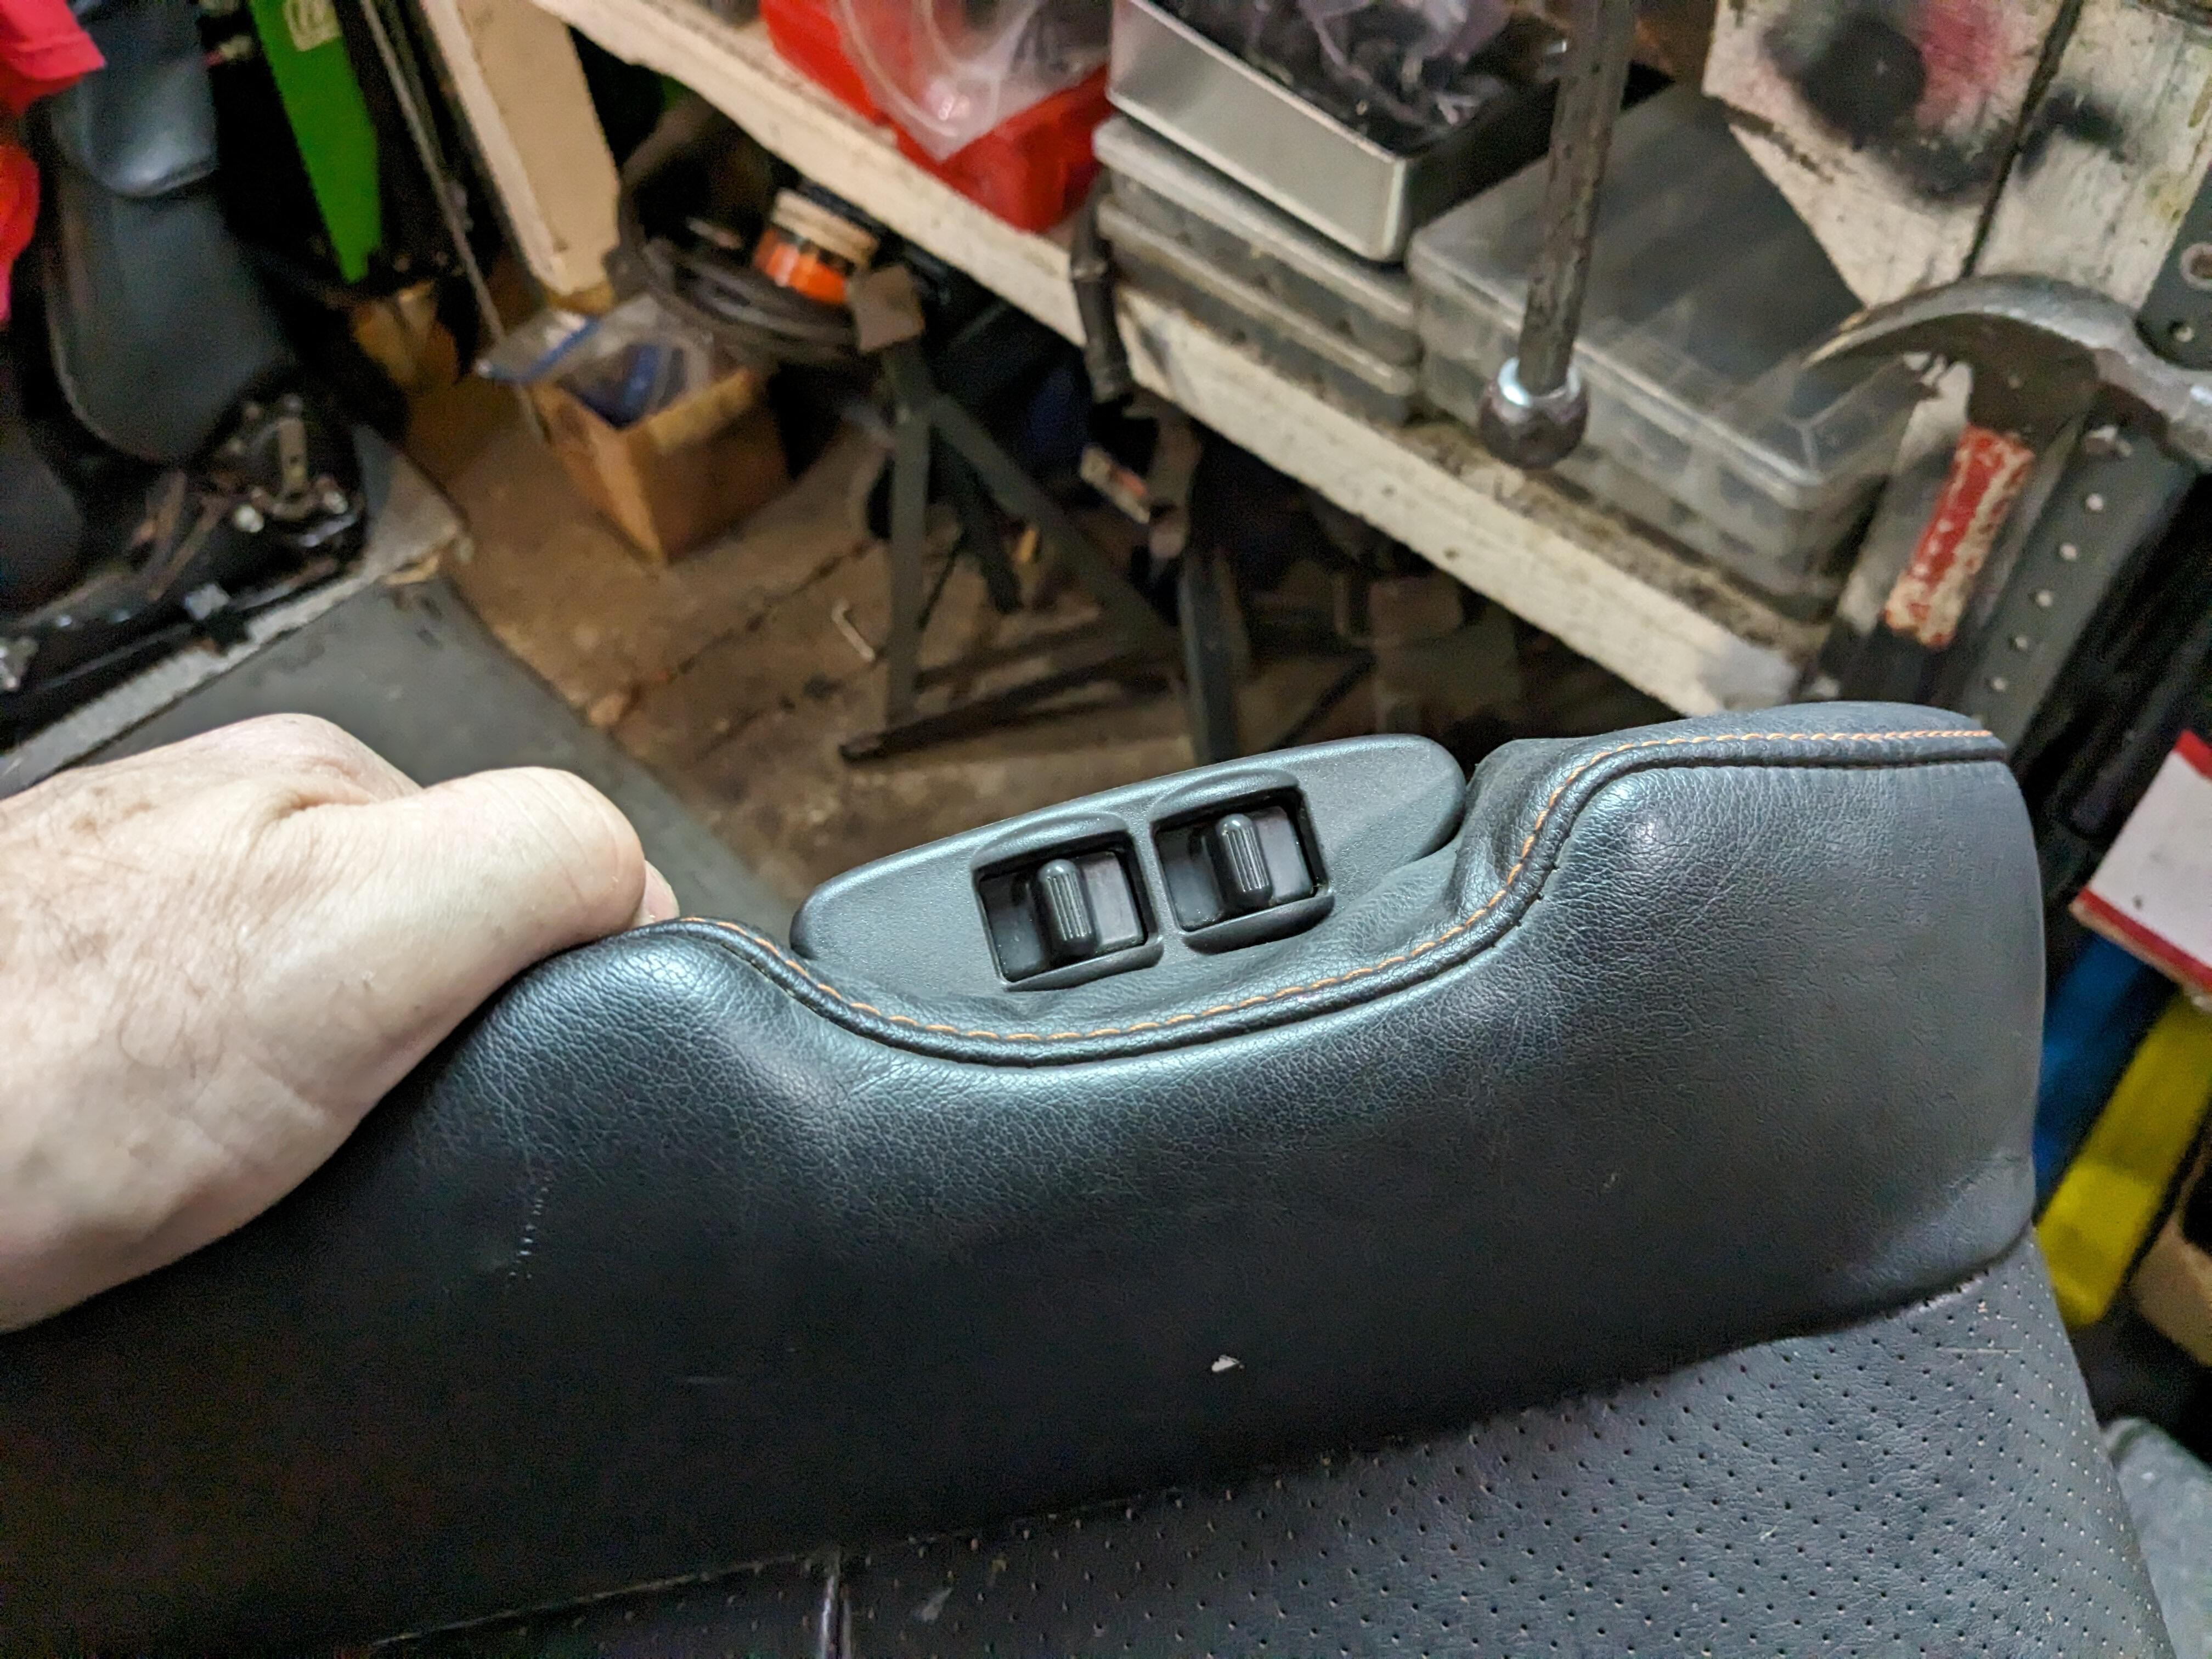
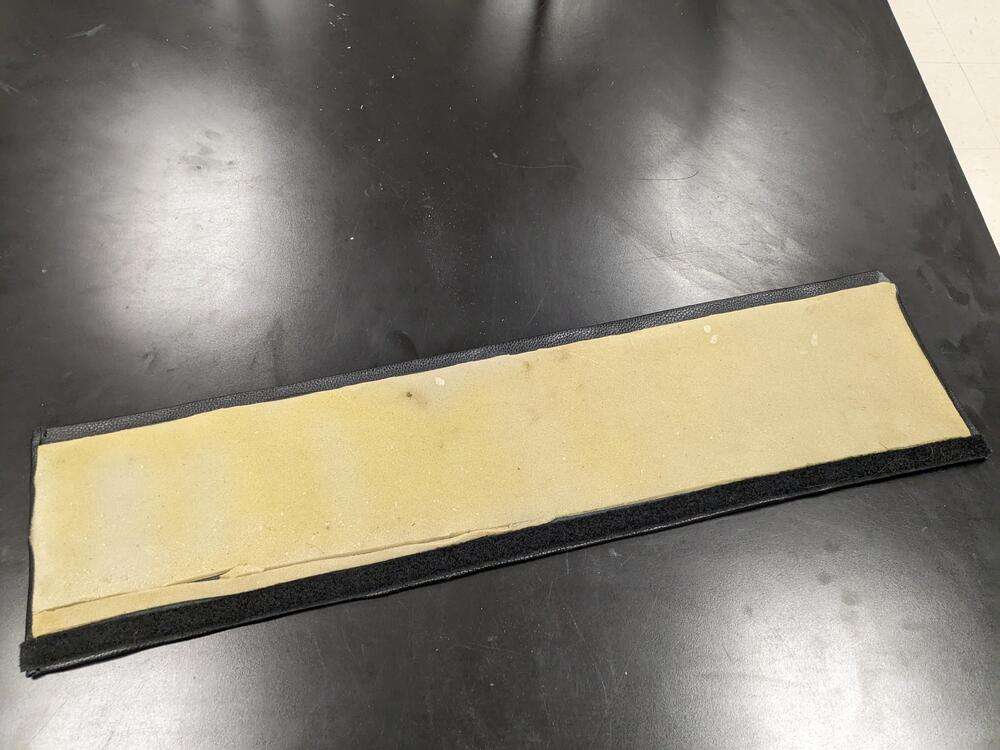
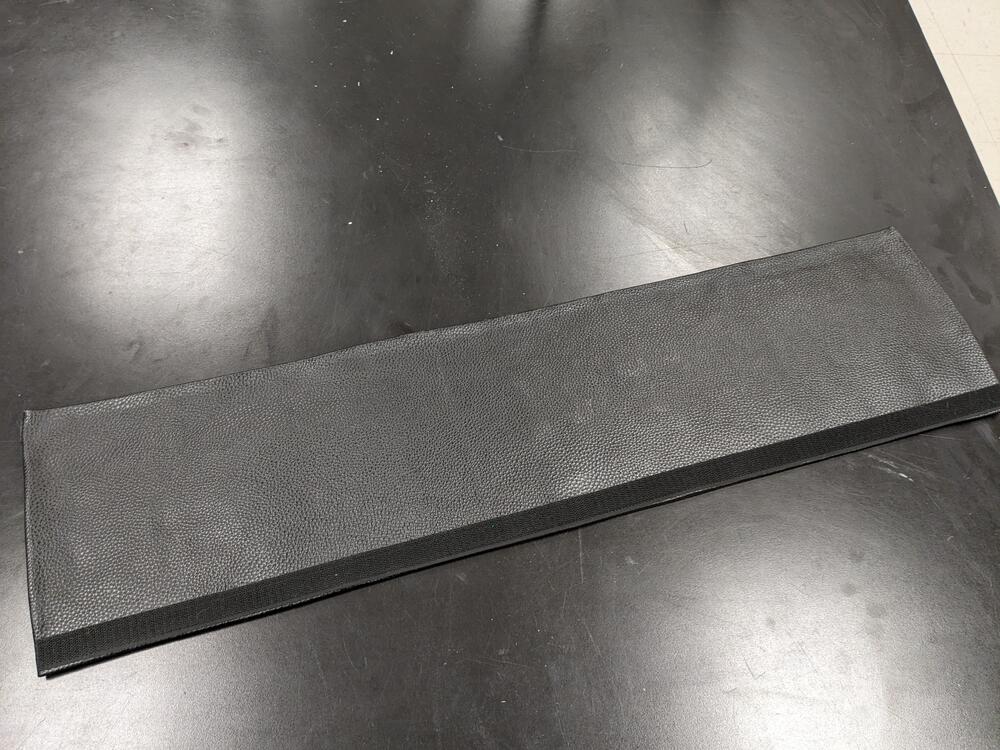
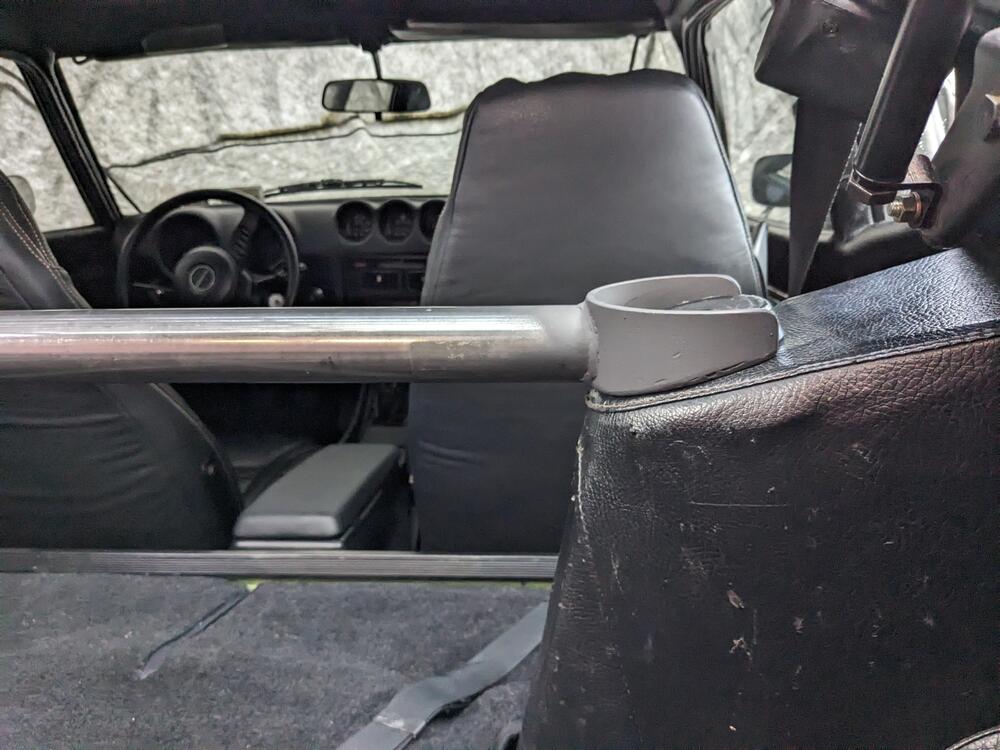
1/4" Skrim coated foam (left over from a Volvo headliner job years ago) faux leather padded sleeve. Velcro fastening

-
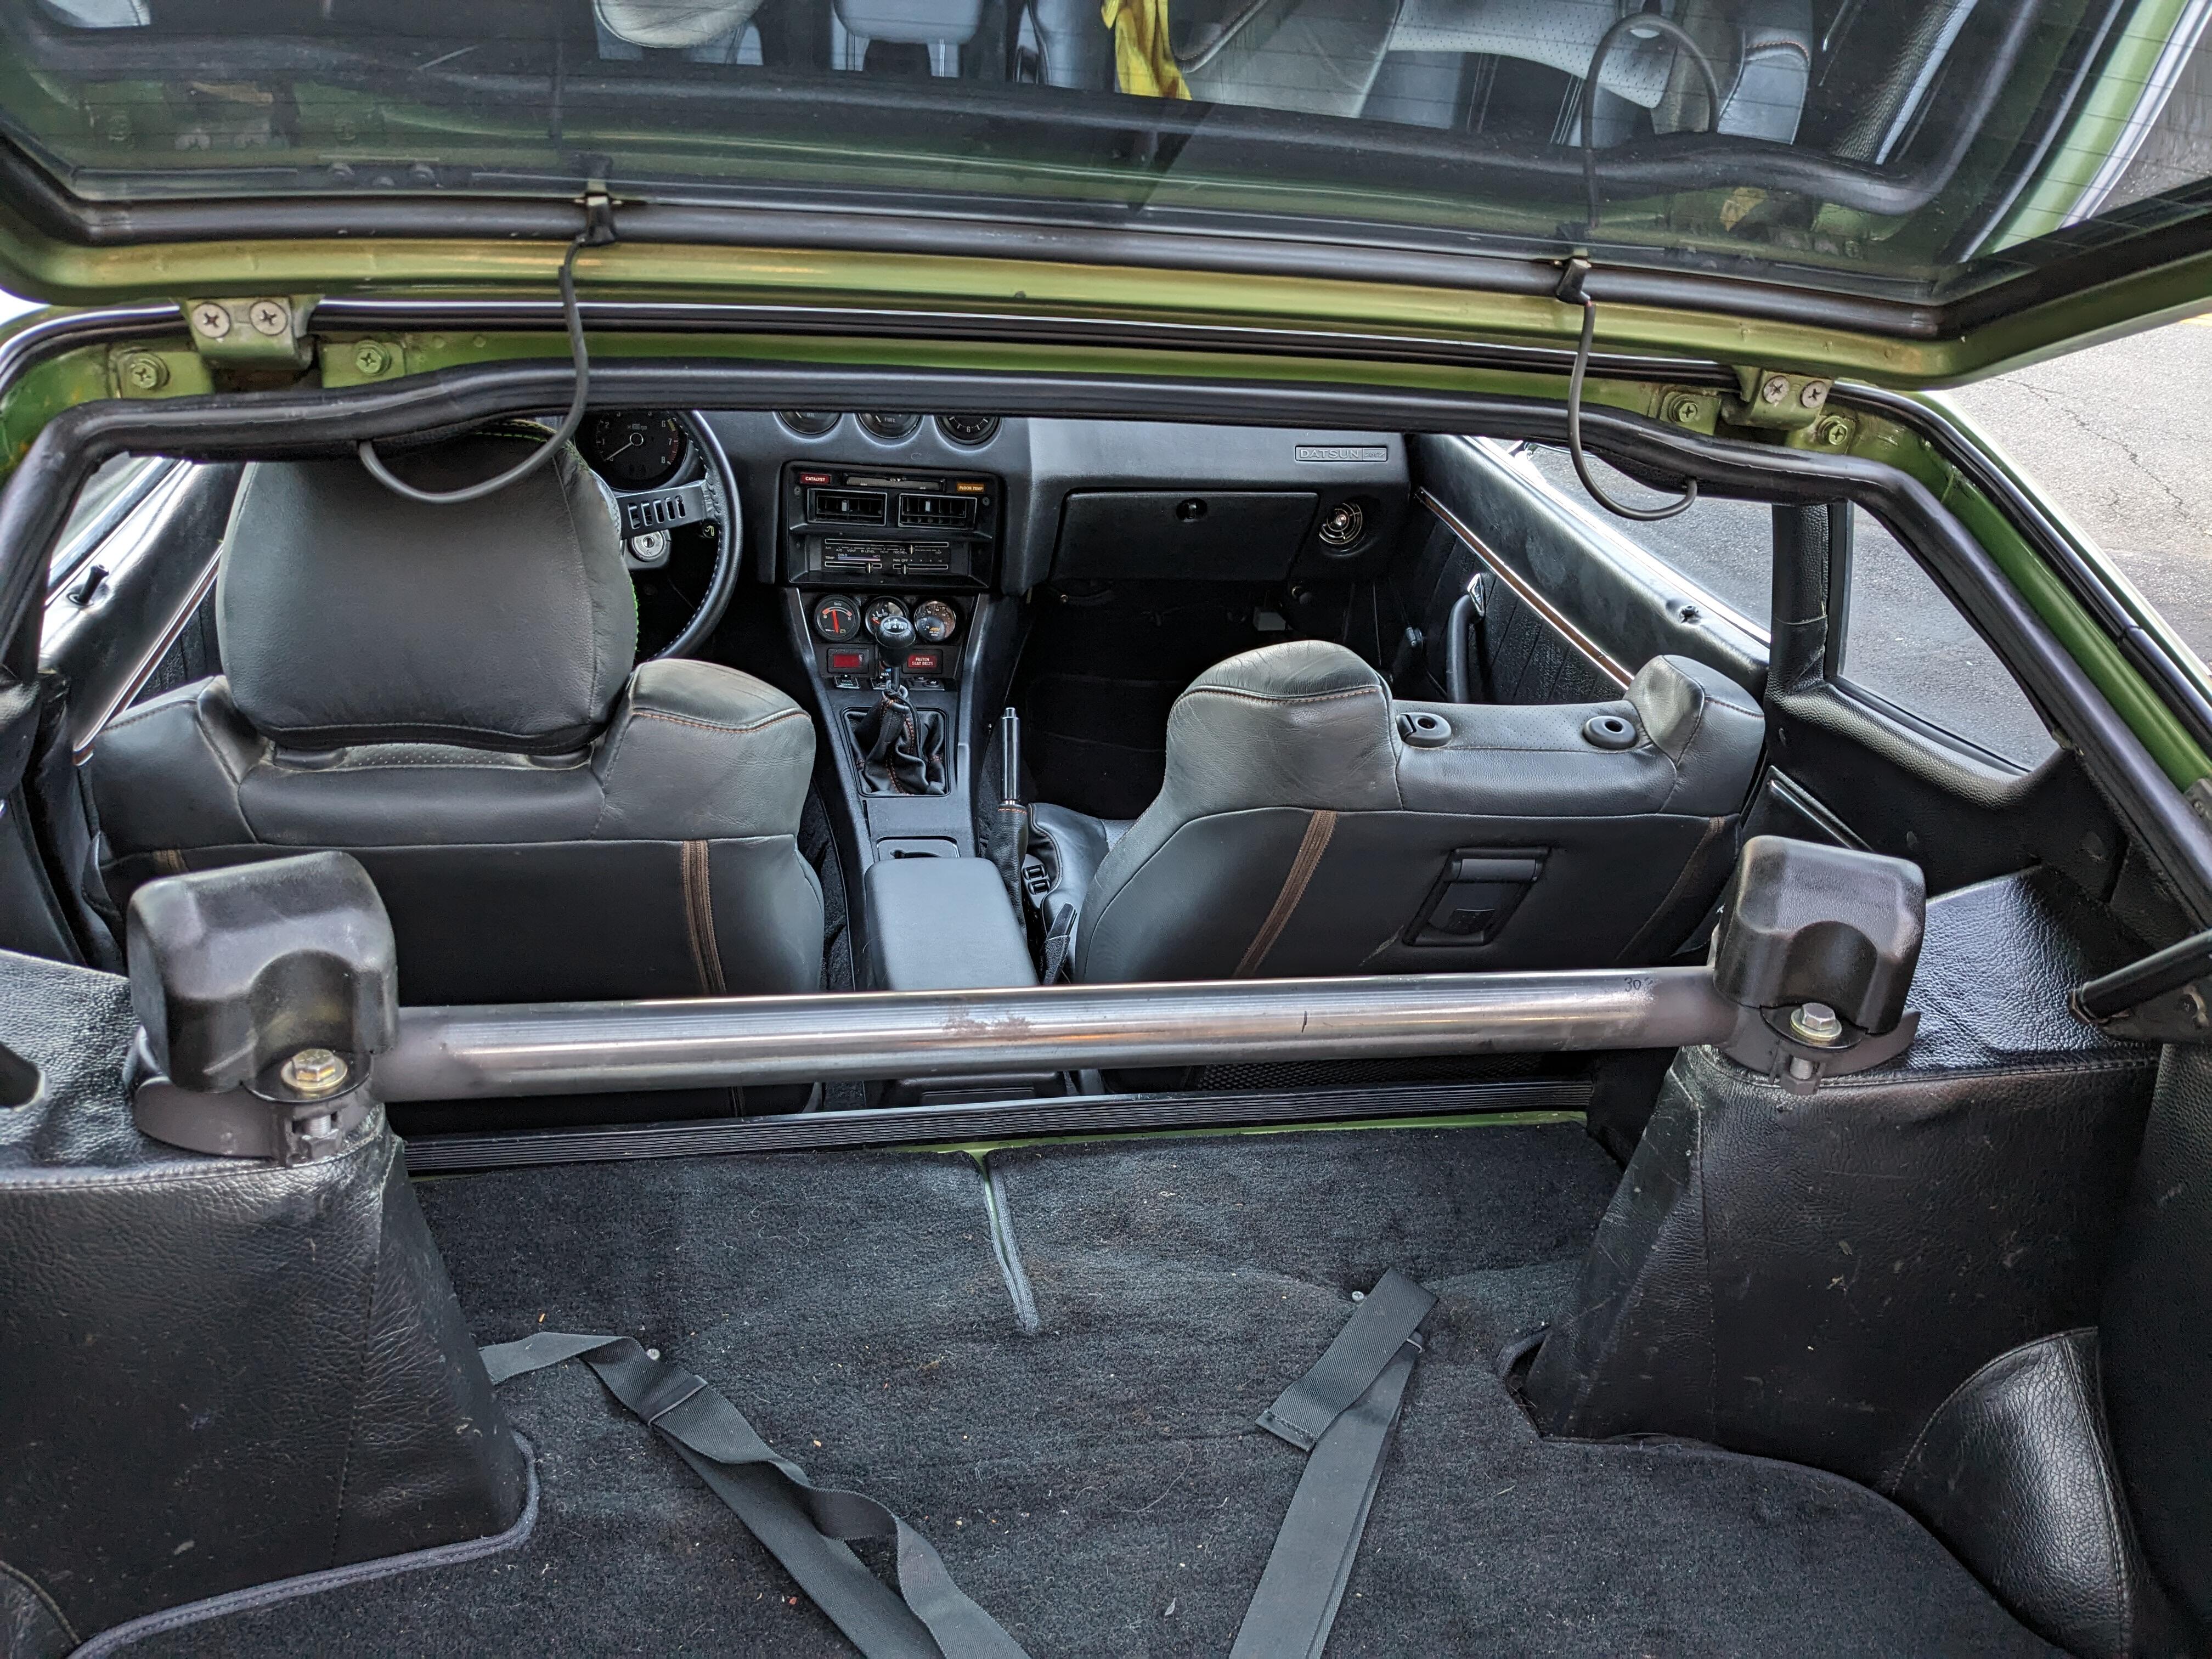
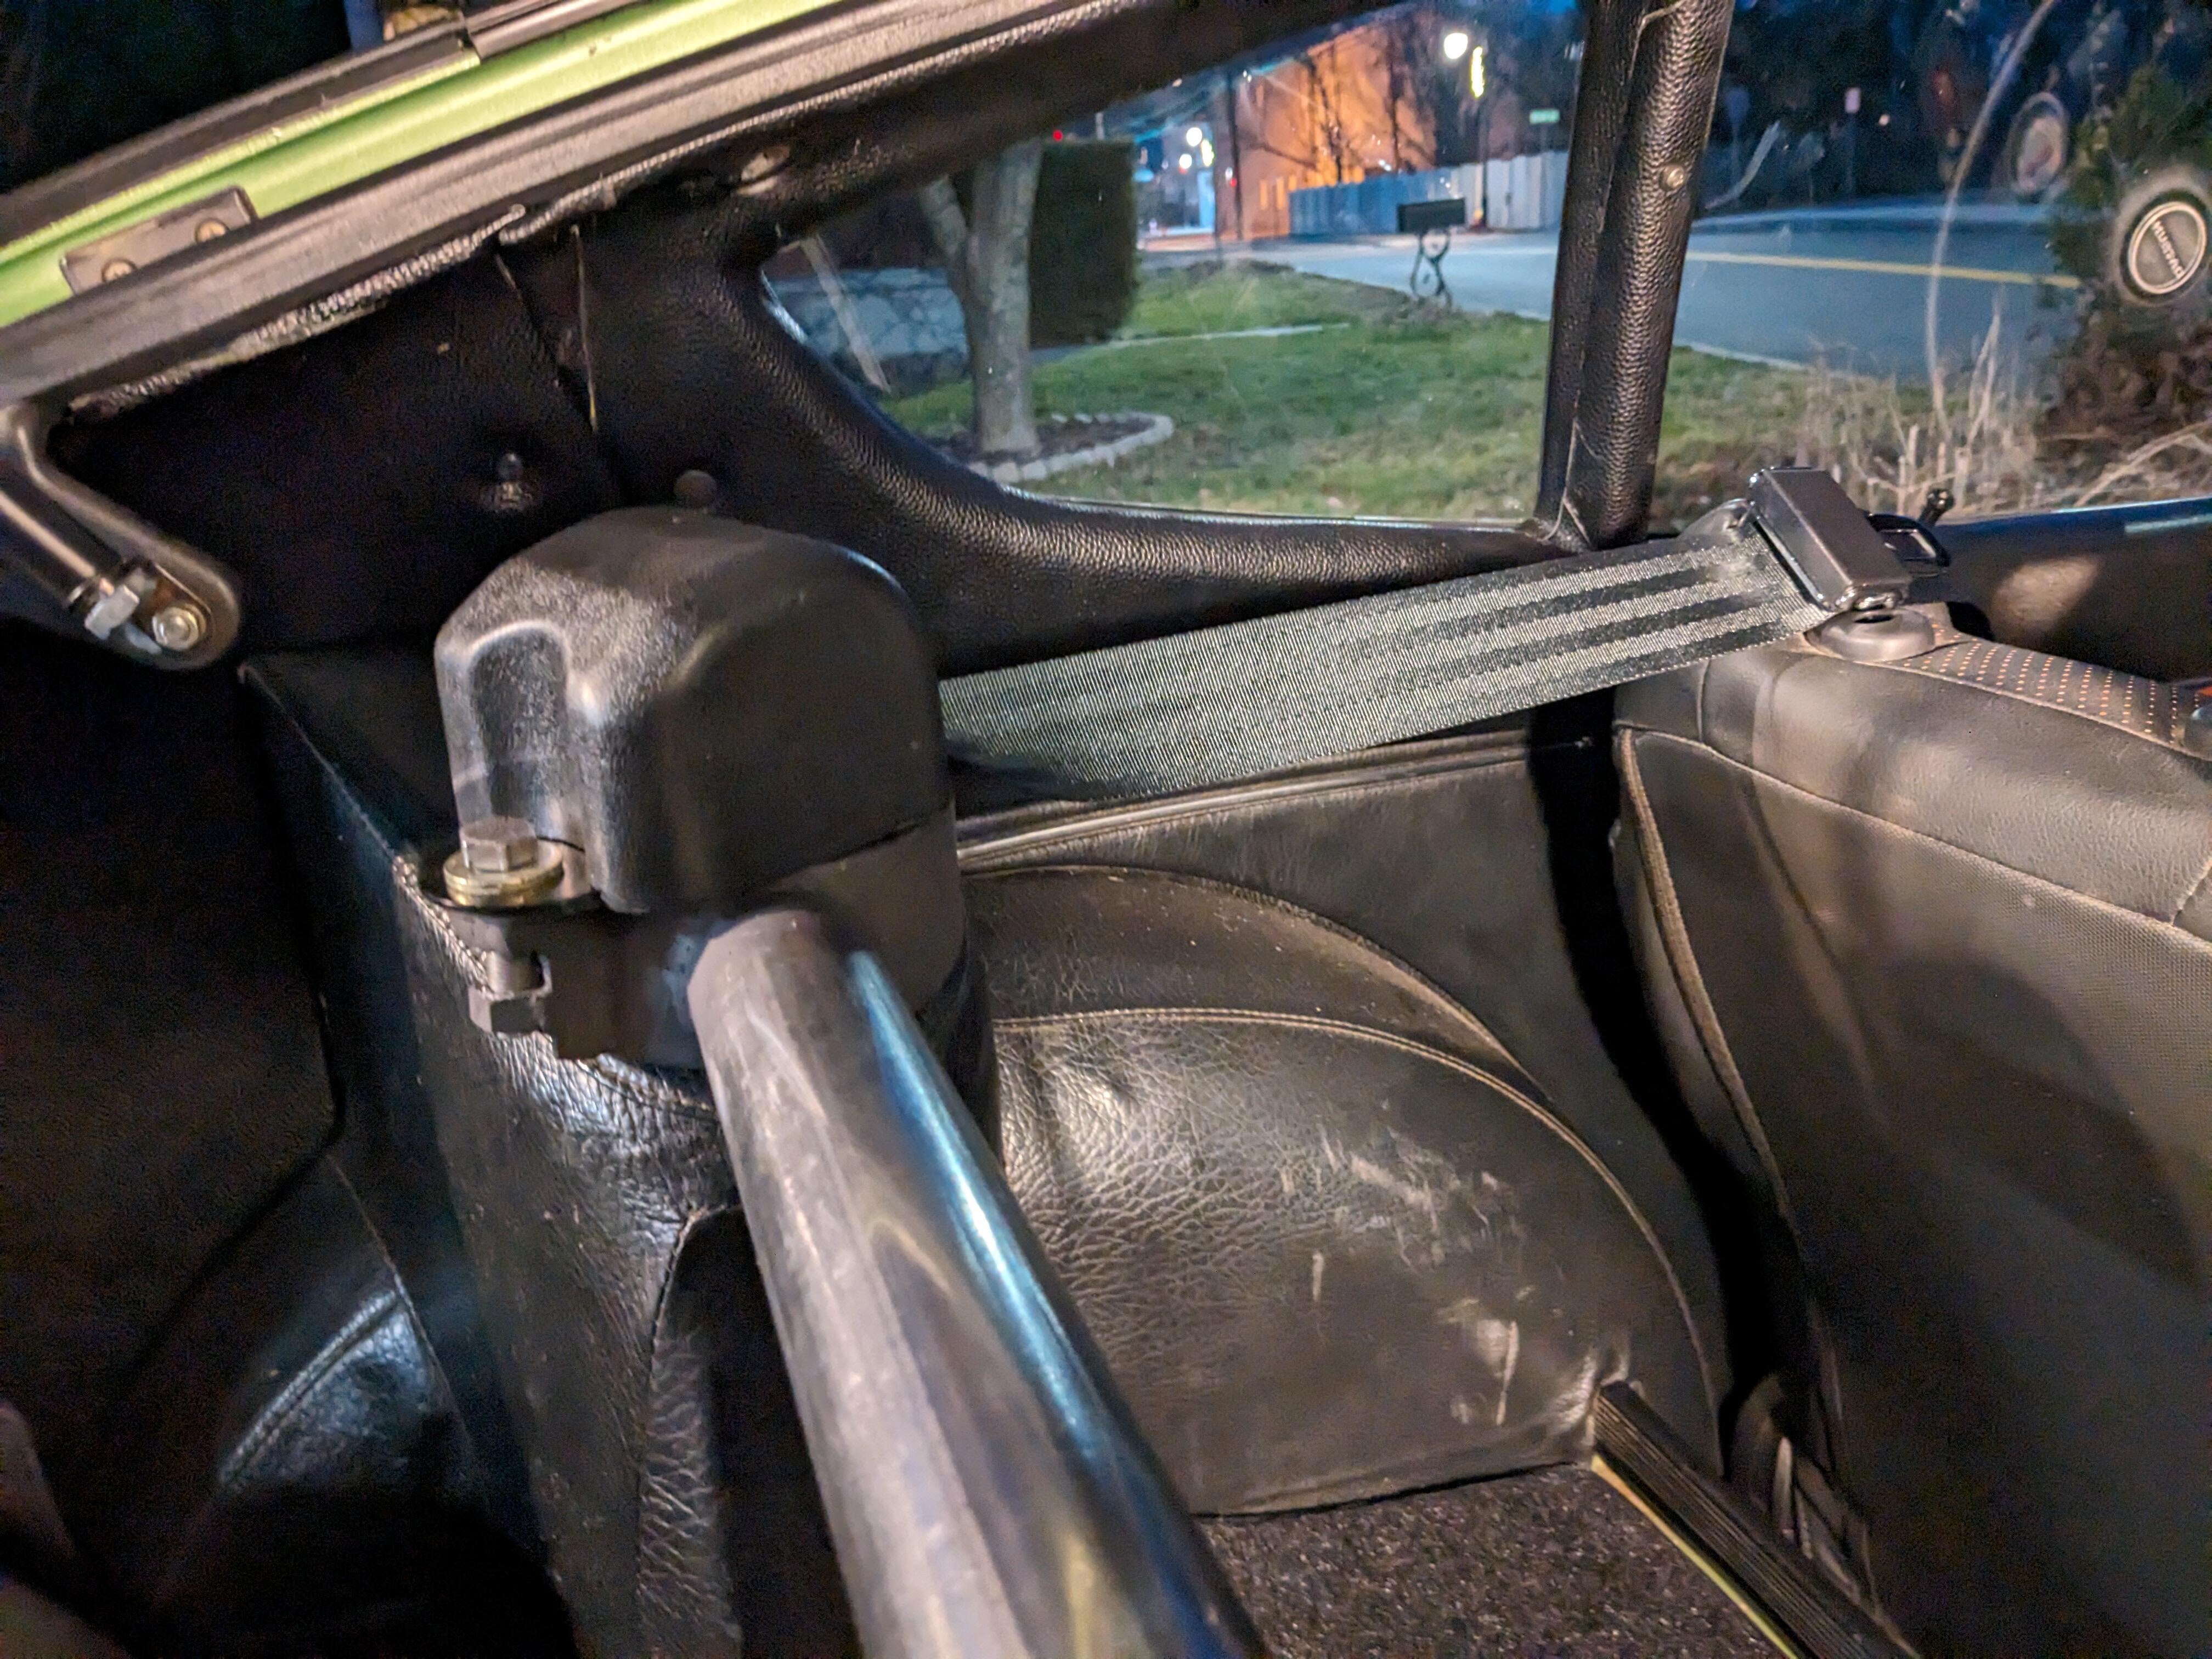
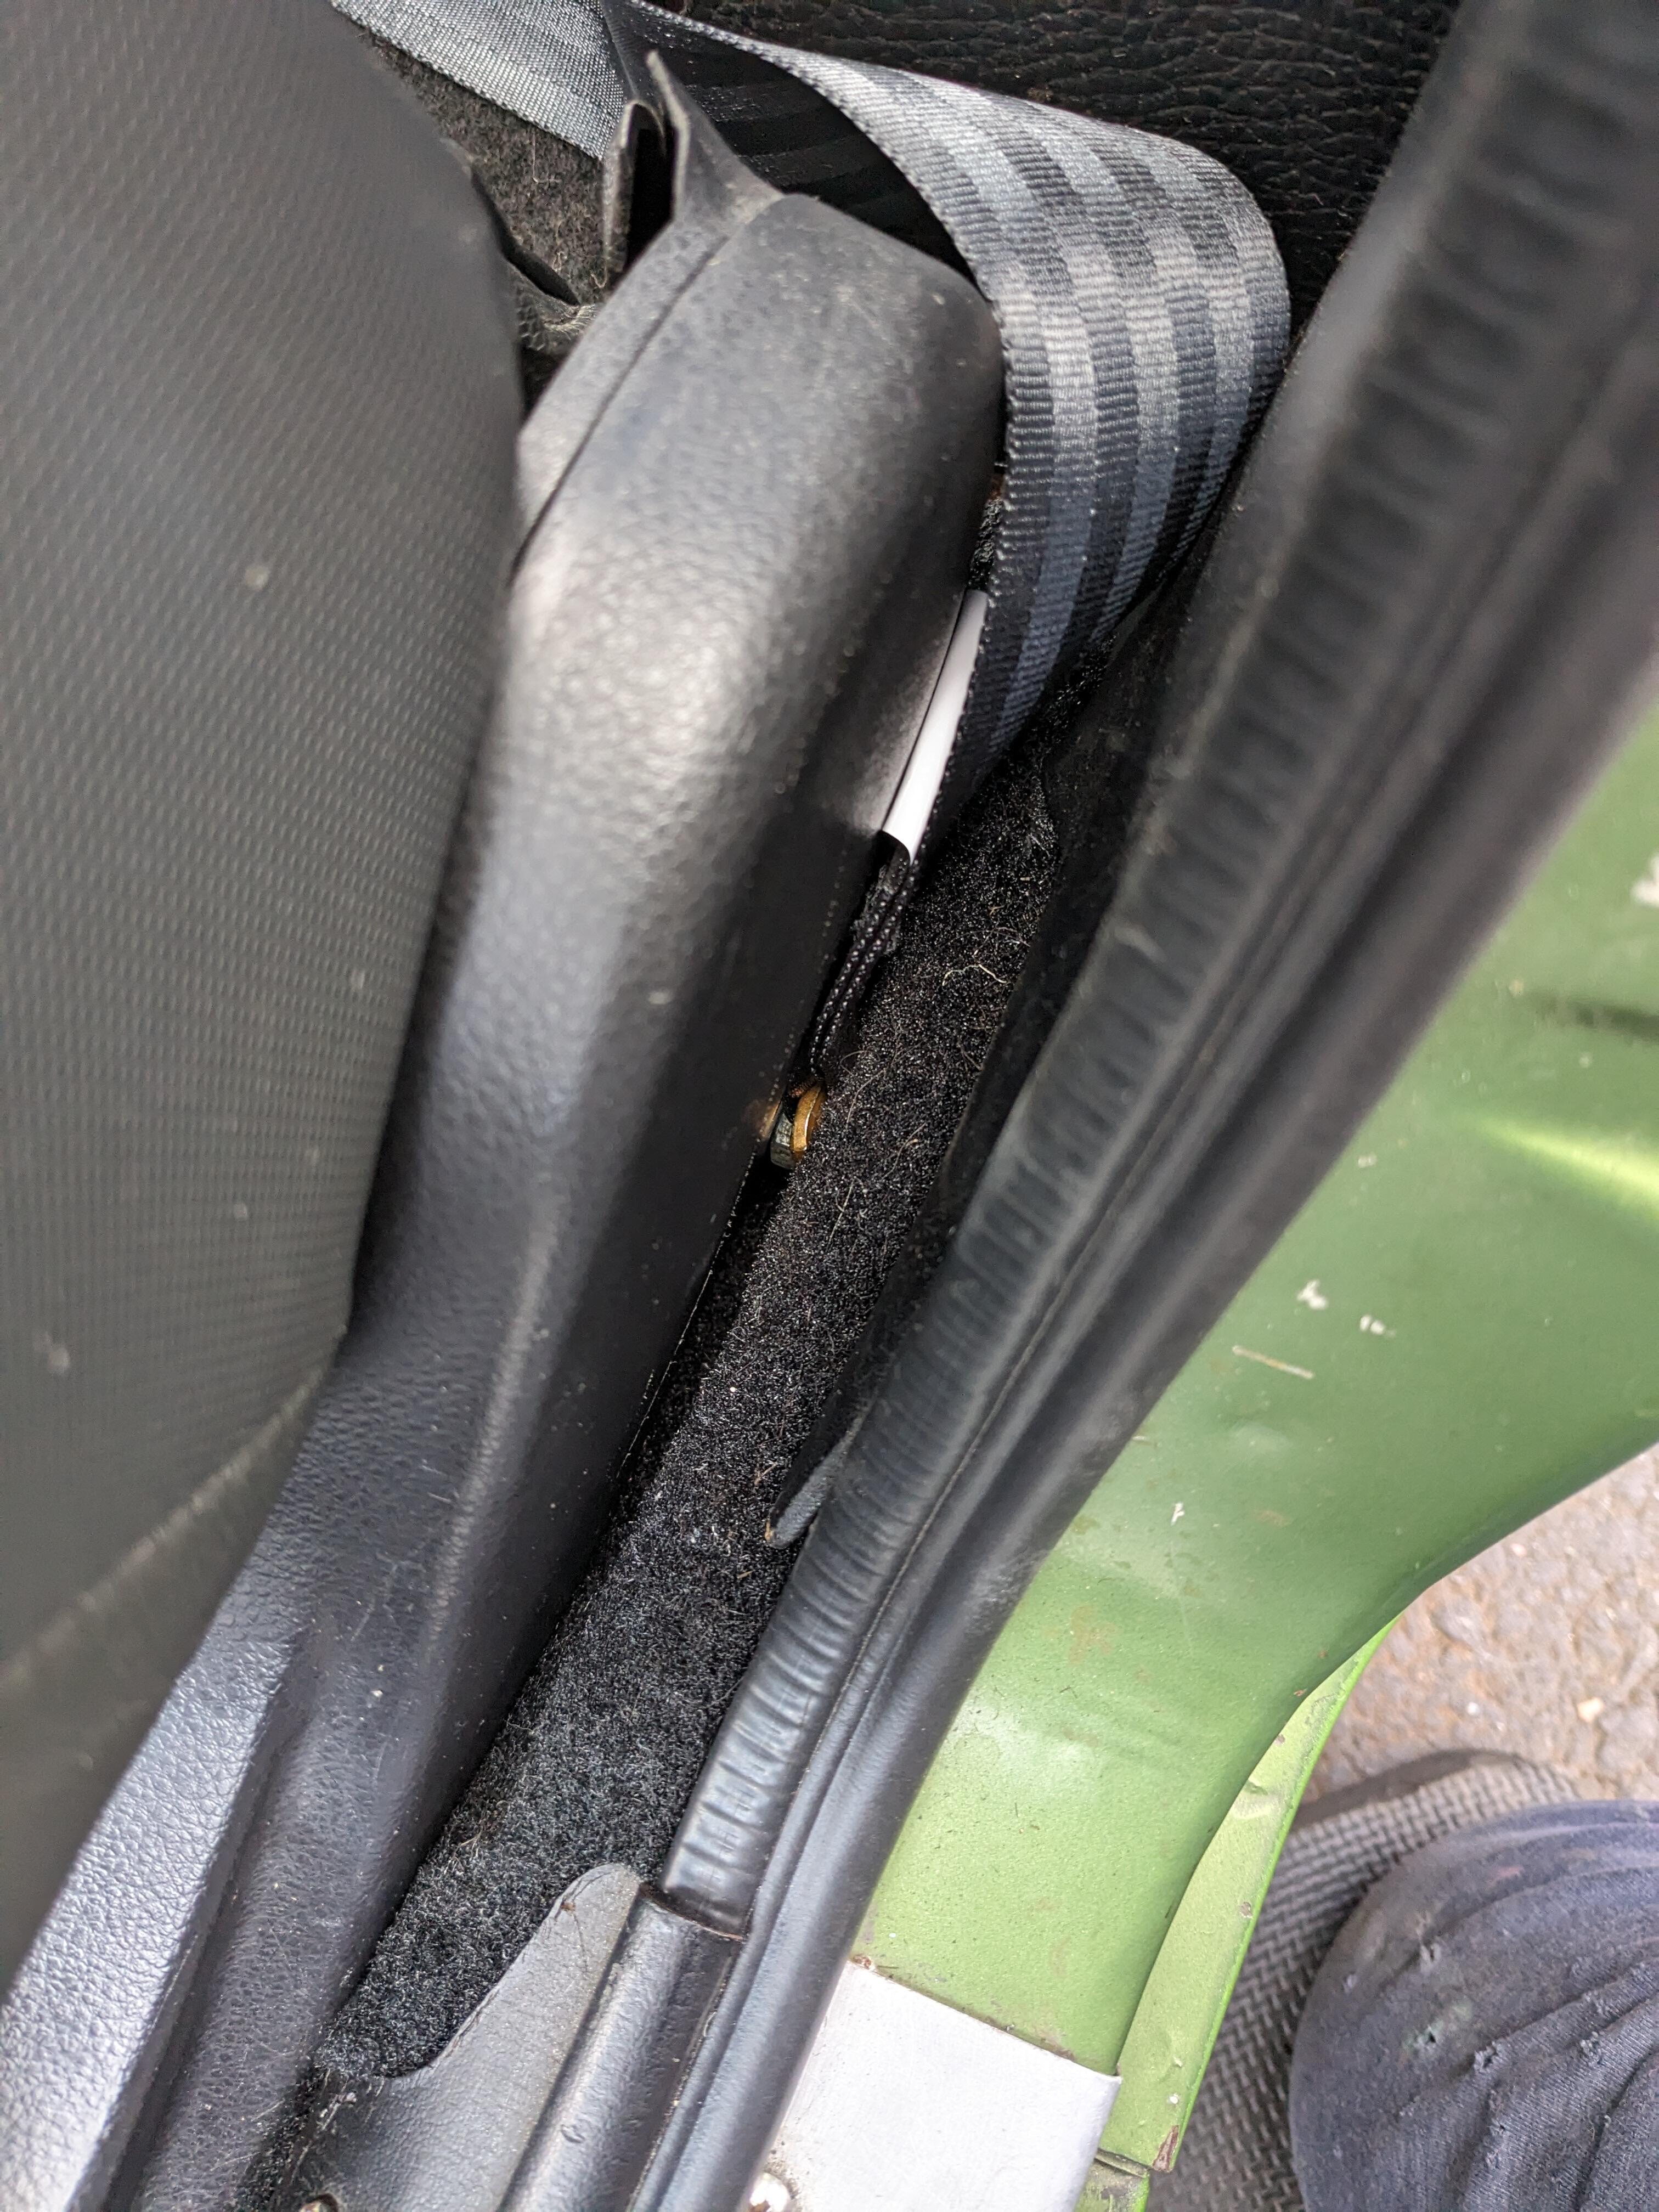
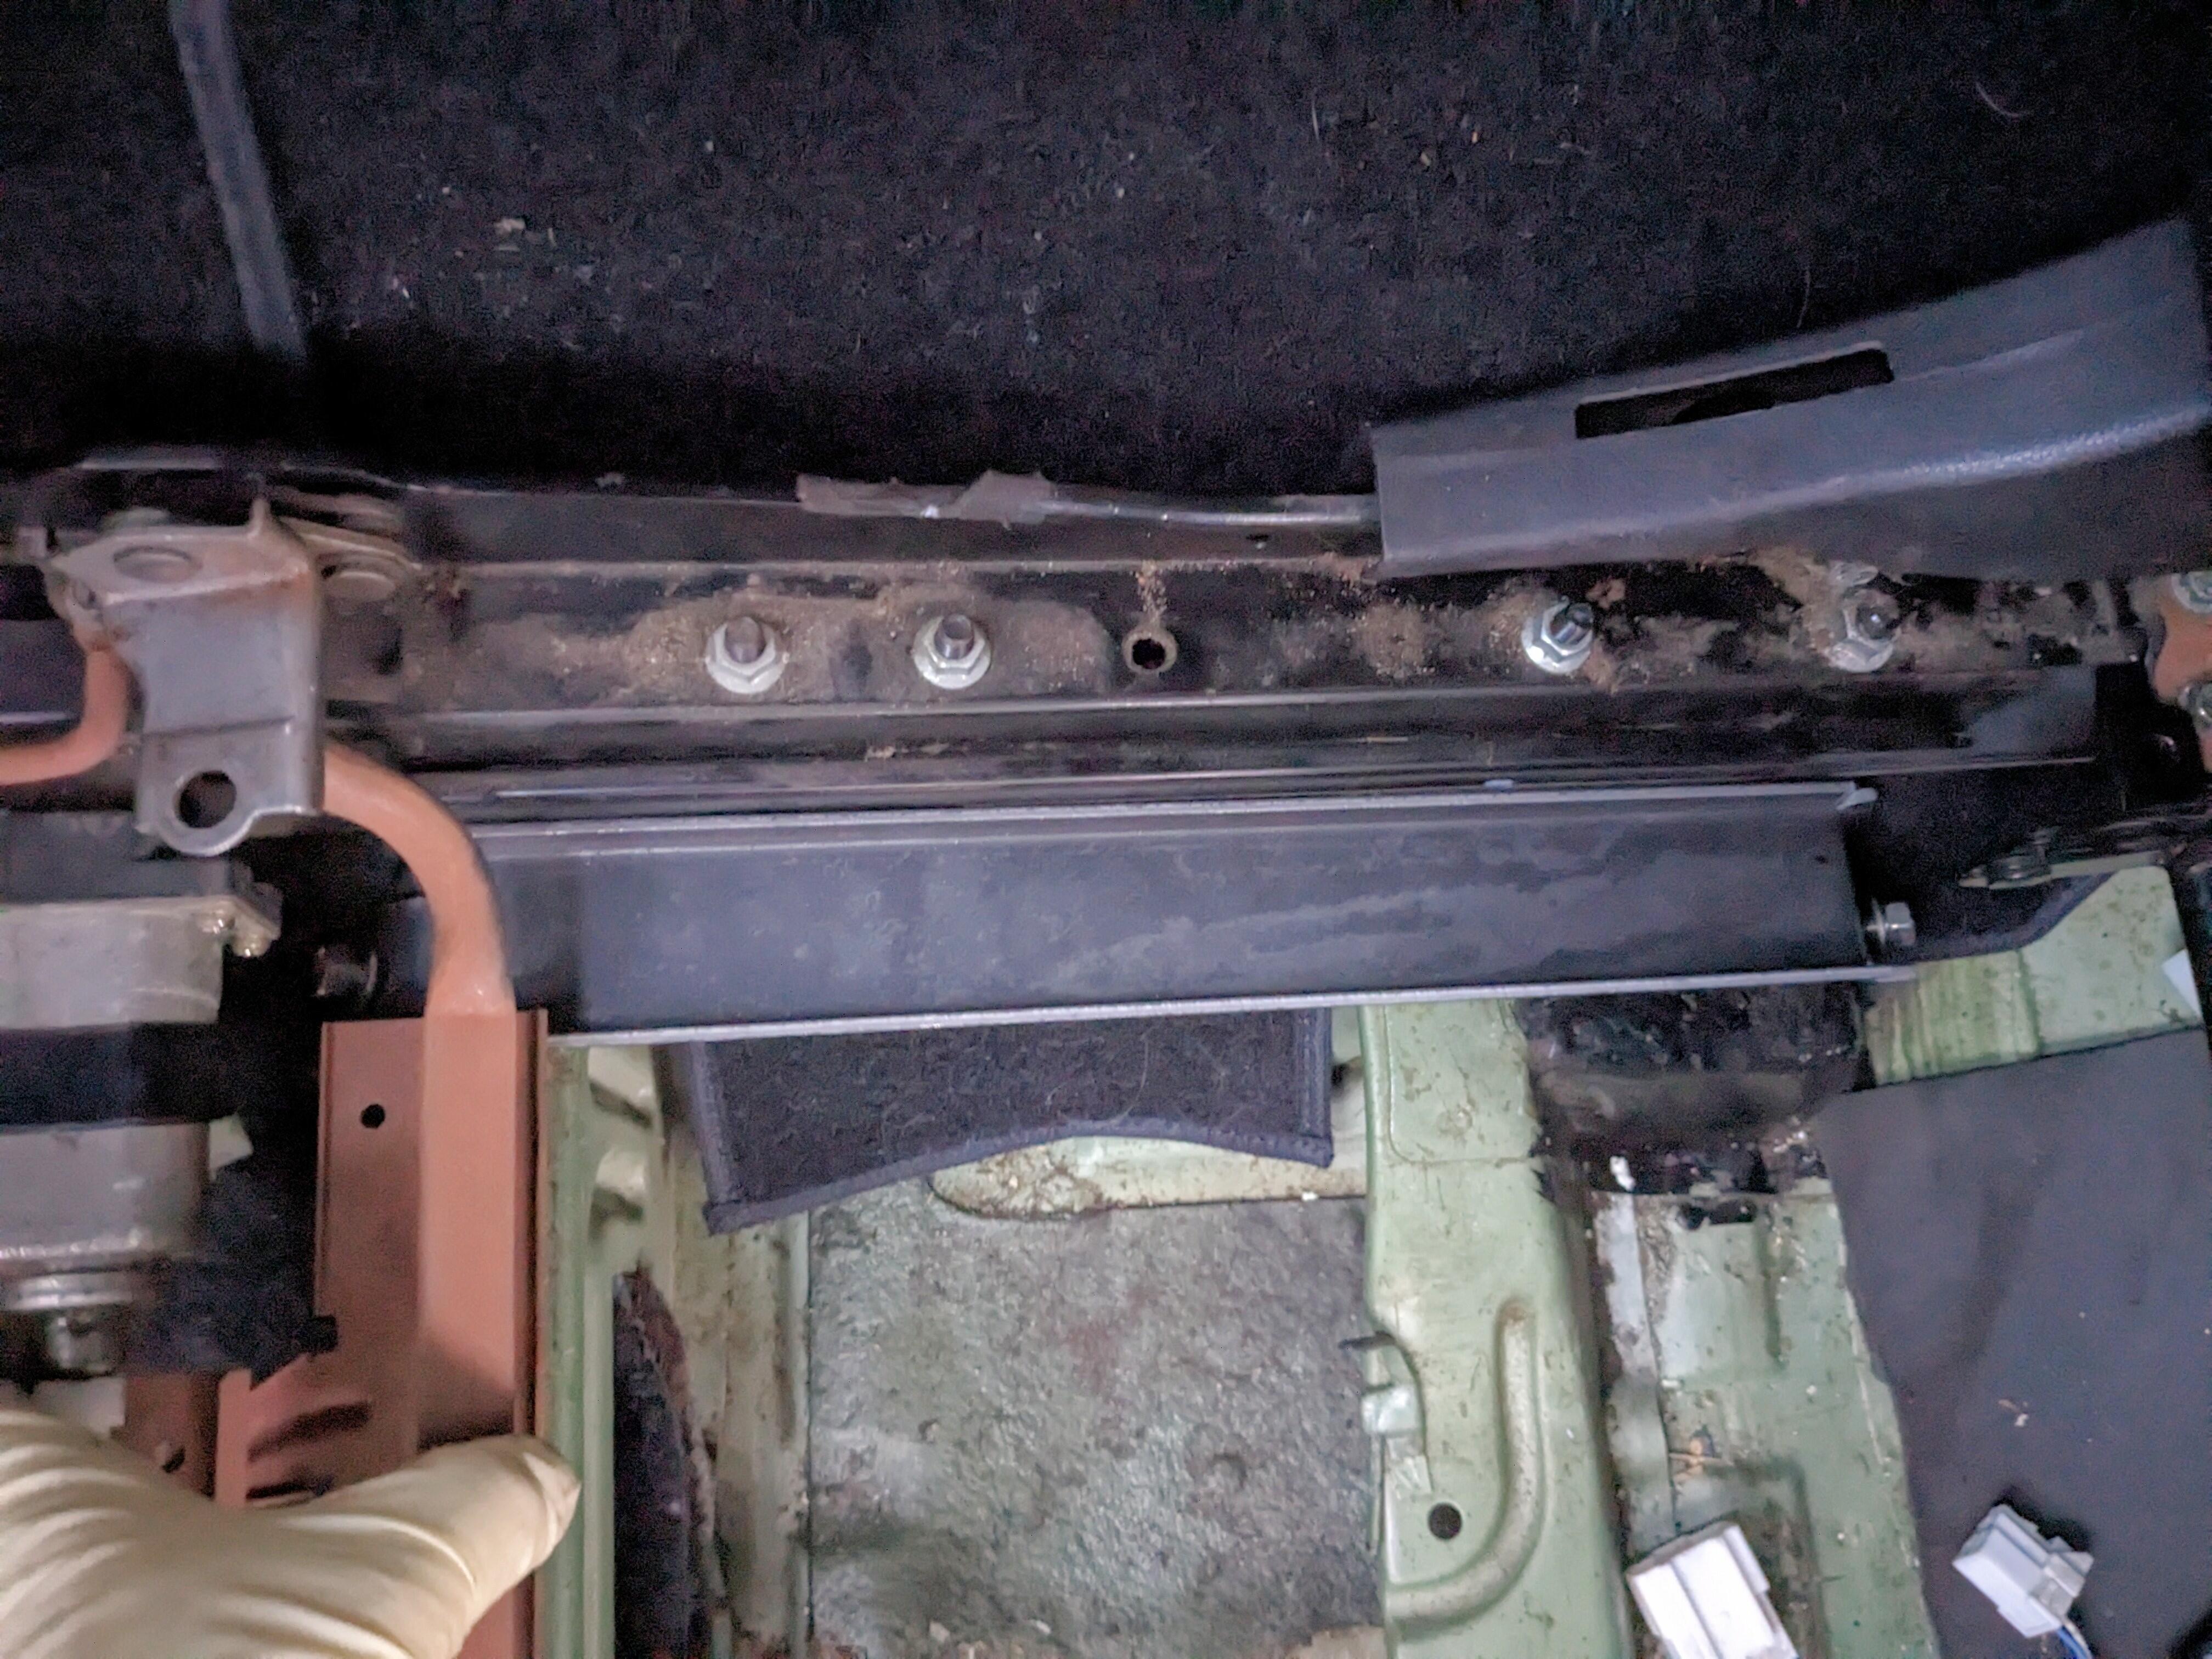
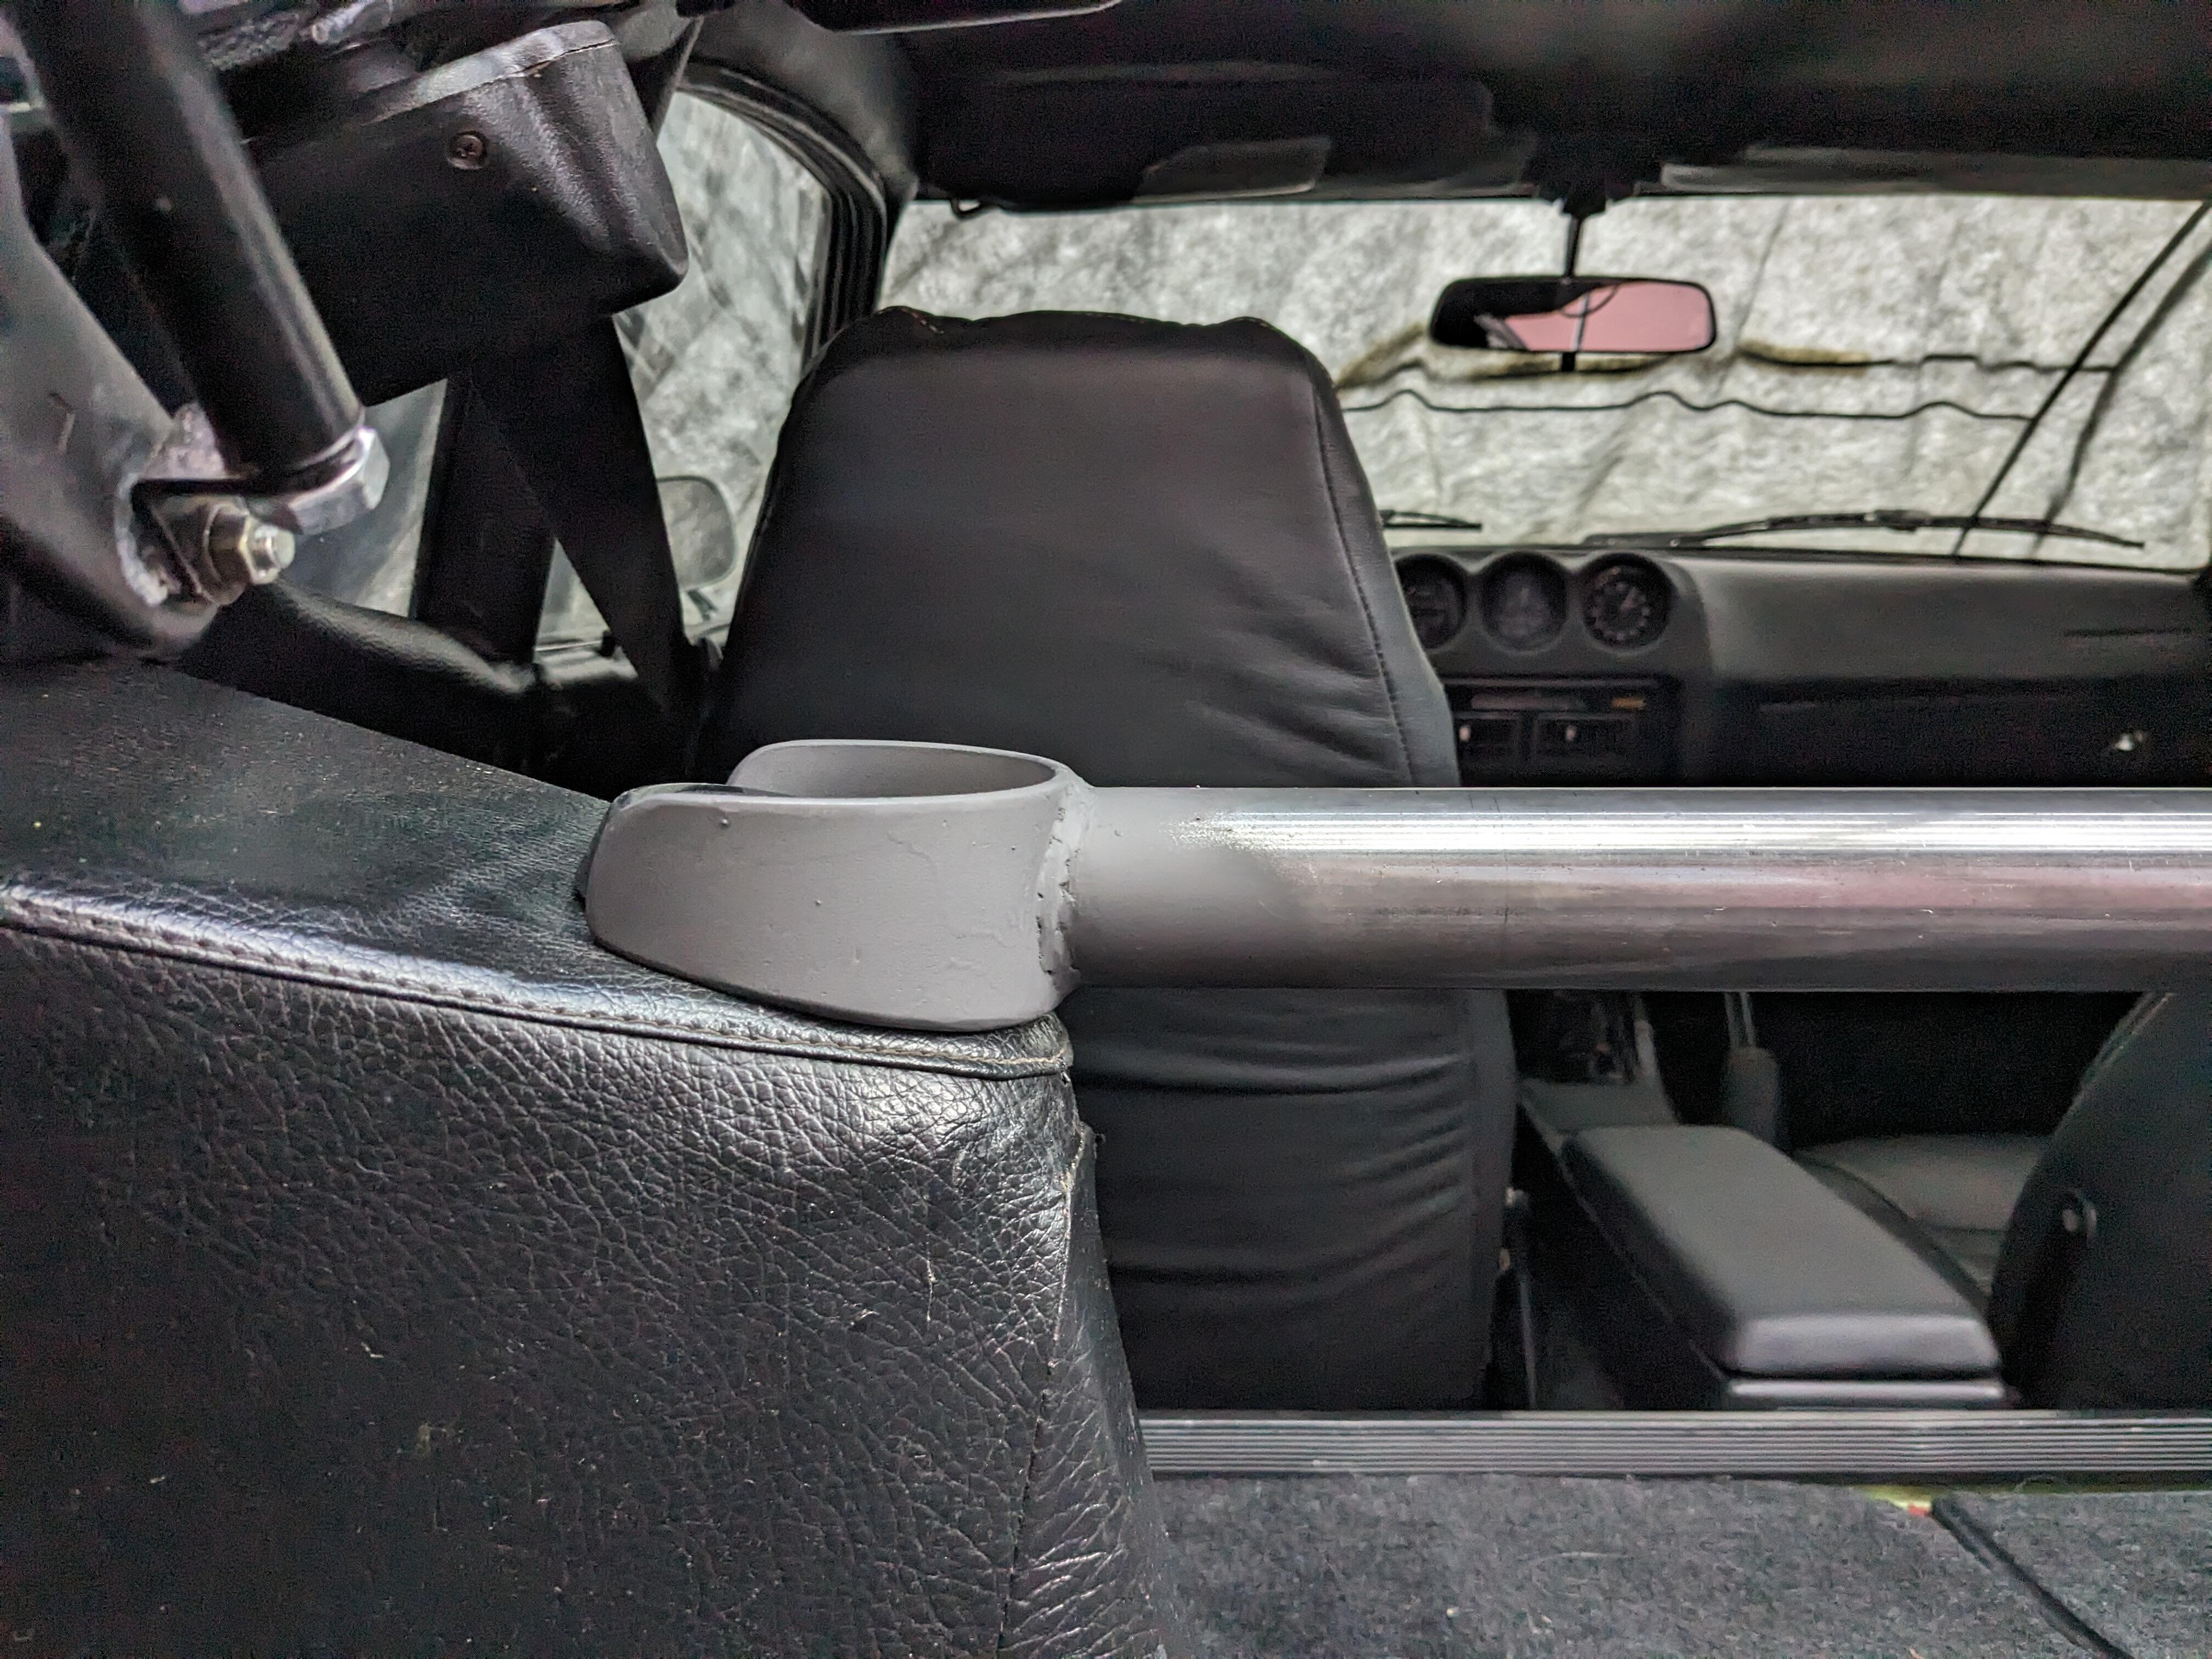
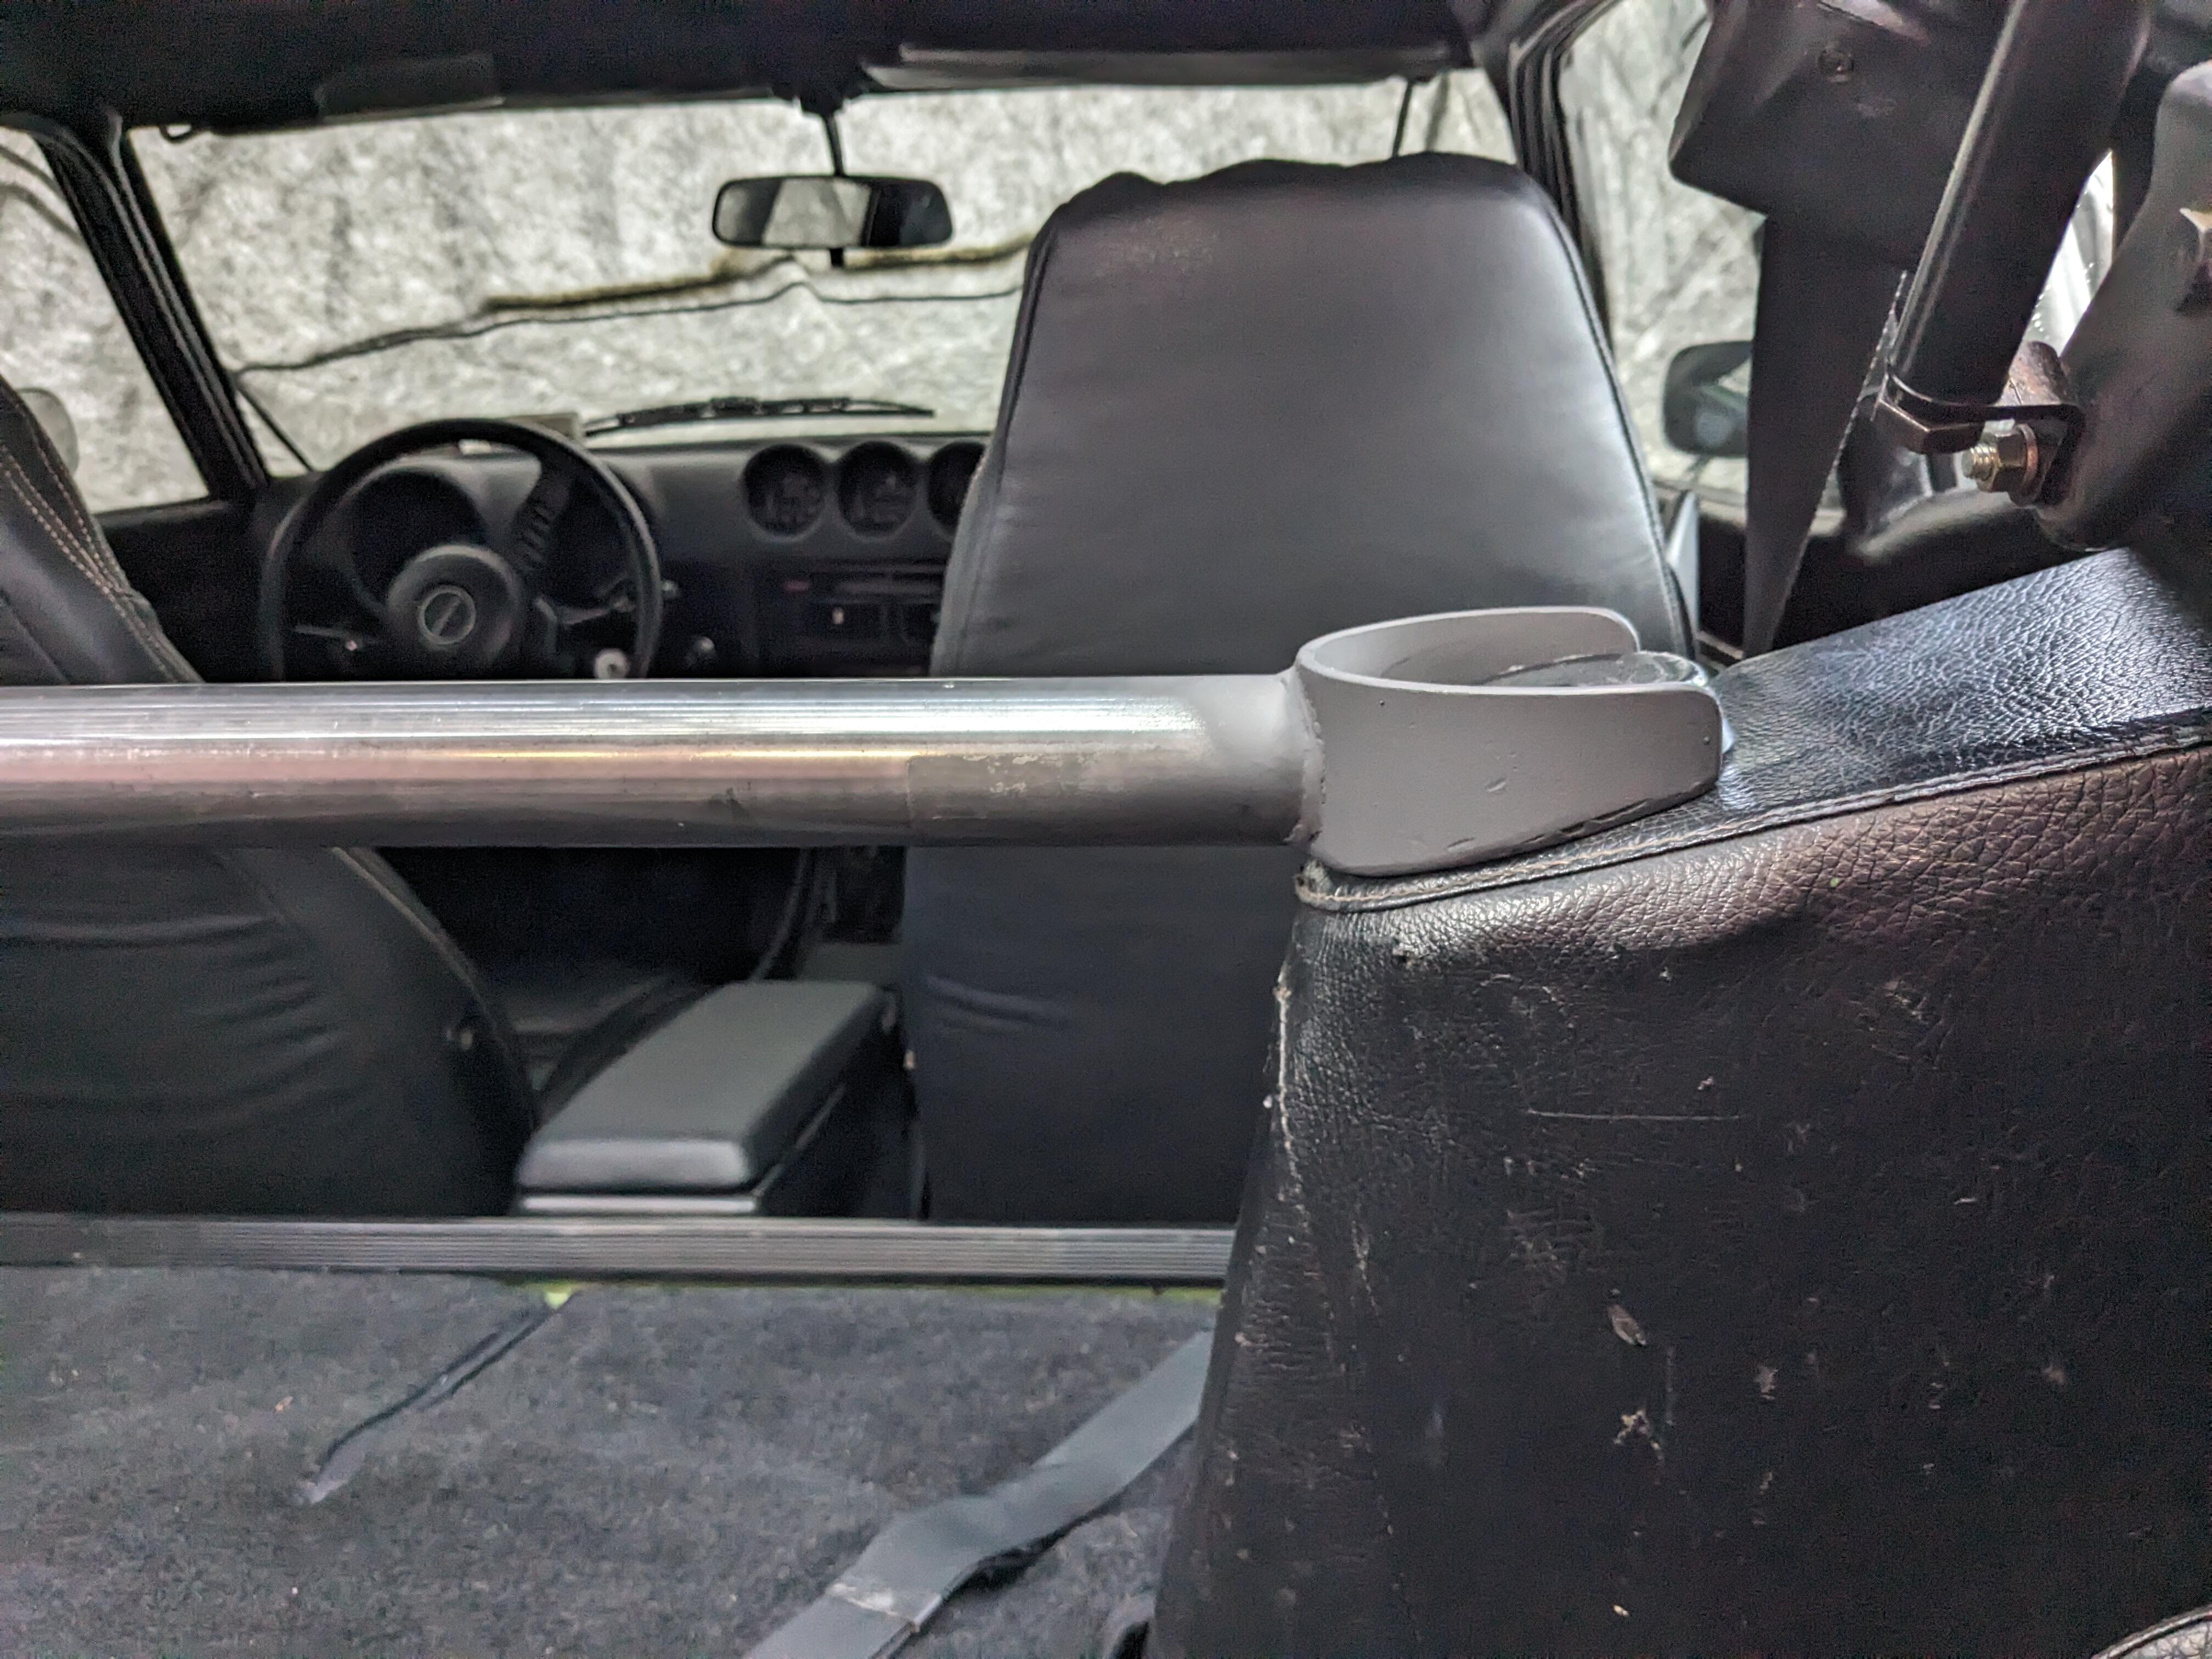
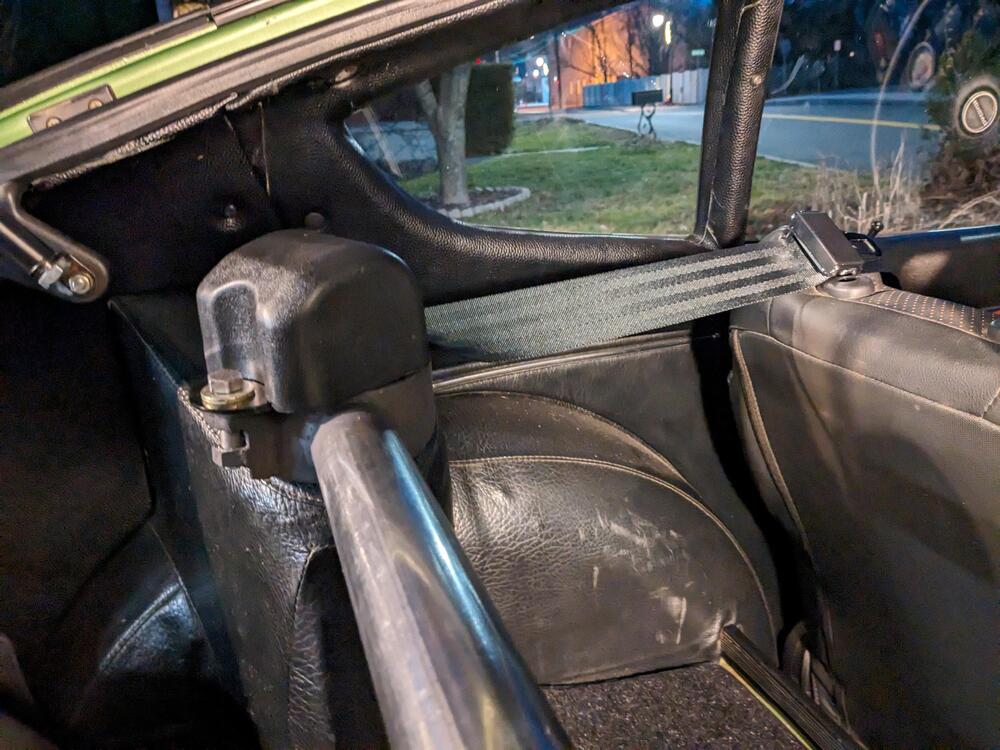
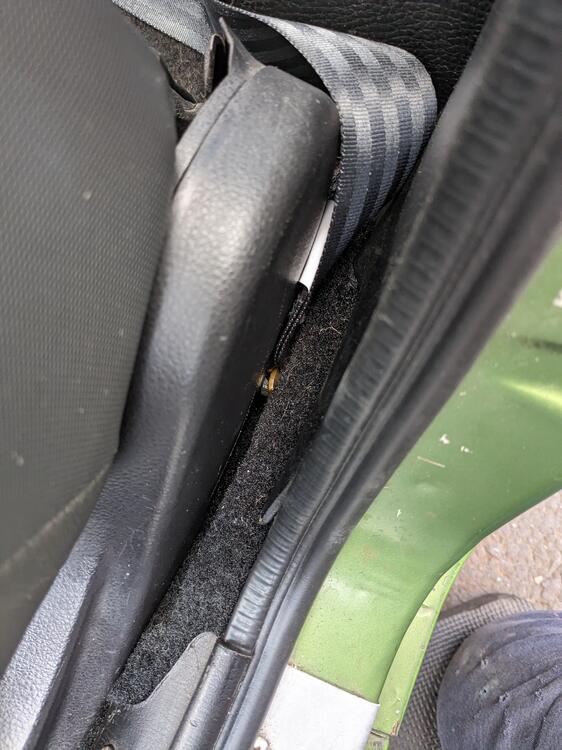
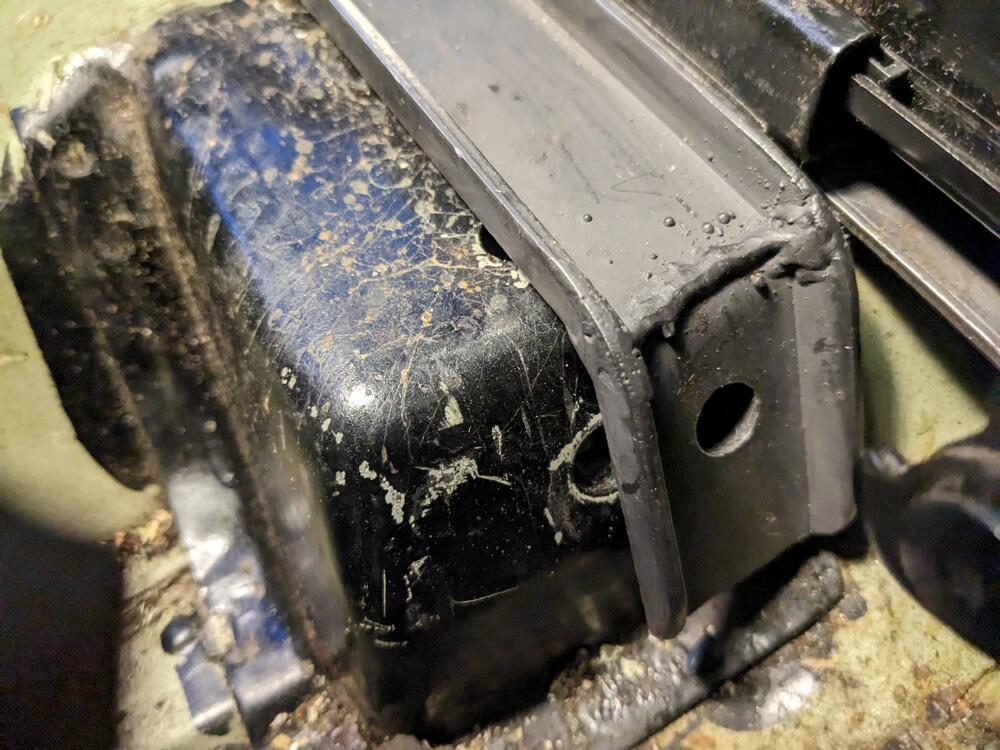
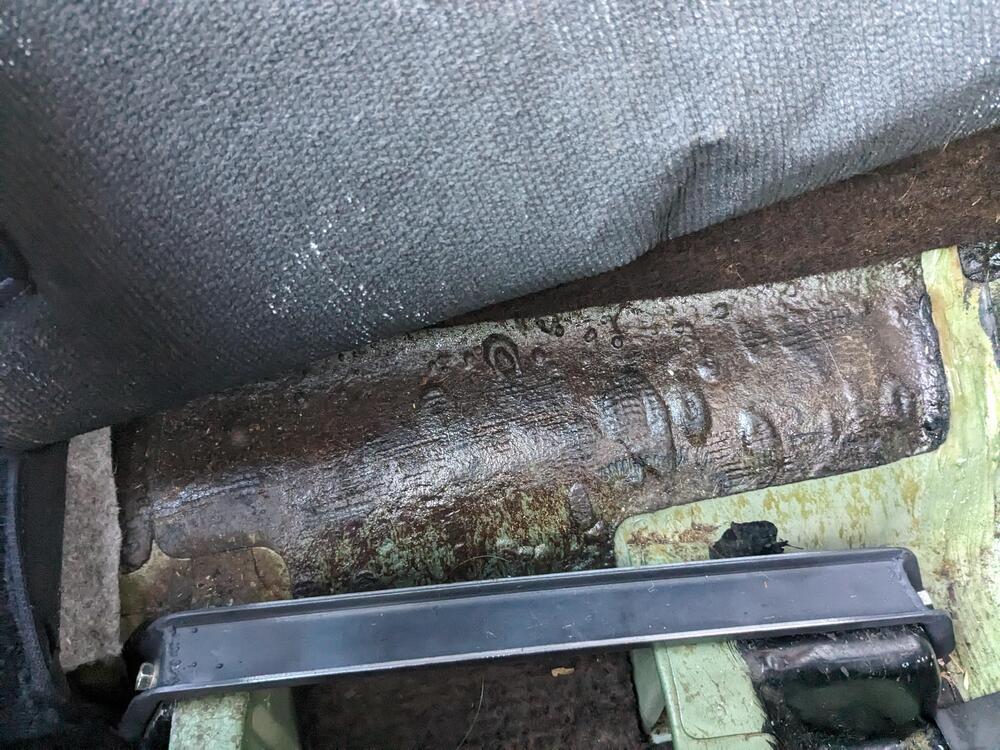
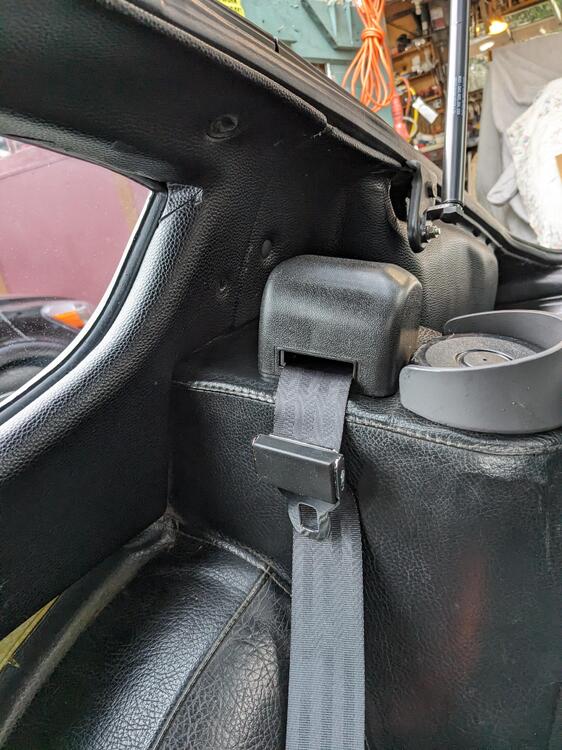
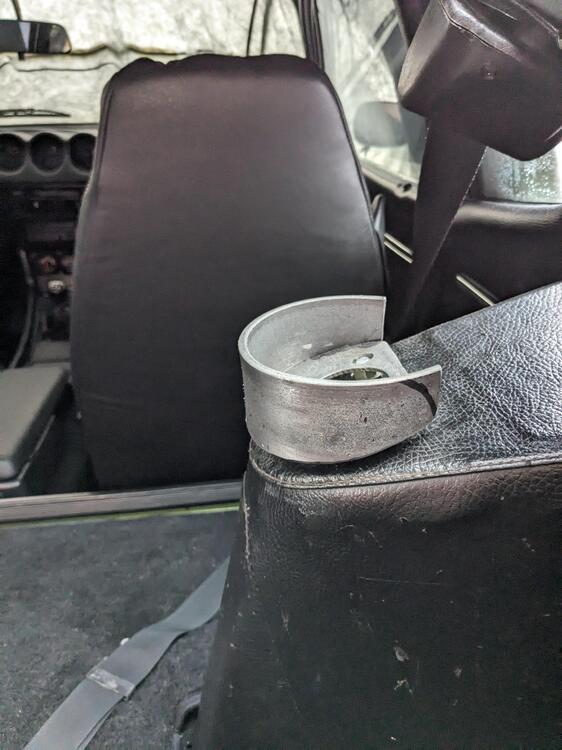
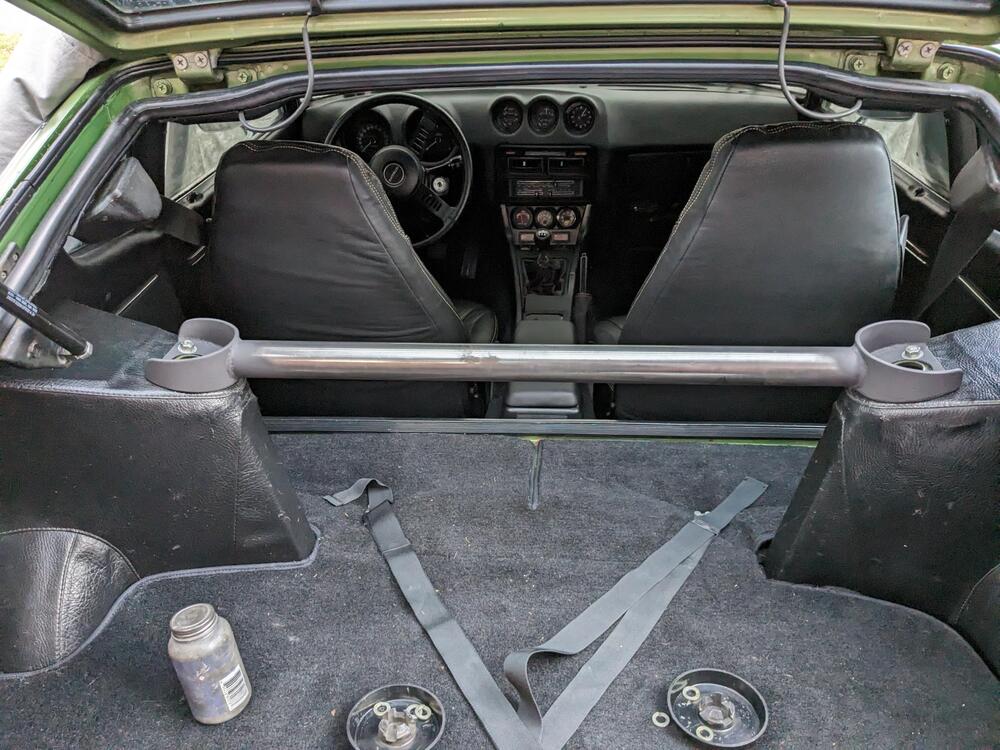
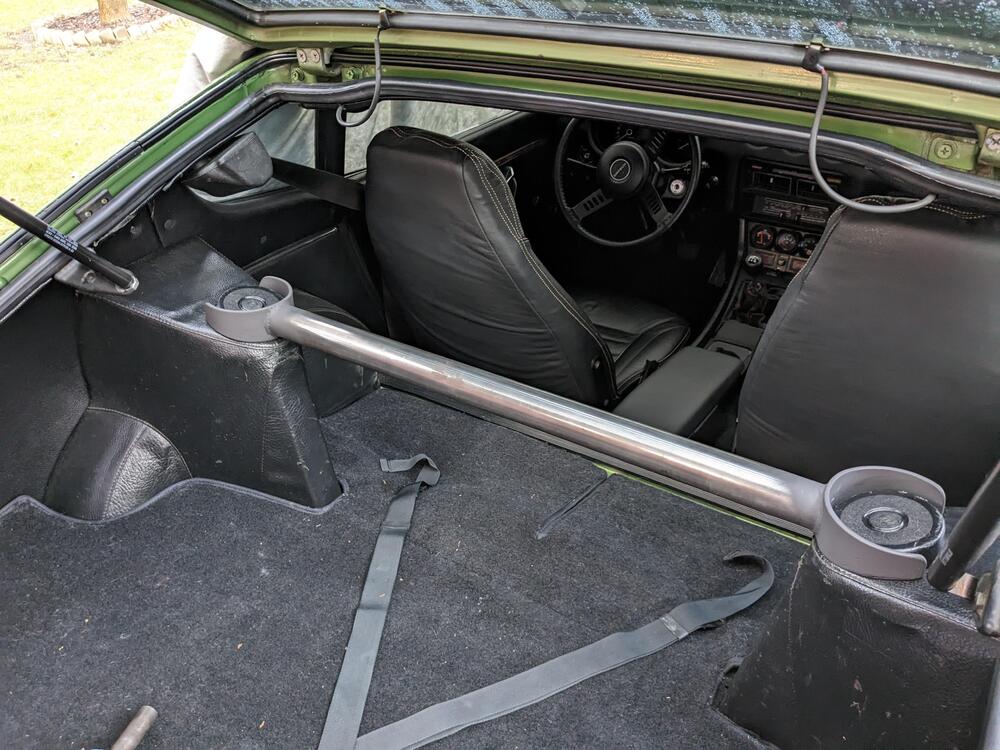
Added the pass side belt reel retainer. I'm going to make a padded cover for the brace

-
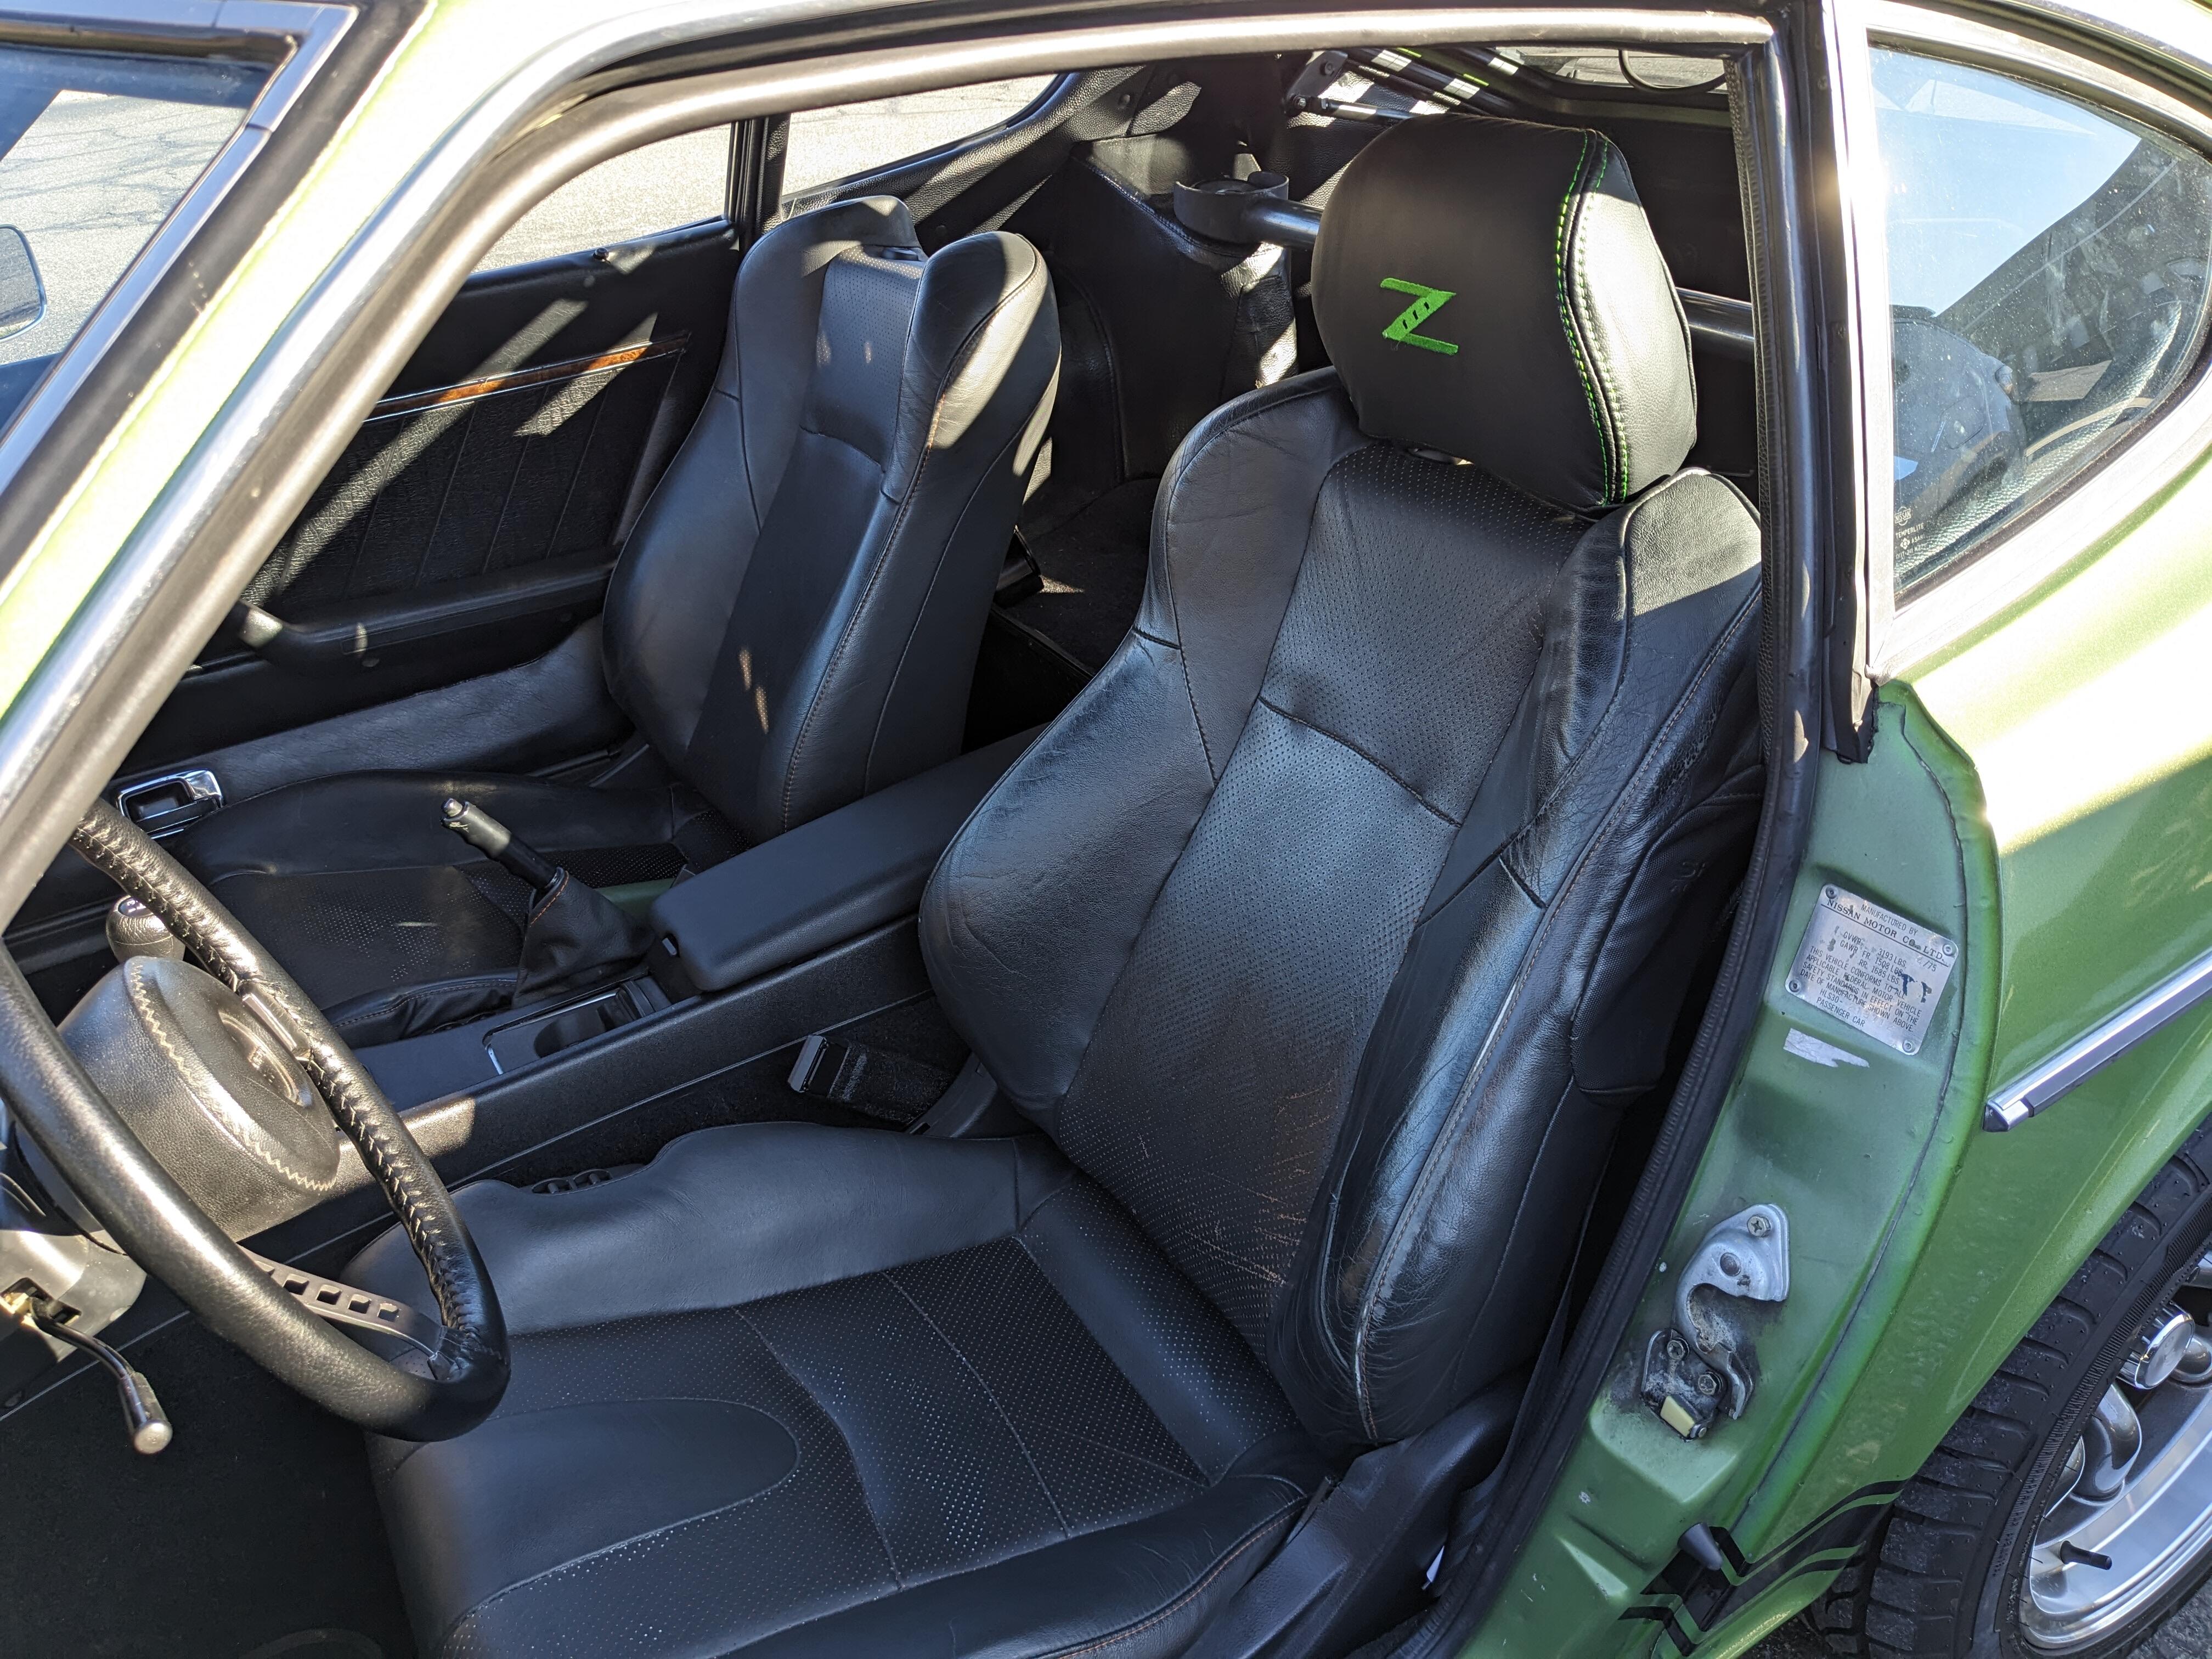
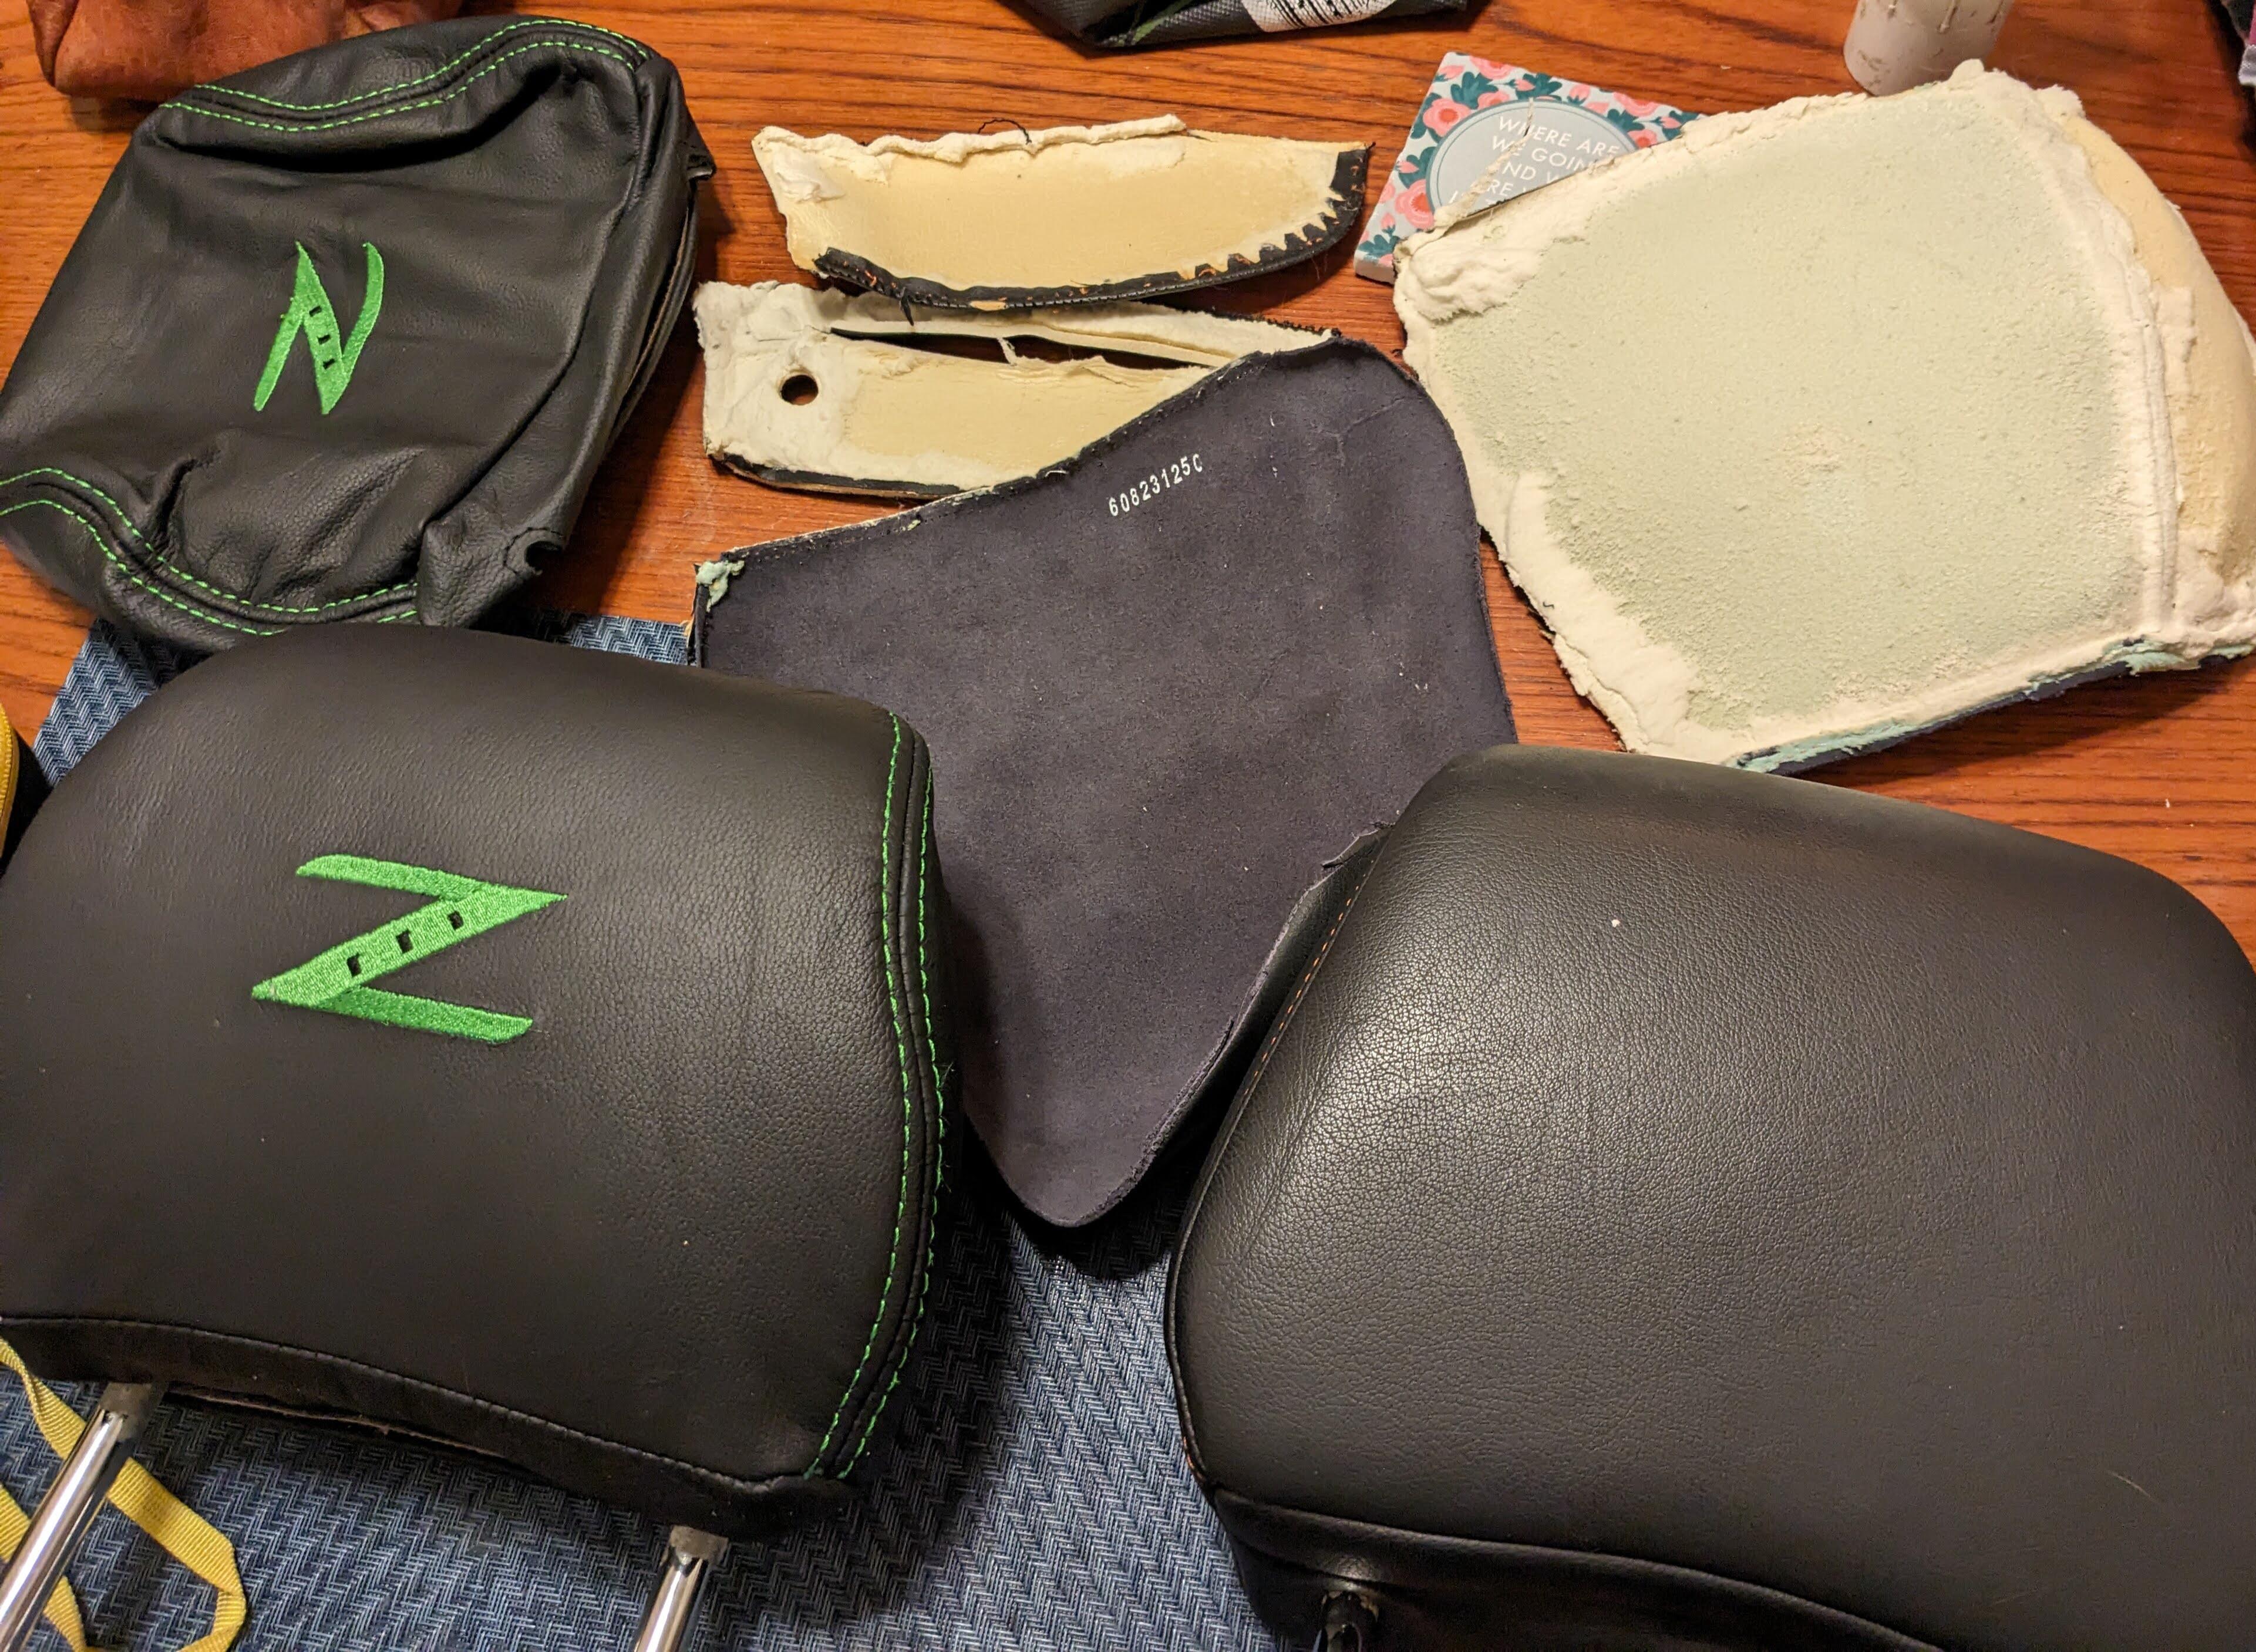
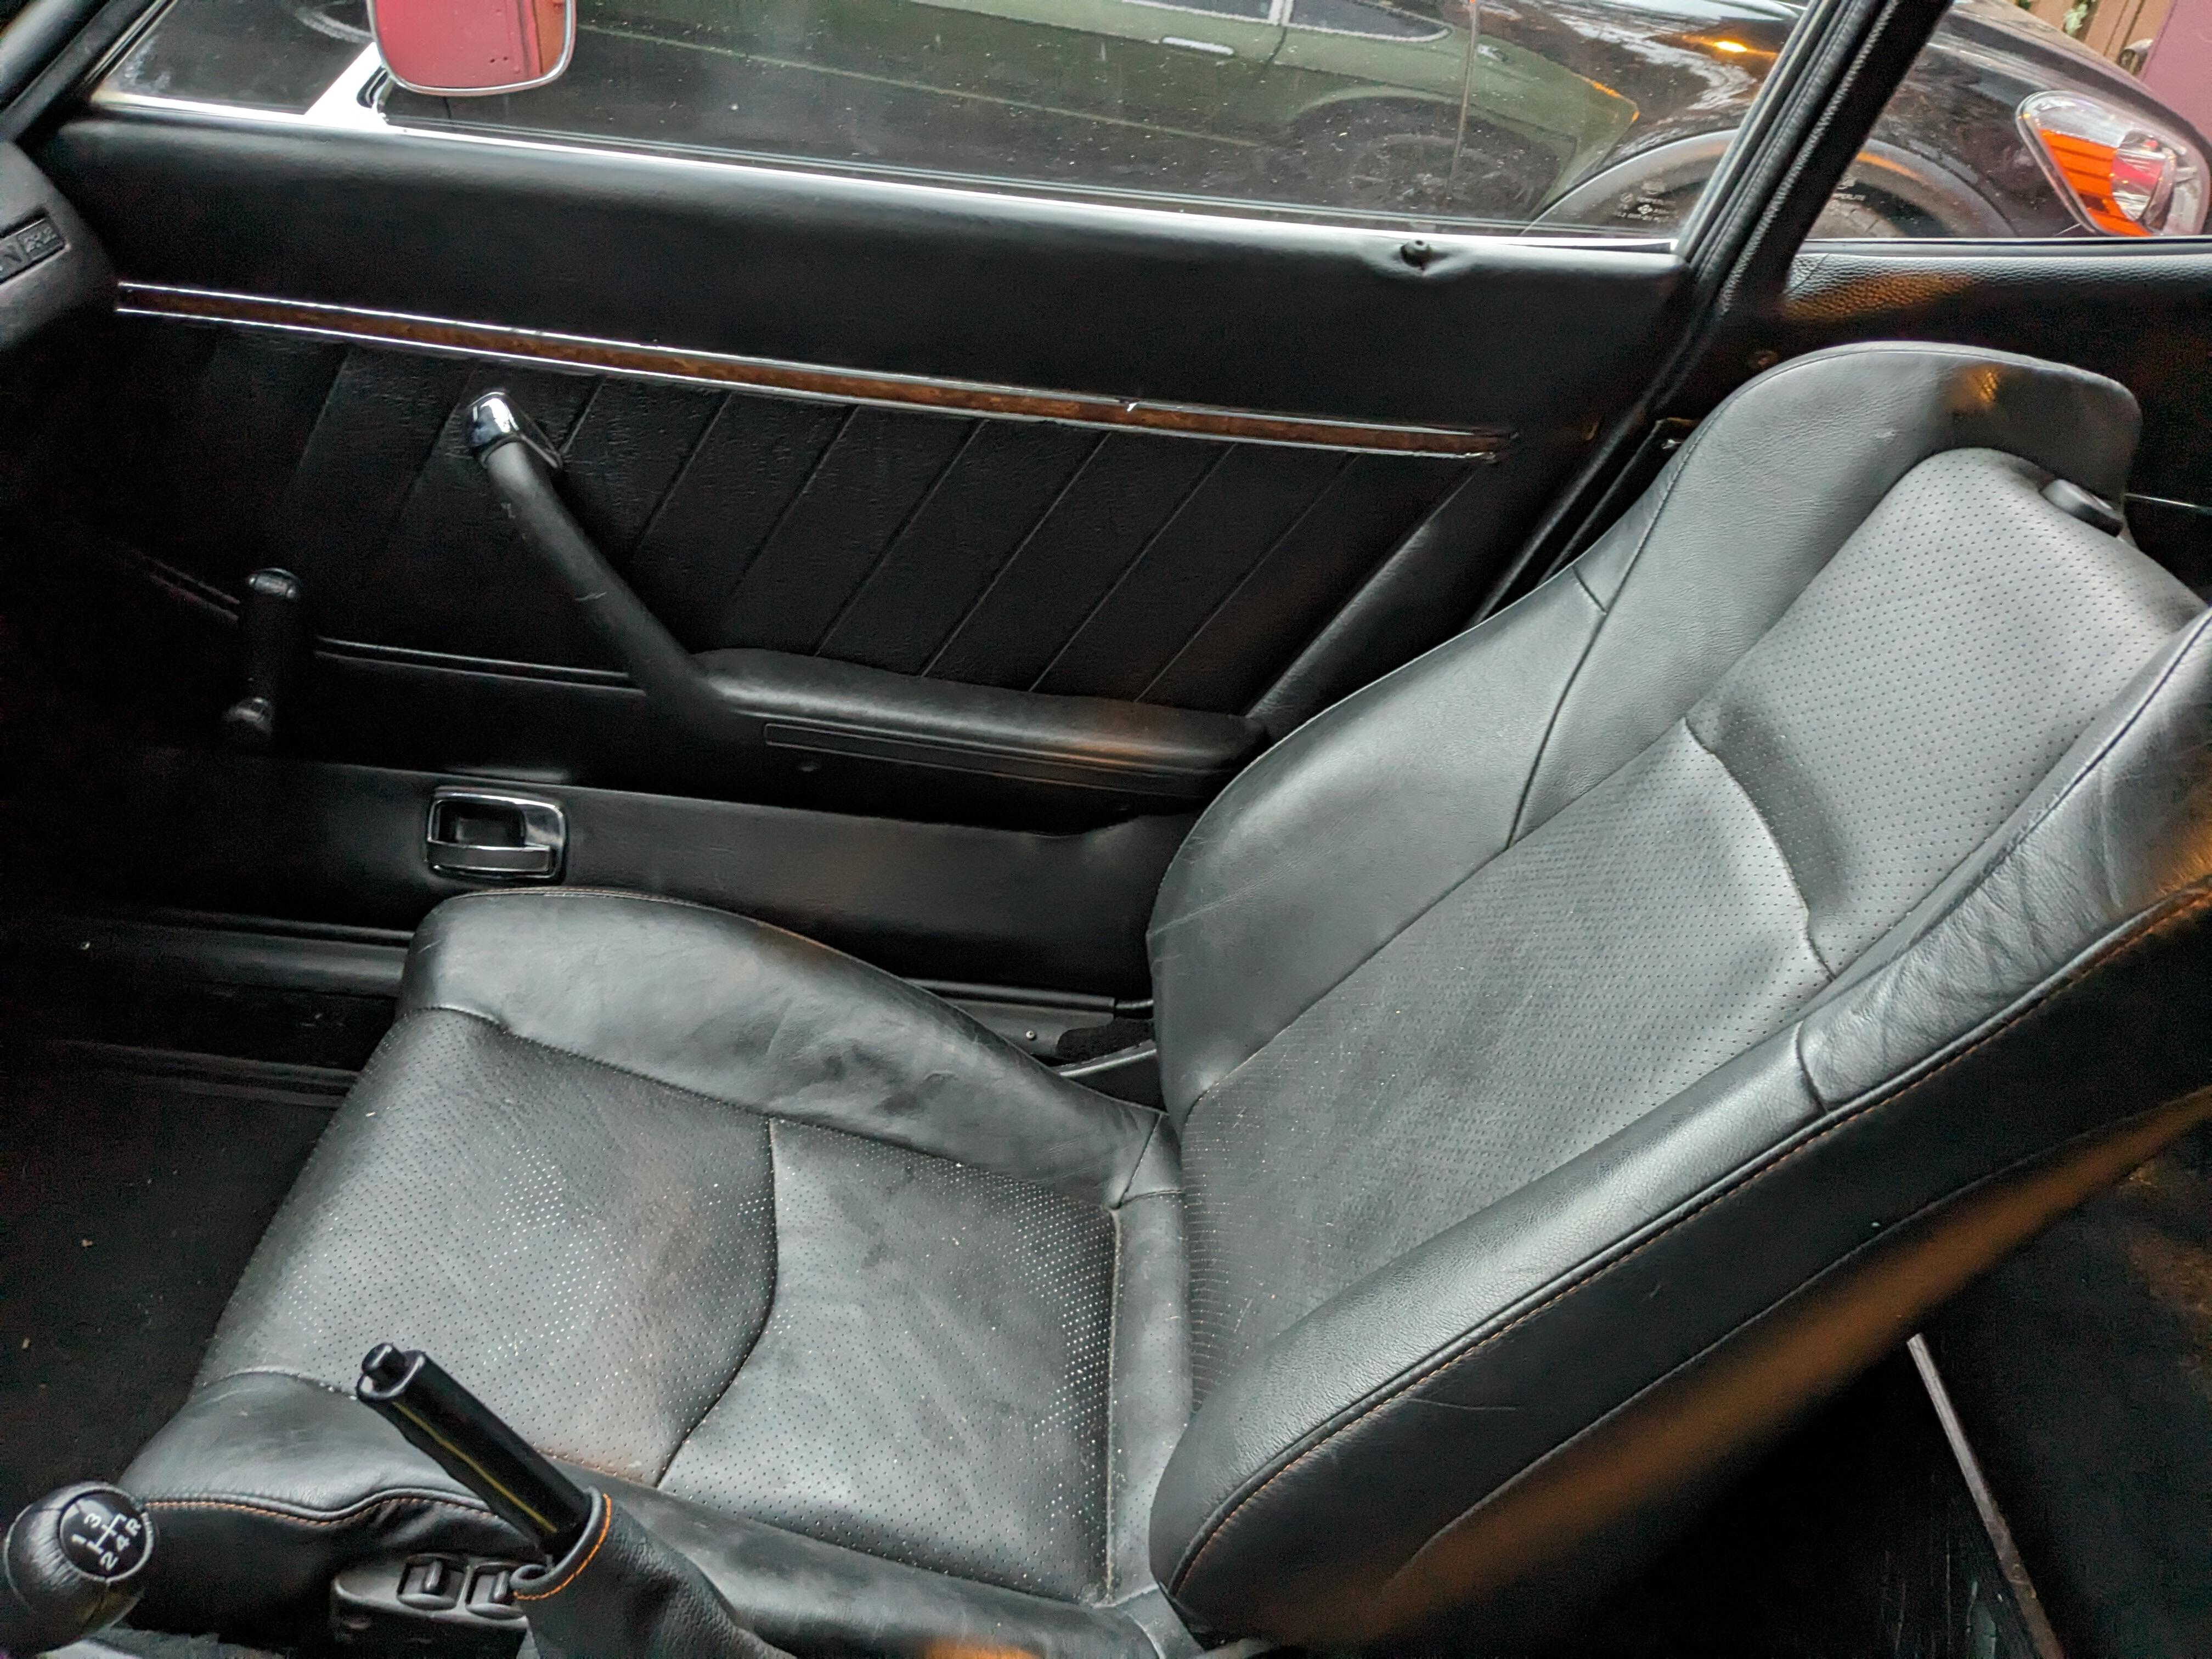
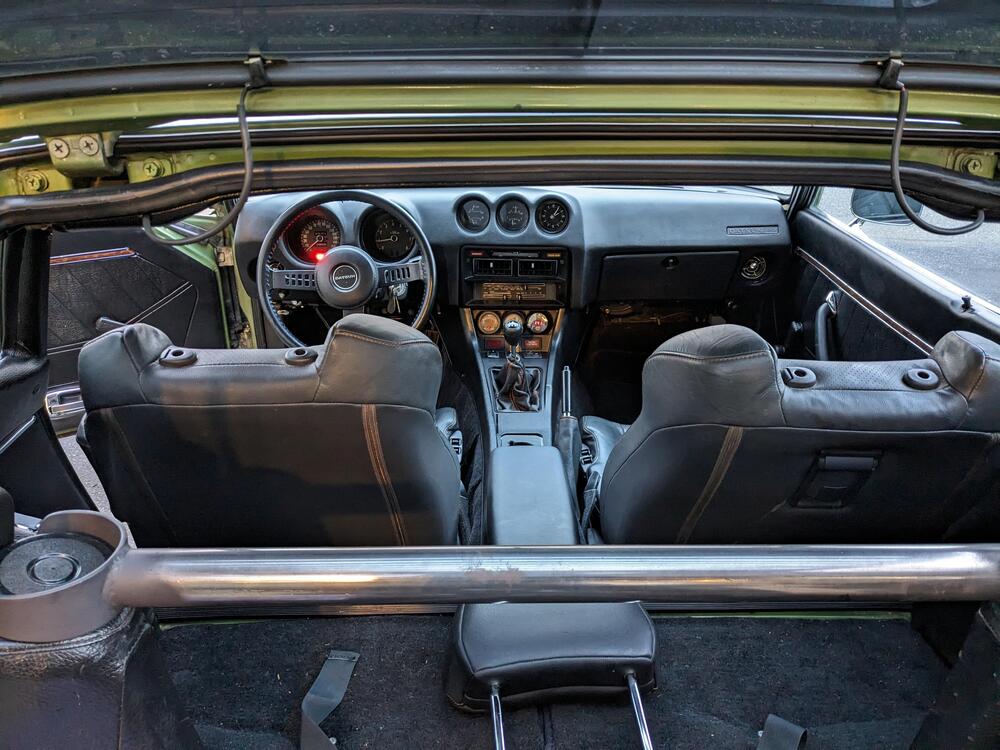
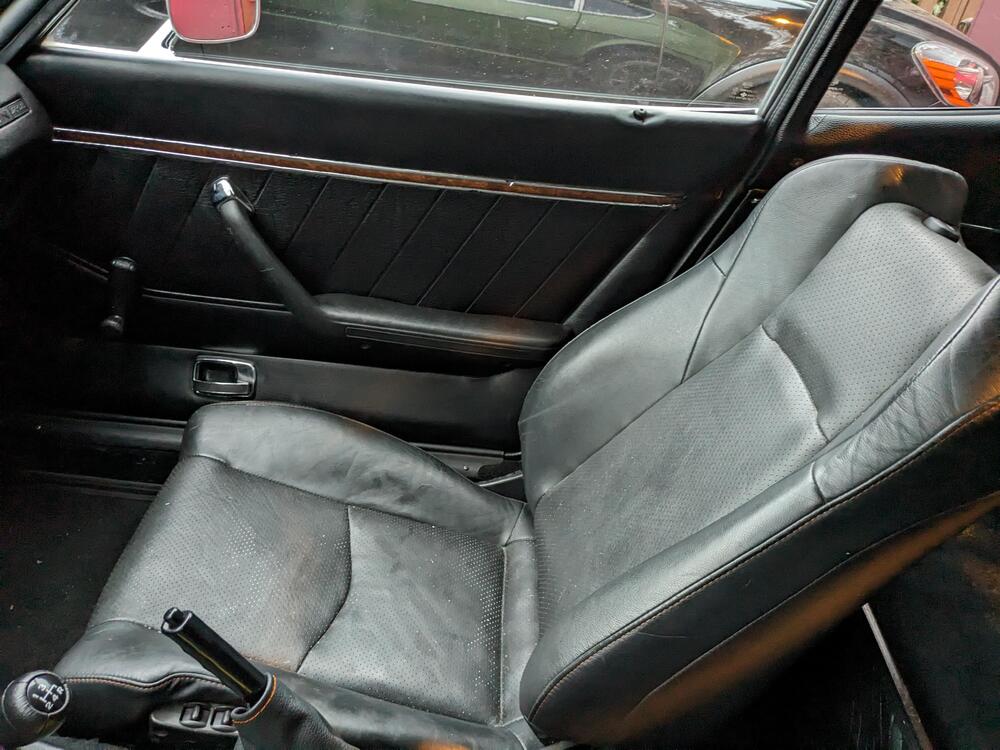
Daytime pic with headrest. New leather for the seats has the same green stitching. I also went with a dark grey inset for the perforated panels. Not sure it's dark enough though. Seems more like a medium grey to me. Pics later

-
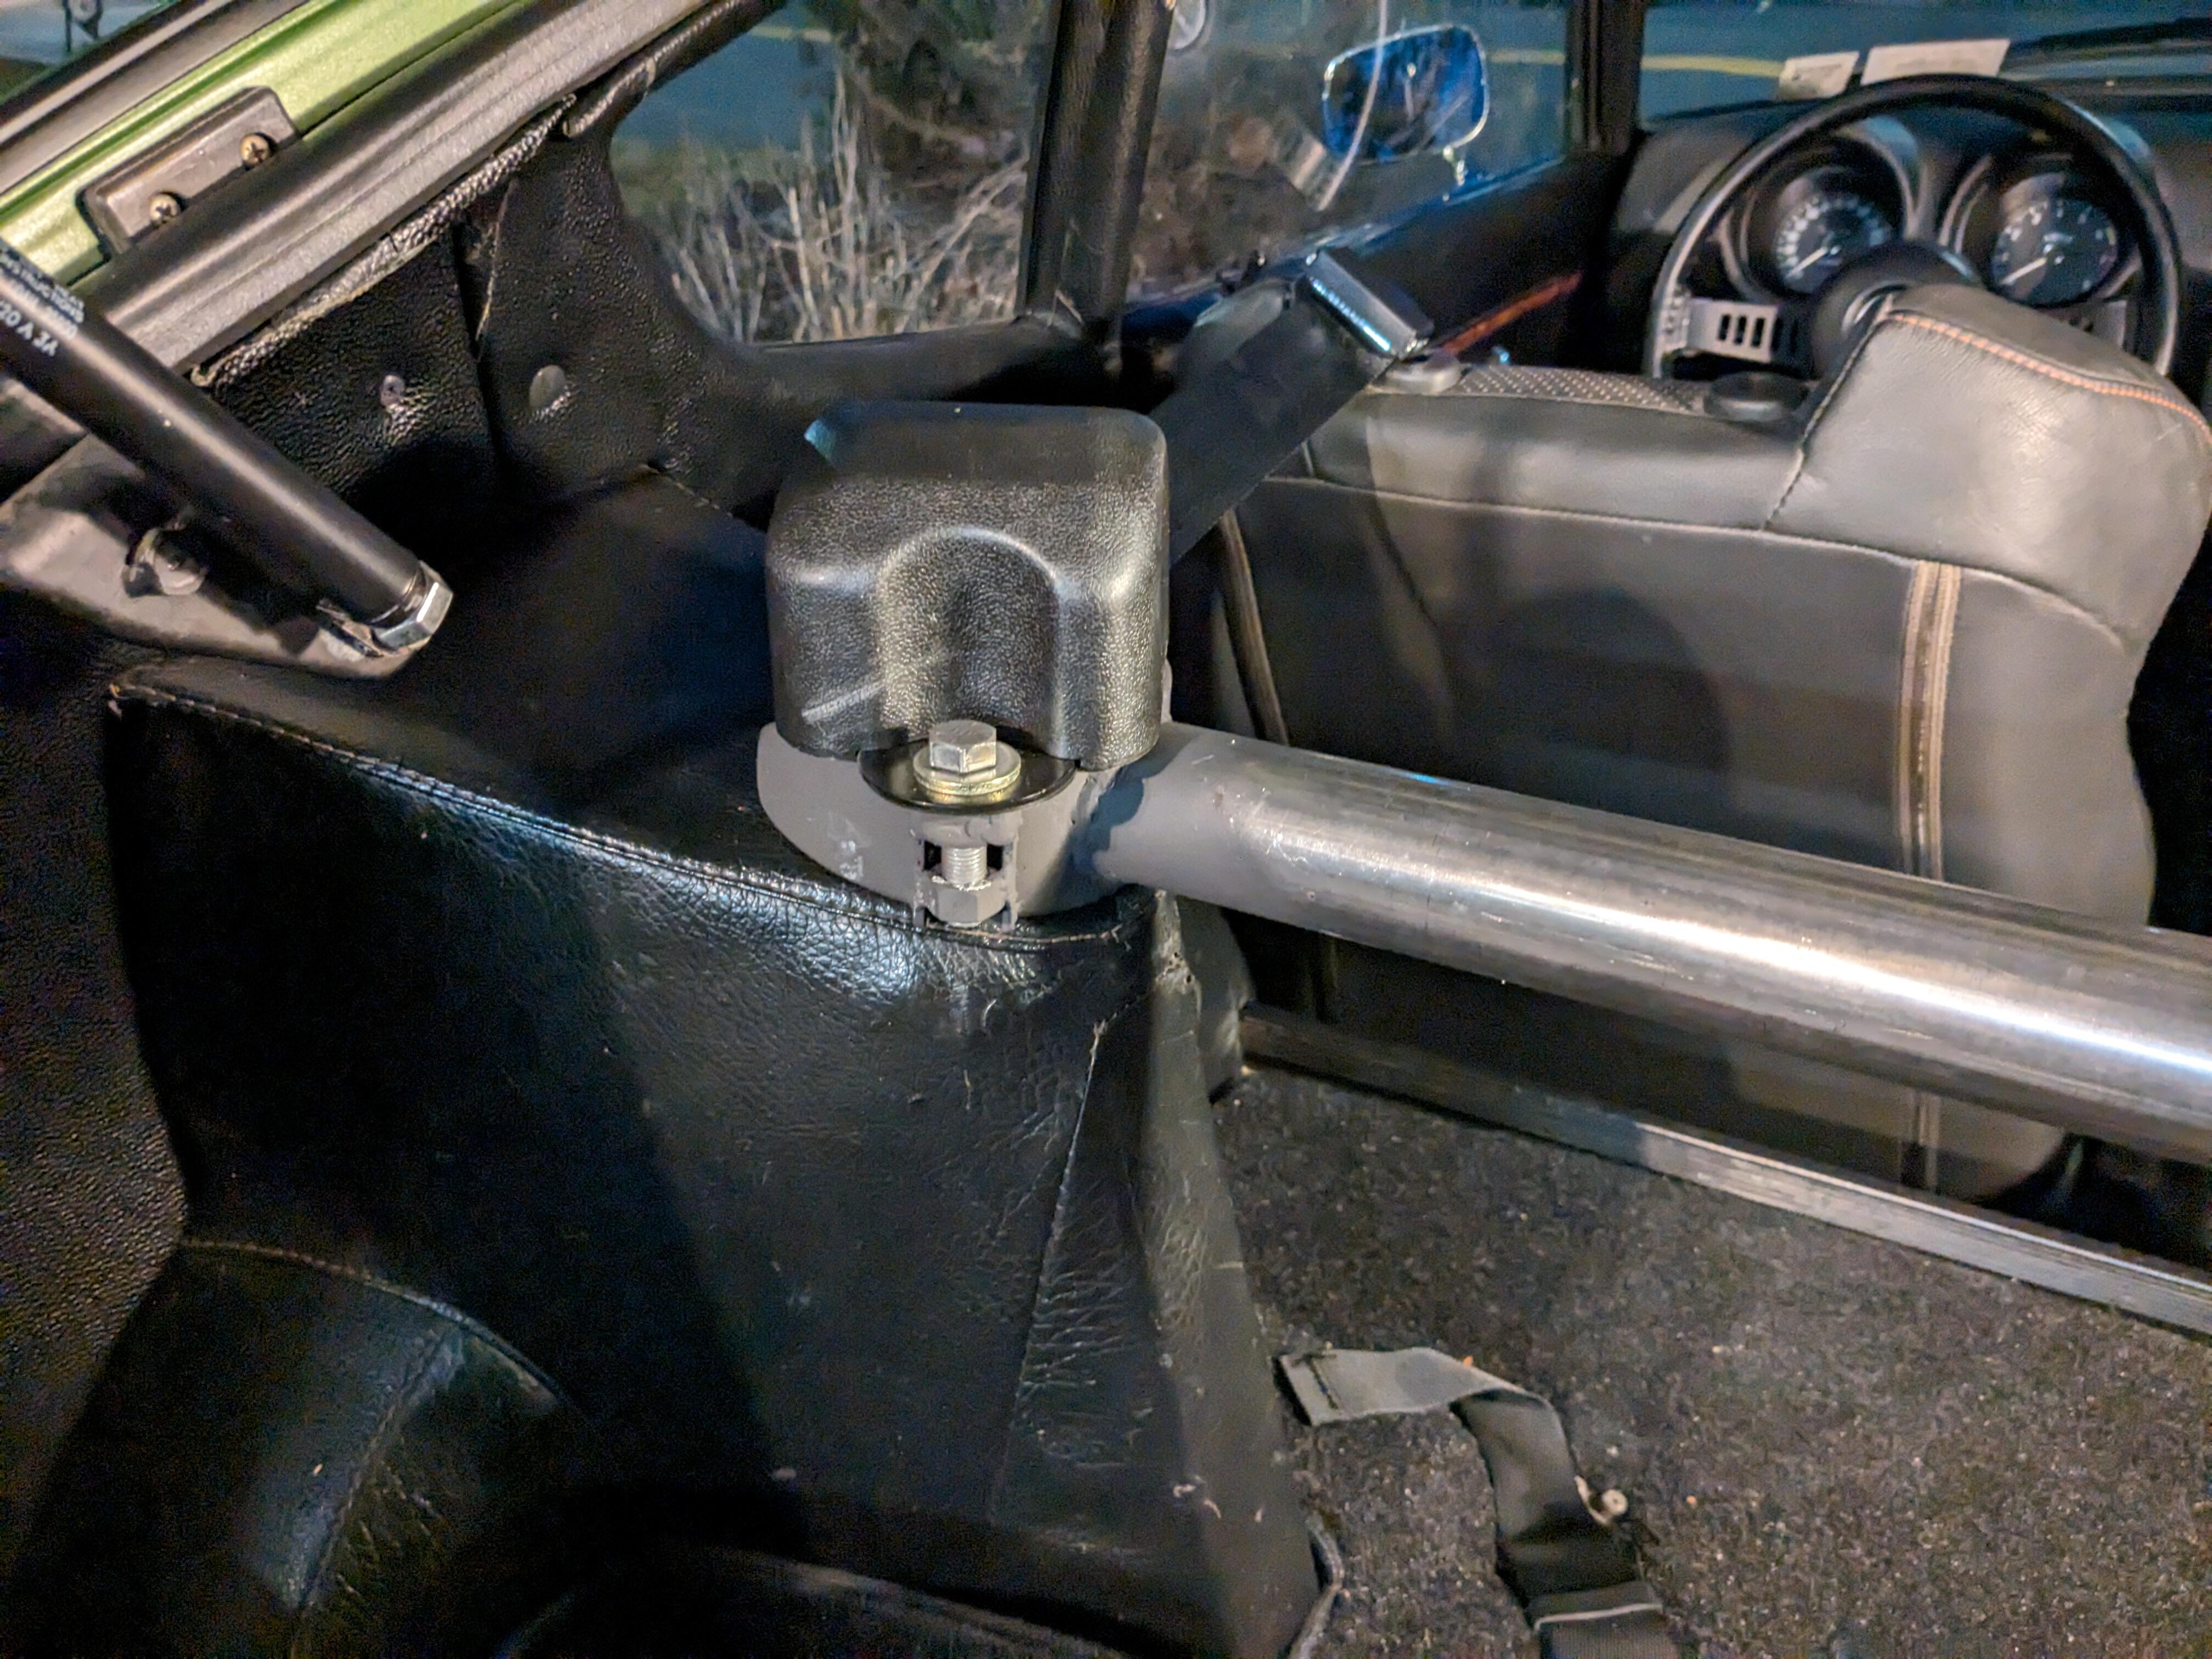
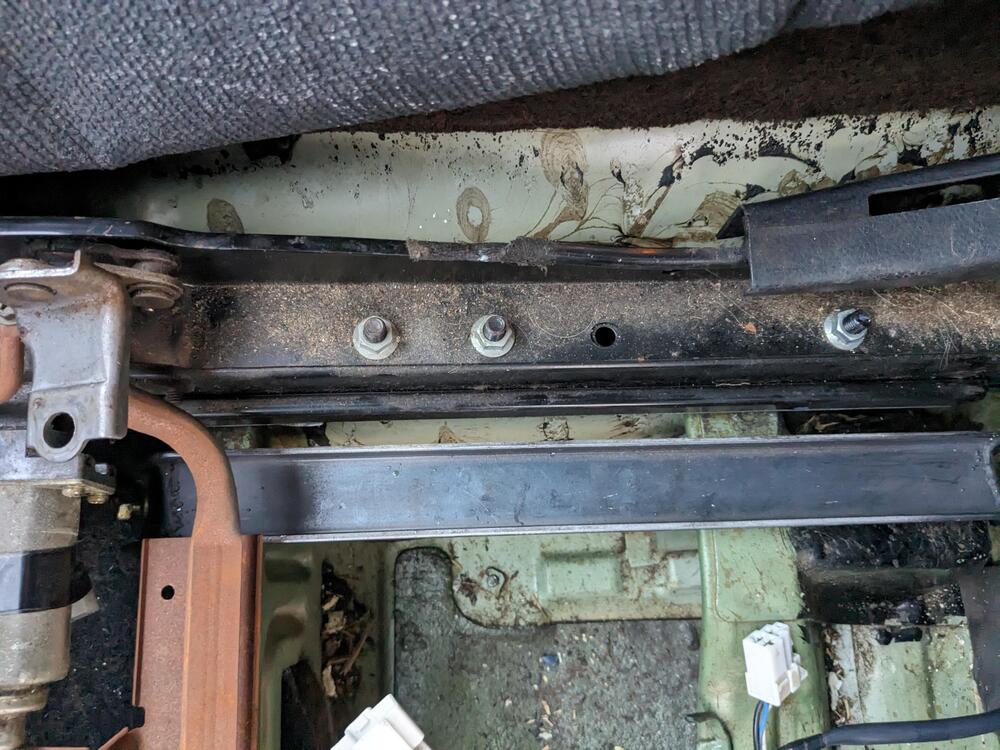
added the support bracket with two nuts to the driver's side of the strut brace. Have to do the pass side tomorrow, ran out of daylight


-
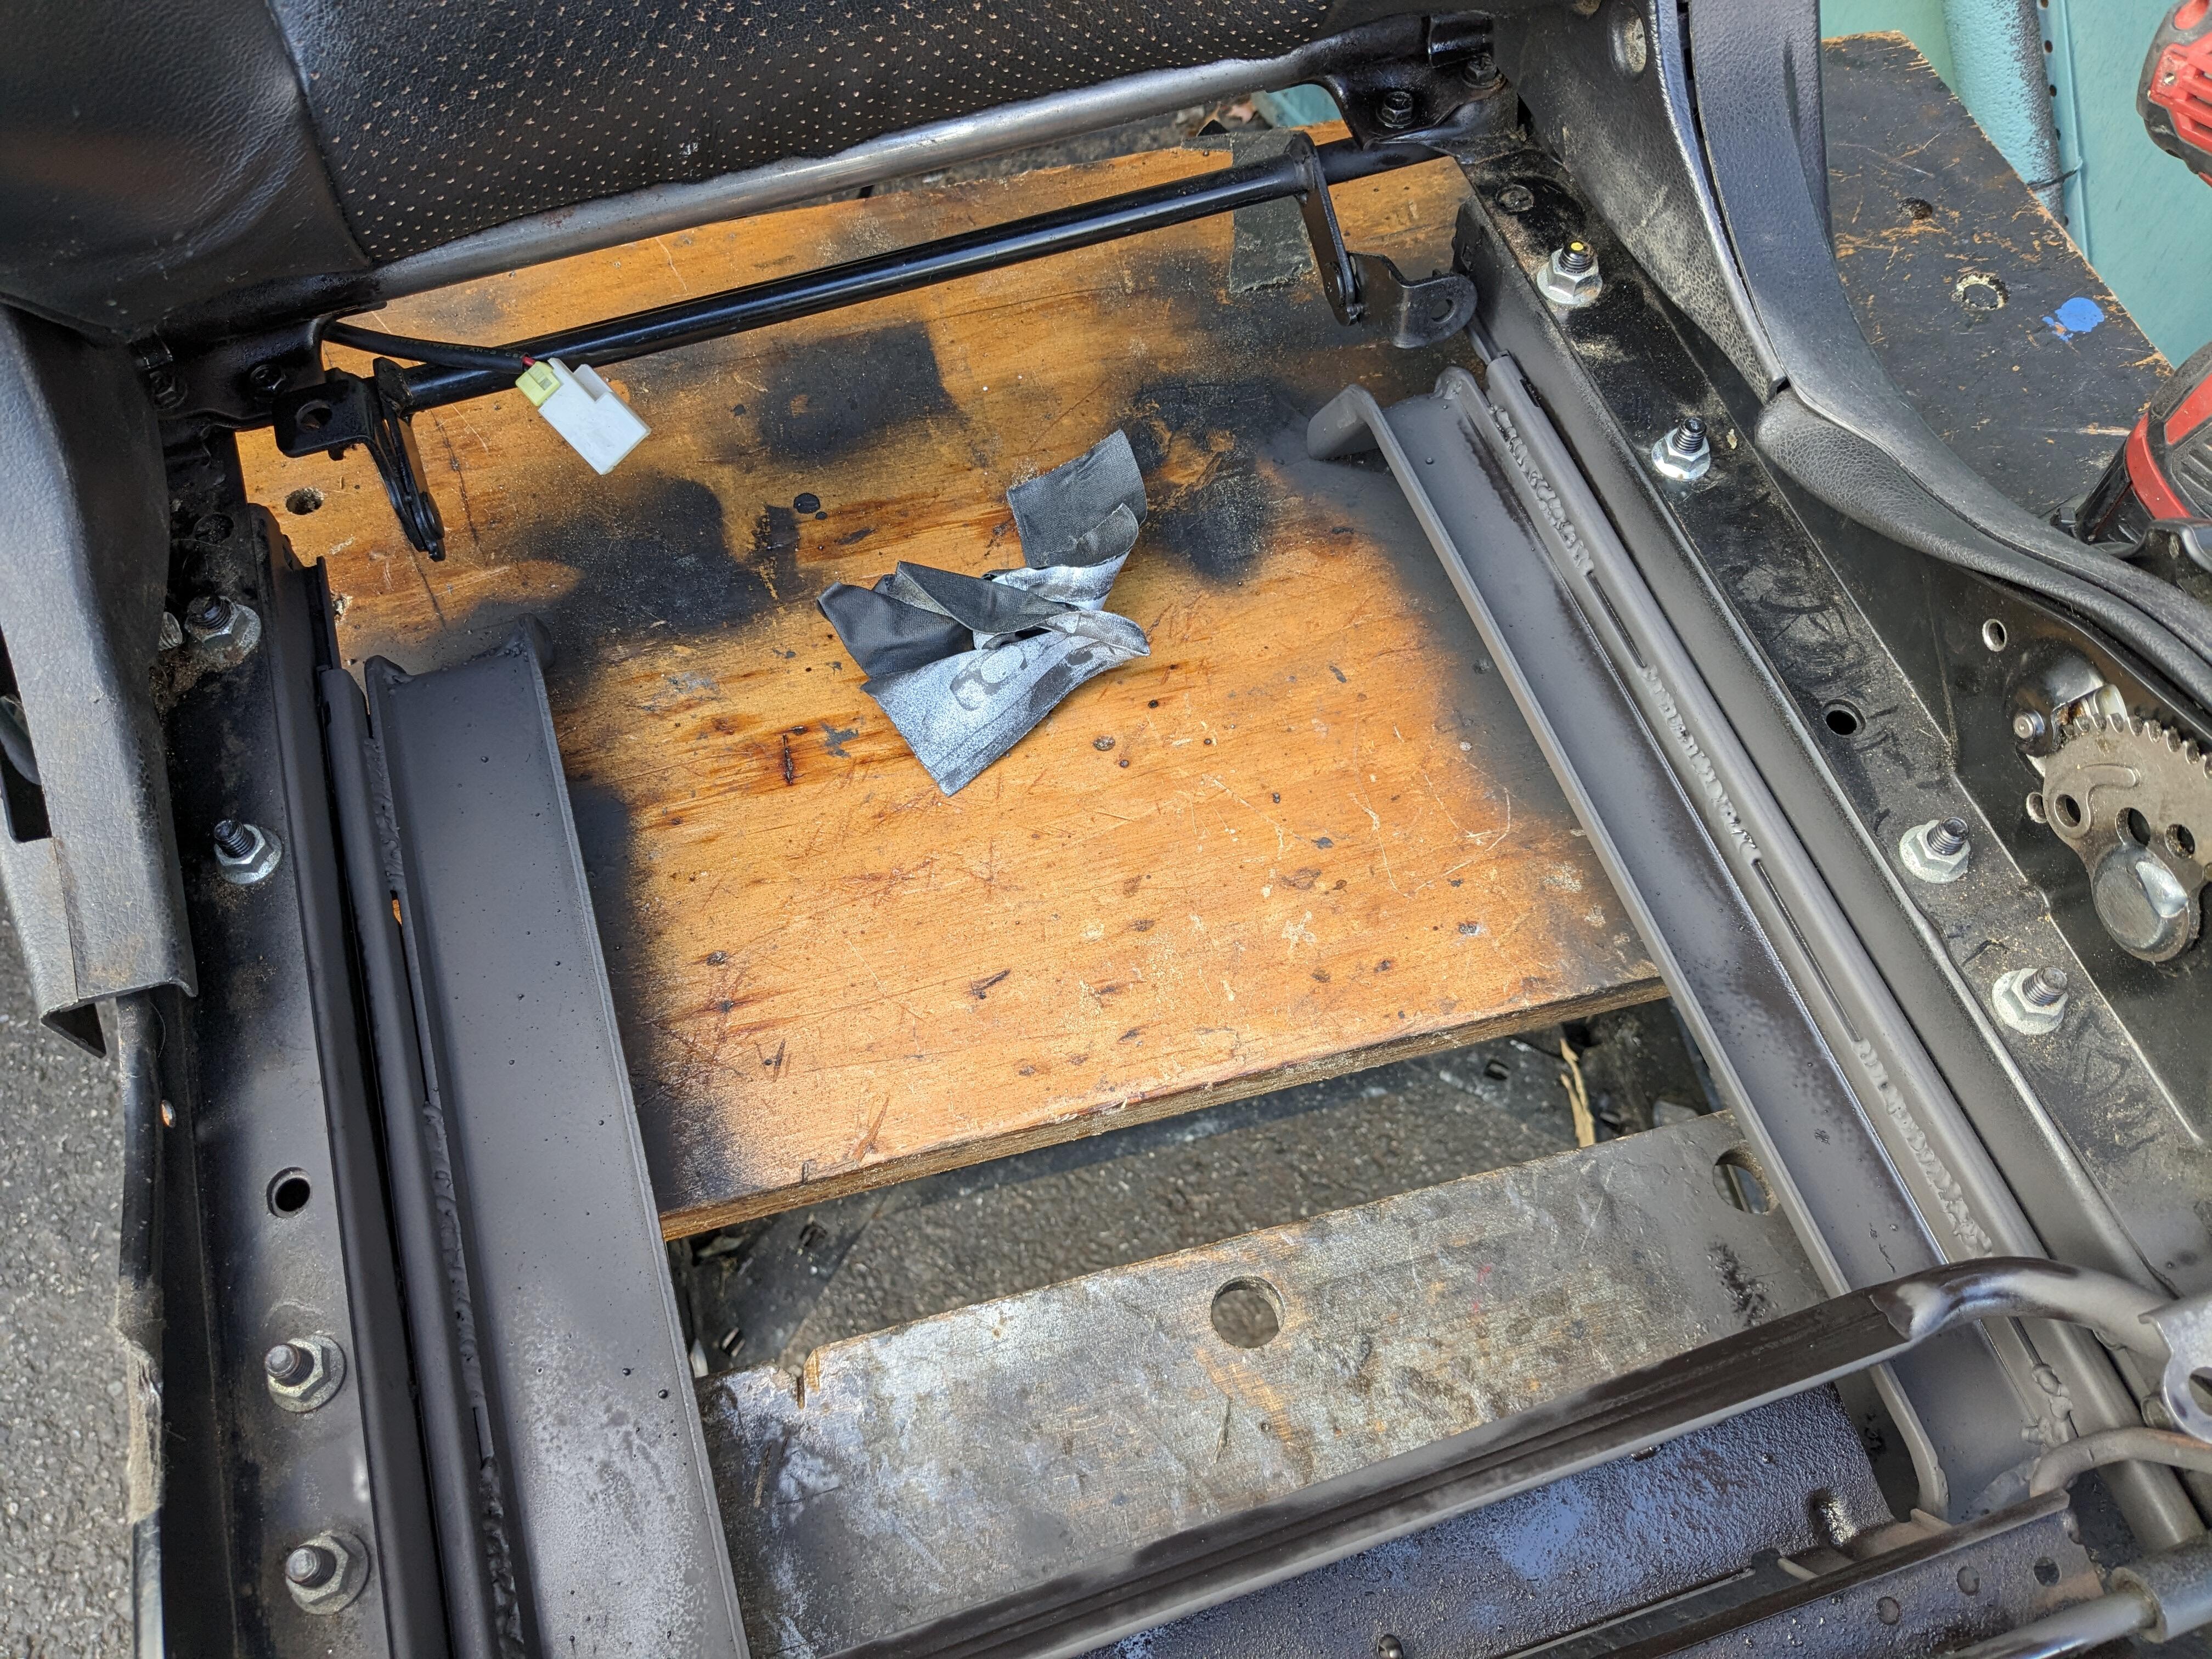
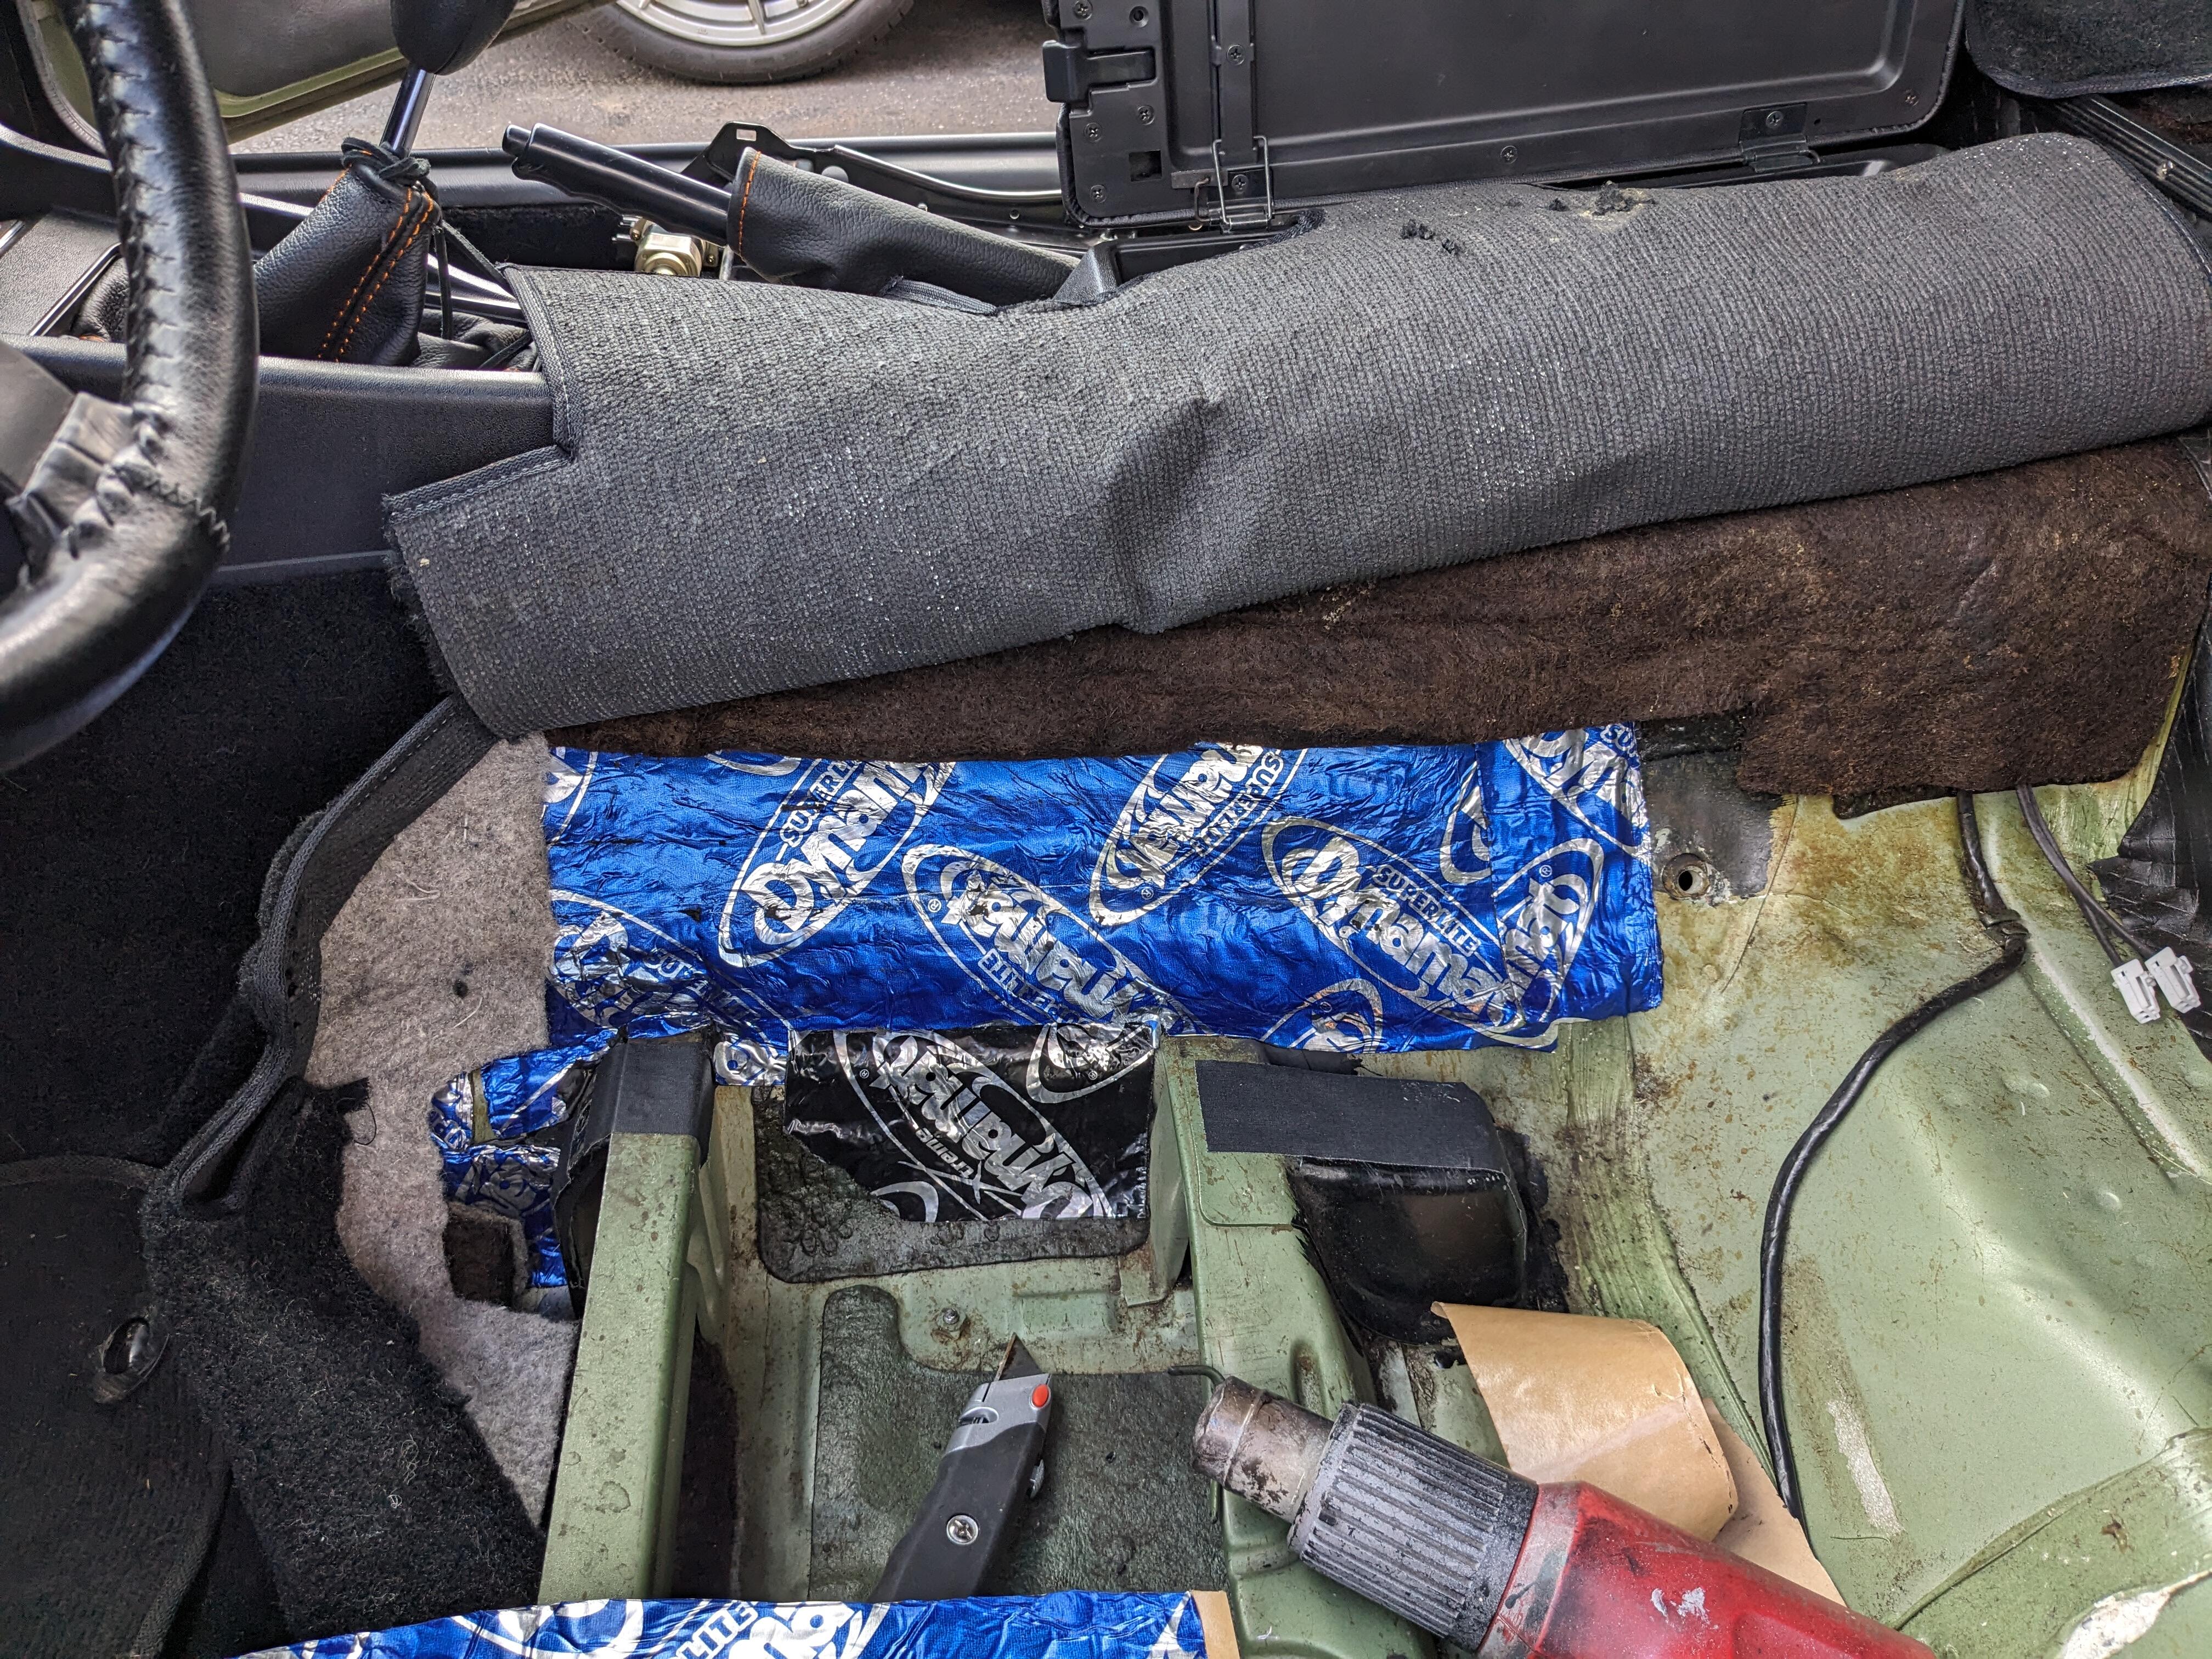
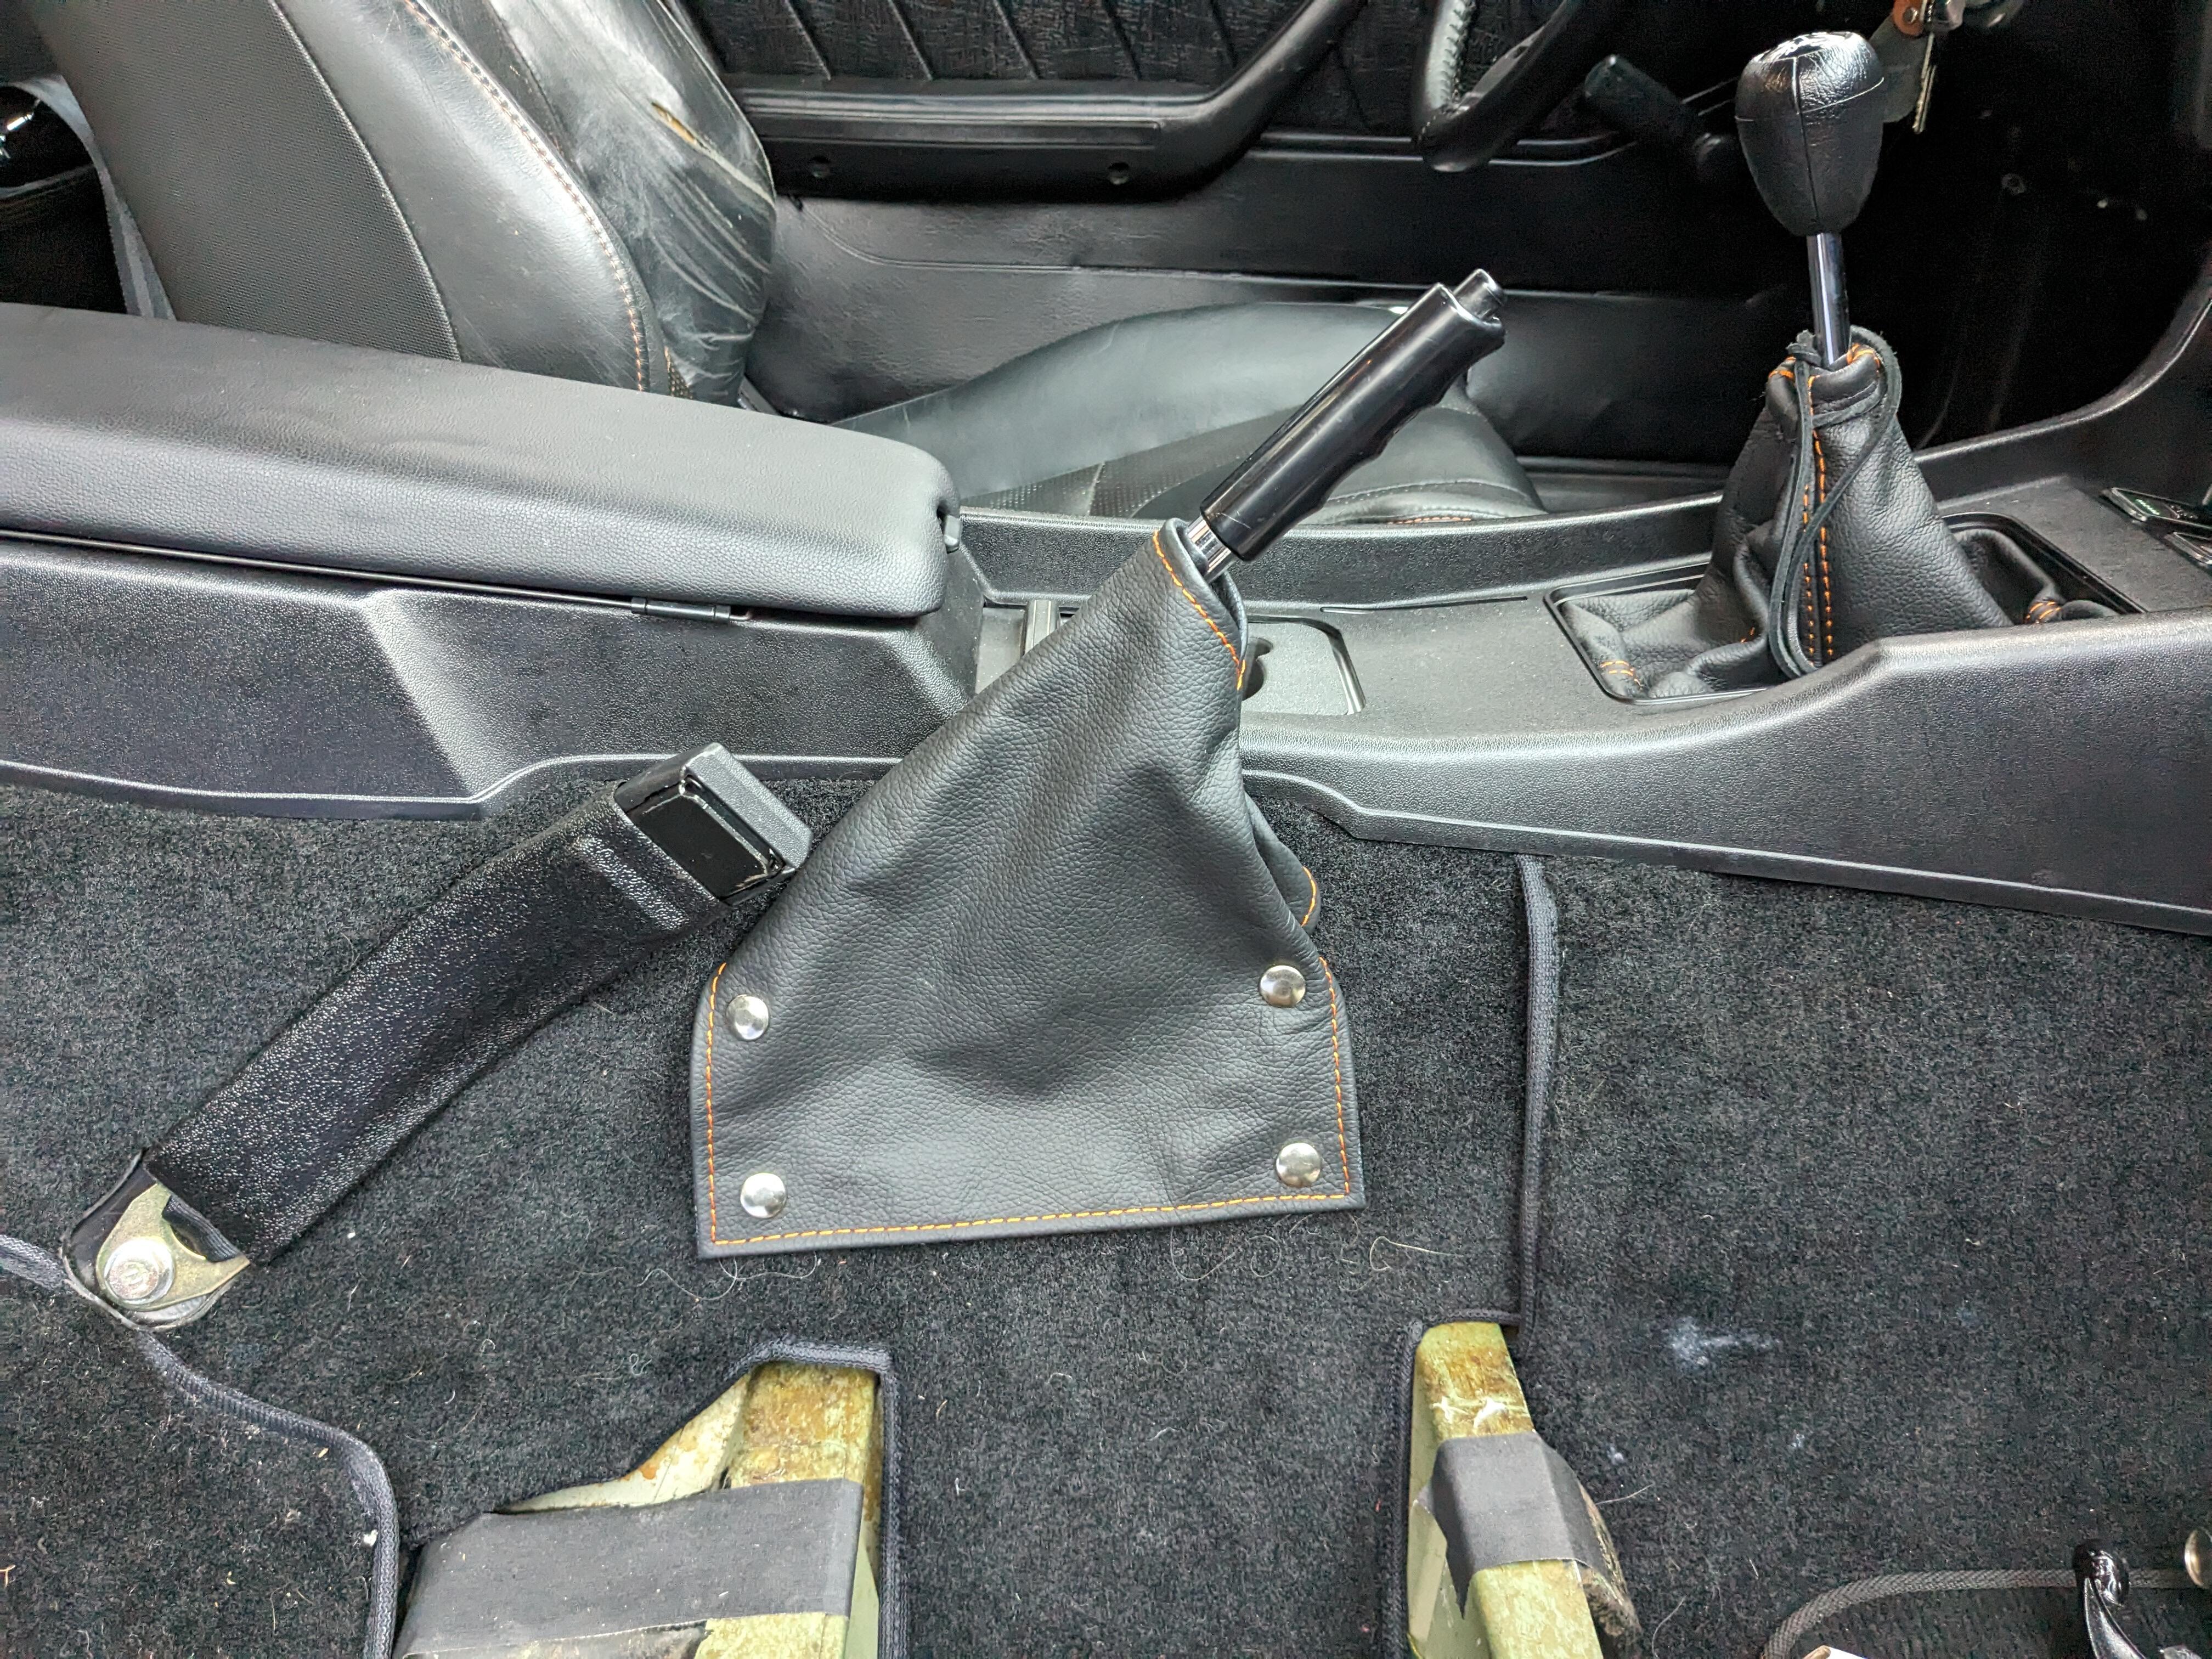
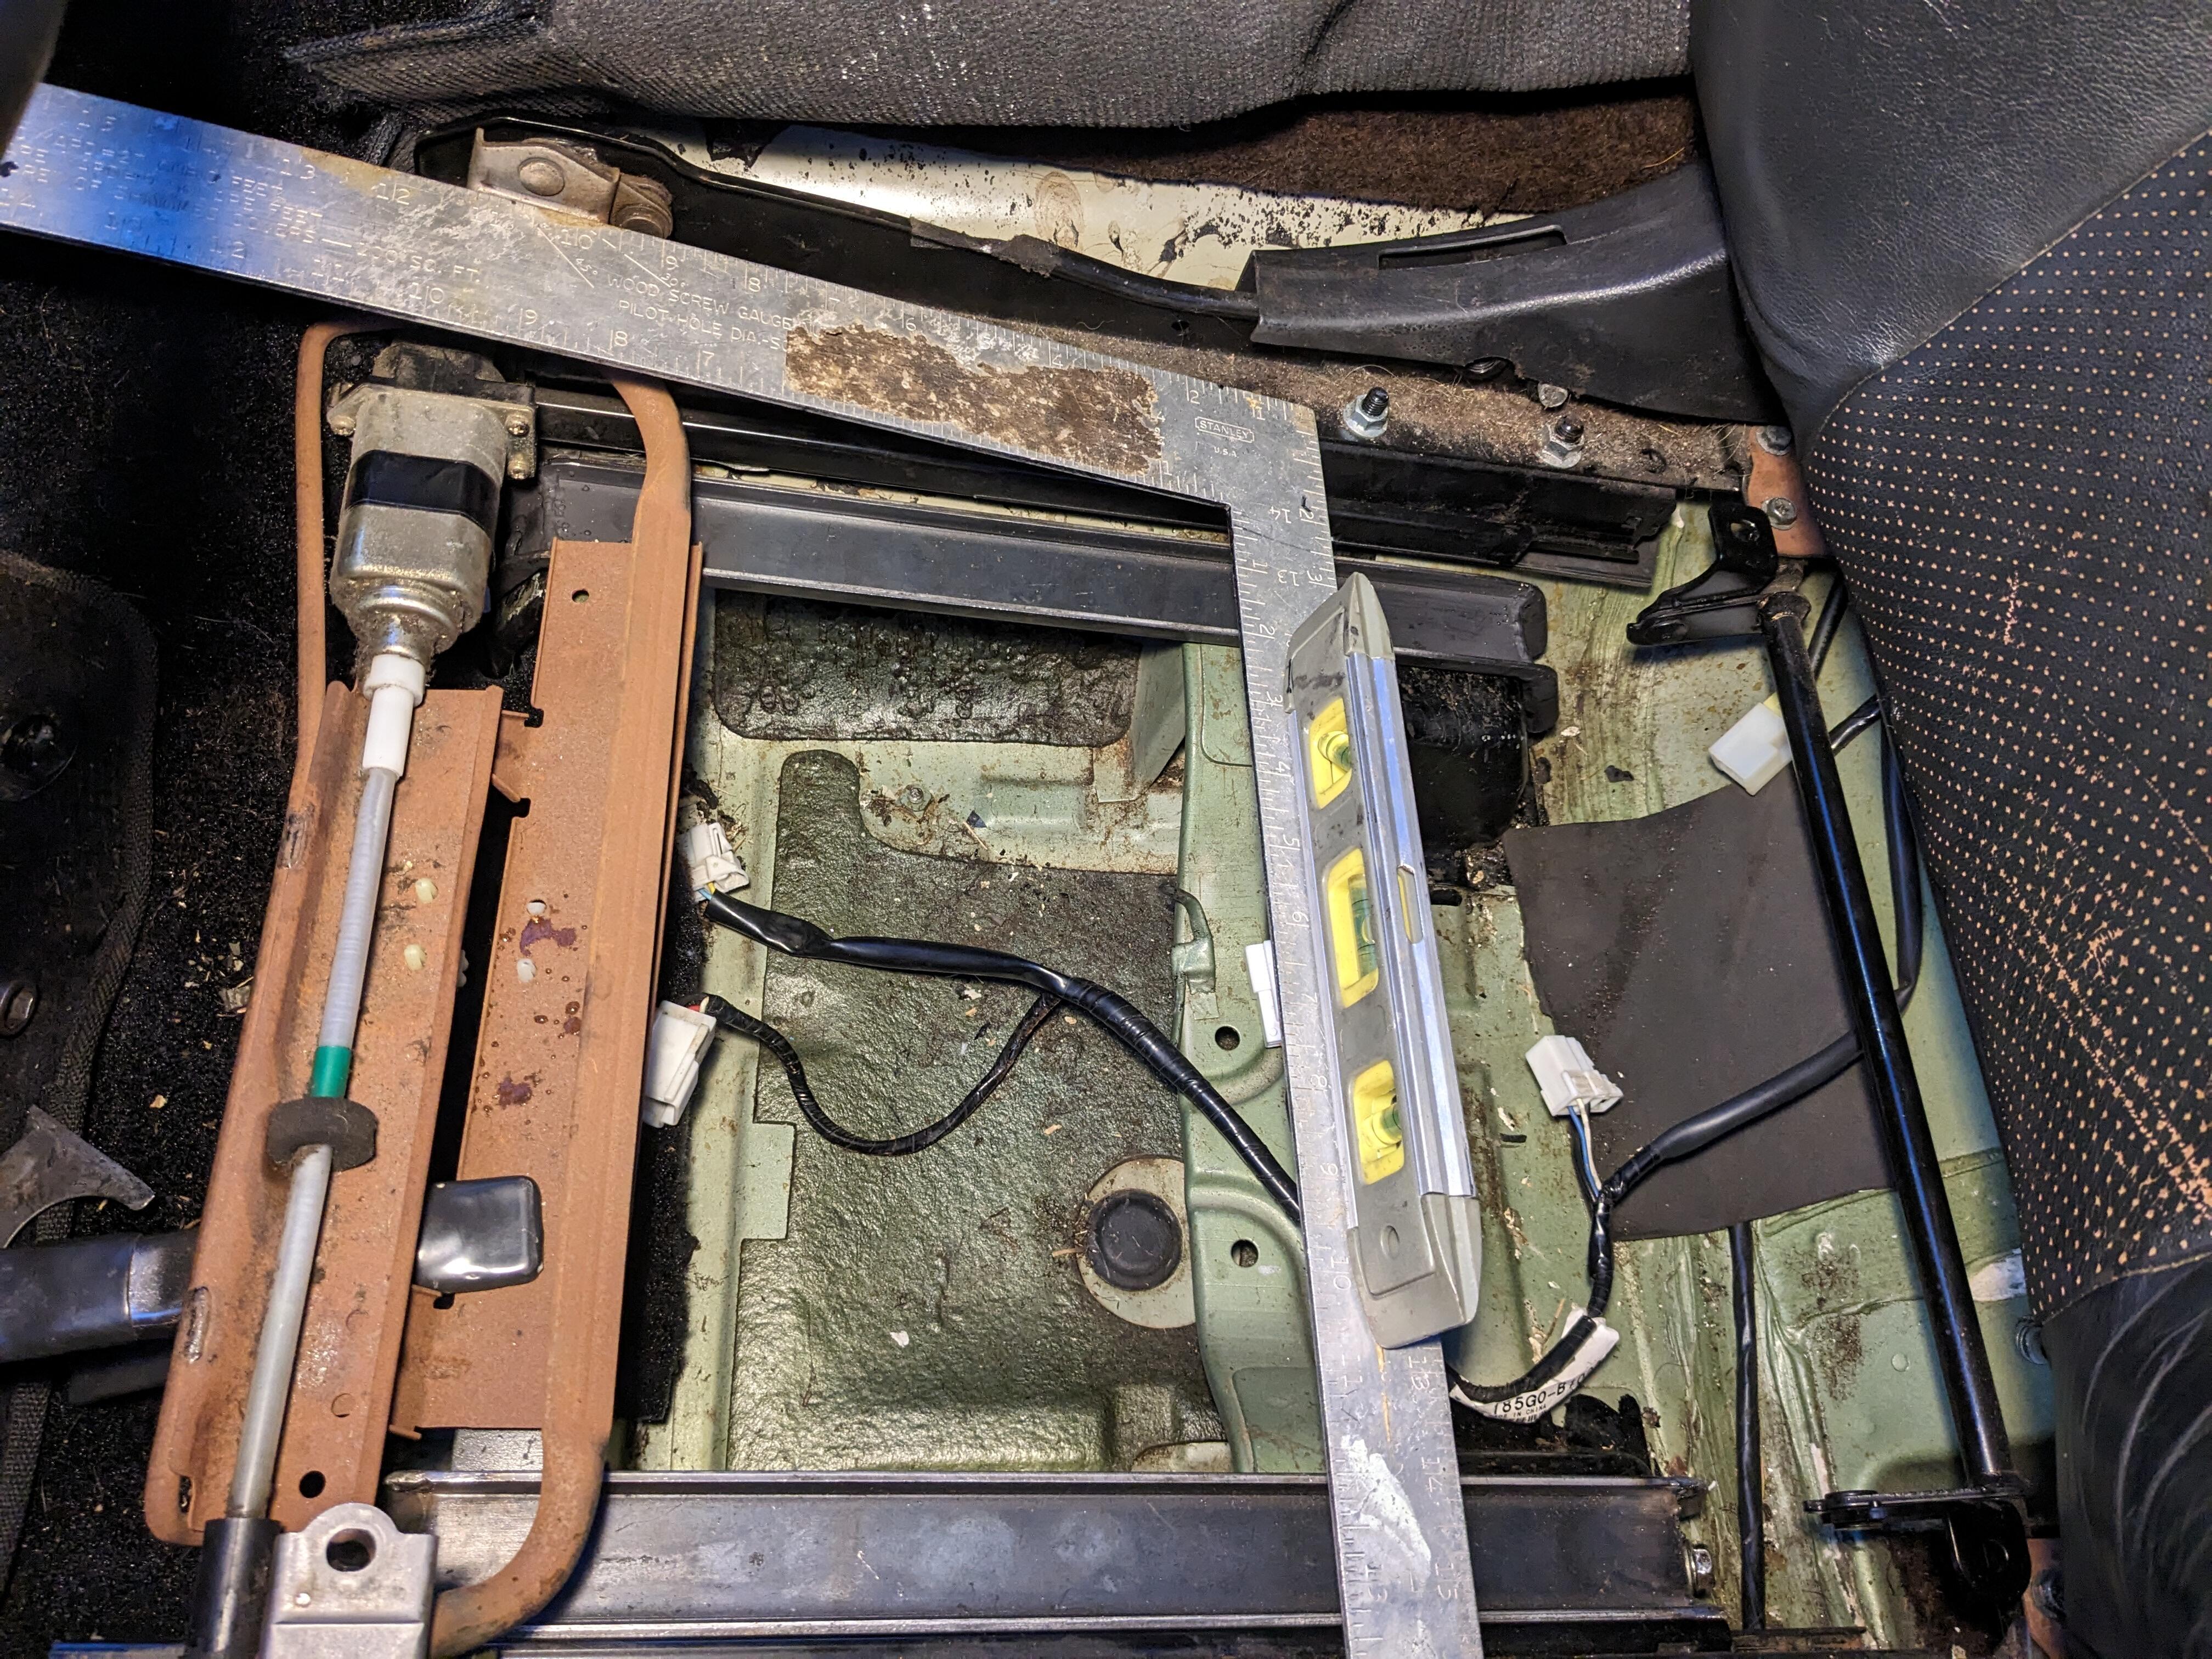
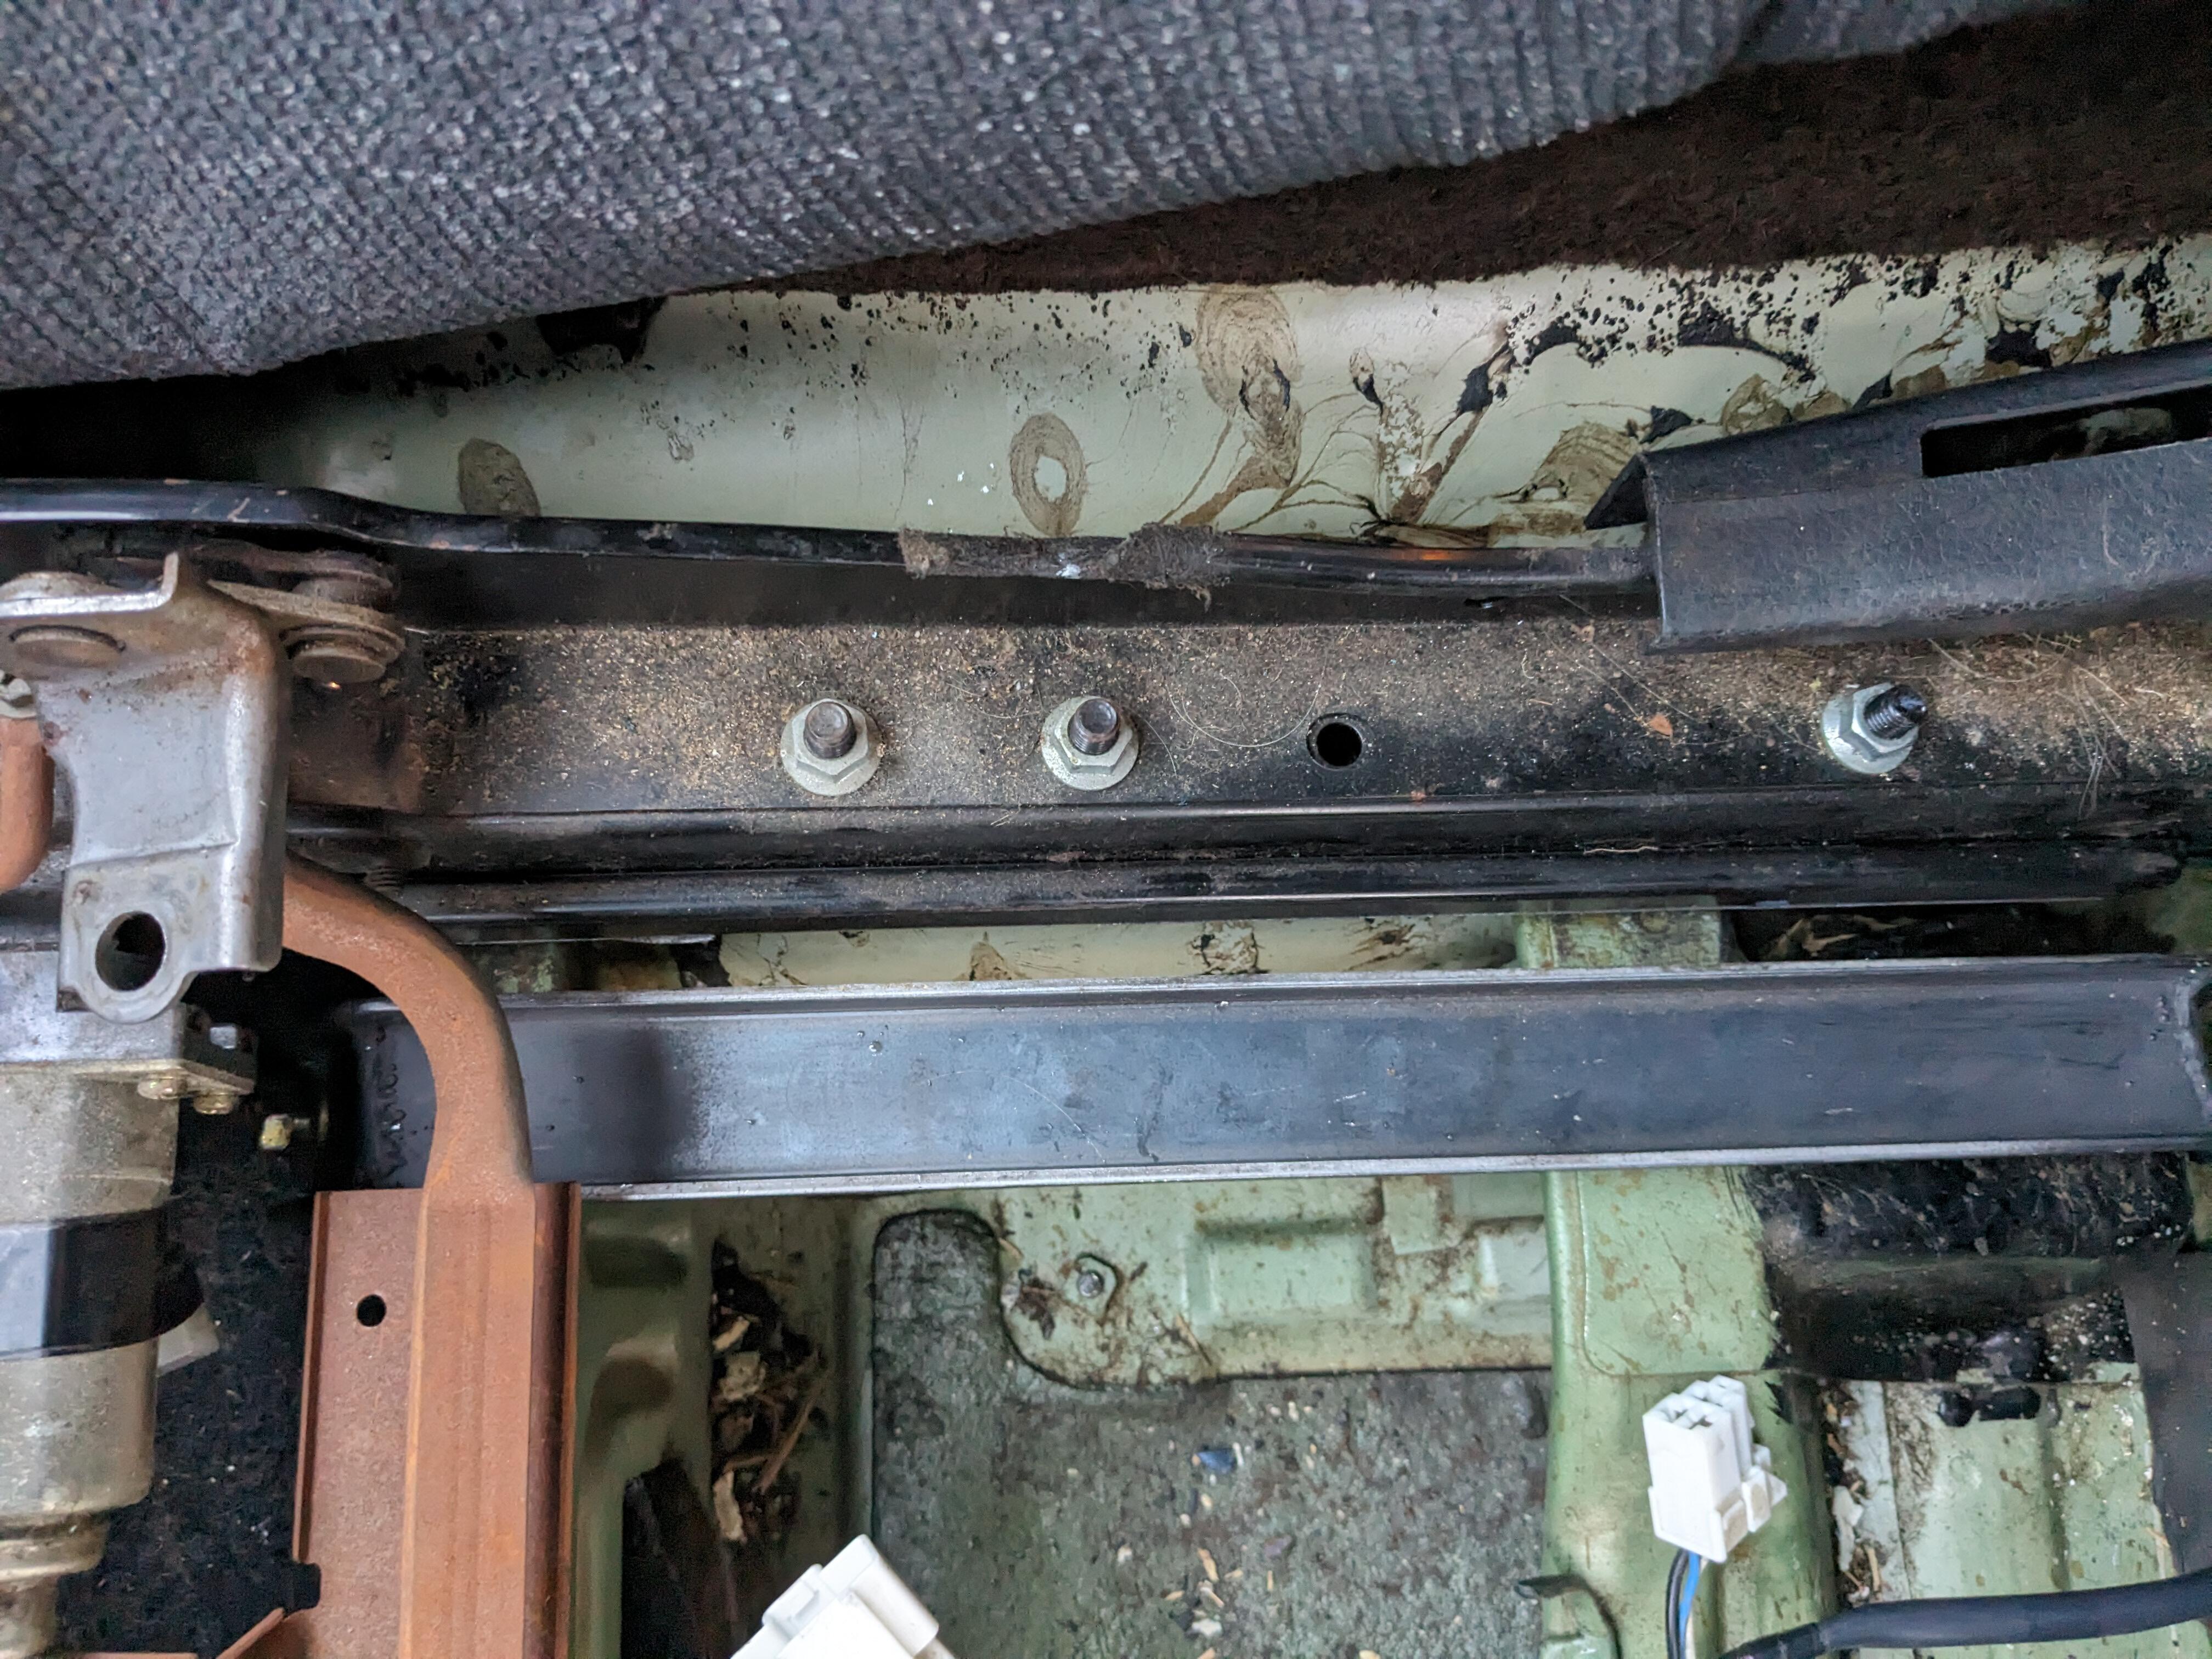
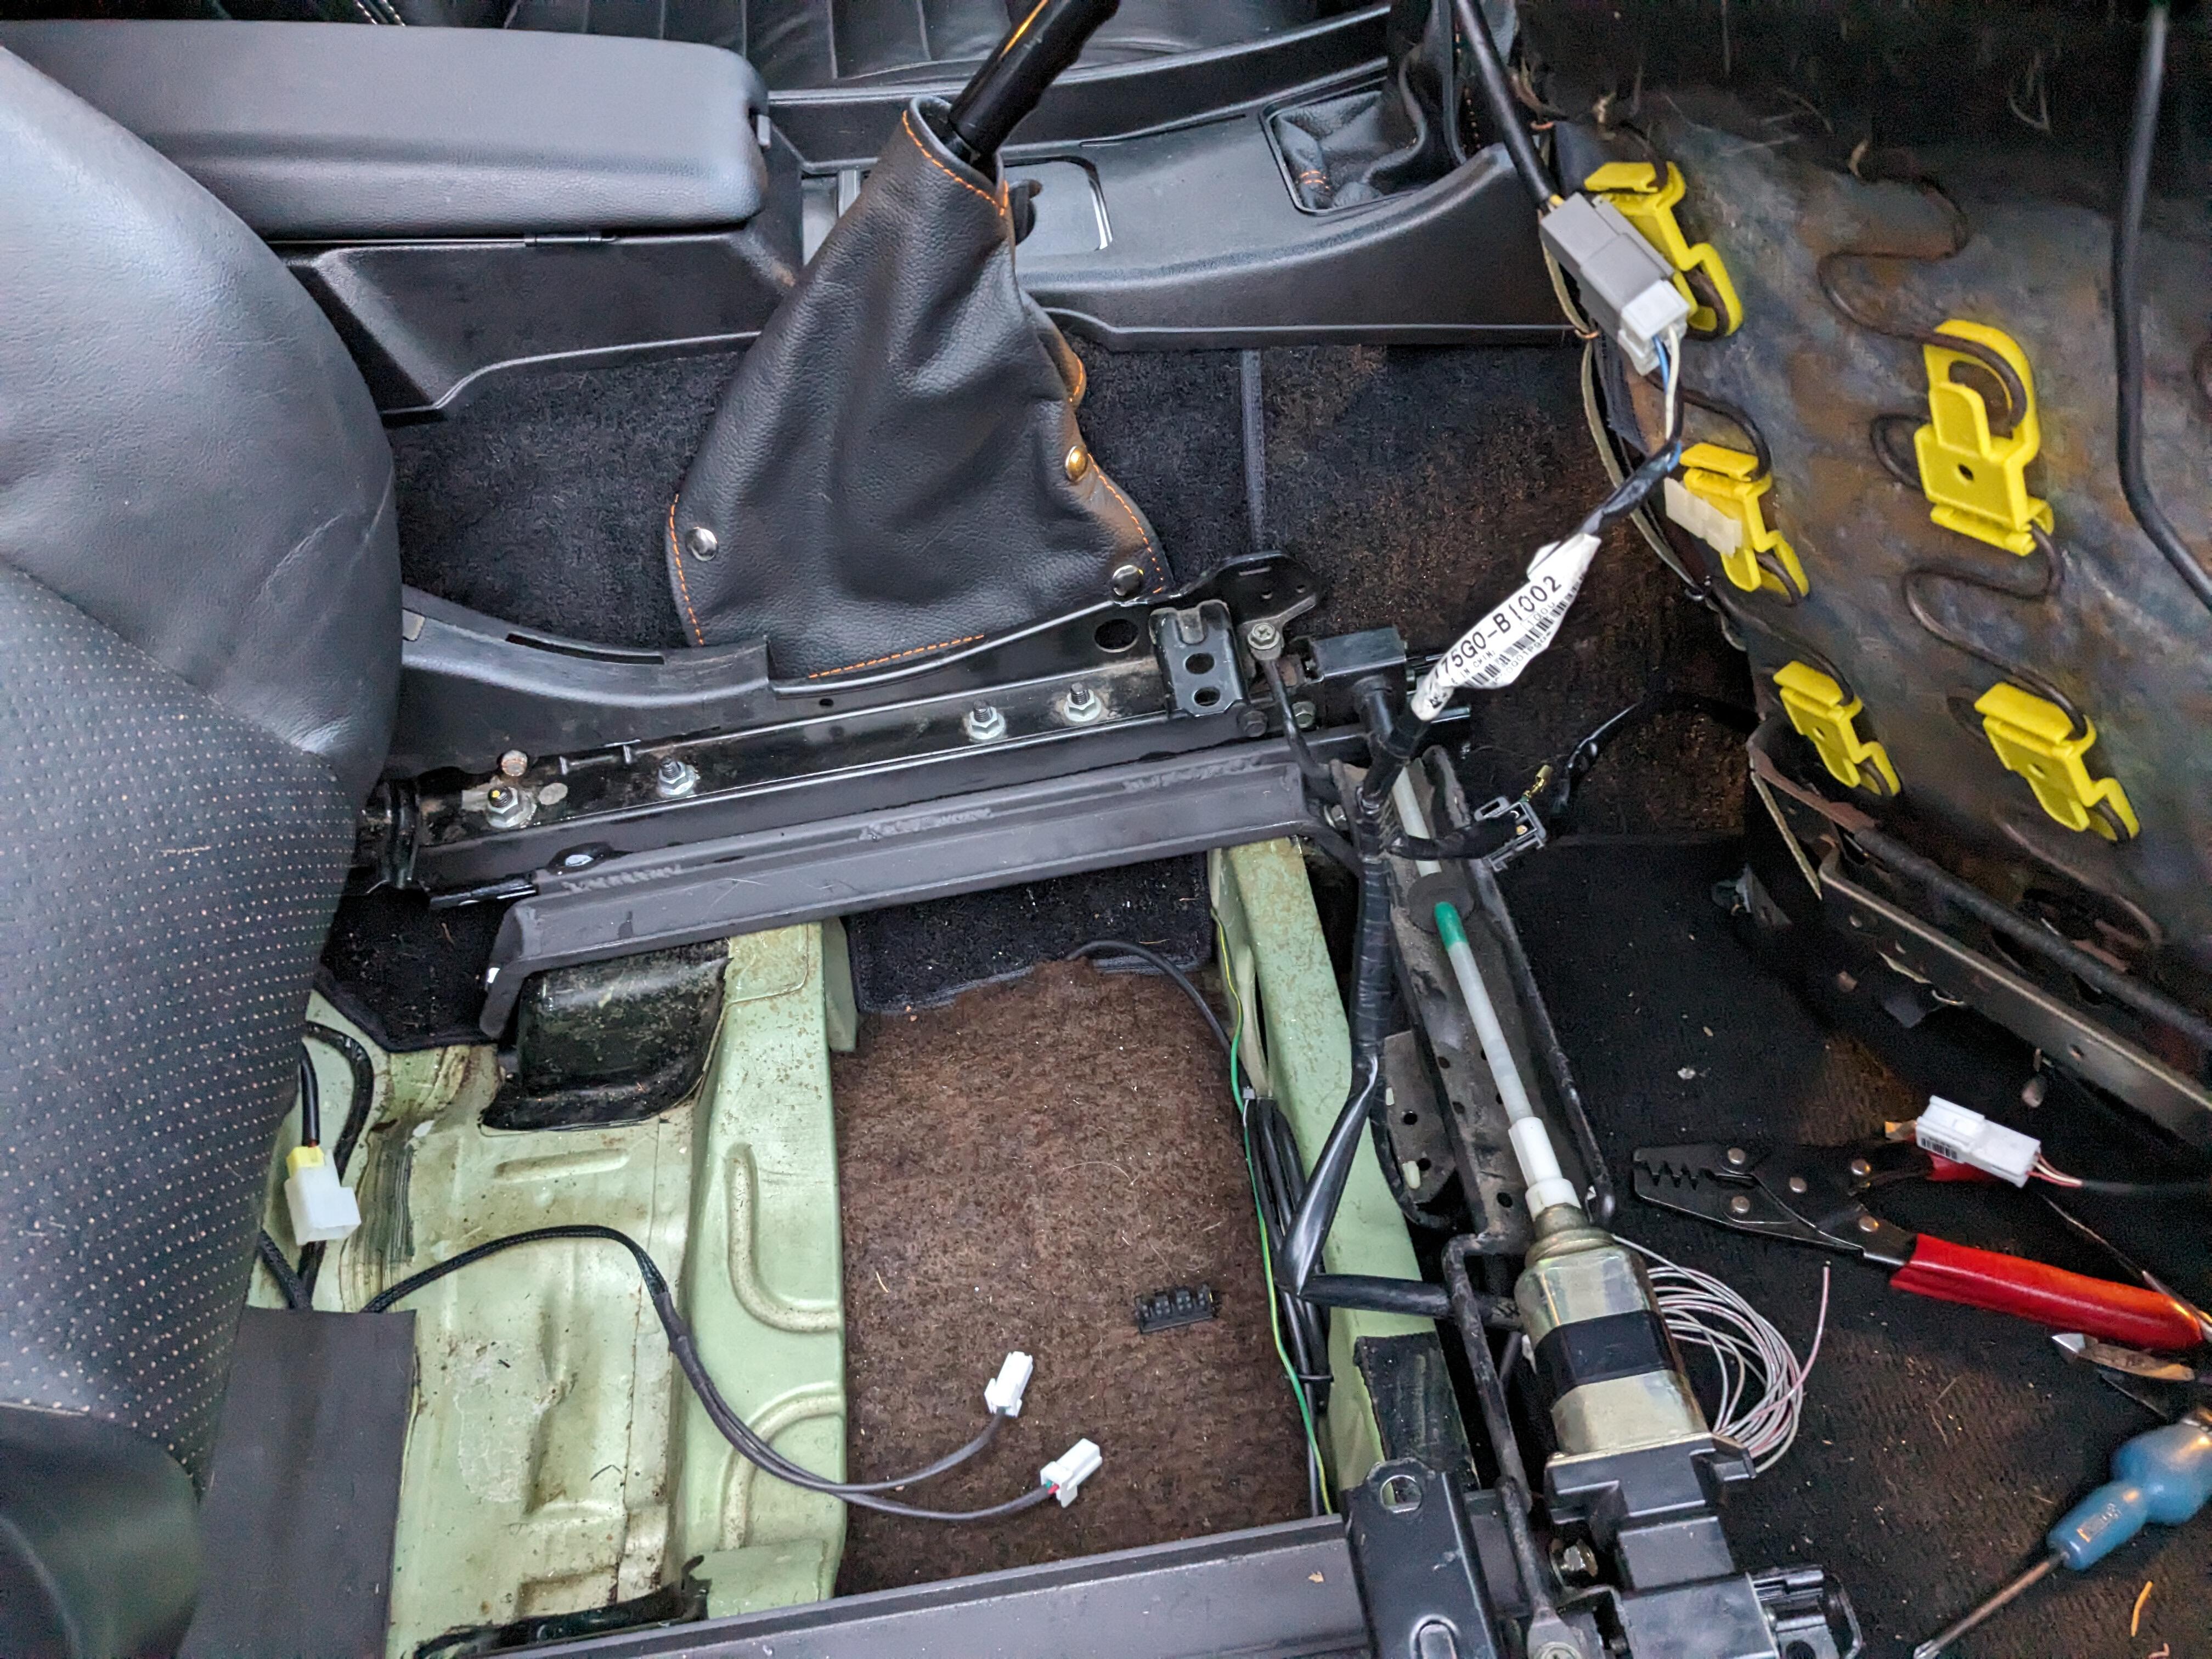
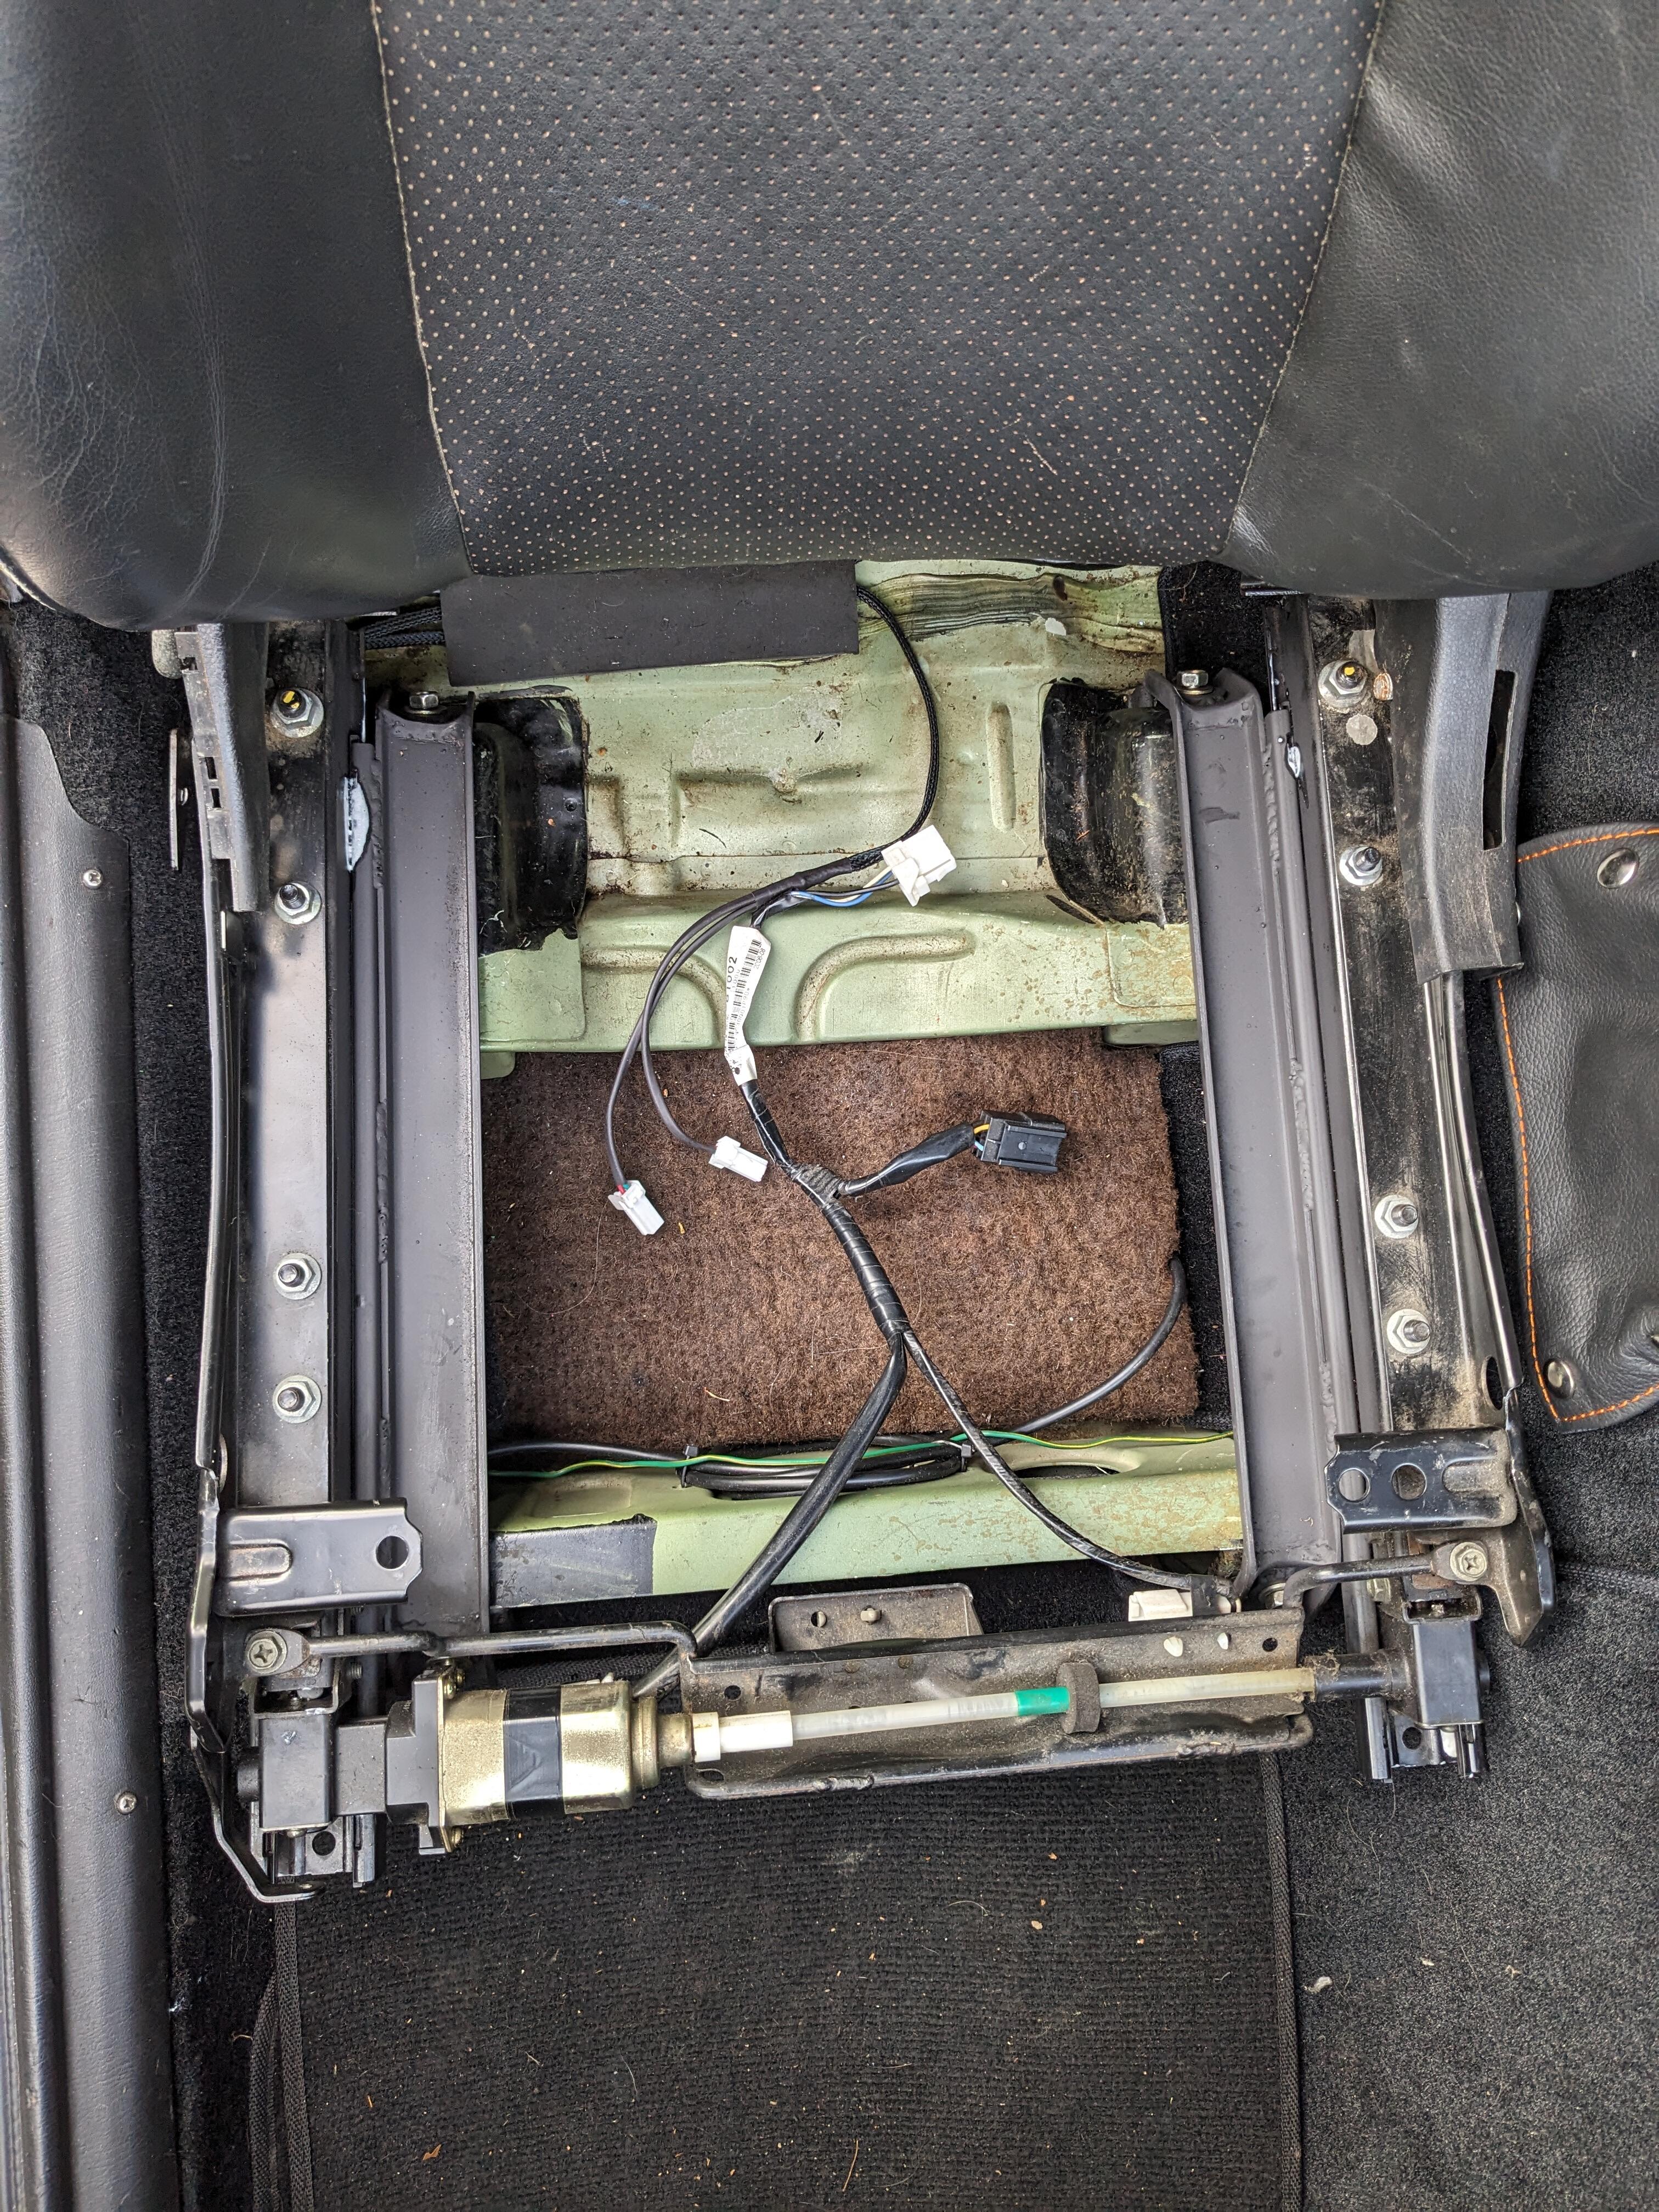
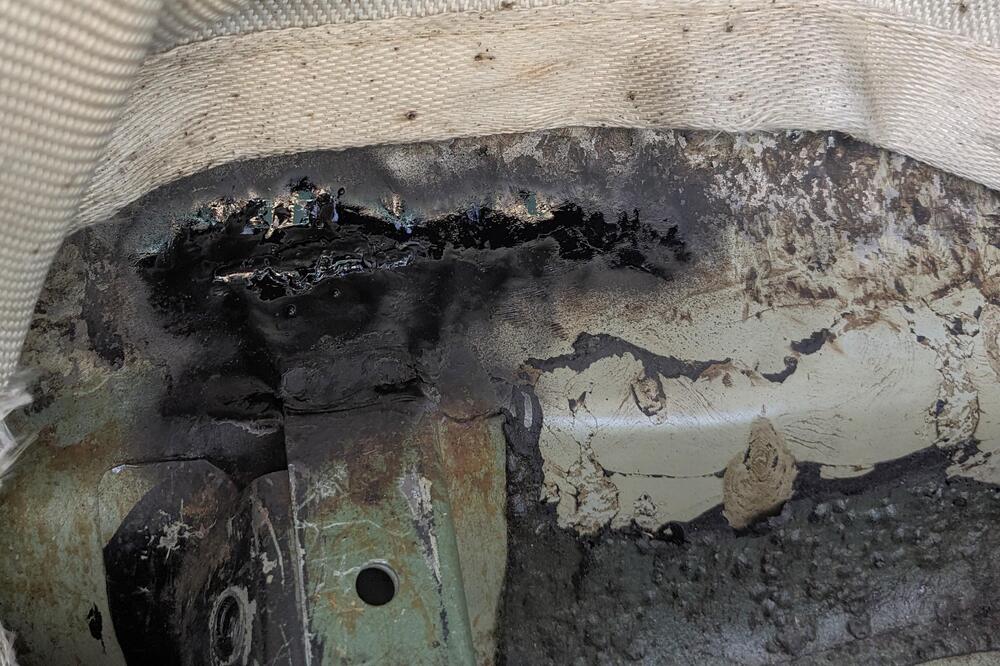
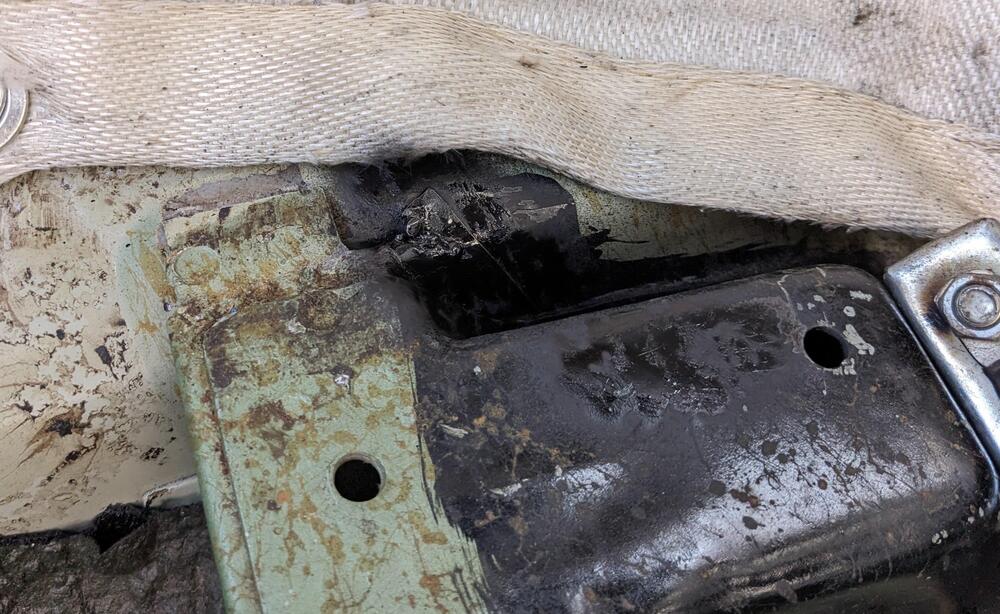
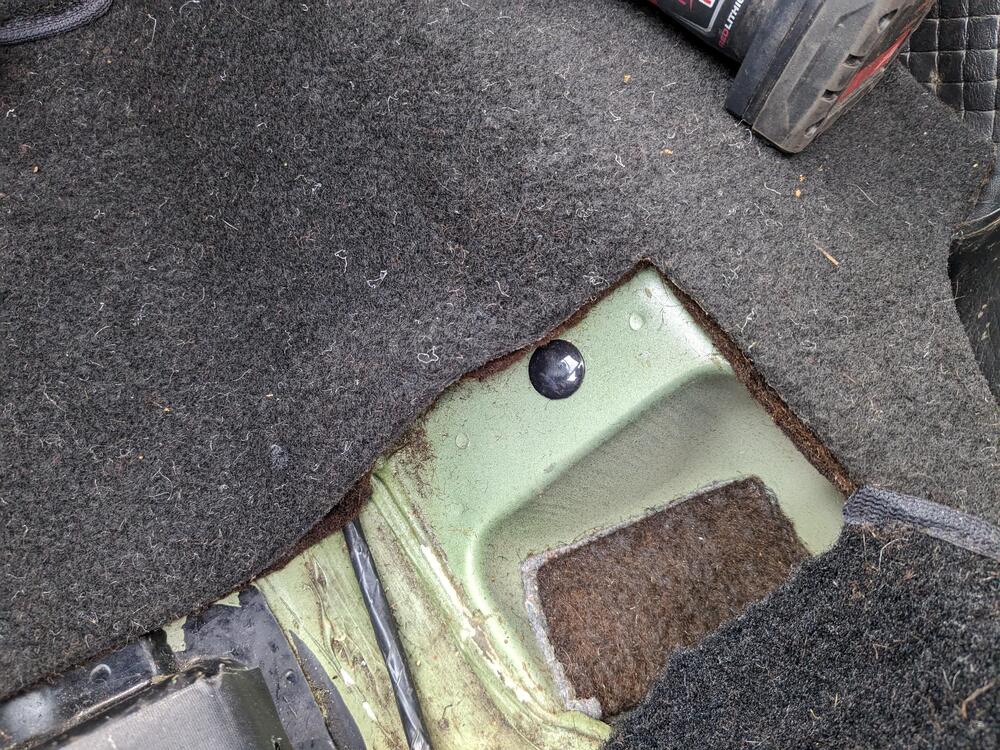
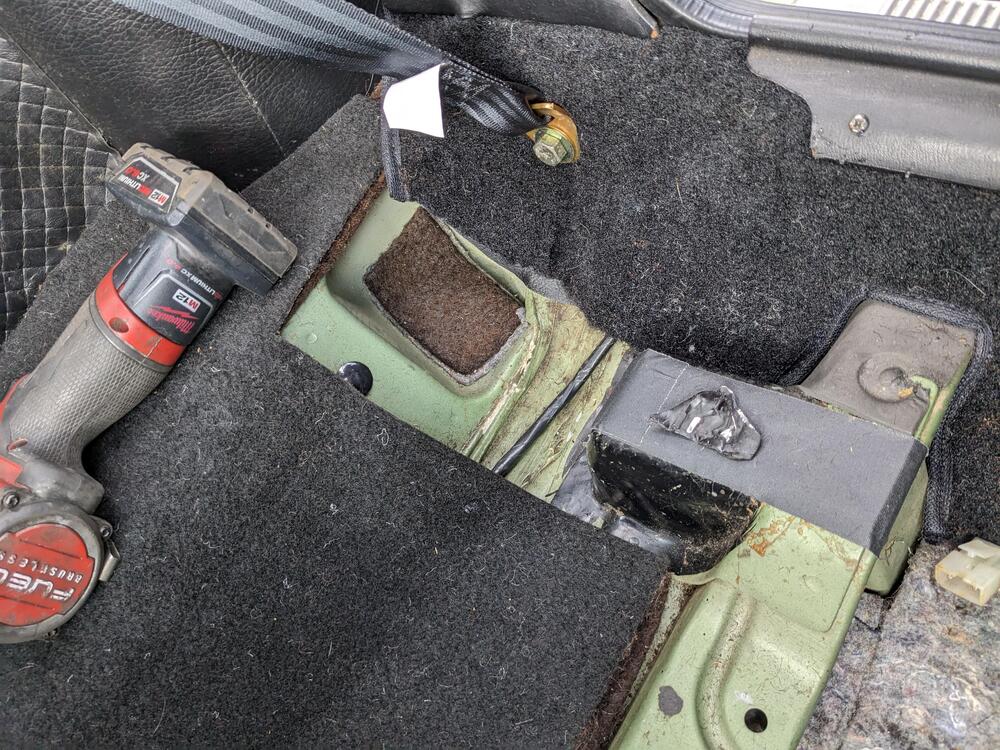
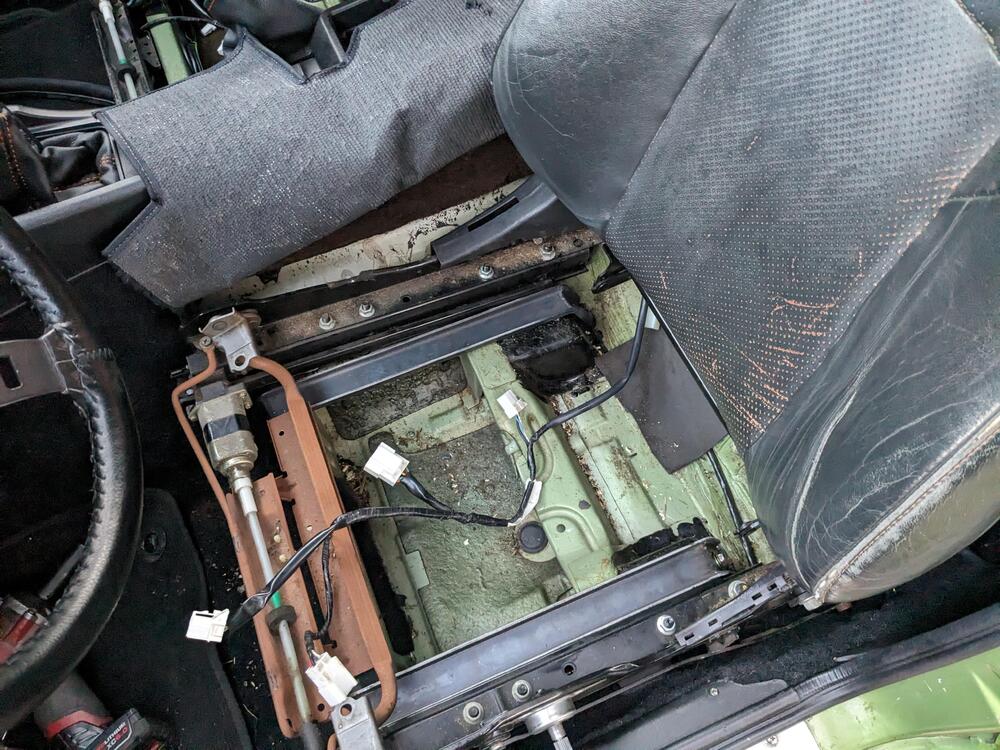
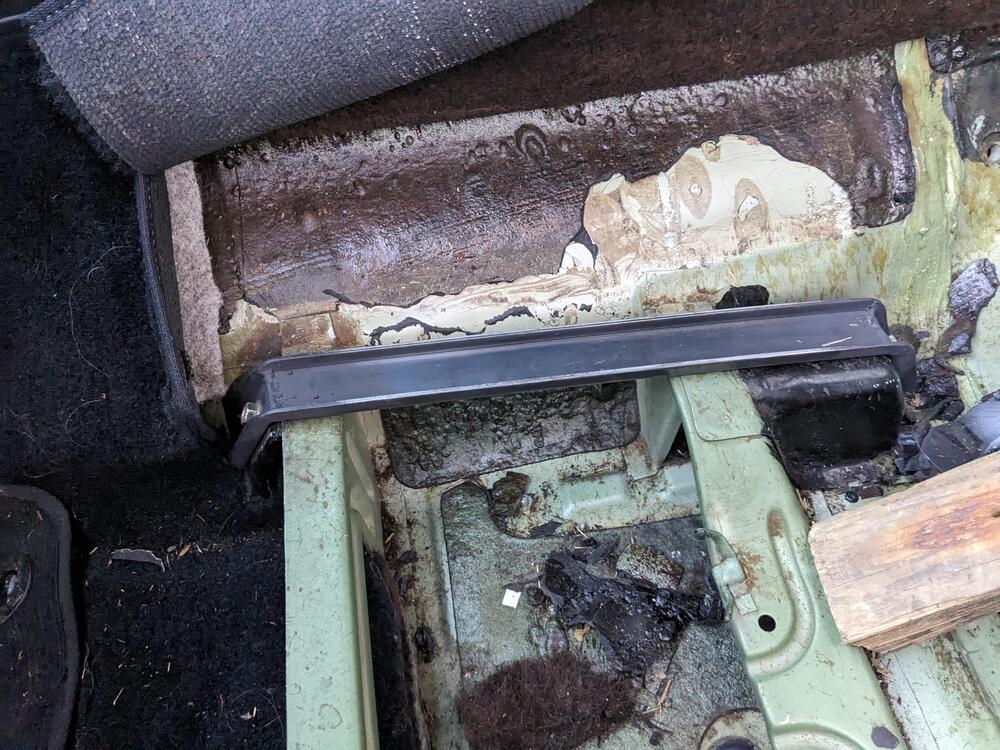
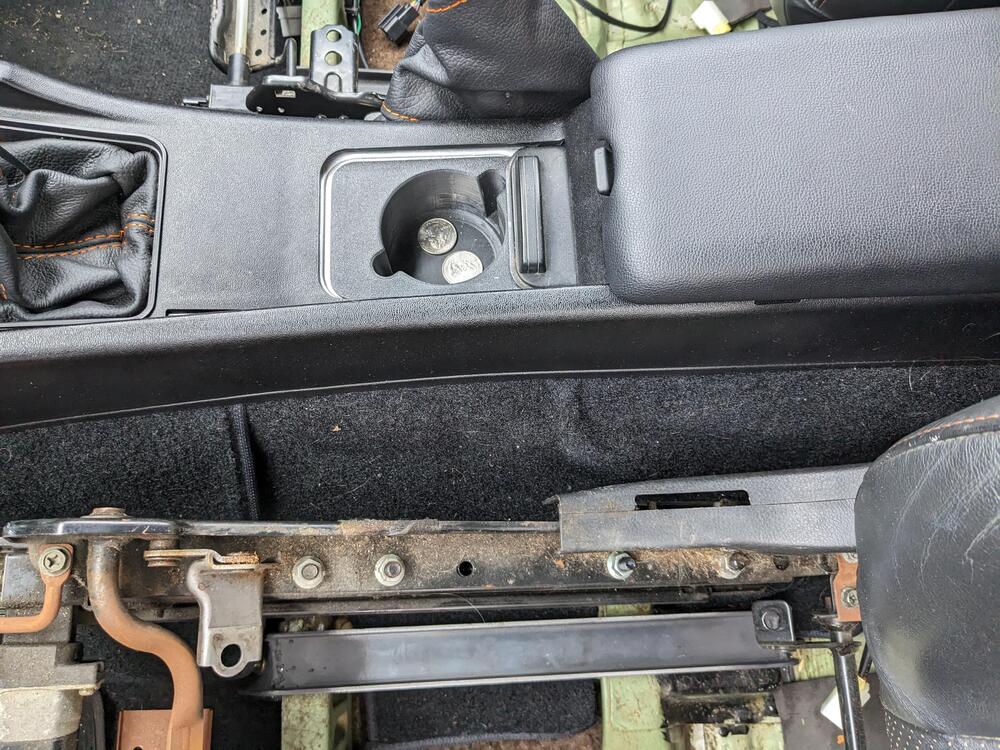
Got back from Baltimore yesterday afternoon, so back on the seat install today. Had to do some more pounding on the tunnel. Metal only stretched so far, then it split, about 3" wide, a couple inches above the seat crossmember. flange tore where the black paint is on the tunnel. dynamat after paint after that, I welded the rail adaptors - tacked in place, then removed to stitch plug for stock seat belt bolt hole (Wesco) seat belt outer Wesco seat belt inner , also added receiver snaps in the carpet for the leather handbrake cover Driver's side, rear attachment sill spacing - just clears the seat belt Seat will be re-upholstered, just not today pass seat out to install cushion, harness routing Headrest cushions have to be stripped to fit the new leather covers, the original covers are glued to the foam


-
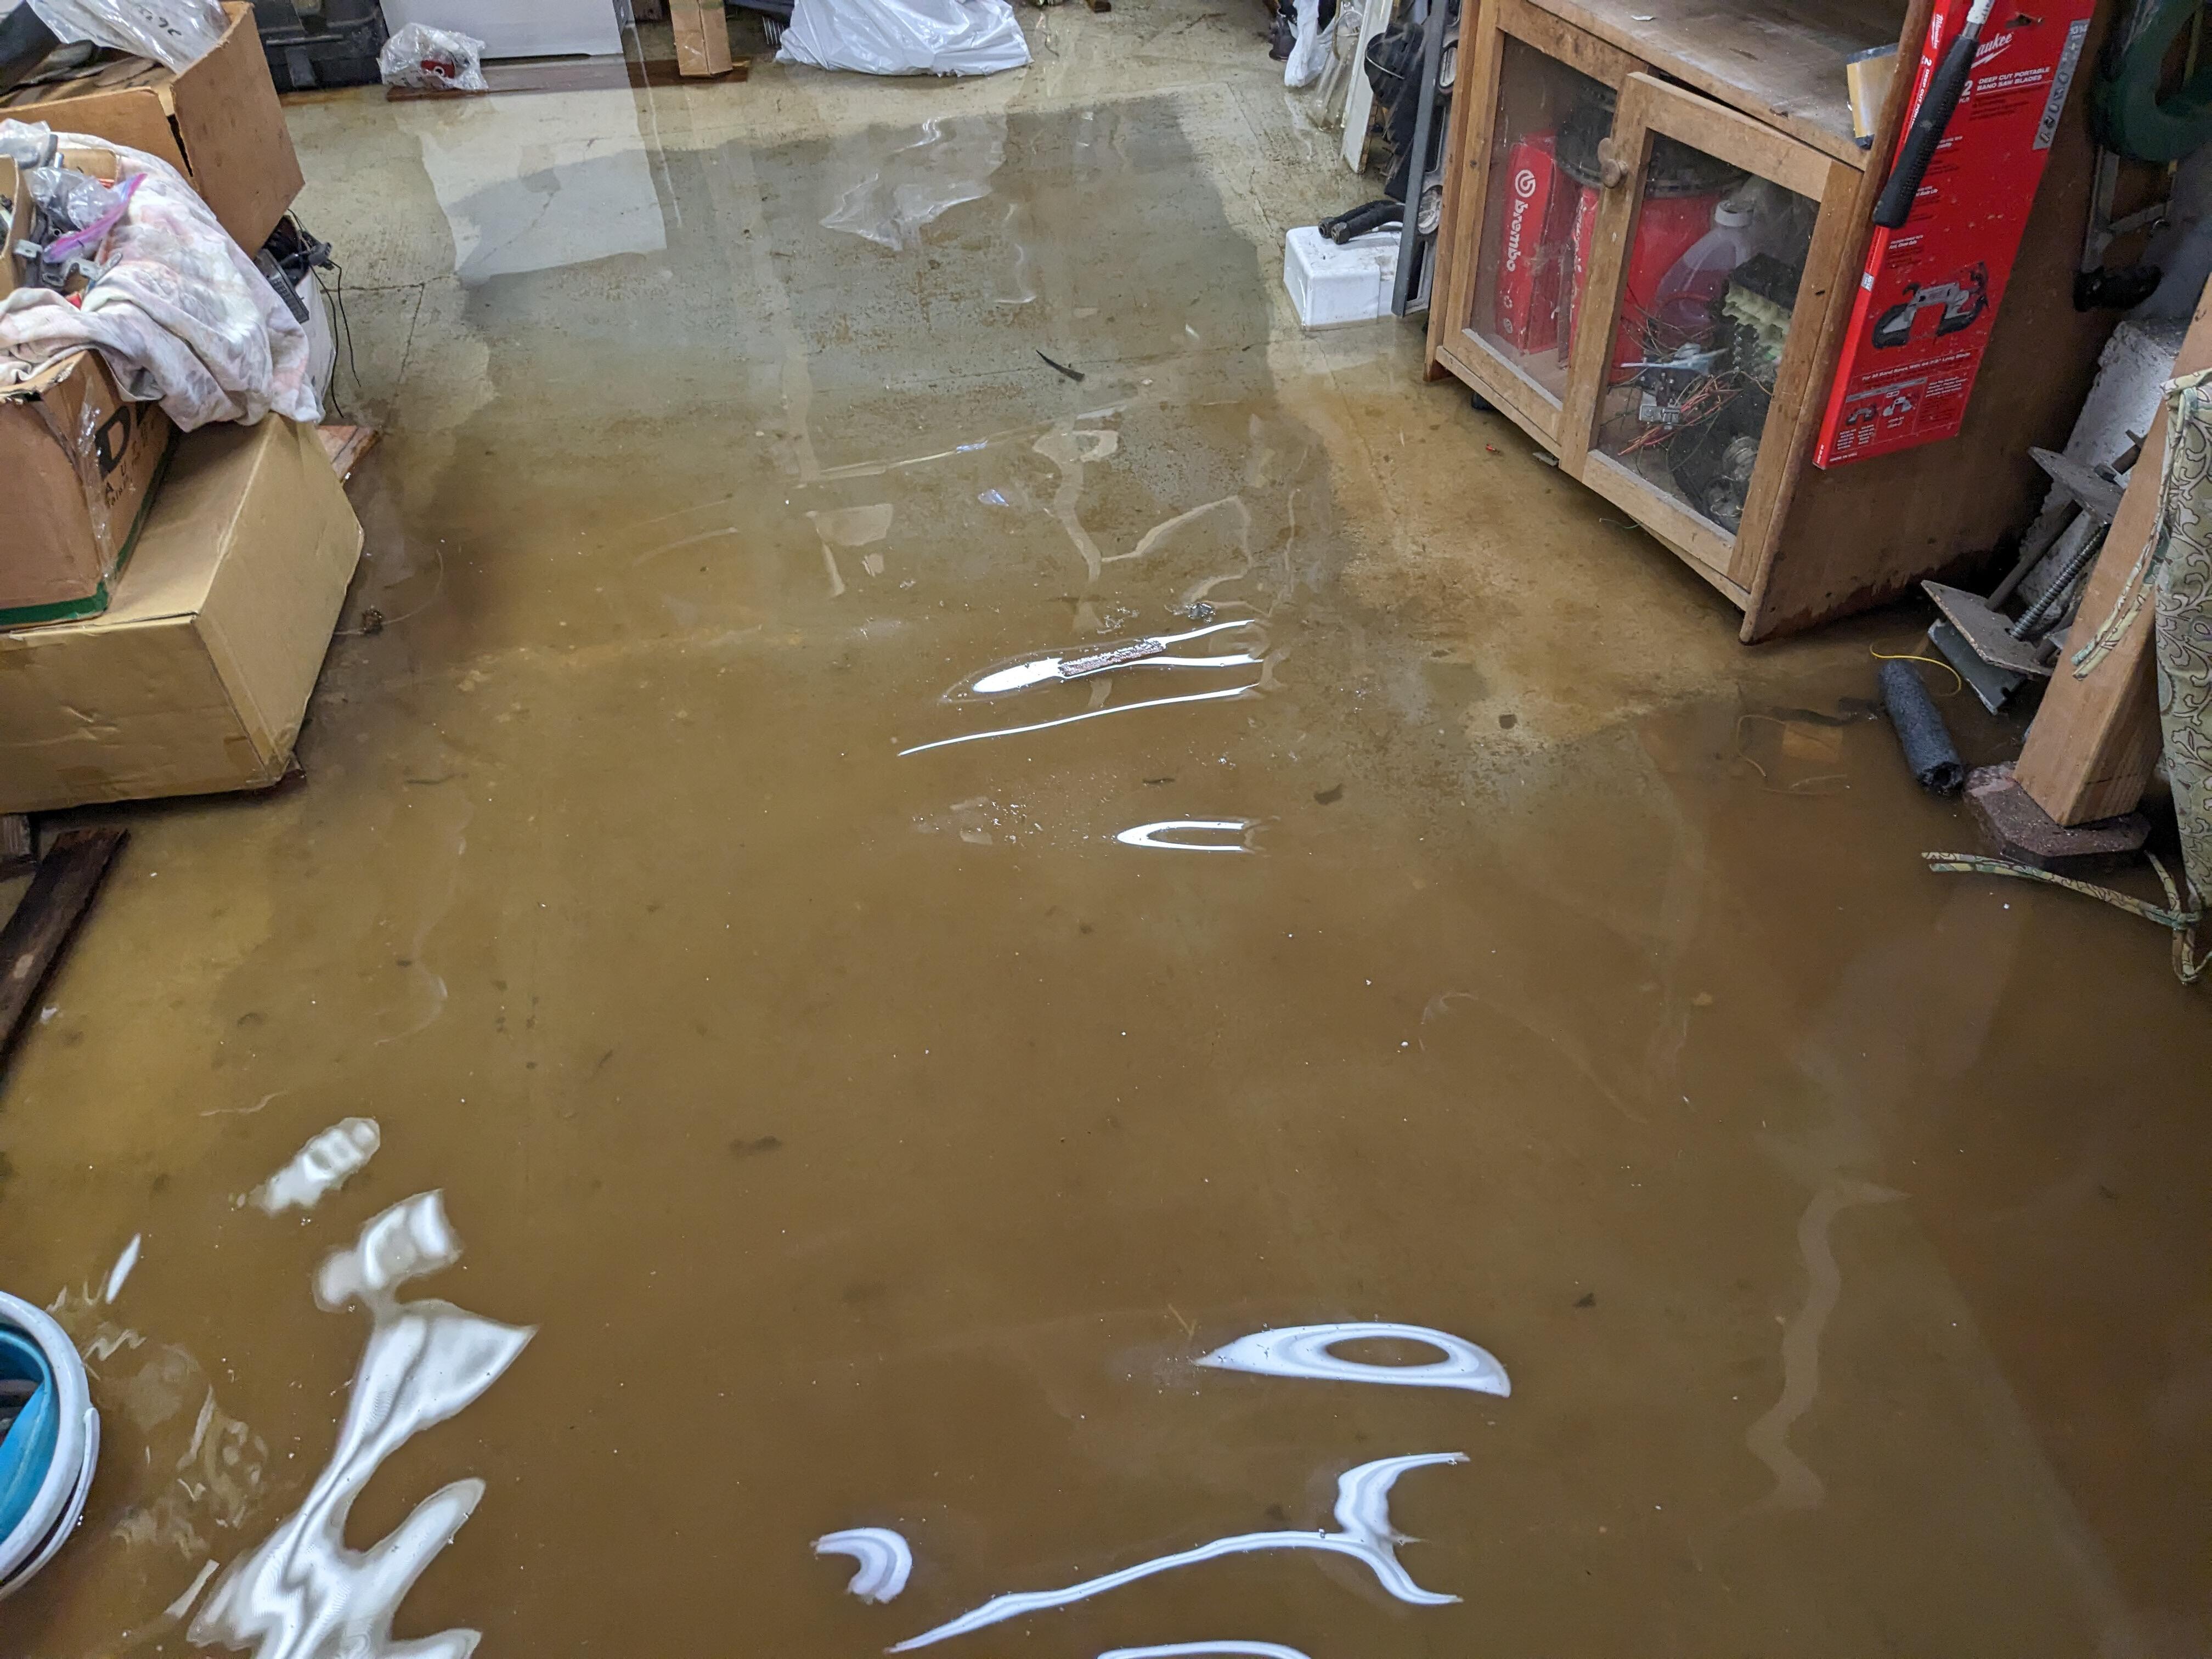
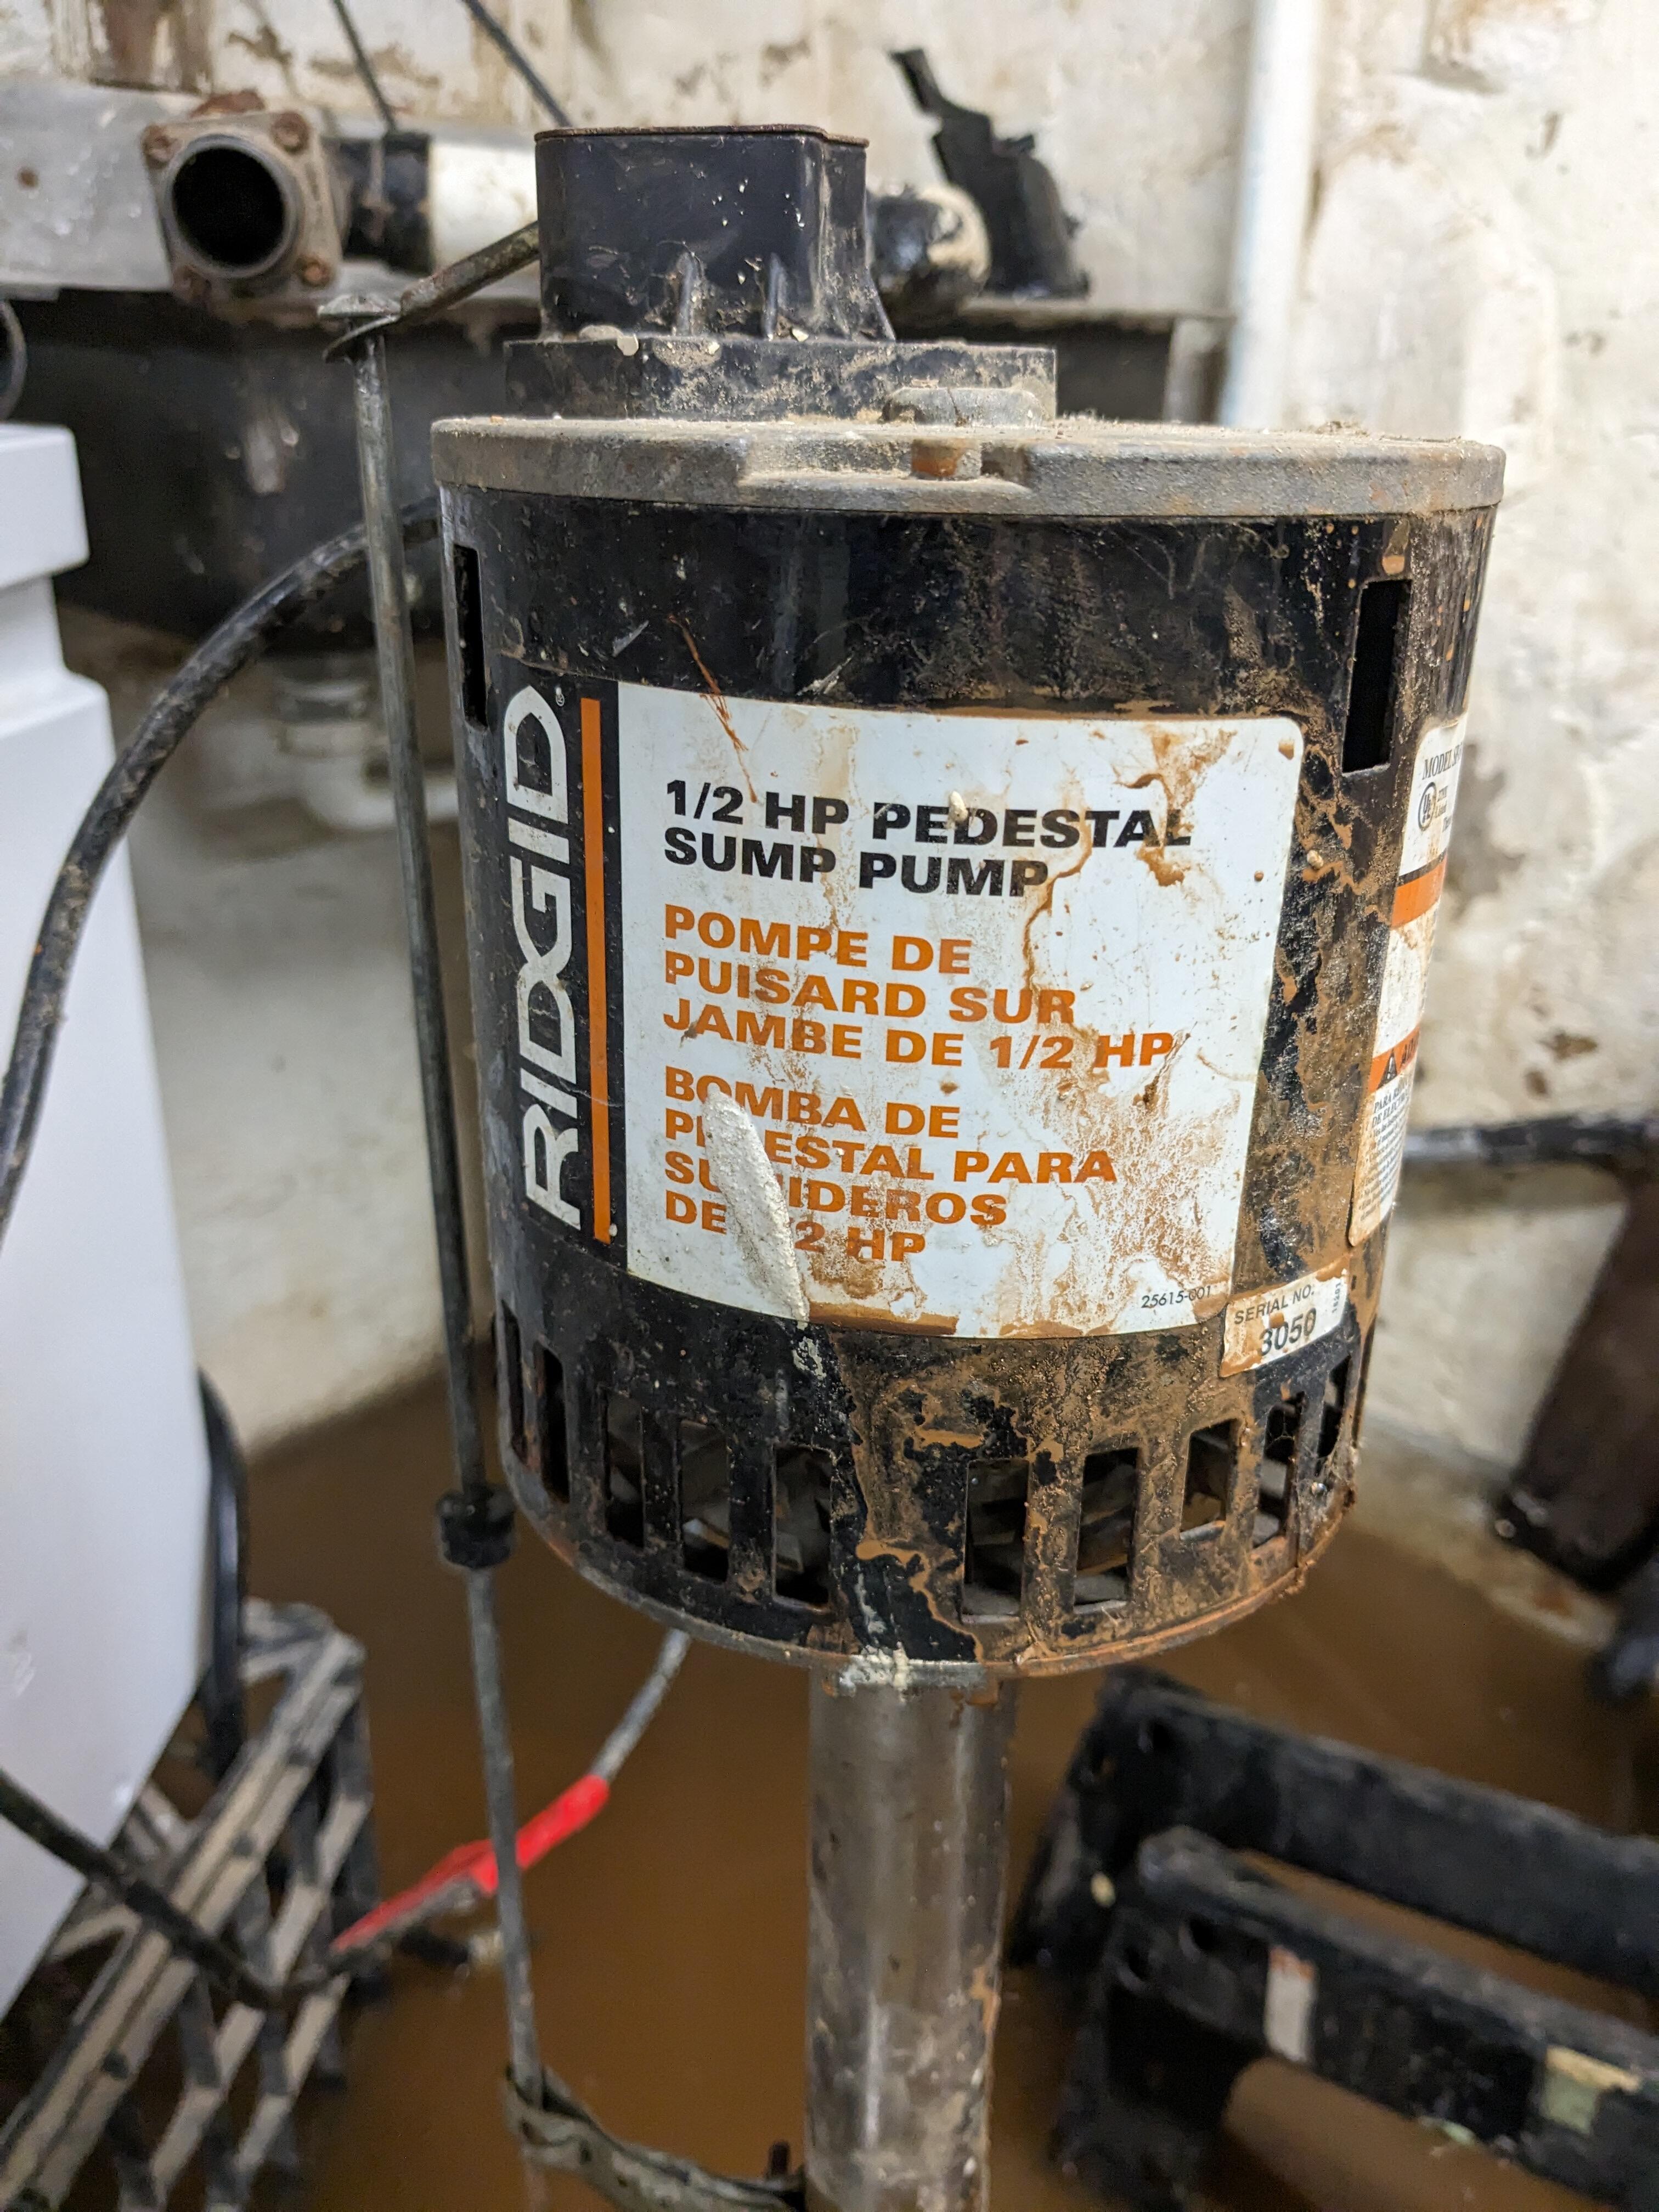
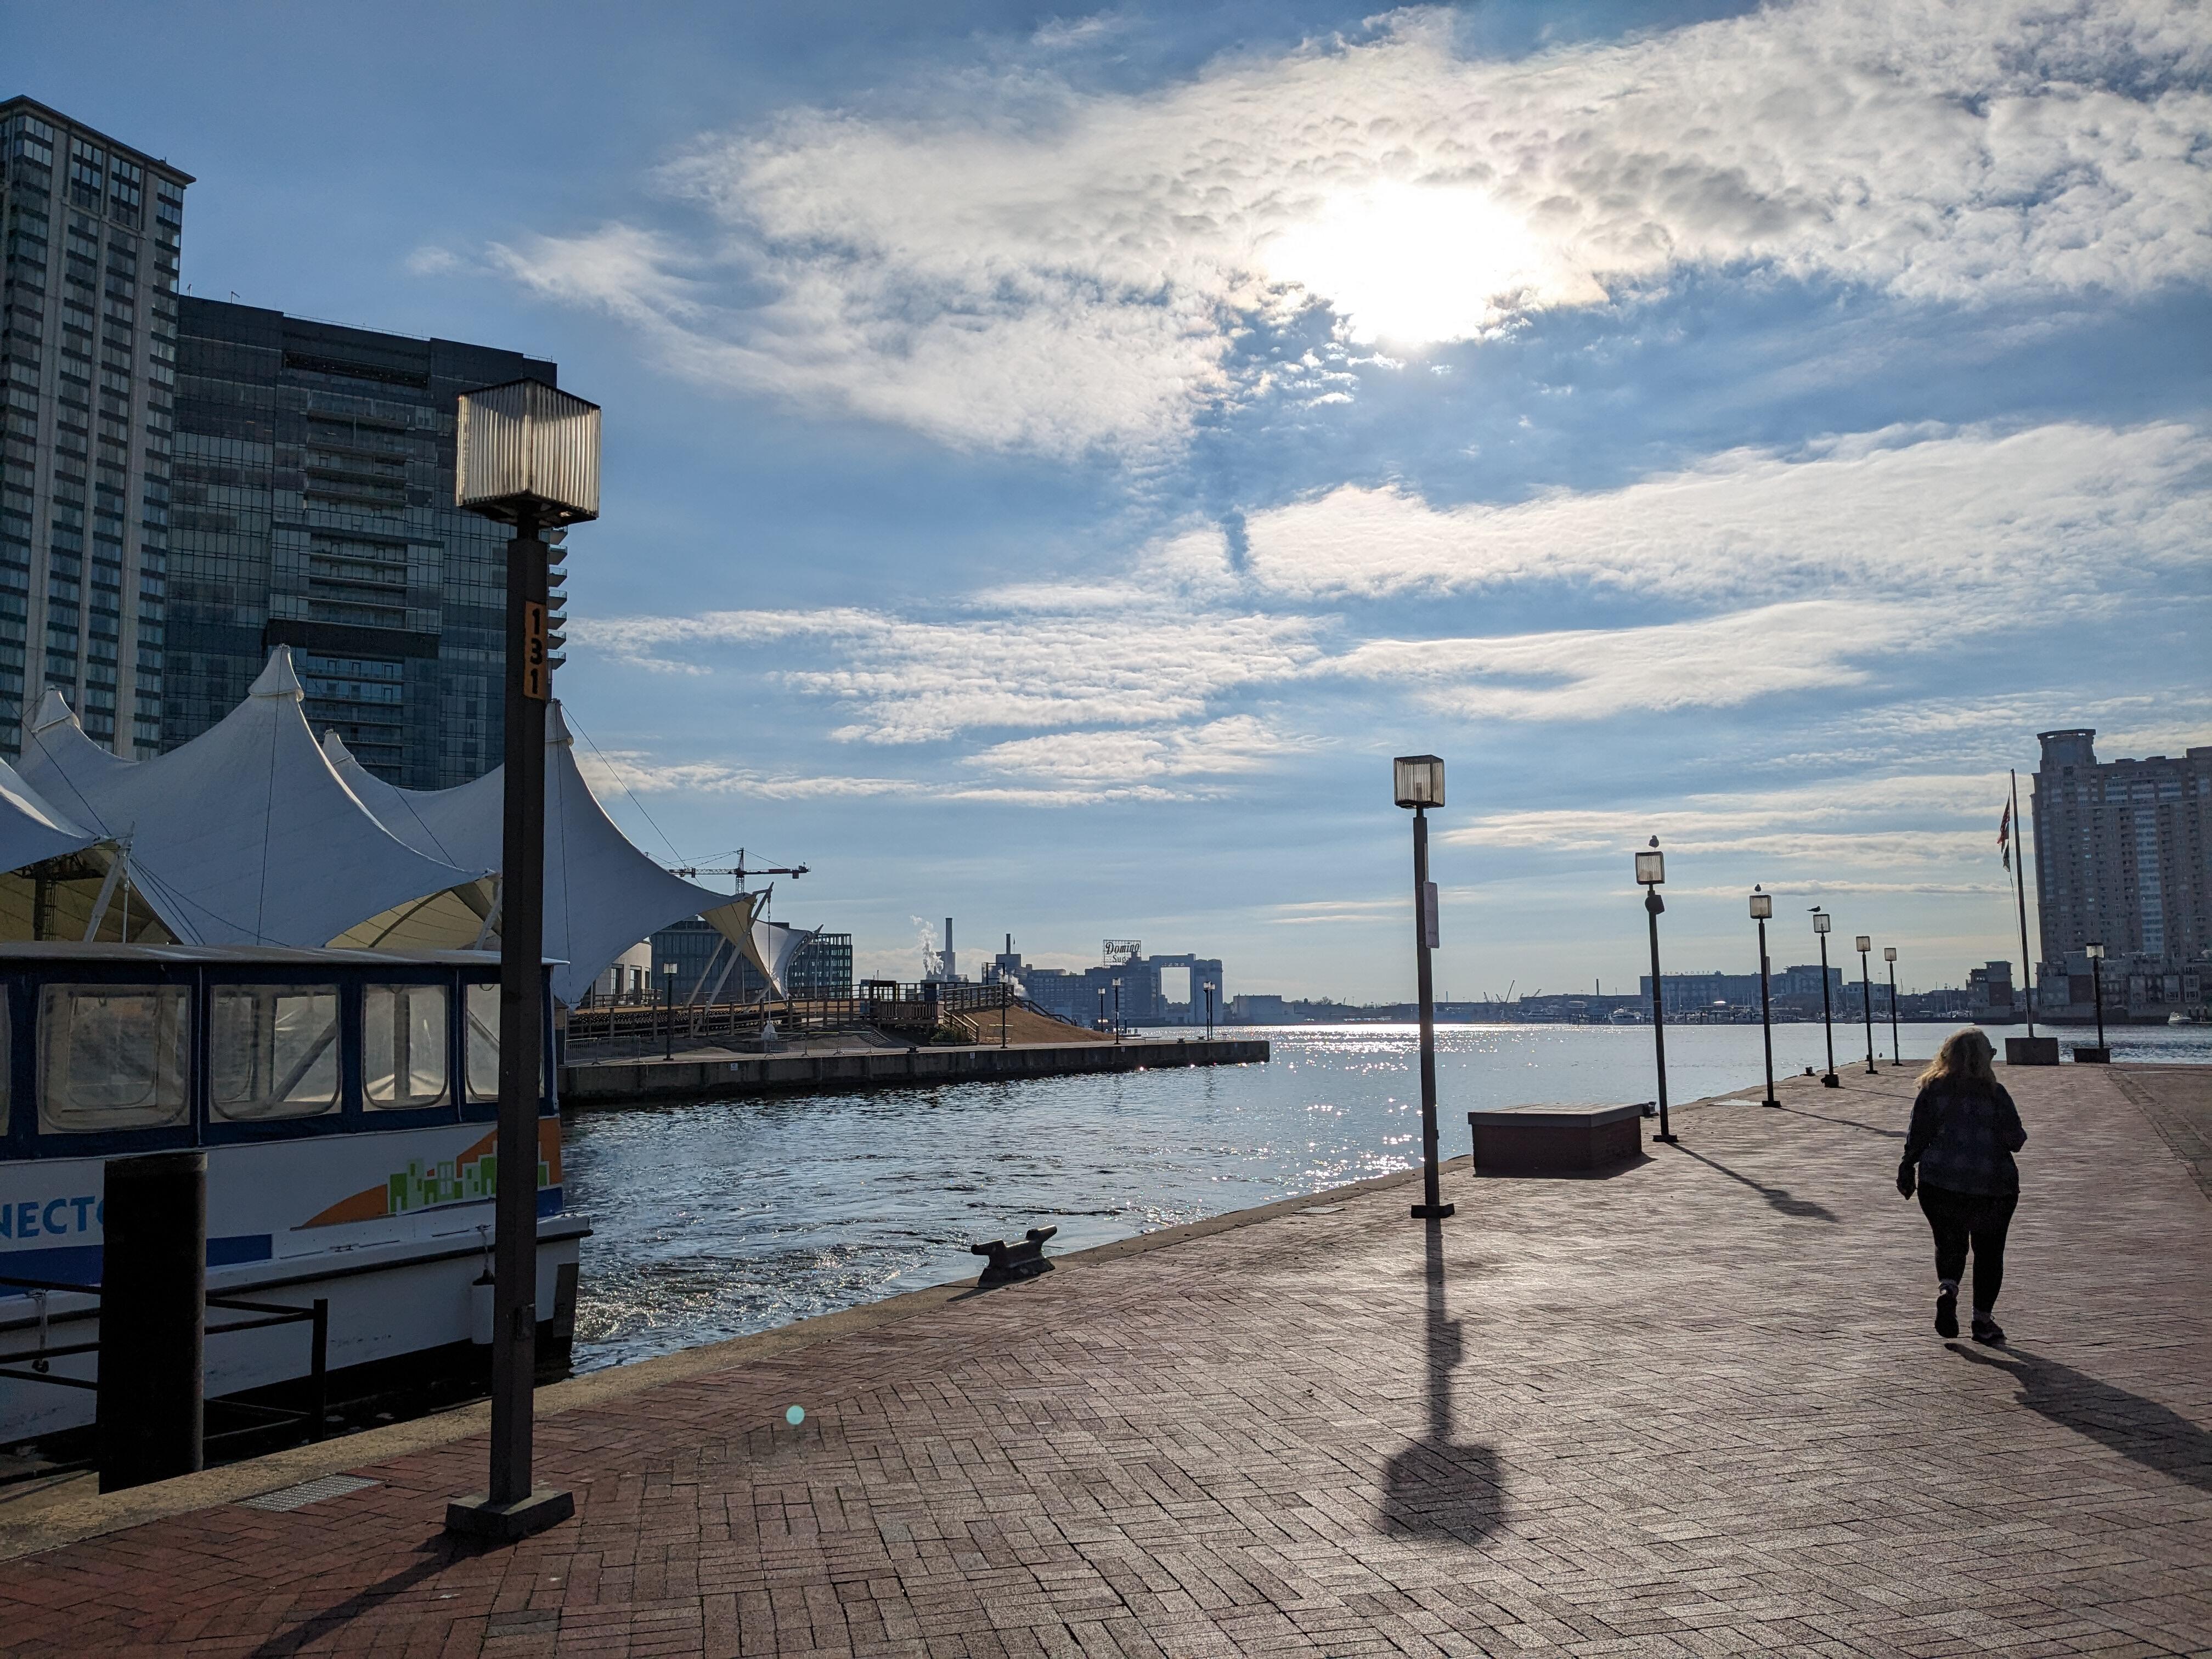
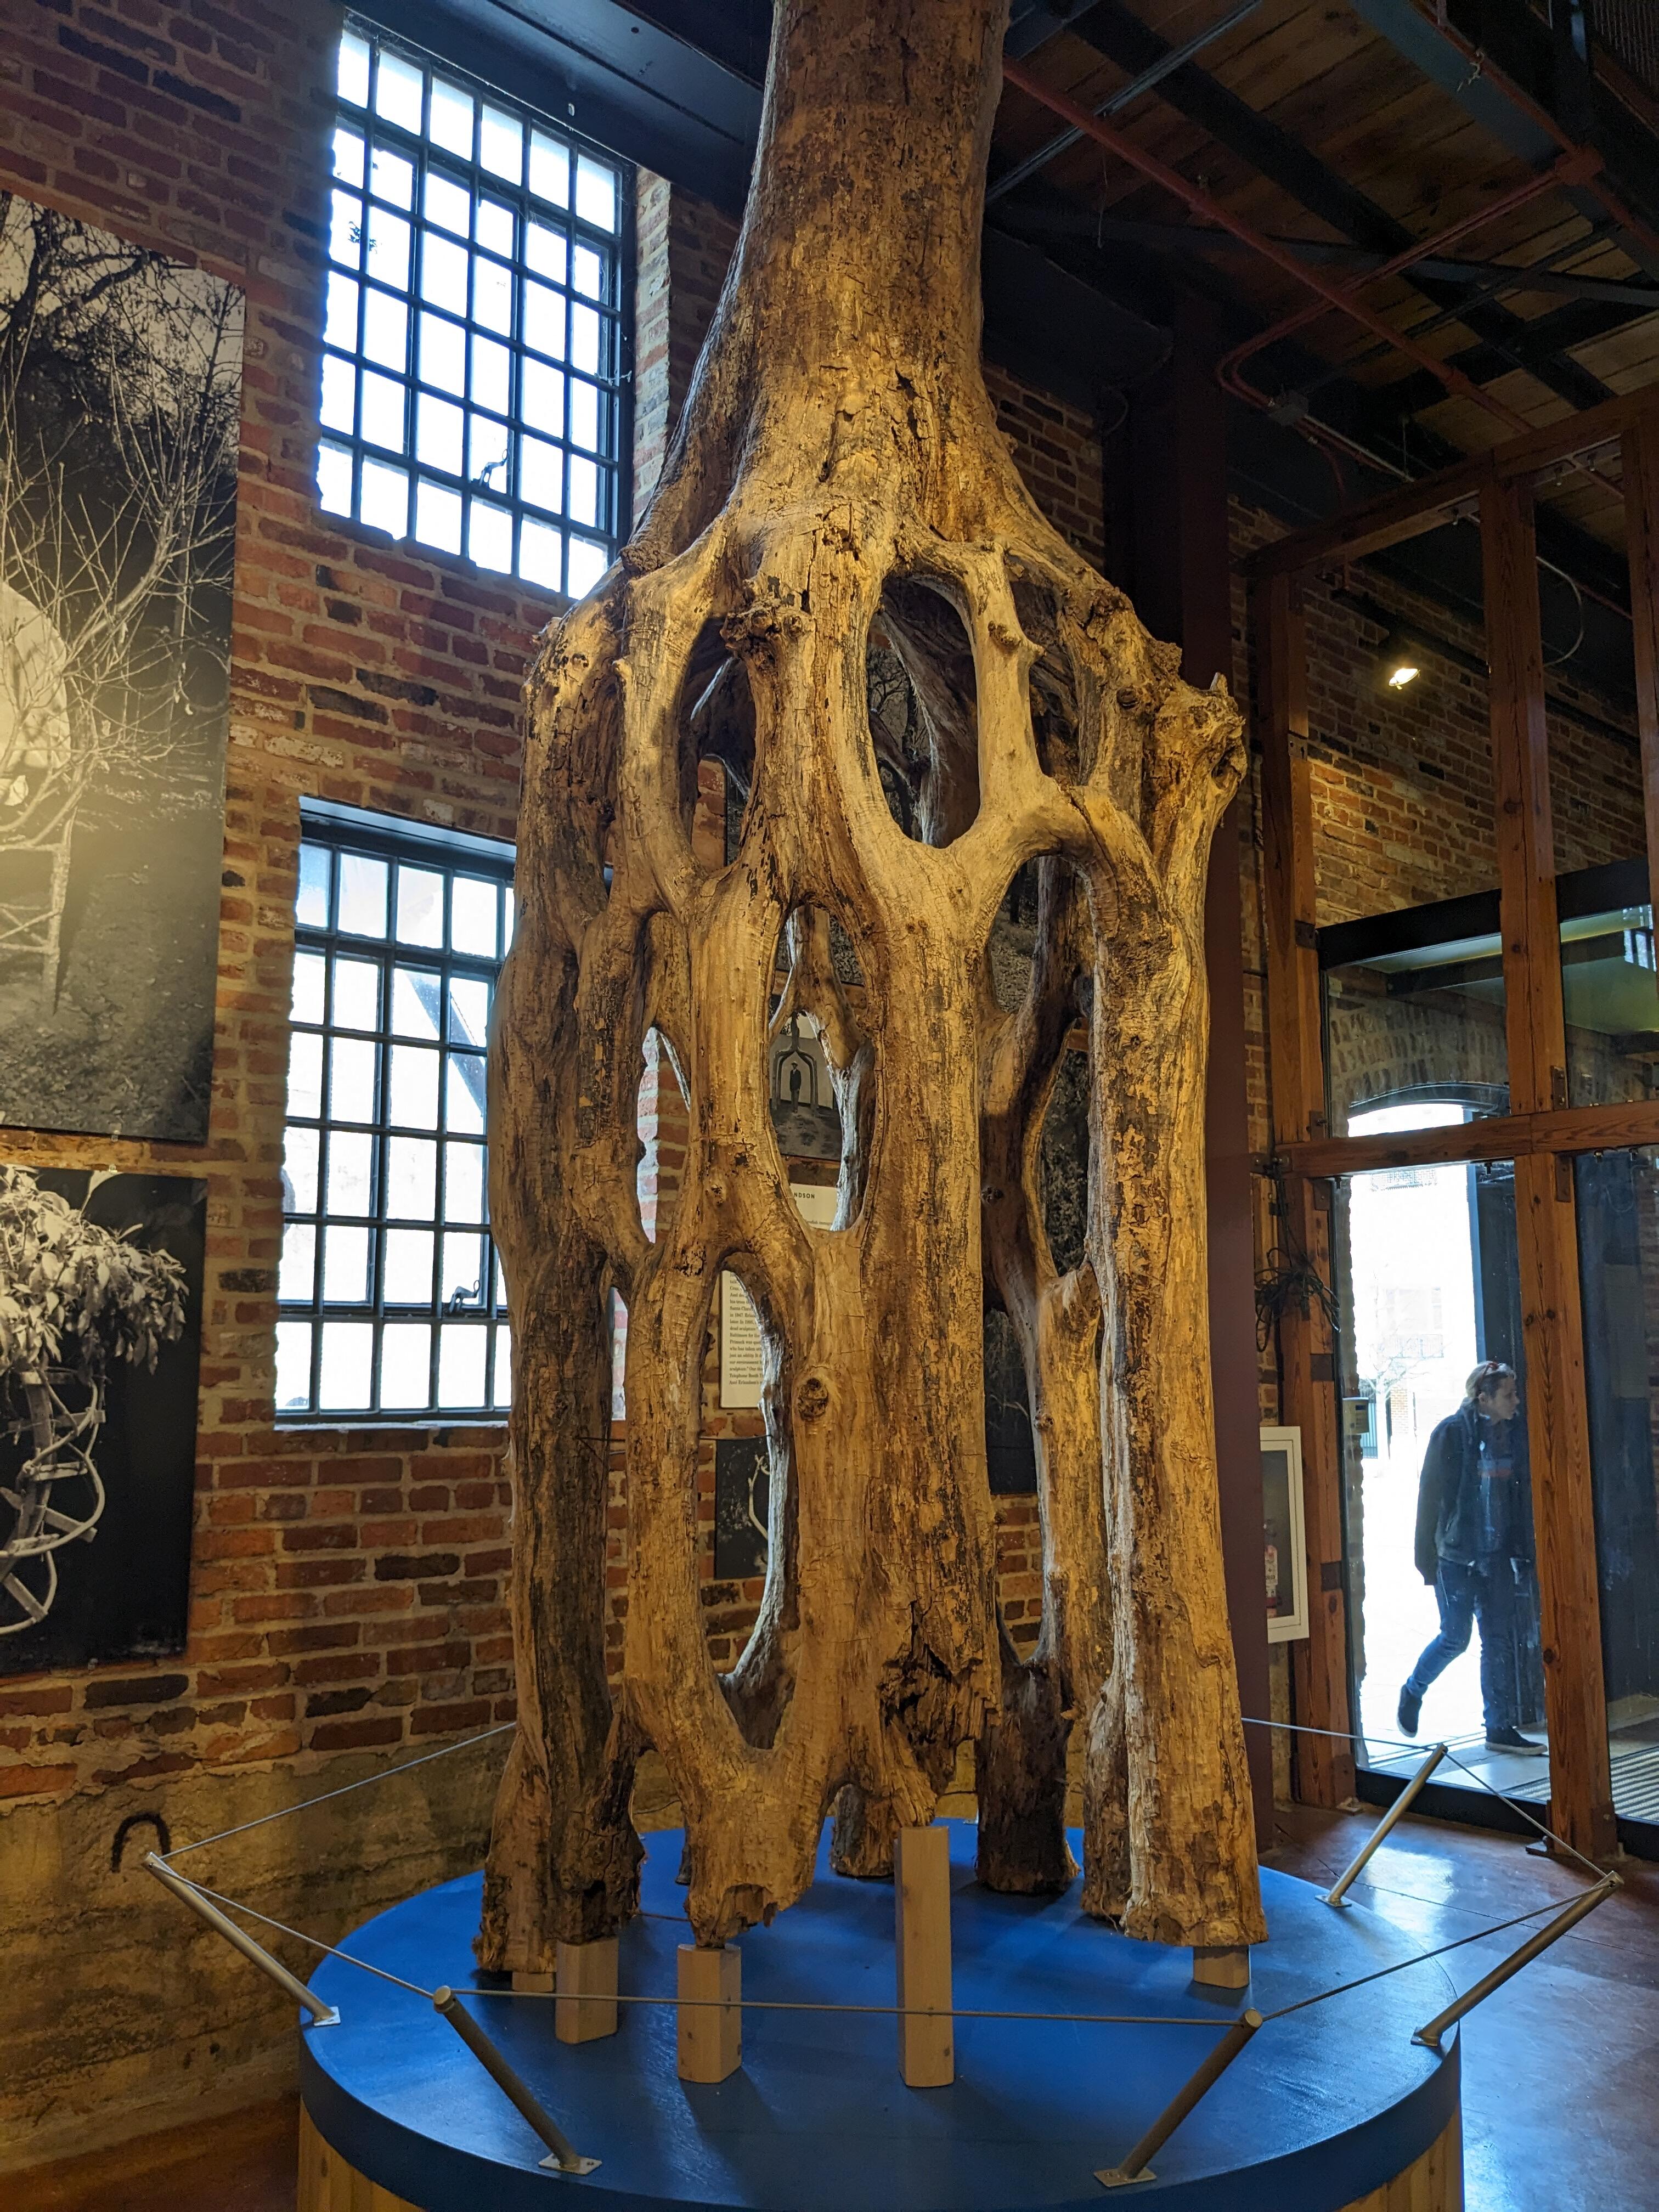
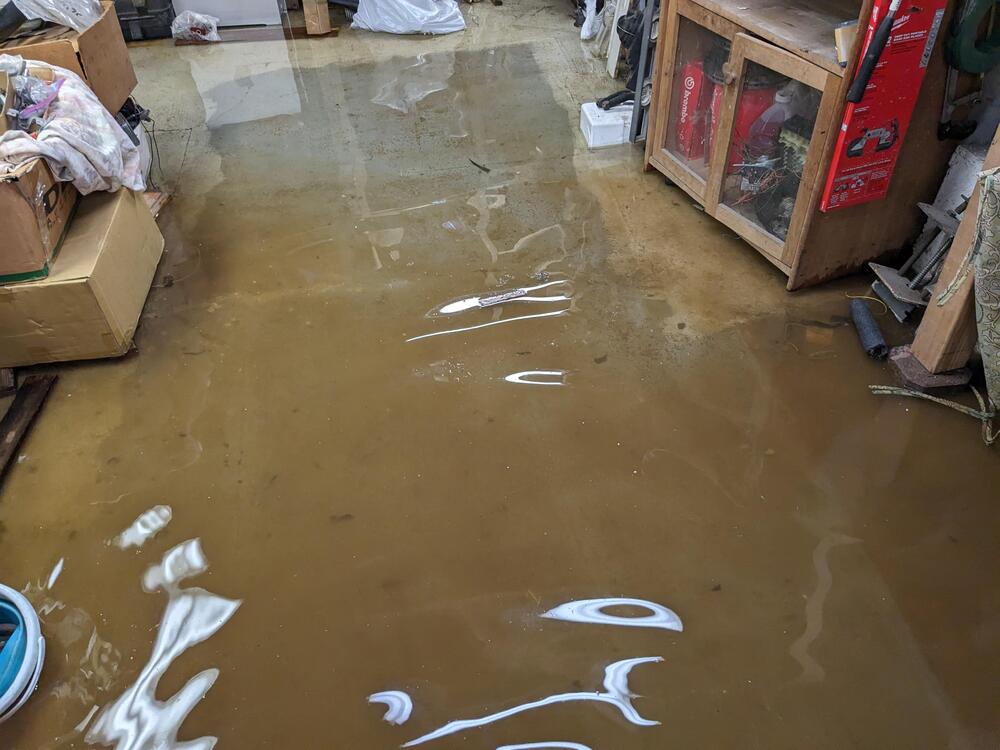
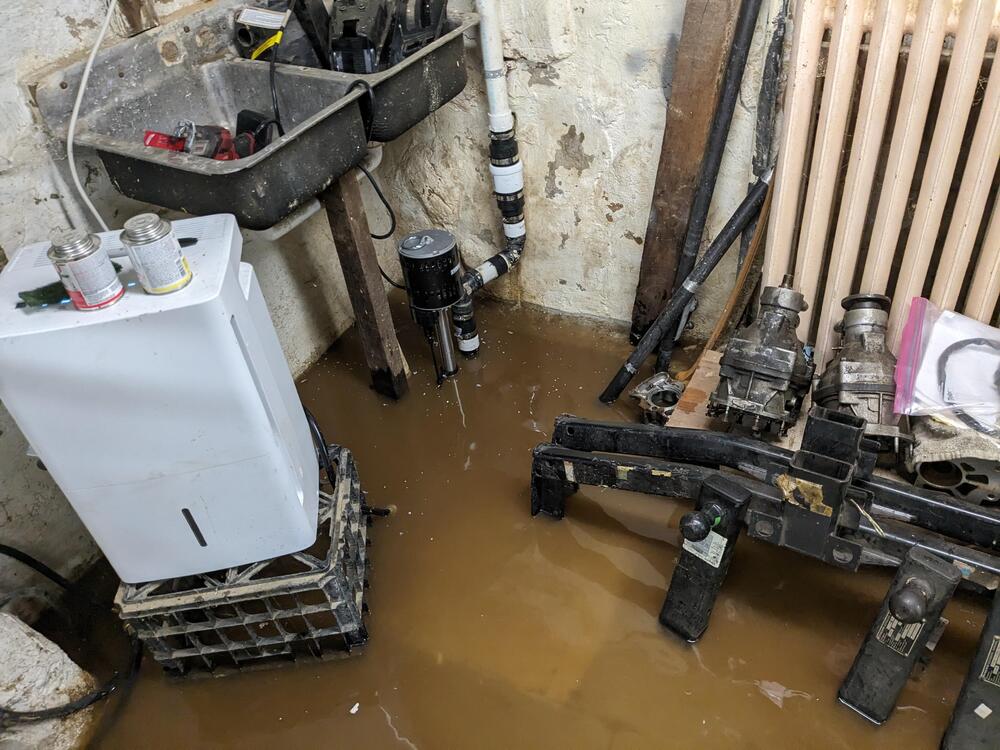
EPDM washer screws finally came (after Amazon first sent a "Baby Alive" doll) - so hopefully next week I can get back to that. My wife & I are in Baltimore for a few days out of town, the trip was delayed yesterday morning when we heard the sump pump screaming - ld dead pump. -lasted about 10 years new pump installed, also from Home Depot. Took only 4-5 min to clear the majority of the water Cool tree grafting what to do with your old Pontiac station wagon


-
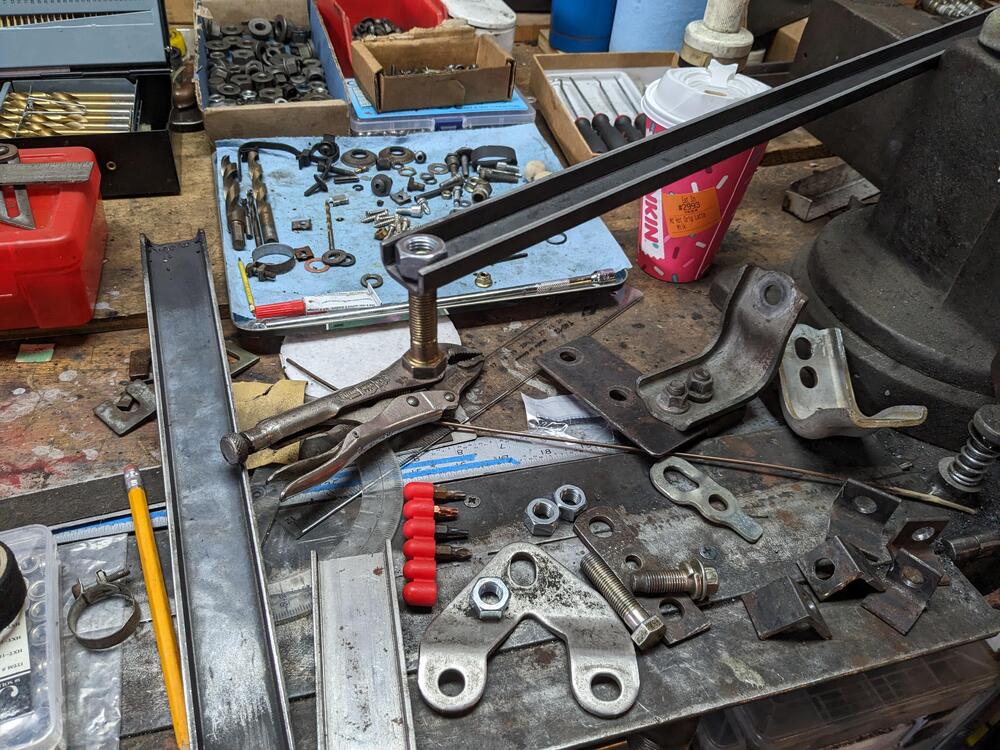
Had about 40mins. between festivities, so I started on the wider inner seat rail . Need to weld it up, however the basic element is ready to move forward


-
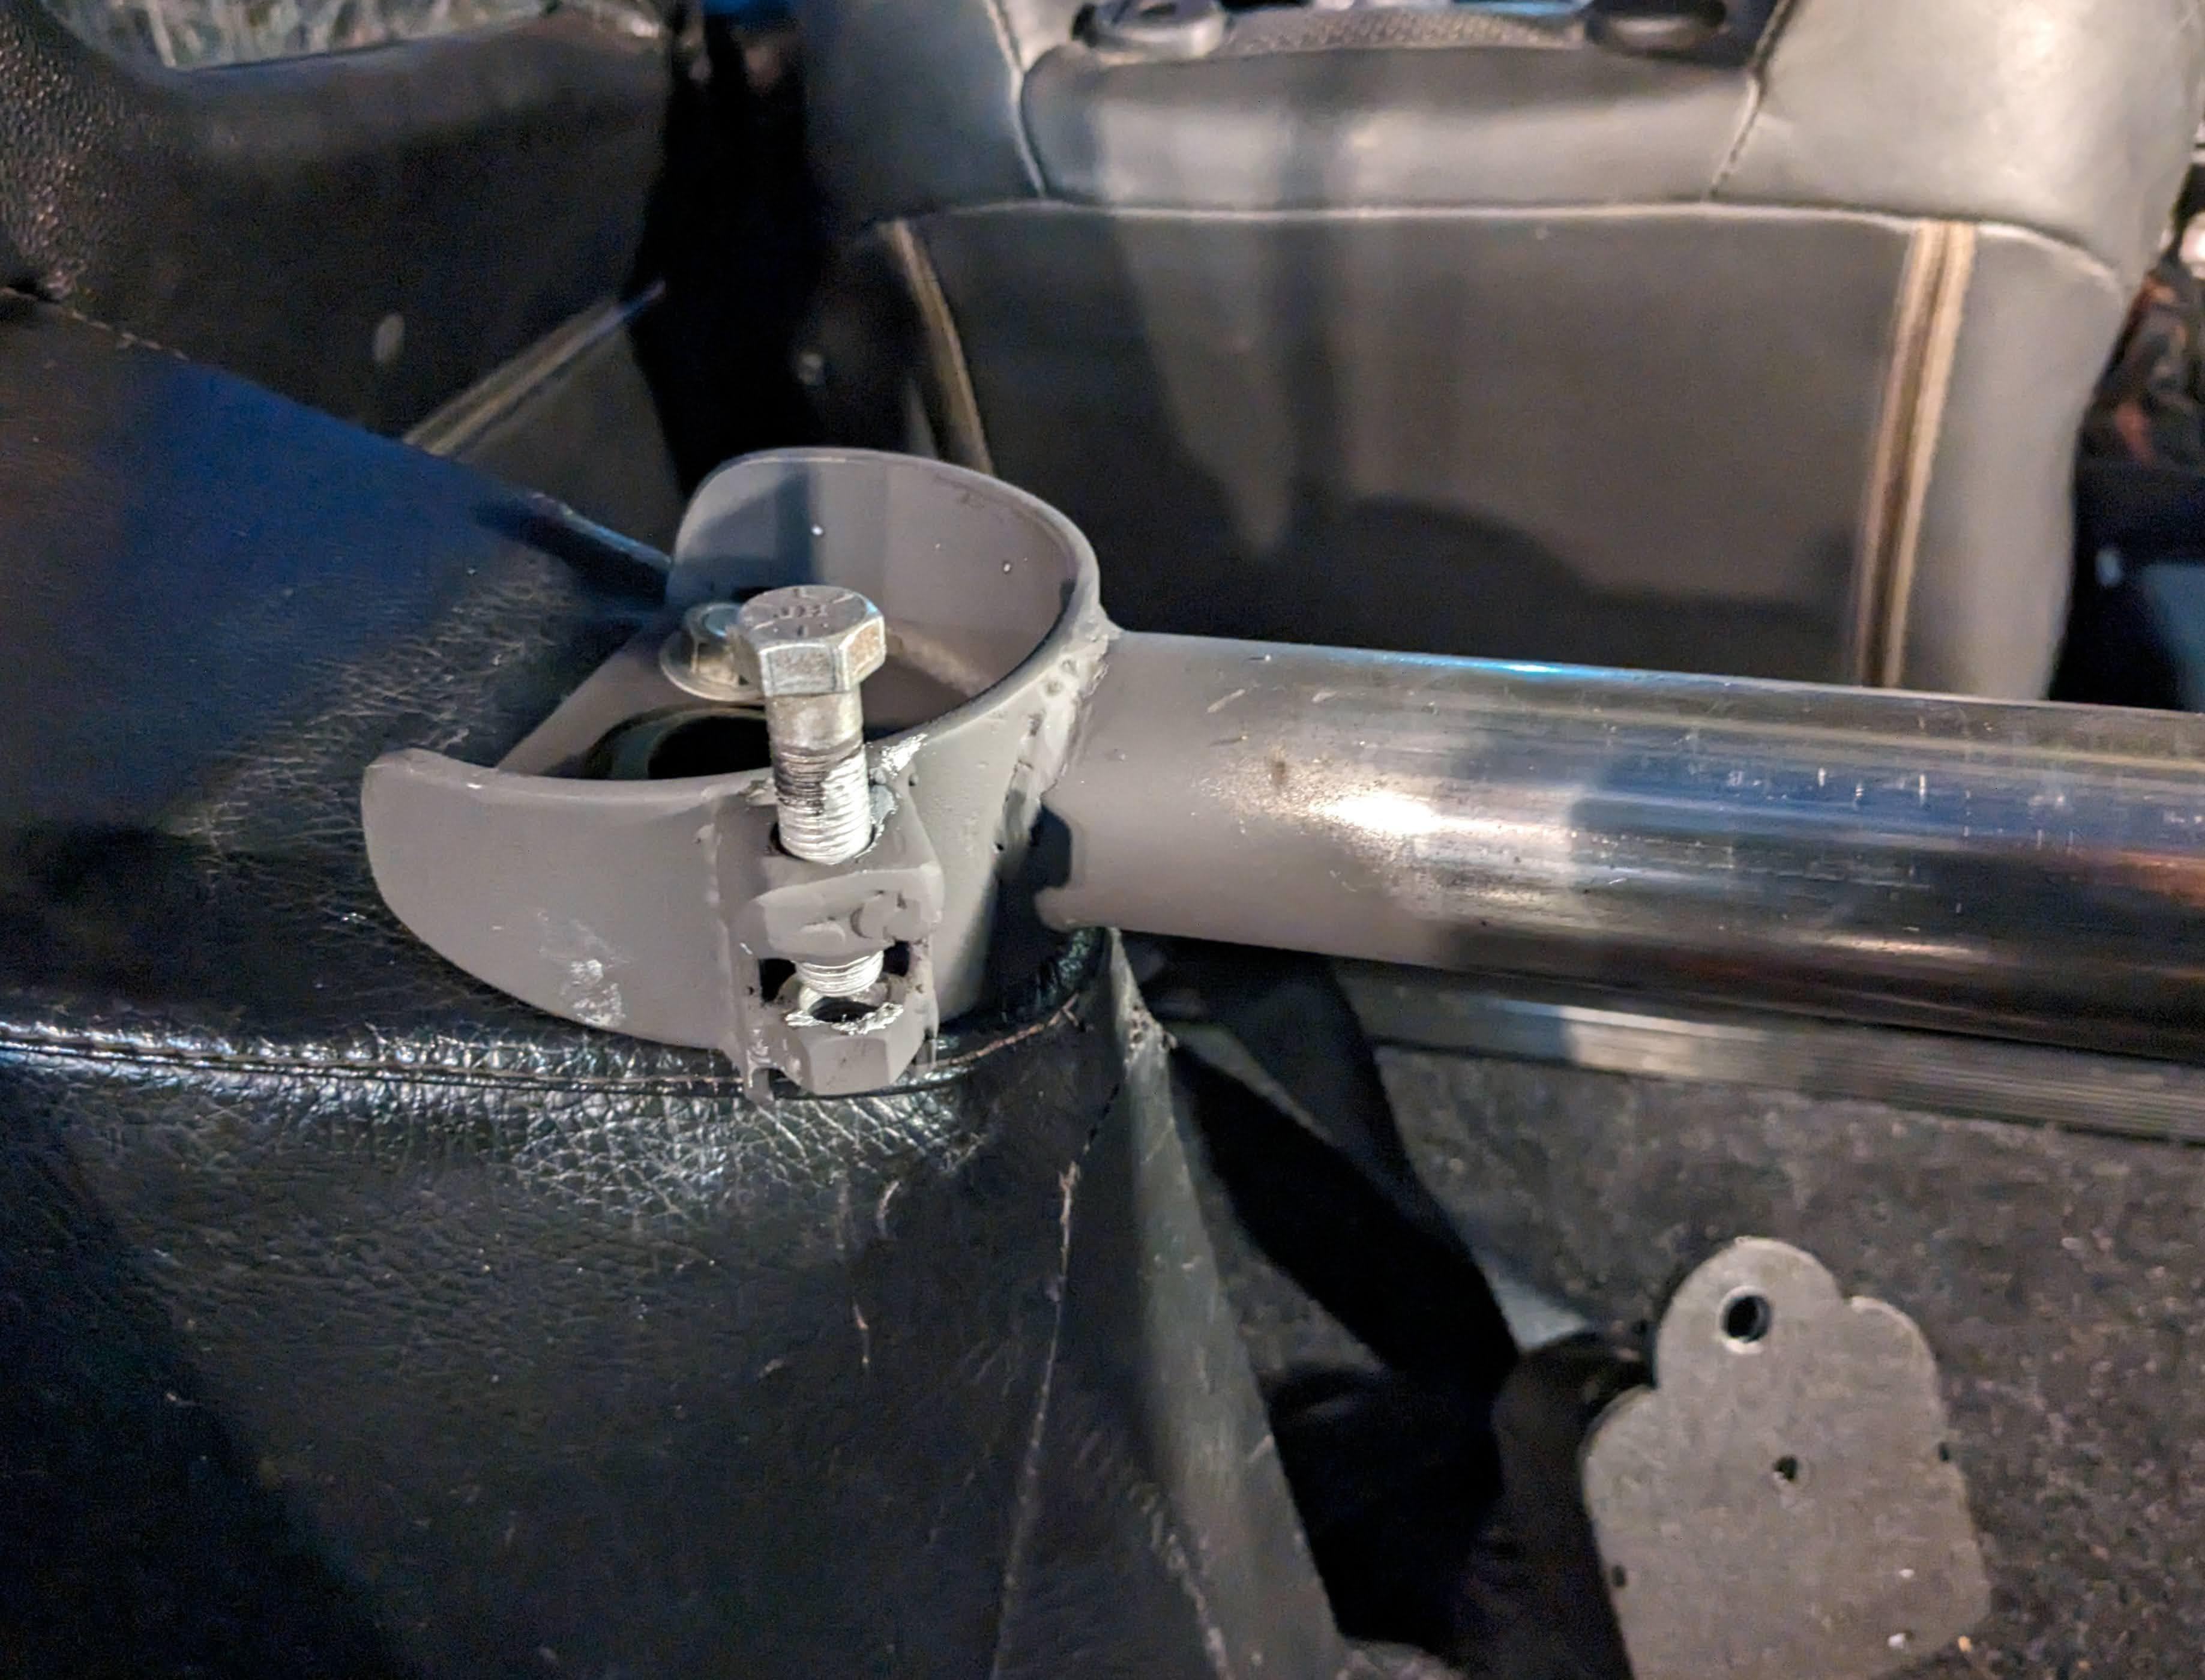
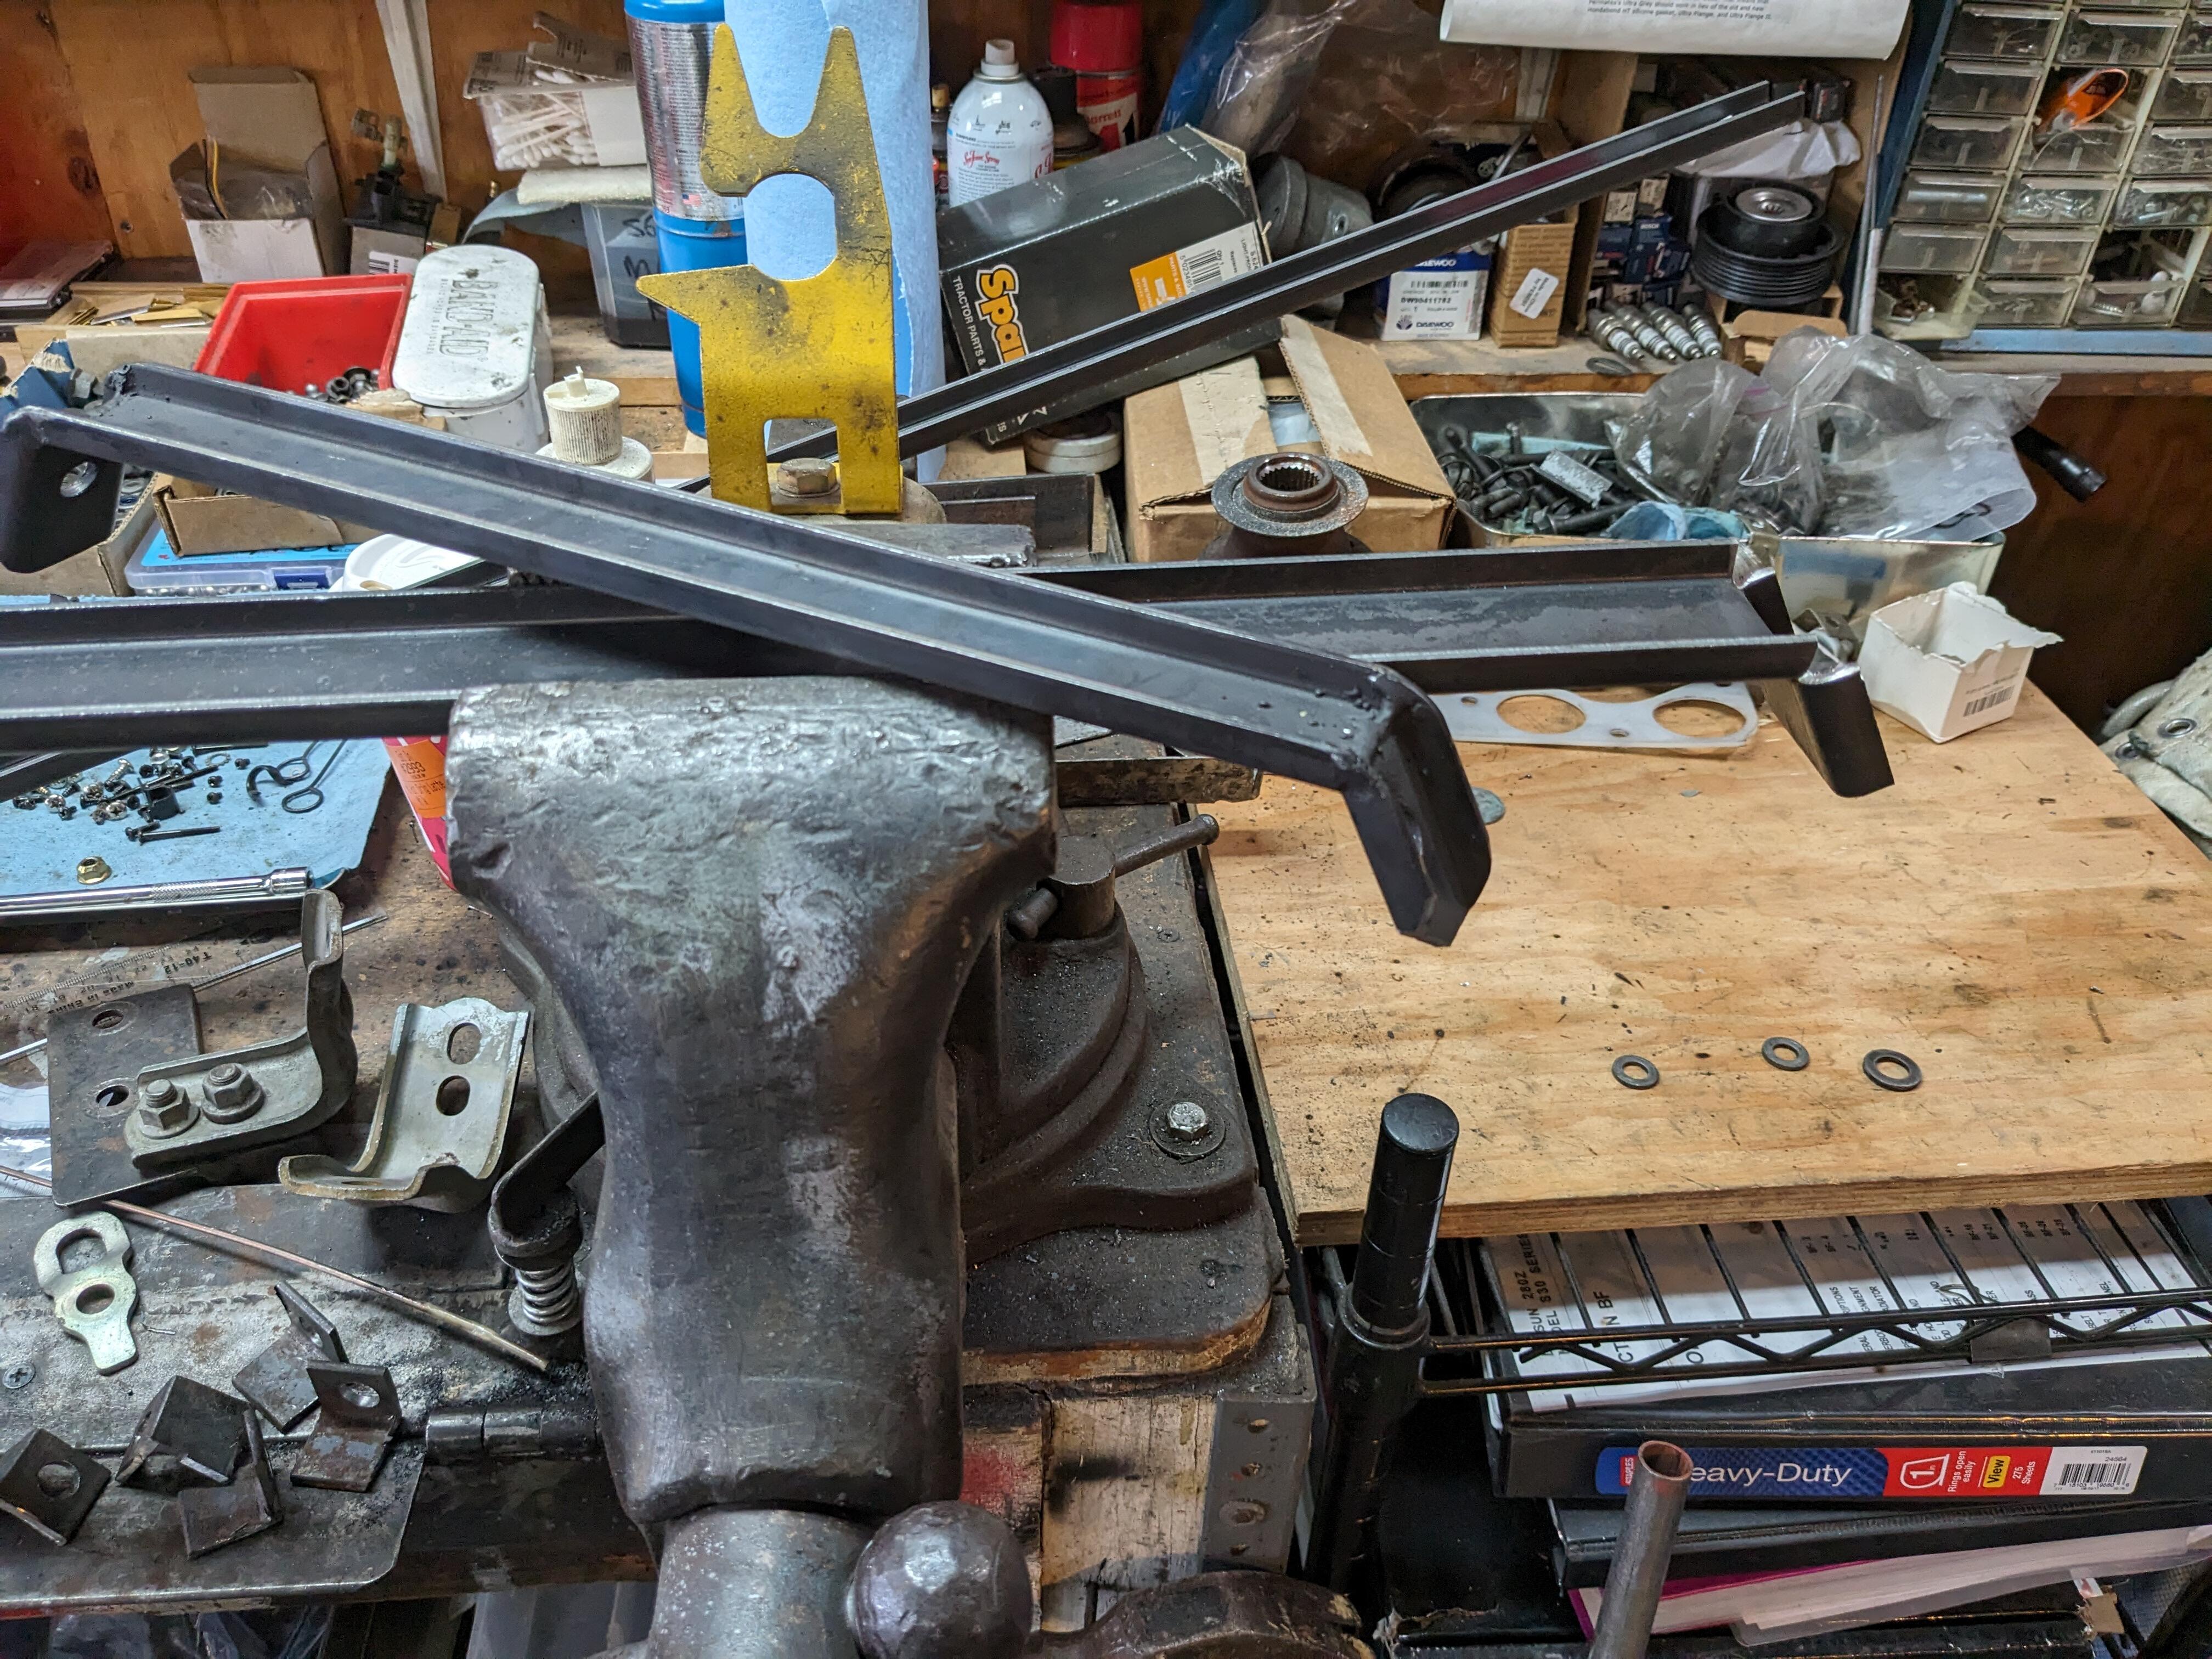
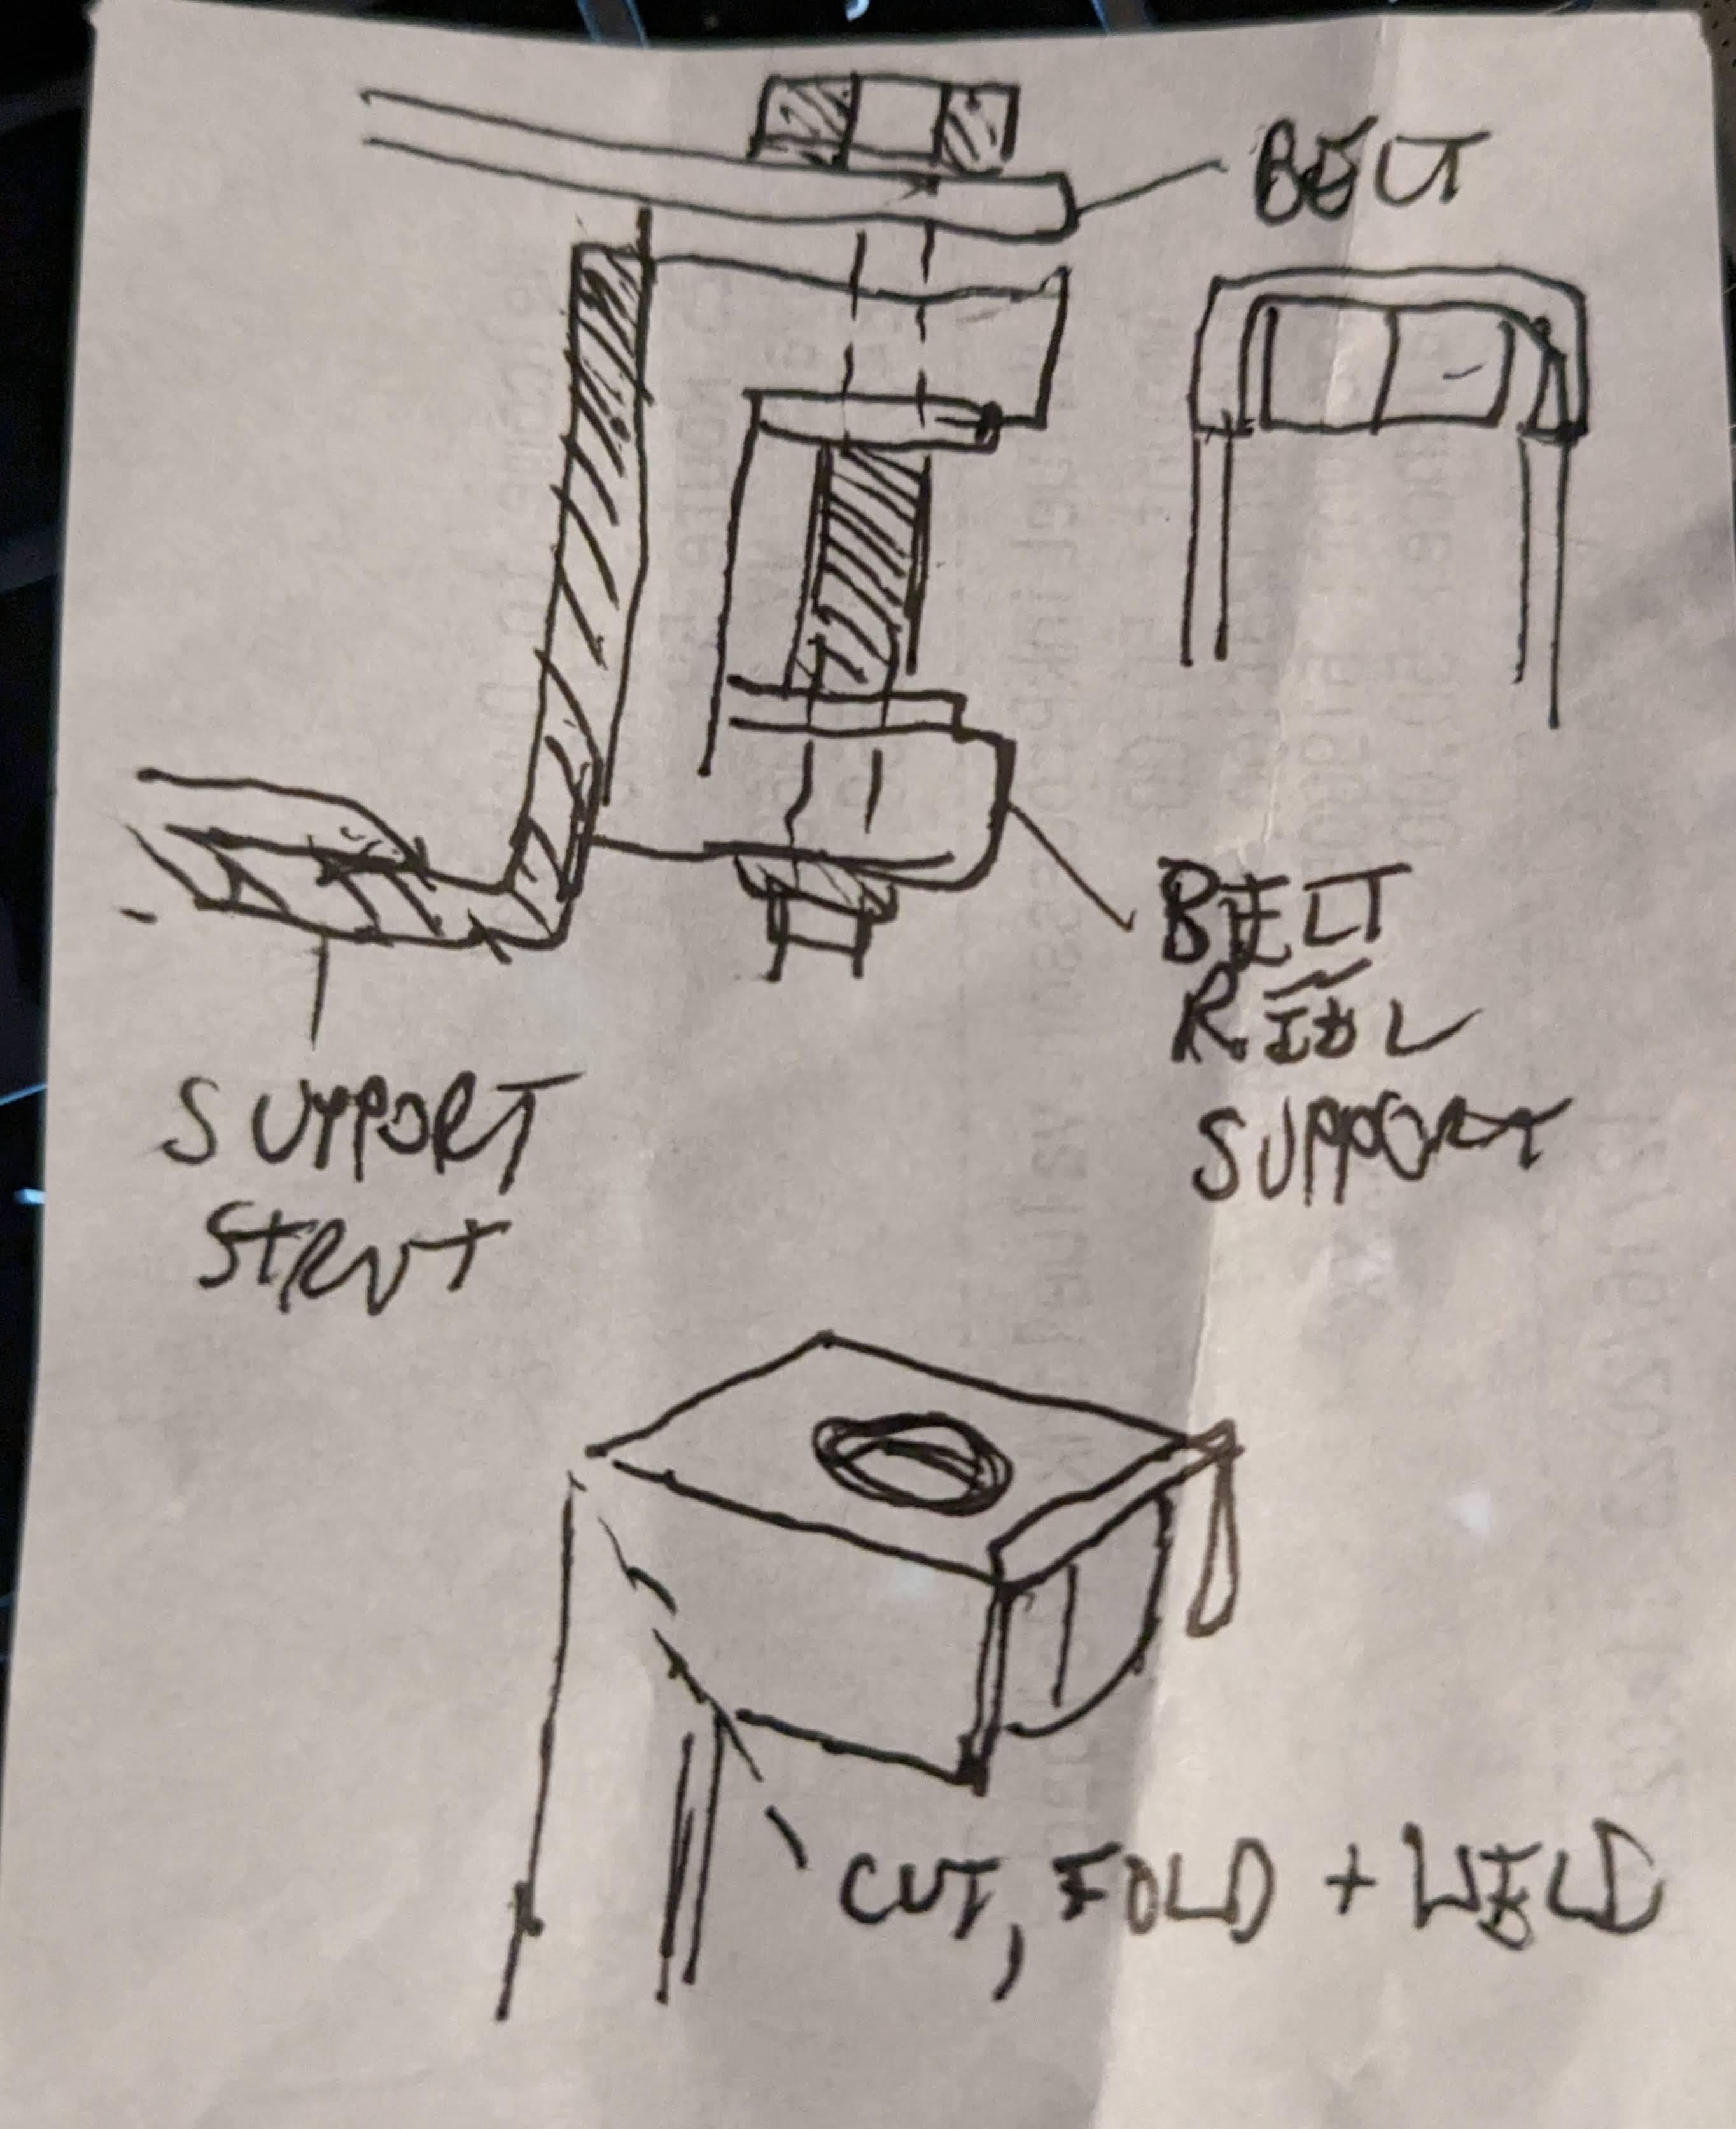
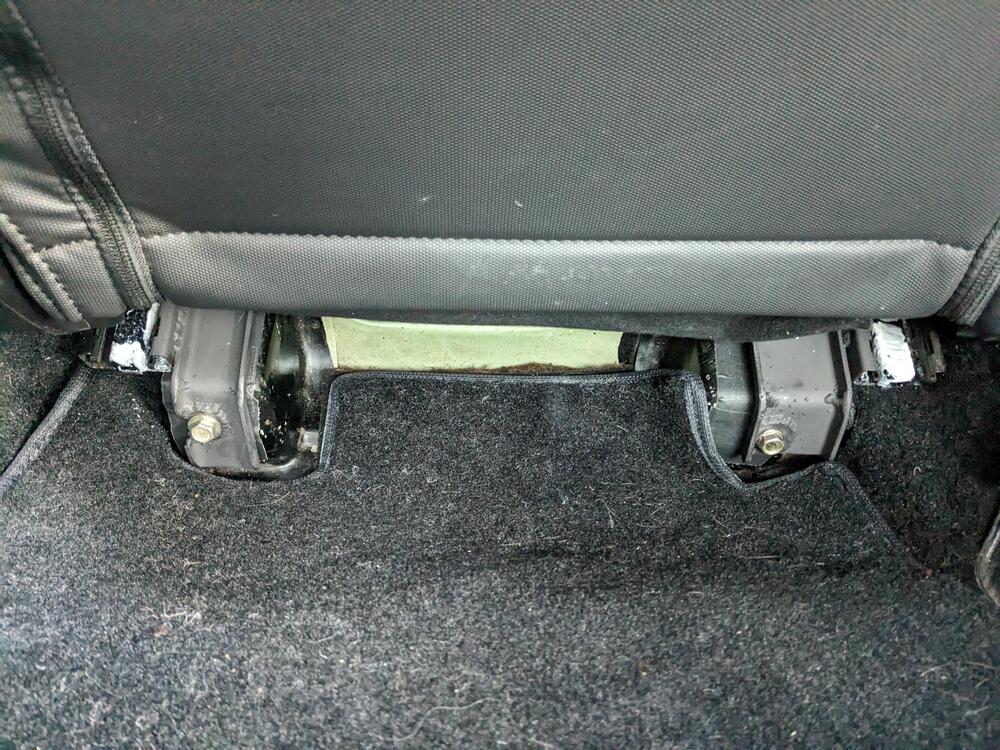
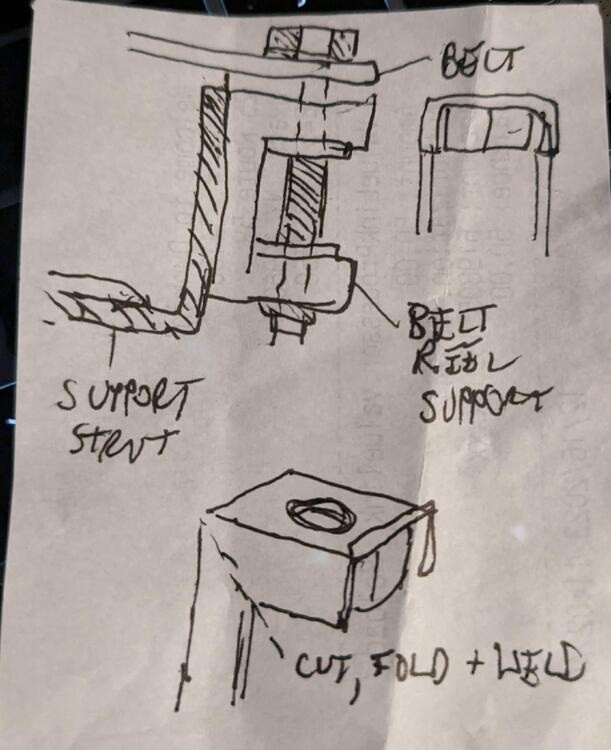
@rturbo 930 thank you for taking the time! I appreciate the clear & close up pics. What is the smaller (M8?) secondary offset captive nut retain?I does appear that I can make a top plate & weld it in - I would thank that would also help beef the structure of the inner towers also, so a plus all around. In the meantime, I realized I can add a beefy support to the strut bar I've already made, and lay the reel on that until I feel like dismantling the hatch interior for welding. I will make a vertical stack with two 7/16-20 nuts at each end with a horizontal support element
-
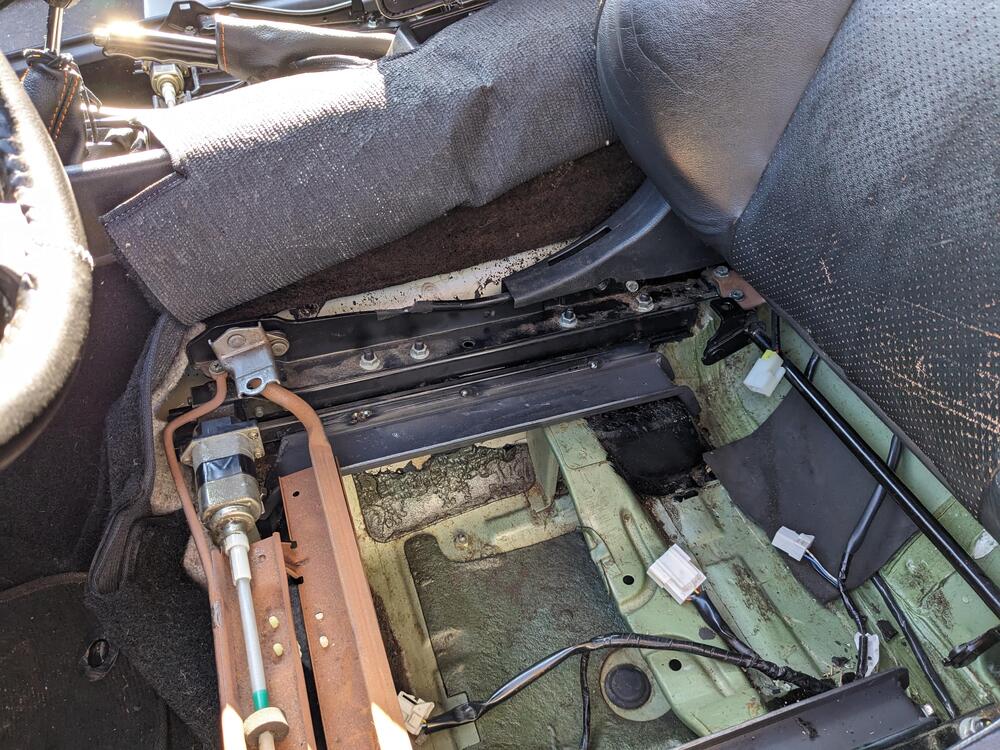
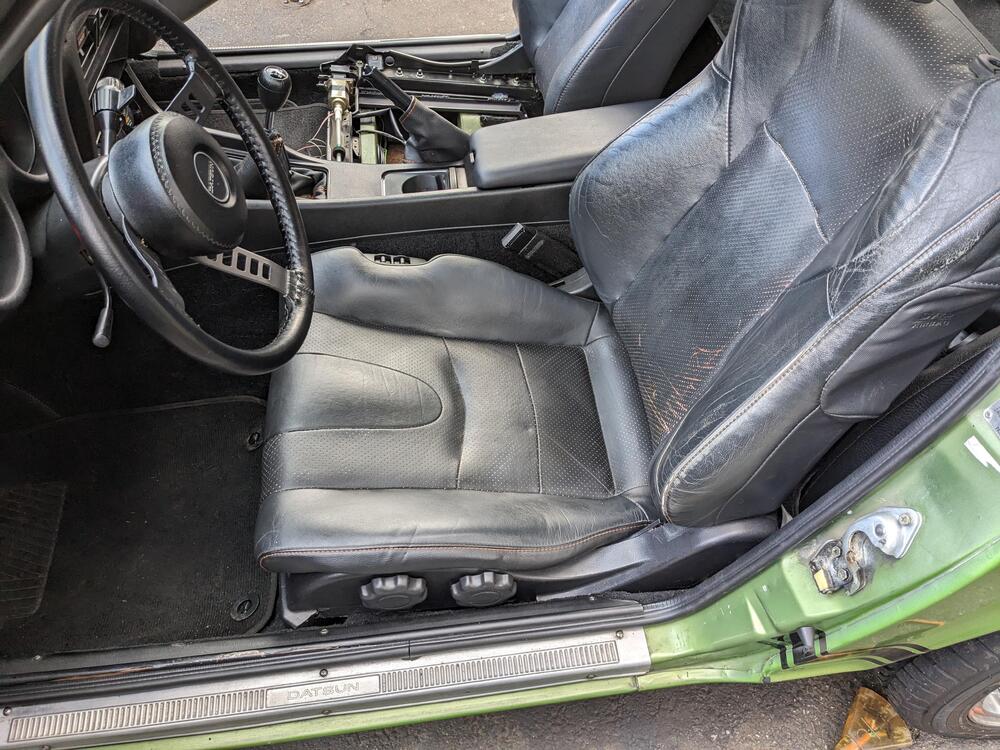
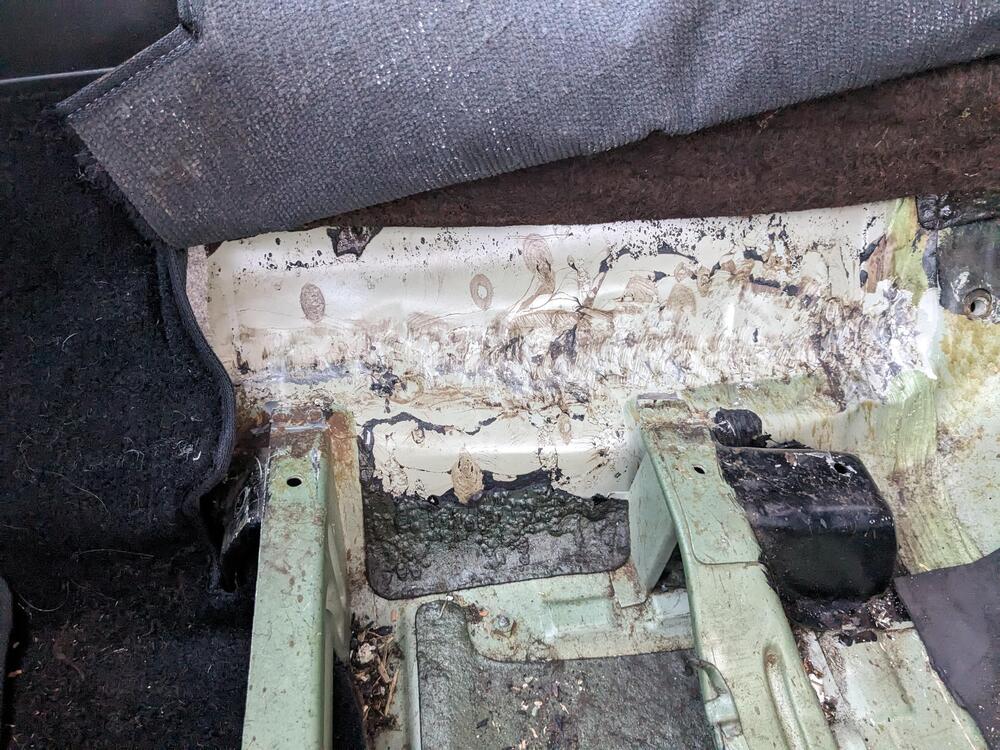
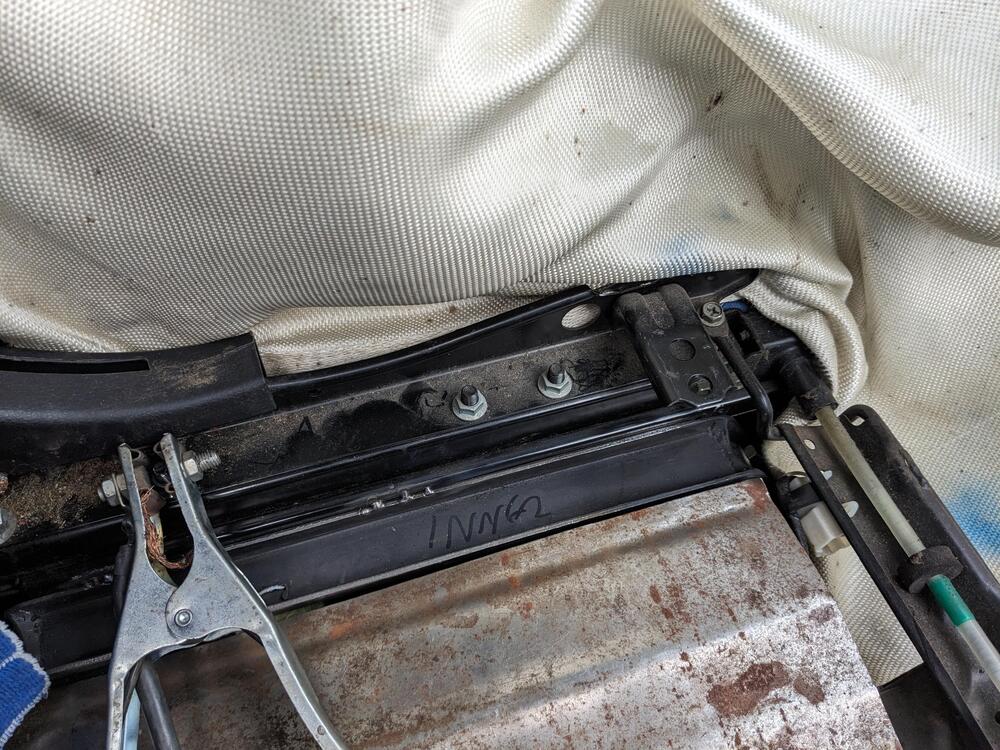
As @Captain Obvious predicted - a beating was in order. Not really happy about pummelling the perfectly good and clean tunnel, so I was gentle at first & used a mallet & block of wood to gently invert the bulge. Problem is that there is a major panel overlap seam in the way, forward of the inner seat belt mount, rearward of the stock rear cross member/seat support. Had to break out the large dead blow to reshape that. After the "gentle" mallet work Beating administered. Cleanup & paint to come, on the underside also. Edit - that is glue on the inner forward seat cross member , not Rust! Now the seat can be made level without lifting the sill side Side note - I guess Nissan wanted to build in the rusting process that was mostly resolved on the outside (compared to classic Z's anyway Seat cushion controls clear the sill Inside clearance matches the pas side Slight problem in that the rail spacing is not even left to right - I have to make a wider rail conversion for this side. Fortunately a 2" "U" channel will take up the gap. I don't want to simply cut & offset the bolt down points relative to the rail.


-
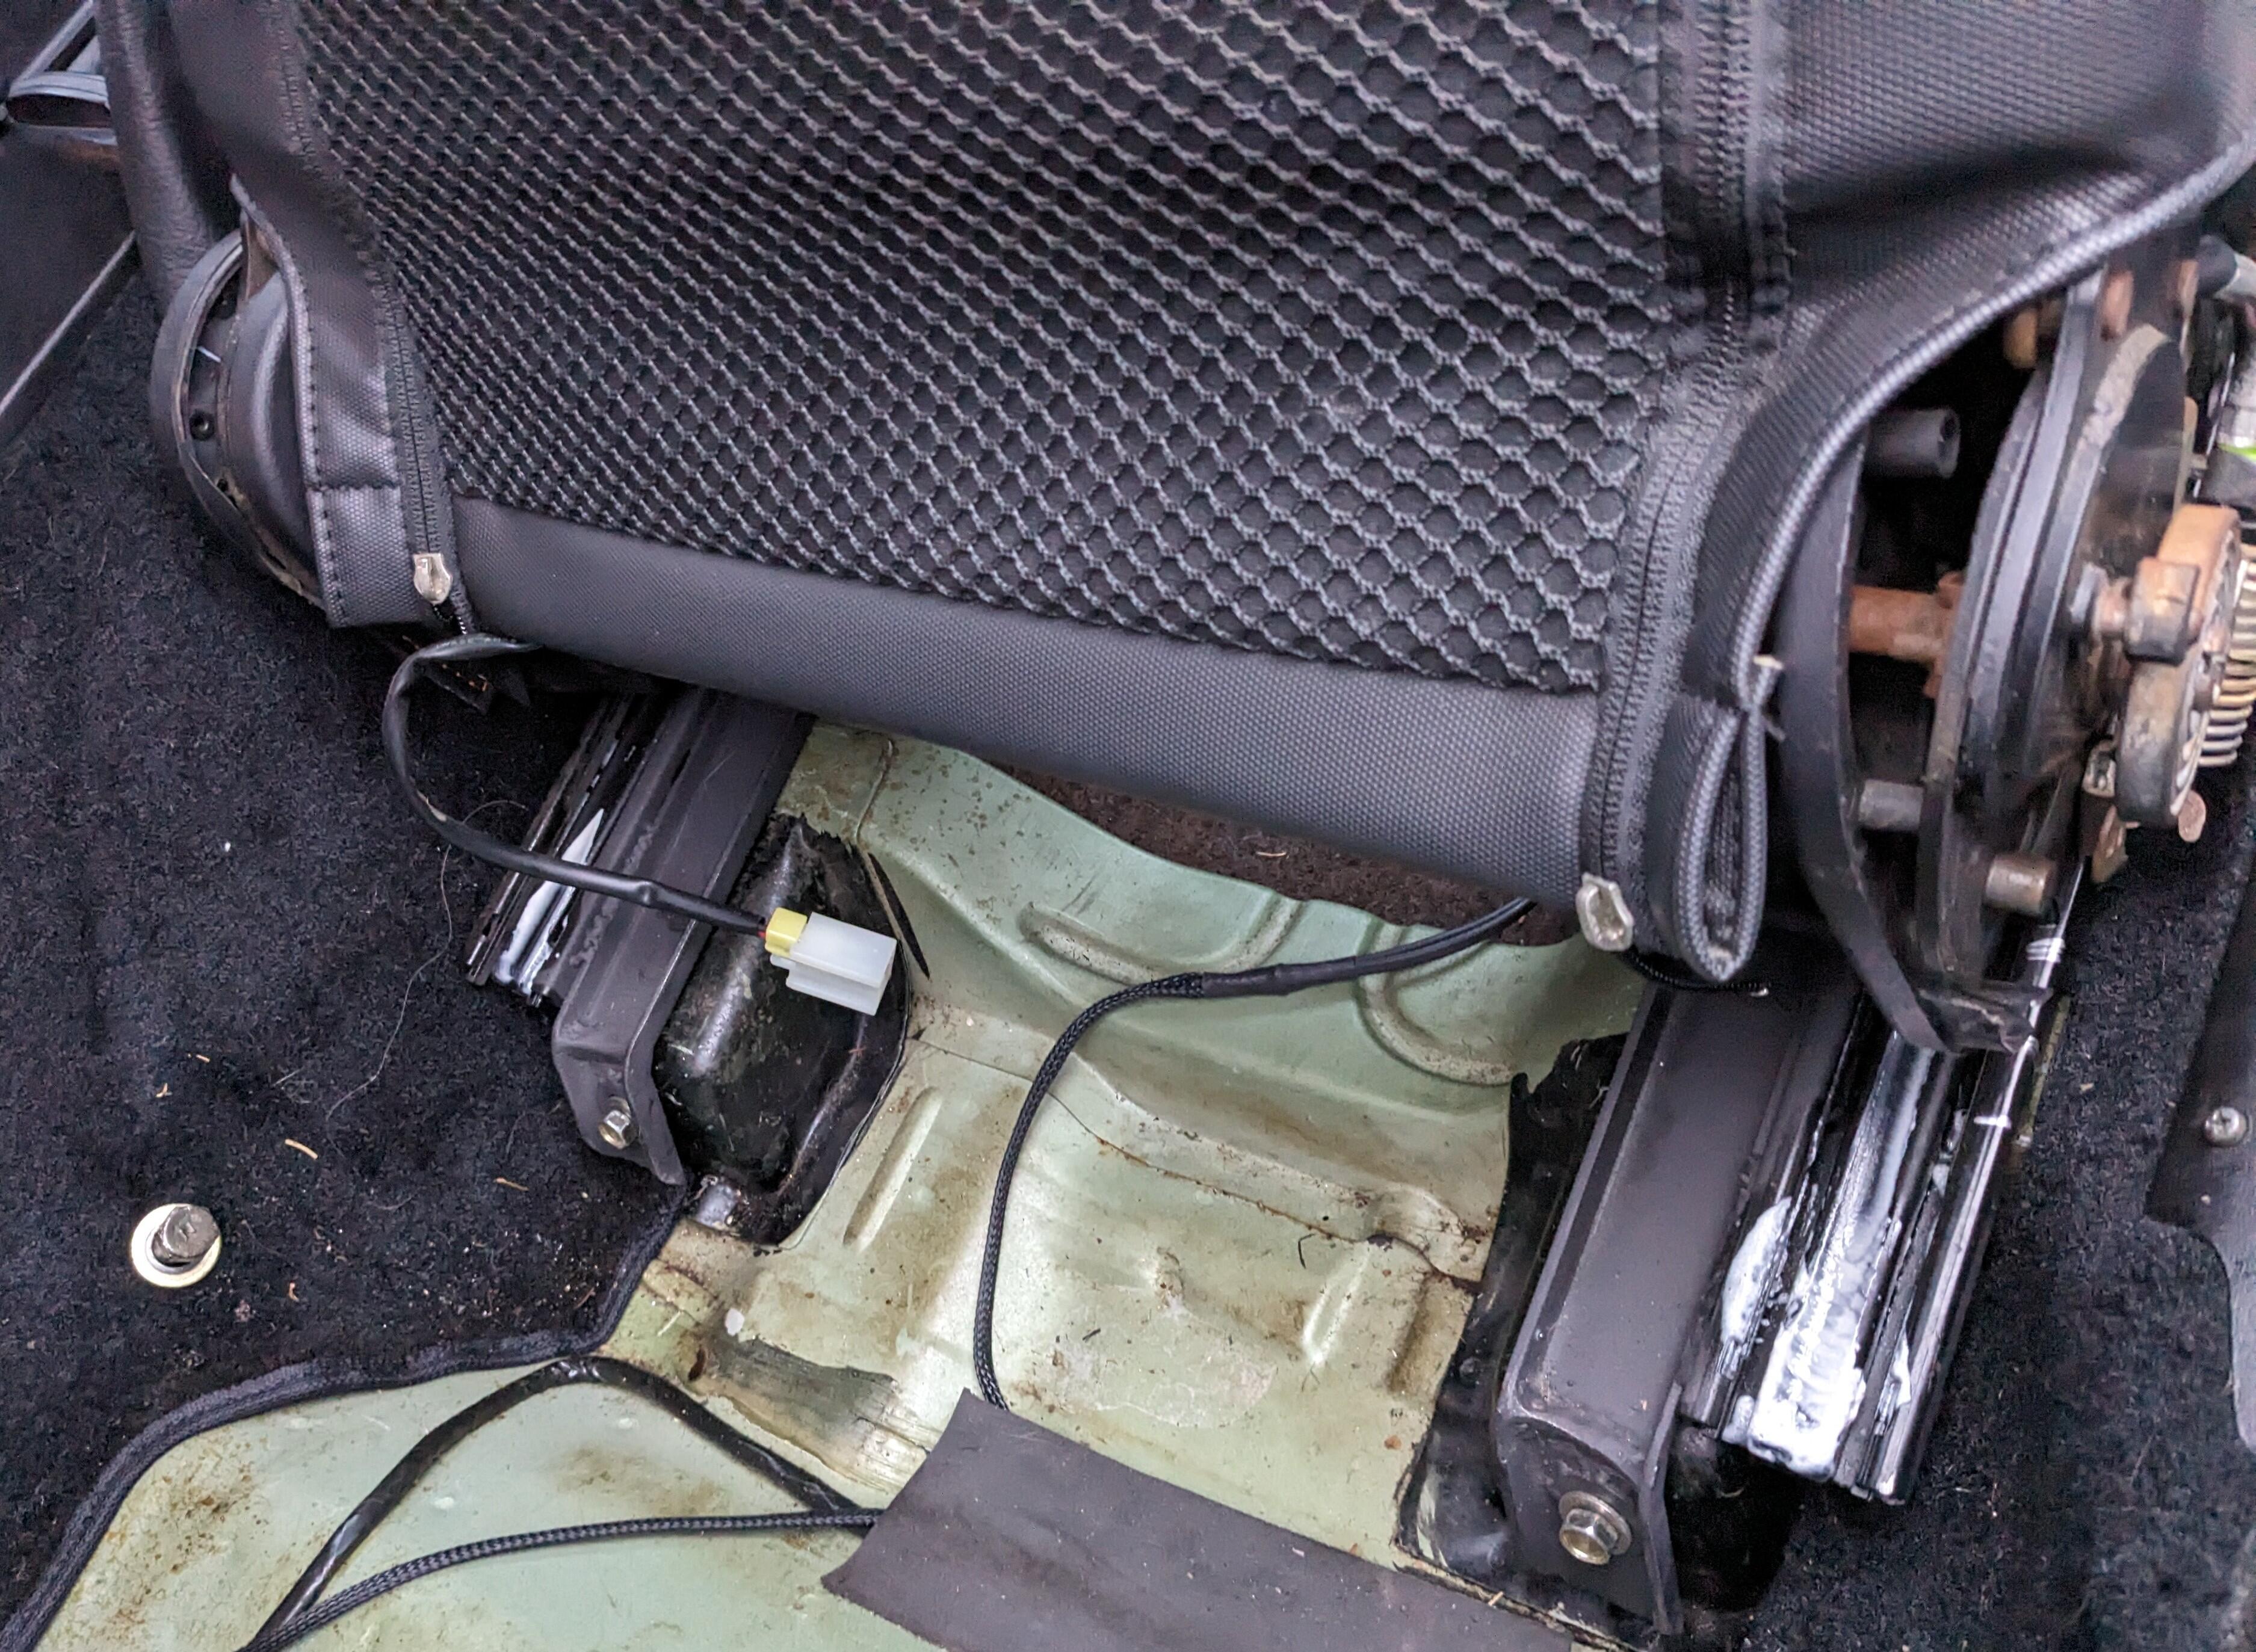
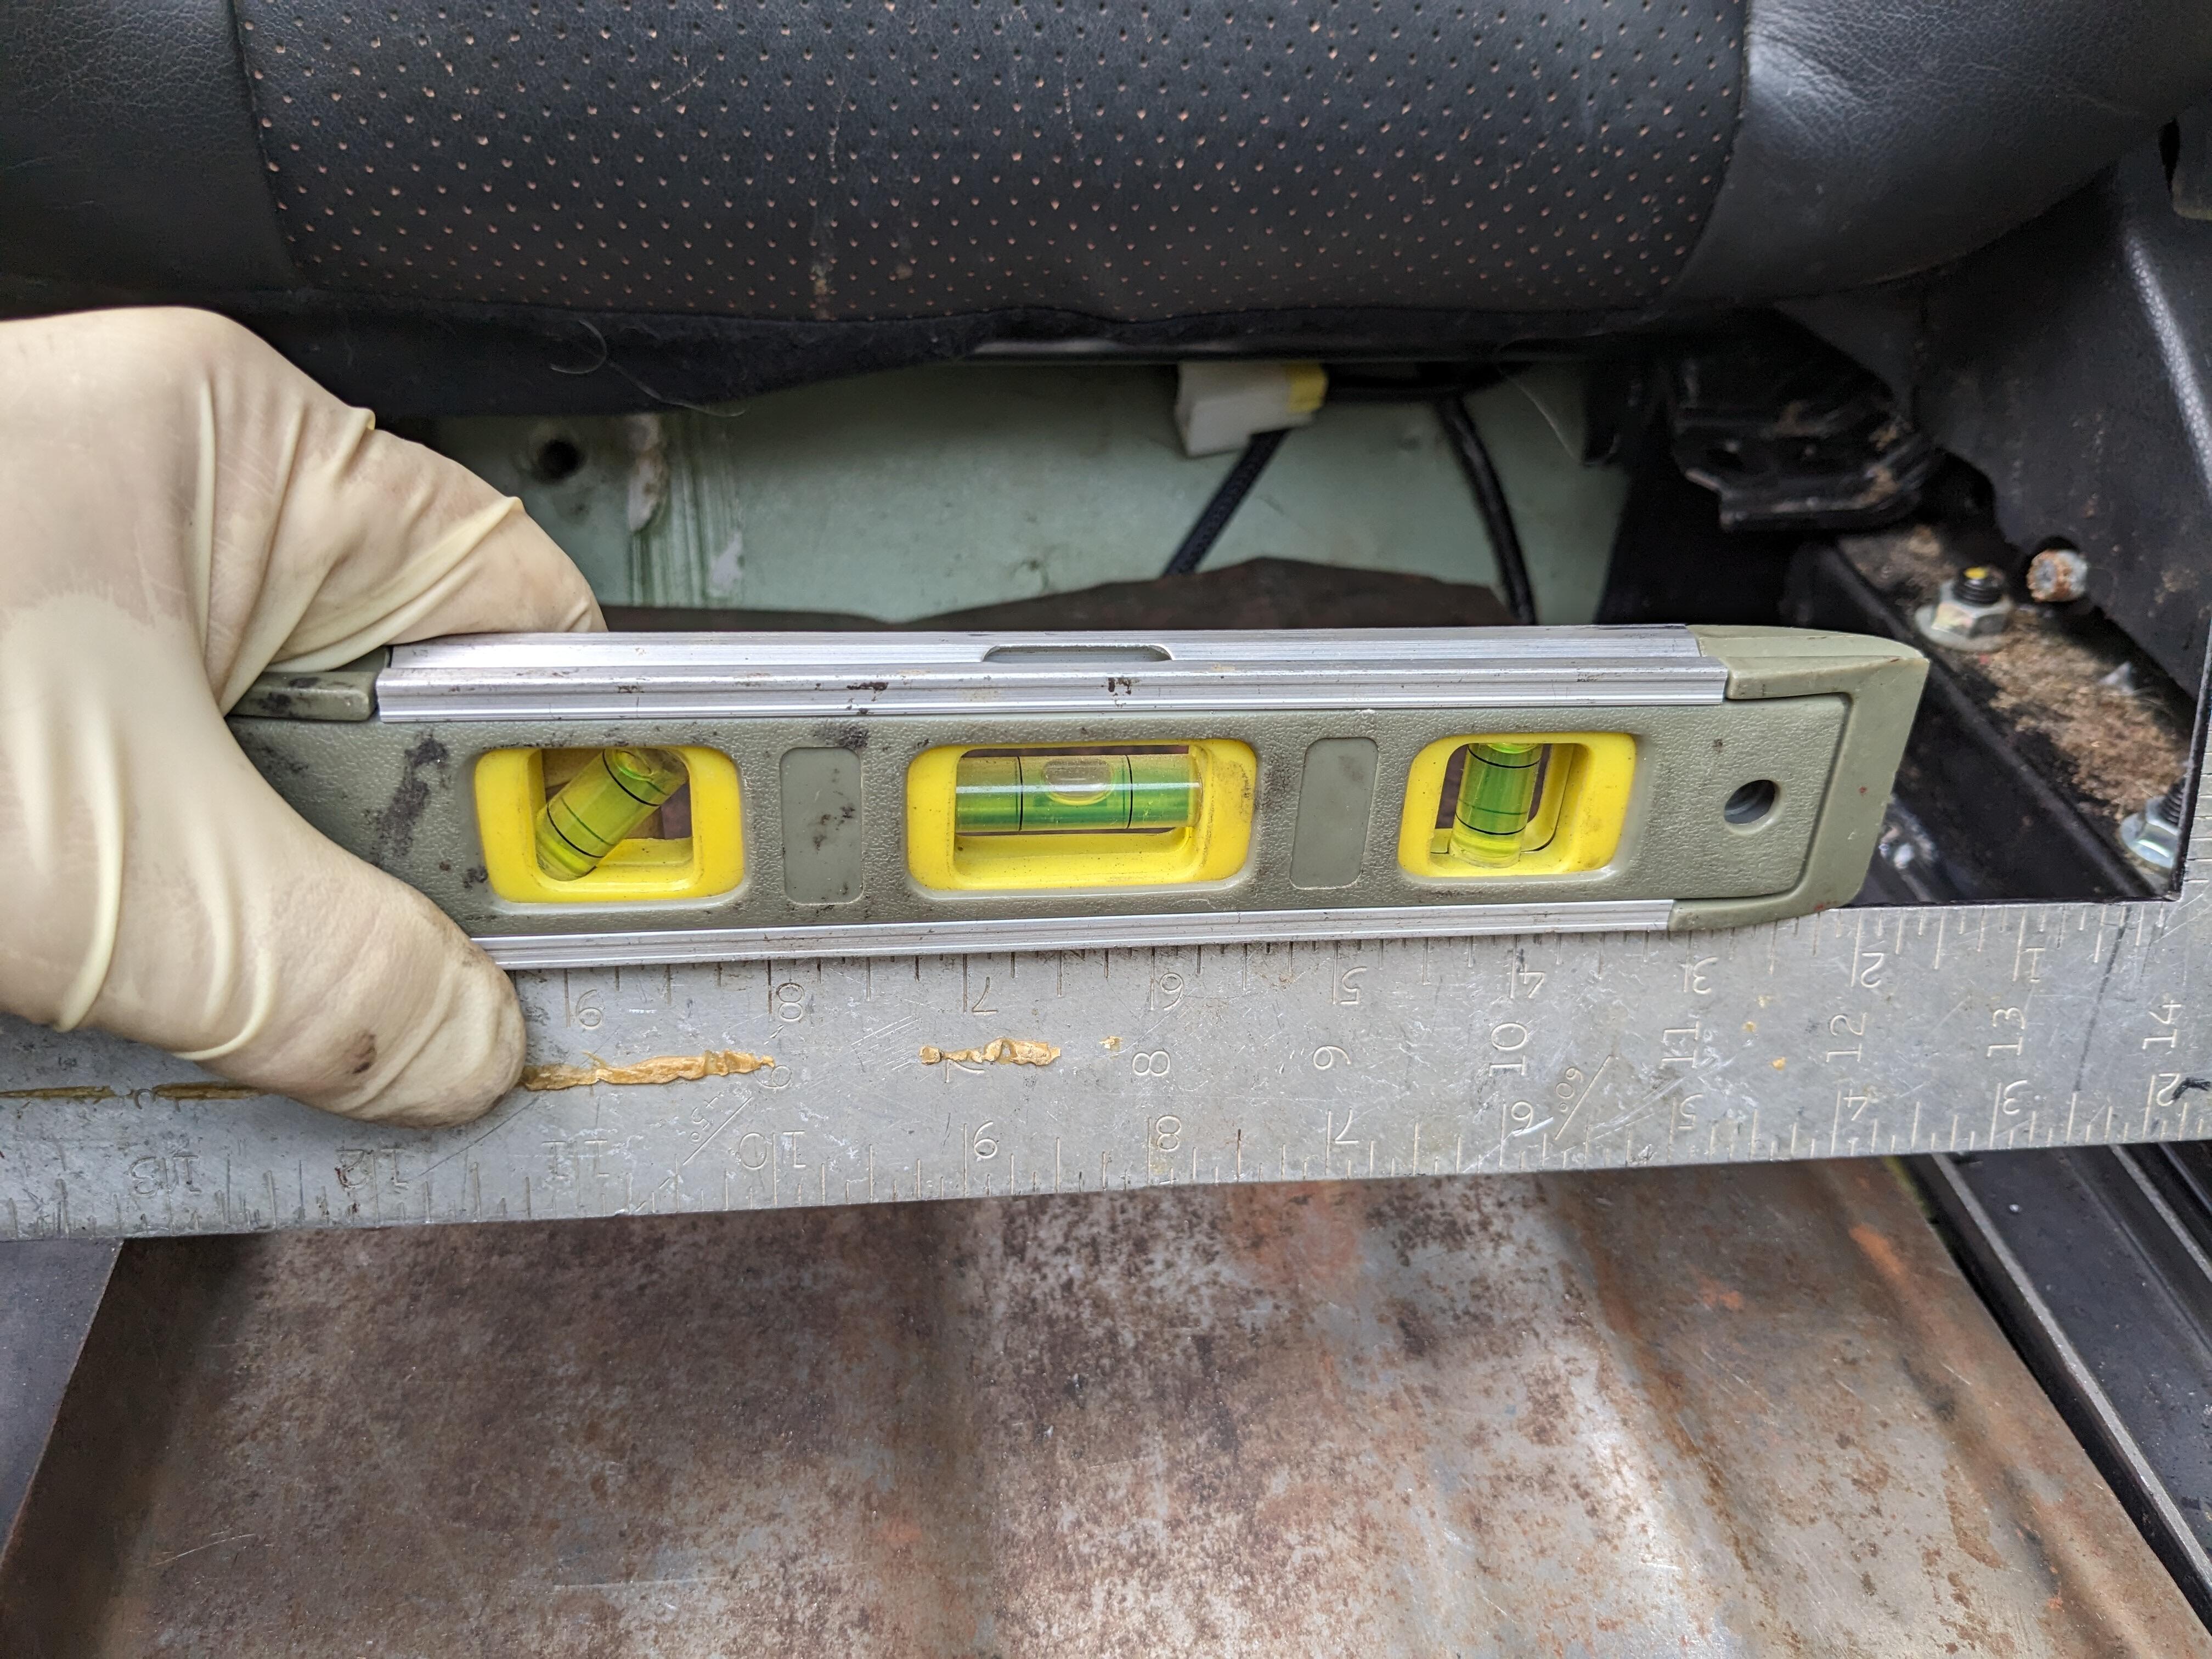
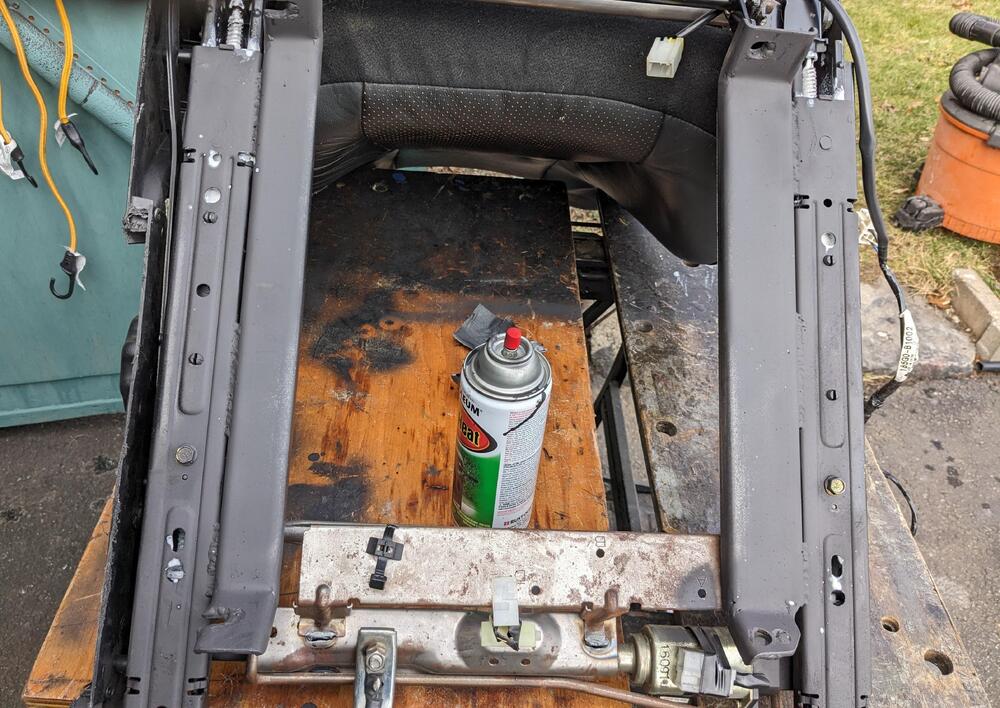
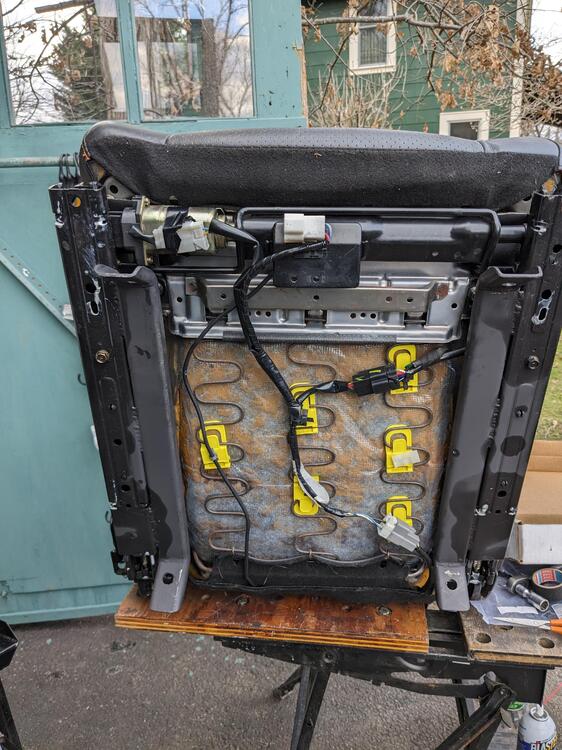
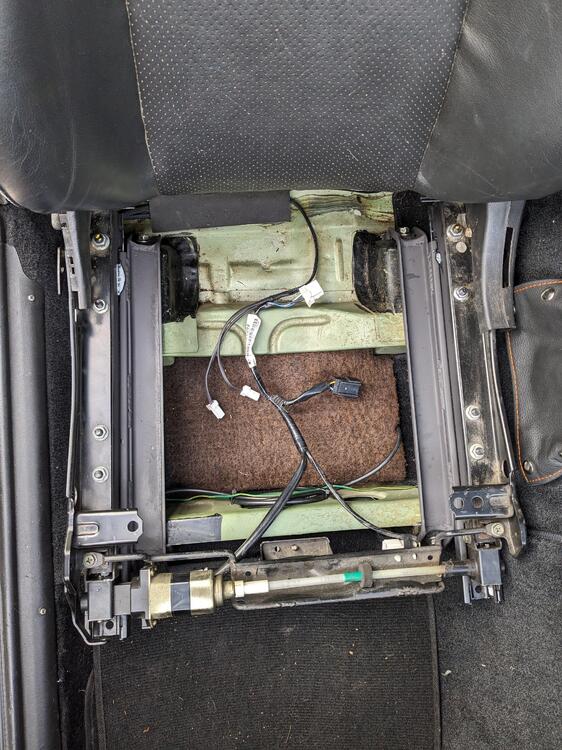
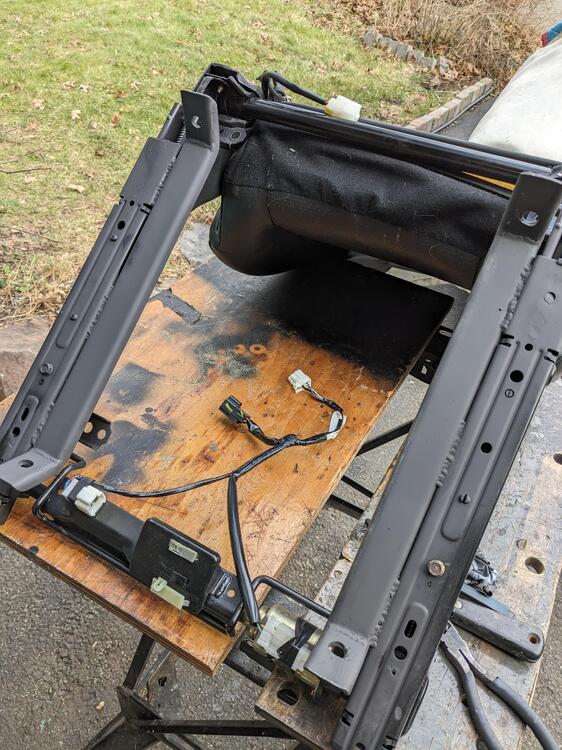
Back in the 350Z seats into the 280Z. Seat belt reel will (hopefully) be relocated to strut tower, like the later 77-78 280. Welded the rails I made to the 350Z rails, Checking that the seat was level to the car before tack welding. Used an weld mat to protect the interior. Removed to finish the welds. Wired the passenger seat (fore/aft only). Have to wire the seat heater Looks good here I didn't seam weld these. There is a plastic guide rail inside that may (did) survive some heat, wouldn't trust it to survive a bead, especially on top Test fit after welding to check for distortion /displacement due to welding, all good sits level with no wobble in the rails Testing wiring for seat fore/aft. I bought used 350z heater switches, however it will be easier (I hope) to rewire the seat grids to the aftermarket relay & switches I already have in place Full forward setting Seat sits substantially lower than stock height. Furthest possible recline in full rear position Wesco reel will hopefully go here. Does not feel like there is a metal plate under the cover, which may actually make it easier


-
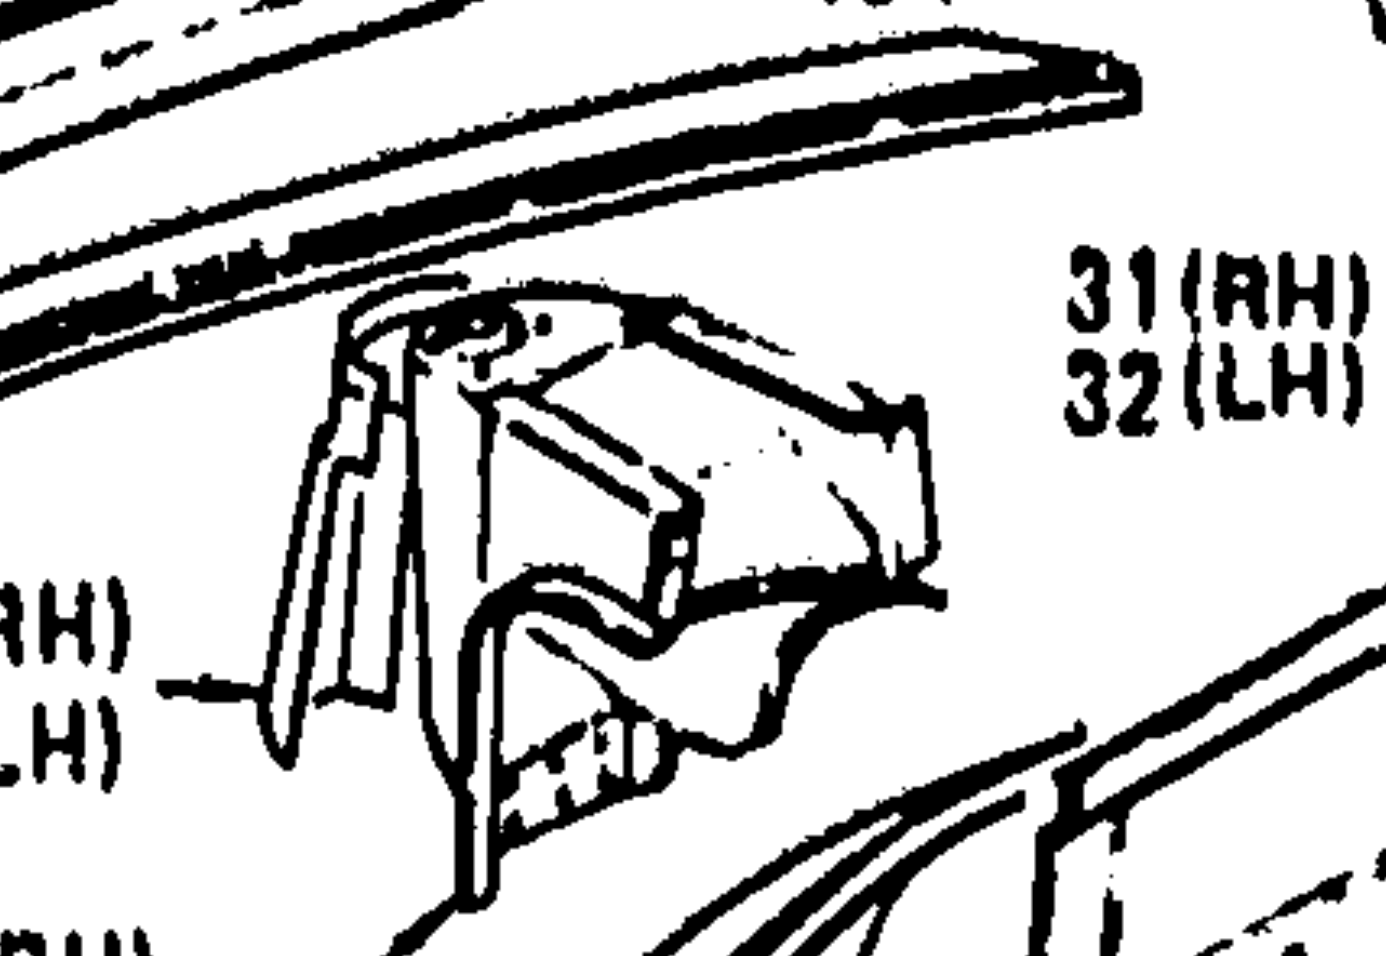
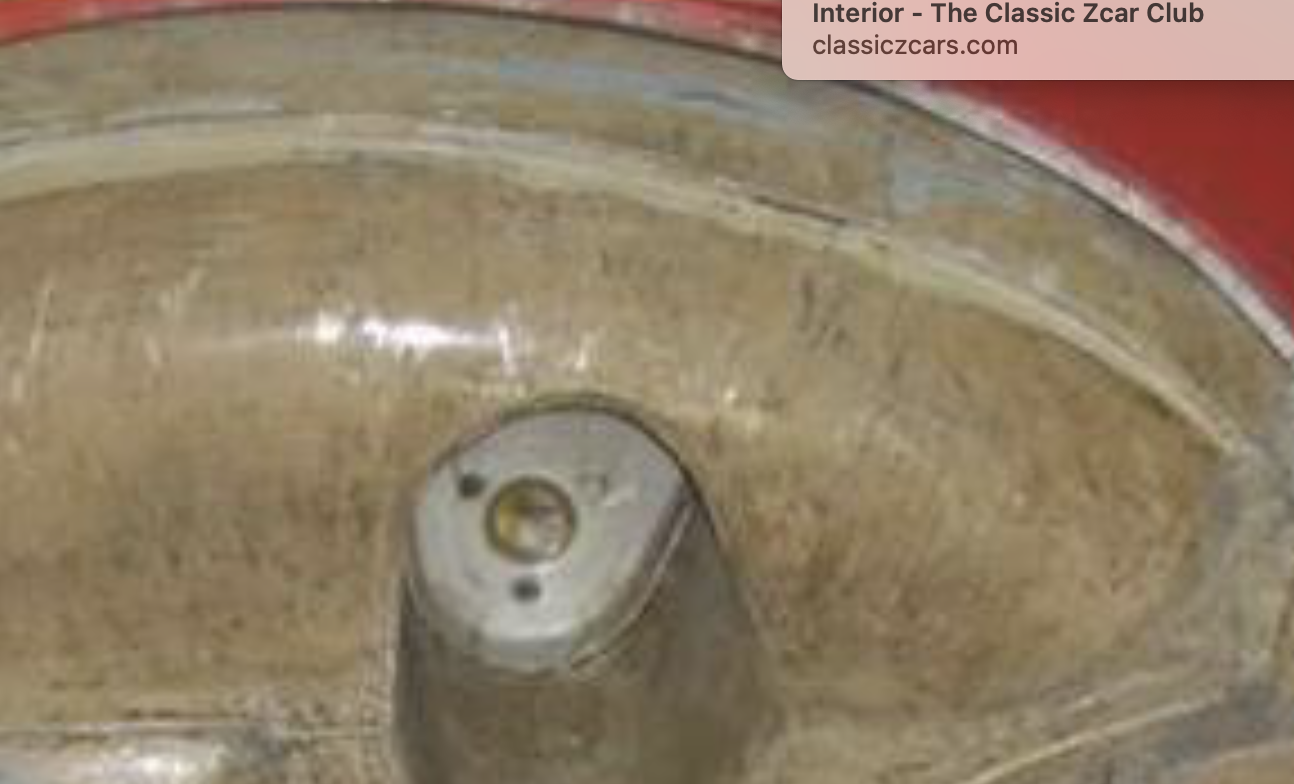
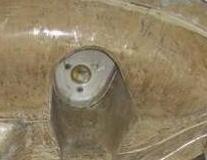
That is what I thought - looking at the rotisserie pic it appeared that there was some access to the flat area between the strut and the inner fender. It would be awesome if you could take pics to clarify what is there for me! EDIT - pressing down on the top cover, which appears to have card inside- it doesn't feel as if there is any metal beneath it, which would make sense if the parts catalog drawing is accurate -

-
Yes, I know the pic shows the main hole & 3 mount holes that are for the strut - what I was referring to is the space outward of that, which is where I would mount a nut plate to secure the belt reel
-
Thank you - from that angle it does appear that the area where your belt reel mount holes are, is accessible from the underside. In which was I can add a nut-plate from beneath

-
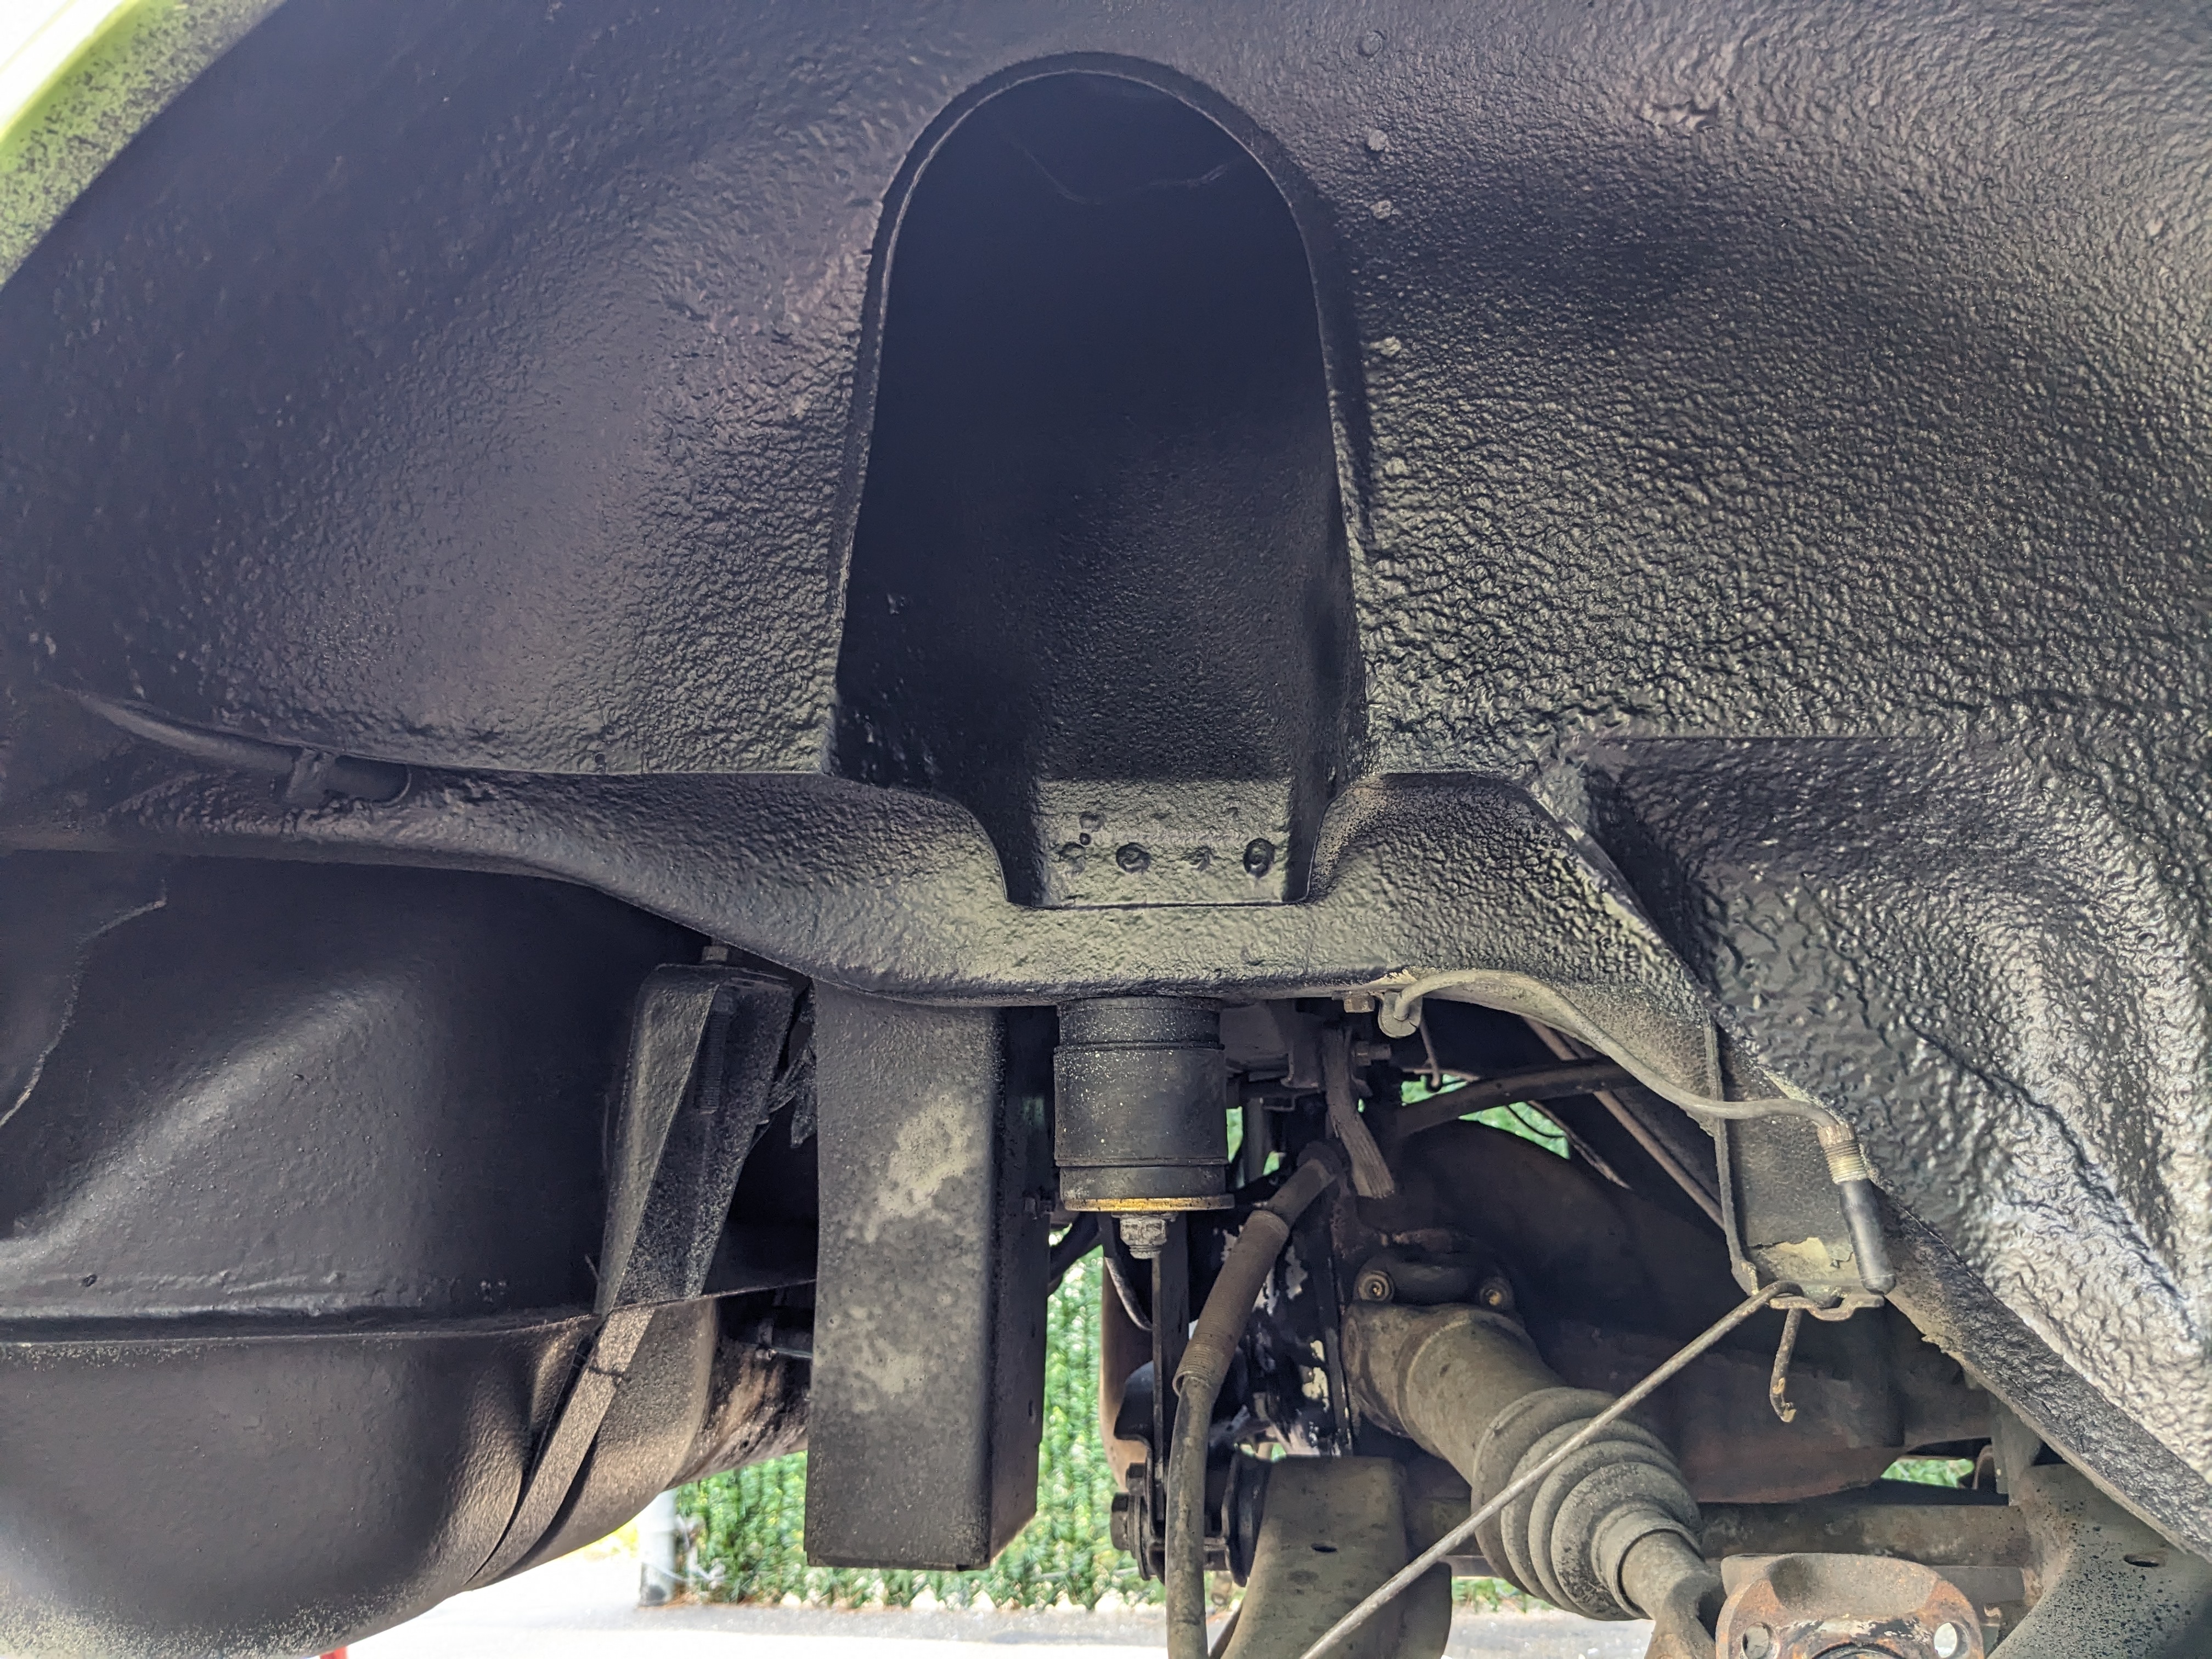
Trying to figure out if anyone has done this. I want to move the new seat belts to the towers if possible. I don't see how or if I can access the underside of the outer strut tower area where the seat belt reels attach on the 77-78 MY. It looks like that is a closed off area. Pic courtesy of CO My wheel arch - don't recall there being a way to reach into the outer section from below

-
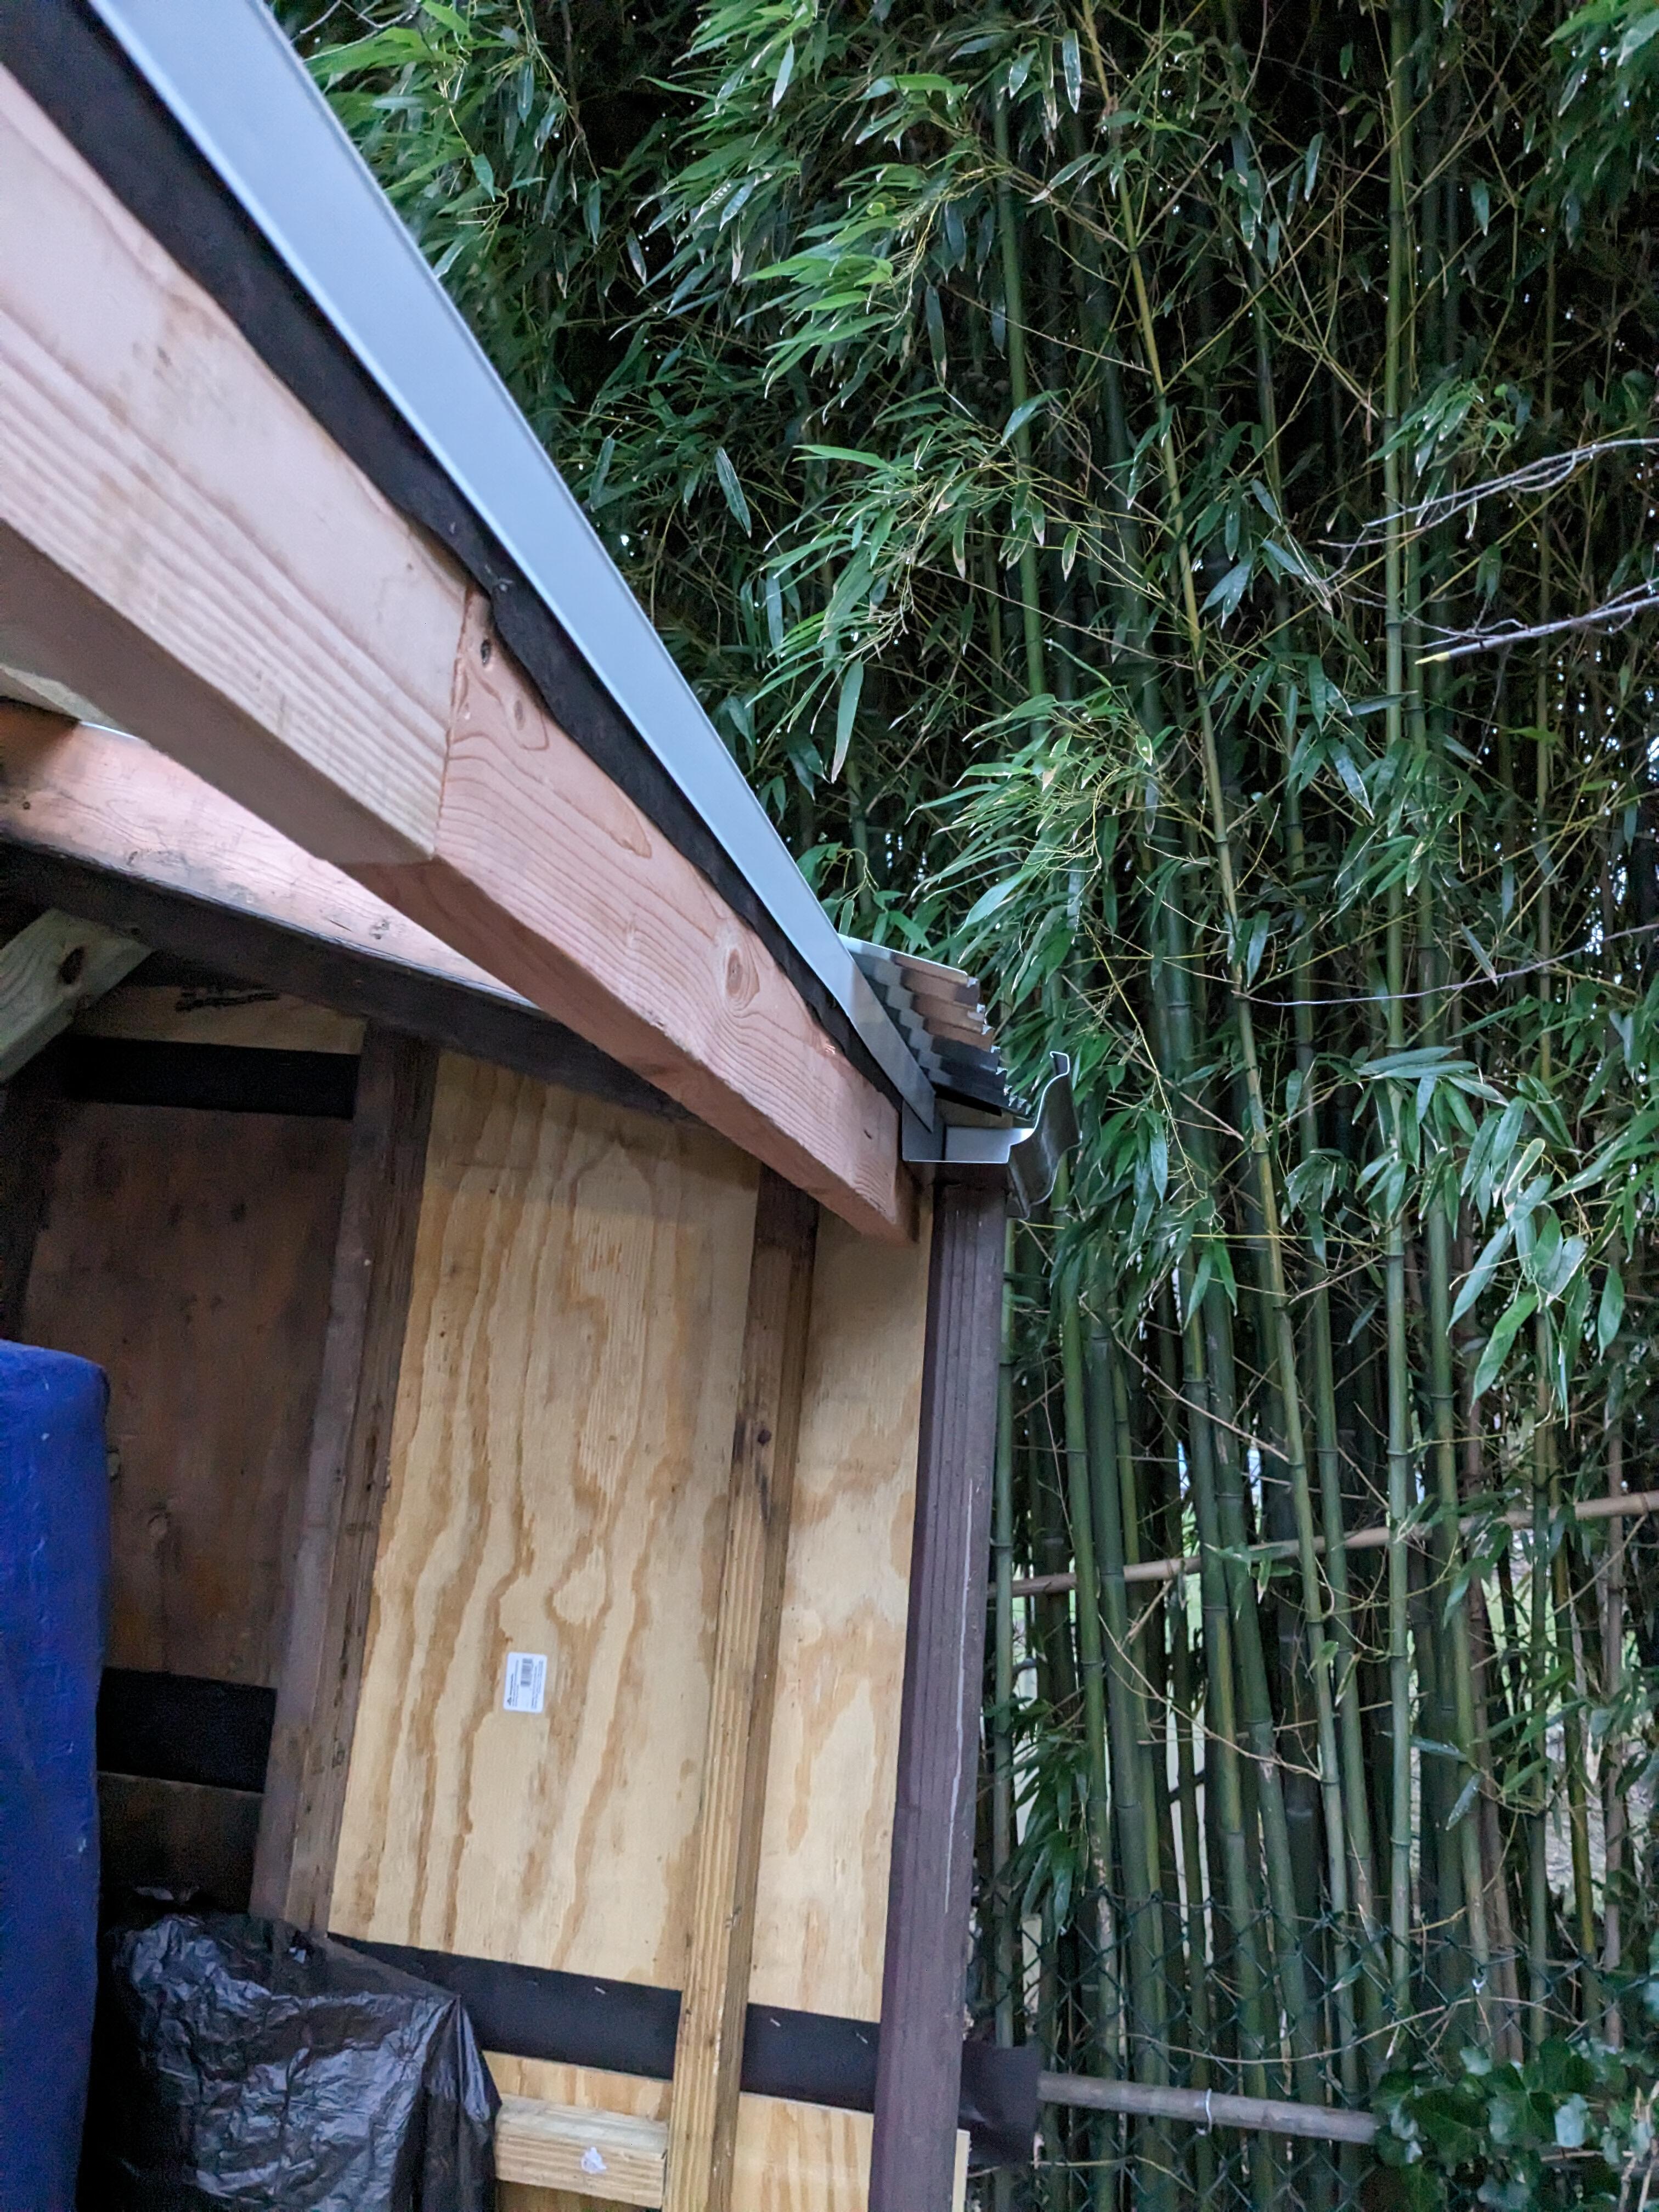
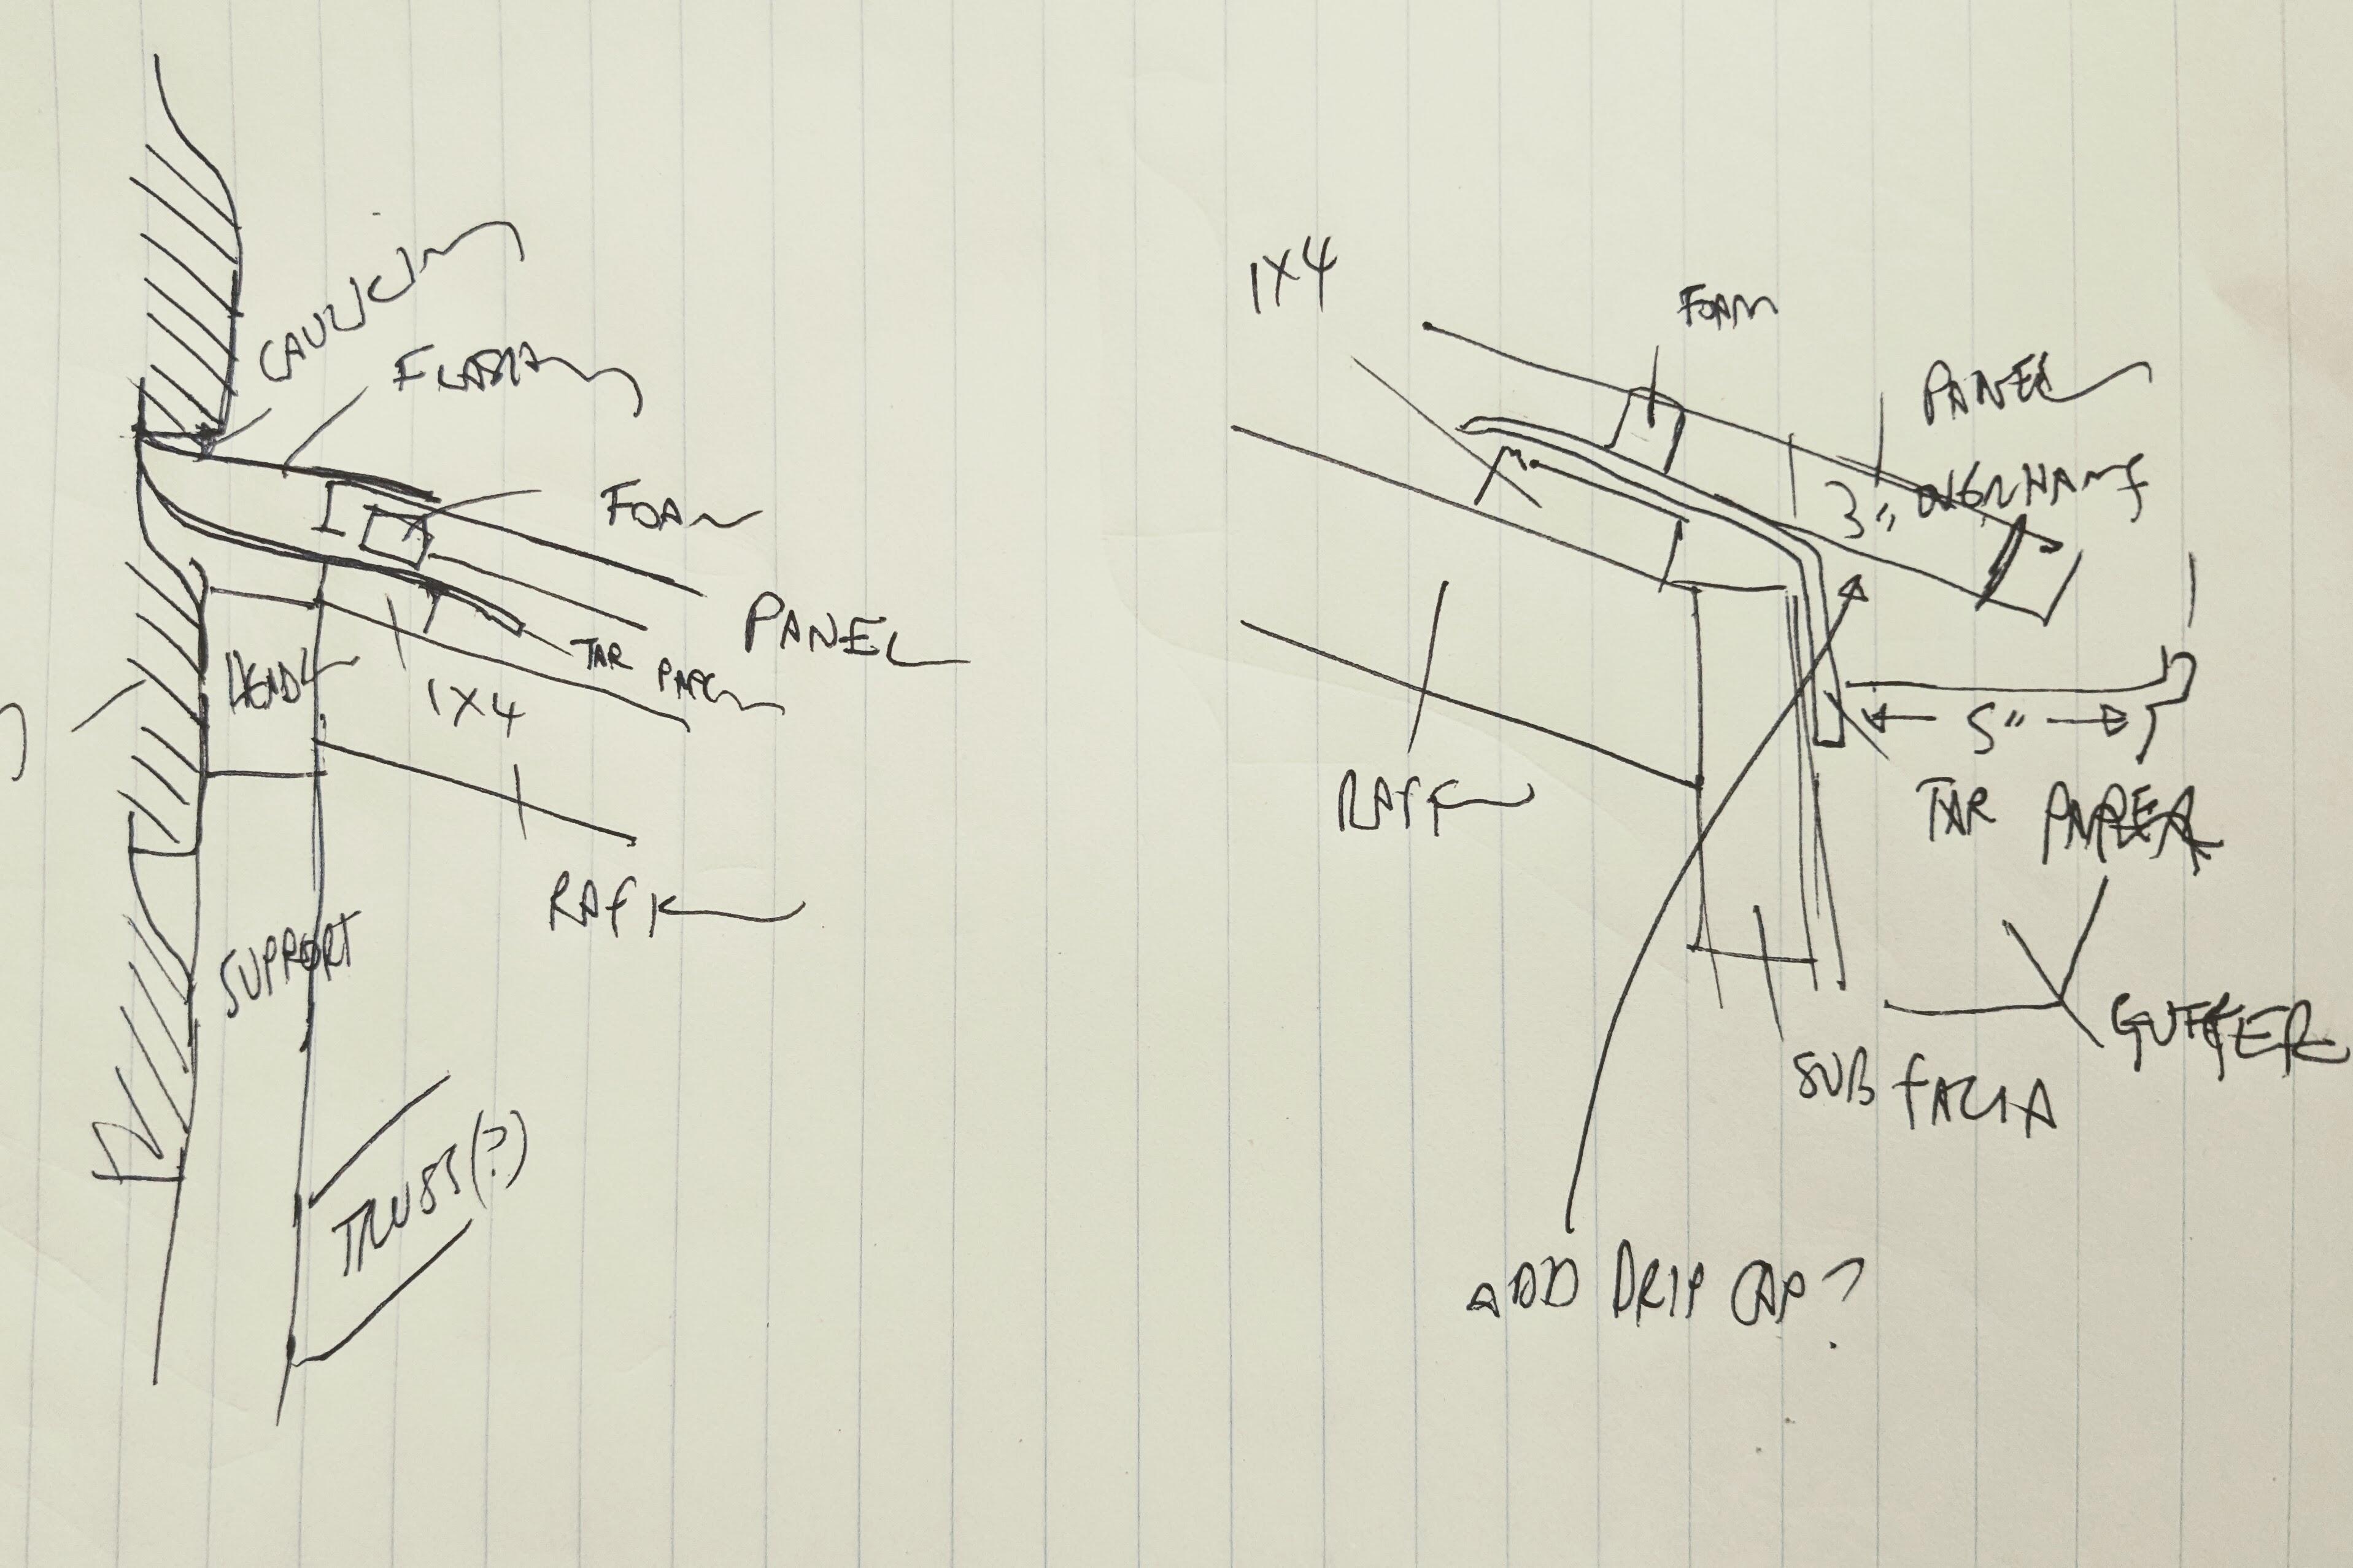
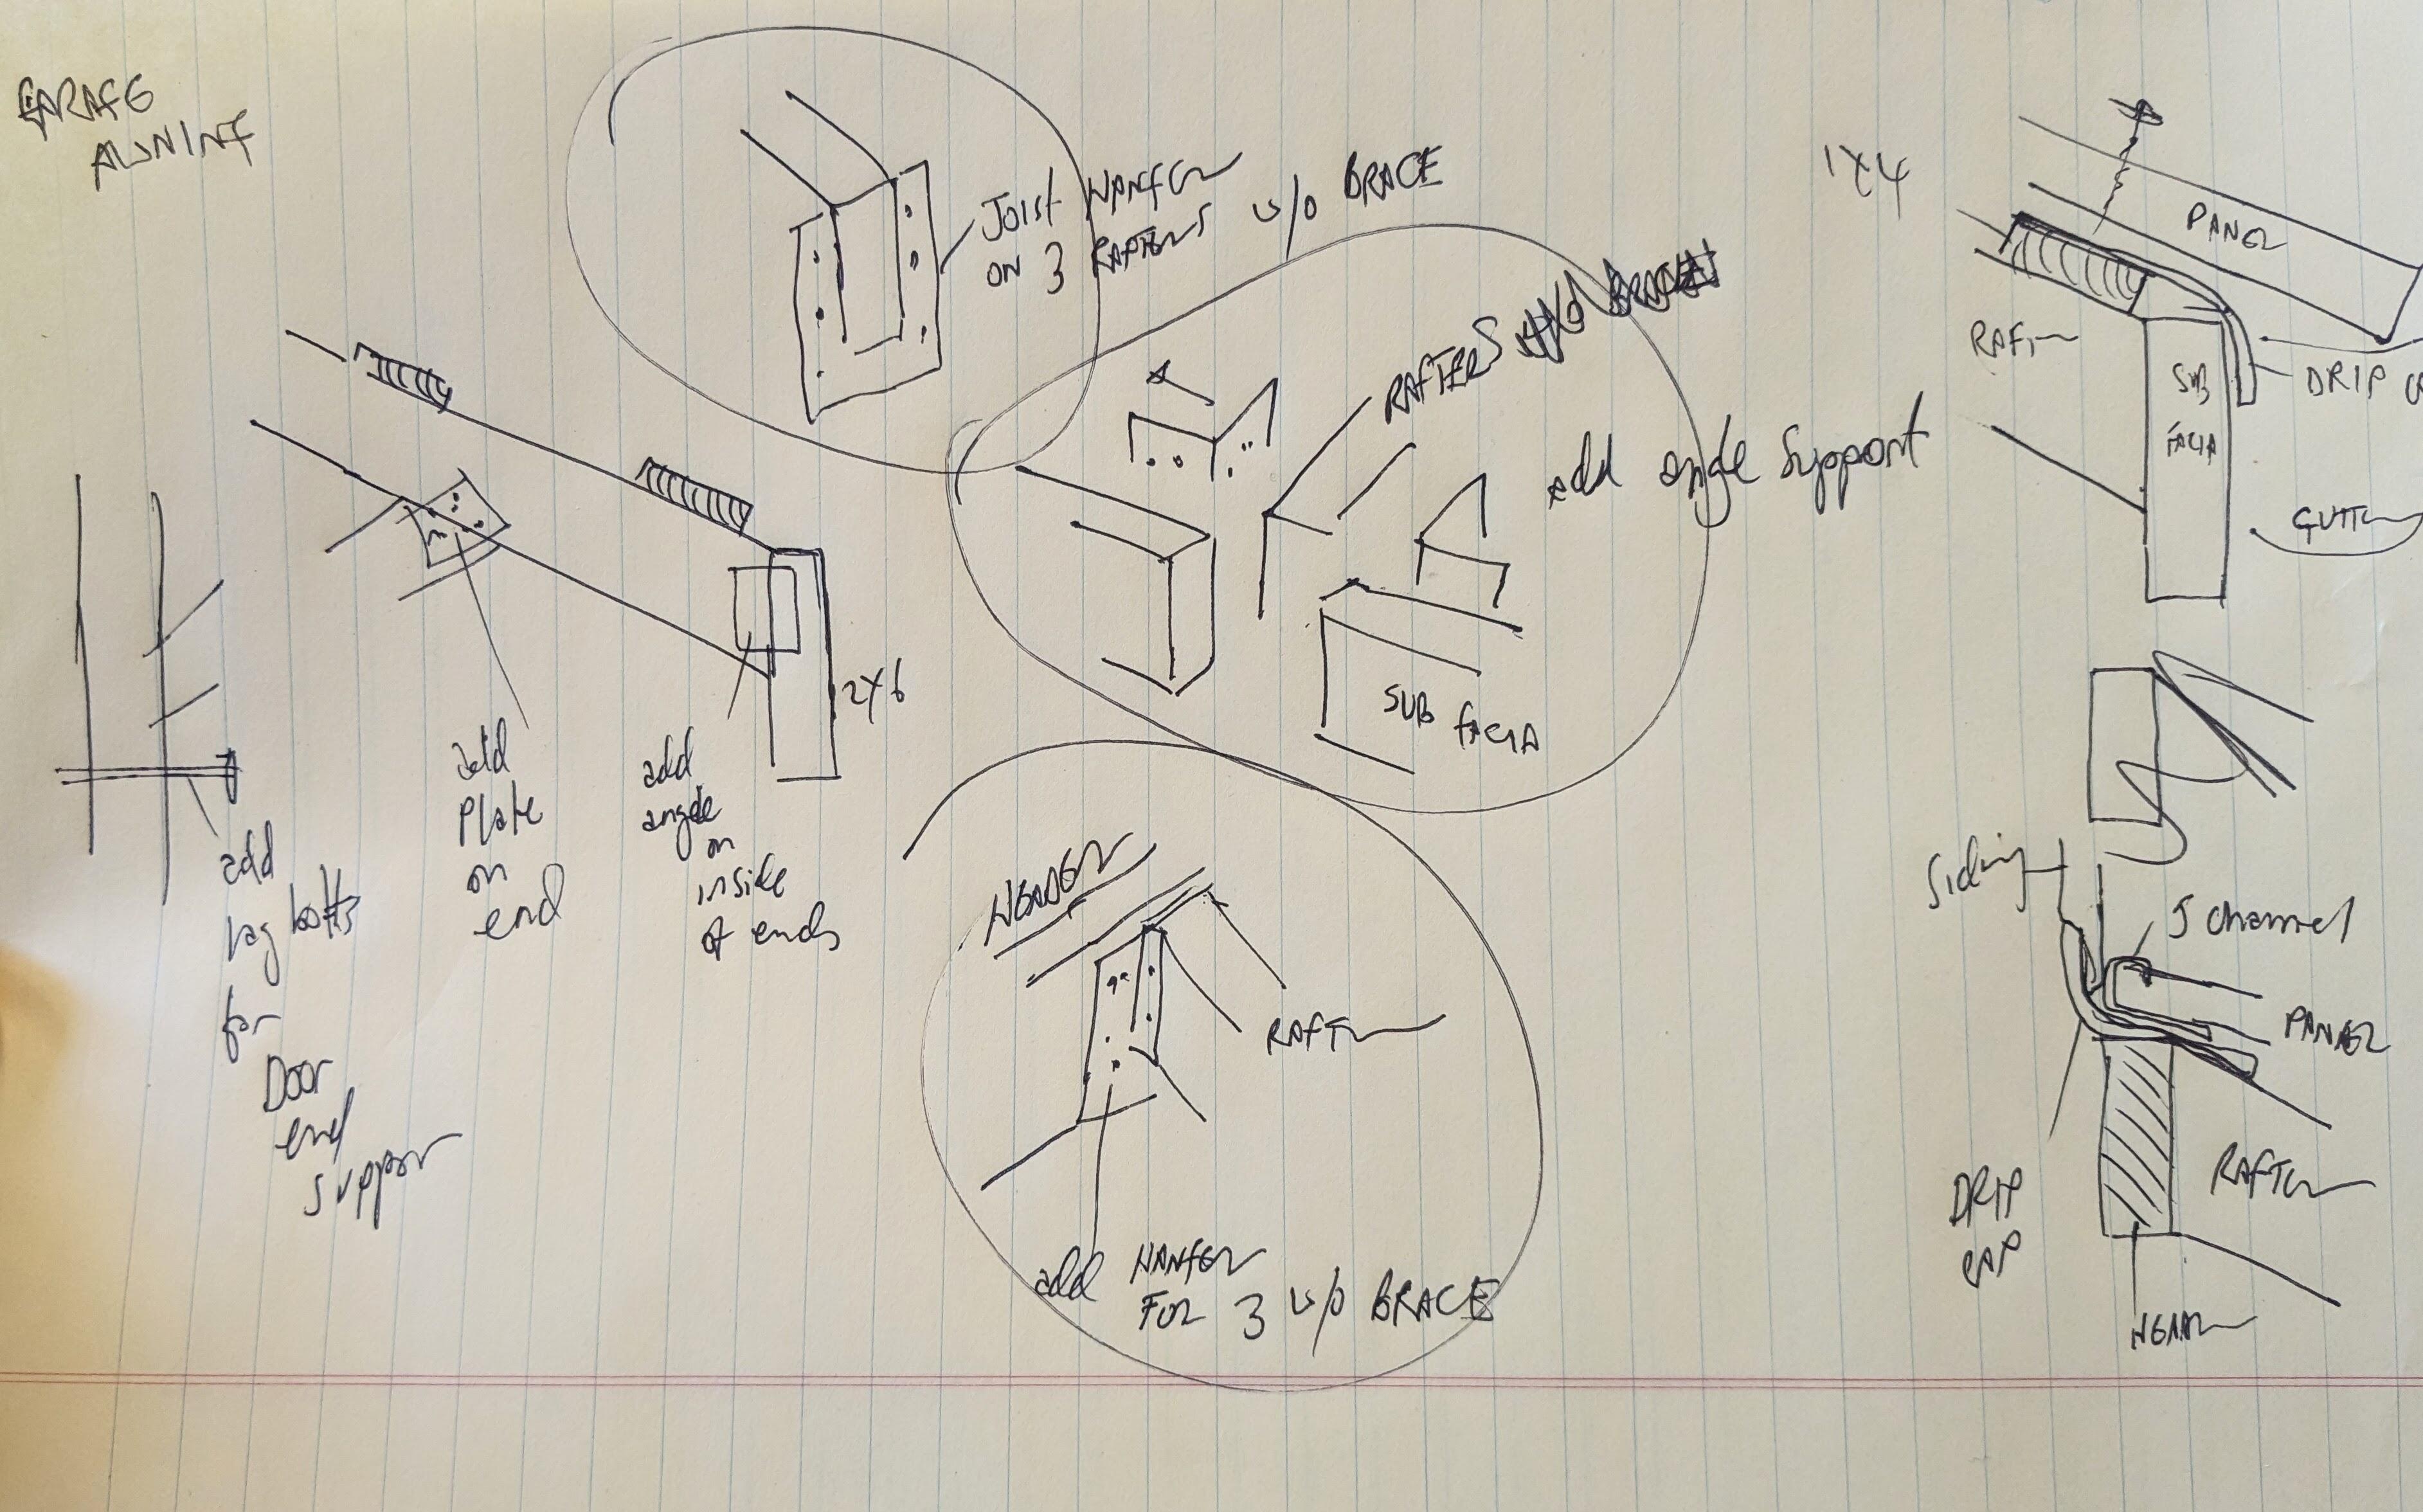
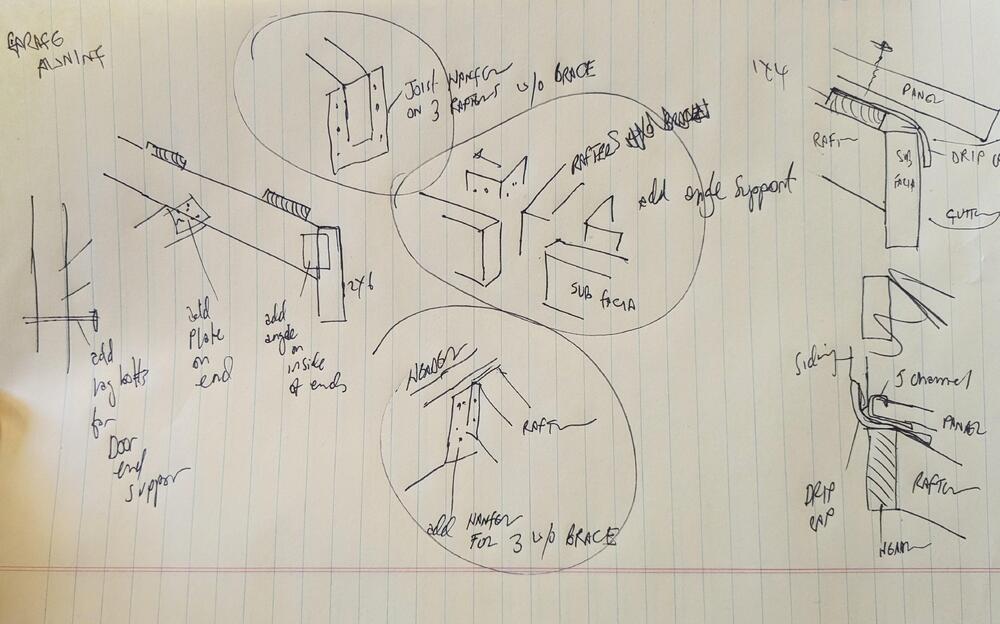
To address the flashing, I cut a 1/4" groove in the siding for the 1/4 lip on the flashing, which I will fill with a urethane sealant & then nail the vertical below the groove, with sealant behind that. Added joist hangers to the rafters at the subfacia. Added a stud, and finished out the paneling behind the press to a depth of 58". Going to add another 2x10 plank for the platform to make it deep enough to easily walk on & move the heavy equipment around, which will even it out with the end panel depth. The universal foam I bought from Home Depot is supposed to expand to up to 1", to seal the gap in the corrugation valleys. I don't think it's going to happen - I've left it unwrapped for over 24 hours, and 1/2 of it is just as uneven thickness as it was wrapped Gutter will sit along these lines

-
Ion addition to the above, your DS rocker appears to be rotted through at the front (pic4) - which means the various inner sections are likely in need of repair/sectioning. If you haven't already, look at Dave 71/240Z thread for clear pic of what the repair work will look like
-
Added the center 1x4 run & started figuring out the upper 2' corrugation overlap & flashing at the siding. Overlap roofing will have butyl seal, and foam seal at the flashing. Waiting for the short screws for the overlap risers Added a drip seal along the siding recess after this - since the flashing cannot fit behind the siding, I need to figure out an alternative sealing method for that. Secured the two outer panels temporarily to check alignment & fit
-
Yes - the metal 90 degree drip cap / edge flashing. I'll ditch the foam at the bottom, didn't seem to make sense, just what I've seen looking online - probably referencing closed structures. At some point I'm going to extend the garage footprint rearward, so all this really only has to last a few years Edit- I do have the butyl type wide seal tape that I used for the frame openings on the new window installs I did some years back. I can use that instead of the tar paper, just have to heat the wood somewhat, it doesn't act very sticky in 30 degree weather
-
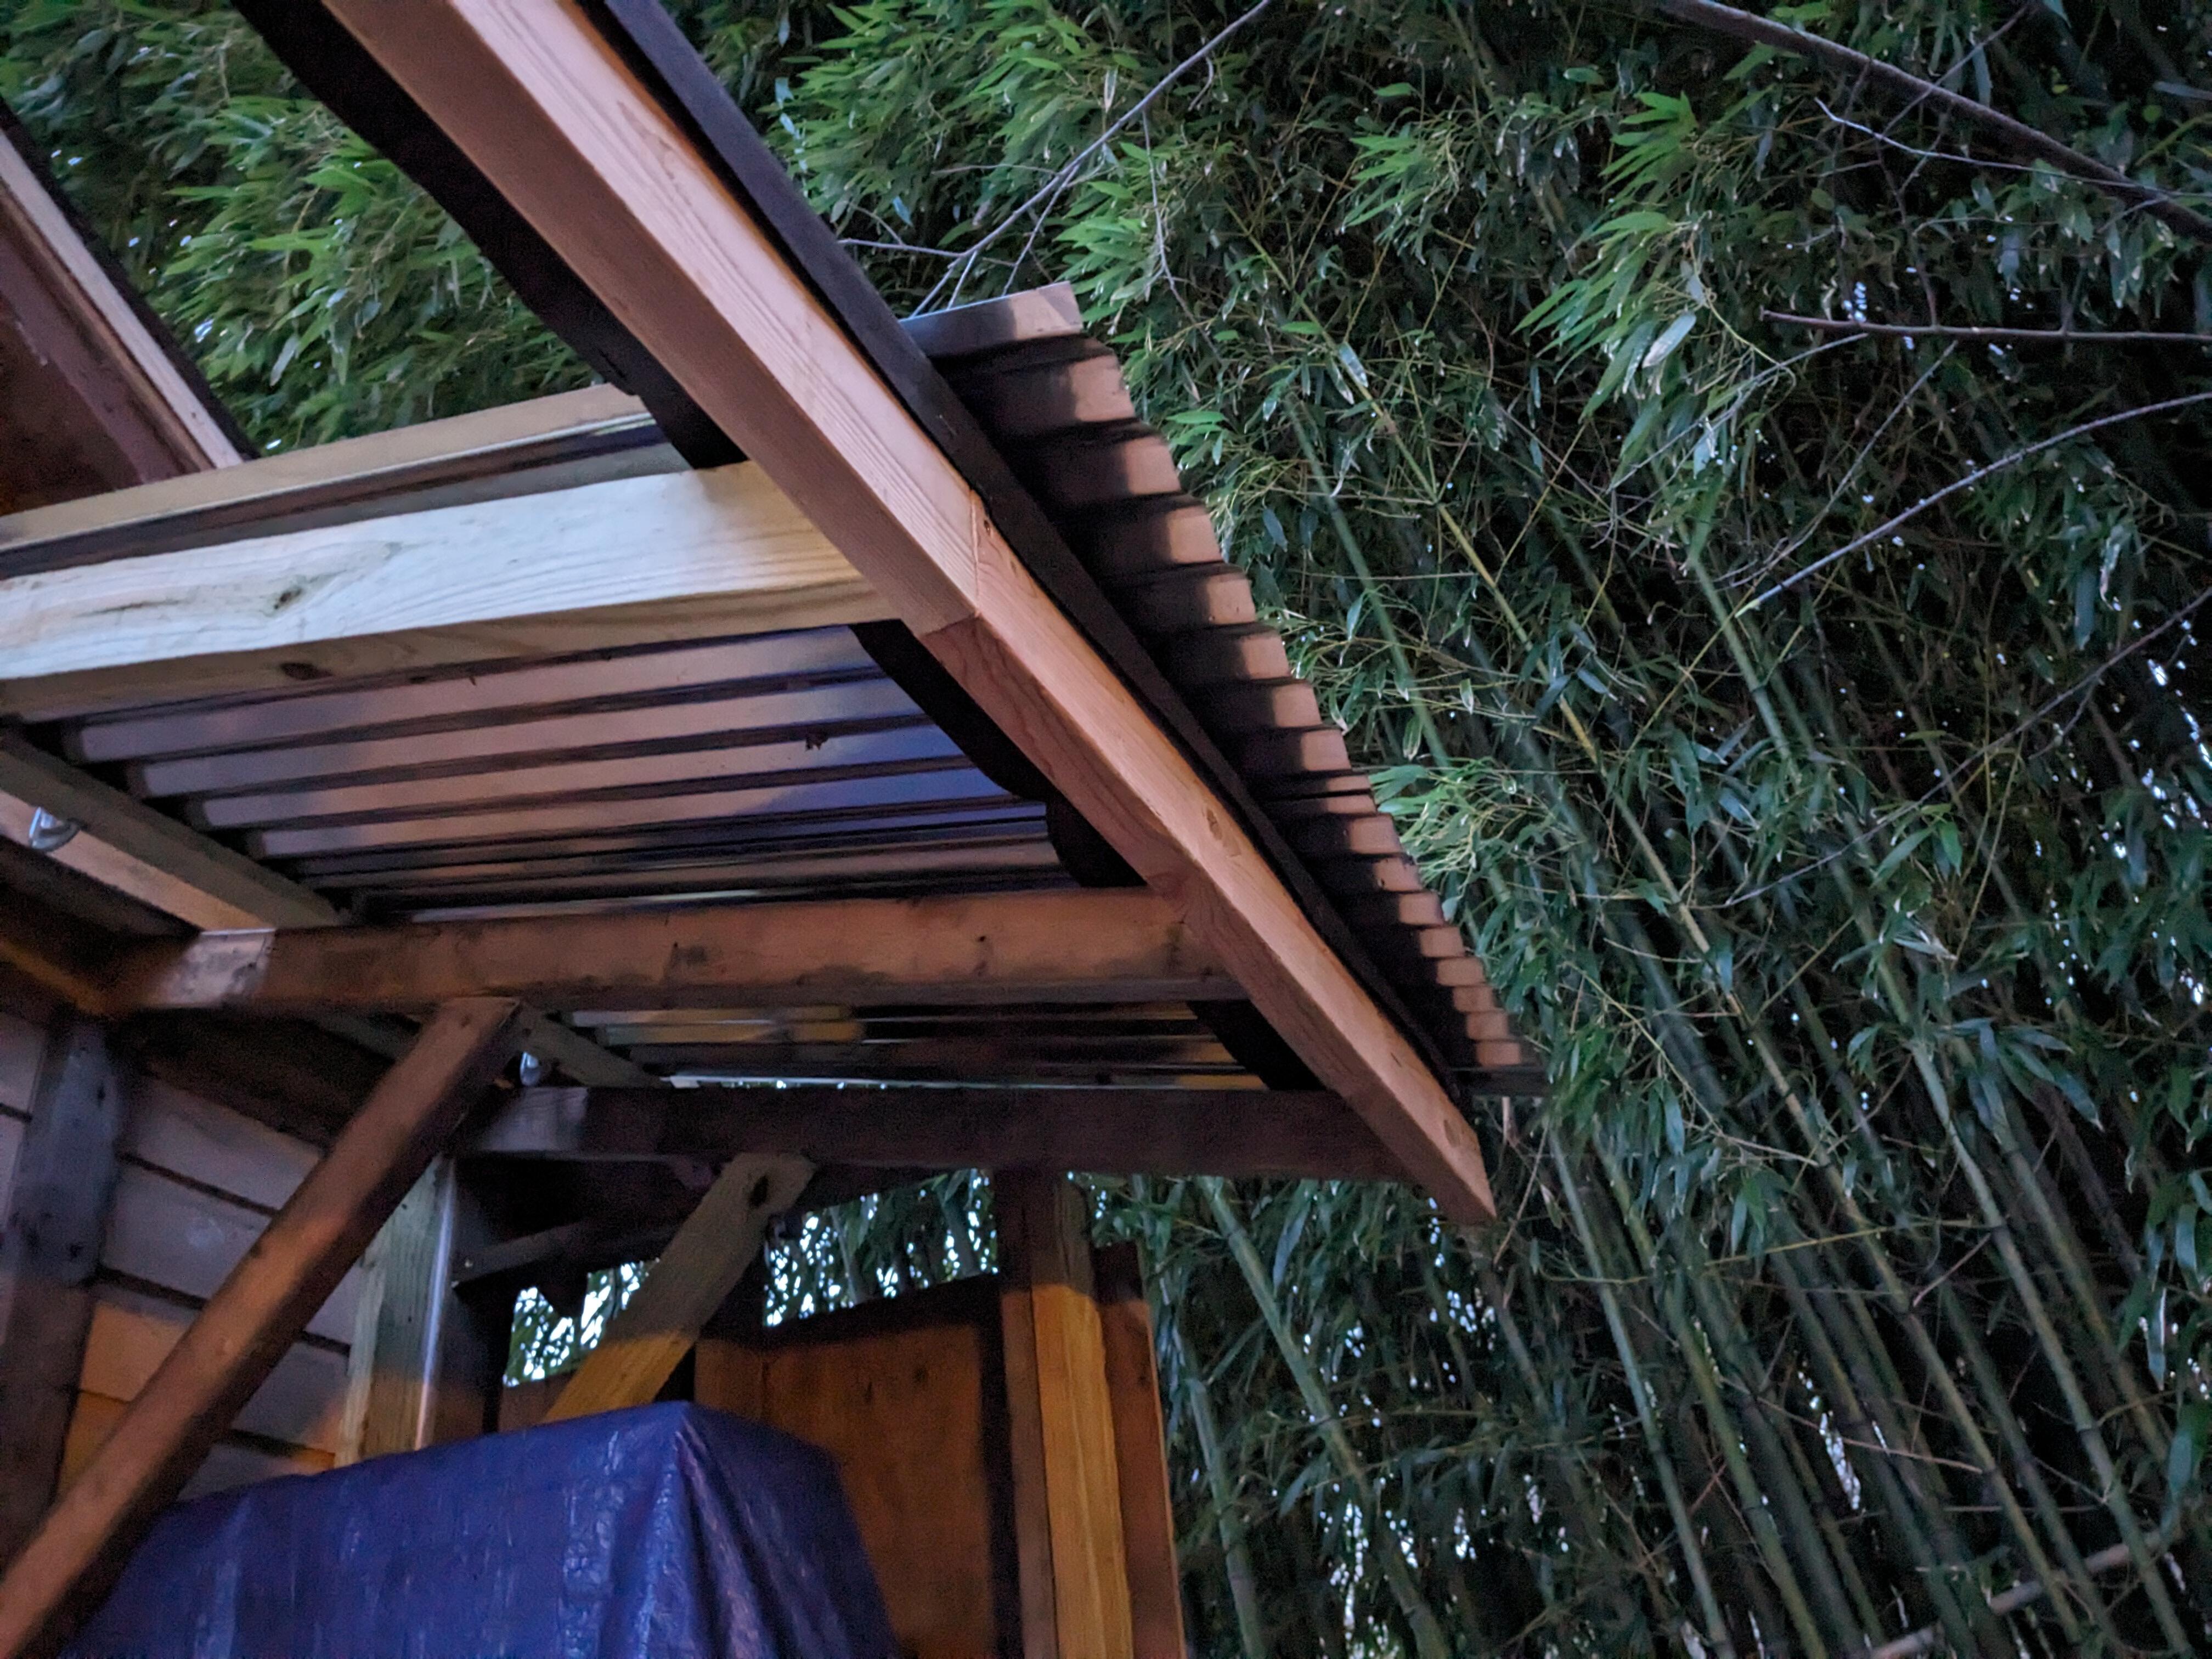
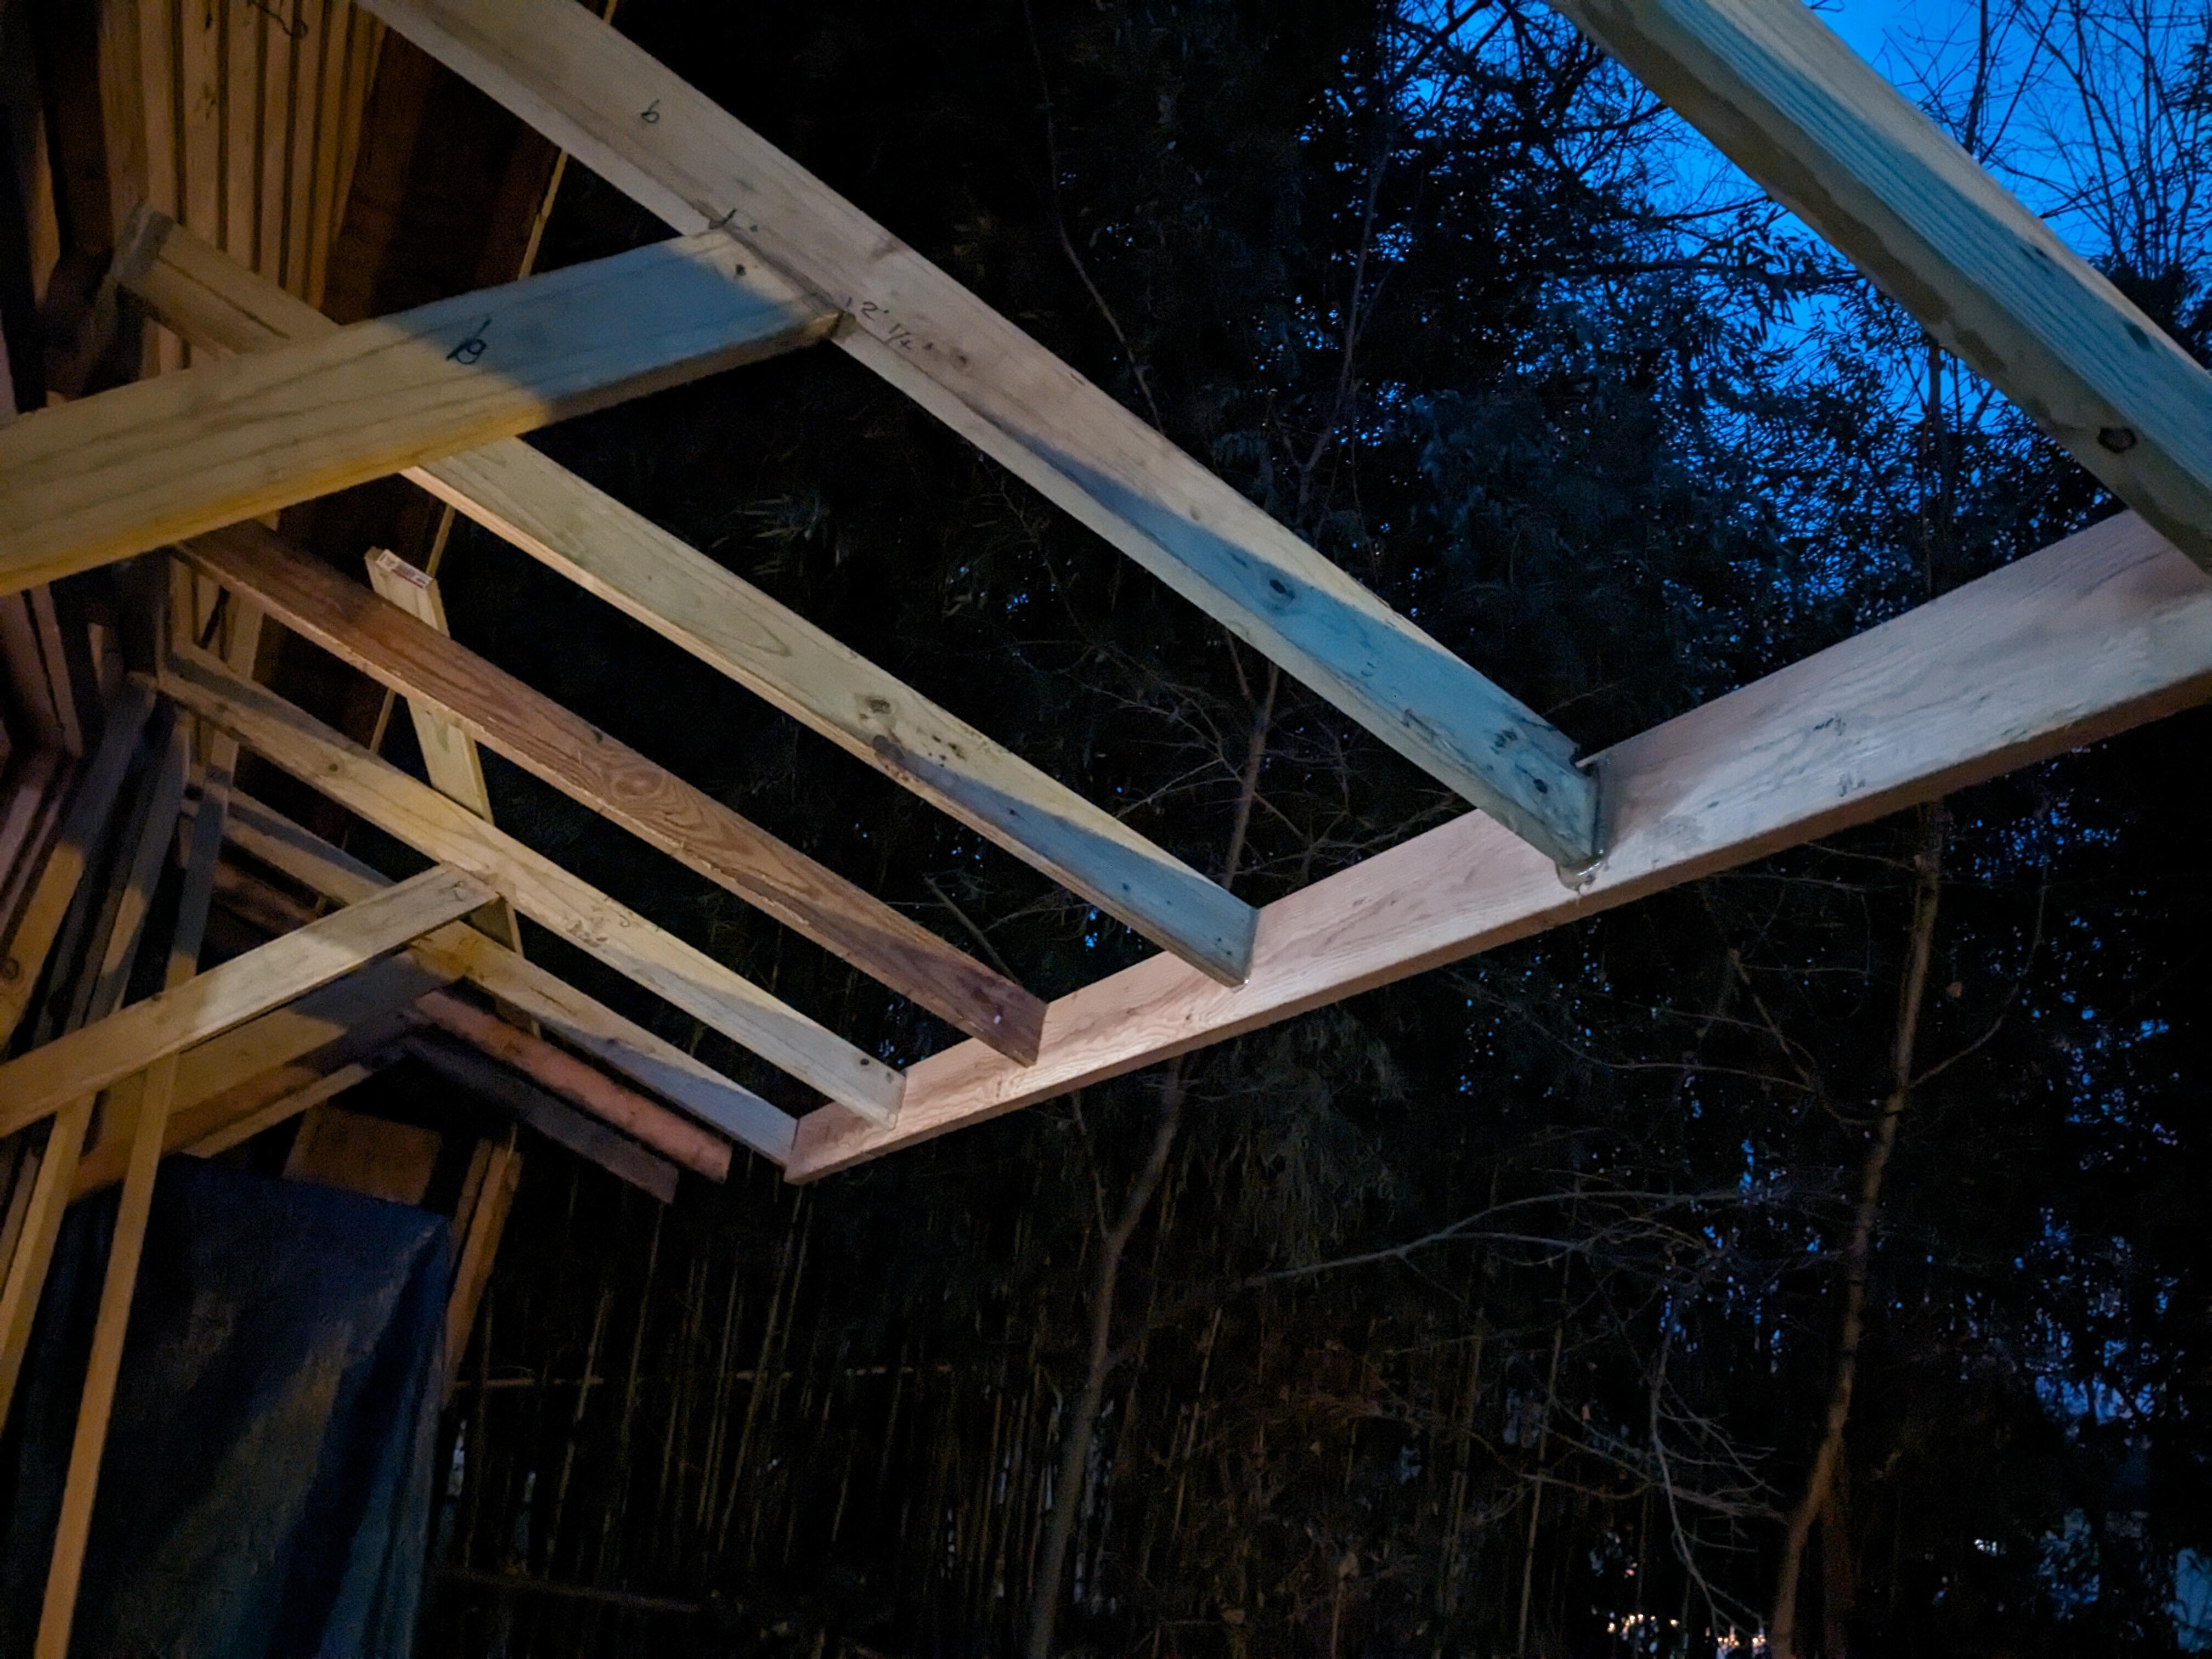
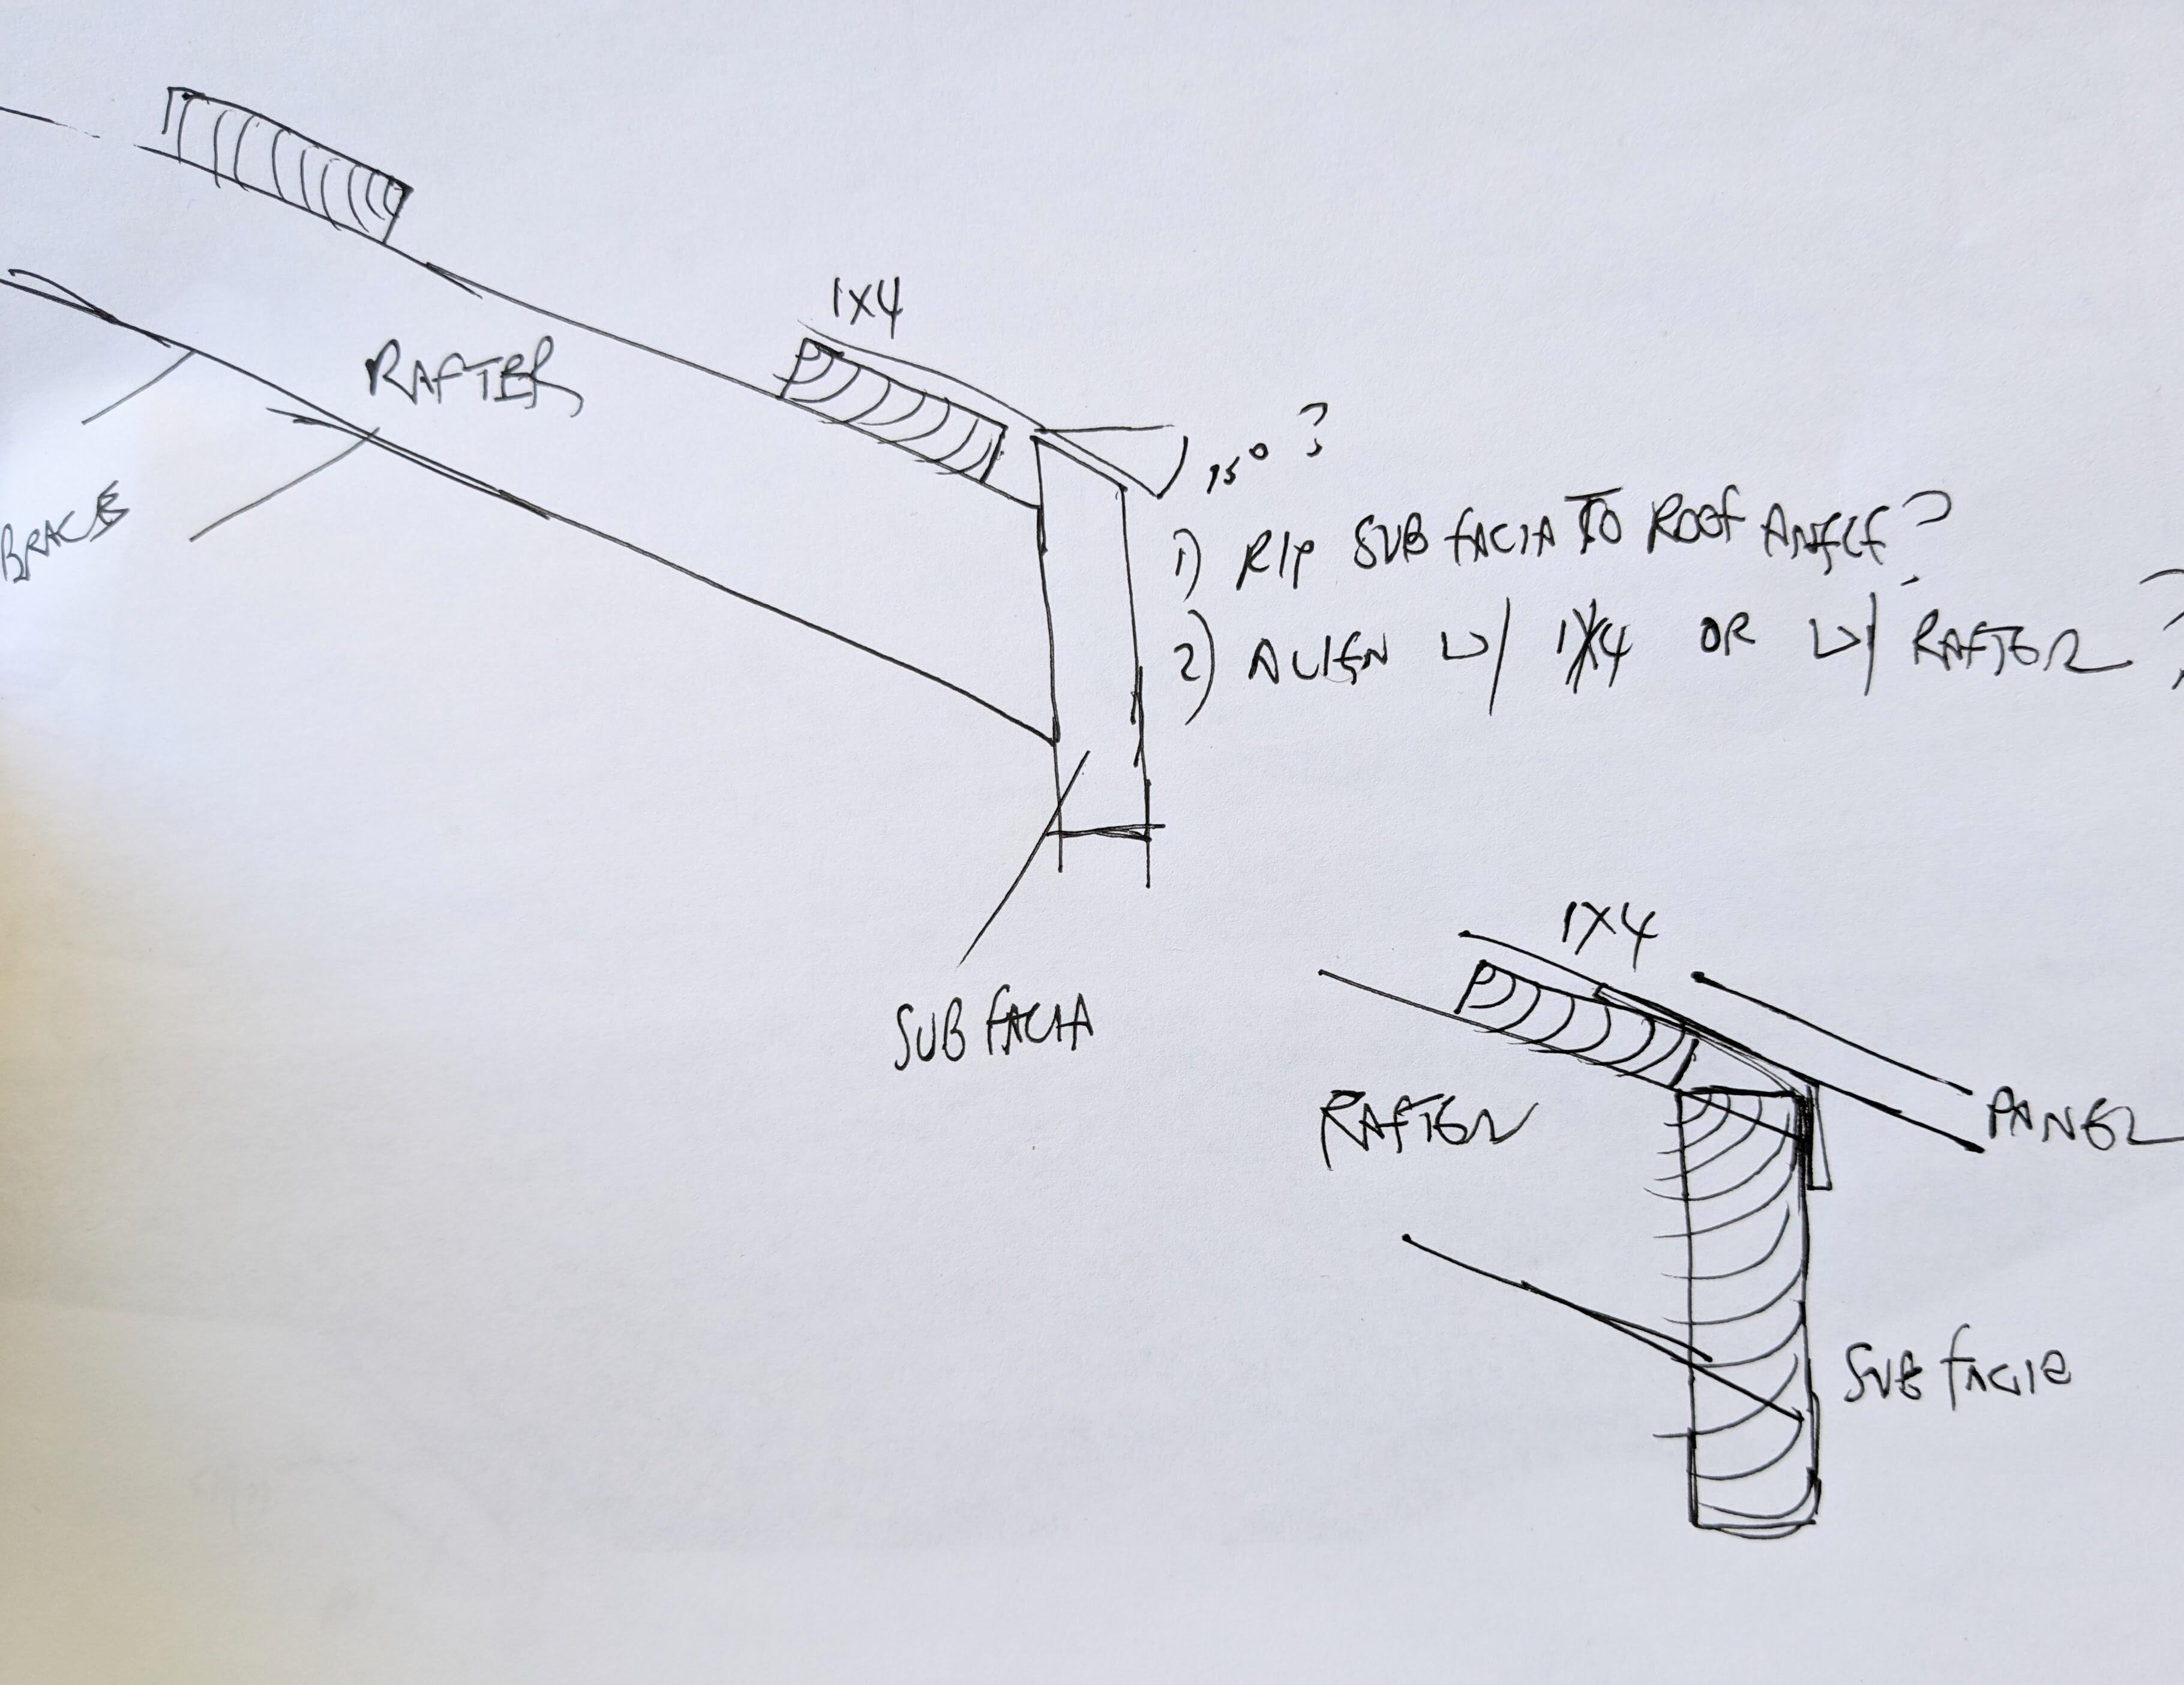
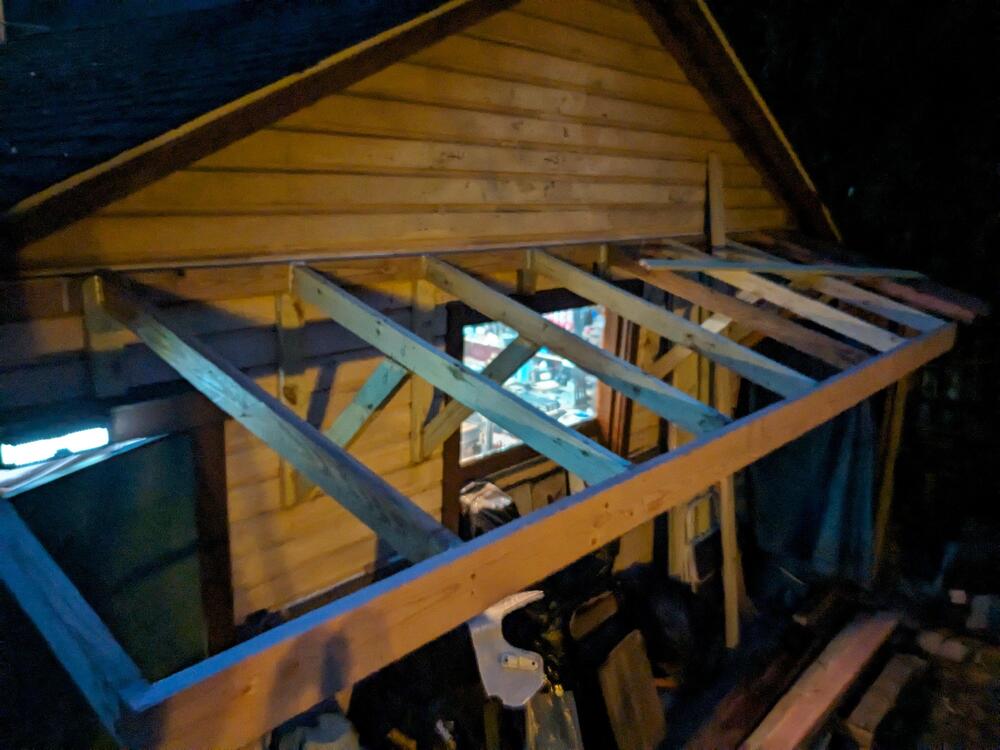
Thank you again. I will scrap the J channel idea. I can't find flashing that is corrugated for steel panels, or foam 'wave' closure that conforms to the panel contour, which was the main reason I was considering the J channel. I did find a 1" foam tape that is meant for metal panels, so I'll get that to use under the flashing, over the panel at the siiding, and at the facia end . Finding angle flashing besides drip edge seems to be problematic. I'll have to see what I can find. I got 1x4's along the top & outer edge of the rafters, along with another strip when the upper & lower roof panels will need to overlap. I still need to add another length of 1x4 in the middle of the span. I put tar paper along the outer 1x4 overlapping the sub facia. I will see if I can pry up the siding to tuck flashing under. I wedged tar paper up under the siding ridge as it stands, I can seal flashing up against that if not under. Test fitting the lower section of the roofing, with 3" overhang. I found that the 4th rafter from the right is not 24" OC, so I need to add a sister(?) rafter at 24" OC. Still have to buy the gutter. I had bought 1x6 to use as facia, not sure I need to bother with that now I have the 2x6. I could add drip edge, but I don't know if that's a requirement with a guttered awning.


-
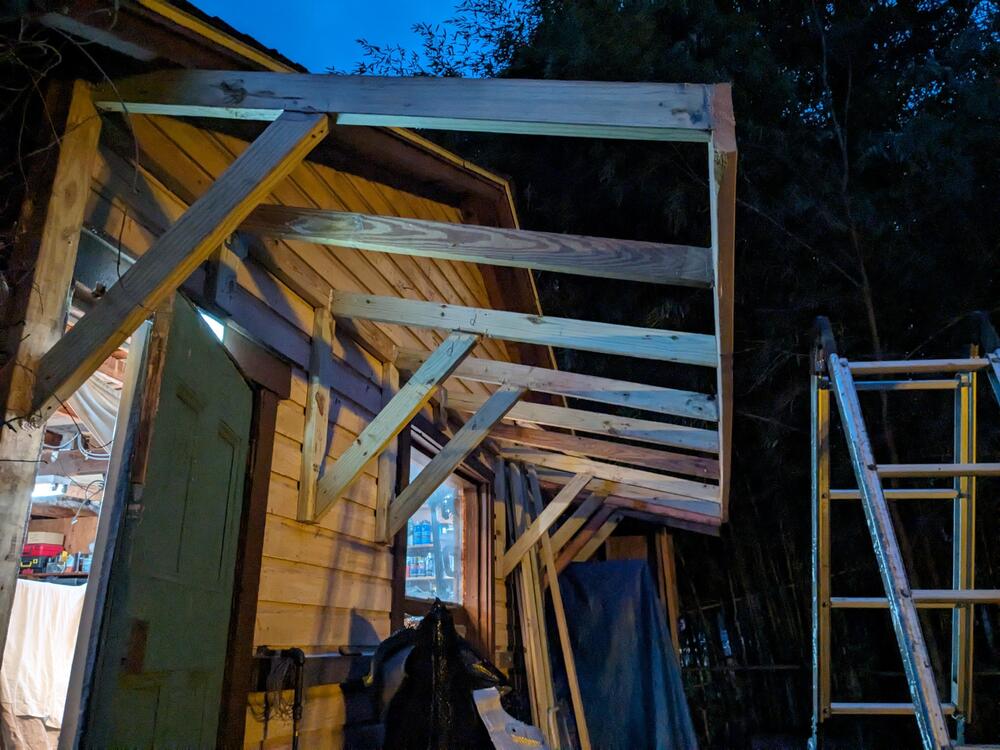
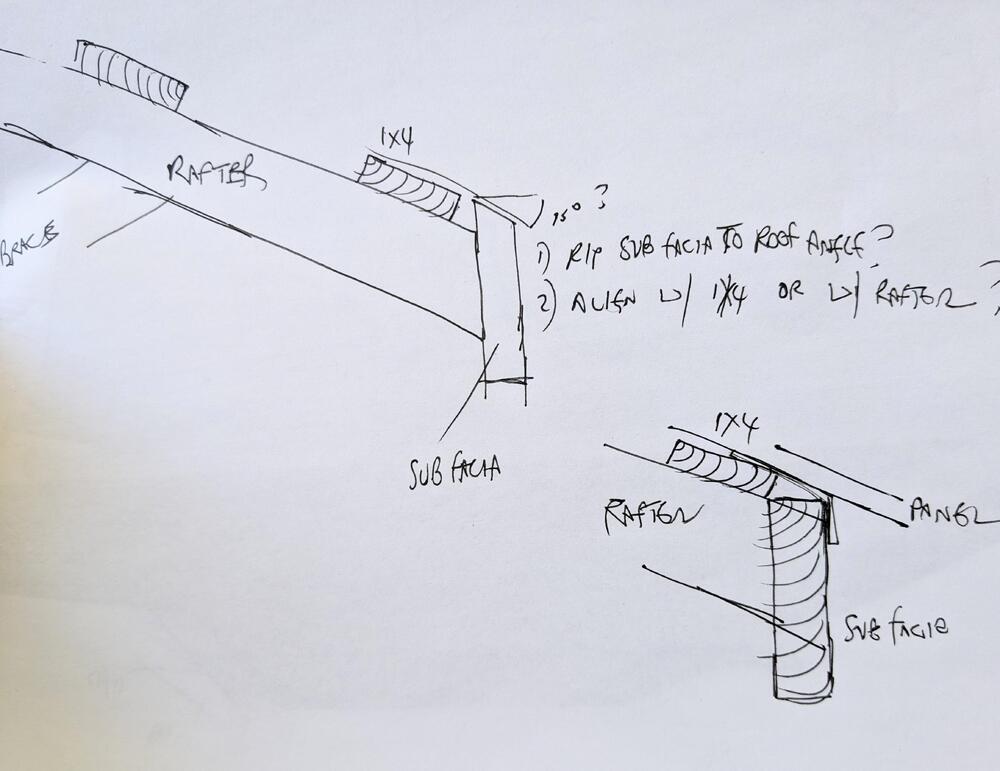
Had time to add the sub facia, at least the 14" section. I used joist hangers on the 3 rafters without braces, at the header @Patcon - wondering if I should add hangers on the same 3 rafters at the sub facia, for additional support. I have to add a 4' sub facia on the end - I figured I should add angle brackets to tie the 2 sub facia sections to the rafter, since they sit midway on the rafter end

-
@Patcon - can't find the answer to this online - should I cut the subfacia @ 15degrees to match the rafter & set it at the level of the 1x4, or leave it be & align with the rafter top? TIA
-
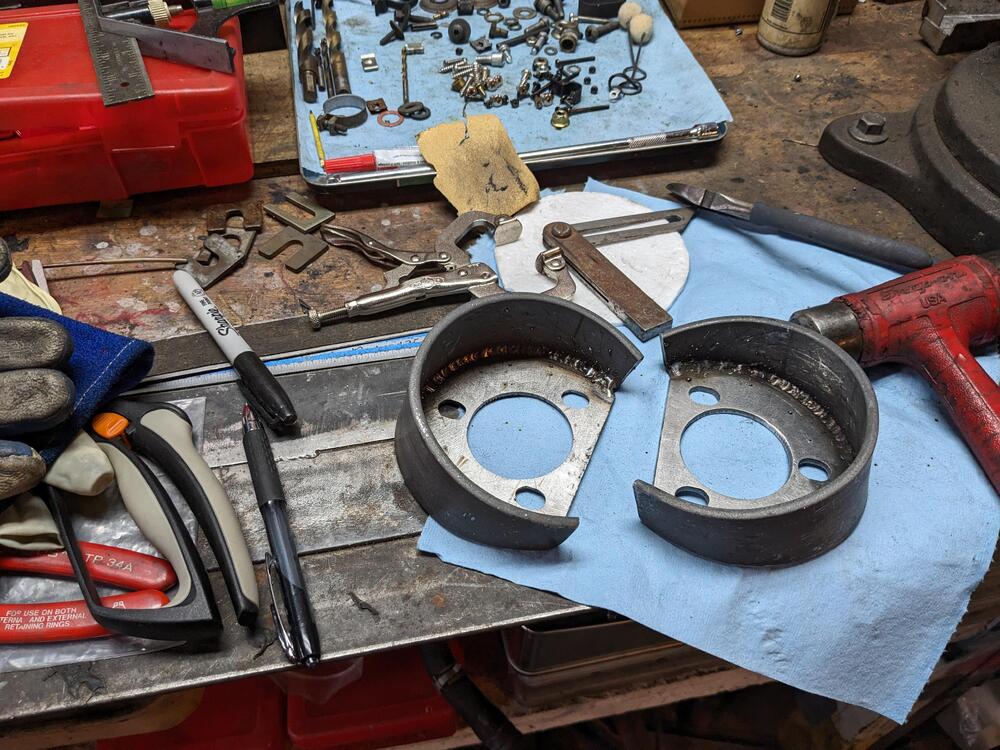
Bar stock, I rolled it in the vice
-
Modified the passenger seat switch mount point, to accept the driver's switch. The pas switch is $$$, vs. the cheap & plentiful driver's version. I don't care if it has 2 toggles

-
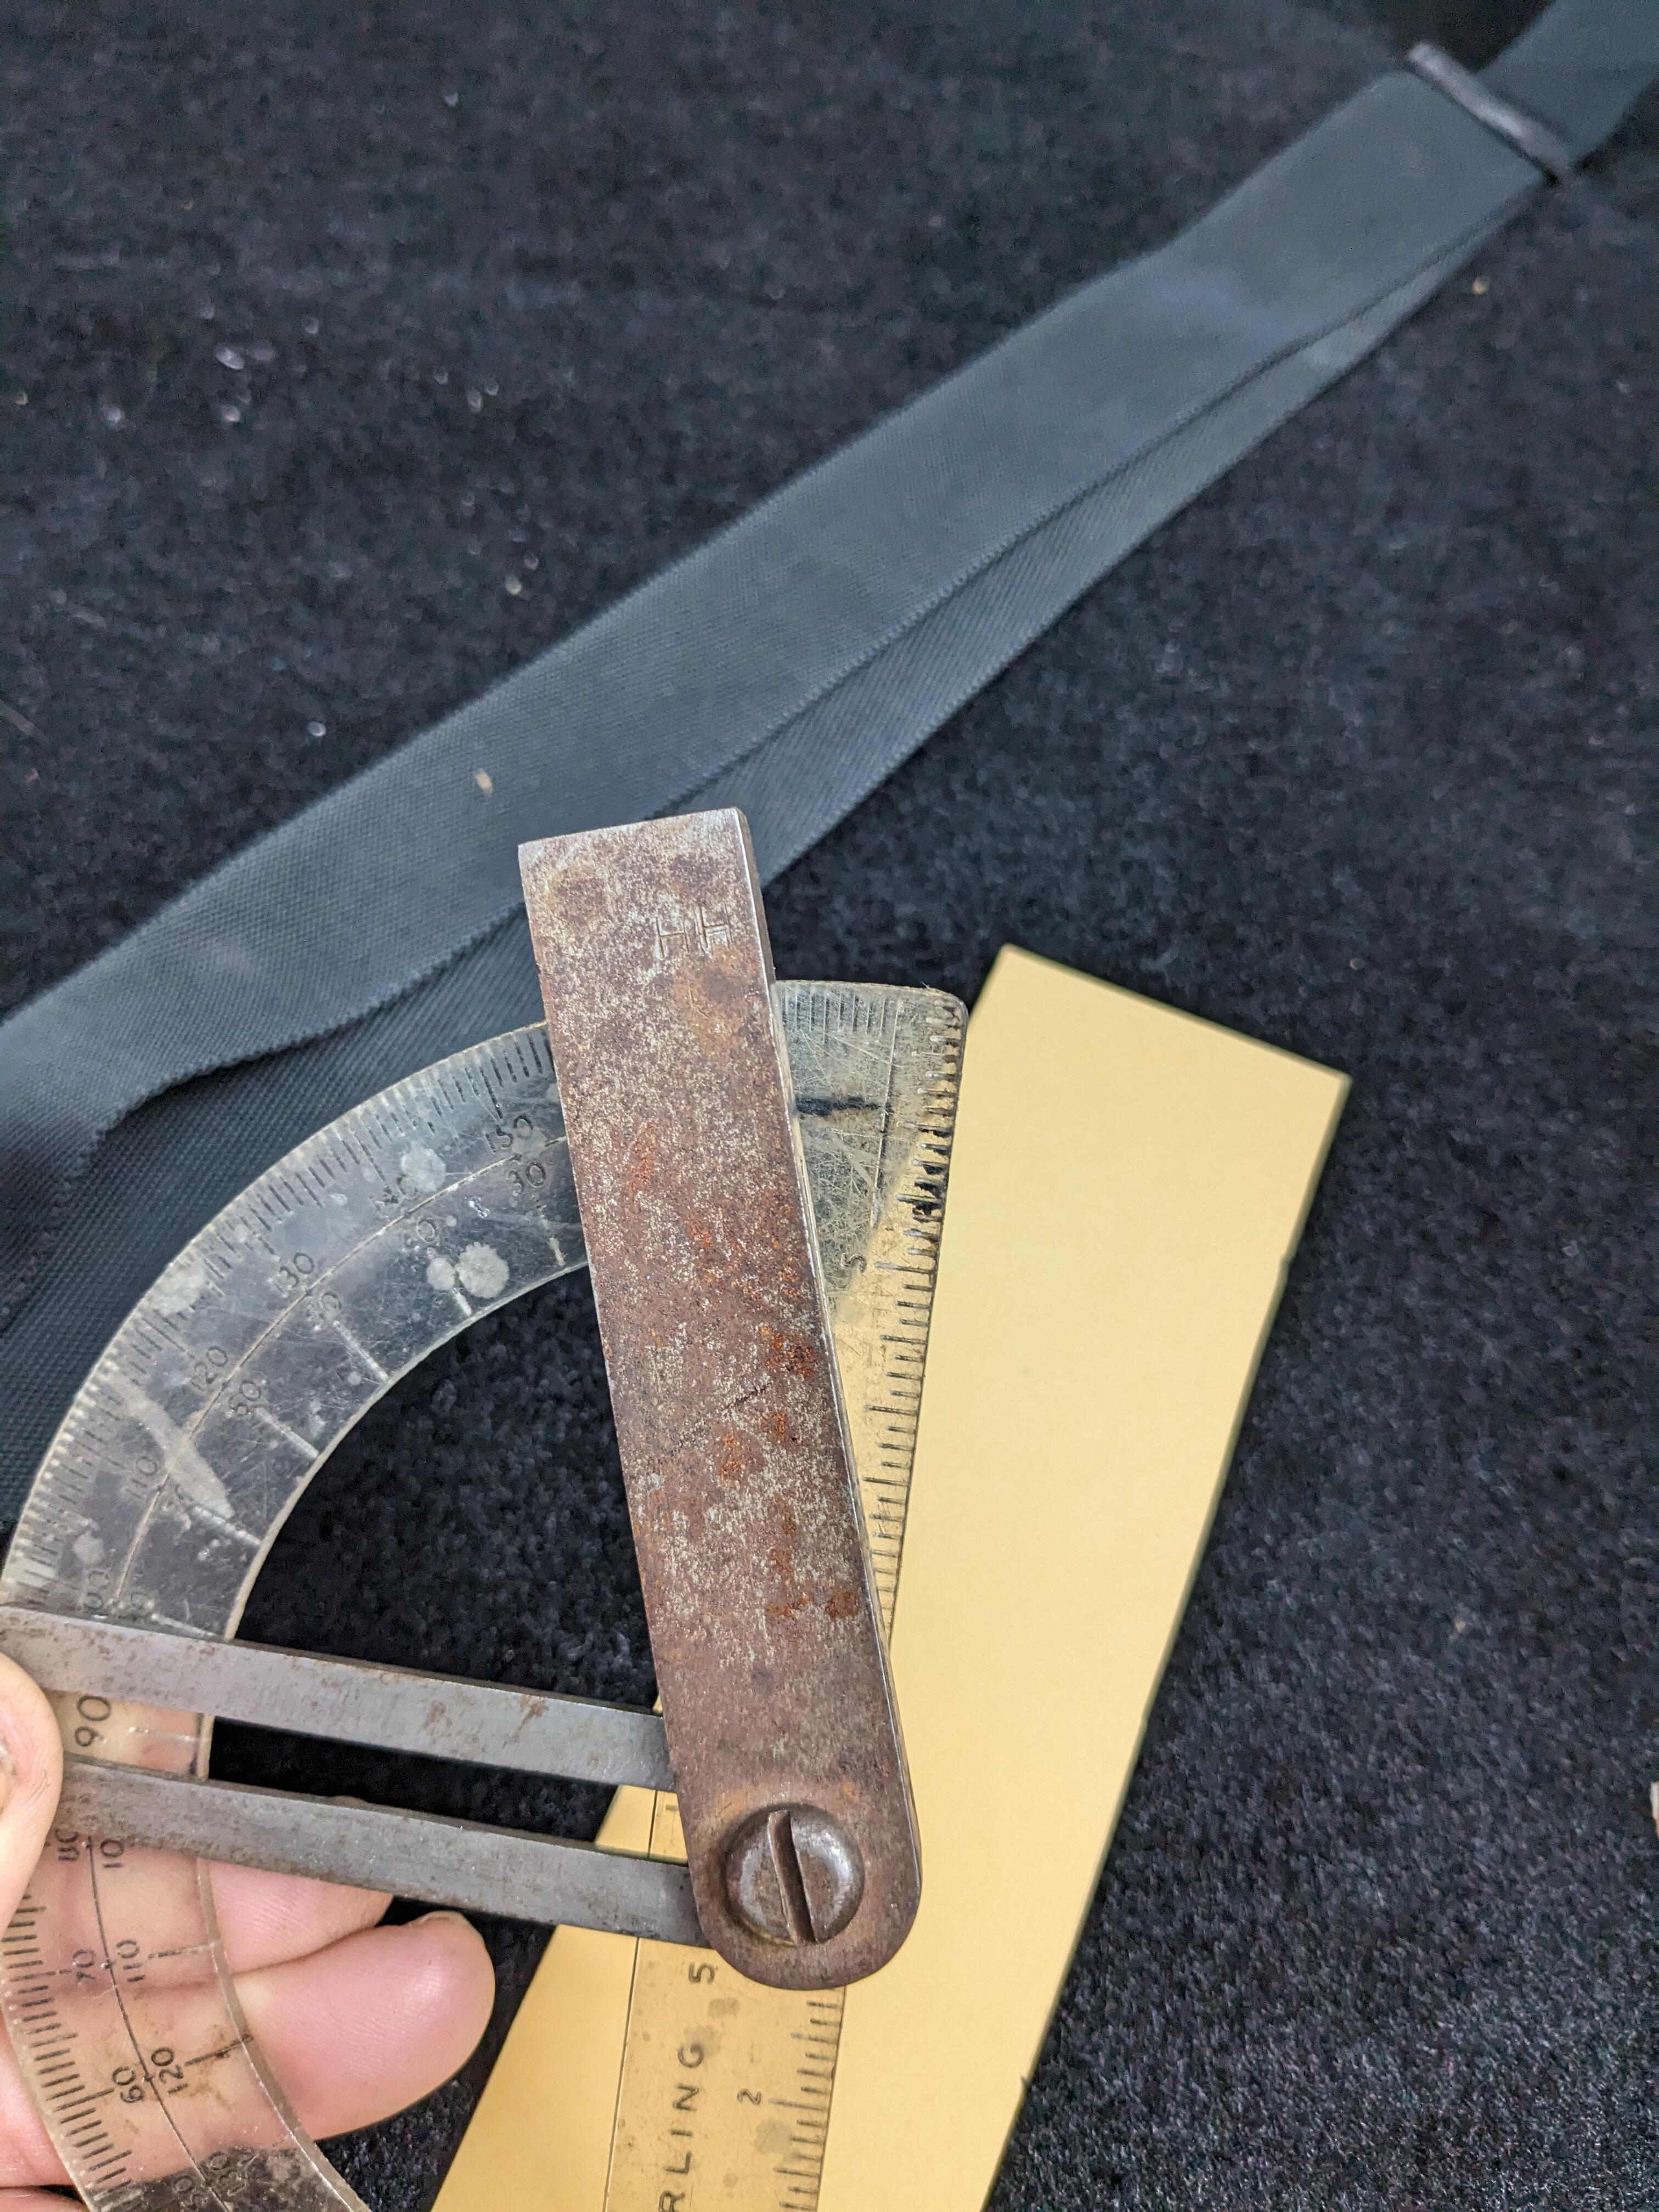
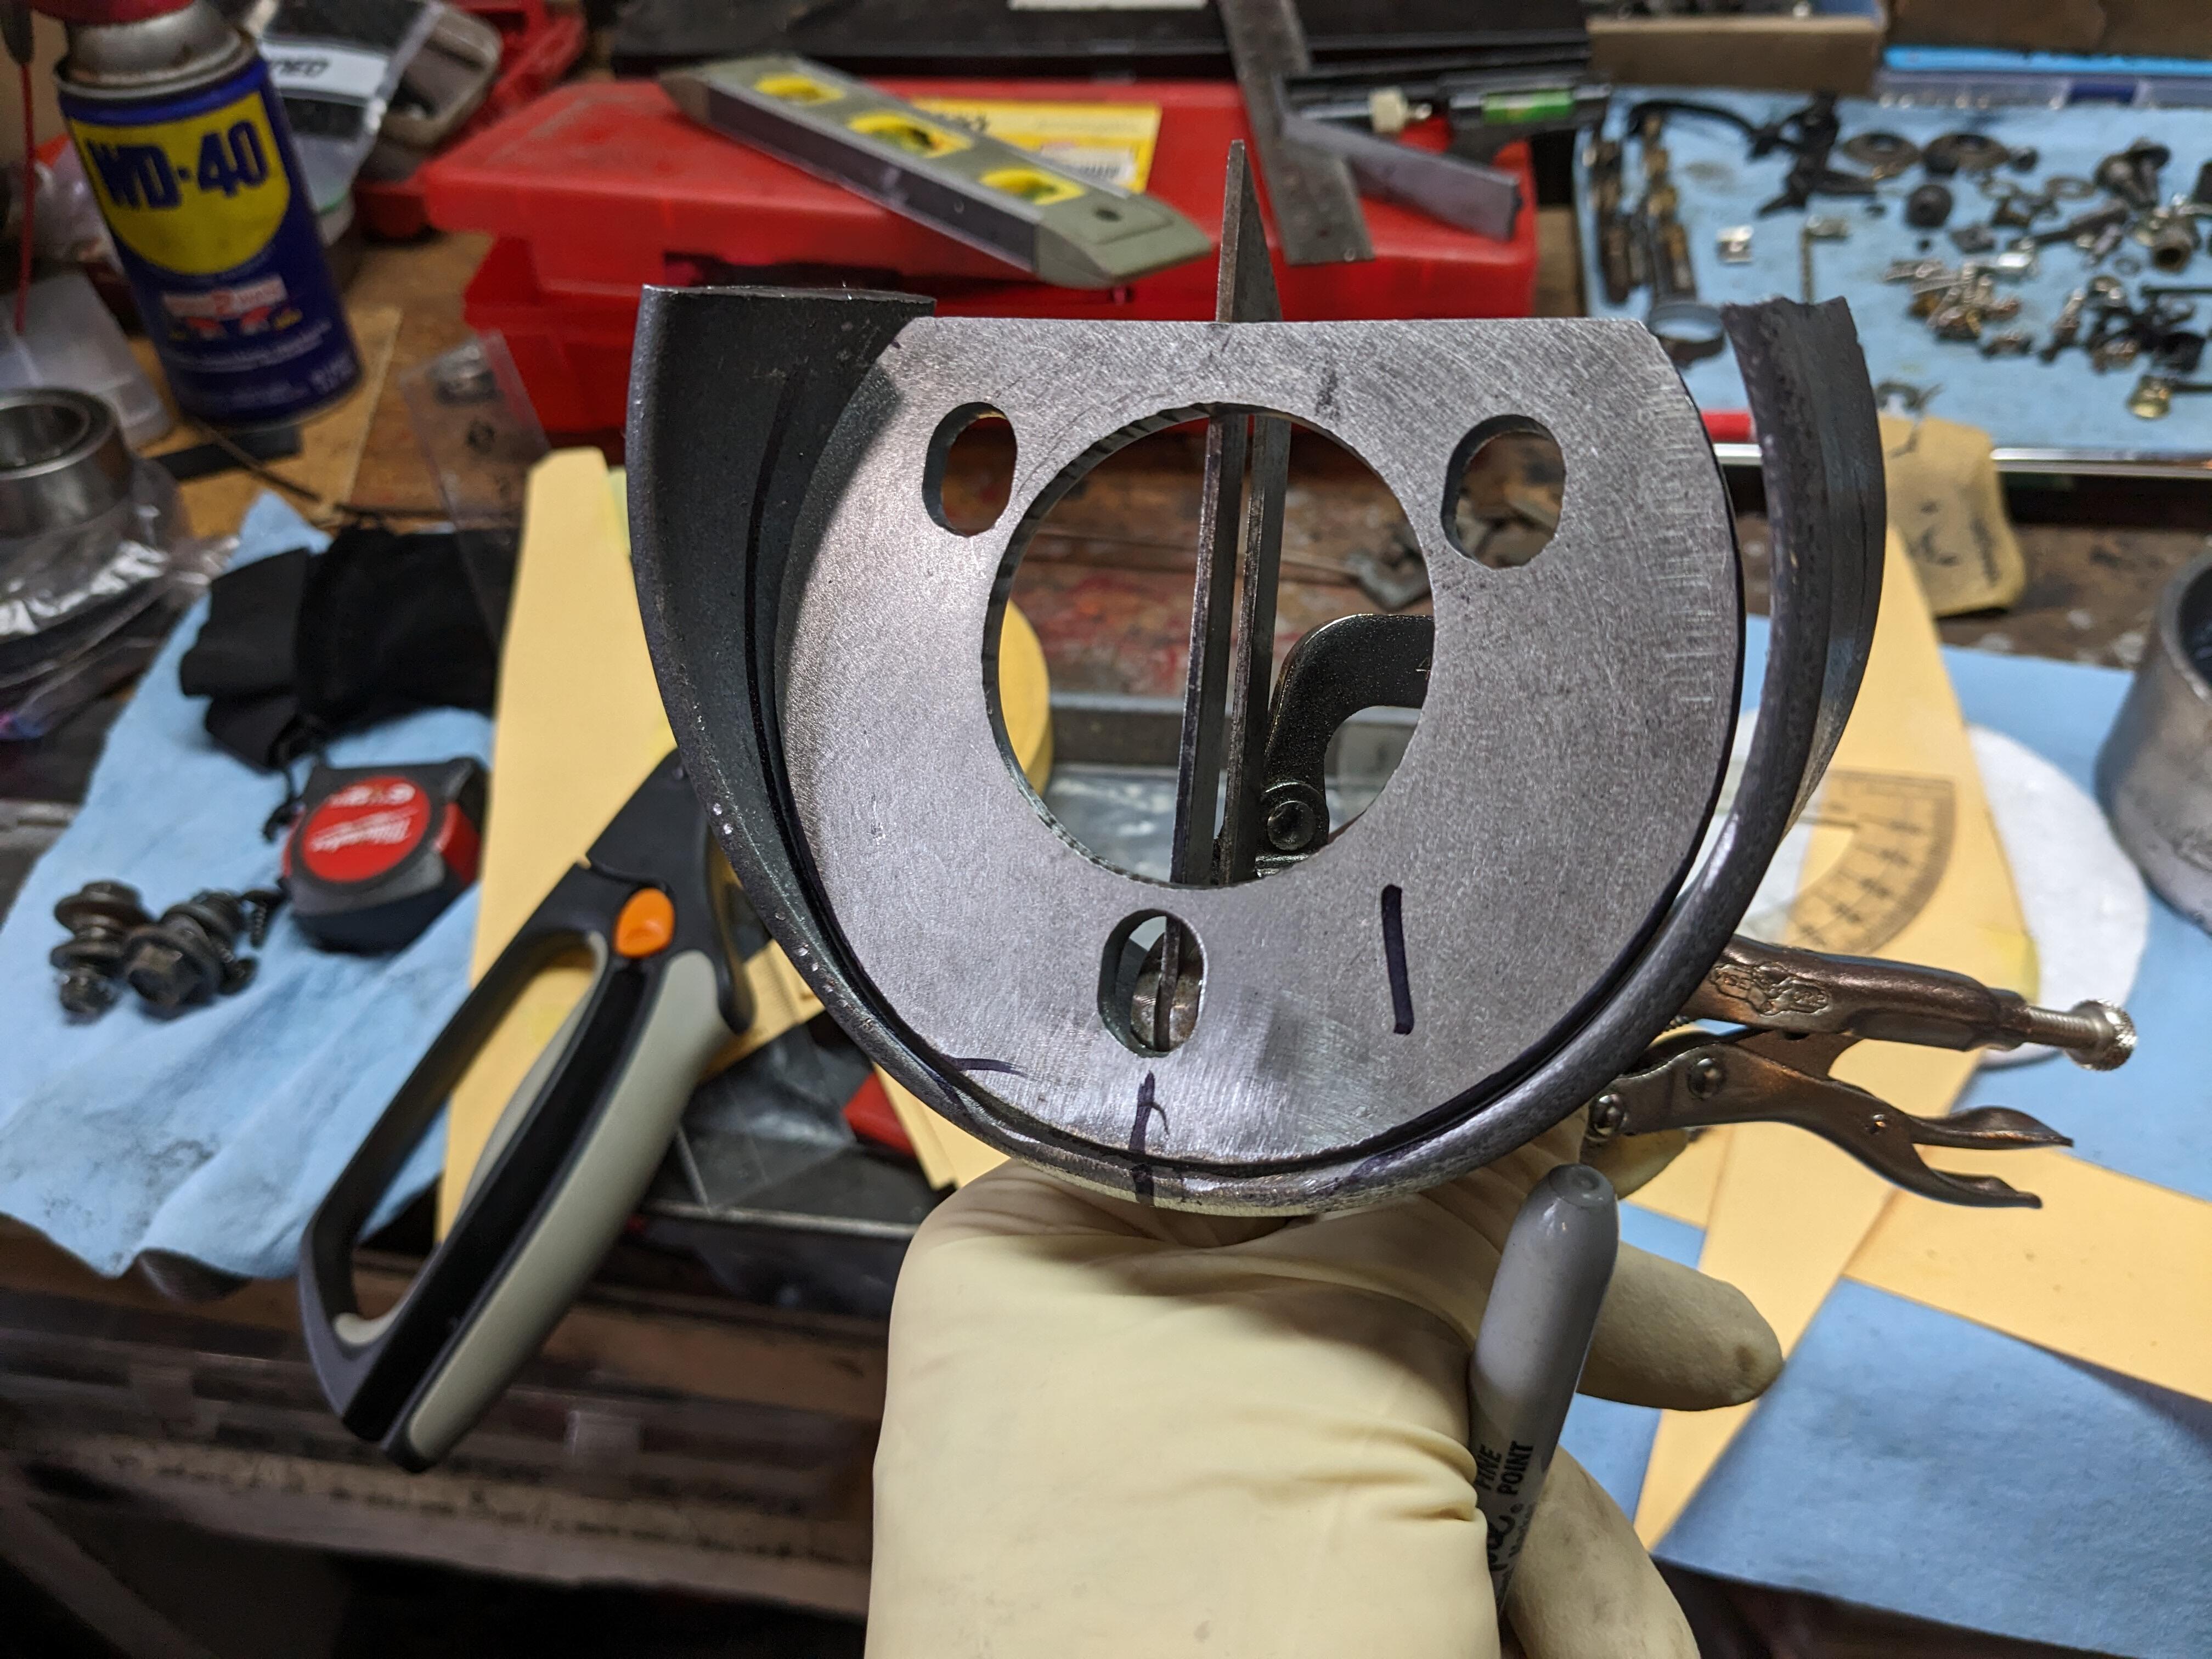
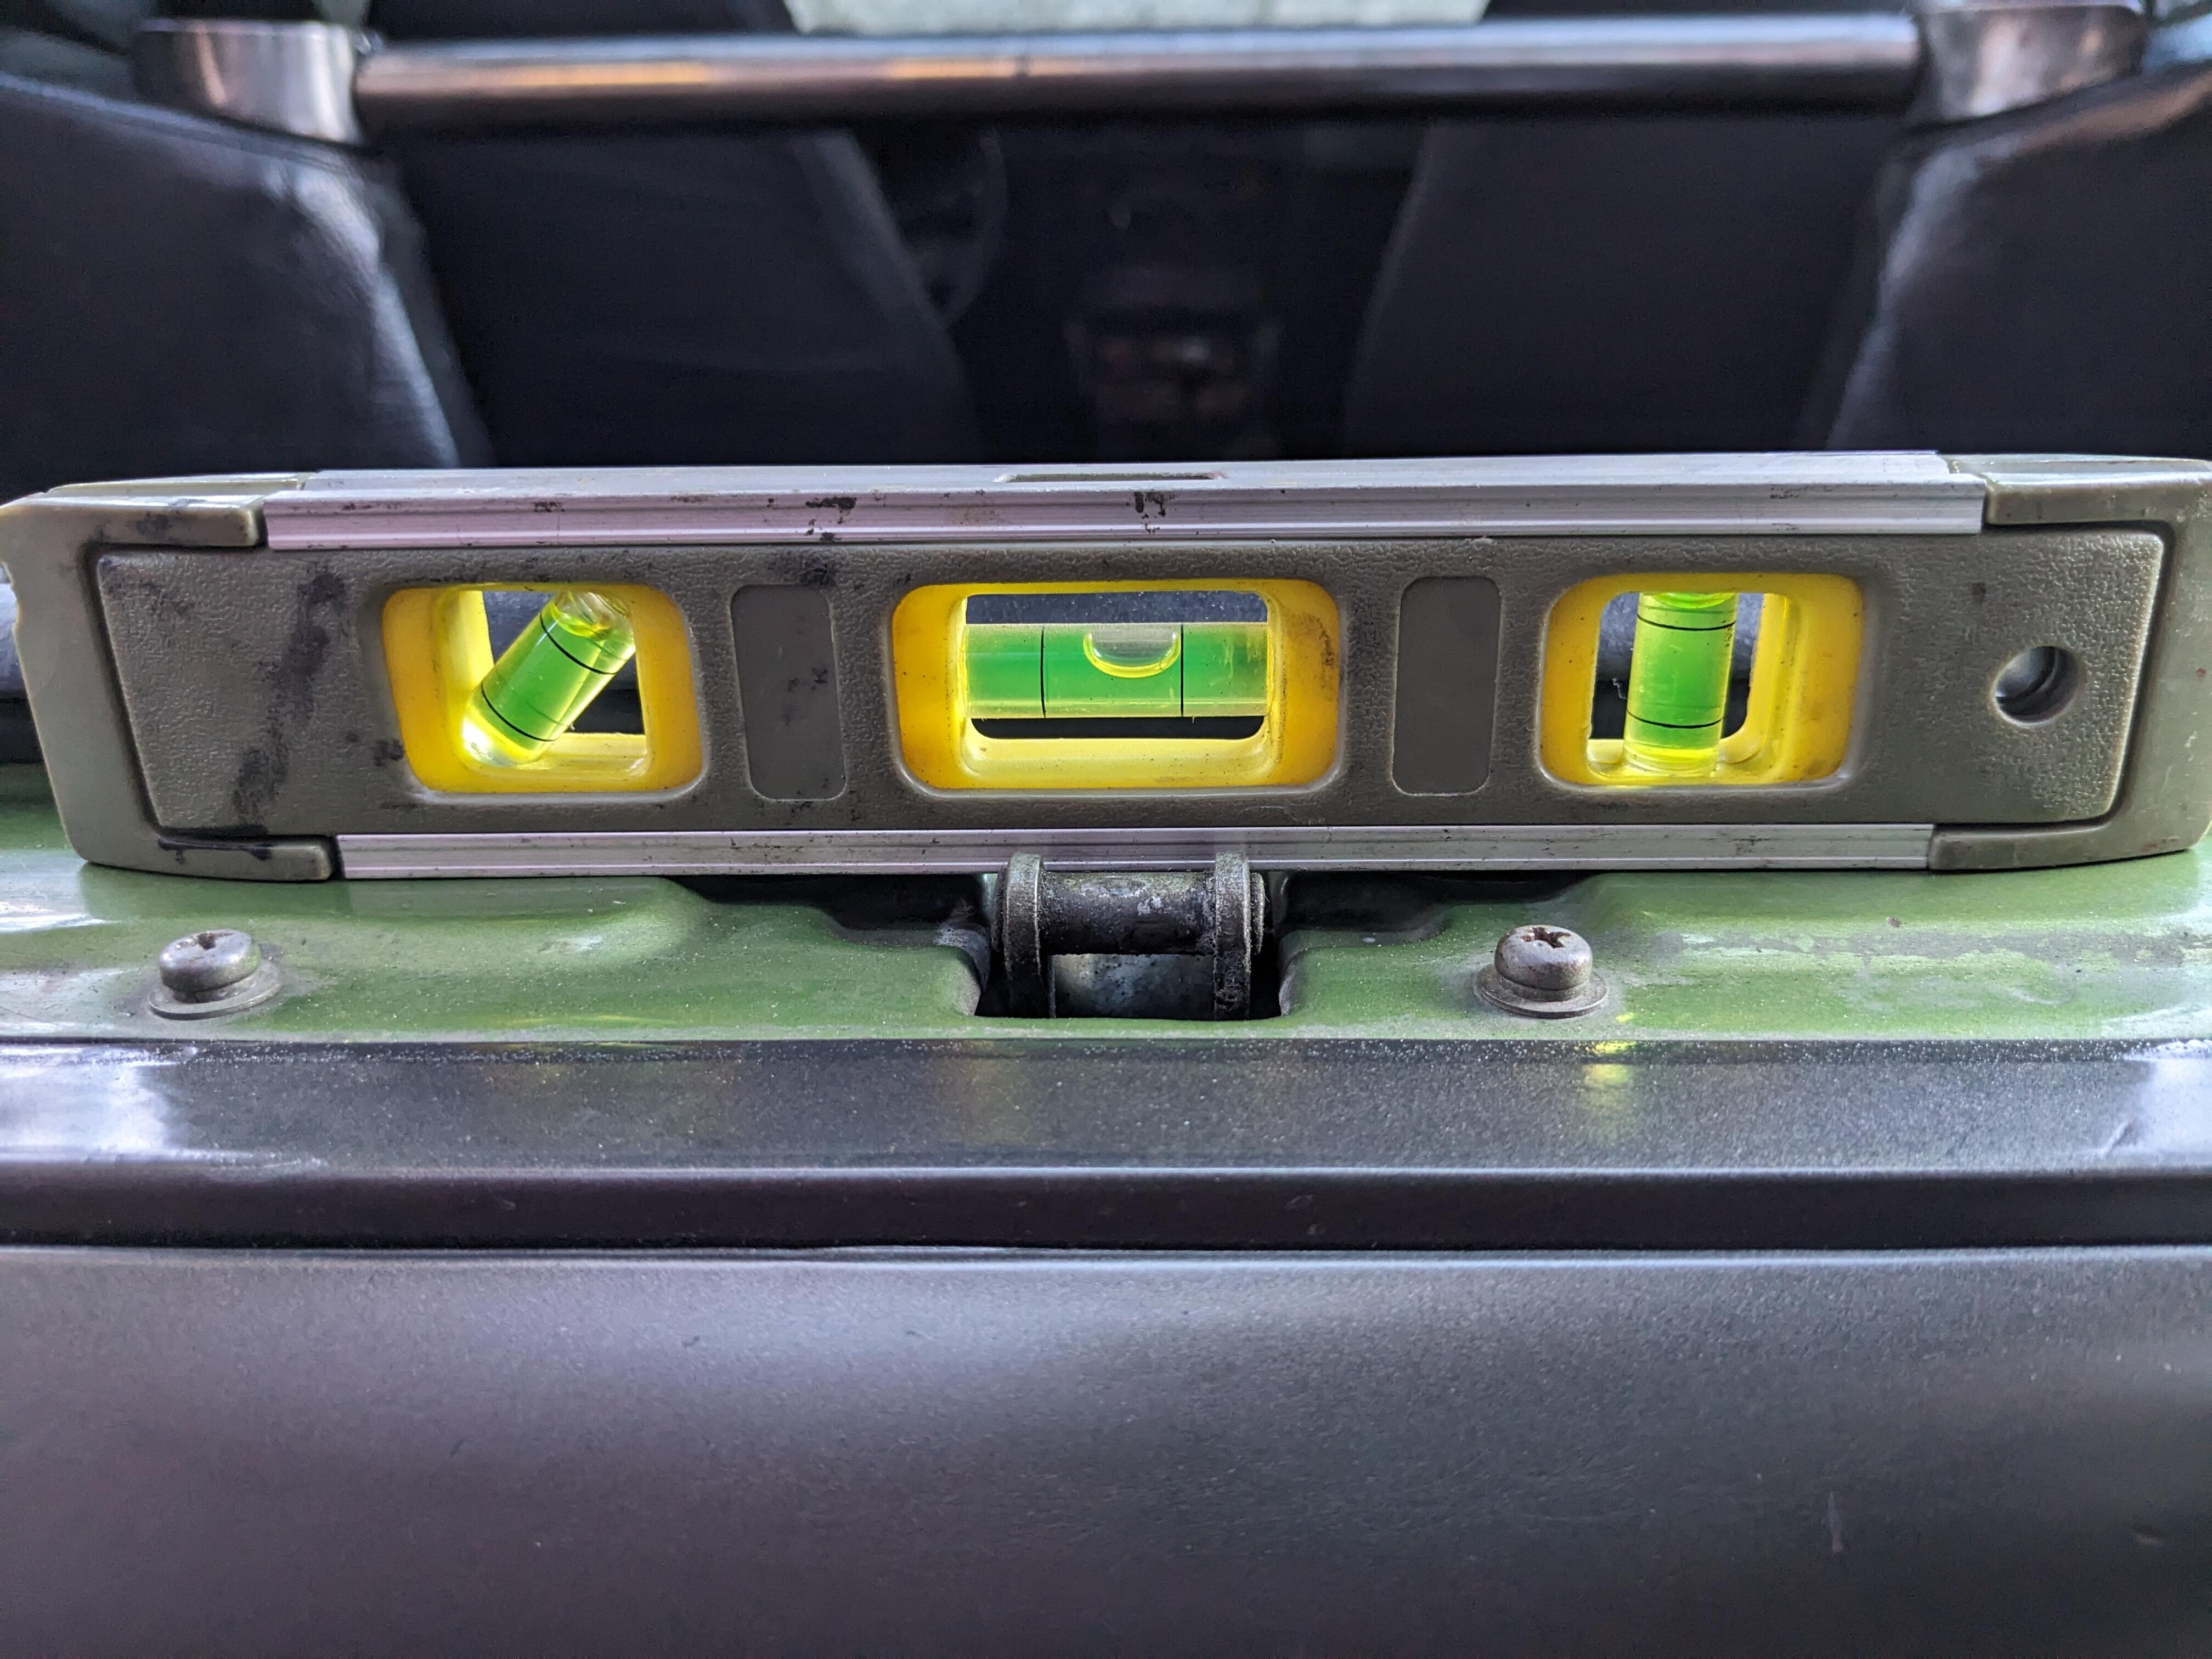
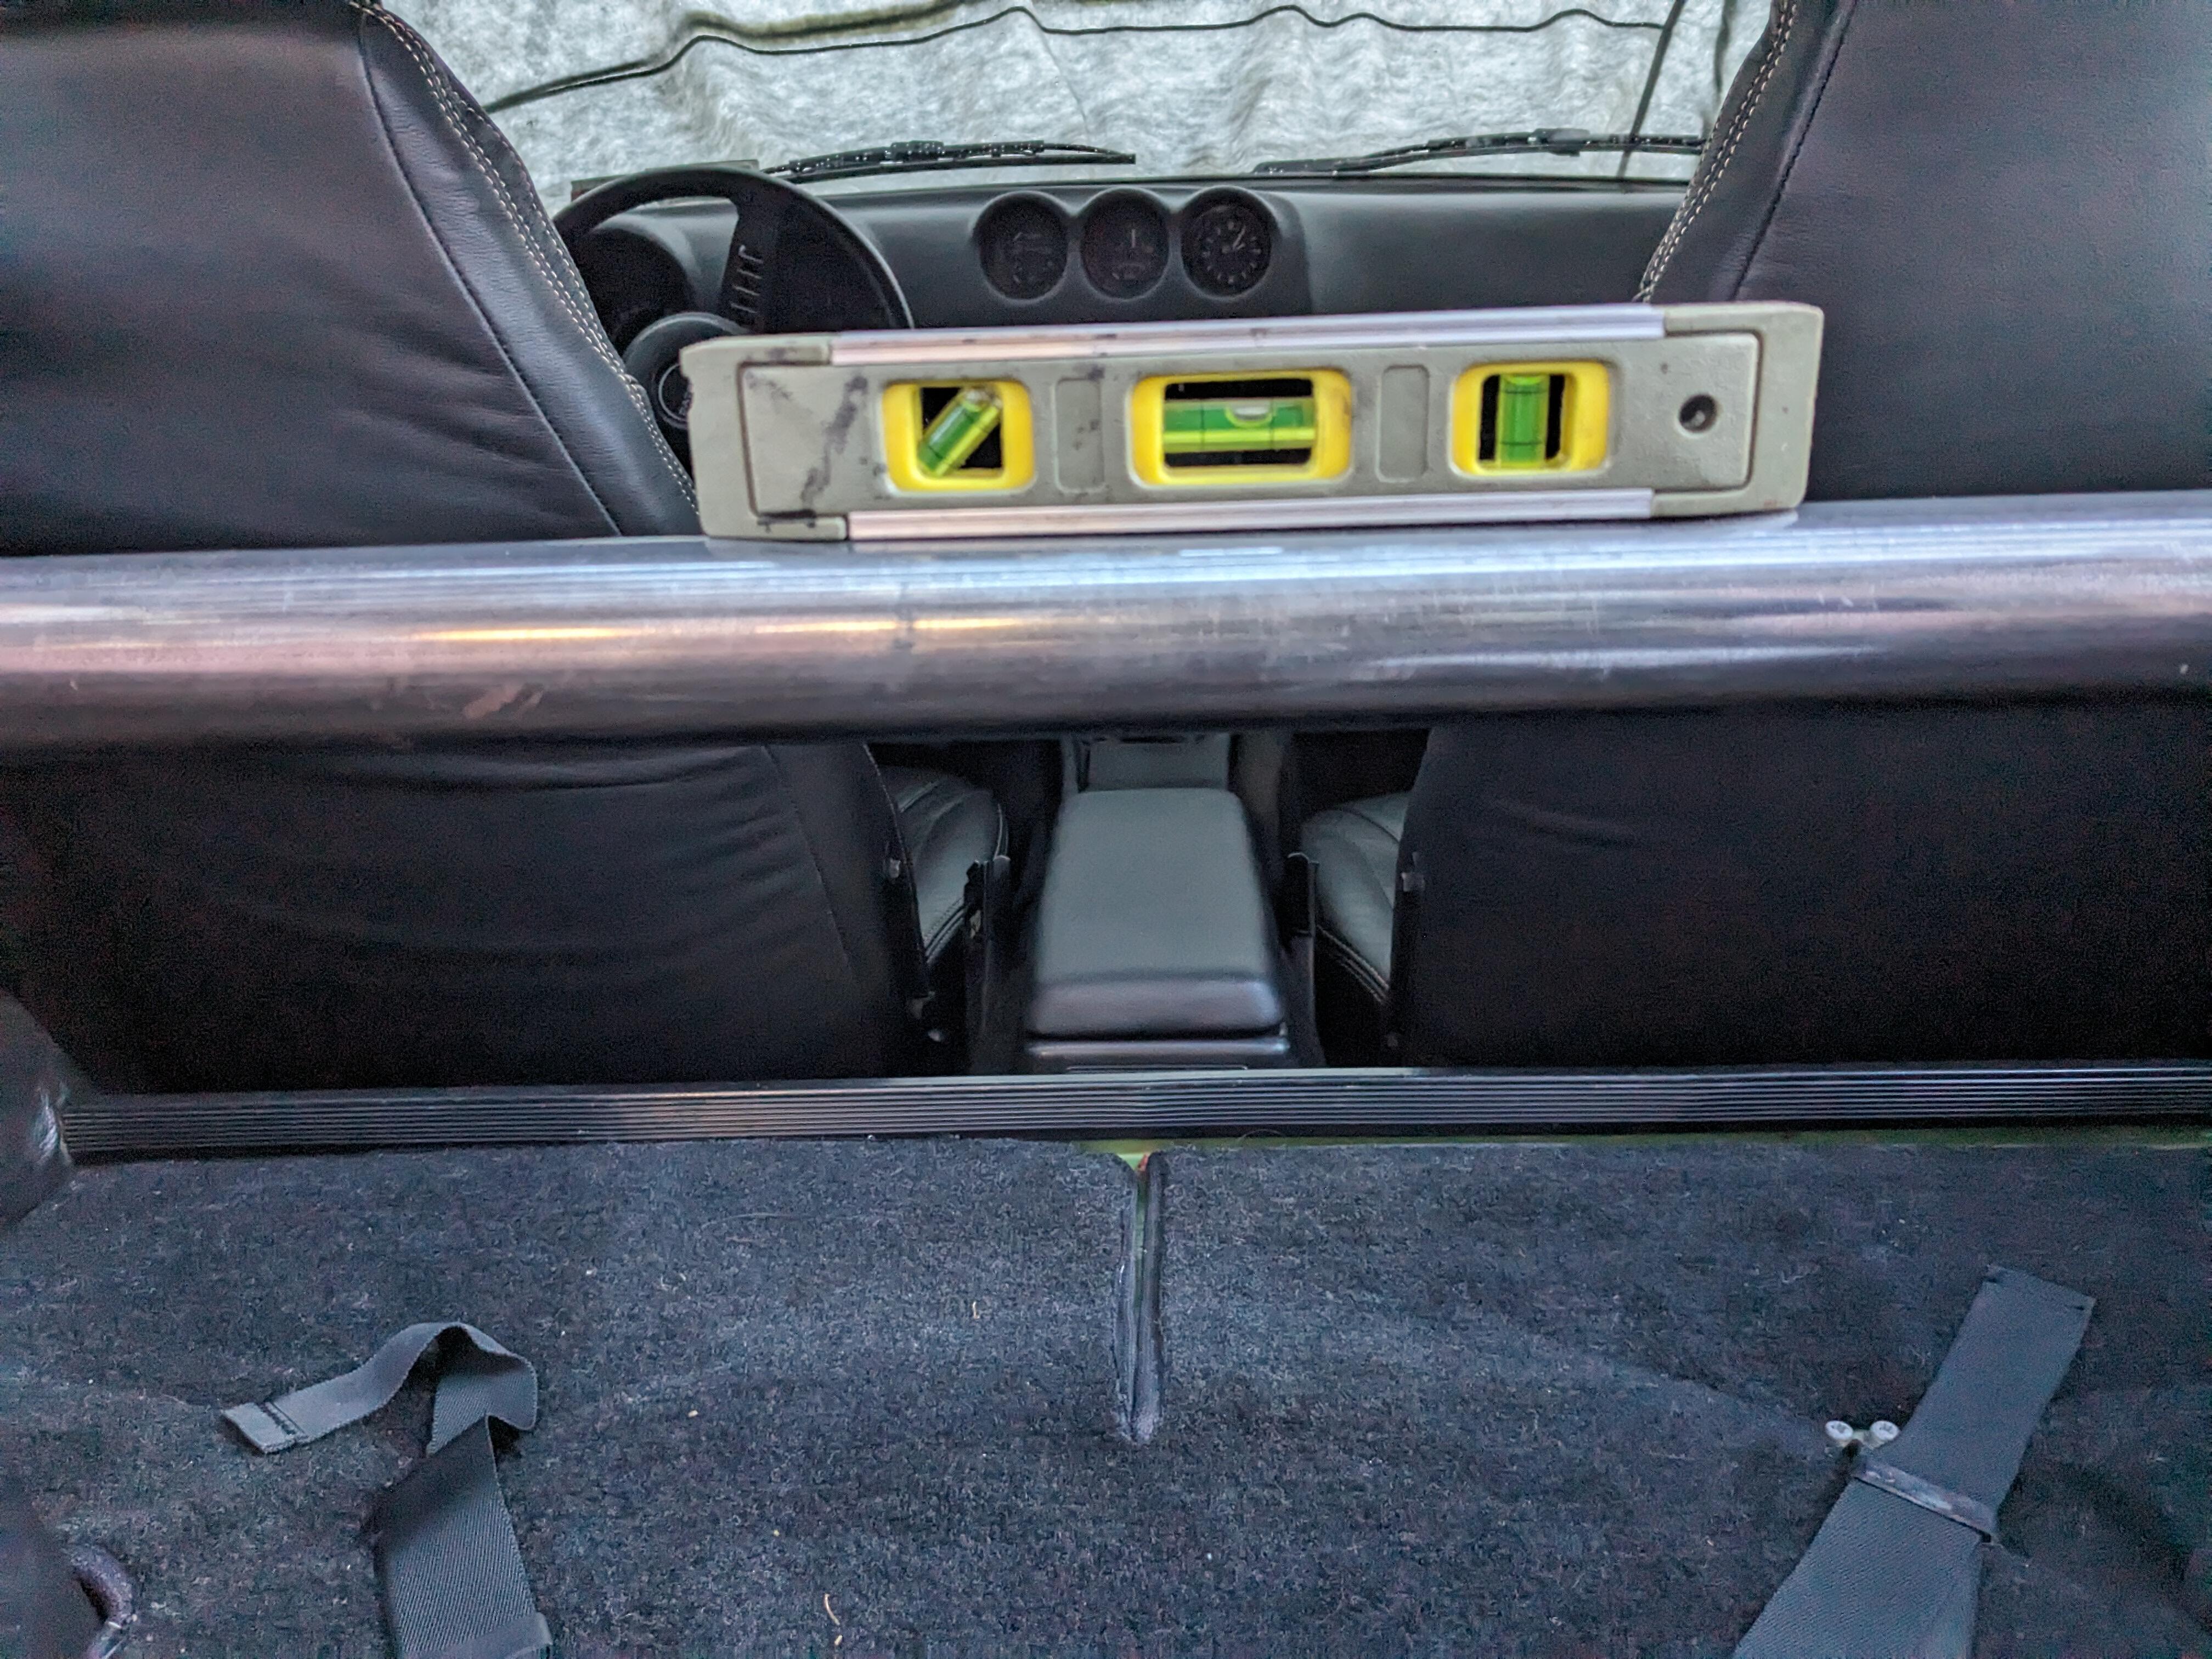
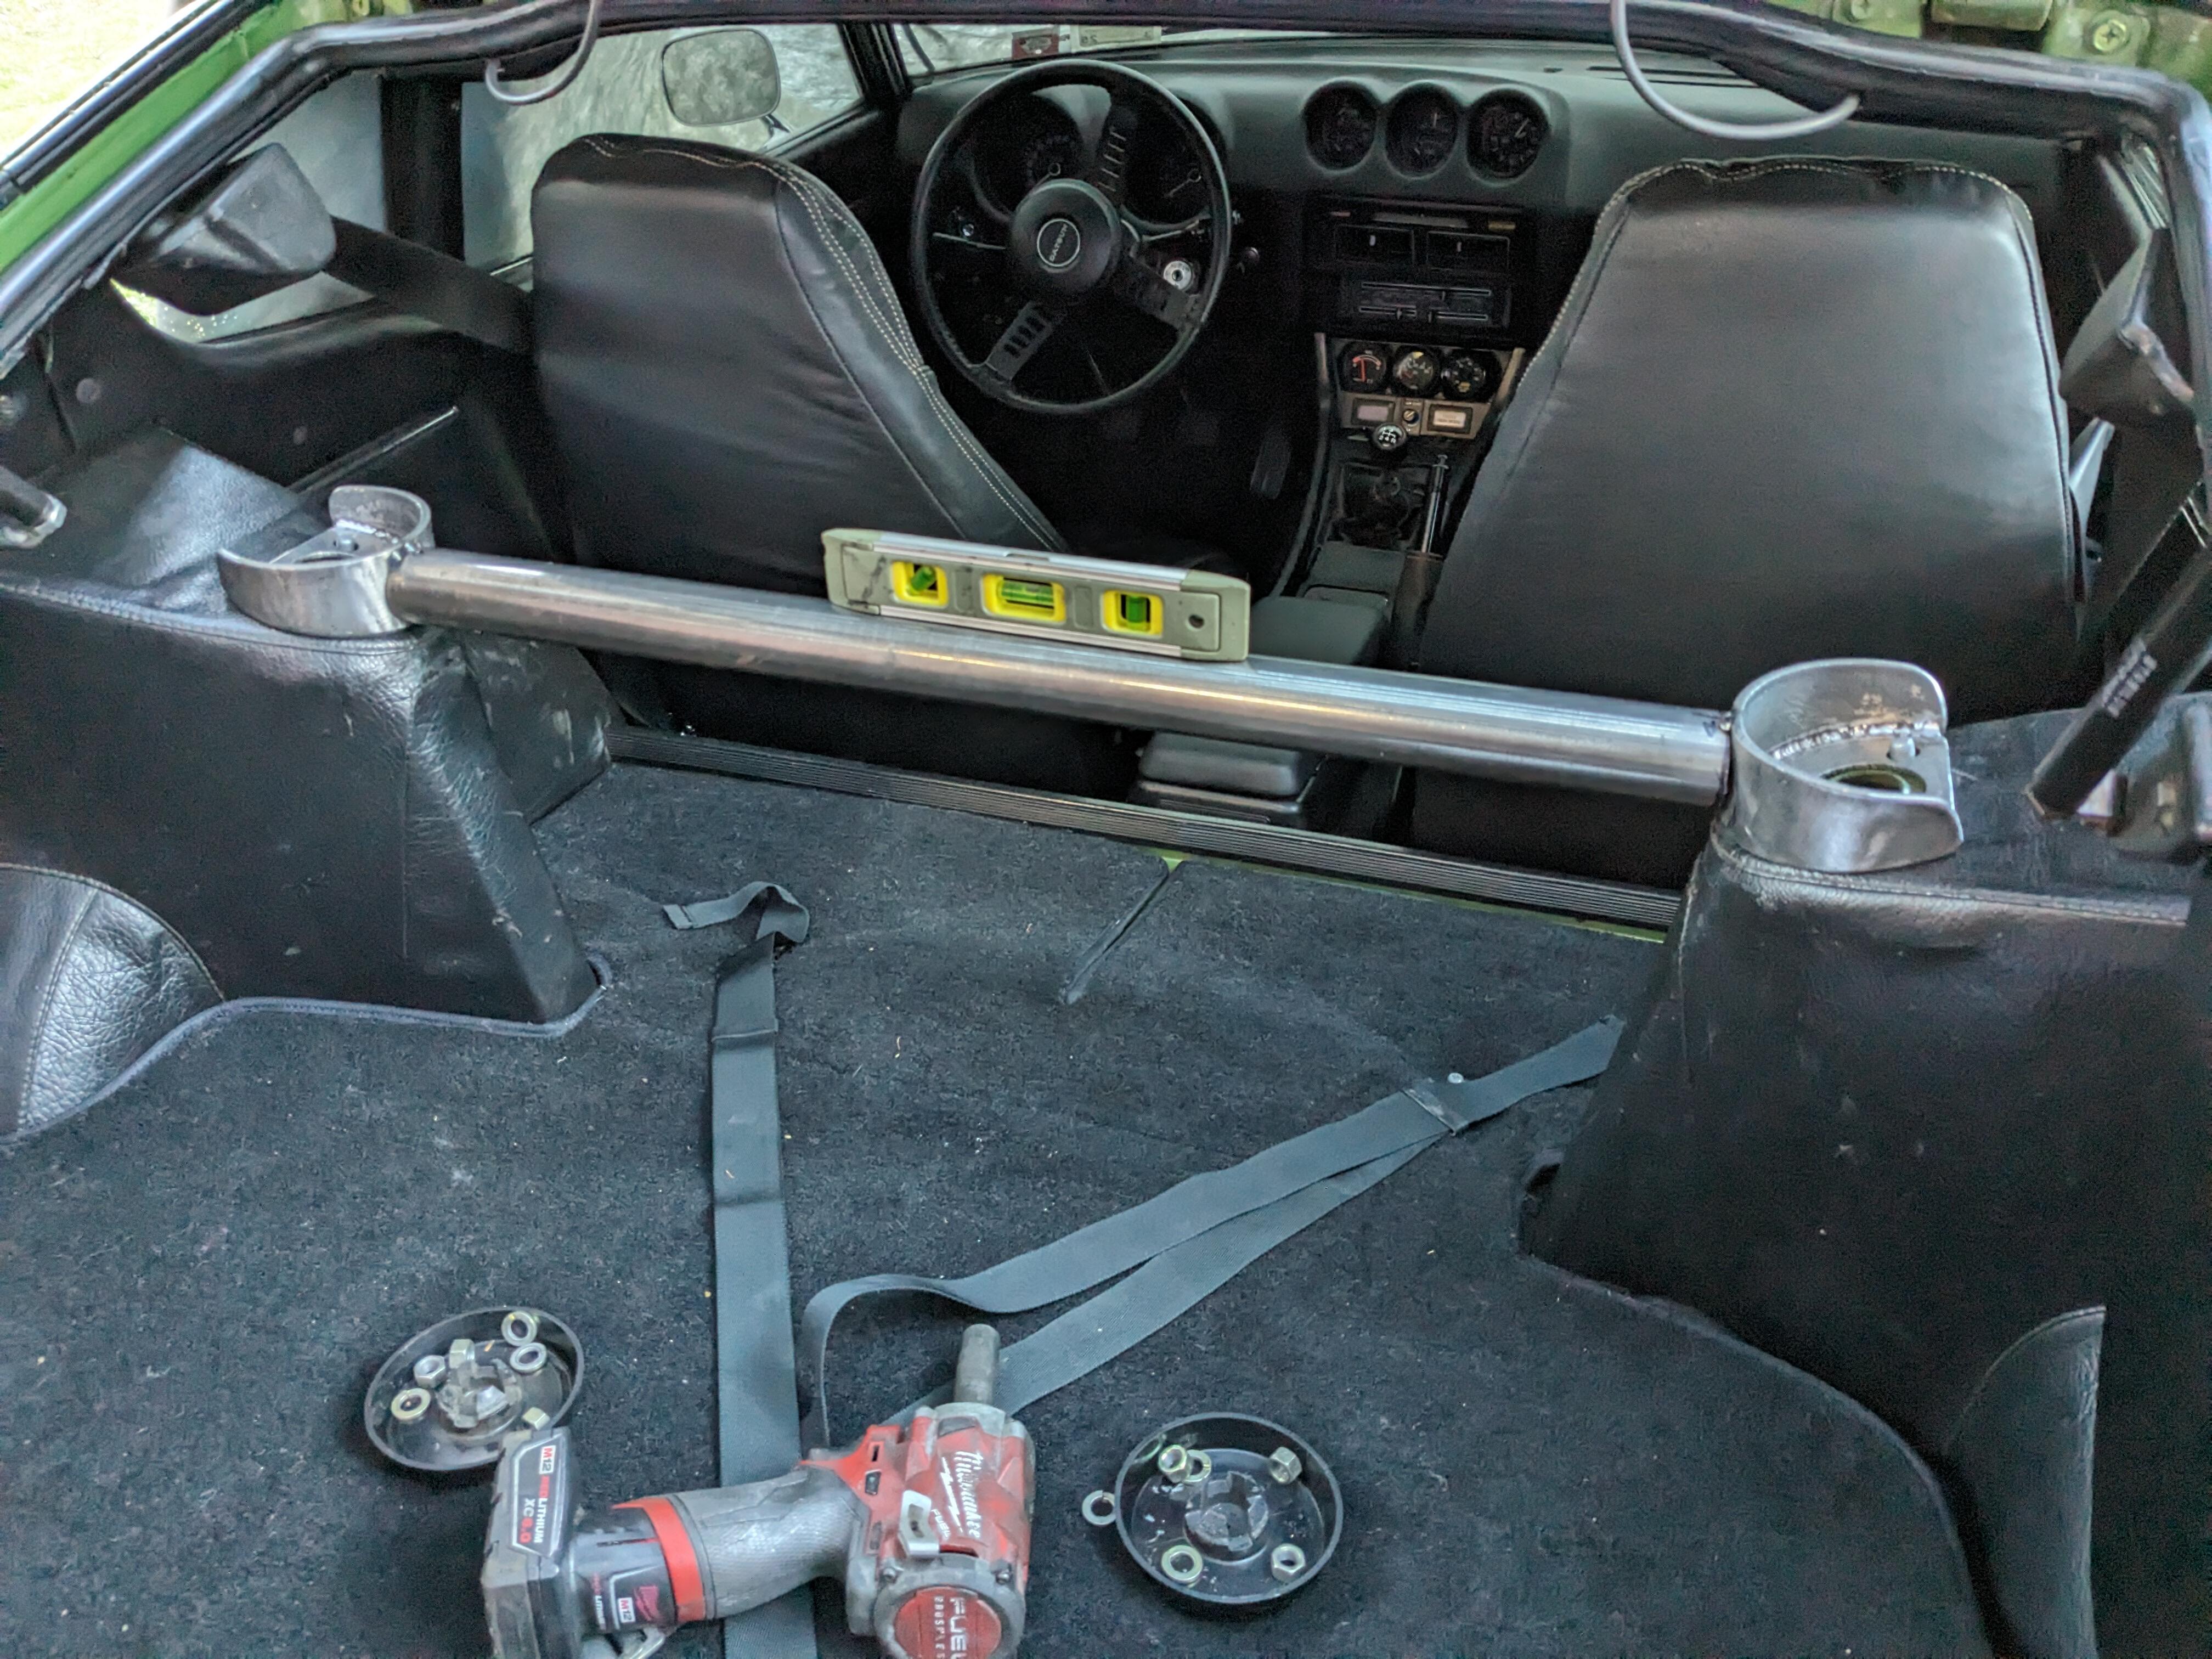
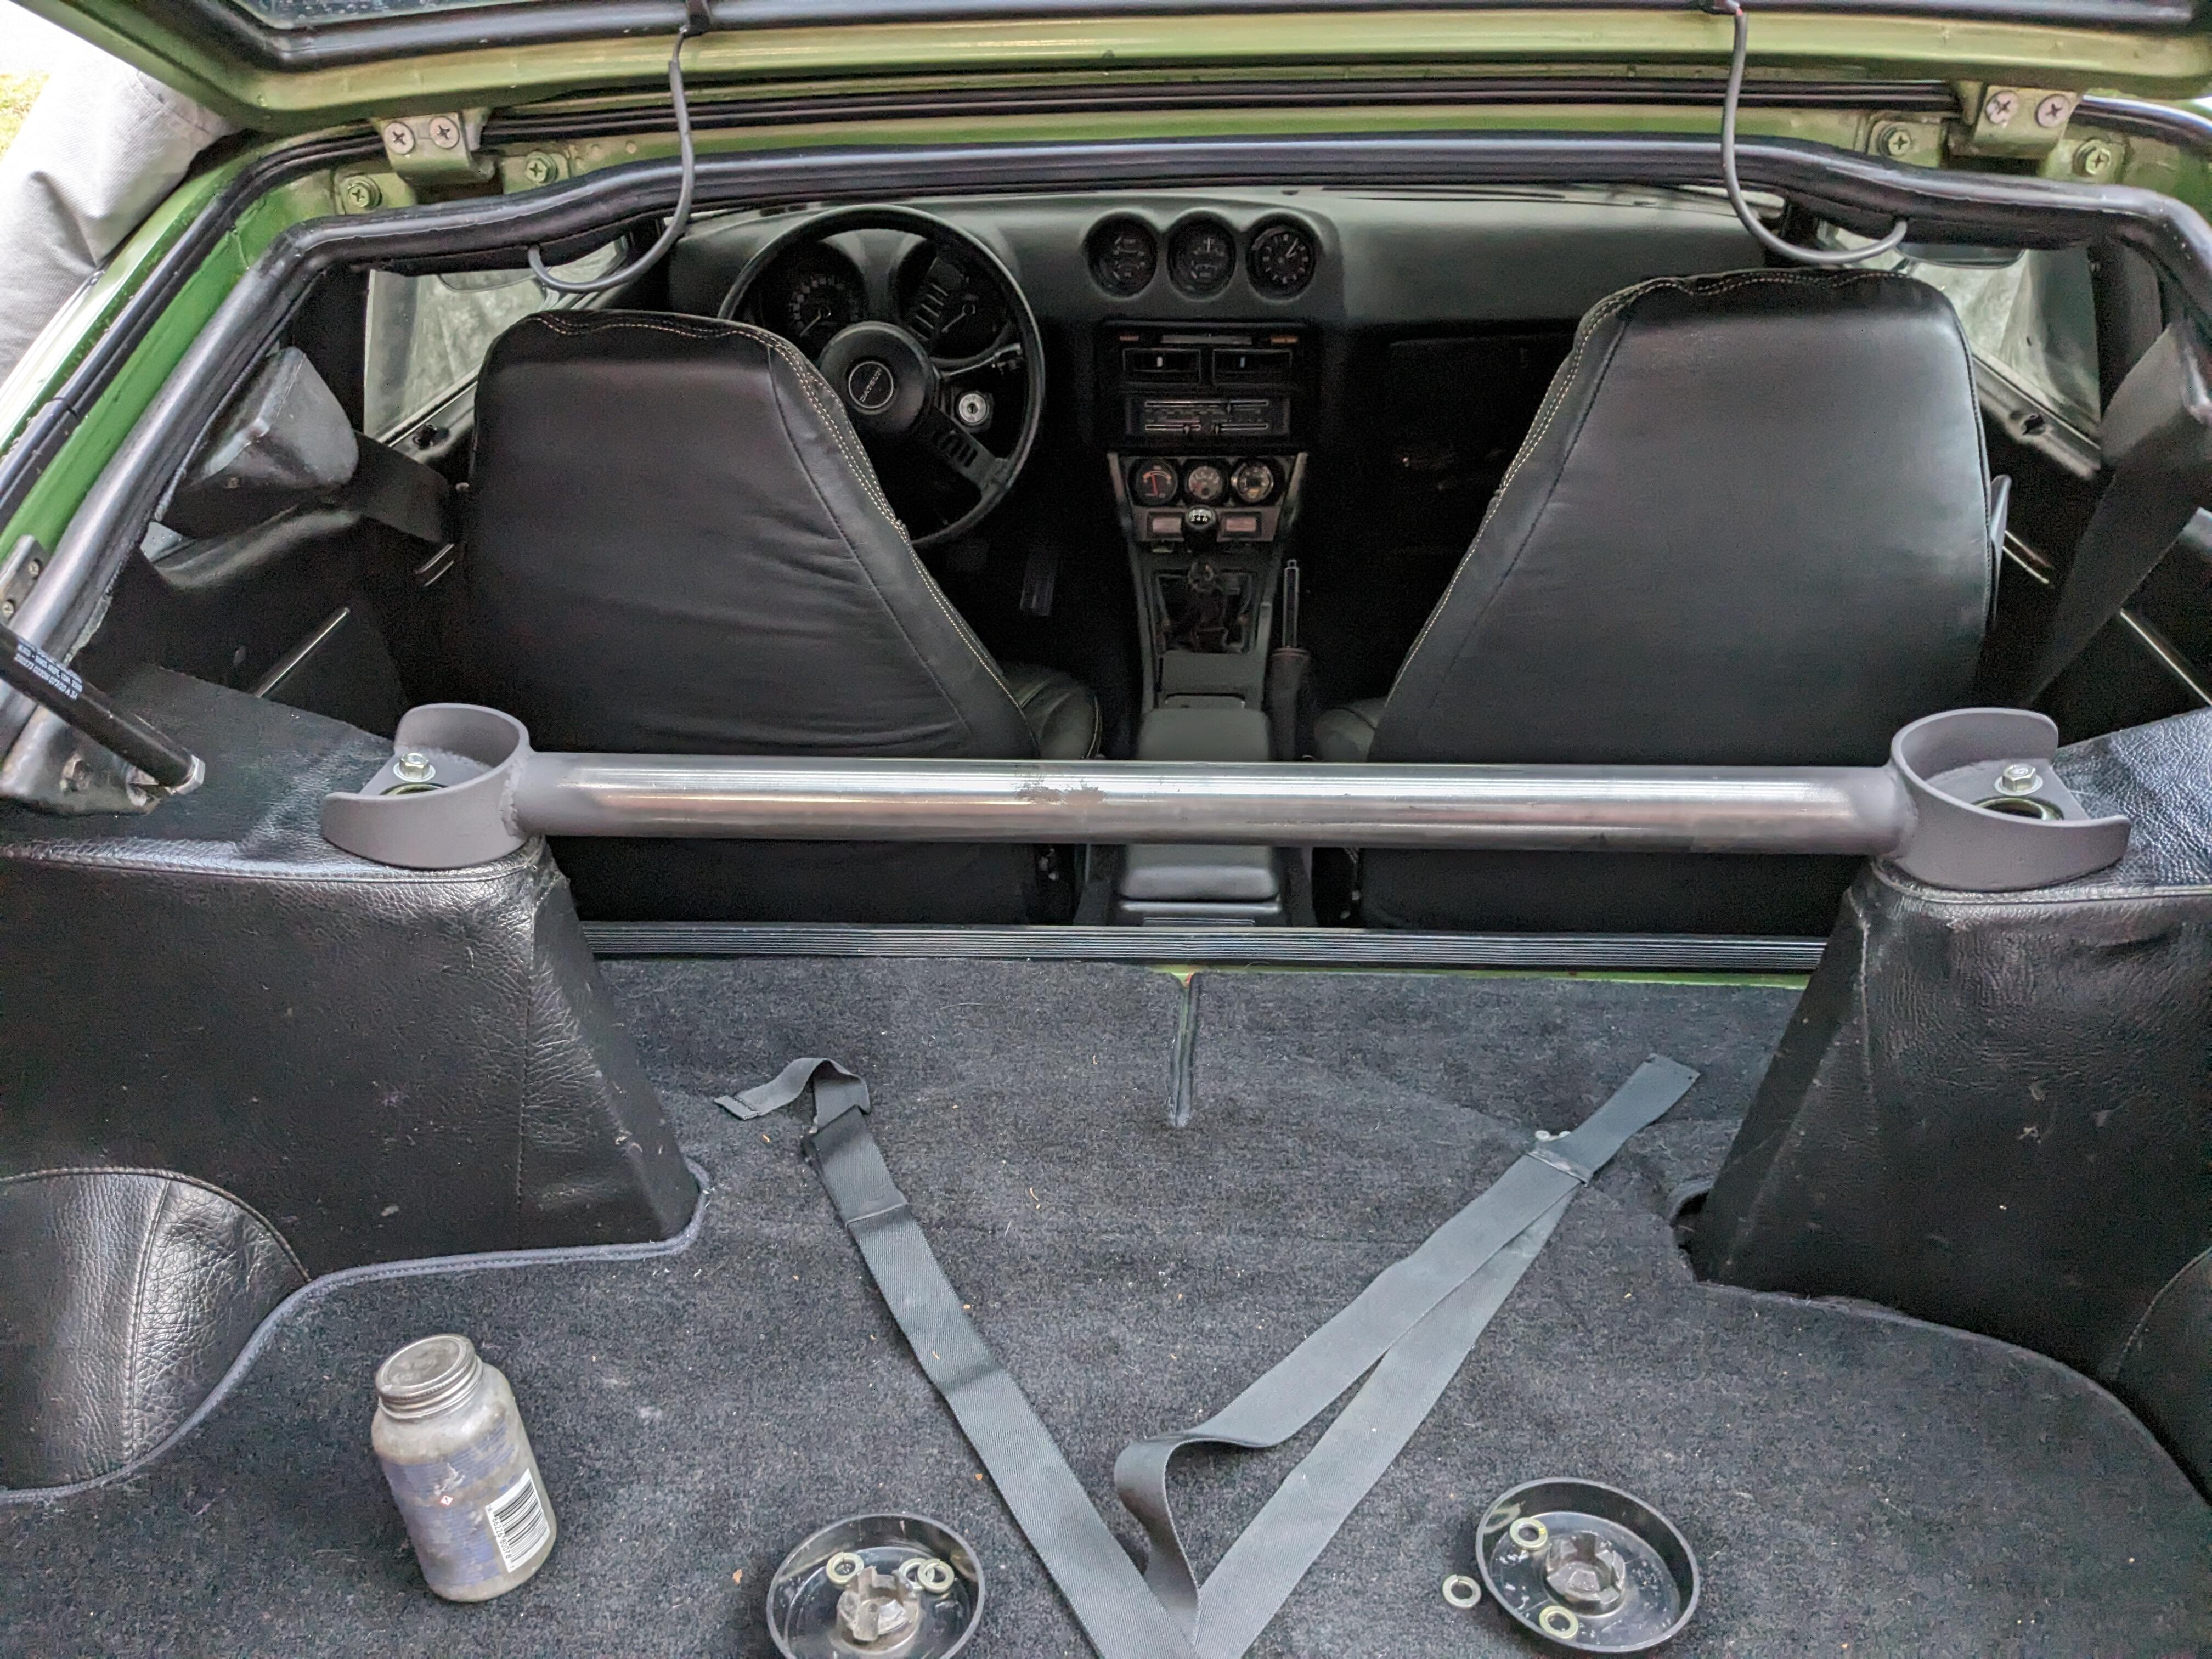
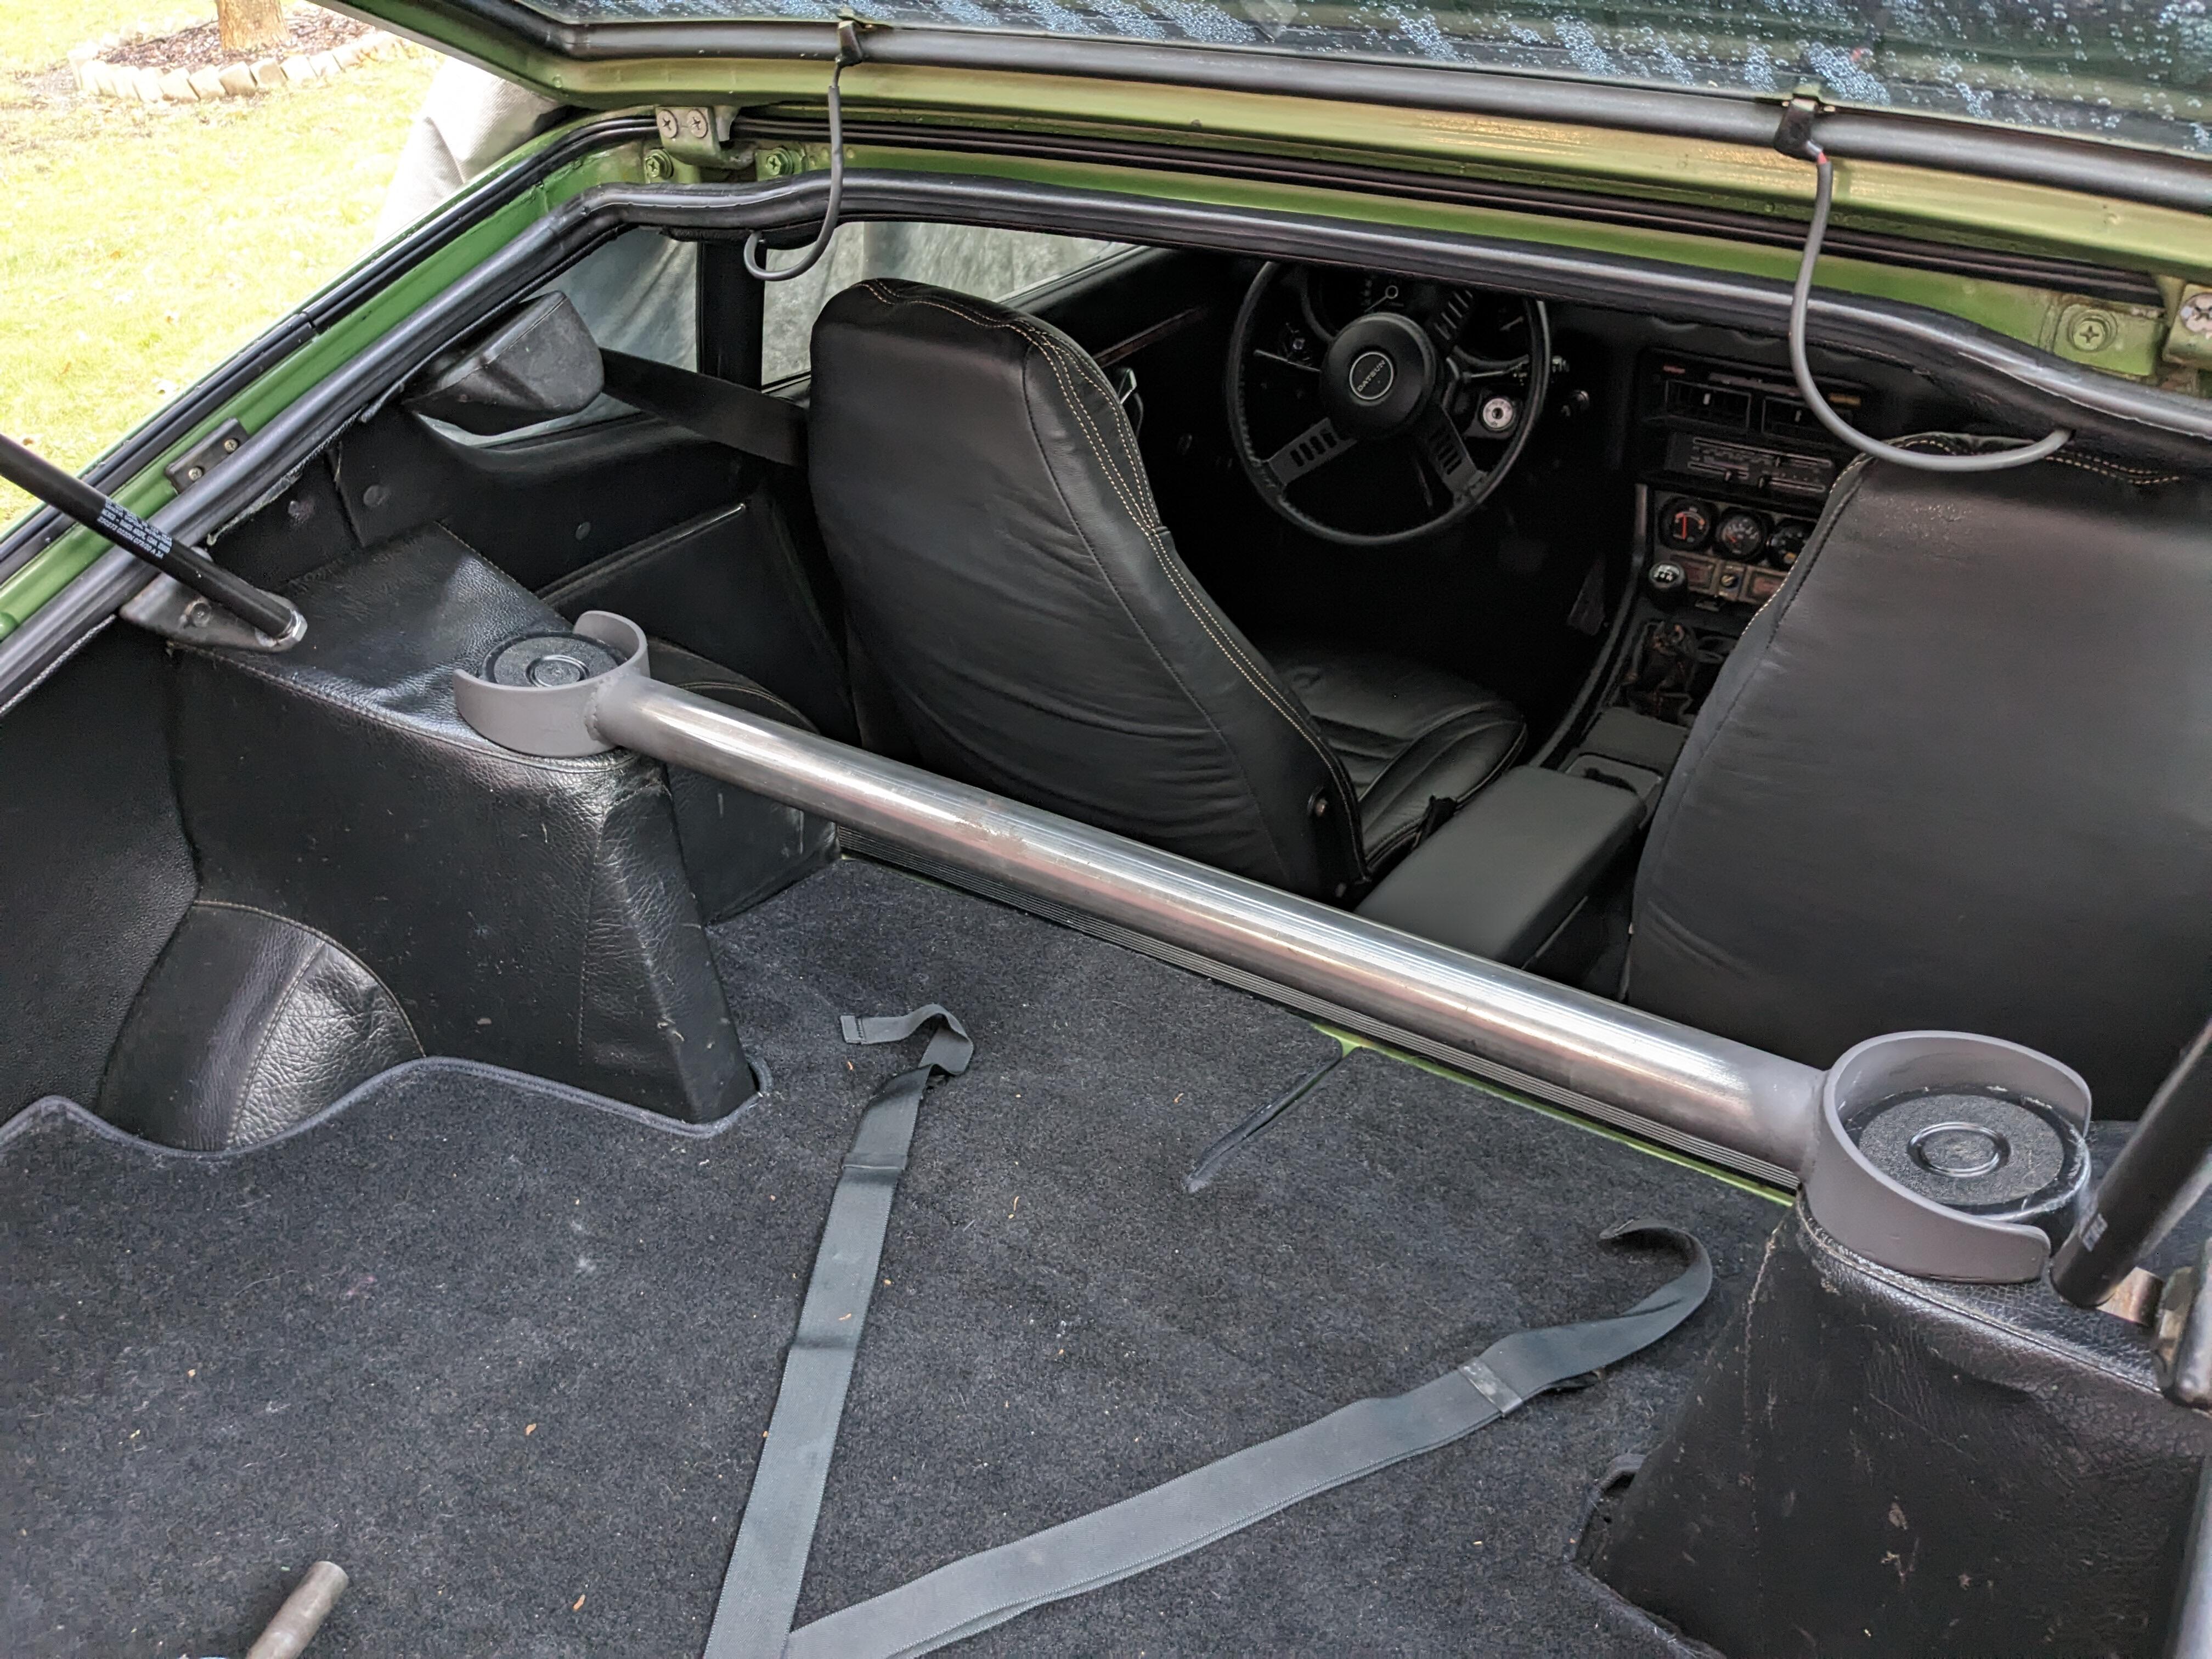
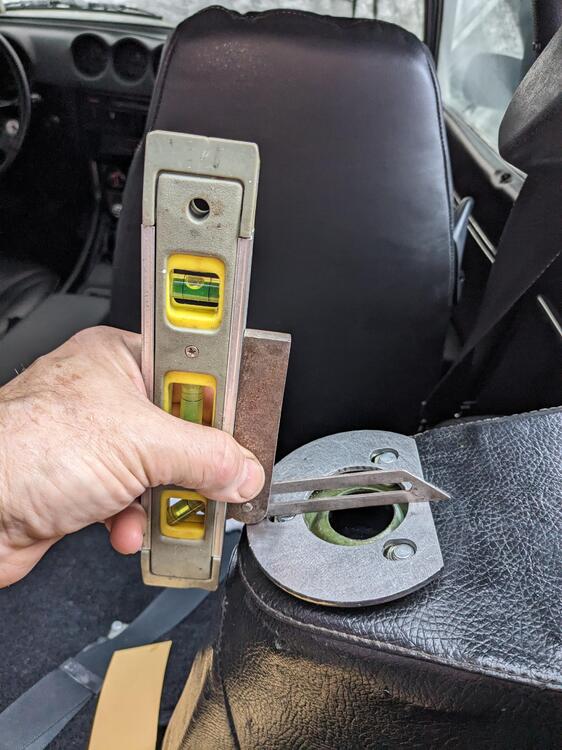
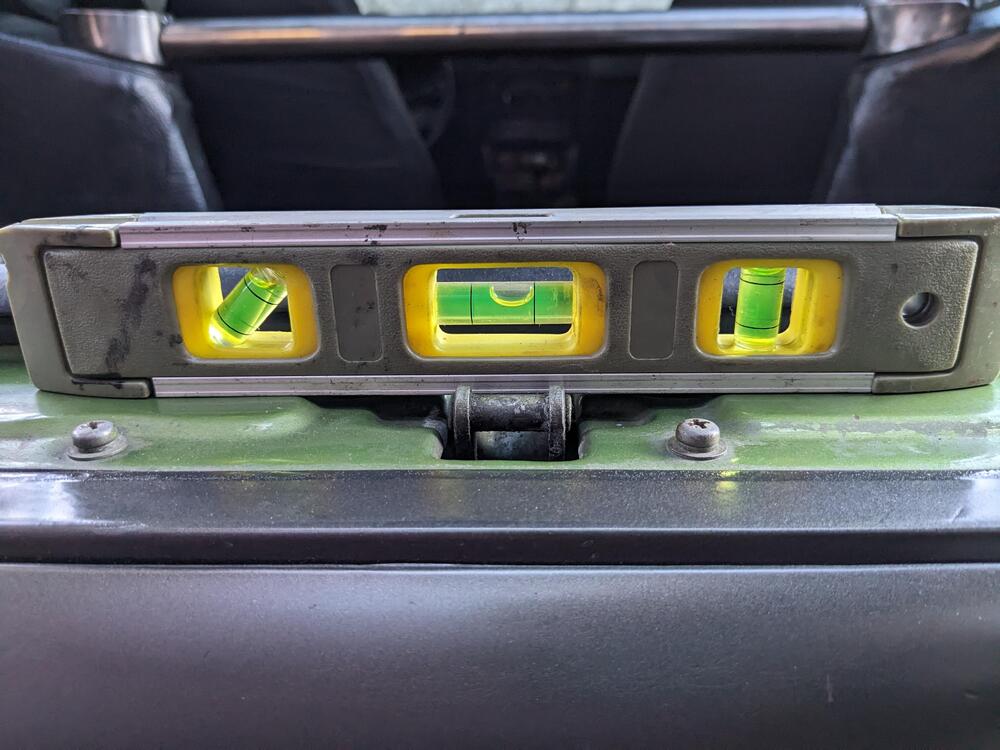
Got the rear strut brace done this afternoon. First I figured out the angle I needed to set the strut plate at Probably 15º, I measured it closer to 16º with my rudimentary tools I futzed around trying to make a card template, but my geometry skills suck, so I just clamped my angle tool to the support Tacked both & checked the fit then I welded them fully Then I fitted them & measured the span at 29.75". I cut the 1.75" tube to just over that, then shaved a dip in the ends to fit snug on the vertical plates, checked that it is level (same as car) After that I fully welded the tube to the supports. Deep socket still clears support wall original caps still fit


-
Worked on the rear strut brace this afternoon, then the rain stopped long enough for me to get the outer rafter up. During the week I'll try to finish it up