HusseinHolland
Community Member
-
Joined
-
Last visited
Everything posted by HusseinHolland
-
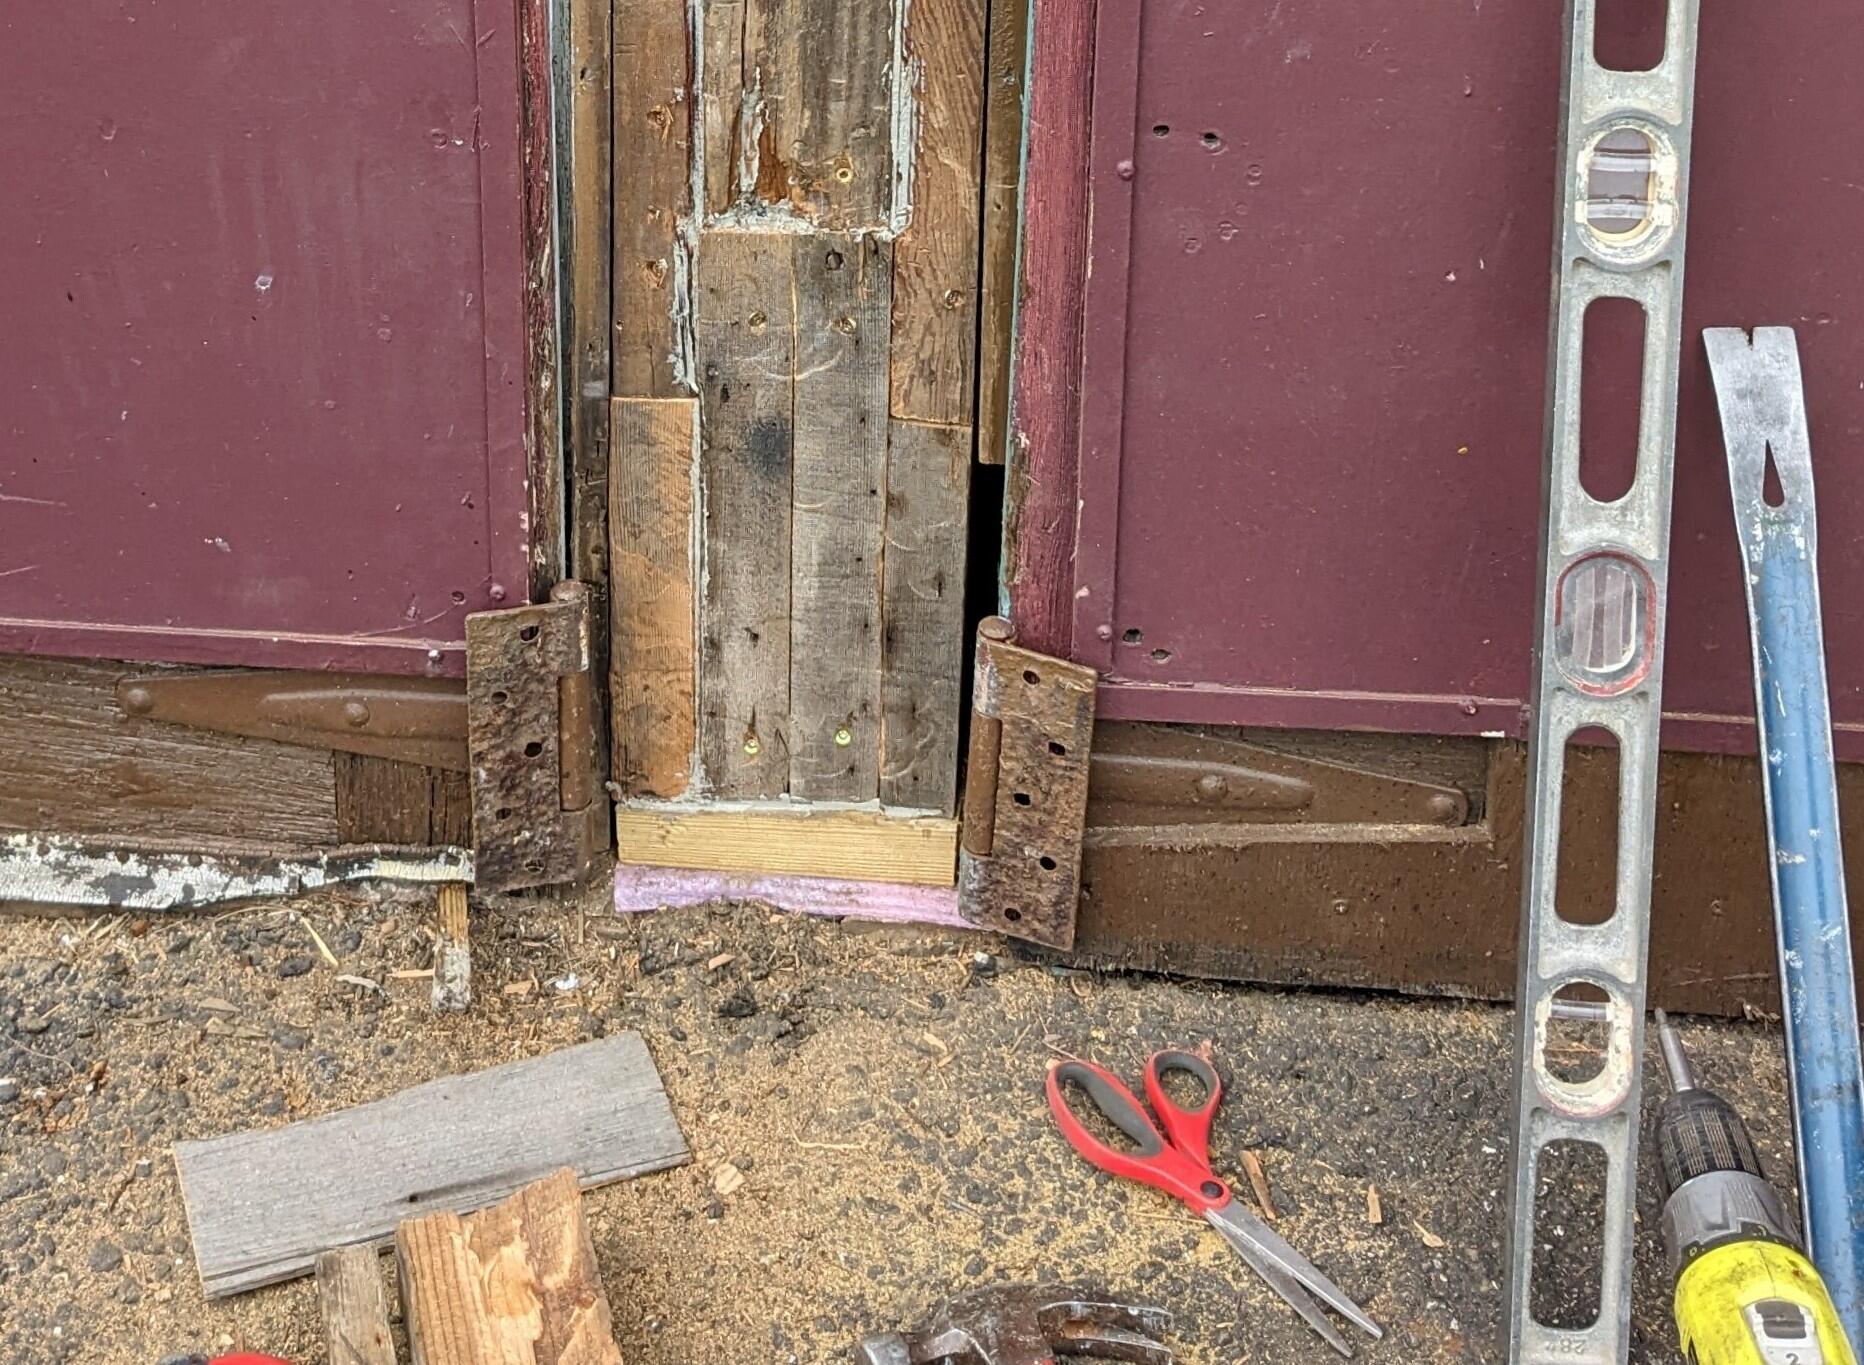
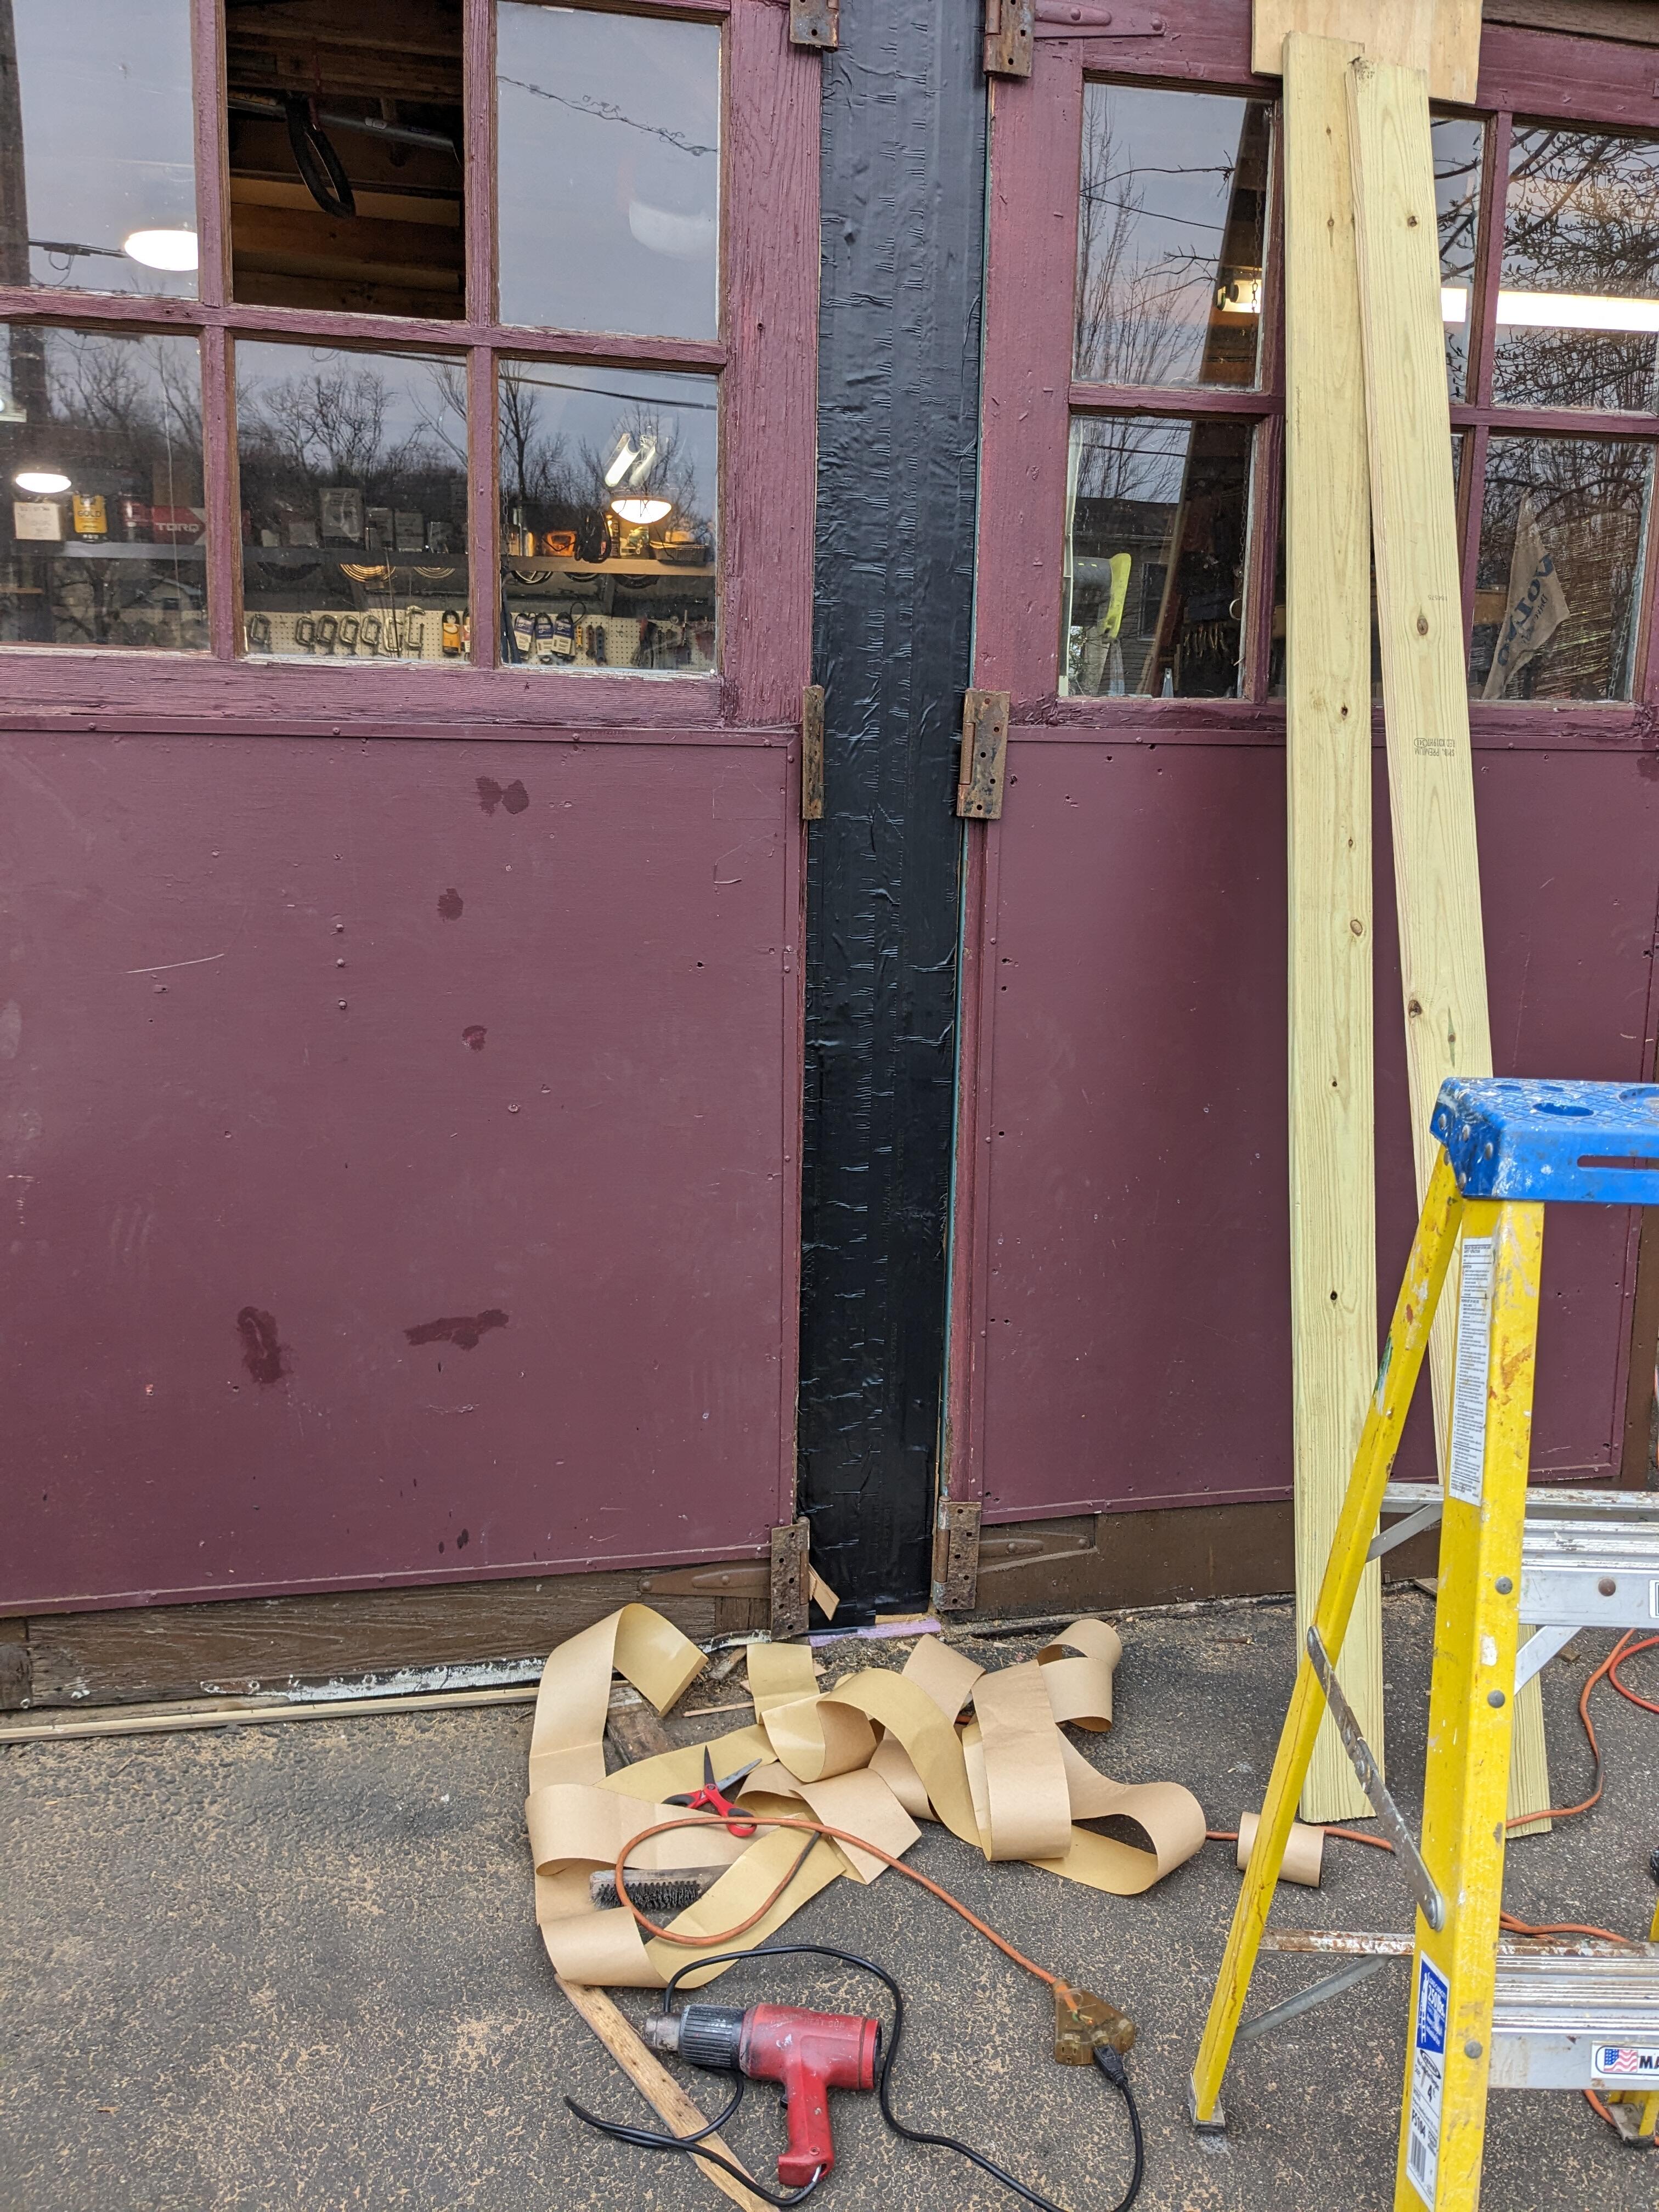
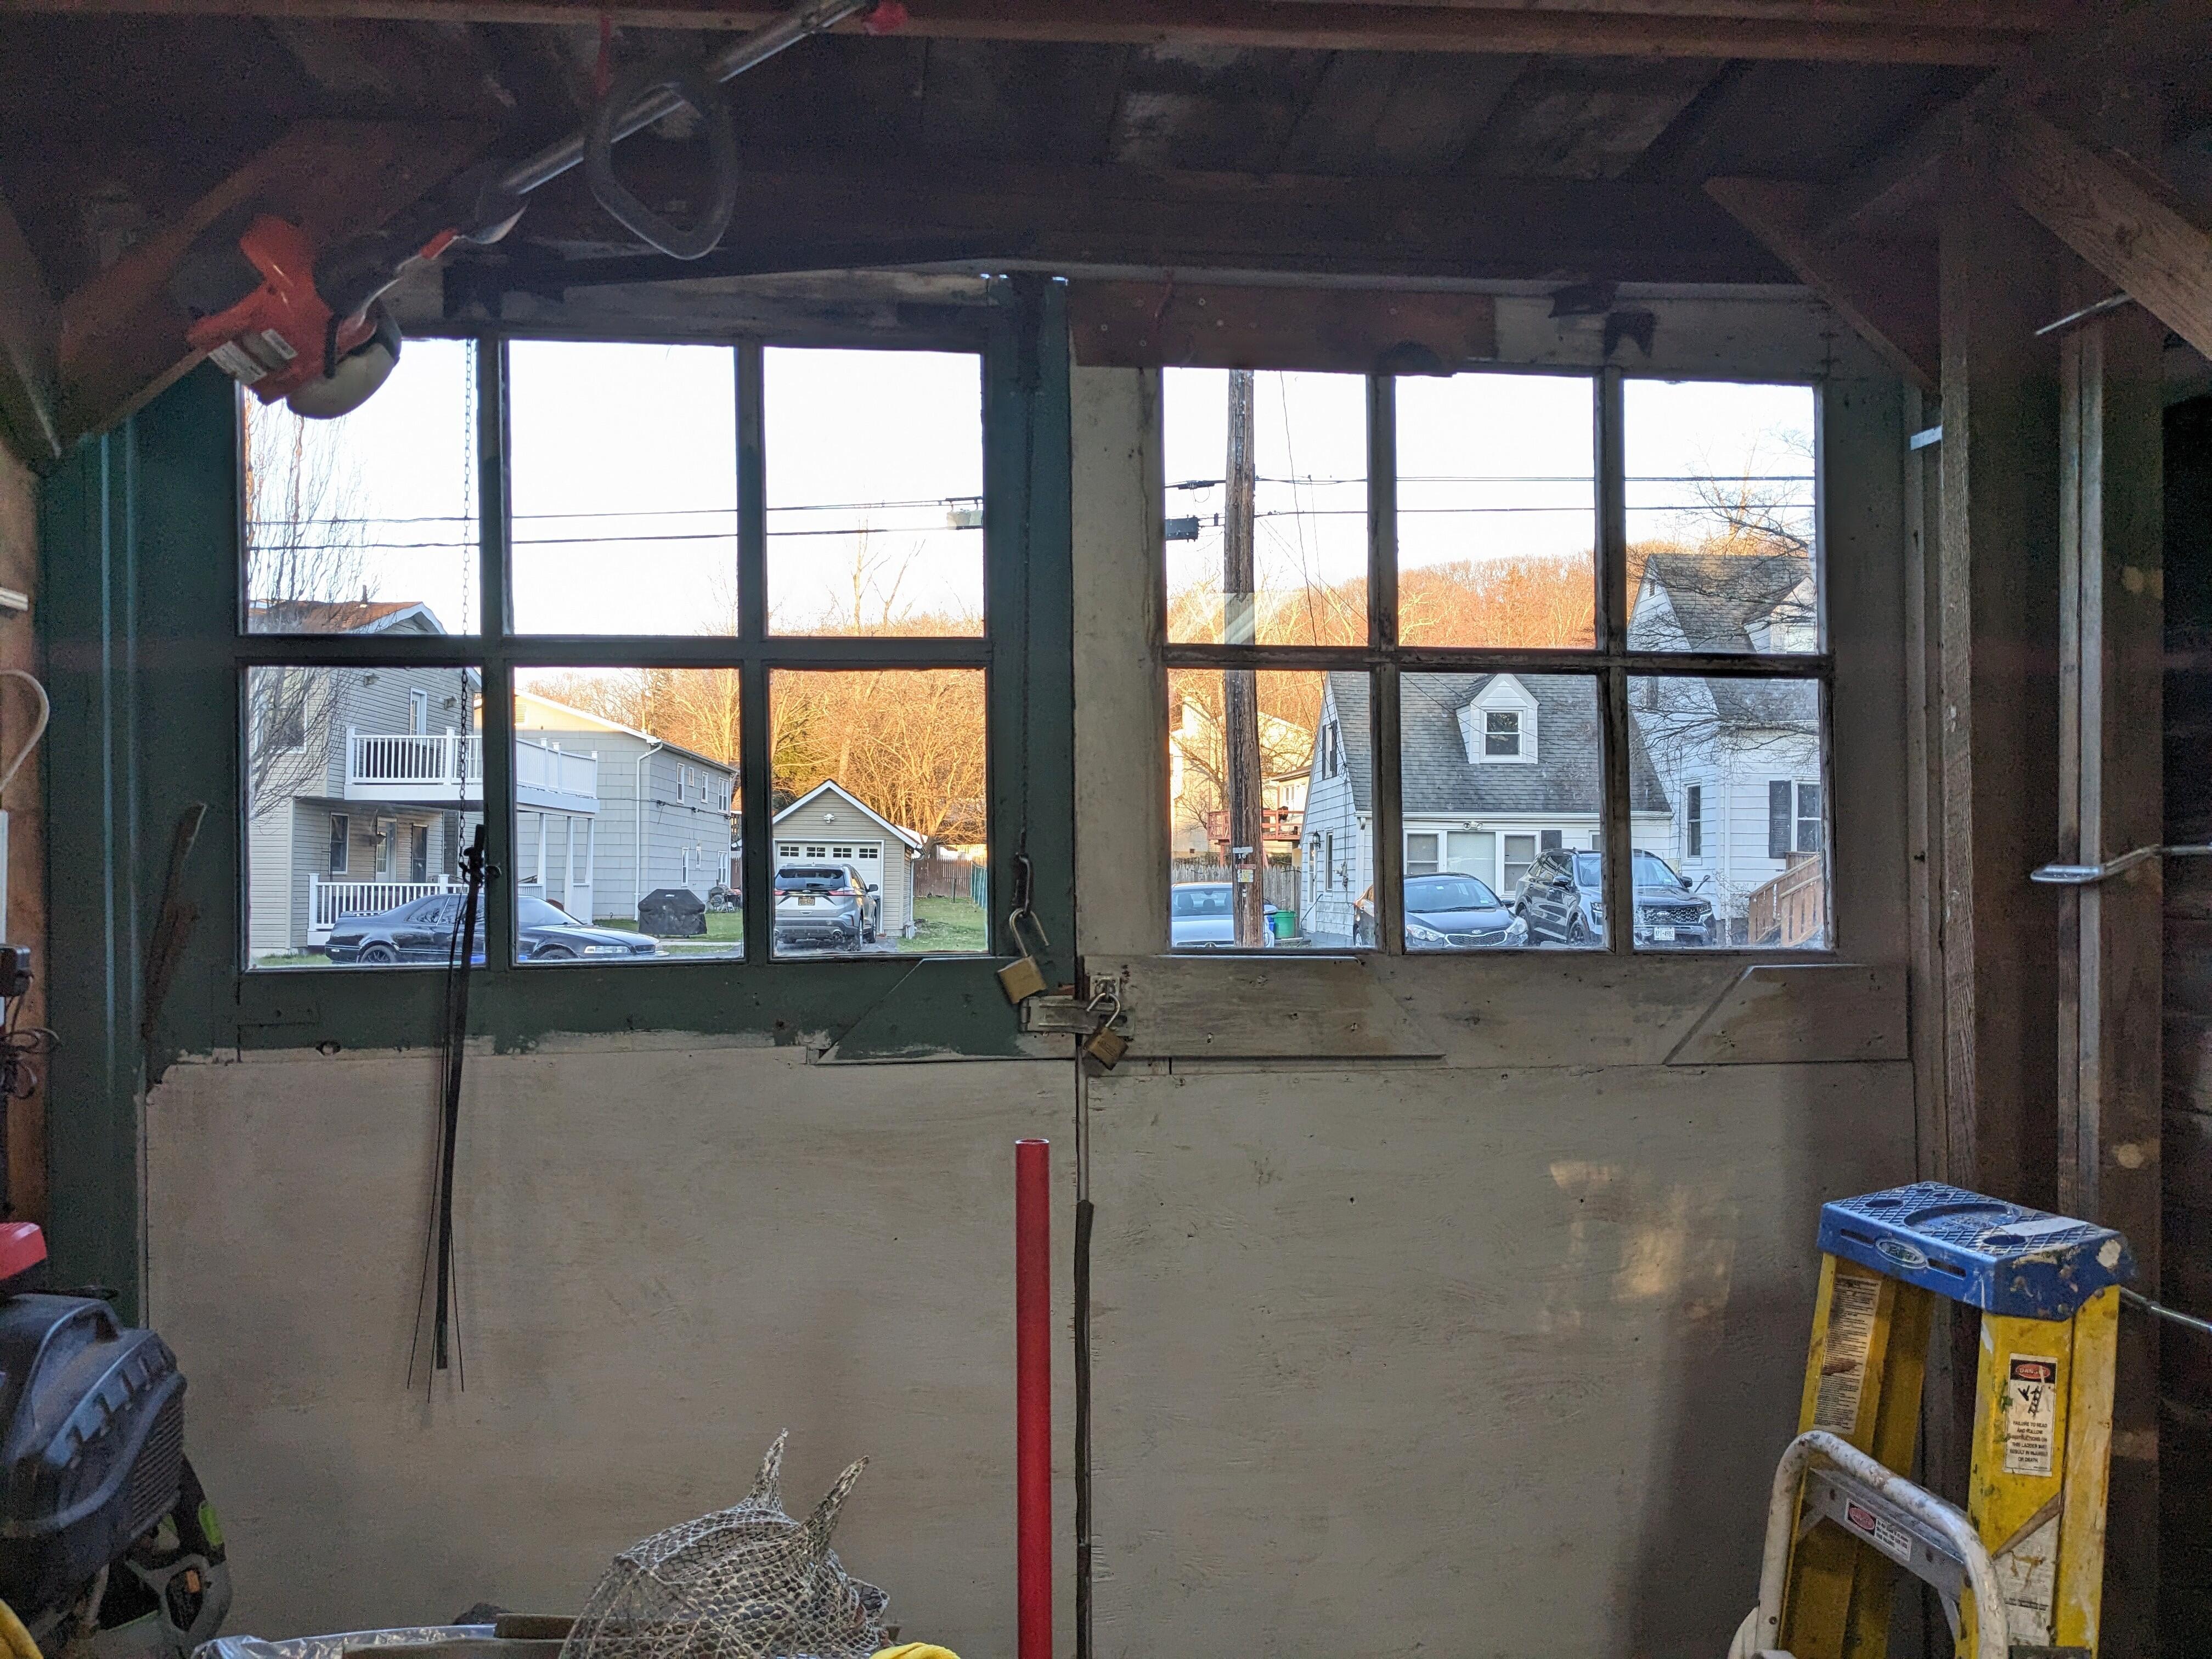
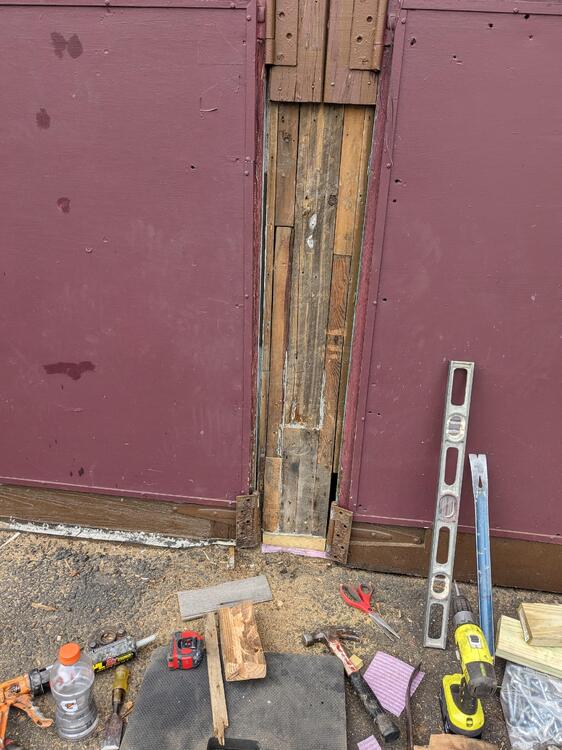
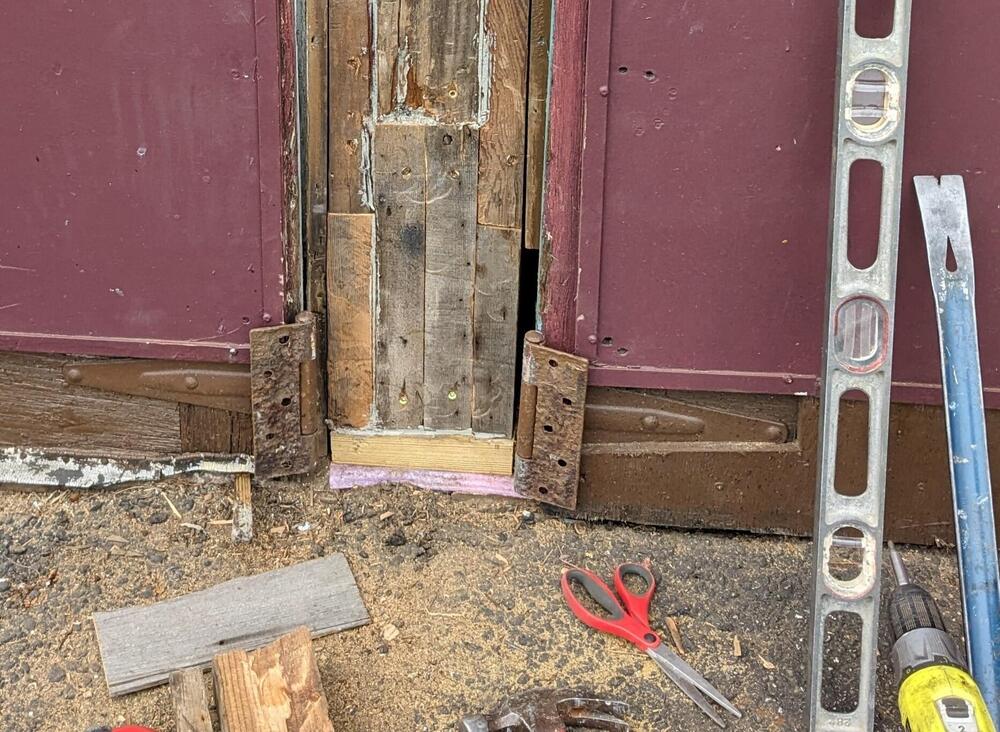
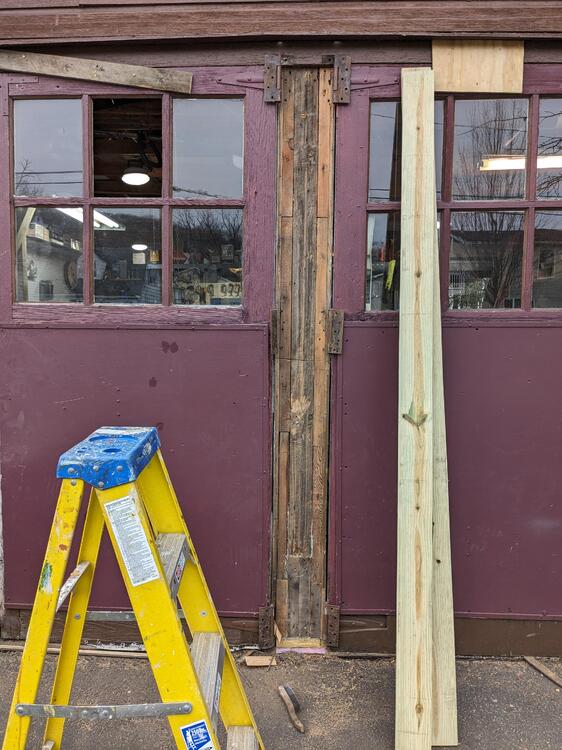
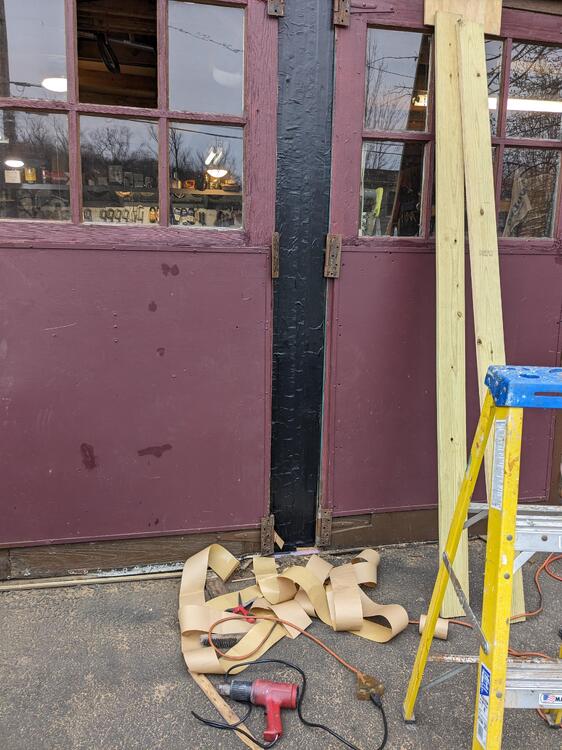
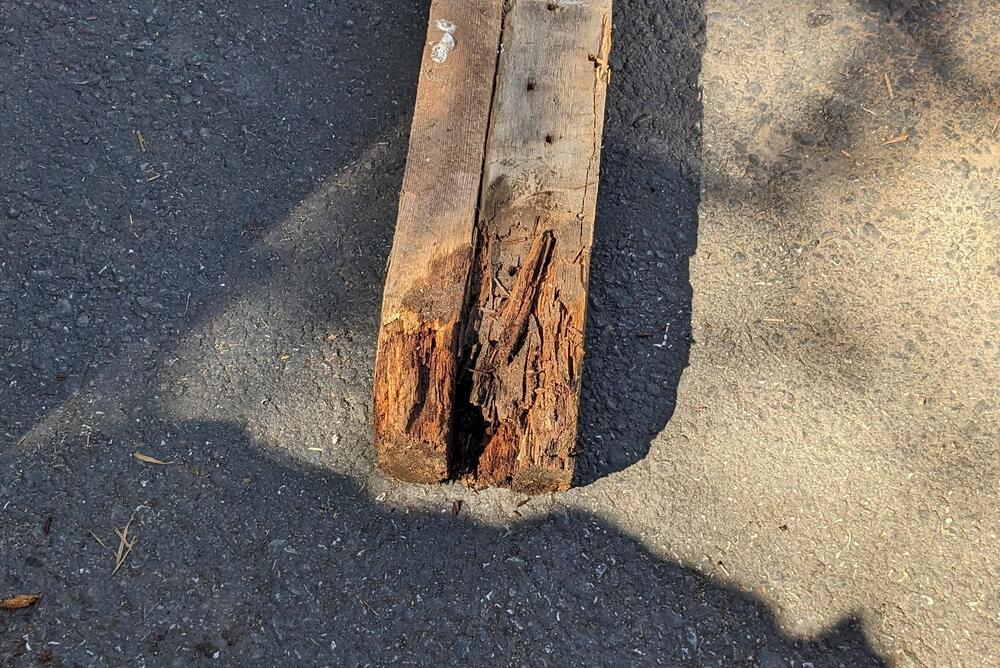
Another detour - since I started aligning the barn doors, I decided I needed to address the floating center post Had to cut out 16" of the dimensional 4x4 center post, and about 12" of the dimensional 2x4" door frame/posts. Fortunately I have saved sections of old posts I've cut up for other areas, so I had sufficient lengths to get clean sections for here. I tied two 2x4 together to get the center, set that on a piece of pressure treated sill, and then added the side posts The external plates needed to be actual 1x, so I got 5/4" x 6" decking & cut the width down to 4.5", to get the total 9" width needed Covered the center area with butyl wrap before putting the external plates in Replaced the wood screws with 3" 5/16" lag bolts, so that should hold up. Don't have any in the left door yet, ran out of time & light. I'll deal with that after work tomorrow.
-
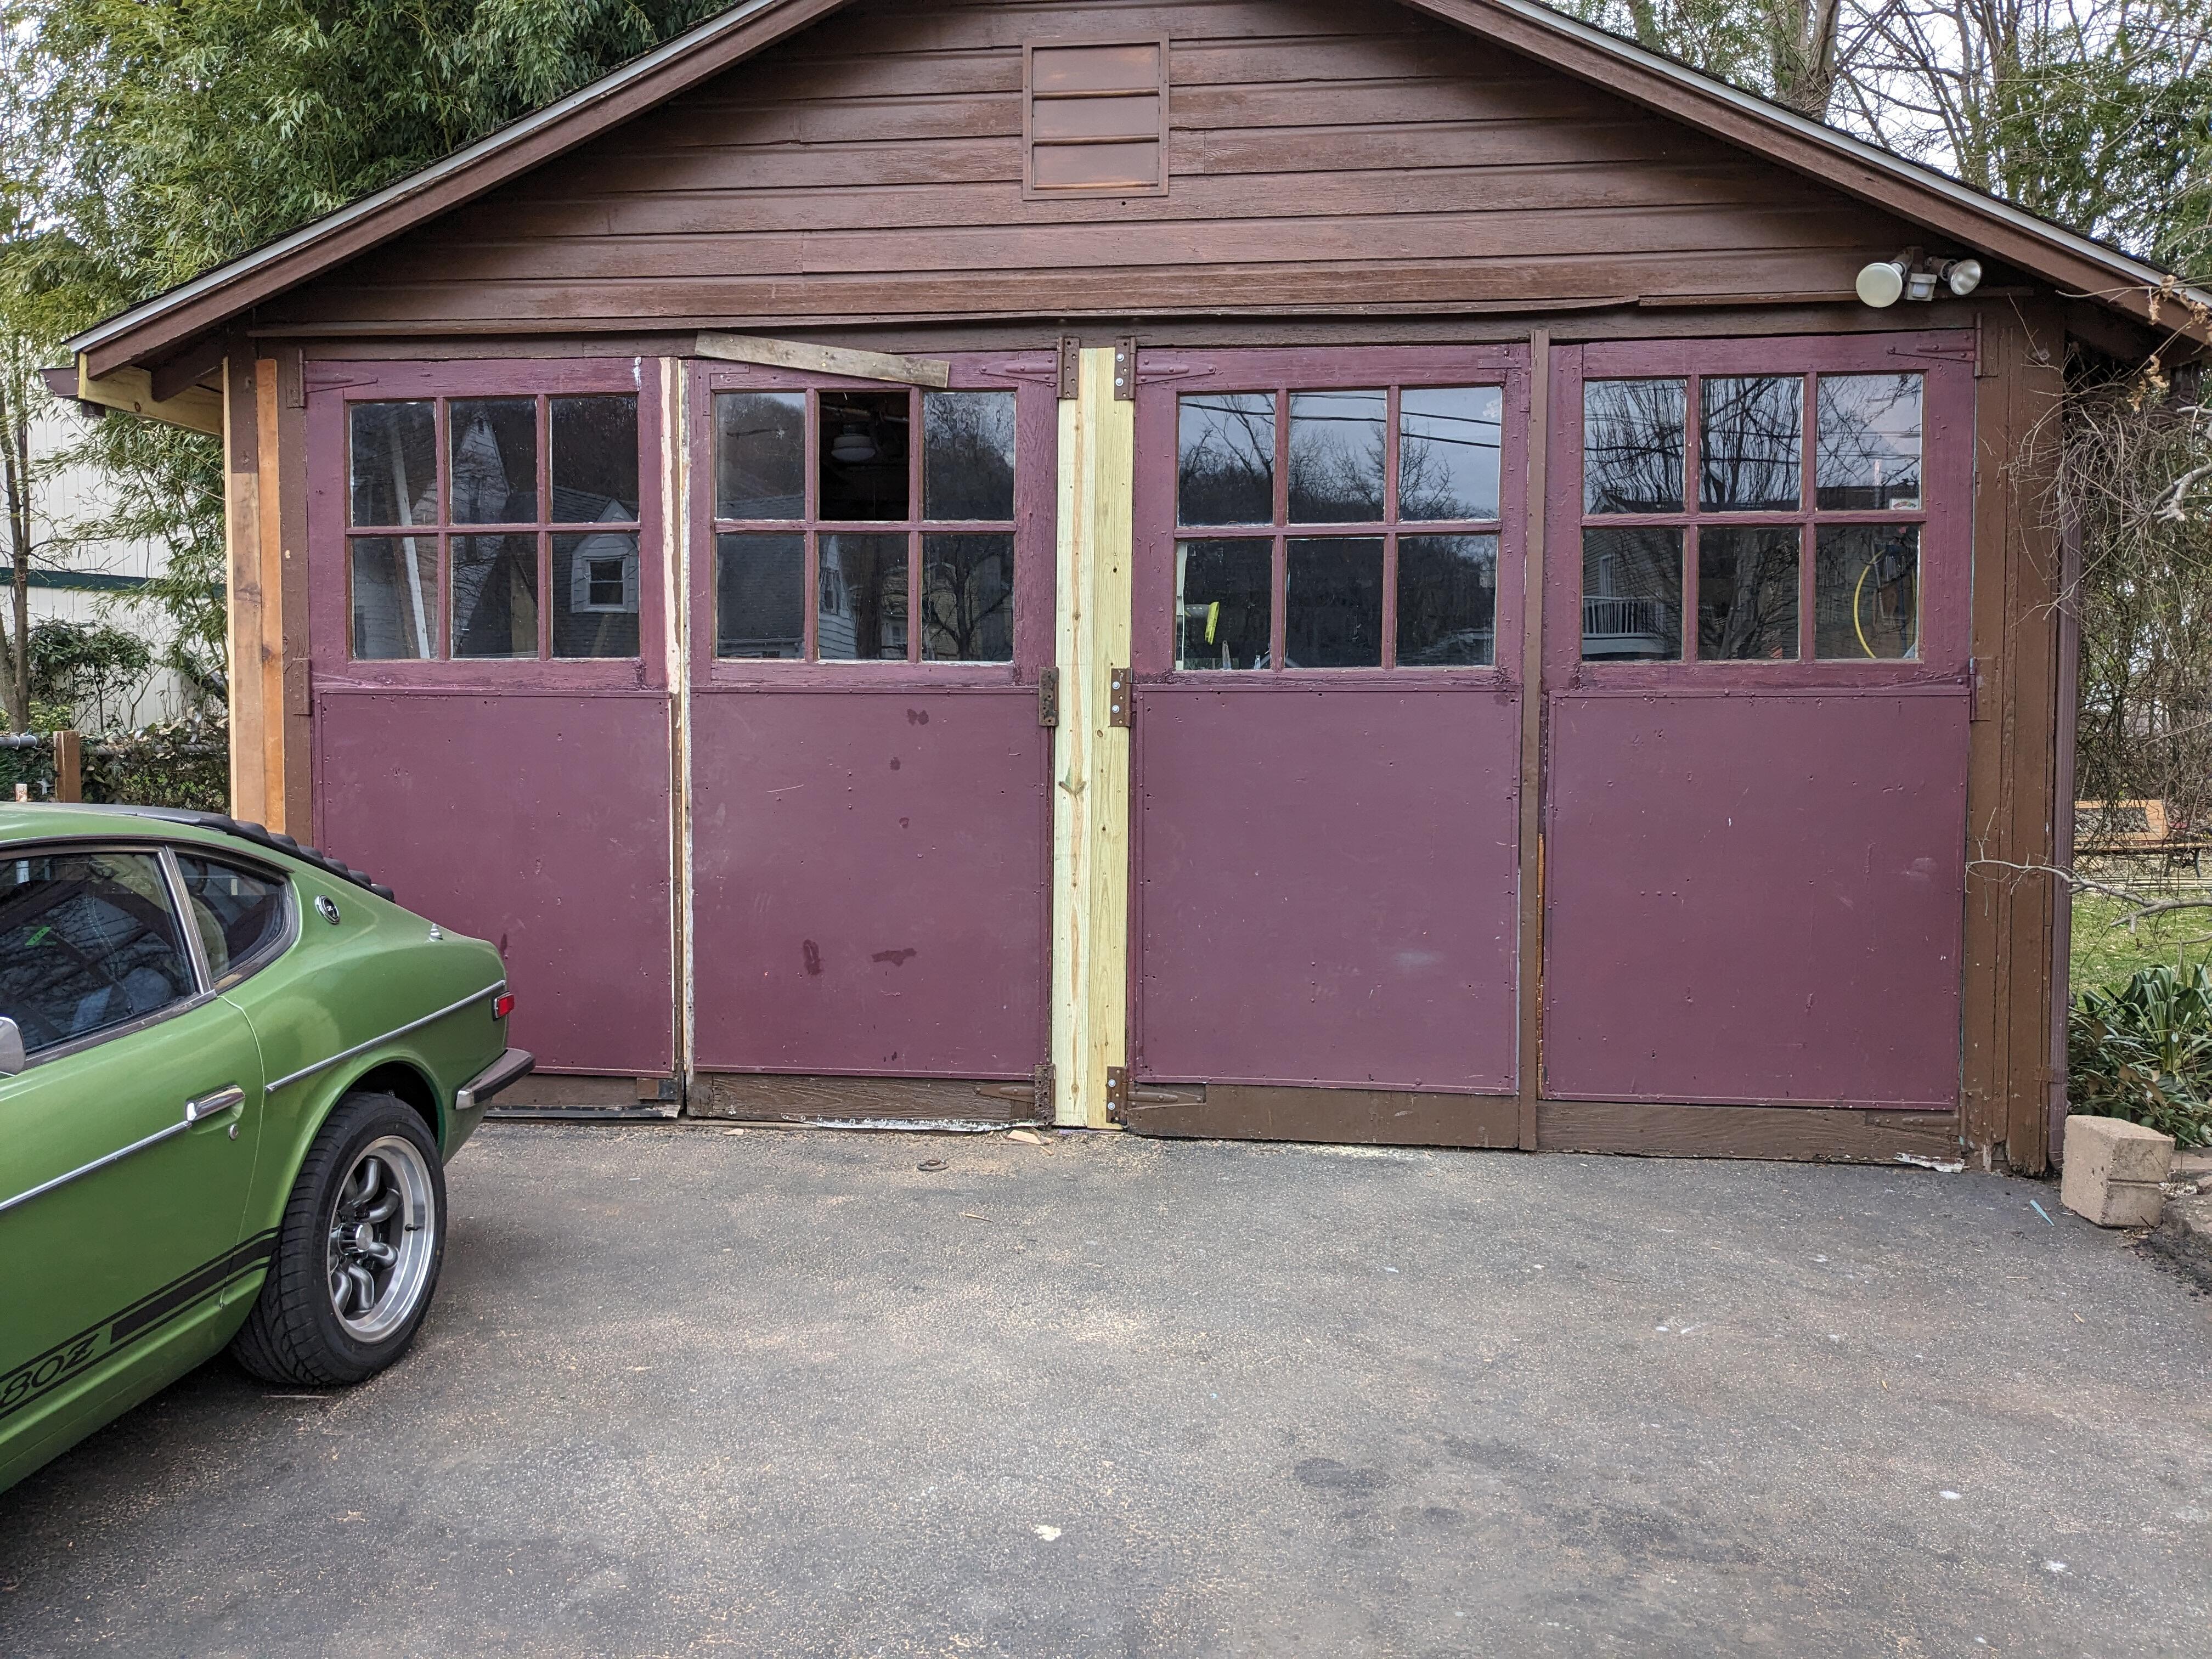
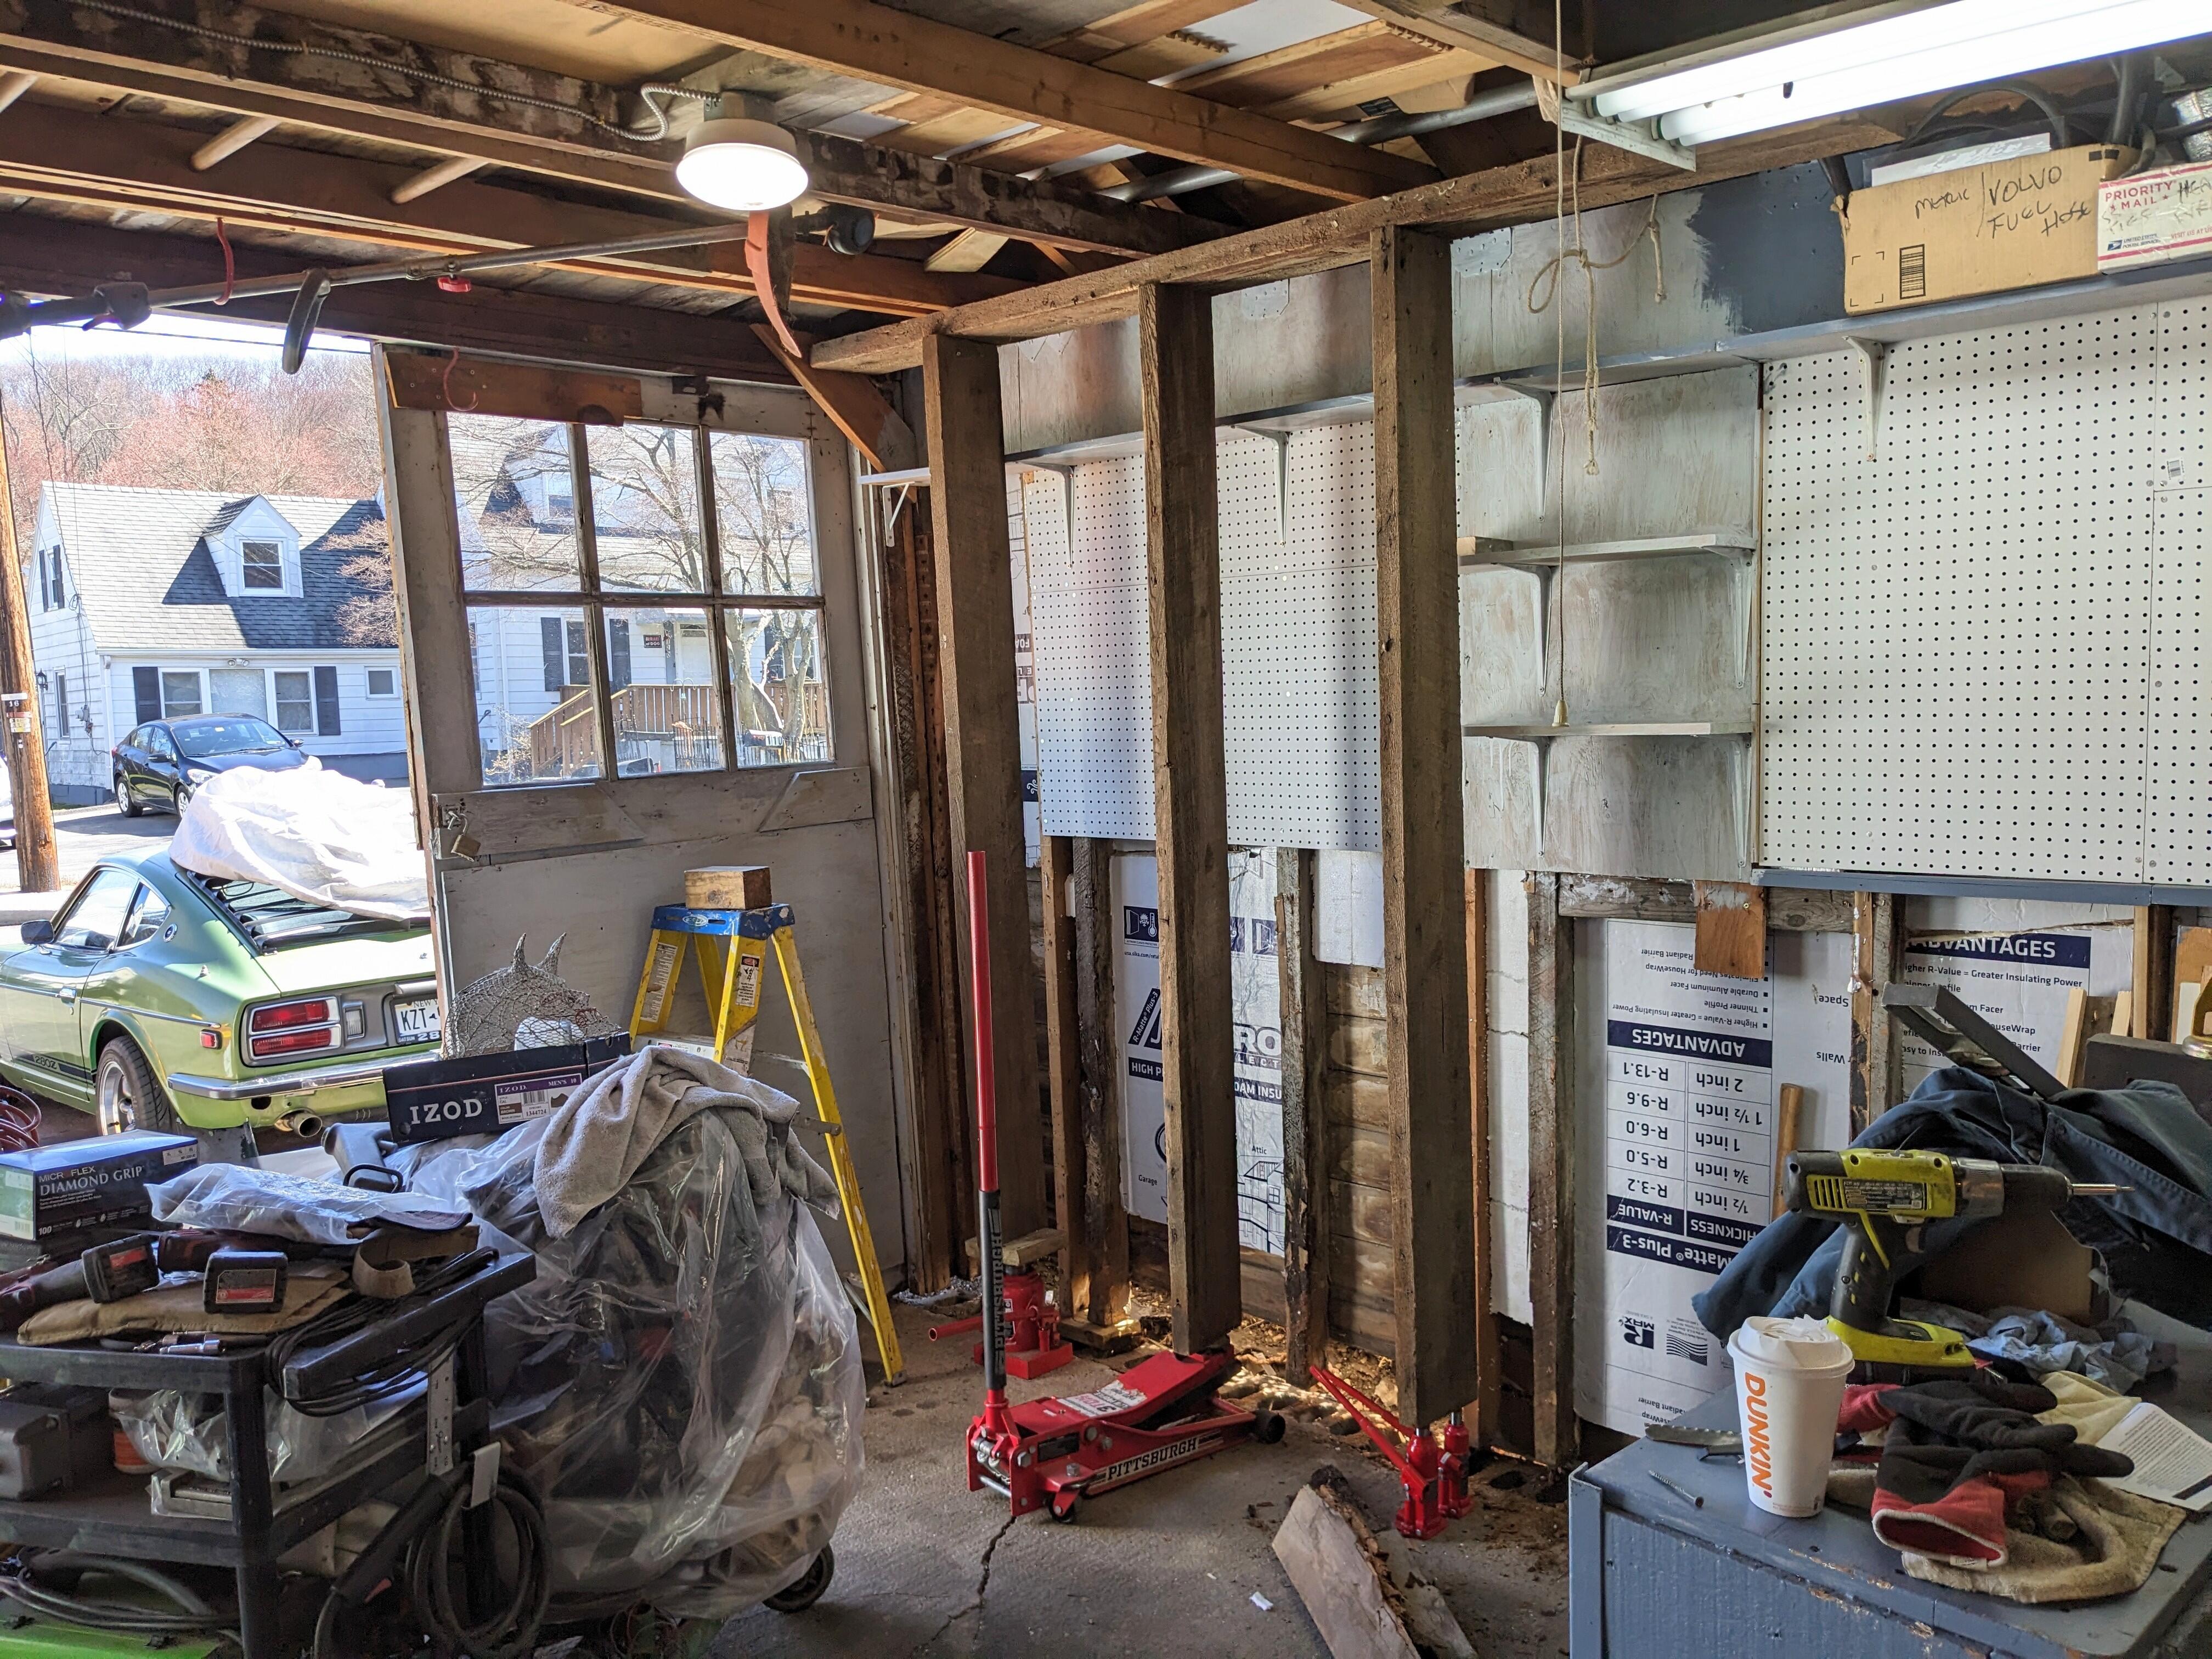
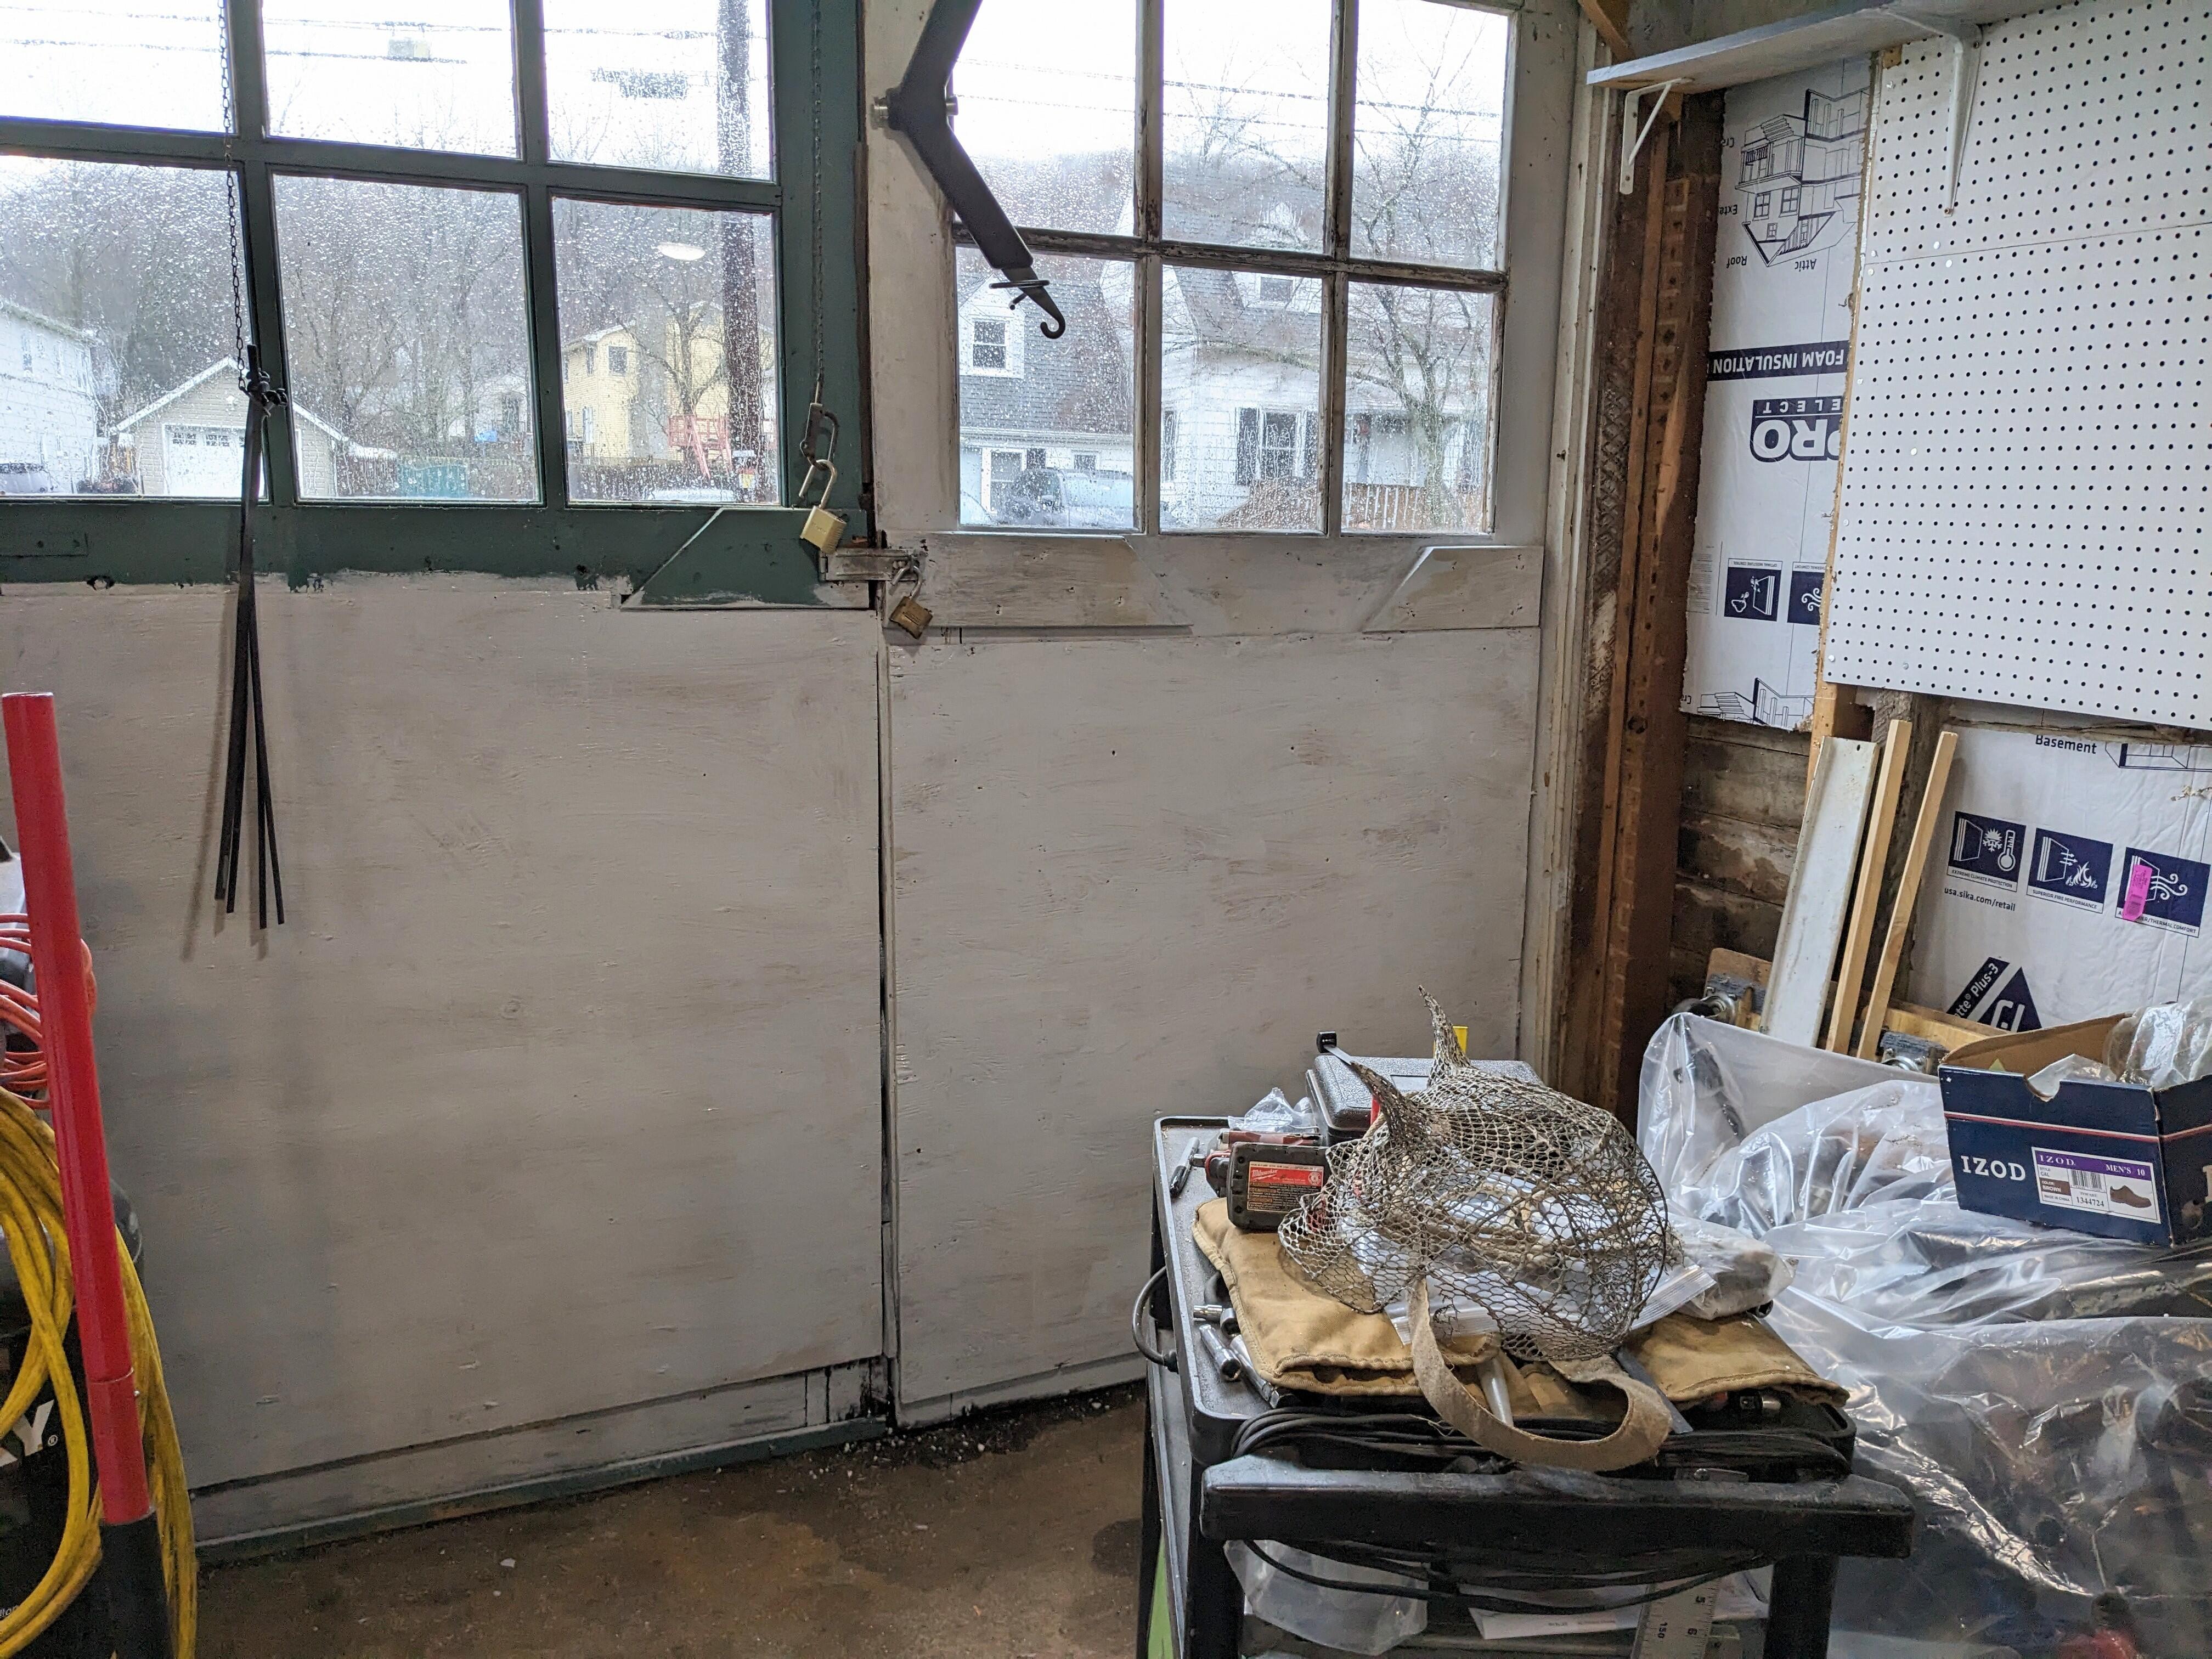
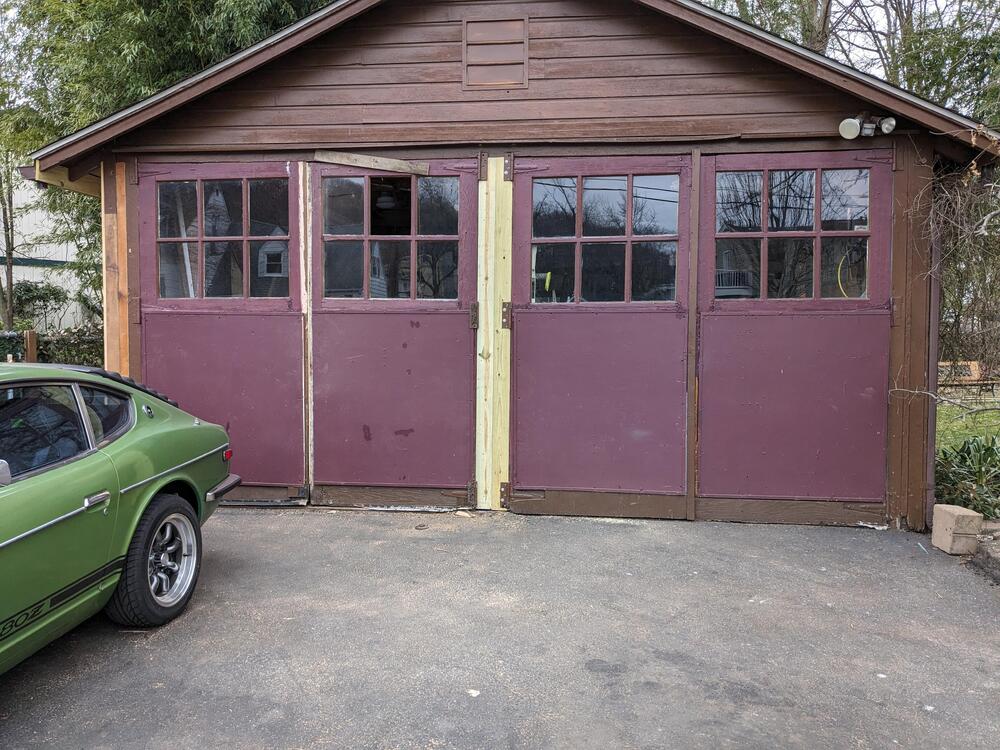
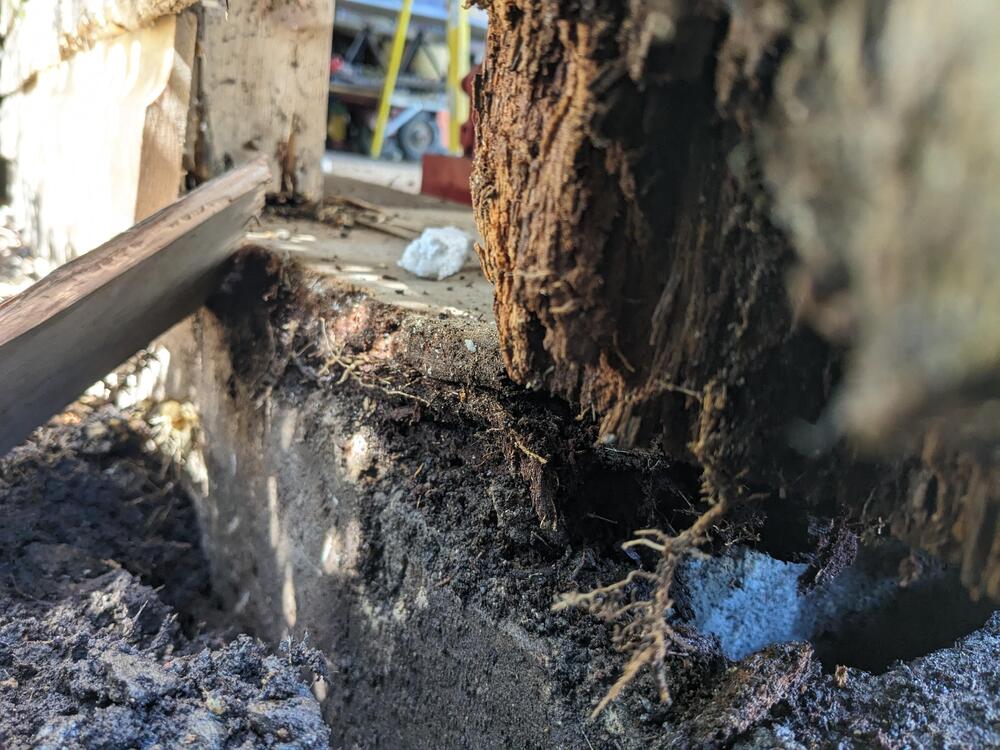
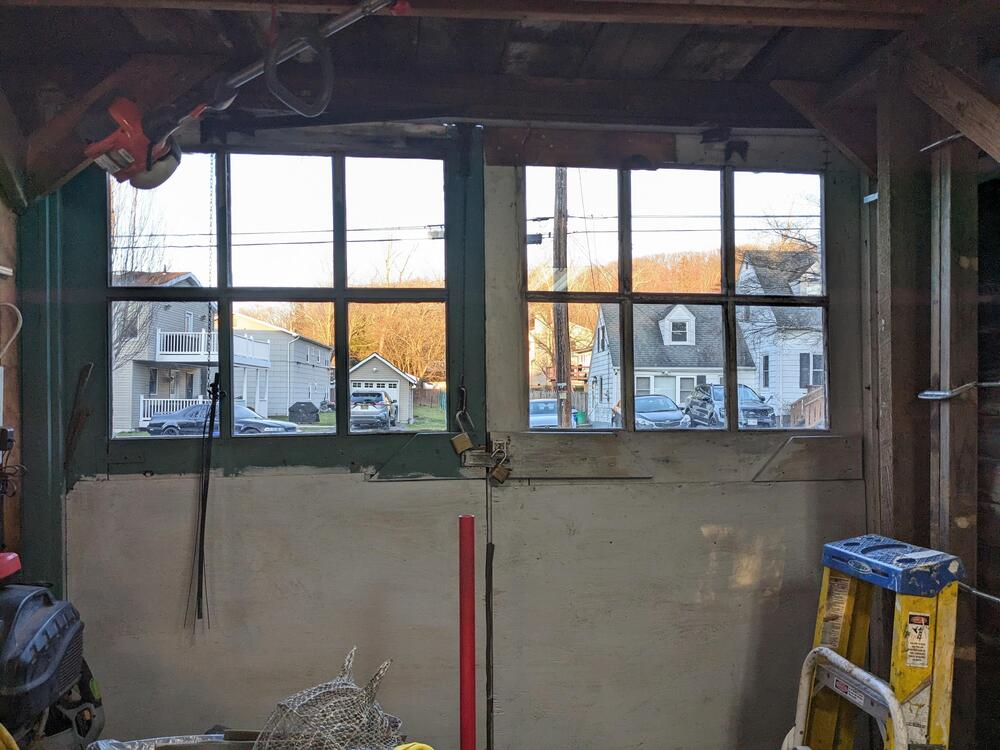
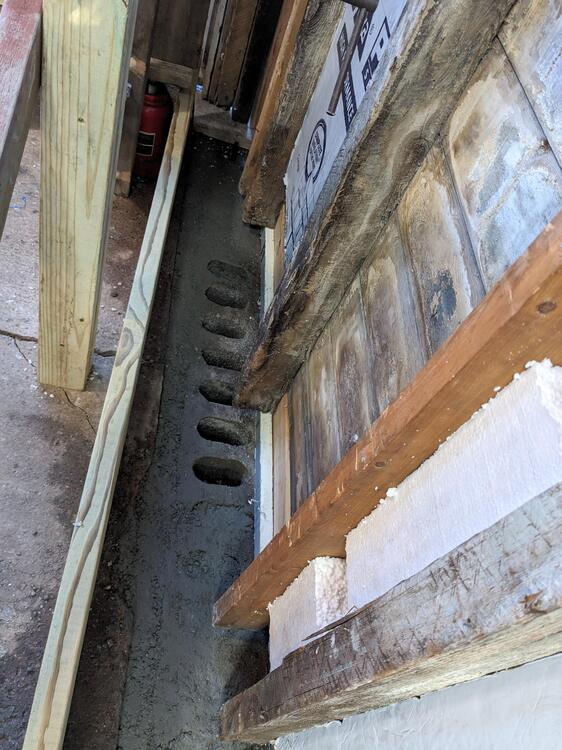
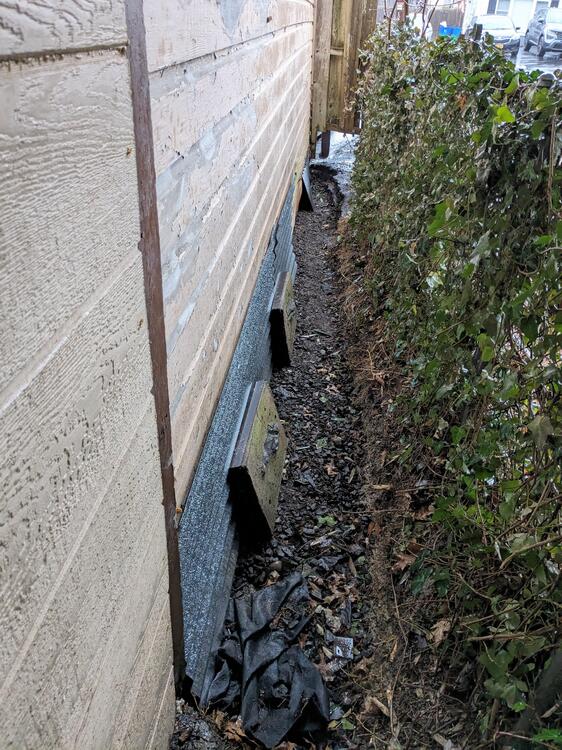
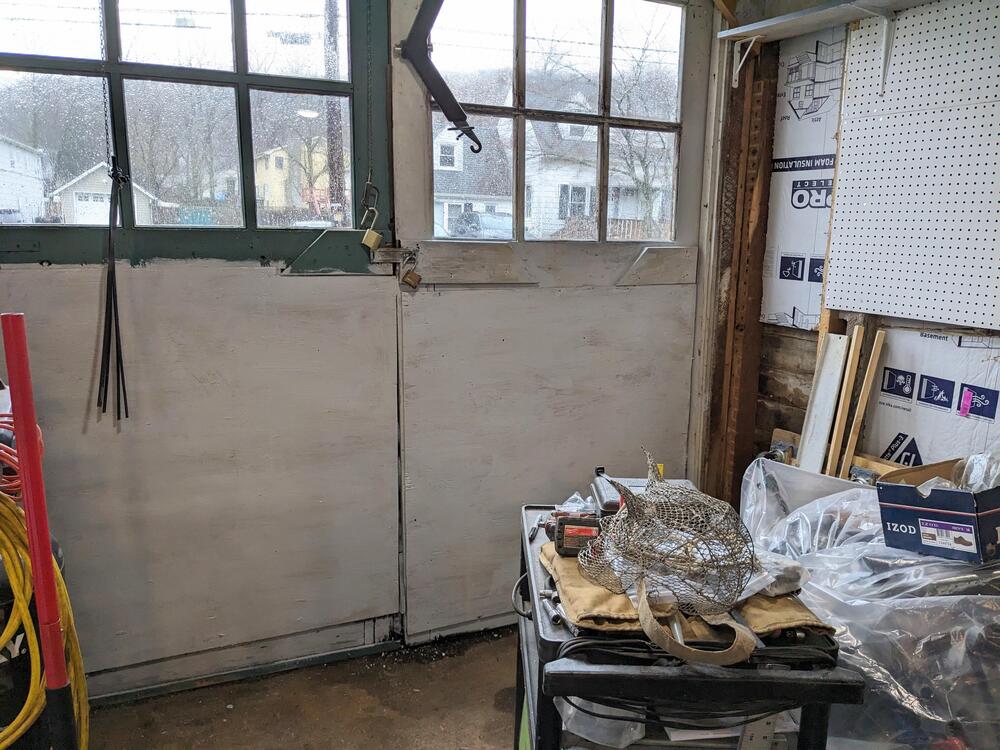
Thank you for your advice! Feels solid enough - definitely not concerned about working in/around it now. In order to make sure this is taken care of before we leave town on Sat., I took half a day today. Put down the sill seal, with a 1/2" strip of butyl squished along the outer edge. new pressured treated 2x10 sill plate, 8' section starting from the East end. 4x4" post in place, and dimensional 2x4" post for the door frame. Wall studs still to be addressed. Outer panels in place for this corner. Sealed the sill at the corner also. Have to get new siding for the bottom 1' of the wall - I'm going to use concrete backer board for at least the lowest run (6") off the sill These garage doors have been unusable for at least 10 years, wedged shut. Now I can open & close them (after trimming the righthand one), I need to address the latches to properly secure them, and replace the pane of glass I broke.
-
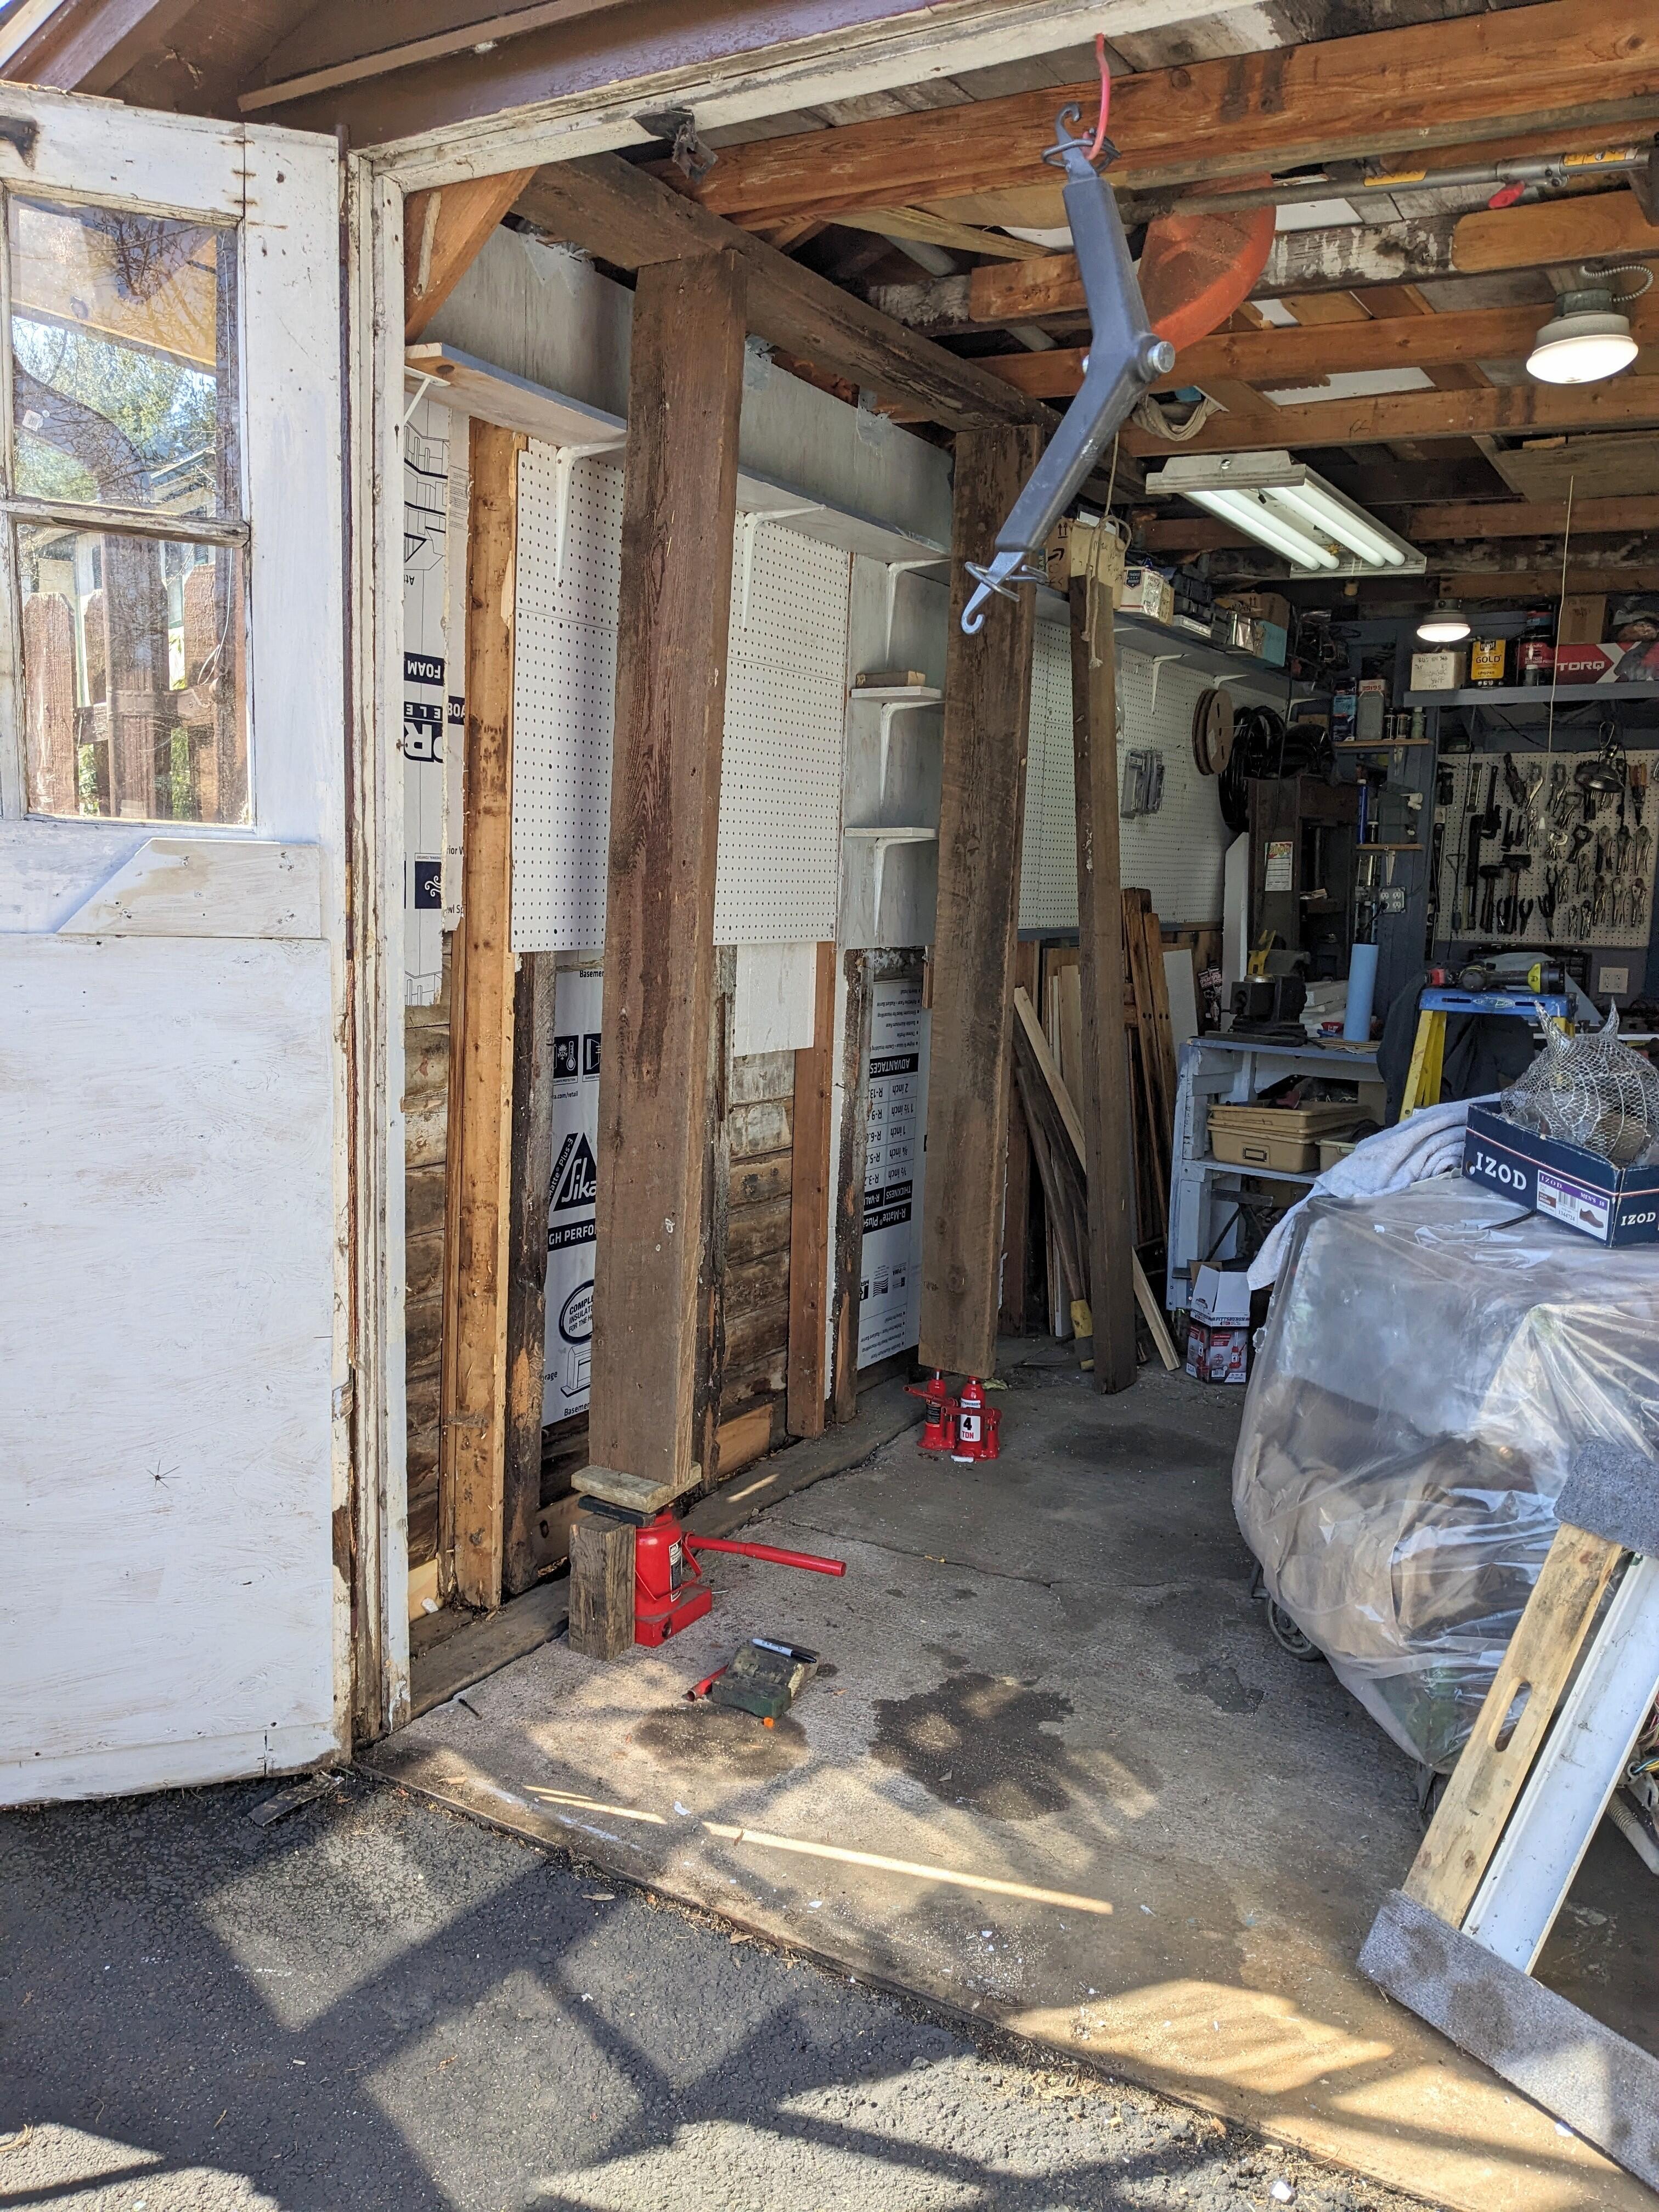
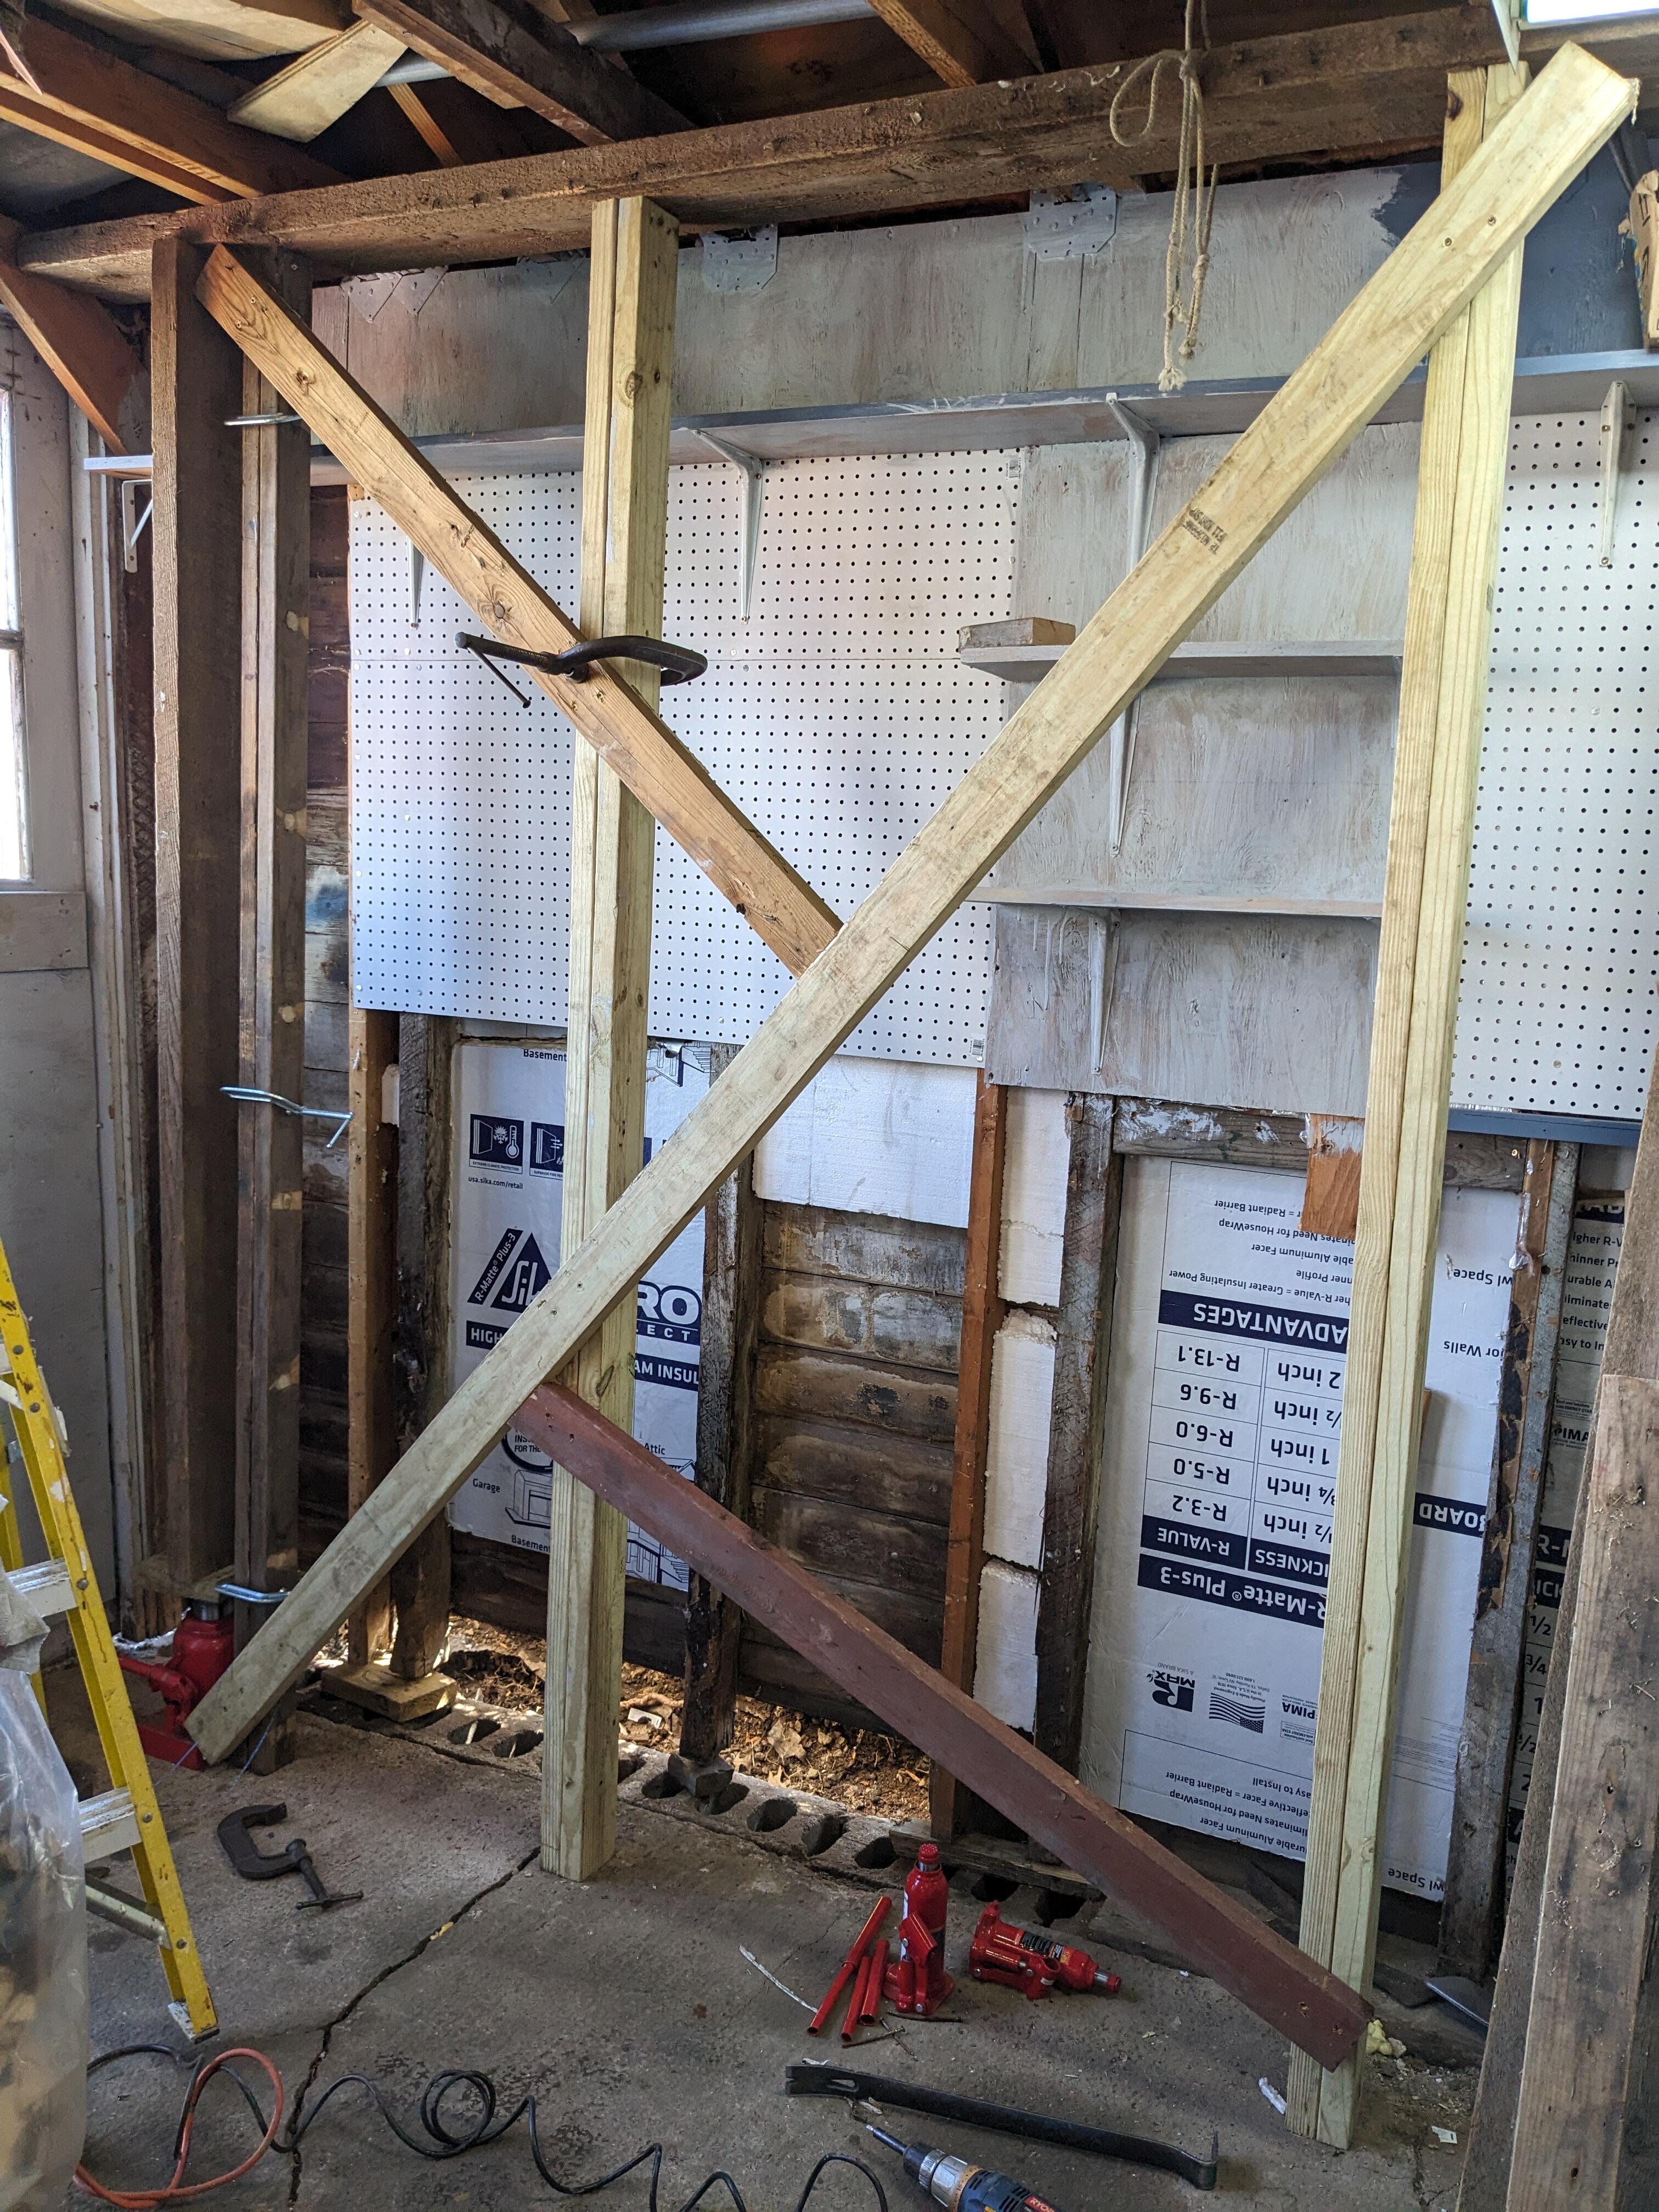
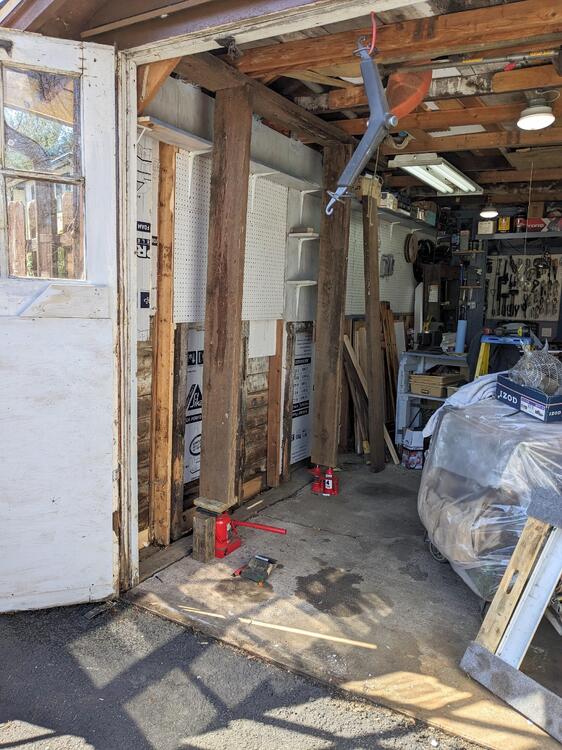
So it took me literally hours just to set up the posts & plate. First I screwed the plate to the rafters, then levelled the posts & jacked it carefully using 2 bottle jacks & then a floor jack in the middle (cut all the stud nails first!). Then I cut 2x4s to fit (95") & clamped then screwed them together Added some cross bracing, since it's gonna be there a couple days, since it took me so long to setup . Found after that that the corner post is toast so I removed it entirely Extra large end opening now. Have to do the sill first, then the corner post , then tie the door frame to the post, then address the studs Doors will be much more level than before, once it's all tied together Cleaned the foundation, packed some gravel in the openings & added some concrete (not finished) - I'm going to add another anchor bolt at the west end to the 8' section going in


-
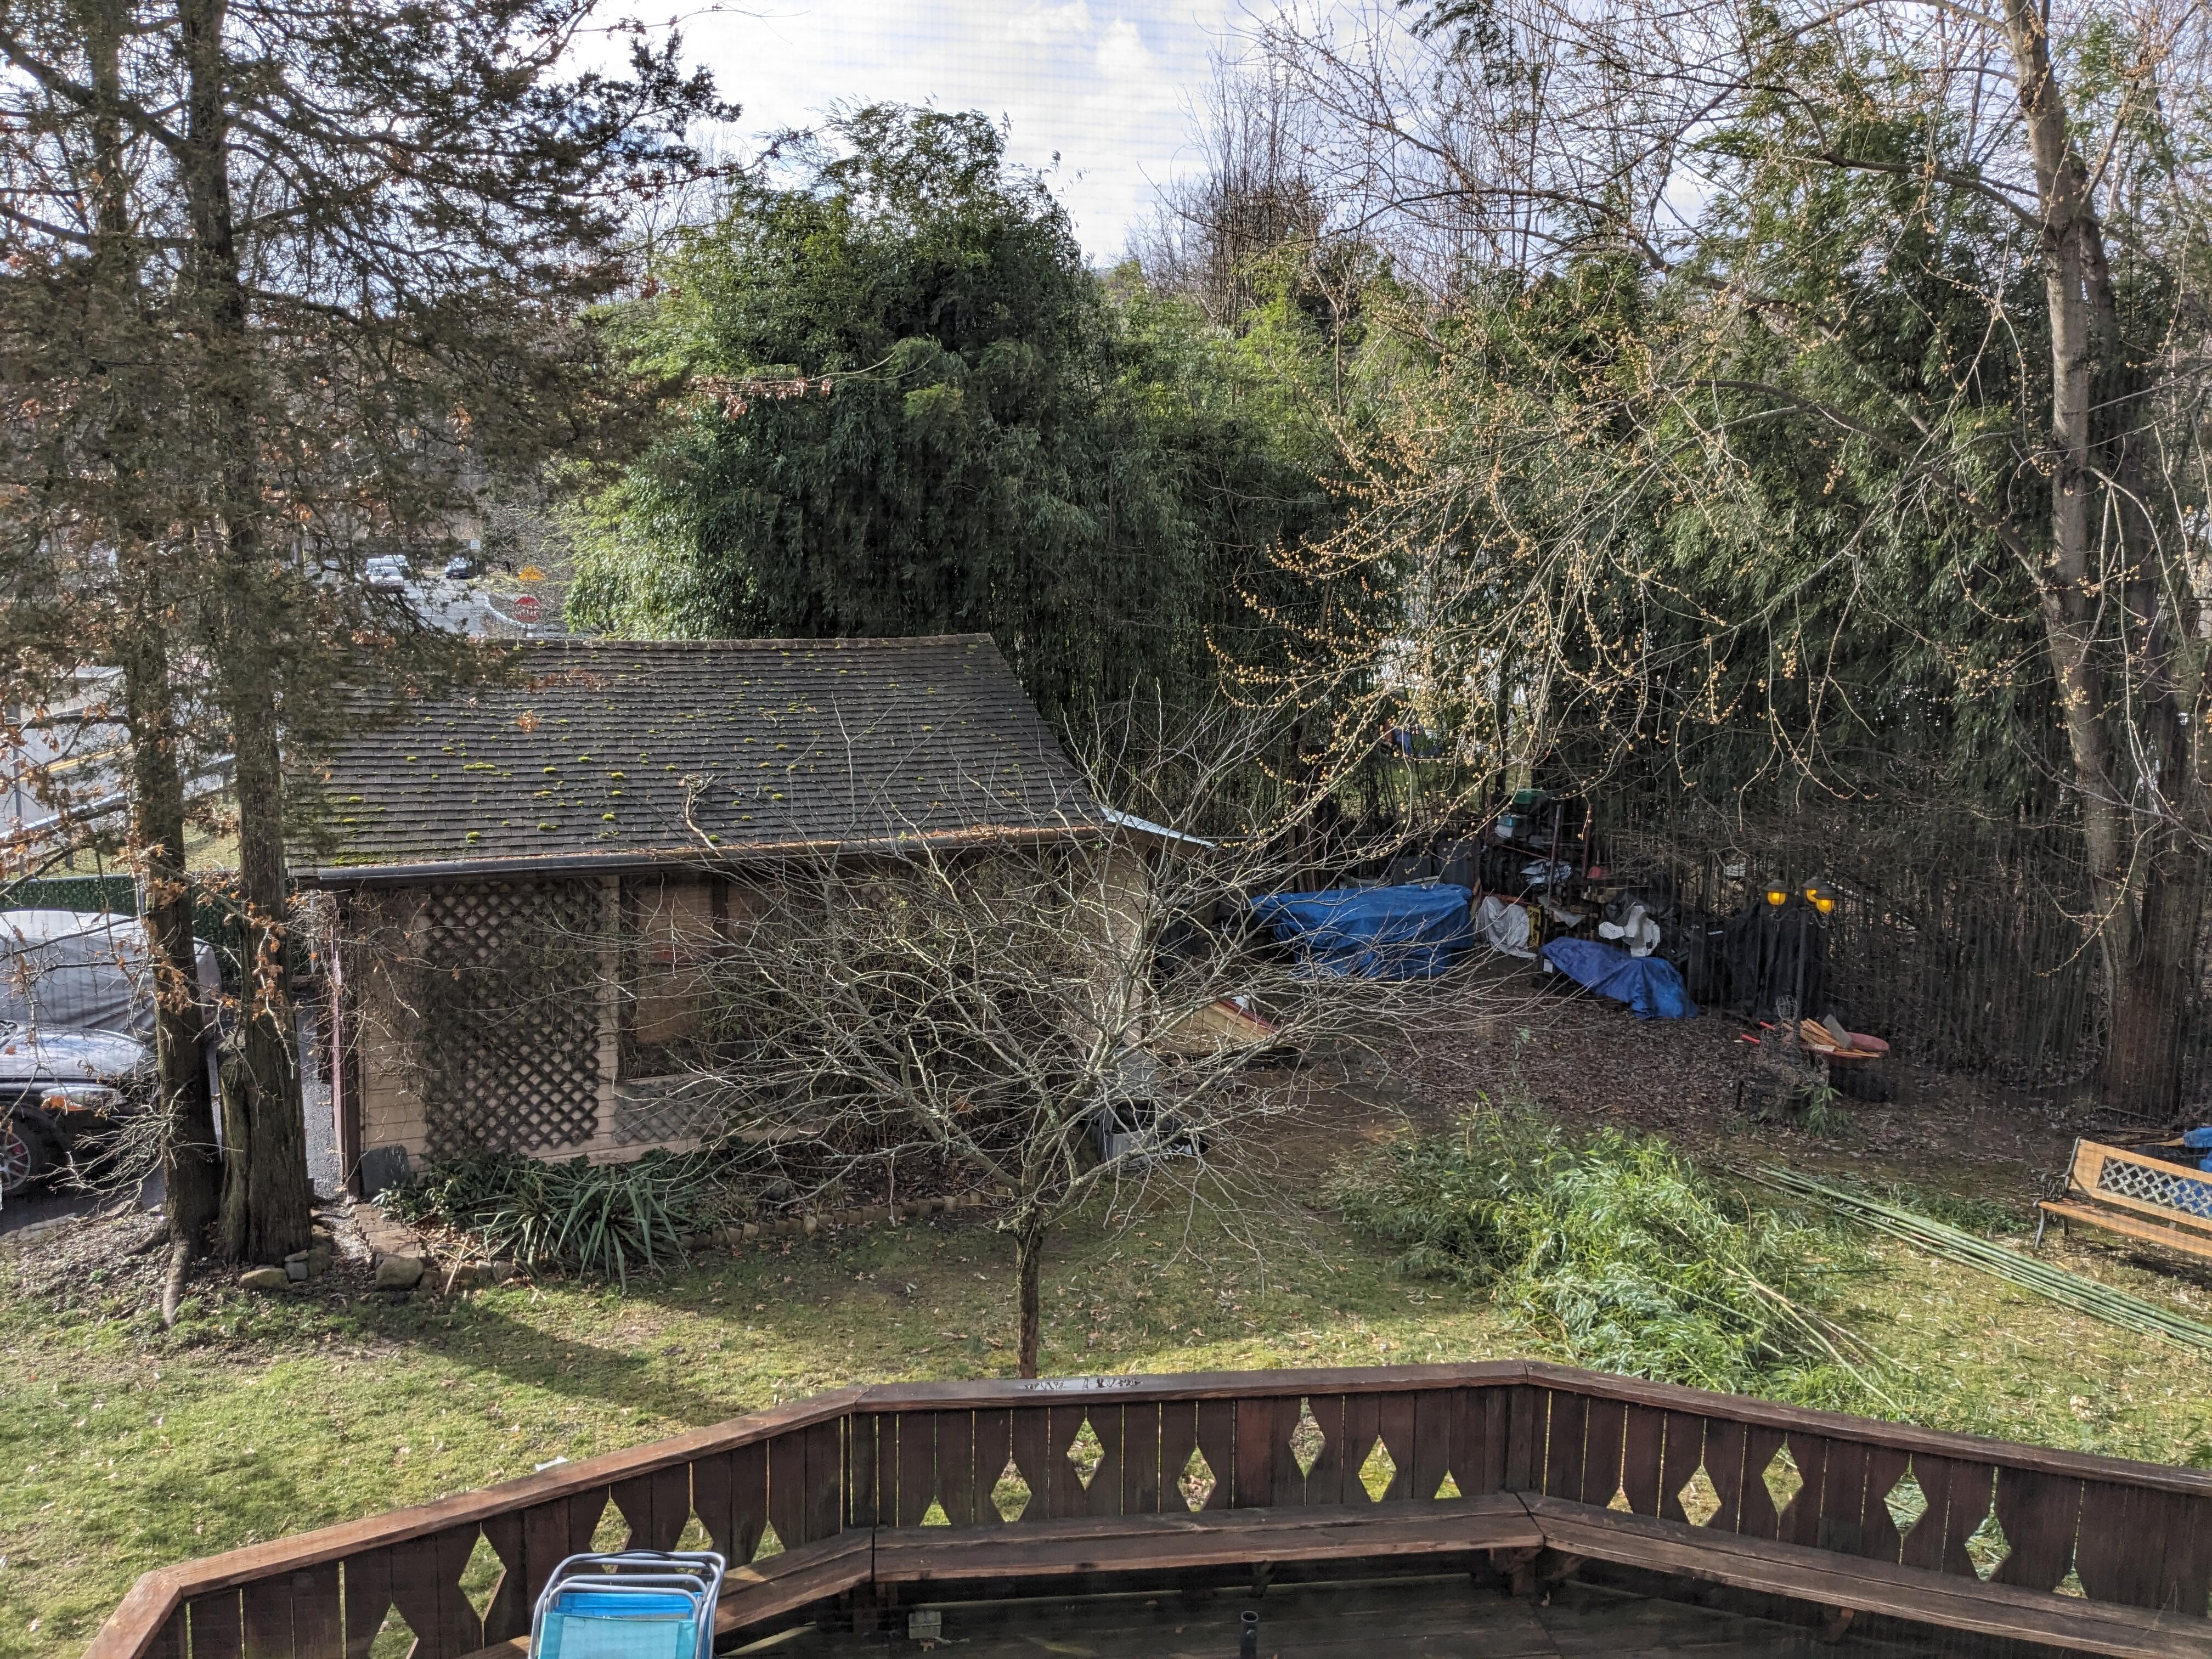
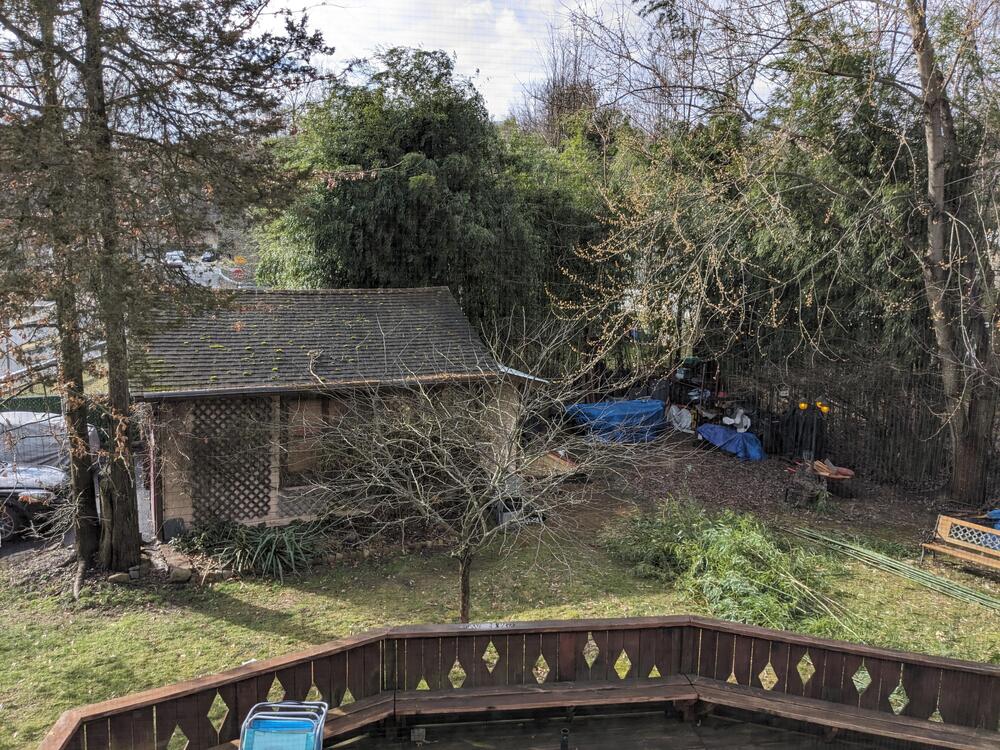
Thank you Pat. I still have a few good length dimensional lumber from the original wall - so that would be good for the top plate, and I think I have several in about 8' lengths which would work for posts. It did indeed rain all day today - this is what the back of my yard looks like whenever we have heavy rain. It's a very high water table, there is a stream that runs around the outside of the property between me and my neighbor, and the soil only goes down maybe 2 ft or less before it becomes clay For perspective, this is the view from the house (different day) right-hand side (West) is where it pools.. Even with that, the back of the garage did not get very wet or have any accumulation to speak of. So, I think I can just backfill that area with gravel. Since I couldn't work outside, I just did some more cleanup inside. Added sheathing to the inside of the garage doors, as those were pretty darn drafty and also a little wonky. While I was at it I also put some primer on the new shelves and upper sheathing Rain is supposed to stop later today, so hopefully tomorrow I can start with the jacking and replacing of the sill sections.


-
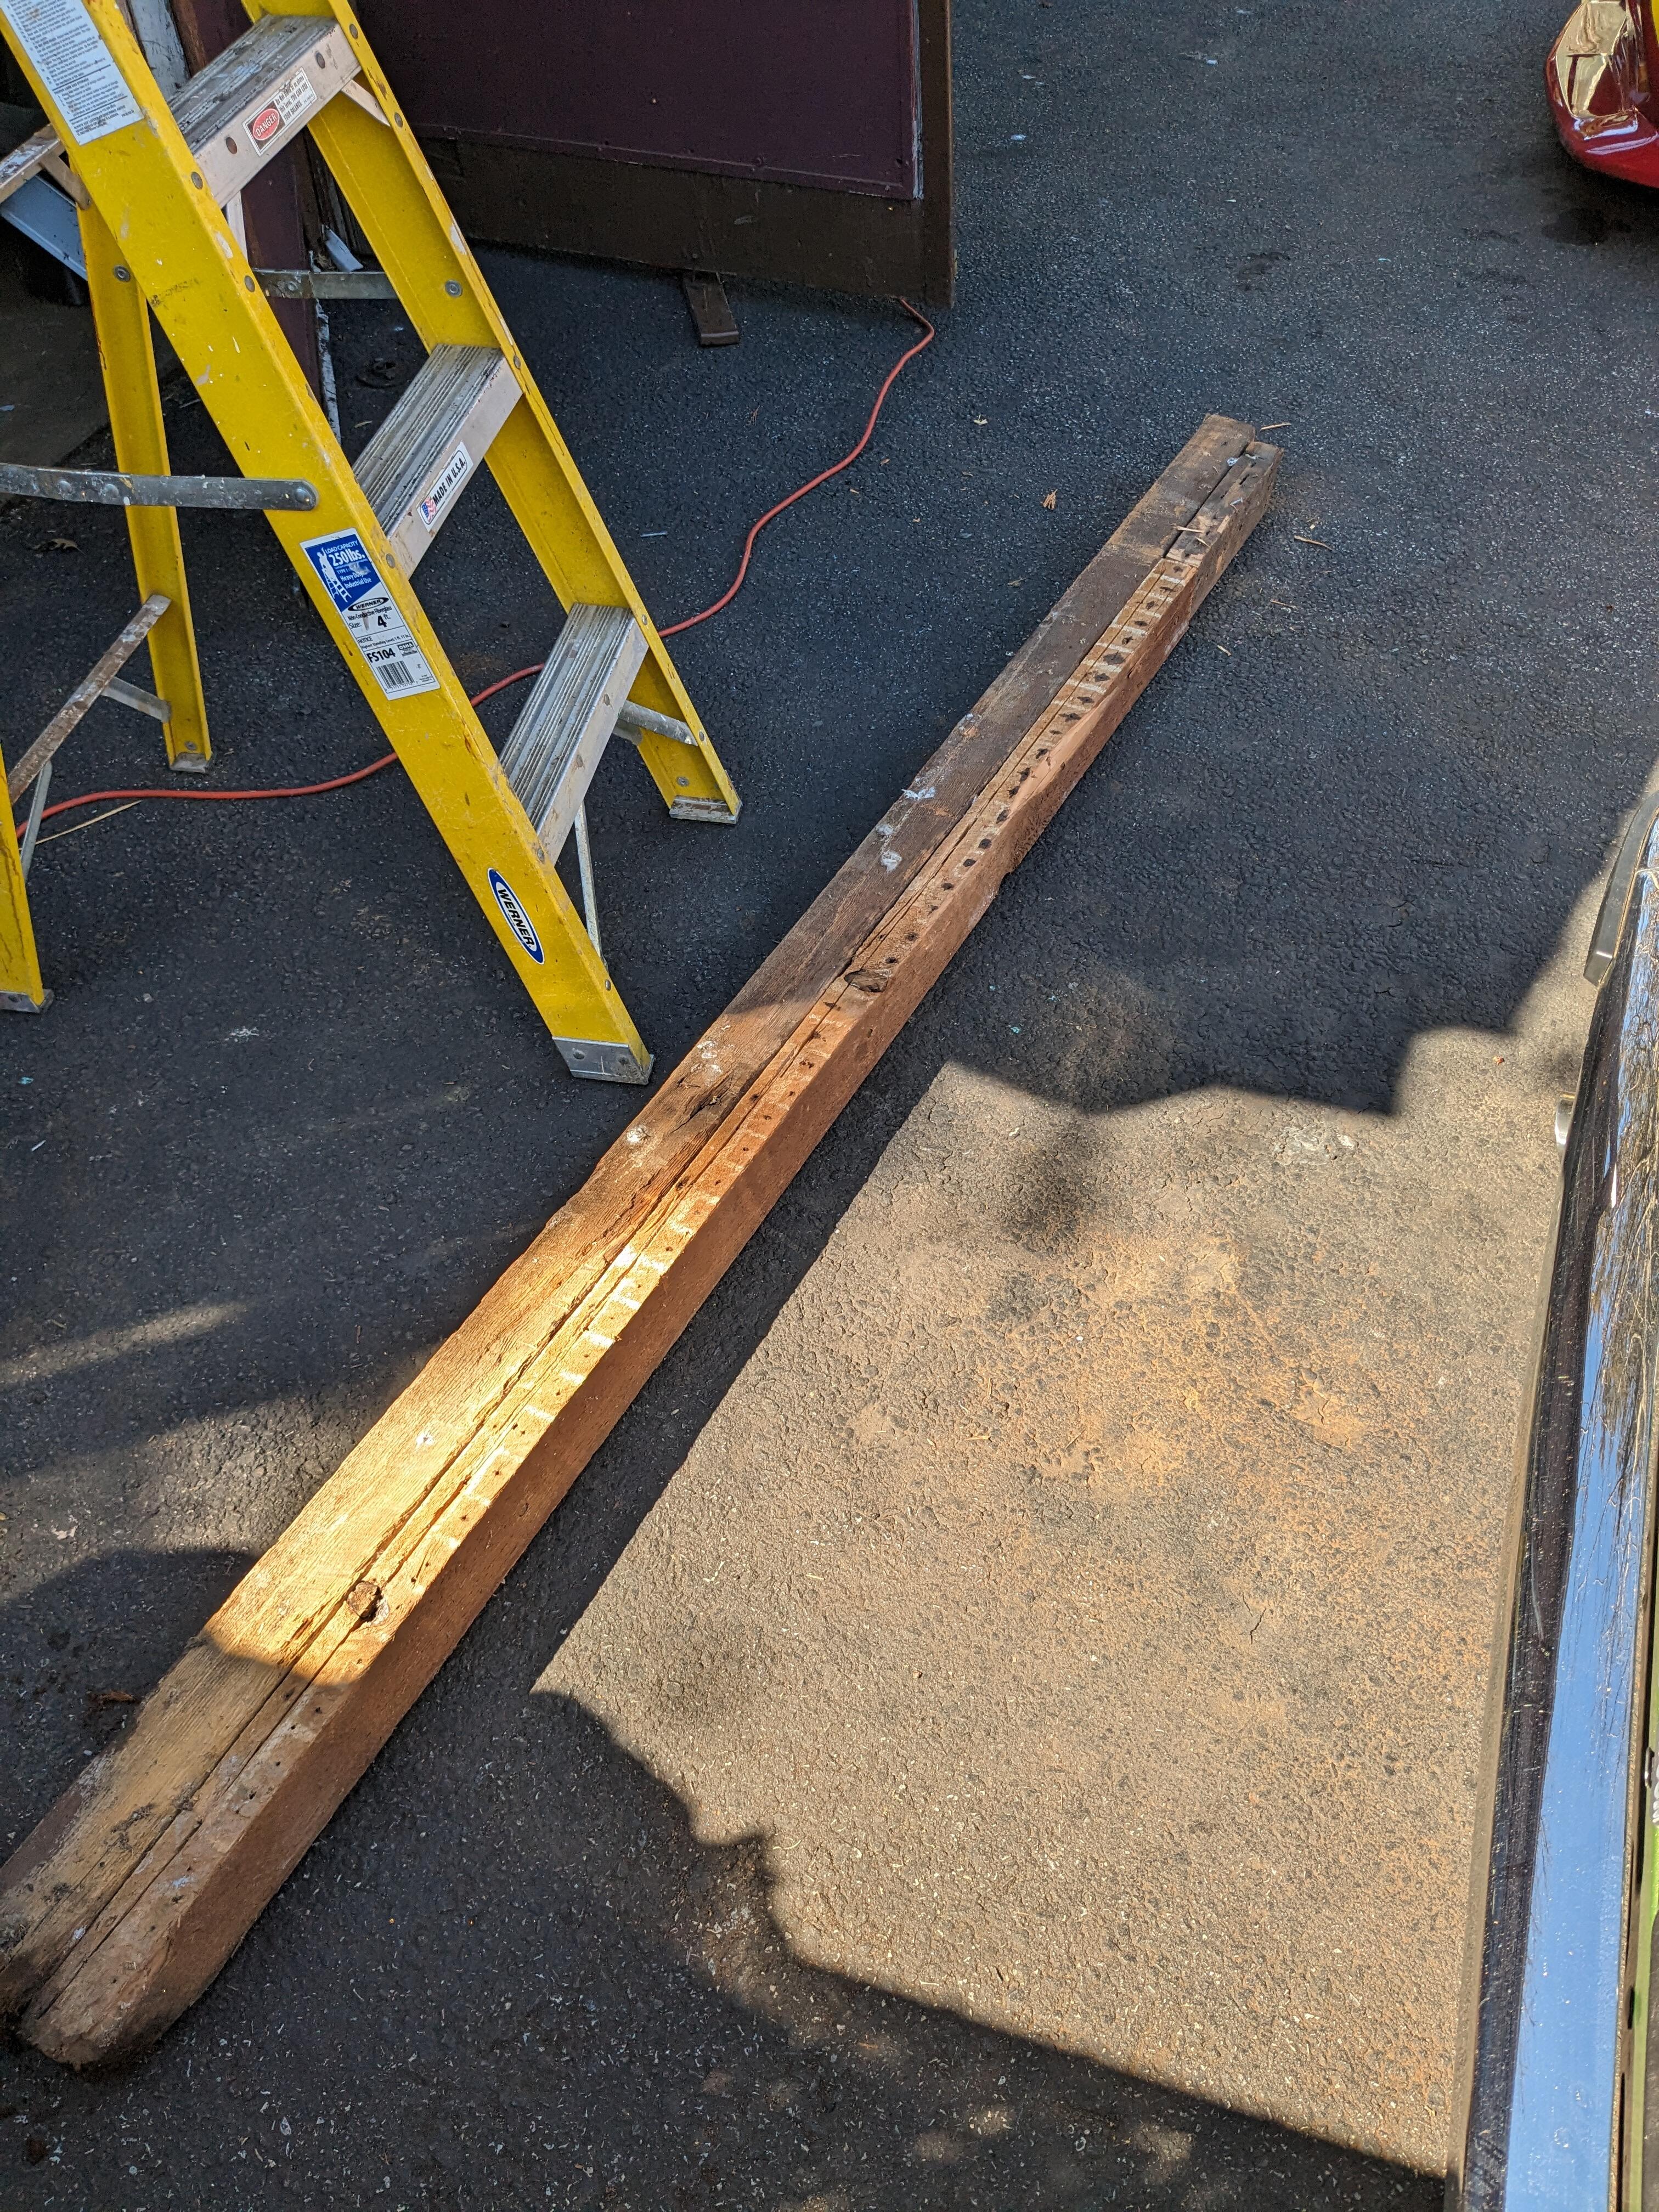
Yeah, I have one herniated disc, which I've been getting treatment for for the past 2 years now. Chiropractor puts me on a rack every couple-few weeks to stretch it back out & allow the disc to move. It is good overall, if I don't over do it. OK - The rafters have hurricane ties to the top plate. I was thinking that it would have to be that way - so, a top plate that bridges the rafters fore-aft, and then posts with the jacks under. The existing studs at the East end have dropped at least 1/4-3/16" into the rotted sill, so I would cut the nails for each stud, then jack the temp posts just enough to loosen the studs, with enough lift to get a new 2x10 sill in place. I assume I will section the sill into at least 3-4 pieces - given the studs are 24" OC, and the total length of the sill is 18' ?
-
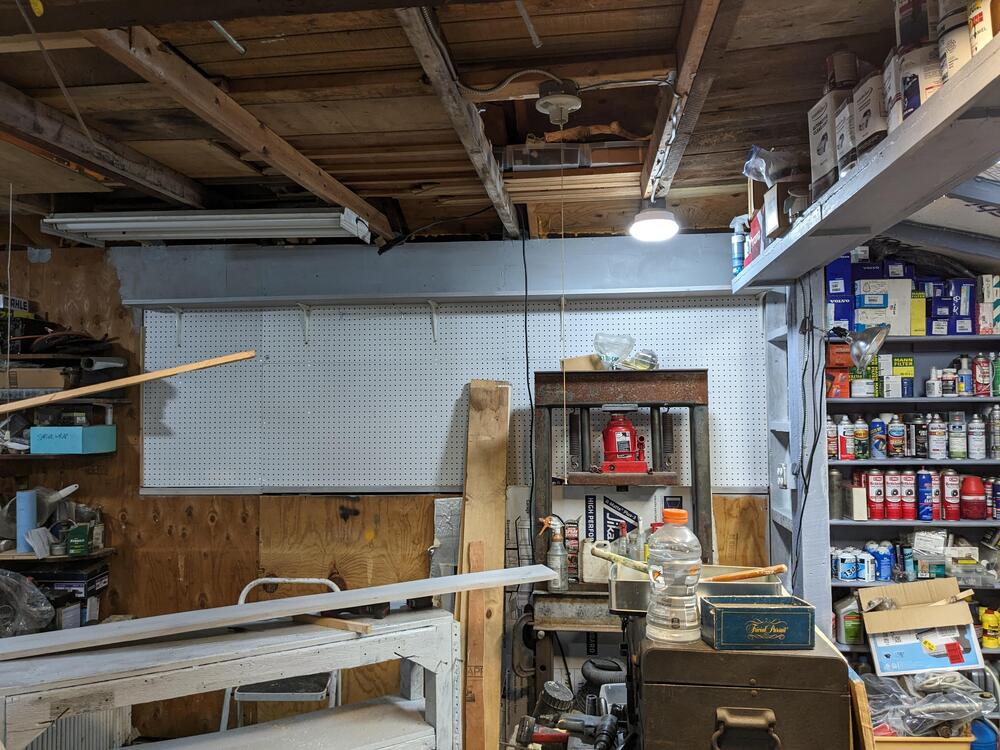
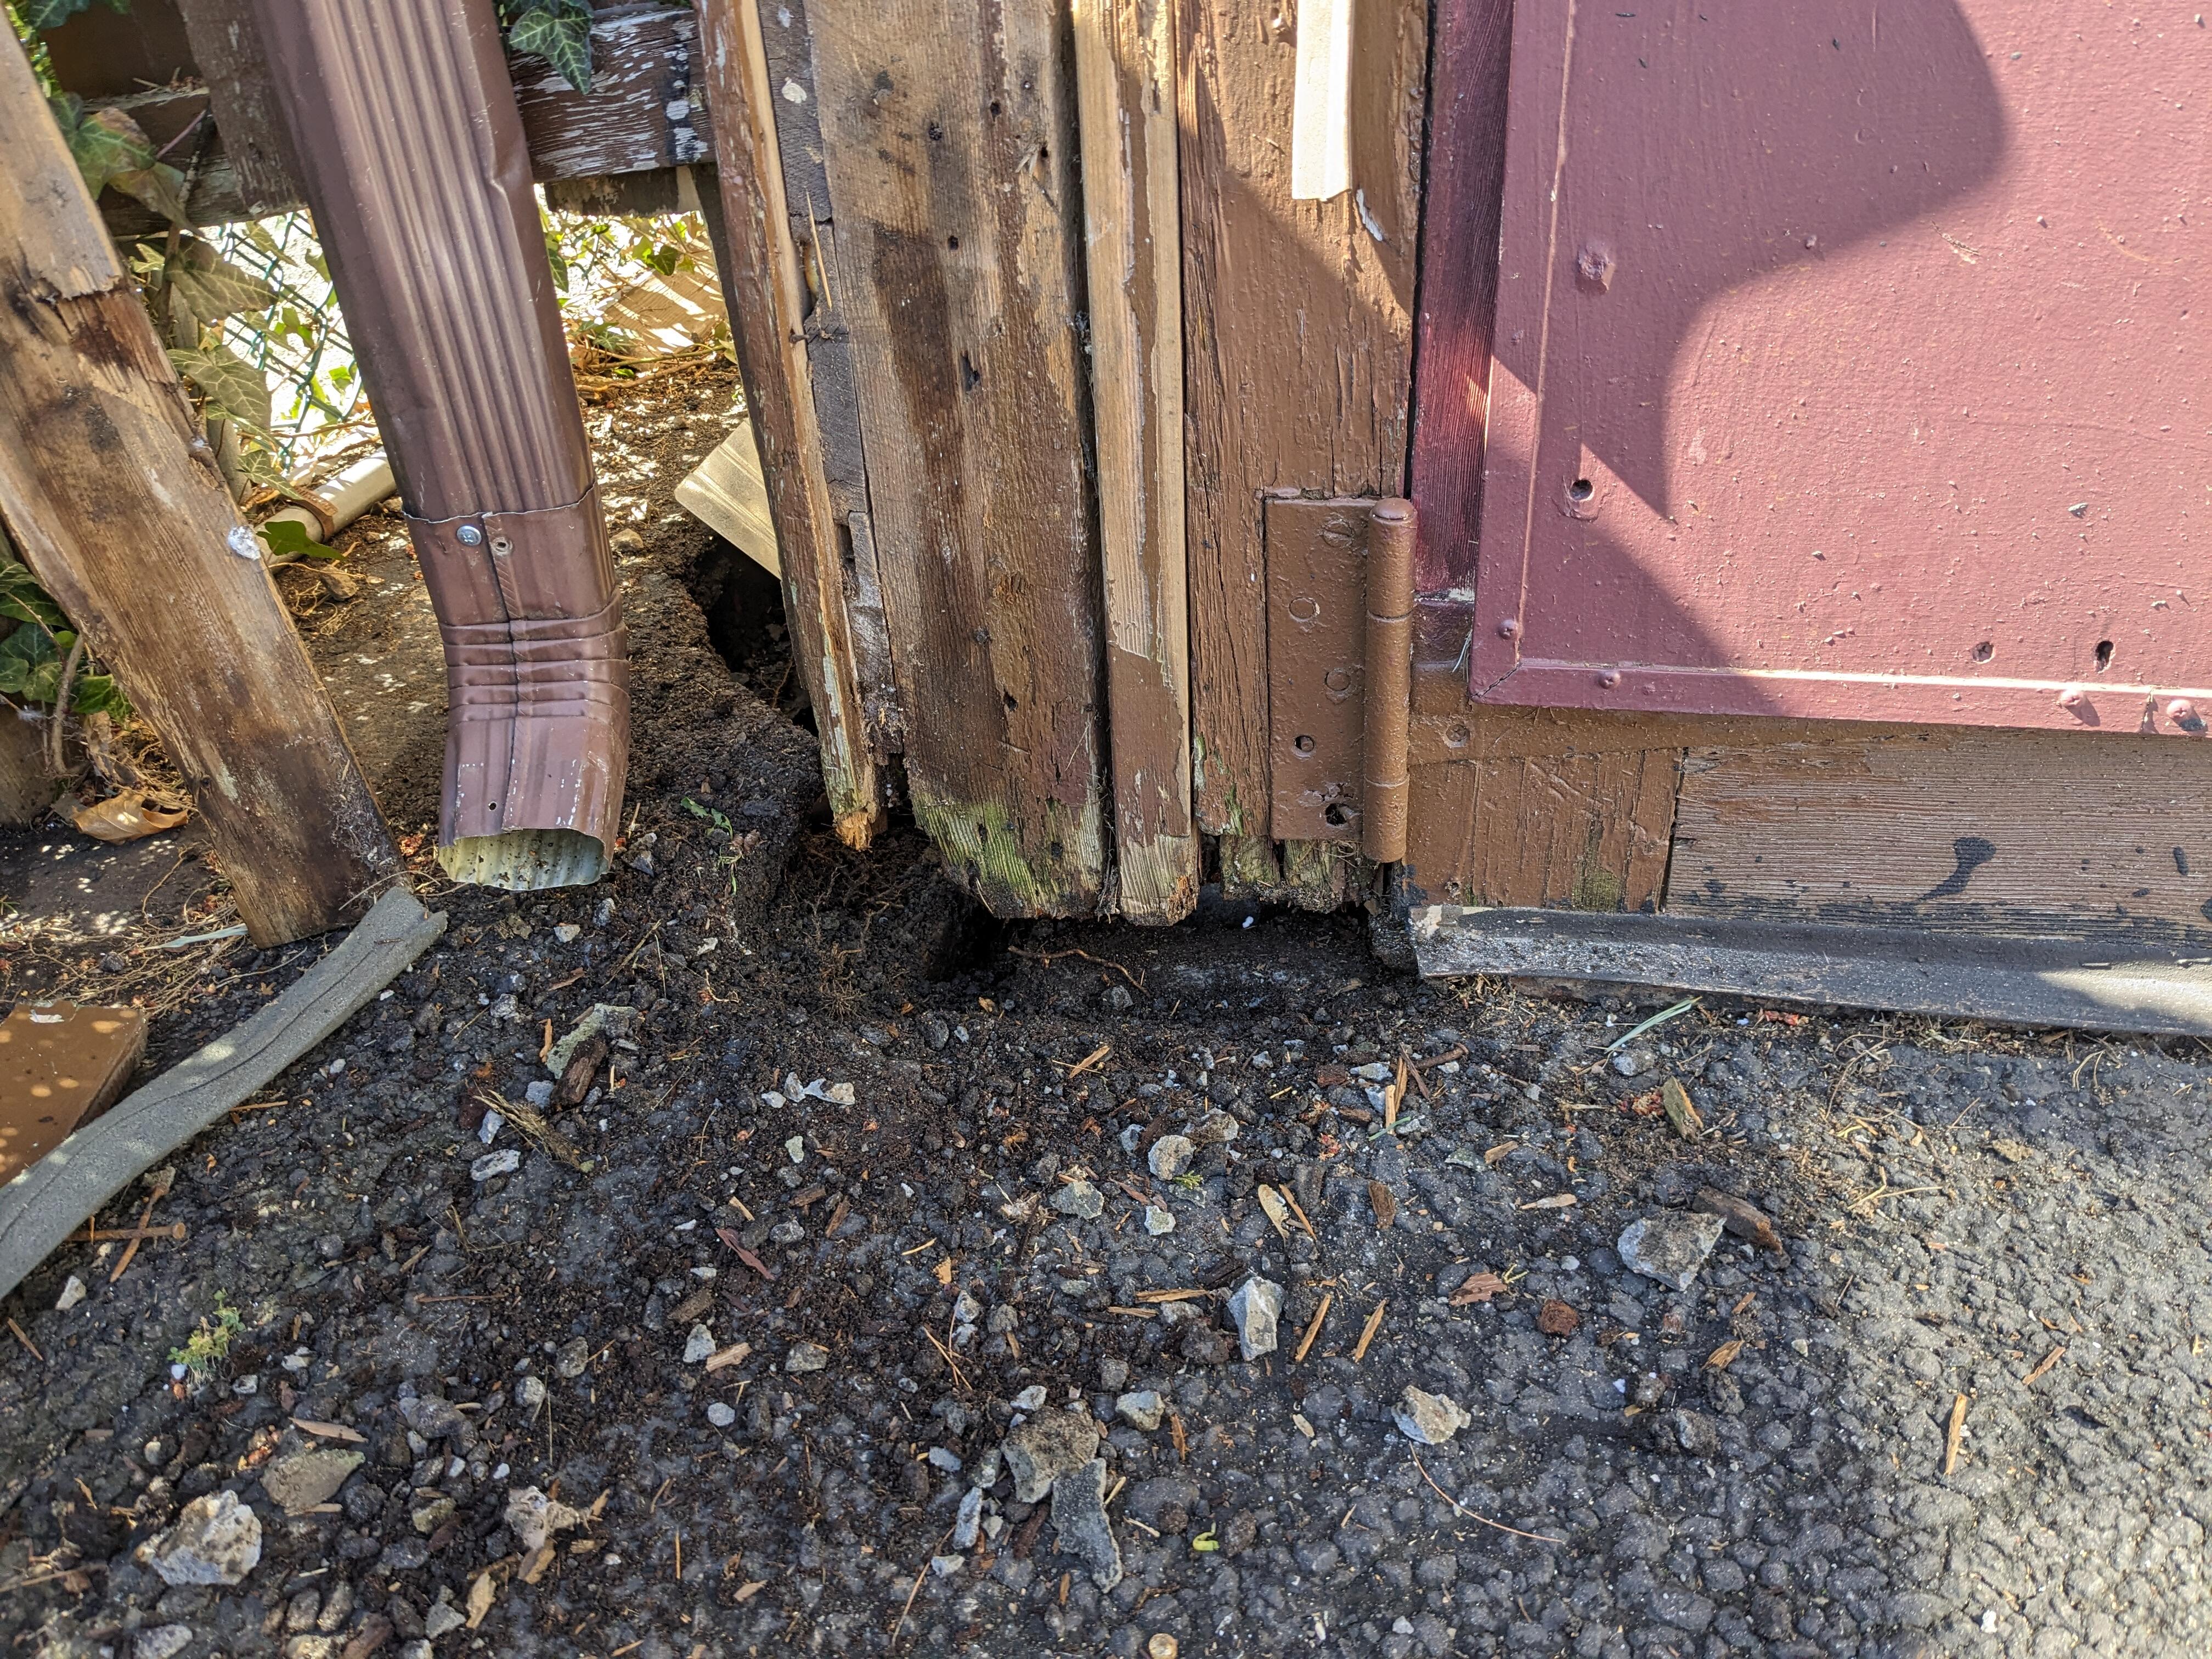
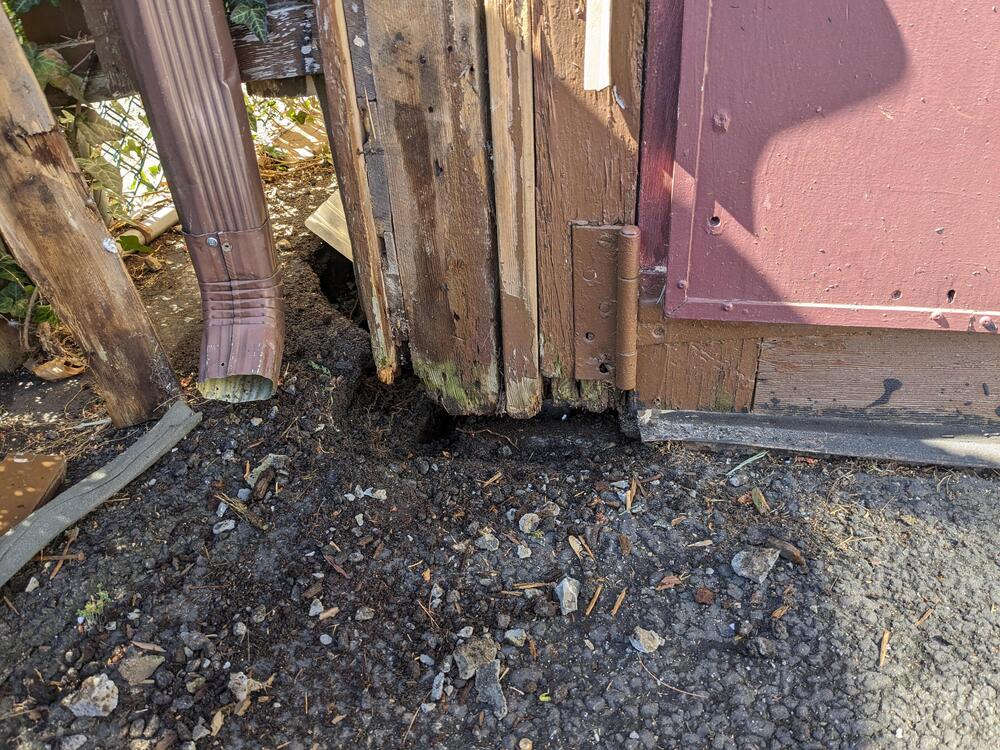
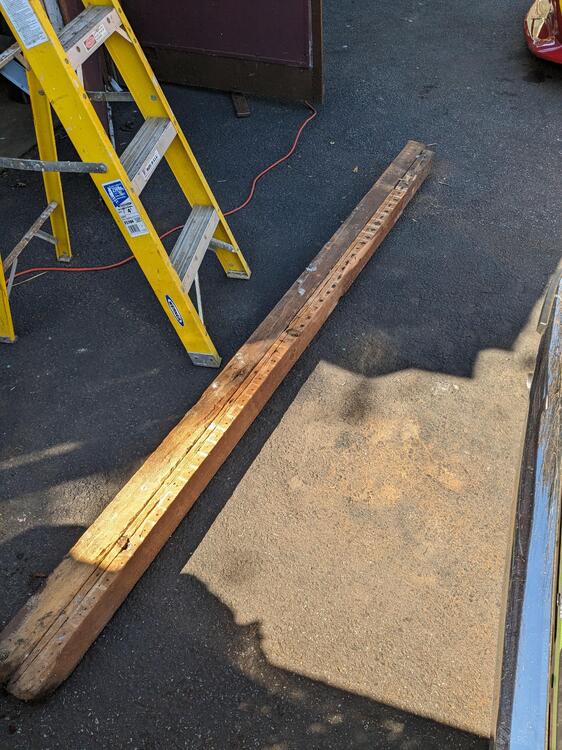
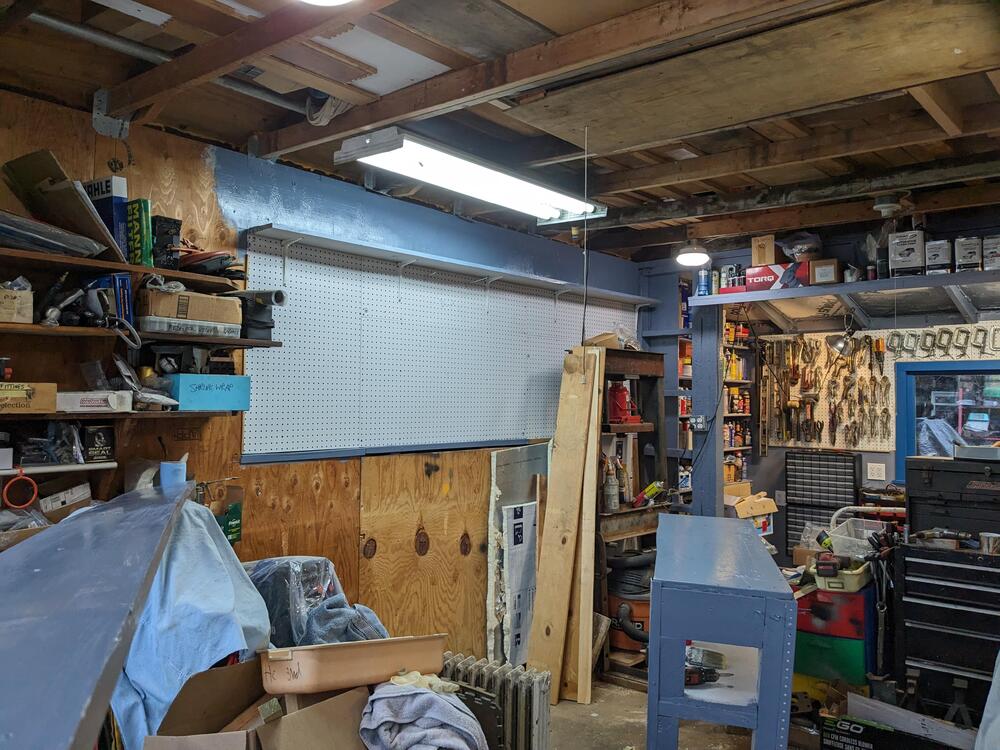
My back has been bothering me for several weeks, so nothing going on with the garage. I felt well enough Thursday to get a little forward movement. Good job I was going to the chiropractor Friday AM, 'cos my back told me I shouldn't have. Yanking the nails was what tugged on my lower back, mostly. Anyway, cut out the sheathing, added insulation & fitted the uppermost shelf. I'll finish the shelf brackets after I do the pegboard. Yesterday I removed the lower sheathing. Sill plate is in really bad shape at this end excavated more of the soil outside, made a more complete trench to keep water off the sill/wall until I get to finish the drainage and sill/wall, it's supposed to rain all day today Added some wood to the outside, to keep the elements out. it was in the low 30's, so very cold Have to figure out how to jack up the wall so I can get the bad sill out. added some small shelves Also added wheels to one of my benches
-
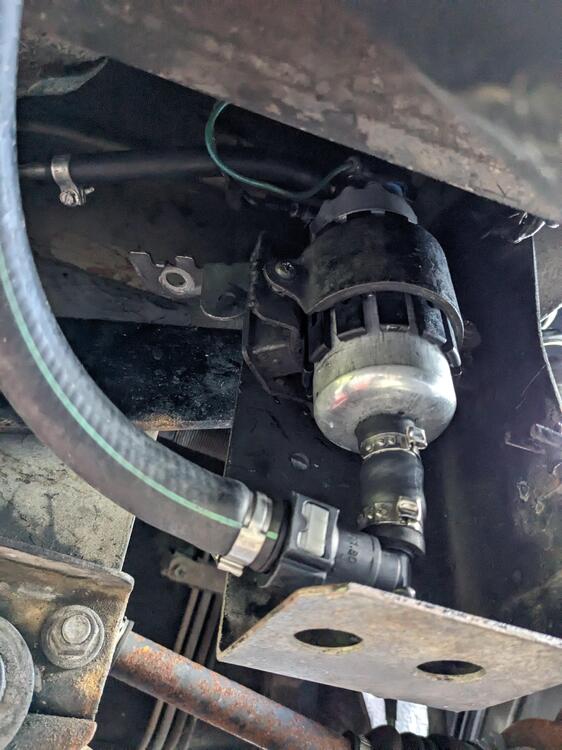
Replaced the leaking (less than a year old, almost no miles) left rear caliper(2014 Mustang GT) today. I had noticed that the front reservoir of the master cylinder had dropped about halfway. Couldn't see any signs of fluid in the driveway on wheels, so I had to get underneath and look around. I found evidence of dampness on the left rear lower slider boot, so it was apparently dripping down out of the main piston boot. No warranty, so I bought a reman off RockAuto Installed, and bled Also aftermarket pulse damper arrived today, so installed that as well definitely makes the fuel rail quieter at idle. Never seen a factory one that required a vacuum reference, but this one is intended to have it.
-
I drove it yesterday evening , probably 30 miles, and to work and back again today. No hiccups. Yeah the coils heating up and then opening the circuit makes sense in hindsight, because as soon as it cools down electrically speaking then the circuit would be engage hence the tying in with me blipping the throttle, which was obviously coincidental to the relay coil cooling off enough to reengage the pump. That's what I'm assuming anyway.
-
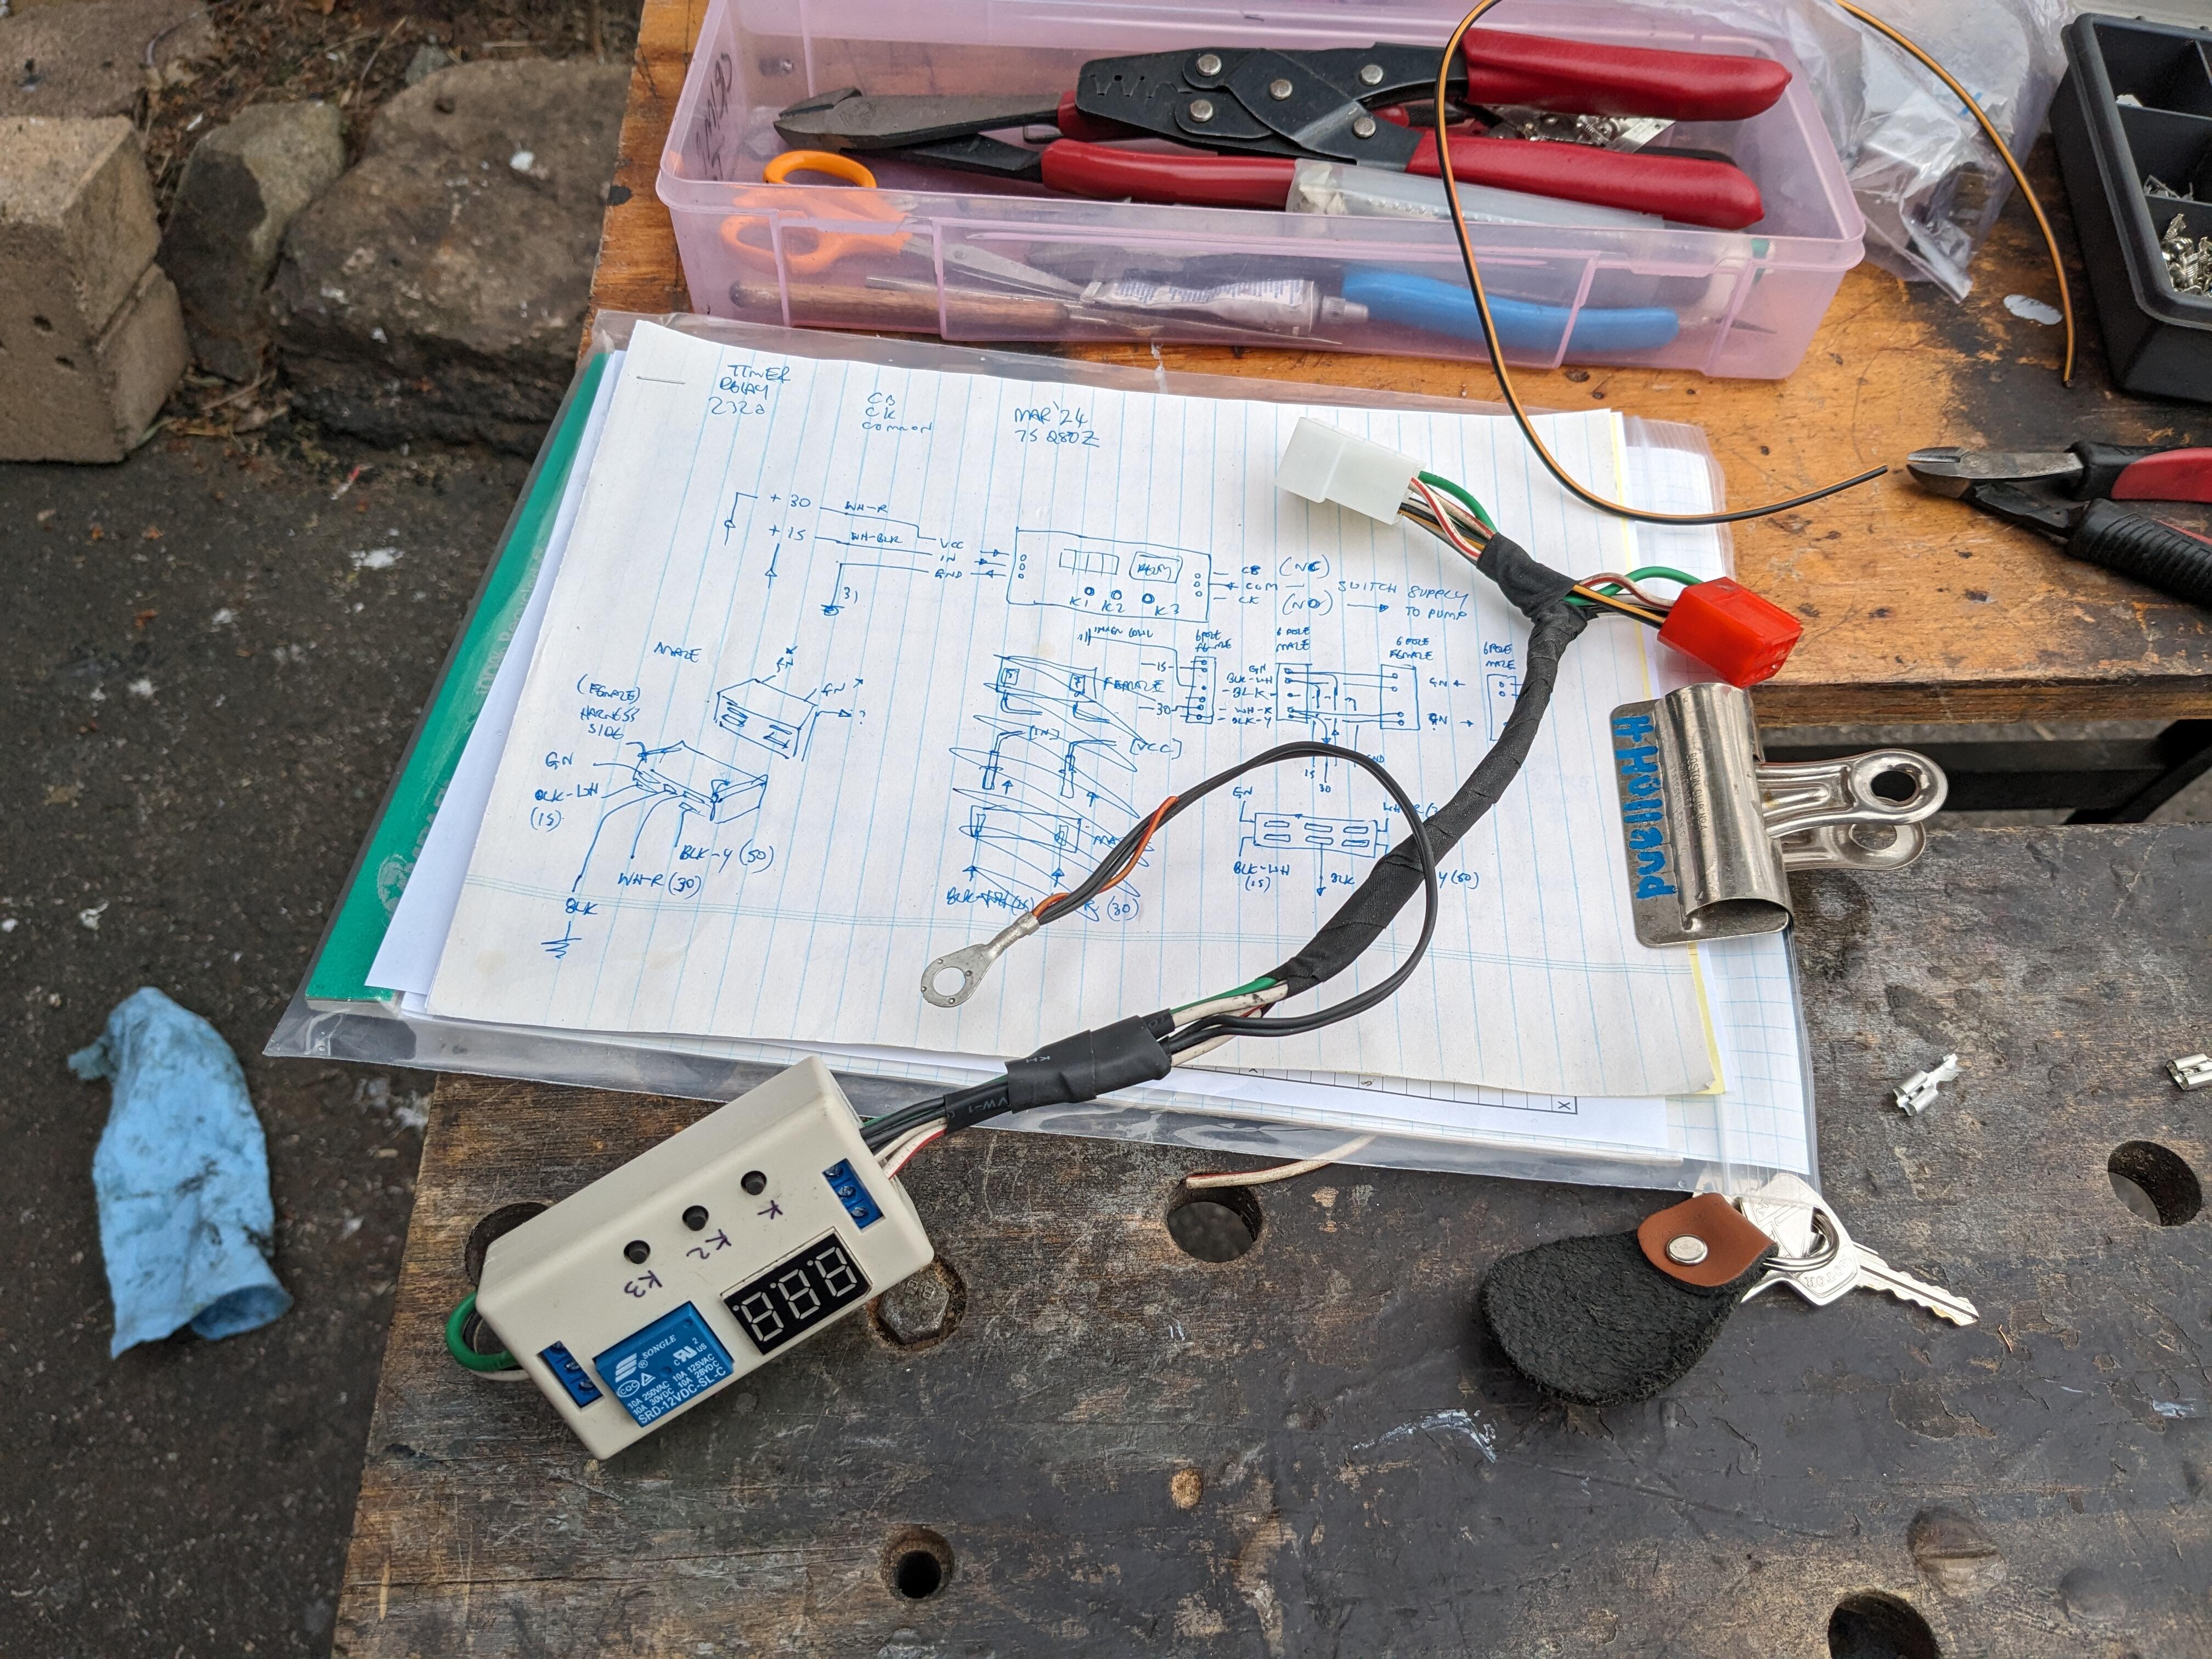
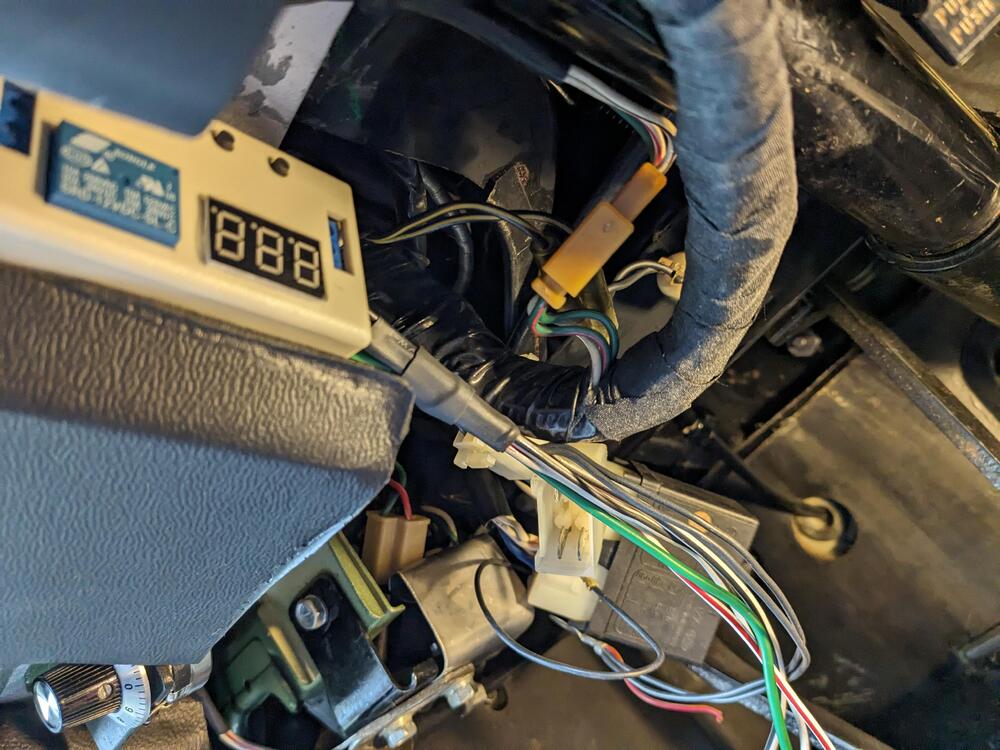
Added the three sec primer circuit after work today. I could actually make it anytime duration but 3 seconds seems more than long enough. Harness tucks neatly up under the dash YT Vid

-
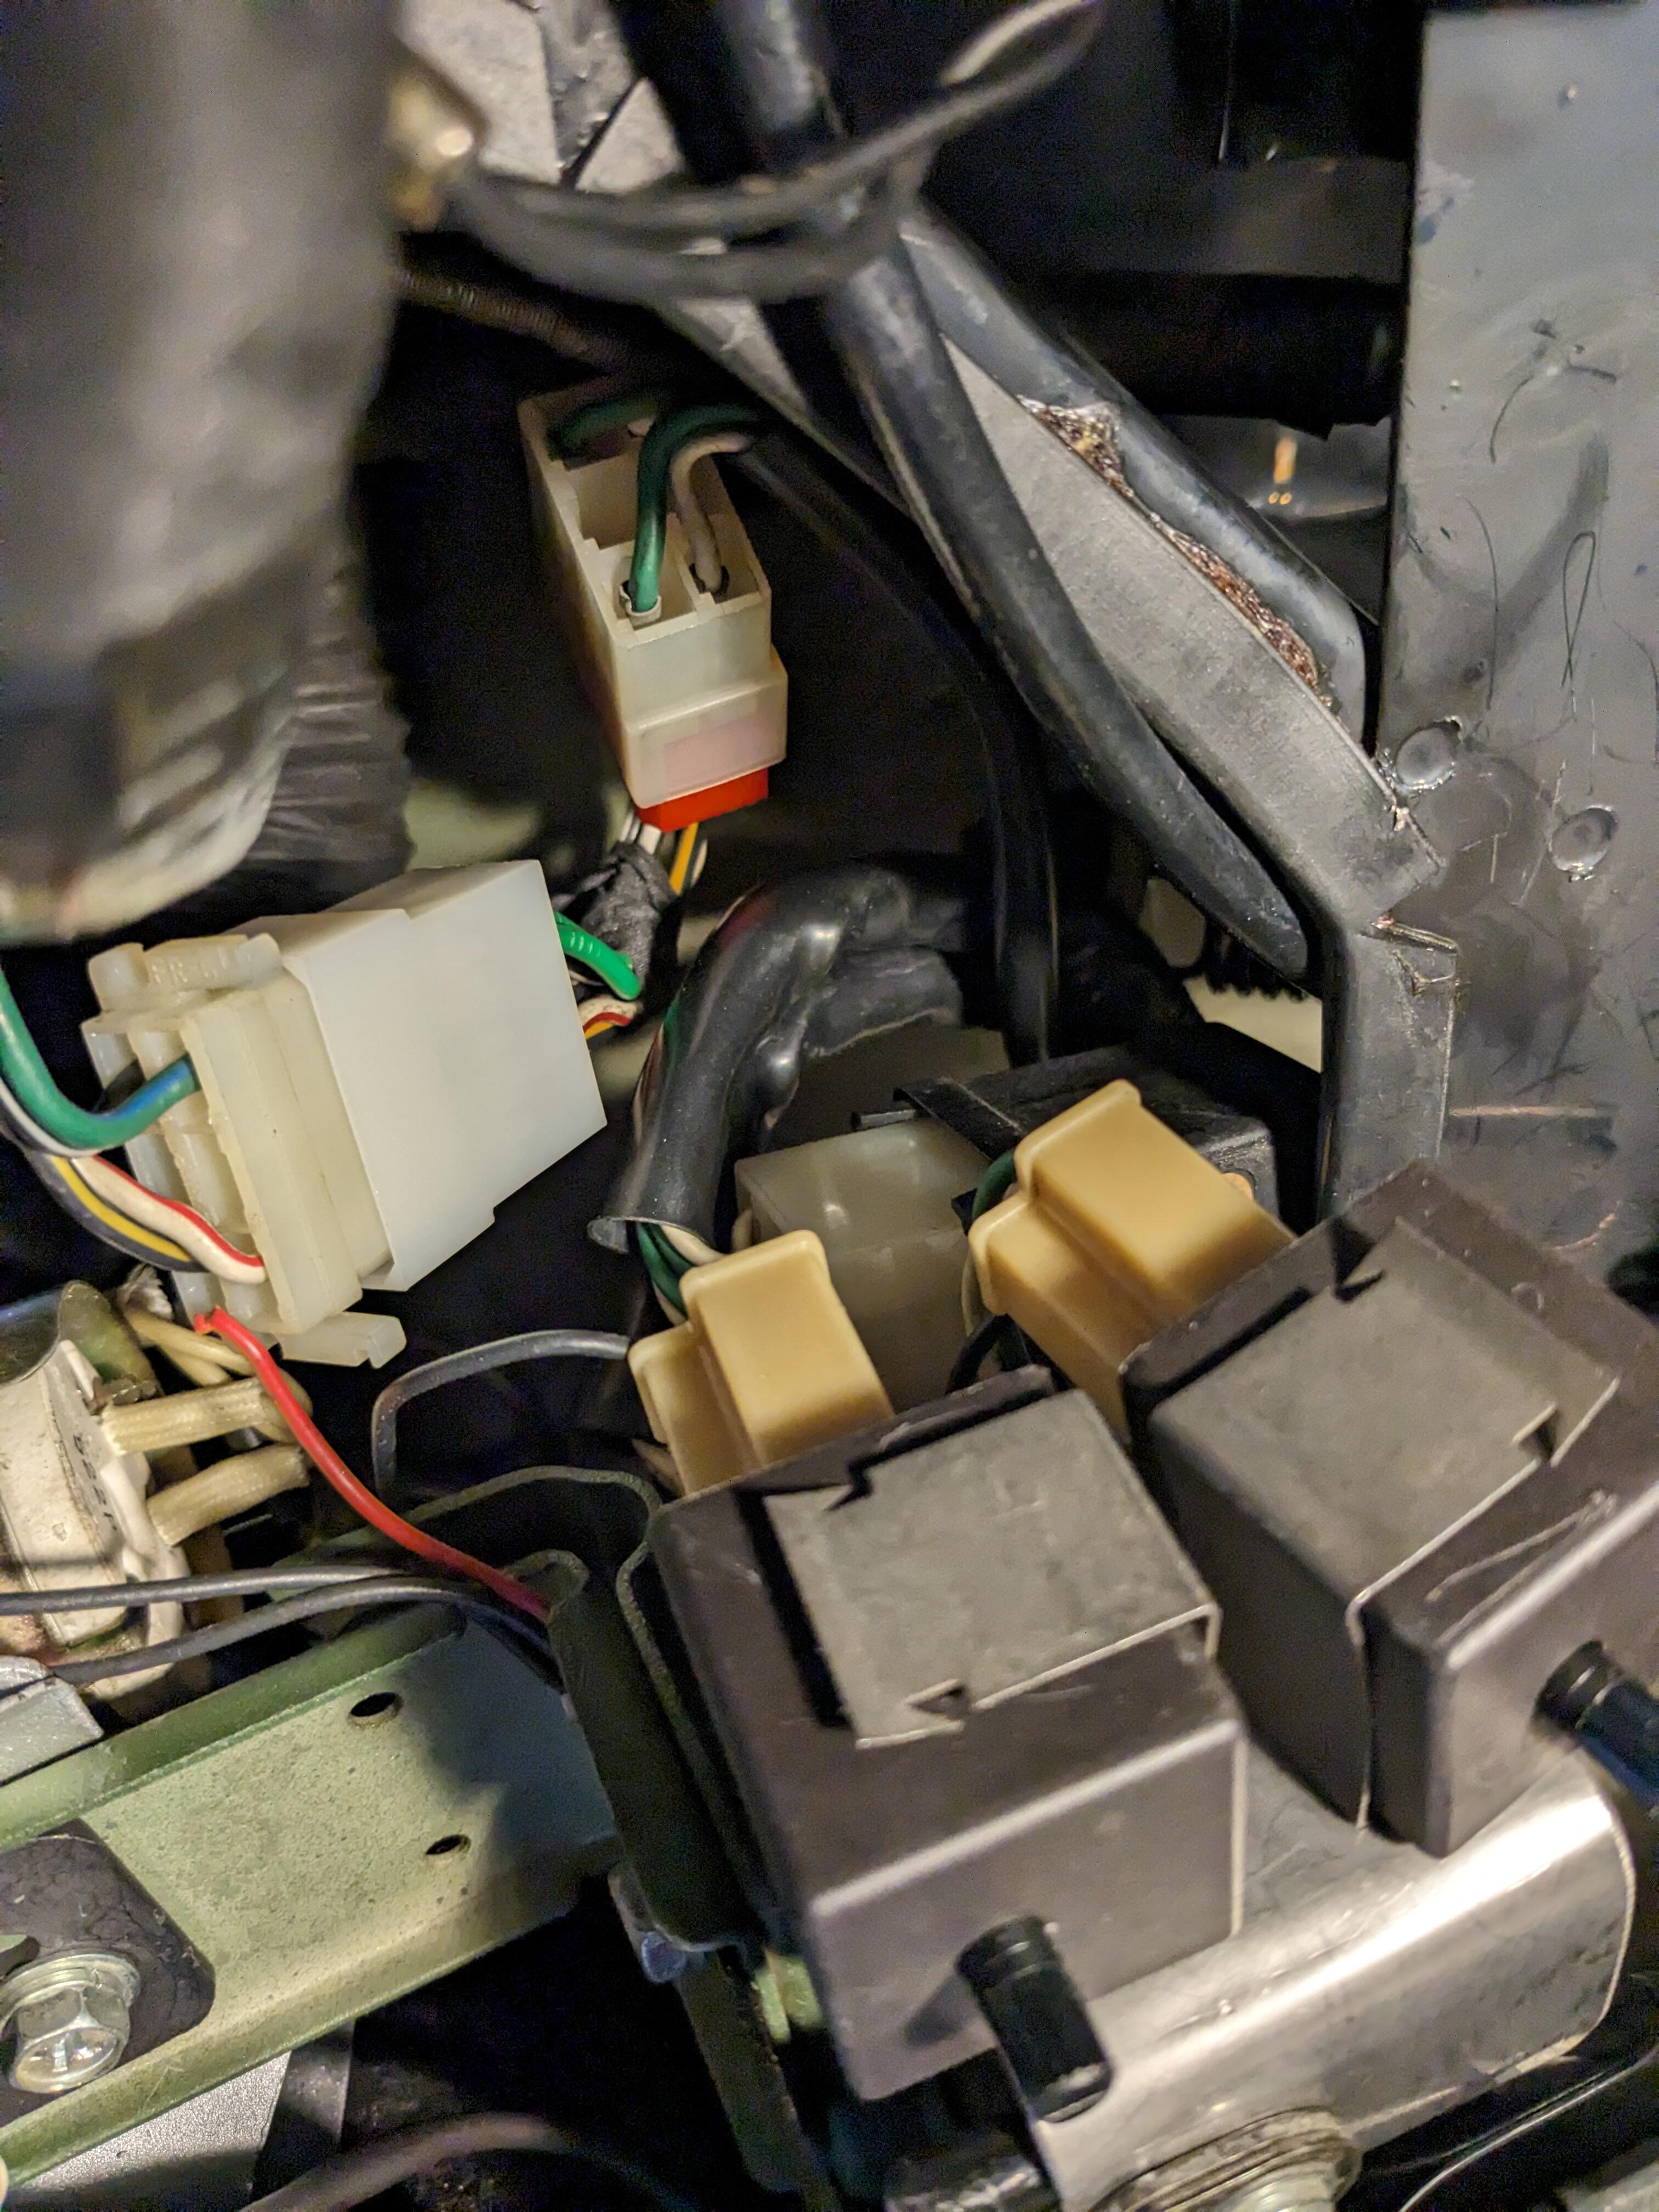
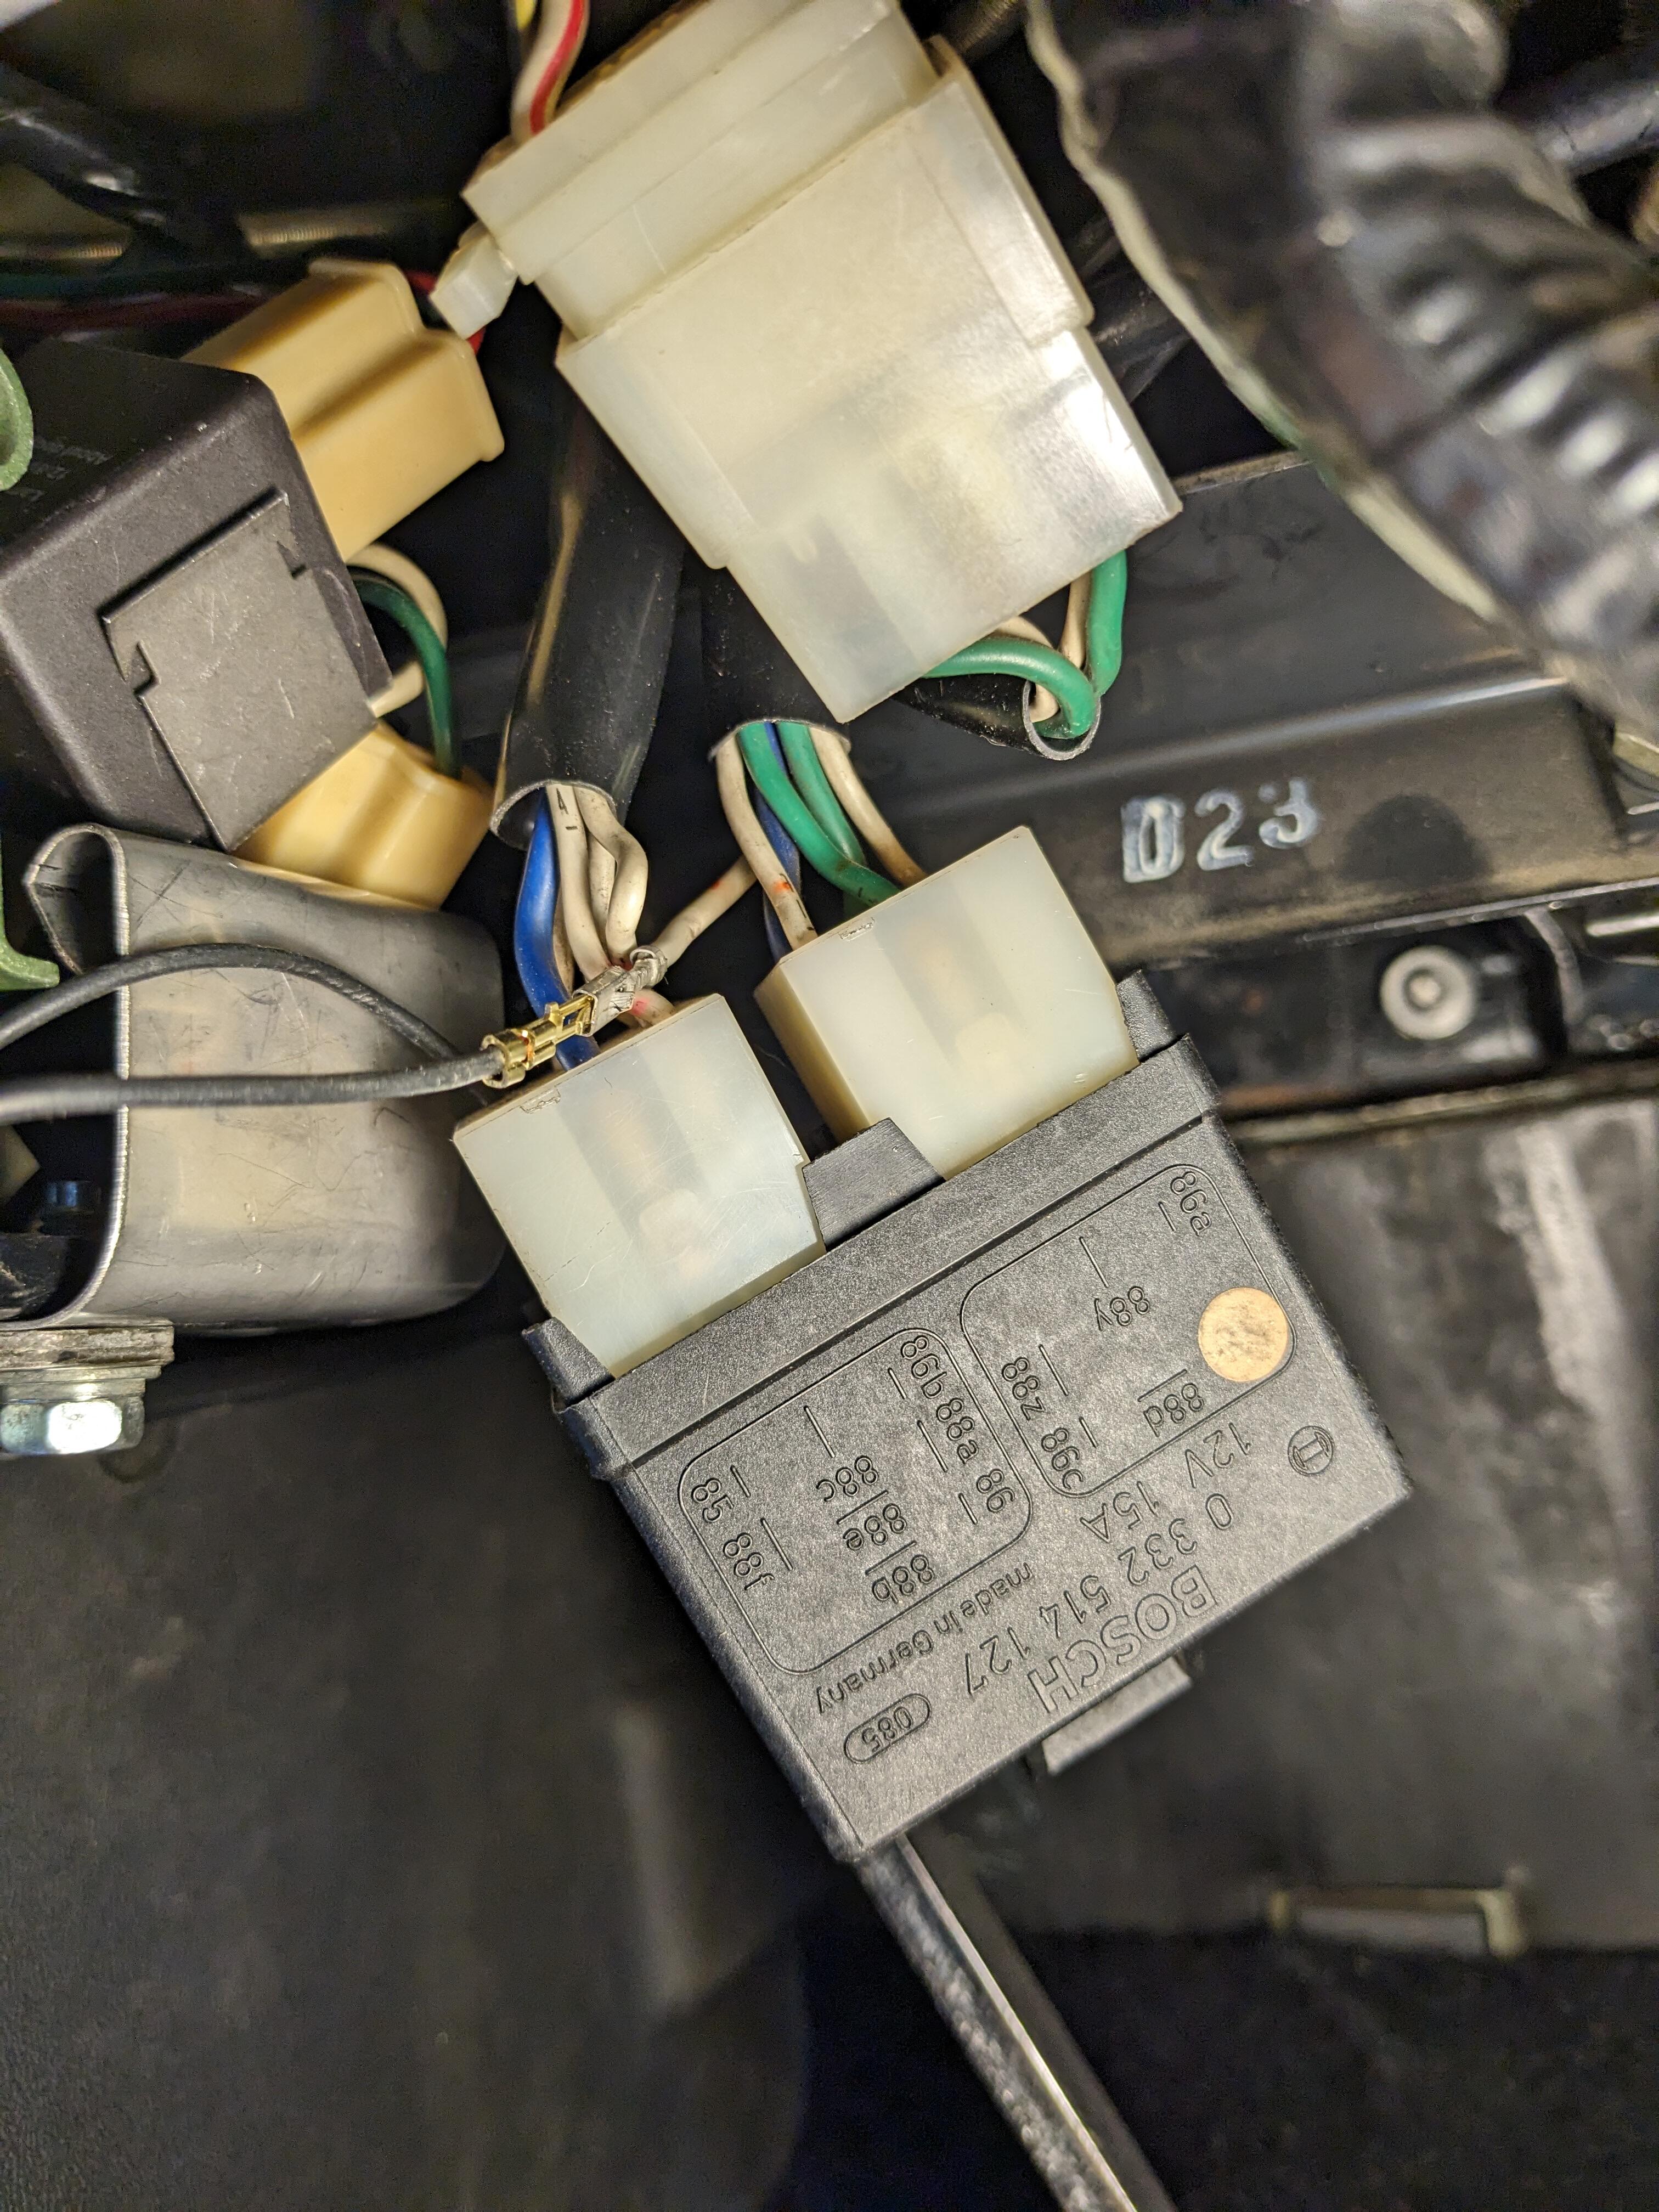
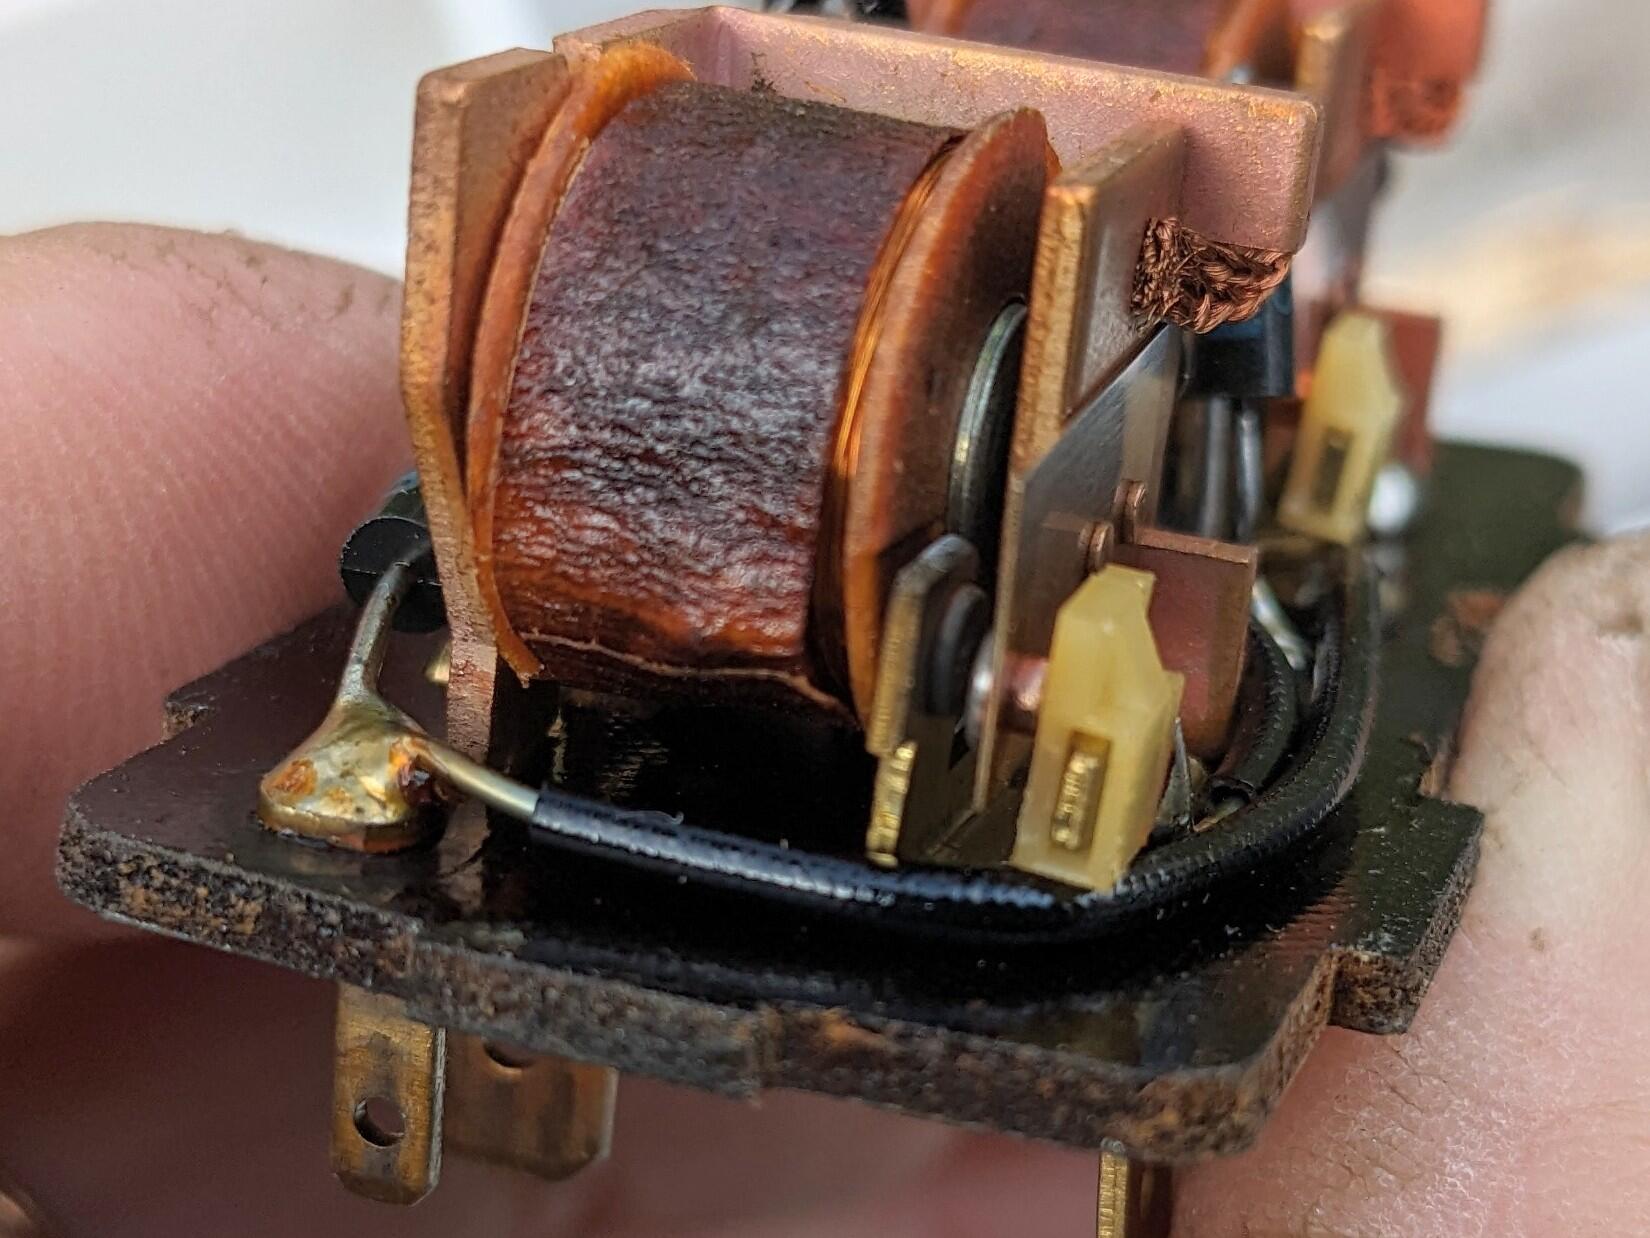
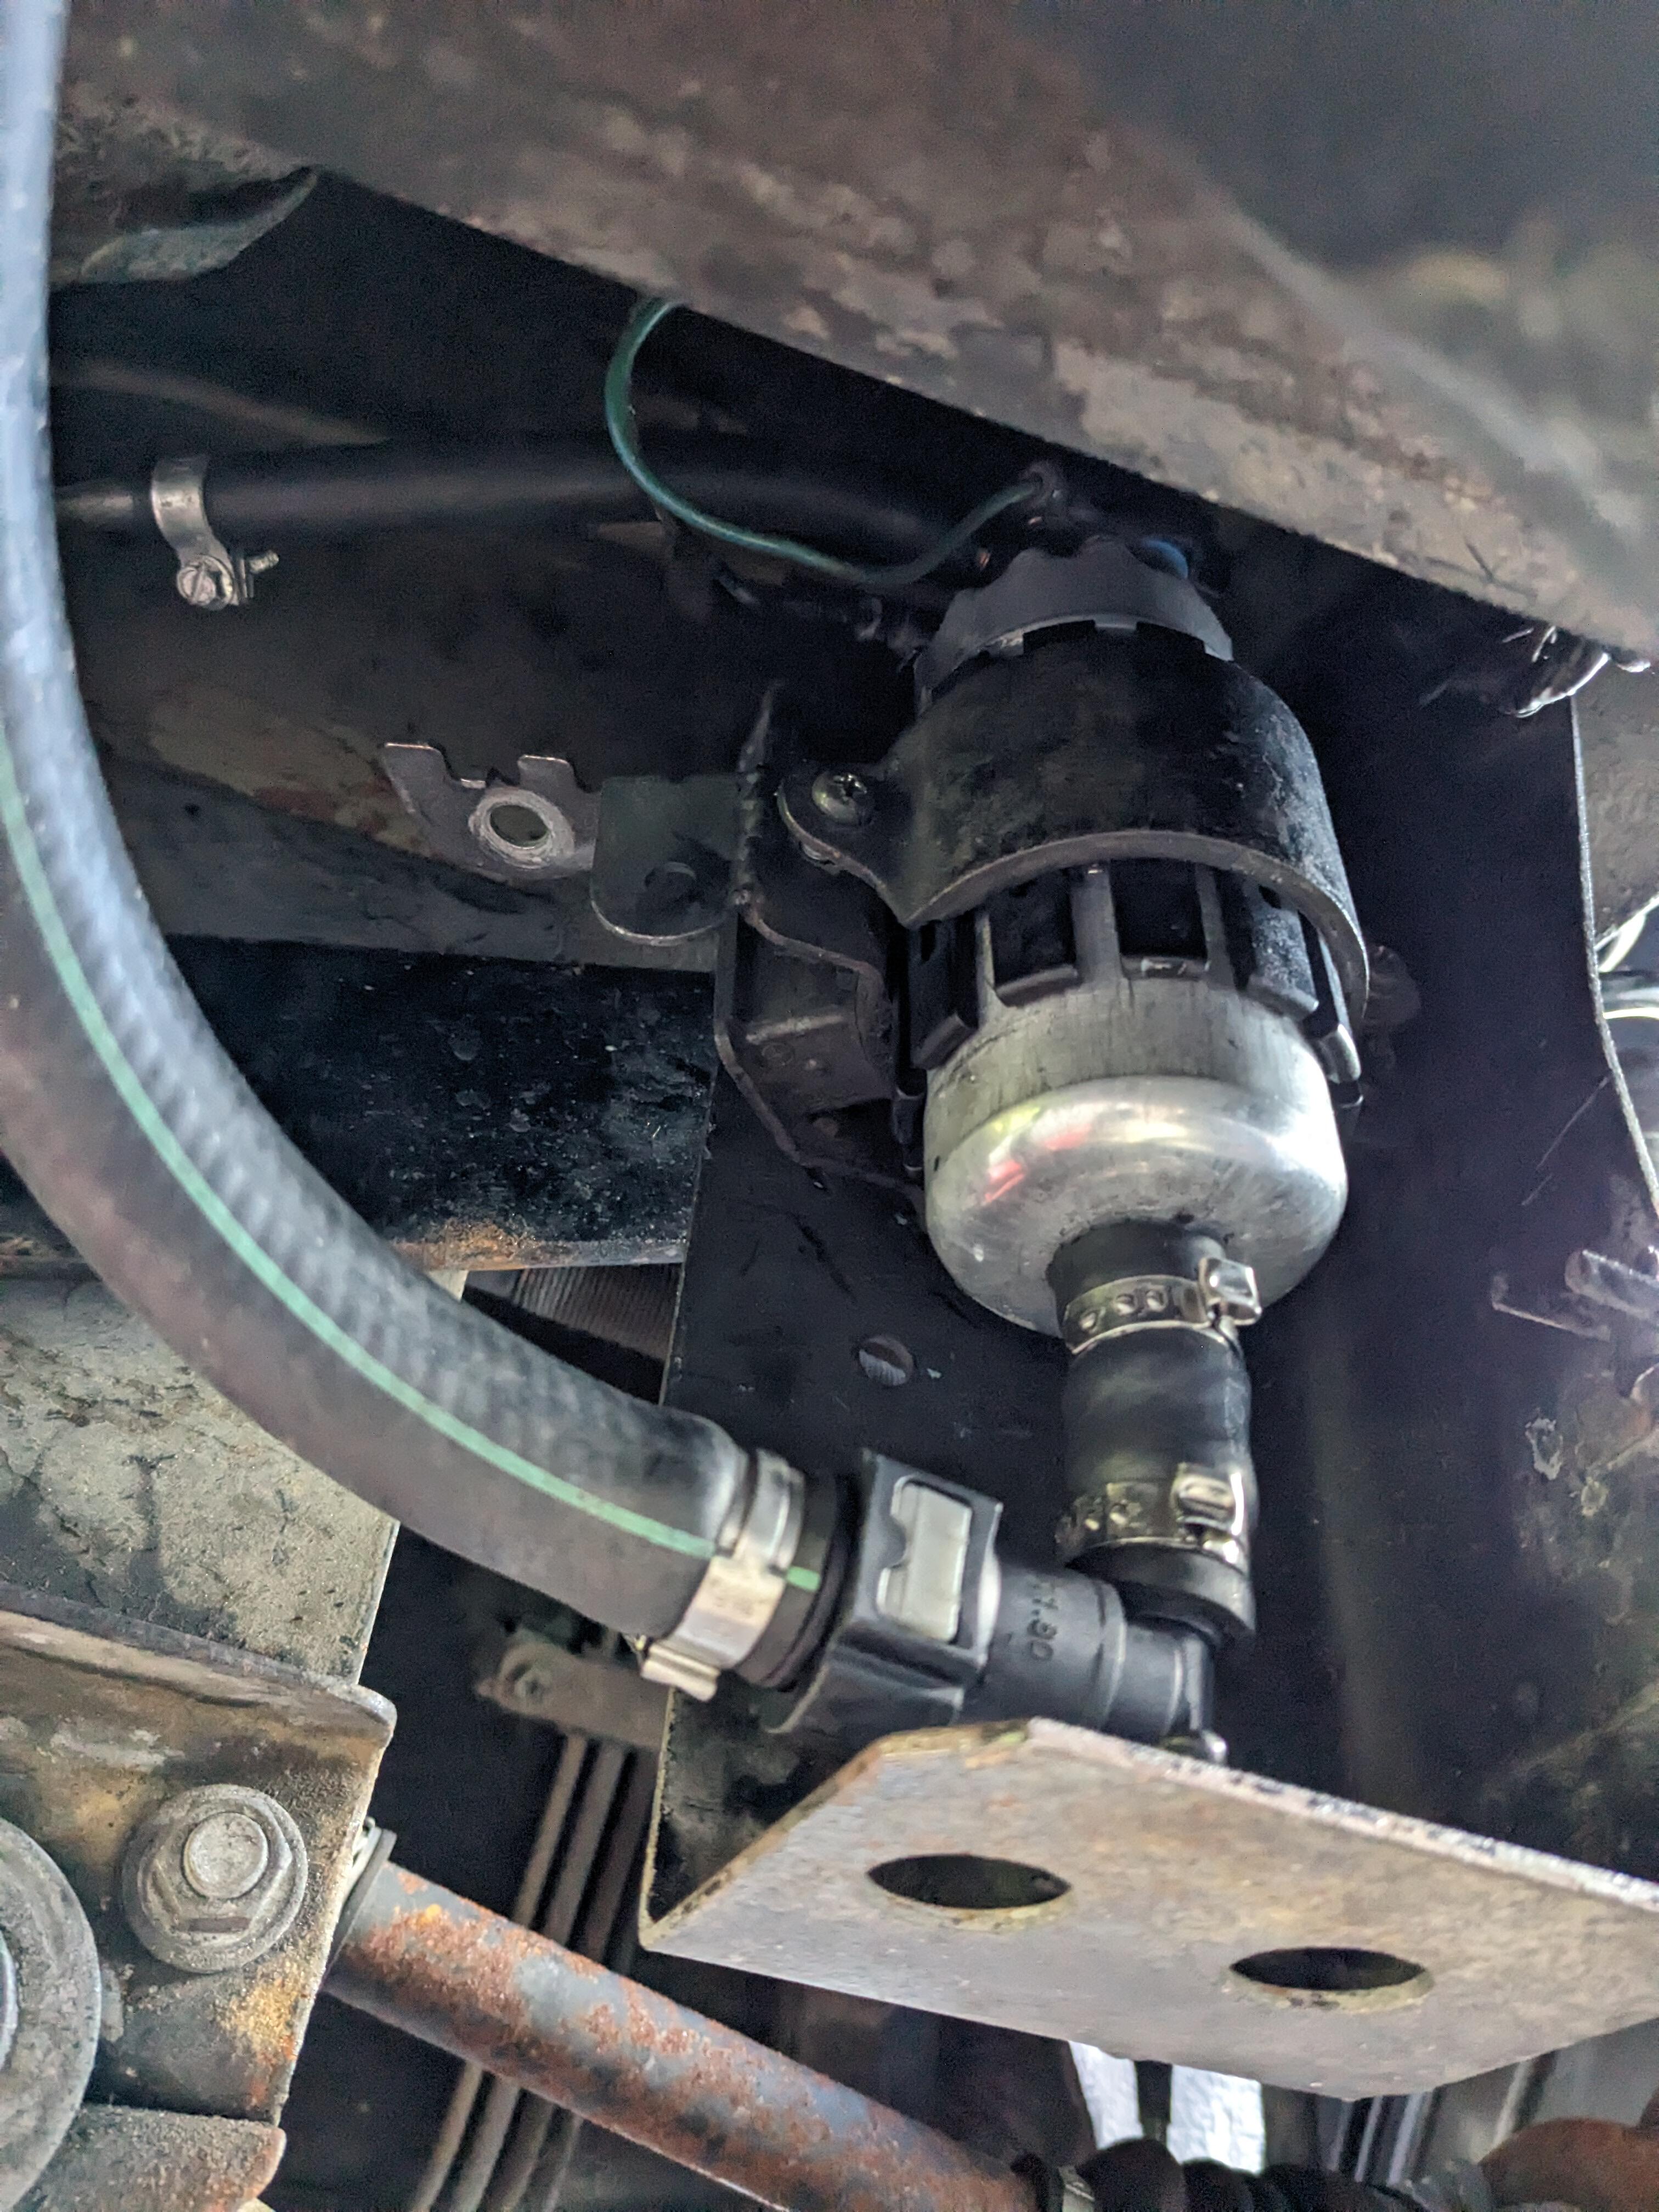
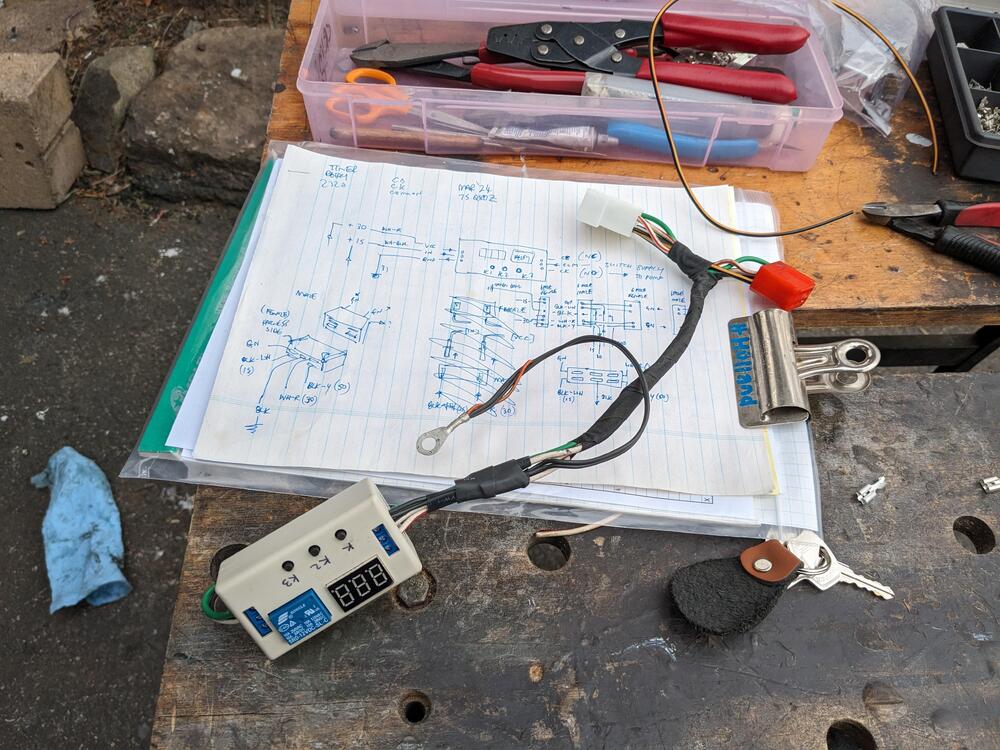
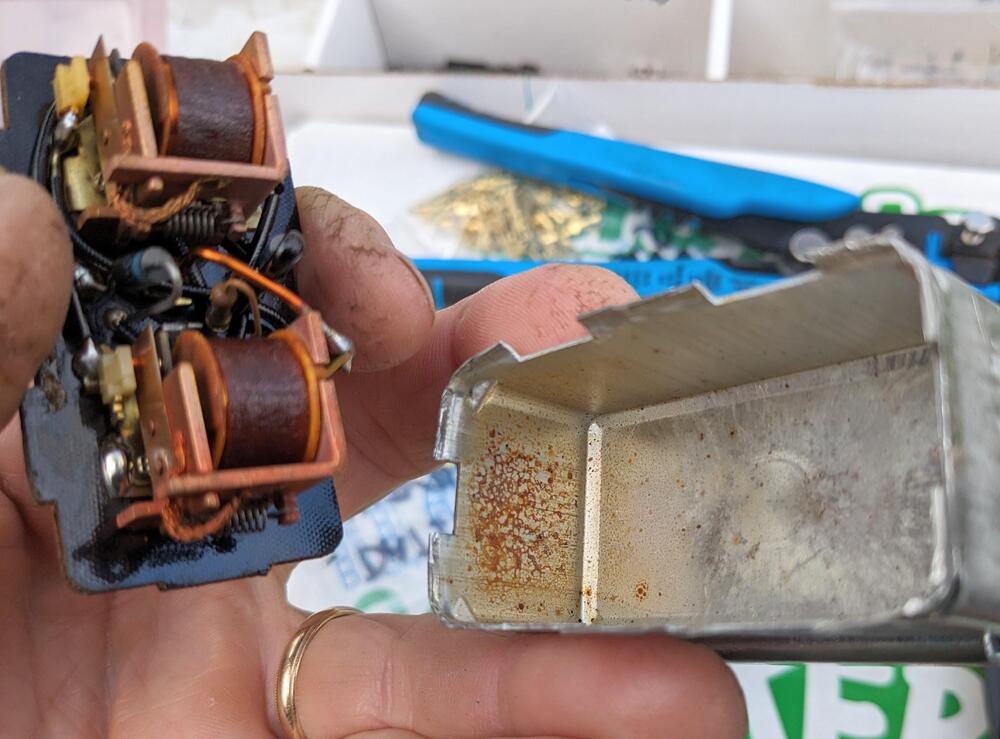
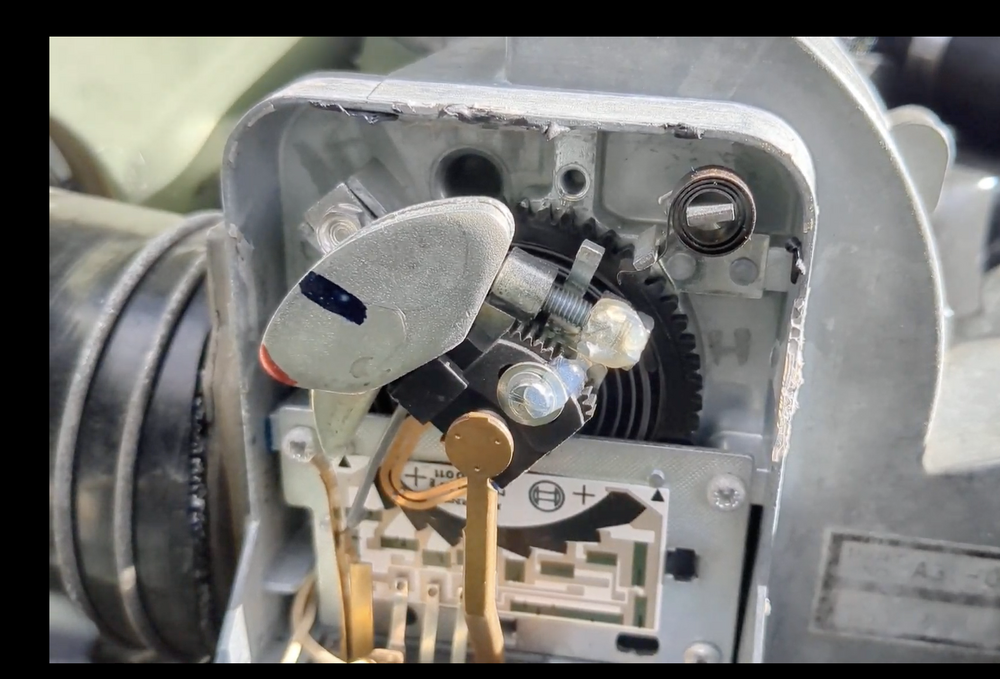
Swapped out the stock relay for the Fiat one, after moving the 85 pin to the other relay socket Thanks again, @Zed Head for sharing your experience with the relay failing. Took the old relay apart, to see how it looked inside: Contacts are crusty, definitely didn't smell as cooked as I thought it might, given how it was cutting in and out. The contact plate definitely looks rough. Since I was under the dash, I started figuring out the wiring for the pump primer circuit. It will tuck nicely up under the steering column, and I will make it insertible, so I can remove/delete it without harming the factory harness. Started right up & hasn't faltered since. I do need to add a pulse damper back, as it doesn't sound as clean as it did at idle before I removed it. Instead of putting the stock one back, I ordered one that will screw into the ORB-8 fitting on the protunerZ fuel rail.


-
Looking back through some earlier threads, I see that the Fiat L-Jet control relay I have on hand (...127) has the same pinout except for the 85 ground location. I'll try running that while I figure out whether it's worth making a more drastic change, given that all this will be coming out int he next year or so.

-
Awesome! That makes sense, and would explain why the pump didn't get louder.
-
Great idea. I thought about checking the pump control circuit, and didn't get to it. I'll figure out a way to monitor the voltage at the pump connections & see what I get.
-
The thing is, if that were the cause, I would expect the pump to start whining as the restriction takes effect - I manually crimped the feed hose with the engine running and the pump noise increases significantly. when the symptom manifests, there is no change in the pump sound, and the fact that blipping the throttle & holding an steady elevated idle can 'pop' the pressure back up. Makes no sense to me .
-
EDIT - Note that the cause was the EFI system relay failing Tried to take the Z out for dinner last night, and only got a block from the house, no throttle response, engine stalled. Restarted readily, but would only idle. WBO2 indicates that the system goes waaay lean when any demand is placed on the delivery system. Today I looked it over. Again, the car would idle fine - but - sometimes (ugh) the pressure (mechanical gauge after filter, before rail) drops off until the engine stalls. Blipping the throttle would sometimes make the regulated pressure pop back up. YT Vid What is bugging me is what the heck in the system could cause the pressure to drop off & then pop back up? I'm not familiar with the workings of the air flap meter to understand if there is an element of it that can shut off fuel delivery. I replaced the fuel filter to eliminate a possible flow restriction. After that, I swapped out the fuel pump, no change. Removed the pulse damper, no change. I pulled the cover off the AFM, couldn't see anything out of order, checked the connector & pins. When the pressure drops off, the pump doesn't get louder, so I don't think it's a flow restriction with the tank or feed side. By the end of all my futzing the car was running normally again. Very frustrating, since I haven't found anything concrete. Did remember to put the protector plate back in finally. Couldn't find the original screws though
-
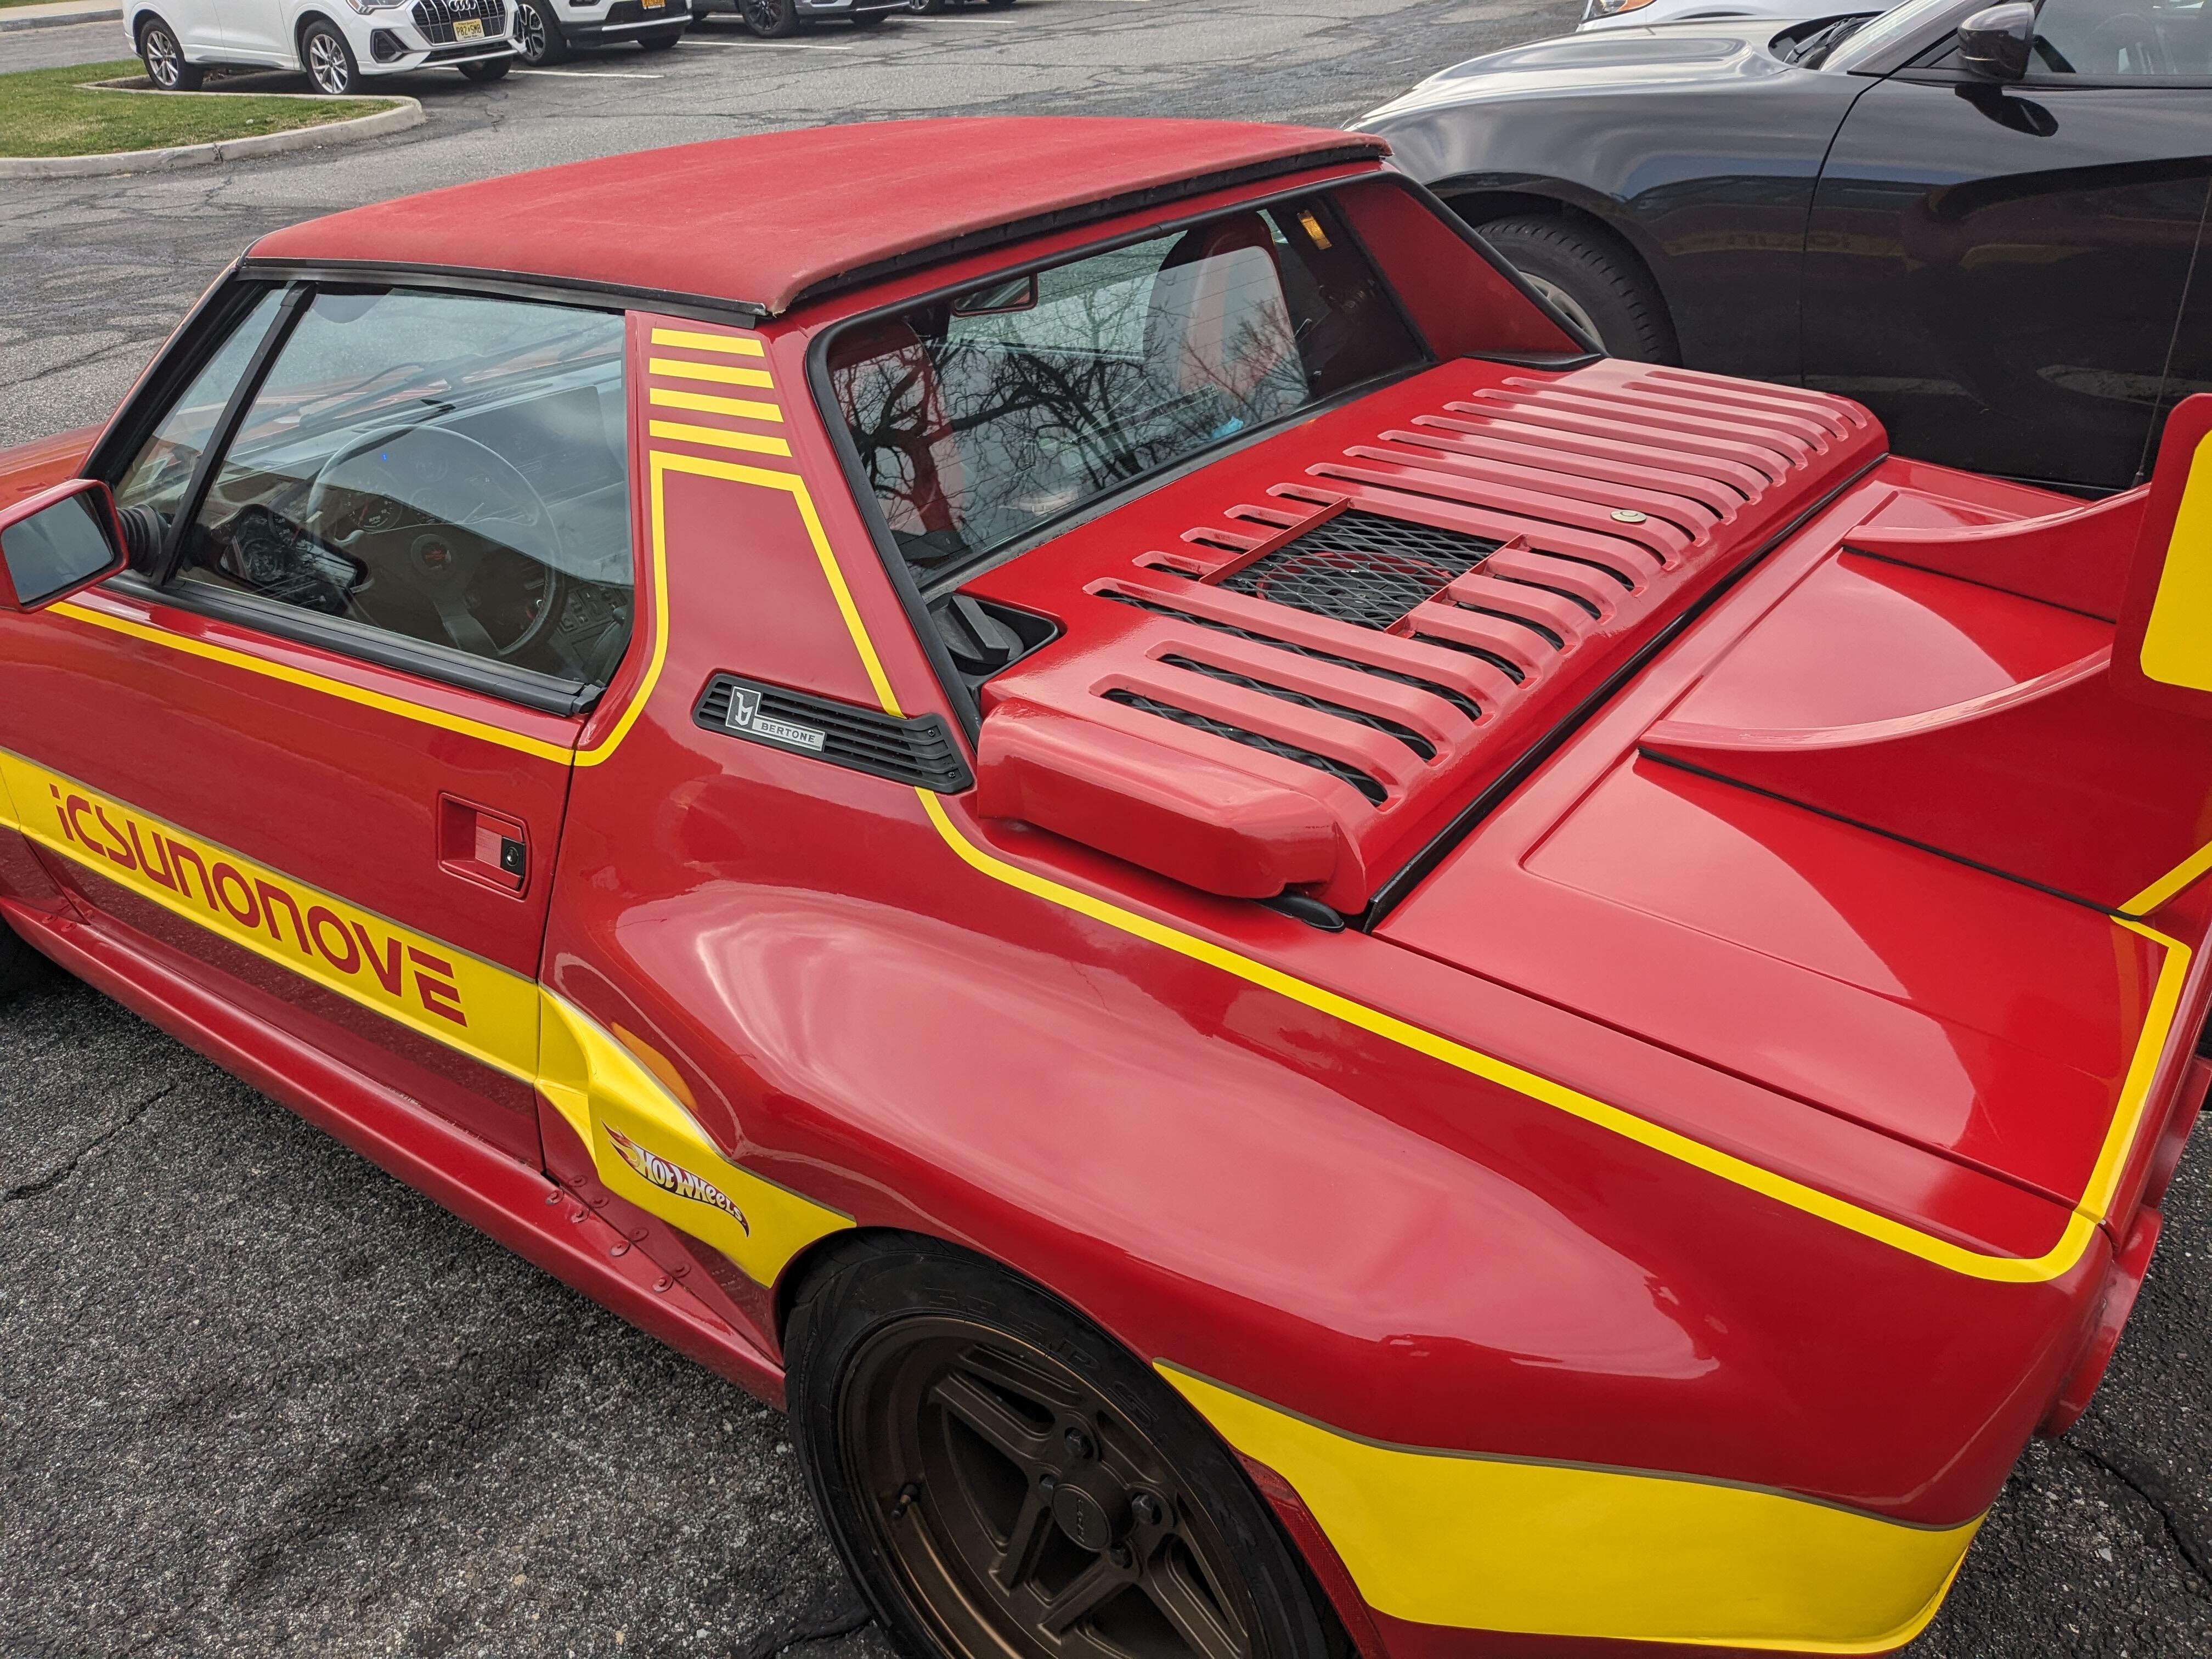
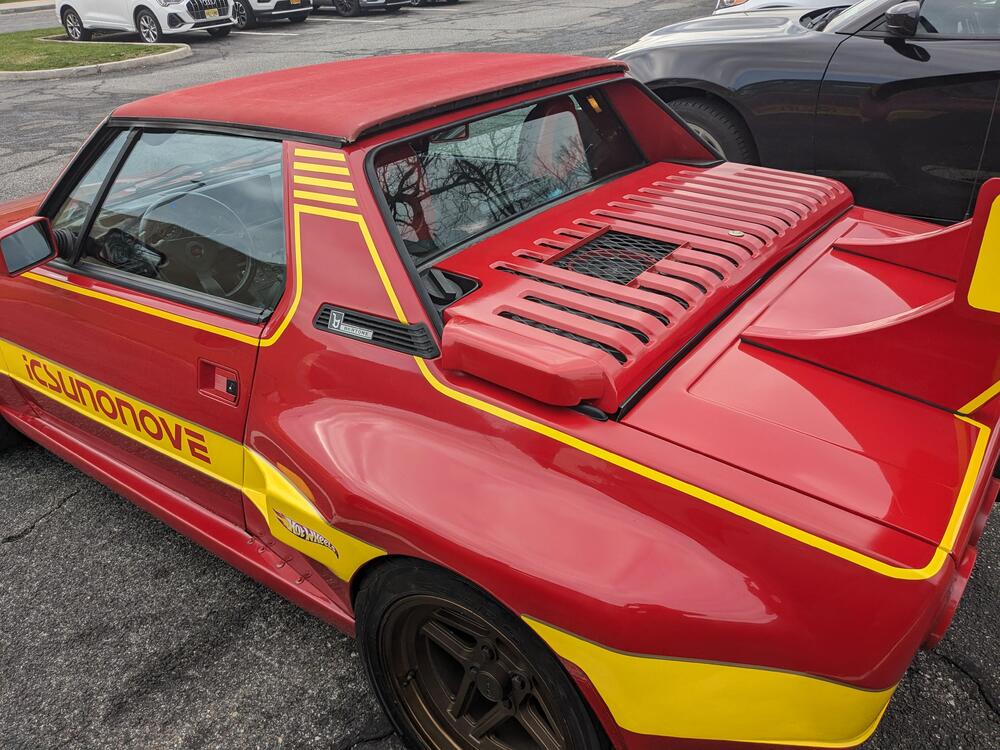
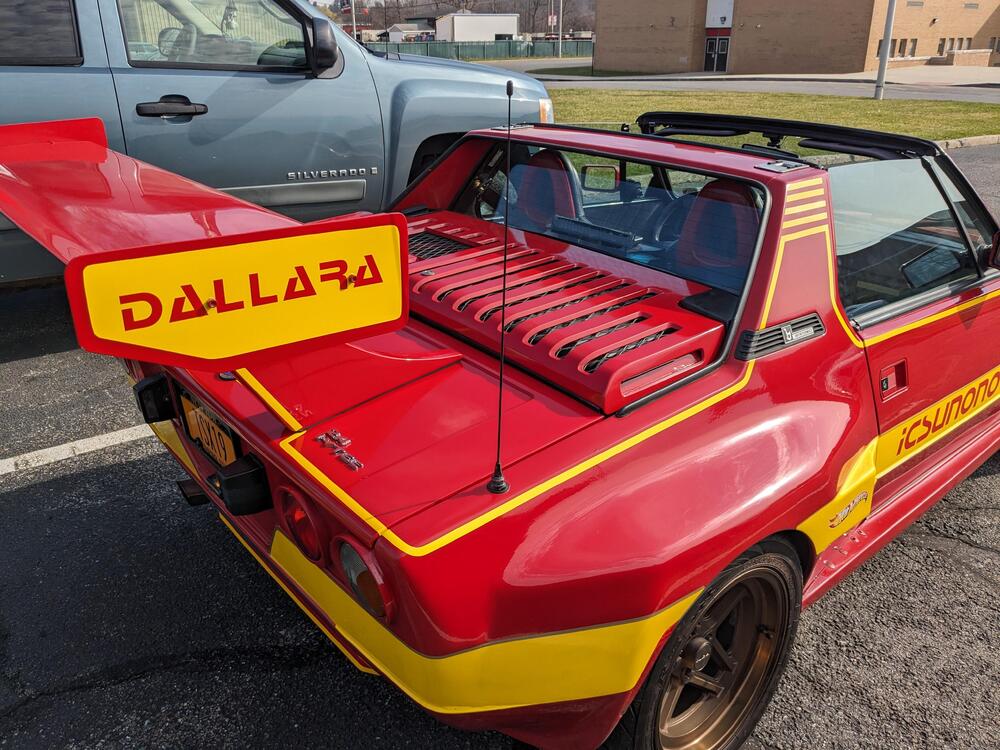
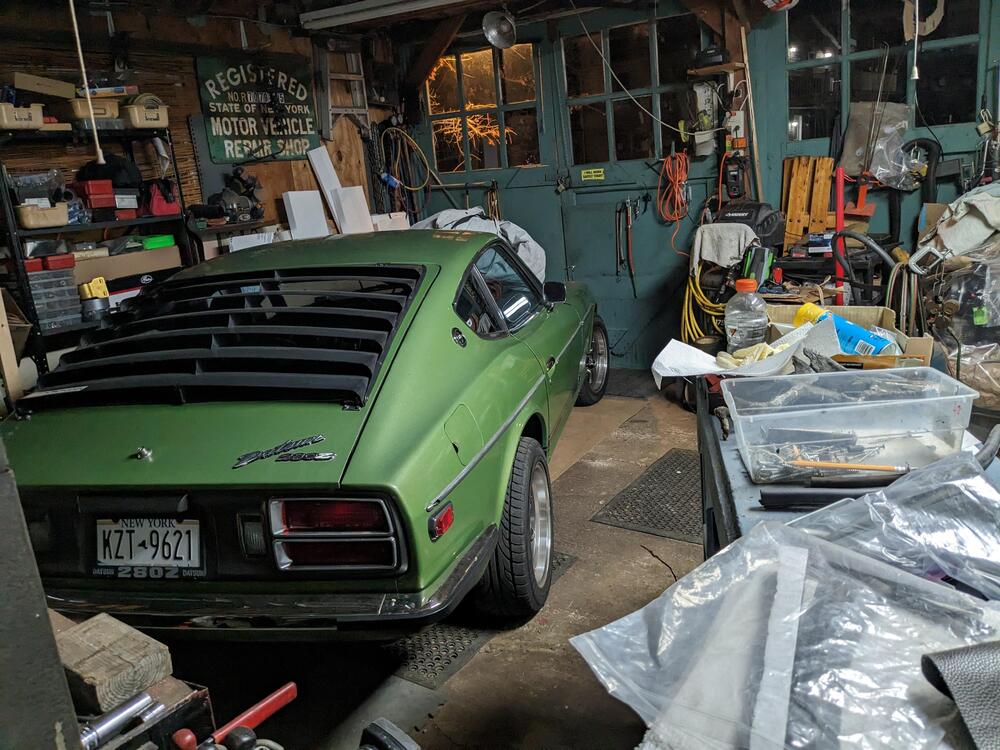
Removed and remade the targa, 1/4 and trunk striping - the coating on it had peeled since I last did them, 3M tape too.

-
I am. I will 😁
-
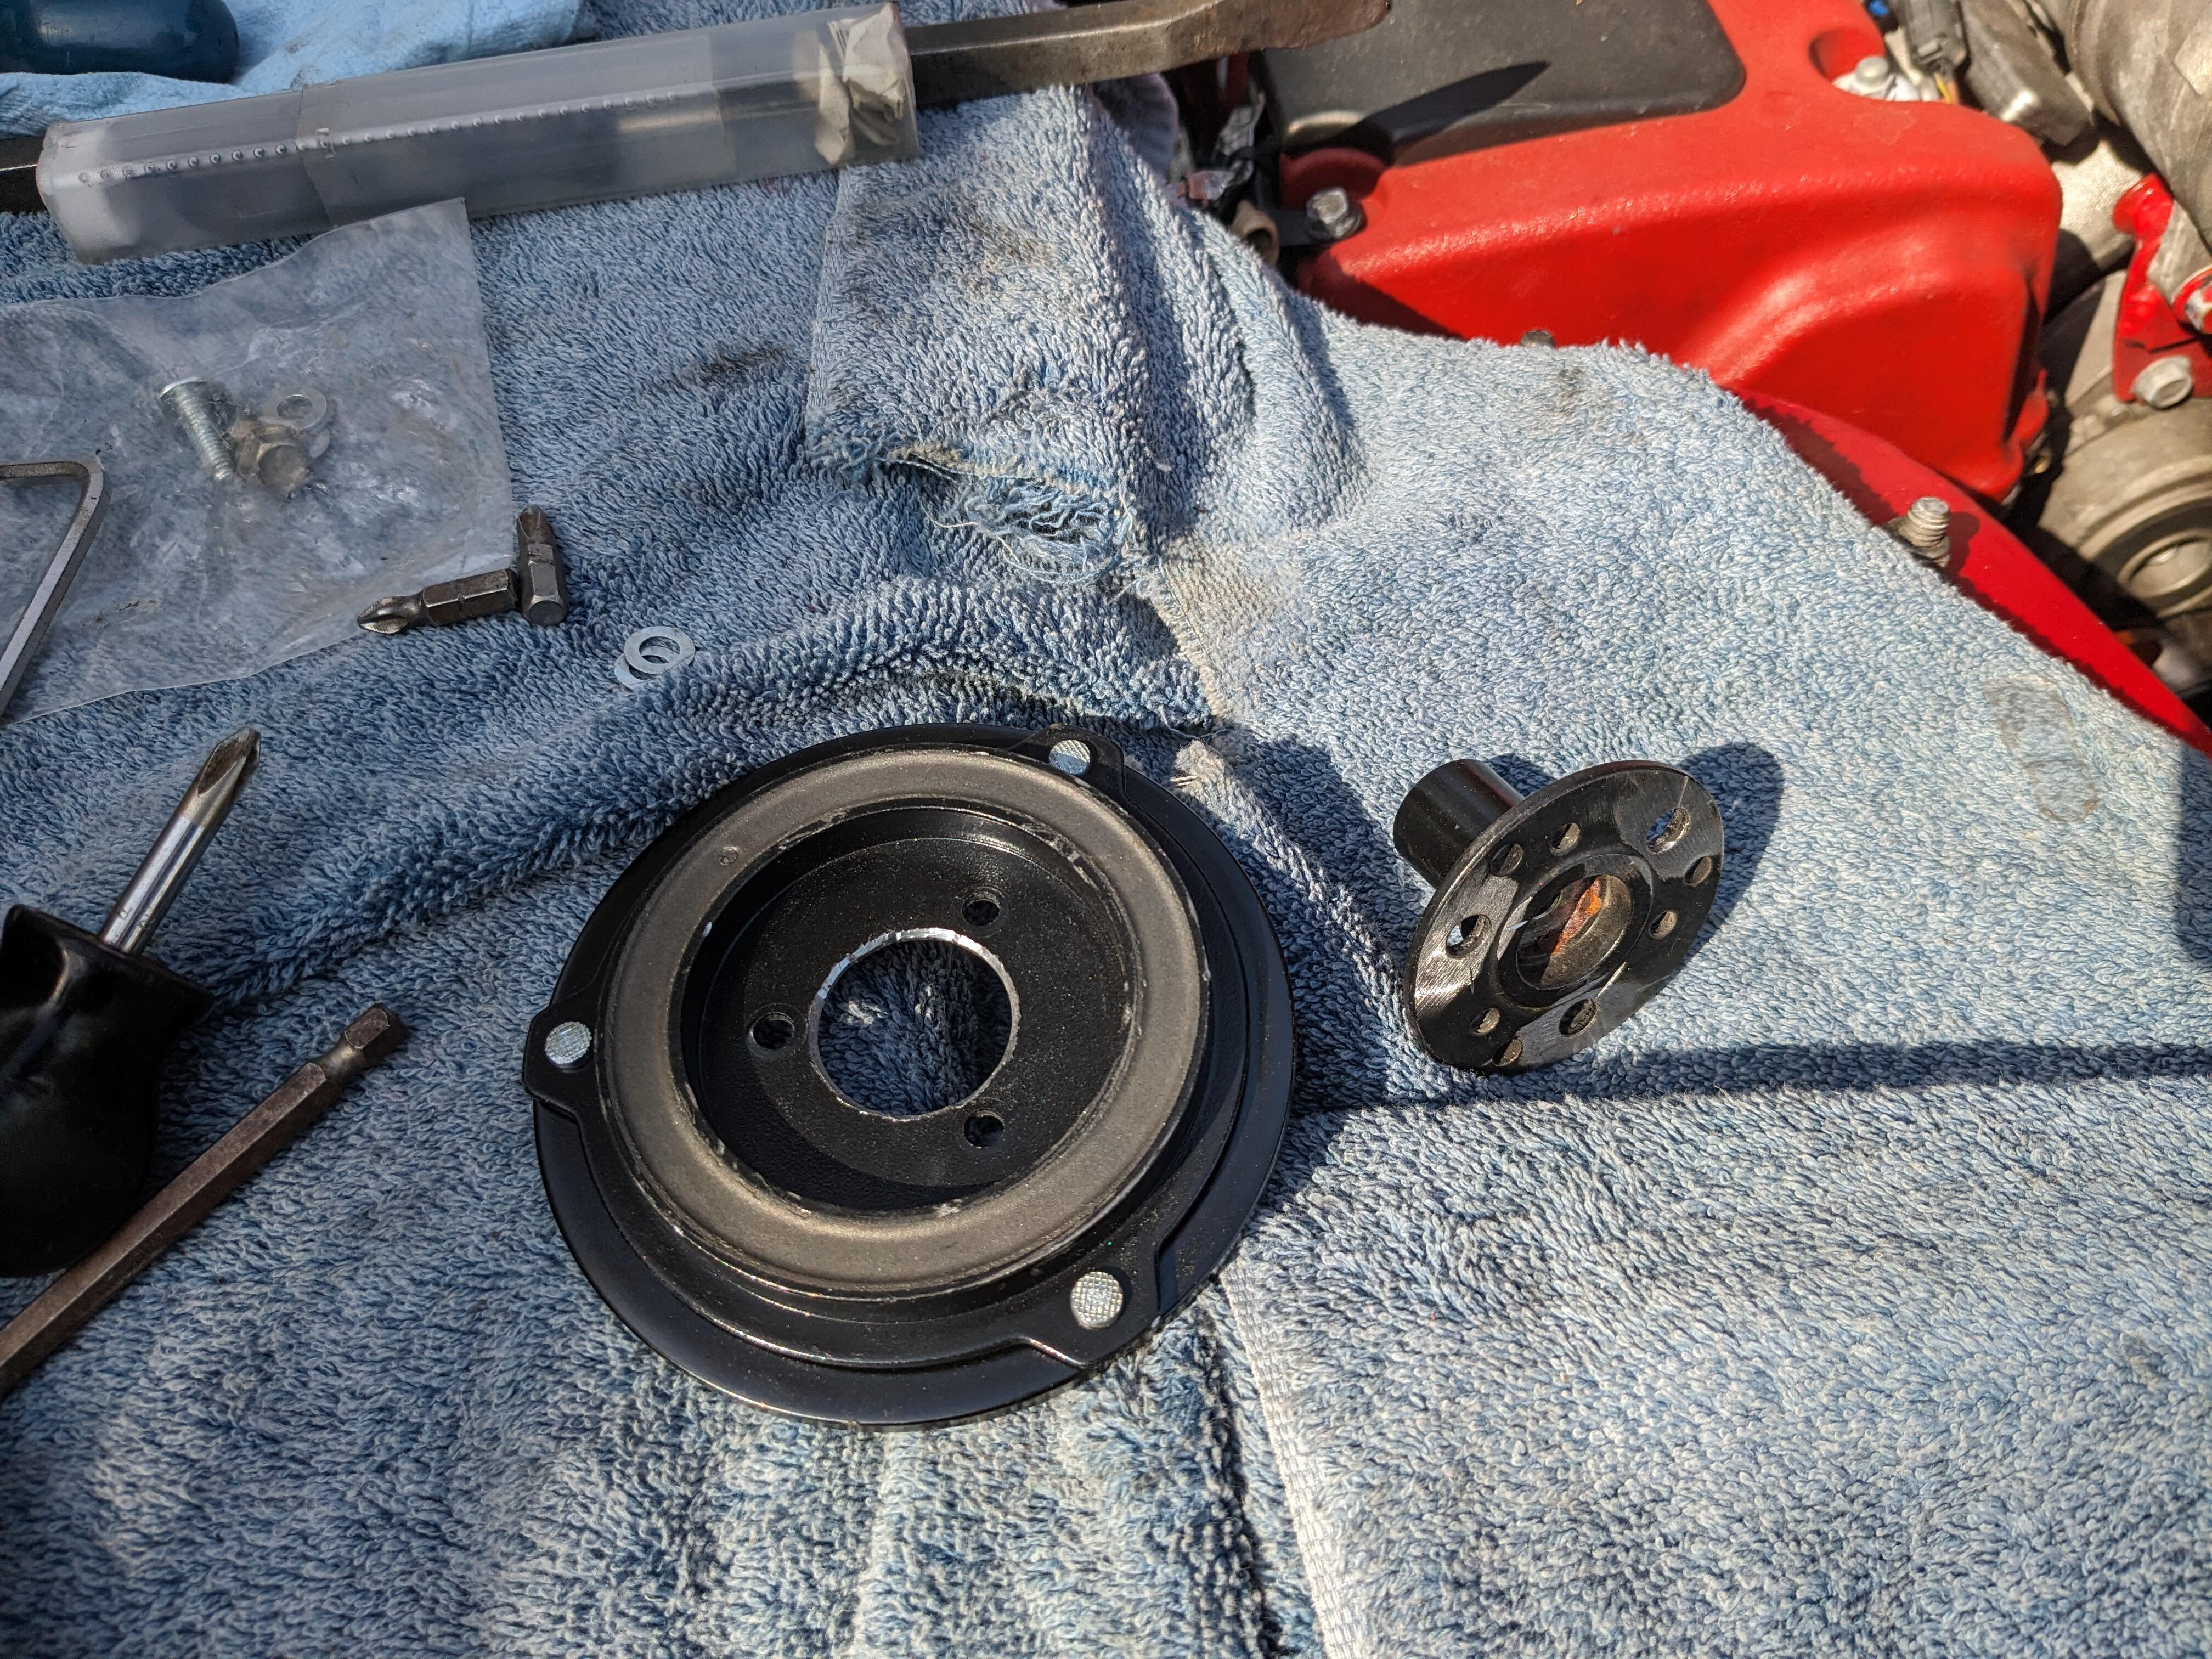
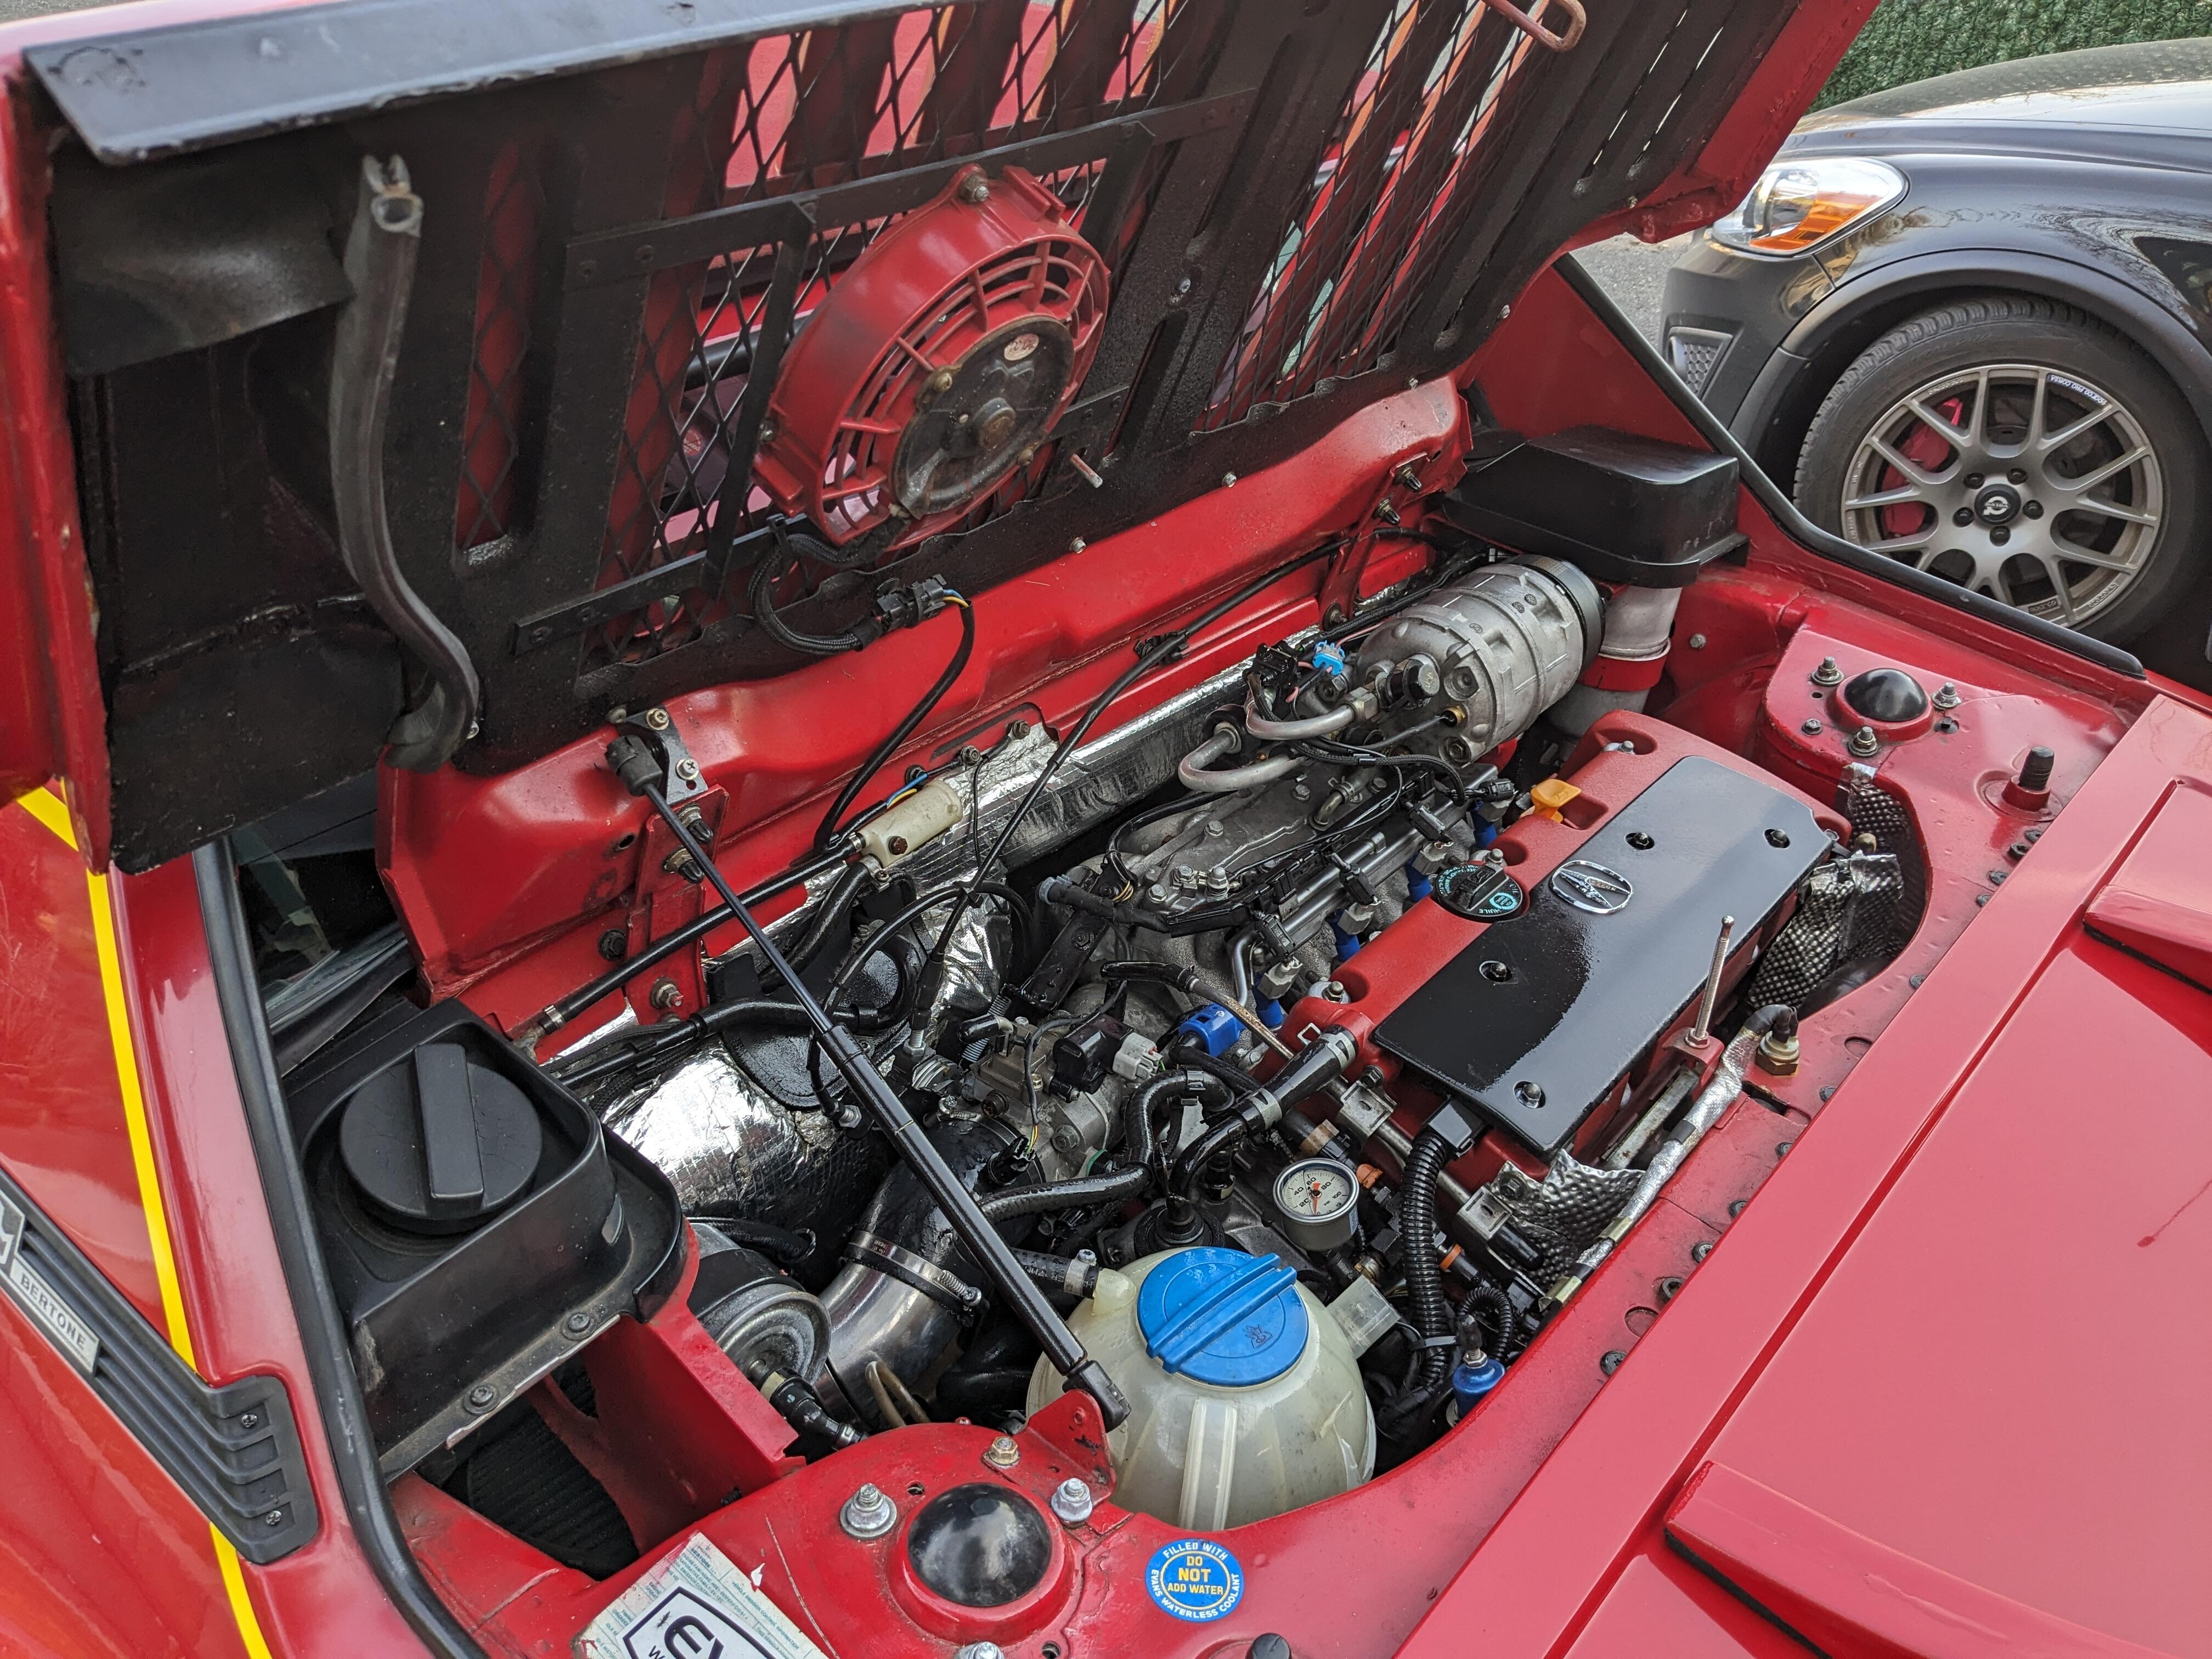
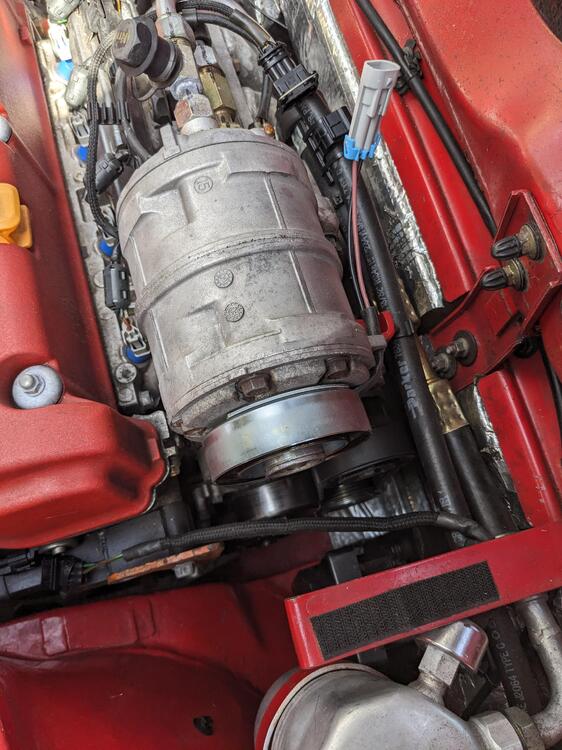
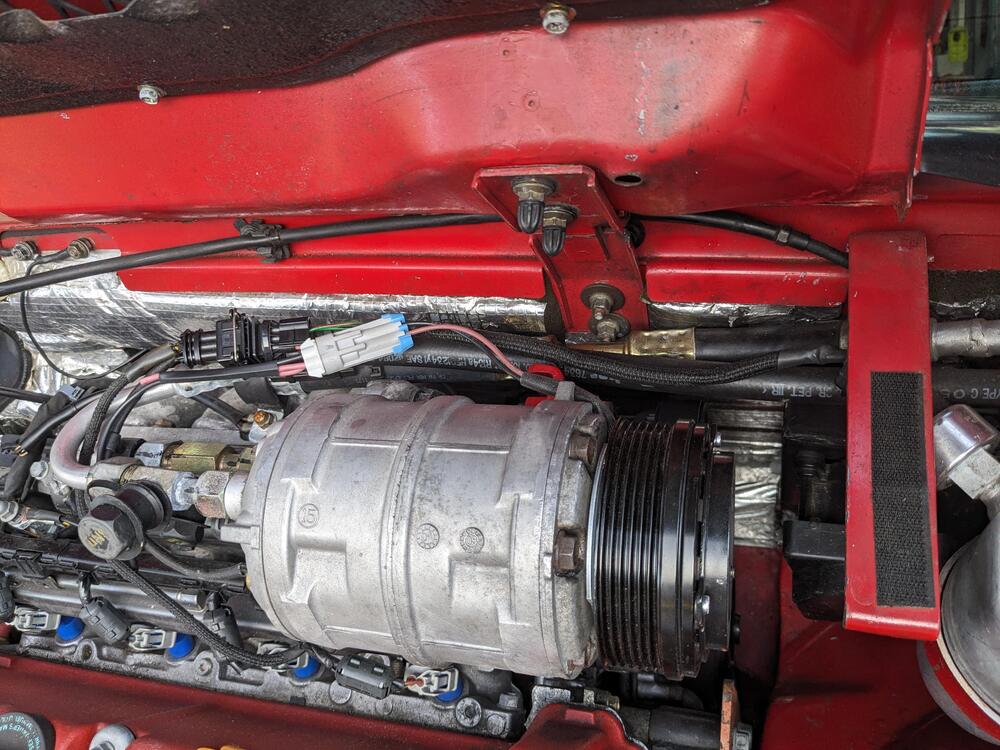
Replaced the ac clutch today. I bought one meant for a Mini, so I had to change the harness connection, and modify the outer magnet plate hub, the Mini version had a smaller OD compressor shaft. Also had to redrill the magnet mounting plate. Why might ask why go to all the bother, it was because the Volvo factory clutch is over $250, if you can find one, vs. $50 for any number of readily available sanden clutches . When I looked online, for ones that might fix the Volvo DCH compressor, I was focused on the bearing depth and dimensions. New belt length is (6PK)1650, 25mm shorter due to reduced OD of the pulley. Took some back & forth to get the plate clearance in the .010-.015" clearance range. Fortunately I had a stash of M4 stainless washers Engine bay needs some detailing, the body shop left my car out in the rain, uncovered when they had it last fall. I NEVER did that - if it ever got wet, I drove it until it was dry back there.


-
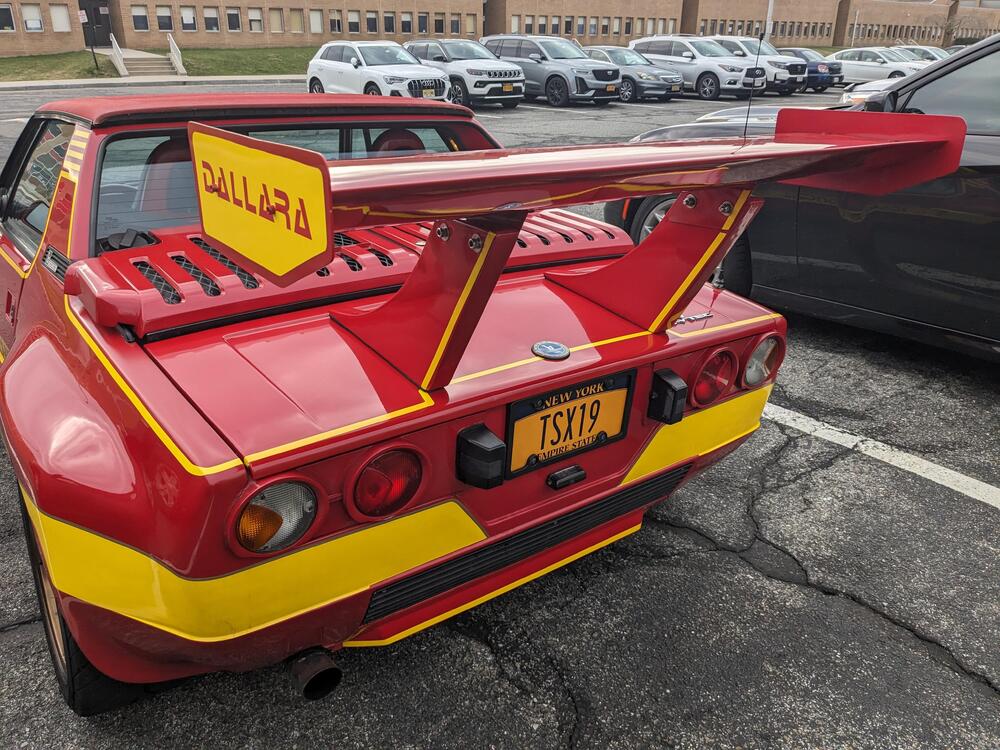
Working on the X1/9... I Installed the new frunk inner cable after school, fairly uneventful install. To access the lock screw on the latch, I had to remove the right cover mesh, undo the latch, & move it around some to get to the lock screw. Today on my lunch break I ran the thin 3M tape down the fender, around the nose and back up to the pass door edge. I think it looks OK without the wide stripe on the nose, at least I feel that way today.... After school I removed the spoiler, located the correct push pins & primed & painted them to match. I don't like them standing out more than necessary. More tomorrow
-
Thank you Steve. Unfortunately it's going to be sometime before the next major update on the Z - I need to get the X1/9 prepped for BaT, and get some more tidying taken care of beforehand. So, keeping track of what happens in-between helps me😁 Z is back inside, I'm going to drive the X1/9 while the weather is clear for a couple days, also to make sure all is good with it

-
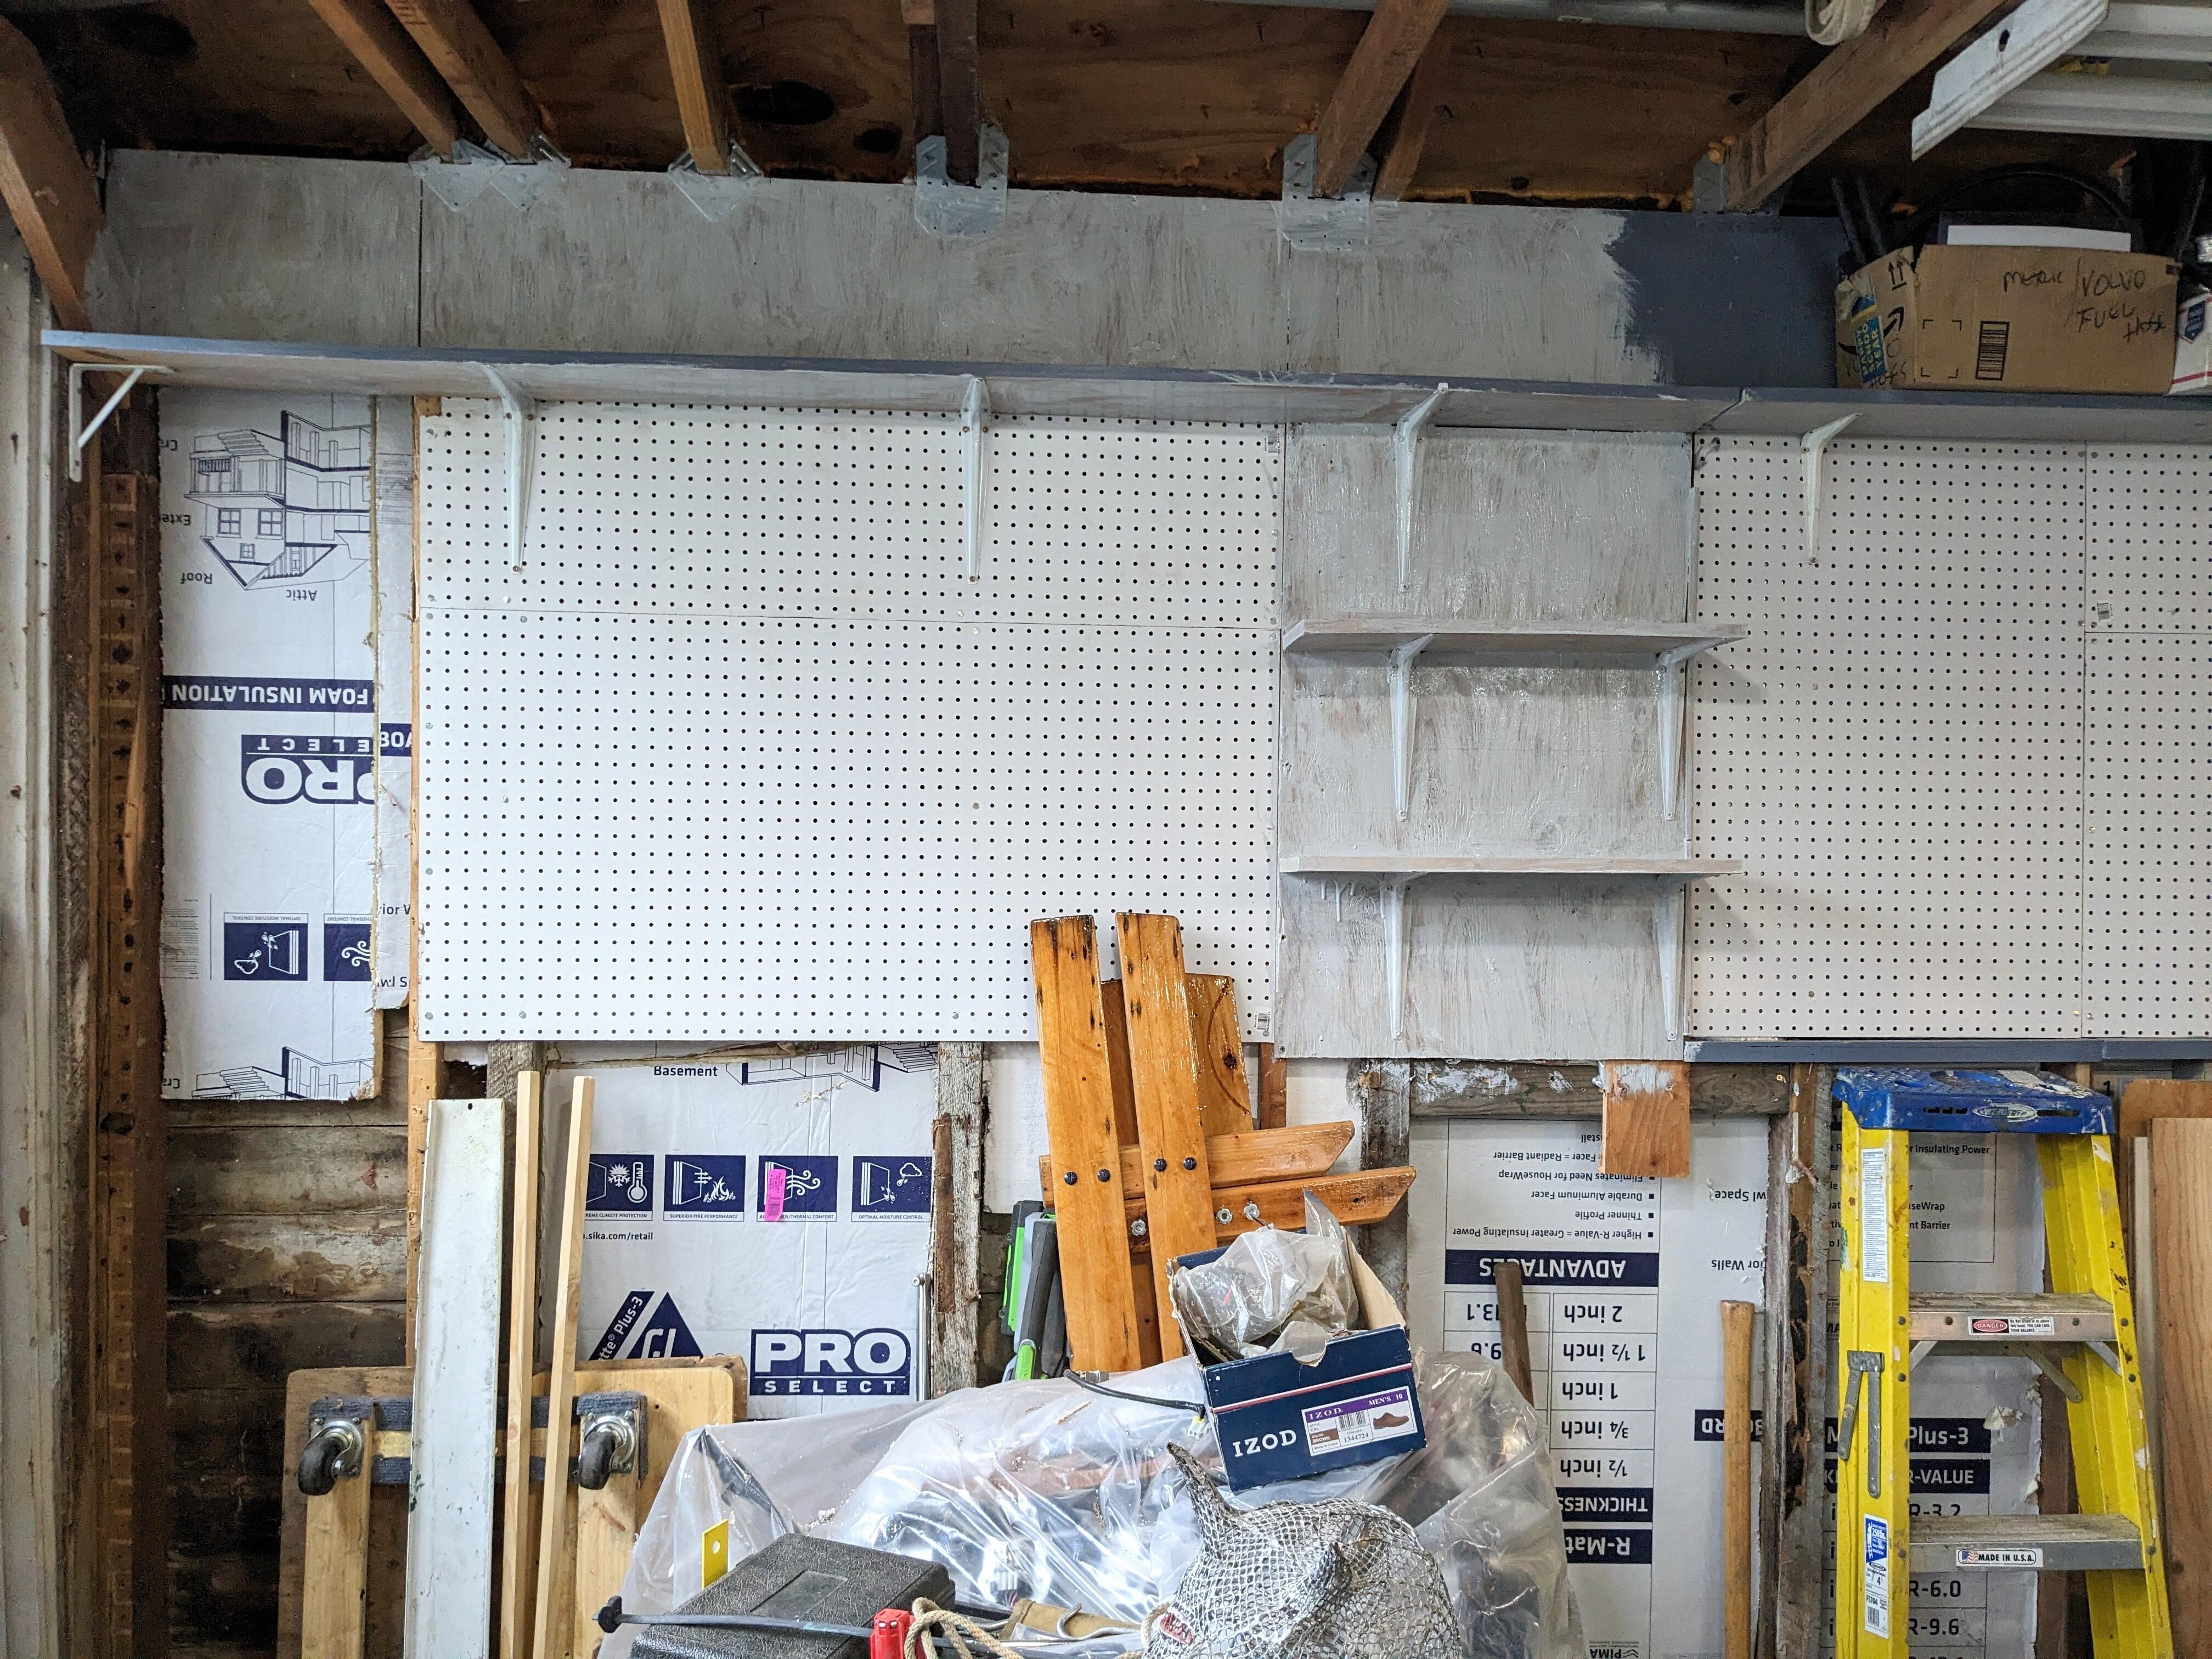
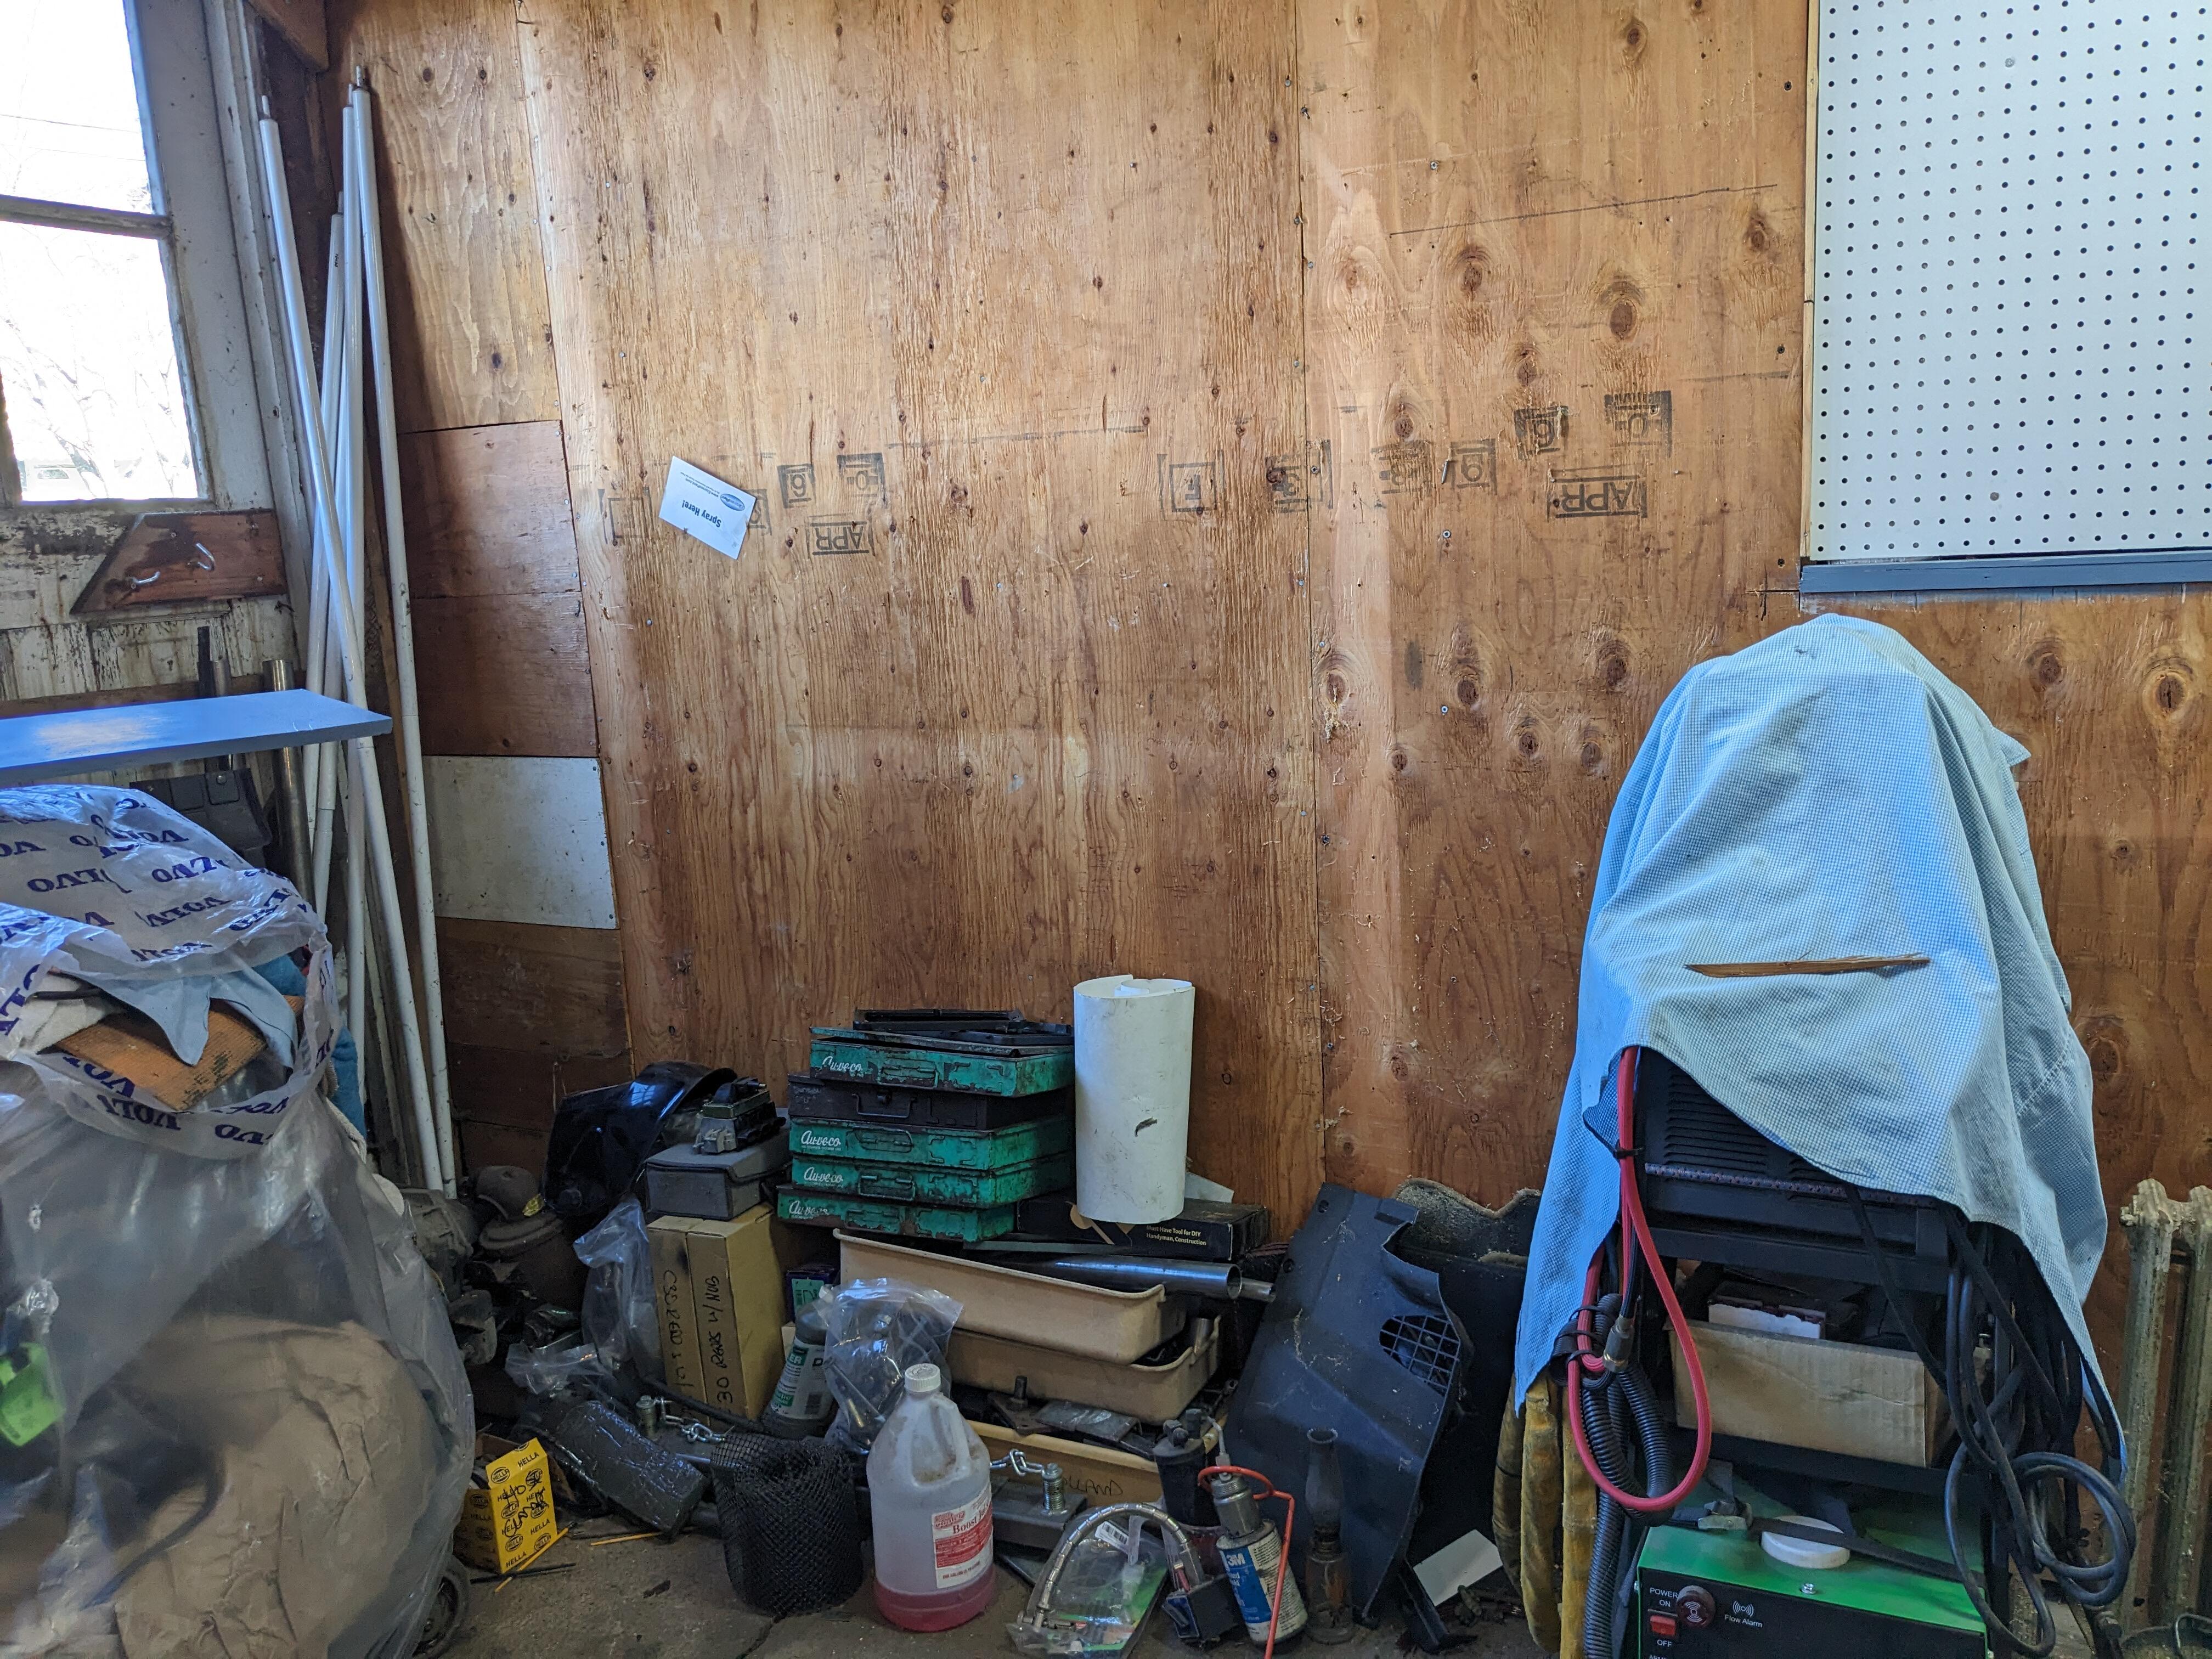
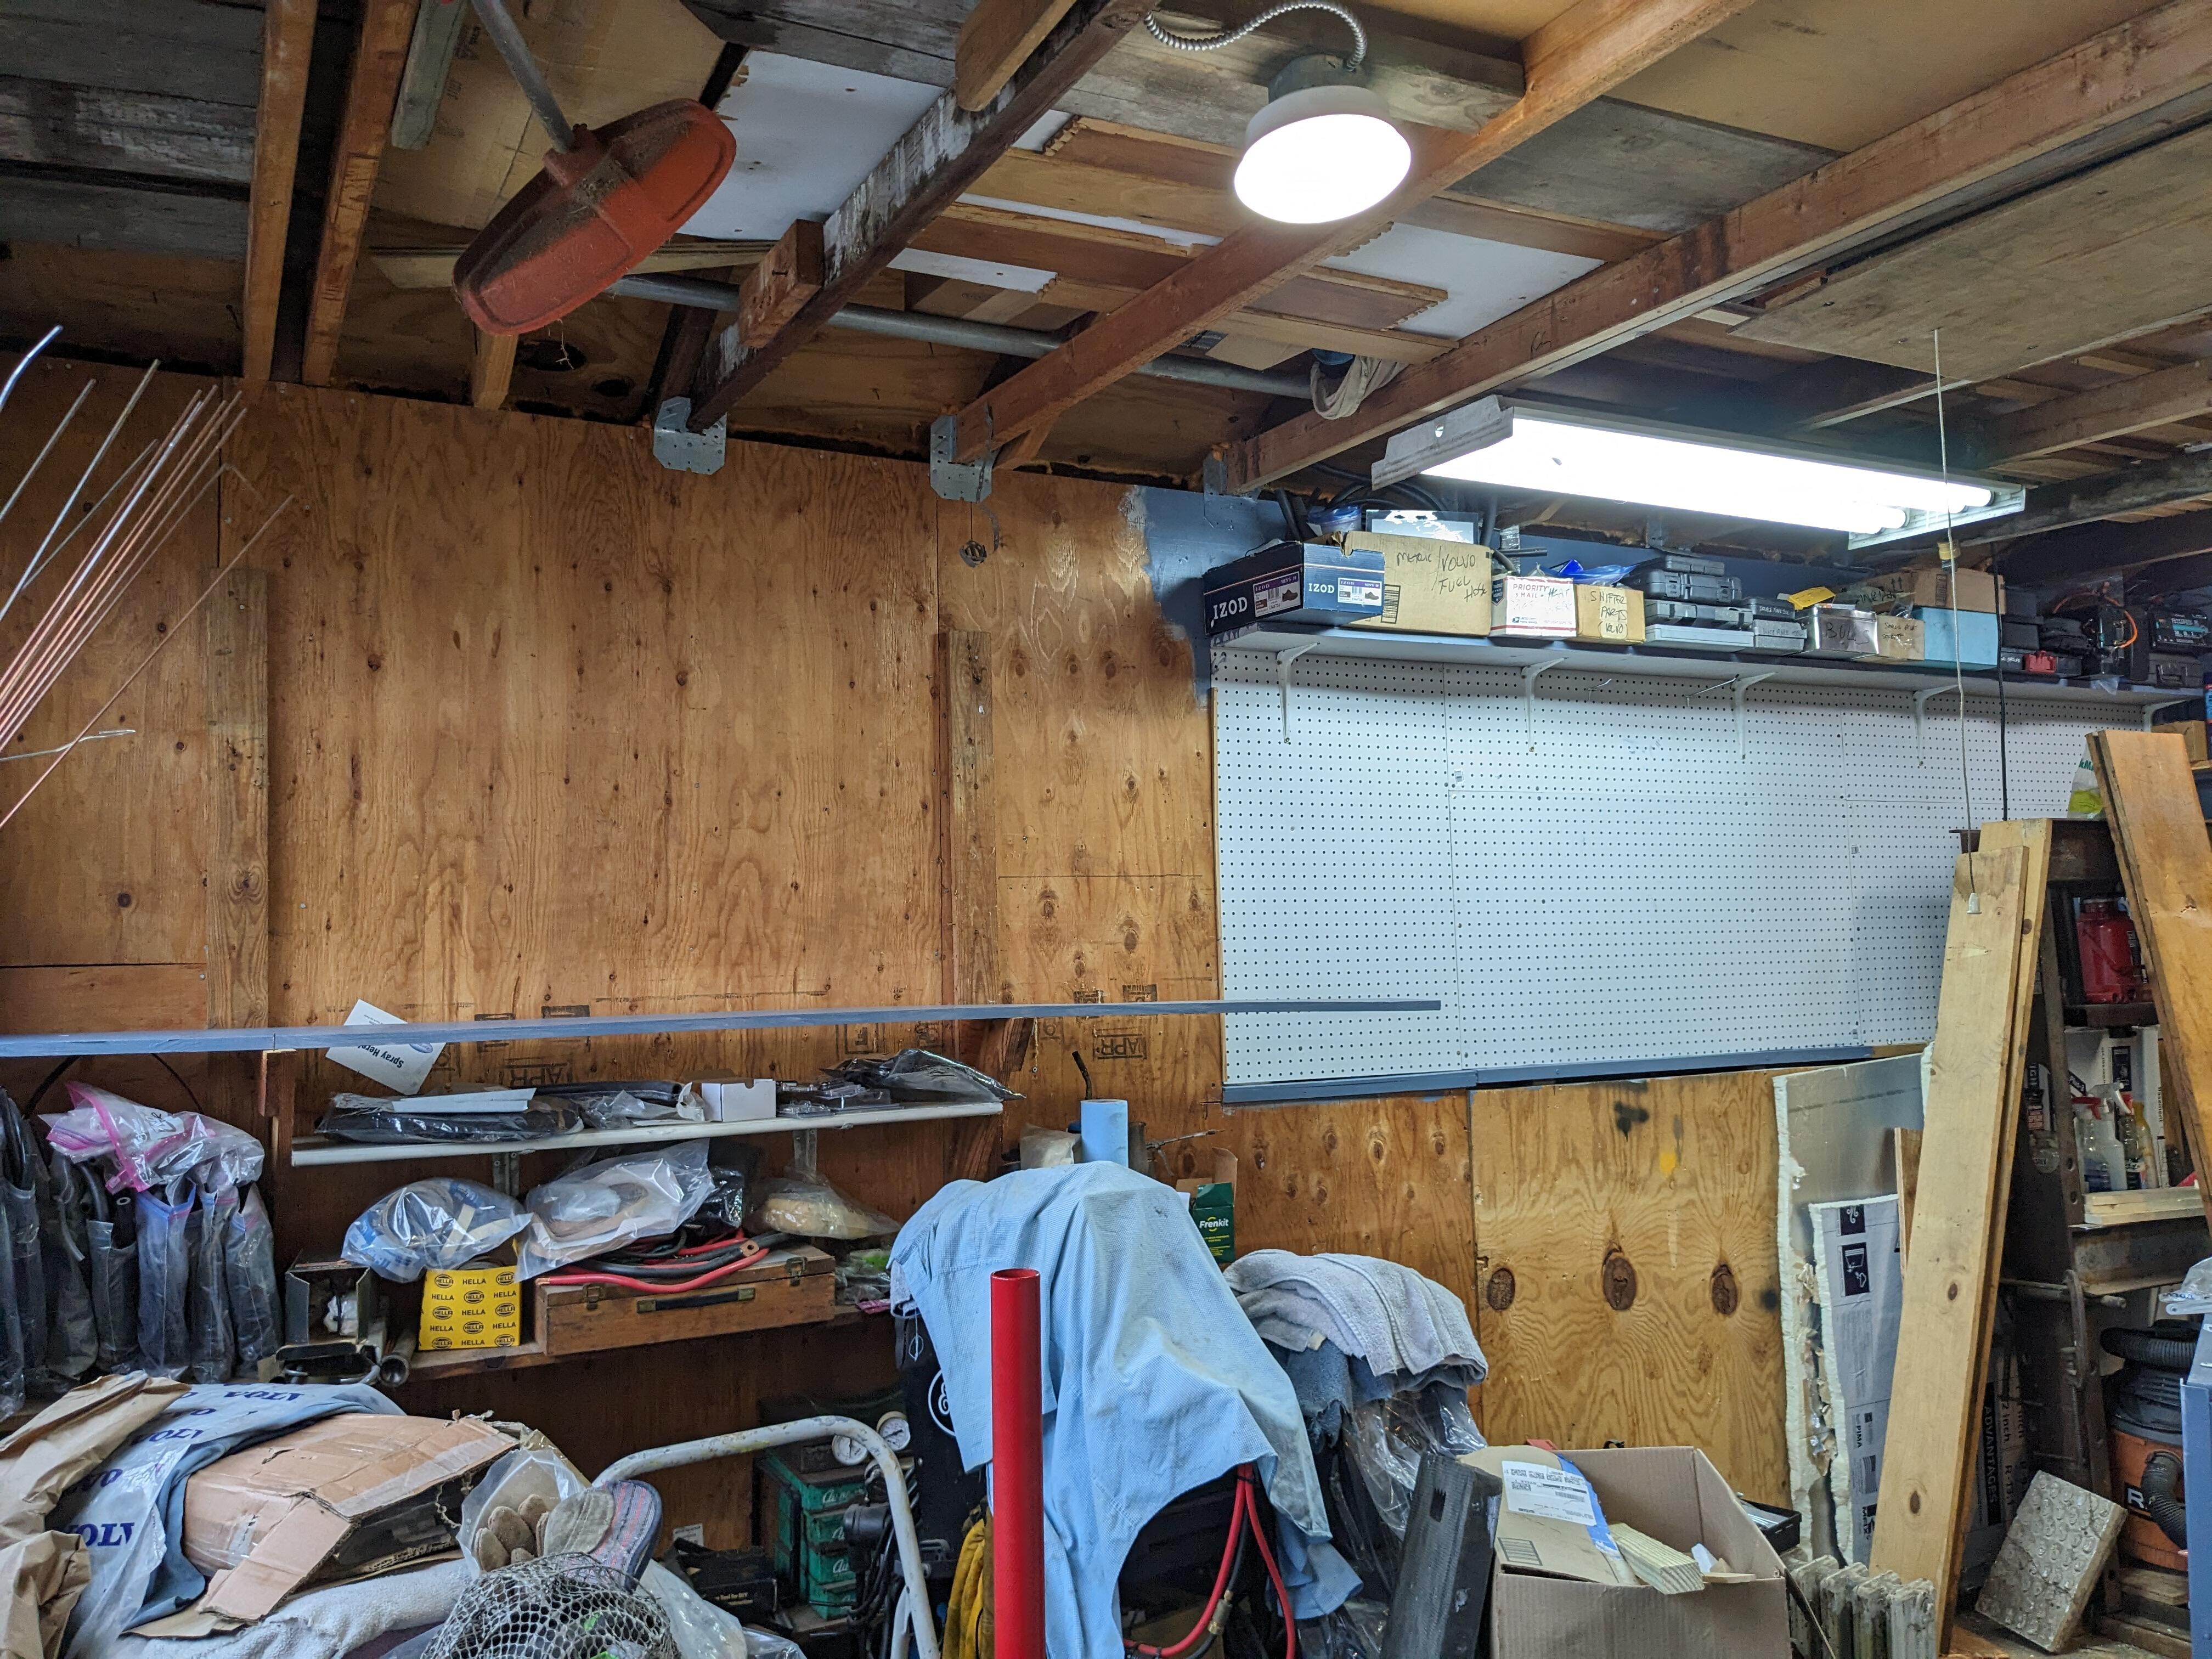
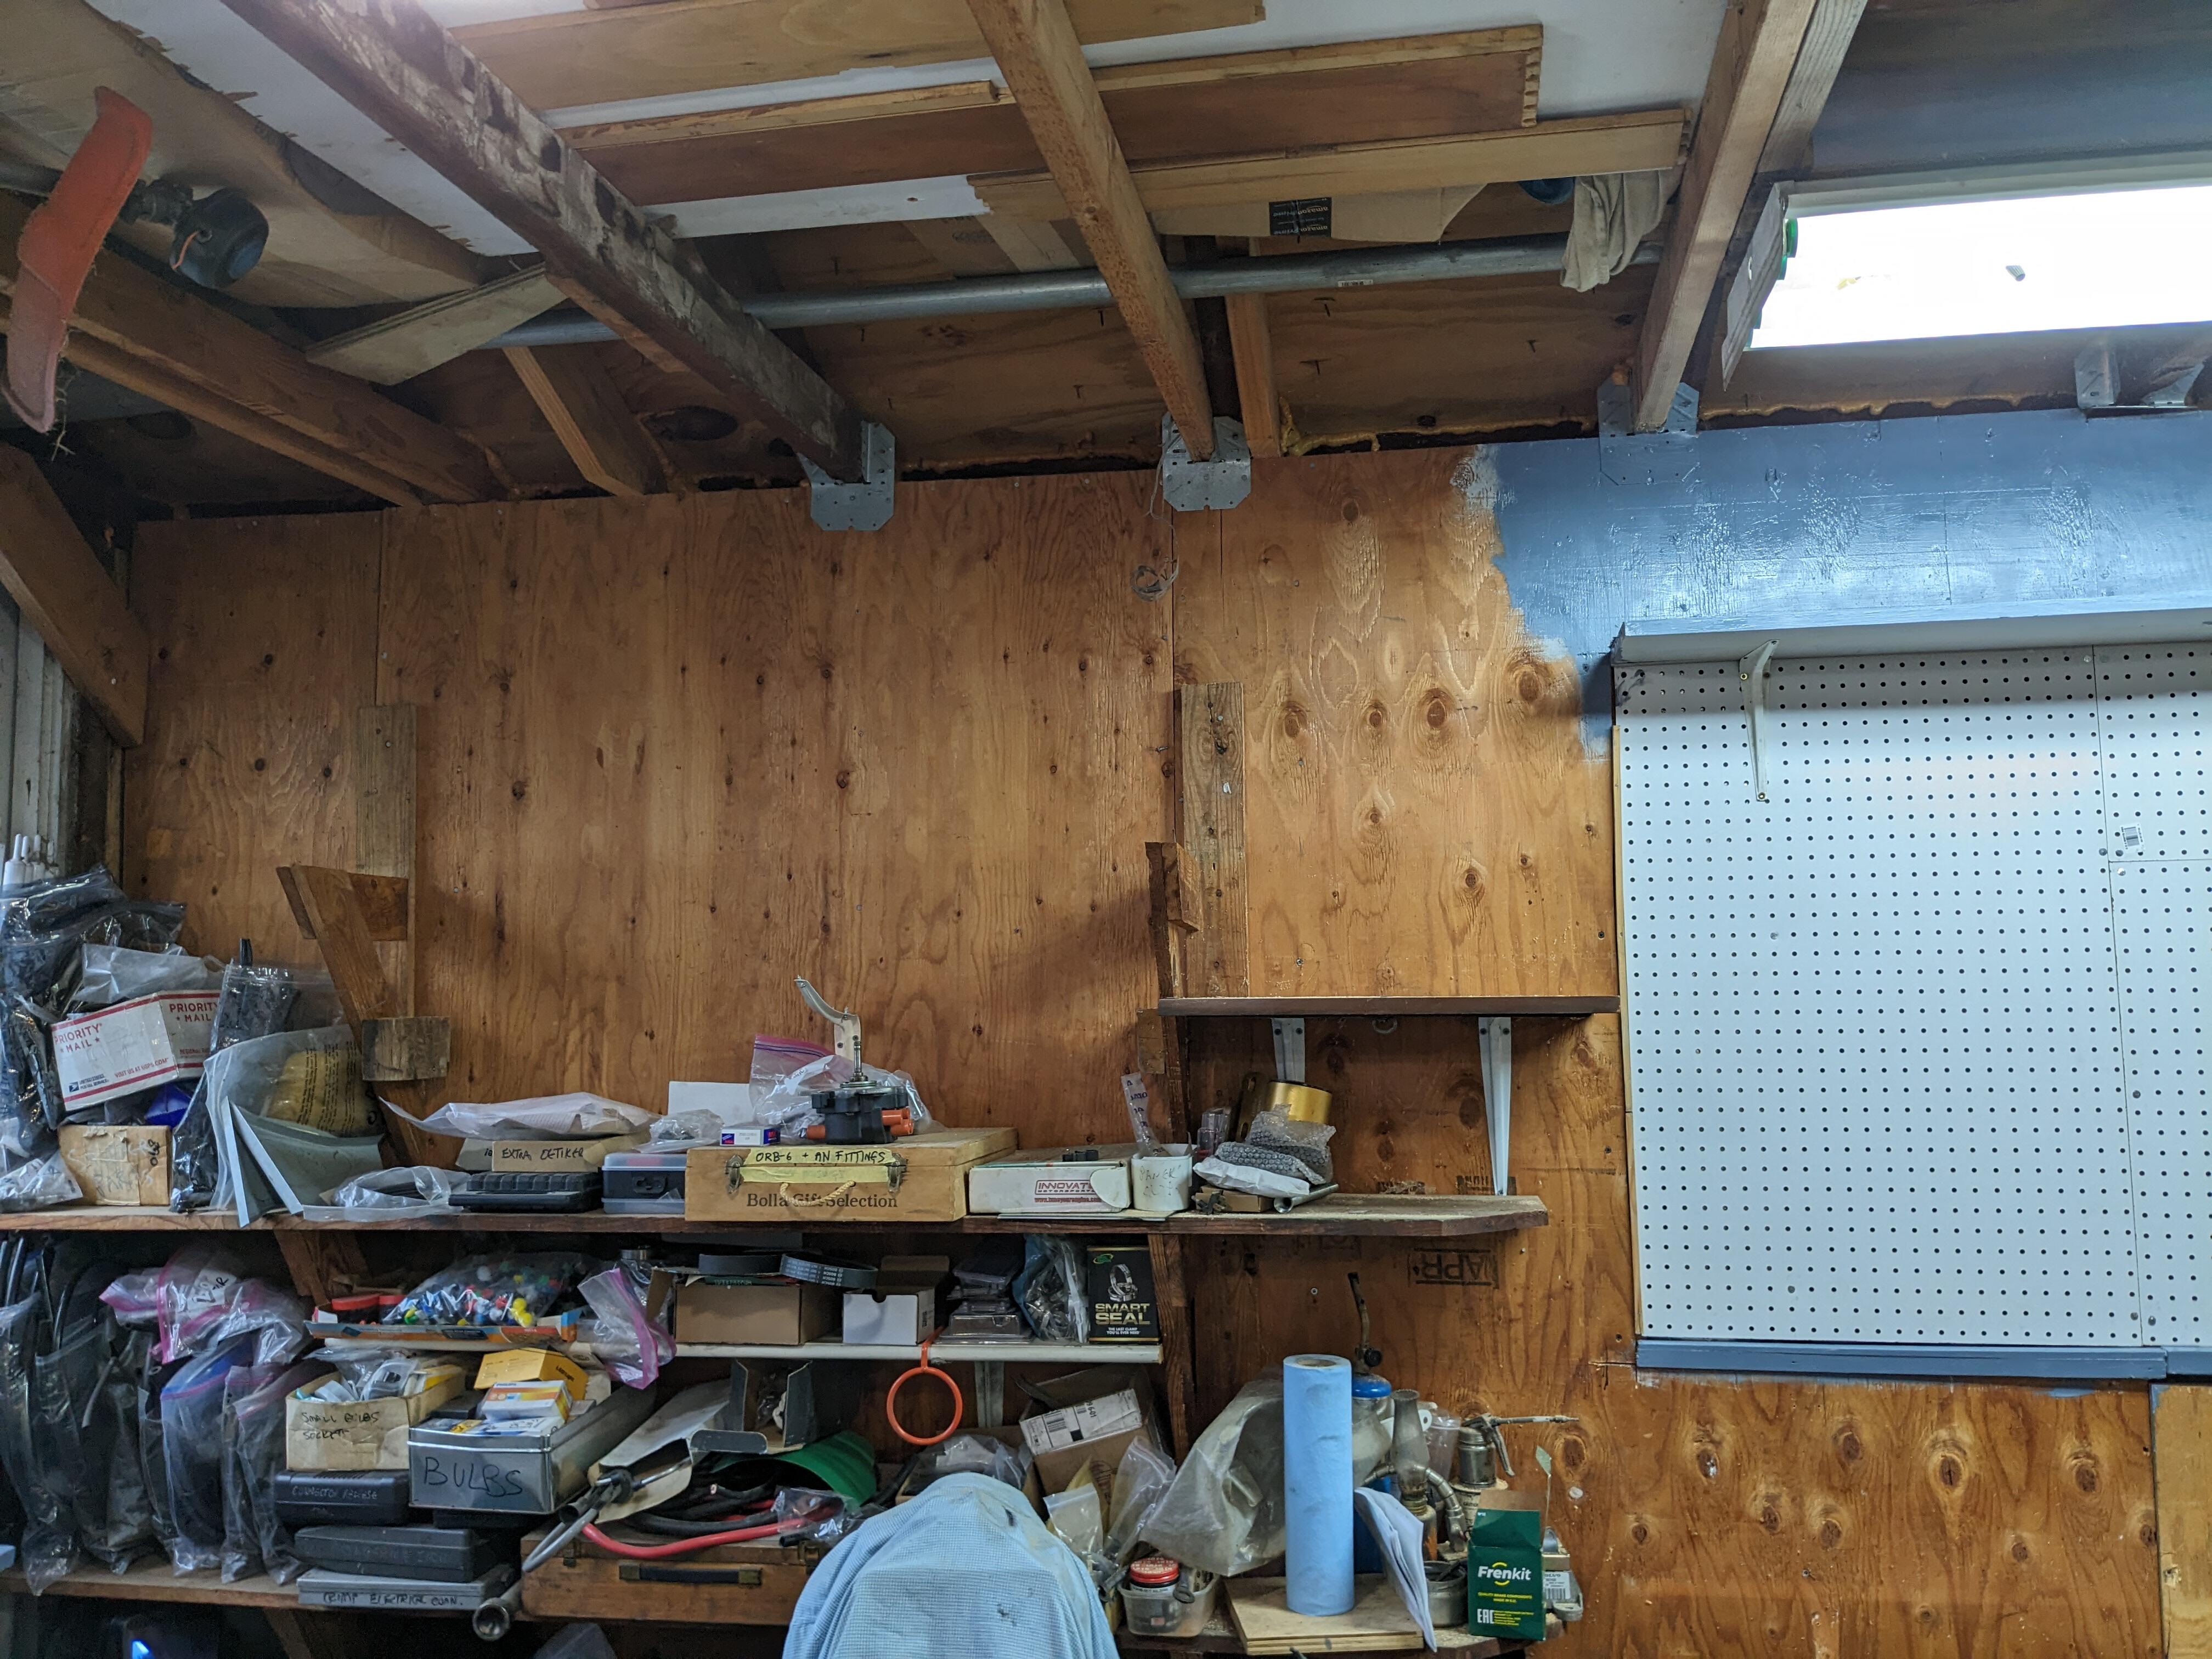
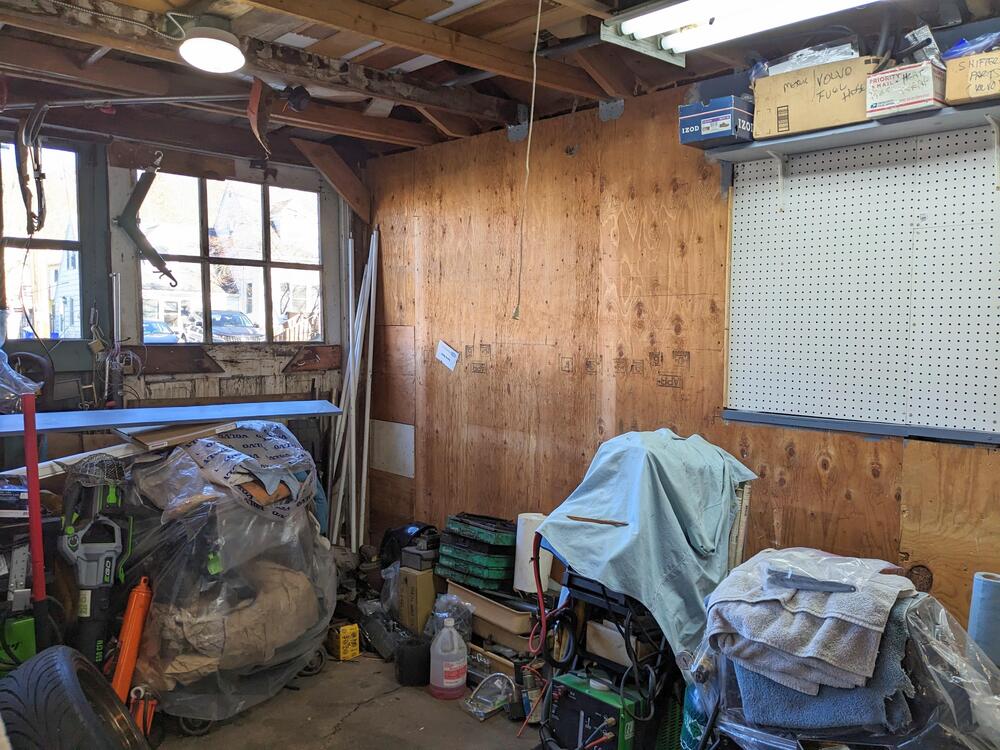
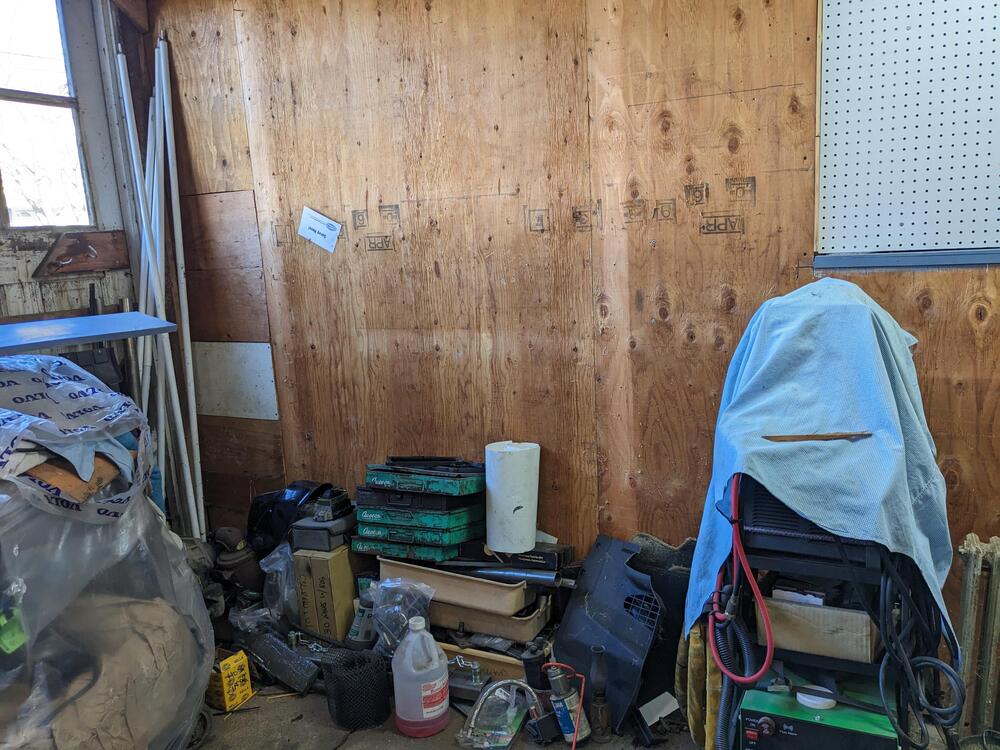
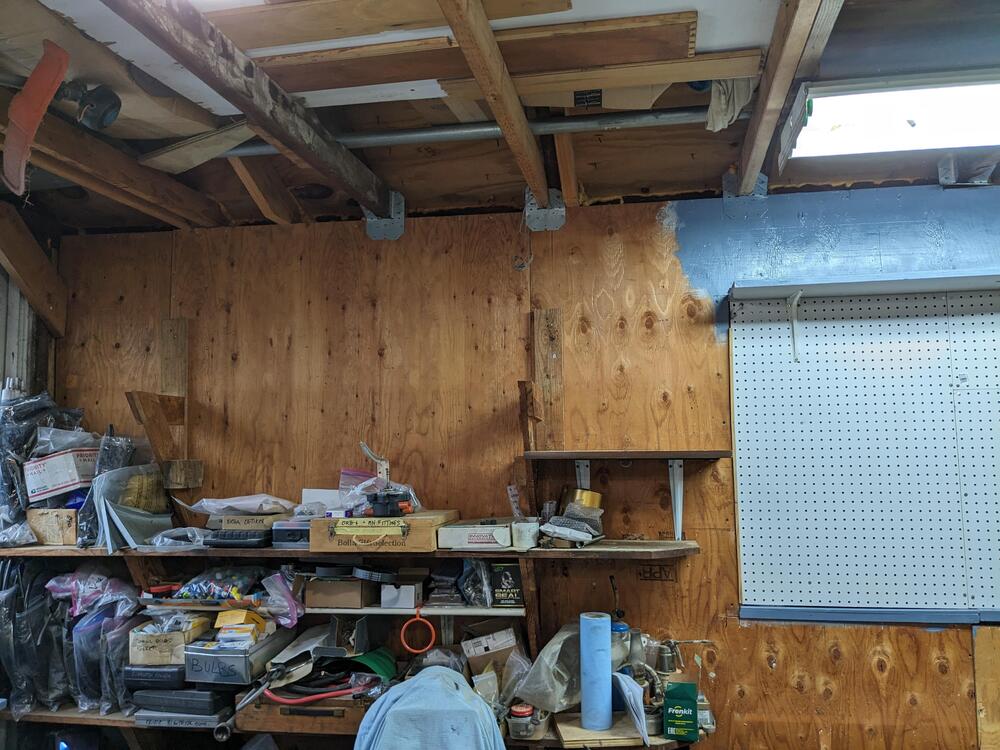
Slowly getting the south wall cleared. Need to move all the stuff at the base so I can remove the sheathing, add insulation & pegboard, then rethink the shelving for this section
-
Larger items - Volvo C30 Turbo/manifold, cat/DP, Intercooler plumbing, driveshafts, spoilers, bumper panels/skirts, Instrument & dash panels, Headlamp assemblies, Boxes of relays, Bosch injection & ignition components, Boxes of parts for other projects: LS conversion parts for the pickup, VQ35DE subframe kit for the Z, new repro door panels & rear spoiler for the Z, and so on. That will need tiding up also. 🤪
-
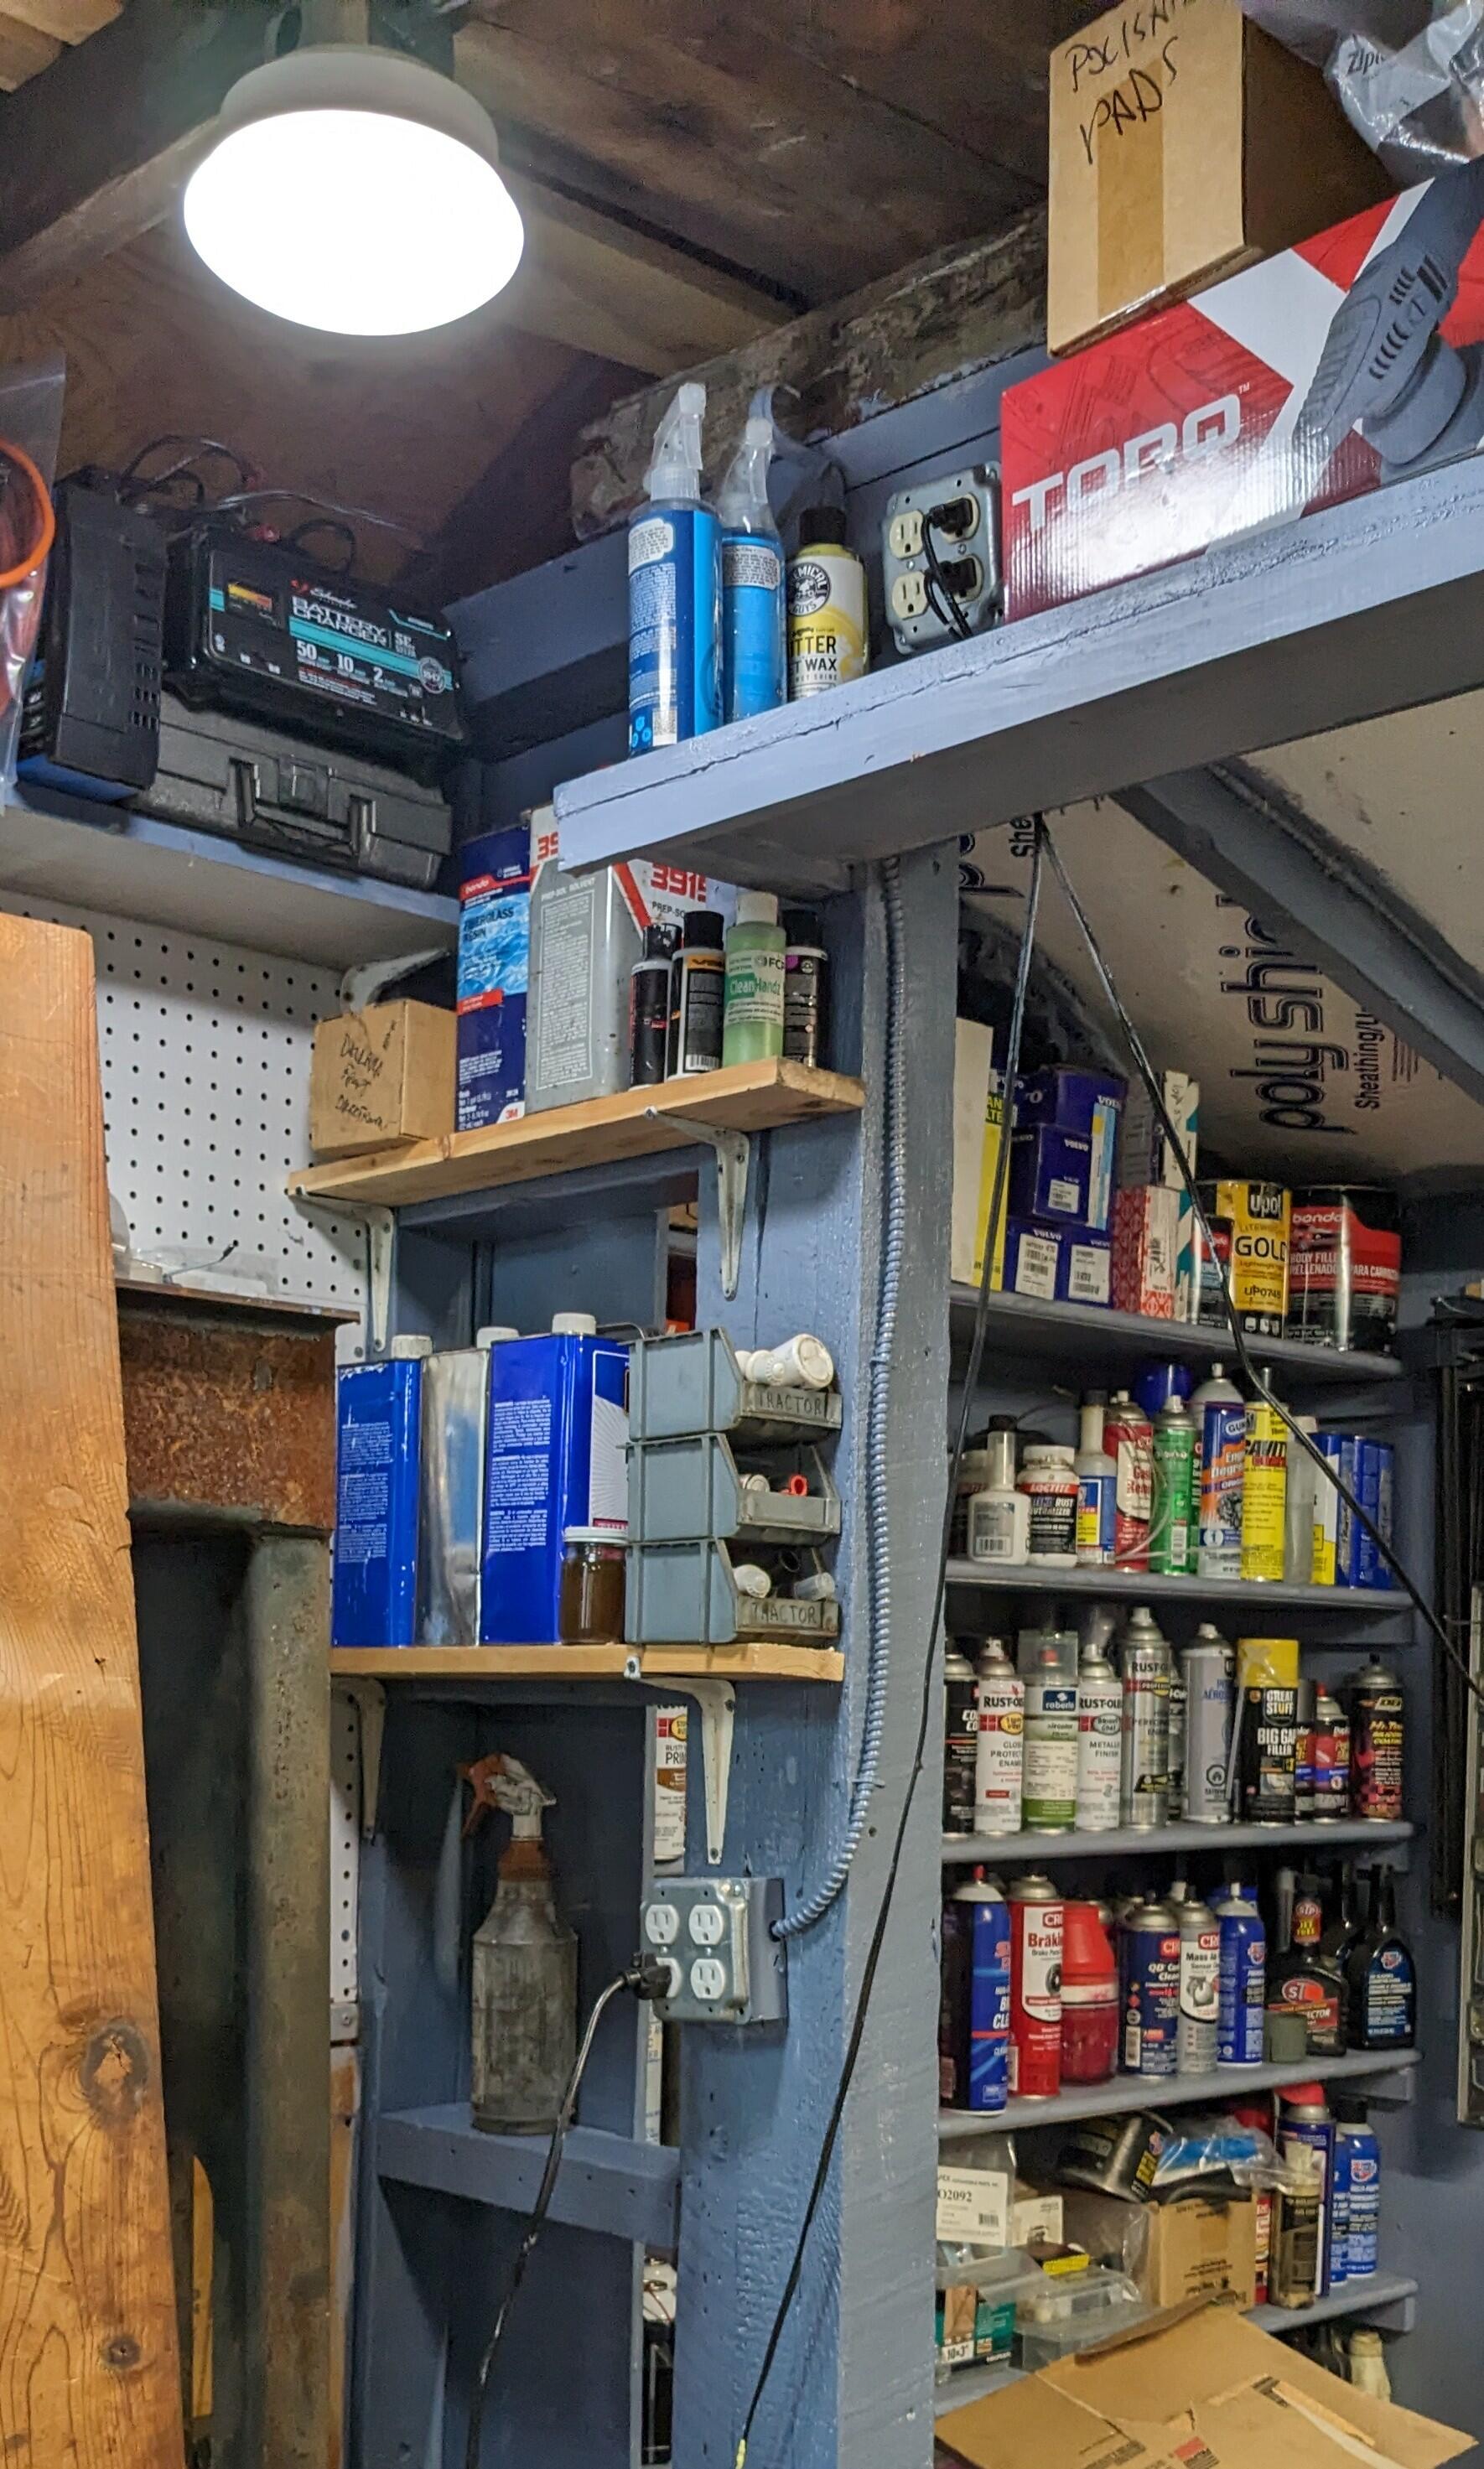
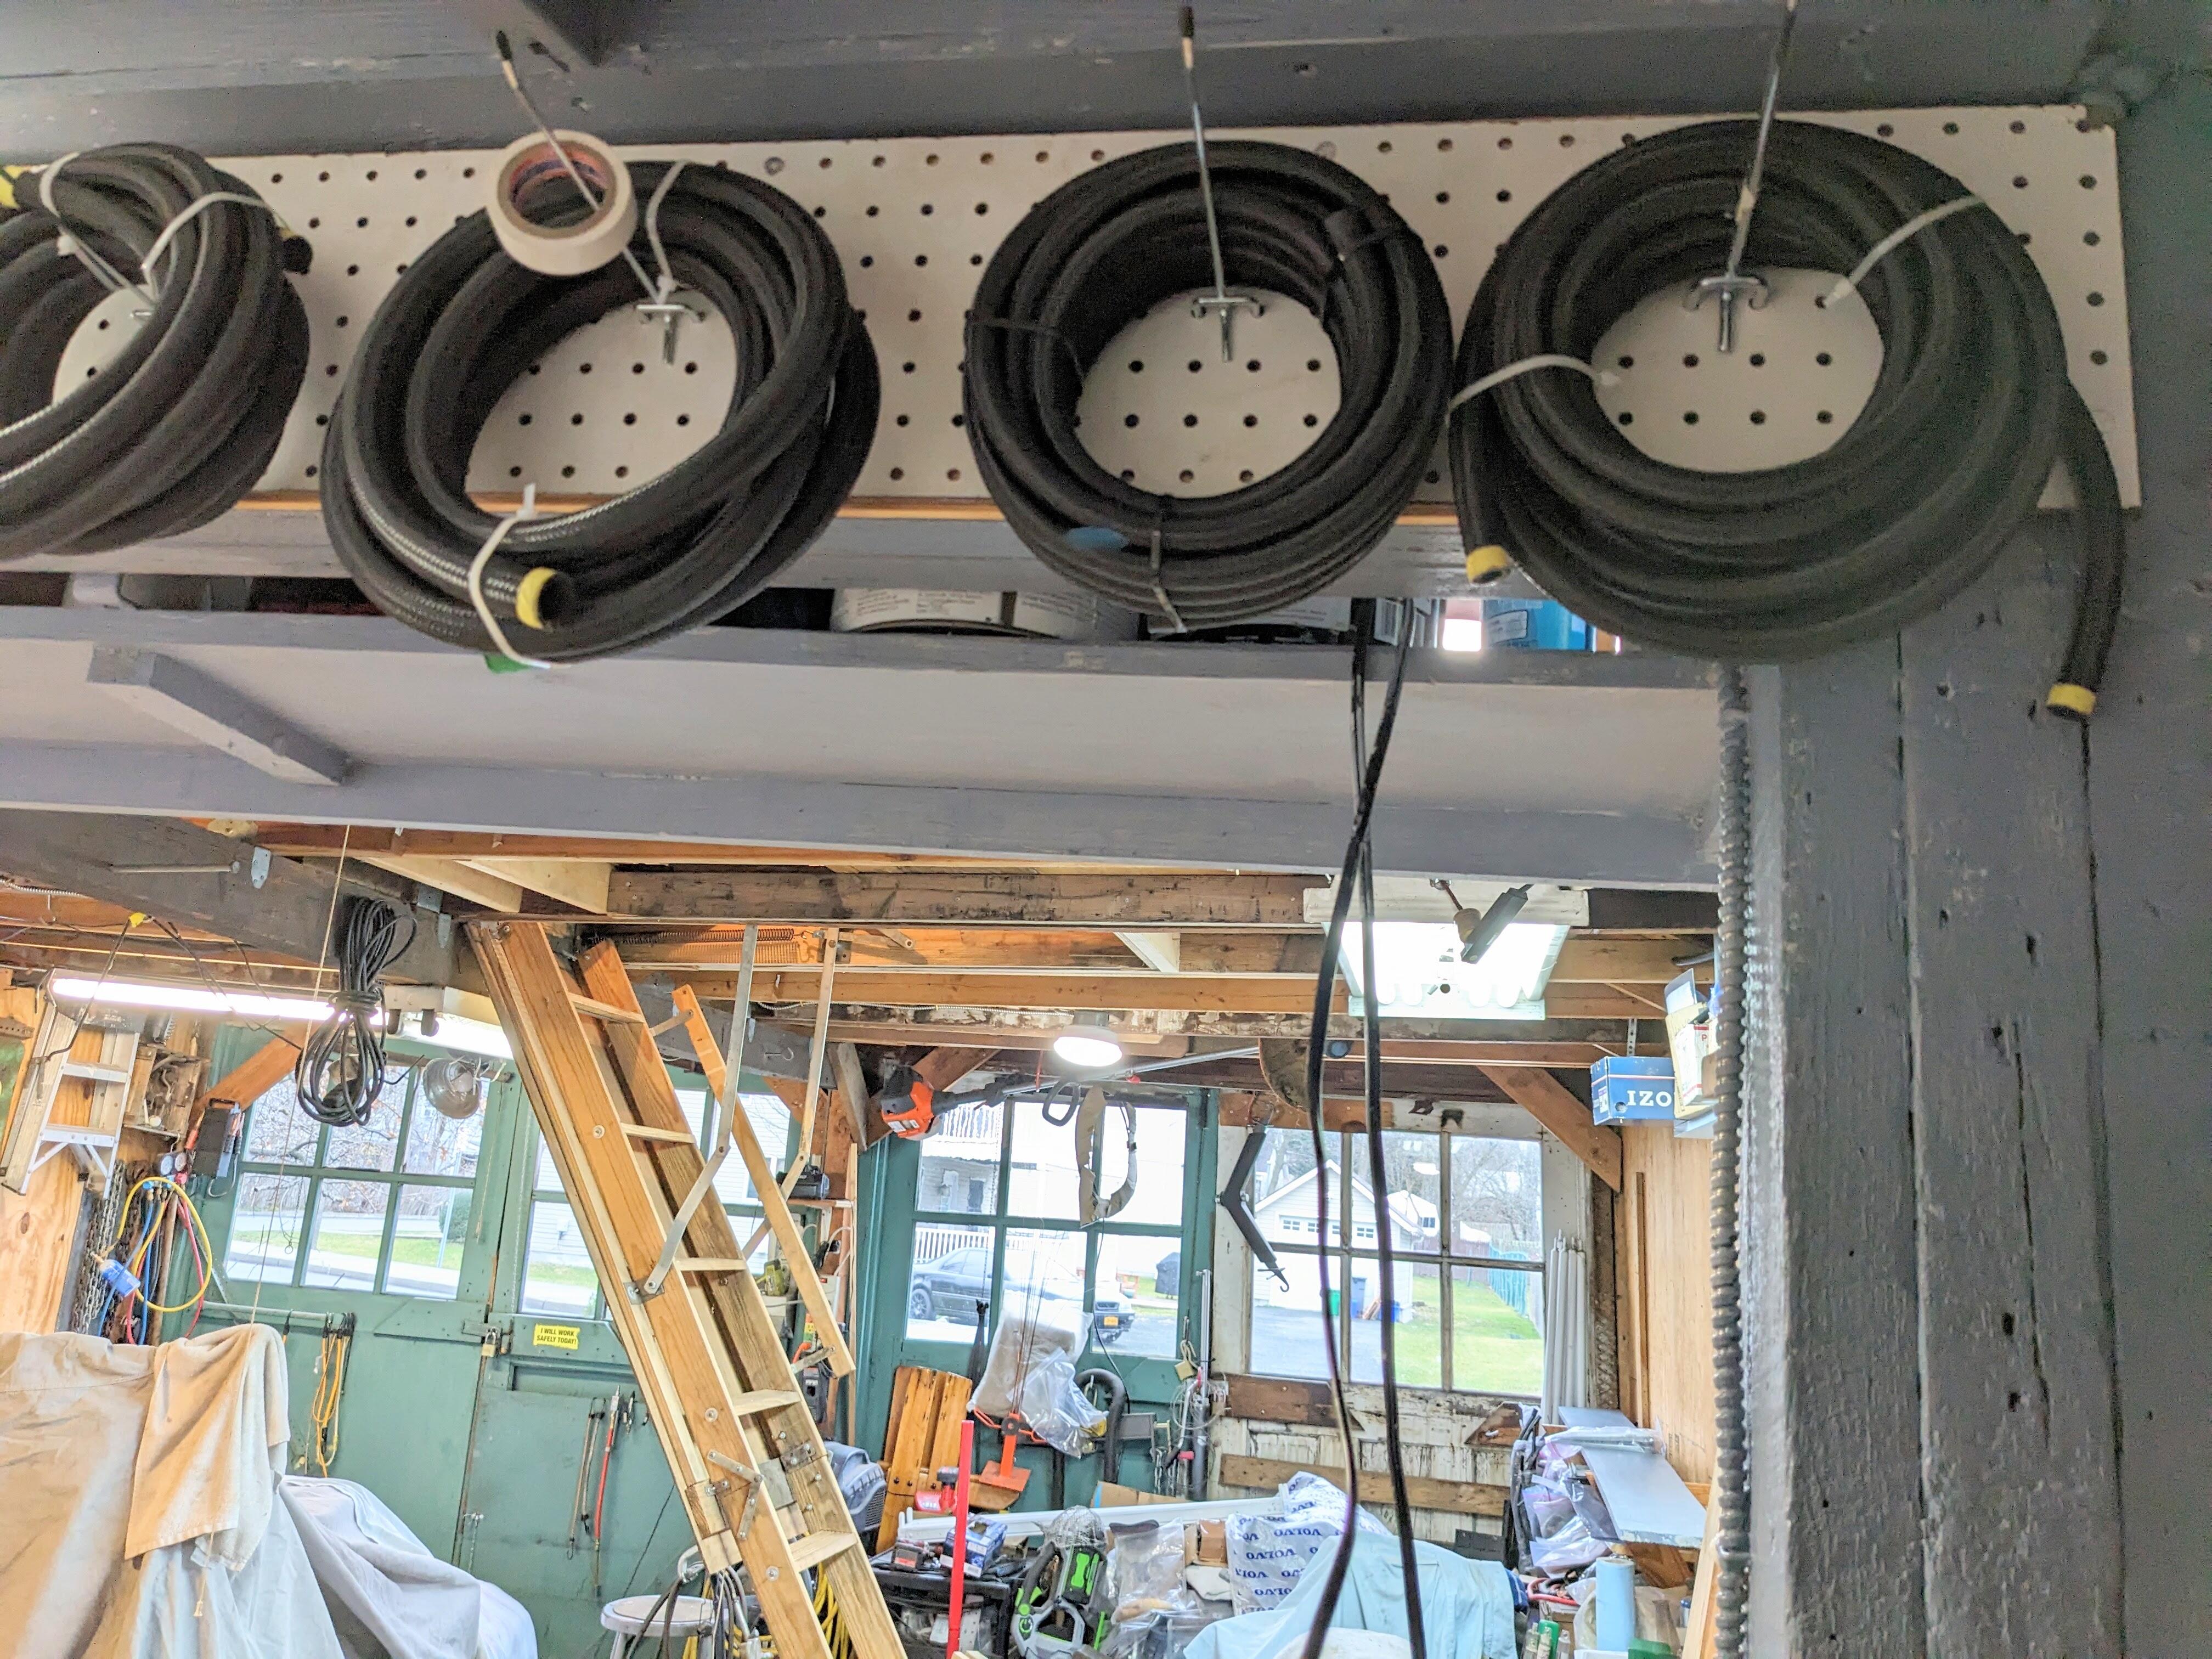
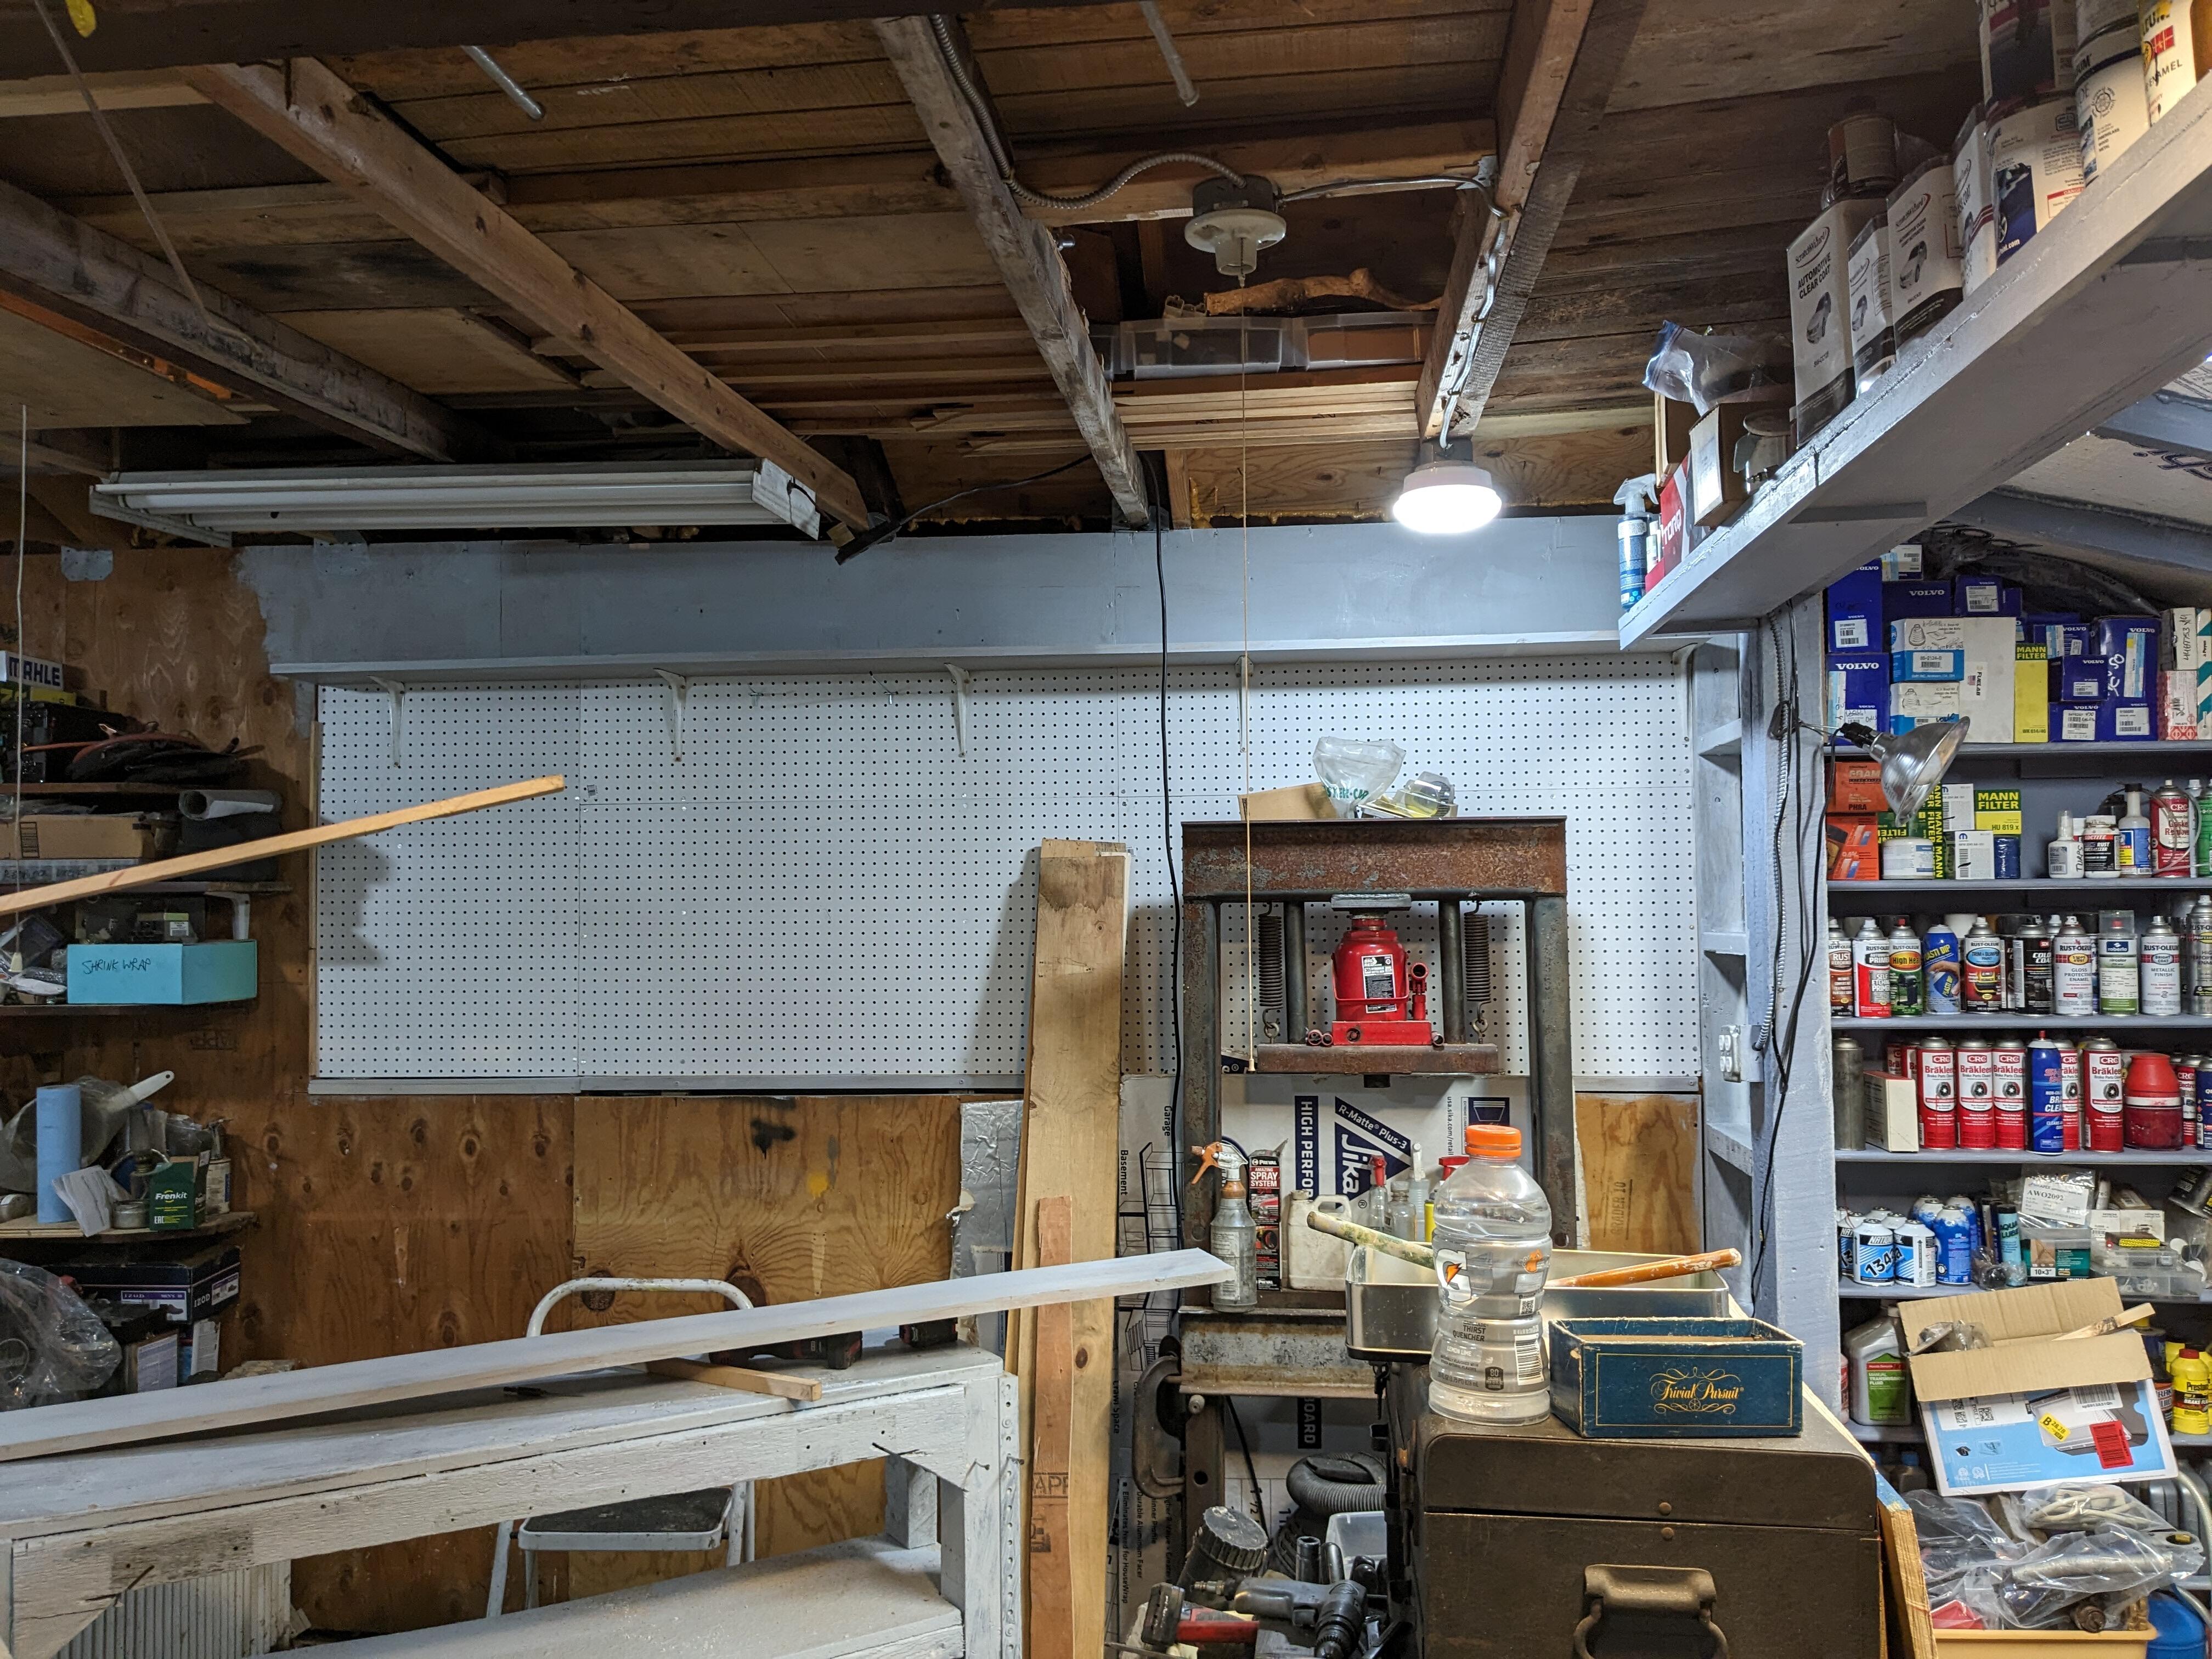
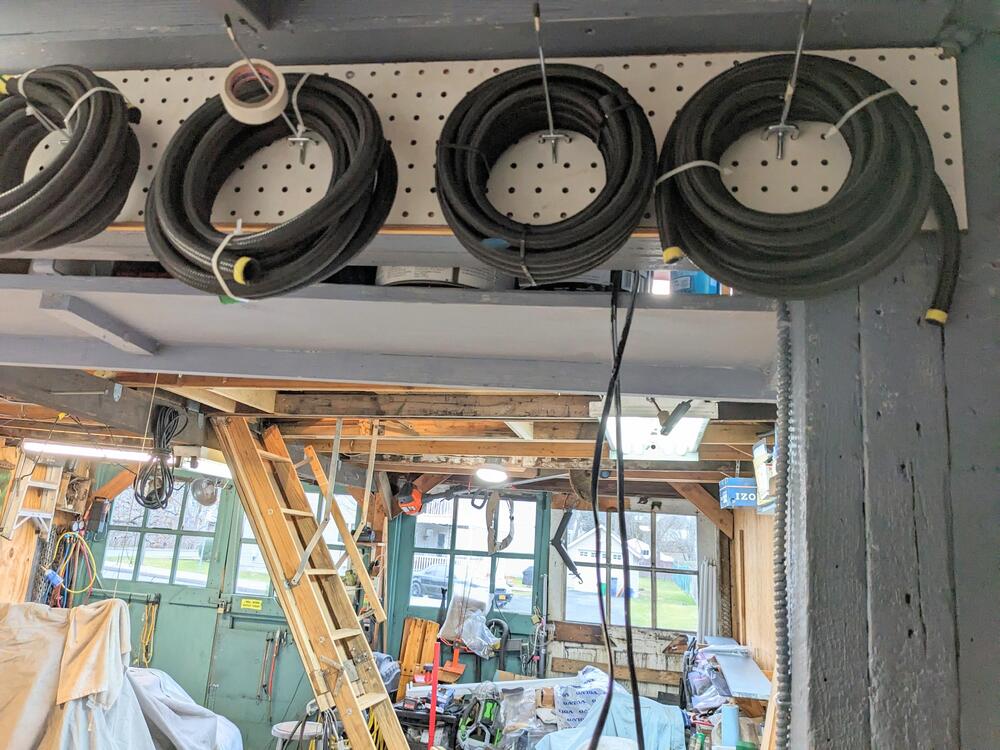
Continued with the clearing of the shelves on the south wall, which also meant I had to make some shallow shelves on the left of the back wall to store more chemicals Put stuff up on the right, so slowly making way also added a 7" deep x 12' strip of pegboard on the backside of the LVL beam, to store rolls of hose that were also taking up shelf space. Much more accessible this way - and harder for me to forget I already have


-
Light rain (mostly) much of the day - even so I spent most of it outside, moving stuff around behind the garage. Just needed to make it a little more orderly than it has been the past couple months. Had to cut a bunch of 25'-30' bamboo in the far left corner, so I could relocate the truck bed liner & other bulky items out of sight. One of my neighbors likes to use the bamboo poles for his veggie garden, so I cut some down to about 10' After that I got some top coat on the shelving and upper sheathing Still had a little time, so I cleared the top shelf on the left & removed it, so I can move forwards

-
Hey - the two lower siding runs I'm going to replace, and cut out the sill plate as needed, then I'm going to pour a concrete foot(ing?) and put a new sill on top. Outside, I'm going to keep the gravel level below the sill so rain etc can't creep up/in to the siding Got some primer on the upper sheathing and top shelf, I spent the day in the city at the Whitney Museum with fellow Art educators, so that was all the time I had to spend on the garage.