HusseinHolland
Community Member
-
Joined
-
Last visited
Everything posted by HusseinHolland
-
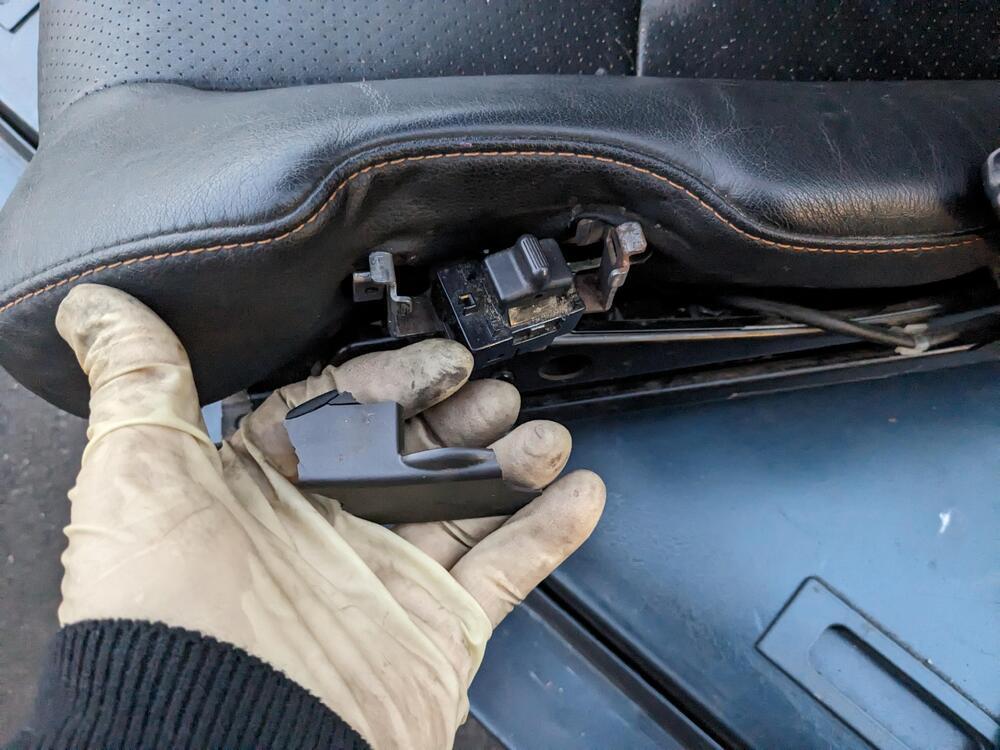
Took the seats out of the 350Z today, and moved the car into her (my mother) backyard, out of the way for her winter driveway access Have to cut a section of the harness for each seat tomorrow Power, heater & SRS broke the pass seat switch, bent the bracket - seat was behind the car & I backed into it Thankfully, I didn't damage the seat itself Cut off the rail standoffs 2 rivets & 2 spot welds for each leg Assuming these elements are for crash protection - I may want to add them back Put some paint on the ground-down areas, to protect it for now
-
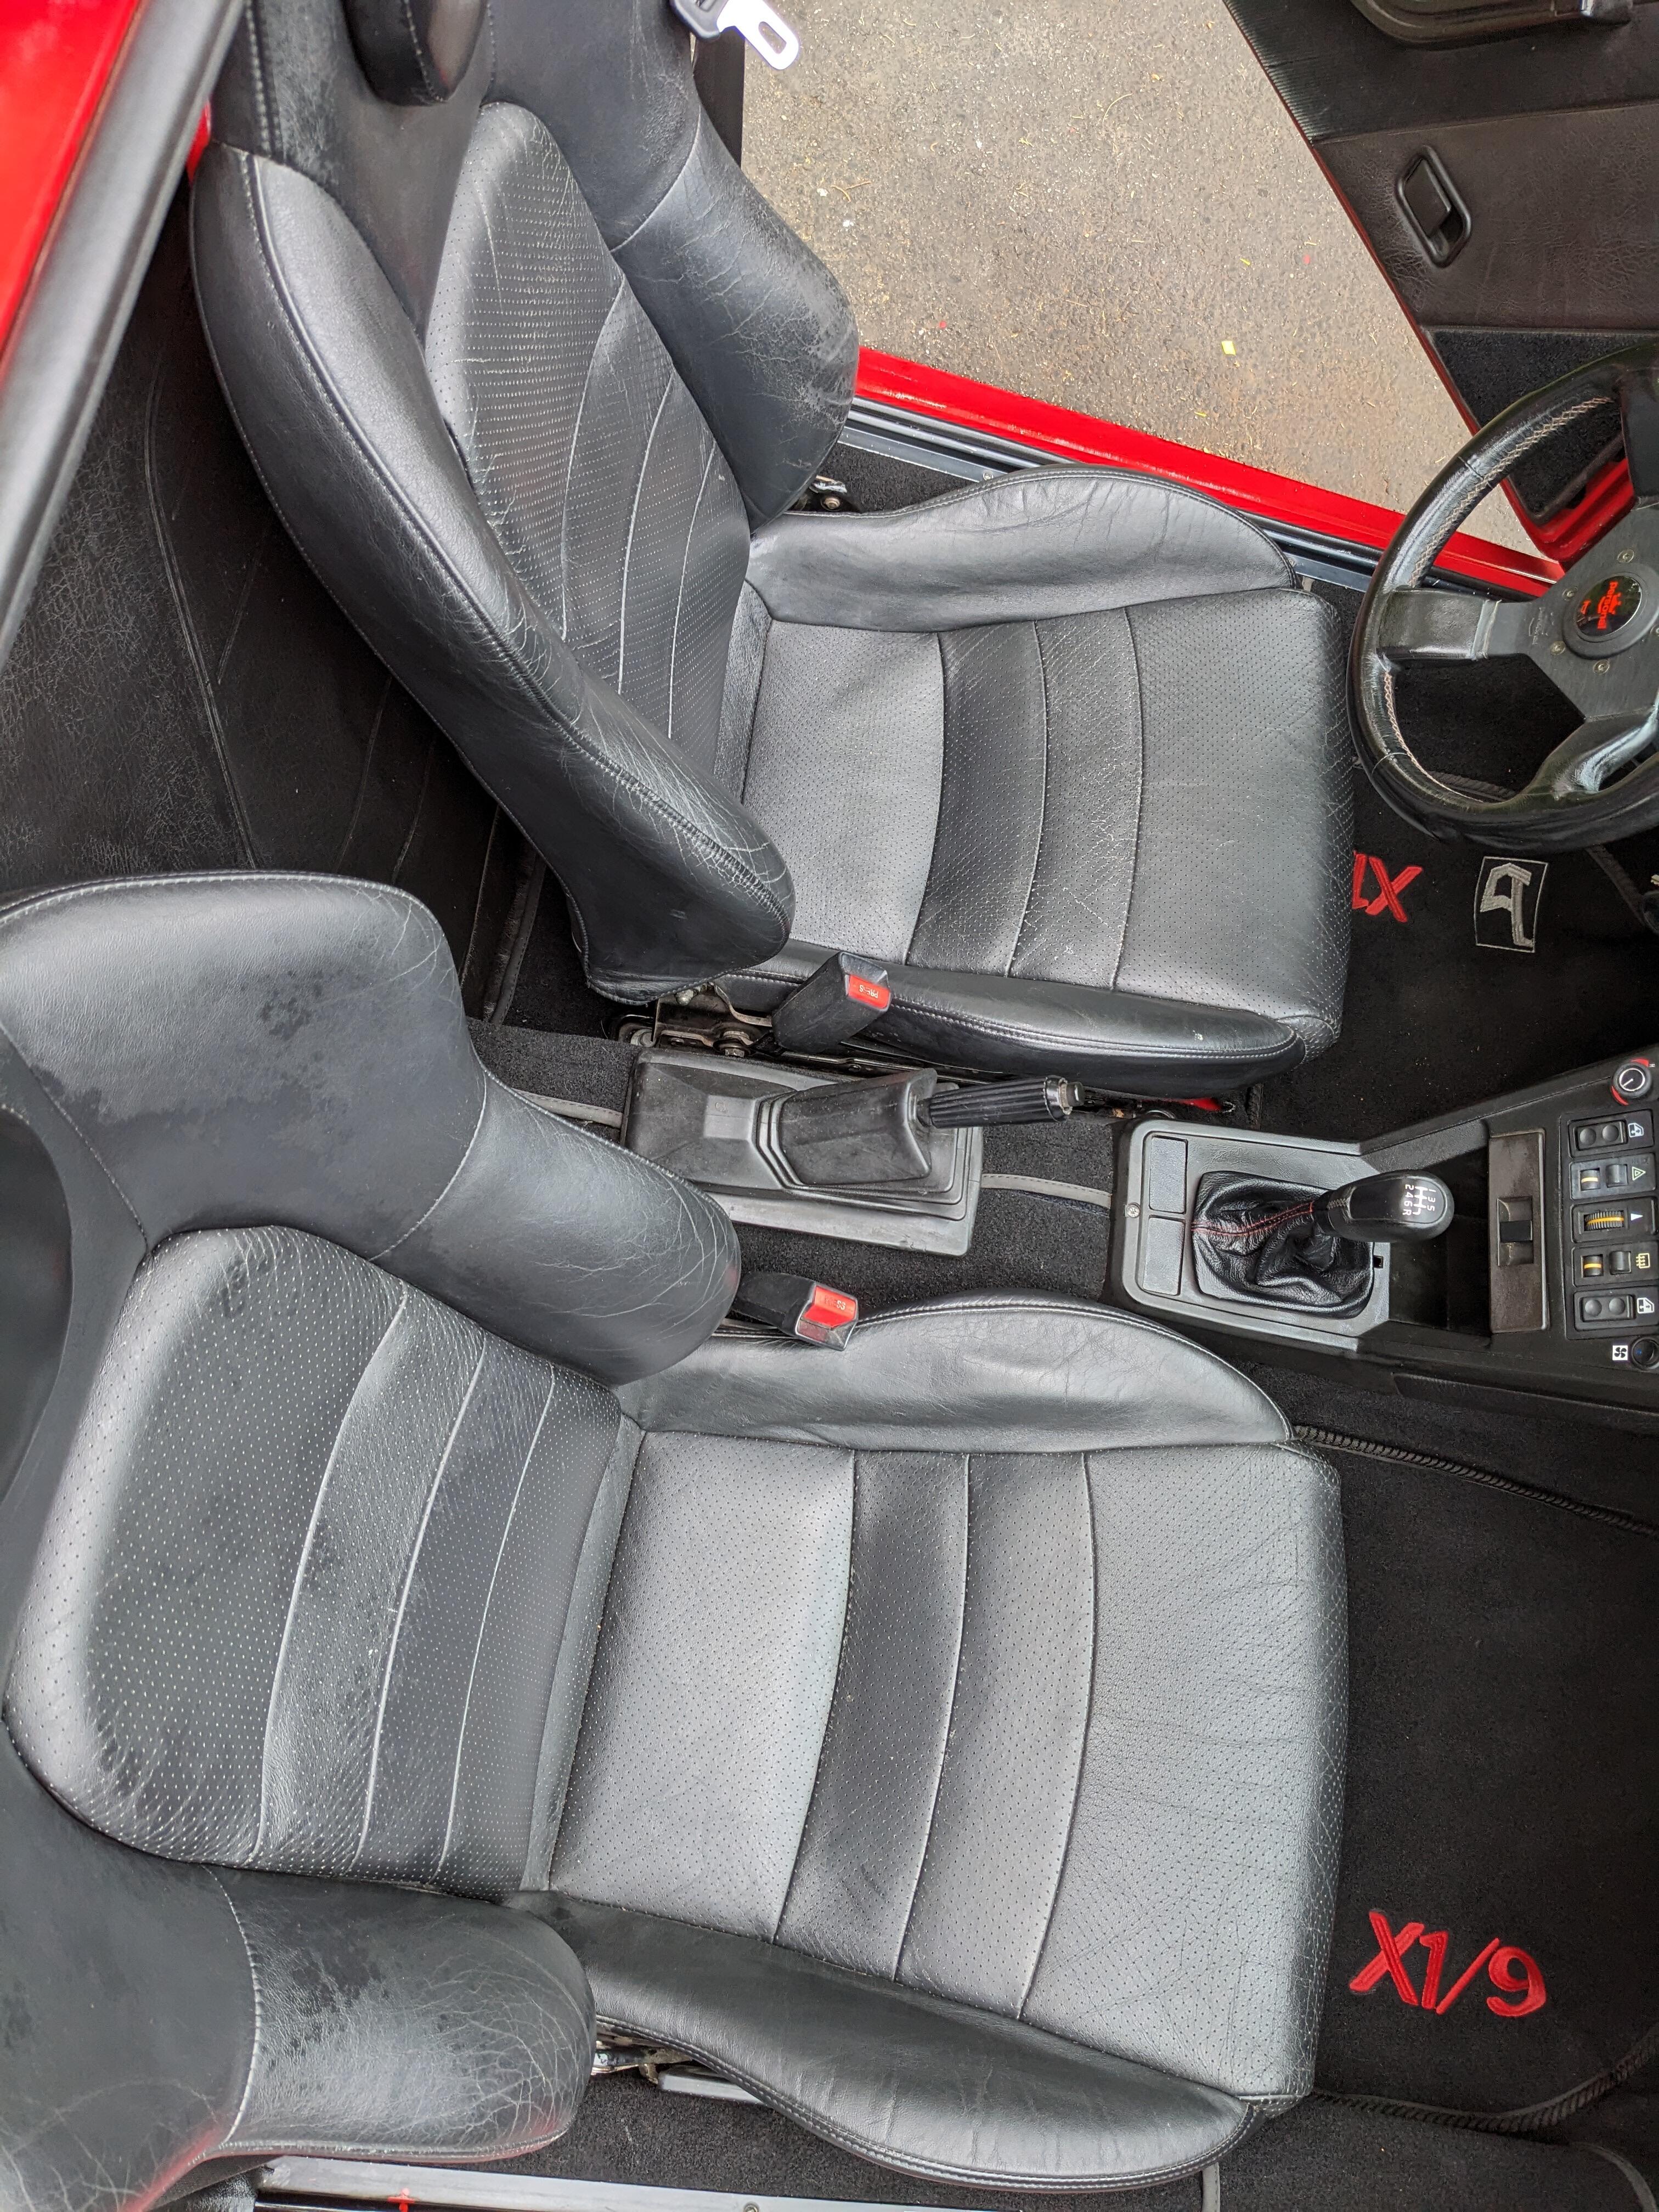
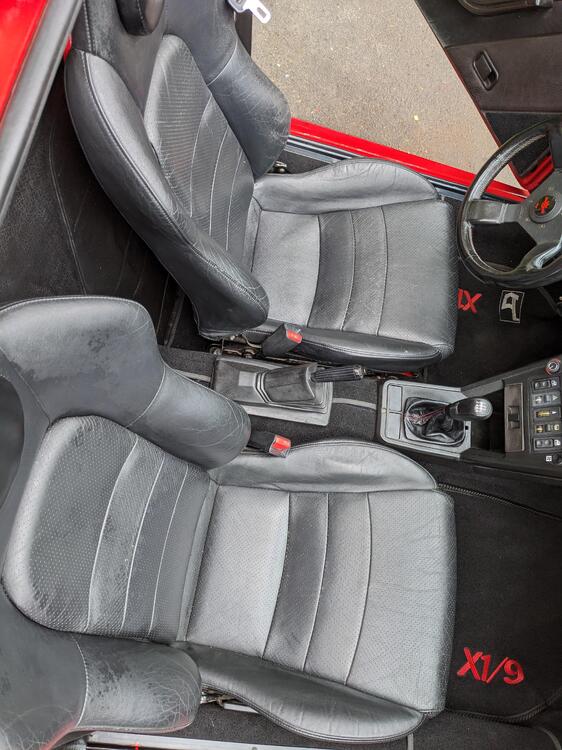
Found a helpful thread on 350Z seat fitment. Since I've been driving the X1/9 again this past week, with the Honda S2000 seats, I really find the Datsun seats uncomfortable for my lower back issues. My 350Z seats are rough, so while I work on fitting them, I've ordered new leather from Ridies.com. Much more price-friendly than the CanadaSeatSkins that I used for the Volvo seats, and full leather for all panels. Going for Black w/ dk grey perforated inserts, green stitching. All the examples on their site have more contrast, like this
-
Apologies, I was looking at the return vs return-less aspect of that debate. I don't see any disadvantage to this setup, if that was why you were pointing it out, or because I wasn't getting the point? The one link posted seemed more concerned with carbureted setups, which is a whole 'nother ballgame, IMO. I would expect it would be unwise to use a stock style diaphragm version FPR for such a setup though. Volvo used this setup from the early 90's until the early 2K adoption of in-tank PWM controlled units. Removes the need for additional fuel lines on the motor, and removes the potential heating of the regulator and fuel returning to the tank. I haven't had any heat soak issues since switching to the billet rail and composite injectors. Improved starts, however the starter crank speed has a variable in that equation...
-
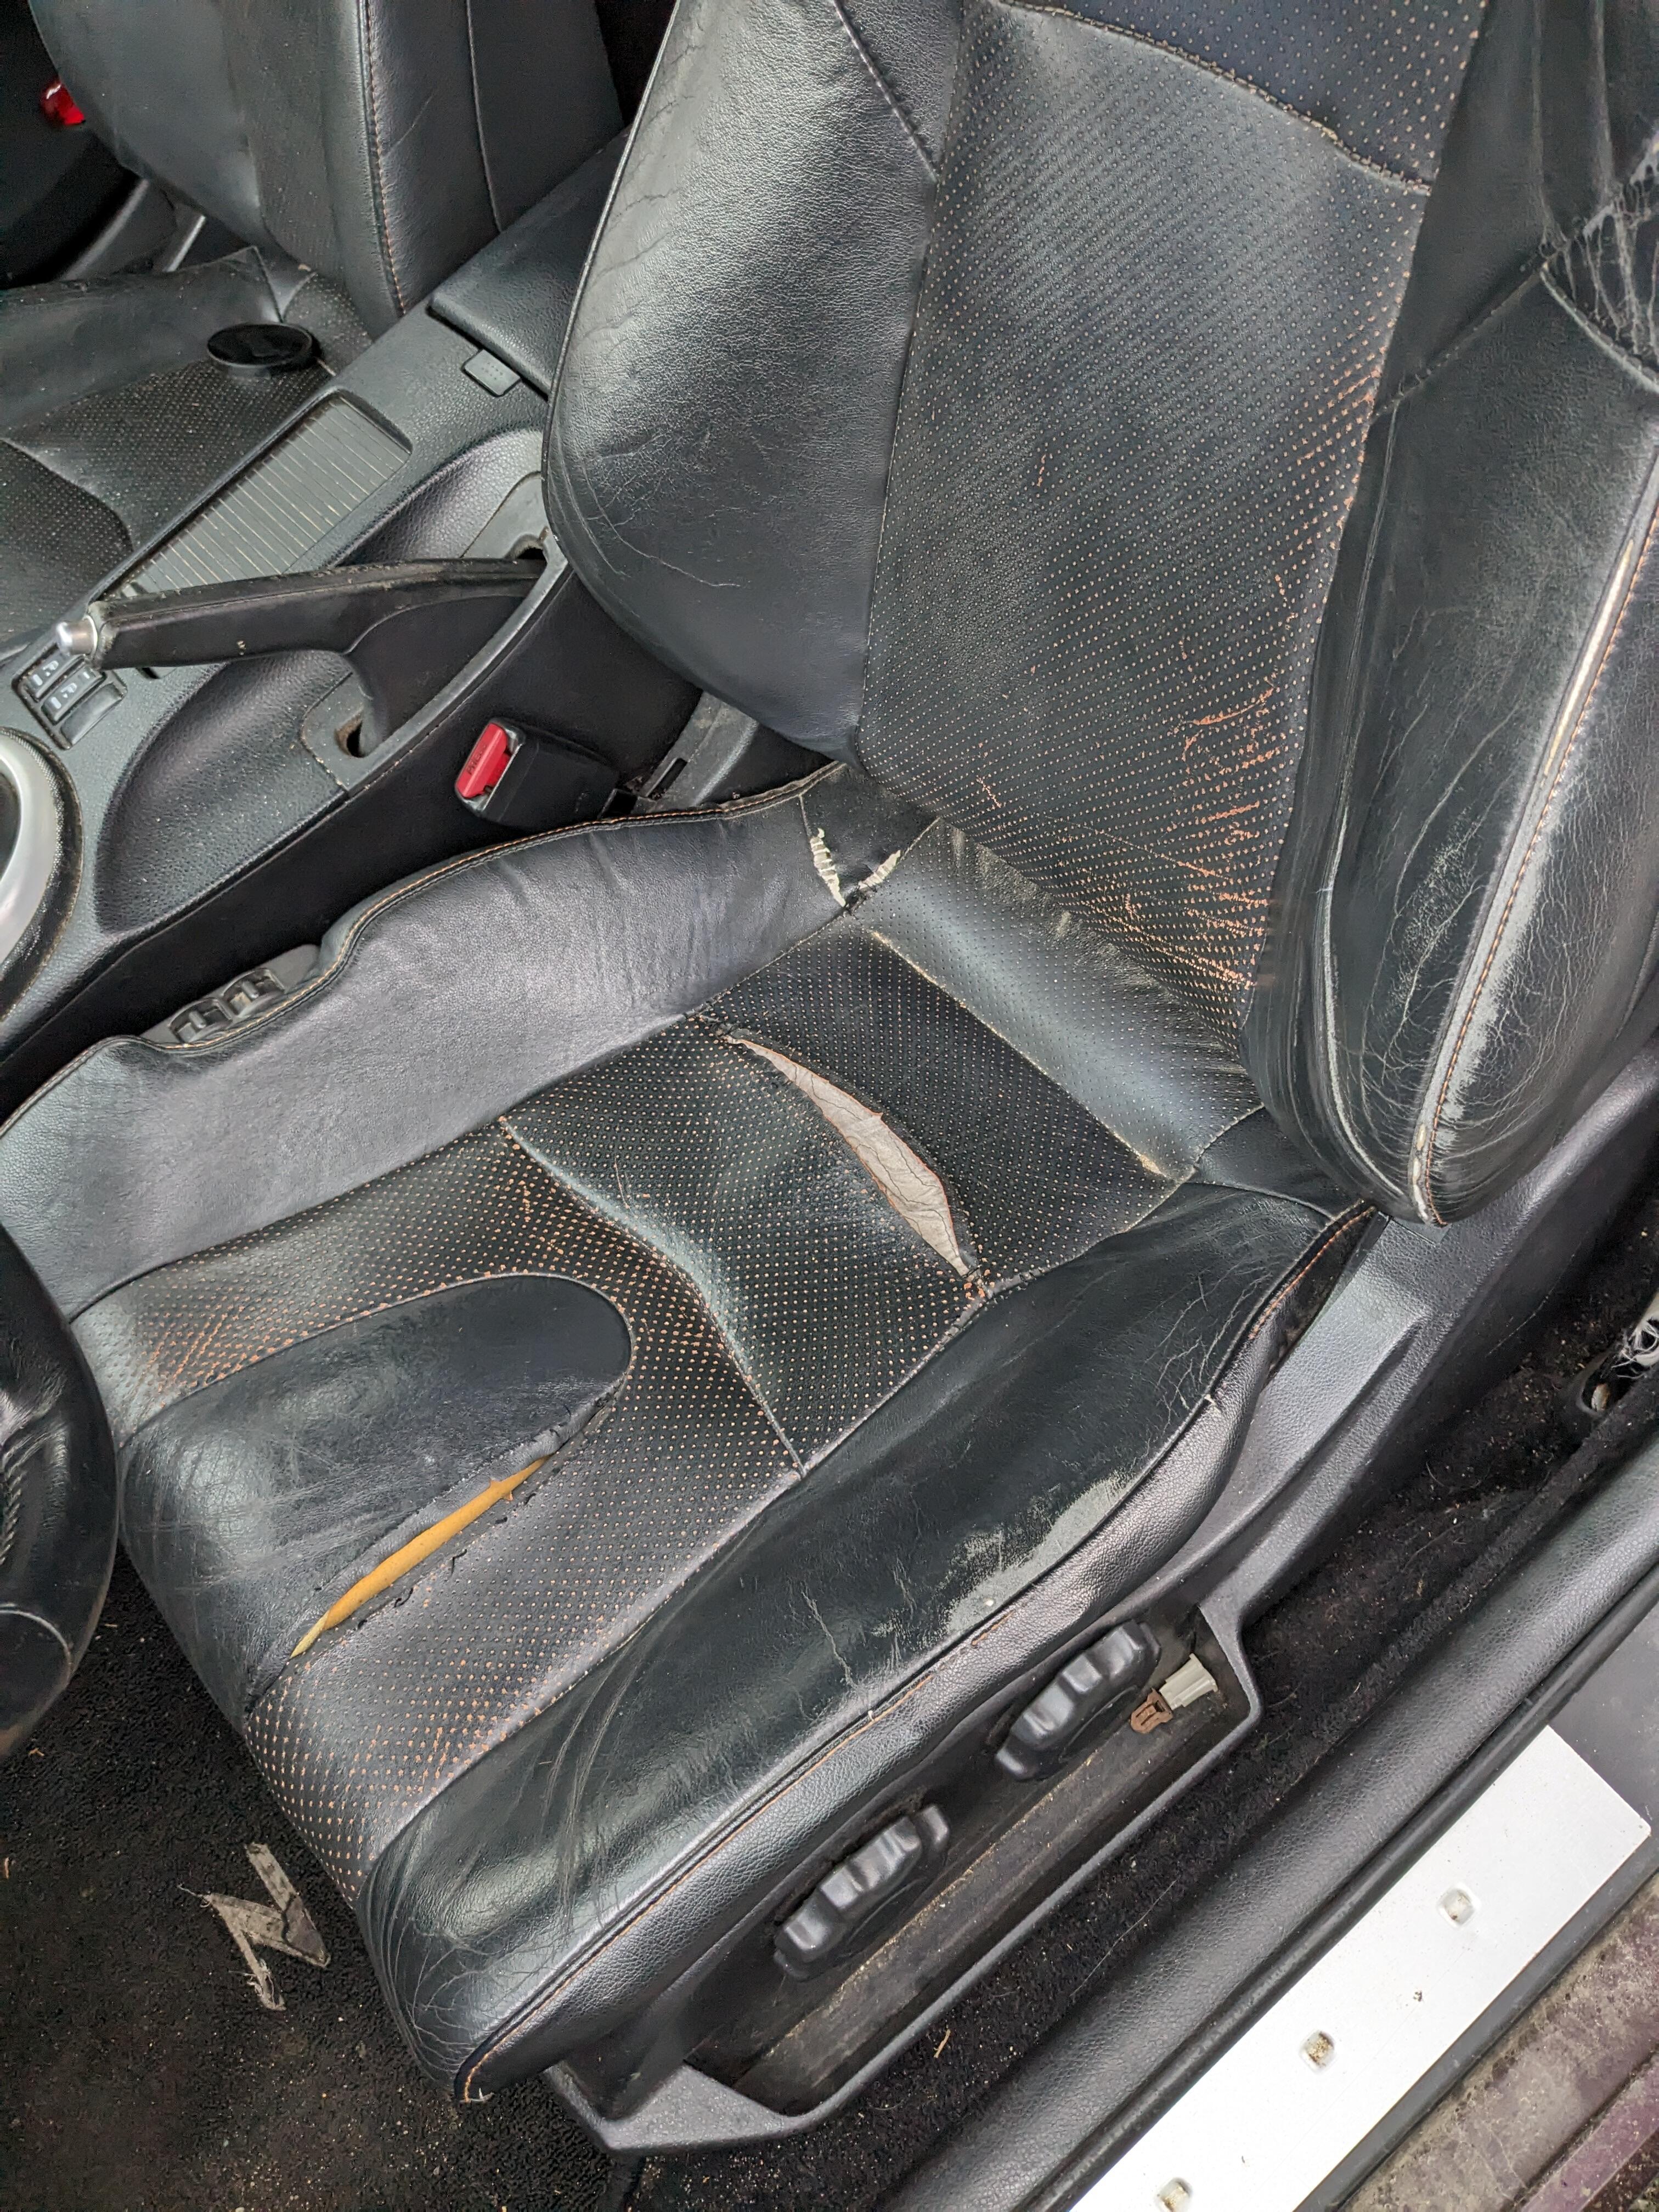
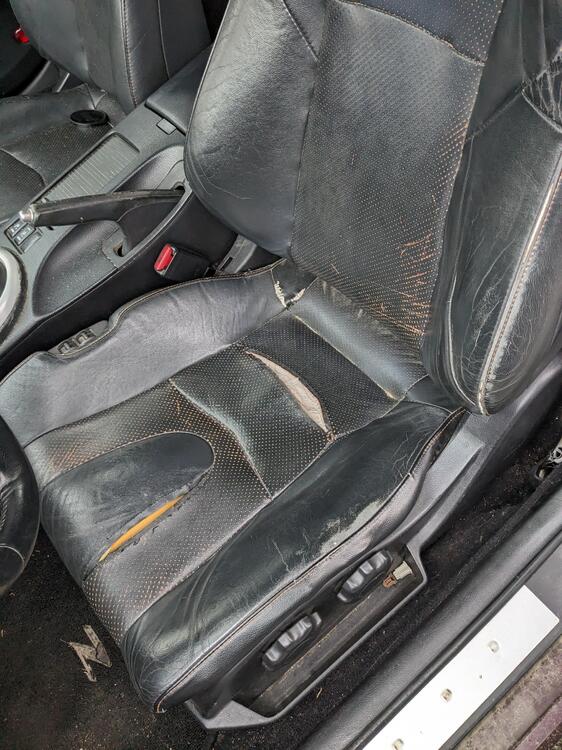
I bought their seat foam + leather upholstery (via their Amazon listings). Took at least 2 months, if I recall correctly. Came from India. Quality is very nice. I will be removing the seats to install 350Z seats, so if you decide you want full leather & new foam, I will be selling the entire seats minus the rails. Note that I added Honda seat belt guides.
-
Those floor panels look like a really good fit! I bought one of those flanger/hole punch tools - it was essential for the roof junction on my Volvo pickup truck conversion. I used Lord Fusor & a spot welder through the sunroof opening to join it though, no panel distortion that way.
-
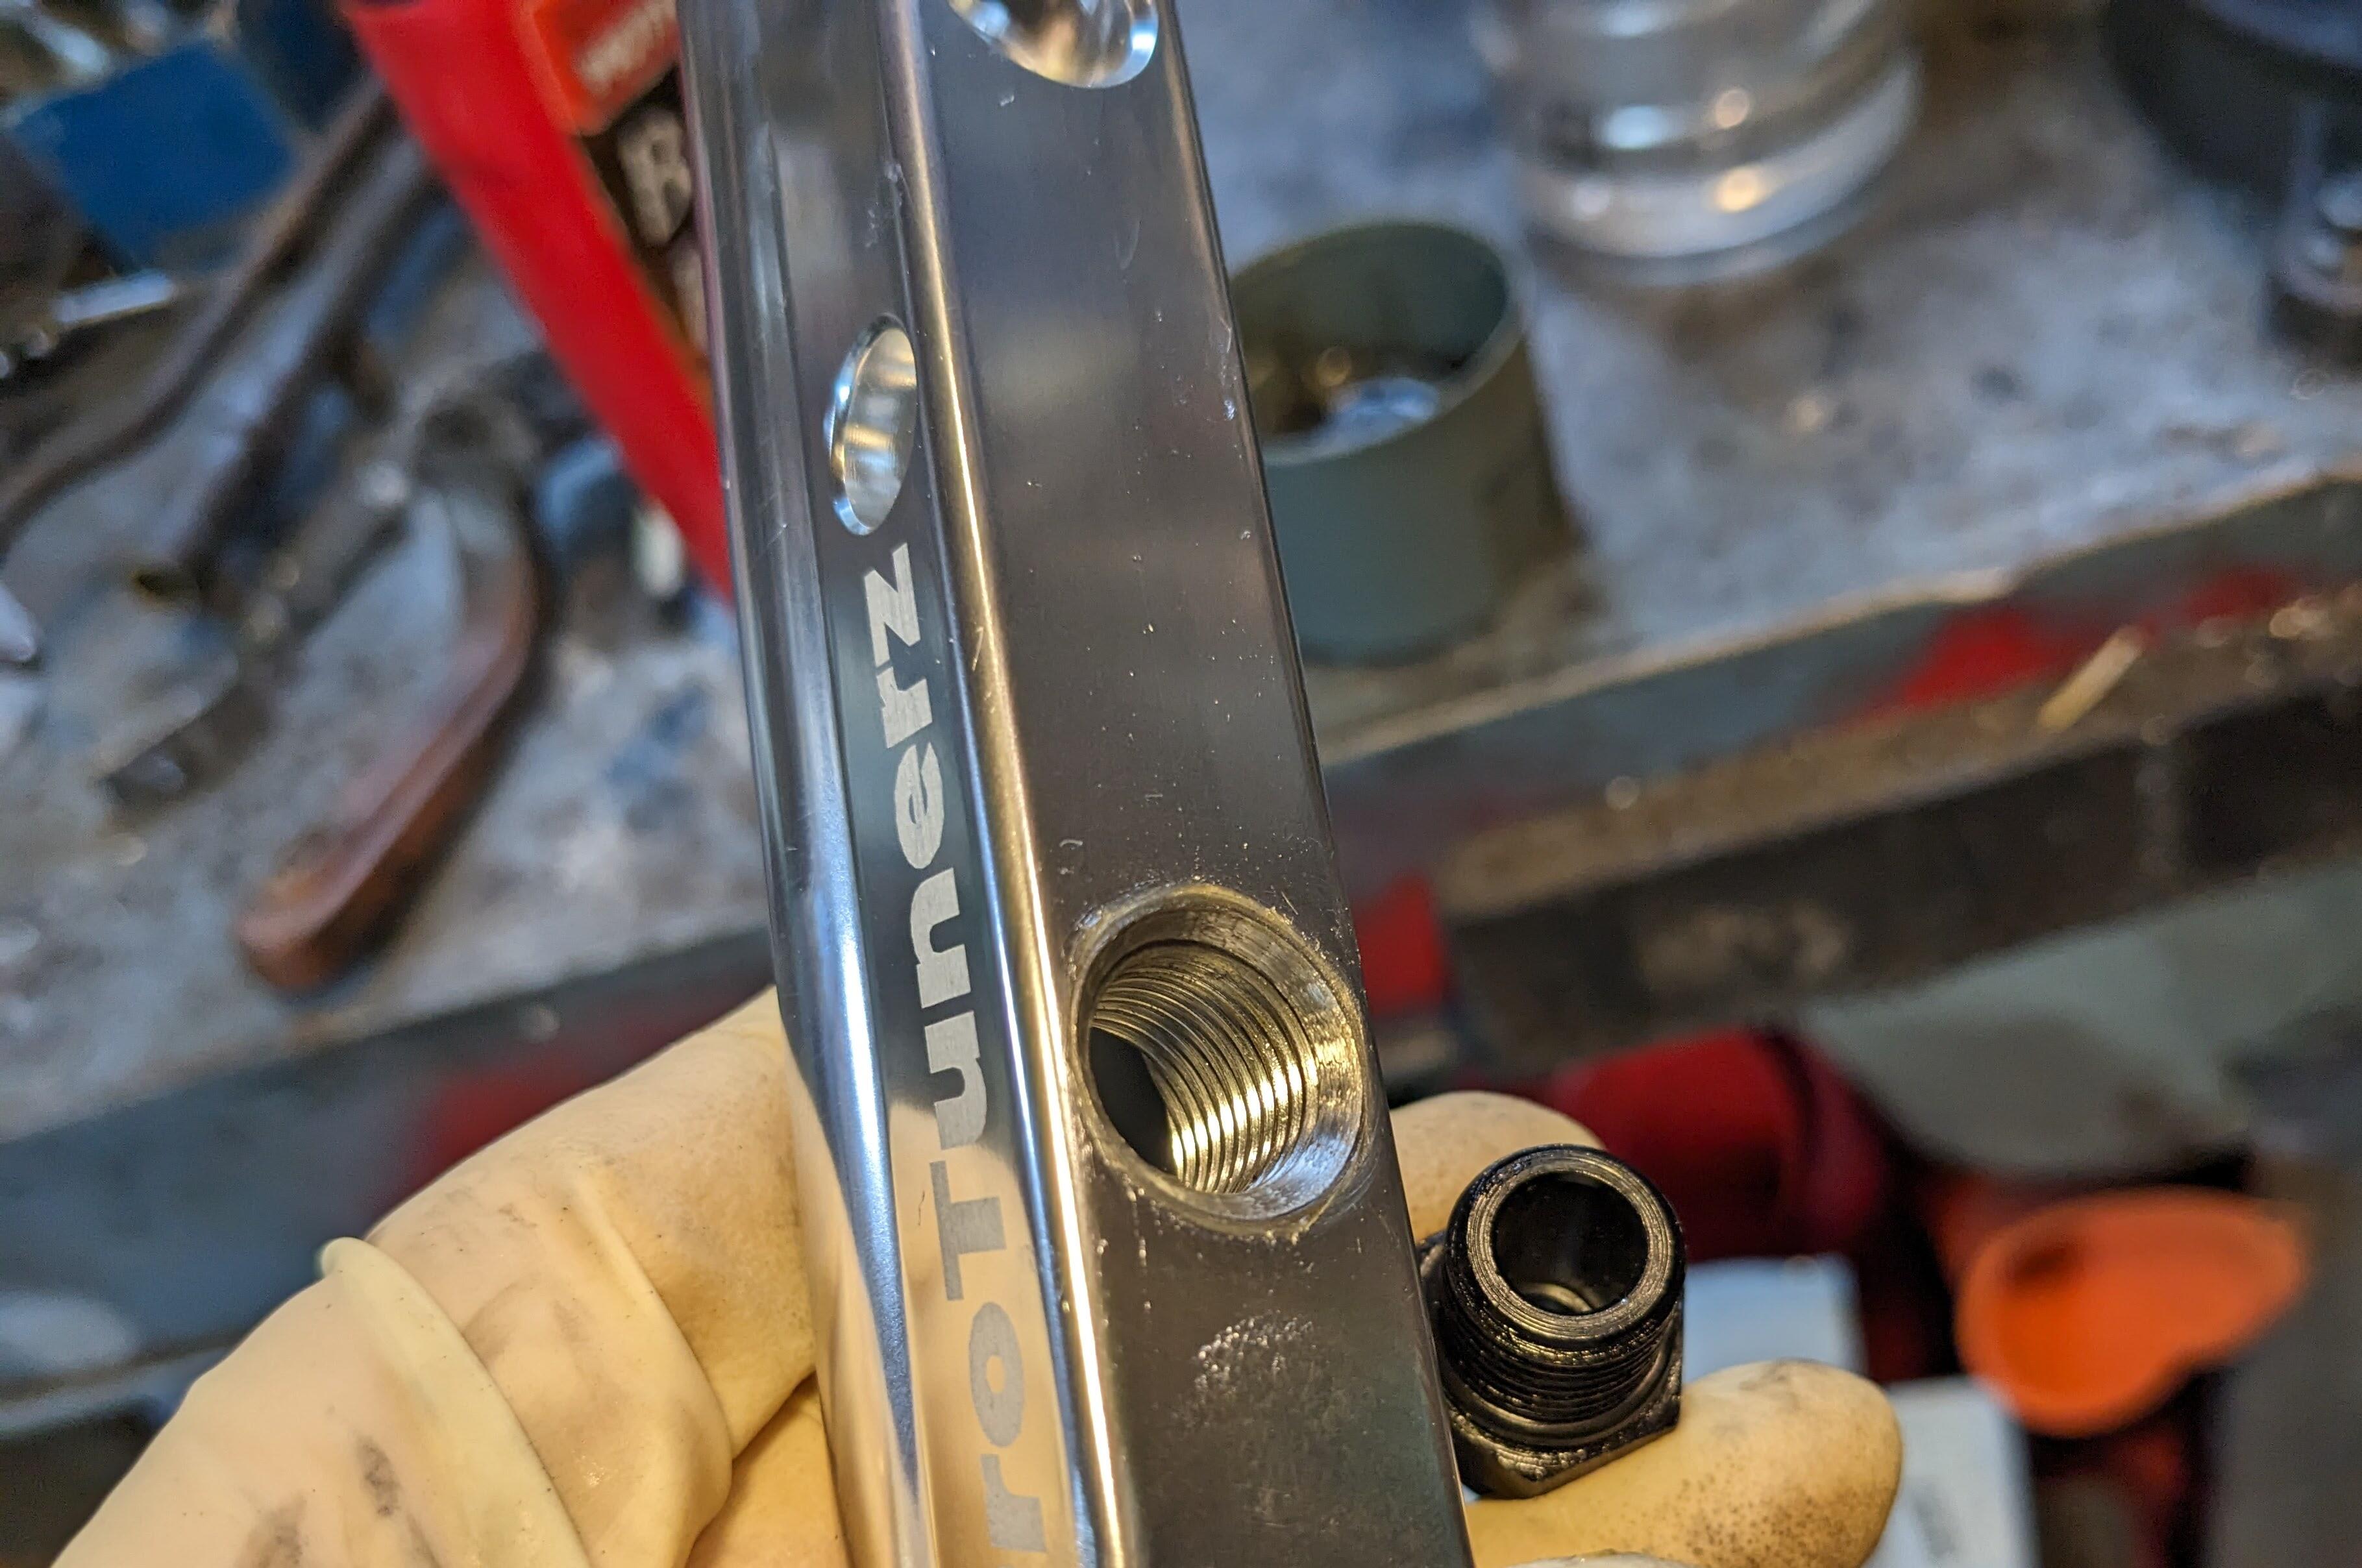
Replacement rail came today. Center port was no different than the first one, so I cut a chamfer with a countersink drill. Just went deep enough that the o-ring compresses without any squeeze-out

-
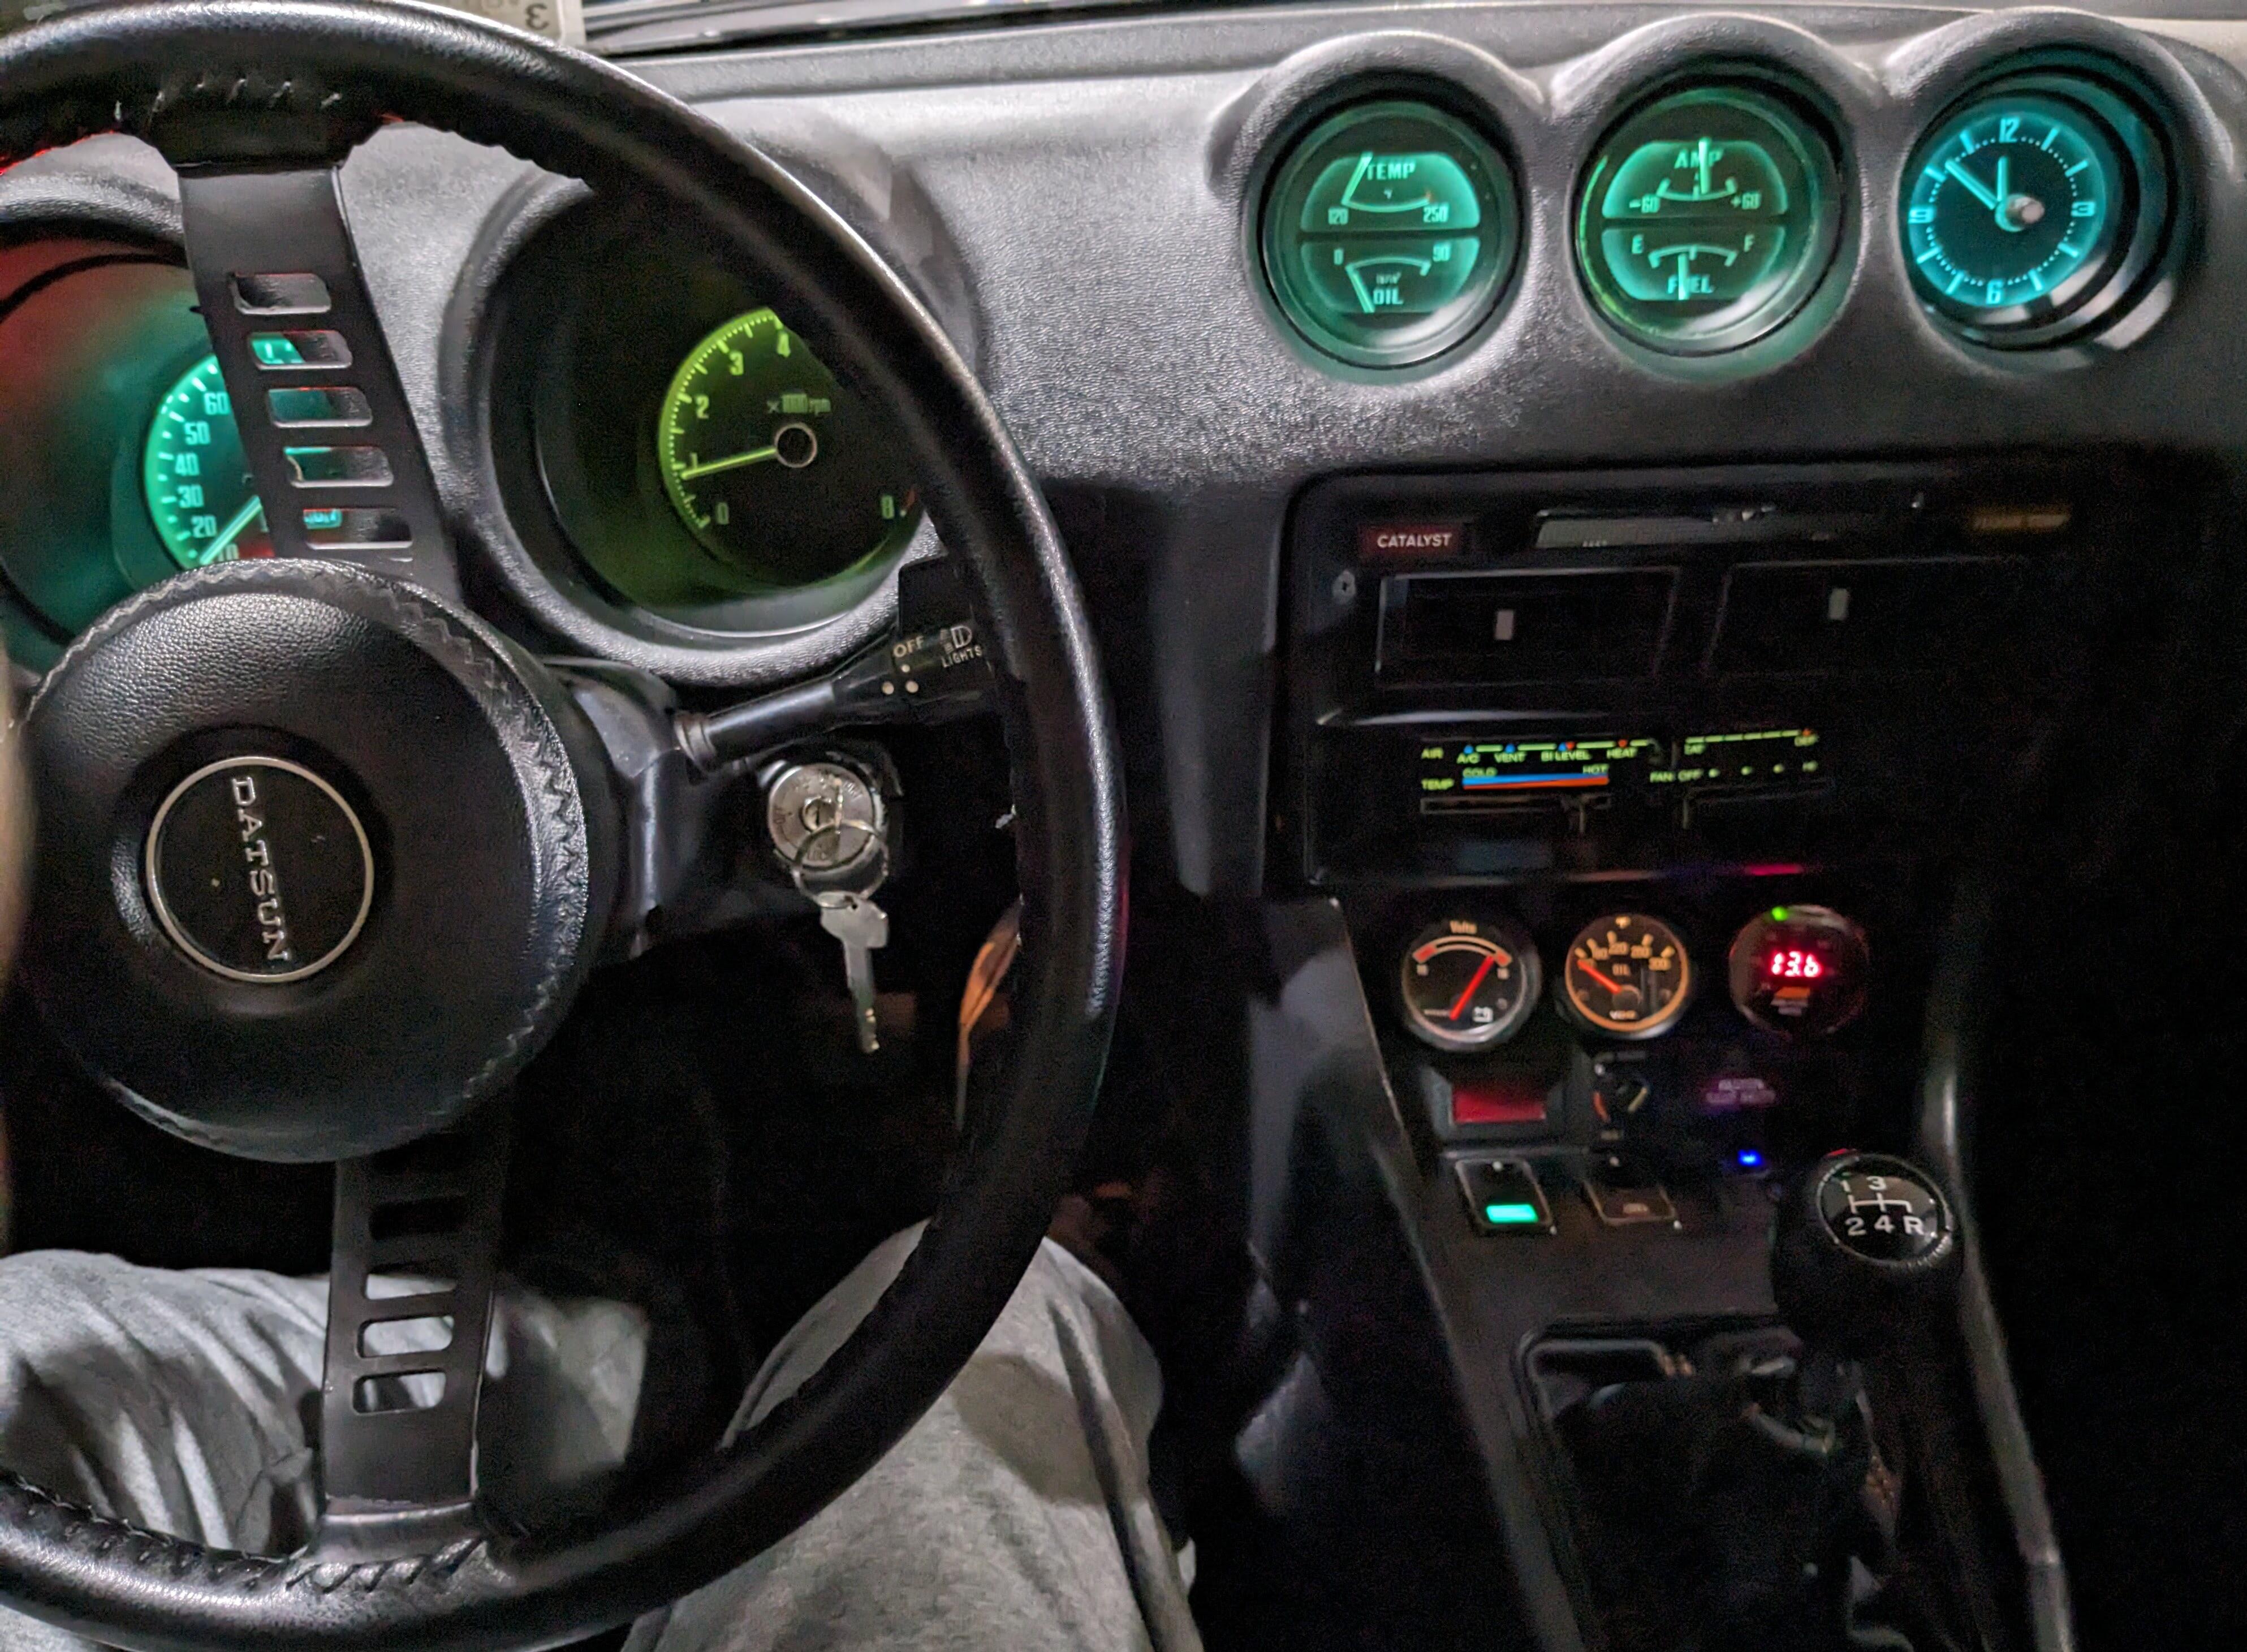
Had one of the new LED bulbs fail - the one in the AMP/Fuel started pulsing on/off. Swapped it out after confirming the power, ground & rheostat wiring to the gauge assembly were all not the issue. Interesting that they appear different color cast in the photo - they are all the same bulb. Secondary gauge pod have standard incandescents.

-
Sorry, Steve, is that an American cultural reference? Being English, perhaps I'm missing it 🤪
-
Two of my cats disapprove of that joke 😁

-
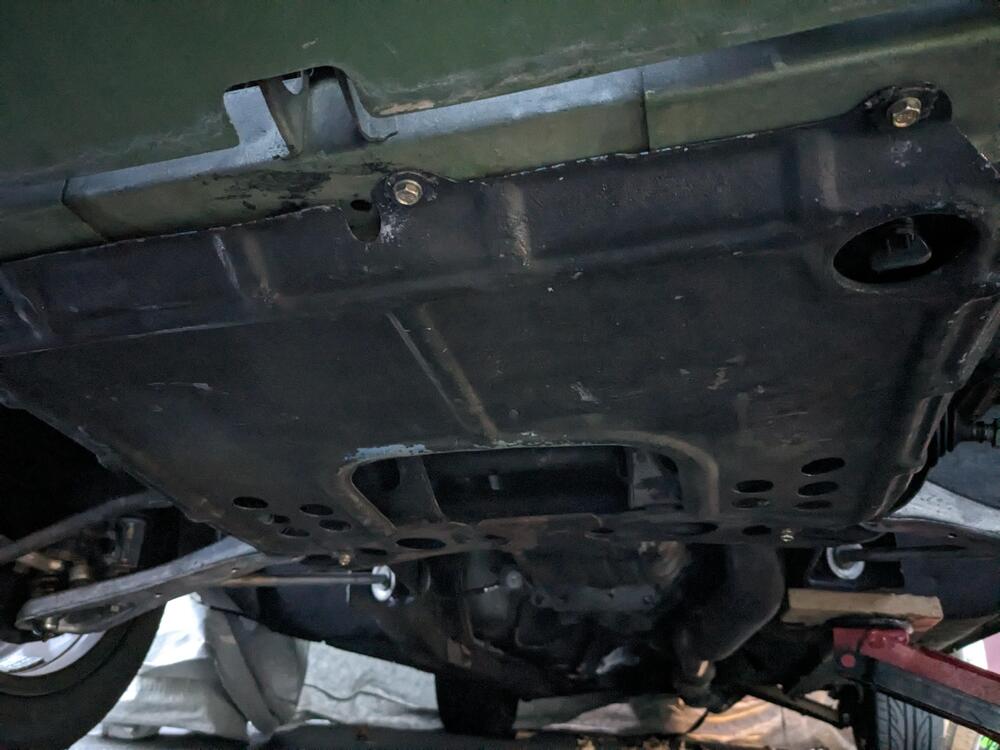
Meaning that the mount screws sit on top where they are less visible? Sounds better. I wonder if the mechanic who did mine was the same meathead who did the AC install. Neglected to review any provided directions 😞 Replaced the pass door handle over the weekend, and the belly pan today. I broke my phone last Friday, so no pics of the work

-
Thanks for the clear detail pics here. I need to remove the gas tank in my 75 to fix the leak that occurs when the tank is full. I figure I may as well remove the vapor tank & do all the hoses, and/or delete it. I've read that Nissan used more than 2 sizes of hose for the lines to/from the tank & canister. Is that correct? As an aside, I also find it odd that they came through the trunk floor with the hoses, instead of in the side well area. Not having dropped the tank, perhaps there is an obvious space limitation that required this routing? Just seems out of character with the overall design flow of the car's mechanical layout & construction. Did you pressure test or otherwise verify the cannister's integrity was solid? I've heard they can leak vapor. I do not have any fumes in the cabin that would suggest I have an issue in that regard. Finally, what brand & thickness of sound matting did you use in the pics above?
-
That's true - much more room to wire over on the pass side. Perhaps I'll just do that. I was planning on just triggering the AFM signal to switch the stock relay. I don't know what load this timer relay can carry, however it should be sufficient to power the pump for a short duration.
-
For me, this can be cheap and effective. The point is, wiring is required. Anything remotely plug & play is going to cost more, since you are paying the creator. The only additional element is figuring out the settings for the timer relay.
-
That's not cheaper than the $5 programmable relay. It still has to be (self) wired into the car, it's not plug & play
-
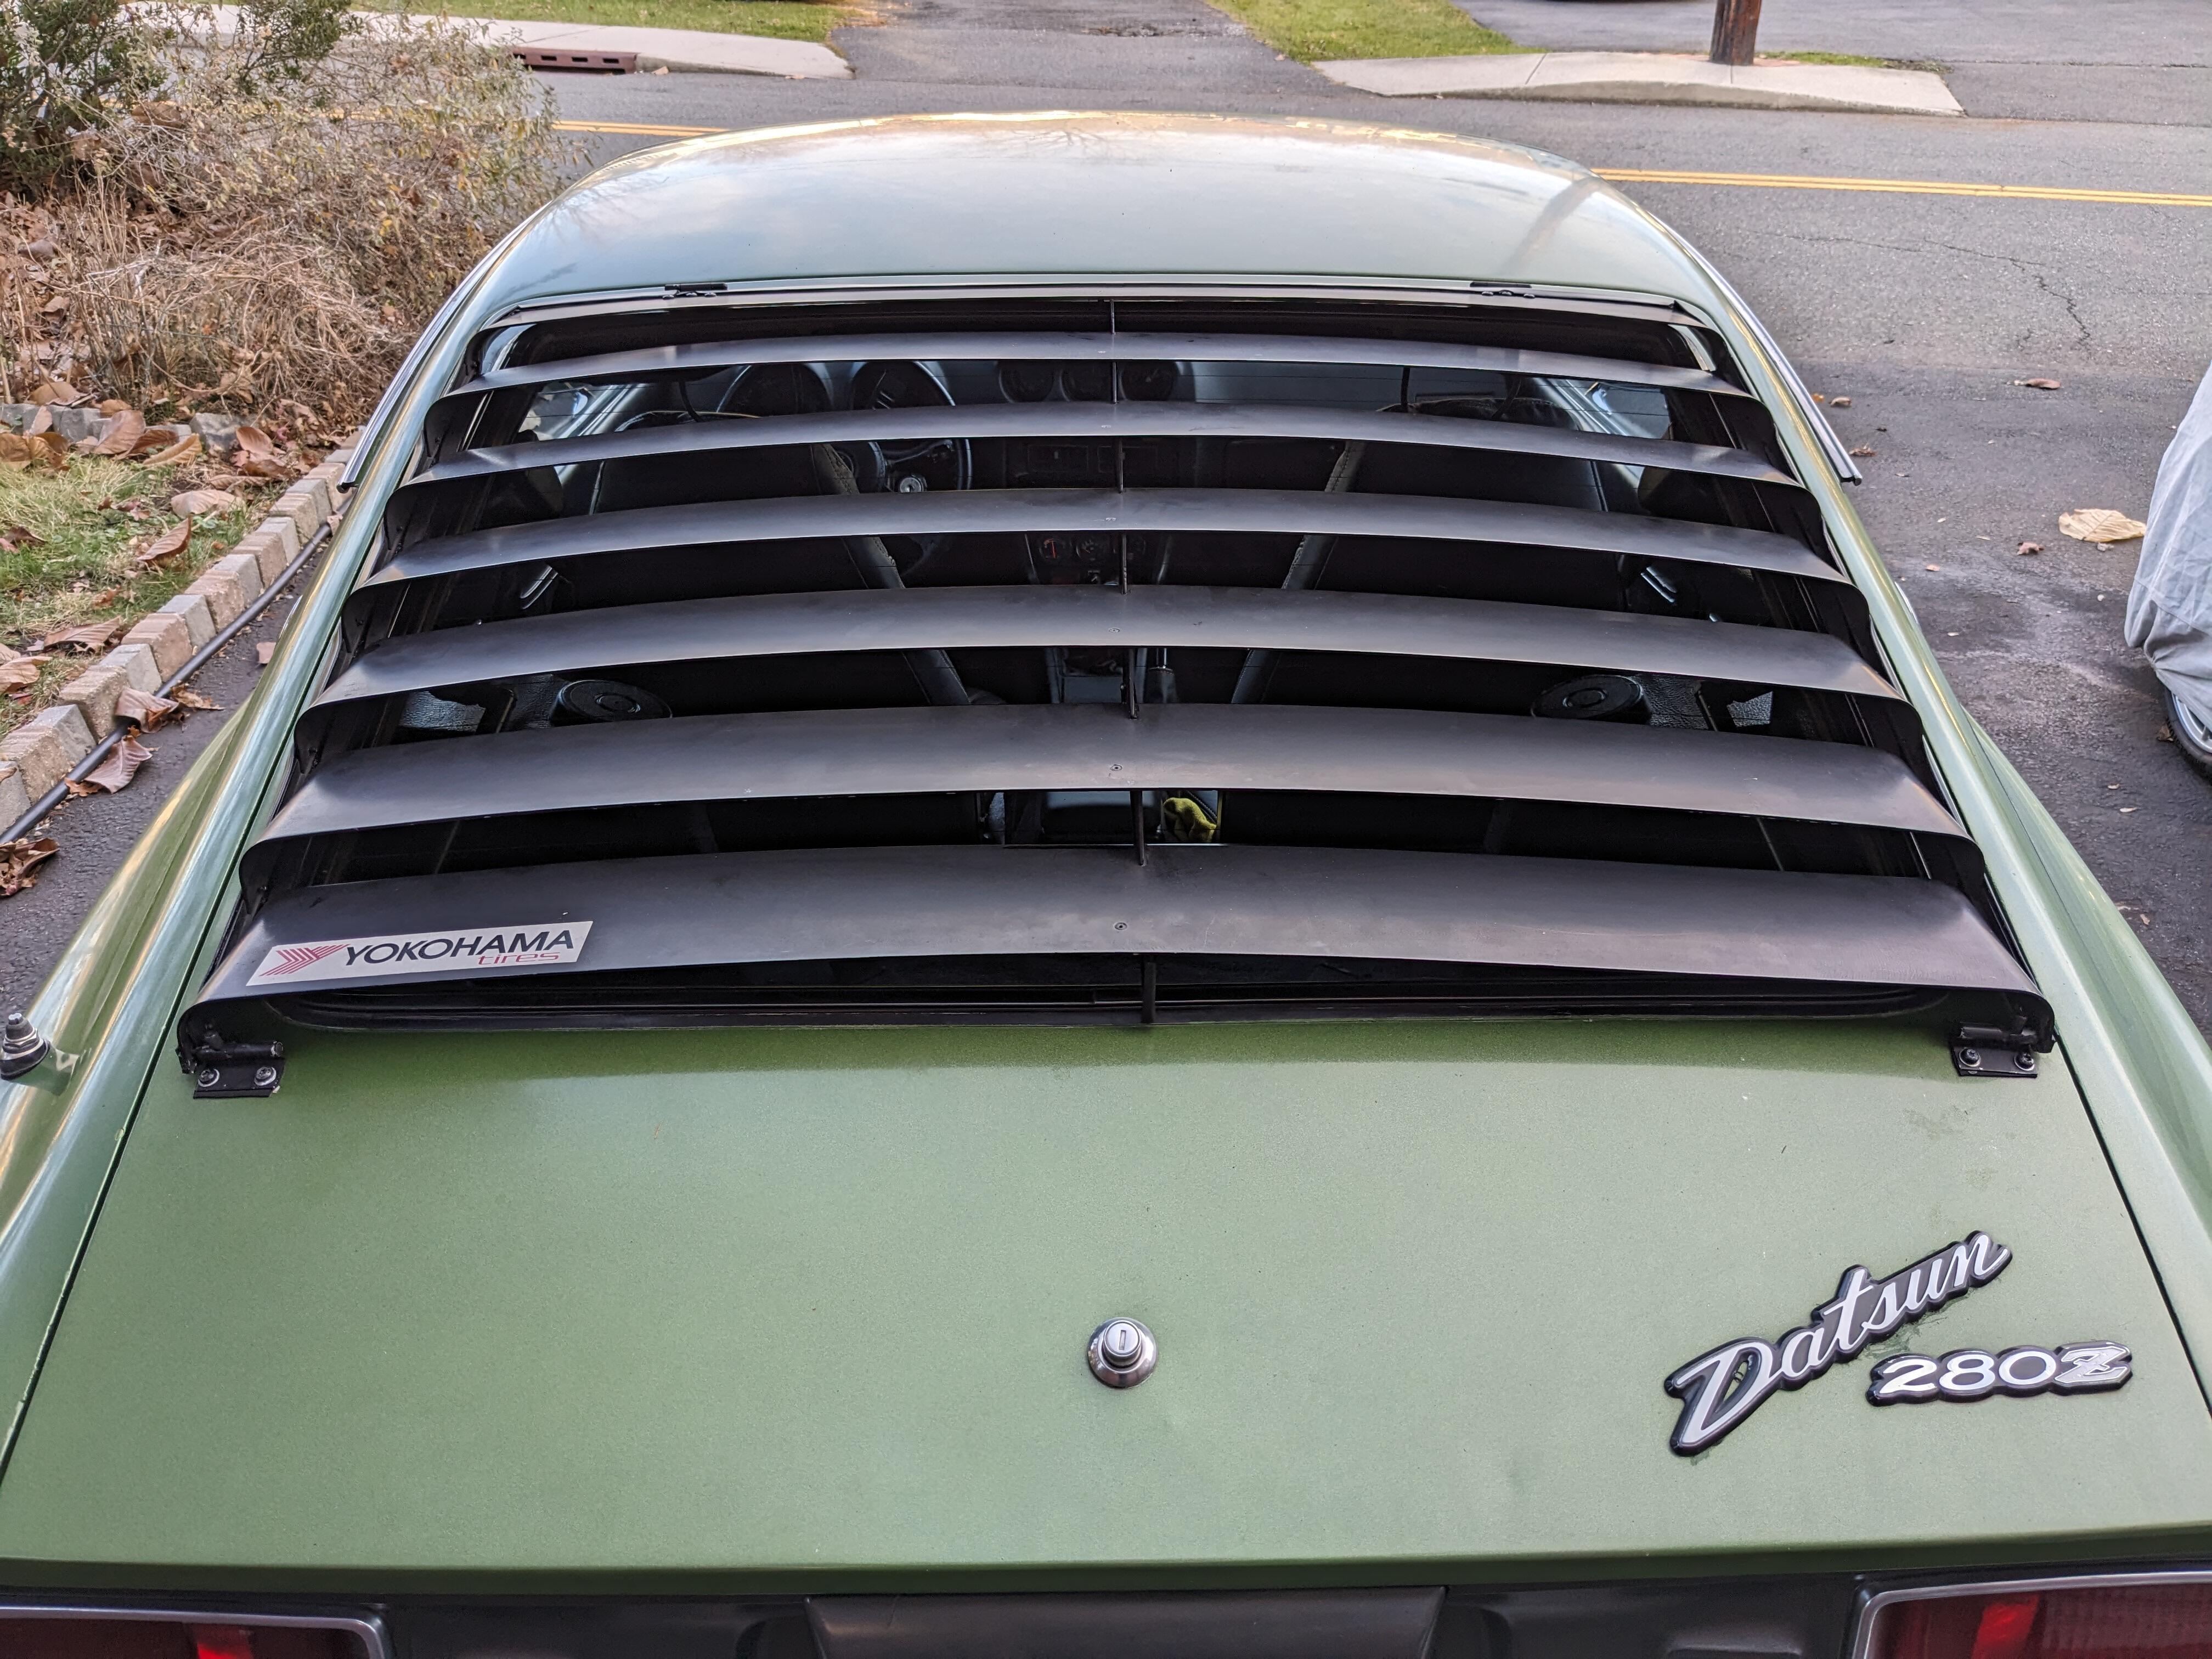
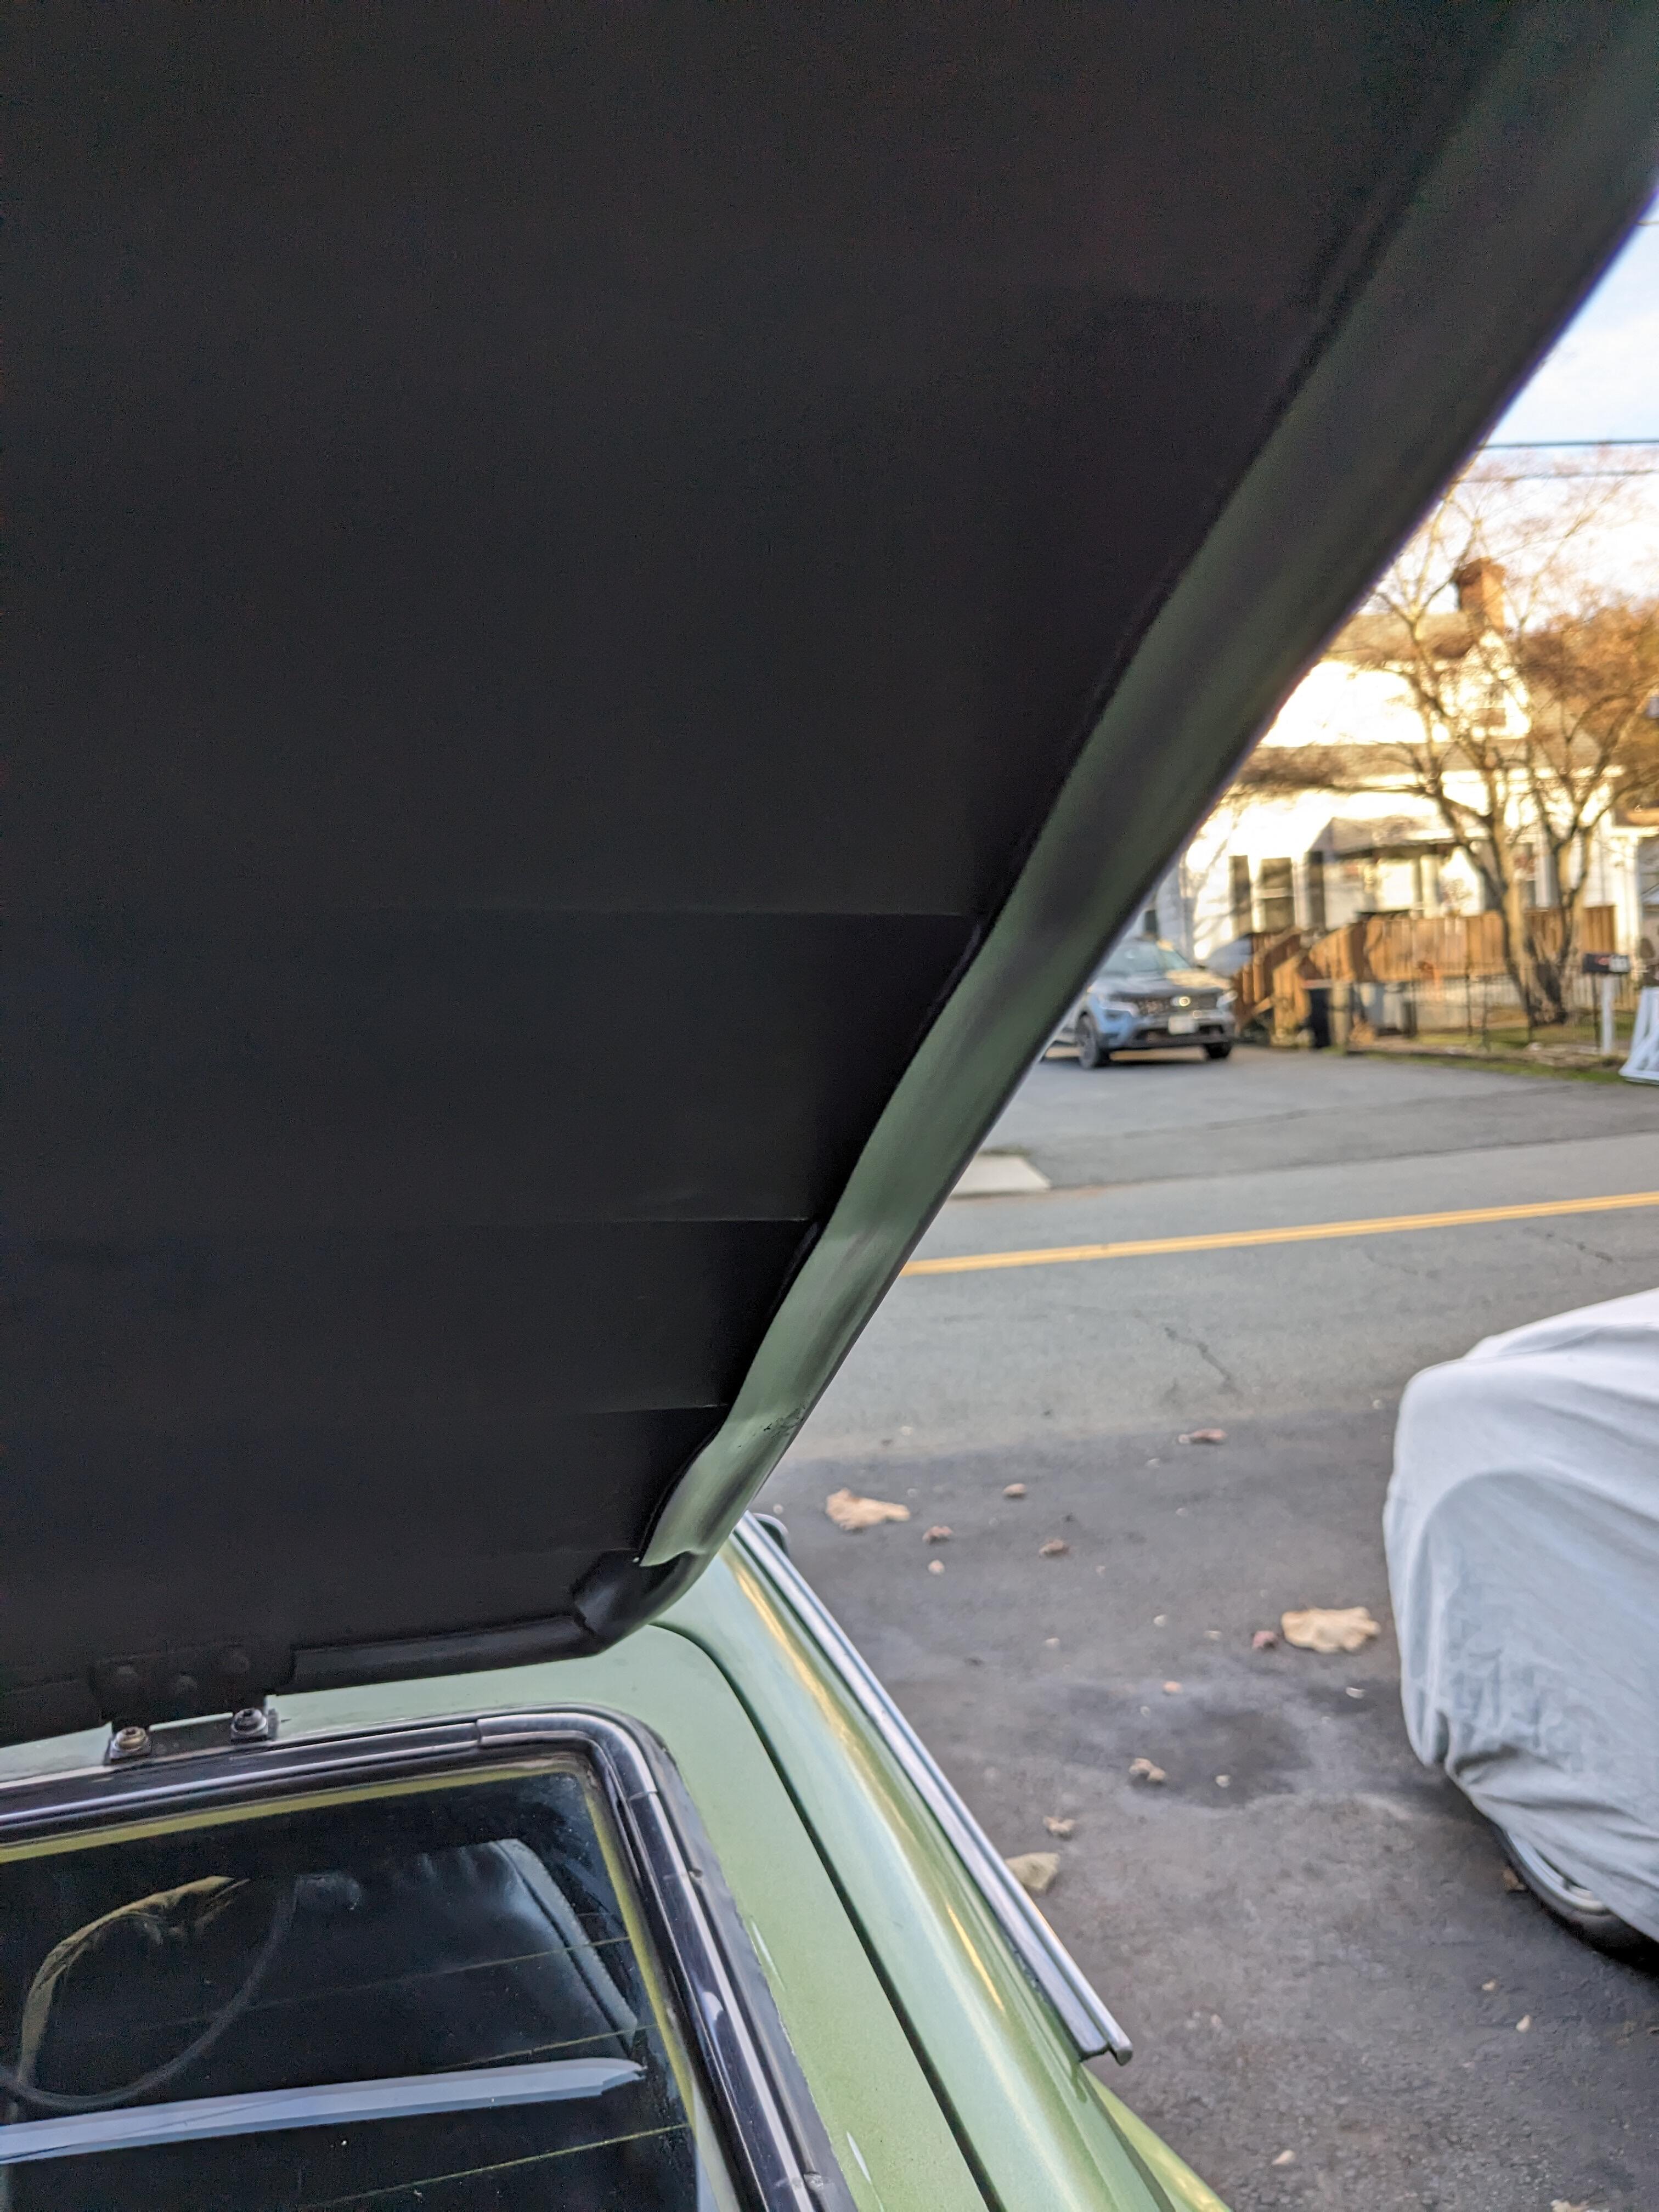
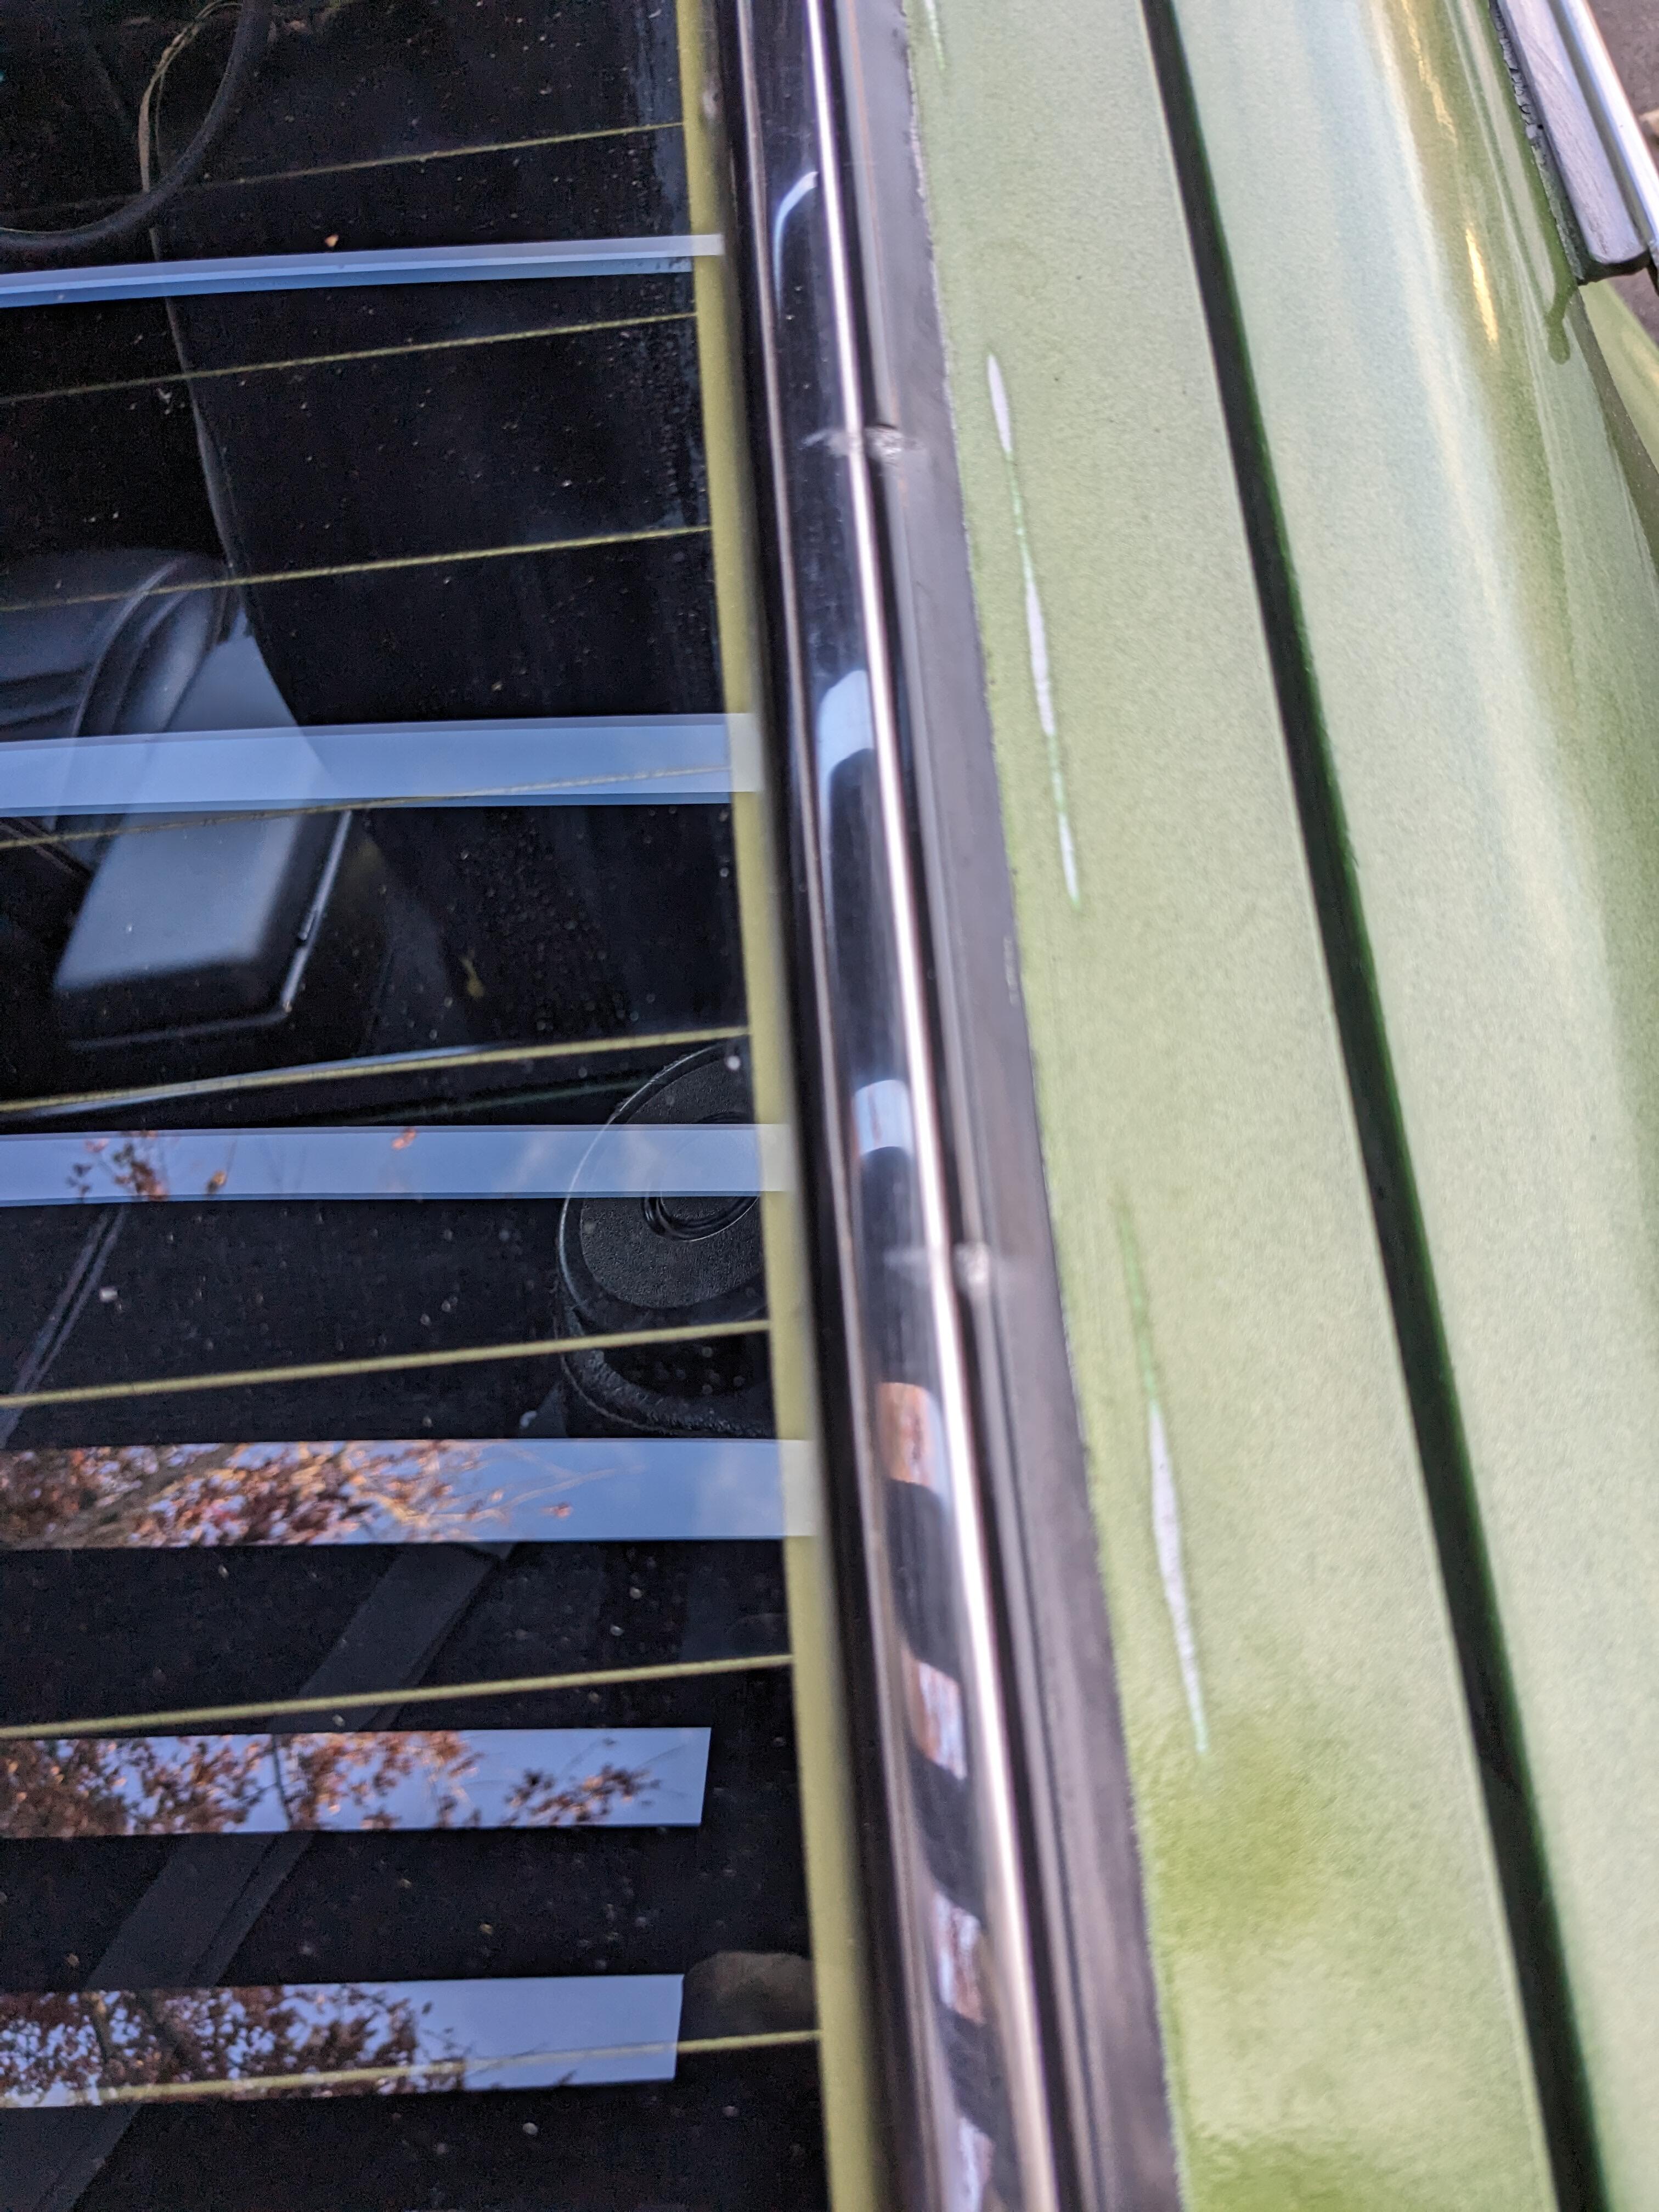
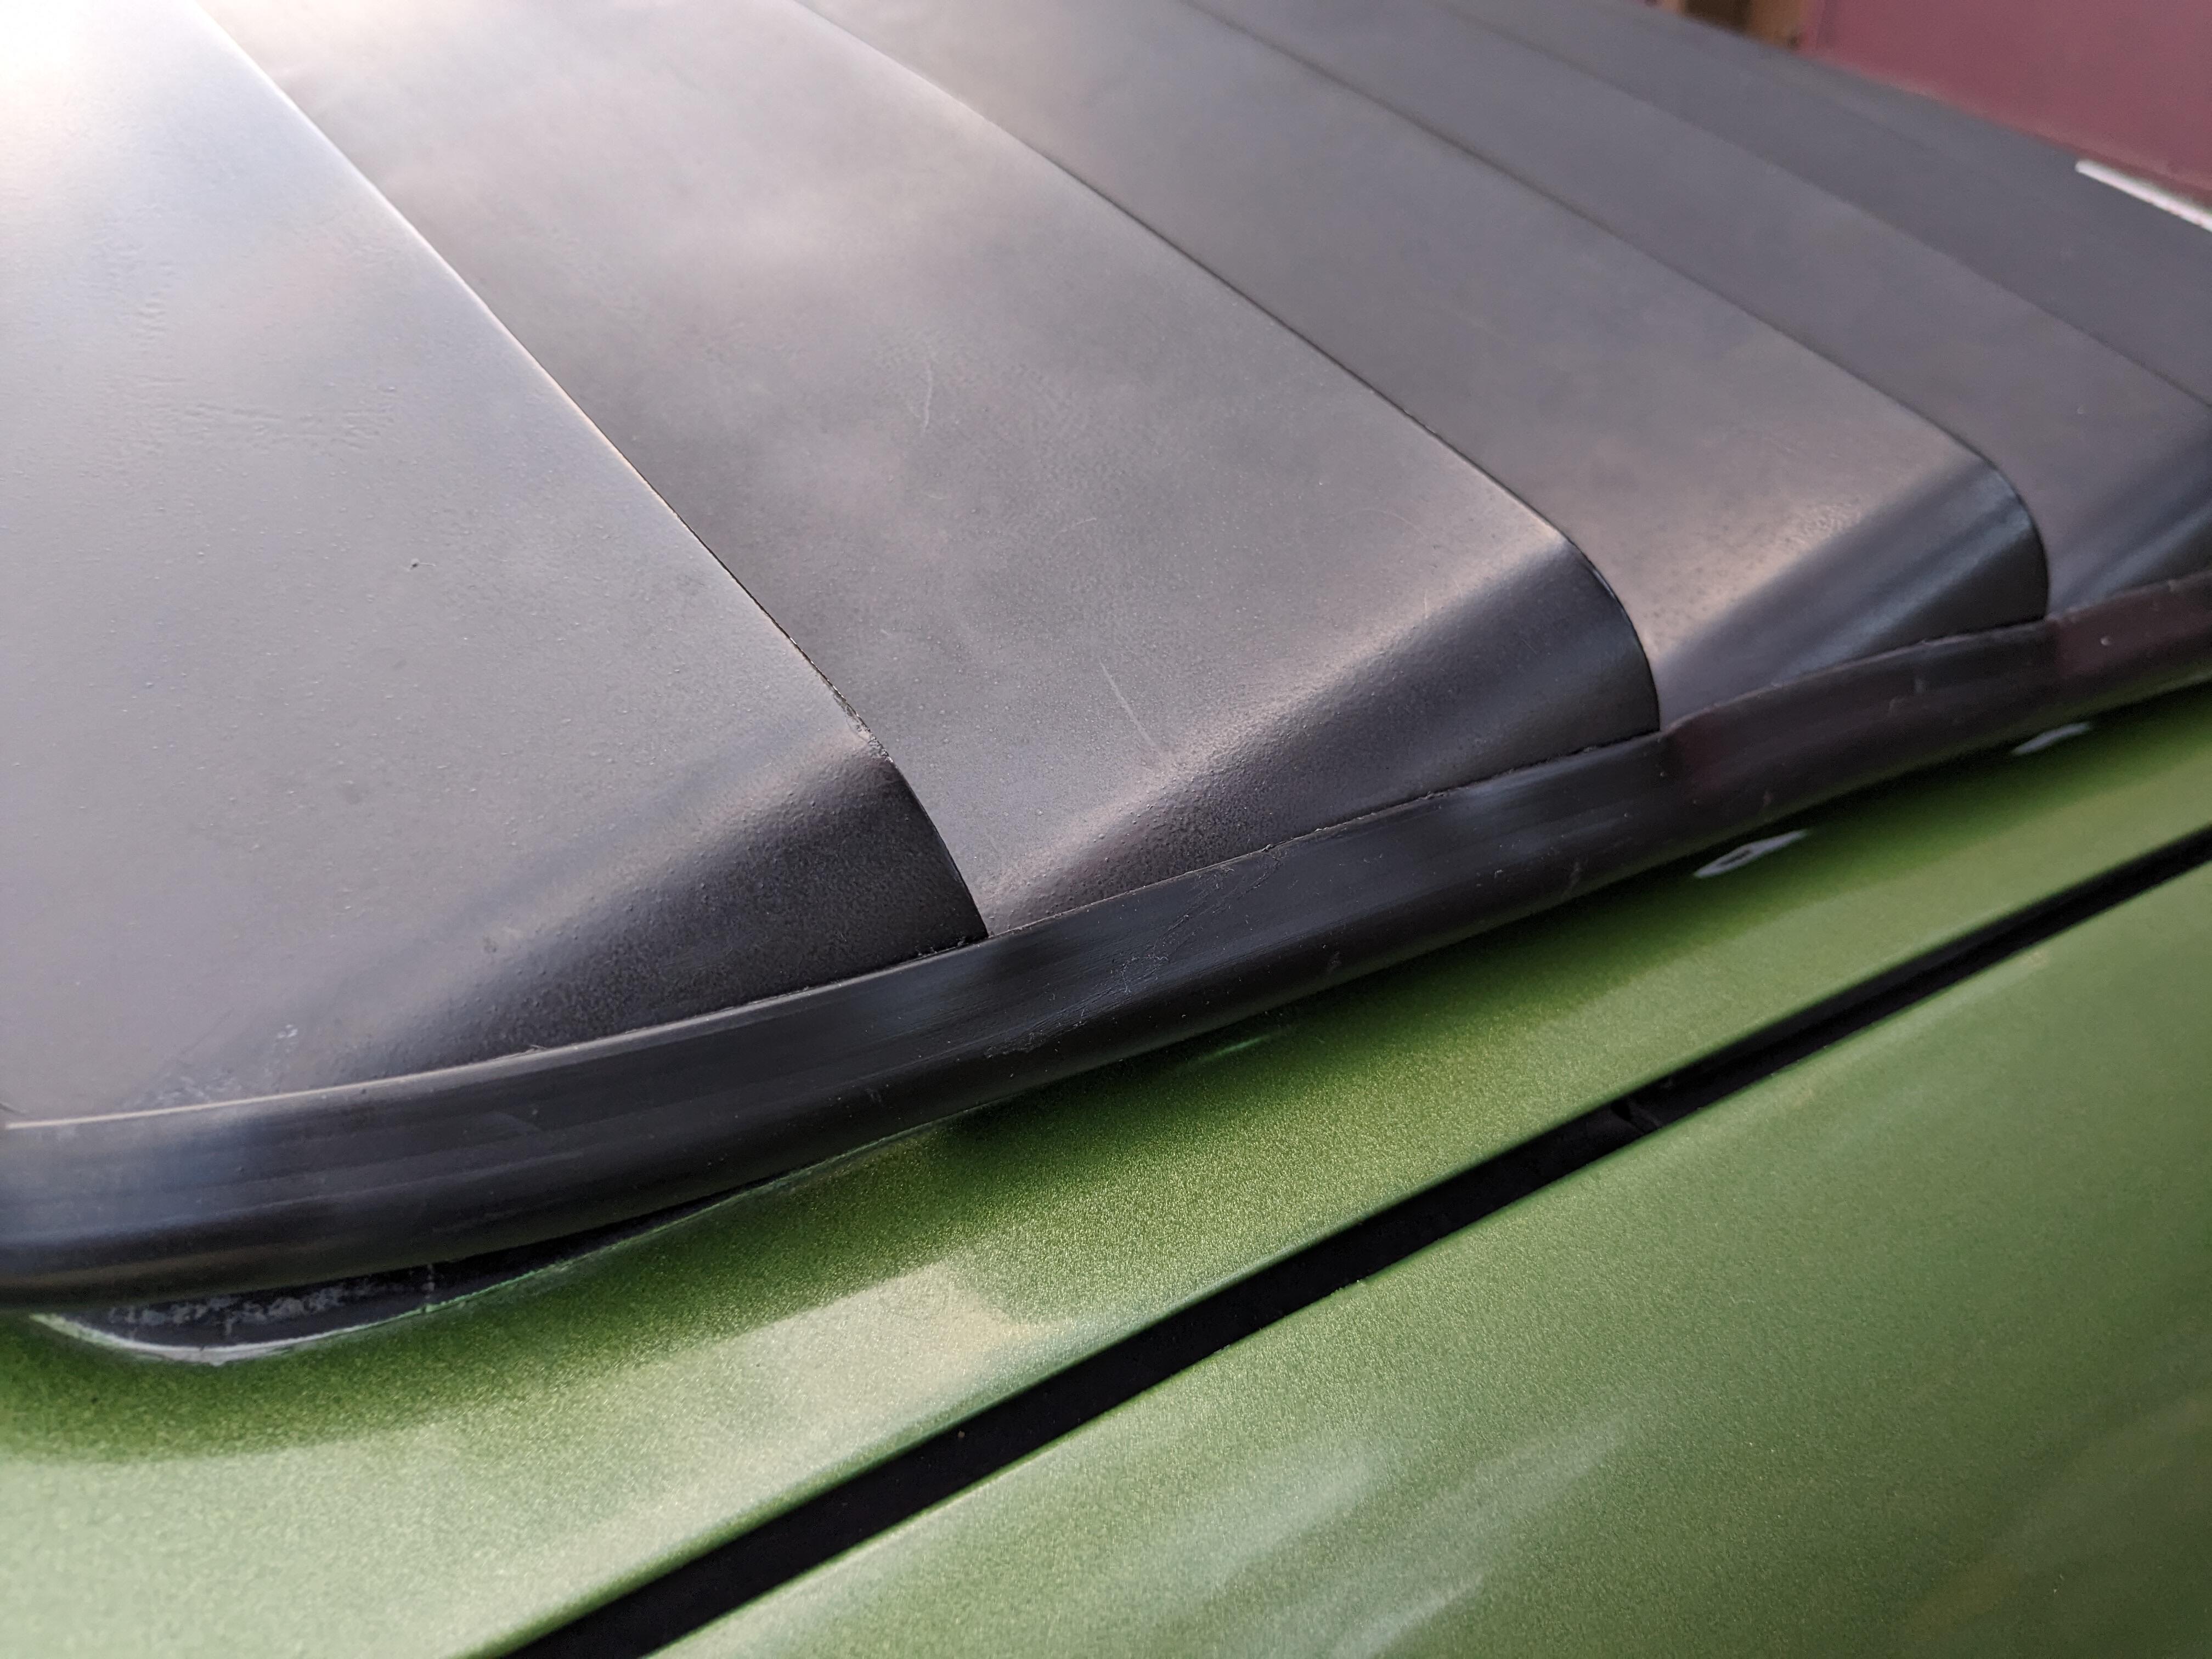
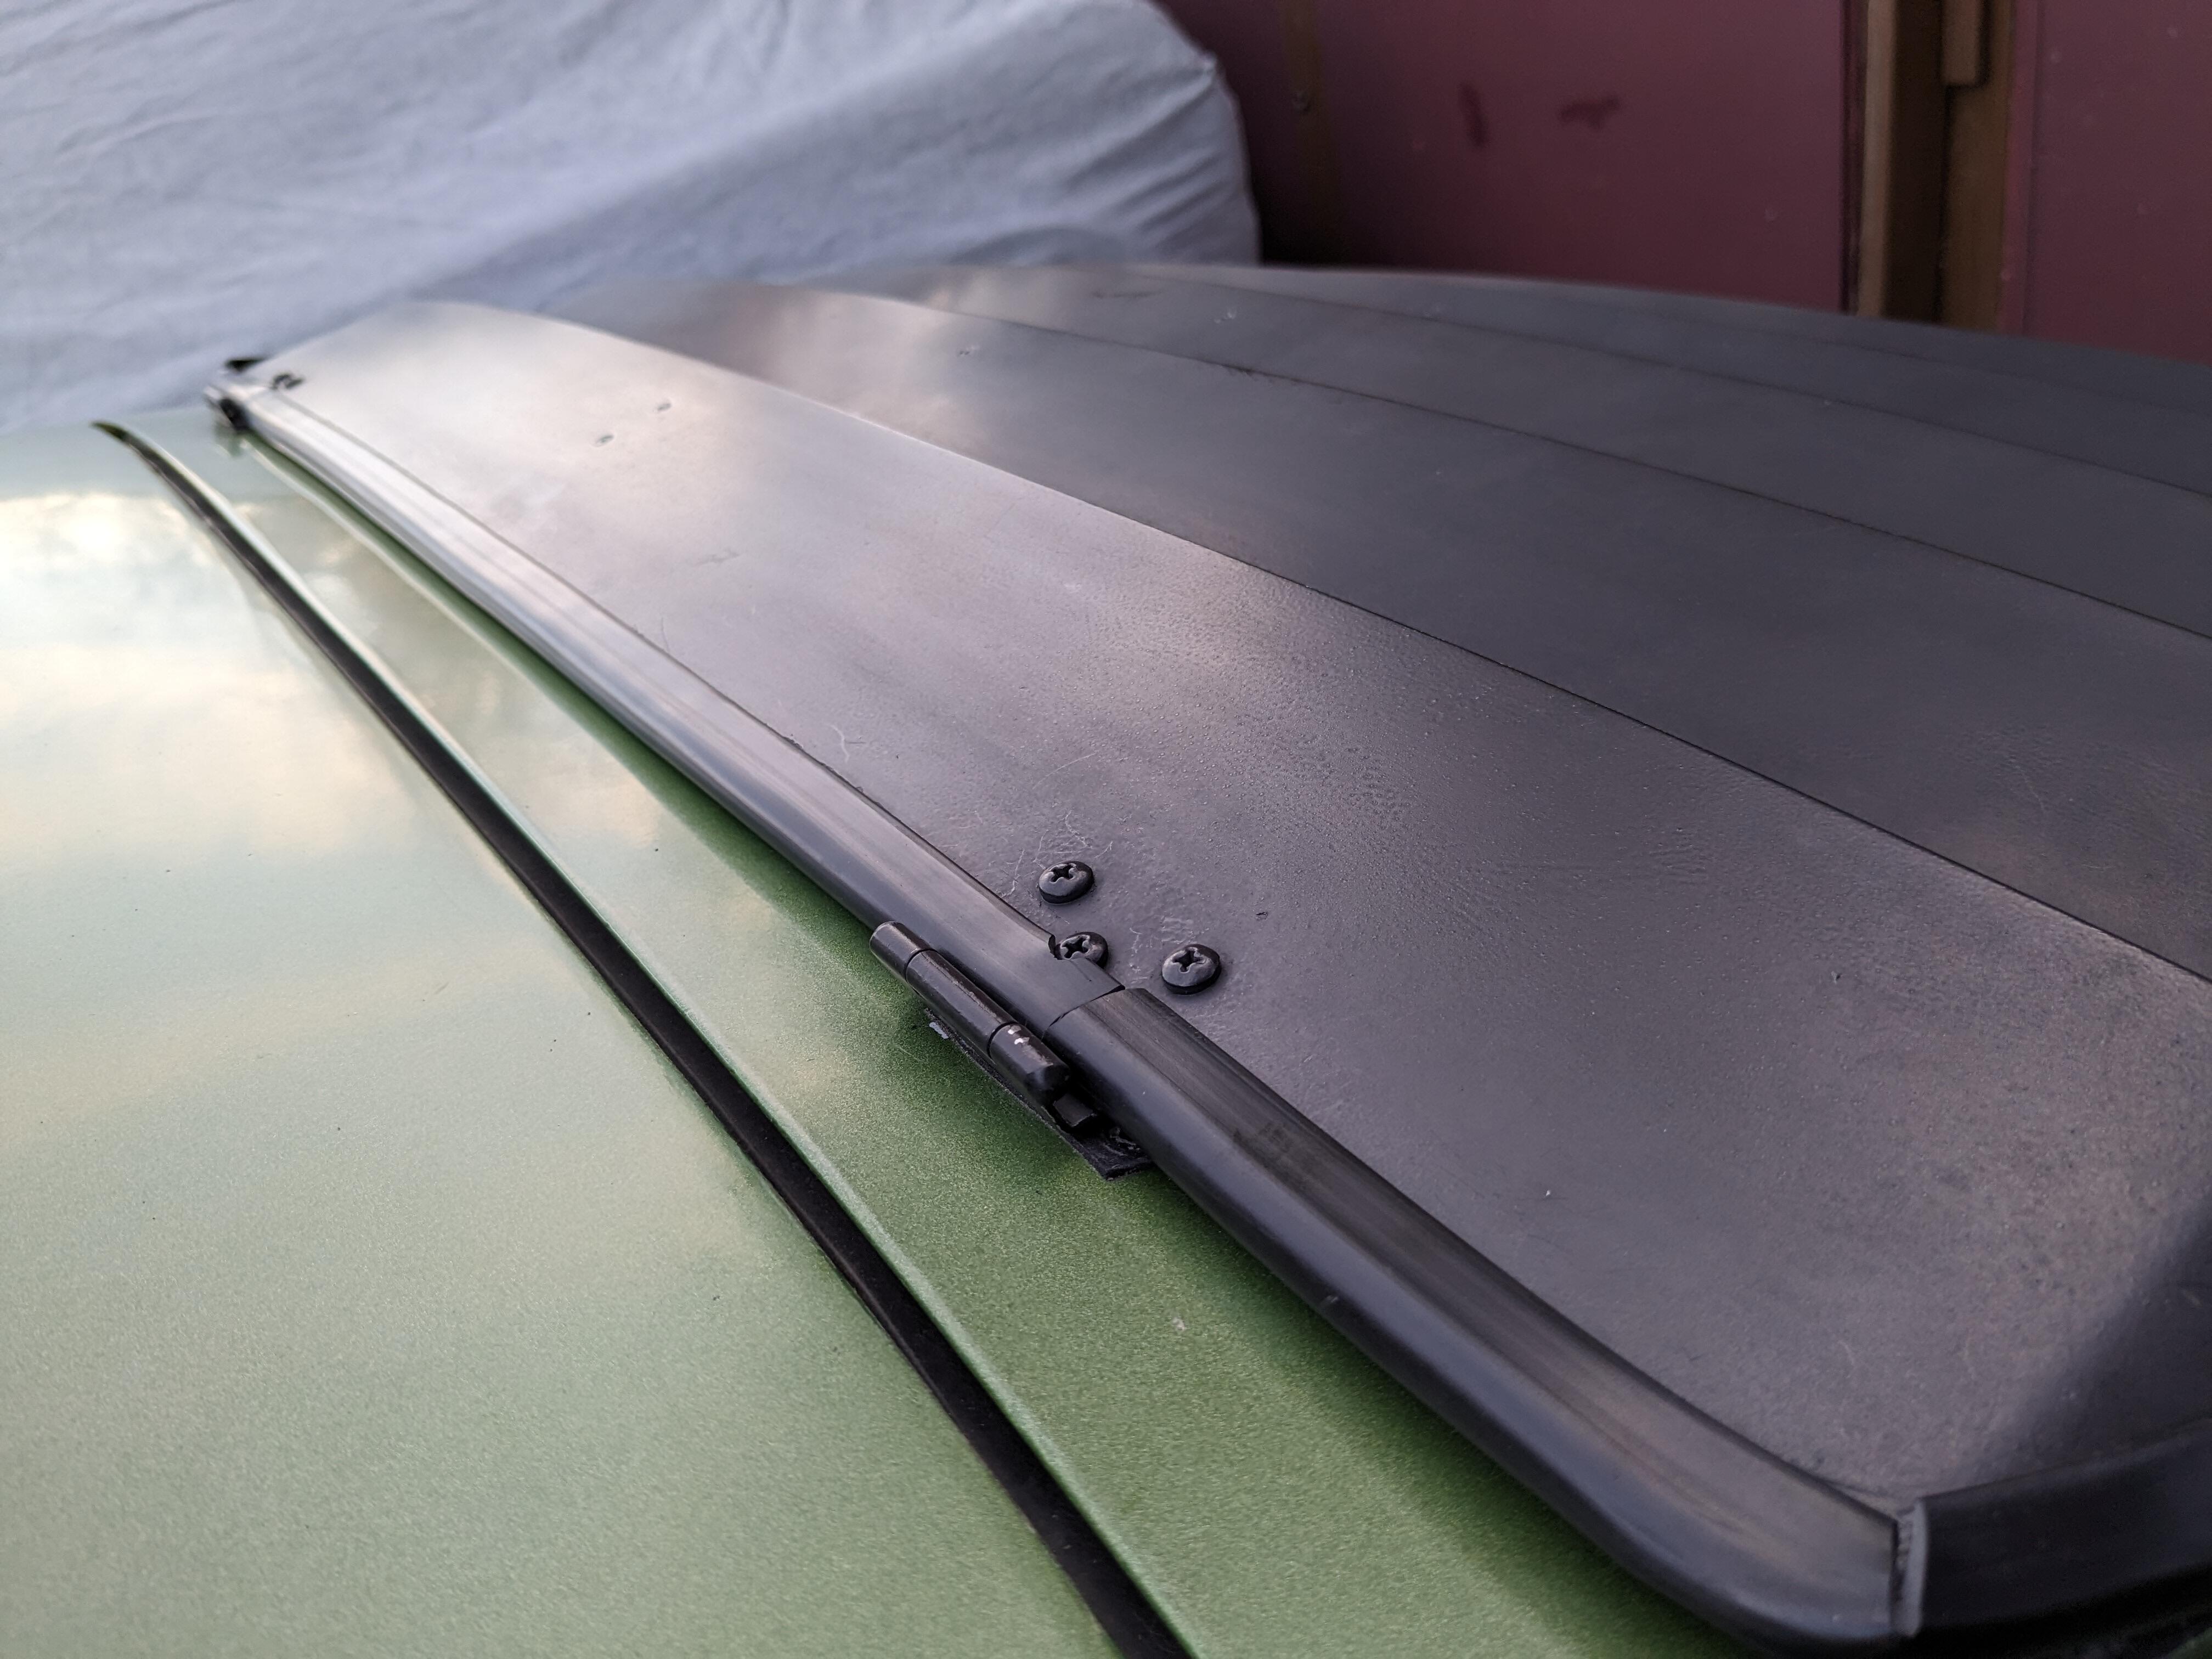
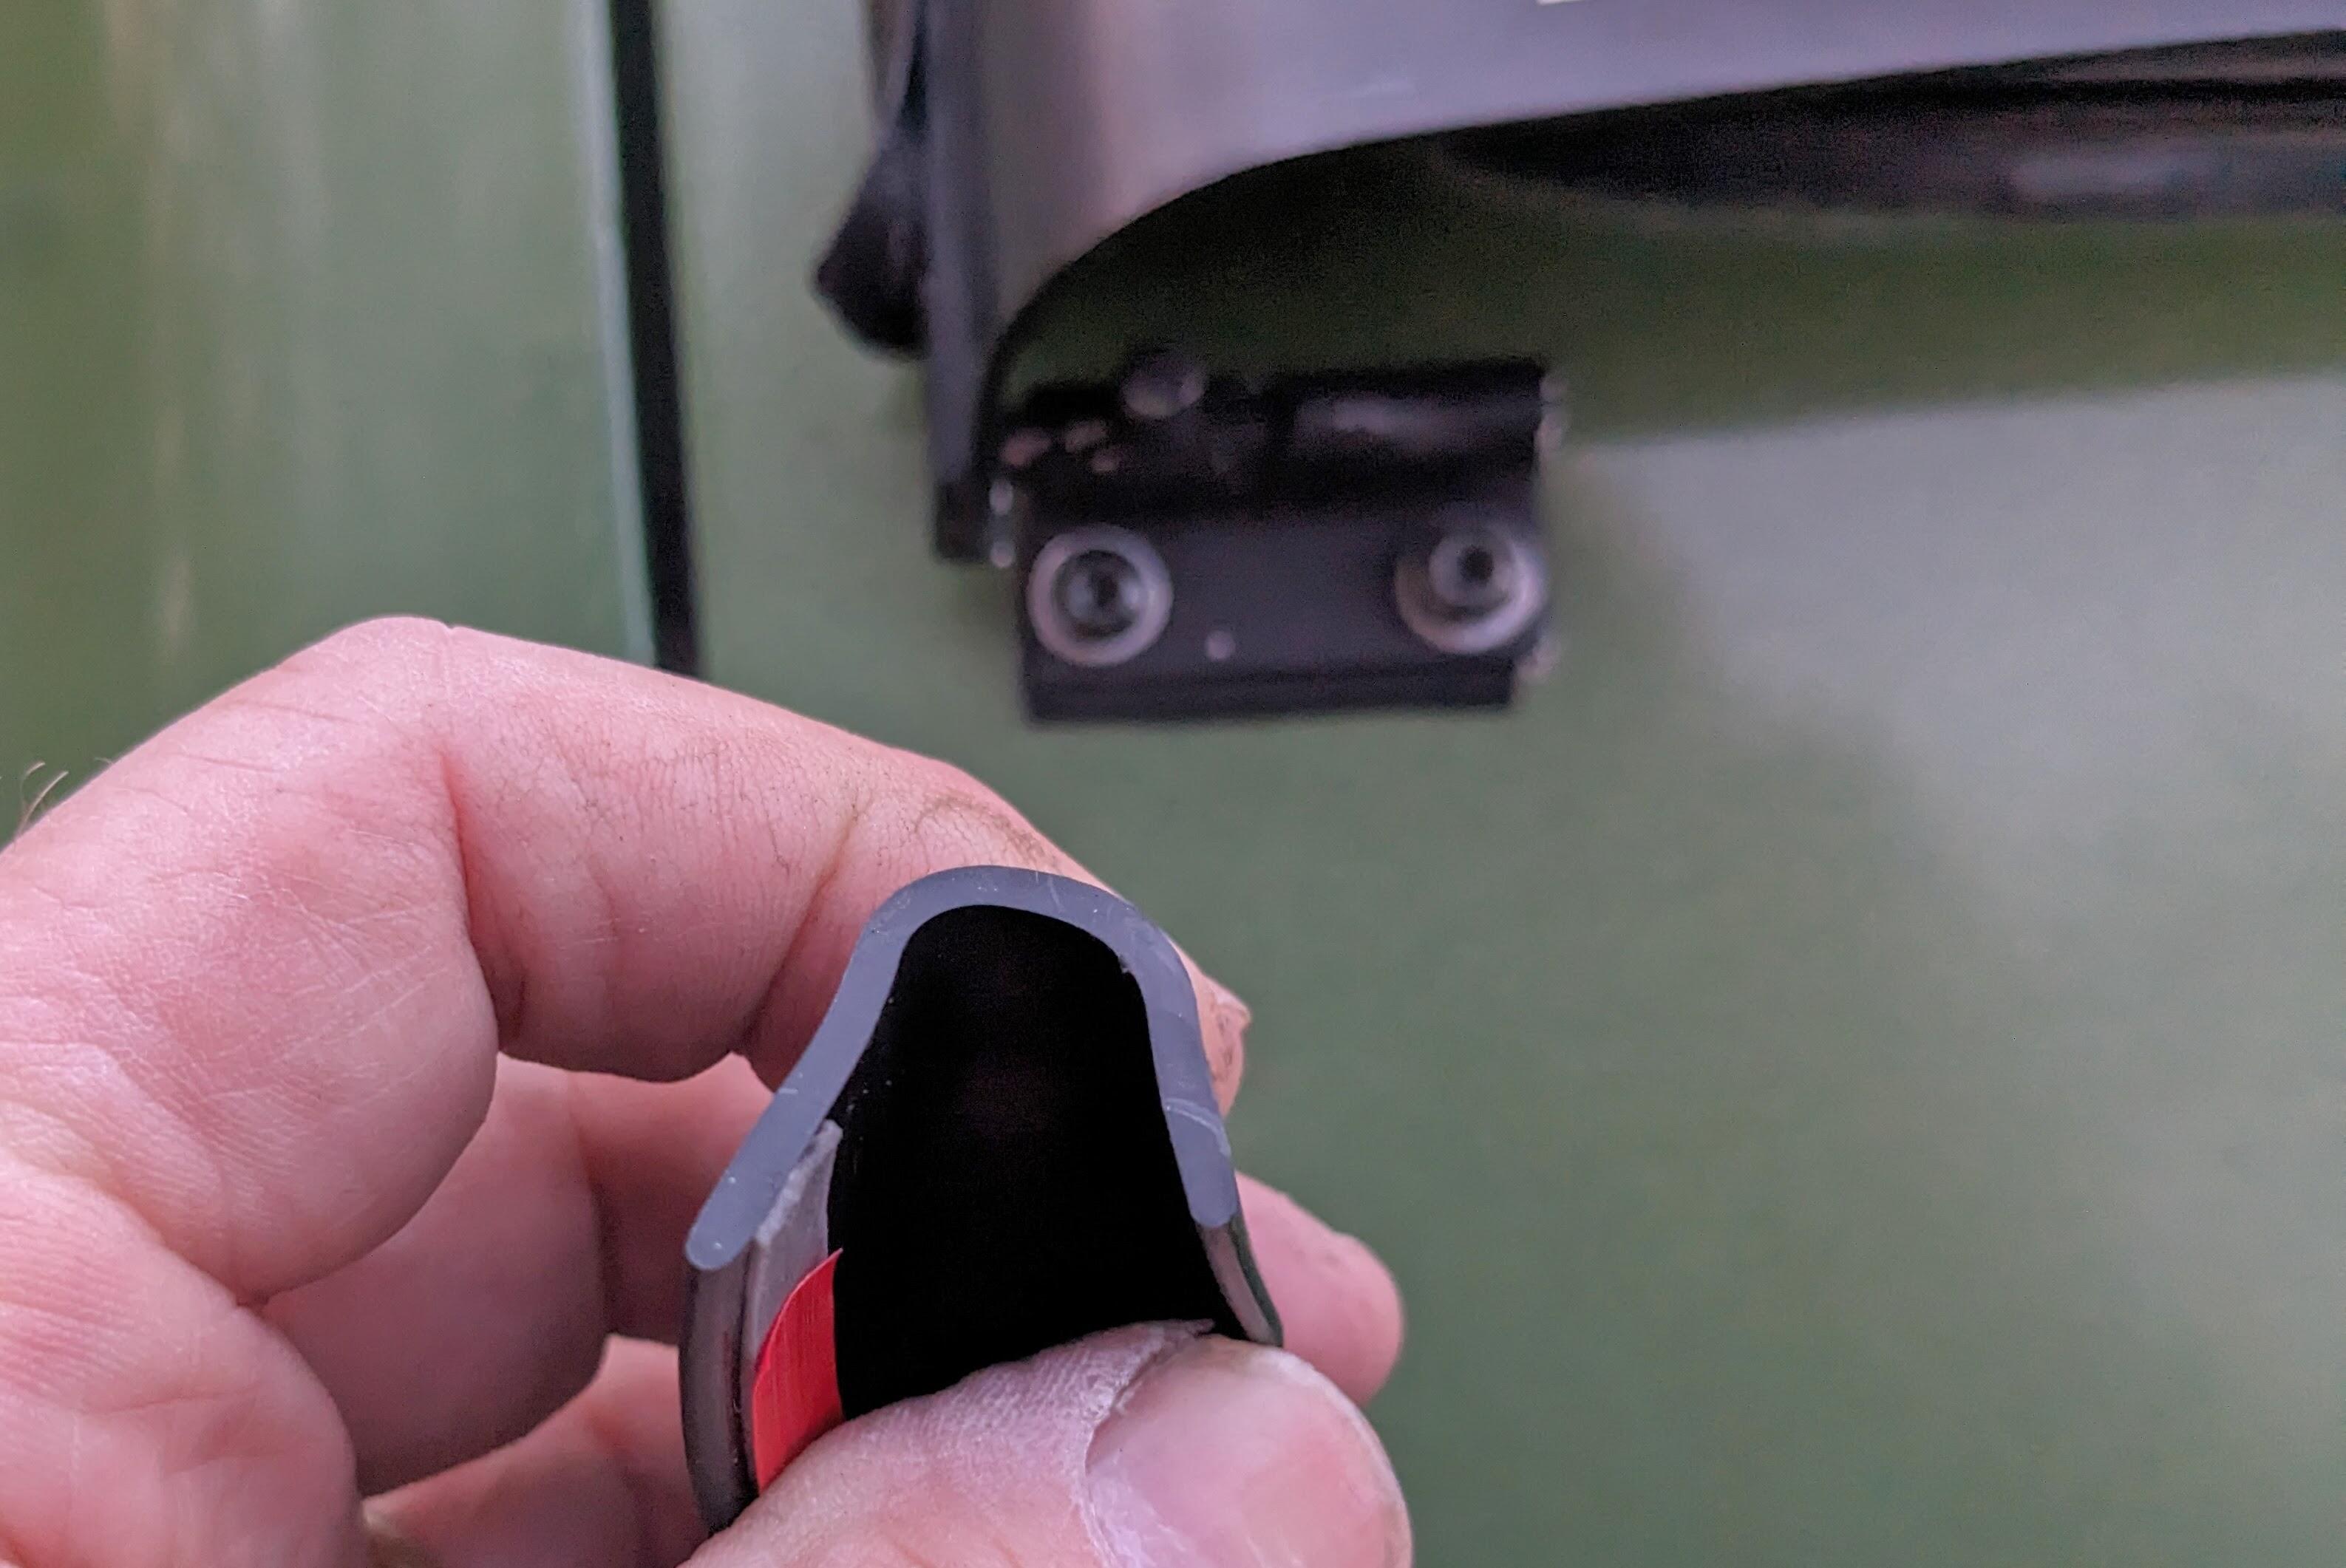
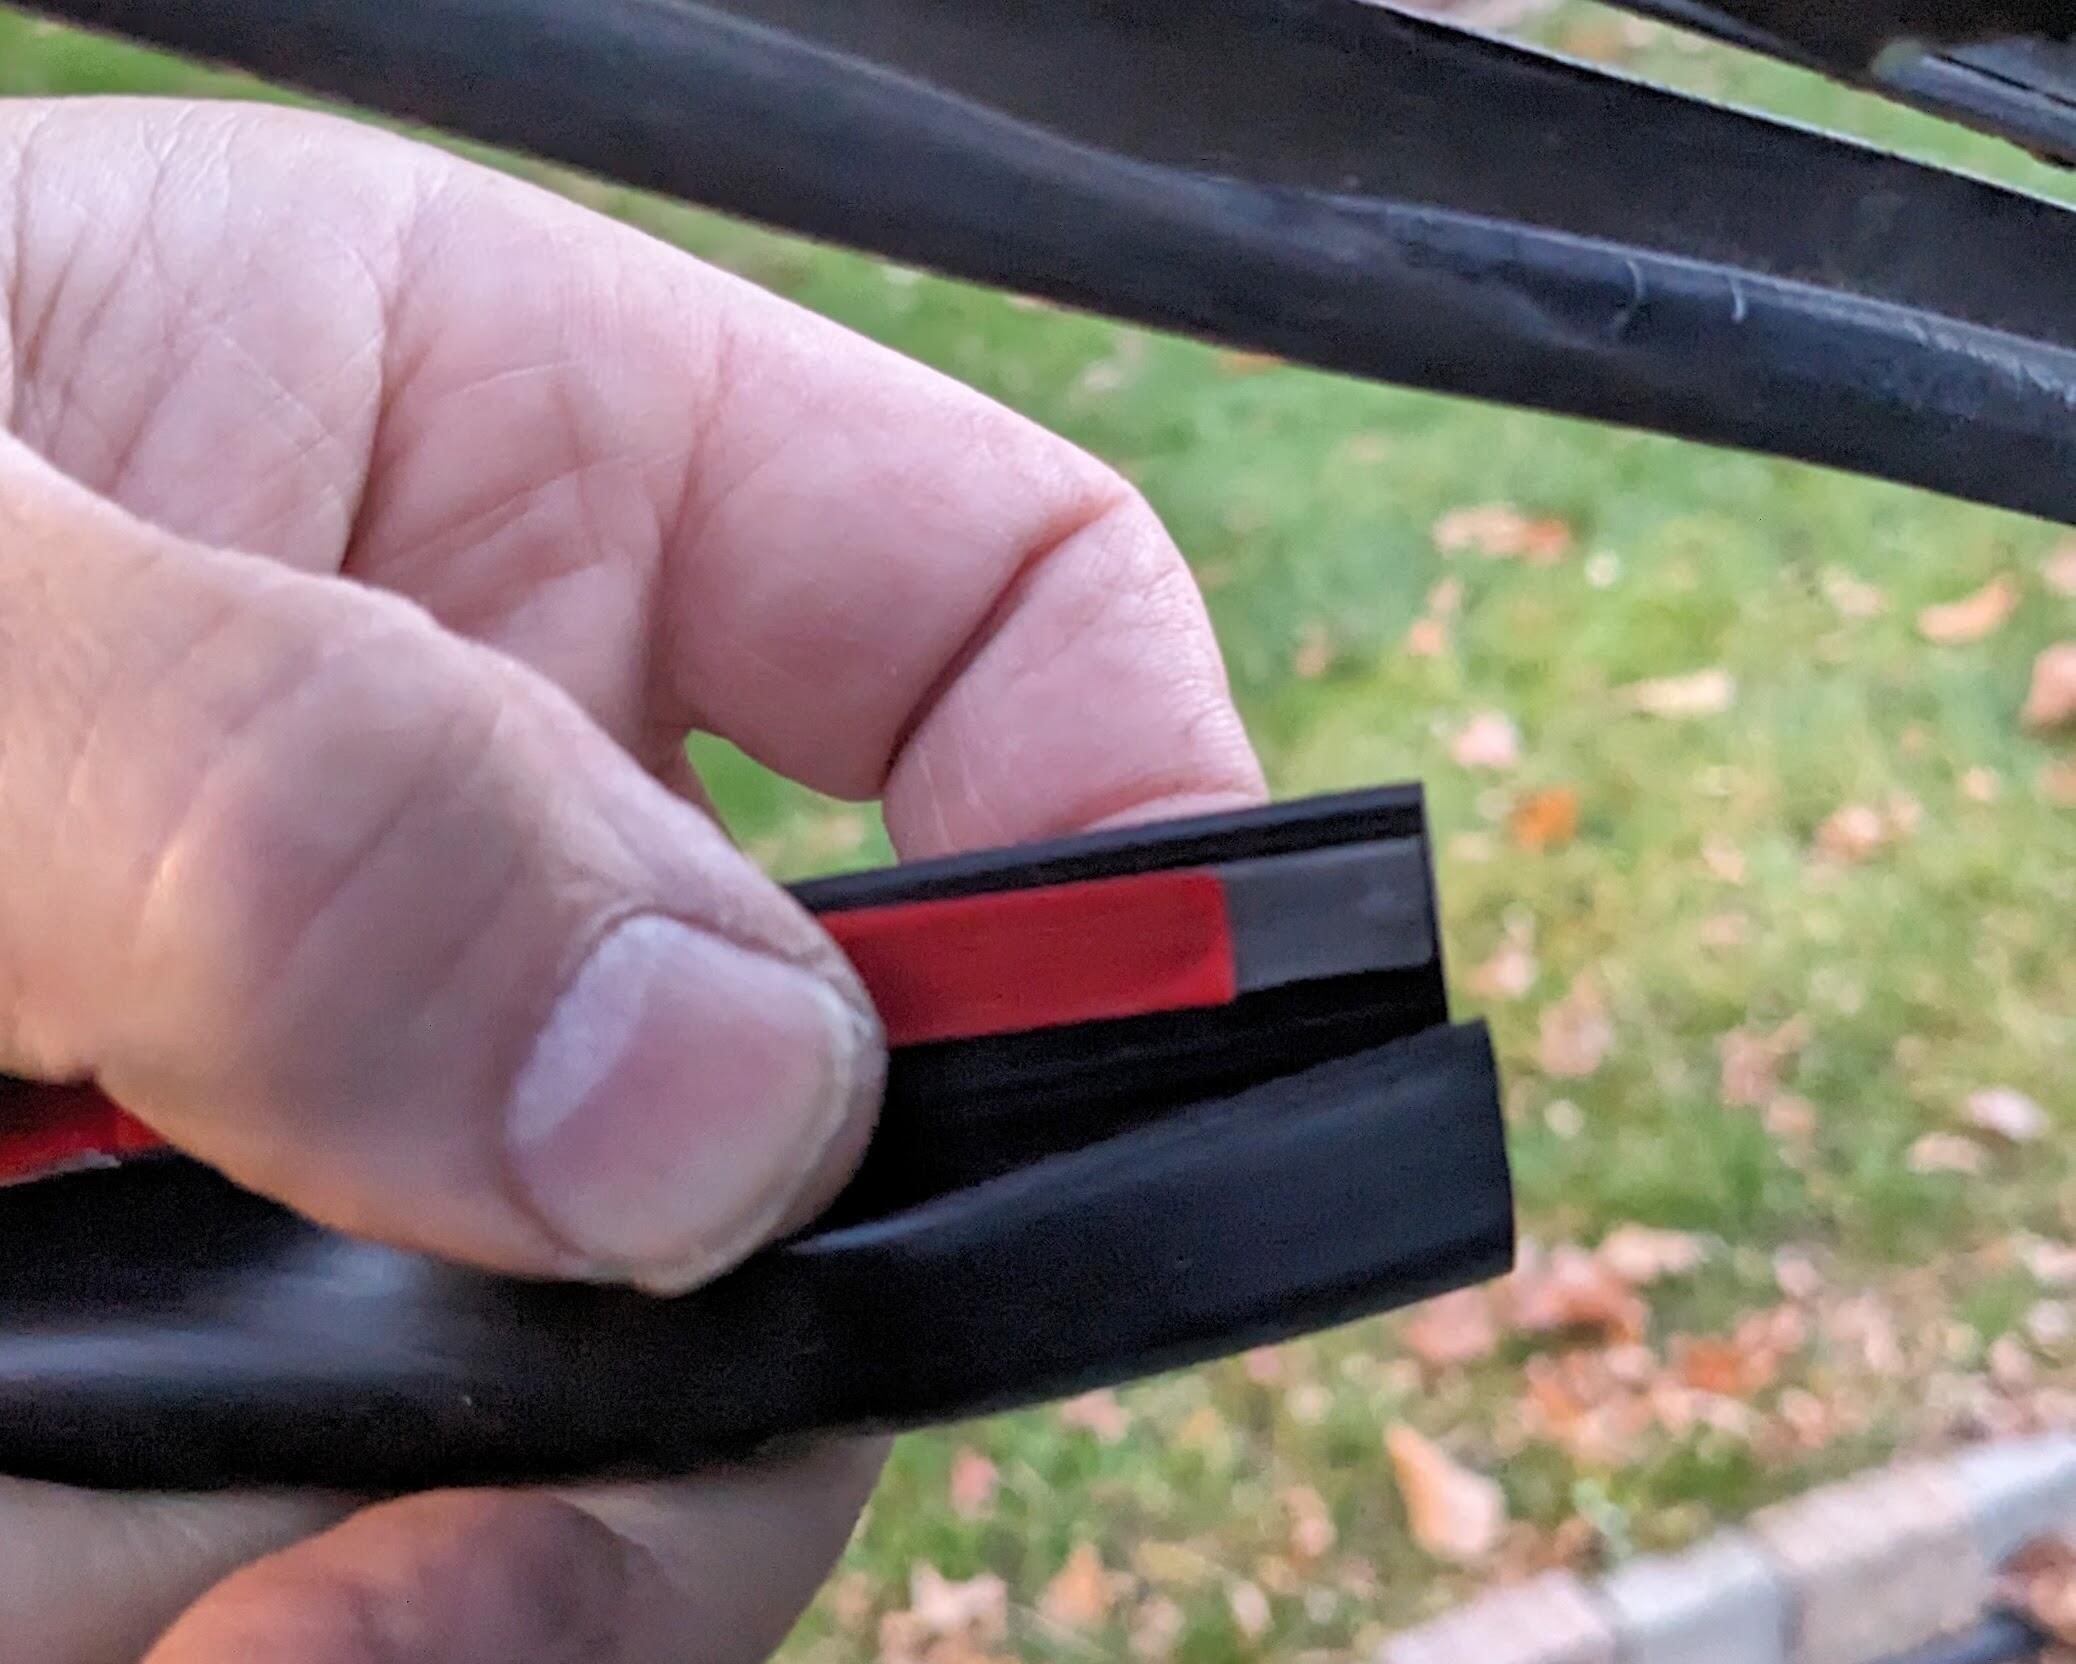
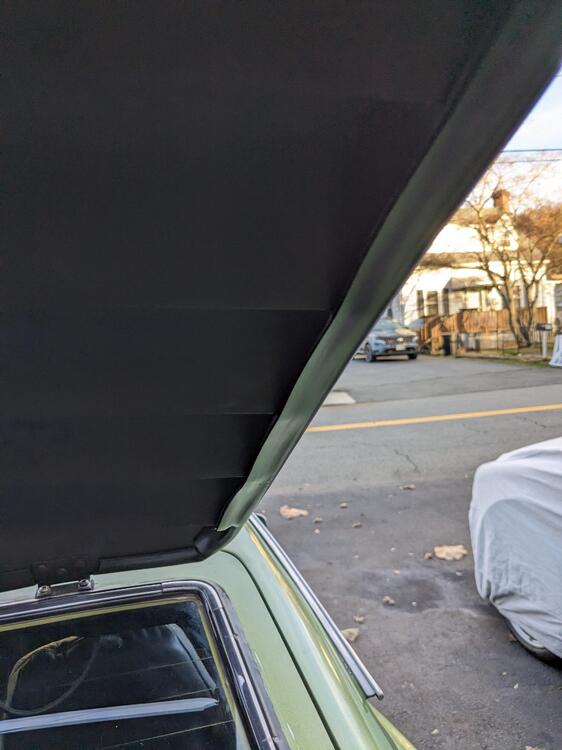
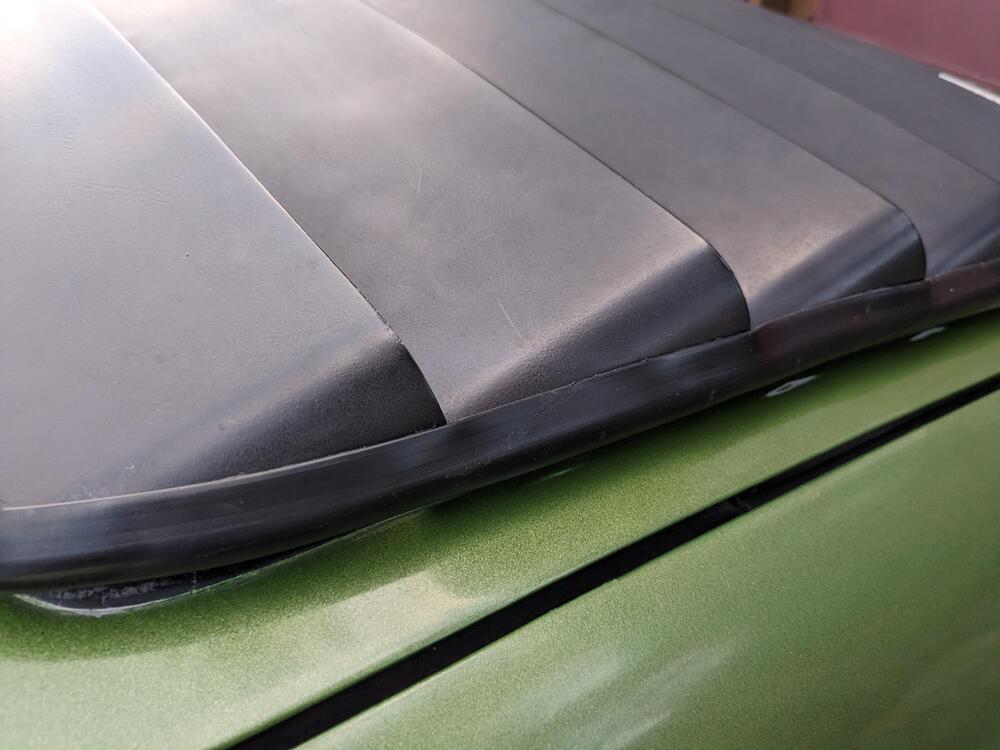
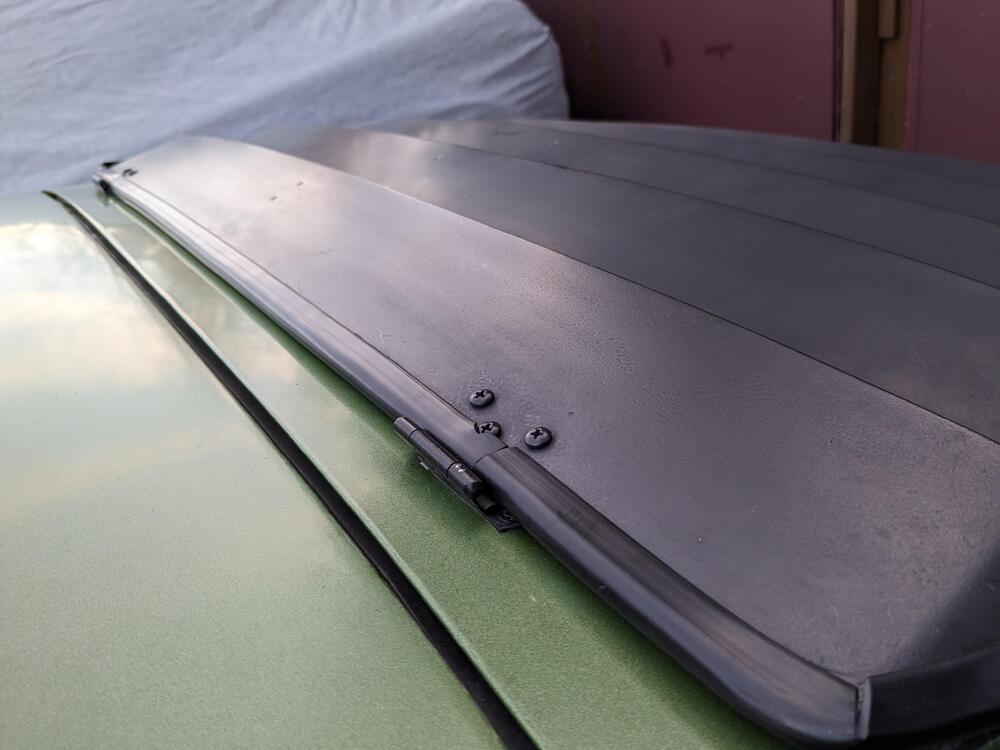
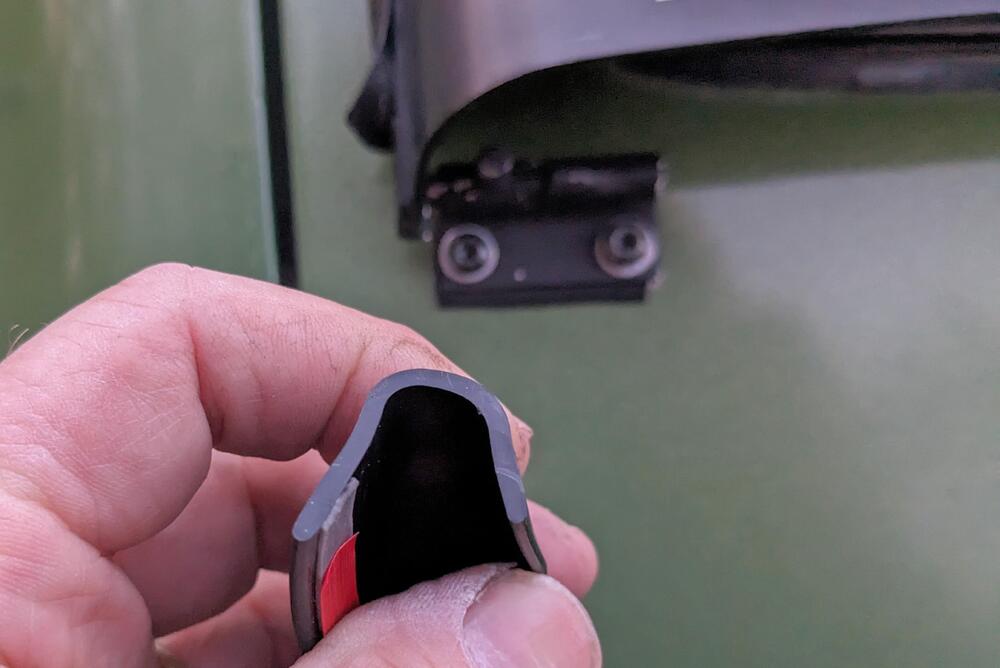
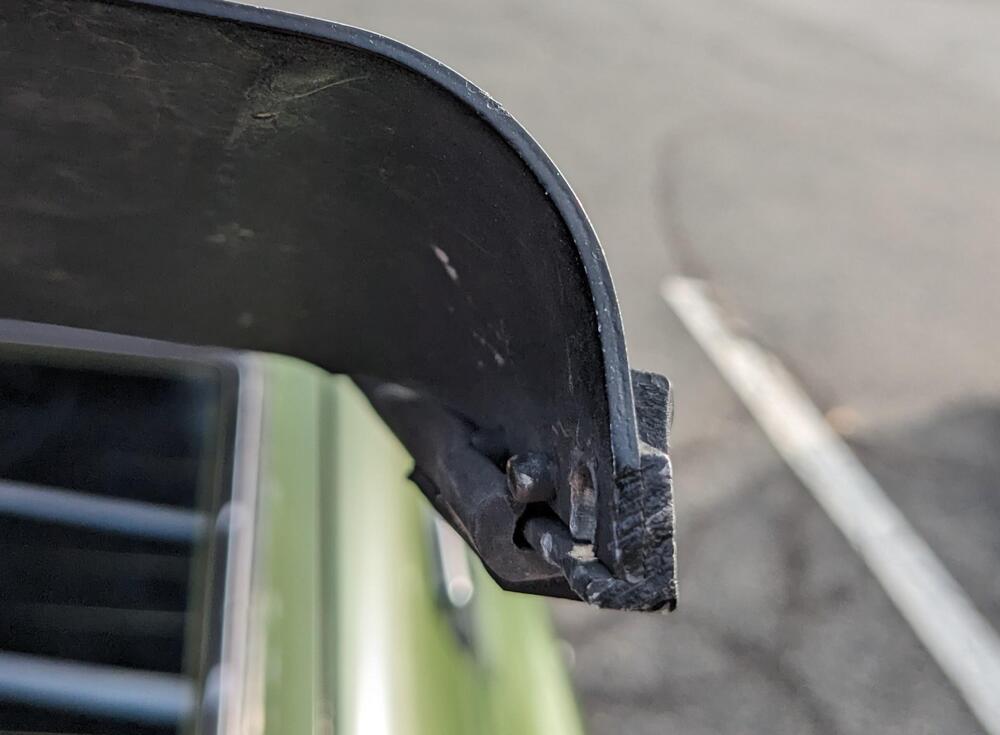
Redid the Louvre outer edging/seal The channel I bought worked, however it's not pliable to the extent of the original, so I had to cut slots where it wraps around at the top. I reversed it so the wide strip is on the inside, and works as a isolator to prevent the louvres from whacking the glass trim as it has been doing for the past 48(?) years


-
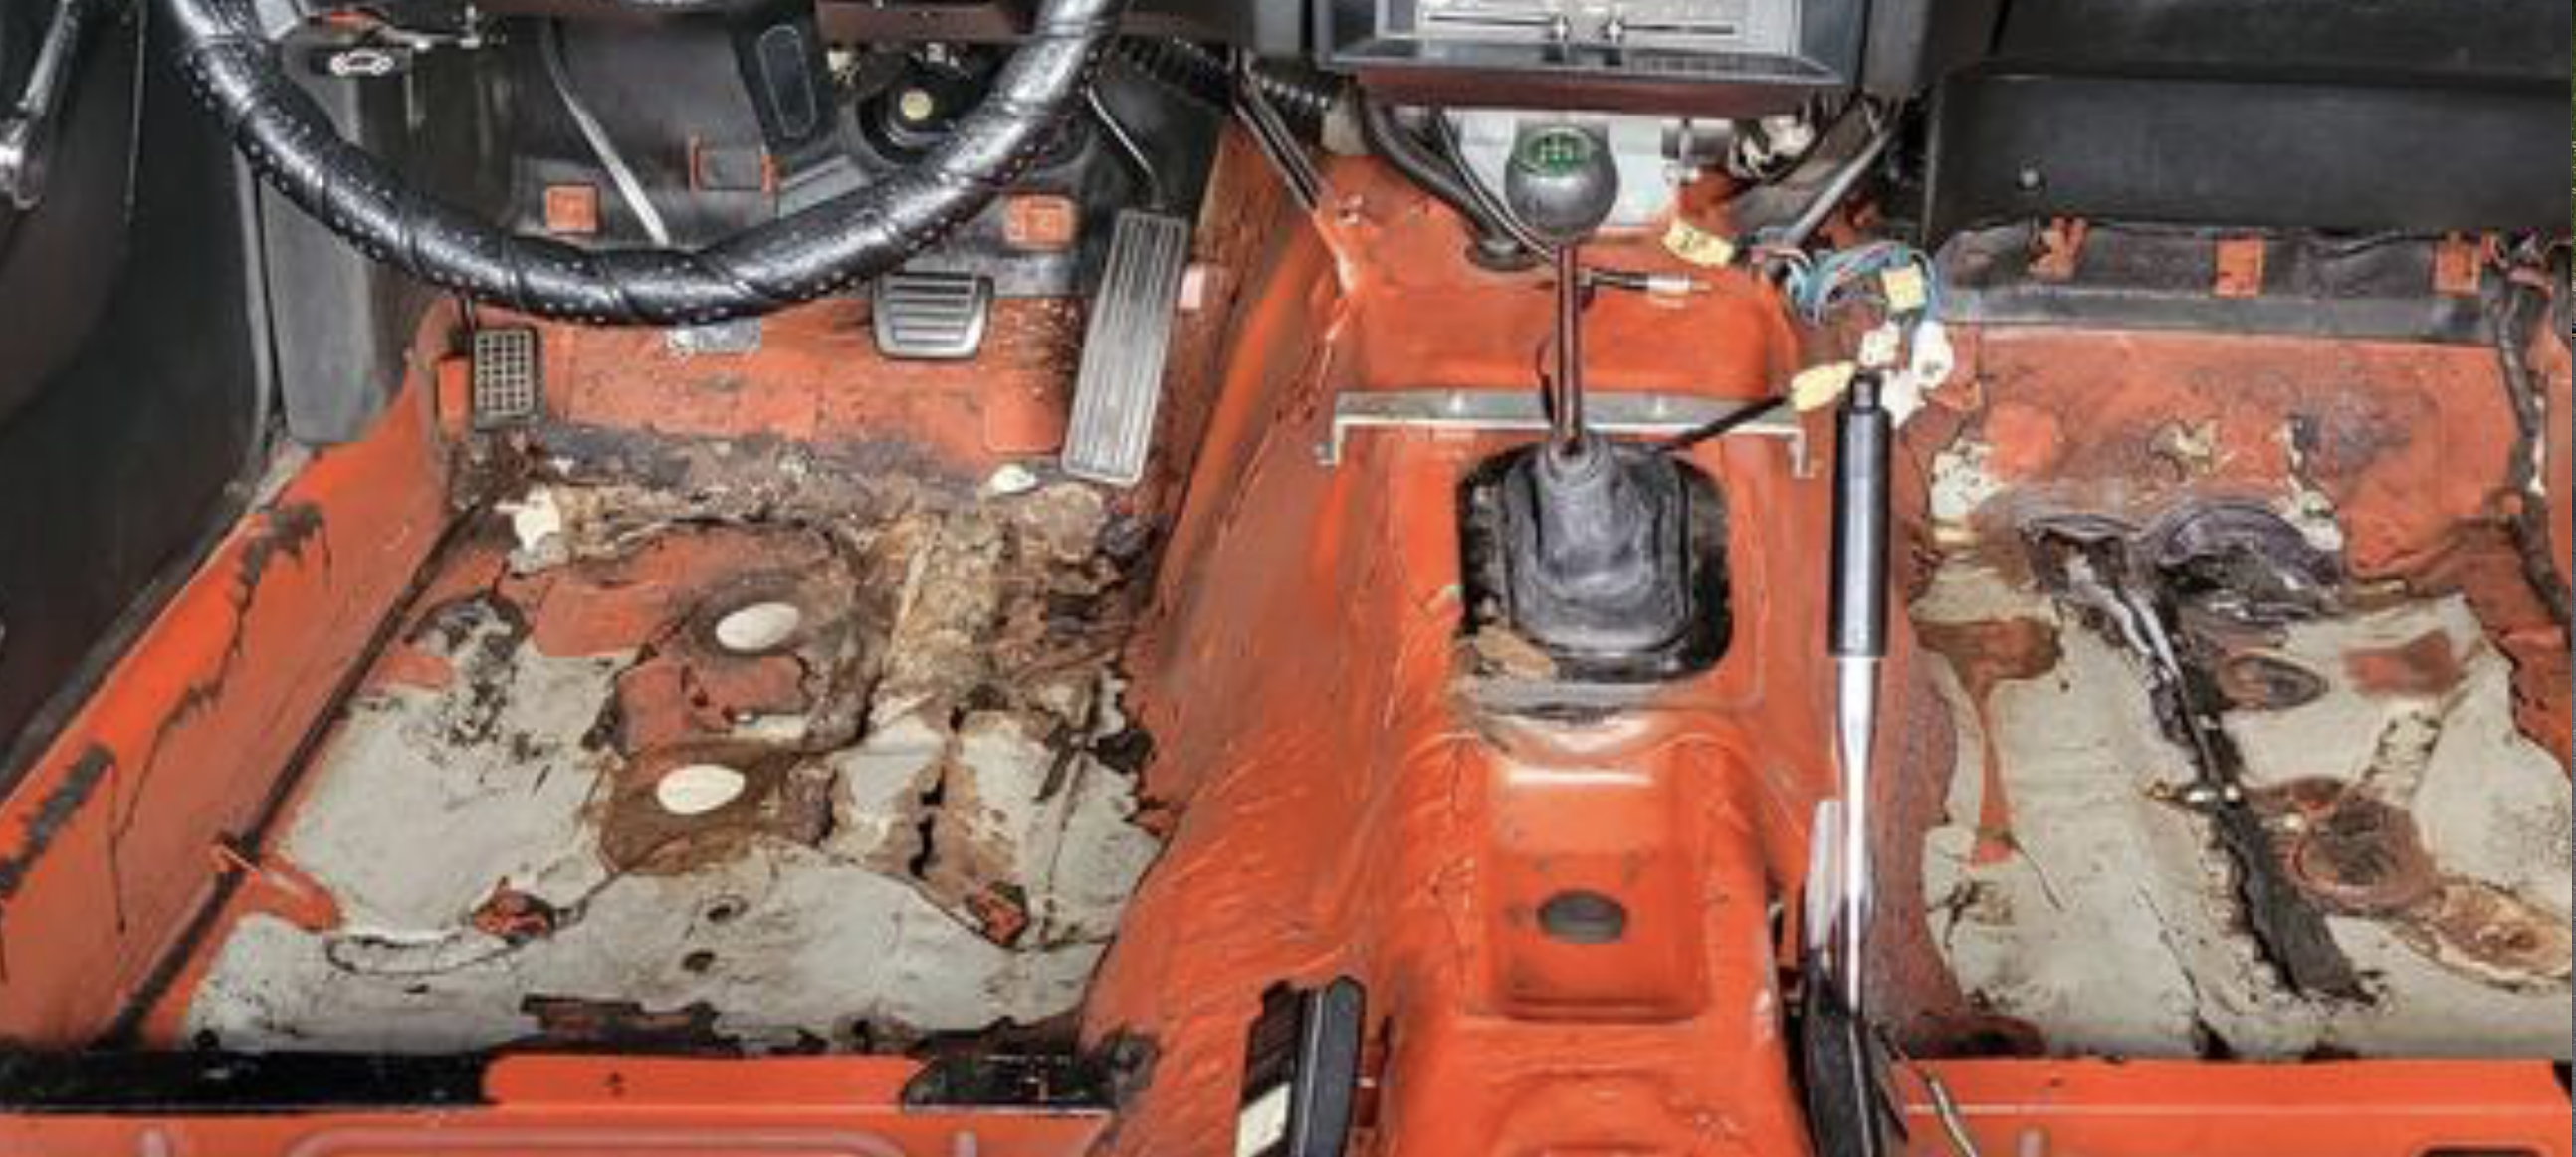
Do you have better quality/clear pics of the floor? The shots you posted are either unfocused or poor quality, so it's really hard to tell what's perforation & rust vs. shadow/tar etc., since we can't zoom in & get any clarification. For the underside, unless you remove the undercoat you mentioned as being added, you are not going to know how extensive the rot is. It's been my experience it's always worse than what is apparent. In this pic, it looks like the rust & perforation goes all the way across the from of the floor beneath the pedals. In one of the other pics, it looks like coffee can under the seat rail. If you are doing it yourself, and have some prior MIG/TIG experience, it's really just a question of stripping all the undercoat, cutting out all the obvious rust back to clean metal, then evaluate whether you can patch or if you need to replace entire panels. The metal used on these seems to be very thin gauge, I'm surprised how easily the outer panel flex on my 75.

-
I'm going to add the relay - it's just a bit of a PITA to work with the relay end of the FI harness in the space under the dash. I really should have thought about this while the dash was out. Hindsight is always 20/20. I'm going to add a bridge harness to take the AFM pump trigger, run it through the timer relay, then back to the factory relay. So, I need to extract the trigger wire from the existing relay socket. The constant and switched power for the timer can also be drawn from the main relay, to avoid running lengths of new harness from other sources. It would be possible to make an entirely plug & play insert to redirect as needed from the factory relay sockets, however that would end up occupying much more space up under there, which I really don't have now that I added the 2 adjustable flasher relays. Working on my back and/or twisted up under the dash is not good for my lower back issues, so in part I am avoiding it for that reason. I will get to it eventually.
-
Much better viewing inside. Got any pics of the underside where those rails & floor meet the bulkhead? The type of issue that can arise is where there are multiple overlapping panels. This was on my X1/9 Once I removed that perforated forward section: multiple layers to address. That would be my concern with your level of visible floor rot When you patch panels you have to consider how the new & old are joined - butt, lap, etc., you want to make sure you don't create water traps. In the end, I cut pretty much all of it out, so I could fit the panel inside at the leading and inner edge and under/outside along the rocker & seat frame area, to match the original flow of the panel welds. You do want to investigate what path makes the most sense. Your DS looks like most of it should go, depending on what it looks like under the seat frame rail....
-
ProTunerZ is sending me another rail. They said they will send one with a more obvious chamfer, as they do seem to be variations. Apparently none of them have a significant chamfer on the ORB-6 port, and they said I am the first one to indicate it is a problem. The "chamfer" such as it is on mine is not uniform, and where the thread is visible close to the surface is where the o-ring pushed out. Perhaps most ppl block it off instead of using it as an active port? I dunno. Anyway, I'll swap it out when the new one arrives. The Allen heads are where the rail is bolted to the provided standoff brackets. The website illustrates the old brackets, which apparently bolted to the head/manifold studs (Yuk) - the new version bolts to the stock rail mount points.
-
Dang. That layered rust is giving me PTSD. Even my X1/9 rot pales in comparison. How do you get through all those layers without completely removing everything inside & out?
-
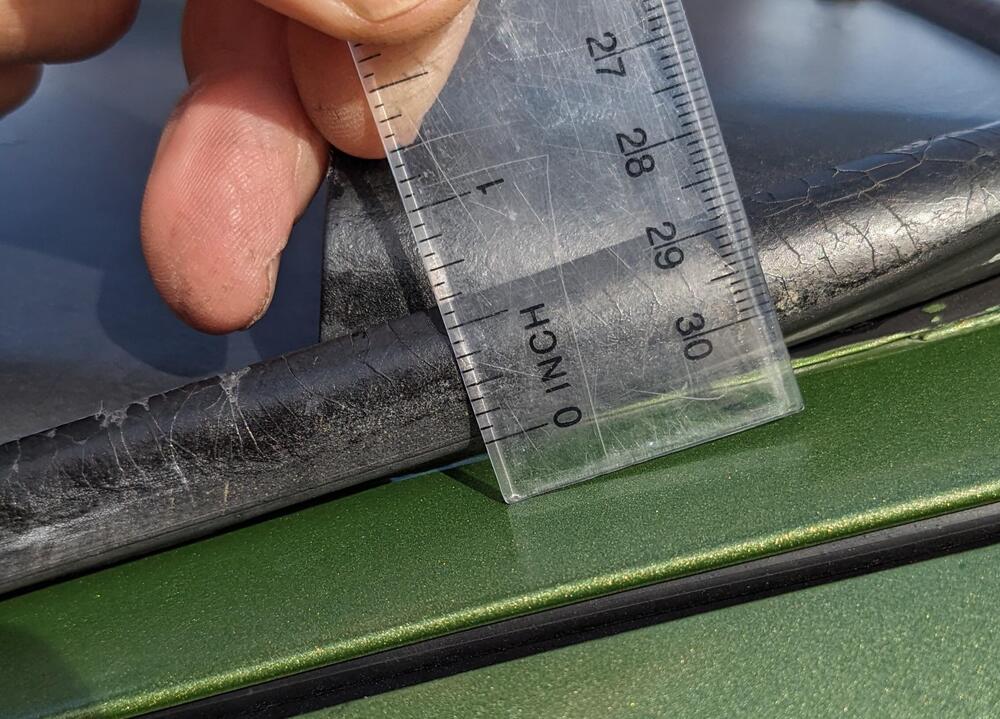
Finally found a rubber seal that should work to refurbish the rear hatch Louvre. Also found a thin U-channel that will work for the center ridge.

-
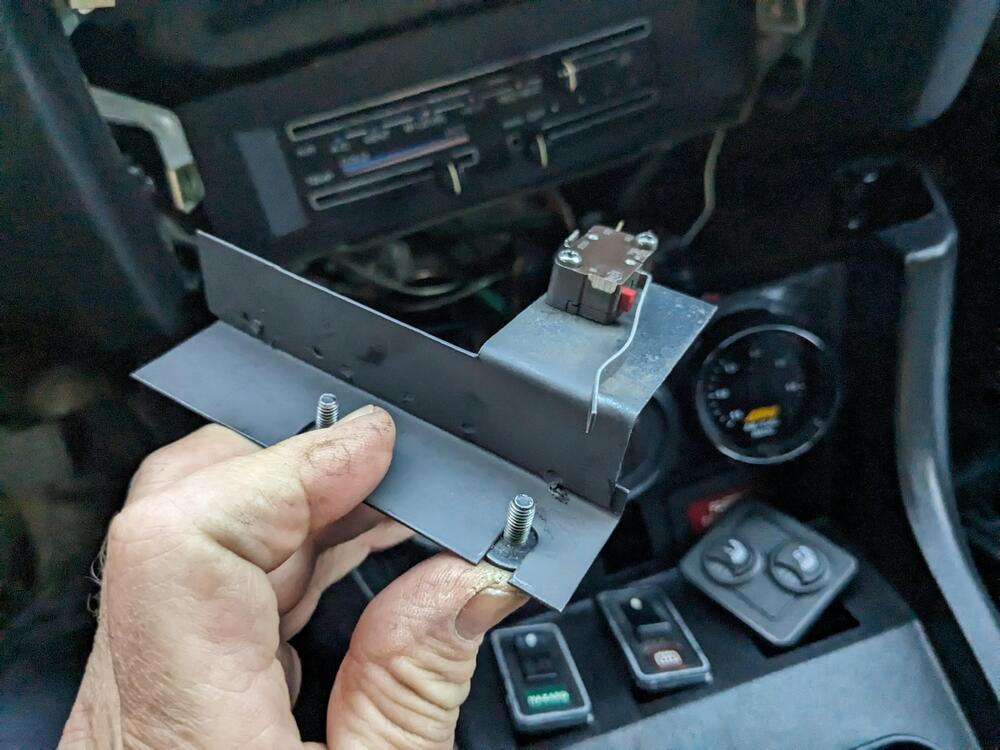
Finally figured out how I can use all the 5 speed settings of the Volvo resistor pack. Been looking for a 4 speed switch without any success, ones I did buy listed as 4 speed, were not so. I decided to add one of the micro switches originally installed with the aftermarket AC. Modified the supplied bracket (sectioned, spot welded to correct the offset) so the microswitch lever sits behind the fan speed switch in the off position, and turns on between off & first speed detent
-
All the others I've seen are $80 or more, so it's still cheaper even with the higher shipping
-
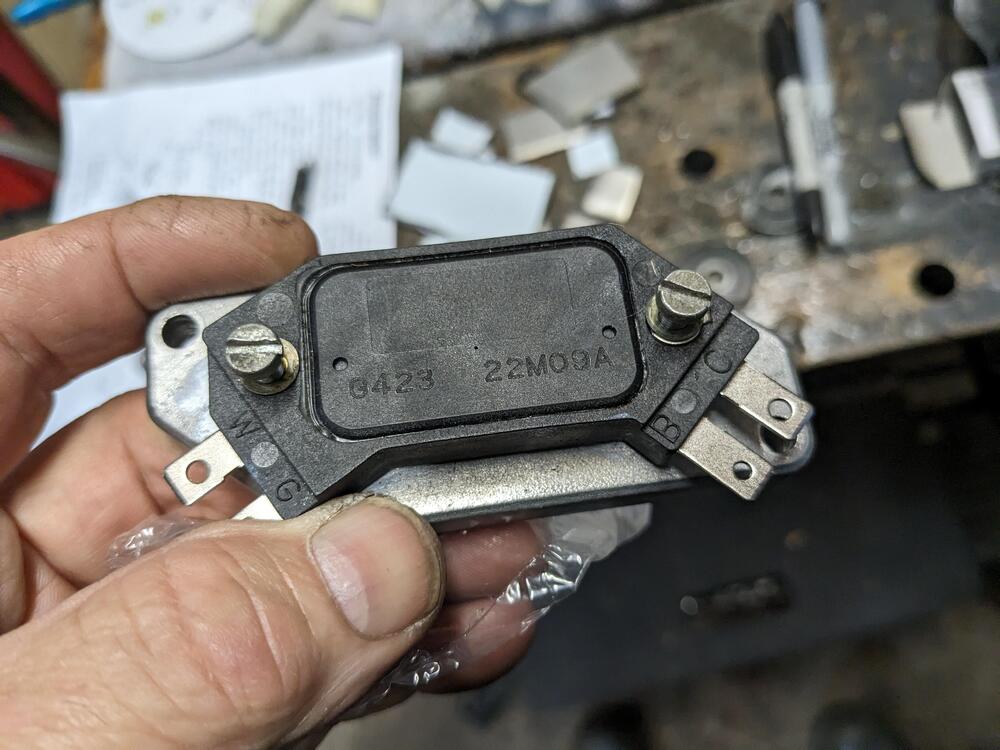
Nice find - I searched for V/regs , and that one did not come up. For the price, I think I'll just get one. As I mentioned, mine has pitted contacts, so even with cleaning it is not perfect
-
Standard Motor Parts, from RA. Actual part is unbranded