Richie G
Supporting Member
-
Joined
-
Last visited
Everything posted by Richie G
-
Thanks X yes I see the last one before the turn about a few inches. I just wasn't sure if there was a vertical one on the upside. May I ask a dumb question? You're comment about flange wrench I was under the impression at each end of a new hard line I would just install the correct rubber hose and clamp? I'm not exactly sure what else I would be doing or what would be flanged, my current lines just have a hose and clamp from filter to line and from line to tank on both supply and return.
-
Agree with all that was said, and jealous of Racer's tool collection and shop! I will certainly be doing this in the near future and keep an eye on this section very closely. I was already looking at the ZCD items and they also have the rubber mounts and clamp downs I'll need. The few sections I loosened had dry rot rubber and a few even had some give to the clamp but it's tightly down again. Couple of questions. I see ZCD has the stock finish or stainless. I guess I can ask them but if anyone knows is the difference really just the plating and the stock is also stainless? I was going to get both fuel lines and the vapor line in stock finish but not upsized (slowly starting to add some originality back to the car). Should I stick with this or get anything upsized? Also, I see when I did the tank there was a rubber mount for the end of the hard lines. Is there supposed to be one in the engine bay where the fuel line attaches to the filter? I don't recall seeing one there and wasn't sure if the end of hard line just came up 90 to meet hose for the filter or PO lost it..
-
That's probably the way to go. What specifically needs to come out and in what order if any? It seems engine side isn't much if anything at all. What about in the tunnel? It seems you have enough room to do it undisturbed about as far back as resonator but I couldn't see much beyond that with my limited clearance. Maybe if I had another set of rhino ramps I could get all four tires up and do it?
-
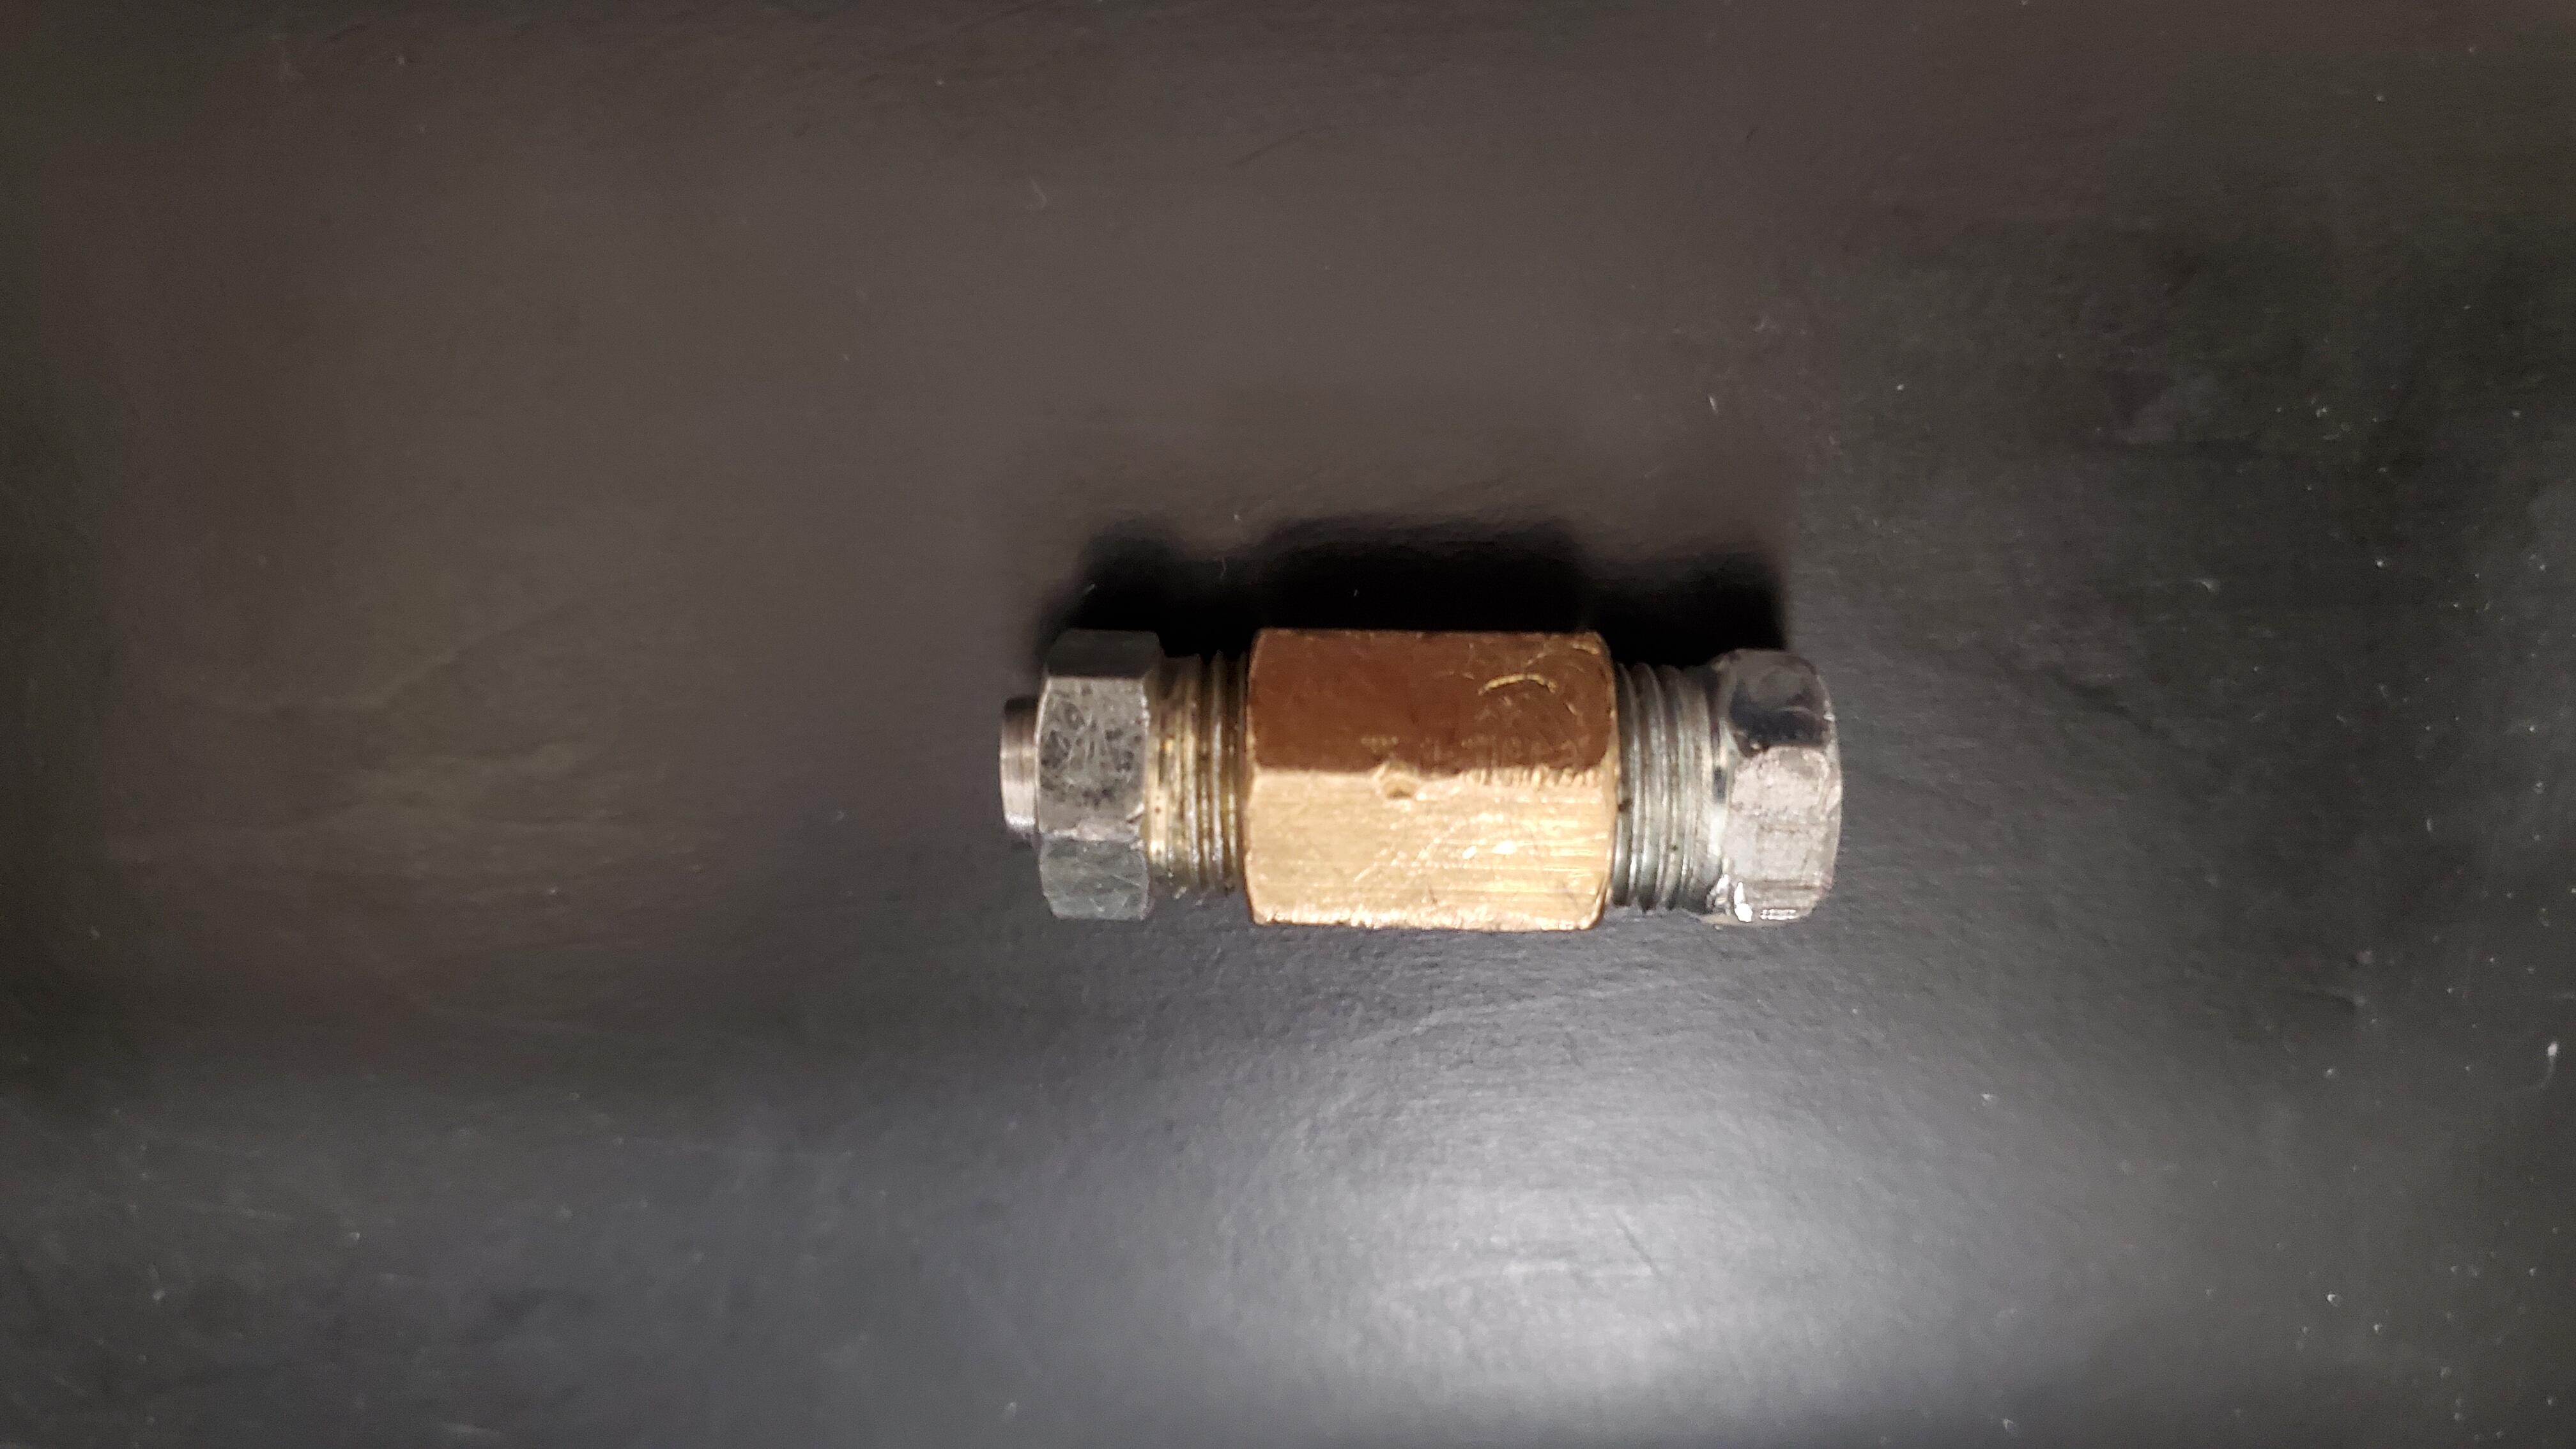
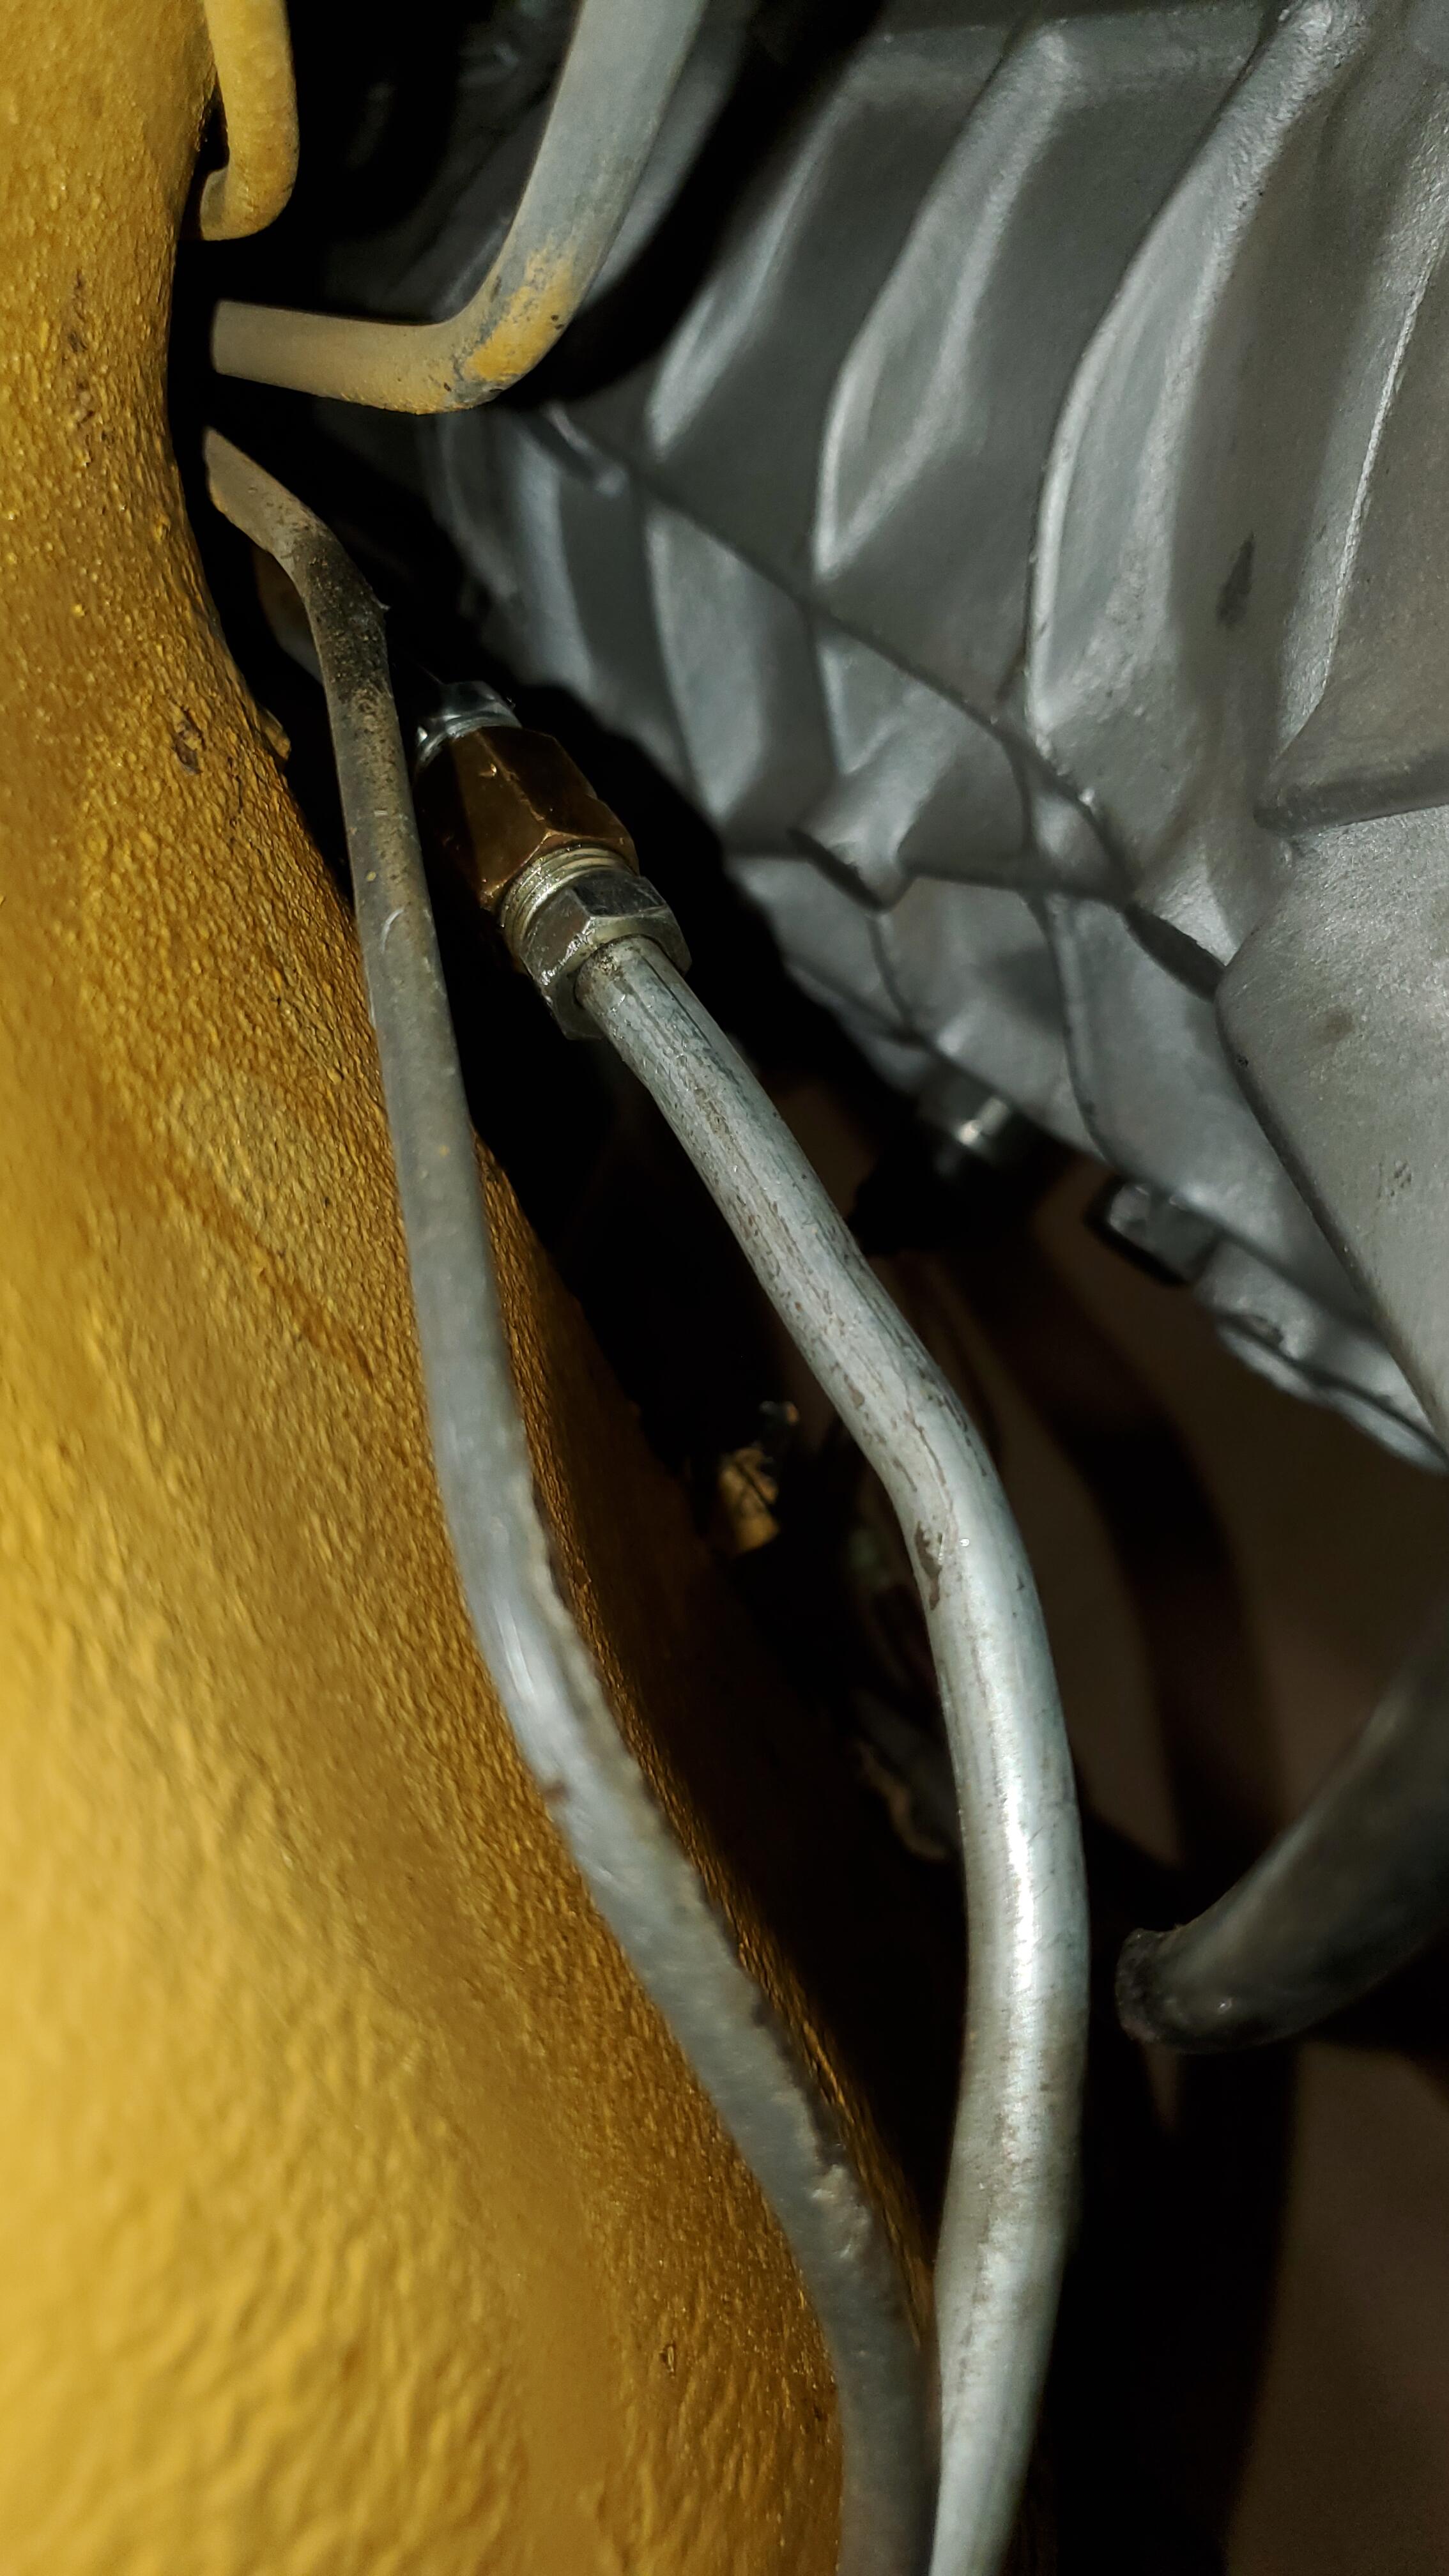
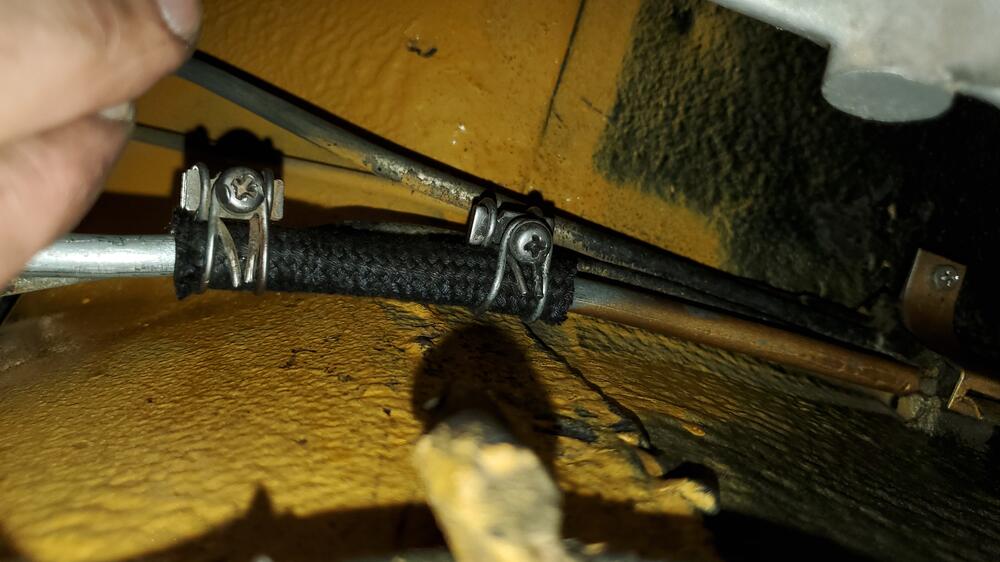
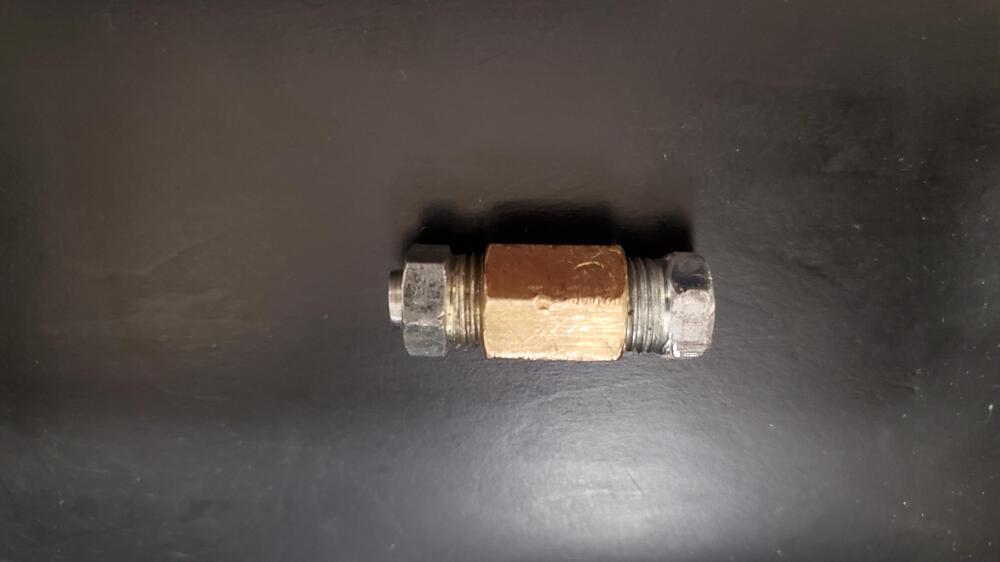
OK, hopefully this does it even if it's temporary. I was able to get the old fitting off and maybe understand what had happened. It was the type of fitting that required a flange not the traditional compression with sleeves. PO made some nice flanges, seemed clean without burs but i noticed on the tank side the tube at the flange was just starting to make a turn ever so slightly. You'd never really notice unless it was cutoff to inspect up close. So i think the flange wasn't sitting perfectly flat inside the fitting. Got myself a micro sized pipe cutter and with enough wrangling was able to cut it out. Removing the mounting screws all the way to the filter and a few in the tunnel got me enough play to get it done. Thanks for that tip. For some reason I look at these hard lines and am always so worried they're going to be stressed to the point I make it worse. Lessen learned. Ok now to the fix. Cutting the section out resulted in a gap too wide to bridge with another sleeve compression fitting no matter what i did. I had to resort to hose and clamps but since I couldn't get the bump ring on the end of the pipe i used 7mm instead of 8mm hose to make it more snug. At some point I think i can get a new section of line and make the bends to get a true compression on there (unless I just ignore this until i get a real opportunity to replace it all). I will leave it overnight again as it's too hot in the garage to know if its evaporating like yesterday. It started and ran excellent so that's a positive. If it does work, here's my trophy and I'm hanging on to this one! Thanks all!
-
I knew I shouldn't have said anything lol. This AM got a bit of a drip. Better than when i started but needs to be replaced for sure. I guess the heat in my garage was the difference. At least I have what I need now to attempt a replacement. Or I guess I can just keep my garage at 105, that seemed to work well lol.
-
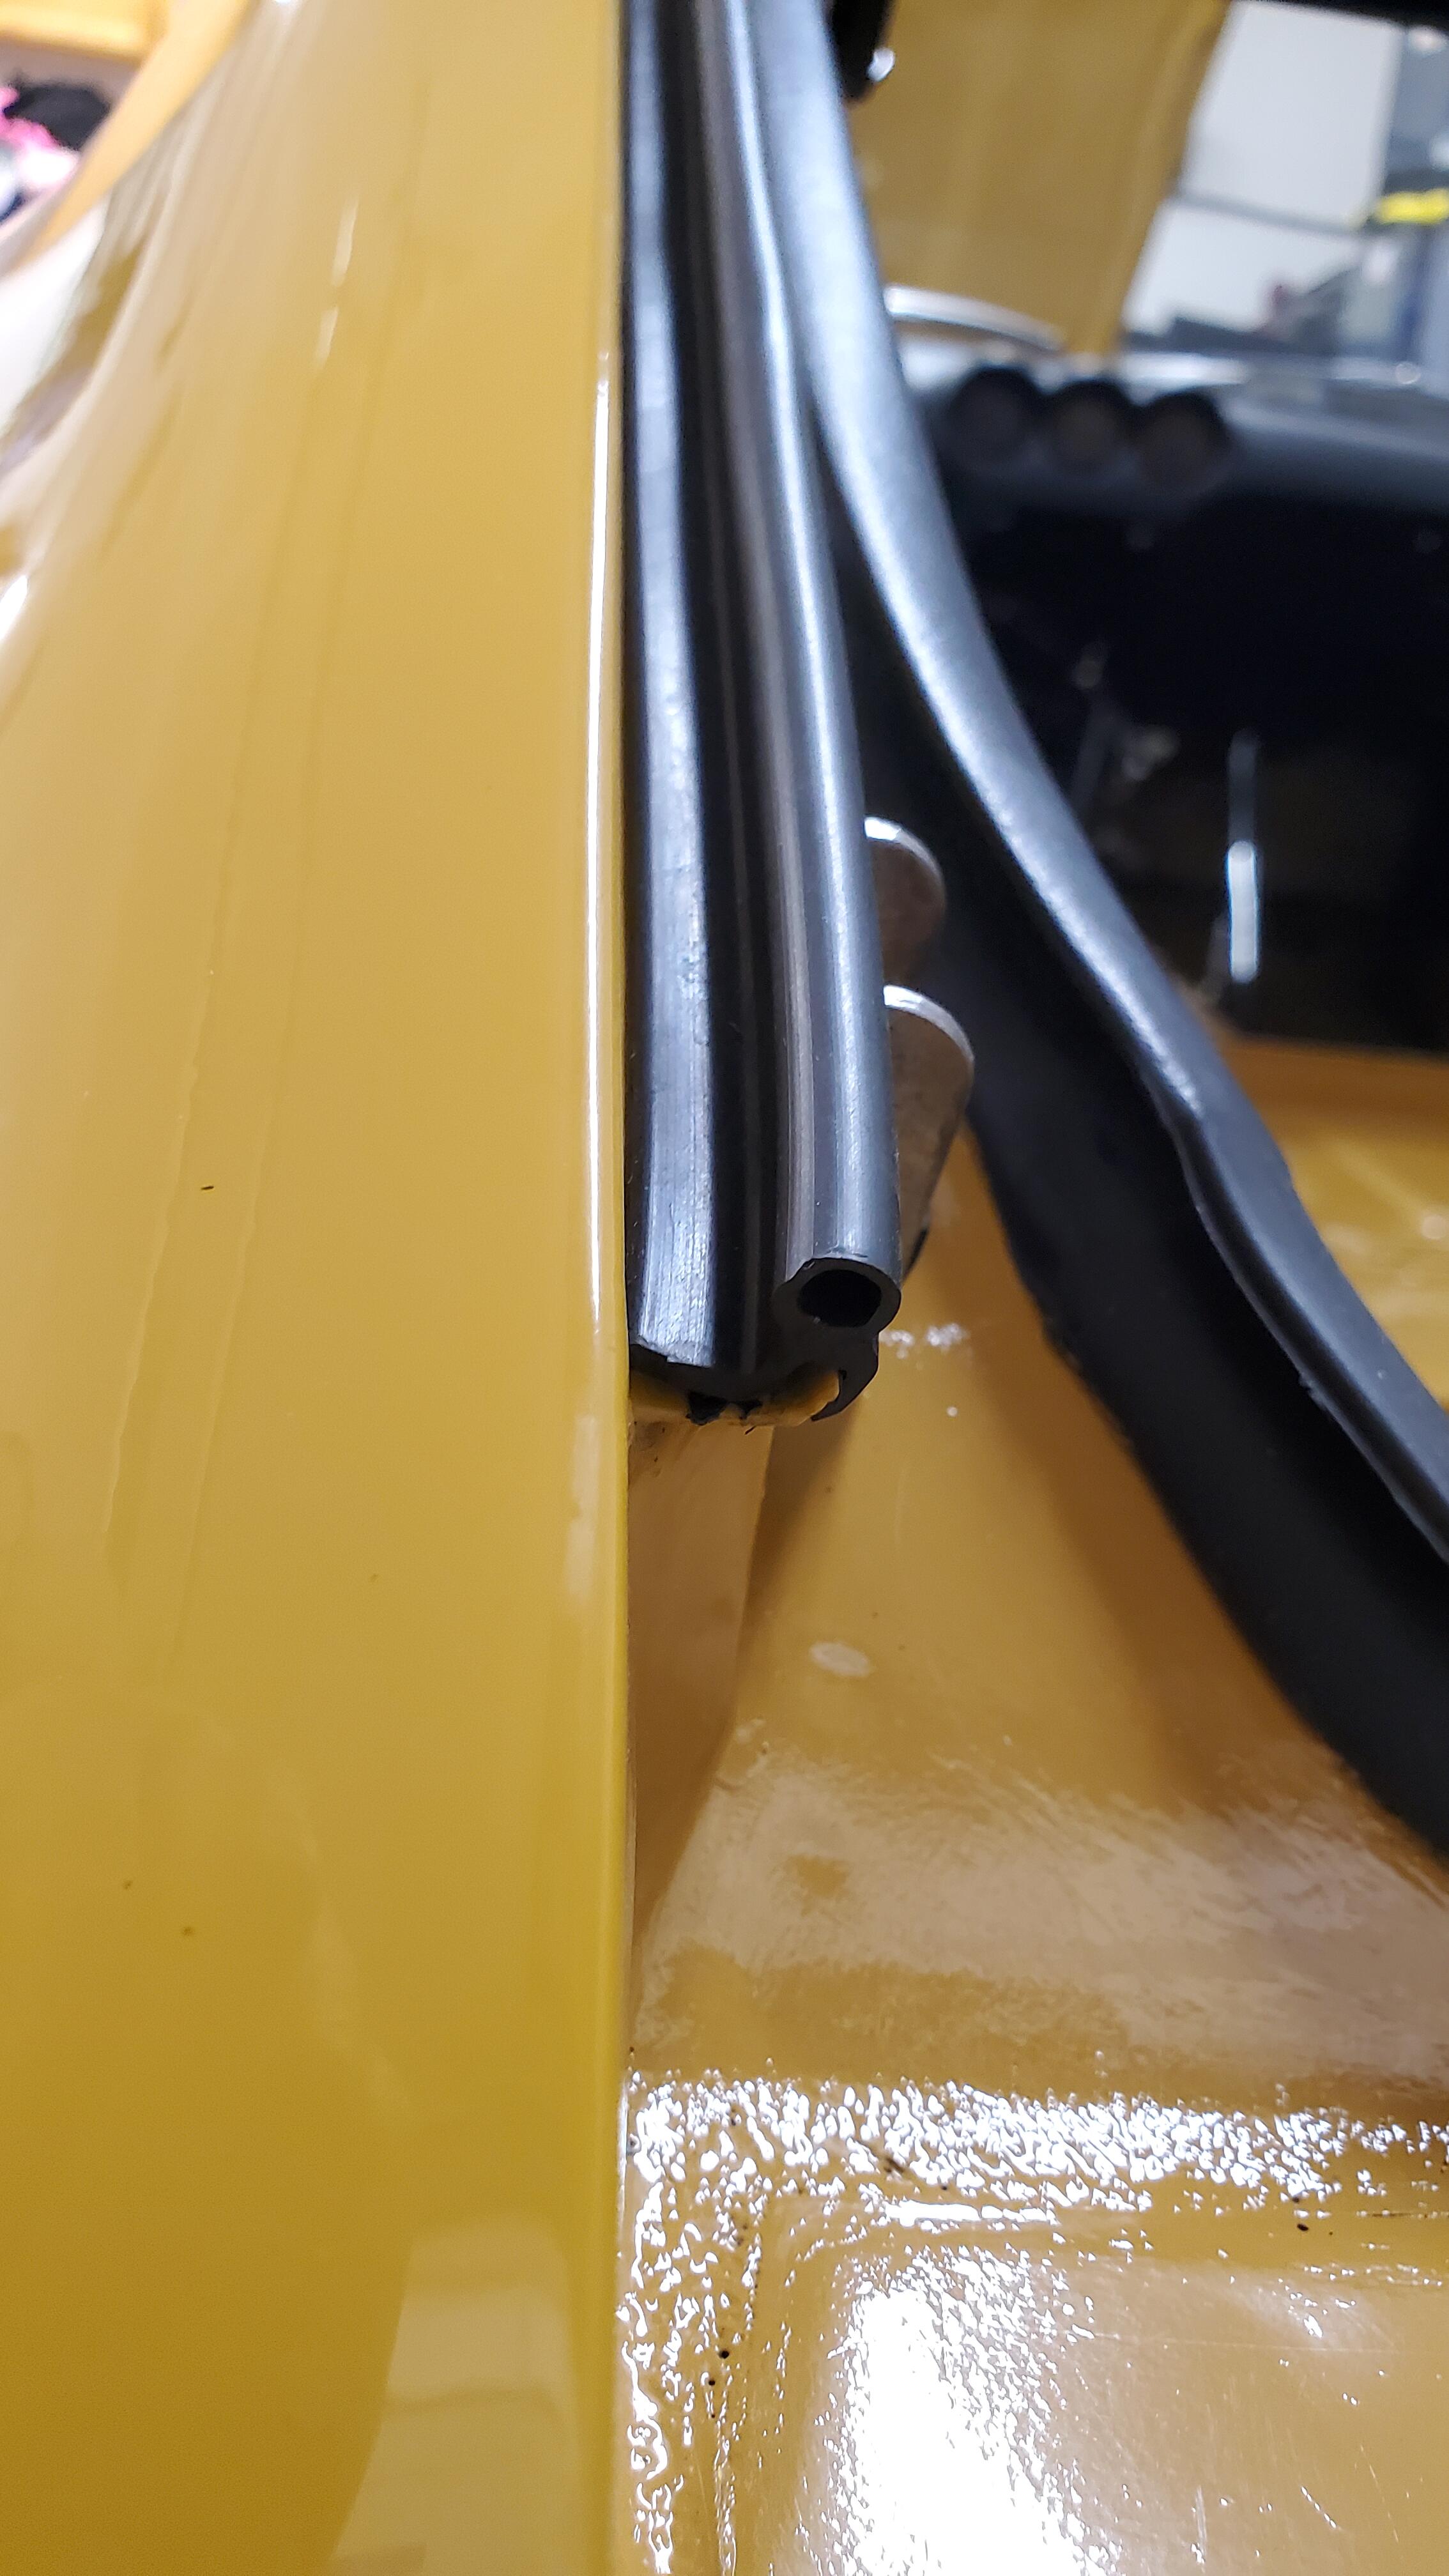
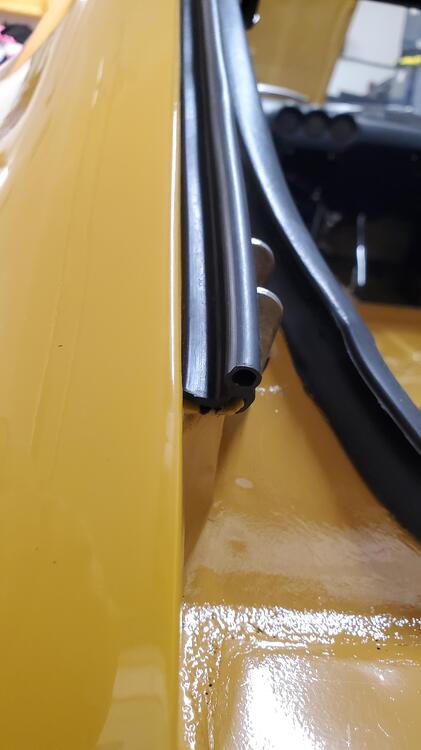
One question I should have asked. HH do you notice the hatch riding a little high with bulb all around the outer hatch? I do notice mine is slightly off (maybe 1/8 measured at the bottom side) and I am not sure if the hatch was just misaligned by the PO or adding bulb down the sides is keeping it up. If I press down on the hatch there is a little room to make it sit flatter but I just don't recall noticing before i took the seals off. I did not remove the hatch to replace my seals. Maybe it being new just needs to flatten a bit under the weight of the hatch. Maybe that's why the factory didn't use bulb all the way. Either way I'm happy and can live with a little bit off if it makes a better air tight seal.
-
Late to the party but Z Store does sell a single bulb type outer hatch seal i just installed on my 71 if you're still needing it. Came outr great with just the 3m adhesive. https://www.thezstore.com/product/5487/rear-deck-outer-weatherstrip-one-piece-top-sides-70-78-240z-260z-280z-coupe

-
I just changed my oil and filter for the first time (71 240z) and was wondering if my pressure readings seem accurate to folks. 10w30 at idle (9000 - 9500) with the engine temp at midpoint gets me about 1/4 reading on the dial. If I give it some throttle to keep it steady at 2K it climbs to 1/2 gauge and hold steady. Does this sound right? It seems the PO put on a new sending unit but it's the gold one which after some digging here it seems some people don't speak highly of. Also I did some reading on dipstick type and accuracy and it seems my e3001 has just slightly shorter dimensions from shoulder to tip than most folks report. My reading is about 3/16th over the fill line to the H symbol. If I account for the shorter stick length it still puts me about 1/8 over what should be the fil line. this was measured at cold engine after running it to idle temp and letting it cool down. New filter and 10w30. I know its best to have less oil than more but so far not a drip and it's been 9 hrs.
-
I don't want to jinx myself, but I think I fixed it! I was determined to do this myself and what really held me back was not having the right tool so I upgraded my wrenches and tried one more time. Got it lifted grabbed a few open wrenches and attempted to tighten the existing compression fitting. It was a bit easier this time and so far about 5 hrs ago not a drip. Now it is 105 in Sacramento so maybe a pinhole still exists and it's immediately evaporating but the finger test so far is holding true. I will check again over the next few days. I have a new compression fitting if I feel it needs replacement but so far so good. Again want to thank everyone. For someone like me still learning and trying to do this all myself I feel real good about what I've accomplished so far. 🙂
-
Good news bad news. BlueZ a 2x6 was the trick for the jack/ramp situation so I got it up safely. i can't believe I didn't think of that, shameful. That was the initial; good news. Bad news tightening didn't do much if anything. There's barely any thread left and it actually feels like it wants to strip or has possibly been cross threaded all this time so I didn't want to push it. That was the bad news. I put it back down, it started sweet and easy and then i let it run for about 5 mins. As predicted the drip slowed due to a probably air-suck but not fully stopped. It's at the point I feel safe driving it (if I can find the seats lol) so in the AM I'm going to call someone whos worked on this for me before with a full lift and everything we would need. While I was under there it really doesnt have as much play as it seems in the photo and i can't really get many tools up there even to cut it out. Gary Cook out of Sacramento had helped me sort a bunch of things when I first got this back in 21. Some of you local guys may know him, he's been racing and building Z's for a while and even had some time on the Shelby team prior. He'll probably have another fuel line he can swap in a jiff. Might take a week or so especially with holiday but the panic has left and I feel ok even if I had to leave it a bit. Thanks to all.
-
Just saw this towel trick, will try it later tonight (when wife is asleep and she wont miss the towels) 🙂 I used to lay a towel partially under each ramp so that it stuck out at least a foot in front of the ramp so that the tires would roll onto the towel and then ramp. That would keep the ramps from sliding.
-
Zed i actually tried that by using my floor jack under the cross member and its like 2 inches too short to get the ramps under fully 😞 Are you saying one tire at a time? If so can you show me where exactly? In the meantime I had an idea how to brace them with something but I'm open to anything.
-
ok so i just went out and set my ramps, started it up. the beauty is it starts and runs so nice!. The crappy part was my ramps are sliding all over the place as I gently inch forward. I have a typical smooth concrete floor that had some old garage floor pain applied to it. By no means slick, but certainly not rough. the tires get a bit up and they squirt out leaving skid marks where the rubber bad is on the low end. Any tips on getting up there? I've seen videos and all of them show them placing the ramps under the tires without any "run up" room between tire and ramp edge.
-
Zed good point on the hose option, I'd love to be able to just crank this a bit but it's so odd that all this time it just all of a sudden dripped. Its been idle in the garage without a start since November, I do all that tank and engine hose work and pow it leaks for the first time not on my first start up but on my second or third. I doubt I put any real pressure on it when connecting new hose to the filter from fuel line but you never know. Its pretty far down the line to think touching either the tank supply end or the filter end would loosen a compression fitting. And Site yes I have the rhino ramps too, just got them a few months ago so this will be the first attempt at using them. I'm thinking a quick start and roll up onto them and then shut off real quick. How long you think I can leave the car on there without fear of compression to those ramps?
-
I like the cut it out and fuel hose idea. That's probably the best thing for my skill level at the moment. I just have to safely get under there over the next few days, will report back. Thanks all for good advice. This community is great.
-
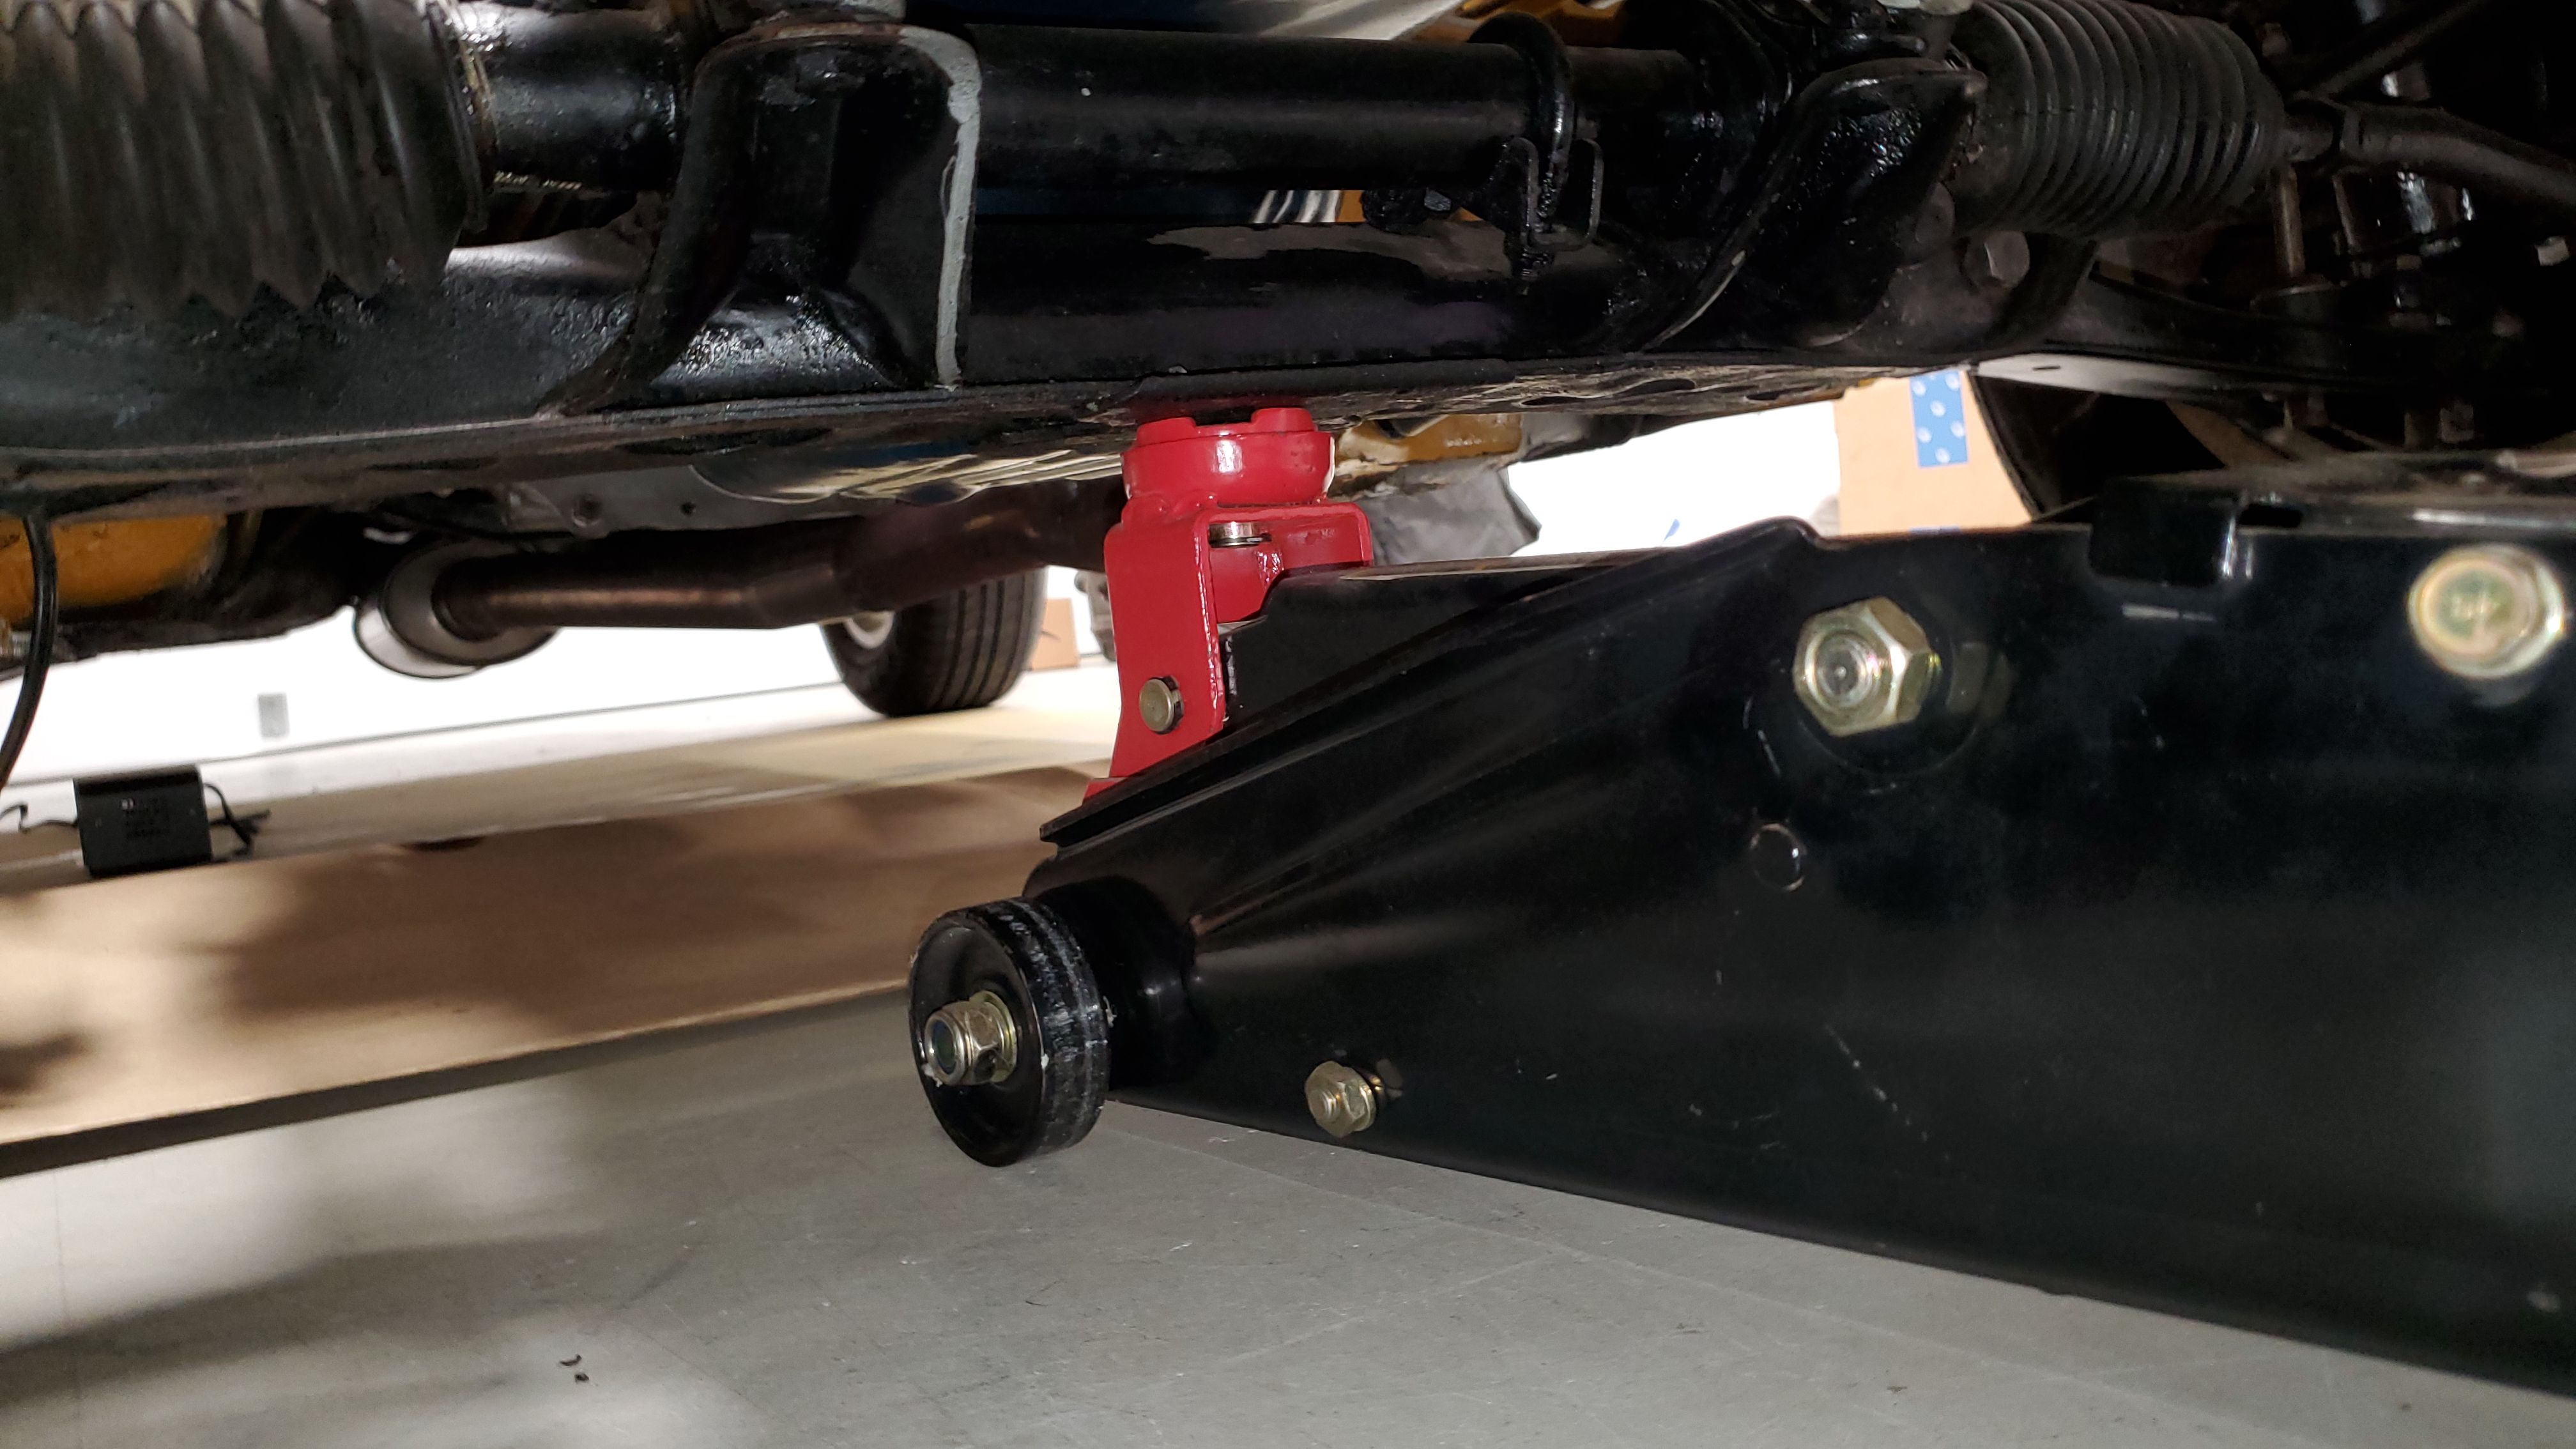
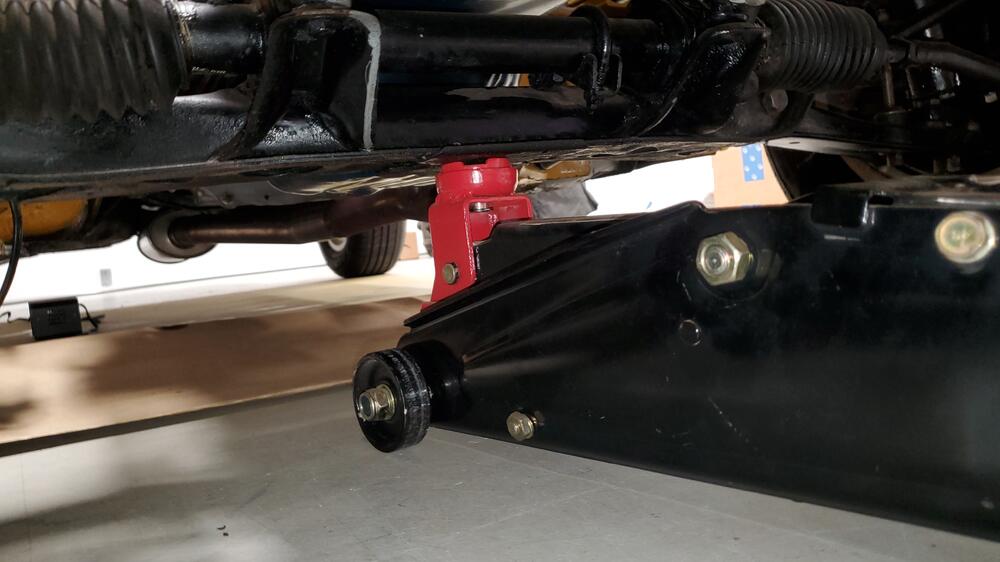
Thanks Patcon, that makes me feel better. The leak is a drip a minute or so but I can see gravity emptied the fuel filter so it may have just slowed itself as it levels out. This was one of my original problems so I guess i finally found the source. I suspect it's sucking air as well because prior to my all new hoses and filter I would see air bubbles in the filter. Funny though when i started it the other day all the bubbles were gone but maybe it's slight enough I can't see them. I'll start it up again to see. Its carbs, original SUs. I gave it some thought last night and am going to attempt to get under and at least see if I can repair the fittings temporarily. I would love to do a new line but I'm afraid at this stage in my learning dropping tranny and anything else in the way in the tunnel is beyond me without bringing it somewhere. I have a floor jack at home and just ordered some stands from amazon. I also have ramps but not sure they will give me enough height. If i decide to jack and stand this is this the right spot on the cross member? I assume the flat plate is the jack point and then I put the stands left / right of it? The stands I thought would be best have flat tops rather than the curved ones. I got them becasue they had a nice locking pin and much wider tripod base. Looking at the cross member though with all those cutouts I'm wondering if I'll be ok?
-
Some of you may have seen my other post about vapor hose replacement. That was a great success, replaced all the vent hoses and both tank side and engine side fuel hoses, new filter, new tank sending unit, filled the tank everything works great and started on first key turn. Now the horror story. So that was a few days ago and my next task was to change the oil and filter. So I peak under there today to start the process and see a nice drip spot rear side of engine. I'm thinking its maybe a rear seal that dried out as the oil has been in the pan for quite some time (hasn't started since November). Well It's way worse. I found the PO had repaired the hard fuel line just where it turns into the tunnel and its dripping gas. I have no real means to lift this car and with dripping fuel I'm scared to even start it again. After all the hurdles I went through I'm really bummed and not sure what to do. I can barely reach this through the engine bay to even attempt to tighten it. Is there anything I can do other than maybe tow this to someone that can replace or repair the line? I could probably get some type of putty around the whole thing as a temporary patch if that's even safe to drive?

-
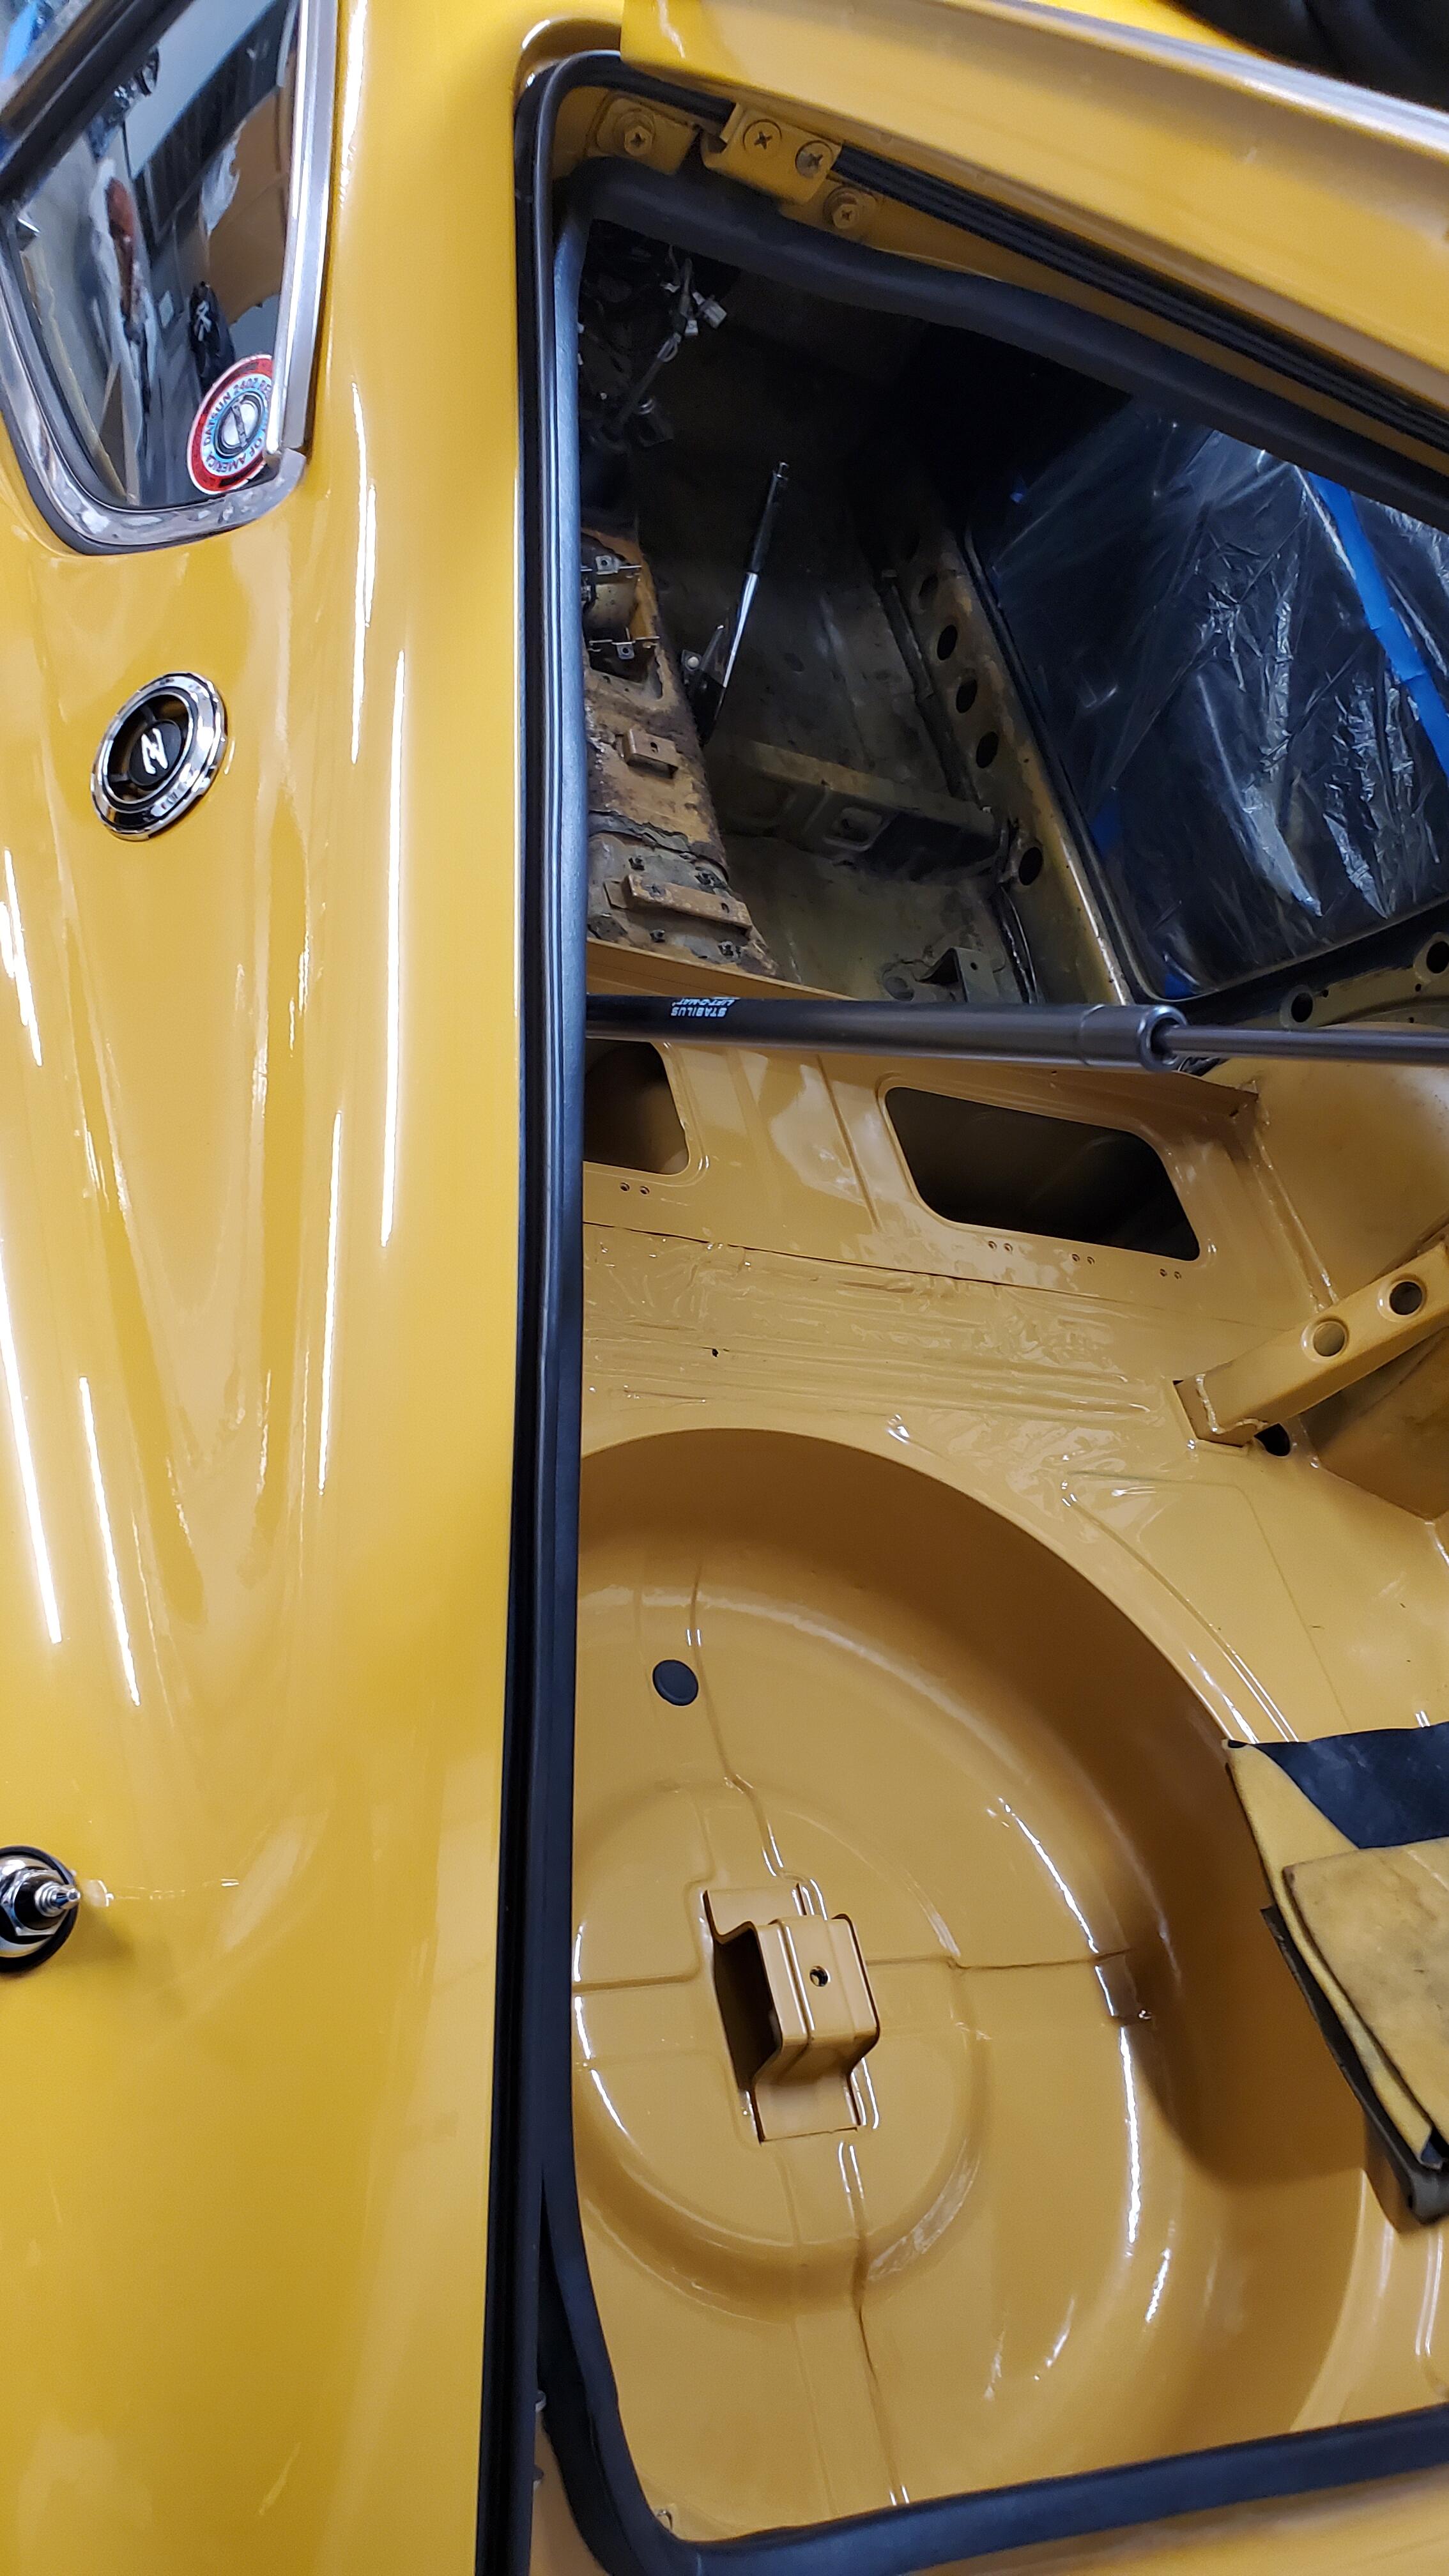
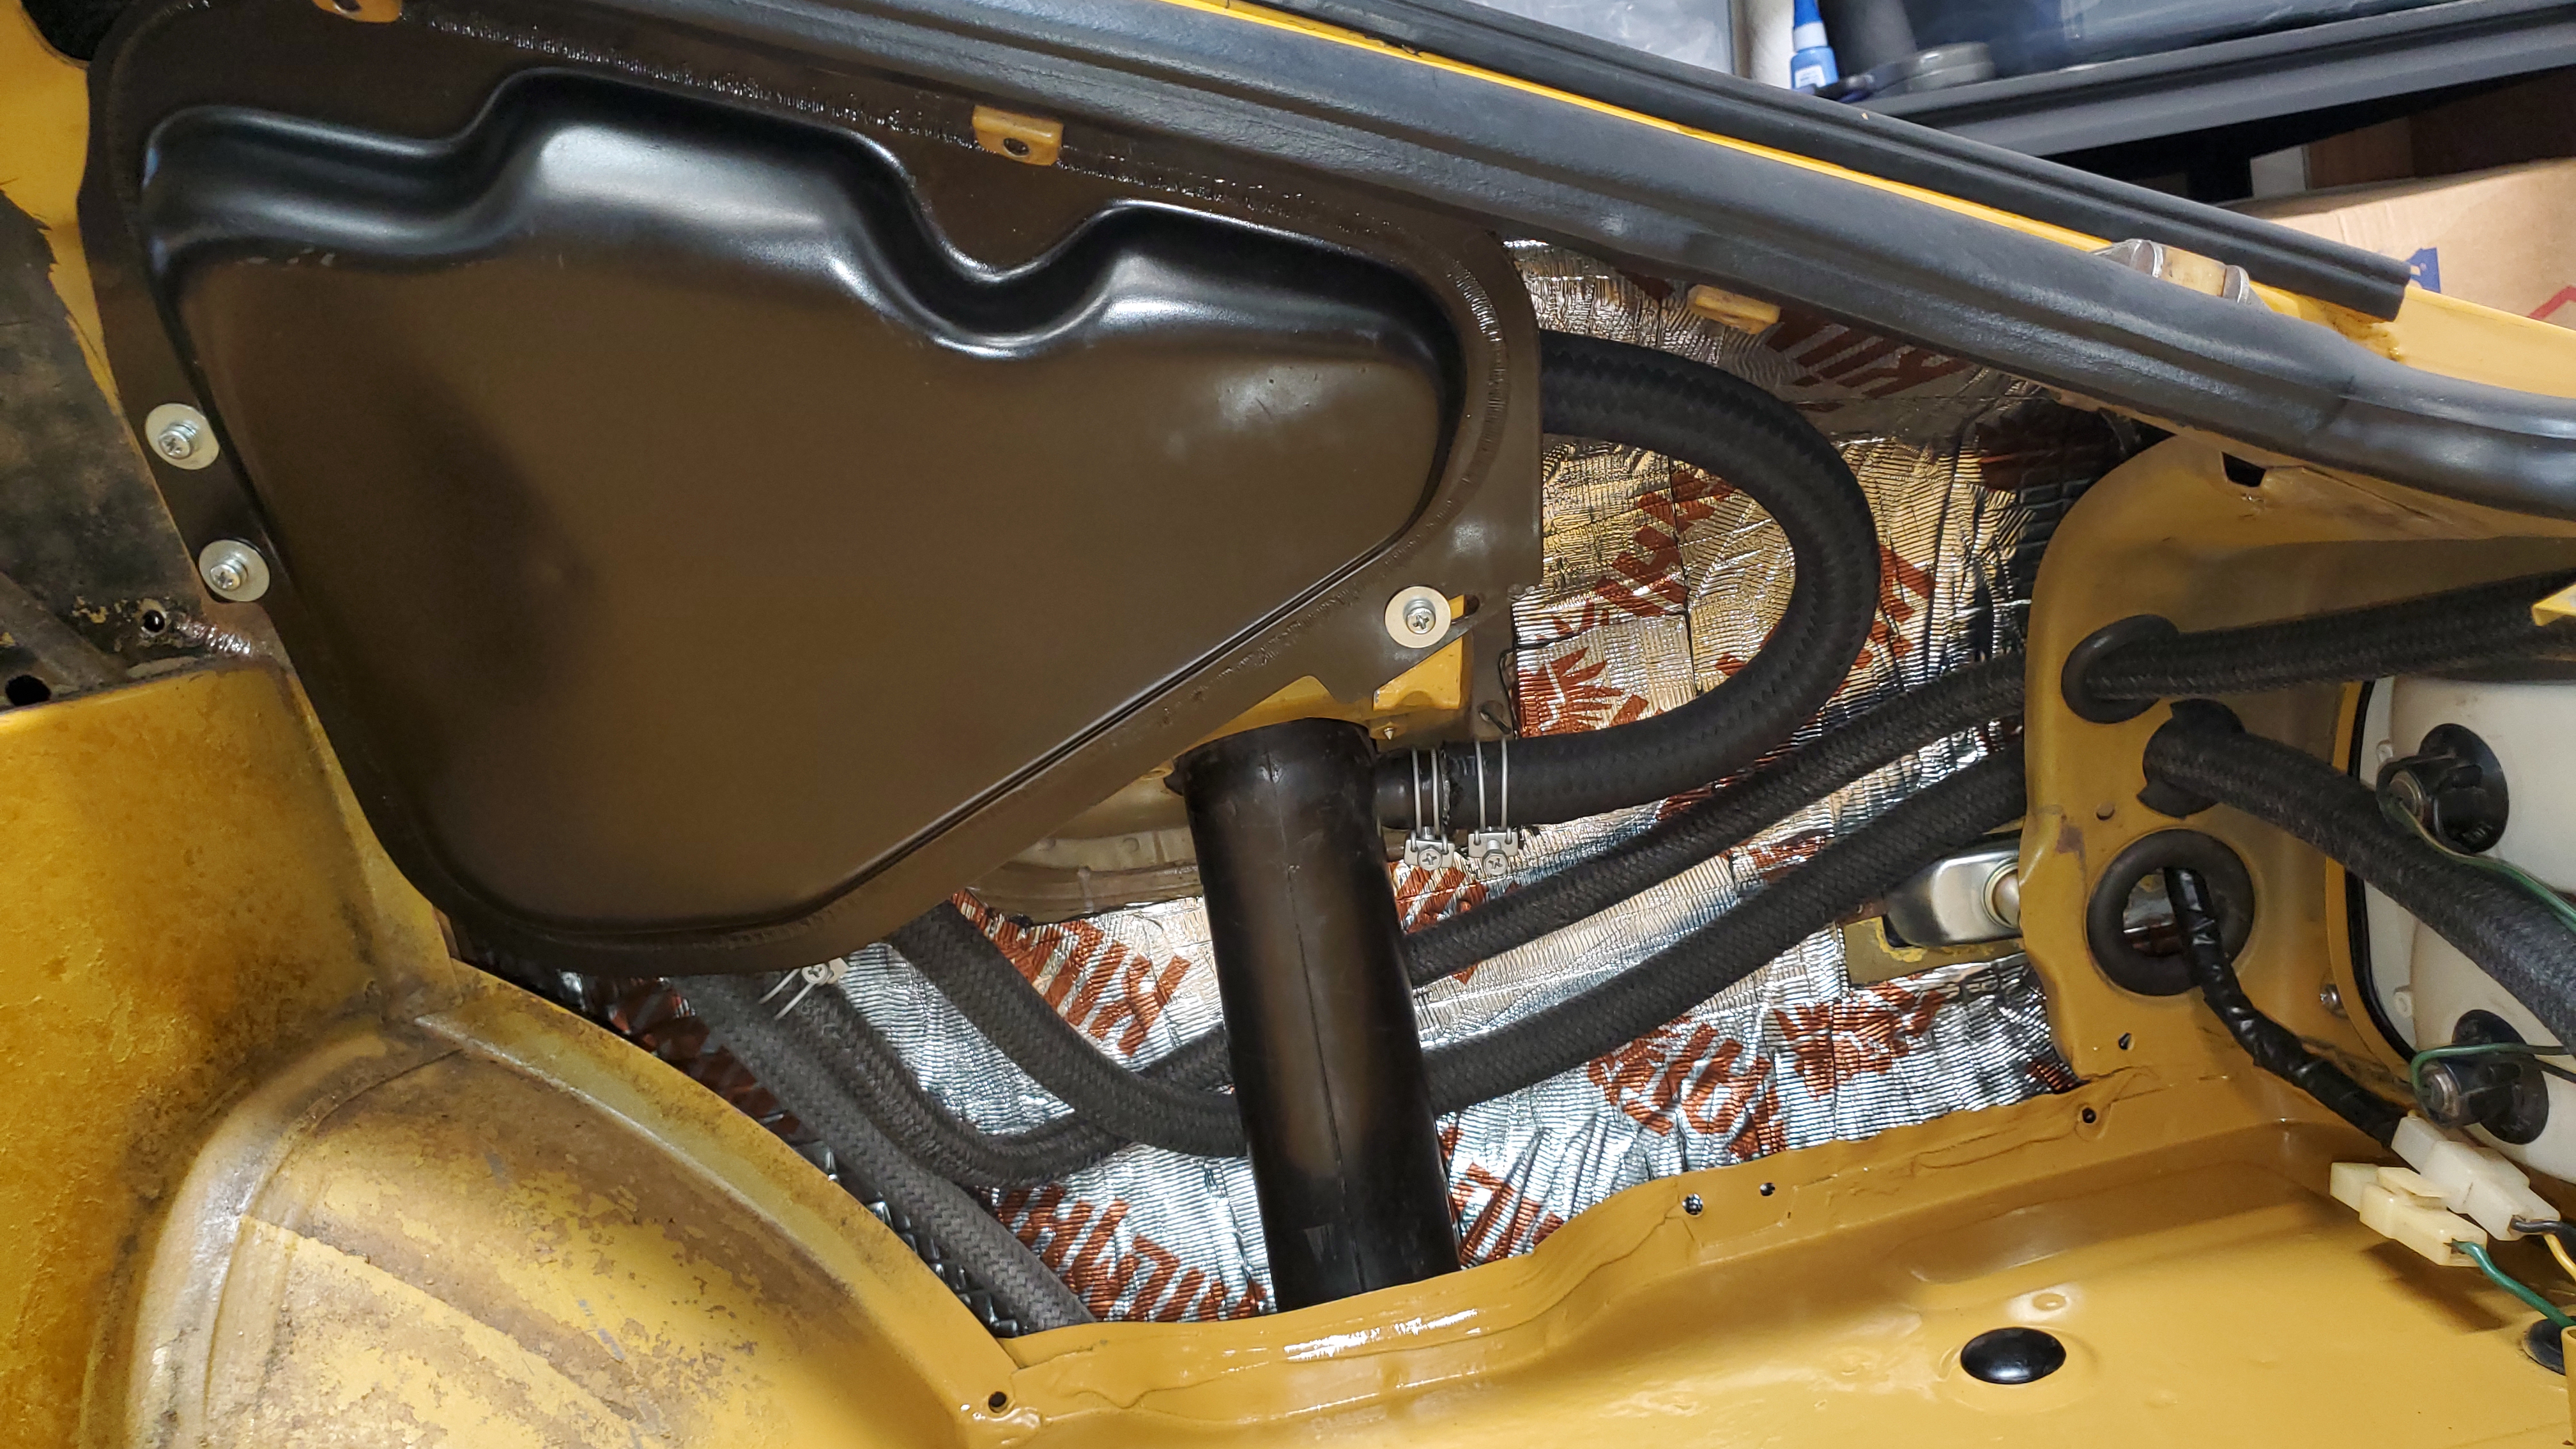
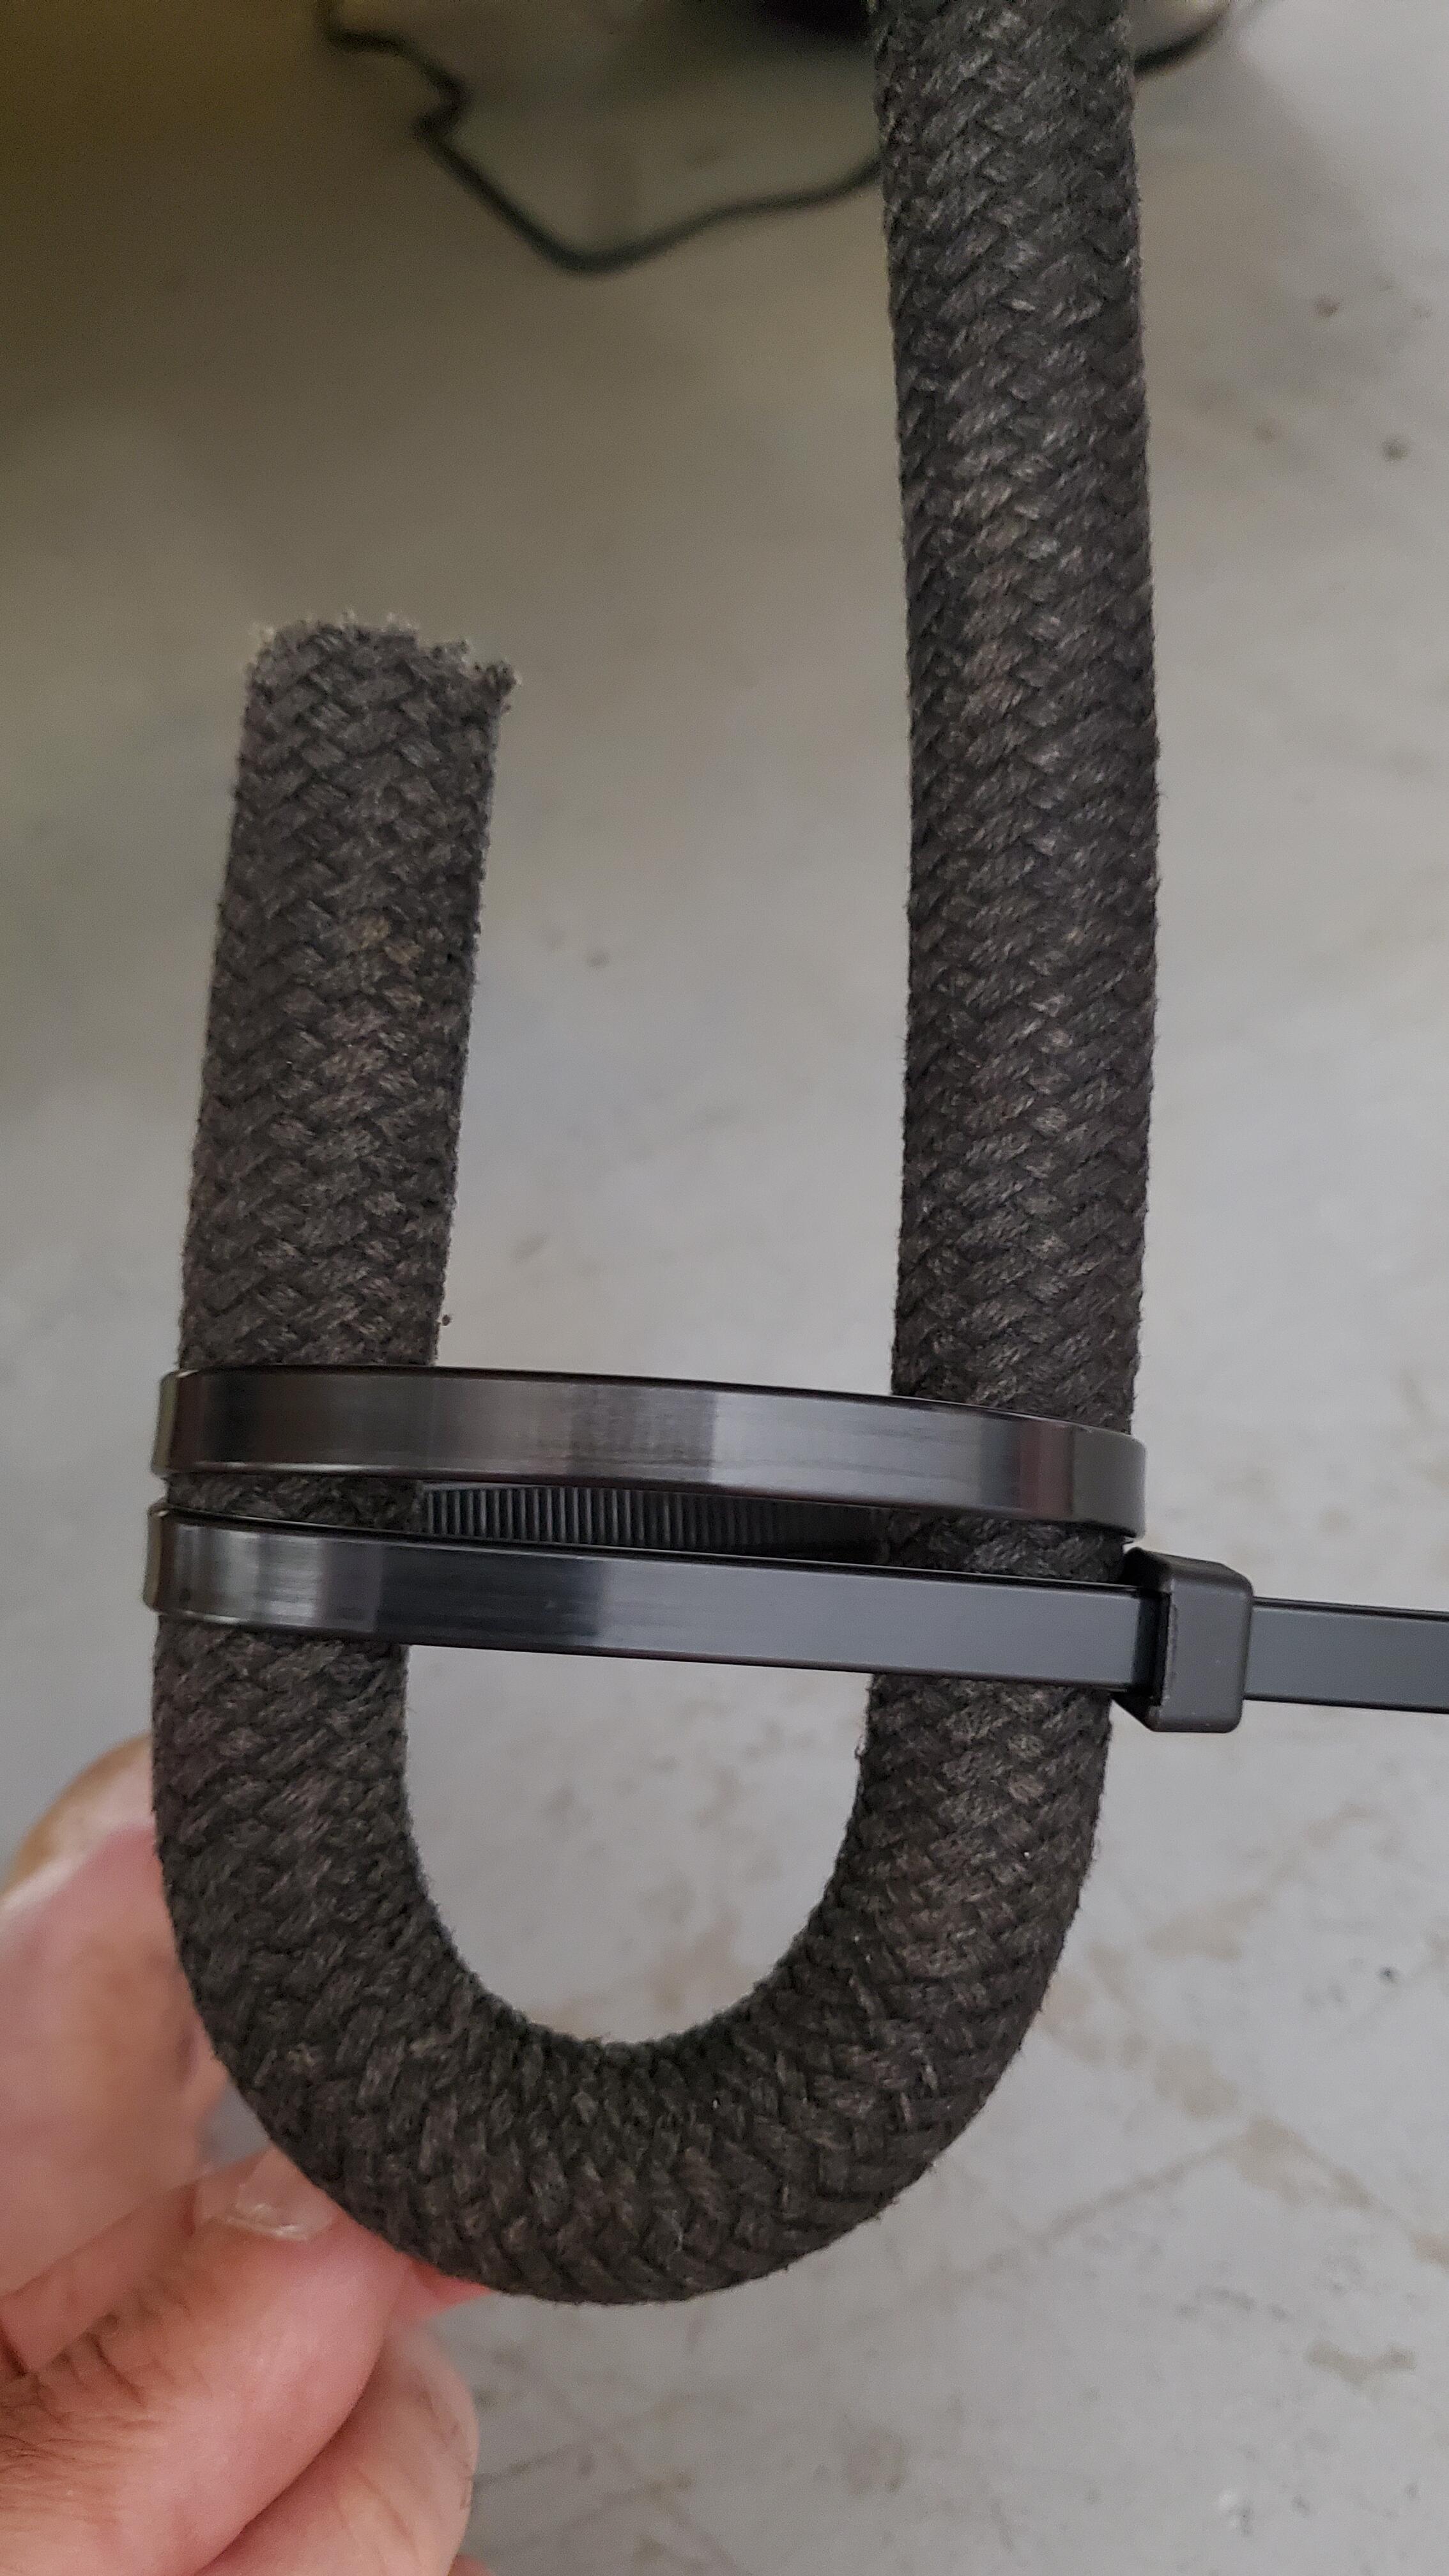
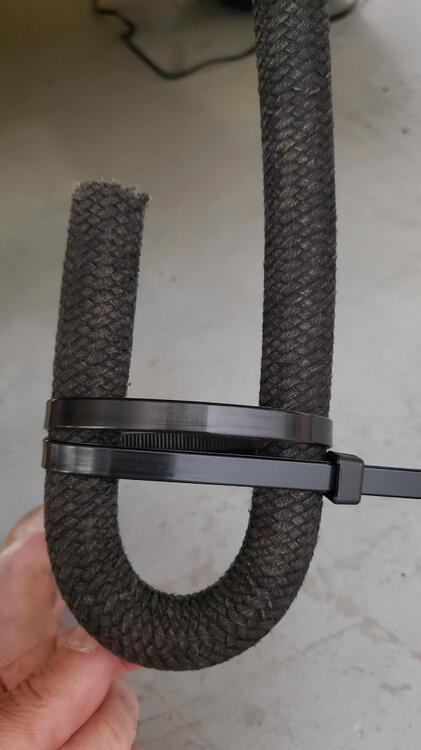
Ok, finally after all this time got the hoses and the canister back in. Wasn't as bad as I expected except for all the bruises on my forearms from under the car 🙂 I was actually able to do all of it end to end without removing the tank. I pulled the shield and I'm skinny enough to fit under there and even reach between the rear body panel and the tank to get the dreaded bent hose on. There was just enough give in the body panel that i could keep it far enough away from the tank that a hand could get in there. Then used a real long screwdriver to tighten the clamp. When I get it up and started again we'll see if it holds 🙂 Here's the final product. Thanks everyone for all the advice and help along the way. And the door spring trick worked incredibly well.

-
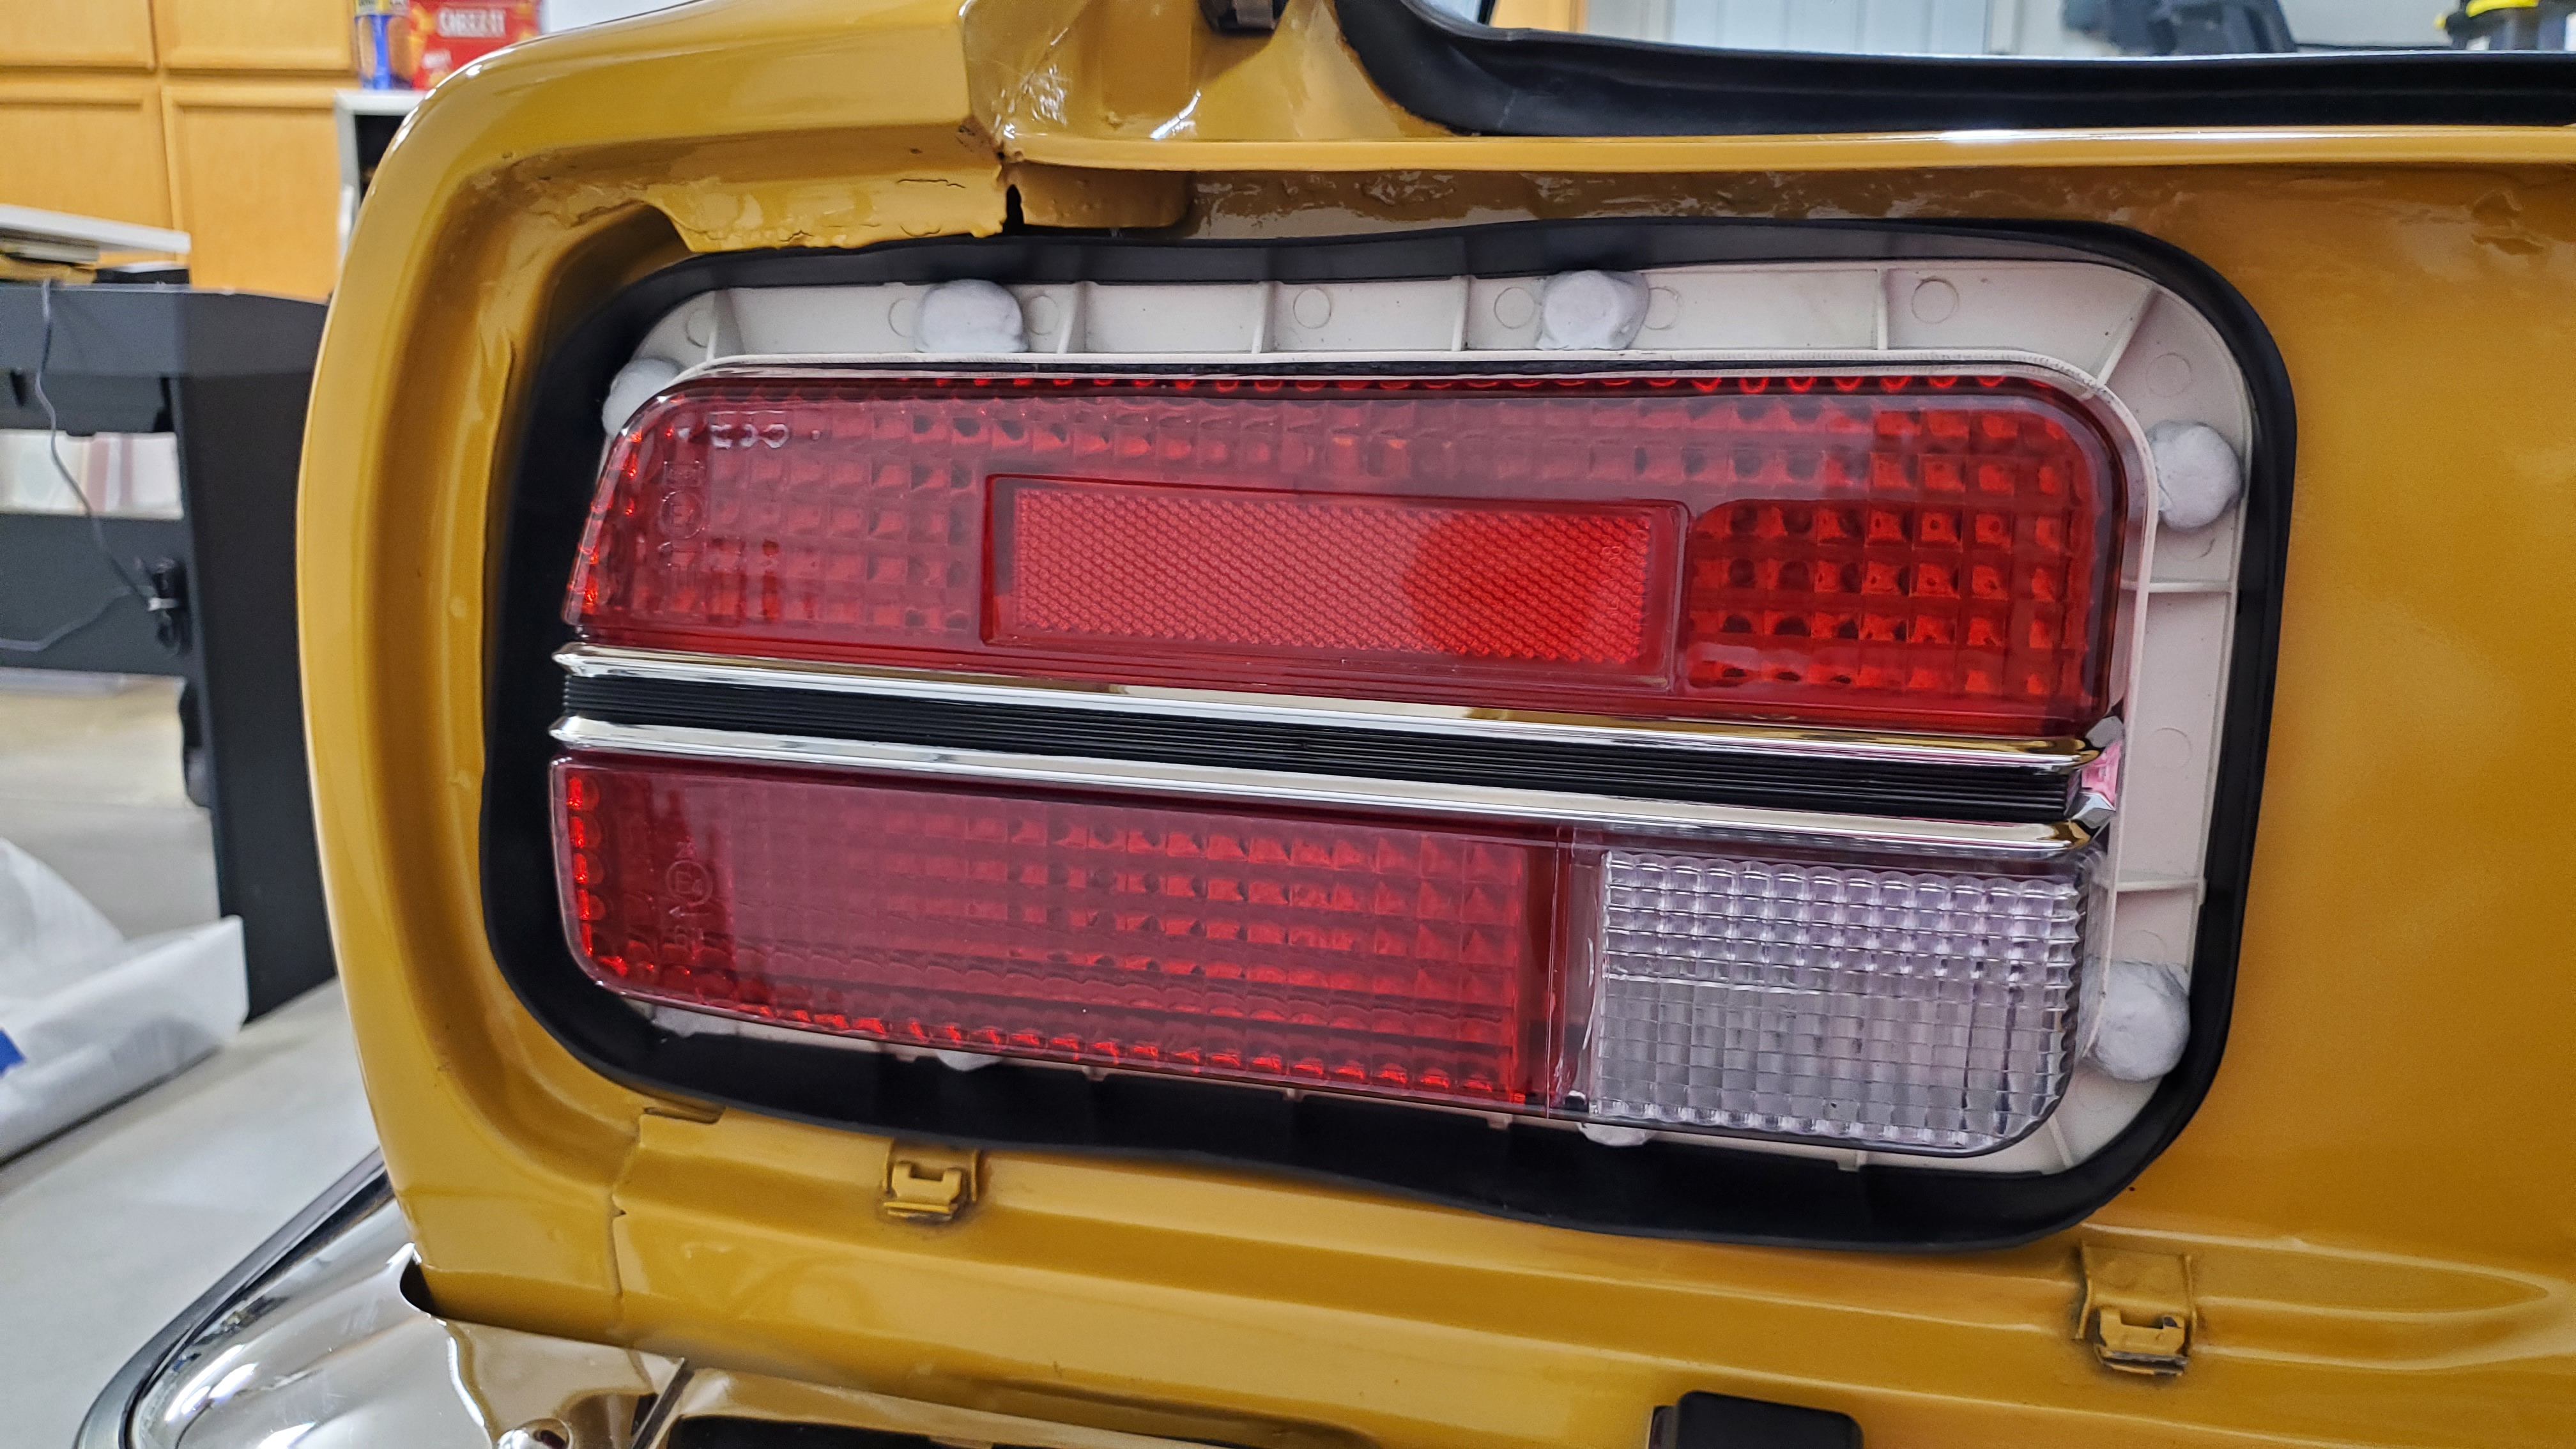
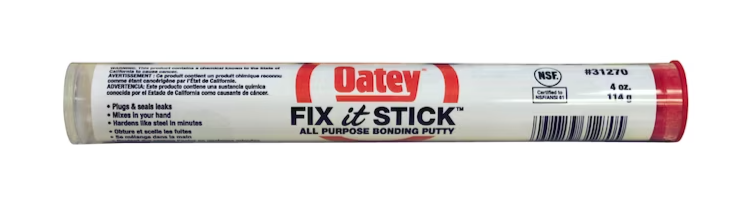
Just finished restoring my tail lights and one thing I did may help people so I'll pass it on. Not really mind blowing but useful :-). When I took them out I noticed the "melted plastic" I'll call it that retained the nut and cap for each hole was so brittle it wouldn't hold the nuts in anymore. Half or more of the 16 total nuts were falling out the back because the plastic the factory melted over was dried out and nearly gone. It's a miracle the PO didn't lose these lights honestly. Went to home depot got this fix it putty I've used in the yard to stop PVC leaks and it was excellent at repairing each nut placement. It even dried an exact match to the color of the plastic housing. What was nice was it was pliable and easy to mold before it hardened, unlike some of the epoxies that become a mess too quickly. I didn't want anything liquid that would seep through to the nuts and ruin the threads so this was the perfect consistency. I had to use a little of it on the inner side as well and it really did a great overall job strengthening the integrity of each hole.

-
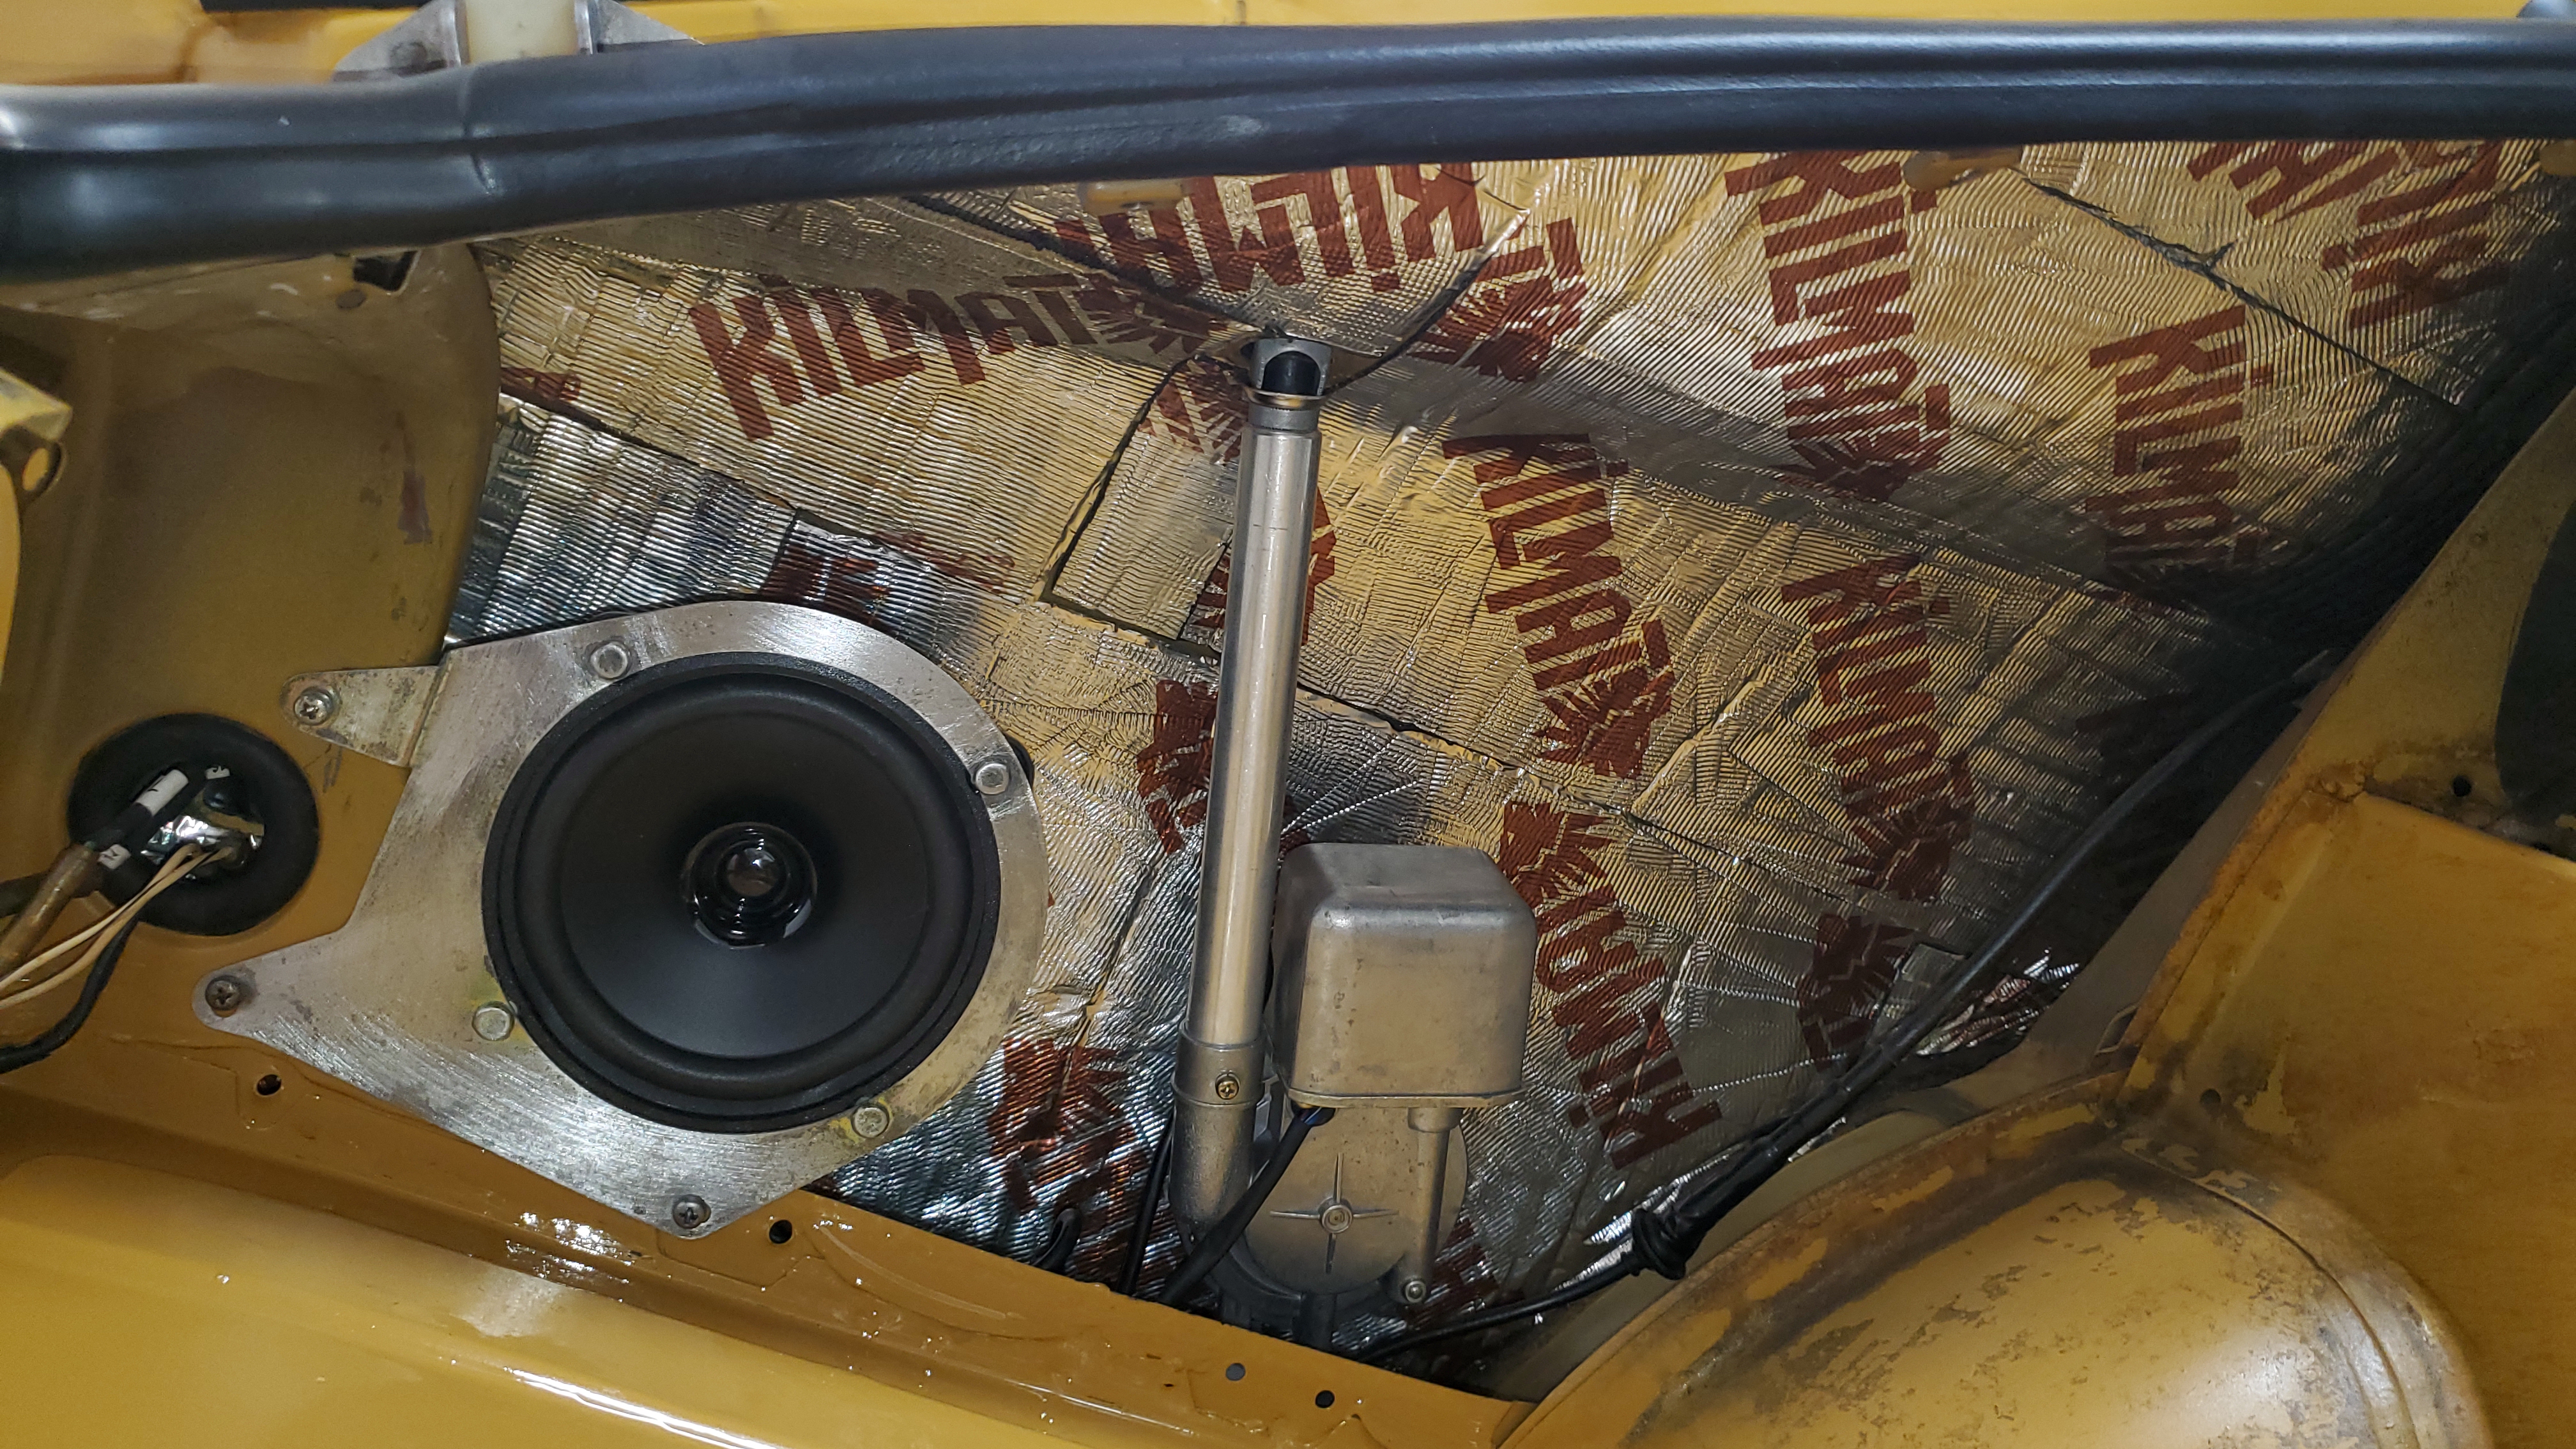
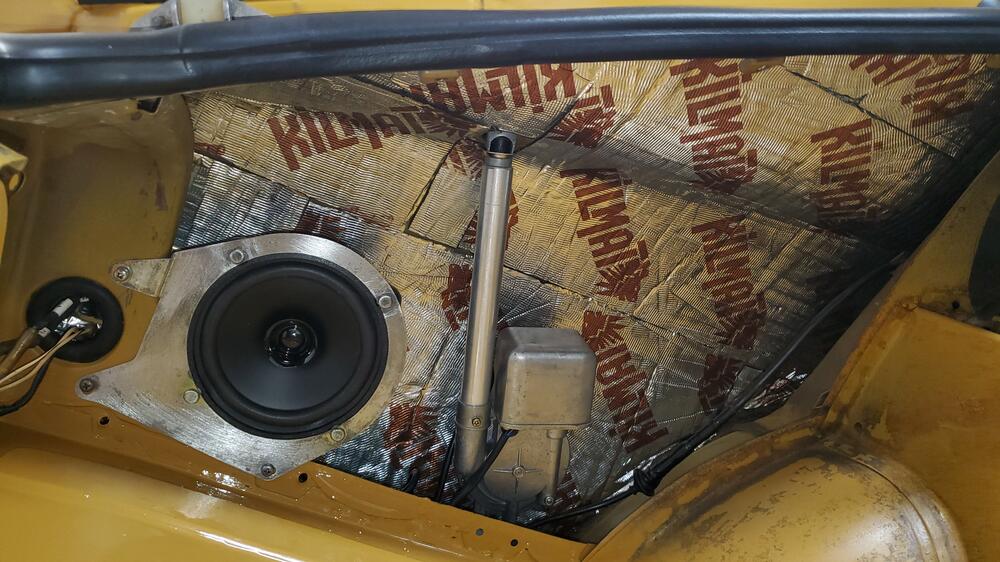
Wow that wd40 did a great job. I'm going to follow your method when I do mine in a few weeks. From my initial inspection it looks like I have the same areas of rust as you and probably half the people on here lol. Heating the tar mat going down all depends on what product you buy I guess. I used kilmat 100 ml which was a great price to performance ratio for me. The only down side is it's not really paintable because of the foil backing. It's super easy to go down though, can be cut with metal shears like butter and has a peel and stick application approach. You'll use a little muscle rolling it all down properly but I was real happy how the trunk area came out. i used that por patch and was super impressed how hard it set up. One lesson i learned is be sparing if you intend to sand and paint over it as it's a bit tough to totally smooth down if you aren't careful. When I removed the glue from the trunk area the goo b gone worked well wnough i didn't really have to sand much if at all. Good luck show us the results.
-
I sure hope so after all the effort I've been putting in. Did the vapor side too, now just need to get all the hoses back in place then i'll do the deck and on to the mid section The kilmat stuff is pretty easy to work with, even the rolling wasnt all that bad. I just wish it was paintable but I keep telling myself to set expectations. I can get ahead of myself with all the great ideas to bring it back to fully original. Then reality sets in but i think i'm learning to live with the balance.
-
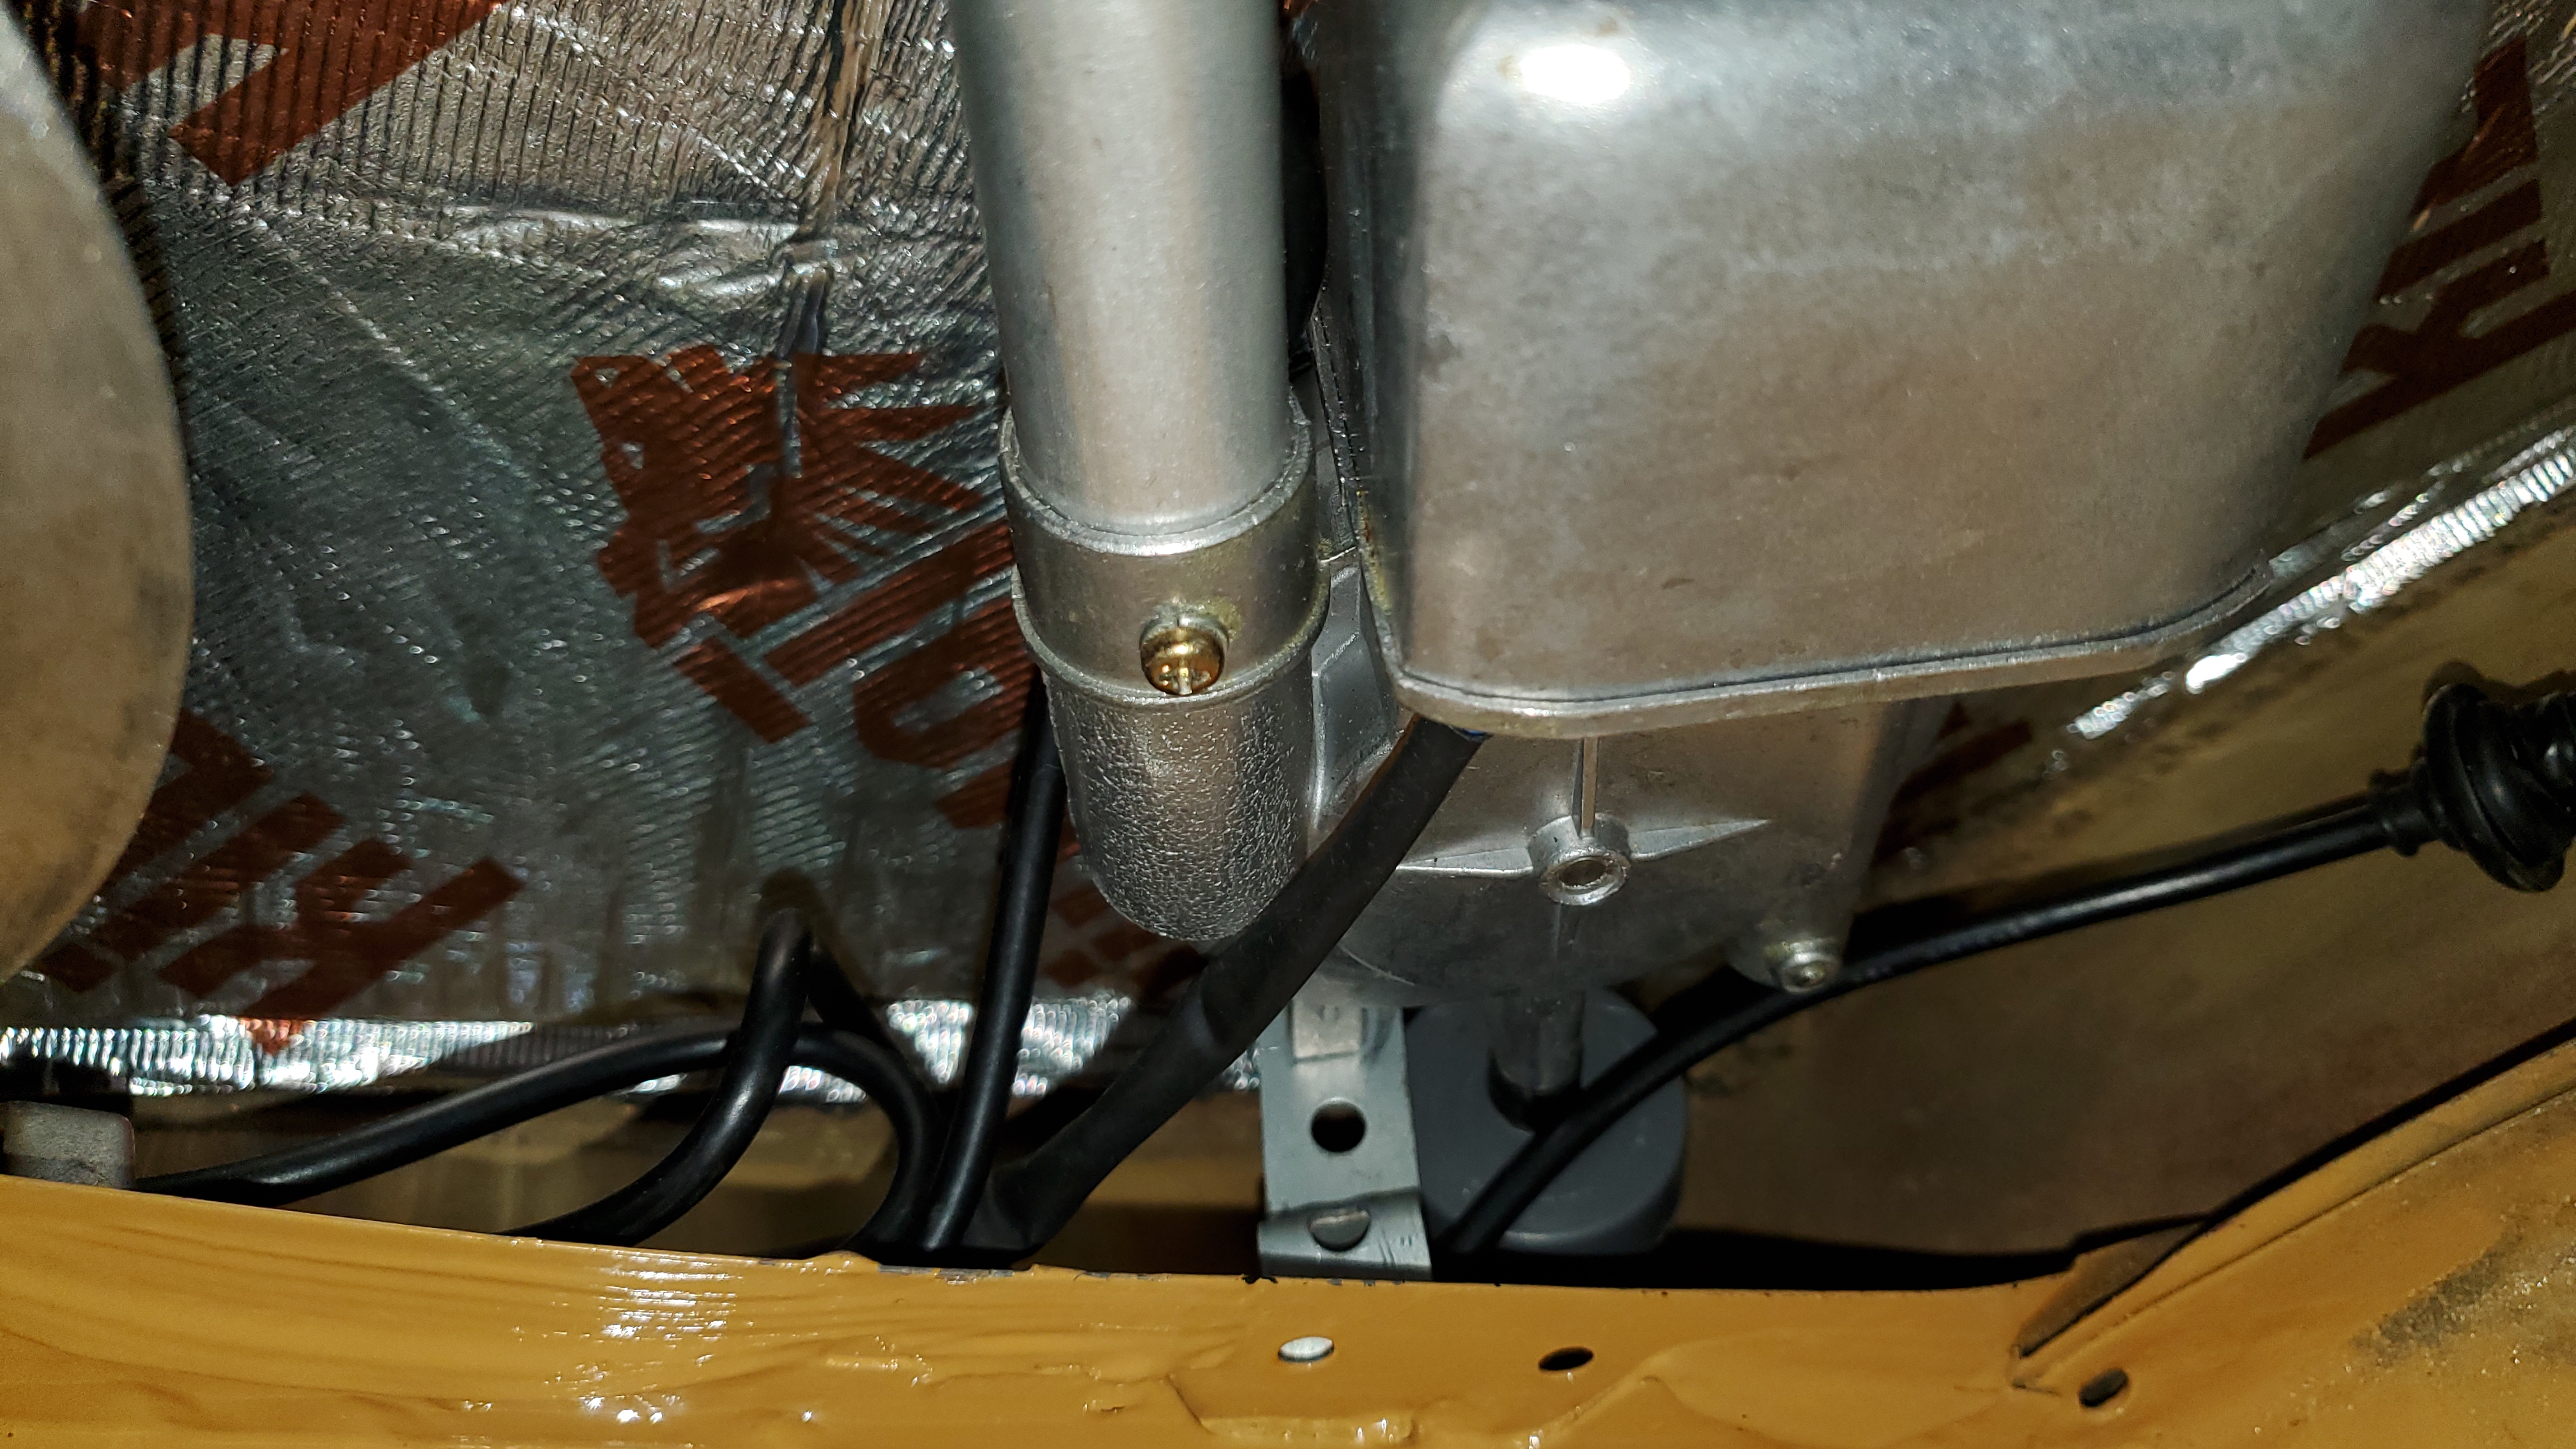
Thanks. I think your antenna is a bit shorter than mine. Your bracket was what I had with it but it was way too long to get anywhere near the right angle I needed. The more I learn about these cars I am amazed at how ingenious most of the design was. From what I've come across in my limited tinkering, this setup is one of those could have been better items. but nothing beats the dreaded gas tank vent bends and twists. There is so many better ways to make those hose connection straight you would think 🙂
-
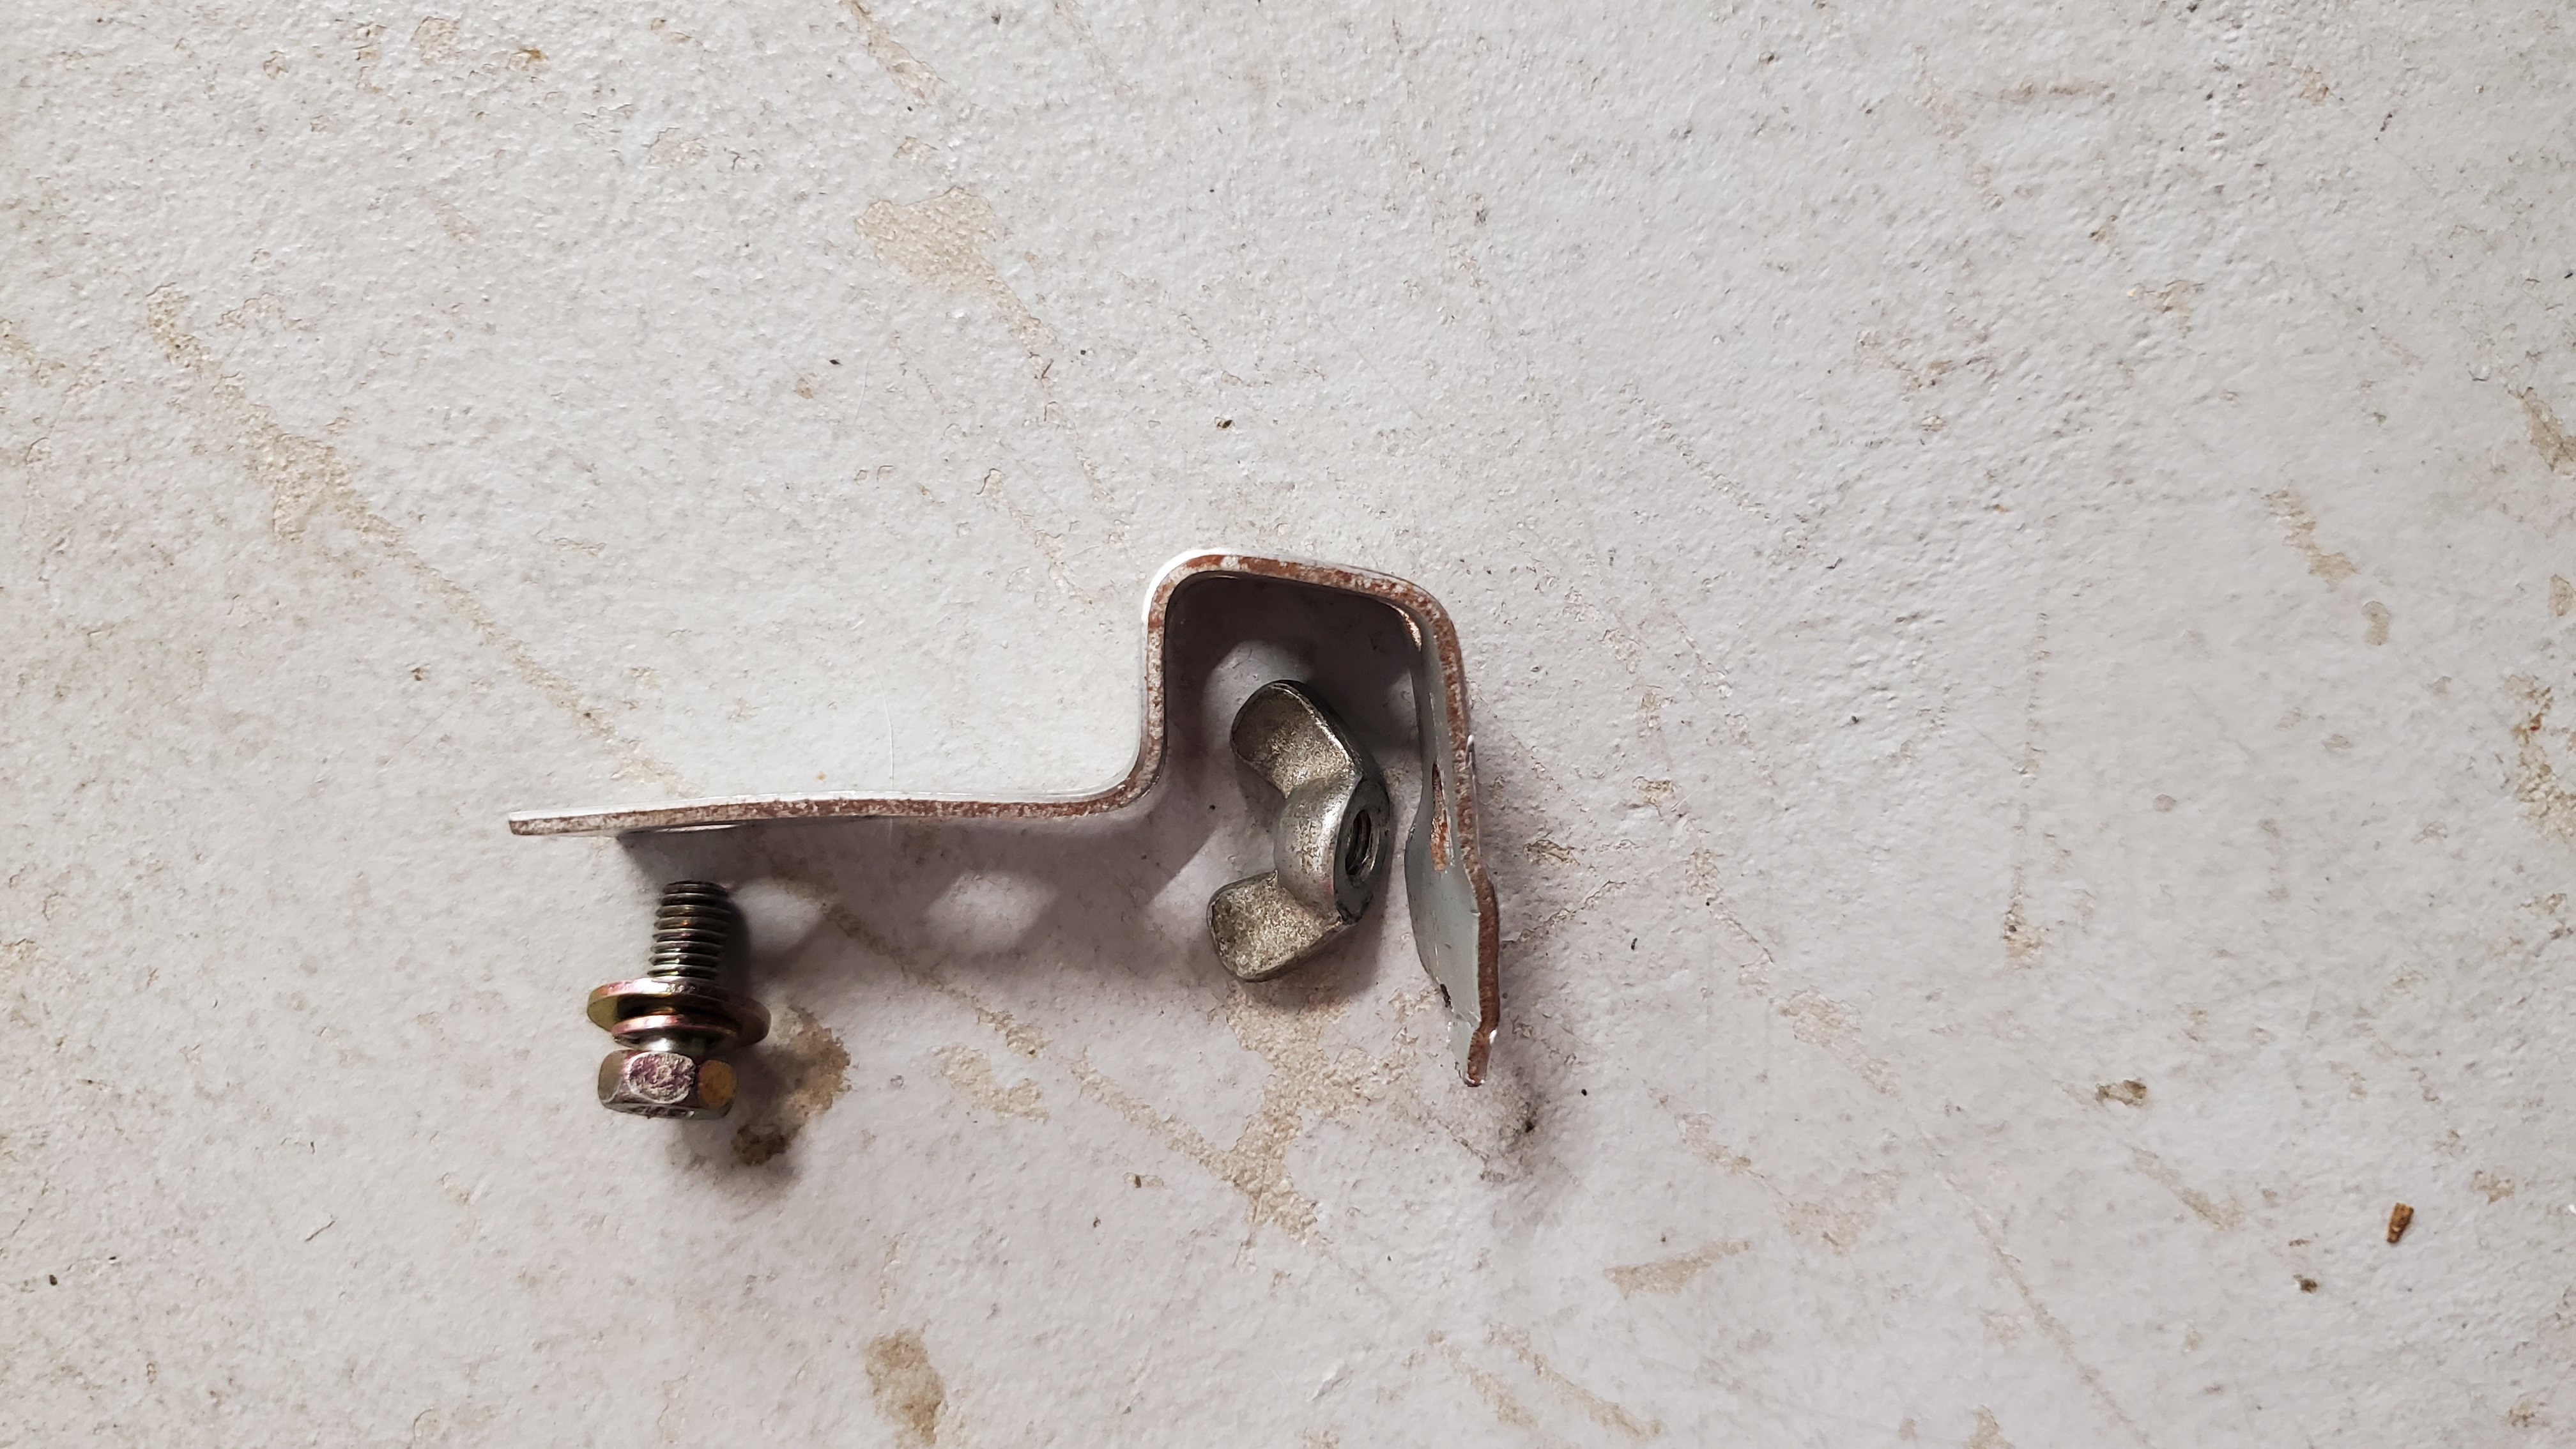
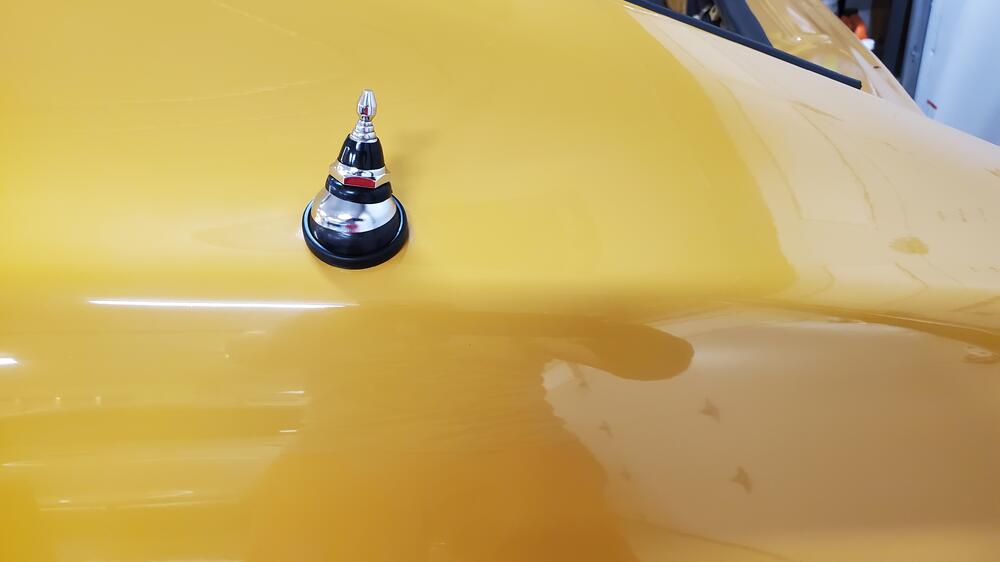
Bingo! Had an old pice of angle iron and lucked into an odd shape that worked perfectly. I thought I'd be bending for 20 mins but only second attempt. First attempt was an L and there just wasn't enough clearance for the wingnut. This must have been an extra father's day gift cause I never expected it to be so easy lol. Finished work.


-
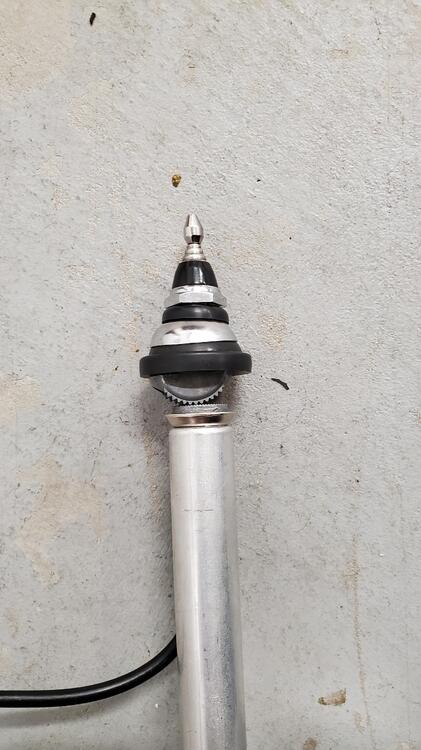
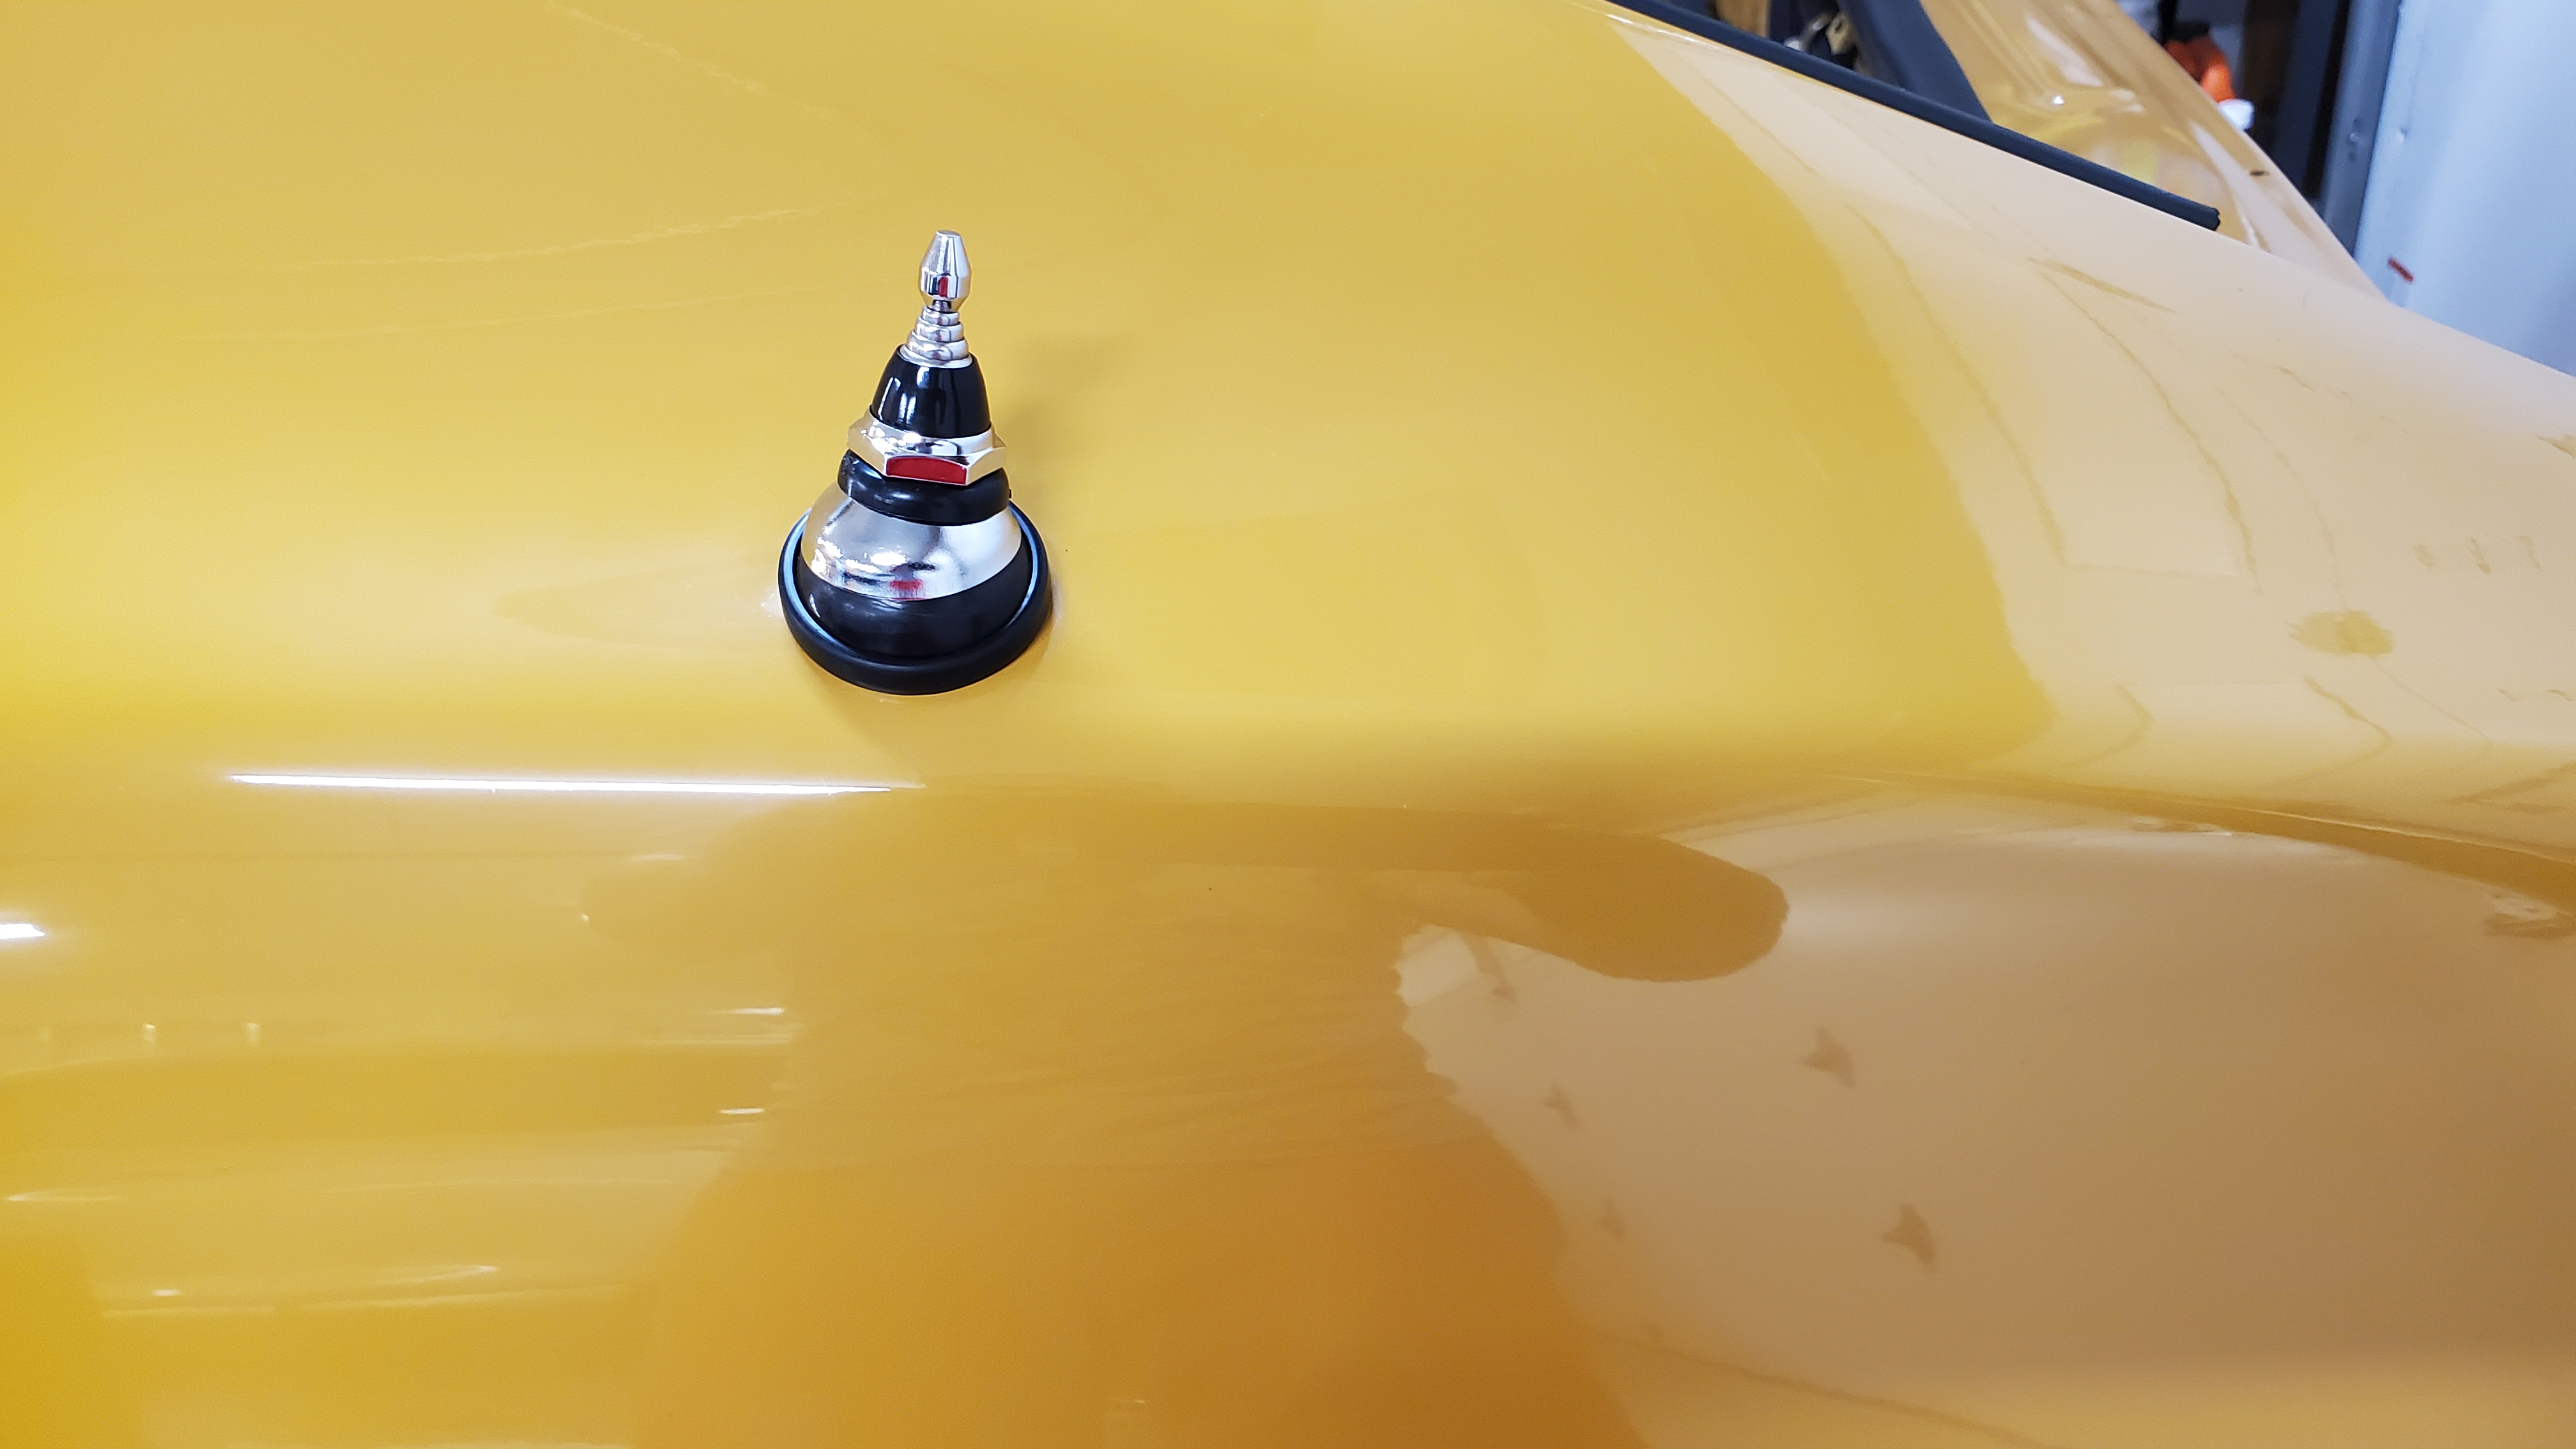
OK, made some progress after scouring the site and some ebay listings. I found that the last two bottom pieces were in the wrong order. Also found the right orientation of the rubber seal and was able to mount it loosly screwed into the mast. Now I also see the longer bracket he gave me was for the "shorter" harada bullet tip antenna, no wonder it was impossible to connect with it. I must have the next series antenna which is longer and has a much longer antenna cord. Seems that type only requires a small L shaped bracket to get on the post. If anyone has a picture of what the bracket should look like on my type of antenna please upload.
-
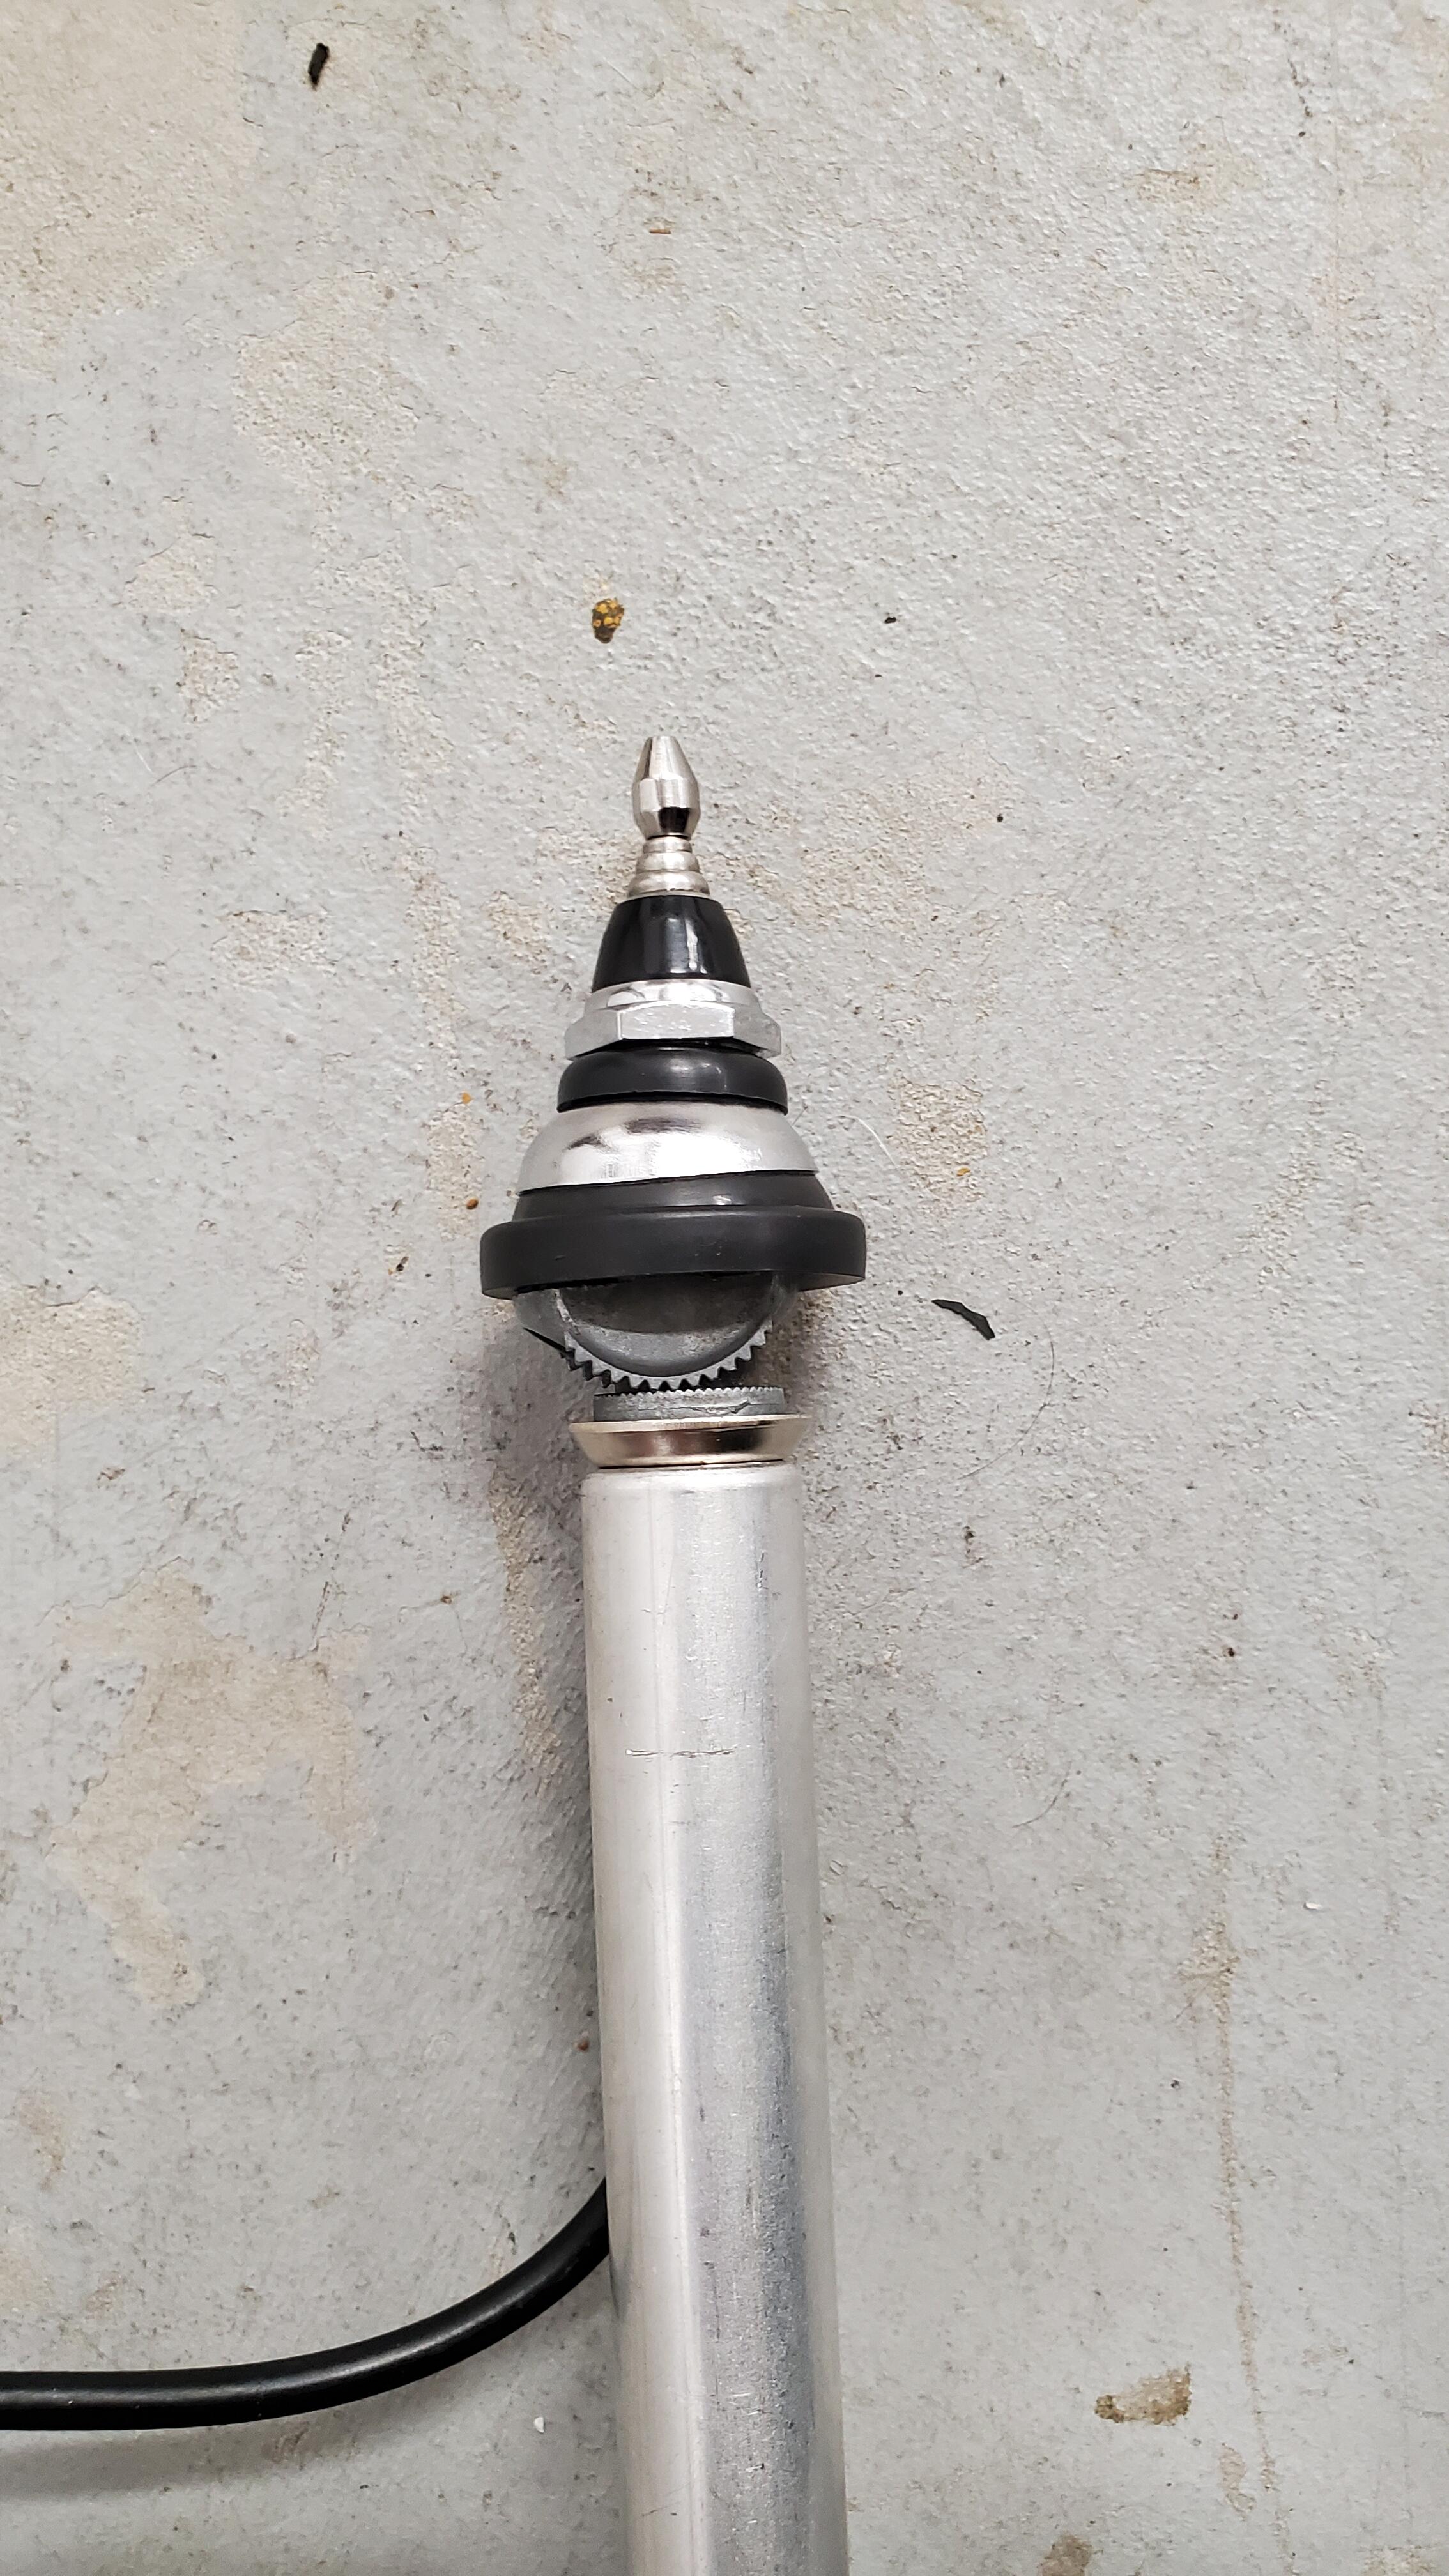
I found a NOS pointy tip about a year or so ago and just getting around to install it in my 6/71. It's a pain in the arse let me tell you. I'm either way off or something is missing. Does anyone have picture of the original setup and also what the bracket looks like? Here is a picture of the antenna as I received it, are these pieces at the top in the right order? Assuming they are, when i try to put it in the toothed half wheel seems too small for the hole in the panel and keeps coming up through no matter what i do to steady it for the washer and nut.. I must be missing something because it's near impossible to orient these with only the two hands God gave me lol. Even when I get close, the bracket I was sent with it seems way too long and I can't get that onto the bottom or the wing nut bolt in the body. Anmy help super appreciated.