Richie G
 Subscriber
-
Joined
-
Last visited
Everything posted by Richie G
-
Cunifer! Found reference to it. Will see if it is something he'd make for me. If I do go this route opinions? From what i saw it was easy to work with, could be polished to a nice finish, but not sure how close that would be to "original cad type plated look".
-
A little snag in my plan. I was talking to classic tubes and apparently what they call "OE" isn't going to come with a yellow plating to match what I would have expected to be "OE". That might be my mistake. His description of OE was low carbon steel galvanized and top coated with an aluminum epoxy that couldn't be plated after wards. He mentioned he had previous requests for plated material but couldn't ever find any in coils for them to use. Anyone know of any I could offer? I know i stumbled upon a material I think it was on this thread that seems to be what folks use nowadays. It was an alloy that had that look but was more pliable and easy to use. The heck if I can recall its name though so I'll keep searching if no one here has it at their fingertips.
-
No doubt, the camera and video have been my best friends through this journey. Once I get under there if it looks like swapping the old ones out are going to require a lift i may just wait and get someone to do it for me.
-
Thanks guys. Sounds like the sizes will be fine, now the labor to get it right lol. I don't have a lift but do have some mechanical friends to lend a hand. What I think I'll do is get it up on stands, tackle the headers and pipe which should be within my wheelhouse, then assess if the lines can be done. If not, I'll get it to someone I trust who does have a full shop.
-
Decided to replace all the hard lines and had a question around sizing. I checked all the usual sites to find the best deal and noticed Z-Car had both stock and upsized for the supply and returns. I ended up going with a direct buy from classic tube and Cliff is making me what I think are the upsized ones I saw on Z Car. Before I commit, checking in with the crew here to give me some final advice. I went with 3/8 for supply, 5/16 for return, 1/4 for vapor all in the OE plated look. I'm still running SU round top and a mechanical fuel pump but down the road looking to go with triples so that's why I figured I would upsize. How do these sizes sound and am I going to run into any trouble with my existing setup? Engine I am assuming is still stock from previous owner, just rebuilt nicely. Oh and while I'm at it, advice on replacing them? My plan is to do all the hard lines for fuel, brake, clutch while I'm replacing the standard exhaust with headers and new pipes. Hoping I can wiggle my way through it all without removing much else of the undercarriage.
-
If I do decide to do this, any suggestions on the proper coating? Started looking around and there's a bunch of options. I saw some internal methods using spray with a 360 nozzle and 2 ft hose that looked like it did a good job on the interior. Exterior seems pretty easy. @jfa.series1 That thing looks beautiful!
-
Hi all. Its been a bit since I've been here and even did anything with the car, life seems to throw obstacles at times. I've been ramping up to start thinking about my next project and headers / exhaust is probably on the menu. Over the last year I've dipped in and out of here contemplating what it would be, even had an idea of how I would do it but never settled on anything. Low and behold I get a new item notification from RC: https://resurrectedclassics.com/products/stainless-steel-dual-exhaust-system-s30z-240z-260z-280z-datsun-1970-1978-polished Its a polished (but uncoated) header with end to end pipes muffler resonator hangers etc. Seems like a true dual exhaust so I guess its 3-2? States its a bolt on to standard block and all the standard hanger locations. For a quasi-newbie DIY type guy like myself this seems like it would be something I can tackle in my make shift garage without any "professional help". From my research previously its been pretty clear a coated set would be best for heat and longevity so that's my first concern. Of course there's the cost concern too as this seems a bit pricey compared to putting an end to end system together from various components but that may be more work and or require a shop trip. There's also the MSA end to end package I guess which I was contemplating as DIY as well with or without coating. Opinions on this would be appreciated. Ignoring the cost factor (I know I know) what about this would be a pro/con if I were to get this and maybe some VHT to coat it myself?
-
Me neither, but did anyone ever replace the mirror for the correct convex piece of glass?
-
Heres a direct link https://www.amazon.com/dp/B011A8ZPL4?psc=1&ref=ppx_yo2ov_dt_b_product_details
-
If your only problem with the original glass was scratches you should try this first: I had awful roller scratches all the way up and down the window and used that amazon product and it came out like new glass. Pictures don't do it justice.
-
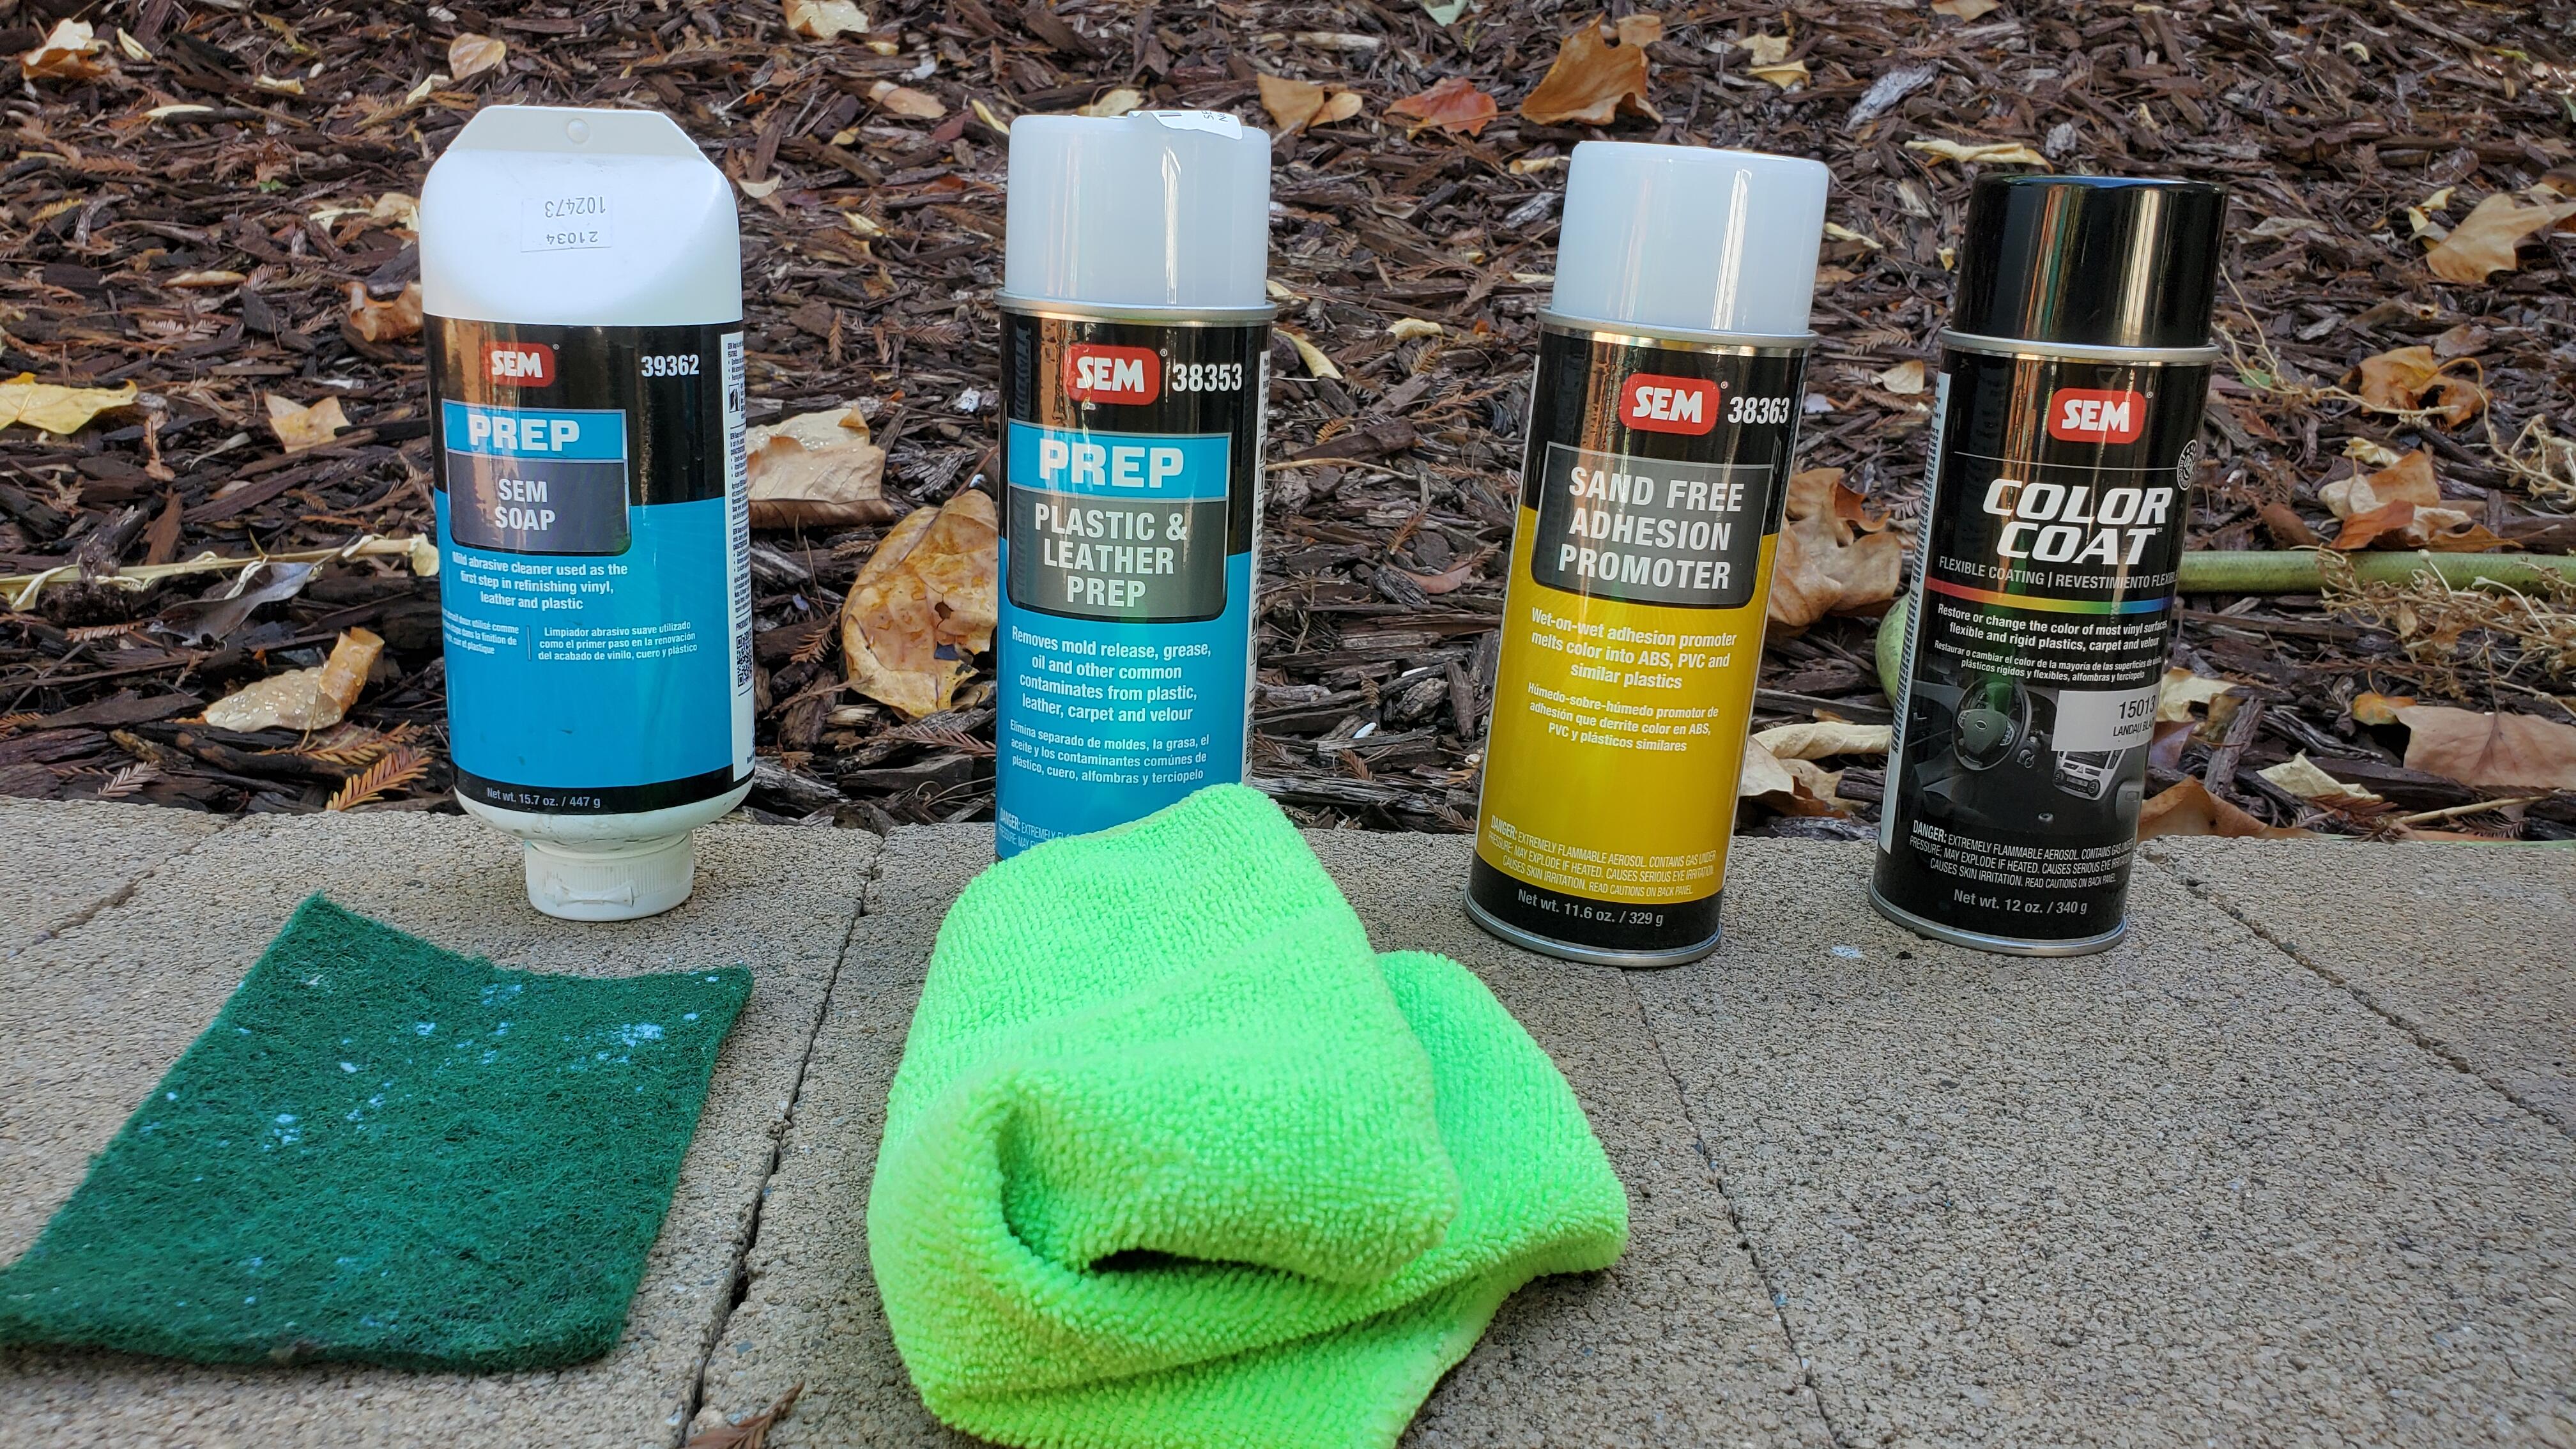
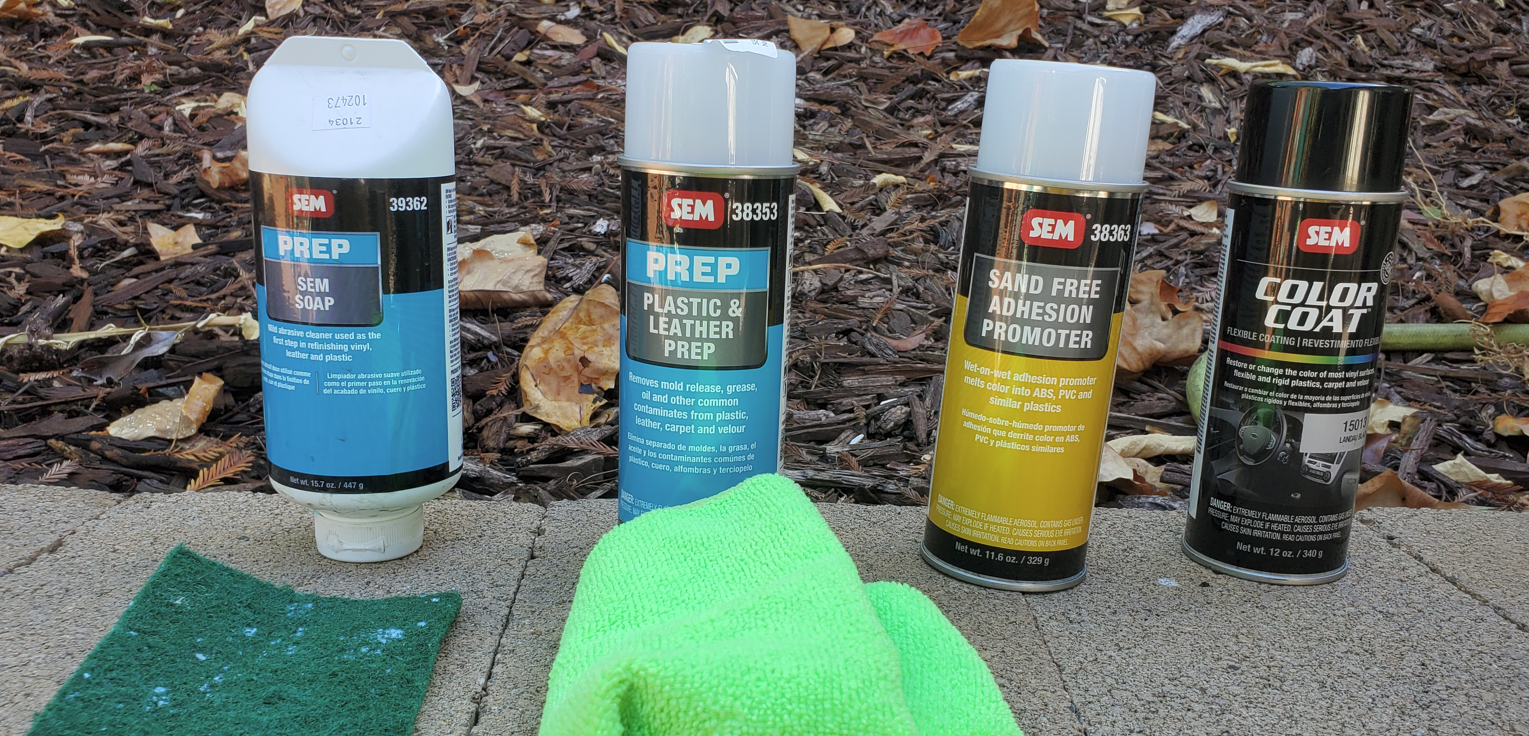
Sorry for the bad pic Yarb, yes 15013. I actually bought them all on amazon june of 21 so the product lasts quite a while in the can. The soap got a little separated but since it was just soap it was fine. the black sprayed a little thick for about 10 secs until the nozzle cleared but other than that it was amazing.
-
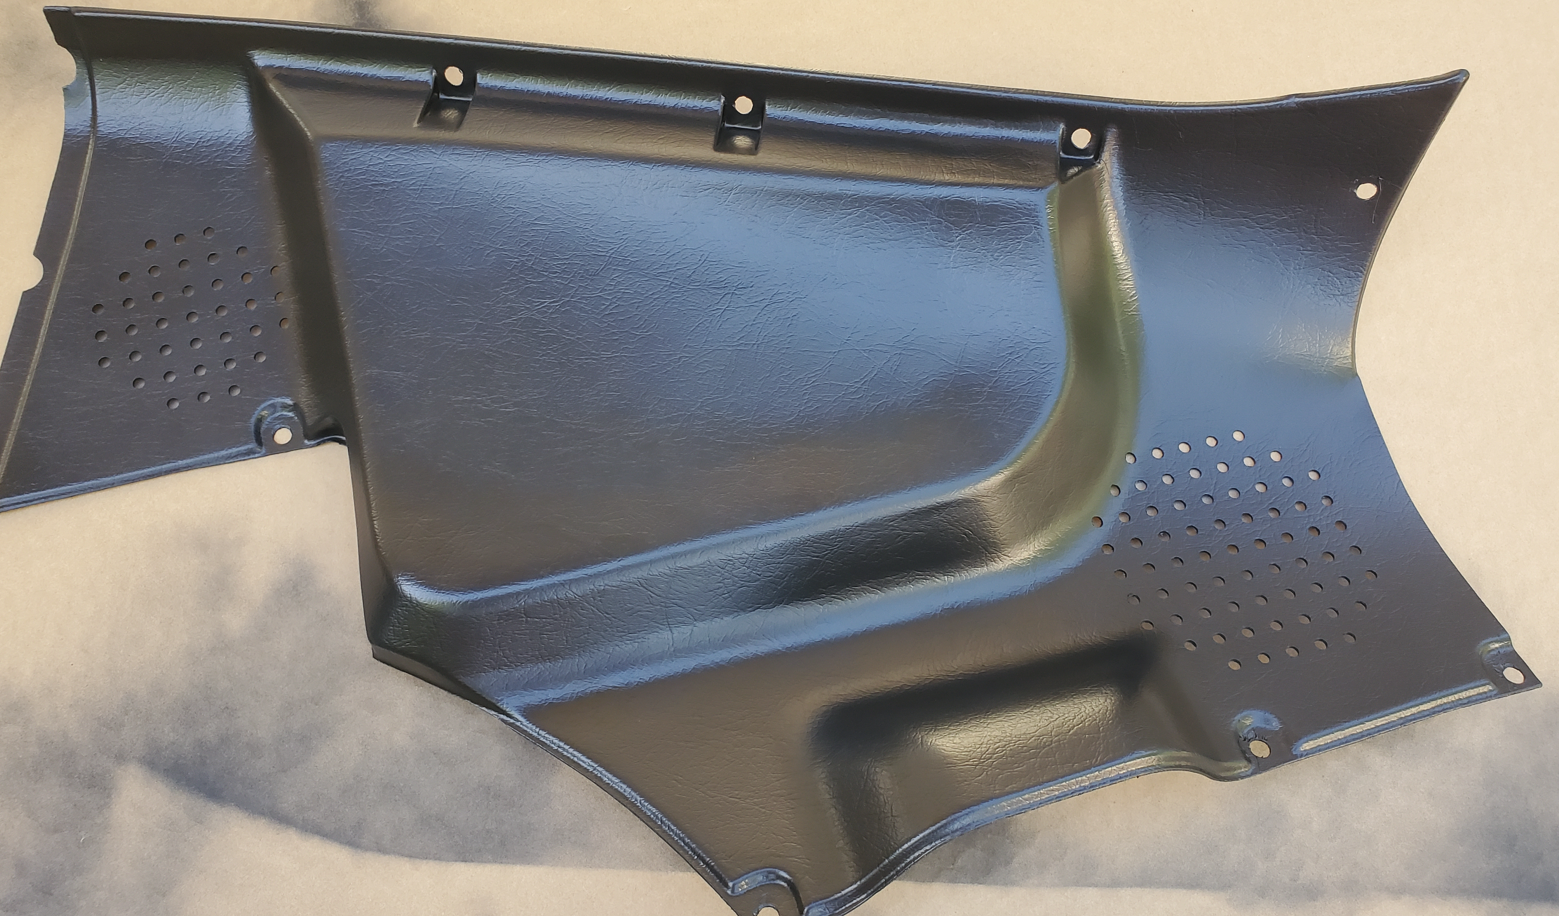
I finally got around to doing the plastic trim and tried this rad paint alongside the traditional SEM way. The SEM way was much simpler than I had imagined and the results were fantastic, practically factory fresh. I followed this demo from the product https://semproducts.com/product/color-coattm-mixing-system/system#product-videos I just did one of the rear panels and it literally took me 20 mins from start to finish and that includes total drying time and ready to install. Sounds crazy, but really it was that easy. If anyone still needs to do this here are the products I used I started from left to right, hosed it and washed it with the soap and pad. Dried it then wiped it down with the plastic prep and it quickly evaporated on its own. Then a quick thin coat of the promoter and quickly followed with several light coats of the landau black. Below is a picture of it fully dry, this is not still wet it literally dried in like 60 secs basically bonding to the plastic.


-
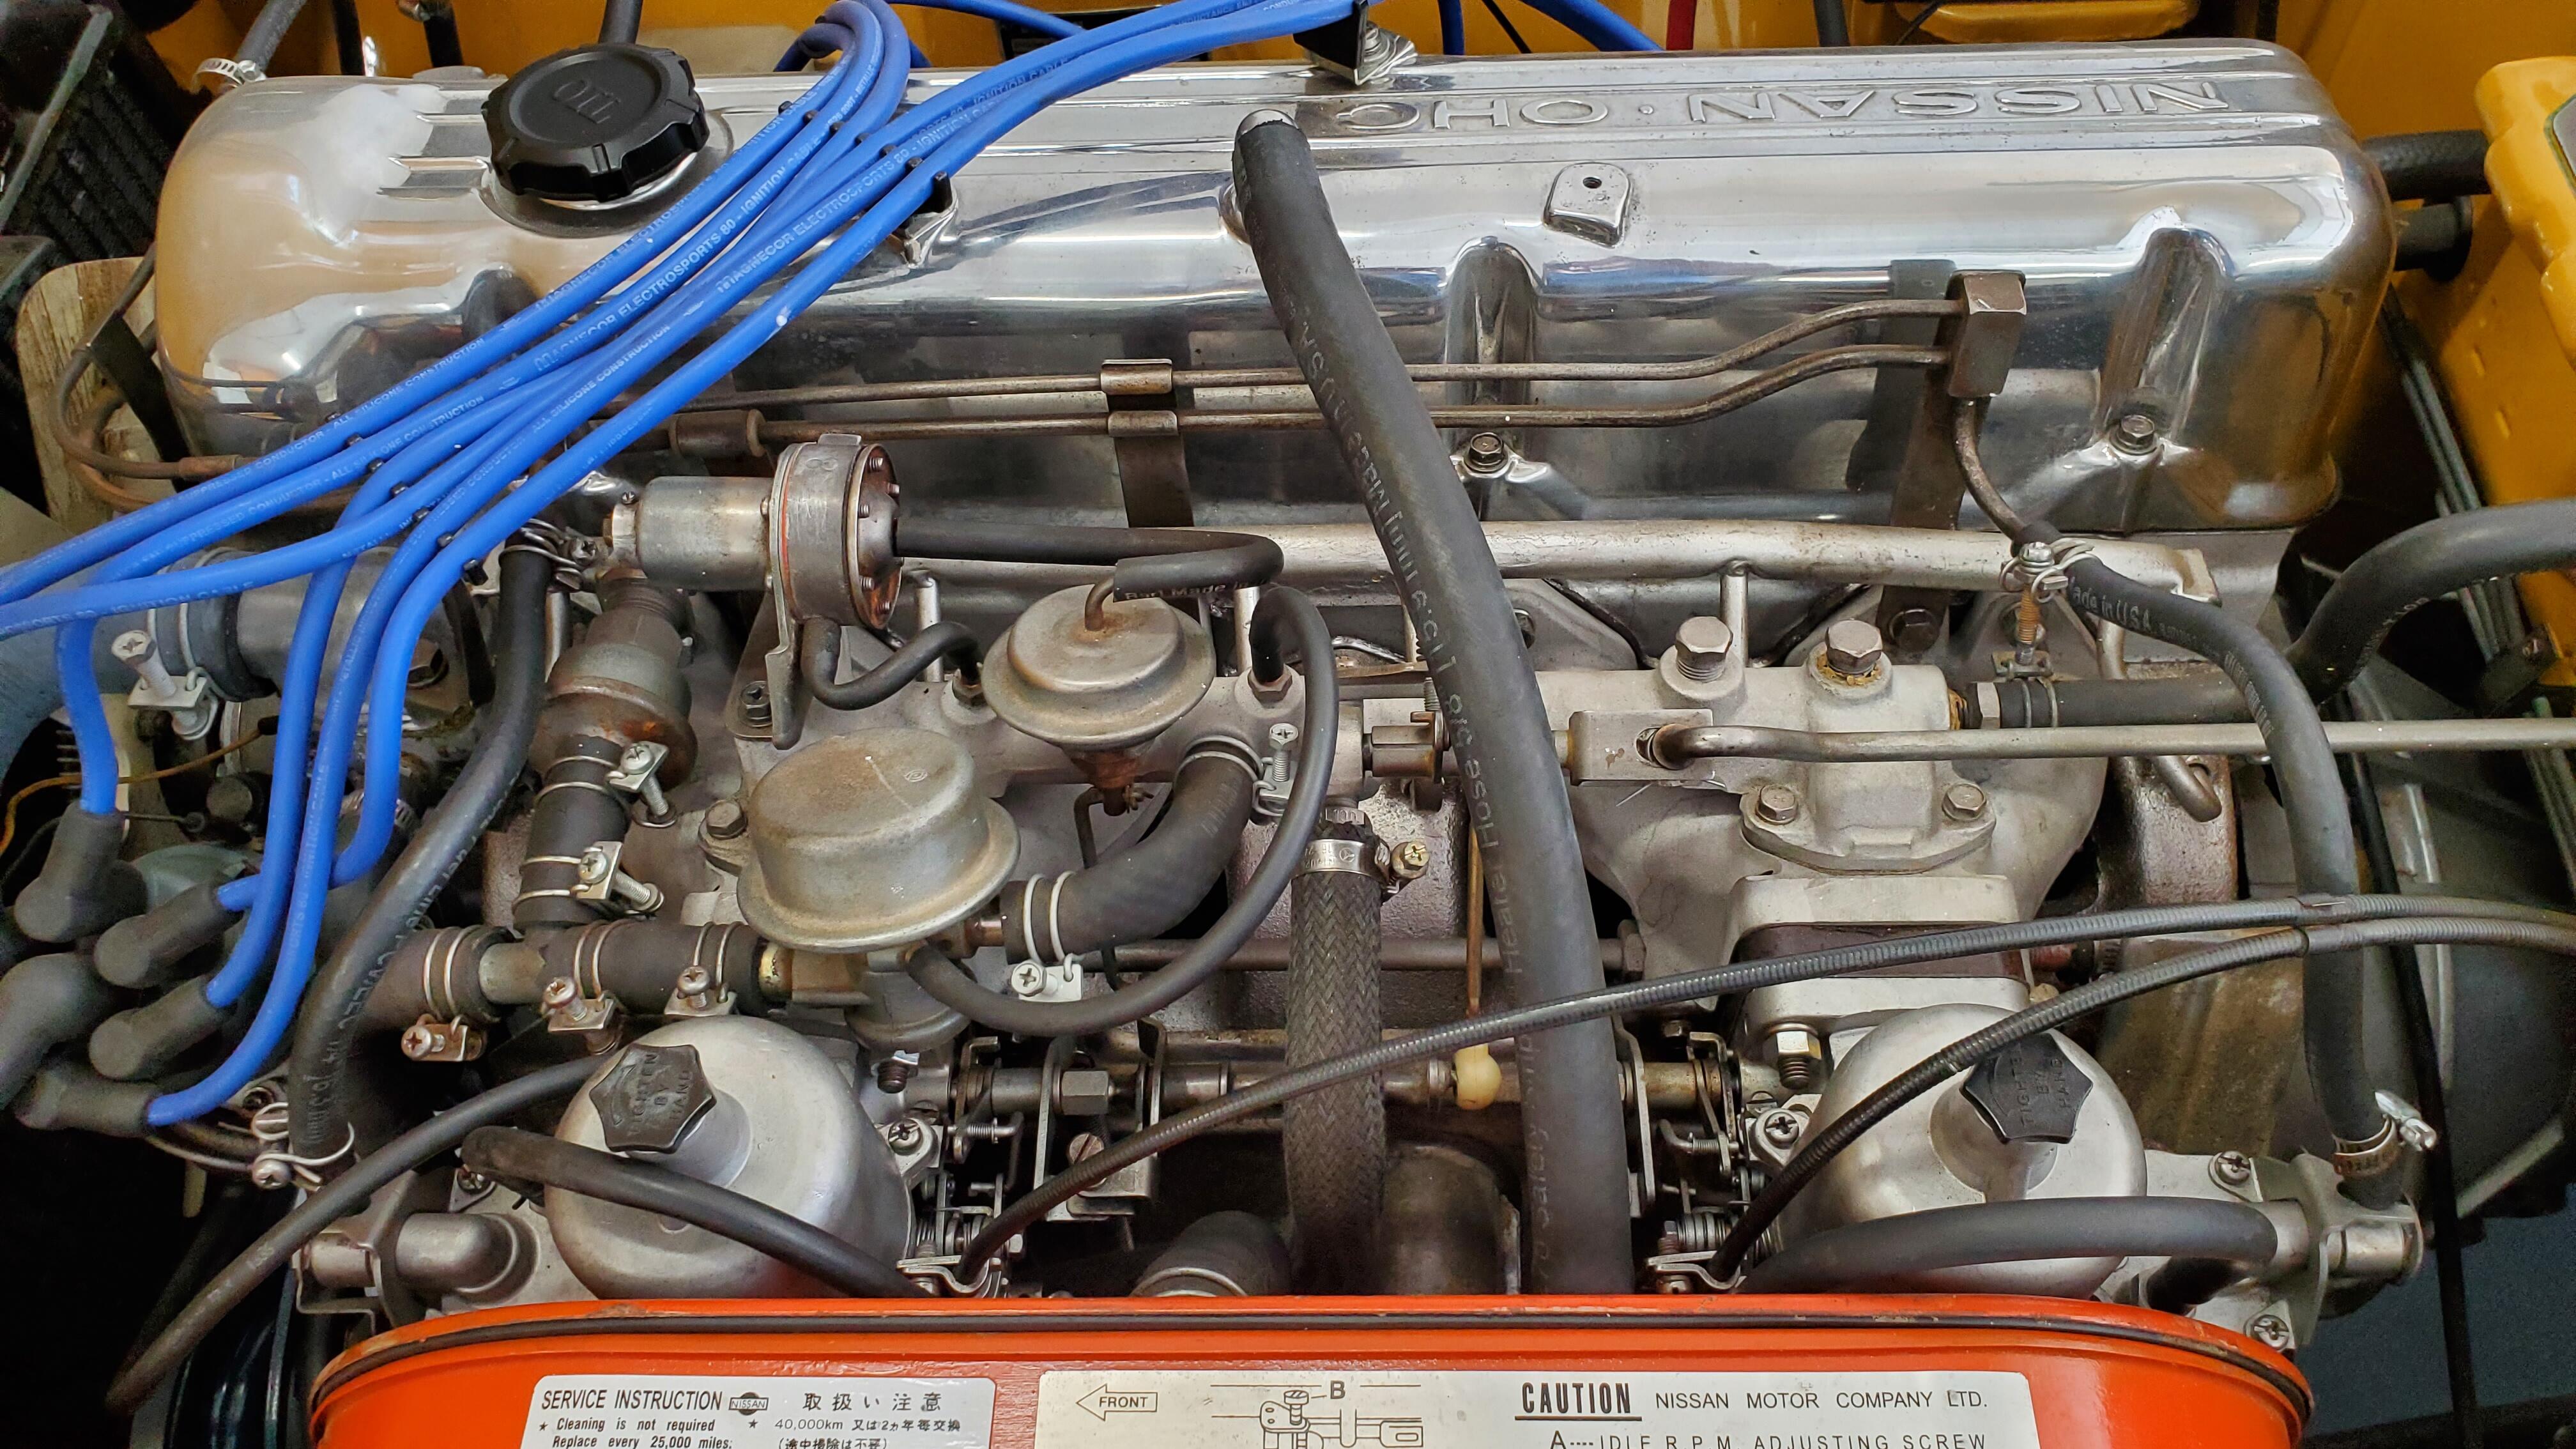
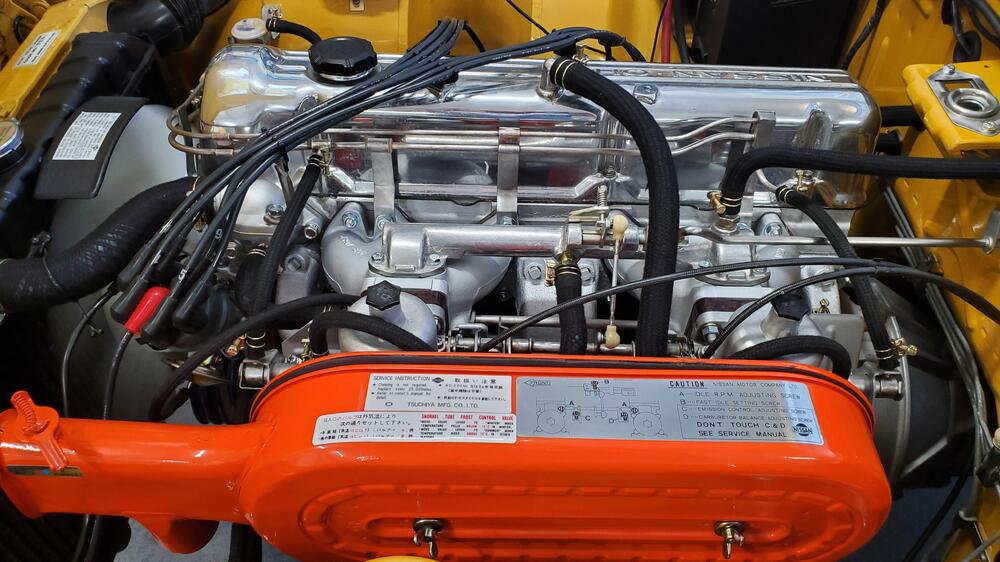
Well, everything is back and Ive attempted to balance the carbs. I think i did it right from all the reading Ive done. i madse sure to balance the airflow in each carb, then tested the mixture by slightly lifting the piston in each. Idle was pretty much un changed after I got them where It felty ok. i didnt have an impedence trype rpm reader was relying on the gauge and the sound of the engine. It feels around 850 from what i can tell. I'll have a friend come by and double check my work lol. One thing i did was go back and find the "before" pic and compare it to my new after. I'm pretty proud of theprogress Ive made as a newbie and 1st time owner. My work is probably not perfect but I continue to advance it little by little. Before, first pic from buying it after with all the changes / eliminations I really want to thank everyone for all the help these past two years. I couldn't have gotten this far without the community. Next up is getting the seats redone and back in so i can test drive it.

-
So I just went out and rechecked and sure enough it is stamped Japan E46 but what's weird is it's not where it normally would be it's closer to the firewall manifold then the radiator manifold and I would think if this was a normal 46 even though they ground down the spots where the smog accessories were screwed in there's only the single plug on the horizontal location for the booster not a second plug on top next to where I have my booster connected. You would think even if that was ground down he would at least have to put a plug in there there's no such plug so I have no idea what this thing is

-
if you flip it over you do see an E46 stamped on the tube so it's weird somebody polished this thing it's certainly not that stock look at least what I had before this has that semi glossy polished appearance to it.
-
@w3wilkes @KenFirch heres that euro tube installed. Came out super sweet. And Wilkes you asked if it was a ztherapy and I think it might be now that I have an up close look. It has their polished look to it in my opinion. I'm cleaning and readying the carbs for the last step, hopefully attempt to start it this weekend. I'm going to atytempt to time it, balance, and adjust the mixture so fingers crossed its my first time lol.


-
Chickened out on painting the pipes, when I went underneath i can see the PO has a jury rigged j bolt welded on and connected to the rear cross member. The support bracket where the pipe meets the muffler has a broken weld from the frame. It all seems stable but I'm not going to mess with it. I'll repair and replace all the pipes when i go headers down the road. added the shield
-
Oh duh, maybe i drop the pipe and slide it forwards with the car on rhino ramps! that should be much less twisting and work.


-
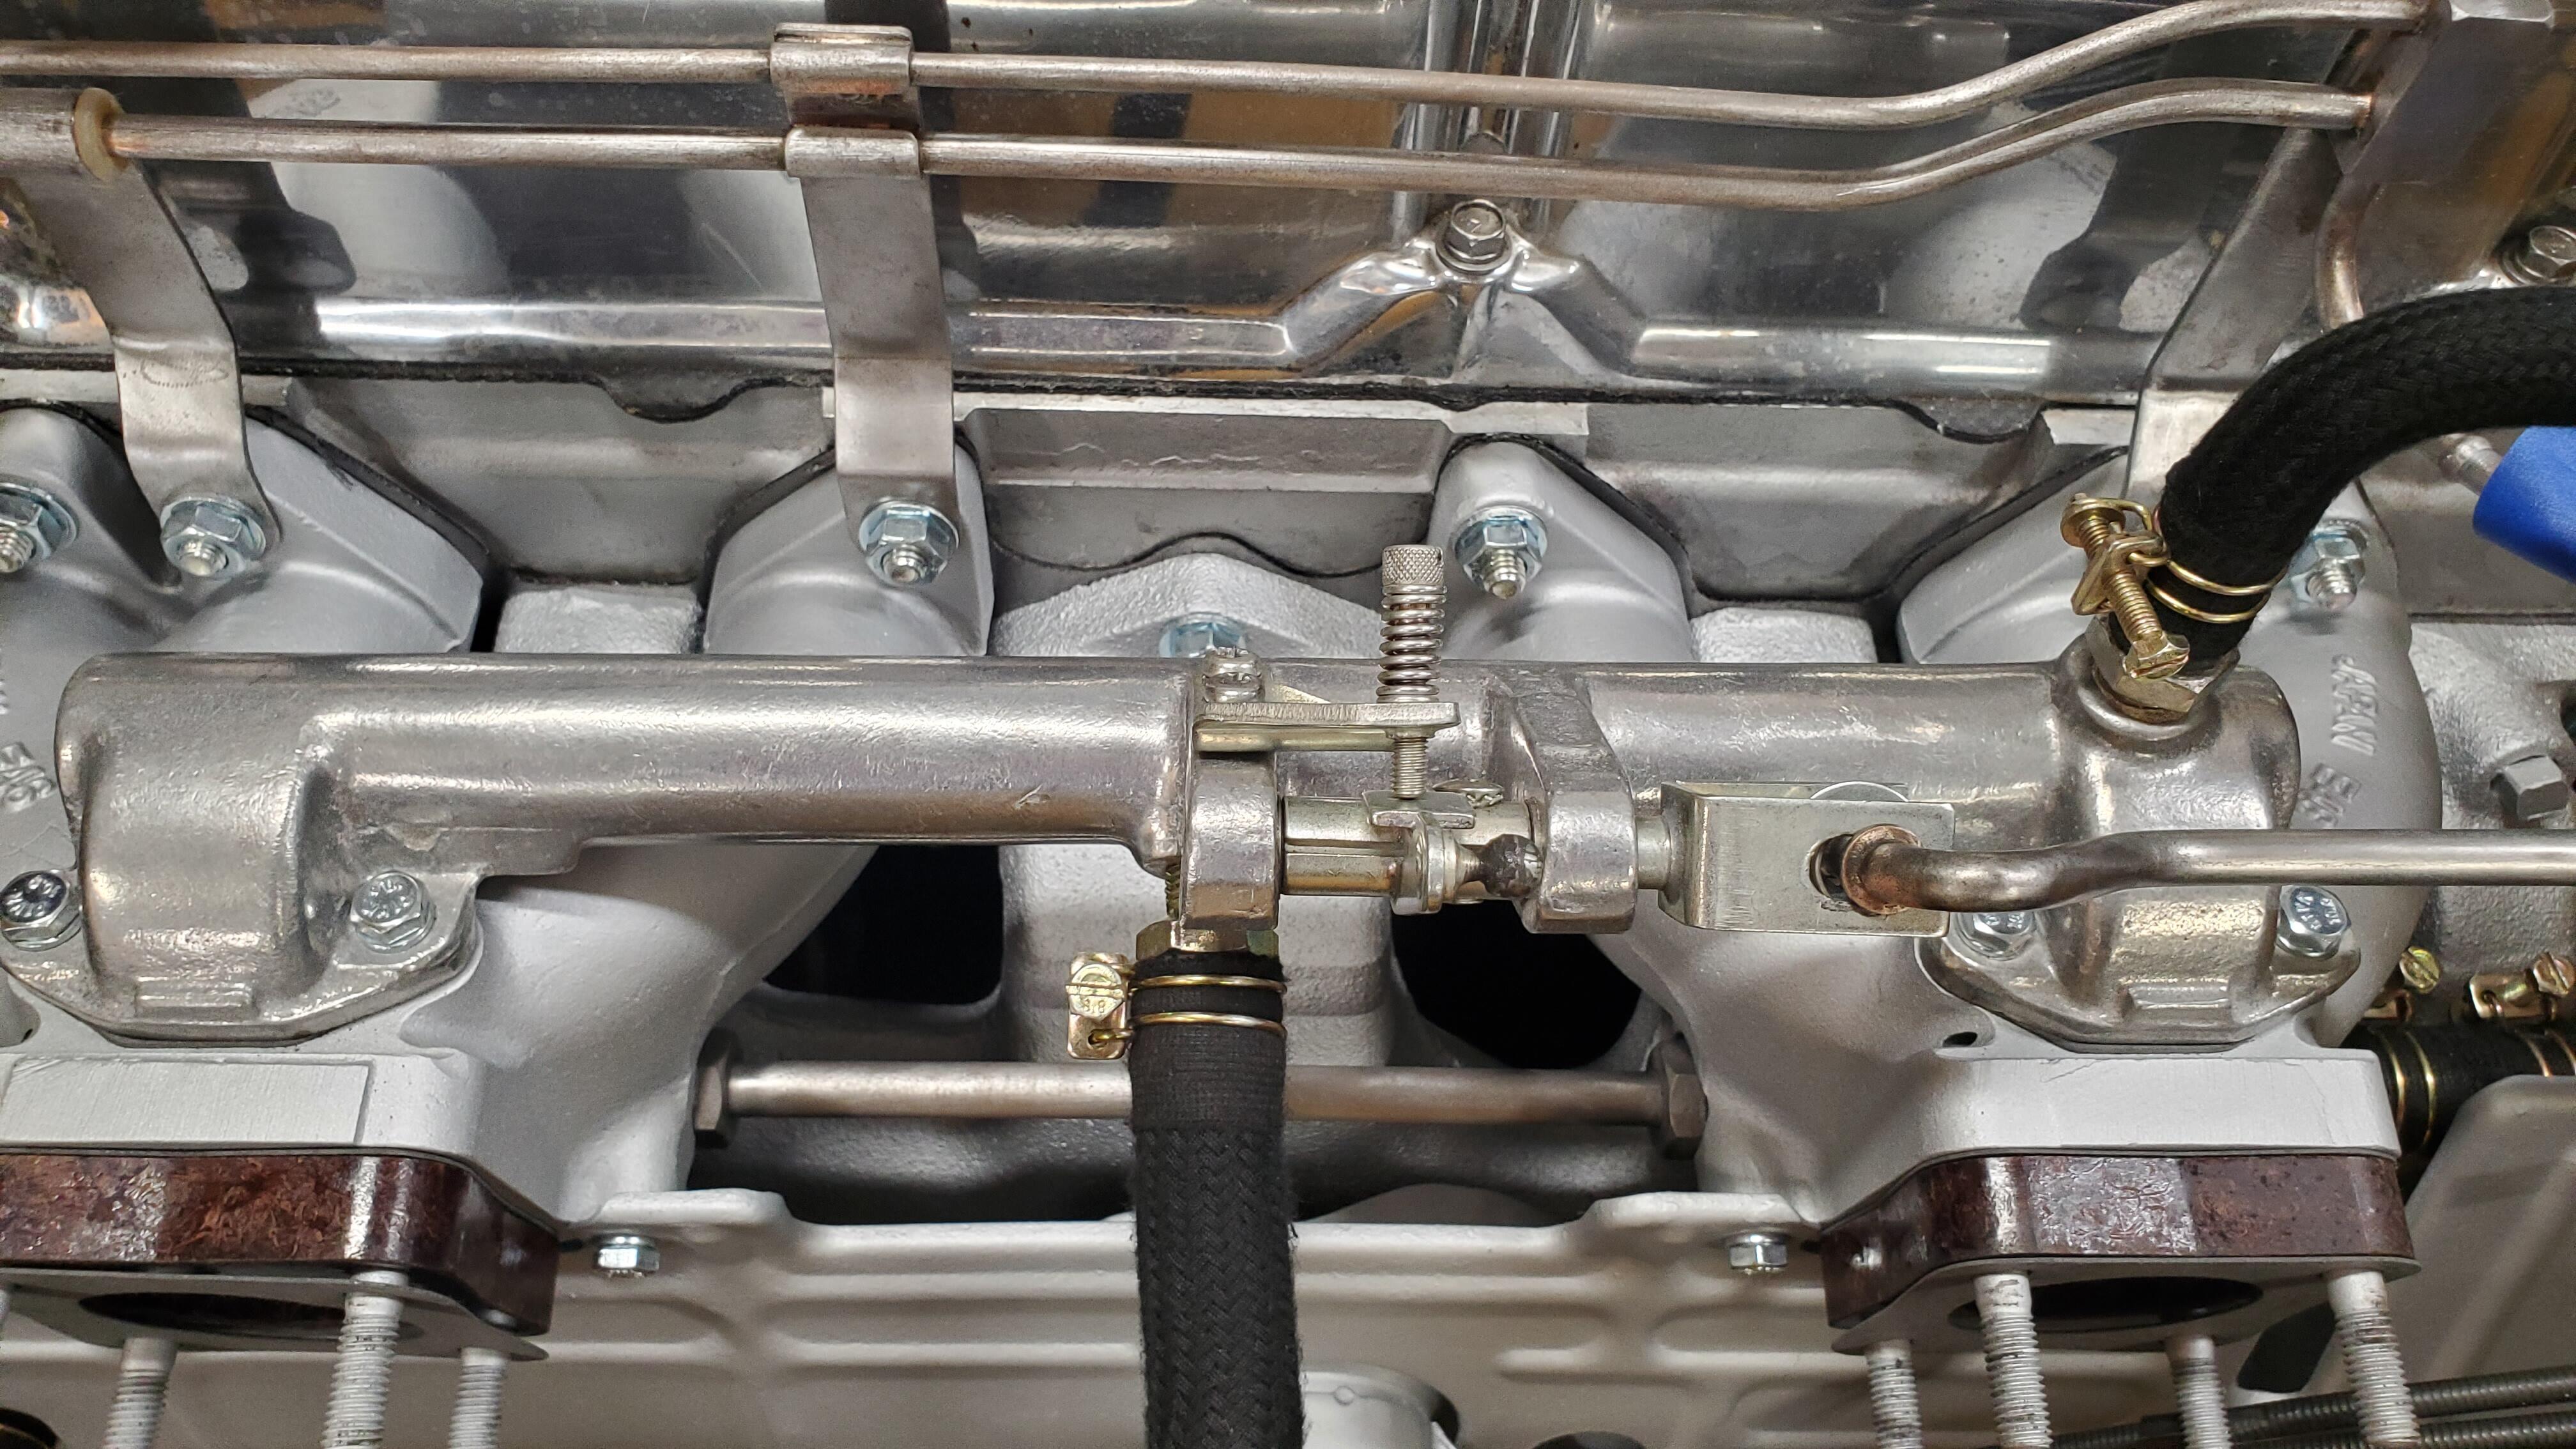
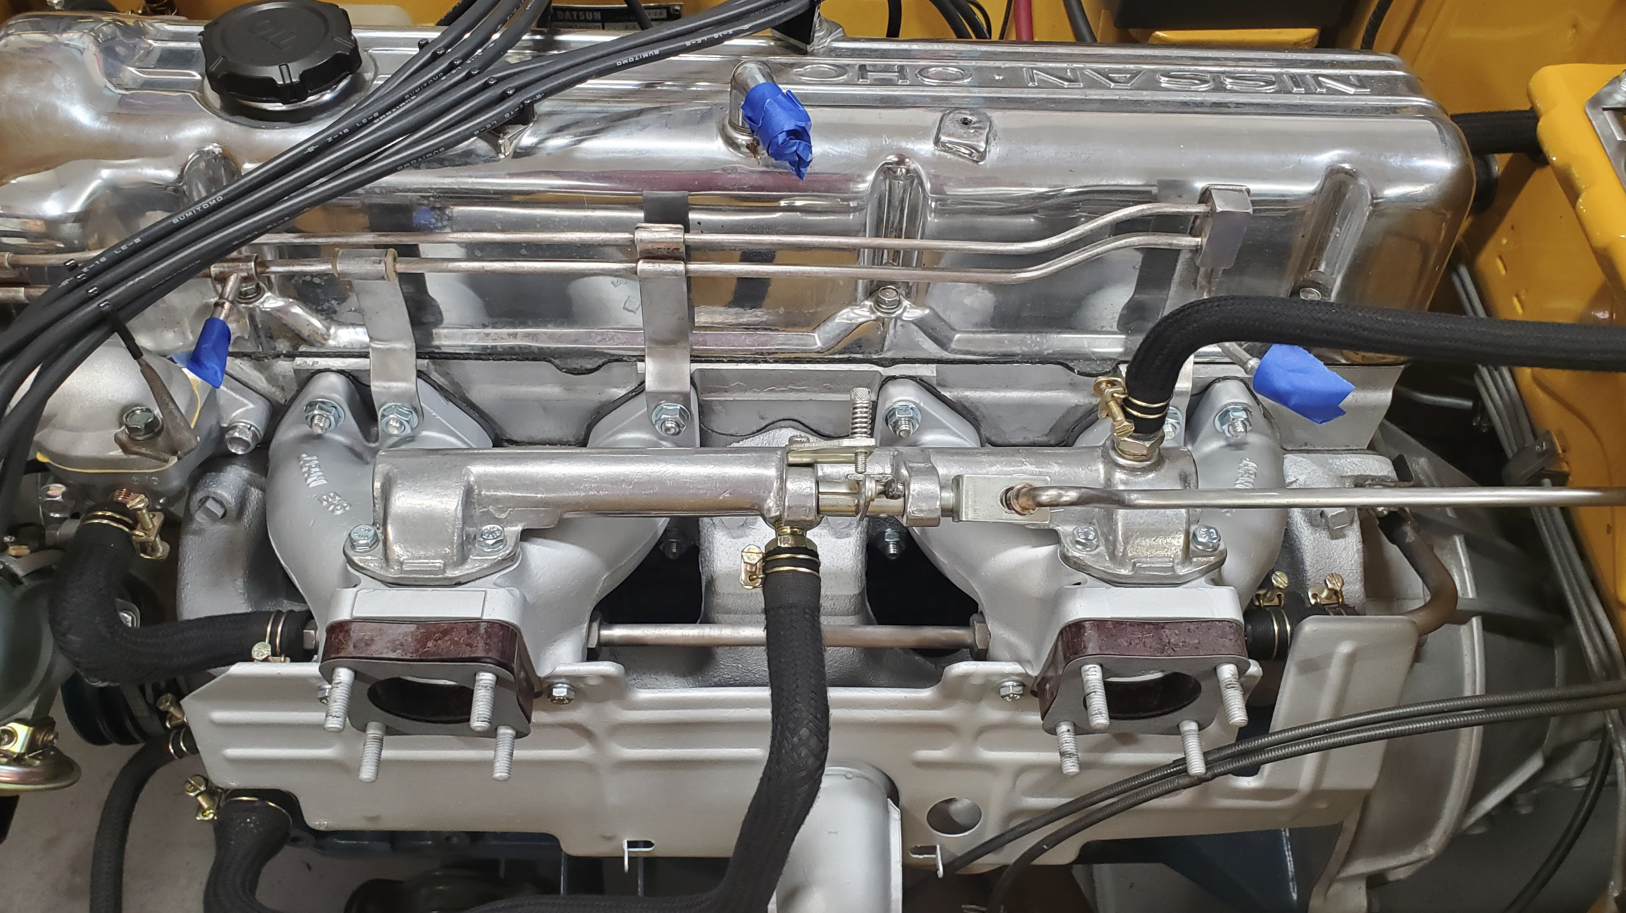
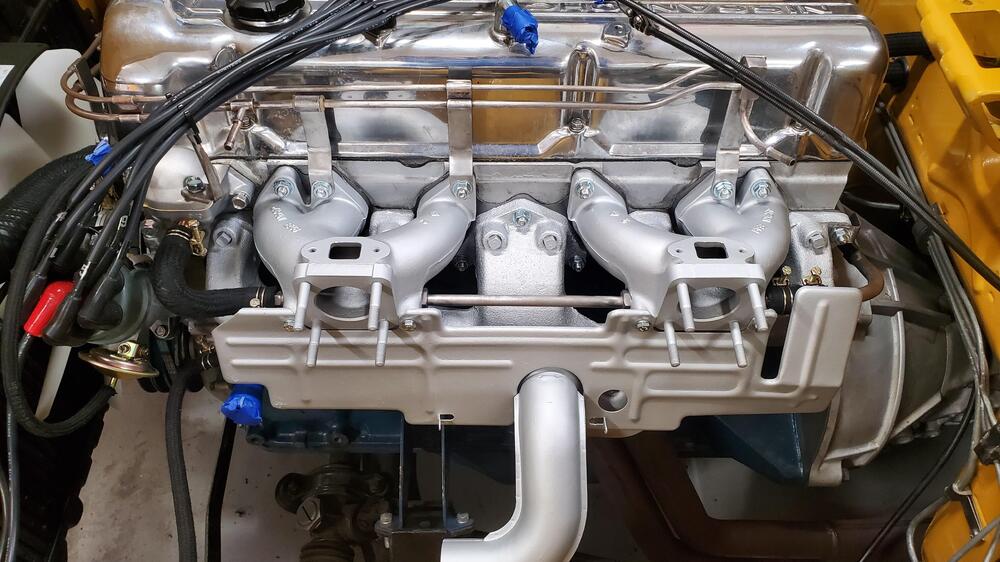
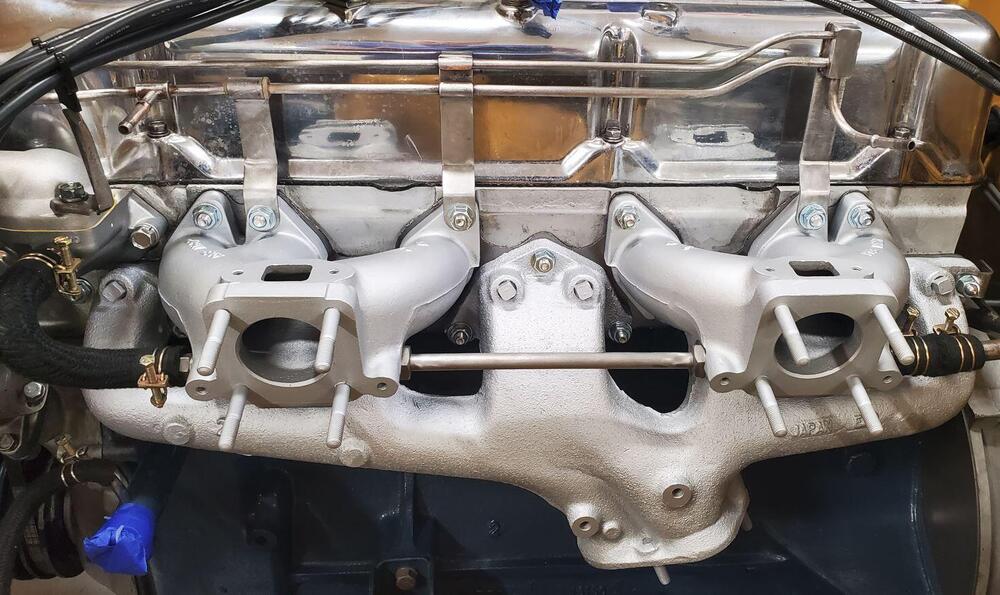
Making progress. A little ways to go waiting on some gaskets for the carbs and balance tube along with the brake booster hose switched to the top load rather than side valve. I decided to get all new studs and HW for the block because the previous set was a mess of sizes. MSA had a decent set all sized and ready to go but it did require me changing out the intake bolts to studs. I kind of like it only because it made the mounting easier rather than having to hold it in place while i bolted it. the exhaust manifold arrived already media blasted nicely but not such a great color so i painted it with vht. I ended up using aluminum to try and match the intake I had already. then i restored and painted the intake, polished the coolant tube and fuel rail Coolant back in and as i wait for the gaskets I'm polishing the linkages as best i can. i'm contemplating painting the front section of the exhaust pipe its currently a rusty looking brown. Without a true lift might be a bit of a challenge getting it out the back but i'll see what i can do. if its not reasonable ill leave it and deal with new pipes anyway down the road with the headers.
-
You're absolutely right no mention of one anywhere. But in doing more research looking at pictures of my E46 manifold that is out there on the web they all seem to have the same valve connected on that side but I can't see what's inside the tube. I'll just try and clean it up as best I can.
-
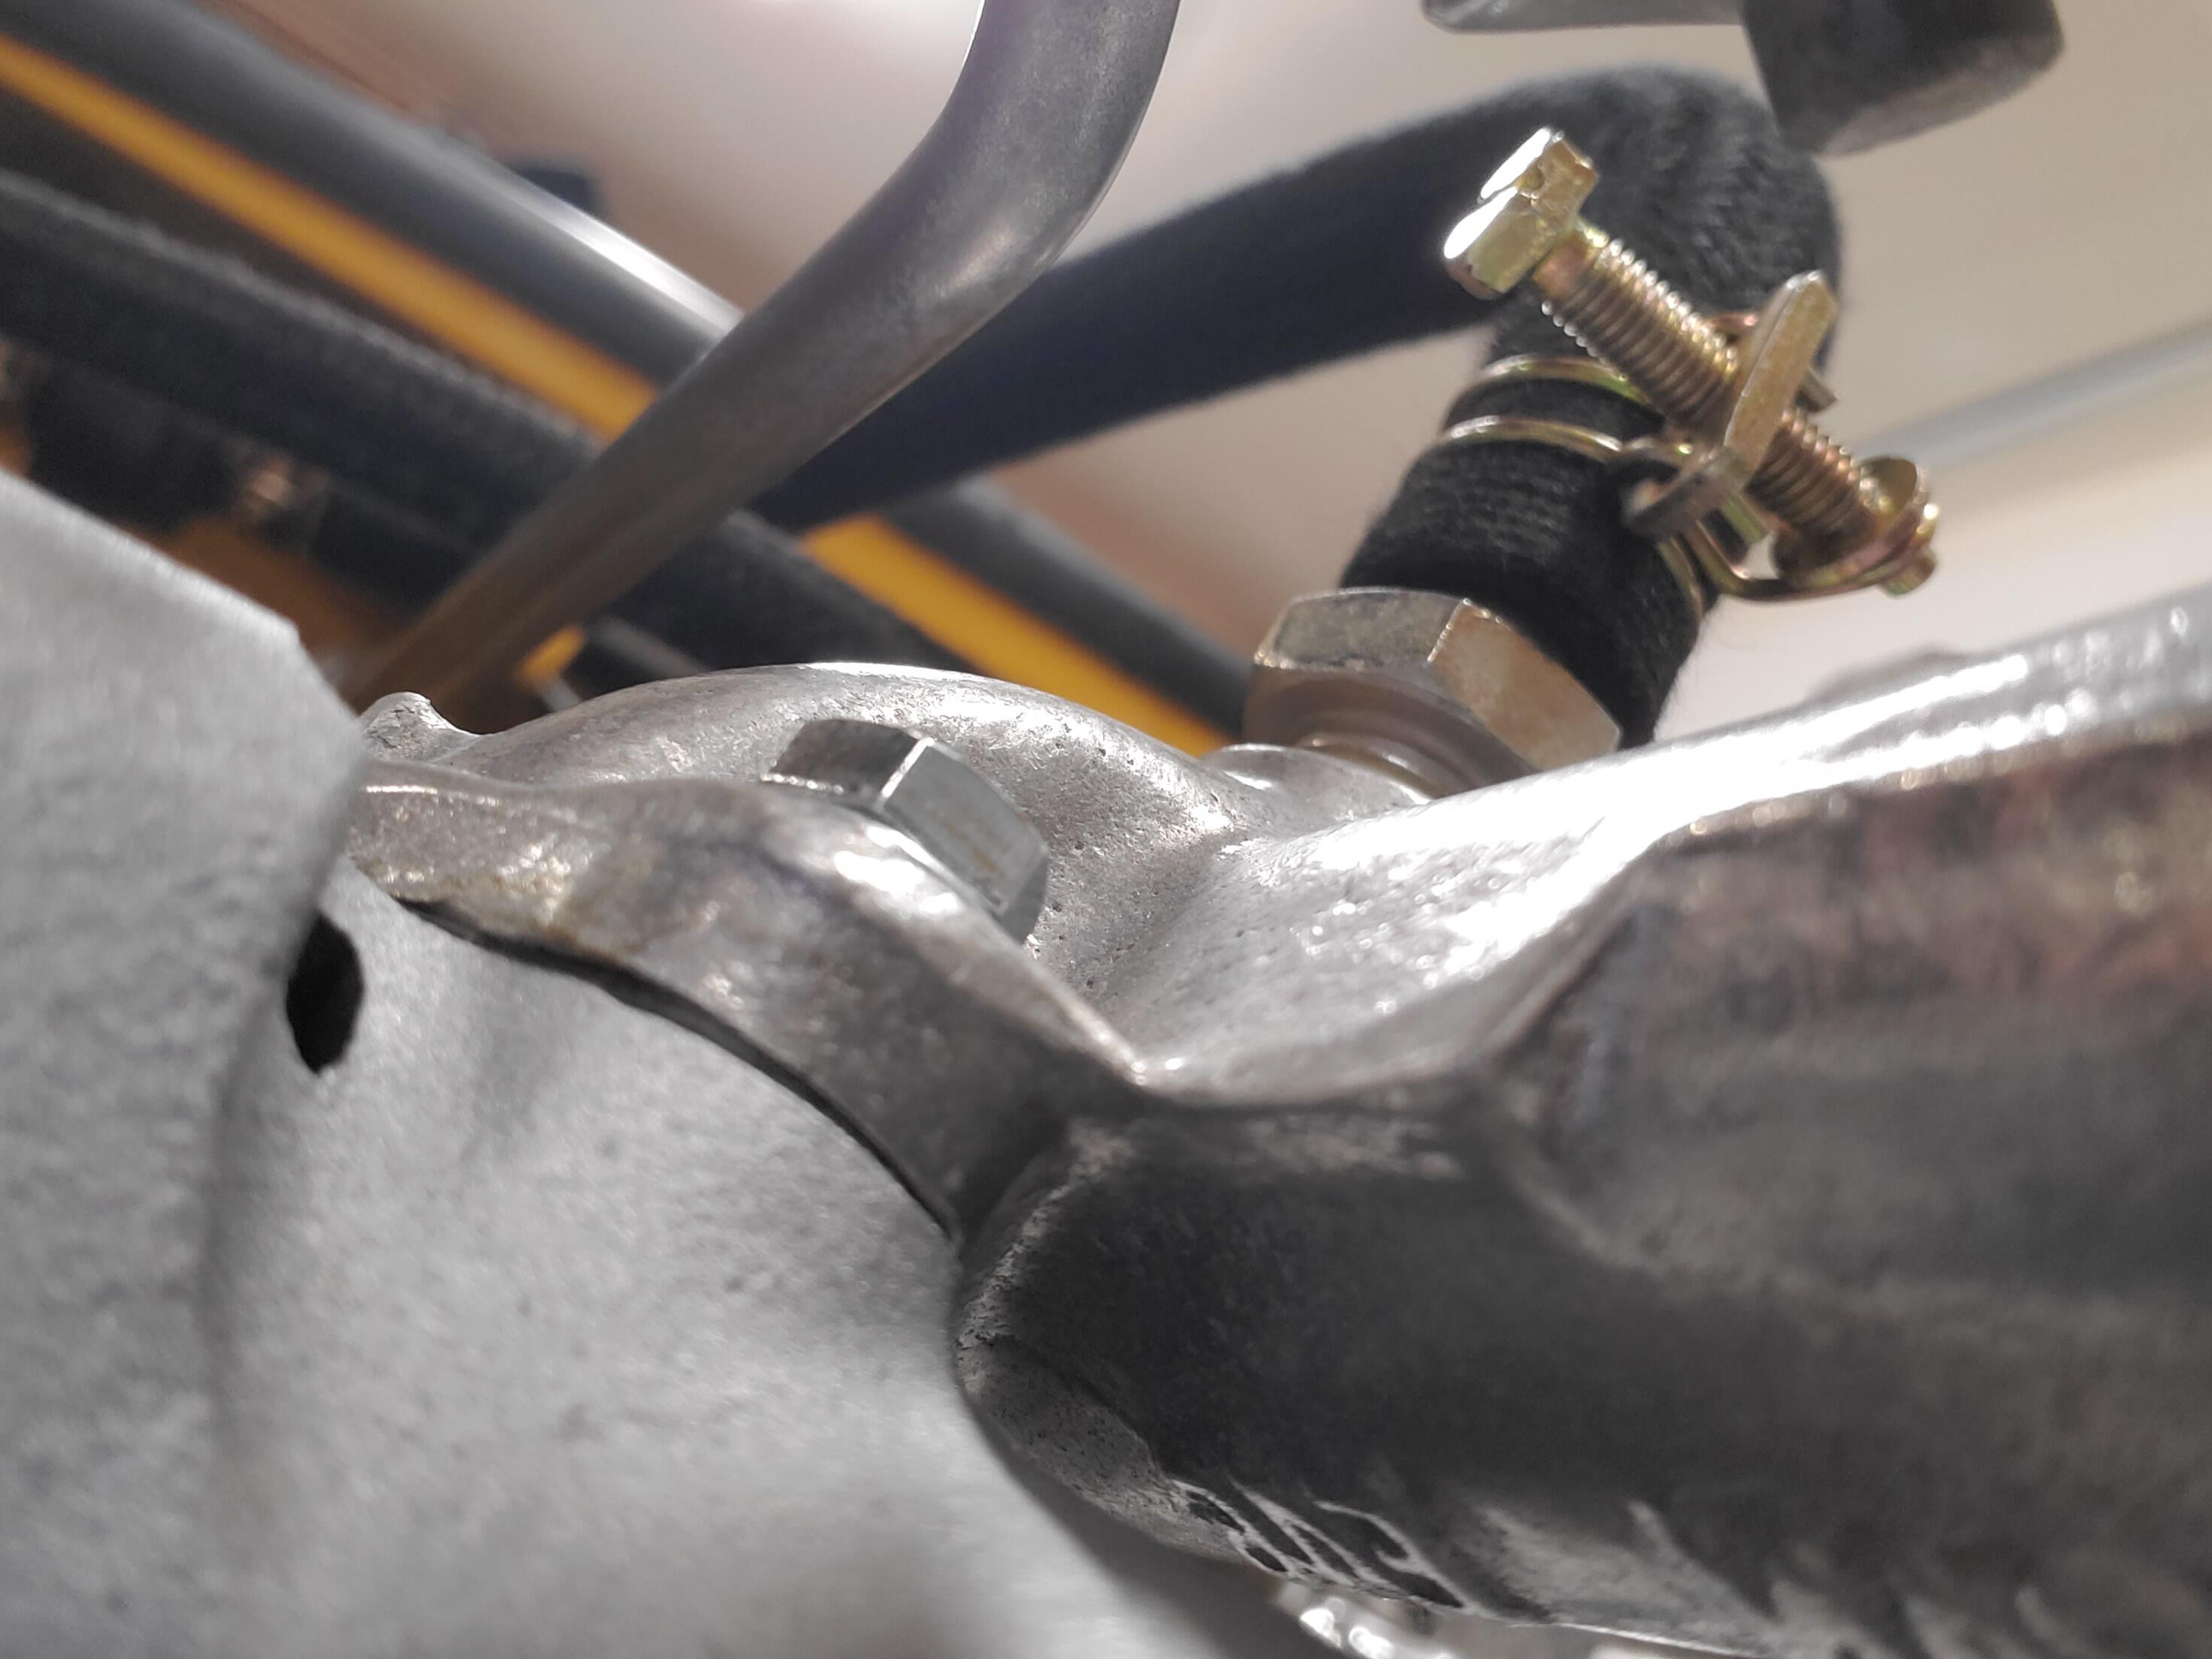
Thanks. Another question as I plan the replacement steps. I notice the coolant tube through the intake manifold has nasty looking valves on each end. Wehn i did some research on replacement it seems the rear one is a thermostatic valve which is different than the front typical standard adapter. When i look at mine, i can see clear through the entire tube one end to the other. Am I right in guessing the PO replaced the back side thermo one with some standard pipe fitting? Any implications to this? Should I try to source and replace it?
-
Thanks. Ok so at least my setup was right but i think i still need new bolts because the set on there are annoying with various head sizes from home depot lol. So are the studs removable, I'm assuming so but I think i'll leave them for now and tackle that with the new header down the road. I dont want to push my luck again lol. although i just found this old pic from the PO restoral book and it looks like the studs are intact and maybe he even painted over them when he painted the block. Either pure lazy or he couldnt get them out and left them

-
Okay couple of more questions. As I was falling asleep last night I was thinking about the bolts and washers and stuff I took off the block and I started looking around because the previous owner had a bit of a mismatch of various bolt head sizes to deal with taking off the intake. So I started browsing the typical sites to see if I can find some relevant replacement Hardware and some sites seem to sell a set of studs nuts and washers others a mix and match of studs and bolts. I don't have access to the car right now but I'm trying to recall if those studs were the type that can come out or could they have been part of the block? They looked really old and I can't imagine the previous owner leaving them there when he had the engine worked and rebuilt unless they were part of the actual block. the question is should a 71 have studs for the exhaust but bolts for the fuel rail and intake like I had set up? Or should it all be studs?
-
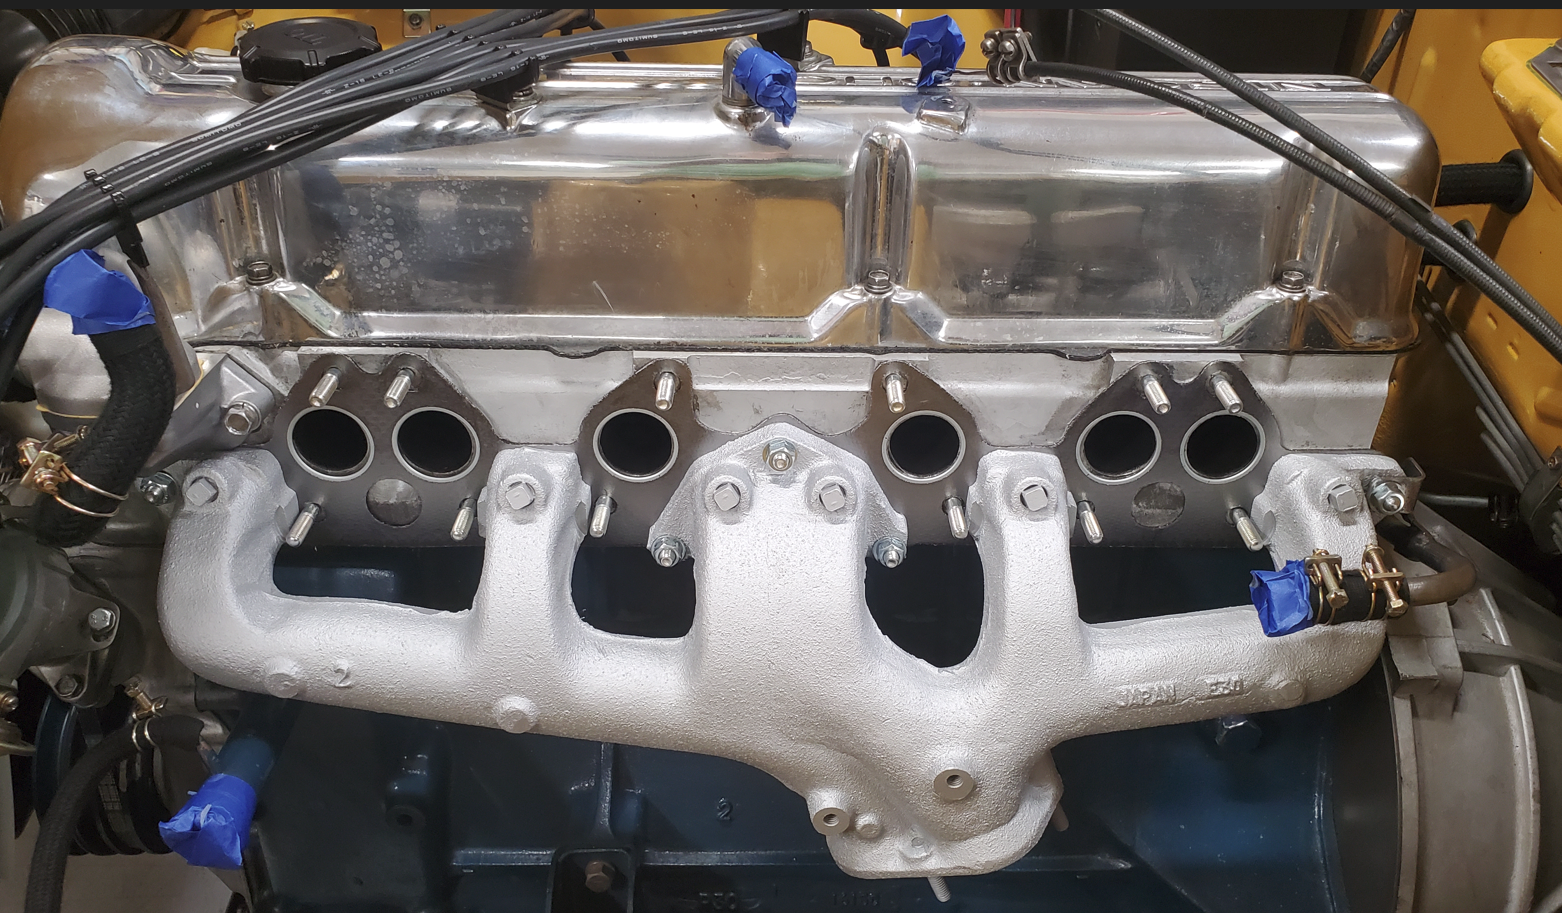
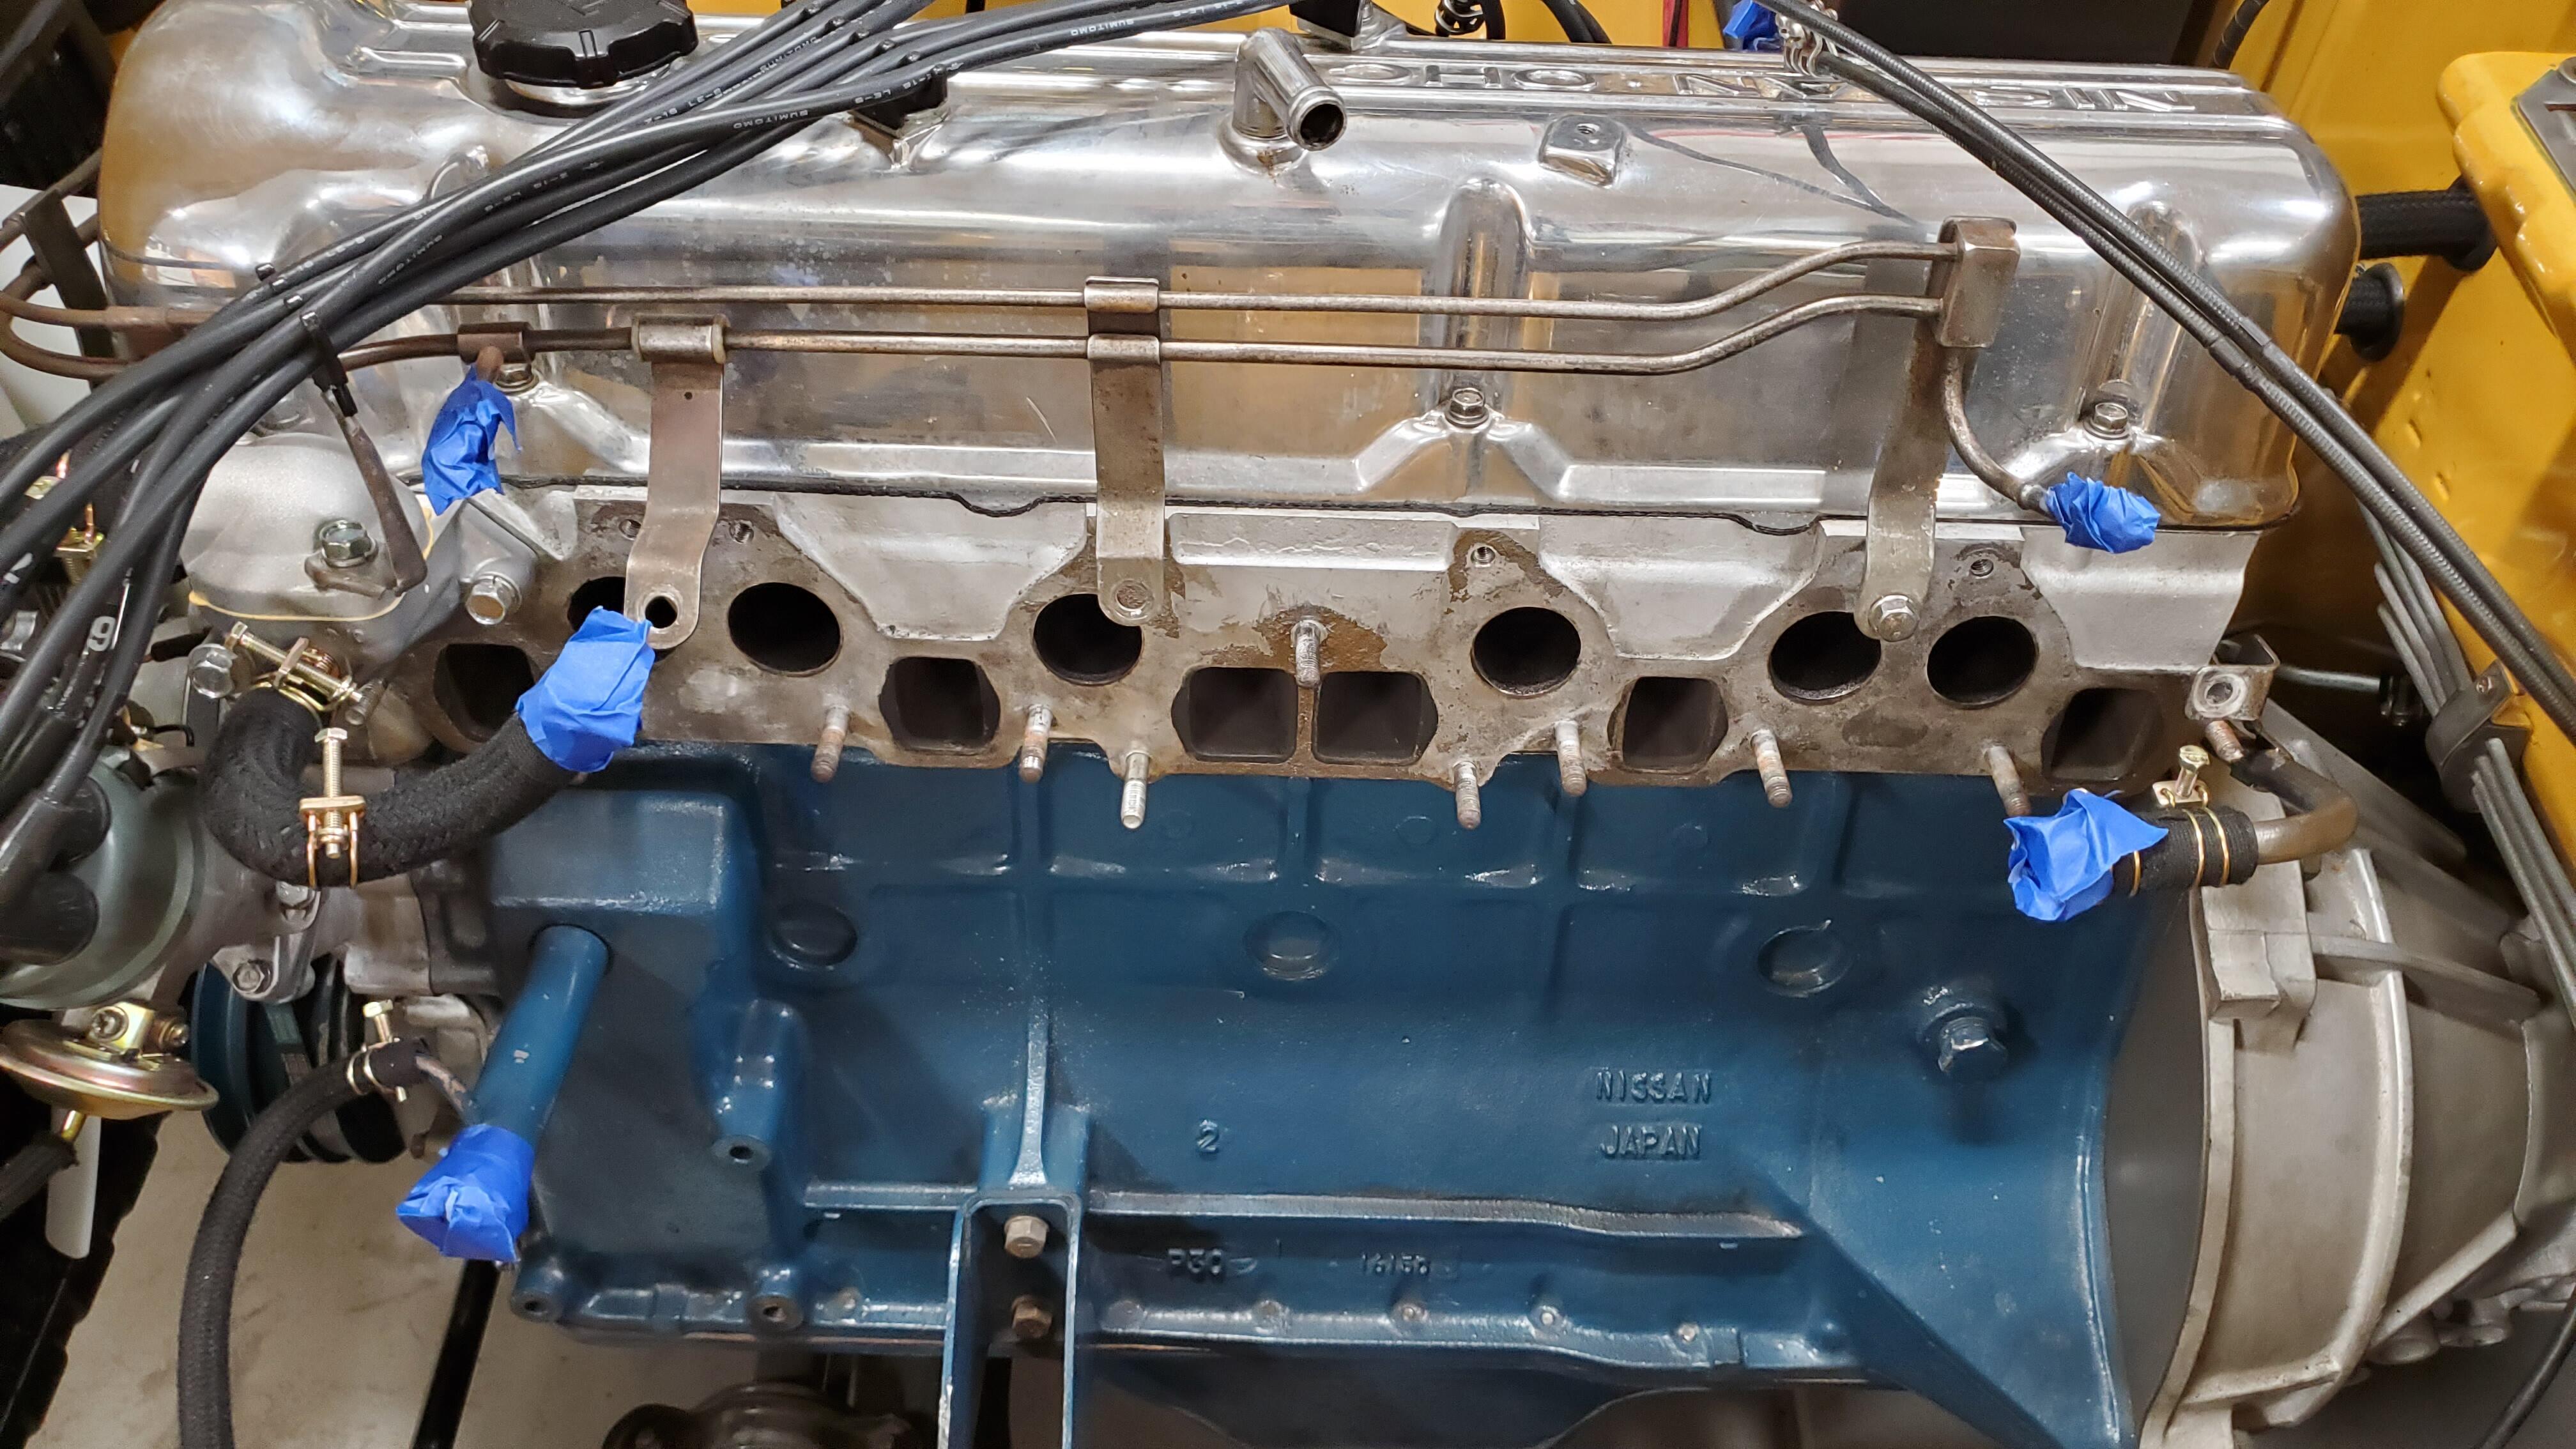
Yes had those and just got done with everything. Wasn't as bad as i expected. Drained the coolant and luckily enough no spills from the back tube or the thermostat to deal with. Then i disconnected the choke, gas lines and pulled the entire intake and set of carbs off all at once. The old gasket surprisingly for only 2500 miles came apart in quite a few pieces making a mess and what i noticed is some of the paint the PO had used on the block started flaking. I saw some particles sitting on the intake ports so hopefully nothing went in there. I did my best to gently clean those out. One thing that I'm not sure if its "normal" or an oh boy is looking inside these ports they sure are dirty. the exhaust ports look like the inside of a chimney and the intake look like they have a bit of sludge on them. As a reminder, this all started when i replaced the plugs and found them dry sooted to heck. That led me to believe things were not right and now I'm seeing the inside of these ports kind of confirms at a minimum i need to start over on balancing and tuning these carbs. I've never done that before so may need some help if things dont go well 🙂 before i did all this the engine ran really well from what it felt like ion the garage. idle was real clean at 800rpm, car came to temp nicely, pulling the throttle seemed like it was very responsive, but seeing those plugs like that just really spooked me. someone said maybe its just the additive you put in to keep the gas fresh, they tend to do that but this is way more than a light coat. Here's where I'm at and it will probably sit like this for a week or so until things arrive and i have a chance to get them ready. the manifold will certainly need some work to get it to look decent plus i need the gasket, the booster hose, and the balance tube to show up. I'm trying to convince myself to not go nuts becasue its very tempting to grab that rail and maybe get it polished and coated while i wait. but again this isn't concourse this isn't concourse lol. we'll see.

-
You're right Ken, even though i dropped the downpipe to disconnect from the manifold its impossible to get the manifold out without removing the intake. i can't cut the air pipe close enough to the nut to get free. Oh well, gonna do it right and take it all off. As of now I think i got it but will certainly PM you if I run into trouble. This whole thing is a good opportunity to learn. Taking things apart is pretty easy, its making sure it goes back correctly lol. I ordered a new gasket because it looks like the one in place will split as I take off the manifold. Newbie question, I'm assuming when i take off the intake and exhaust manifold no issues with any oil to deal with? There's nothing to do with oil where I am with the engine right? Oh and Captain, for now i'm thinking i may hold onto these hoses but I tend to change my mind quickly lately with this car. you're the first person i'll ping if i do.