grannyknot
Free Member
-
Joined
-
Last visited
Everything posted by grannyknot
-

-
Long drive for a 2 day event but it looks like a blast. Any other S30's going?
-
Jay, that looks like a pretty decent car from the pics, lots of owners have cut out replaced the floors themselves, it's not an easy job but it will save you lots of money. There are lots threads in the archives with great pics of how others did there Z's
-
Yes, but you will want to remove the hood latch so the hood sits flat and you can see the relationship between all of the panels, after you get the hood into a position you like tighten the bolts equally on each side a bit at a time so everything stays the same relative position then re install the hood latch and line it up.
-
Try to pull the hood forward until it lines up with the front of the headlight buckets. Those slots on your original hood are not stock, someone elongated them to get the hood to fit and you may have to be duplicated on your new hood, they are for front/back adjustment of the hood.
-
Hopefully your insurance is paying for it.
-
Yeah, those guys are swimming in Datsuns.
-
-
Check out HybridZ classifieds, http://forums.hybridz.org/forum/70-cars-for-sale/
-
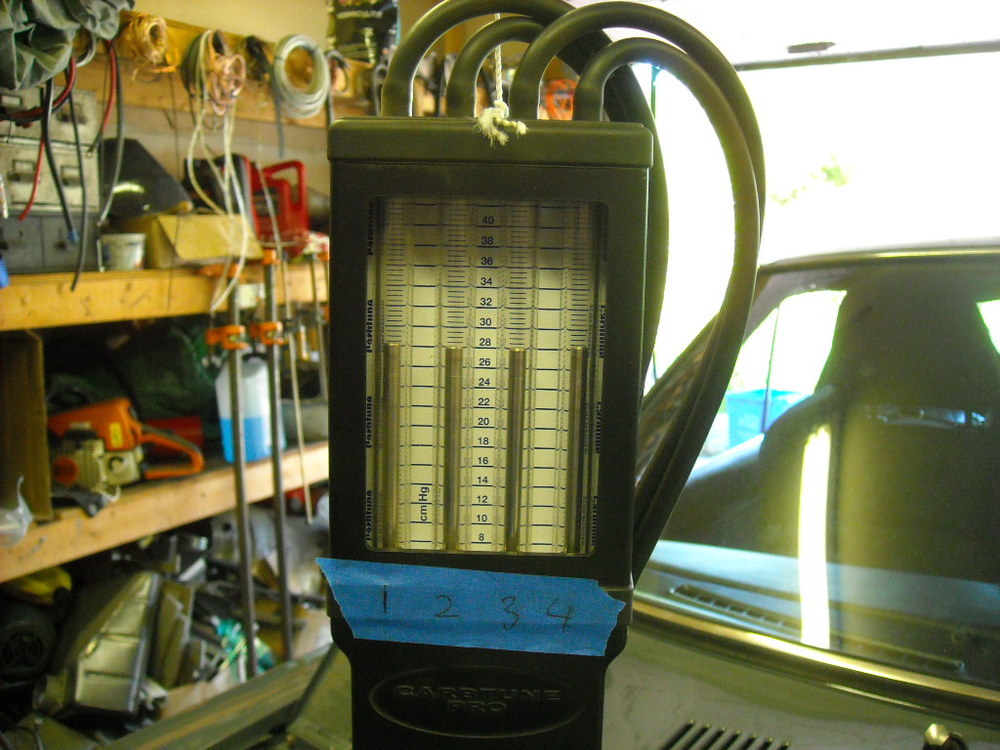
Thanks sweaty, 14 inches of vacuum, does that sound right? I know the boosters are pretty efficient.
-
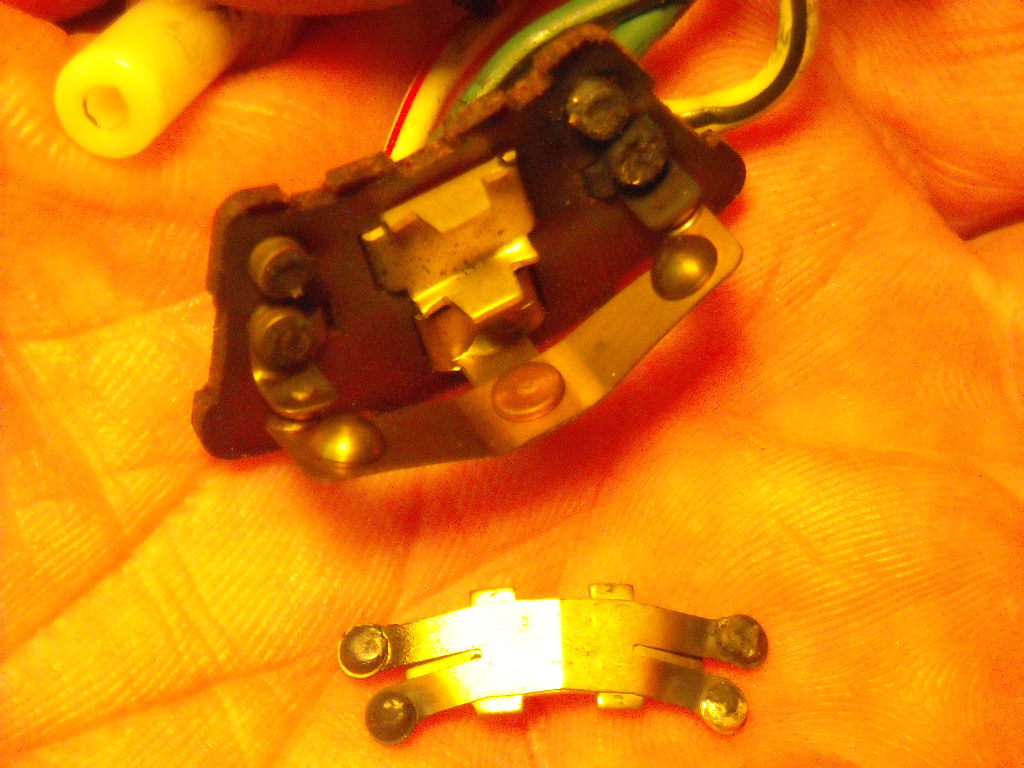
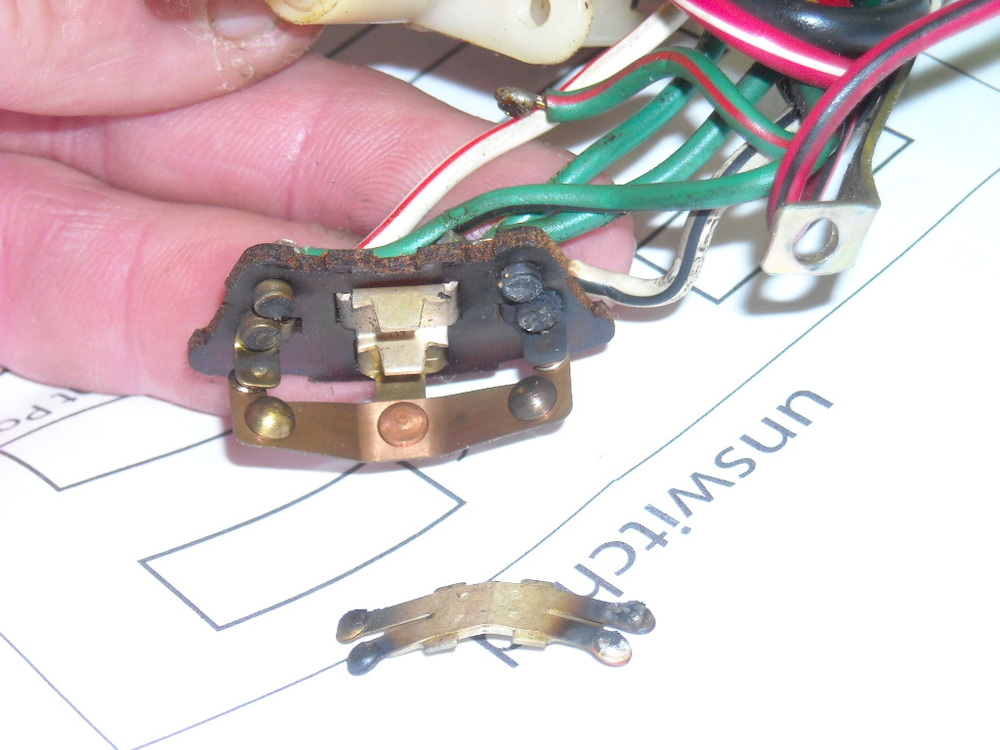
Got it working, the right combination was the spare signal switch and a 1/8th" ball bearing, all lights and signals are working perfectly now. I'm thinking maybe the rain had nothing to do with the failure, at least I'm hoping the rain had nothing to do with it. I've never read about anyone else having their signal switch blow due to wet connectors at the front of the car.
-
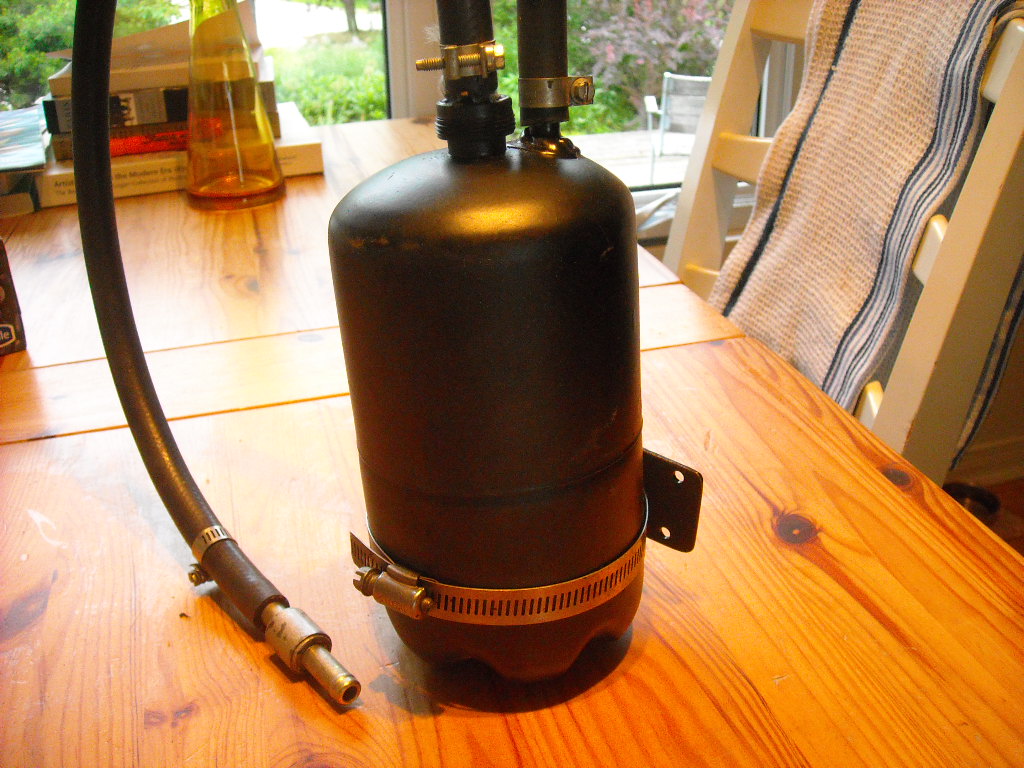
z boy, if you do decide to install a vacuum canister you don't have to spend $65 for one, I use a camping propane canister. Make sure it's empty first, the safety valve is just a schrader valve like from the valve stem on a car tire, unscrew it and blow some air into the canister blow out any remaining propane gas then drill out the main valve and the safety valve hole to 5/16", slip in a couple of pieces of 5/16ths hard gas line and solder, braze, weld or even seam seal them in. If I remember right the brake booster requires less than 14lbs of vacuum to activate the diaphragm so not very much.

-
Sarah, it's so nice to see you back here!
-
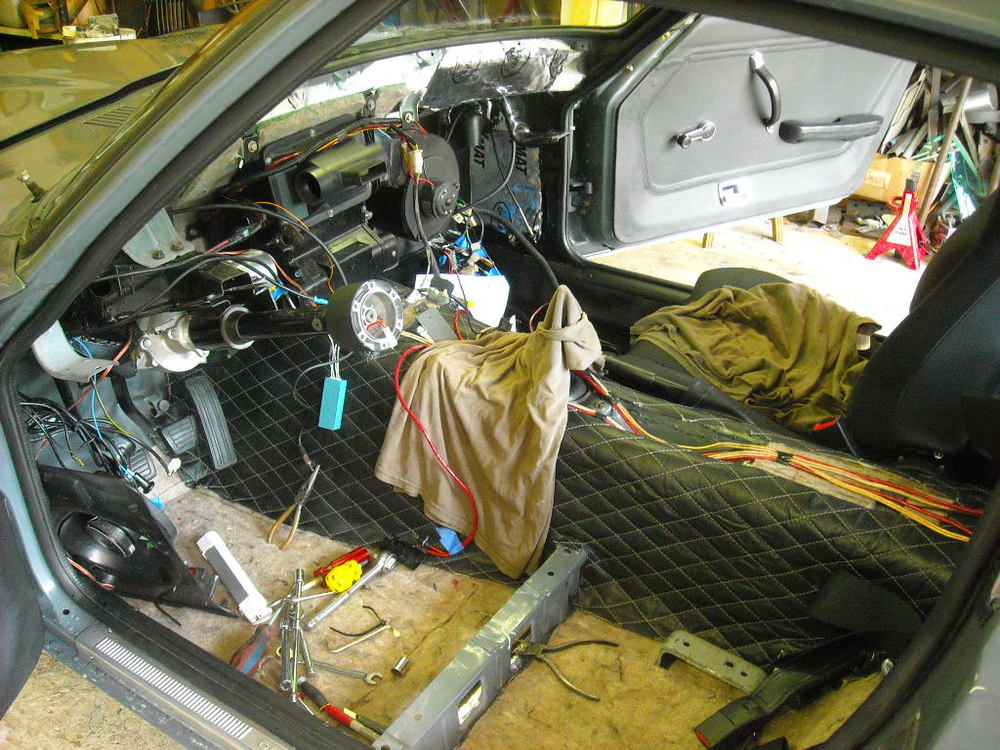
I deleted the stock dimmer. I installed the spare signal switch today but something felt weird about the action so took it apart and the little ball bearing was missing so I cleaned up the old switch and re soldered the the wire back and installed it. Instrument lights and parking lights are now working again but the D/S front signal is still not working even though it blinks perfectly when the hazards are on. I also have the parking light relay set up from Zsonthebrain . Pretty sure the signal switch is still the problem, I'm going to stop by a bicycle repair shop tomorrow and see if they will sell me one 3mm ball bearing for the spare switch.
-
No fuses were blown, hazards lights work perfectly, could a lot of rain water temporarily bridge the terminals and cause a short? You know it may have nothing to do with the rain, could just be the signals switch haven't been used in 20 yrs.
-
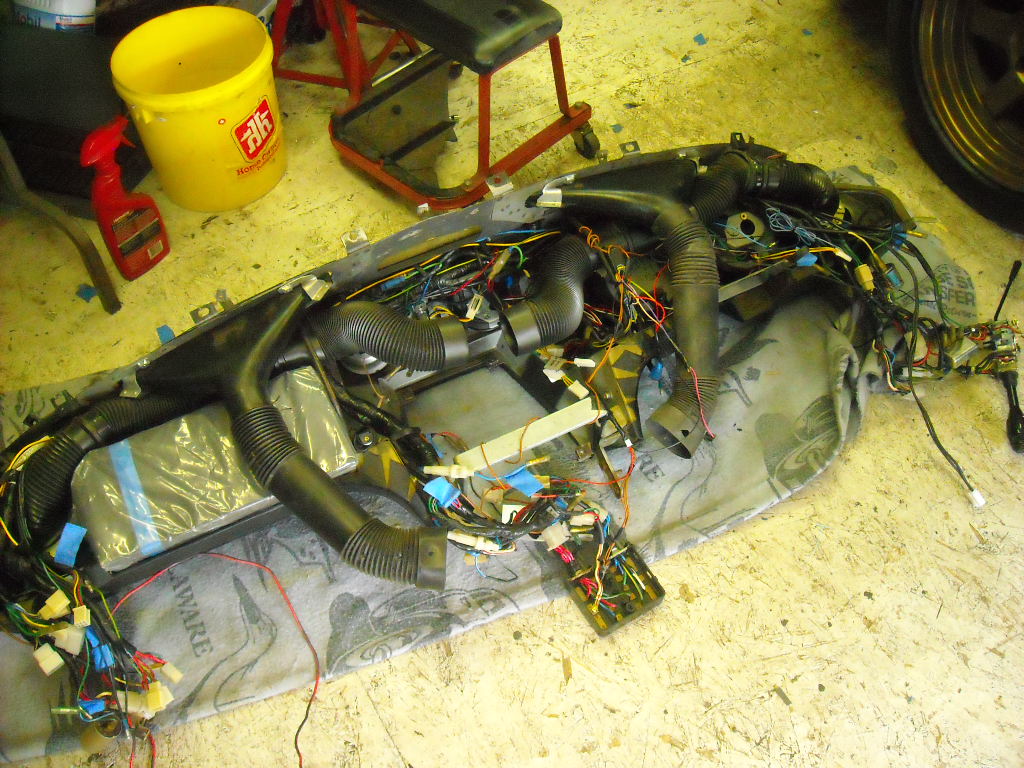
Before I forget I just want to say a big thanks to everyone that has supported and encouraged me through this build, it's so easy to loose focus but this thread and your replies has helped keep the goal in site, thank you for that. But she aint done yet, I took the car out for another test run this morning after completing some tweaks and got caught in a 5 min down pour of rain, first the instrument lights went then the D/S front signal and the running lights at the same time, then came the smell of something electrical burning, it lasted a couple seconds and then was gone. I turned off the the lights, the fan, the wipers and beetled home quickly. After checking all the fuses and connectors and not finding anything wrong I decided the melted mass of wires must be in the dash wiring... so Still didn't find anything wrong, then I noticed the green/red wire on the turn signal control had broken or burned off, luckily I have a set of spare set so changed that out and finding nothing else wrong re installed the dash. I'm sure this is what I smelt burning this morning, obviously this is the cause of the turn signal failure but I don't know if this could also be the cause of the marker/running light failure. The instrument lights I don't think is related and not much of a concern for me. I know there are a few of you out there that know this circuit inside out, I'm all ears. The socket/connectors for the turn signals at the front of the car were soaking wet when I pulled them apart but then those black covers aren't really suppose to keep them dry are they?


-
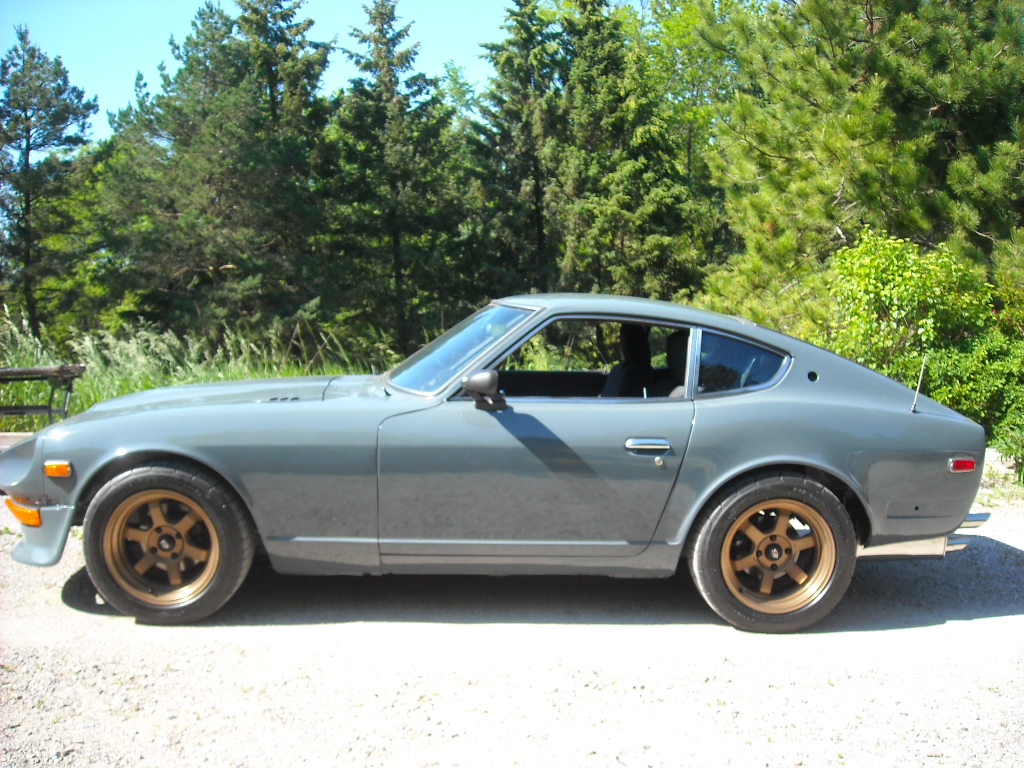
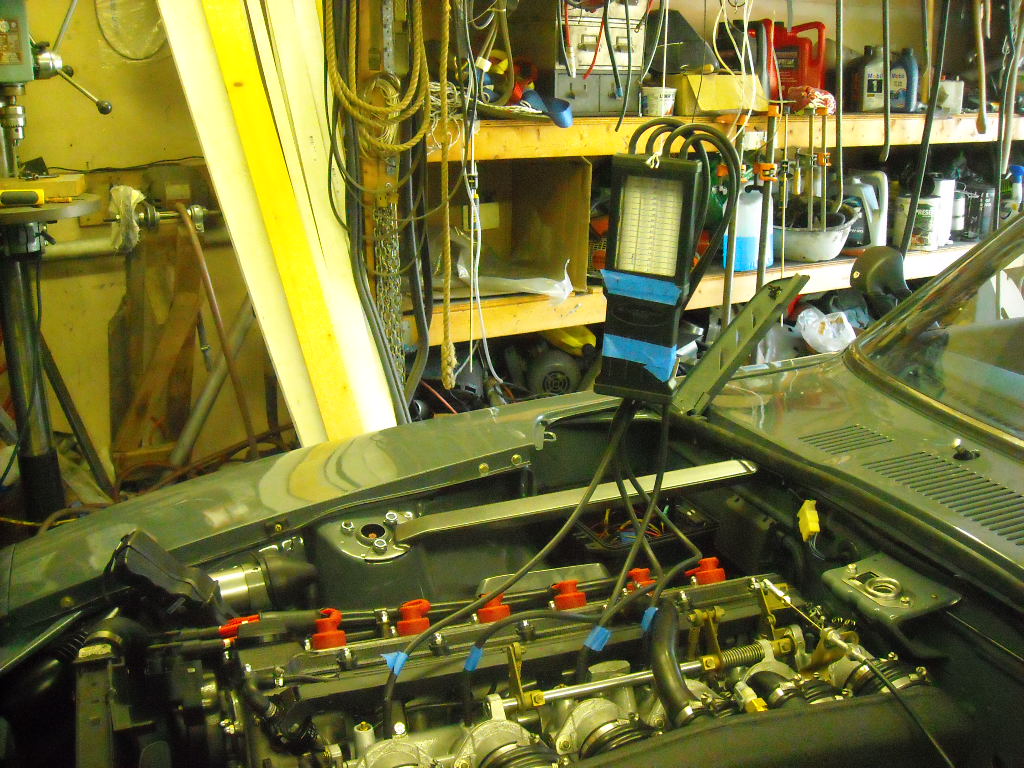
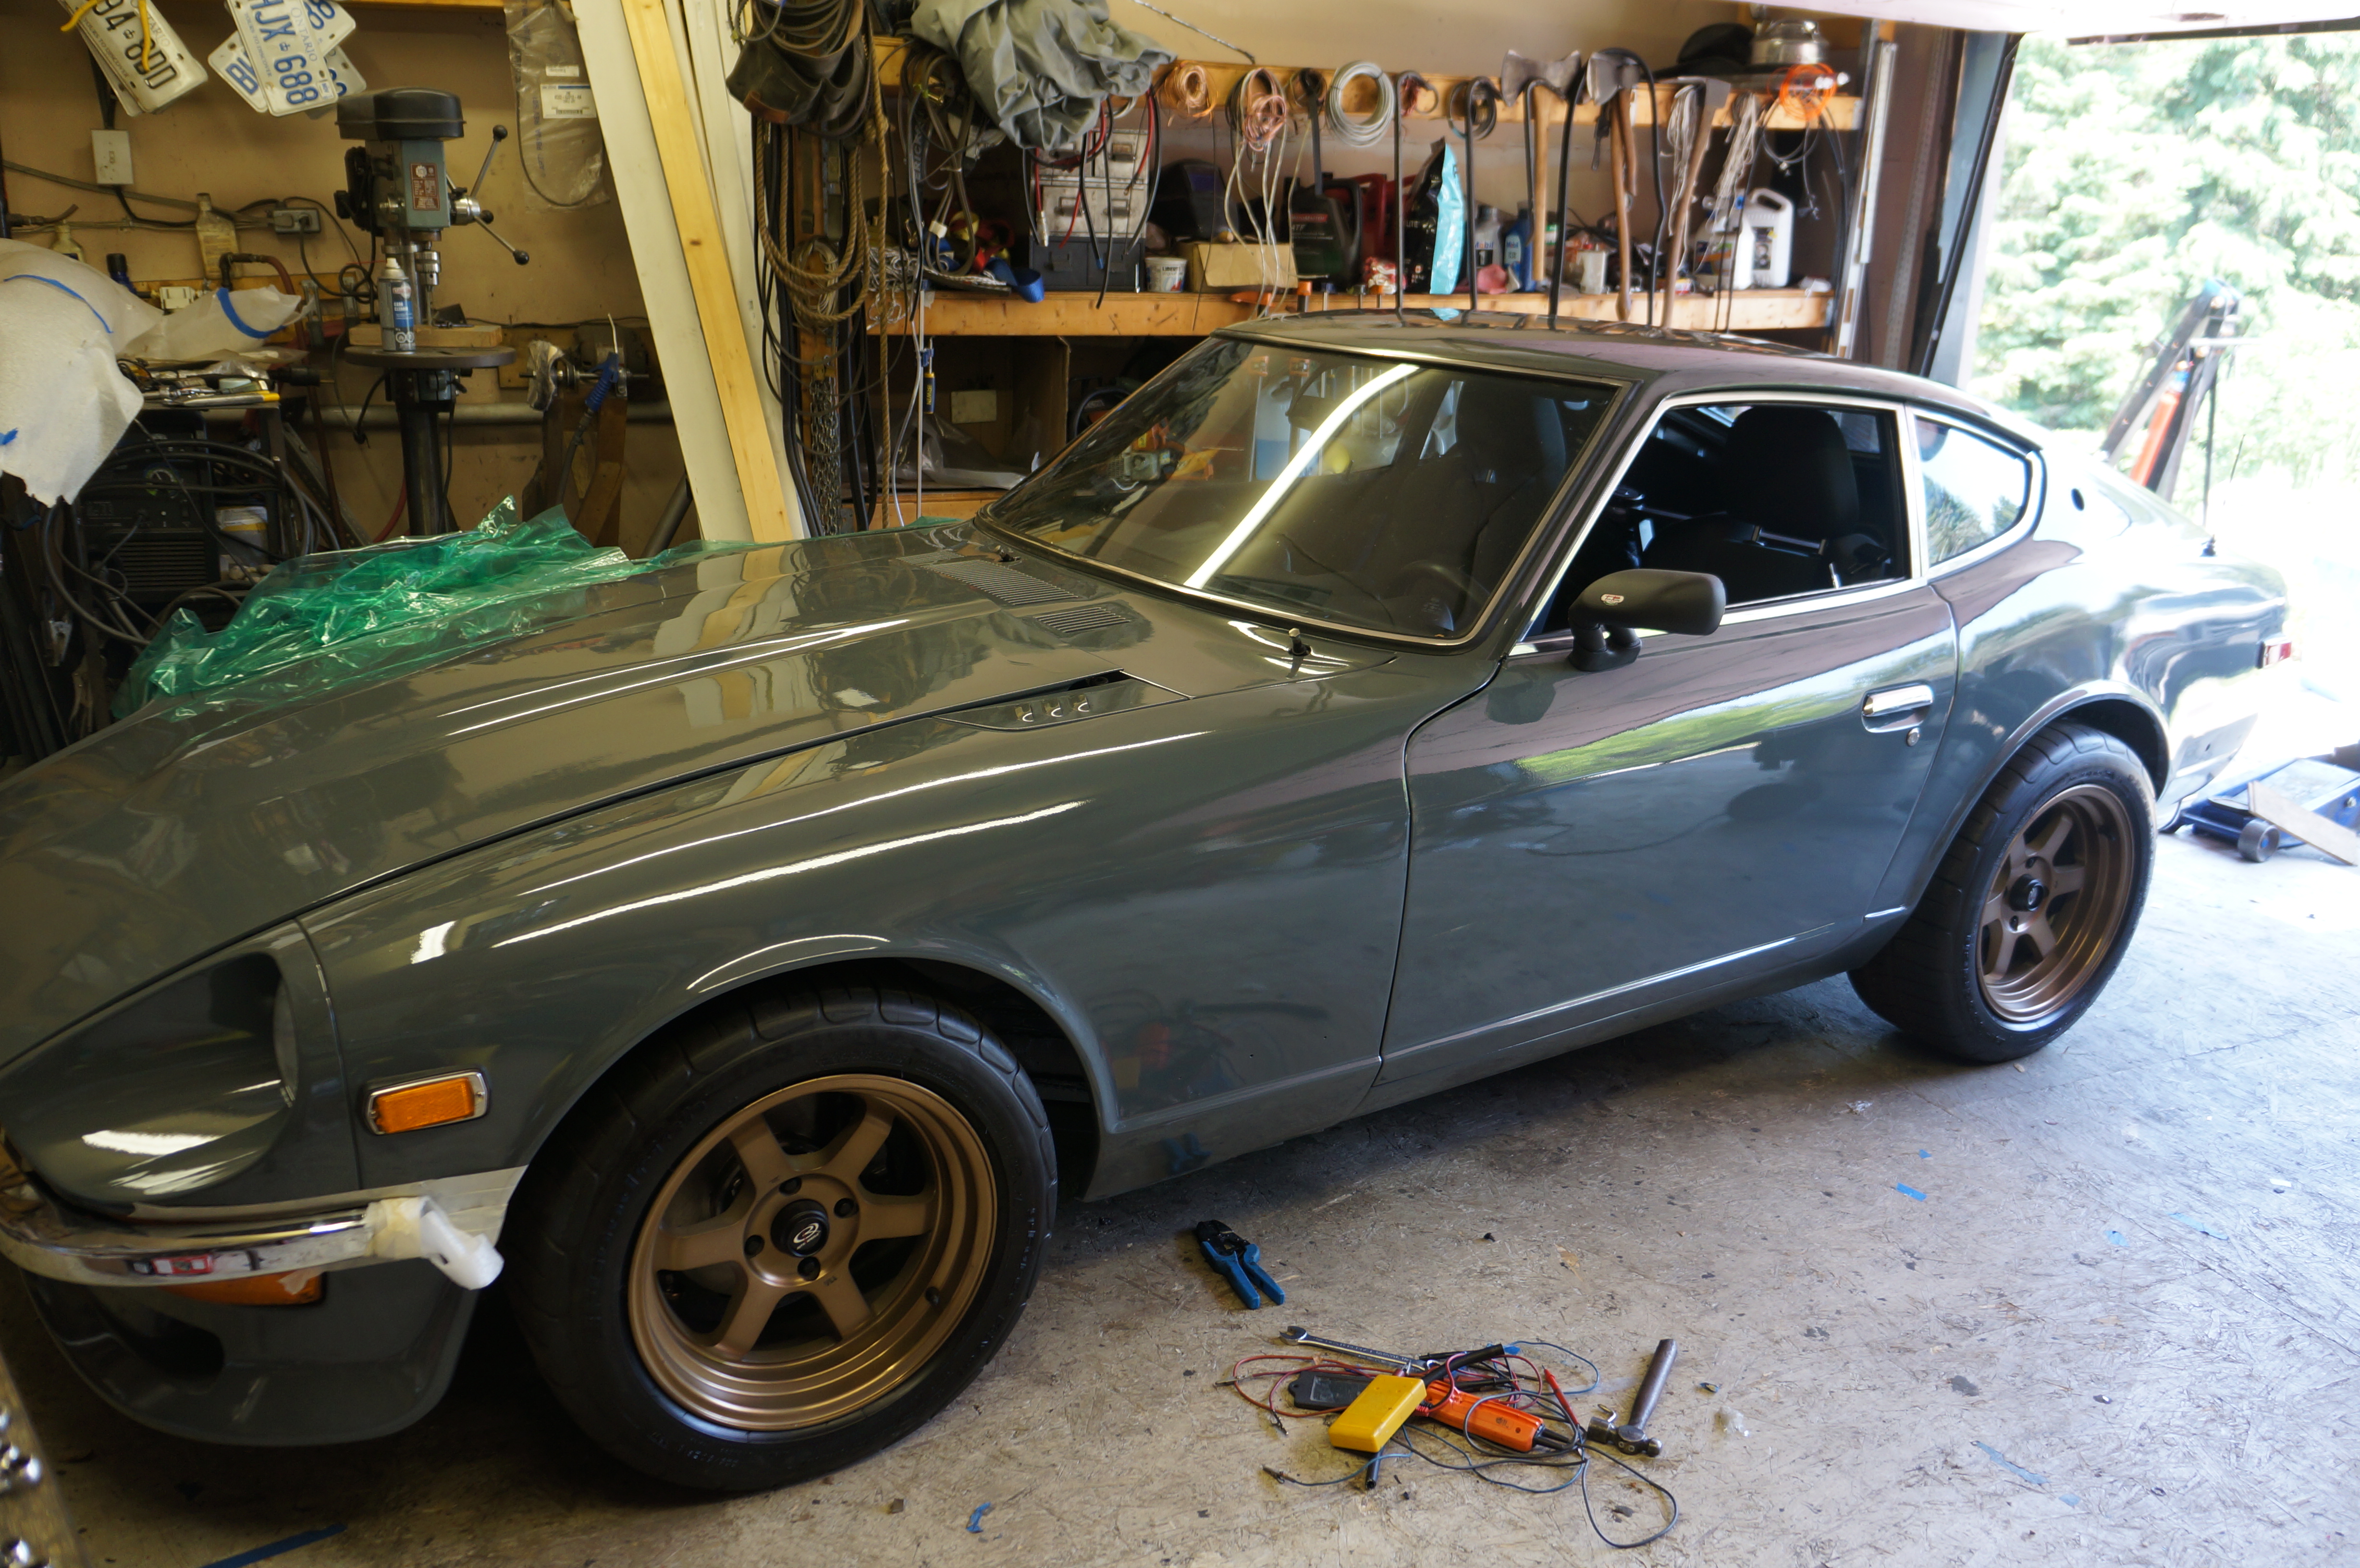
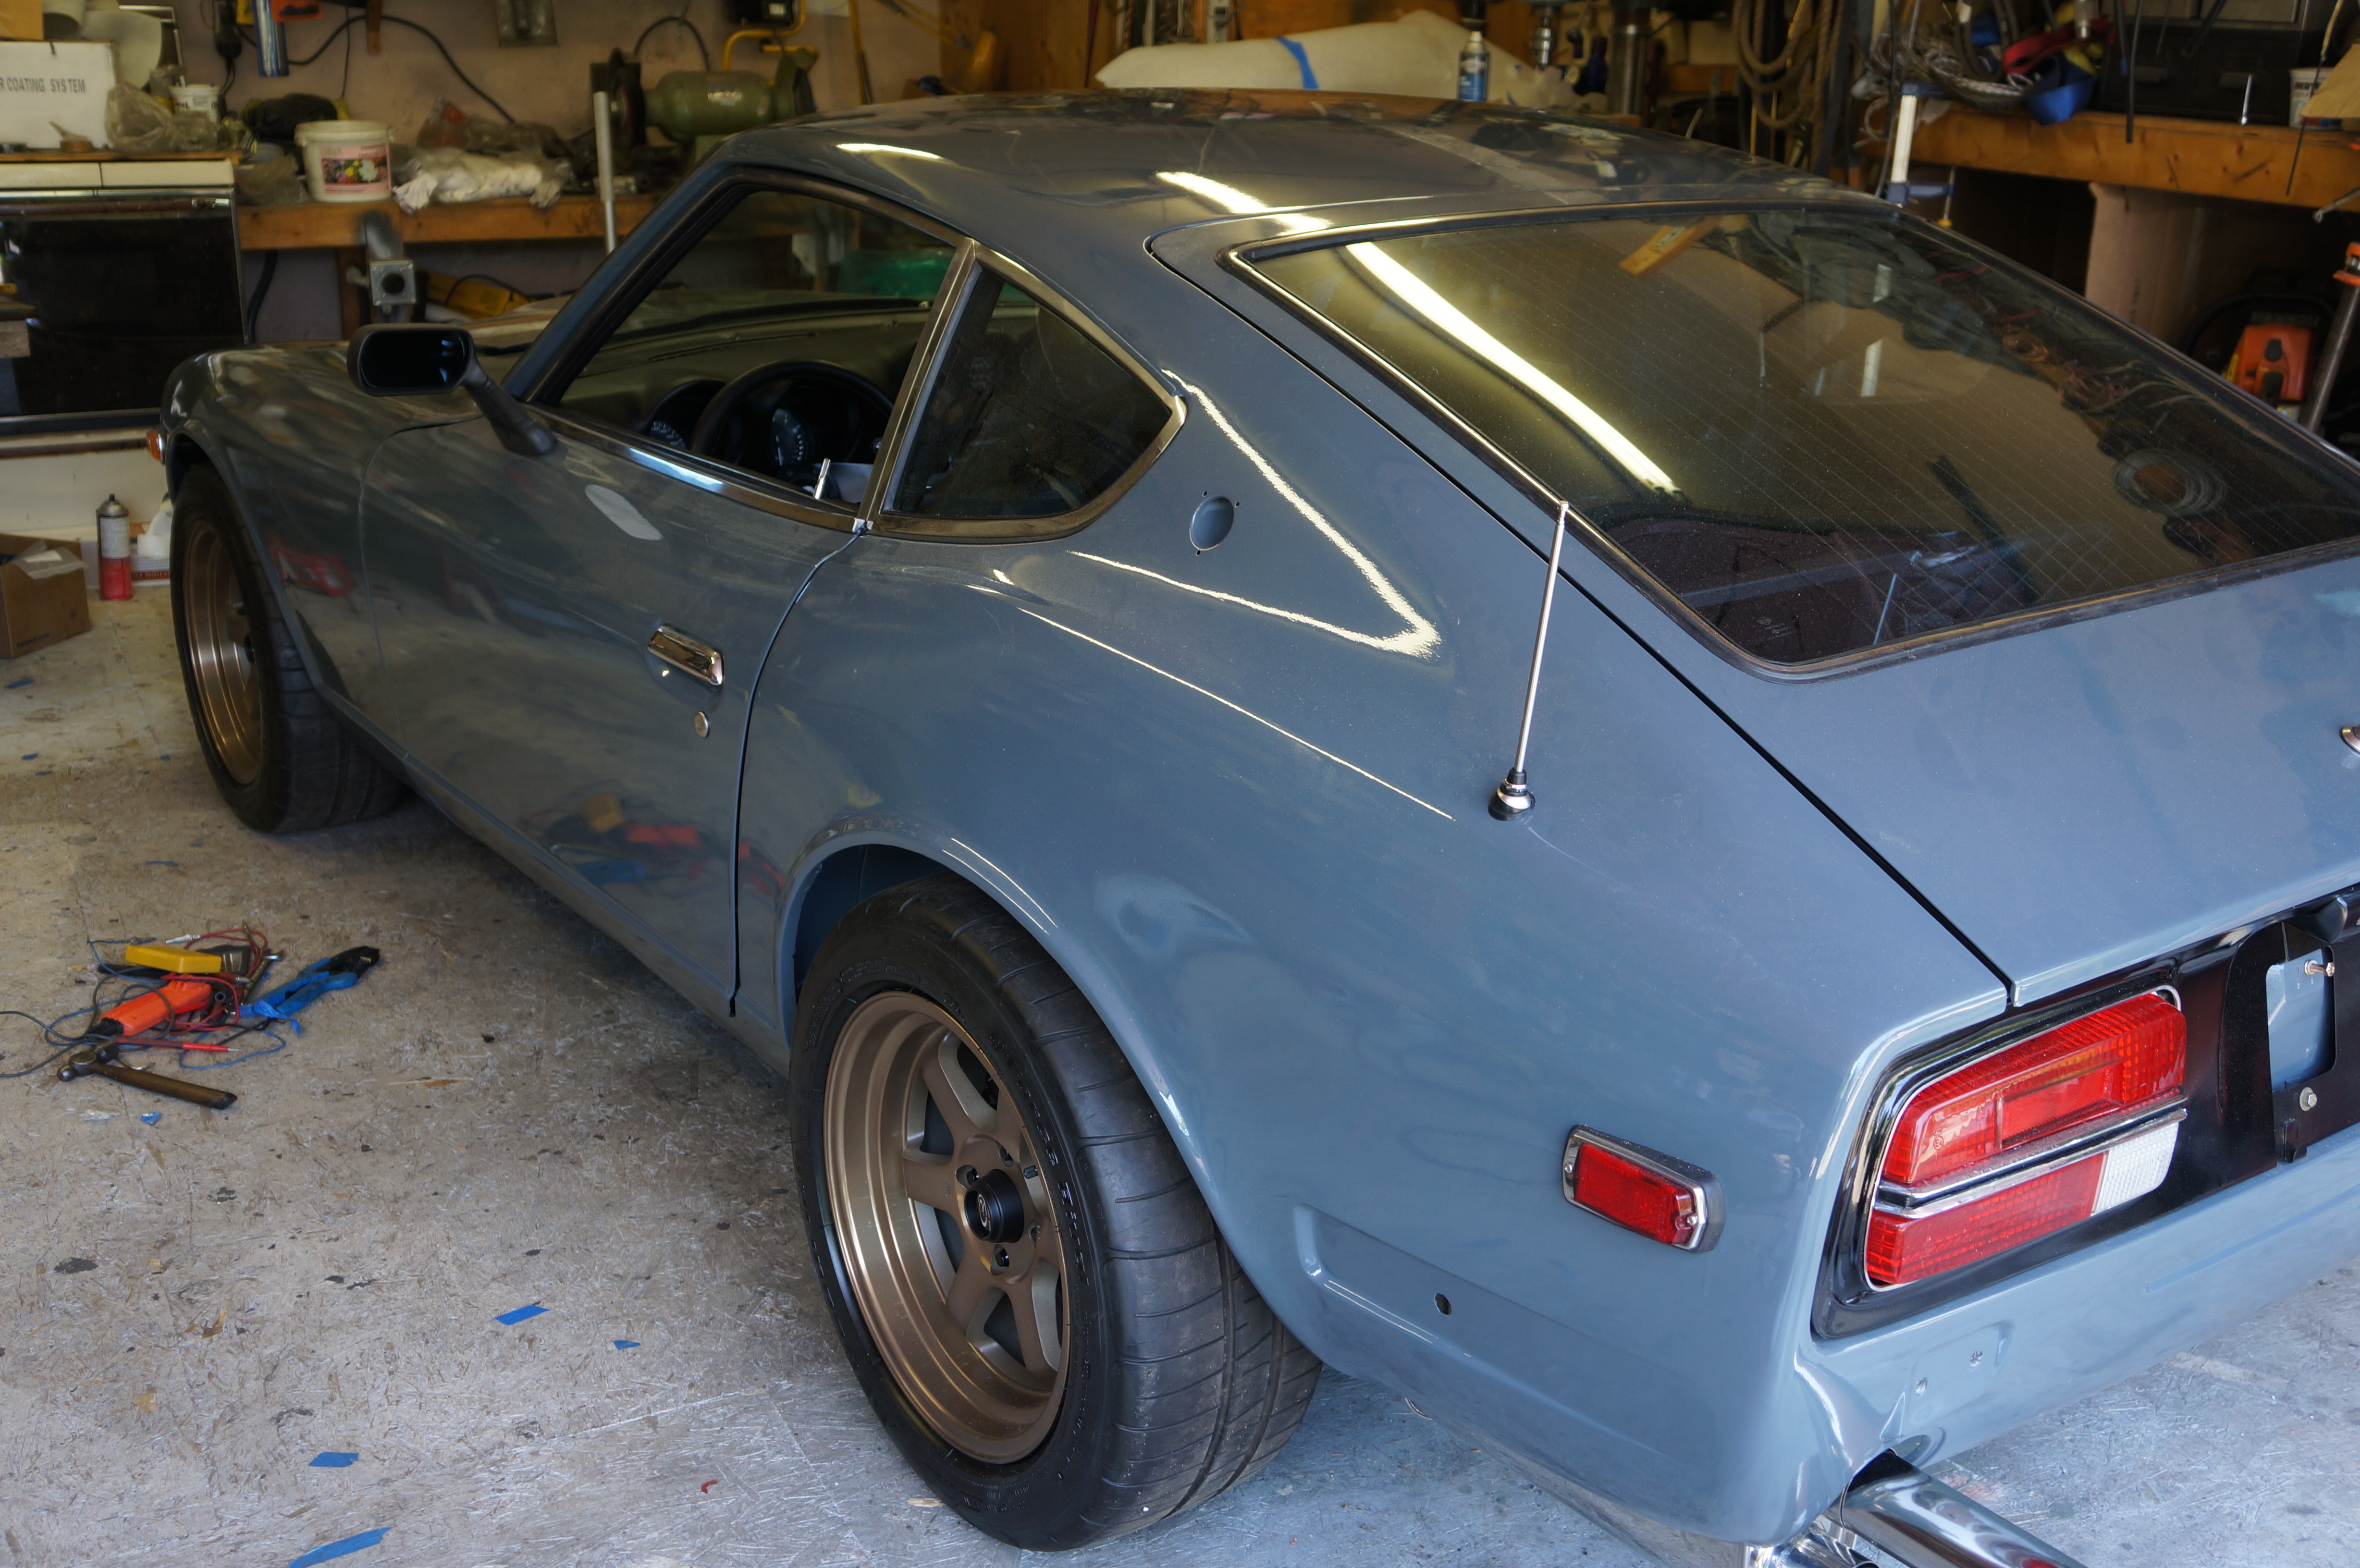
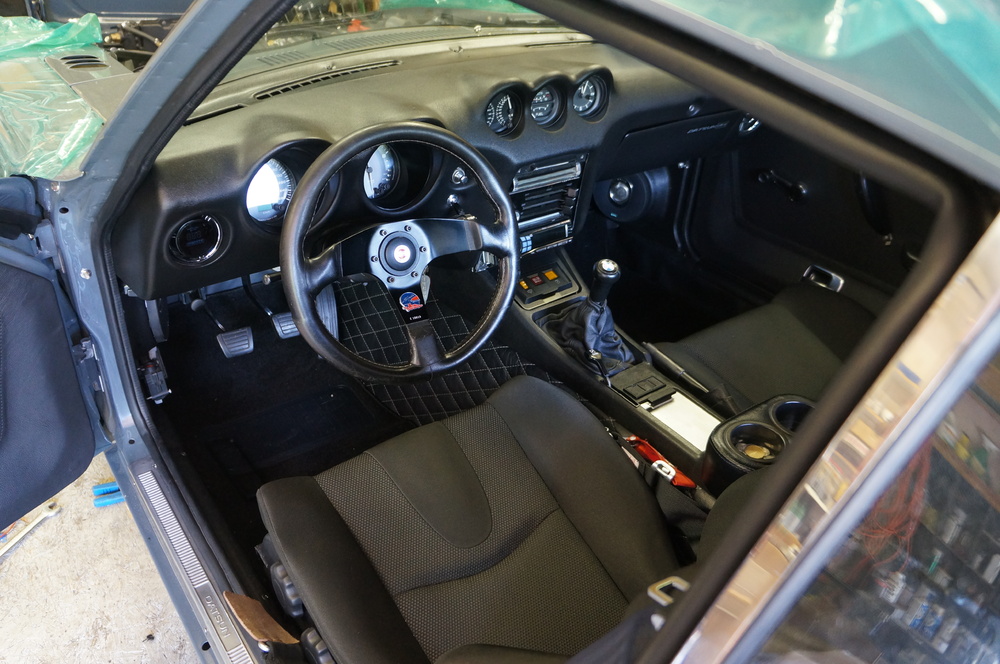
She is on the road! first time in about 20 yrs, Matt tuned it from idle to about 3200 rpm so I'm trying not to push it too hard until I can get down to his shop this week and finish the tune on the highway. Got the TB's balanced using my old motorcycle manometer, evened out TB 123 and 4 then pulled the tubes from 1&2 and put the on 5&6 and balanced them with 3&4. I'm leaving as much outside trim and badging off until Jody gets the cut & buff done at the end of the month. Years ago I read somewhere that you must do a second torquing of the wheel nuts after a few miles when you have installed new wheel studs, that came flooding back into my head after I heard some clicking happening on the front wheels, I was only a mile from home so headed back. Two nuts were loose and all the rest of them needed re torquing That's one of the reasons I never let myself get too far from home when shaking out the bugs, I had a list of 8 things to work on before I even got out of the driveway. But the thing I have been most concerned about was the 1.75" drop of the steering rack, that the car wasn't going to have that great handling anymore, very pleased to report that the TTT off set tie rods and the bumpsteer spacers did the trick, the handling is spot on, nothing strange, it all feels very familiar. No bad sounds coming from the LSD OBX rear end and I did lay a little patch just to make sure both tires were leaving rubber on the road, the braking isn't as good as I hoped for but there is still room for tweaking. So far it is feeling very good, very much like the old Z but a lot more power and NO squeaks, pretty sure that is the stitch welding. Going to try and get the rest of the tuning and window tints done this week and I guess it is time for another appraisal.


-
I had an /89 535 blk/blk 5spd, great car, the best highway I have ever owned. The wife never liked it so it is gone now.
-
Love CLR, very versatile stuff.
-
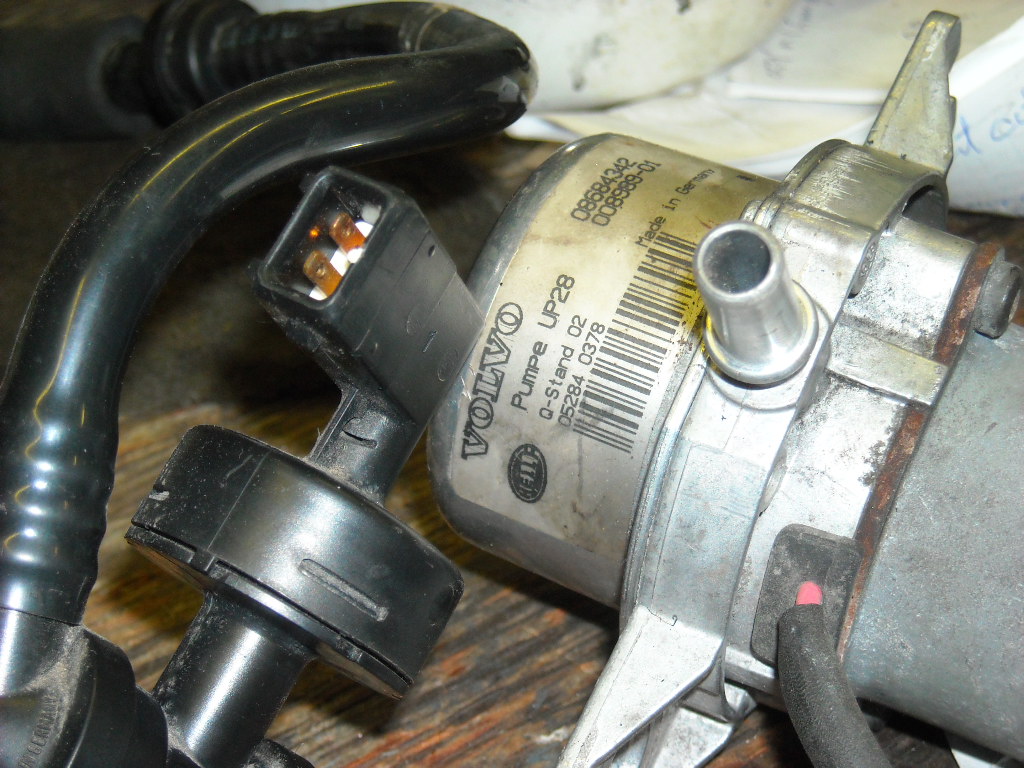
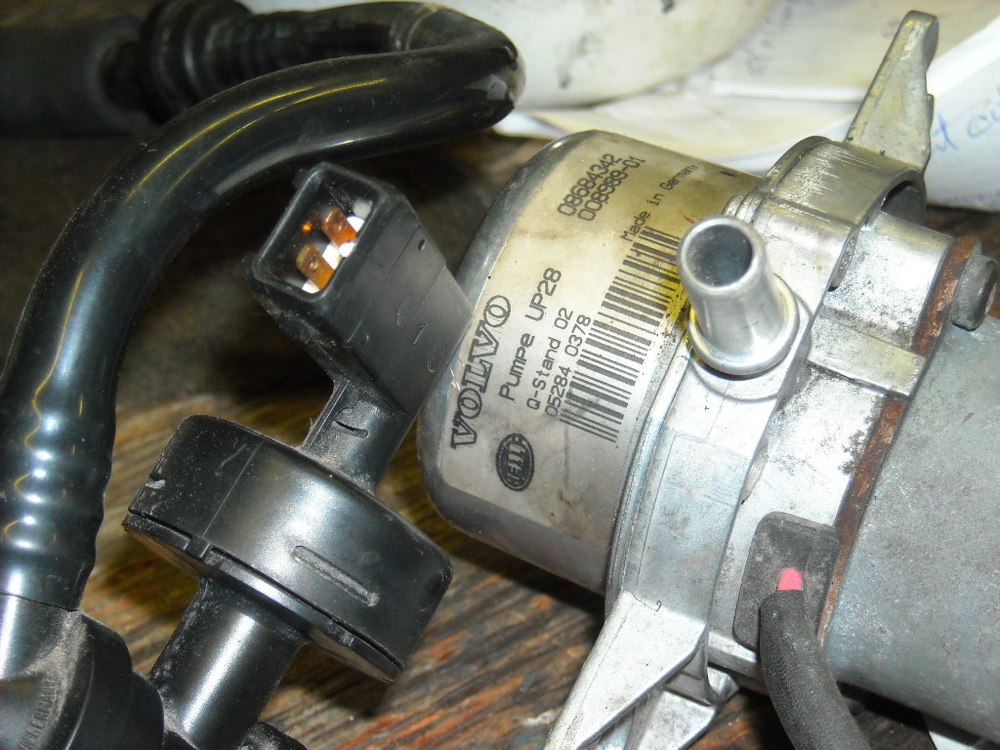
I hooked up a vacuum pump off of a Volvo for my modified Z and although it works well, like gnosez says it's loud and cycles on and off everytime you hit the brakes, kinda of irritating. I'm trying to tap into the vacuum log instead.
-
1993-2002 Kia Sportage door seal, I have a spare used kia seal and two brand new Precision door seals. The new Precision seal are much better now then they used to be but because they are new make the door hard to close until they are worn in and relax.
-
Great work, couple of questions, will the horn button still work and where do you put the controls for the window glass?
-
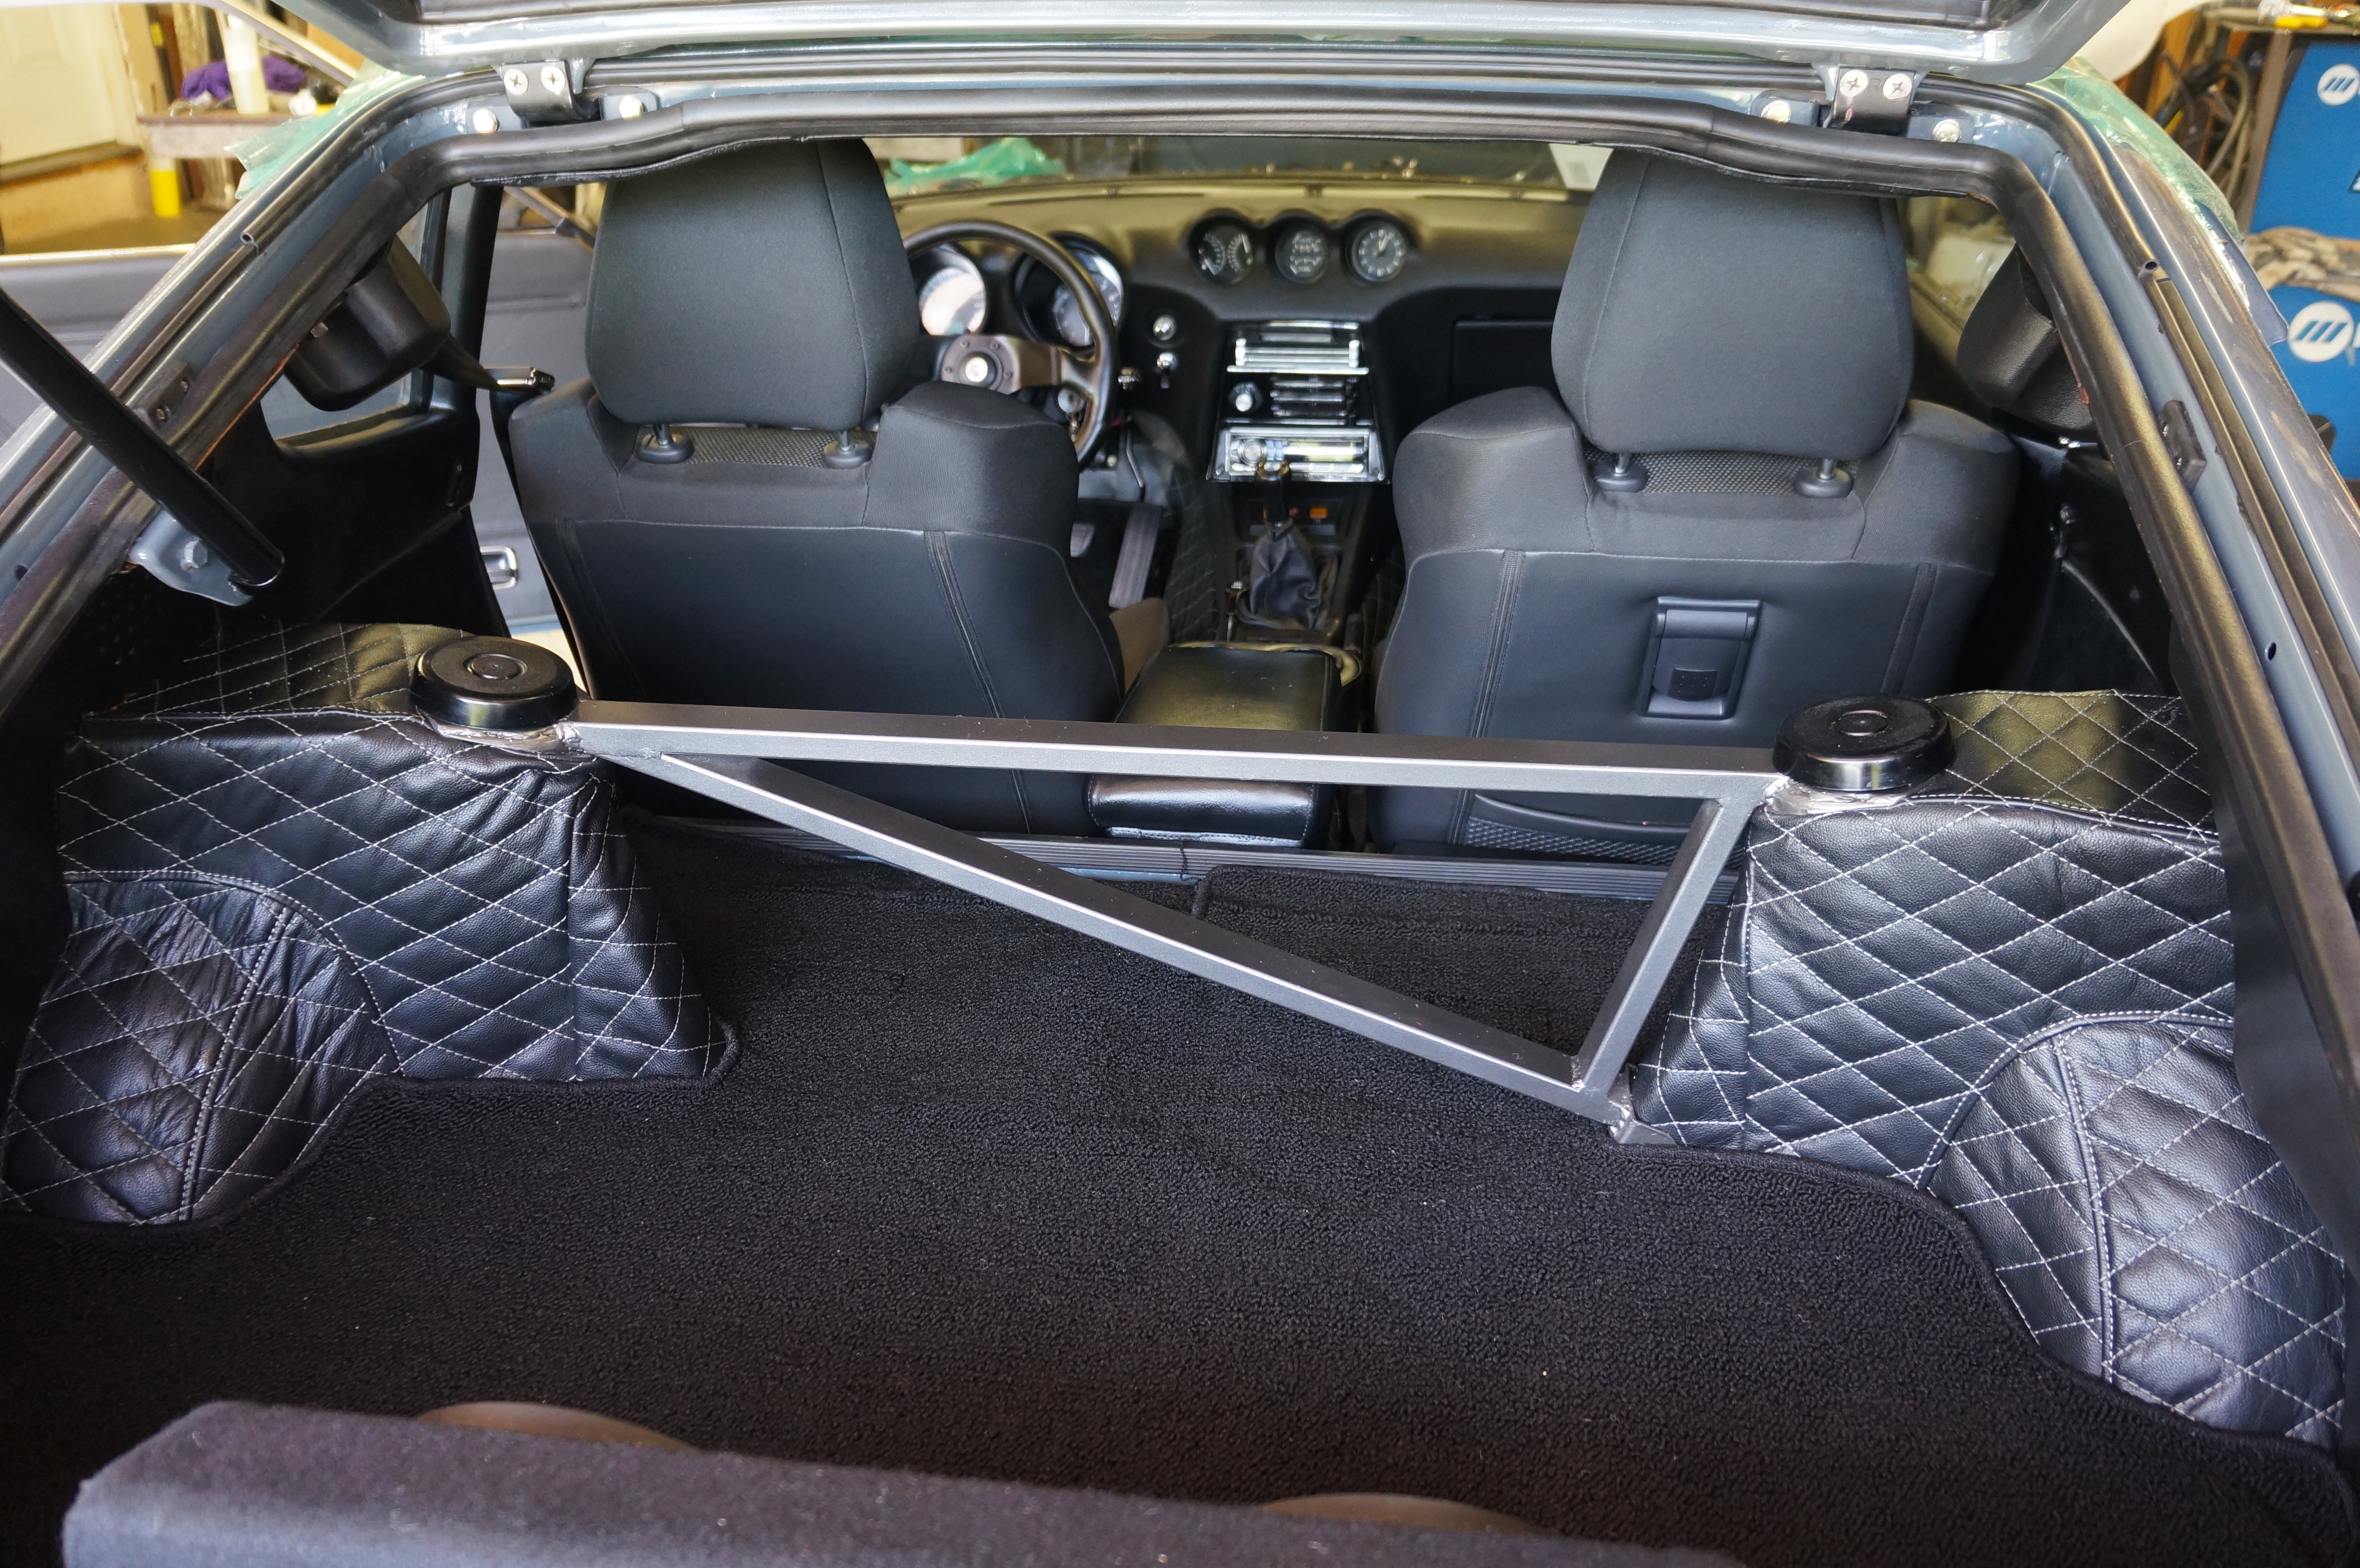
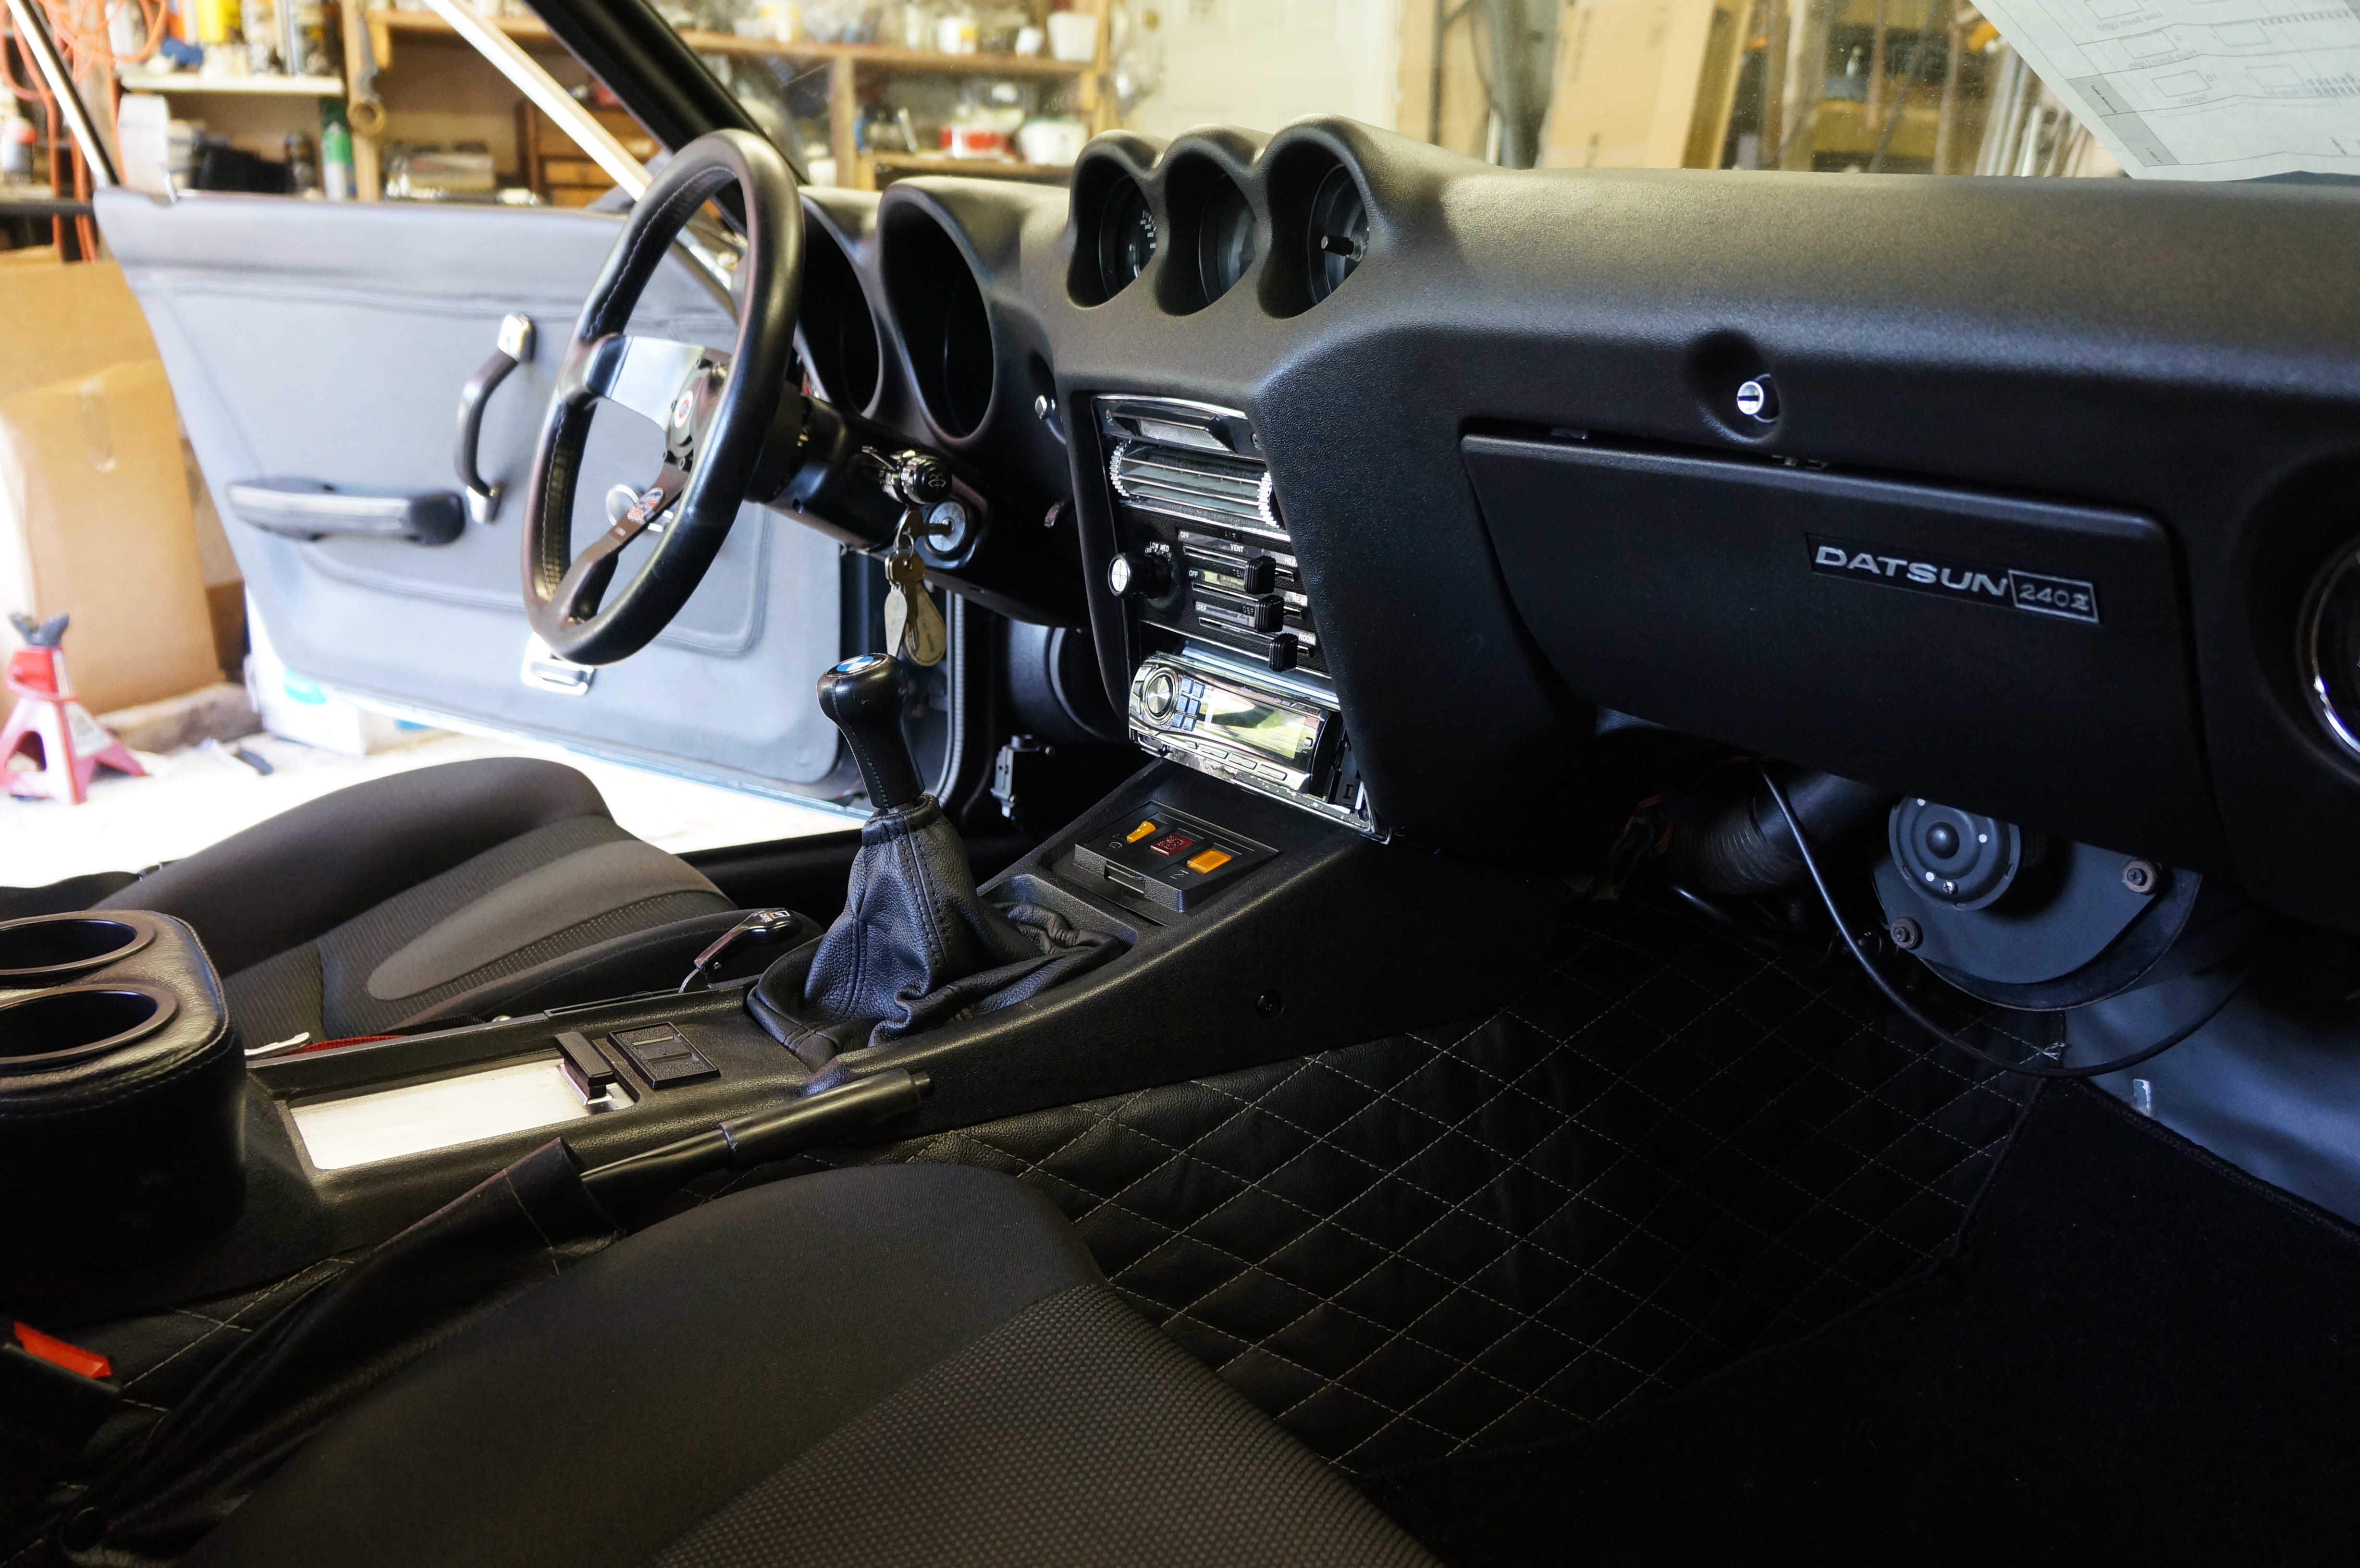
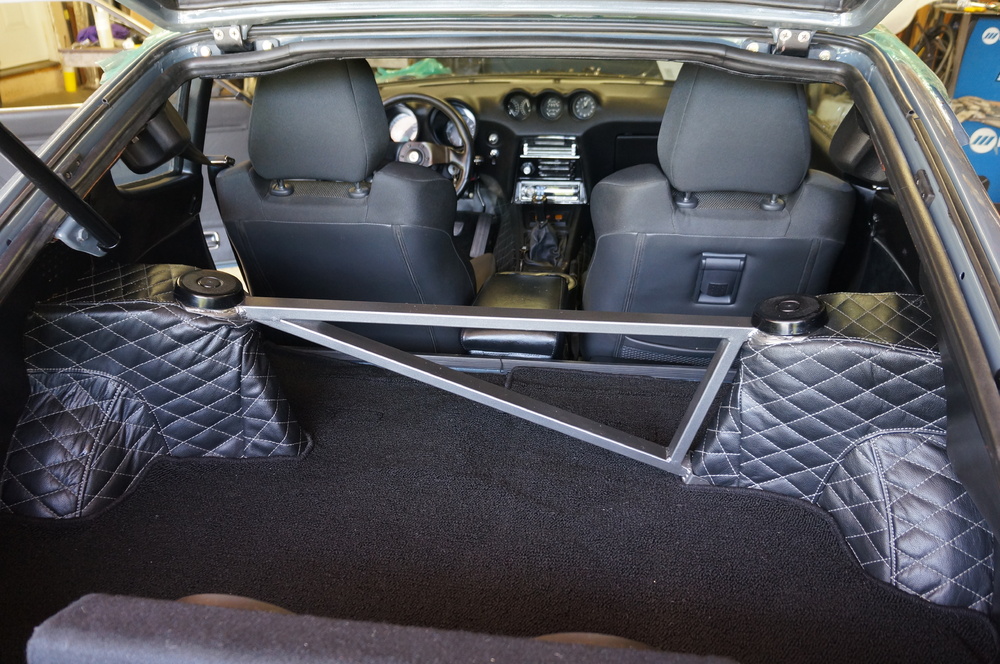
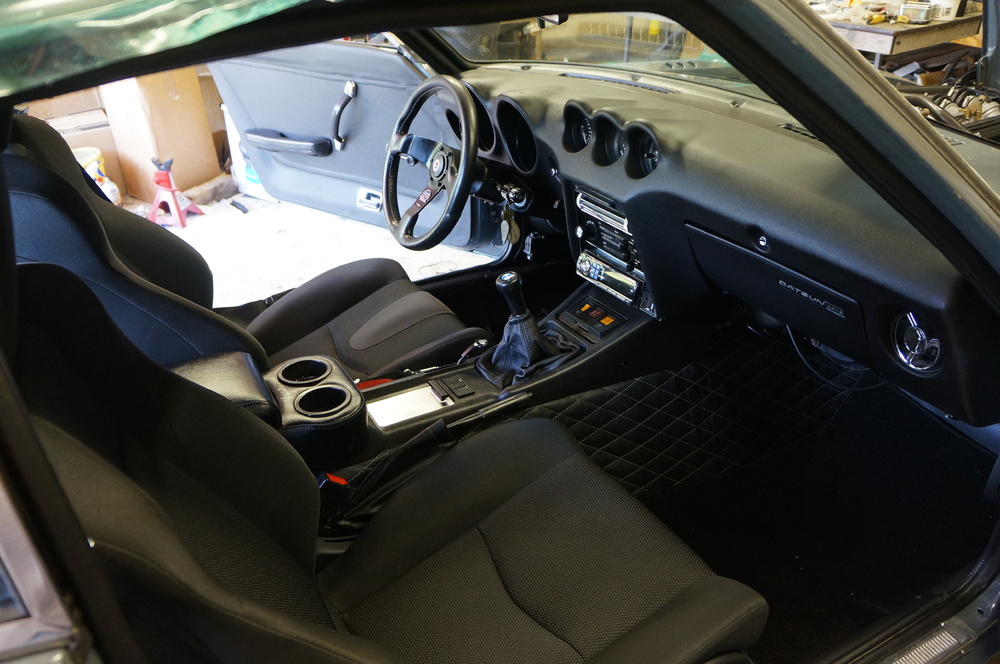
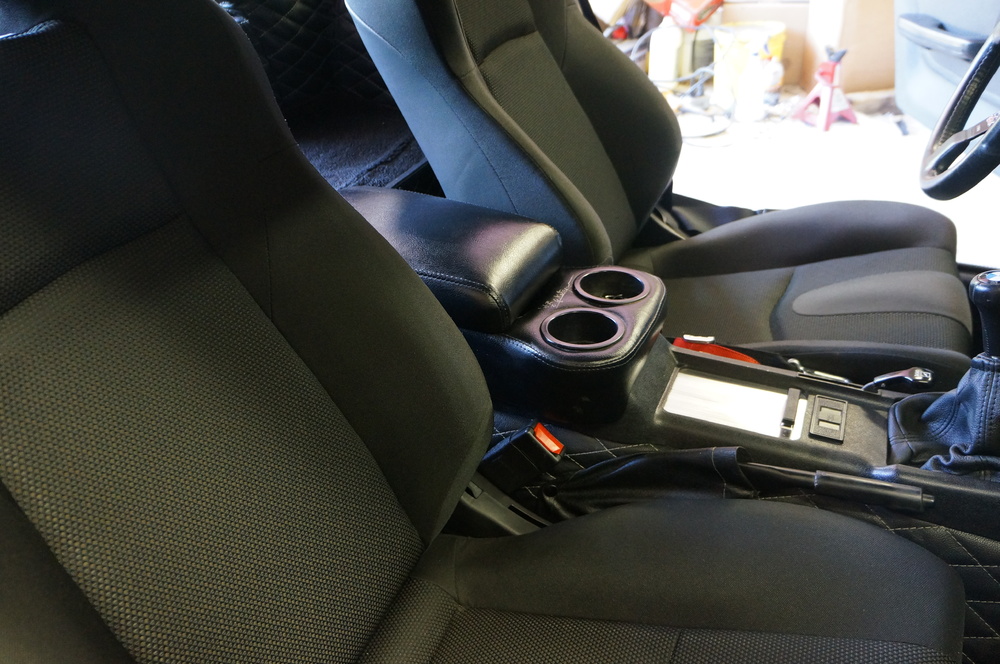
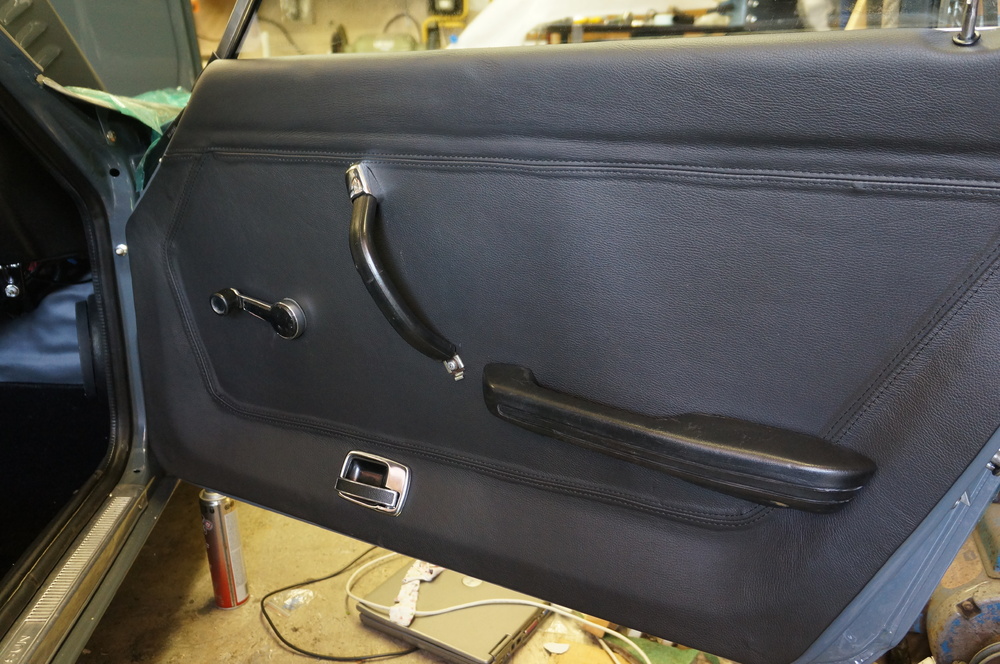
2.5" from the bottom of the skid pan, 3.5" from the bottom of the oil pan. Maybe I should attach some Titanium skid blocks and do some spark shows at night. Well, getting down to it, finished the interior today, still missing a pull knob and a chrome cap but it is pretty much done. Matt is coming to tune the megasquirt tomorrow morning, I get the safety certificate on Tuesday and hopefully licenced that afternoon. Then I get to start slowly driving it around to see if all my steering mods worked and of course then back up to Jody so he can buff out the paint. I borrowed my wife's good camera to get some better shots than the old shop cam is capable of.


-
Yikes, something wrong with that gasket for sure, just did my windshield with a Precision gasket with no problems. You could also try these guys, http://www.vintagerubber.com/datsun240z-windshieldsealCalStyleOEM.aspx I used their windshield gasket on the first Z I did and it was perfect.
-
Yes, I have a full carpet kit ready to go. Thank you that's very kind, yeah it was beautiful moment when it roared to life. Started it up today and let it tick away at 2000 rpm until everything was good and hot, burned off oil and cured paint and coatings, checked for coolant and gas leaks, sofar everything is good. There is one oil leak on the timing cover right by the chain tensioner, I have been trying to stop that leak since I got the engine 10 yrs ago with no luck. The aluminum welding job on the cylinder head seems to be fine, no leaks. I wish I had not extended the oil pan down so much now, I have 2.5" clearance between the skid pan and the road, if it proves to be a problem I will have to pull the engine, remove the oil pan and slice an inch off the bottom of the pan and weld it up again.