cgsheen1
Free Member
-
Joined
-
Last visited
Everything posted by cgsheen1
-
 Yes. Gasket and heat shield in one goofy thing..
 -
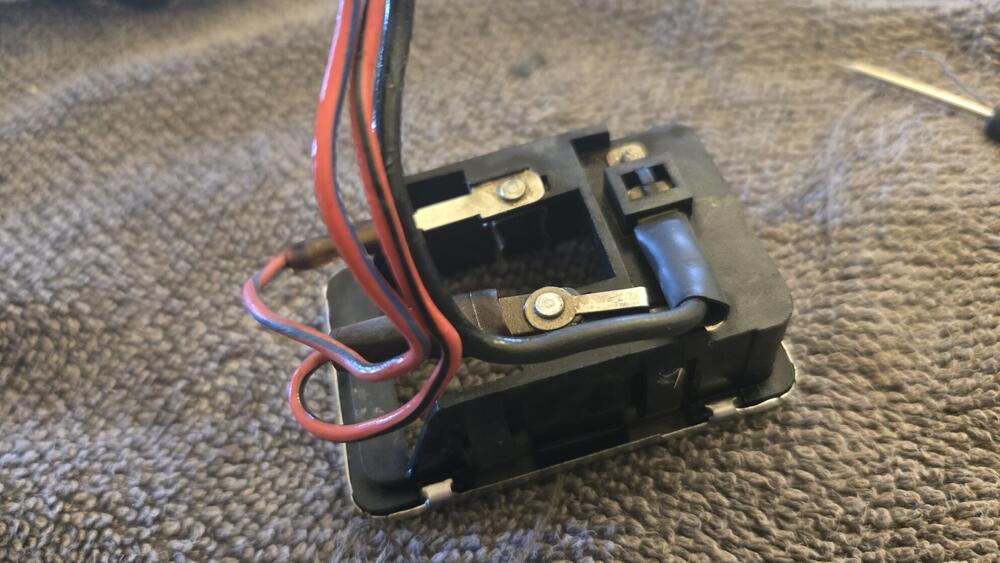
I used aluminum aircraft rivets - and like your pop rivets, I should have used a semi-tight washer on the squishy end. The sheet metal on the contacts is really thin. I also "re-squished" the (original) rivets on the bulb holders.
-
-
Posed the question on the interweb and got this "AI generated" answer but it lines up with the automatic transmission info in the 1976 280Z FSM: "The inhibitor switch on a 1973 Datsun 240Z automatic transmission is located on the transmission itself. It is typically found on the right side of the transmission, where it controls the circuit for the reverse lights and the starter interlock system. The switch is responsible for ensuring the car can only be started when the transmission is in Park or Neutral, and it provides a closed circuit for reverse when the transmission is in reverse. For a 1973 model, the switch is specifically designed for automatic transmissions and is not present on factory manual transmissions." (We've had A/T Z cars in the shop and swapped out auto transmissions for manual transmissions, but I honestly don't remember the wiring at all.) The electrical schematic has it wired with 4 wires: B/Y, B/Y, RB, R. (B/Y for the start circuit and R & R/B for the reverse lights) The other relay in question is called "Seat Belt Relay" on page BE-2 of the FSM. Refer to "Fig. BE-1" item 17 "SEAT BELT RELAY (A/T MODEL ONLY)". The FSM shows that with 6 wires (as does the schematic - but the schematic does not label it "seat belt relay"): B/Y, B/Y, B/Y, B, G, G. (B is shown on the schematic as the GND symbol). BE-2 of the FSM shows the seat belt relay mounted on the firewall. Others, in other forums, do describe it as the "K-18". Those are the only ones I see related to the start circuit - I don't think the black box under the glove box should be involved. (Is it the ACC Relay?) And there's a post on ZCAR.COM: https://www.zcar.com/threads/not-the-inhibitor-relay-topic-again-1973-240z.424554/
-
-
In a 1973 240Z the start signal (battery voltage) is delivered through a Black/Yellow from the Ignition Switch directly to the Starter Solenoid in the MANUAL transmission version. In the AUTOMATIC transmission version it feeds through an INHIBITOR SWITCH (a control and/or relay box) which assures the automatic transmission gear selector is in the proper position for starting. The Inhibitor Switch system IS NOT DESCRIBED in the Factory Service Manual (at least that I could find). A starter relay is fairly simple - it uses the "start signal" (battery voltage on the B/Y wire) for the relay coil POSITIVE and the coil NEGATIVE is simply grounded. The supply to the relay switch is directly from the battery and the switch output goes to the starter solenoid. SO, the ignition switch activates the relay, which delivers voltage straight from the battery to the starter solenoid. The manual start circuit is so simple I'm wondering if you have an auto trans frame... But, could be your ignition switch, fried wiring or connector.
-
That's the old skool way. A friend of mine years ago gave me a push button switch with two long wires attached and alligator clips on each end. One clip gets attached to the battery POSITIVE and the other gets clipped to the spade on the starter solenoid (remove the wire from the solenoid first). With the transmission in neutral, a push of the button should engage the starter motor. They call them "Remote Starter Switch" on Amazon... This problem is a common one on Z cars and has prompted many owners (including me) to install a STARTER RELAY. The start signal comes from the Ignition Switch and gets diluted by the interlock system and years of wire/connector oxidation. It's easier on that circuit if it just "sets" a relay - which then delivers power straight from the battery to the starter solenoid. (I also removed the overly complicated interlock system on my 260Z - just sayin' - personal choice...)
-
Better question is what is that carb for... Sorry, no love for those with me.
-
Light. Console. I think G/W is clearance, gauge lighting, and etc. but I'll look... 72_dash_2.pdf The 240Z dash I have has that same connector - the entire dash and harness is unconnected so... But - the G/W on that connector traces to the small 6-pin Body Harness connector shown in that .pdf - G/W in the upper right corner of the connector. The body harness G/W goes back to the clearance lighting in the tail. Trace that Red - I think it may well go to the front (engine bay harness) and the two hidden Fog Lamp connectors in the harness as it spans the radiator core support. And as you know the US model did not come with a Fog Lamp Switch from the factory so that would be an unused connector if what I said is true. Oh, if you look at the first wiring diagram in the FSM (not the "US and Canada Only" schematic) you'll see Fog Lamps and the connector for the Fog Lamp Switch. BUT, it'll confuse you because it shows a R and an RG wire to the switch. If you trace the RG, you'll see that it "tees" off a GW. So maybe the schematic doesn't follow the harness build exactly or vise-versa...
-
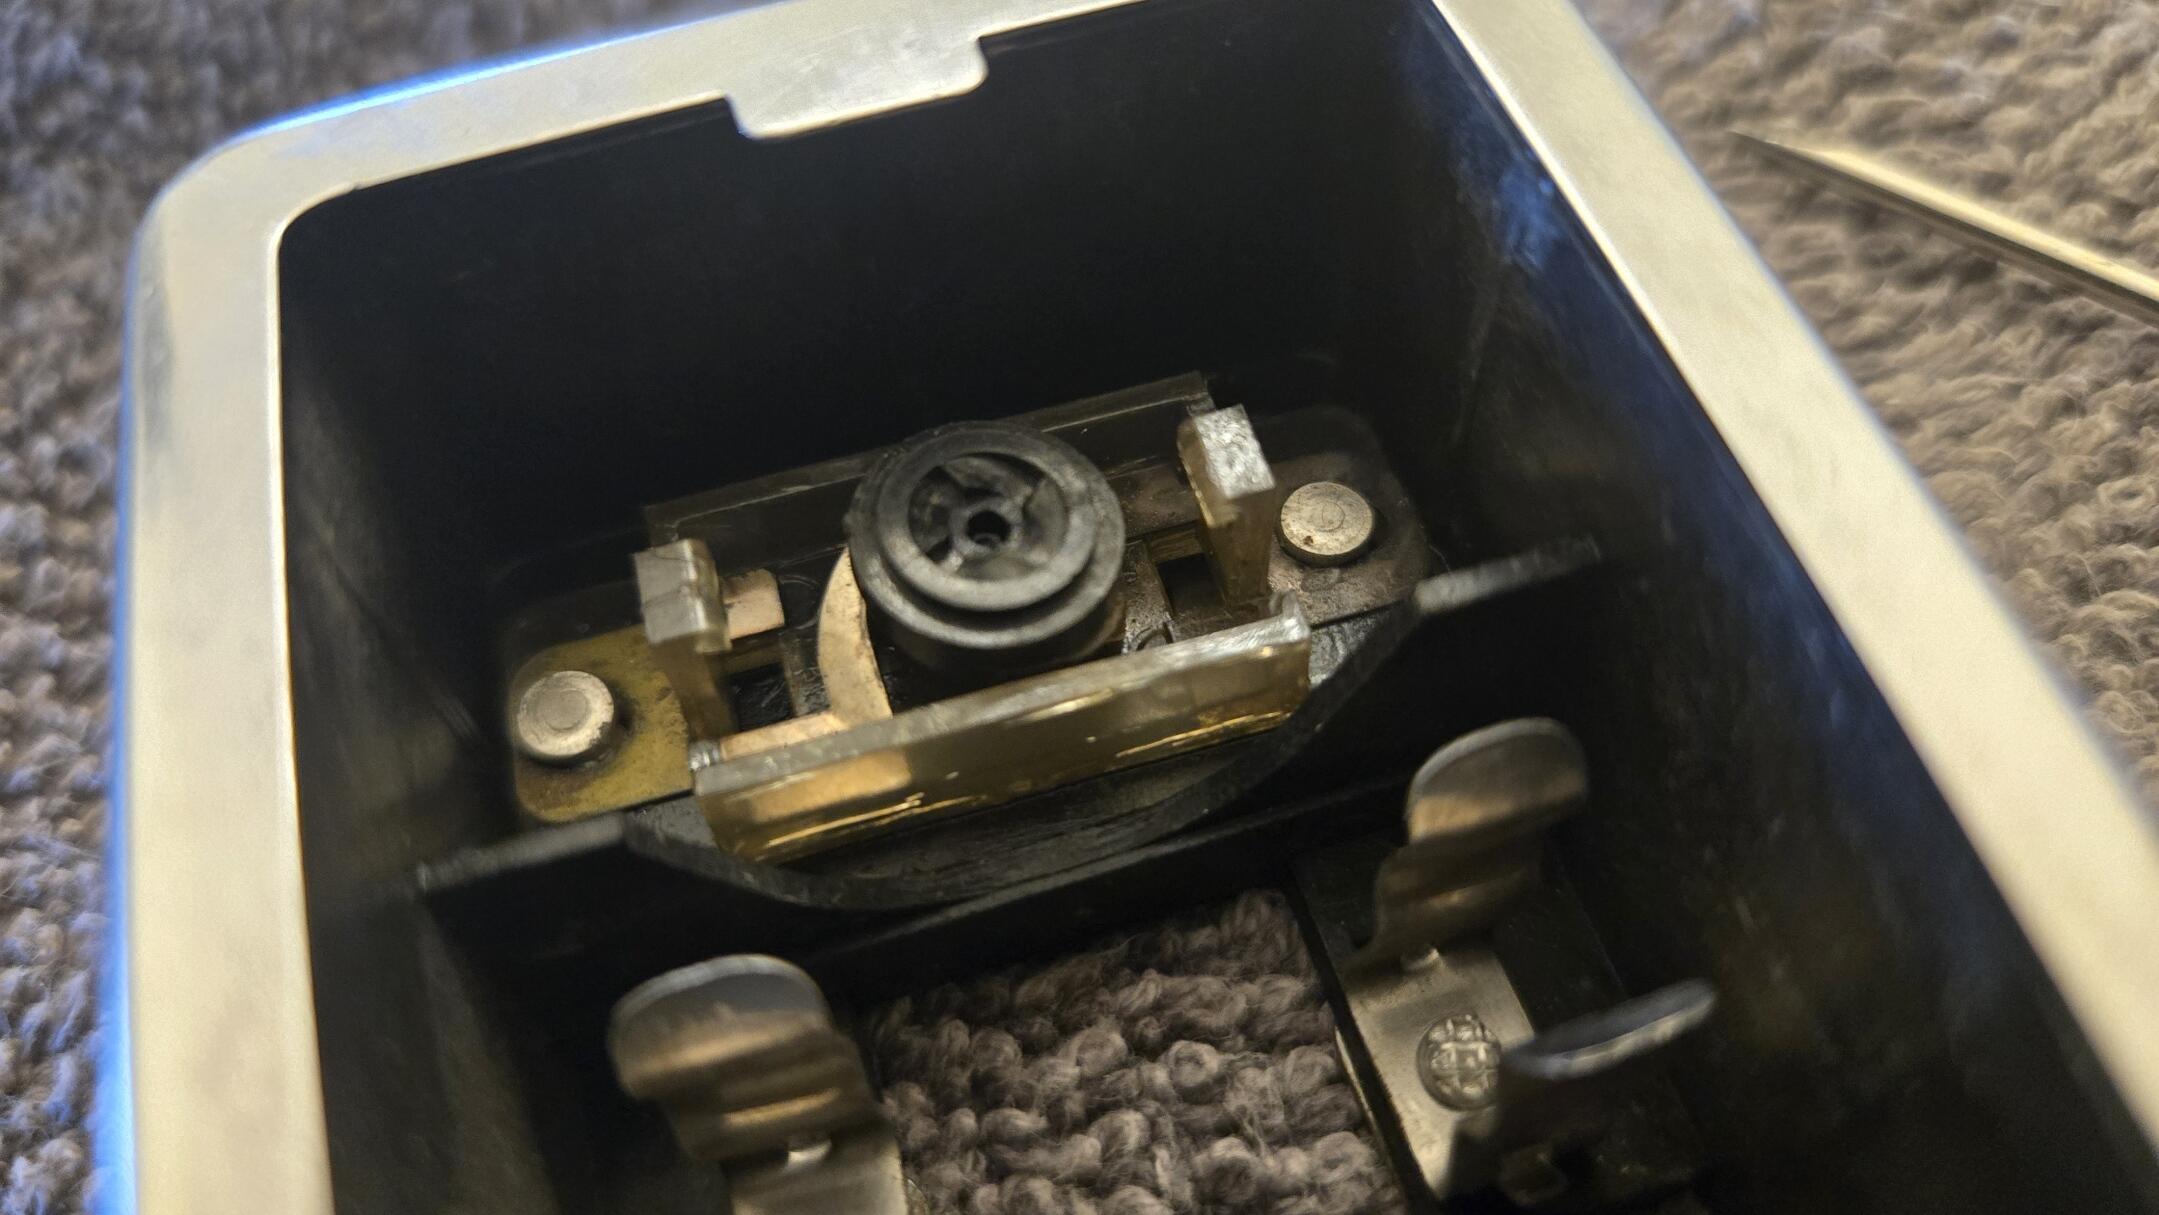
Here is how this one was wired: Main GND (B) is a male spade that pushes into a female held in that little box. Red/Black (RB) is the GND from the door switches. Red/Blue (RL) is +12V from the fuse box. And they're both female spades. You'll notice that the main GND can be interrupted by the switch and that the RB GND from the doors is independent of the dome switch. Now. To refurbish this one AND try putting it back together - so that it still works...
-
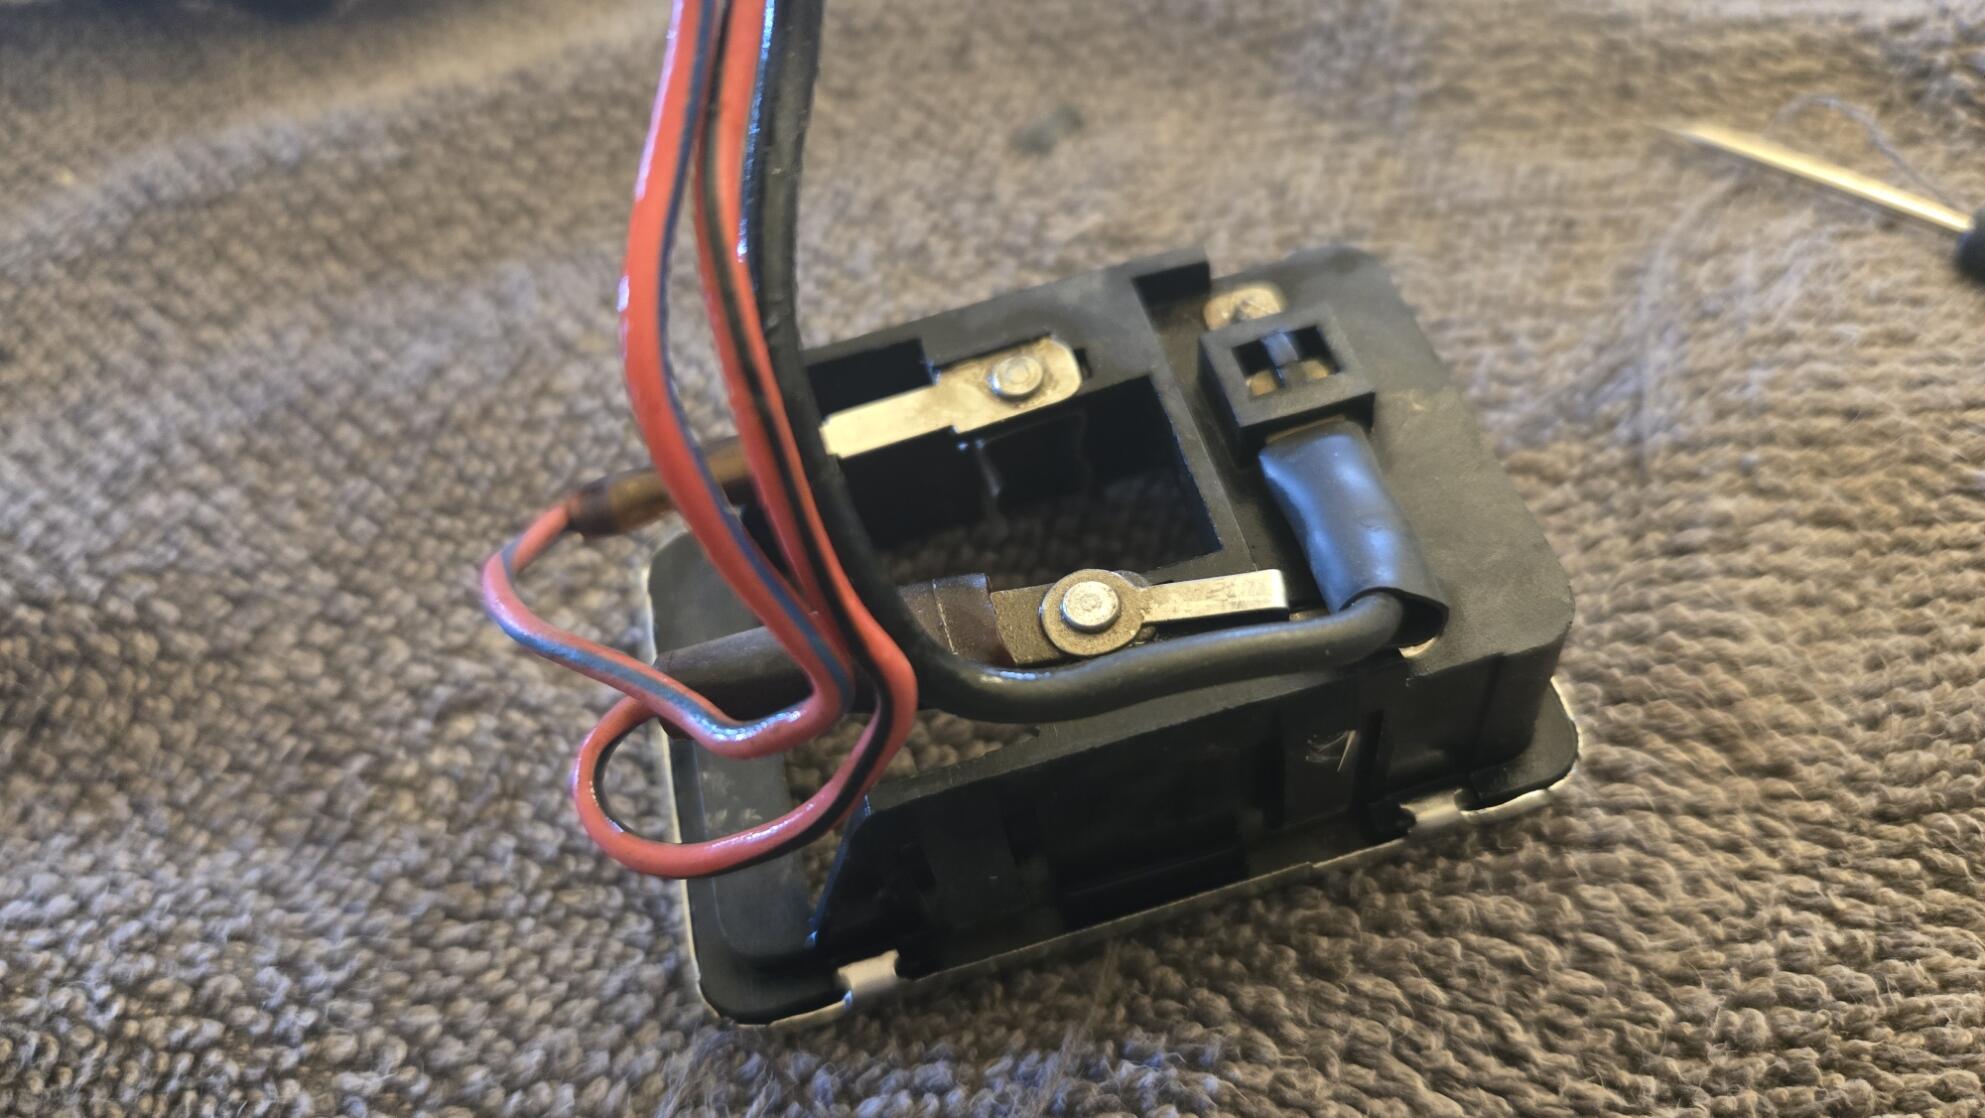
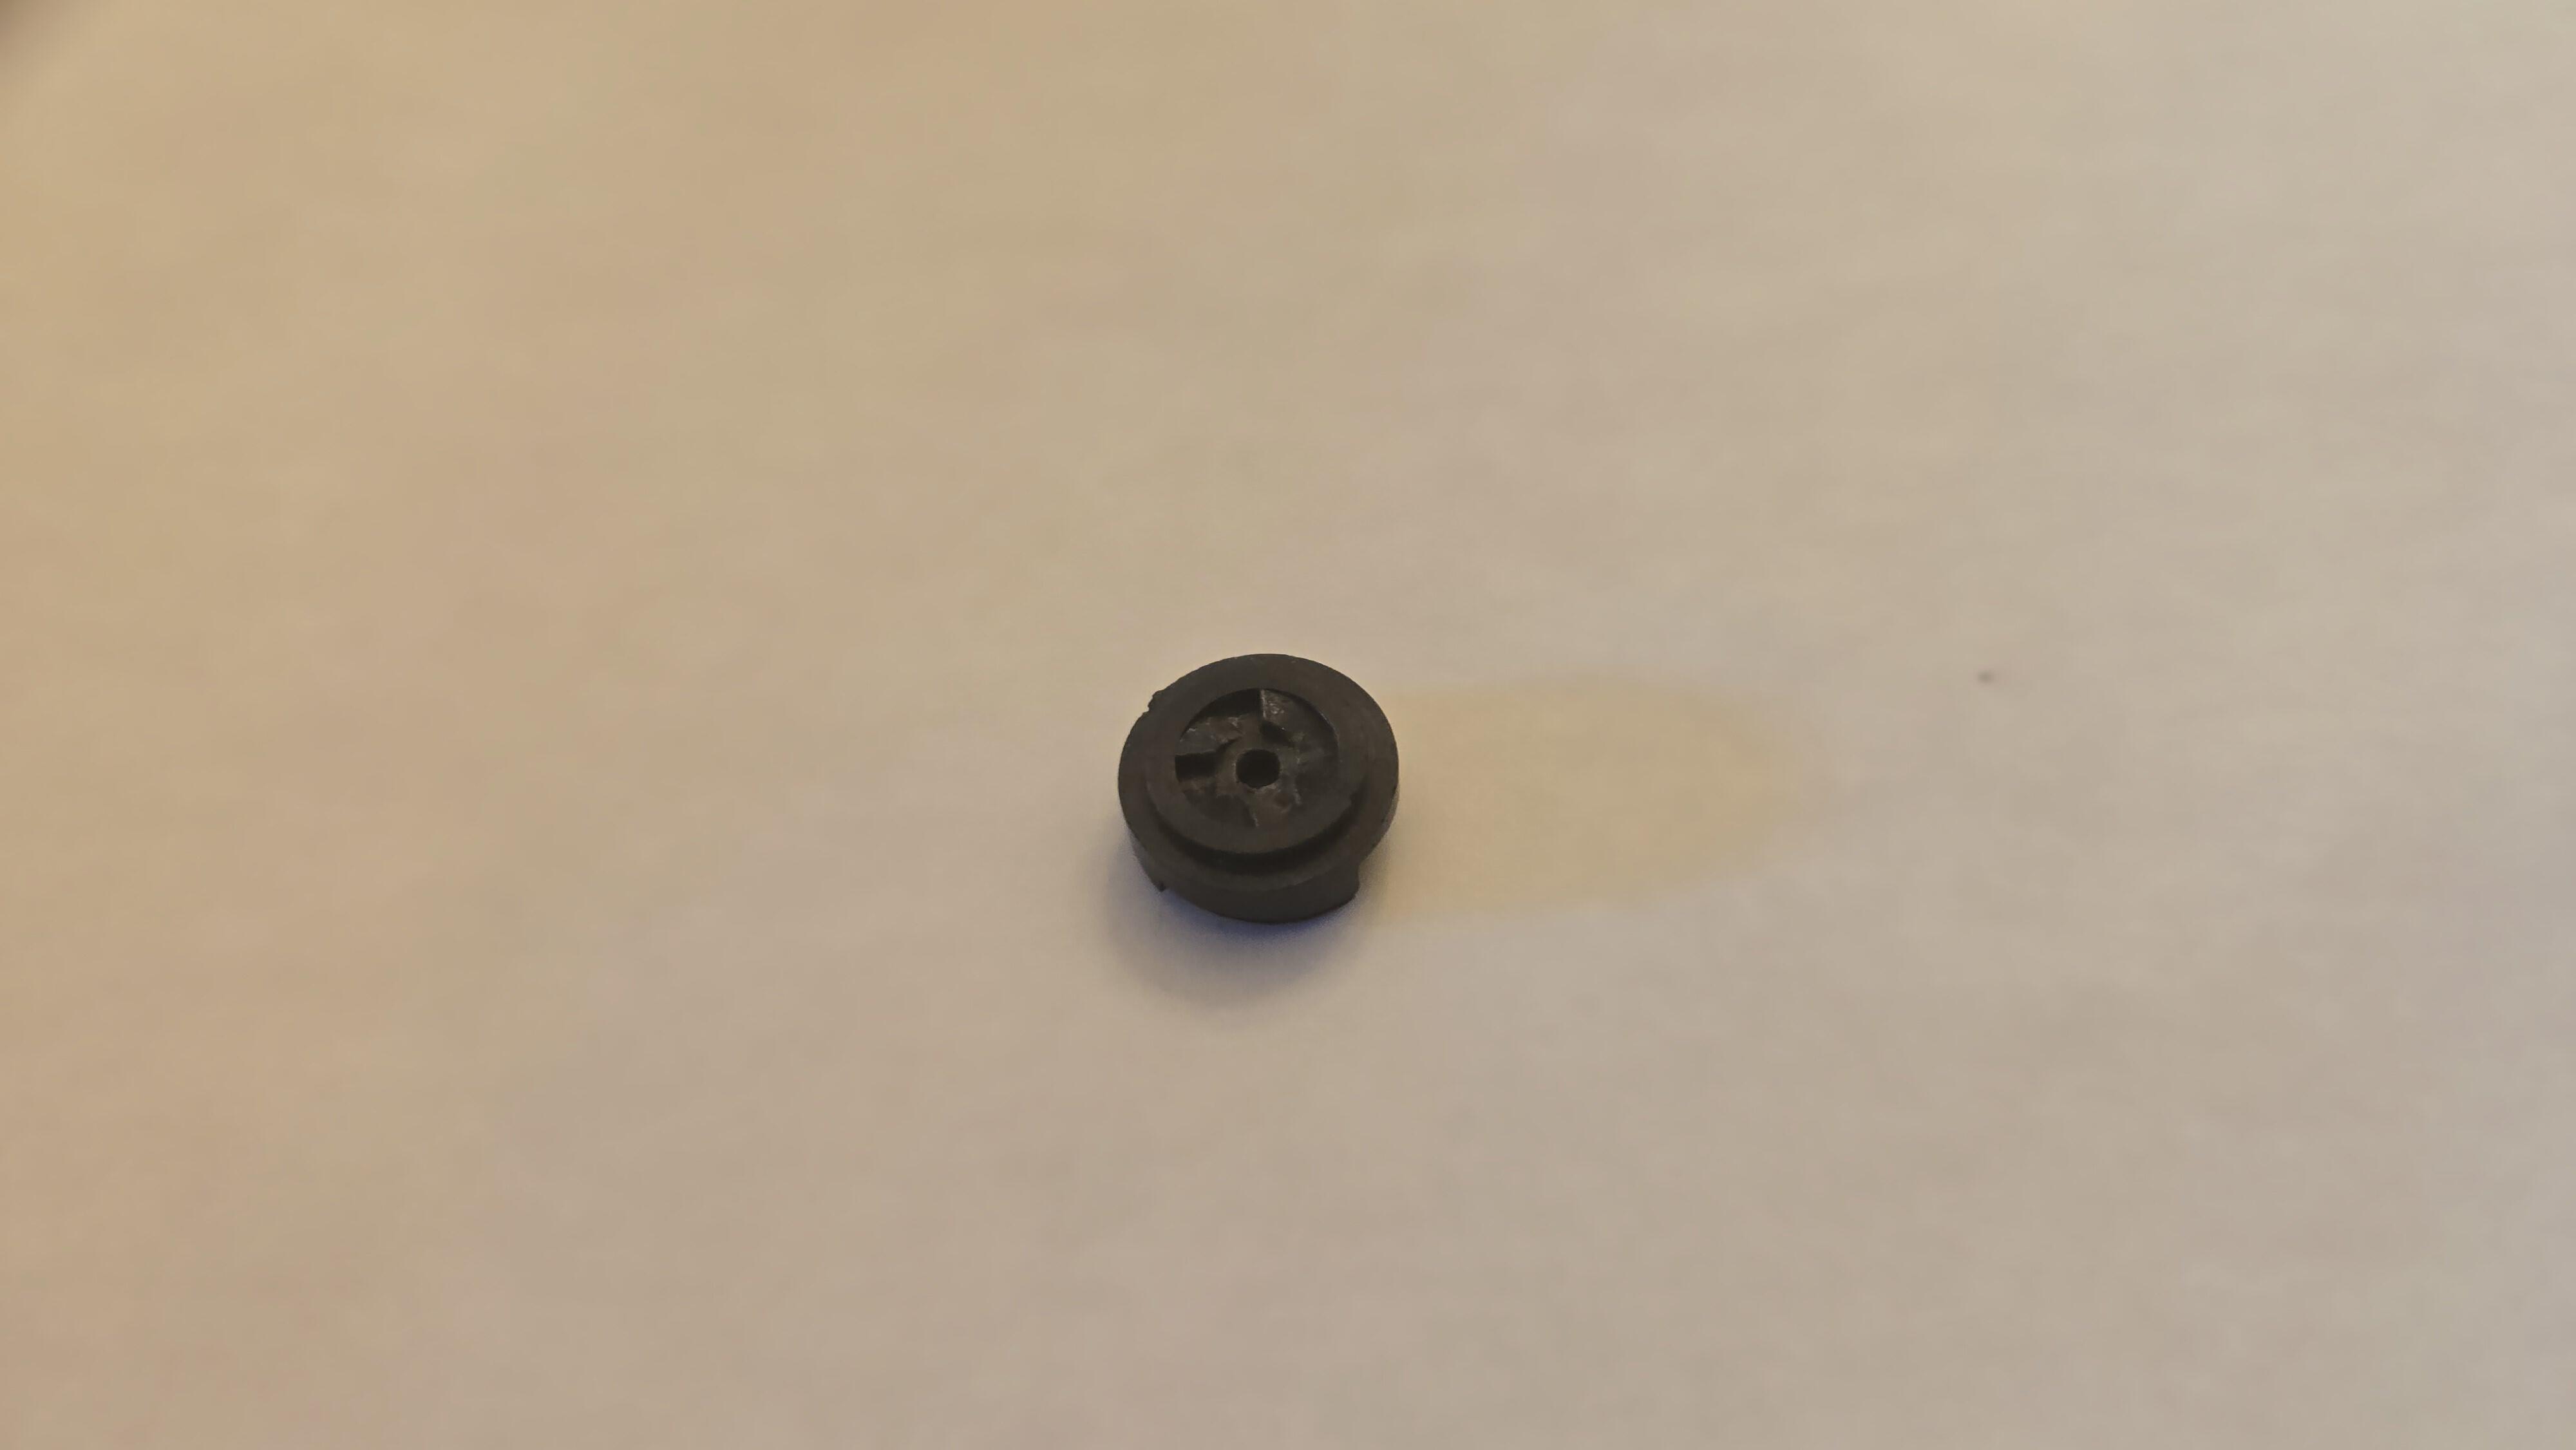
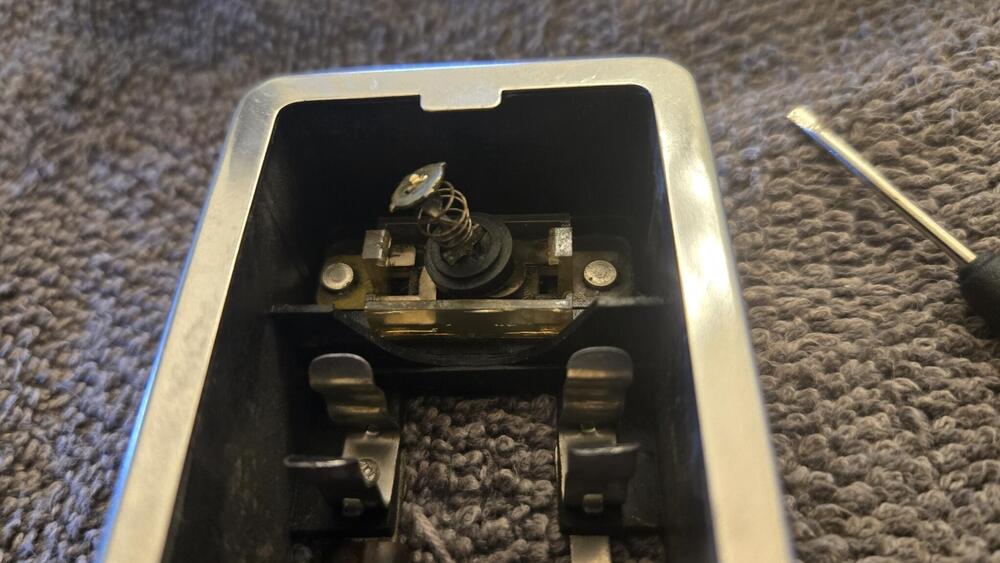
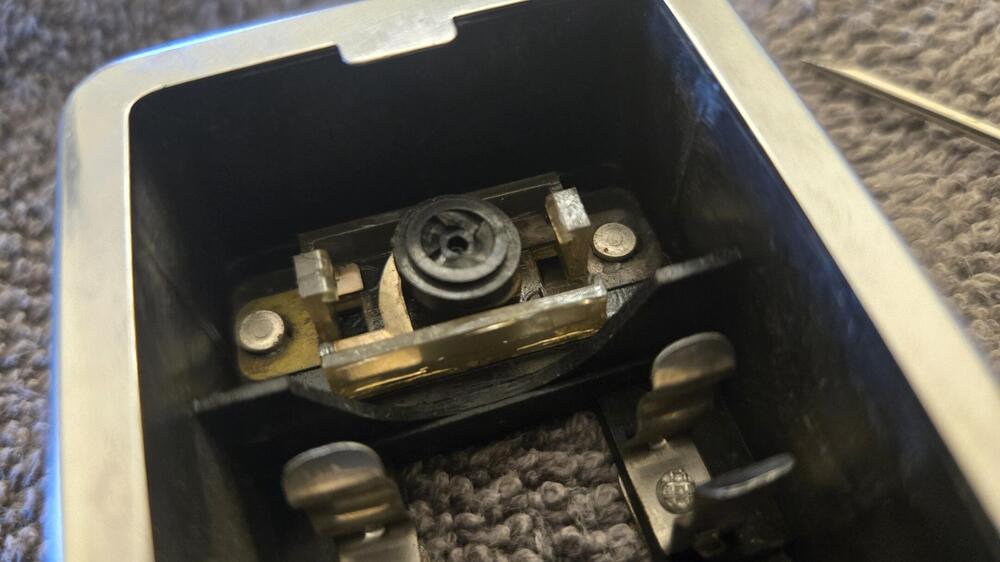
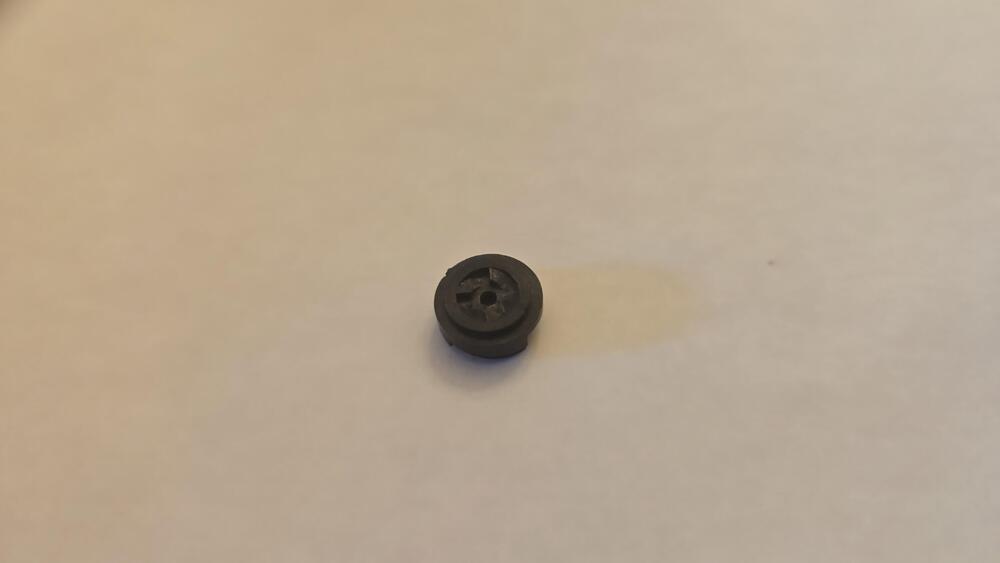
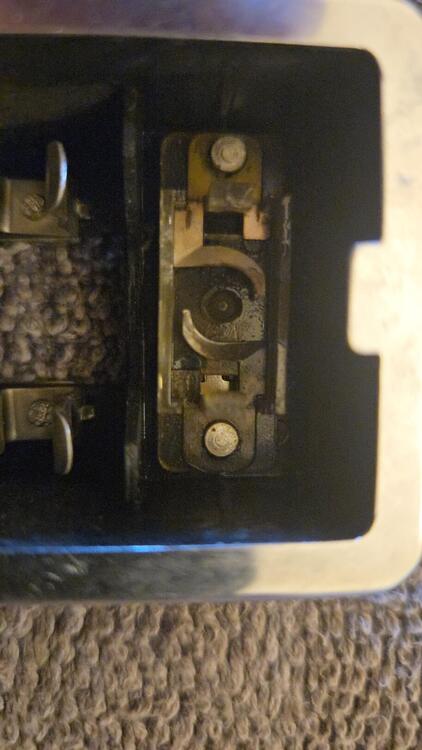
Weird - it's a turn-y switch - it rotates into or out of contact by pressing the button. That little black disc (brass contacts on the bottom side that I didn't take a pic of...) gets turned by the shaft above it. So, it needs to turn freely, have an undamaged top side (the little ramp, triangle thingy's), and the entire mechanism needs to slide / move freely, and all the contact brass needs to be clean. I didn't notice any old grease or lubricant in this one. I was surprised that the "top" was just held on by a couple of clips on either side. Everything is PLASTIC and we don't have very good luck with PLASTIC here in the DESERT, so I was a little nervous. I heated the whole thing up a bit and used an extremely small screwdriver to pry one side at a time. First side was pretty easy - the second was quite a bit harder but eventually the "top" came off and revealed the underlying surprise. The switch is indeed simple and you can test continuity straight through on the rivets both sides or the brass the rivets tie down. Also check continuity through to the bulb holders to make sure corrosion hasn't killed the circuit between the switch and the bulb.

-
I don't see anything unusual other than it has two possible grounds - one that can be provided by the dome switch and/or one that can be provided by the door switches. No one of them interferes with the operation of the other(s). All can be providing (or removing) ground in any combination of the three. The dome light switch itself looks fairly simple.
-
Hmmm, that's one switch that I've never taken apart... Now you have me curious. I think I'll see if I have a spare and drill out the rivets.
-
Yes on the White/Red. Through the hole in the back, attach to the screw lug in the middle right.
-
-
If you need headlight buckets, I have a few.
-
I'm no expert but in the inertia switches I've installed I've mounted them to a hard point so any energy exerted on the unibody could be picked up by the switch.
-
Both are under the center dash. In the blower switch harness is a BLUE that is A/C power. And there is also a 2-pin connector with a B/W and a G for power to the fuel pump. I always put an inertia switch in that circuit.
-
Like the Z's here in ARIZONA...
-
Outstanding.
-
Yup, and those pillars are a bit more complex than they look from the outside. I've cut apart a few Z's and the lower center section isn't as strong as one would hope - I'm sure you're careful in it's support with the roof skeleton removed. I'll be interested in how you reconnect the center sheet metal in the pillars. There are an awful lot of people who painted over that Yellow...
-
Maybe this is the point where you decide which you want most - working tach or good running engine... Back when I learned to drive - and for years thereafter - cars didn't come with tachometers. They ran and we drove them all over the place anyway. (but, from the factory that car ran VERY WELL with a stock coil, a stock ballast resistor, a stock distributor, AND a stock tachometer. Just sayin')
-
Okay, cool. thanks for the correction.
-
Easy test, take the ballast RESISTOR out of the equation: Take the G/W wire OFF the ballast, hook it up to the B/W that's connected to the other end of the ballast. Run the engine. Is it better? Is it worse? Don't notice a change at all? (Better: leave the ballast out - figure a good way to connect the G/W and B/W permanently cuz VOLTAGE. Worse: hook it back up the way it was. No diff: Hook it back up the way it was - if you're sure there was no change.) (I haven't said yet what I'd really recommend which is: replace all your harness wiring, especially the engine bay harness which suffers the most degradation over 50+ years of living on this Earth... Few people listen - even me - I'm just barely doing that in my own car (and it turned 50 last year).)
-
O.P., you should probably pull a spark plug or six and see if (how much) they are sooted up. The Fuel Pressure Regulator (FPR) on an EFI engine is "vacuum referenced" or Manifold Absolute Pressure (MAP) referenced. Meaning it has a hose connection to the intake manifold. The FPR is supposed to maintain a fairly constant fuel pressure differential with the manifold pressure. Nissan uses 2.5 BAR or 36.3 PSI as the required differential. That means WITH the engine NOT RUNNING and fuel pump RUNNING the pressure to the fuel rail and injectors should ~36.3 PSI. When the engine IS running, the FPR will SUBTRACT the manifold pressure while under VACUUM or ADD the manifold pressure if under boost (positive manifold pressure). You don't need to consider boost. But, say you have 10 PSI of VACUUM while the engine is running at idle, your pressure at the fuel rail and injectors should be ~26.3 PSI (36.3 - 10 PSI). First: The ECU DOES NOT get the "tach signal" - that circuit if for the GAUGE ONLY. It is pointless to look for it. The Electronic Ignition Module figures out when to send a signal for the coil to fire - it gets the information from the distributor electronics (pretty sure - I haven't handled the original Bosch L-Jetronic for a blue moon...) Second: Have you tried operating the engine WITHOUT the cold start valve? Disconnected from wiring and/or fuel? (IS your engine only running on the cold start fuel??)