jfa.series1
 Subscriber
-
Joined
-
Last visited
Everything posted by jfa.series1
-
 Joe - I installed new squeegee strips in the same manner as the fuzzy strips we recently covered: an even spread of pop rivets. Jim
 -
Remember - you are known by the company you keep. We'll always have Austin!!!
-
@Zedyone_kenobi - did mine on the cheap and refinished it myself.
-
Here: https://www.240zrubberparts.com/
-
Sounds a bit like the slave cylinder has failed. it might be an internal failure without an external leak. Get one person to operate the clutch pedal, another to observe if the clutch fork is moving.
-
Torrential rain in our area all day, kept us from attending a really great car show that I've been looking forward to since last year. So... it was back to the bench to continue work on restoration & refurb projects. Today's output: three inspection lights - one complete with new lens and two others waiting on bulbs and lens.
-
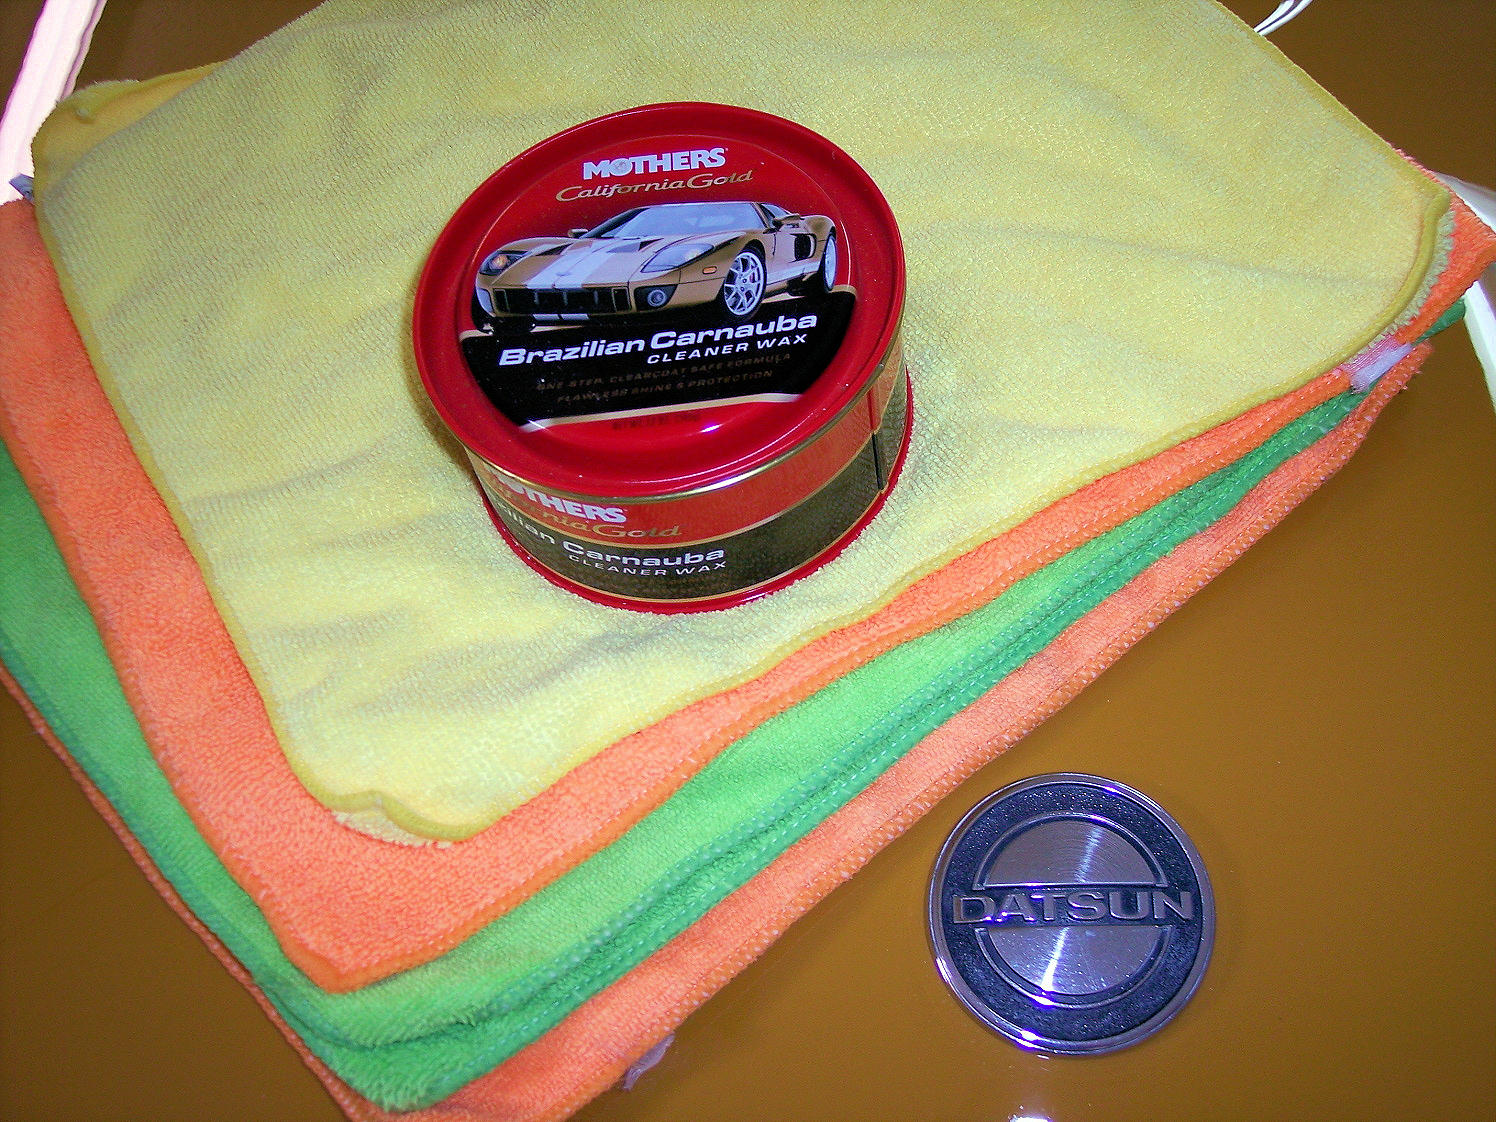
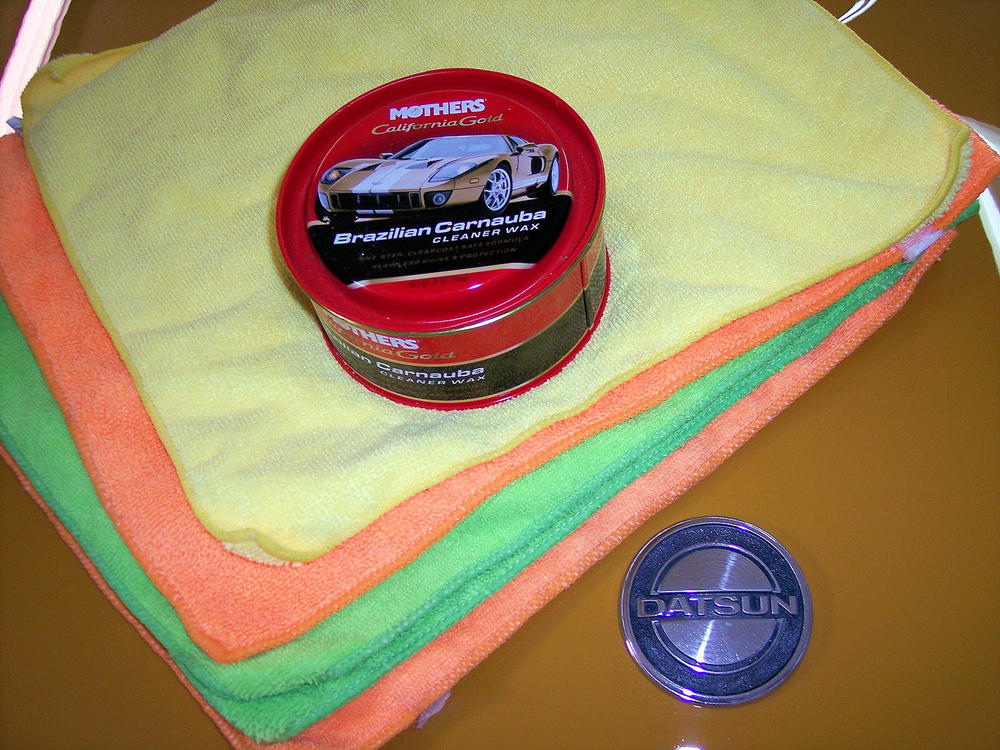
I treated Baby to a Brazilian today. Pretty sure I heard a deep sigh of appreciation in the exhaust note afterwards.
-
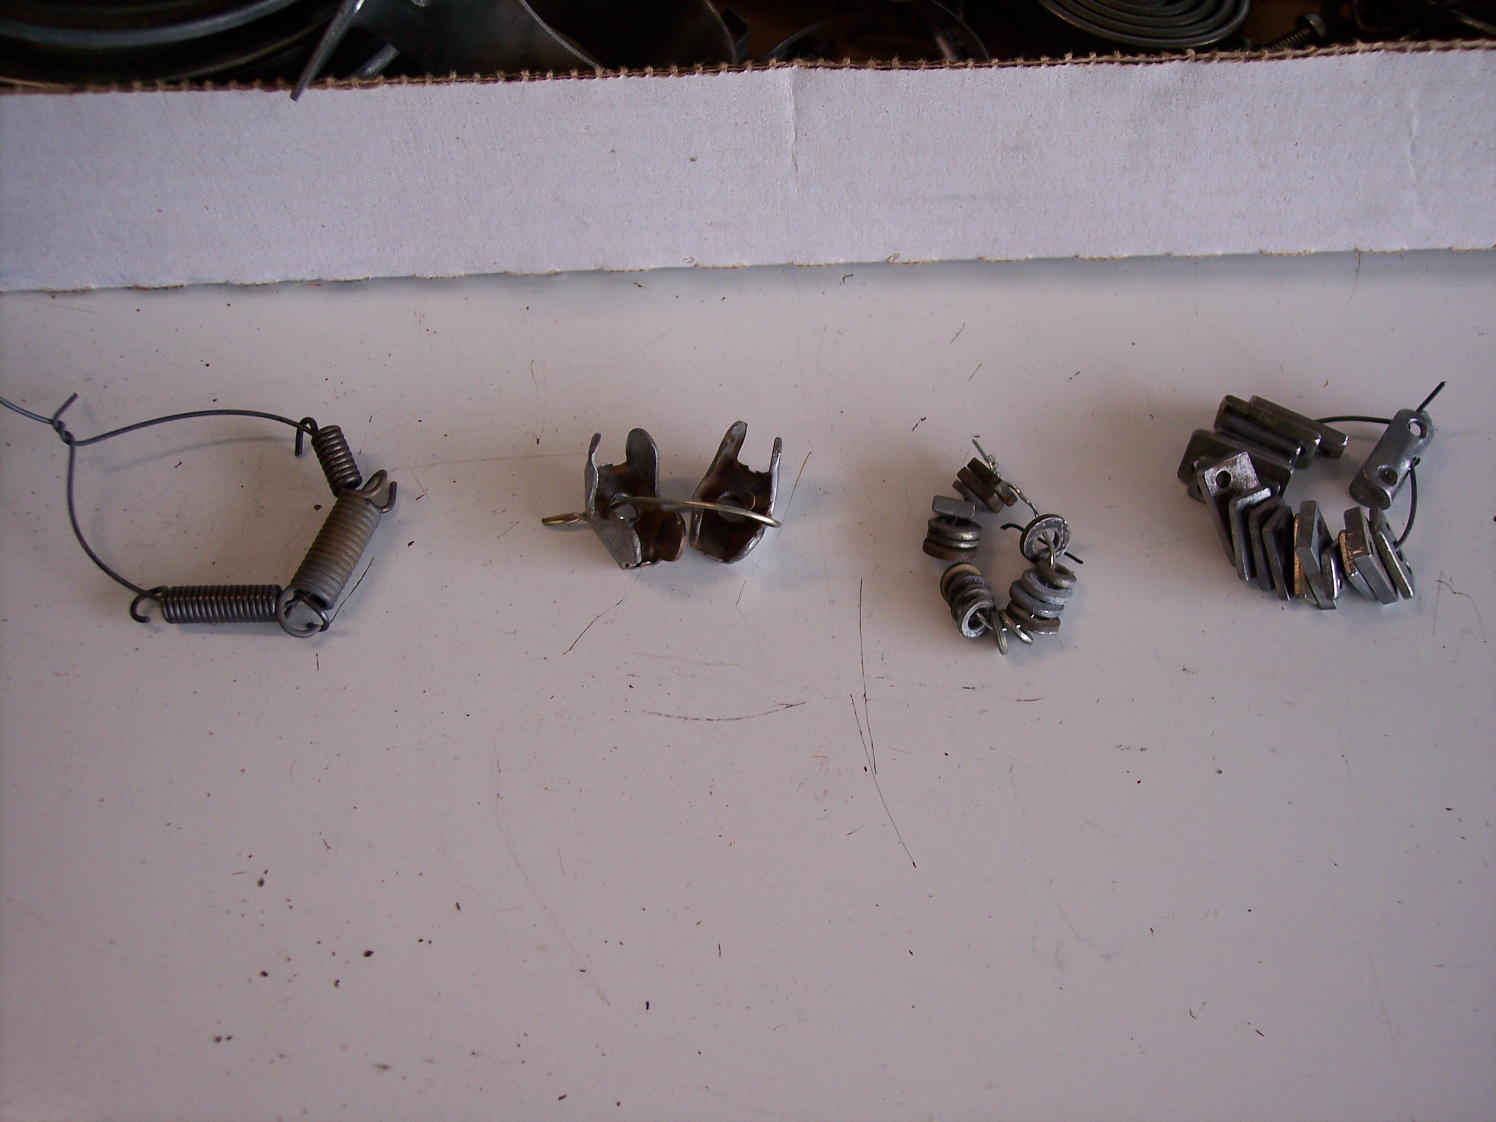
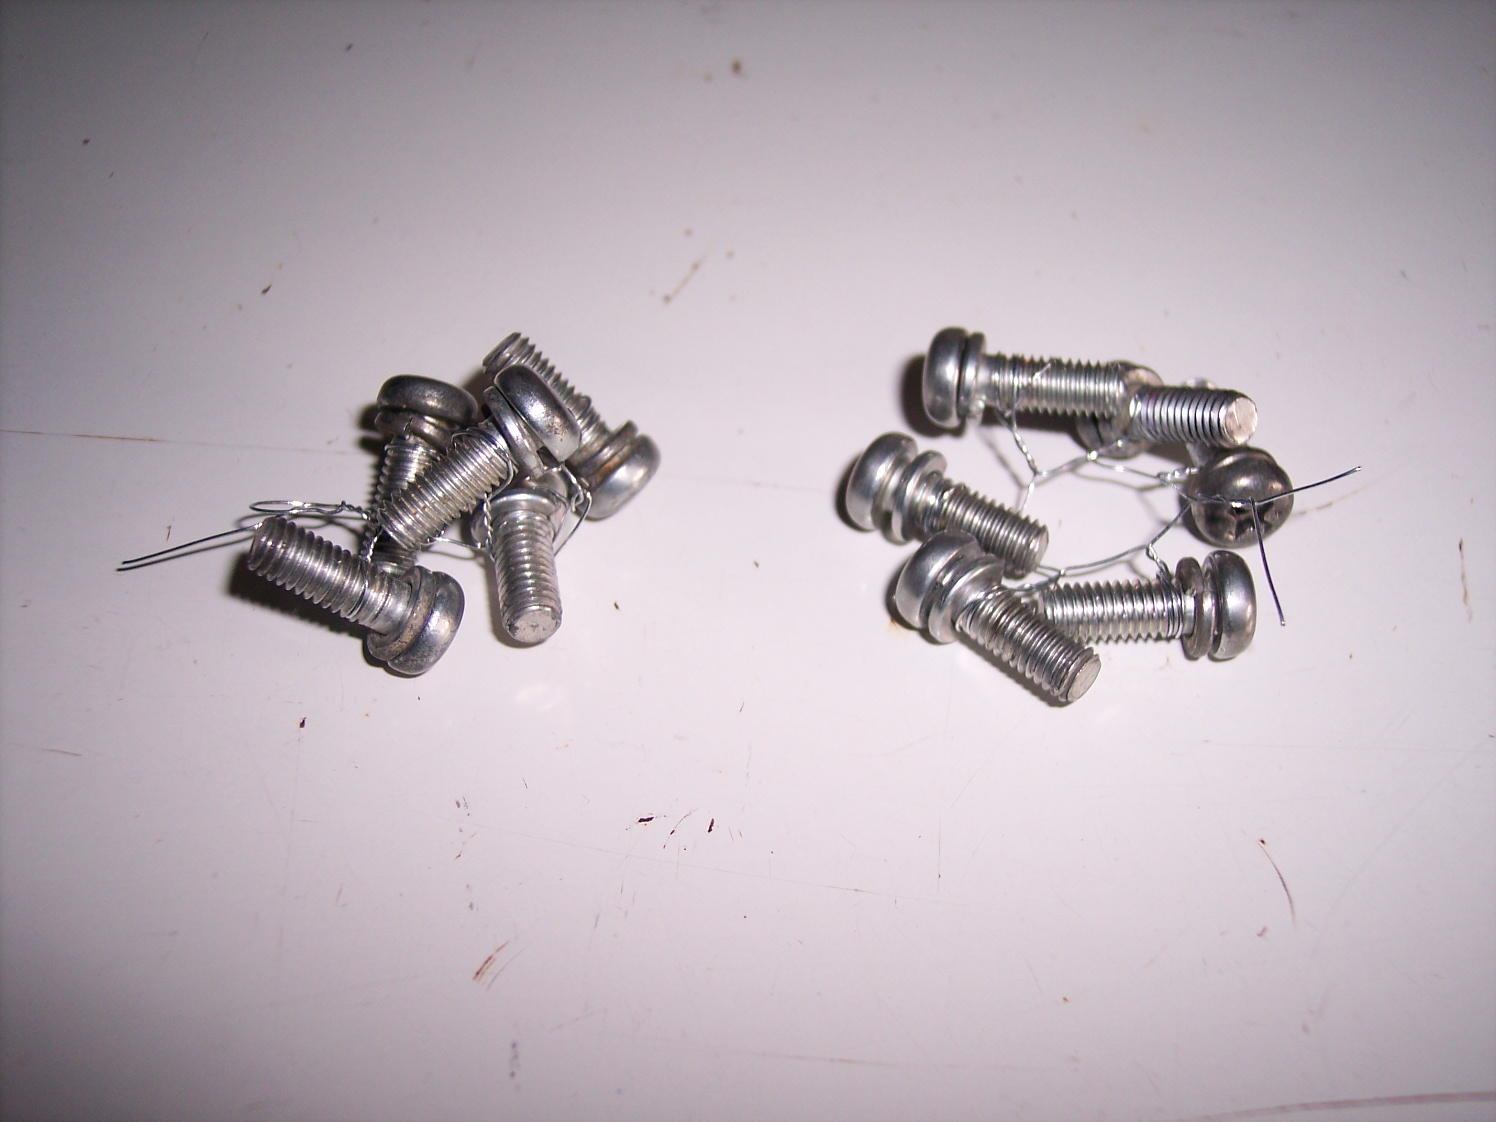
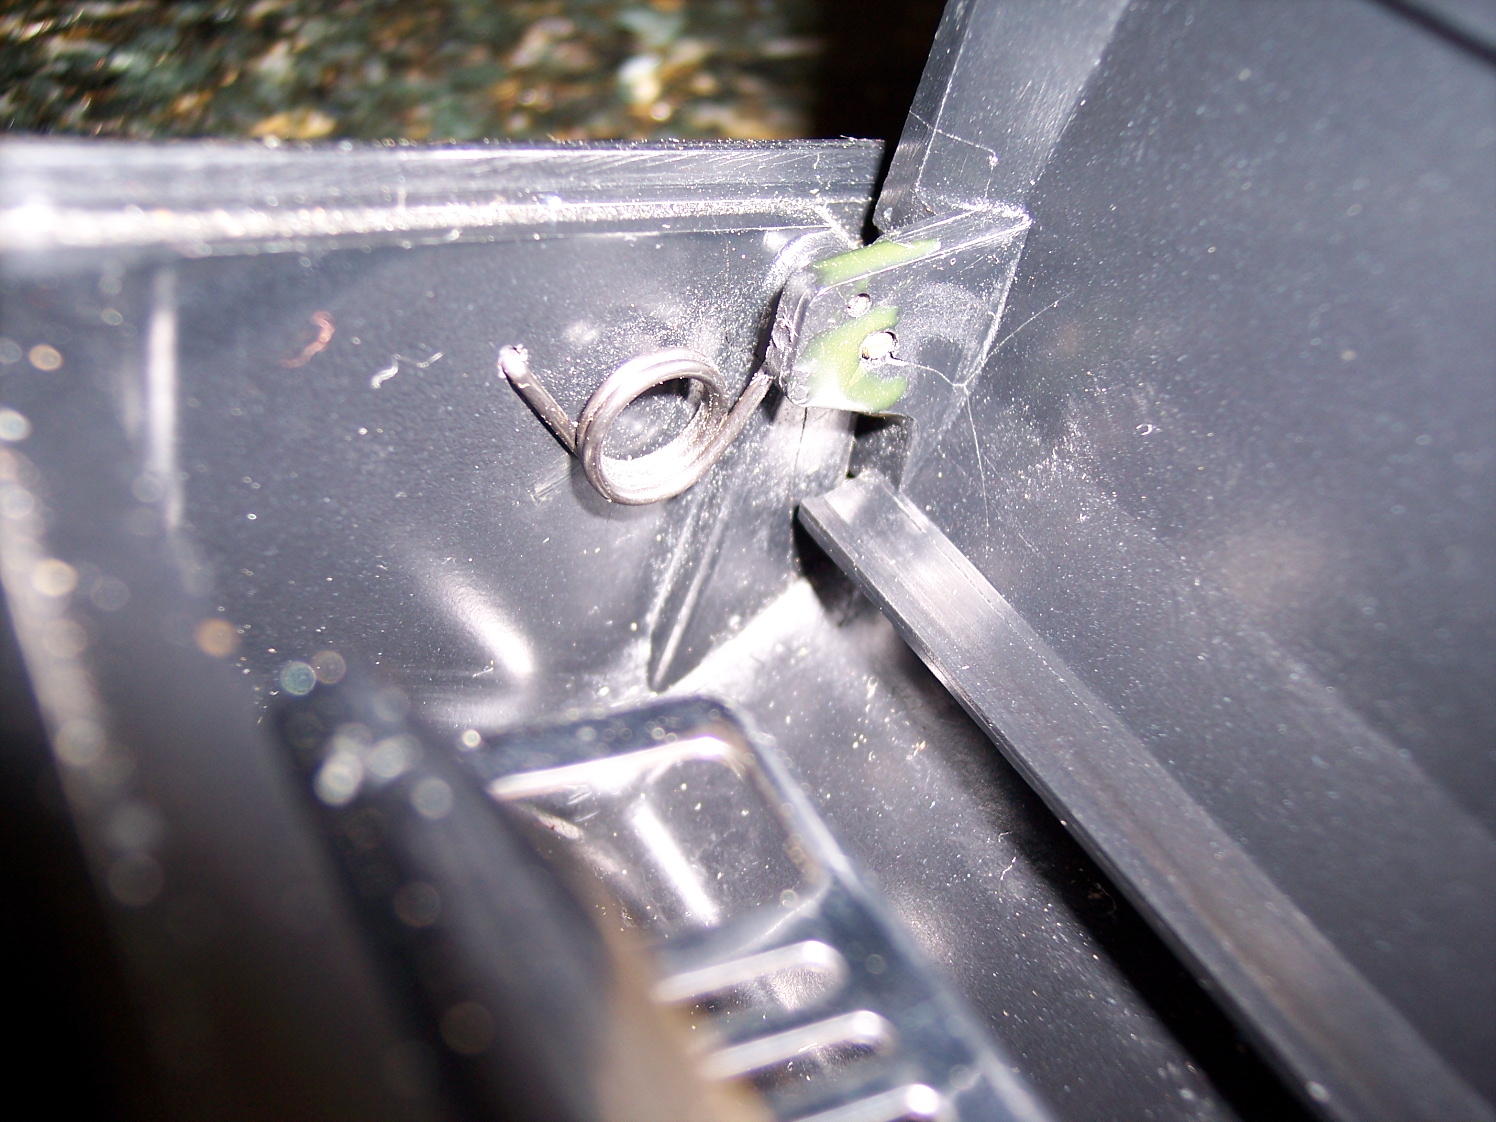
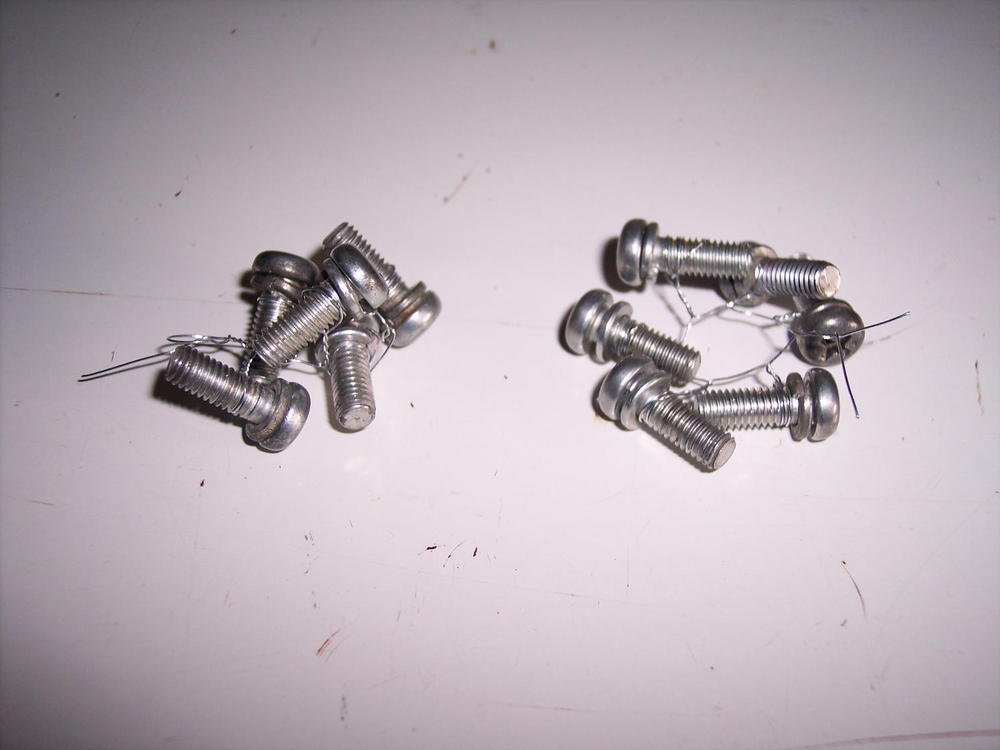
I understand your concern over remembering where everything goes after plating - we all go thru that. Here's a suggested approach: - During disassembly, carefully bag and tag everything immediately as it comes off the car. DO NOT consolidate stuff, make it specific. Use a paper tag inside the zip bag with the parts to identify what it is / where it came from - a felt tip marker on the bag can easily rub off. - Thoroughly clean everything in a bag, remove all rust, dirt, paint, ...etc. The better you clean things, the better your plating results (remember the old axiom: garbage in. garbage out). A wire brush wheel on a bench grinder is great! Take stuff apart wherever possible: bolts, nuts, washers, springs, ...etc. If the factory plated things before assembly, so should you. - When a bag of parts is clean, photo the parts with the paper tag visible. Put it all back in the bag until all is done. - Small parts like washers, nuts, tiny springs can and will get lost in plating if left loose. Use some thin, soft wire to make closed loops for like things: nuts, washers, springs. For tiny screws, tightly wrap thin wire a couple of times around the threads then give it a twist to lock it in place (see pics). - When everything is cleaned, the moment of truth arrives: time to dump everything into a big zip bag to take to plating. Save your small bags and tags for use later when it all comes back. If you've properly documented everything, you should be able to return all parts to their original bag with tag. Good luck. -

-
As @Patcon says, there is no such list. A very general "rule of thumb" is that unpainted parts from the firewall forward are plated yellow zinc and parts aft of the firewall are clear (white) zinc. One noted exception to the clear zinc rule is the fuel filler cap and neck - those are yellow zinc. Your best bet is to surf for pics of engine bays and other areas that have been restored to locate parts to be plated.
-
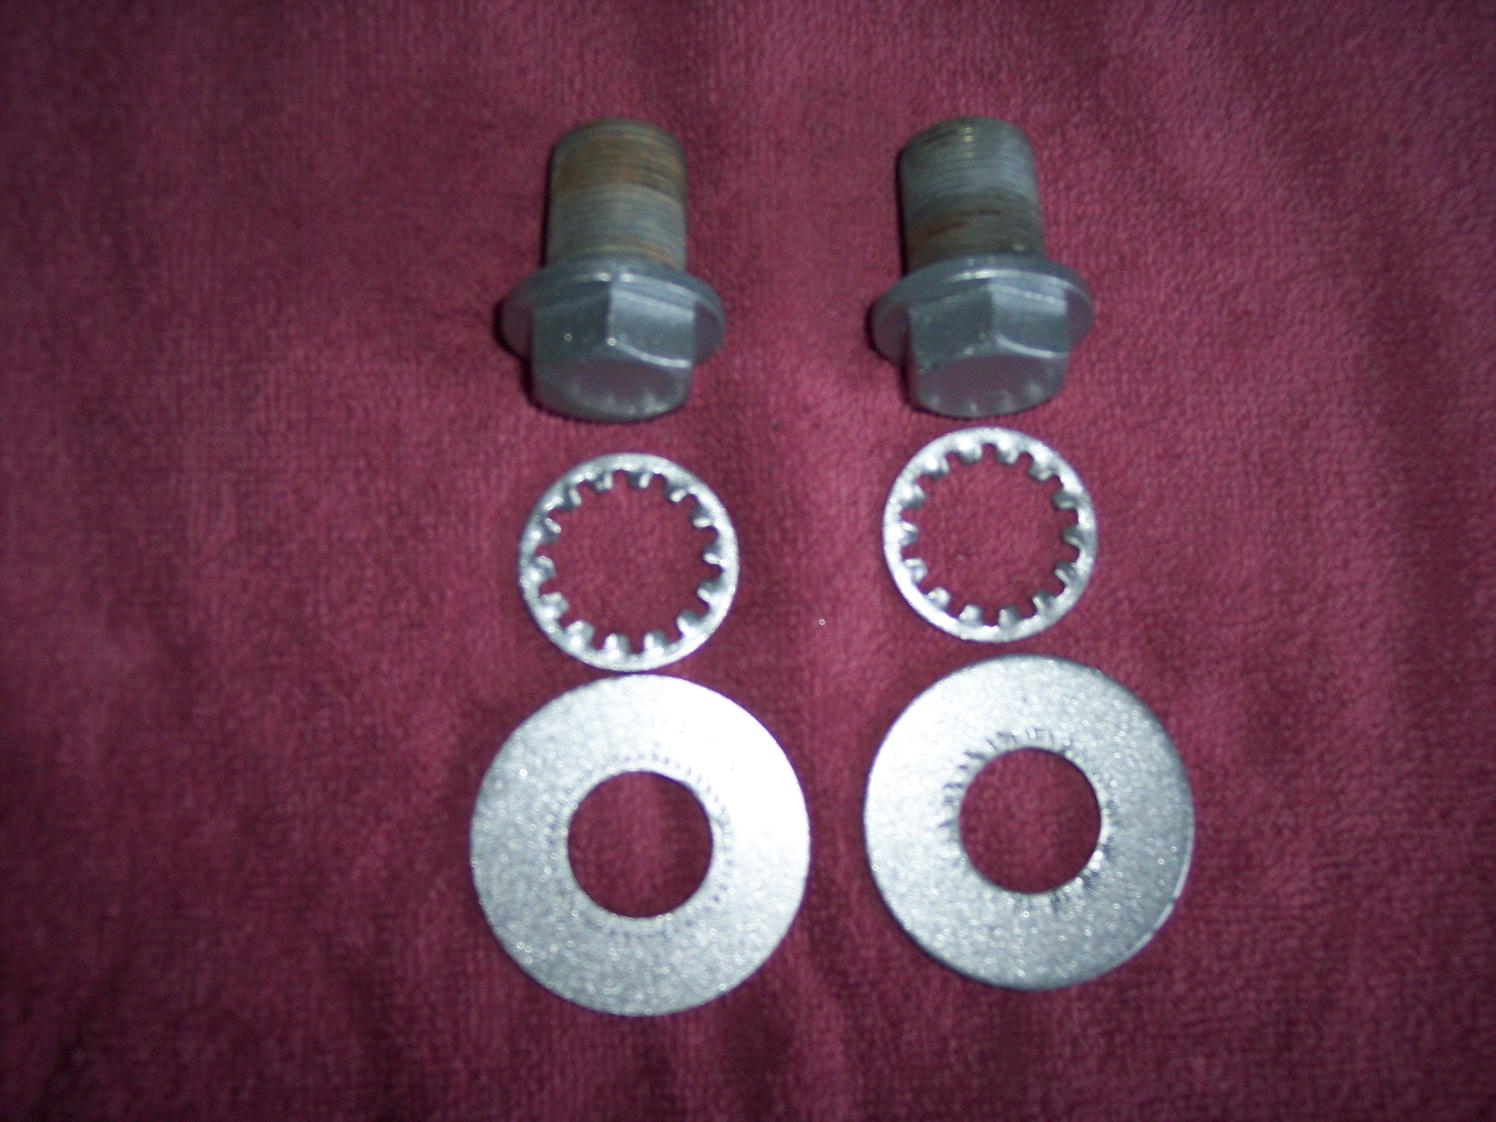
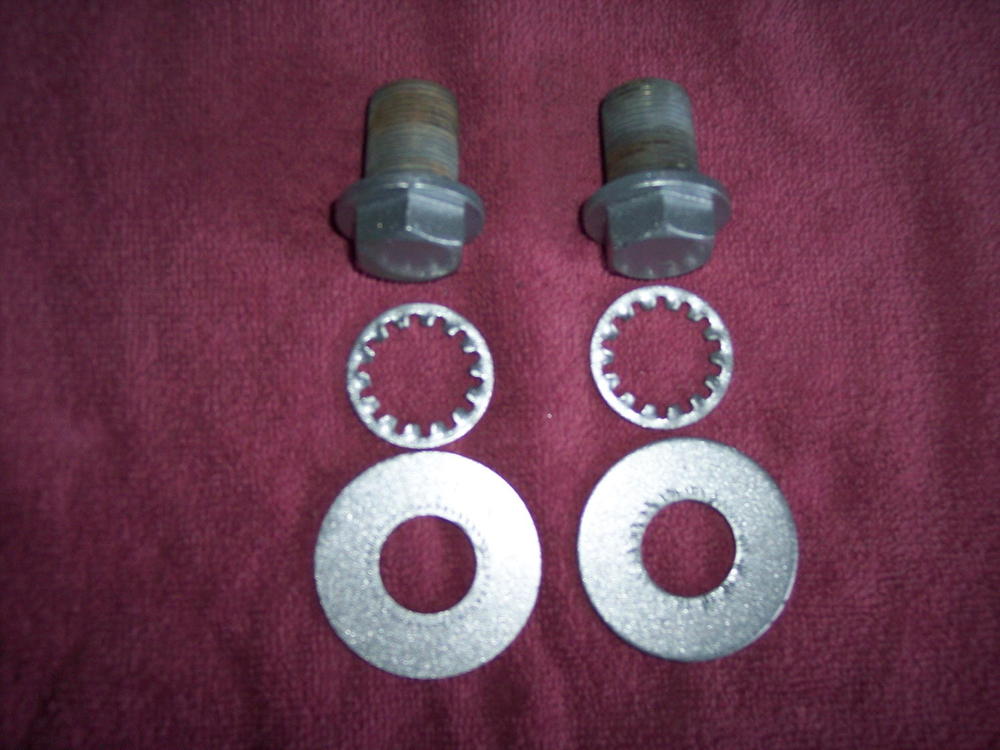
Given some time to think back I finally figured out how I have two extra bolt sets. I had a machine shop press out the spindles on the control arms and one was stuck so badly that the control arm bent! I ordered a replacement from the Z Barn (remember Roger?) and it came with the bolts installed - typical excellent service as always.
-
FYI - I have two of these rascals available if needed. I have no idea how I came to have only two, and yes - all four of mine are installed. Too many beers between then and now to remember these details.
-
That's some fine looking Canadian patina you have there!
-
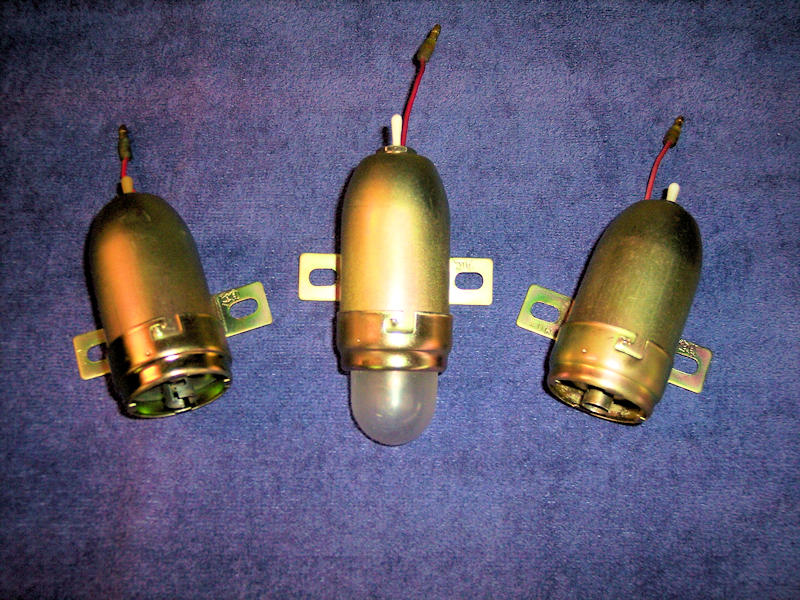
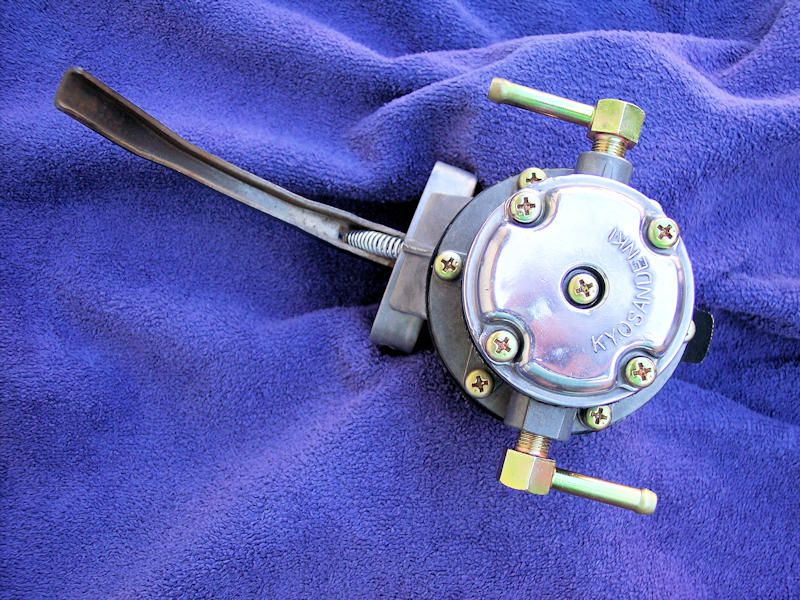
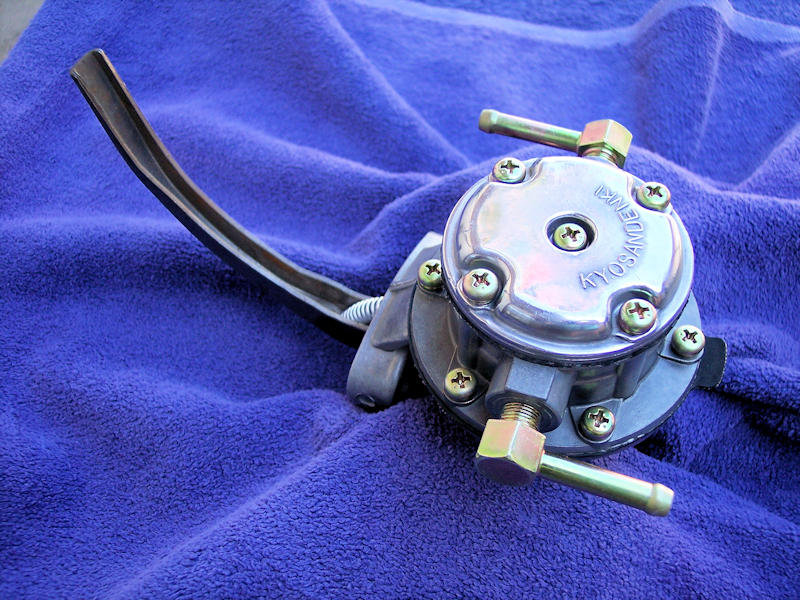
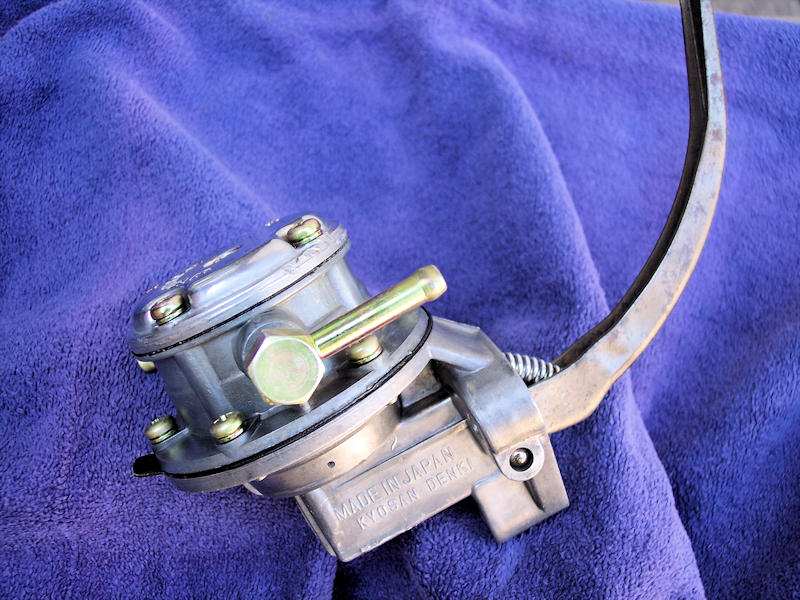
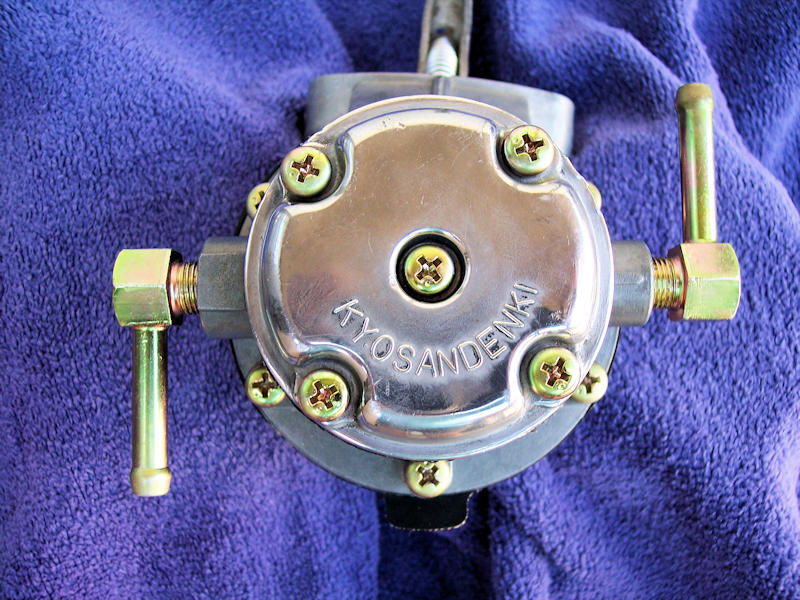
I just wrapped up another Rescue & Refurb project - this Kyosandenki fuel pump. It turned out really well so I feel like strutting a bit! It will be listed for sale as soon as I get some other stuff behind me. So many partZ - so little time.
-
I noticed the seller's Ontario postal code is L0L - Canadian humour?
-
Yet another welcome to the group. It sounds like you have the gift that keeps on giving. By now you probably know there's a lot of Z activity in S.A. and Austin.
-
Tarting up the ride a bit in prep for ZCON???
-
If you do end up needing a new one, you can get it here: https://www.240zrubberparts.com/apps/webstore/products/show/4423653 He pretty much charges a flat rate shipping for one or more products so shop his site to see if there are additional items you need and order all at once. If you get a new one the trick to installing it is to gently remove the pins from the plug, pull the wiring back thru the old grommet, reverse the process for the new one. Easy peasy, been there - done that. If the plastic covering on the wiring is brittle or cracked, this would be a good time to get some new shrinkwrap tubing and install it before the plug goes back on.
-
The FSM shows the R blower harness power connected to a L (blue) wire - looks like you are on track there. And it looks like a blue wire is also power for the radio.
-
The FSM says the map light RL wire connects to a R wire that is common to all the gauges - you should have an open female connector nearby. The black wire should be a nearby ground. At least you figured out the male plug red wire on the blower harness is for power - could have been exciting! Do you have the FSM and '71 Supplement downloaded for reference?
-
I can't speak to the kits but my experience with local hardware and big box stores is that the available metric fasteners are what I call Euro-spec. That is, unlike our JDM-spec fasteners which are even number mm wrench sizes, the local supplies are always odd number mm sizes. I can usually get the correct thread diameter and pitch but have to settle for a "wrong" size bolt-head or nut for a non-visible fix. Trying to match a correct bolt-head style is usually impossible. That's why I and so many others hoard all the fasteners we can find from parts cars.
-
Check out this thread I started: https://www.classiczcars.com/forums/topic/60079-ss-bumpers-from-vietnam/ You'll see I comment on prior experience with Taiwan-mfg chrome bumpers purchased from MSA and Futofab. I've had no experience with SS bumpers from Taiwan. I had very good results with the SS rear bumper from Vietnam. Another member in Canada purchased a full set of the SS bumpers from Vietnam, he might see this and add his comments.
-
Yep, that should solve the problem. I just checked the '72 FSM (BE-5) and find that wires RB & R connect to the reverse switch. Tracing the R wire it later becomes LR - consistent the OP's post. RB is the wire that travels to the rear of the car to power both lamps. I found the OP's diagram in the '71 FSM Supplement, page 26.
-
-
Steve - I agree with the logical aspect of your recommendation, just not the actual physical aspect. Looking at my car, the reverse switch wiring is part of the engine bay harness - emerging just below the battery. I still can't figure out the connection point in question. Jim
-
Joe - I presume you're talking about the fuzzy strips on the top of the door panel. A few folks have been successful at reusing the OE staples but this is a pretty tough process. Glue is not a good option for this install - probably why the factory did not go this route. I went with a set of 8 small pop rivets and it worked out well. A key trick is to get the rivet head well seated into the fuzzy material by using something small and pointed to pull the fuzzy hairs out from under the rivet head before squeezing the rivet down to finish. This will ensure the rivet head is not sticking out with the potential to contact the glass. Hope this helps. Jim