jfa.series1
 Subscriber
-
Joined
-
Last visited
Everything posted by jfa.series1
-
 This is a 'Denki I refurbished, no such cracks or cuts.
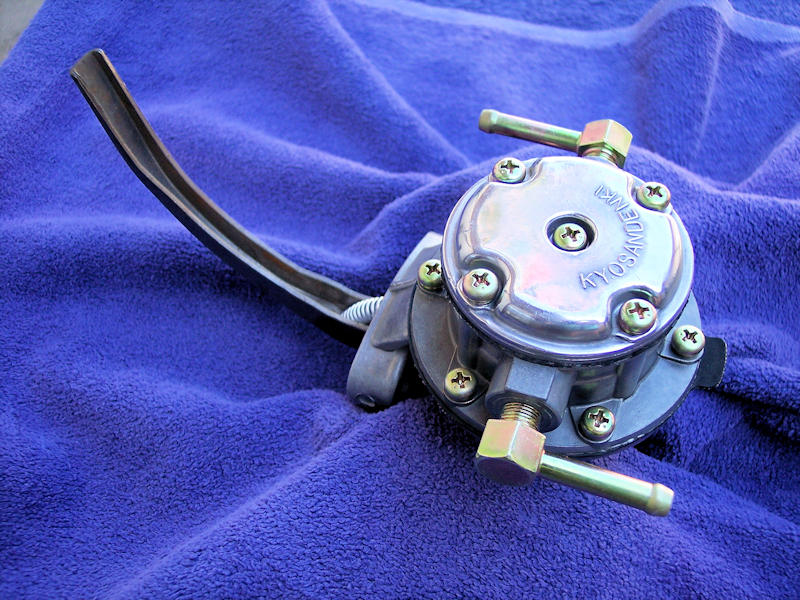
-
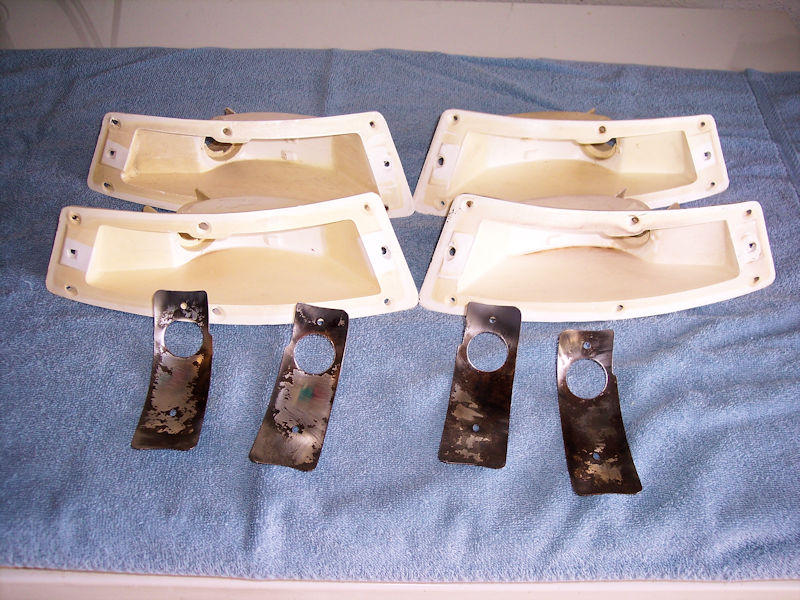
View Advert 240Z Tail Light Assemblies A left and right set of US-spec 240Z tail lights complete with wiring harnesses. The lenses are in excellent condition with no cracks, scratches, chips, or other damage. They have been polished to a high shine, very much like-new. The chrome bars are OE and in very good condition. They have been polished and the center sections repainted in correct flat black. The left side bar has a chrome pen touch-up about 3/16” long (see detail pic). The back panels are in excellent condition – no cracks or other damage, all of the captive acorn nuts are in place with no damage. These lenses were not disassembled for the refurb. The wiring harnesses have been checked for correct operation. There are no cuts or splices in the wiring, all bulbs are included. $295 includes standard domestic shipping, international shipping available at actual cost. Payment via PayPal. PM if interested. Thanks! Advertiser jfa.series1 Date 08/08/2020 Price $295.00 Category Parts for Sale
-
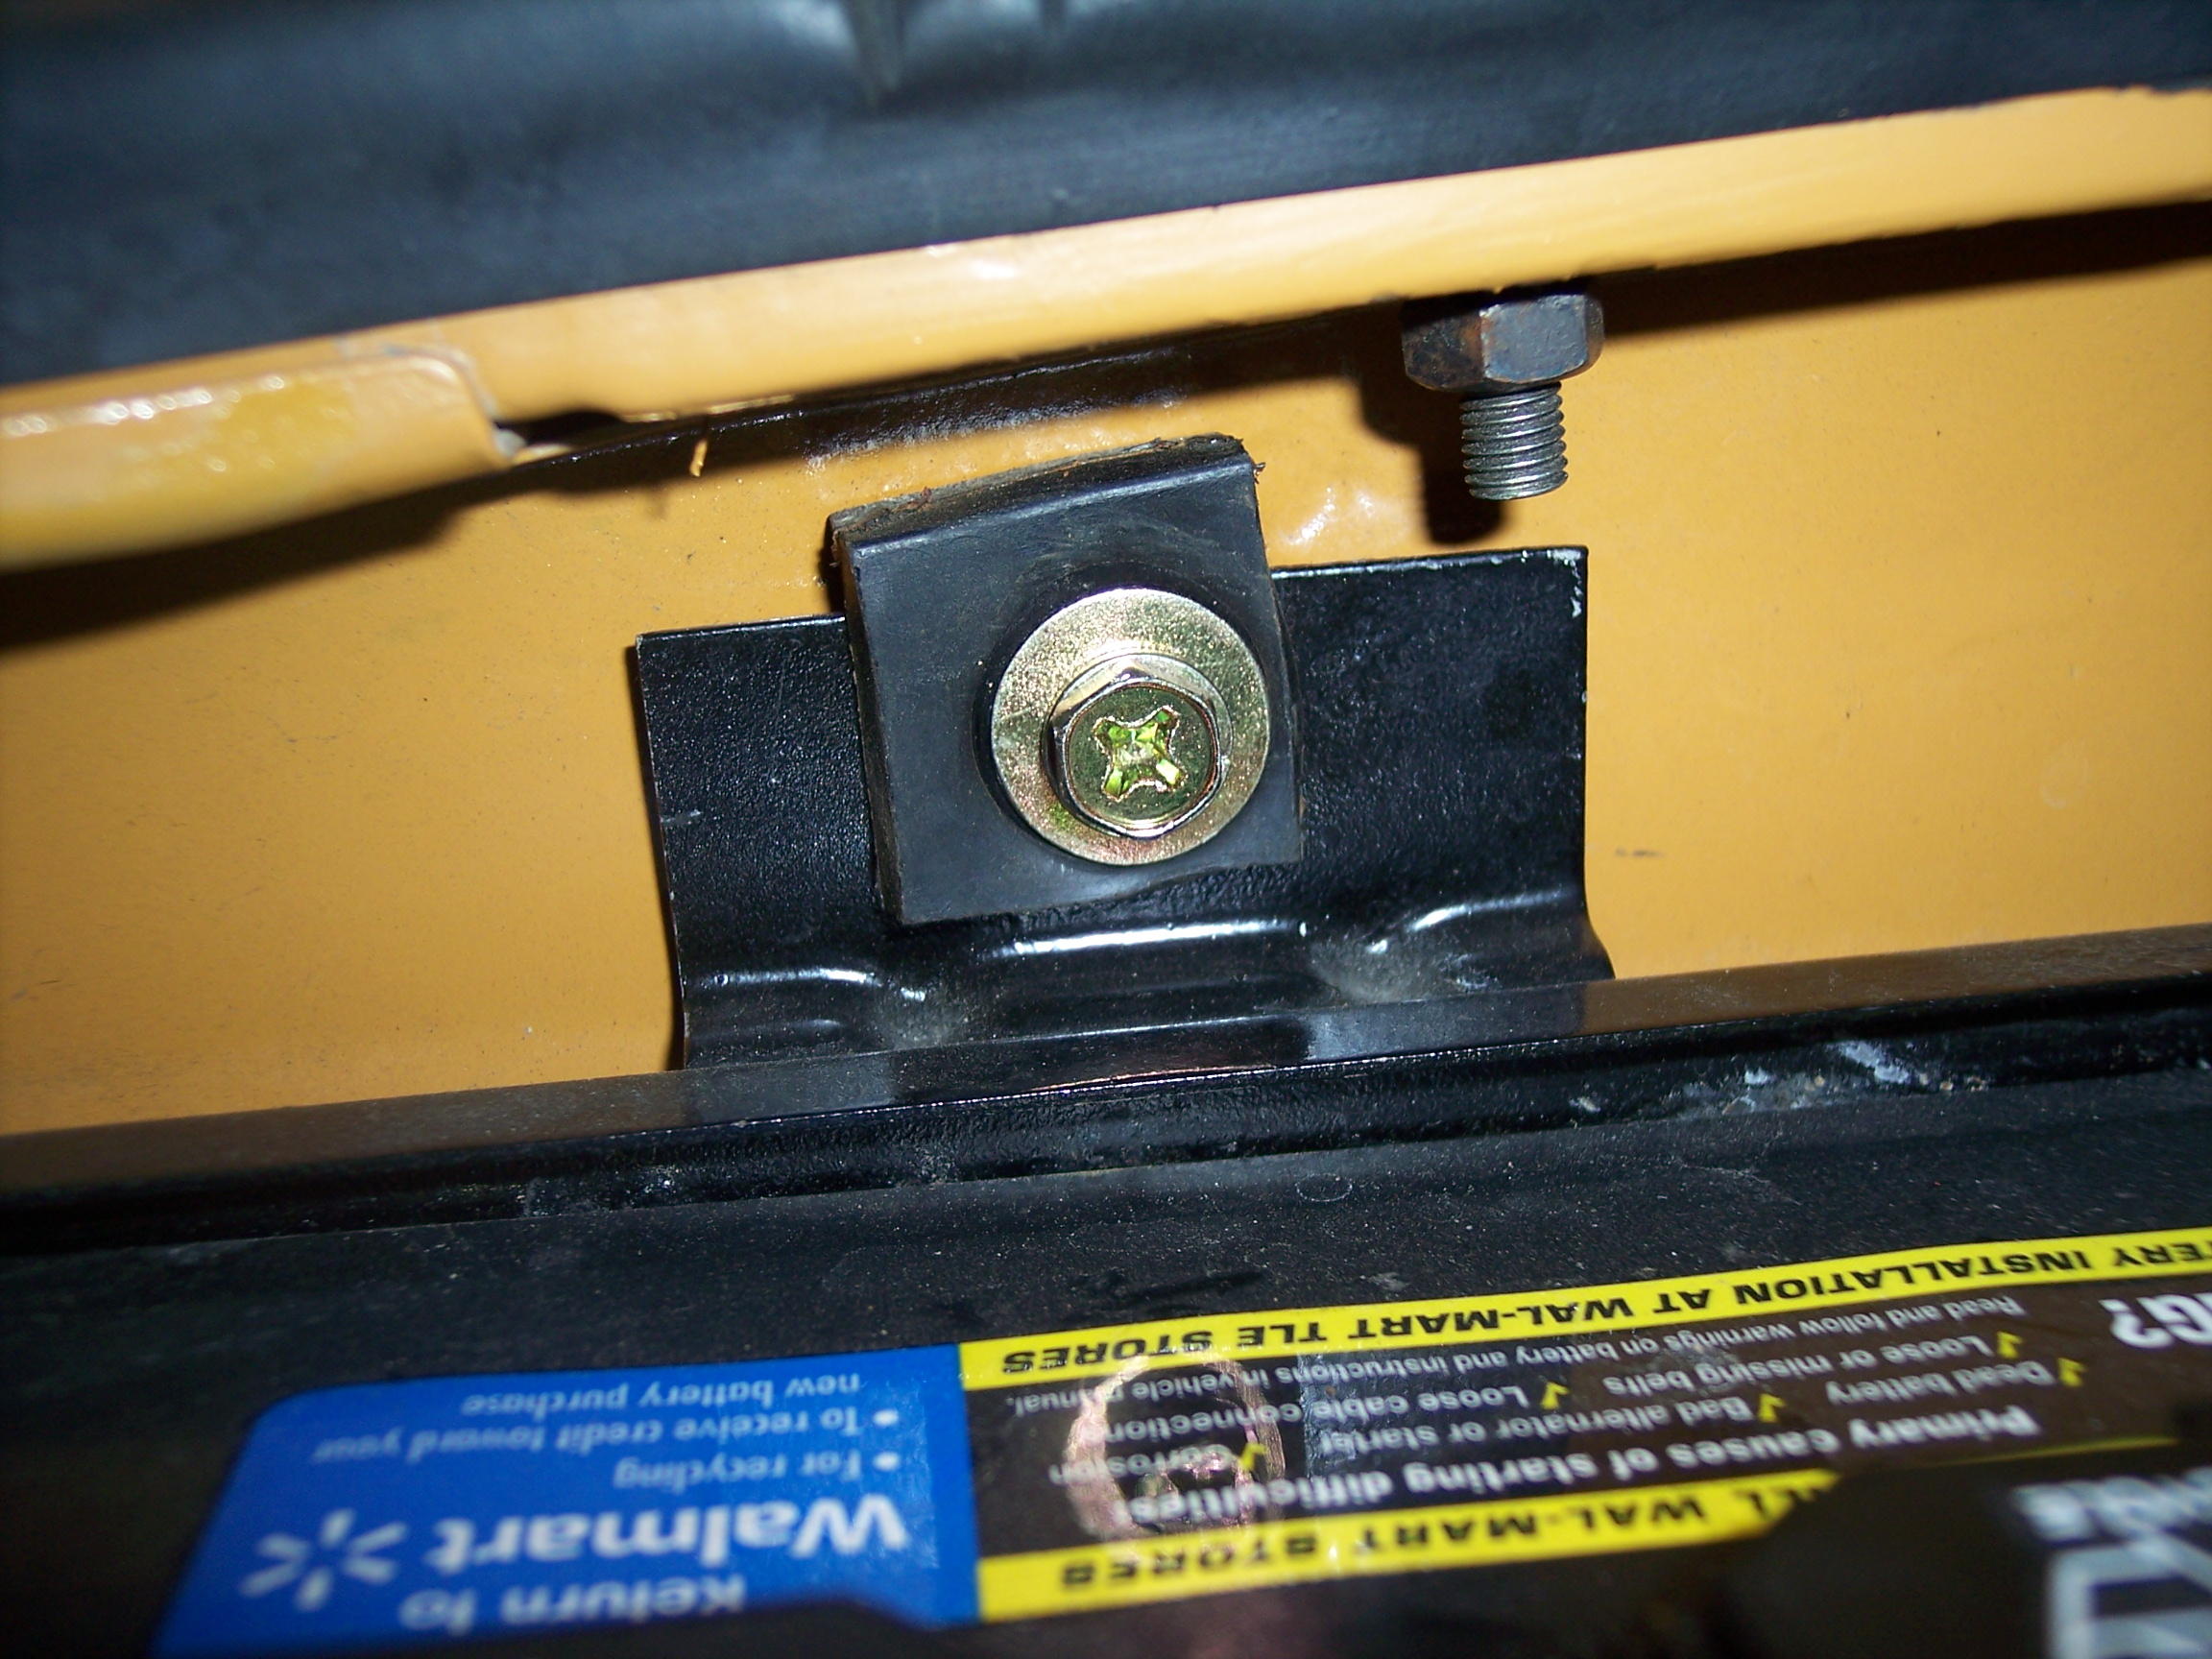
If it is not tightening, it is possible the threads are stripped either on the bolt or the captive nut welded to the back of the firewall. Or... possibly you have an undersize bolt. The one in your pic is not OE, it should look like this one. Also, the bracket tab usually has a rubber insulator.

-
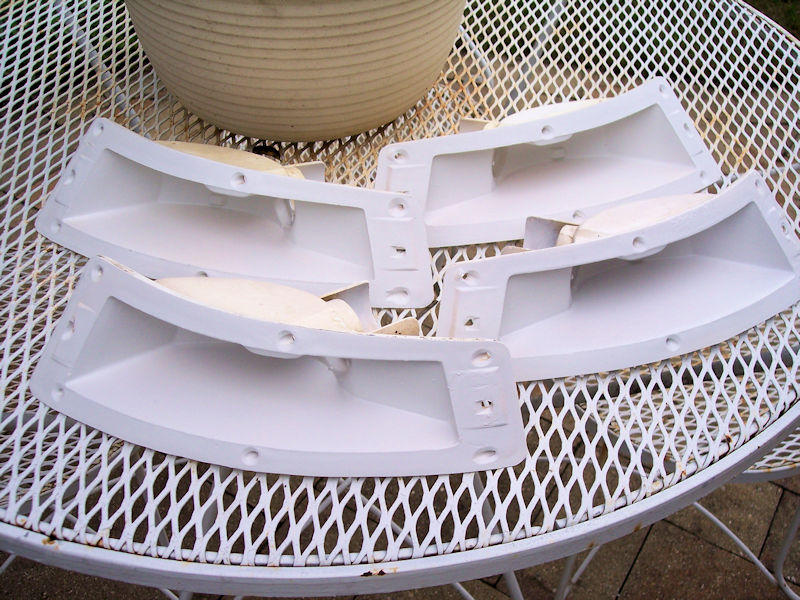
View Advert 240Z Turn Signal Housings Refurbished turn signal housings for 240Z or early 260Z. Reflectors removed and refinished in metal tape polished to high shine. Interiors painted in flat white. Lenses are original IKI units – not reproductions! Lenses have no scratches or cracks and have been polished to a high shine. The valance mounting brackets have been stripped and commercially replated, are fitted with new washers and flange nuts. Rubber gaskets are in like-new condition. Lights have been assembled with new stainless steel screws. NOTE - these are housings ONLY, no wiring harnesses included. $185 includes standard domestic shipping, international shipping available at actual cost. Payment via PayPal, PM if interested. Thanks! Advertiser jfa.series1 Date 08/05/2020 Price $185.00 Category Parts for Sale
-
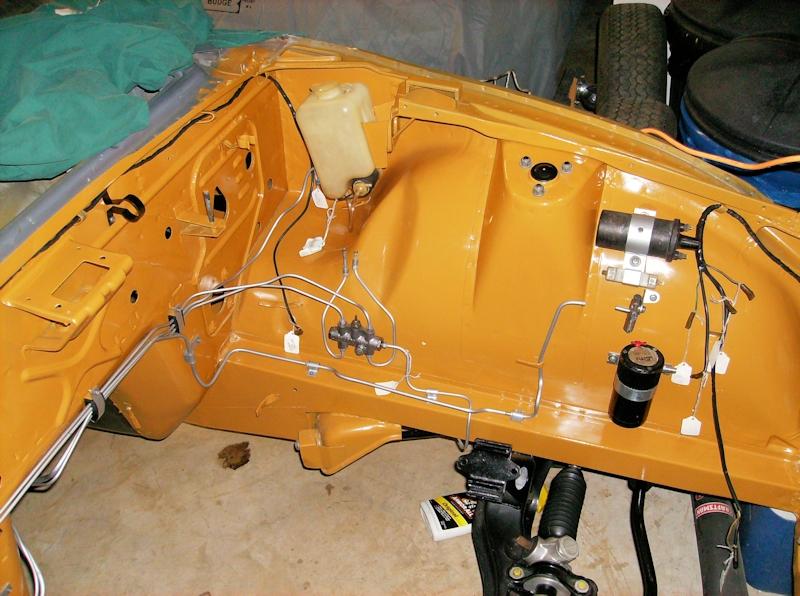
Matt, I think this should meet your need. The vapor line gets connected to the vapor valve with a short length of hose, not yet installed in this pic. The vapor valve is just below the ballast resistor. FYI - the not-stock item below the vapor valve is a compressor for air horns. Let me know if any questions. Jim
-
Sadly, won't be making the trip this year. I posted my rationale earlier today in my Hotel Impact thread.
-
It was with sad reluctance that I made the decision to cancel my ZCON hotel reservation last week. TN is one of the states seeing a marked increase in COVID-19 cases and Nashville has been particularly noted on some newscasts. This situation is not going to magically disappear in the next 6 weeks and I am very much in the susceptible age group. Even if I went to the event, I would then have to quarantine myself away from my home for a couple of weeks to ensure I did not bring the virus home to my wife who has an autoimmune condition. As an original owner, this 50th anniversary meeting holds a lot of significance to me but I cannot allow that to seriously jeopardize my health and that of my family. I will dearly miss meeting up with old friends and getting introduced to new ones from this great site. For those of you who move forward with plans to attend ZCON, I pray that you remain safe. I will have to "enjoy" the event vicariously thru your reports and photos.
-
+1 on getting the correct Datsun blue from Mike McGinnis, ZCCA approved!
-
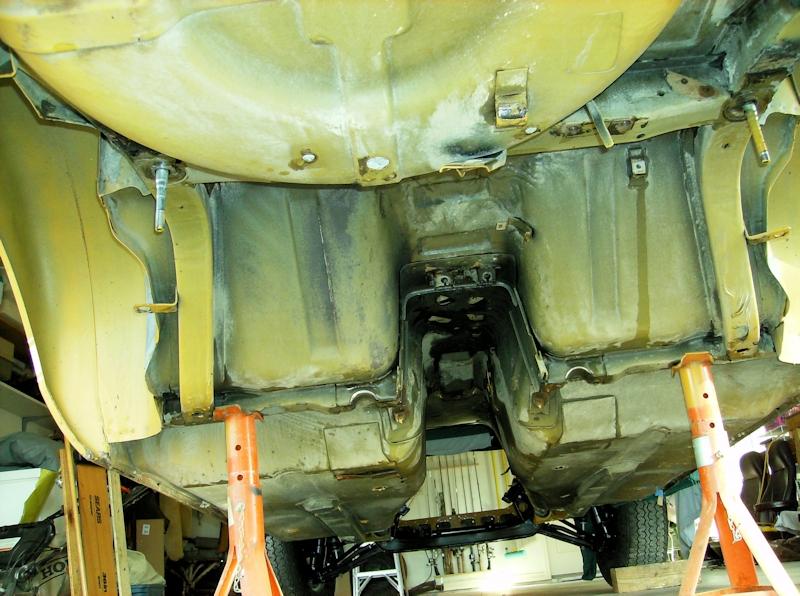
Lots of new metal in there.
-
View Advert 240Z Master Vac Check Valve Bracket #2 Later style master vac check valve bracket - the thicker & wider metal version with the check valve retaining edges. P/N 47477-N3000 from 7207. Stripped, primed, refinished in satin black, includes replated mounting screws. $35 includes standard domestic shipping, international shipping available at actual cost. Payment via PayPal, PM if interested. Thanks. Advertiser jfa.series1 Date 07/22/2020 Price $35.00 Category Parts for Sale
-
View Advert 240Z Master Vac Check Valve Bracket Early style master vac check valve bracket - the thin metal version without the check valve retaining edges. P/N 47477-E4100 to 7206. Stripped, primed, refinished in satin black, includes replated mounting screws. $35 includes standard domestic shipping, international shipping available at actual cost. Payment via PayPal, PM if interested. Thanks. Advertiser jfa.series1 Date 07/22/2020 Price $35.00 Category Parts for Sale
-
View Advert 240Z Fuel Filter Bracket Refurbished 240Z fuel filter bracket. Stripped, primed, refinished in satin black. Includes replated mounting screws. $85, includes standard domestic shipping, international shipping available at actual cost. Payment via PayPal, PM if interested, thanks. Advertiser jfa.series1 Date 07/22/2020 Price $85.00 Category Parts for Sale
-
Looks like there should be one on each side. I'm only good for one answer today. ?
-
I understand - I have that equpiment off my car as well. This bit of plumbing is entirely passive and uses the air flow thru the air filter box to pull excess fuel tank and crankcase vapors so they can be burnt. The connection between the valve and the pipe is a 3-4" piece of hose usually secured with a couple of spring clamps.
-
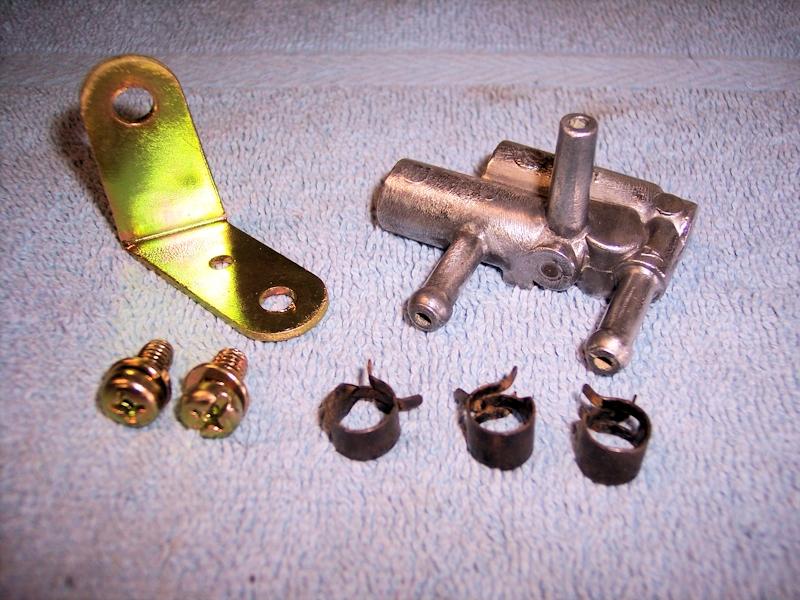
Matt - here's a pic of the flow guide valve, slightly diferent versions on each year but essentially the same. It mounts to the inner fender wall beneath the ballast resistor. Check this diagram for the hose routing - one line from the small tube on the crankcase breather pipe, one short hose from the tank vapor line in your pic, one line to the back of the air filter to feed the vapors into the carbs. The valve is #57. http://www.carpartsmanual.com/datsun/Z-1969-1978/engine-240z-260z/emission-control-device
-
I'm not sure what a Euro configuration should look like but this looks like you are missing either the supply line or return line completely. The line running to the left side should be the fuel tank vapor line that connects to the flow guide valve mounted below the coil. The diameter of the line on the right side will clue you as to what is missing - the supply line is significantly larger than the return line. http://www.carpartsmanual.com/datsun/Z-1969-1978/engine-240z-260z/fuel-piping
-
Let it be said the Z car has always been inspirational to so many!
-
My Matsuo-san story dates back to the 2015 ZCON in Memphis, my first such convention. It was the wash day morning and Matsuo was strolling around the parking lot observing all the cars getting cleaned. He stopped by my car as I was desperately trying to get it dried before water spots could take a set. He began sharing the story of the origins of the hatch strut. He said they took the concept from the canopy strut of the elegant French Mirage aircarft but it was a relatively expensive piece to build. As a designer they had to fight the accountants to move forward with the part. When they suggested the car would benefit from two struts, the bean counters made it clear they would make do with one! He also spoke briefly about the inclusion of carpets for the US market, stating that although they might be able get away with rubber mats in Japan that would not be the case for the US-bound cars and even then they had to settle for less costly looped-style carpet over a higher cost cut pile product. He chuckled about the ongoing battles with the bean counters throughout the entire design and build process. He was indeed a wonderful and entertaining personality and we are all so very fortunate to have had him in our Z car history.
-
Your car is a '72 model so buy parts accordingly.
-
Joseph, the fuel supply and return lines are routed to the right side of the engine bay - the return is a direct connect to the fuel rail. There is a vapor line from the tank that routes to the left side of the engine bay and connects to the flow guide valve mounted just below the ballast resistor (under the coil).
-
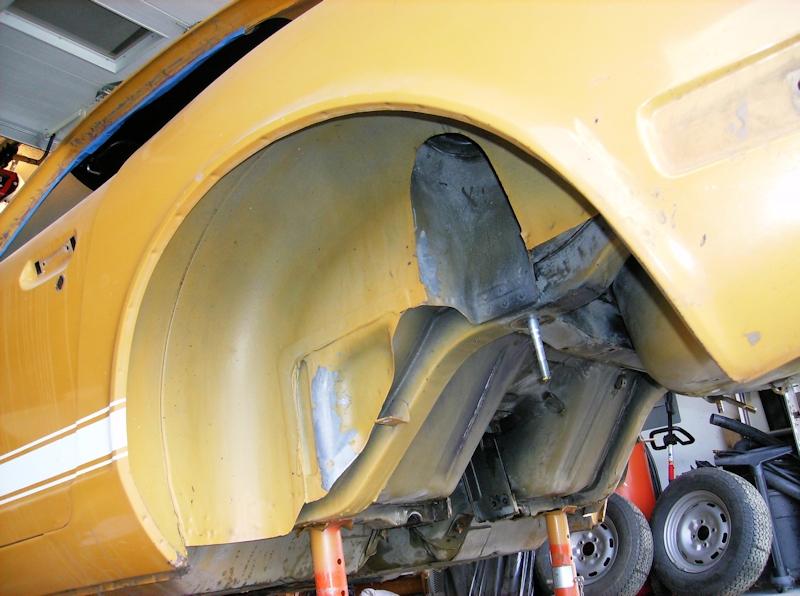
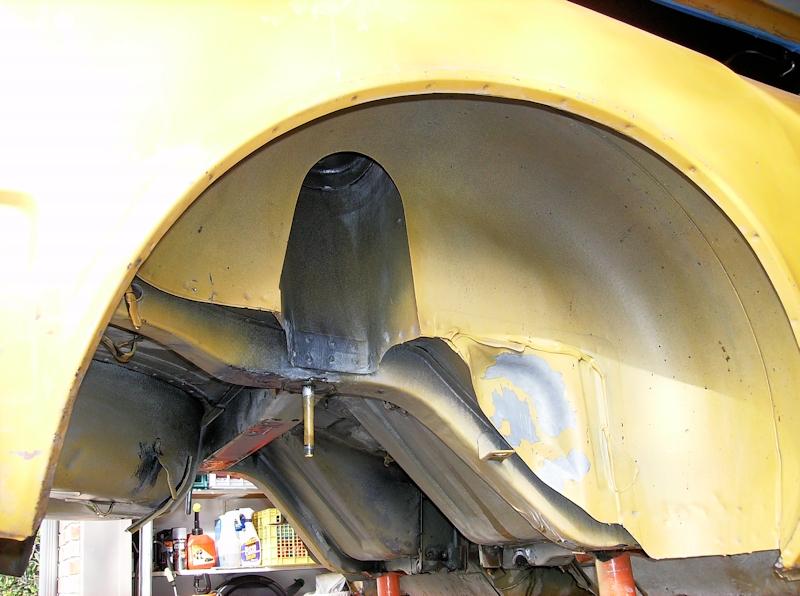
Interesting observation regarding the headlight opening as a potential conduit for overspray. Given the broad and intense coverage and specific areas of coverage on my left side, this could not be explained by casual overspray thru the headlight opening. There is no doubt in my mind that this degree of coverage is a result of intentional spray directed thru the fender arch. It is likely a fellow painter on the right side was less intense on his approach. That suggests to me that these are all cut-in areas roughly applied prior to the higher quality exterior coat. The same could be said for the rear wheel wells with very intense and thorough coverage on top of some kind of protective layer to absorb impacts from road debris. BTW - the car had 92k miles when these pics were taken.
-
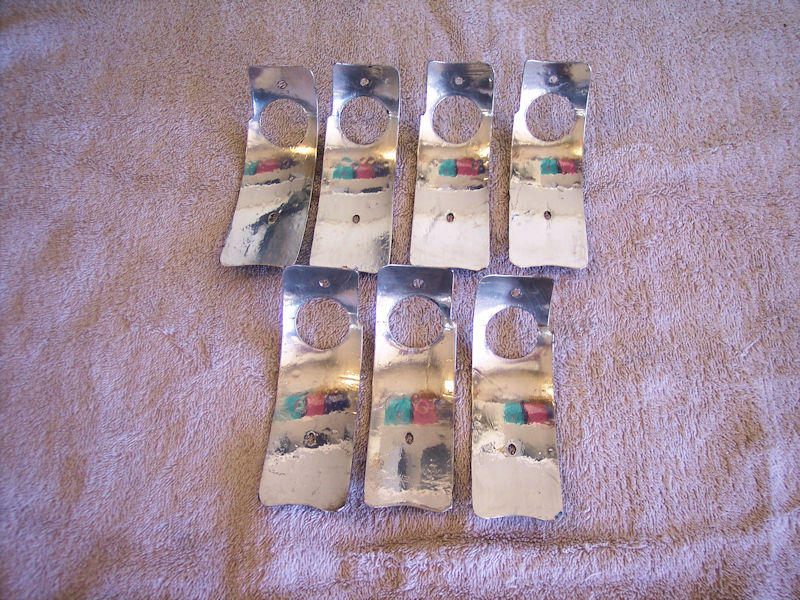
I've been refurbing some of these and used the metallic A/C tape with success. I removed and sanded the reflector smooth, applied the tape, then buffed it shiney with jeweler's rouge. I also cleaned and painted the interior of the housings. PM me if you have any questions on the details.
-
The person who requested my info had the MSA unit, said it was smaller and did not fit well.
-
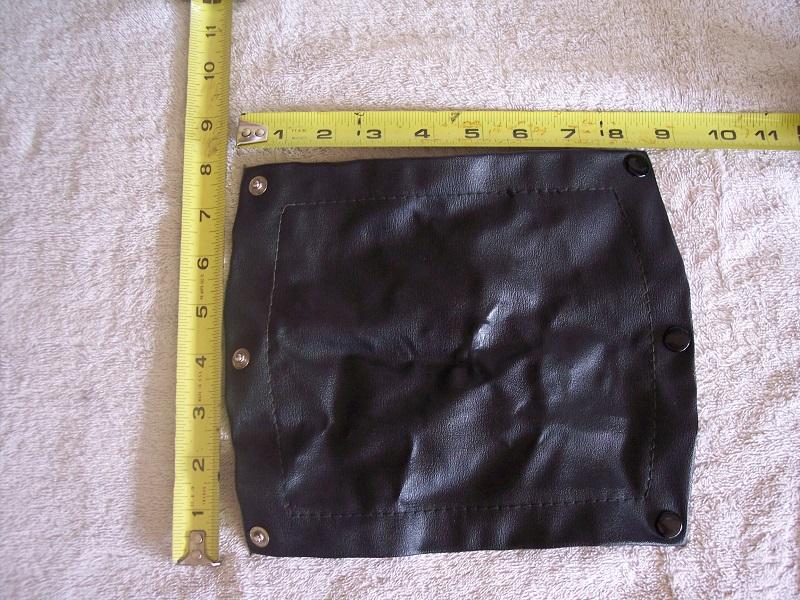
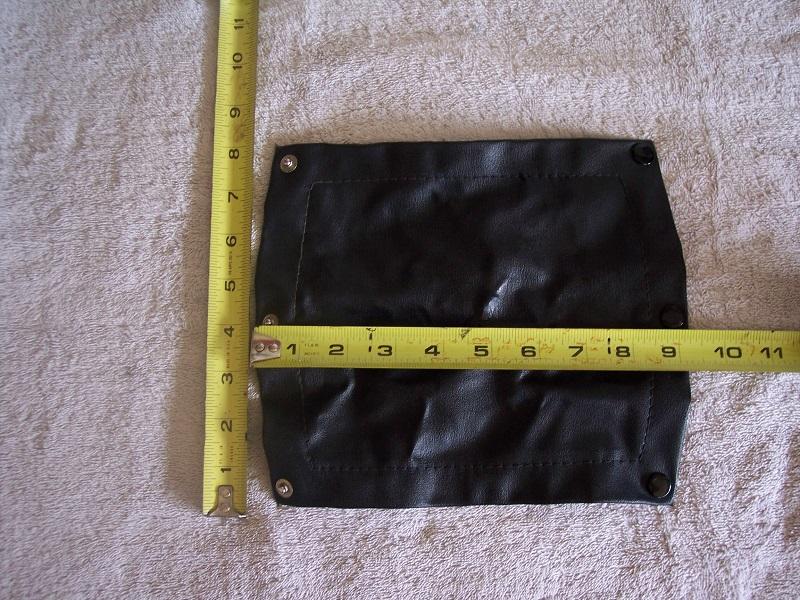
I know the 1970 and 1971 240Z's came with a vinyl wrap around the bundle of wires at the right side of the console, perhaps the later models did as well. Recently I was requested to measure and photograph my OE wiring wrap so that a friend could have it reproduced. These photos and measurements may be of benefit to others to also get a wrap made. Note that the center of the wrap is wider than the top or bottom to accomodate the bulge of connectors in the middle of the wiring bundle. There are two darts cut into the fabric edge on each side to form the "curve".

-
Looks like a lot of needs might soon be satisfied: https://www.facebook.com/datsunworld.eu/?__tn__=%2CdkCH-R-R&eid=ARBAoO8RWd31Pe-unfTDMXBsFzlHWcttEluluVDP8y_TYOeKk4UNjAD5gRZdvrmK6seUqwnNlcXrPGn2&hc_ref=ARTDL-i29SetqVO8moJzGMaUEYfRR-Gov0818HiuX6MHRg5jH0gfzoG8E9LOB_TtagY&fref=nf&hc_location=group