jfa.series1
 Subscriber
-
Joined
-
Last visited
Everything posted by jfa.series1
-
 Here is the P/N for the small rivets to secure the rear finisher, still available from your local Nissan dealer or CourtesyParts.com: 79909-E4100 Not cheap at $1.86 each (Courtesy Parts dept. pickup) but its the correct item if that is important to you. Interesting that the online parts catalog specifies qty. 8 when only 6 are required. The center panel of the finisher set uses two small hex-head bolts behind the license plate.
 -
A "must have" for tropical BC, eh? 😁
-
Hah, I knew that pic was familiar - that is a shroud I refurbished and sold about four years ago. As I recall it went to guy in the Philippines. The towel under the piece was the giveaway.
-
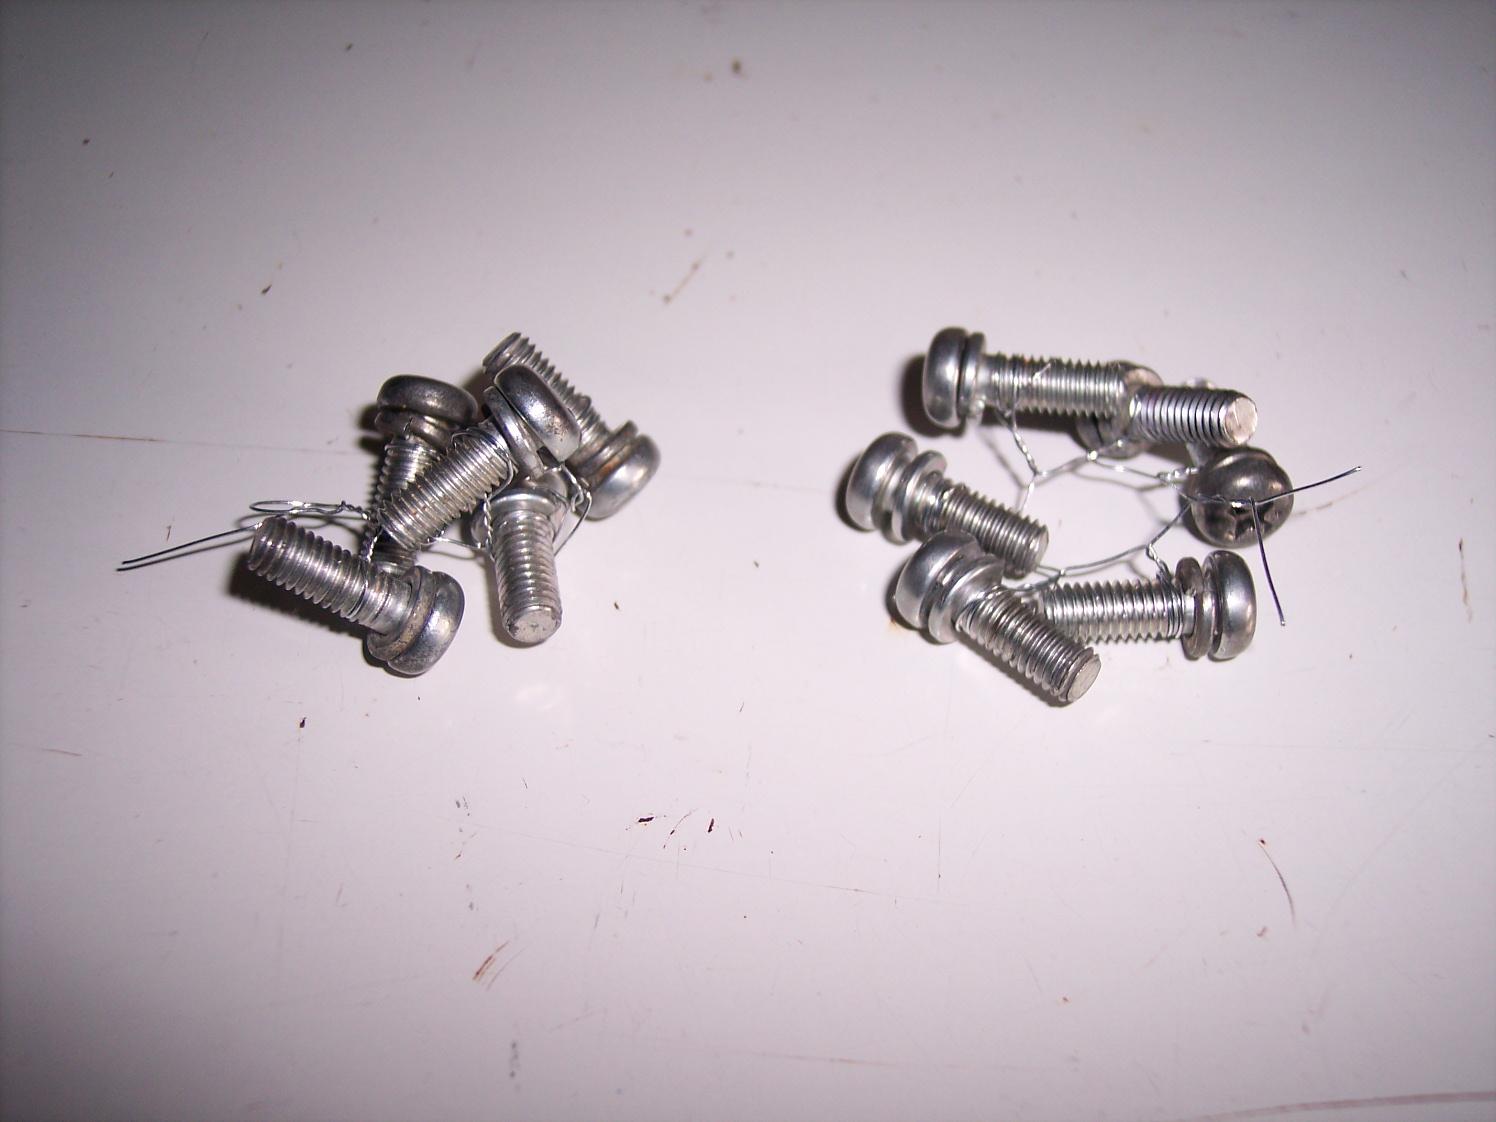
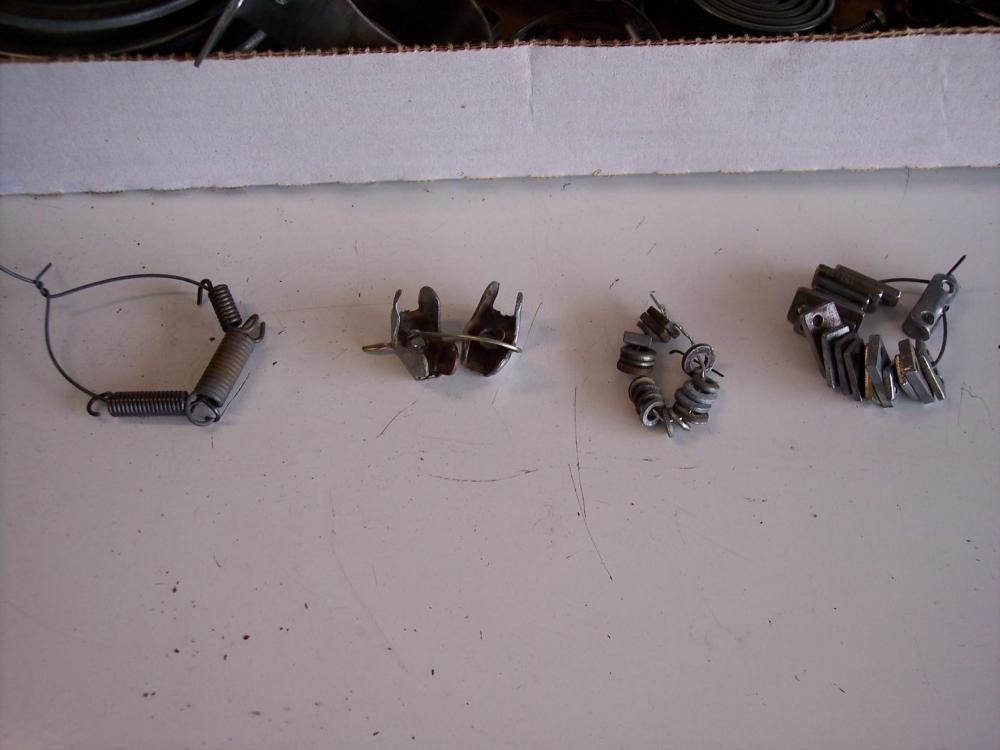
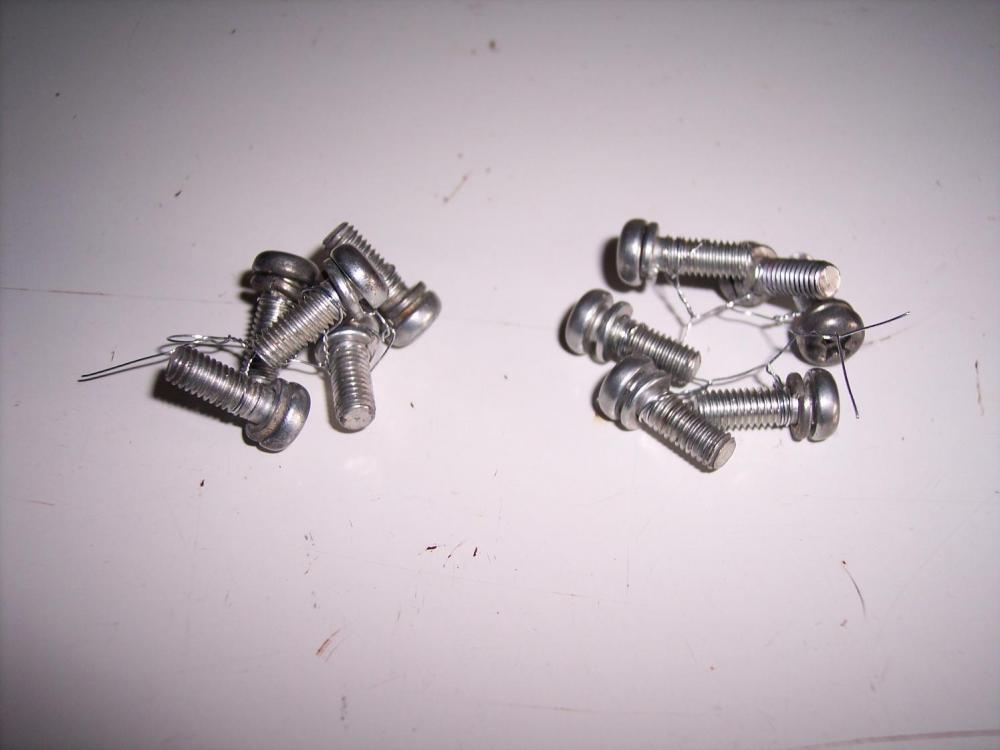
If you have not used a commercial plating service previously, be advised that tiny bits can/will get lost - it's just the nature of the process. You can help to avoid much (but not all) of that by tying small items together. I use soft wire for stringing springs, nuts, washers into a loop to cut down losses. For small screws I use a thin SS wire and wrap it a few times around the threads, then give it a few twists to lock it, then daisy-chain the next one and so on. This approach is not perfect but far better than leaving everything loose.
-
That looks to be most excellent prep - congrats! I've only wet sanded a couple of items - fuel rails and inspection lights, everything else gets the wire wheel for consistency as @grannyknot mentions. I resort to the Dremel only for very tight areas where the wheel won't reach.
-
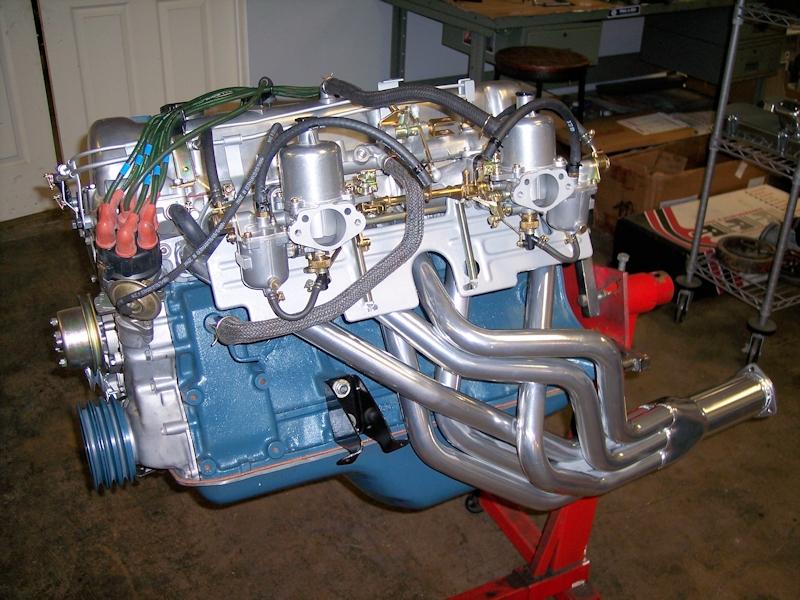
Here's the MSA 6-1 header installed on my engine. The flange thickness is a perfect match for the intake manifolds.
-
I've done a certain amount of parts refurb over the years, both on my ride as well as the parts I handle for my hobby business and I have yet to find a shortcut to good prep. Ultimately it comes down to the wire wheel on the bench grinder or on the high speed drill motor or a small wheel on a Dremel. For parts I really want to "pop", a bit of wet sanding after the wire wheel works out very well. Its critical to get all of the old plating, rust, oxidation scale, paint, ...etc. off the part before any new plating is laid down. If this is not done, the new plating will quickly drop off. This prep work also applies to all of your fasteners - bolts, nuts, washers, screws.
-
I think this is another great example of the difference of parts used in the factory assembly and replacement parts sent to the dealers. We know the air filter boxes used on the assembly line were a bright red-orange while those going to parts departments were light blue.
-
This popped into the inbox, a nice commentary on JIS vs. Phillips head screws. It got me to thinking about JIS screwdrivers and bits and I ran across another article that makes it clear that all the so-called JIS drivers on the market today are not truly JIS but most are the later DIN/ISO standard that is a compromise between JIS and conventional Phillips head screws. The bottom line: if the tool does not explicitly state it is JIS B 4633 specification, it is probably a DIN 5260/ISO 8764-1 spec. Close but no cigar! https://www.hagerty.com/media/maintenance-and-tech/that-phillips-head-screw-isnt-what-you-think-it-is/?utm_source=SFMC&utm_medium=email&utm_content=21_February_6_Newsletter_Weekend https://rtstools.com/jis-vs-phillips-screwdrivers-and-where-to-buy-a-jis-screwdriver/
-
View Advert Inspection Light Completely restored inspection light. The body and lens collar have been stripped, wet sanded, and professionally replated in yellow zinc. The OE switch has been disassembled and serviced. The light has a new wiring grommet and the OE lens has a new seal. $95 includes standard domestic shipping, International shipping available at actual cost. Payment via PayPal. PM if interested, thanks. Advertiser jfa.series1 Date 02/03/2021 Price $95.00 Category Parts for Sale
-
No longer available. Thanks.
-
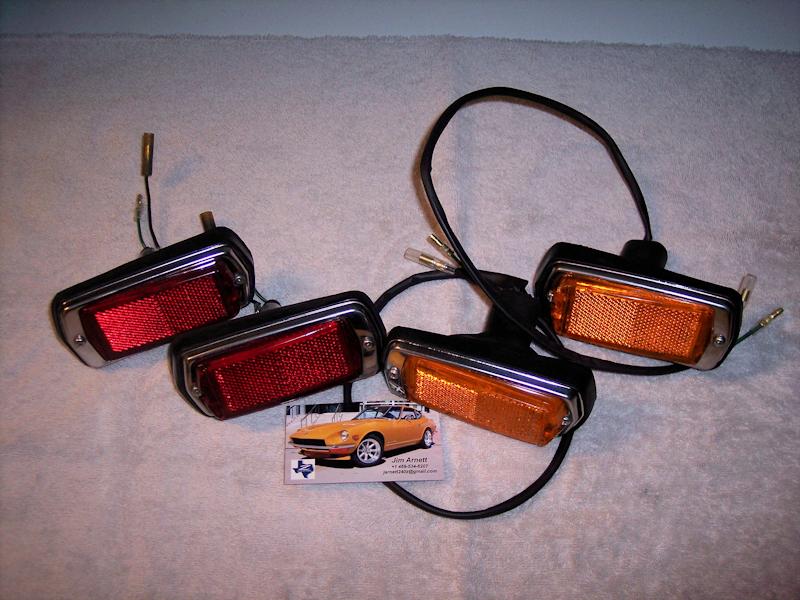
View Advert 240Z Sidemarkers Completely refurbished set of front and rear sidemarkers. These are genuine OE IKI5004 units – lenses and bodies, not aftermarket reproductions. The lamp bodies have been professionally replated in clear zinc. The lenses have been polished and are free of scratches or cracks. The stainless steel bezels have been polished to a high shine. The mounting boots are in perfect condition. Bulbs and replated fender clips are included. The front lamp wiring is covered in new shrinkwrap and has new connectors. The complete set of sidemarkers is $225, including standard domestic shipping. International shipping is available at actual cost. Payment via PayPal, PM if interested. Thanks. Advertiser jfa.series1 Date 01/31/2021 Price $225.00 Category Parts for Sale
-
Thanks. I sourced the correct screws from Belmetric a while back and wrapped up that particular project.
-
Pleasant temperatures today and a productive session at the workbench.
-
This month's featured car. https://www.rockauto.com/Newsletter/ Bonus item: a '72 Datsun pickup in the blunders section.
-
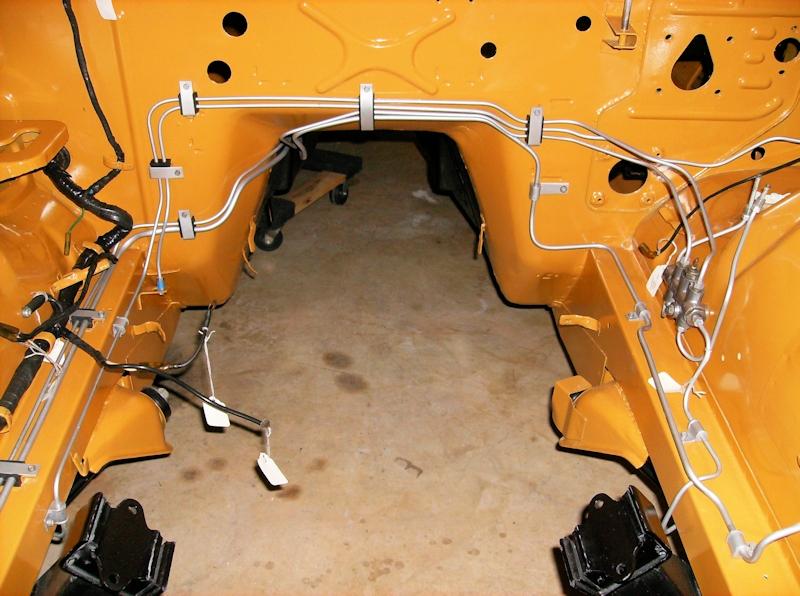
There were no traces of green paint on any of my lines when I stripped my car some years ago, but there was lots of evidence of yellow plating as it was flaking off. We are very fortunate to have an excellent plating company in my area and they have the large tanks to accommodate long lines without bending. Several buddies currently doing restos have had their lines replated with outstanding results and they handle all the smaller items for my hobby business. I was on a strict budget for my restomod years ago, no allowance for getting the lines plated. I thoroughly stripped them and painted in metallic silver topped with clear. - it worked out pretty well. Everything is still fresh and bright 10 years later.
-
True, but the screw will draw less attention than the zip tie on close examination and look more OE.
-
I noticed the effect of this servo very soon after taking delivery of my car back in '71 - the car was not providing any engine braking when I lifted off the accelerator. This was really a PITA to someone active in the local autocross scene! It didn't take a lot of investigation to trace the culprit and perform a bit of "civil disobedience" with an adjustment to the offending screw. Tailpipe emissions tests of that era did not detect the change and the car was more responsive to spirited driving.
-
Here's an alternative view on the function of the missing screw (#13). Its purpose is to adjust/manage the effect of the servo (#6). The servo is an emissions control device to slow the rate of deceleration of the carbs when the accelerator pedal is suddenly lifted and avoid a dump of raw fuel into the intake. That's why the decals on the air filter say "don't touch". With the servo deleted from the balance tube, this screw either missing or present makes no difference. The zip tie on the linkage can be left in place or removed, same answer - no difference.
-
Removal of the panel generally makes access to the filler tube easier, might also help in accessing the small vent lines in that area when getting the tank back in. BTW - removal of the panel usually requires removal of the RR tire so its up to you as to the amount of work you want all of it to be.
-
Yeah, your pic is not showing but your questions are pretty straightforward in describing the situation. 1. The wiring harness at the tank does include connections for a electric fuel pump in addition to leads for the sender. 2. Yes, there is a removable panel on the right side, held in place with three very small philips-head screws. 3. Your choice of screws for this collar, its doubtful anyone will really notice a swap. 4. The OE hose clamps are superior in all aspects to the the common SS clamps at most auto supply stores. I highly recommend using them wherever possible. 5. Grannyknot covered this one. 6. Get all your vent lines installed in the body and protruding under the car. Position the tank under the car and attach the vent lines - a floor jack works well for this. Raise the tank into final position - a bit of lube on the filler pipe will assist it in sliding into the filler tube. Secure the tank straps. Been there, done that!
-
Smoke from unburnt fuel tends to be black, but from burning oil it tends to be blue. The sniff test is good.
-
The black-out of the radiator bulkhead and grill mount tabs is commonly overlooked with many repaints.
-
The five grill mount tabs were also painted black for the same reason.
-
PM sent.