jfa.series1
 Subscriber
-
Joined
-
Last visited
Everything posted by jfa.series1
-
 Great pics of what you found. I suspect the oil breather pipe from your L24 would fit the new L28 and allow you to retain the flow guide valve piping. If not, you could cap the one inlet nozzle on the flow guide valve to retain the one from the fuel tank. BTW - hold on to all those little OE spring clamps and refinish them in satin black for originality.
 -
Excellent details in this thread:
-
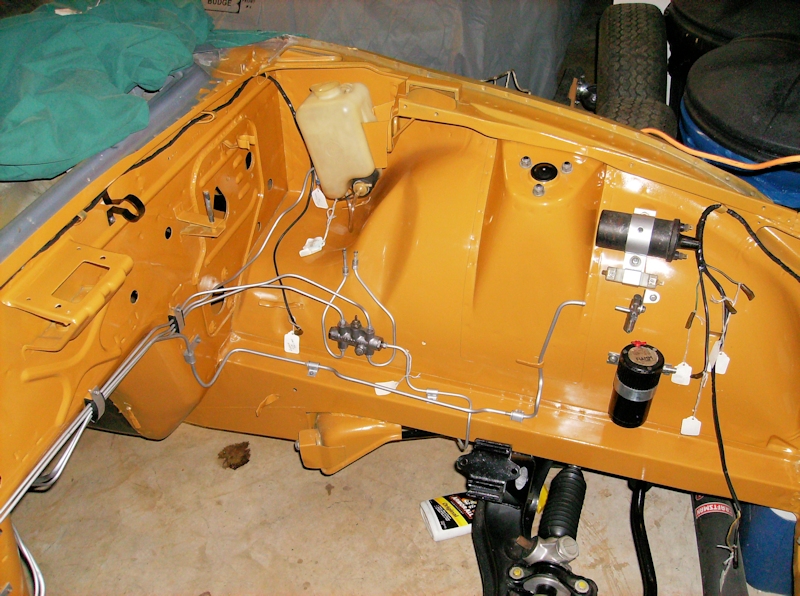
@SteveJ has it right. The hard line comes up on top of the left frame rail and connects via a rubber line to the flow guide valve. This valve is a small aluminum casting mounted under the ballast resistor. You can see the hard line and valve not yet connected in this pic. As to the purpose, the valve routes fuel tank vapors and oil pan vapors to the back of the air filter box so they can be pulled into the carbs and burned.
-
Oh heck yeah, lots of prep work: Thoroughly clean both sides of the panels, fix any bends/dents/dings - sometimes requires multiple passes of filler primer and wet sanding, polish the stainless steel bezels, tape the front sides of the bezels. If the back sides have any surface rust: remove rust with light sanding, tape back sides of bezels, primer the back sides. No sanding on the front sides until the bezels are taped and protected. Wet sand front sides, primer paint, wet sand primer, repeat as needed, color coat paint, wet sand, usually repeat at least once, apply clear coat, very lightly wet sand to remove any dust - just a kiss with the paper! Untape the bezels, wipe down with soft cloth, grab a beer to celebrate!
-
The hub should not require any special care or treatment. Remove the horn elements and set them aside for a good cleaning. Strip and clean the spokes and hub for your paint prep. I found that refinishing the rim before painting the spokes and hub worked best for me. This is a fun and satisfying project, looking forward to your results.
-
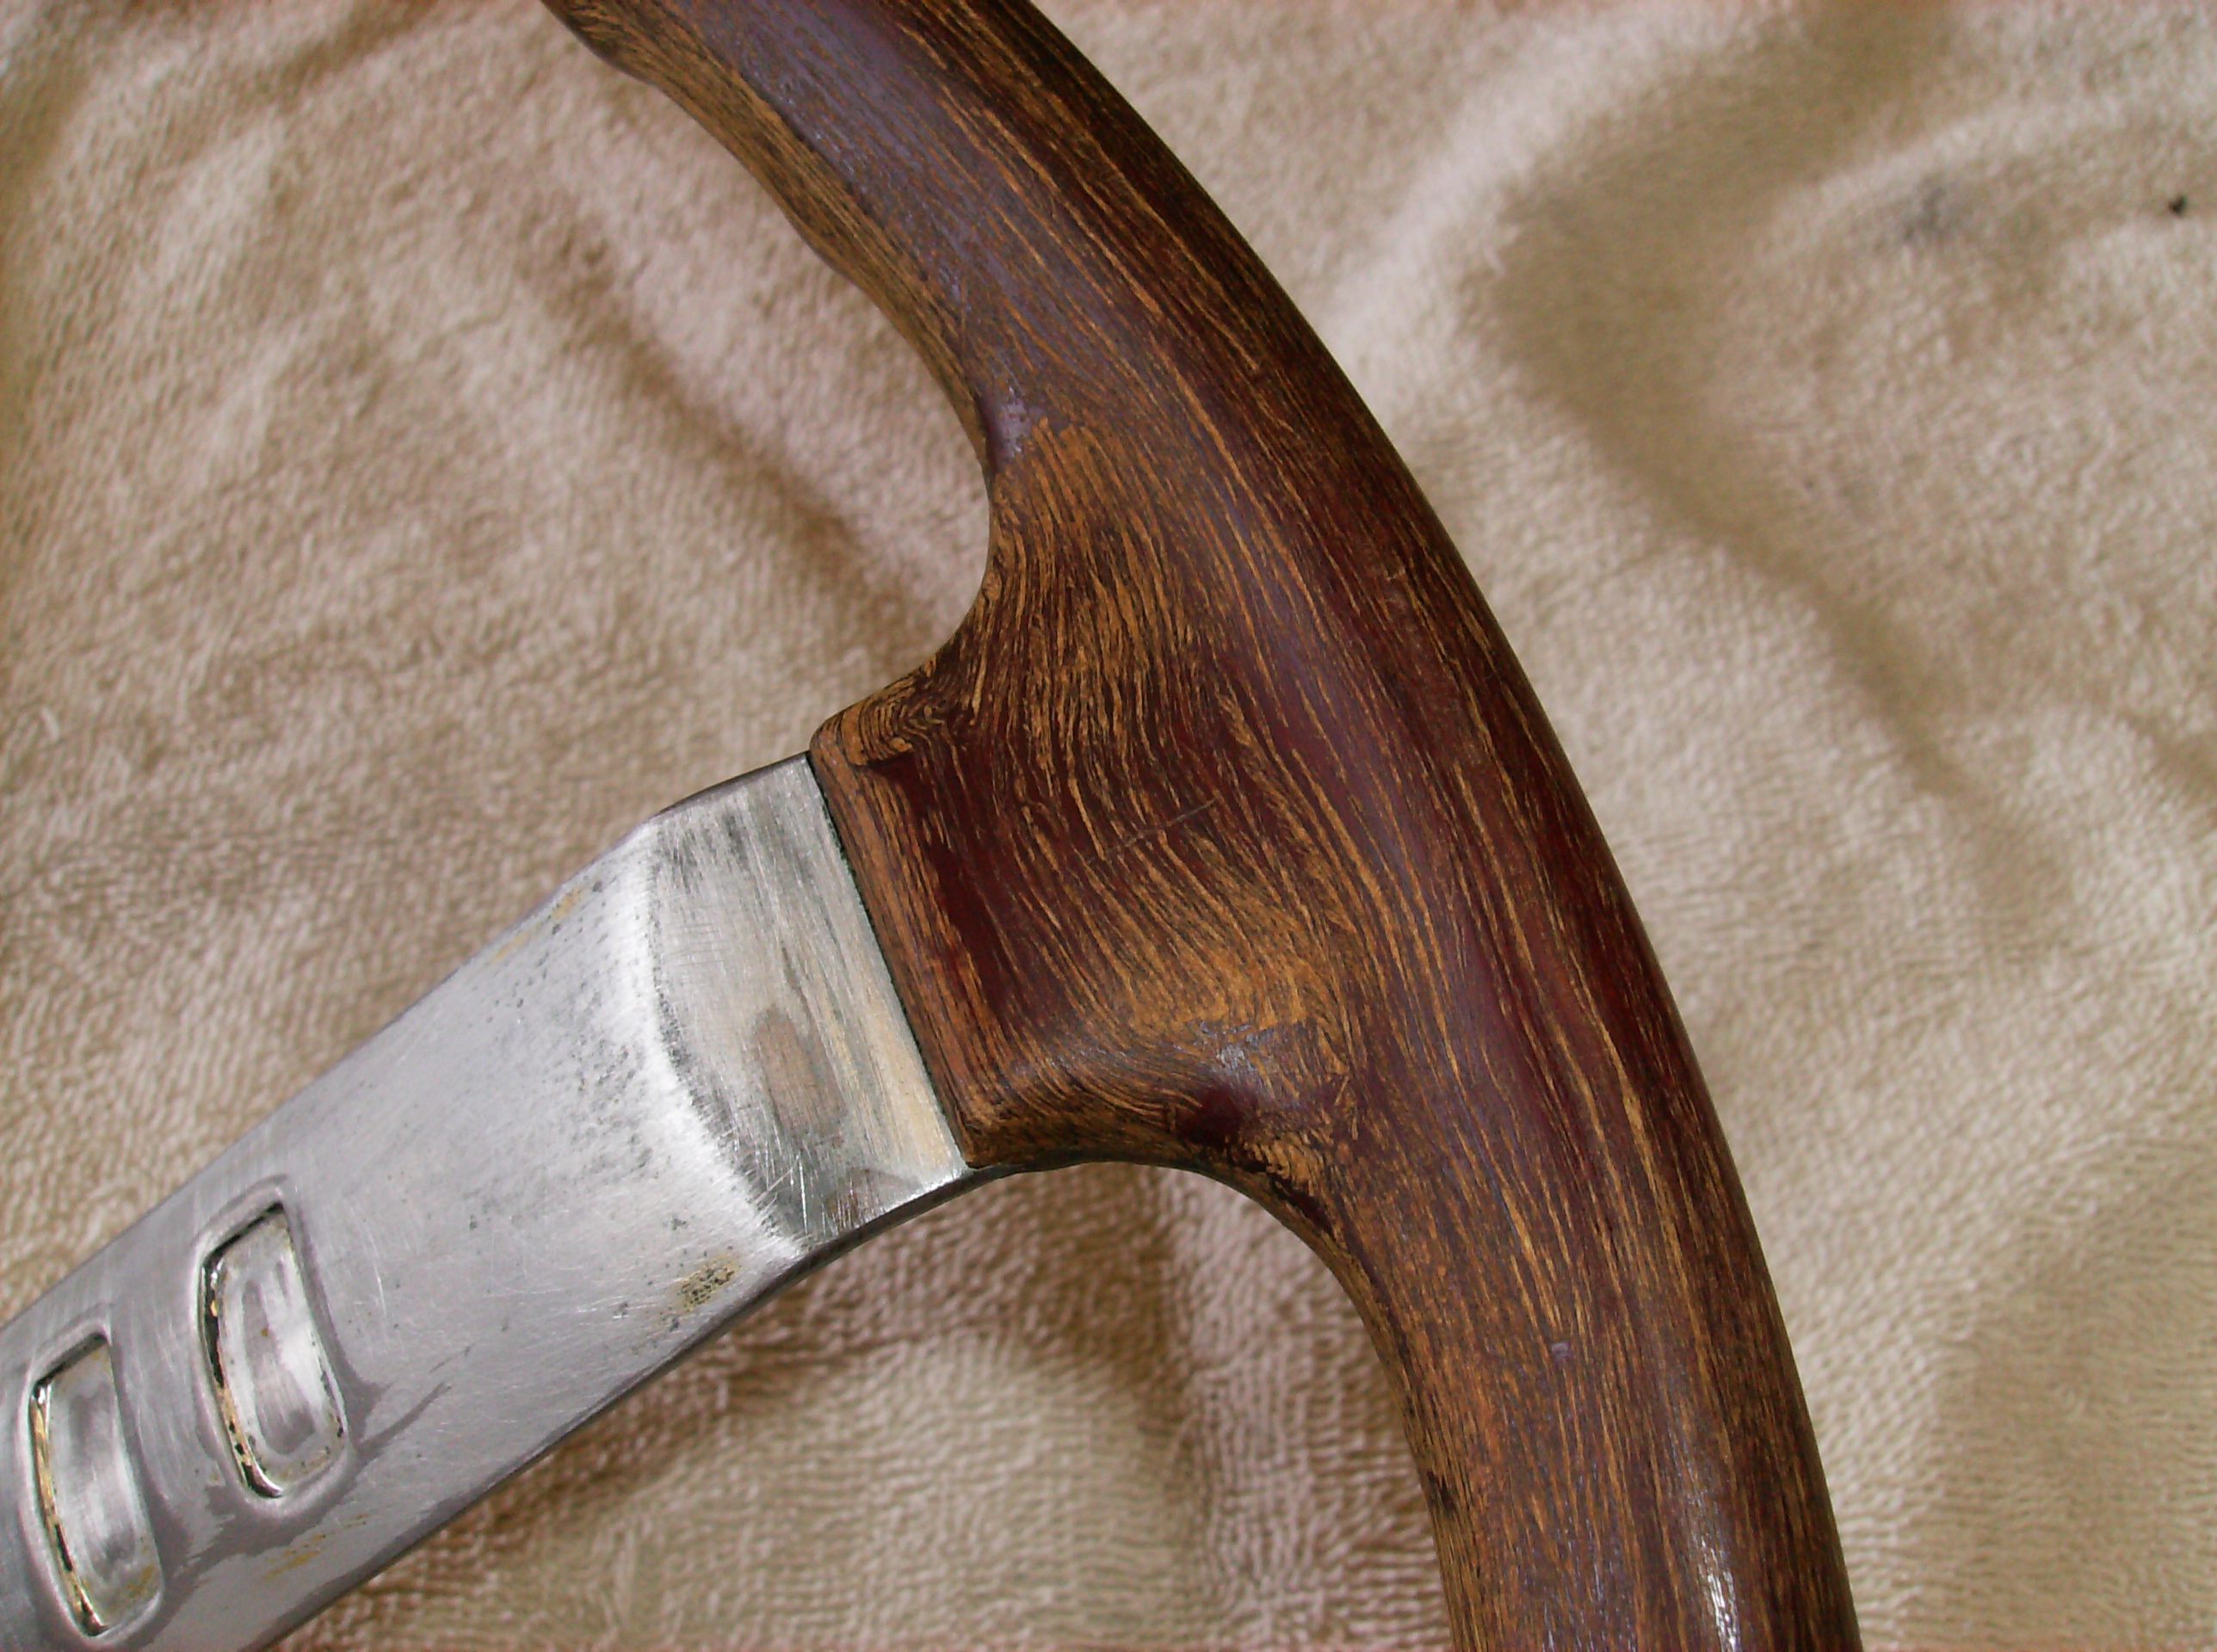
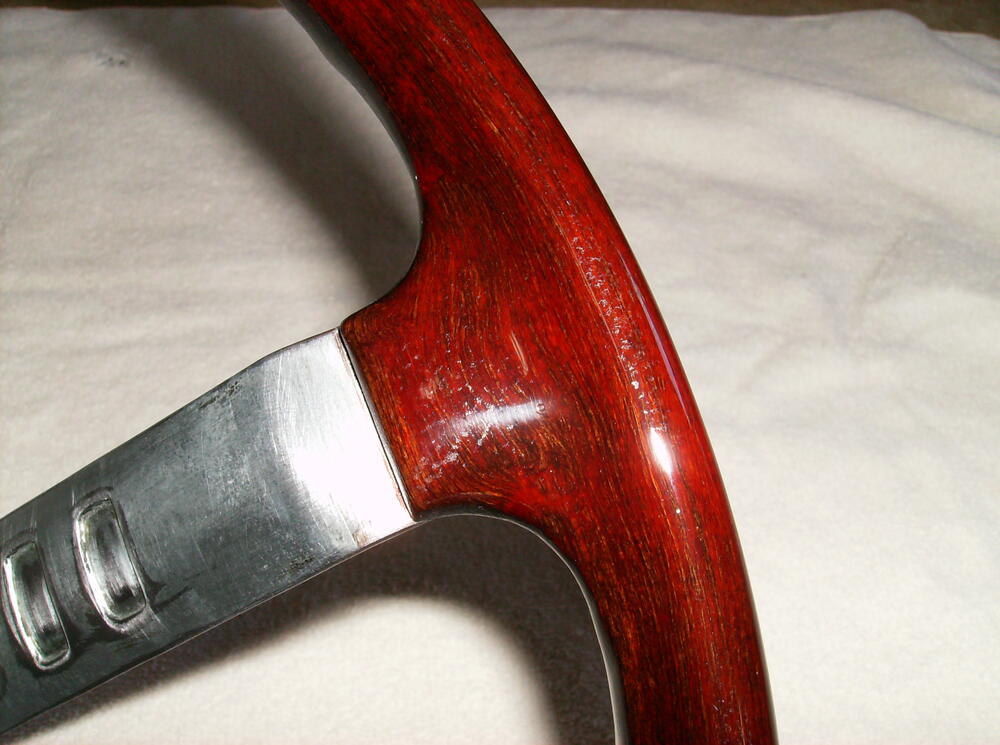
Here's a couple of close-up pics of my wheel in process some years ago, one with it stripped and one with it stained and topped with a coat of clear lacquer. The preferred clear coat today is usually spray polyurethane. I used a hand-rubbed oil base stain.

-
View Advert Restored 240Z Tail Light Panels Up for sale is the last set of 240Z tail light panels I expect to complete. They have been restored to the OE color and finish. The stainless steel bezels have been polished to a chrome-like shine and are free of dings or scratches. The back sides have been thoroughly cleaned, any traces of surface rust removed, and sealed with a fresh coat of primer. I’ve included a pic of a set I recently completed and installed on my car with the license light refinished to match. Also available (not pictured) is a matching restored grill for a ’72-73 240Z. It was completely disassembled, parts straightened/repaired/replaced as required, stripped to bare metal and refinished. This grill will fit a ’69-71 Z if the lower/outer brackets are swapped out. The tail light panels are $295 including standard domestic shipping. The matching grill is $315 including standard domestic shipping. A 10% discount is available if both parts are purchased together. Payment via PayPal, PM if interested. Thanks! Advertiser jfa.series1 Date 07/25/2021 Price $295 Category Parts for Sale
-
Remove the hatch strut from the bracket, prop the hatch open. The bracket is welded in place, leave it alone. Get the foot of the panel in place and very gently bend the panel to get it past the bracket.
-
If you are sure you have located the correct fuse the next step will be to see if battery power is coming into that fuse. If so, then check that you have continuity from the other end of the fuse to one of the wires at the door switch.
-
I'm going to do my best to respond to your post and not get you pi$$ed off. You've probably noticed that you're not getting responses to this thread and are getting frustrated. There are at least two reasons for no responses: (1) it seems you are ignoring the help offered last week in your prior post, (2) you are trying to fight/hack the factory wiring instead of tracing and fixing the problem. There is NO need to ground any wire at a door switch - all of the grounds are in place at their proper location! There is one wire to each of the the door switches that should have constant power. Last week our fellow member wal280z edited my comment to say this is a fused wire. On the driver's side switch the other wires go to (1) the ignition buzzer and (2) the dome light. The buzzer is already grounded and so is the dome light. The fact that your dome light works at the light switch says you have constant power there and the ground is good. This is a different power circuit than the one coming from the door switches. The passenger door switch has only two wires - one for constant power and the other going to the dome light. Since neither door switch works, the problem is likely no power, possibly traced to a blown or bad fuse. You need to locate the fuse for the door switches power circuit. Check that power is coming TO that fuse (probably direct from the battery). Replace the fuse and see if you now have power coming to the door switches. Its not uncommon for these switches to fail but if you can confirm power, then replacing one or two door switches should be a simple matter. I hope you have the FSM for your car and are making an attempt at following the wiring diagram.
-
The power wire should be live all the time so that the dome light comes when either door is opened.
-
The switch is not grounded to the frame. One of the three wires is providing power, the other two wires go to (1) the warning buzzer that the key is in the ignition and (2) the dome light. Putting all three wires together will defeat the switch - the buzzer and light will always be activated.
-
Weld it and you will surely warp the outer skin all to heck. Why do you think the factory did not do so? Get a piece of 1/8" thick closed cell foam and make a new pad to slip into the gap. Here's an offer: I have the material and will make up the pad for you. All it will cost me is a stamp.
-
The OE antenna had two power wires running from the switch - one to raise it and one to lower it. The antenna was grounded thru the body. Unless your new antenna has similar wiring, it probably won't work the same. Many newer antennas raise as soon as the radio power comes on and automatically retract when the radio is switched off. Check the wiring set-up on the new one to see if you can replicate the OE current flow and run the power thru your antenna switch.
-
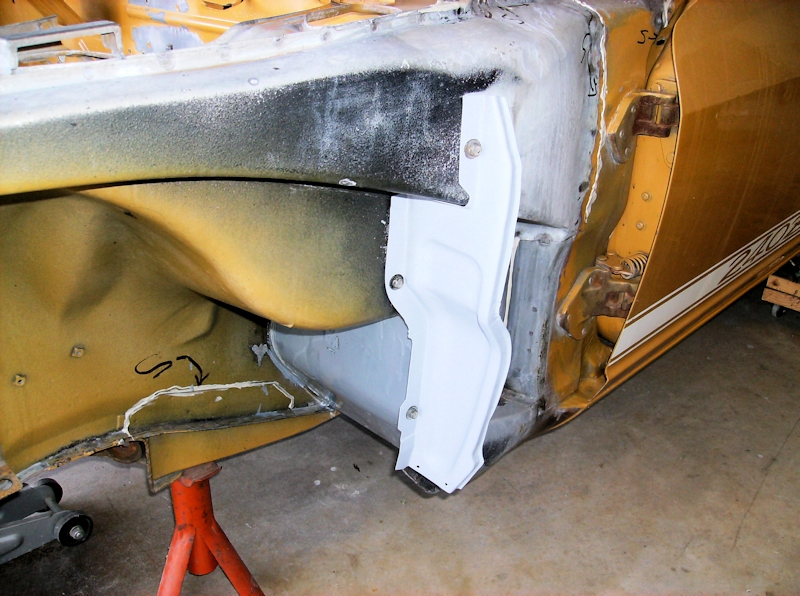
It appears to be just a support between the two layers of metal. There looks to be residue of a open cell foam pad between the bracket and the outer skin. It was not spot welded to the outer skin as that would have shown on the outside.
-
Ollie was the snaggle-toothed dragon from a popular 50's TV show called "Kukla, Fran and Ollie".
-
Most excellent work! If you are not going to run a front license plate, consider painting the two license brackets either flat or satin black to avoid the "Ollie The Dragon" look. Been there, done that. Tell me you remember who Ollie was. 😉
-
Hey Jim, Here's a pic of the mud guards getting reinstalled on my car, note three screws per side. The online parts catalog says this part is the same for all 240Z's and I have buddies working on '72's that are attached the same way. I think the parts from any 240Z will work for your project. Jim3 http://www.carpartsmanual.com/datsun/Z-1969-1978/body-240z/front-fender-hood
-
The wheel rim is a type of resin that has wood fibers impregnated. A good way to clean it is a soapy solution in the kitchen sink and VERY GENTLY rub it down with a fine steel wool. You don't want to damage or remove the wood fibers. Strip the spokes and hub to bare metal and finish out as @Patcon mentioned.
-
I'll not be making it to the big dance this year. The days of 12-14 hour drives are all in my rear view mirror. 😟
-
Not a Z in the bunch but some fun ads to look over. Lots of way-back items. https://www.hagerty.com/media/lists/the-20-best-car-ads-of-all-time/?utm_source=SFMC&utm_medium=email&utm_content=Saturday_RoadTrip&hashed_email=de944125ccb5a42dfb7026b775aa30099a1b5f37a265de7988889e9f9889f055
-
View Advert 240Z Tail Light Panels / Rear Finisher Up for sale are the OE panels from my car (I just replaced them with a restored set in OE gray). They are finished in satin black and are in perfect condition – no bends, dings, scratches, or rust. The stainless steel bezels have been polished to a bright finish. The 50 year-old factory red primer on the back side is close to a “like new” condition. If satin black is your color choice, these are ready for installation. $325 includes standard domestic shipping, international shipping available at actual cost. Payment via PayPal. PM if interested, thanks. Advertiser jfa.series1 Date 06/13/2021 Price $325.00 Category Parts for Sale
-
The steel rivets will pull down to about 1/16" thick on the back side, adequate clearance to not hit the top edge of the door panel. Anything thicker will likely have a problem. A buddy used aluminum rivets that finished out with about a 1/8" shank backside, would not clear to install on the door and had to be trimmed.
-
I used pop-rivets to install new squeegee strips as well as fuzzy strips to the door panels. They were 1/8" dia. X 1/8" grip depth steel rivets, spaced about 4" apart. Worked perfectly. Aluminum rivets can pop "prematurely" leaving a longer shank on the inside. This will interfere with reinstalling the door moldings.
-
Uber rare Ejection Seat Detonator!