


Everything posted by Zed Head
-
 I've done similar things in the past. One of the great things about these old cars is that they are primitive enough that you can understand things at a fundamental level, to fix problems. Ponder how duct tape on the outside is going to withstand the pressure from the inside. It's not really doing anything. The "SS" brake lines are really just brake hoses with a braided metal protective sheath in place of rubber (which is probably fiber reinforced). More durable, but most likely have little effect on performance. I have a set up front myself, but don't know if I'd buy another. When your brakes were slowly dying, the first thing you should have done, probably, is to bleed them. And, as I understand things, when the reaction disc is missing the symptom is an on-off brake action. Probably why they call it a reaction disc. It moderates the reaction. The disc in in the booster, not the MC.
 -
The chest pounder says that some flow back to the pump when the thermostat is closed is necessary to prevent cavitation. Since you've closed off the manifold/carb route maybe another line is needed. I wonder if How to Modify book has some suggestions. Edit - nothing there. They run open flow restrictors. I don't even know why that "jiggle valve" piece is there. http://www.hemmings.com/magazine/hcc/2005/02/Some-Like-It-Hot/1281095.html
-
The various transmissions out there have a variety of switches. Reverse, top gear, neutral.
-
I would pull the front bearing cover (the small one inside the bell) first. There's a guy on Hybridz who posted last week saying that he blew up a countershaft bearing. If it was the front bearing you could probably devise a way to pull it alone and replace just it then run it as the used transmission that it is, without tearing it down. Or, you could pull the front case/bell and replace just the two front bearings. Rebuilds are always a matter of degree. There's another guy on Hybridz who basically blueprinted his transmission, every measurement in spec., then modified it even further for high RPM shifting.
-
I've found that the rubber jack stand covers HF sells are helpful in reducing damage from the odd shape of the stand head. The 3 tons were high enough for me, if I recall right. Gotta get out that tape measure. I also have a collection of wood pieces of various thicknesses and shapes that I place between the stand head and the car part, when appropriate. They spread the load, top and bottom.
-
The engine blocks have letters and numbers stamped-engraved on the upper right back edge that identify what they were when they came from the factory. The heads have letter-numbers molded in to the lower front right edge. Those are what people use, not year of car. Too much modding and swapping to tell what's what by year. The interior parts are probably all 77 and most of them are probably unique to 77 and 78. I'd start taking pictures and posting them here. Even if somebody pays a visit, you'll need to do that anyway. Heads are typically an assembly of head, cam, and valve train. If it's bare, it's worth less than complete, for example.
-
there are four different mustache bars out there. they have part numbers painted on them. if yours isnt red yet you could check that number
-
Now you know where the 98.5% came from. Escrow was the word I was trying to think of when I suggested using an agent. As far as US versus Europe, I think it's easier to sue somebody in the US. But a good escrow transaction makes that unnecessary. The deal's not complete until both parties are satisfied. It unwinds if conditions can't be met.
-
Dave WM just tore his transmission down. The FSM goes in to pretty good detail about how to do it. When the cage comes out the bearings can all move to one side. It basically just increases the slop in the bearing assembly. The bearing is in the adapter plate. If the transmission works fine, why replace everything? Old factory parts are often better than new aftermarket. Sqwawk. The rebuild parts market for these transmissions is full of misinformation.
-
considering your early vin number issues maybe somebody just jammed the diff in with the wrong parts. mgith want to start over
-
That's not a bad idea. I don't know if the console is ABS or some other plastic, but ABS cement would probably do the job. I would add some reinforcement, like glass mat. I have a cracked console too. Might give that a look.
-
Don't overlook that eBay ratings are essentially worthless. They can be gamed, most sellers will never give a negative rating to another eBay user because they'll get false negatives back in retribution. So a 98.5% could easily be an actual 75%. Not to cause undue worry, but using an agent to ensure a proper and legal transaction might be worth the fee. There are lots of scammers out there, who use the fine print to make their money. And eBay, PayPal, etc. will only go so far in resolving a dispute. People get screwed often through internet transactions.
-
Are you sure it's the throwout bearing? It's common, apparently, for the transmission countershaft bearing to do that. Everybody has it.
-
you posted a picture of how it came out of the car in your own build thread. could be the body is not quite right. you could take a measurement. maybe someone will take the same to compare.
-
Lifetime warranty, endless exchanges! All I need is my name and phone number at OReilly and they can tell me if I get free exchanges. No receipt necessary. My "brand new" replacement reman alternator has been sitting on the shelf in my garage for about 4 years.
-
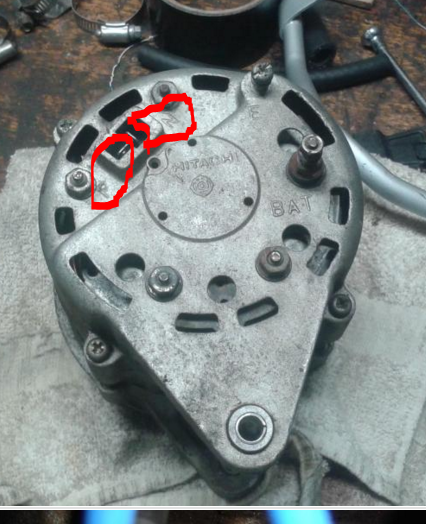
We have a Cool Hand Luke situation here. F and N are the T plug terminals. You circled what could be used as E, for ground (the whole case is grounded). So that would be right. I would take the T plug off and measure resistance to ground from each female pin. Maybe you pinched a wire or have a short in your regulator. Then you could also measure power there with your meter, and the key On. Edit - added an F and N picture.
-
I don't think that's right. Resistance between F and ground (E) should be 5 ohms, according to FSM. If you have F connected to ground that might be your problem. F is for Field and is a wire that gets power when the key is On.
-
Hey, I'm not sure I'm writing right. It is clear that the 77 alternator IS NOT the alternator to use with Dave Irwin's ZXP plug, right? Or are you still using the external regulator? If so, that 77 alternator should function the same way, just put out more amps at full output. When you mentioned Dave Irwin's pug, I assumed that you were using one. Maybe not.
-
If those two were sitting in front of me I'd measure resistance to ground through F and N on both. If they're both the same and they both worked with the external regulator that would tell something. Alternators do short internally sometimes. Still need the right alternator though, in the long run.
-
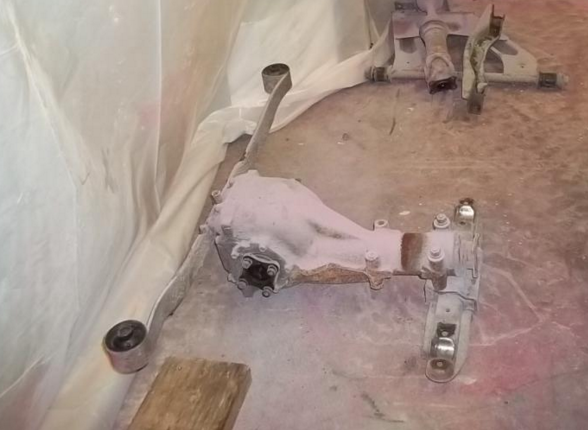
Depends on R180 or R200. Illustrations in the Suspension chapter.
-
Actually, it doesn't seem like that would be the cause of your problem, but I don't know for sure. The L wire would be running to F or N which might be a short and pull enough through the Lamp to blow the fuse. The S wire might be doing the same but that should happen as soon as it's plugged in. CO, SteveJ, or Dave might know the circuit well enough to say. 240Z circuits are bit odd. Either way, you'll need a ZX alternator to use with Dave's ZXP plug. You could just get the right one and try it. Worst case you waste another fuse.
-
Those are both external. The F and the N of the "T" plug tell the story. Internal uses S and L. I'm using an ancient 1981 280ZX wrecking yard alternator on my converted system. My parts sore alt crapped out and never had much juice at low RPM.
-
-
Aack. The 77 used external. I think that you mean that you should have used a ZX alternator with Dave's ZXP plug. The 77 alt is essentially the same as a 240Z alt. 78 and up is what you want with the plug.
-
File the flats smooth and parallel, really clamp the vise-grips on tight (I use full-size, for leverage and more grip area), get a good view of the nut using bright light, then put some force on it while watching for any slippage. If it slips at all, stop and reset. Clean the flats of the nut with crab or brake cleaner and dry them off. Any oil film will allow slippage. Use a torch or heat gun to heat up the female side. Leave room for your knuckles, when it goes it will feel like it broke. If you're doing the junction, put vise-grips on the other side also. Don't depend on the fitting on the strut, it will round out too. If you use two vise-grips, set them up so that you can squeeze them like a motorcycle brake lever. Or press them together with two hands.
