Mikes Z car
Free Member
-
Joined
-
Last visited
Everything posted by Mikes Z car
-
 Is there any spray paint that would look anything like the original color for fixing up an old one? I painted the one I had on my previous 240Z with silver paint and it looked okay but not as close to the original color as I would have liked.
 -
Hi all, I made a new engine bay light lens out of an empty nutrition drink tube that looks like a large translucent white test tube with a tube DIA of 33.8 MM, though it does not have to be exactly that to work. The nutrition drink is called Energize and has the words "Hardcore Energize bullet" on it with the word "Energize" much larger than the other words (Thank you to SteveJ for identifying the brand of drink for me since I had thrown away the wrapper). It is sold by Wall Mart here and I have read Walgreens sells it though not in the Walgreens we have (Several Energize offerings are on eBay now 23 Feb 2013). There is a colored shrink wrap covering on the Energize tube but the tube itself is translucent white. Another brand of tube that might work is the Profect brand tube though its color appears more neutral if the color at the top just under the lid isn't from shrink wrap: Energize Hardcore Bullet:_____Profect Protein Beverage: ******EASY WAY****** (see further down for how I did this the hard way) 1. Cut off the rounded end of the nutrition tube so it is the same length as the original lens (33MM or 1 5/16" or 1.29") and scrape off any plastic burrs. 2. Sand off open end on the side of a bench grinder disk or on a sidewalk to remove irregularities if any. 3. Push into the light housing. You are done. Pushing the new tube into the housing will take some hand force if you use the same size drink tube I did and will likewise take some force to pull it back out to replace the bulb however the engine bay light bulb will typically last for decades as it isn't often used. This easy approach will result in the best looking light lens as you won't see any cut/grind marks needed to make the new lens twist into place like the old one did if you try the same thing I did (see "hard way" below). Note that I also made two new rubber gaskets out of a truck tire inner tube to be a weather seal between the lens and metal housing as the existing rubber seals in the metal housings I have had deteriorated. OLD lens/NEW Lens:....................Rubber gaskets: The three pictures immediately below are also on this related thread: http://www.classiczcars.com/forums/open-zcar-discussion/48344-240z-inspection-light-source.html White translucent tube for new lens material: DIA of new lens material 33.78 MM:..DIA of original lens 32.52 MM: .......... ******HARD WAY****** (see above for easy way to do this) The goal of doing this the hard way was to duplicate not only the look of the original but the way it twists on. 1. Be sure any old rubber gasket or freshly made one is in place before doing this. I pushed the new lens into the bay light metal housing after cutting it off from the nutrition tube and put masking tape on it right up to the metal housing. 2. I drew a line across the top of the four tabs and extended this line the width of each tab in a counterclockwise direction from each tab as viewed from the rounded end. Each tab will slide in its own slot as the lens is twisted on. I also put a dot where each side of the four tabs were to be used in the next step. 3. I pulled out the lens and drew a straight line from each dot to the open end of the lens as a guide for grinding with the dremel small cylinder grinding tool. 4. I ground the area down between the three lines for each tab so the tabs will slide over that area easily. 5. Using a dremel thin cutting disk, I cut the slotted line I marked earlier. NOTE: Don't do like I did, take time to cut a little at a time and then test to make sure you didn't cut the slots too deep. You want a firm effort to twist the lens into place so it doesn't come off. If the slots are too deep the lens will be loose and can be cocked over at an angle which doesn't look good. Dremel tools I used: Note: As the drink tube is much longer than needed it is possible to practice several times to get the plastic cut/ground off right. I cut off each practice session to give new plastic to practice with before cutting the tube to final length. Plastic slivers from the tube can be melted on with a soldering gun while positioned next to the slot towards the open end of the tube if needed to get rid of any looseness if the slots get cut too deep.
-
They over torqued the drain plug on my DD (non Z) which cracked the plastic drain gasket so it leaked a lot of oil over a few days until I took it back to them and they put a new plastic gasket on the plug. Once the oil changing shop forgot to put the fill plug back on on the diffy of a 300ZX I had once. Got lucky, I smelled the stinky rear end oil after a highway trip before there was any noticeable damage.
-
It isn't just you. The guy who gave me the empty tubes of drink said he doesn't remember what drink it was but he thinks it was a nutritional drink.
-
SteveJ, Thanks! The shape looks right, I still can't remember the brand for sure as I threw away the packaging a couple of months back. I have a nice looking new lens for my engine bay light now, I spent the afternoon finishing the one I started. Had to use a dremel to grind it down and to cut the slots in it. Will have to clean and paint the metal part the ones I have are very dirty. I love making this kind of thing. Heh heh. I have another one I will mail for postage if someone wants to try making a lens. May have more lens making energy drink containers somewhere, thought I had 4 of them. Mike
-
Thank you for taking the time to take pictures and post this. On the transverse link were the old bushings difficult to get out?
-
I didn't realize their infrastructure is that bad I thought those things happening were just coincidences. Egads. Where I work we have telephone poles 50 years old and they are being replaced as a few finally fell down.
-
I wondered about why there are so many videos of people driving over there! Thanks Rob.
-
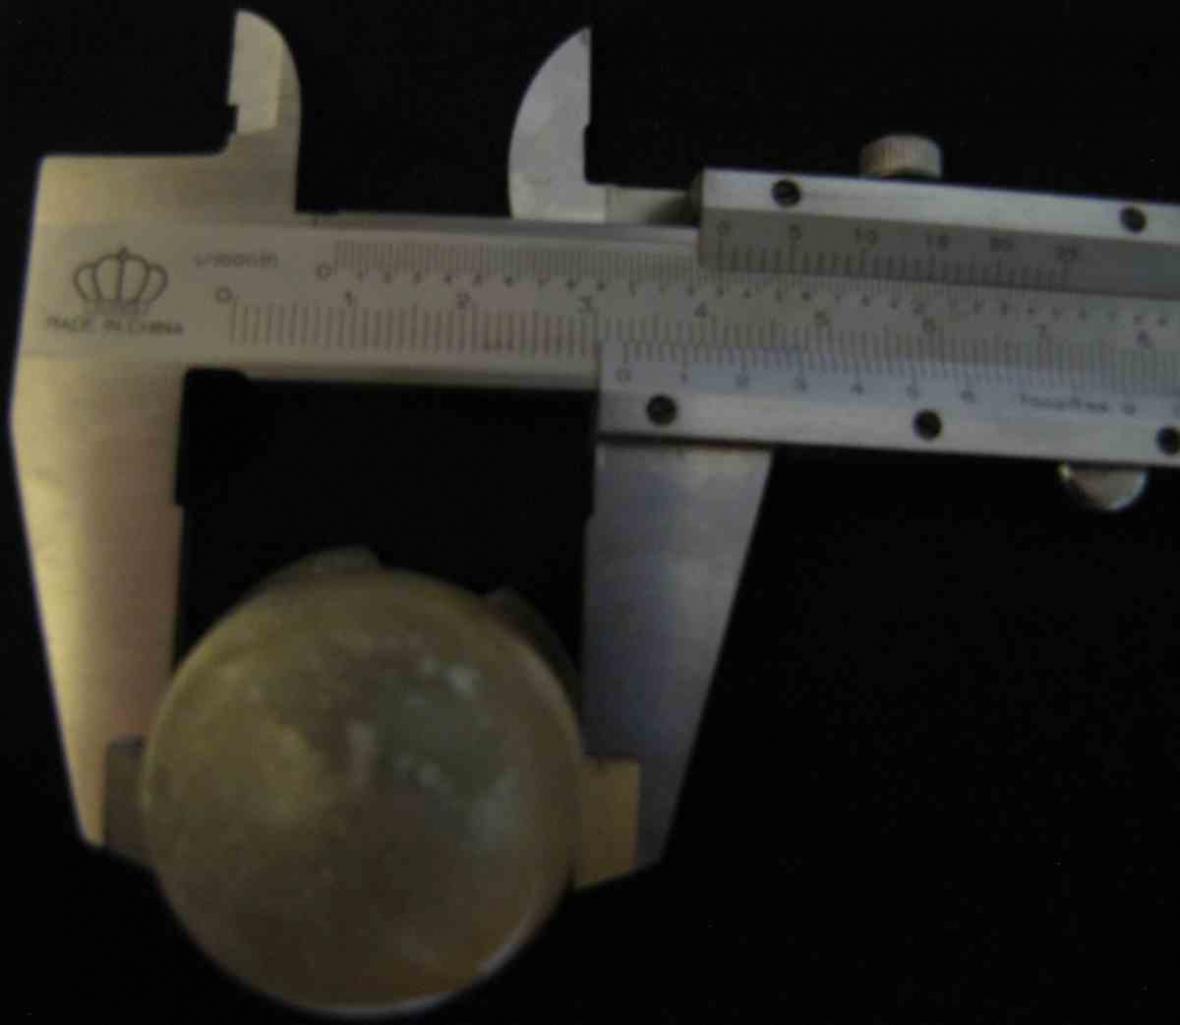
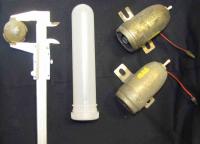
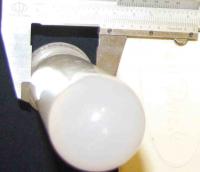
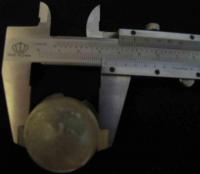
If a new lens is needed apparently one can be made by sawing off the bottom rounded end of an empty energy drink tube someone gave me. Unfortunately I don't know the kind of drink it was but I will get that this week from the guy who gave me the empties. The old lens per my measurement is 32.53 MM in DIA and the energy drink tube is 33.78 MM in DIA if I am reading the caliper right. The new lens material can be ground with a bench grinder where the retaining tabs are on the metal body for a tight fit so it won't fall off though there are variations on this idea. One of you may have a better idea on how to captivate the lens that is more like how the original mounted than what I came up with. I plan on sharing anything further on this VIA my blog when I get done with it in case anyone else wants to try this. The old lens shown here and the two engine bay light assemblies came from JY 280ZX's; my car is missing this item. The pictures vary in brightness but were adjusted for maximum readability of the caliper. Mike New lens material and old lens: New lens material measures 33.78 DIA: Old lens measures 32.53 MM DIA:
-
When I compare this with my idea of spirited driving I am a slacker. Nice training video for improvement though.
-
I enjoyed getting to see that!
-
INST3D, How long is the video as far as time? Looks it is about 601 MB in size from the error message. If you can edit it to a shorter time and then try uploading that it might work. Or break it up into smaller pieces, maybe the total size isn't an issue but the size of any one file is. If you didn't want to experiment with editing it someone else might be able to do it if you were to break it up into pieces that could be emailed and rejoined by the person you email the file to. Maybe 60 files (assuming email max file size just over 10 MB) each 10 MB in size would work. A good program that I have used for that is HJSPLIT. I have used it for years on a Mac and a PC and it has always worked. It doesn't have to be installed and is freeware. Google will find a download page for it. Mike
-
Thanks Steve, the PDF is clear!
-
On my computer I have to click on that picture about three times in succession before it zooms in to full size filling the screen, I think it is because it is a thumbnail picture. I have never figured out how some post pictures and they are real big and easy to see but other pictures in posts seem small like thumbnails requiring further clicking (my posts always have small pictures requiring further clicks for some reason).
-
Steve, The drawing looks promising but the resolution is too low and when I zoom in I can't read it, I may be doing something wrong though. Mike
-
I got pulled over in Tennessee back around 1976 driving the 240Z I used to have for doing 77 however I had been going 107 a few moments earlier. I felt justified in failing to mention that. Officer, I know for a fact your speed gun isn't working properly, might want to get that checked... He asked me how fast will that car go? I said the book says it will do over 120 but I have only had it up to 107 (neglected to mention how recent that was).
-
Thanks for trying! Could you be convinced to record how to make one small part of the drawing, either of you?
-
I would enjoy seeing a video of how you two, motorman7 and INST3D make those drawings but I might be the only one interested in the creation process. heh heh. Nice work! I can see an engine number plate and frame rails. I can respect this work since I did a drawing of parts of the 240Z a while back that doesn't look as nice.
-
Drool; slobber
-
The wire powering your parking lights now is probably the one that is supposed to go to the dash lights as they can be dimmed. The dimmer may not be able to handle the current of the parking lights for long and might burn out if left connected that way, I don't know for sure, just an idea.
-
Someone has an older RX7 sitting in their driveway in town maybe 10 miles from me. I don't think it has ever moved.
-
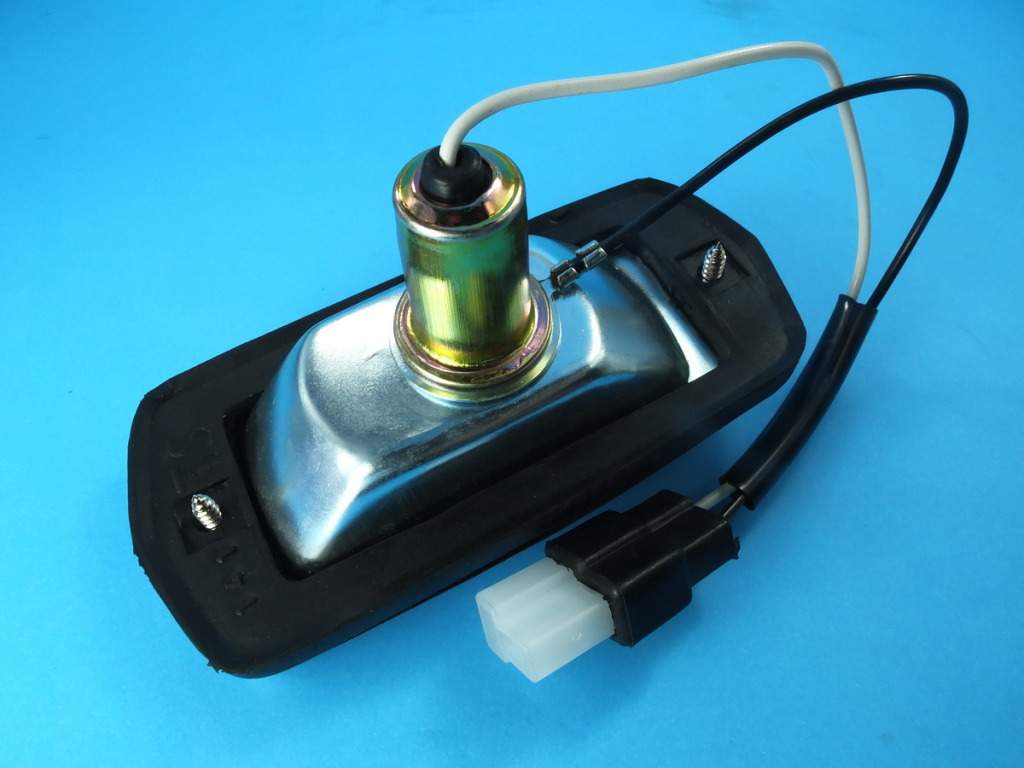
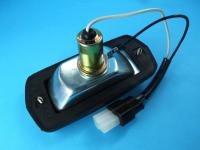
Can anyone tell from looking at the picture of the Thai marker light below sold on eBay now if it can be modified to connect to the turn signal so it flashes with the turn signal? I don't know if it is possible to tell from the picture. I don't have an original light as my car didn't come with any. Thanks, Mike
-
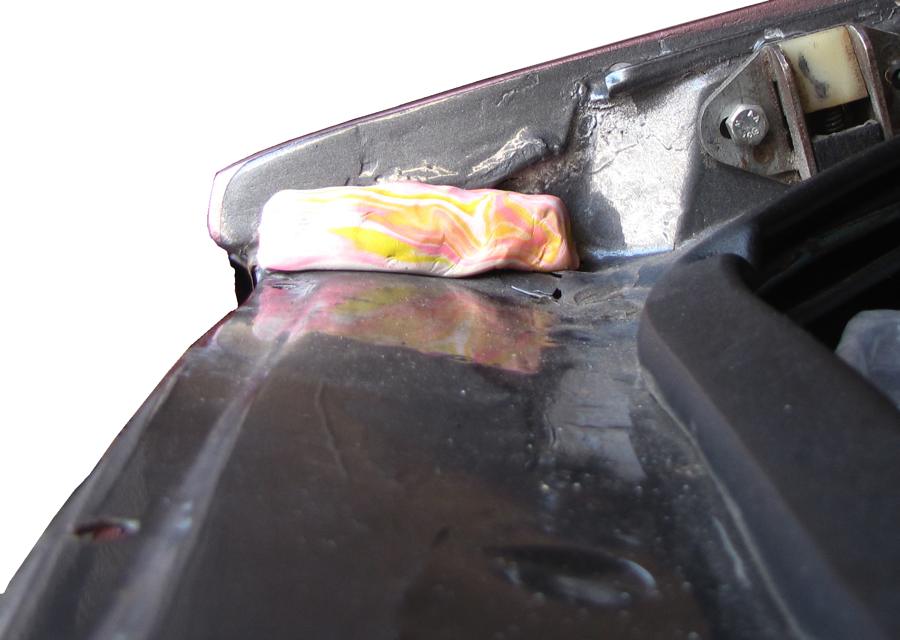
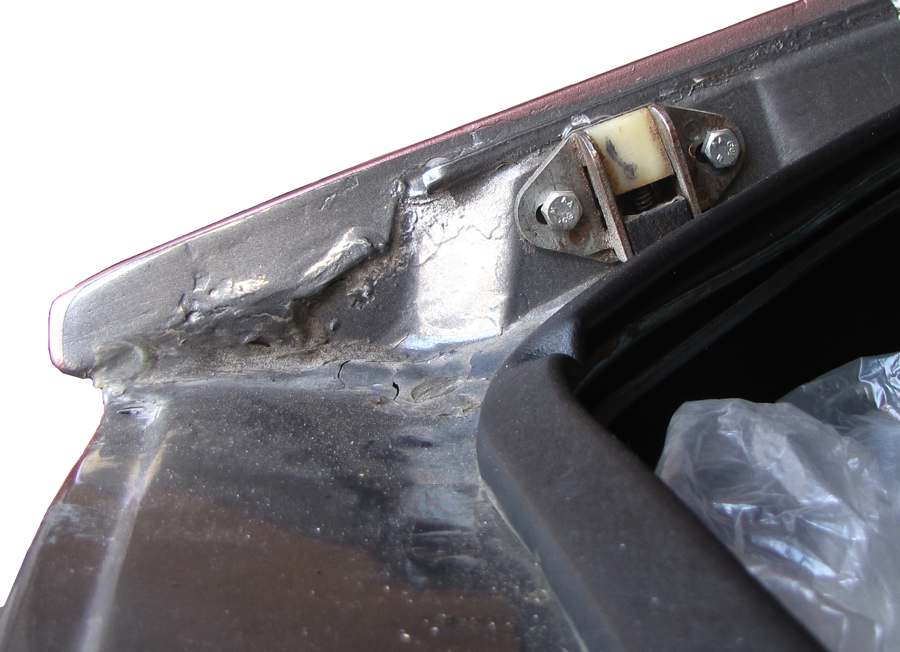
I haven't tried gorilla glue for anything so don't know how well it sticks to plastics. I would think a tube cut in half would work as long as there is a good caulking or weathertight seal between the hose and the car. If you look straight down at that tube after installation I would think it would need to be as least as wide as the existing gutter drain at the side of the hatch, wide enough to drain off any water going straight down into that crack between the hatch and the car. Wouldn't hurt if it went under the lowest lip of the existing drain gutter. I had been putting this off but today I put a wad of clay in a tube shape in that area and closed the hatch to see what clearance there is and it looks like there is plenty of clearance for your idea as the clay was not touched by the hatch. On the 71 240Z I used to have I used to keep that ledge heavily waxed but the car was kept garaged so I never found out if that had an effect. Before: After:


-
Don't remember who but someone did some bodywork on their car to slant that area under the back hatch so the water would run out of the car. The edge closer to the front of the car was raised to accomplish this if memory serves. I plan on extending the drip edge on my car with something removable in case I want to try something else later.
-
Is there a possibility of heating suspected components with a heat gun one sub freezing morning one at a time to see if it will then start? Easy for me to say I don't even have a car with an ignition module!