


AZ-240z
Free Member
-
Joined
-
Last visited
Everything posted by AZ-240z
-
 Hi Ron, My purpose in doing these decals was to provide my car with one, and, help finance this project by providing them to all interested. You can certainly have one. I am just trying to get some feedback of the number interested so as to fairly price them. I am thinking in the $12 to $15 price range depending on the number of people interested. Does this sound reasonable? Tell me what you think.
 -
I know that it took more time than planned to get the result that I wanted with these decals, but I thought I would bump this back to the top since there was considerable interest in these at the onset of this project. Dan
-
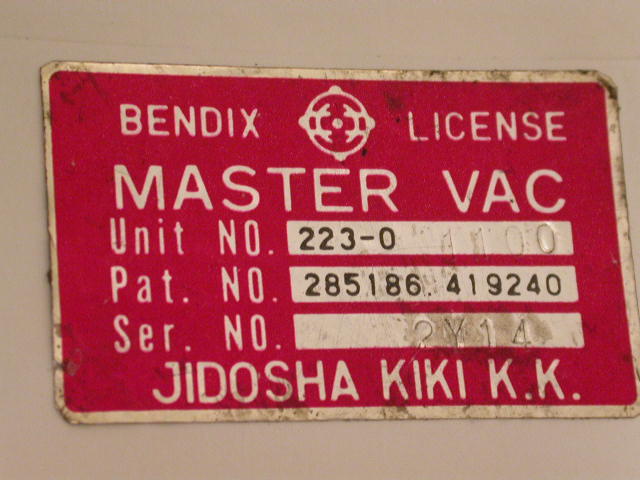
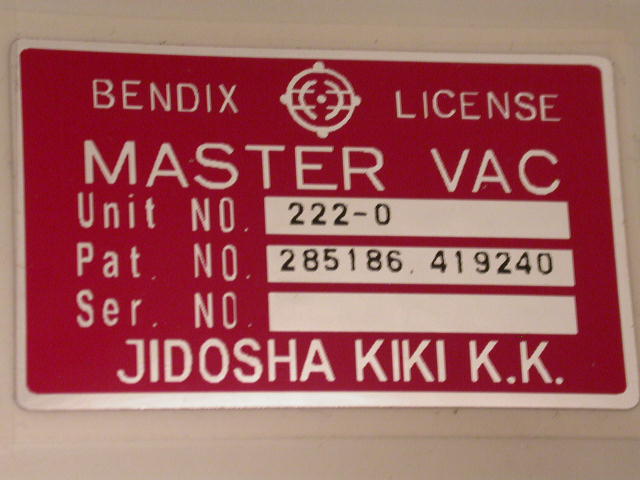
Hello geezer, As far as I can tell by comparing these to the original, they are a perfect reproduction. The chrome is bright and the red is just a slight bit richer than the original as if the original red had slightly faded. I'll try to include pictures of the original below. Let me know what you think. Dan

-
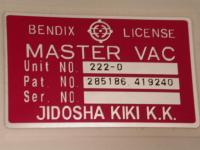
Well, I can't believe that it has been almost a year to get these master vac decals done. The sign shop that did these worked on them between jobs and I can't count the number of revisions and refinements that were done. I believe that they are now quite good and have tried to include a picture, hopefully. The picture doesn't do it justice as I had to use a white backlight to make it ledgeable and reduce glare from the chrome material. Let me know what you think. Dan

-
Hi Carl, I noticed that, also. The master vac decals on early 240z cars had two spaces, which were Unit NO. & Ser NO. This one of Bob's had Unit NO. & Lot NO. along with some other differences. Possibly his NOS unit was meant for the domestic Japanese market, or the Euro market. Not to hijack this thread but I just completed reproducing this decal for the 240z. It came out perfect but I'll update later on the correct thread. Dan
-
I just KNEW it was the angle of the picture. Are you still my friend? When I get that master vac decal finished, you can get back at me. It should turn out quite good after many trips to the sign shop working on this, but the proof will rest with the opinions of all wanting one. I'll keep looking for a good grommet for your project, Marty. Great, Great Job. Dan
-
I've never tried this, but I think I would try from the outside of the tank. Obviously you don't want to weld pull rods to the tank, but maybe you could clean off some spots and epoxie some rods on several pull points. Use gently, continuous pulls so as not to pop off the glue points. This would, also avoid fulcrum or leaverage points needed to work out the dent from the inside and possible distorting the fuel sending unit hole. Just something to consider. Dan
-
Most excellent job, there, Marty. I'm looking at my NOS boot right now, and I can't see any real differences. The vinyl grain is a perfect match, and the stitching is exactly what my boot shows. If I were going to split hairs with you, and it is difficult to tell from the picture of the full boot, my boot, from the mid circumferal stitching to the top measures 2 1/8 inches, and 6 inches to the bottom of the boot. The top part of your boot appears to be a bit taller than the 2 1/8 inches, but this could just be the photo angle. Don't you just hate it when someone in the crowd does that. Seriously, that is a tremendous job. I'd certainly get one if I didn't have mine. Dan
-
BRE-240Z, I believe that Mike at Banzai Motorworks, www.zzxdatsun.com, has the outer hatch weatherstrip for the early 240Z in reproduction form. It has the tubular cross section all the way around the hatch gutter. It would be a lot easier than piecing together the original upper pieces. Just a suggestion. Dan
-
Arne, I agree, not rubber. My boot is NOS still in the Nissan plastic bag and the grommet is quite soft and pliable, probably to help squeeze it through the hole in the boot. When you say vinyl or hard rubber, I am thinking yours may have aged a little. If it is molded from a soft synthetic material such as neoprene, vinyl, or silicone material, it may be much easier to find someone to make, as opposed to rubber which involves a vulcanizing process, I believe. Just some opinions to explore. Dan
-
Chris, I got the catalog and took a pretty close look at it from end to end. Most of the stuff is specialty for US cars, and the grommet section, though pretty complete I don't think came close enough. The shift boot grommet has a fairly unique shape. I am doing Google and local suppliers to see what I can find. Dan
-
Will, I took some measurement from mine. The inner diameter of the grommet is 1/2 inch, the outer diameter of the top half is 1 inch, and the outer diameter of the bottom half is 1 1/8 inches. See last picture above to see this variation. Total grommet thichness is 5/16 inch, and groove width is between 1/16 & 3/32 inch. The material, to me, looks more like a synthetic, very pliable, shiny material instead of molded rubber. Dan
-
Yes, the area under both seats, and the area behind the seats and under the black plastic jack and tool pouch housings all had the natural fiber jute installed on series 1 cars. If you do a search for jute, I think you will find a lot of good info and pictures from Kats.
-
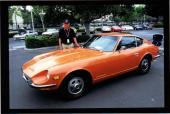
When my car was entered in the show at the 2004 National Convention, The editor of this book and his photographer asked to take some pictures for this book. I was more than happy to honor there request and was quite surprised that my car was profiled on pages 110-112, much more than I expected, upon receiving a copy from the publisher. I have been putting off trying to get the associated article translated, but I really must do this to see how my comments were translated. If anyone has a good grasp of the Japanese language and would be willing to translate those pages, I could send you a copy of the article.
-
Marty, As far as I know, there are only two shift boots for the 240z. The early boots which incorporate the soft rubber grommet installed on the series 1 cars, and the later boot with leather ties. The later boot with the leather ties seem to be readily available as they are often offered through ebay sellers. Is this a correct assumption on my part, or were there other variations? Dan
-
Slide the boot down the shift lever on the Z432 and it becomes an innie.
-
Hi Kats, I am looking at my NOS boot, part # on the bag is 75150-E4101, and your boot looks exactly the same right down to the stitching as far as I can tell. The boot shown on the Z432 is stitched a little differently, and the vinyl grain appears to be more of a pebble texture. The clothed backed vinyl is fairly thin. Kats, your car is a treasure of originality. Dan
-
Mckrack, Just out of curiousity, what do you base your assumption on that the color is not the same on the tail light and grill panels as is on the original hub caps? I have a not too great picture of my car when it was new, and the color of the tail light panels appears to be the same as the hub caps. I, also, have a set of NOS hubcaps as a comparison. NOS grills are still available, but buying one for the sake of making a comparison is not in my budget right now.
-
I can remember the same problem with my 71 about 33 years ago. It turned out to be one of the U-joints in the half shaft. The early cars had the off-set in the half shafts to the differential which put unusually hard loads on those U-joints. This would be the first place I would look. Hope this helps. Dan
-
Arne, I have my boot and have been attempting to take physical measurements of the grommet as accurately as possible without removing it from the boot and possibly damaging the it. It appears to just slip into a hole in the material but I'm going to be safe, for now, with a brand new boot. If I can make a drawing of the grommet and figure out how to scan it into the computer, (not easy for the illiterate computer guy), I'll post what I have. The quest for the Grommet continues. Dan
-
Interesting that this search for shift boot grommet topic came up. I have a NOS early shift boot that will be going on my car, but have recently been looking for a source for this grommet, myself. My thought was to have this boot reproduced before I install it, if there appeared to be any sort of demand. If anyone is able to come up with a part number for this grommet, I will be keeping an eye on this thread. Japan supplier can often find impossible items. Dan
-
Jim, I would say that there is a lot of hope for your having a numbers matching car. My car is numbers matching, about 2,000 numbers older than yours, and my engine is just shy of 6,000 numbers greater than my vin. It is one of the last series 1 cars produced with a build date of 1/71. Dan
-
I'll put in my 2 cents. I don't have my car here, but, as I recall, the bolts pass through a cover plate and then screw into the block. If you were to remove the timing chain cover plate, I think you will find that the thin bolt probably snapped off outside of the block. You will need to use a pair of vice grips to grasp the remainder of the bolt and unscrew it from the block. Trying to go through the cover plate with some kind of easy out is looking for disaster in my opinion, until you actually look to see what it looks like at the surface of the block. In the early days of the 240z with the metal fans, this was a very common problem when replacing water pumps gone bad with the use of these early, heavy metal radiator fans. Hope this helps in your discovery of the easiest plan for a repair. Dan
Chris, my only point was to describe the original paint texture as being slightly sandy, ie., matchbook scratcher, to the feel. As to how this was accomplished, Wick Humble developed a formula of Gray Lacquer paint with a suede agent added as described in his Datsun Z-Car restoration book. If you have obtained the original paint code and formula, I would love to have a copy of it. I have a NOS set of these hub caps still in the paper bags, except for one, that I use to confirm paint texture and color accuracy.

Important Information
By using this site, you agree to our Privacy Policy and Guidelines. We have placed cookies on your device to help make this website better. You can adjust your cookie settings, otherwise we'll assume you're okay to continue.