


zKars
Supporting Member
-
Joined
-
Last visited
Everything posted by zKars
-
I’ve been quite shocked how much transmission noise came and went as I changed bushings, shift knob size and weight, shift lever lengths, etc over the years. A LOT of noise and vibration comes from the trans, made worse I’m sure by internal wear and slop. A friend of mine related an interesting story that shows that Nissan recognized this as an issue. First we know about the ZX shifter bushings that have the plastic bushing plates with the embedded spring to absorb vibration, and with at some or all of the C type shifters, if you foolishly cut the shifter rod off to lengthen, or shorten, or change the angle, you find that the shift rod is actually a composite of a small internal metal rod that connects into the transmission selector hole, then a laminated rubber coating over that, then the outer metal shift rod that you see and feel. Makes welding really fun, and you will lose all that nice isolation....
-
She has been convinced to donate her wages to the cost of our Disney+ subscription....
-
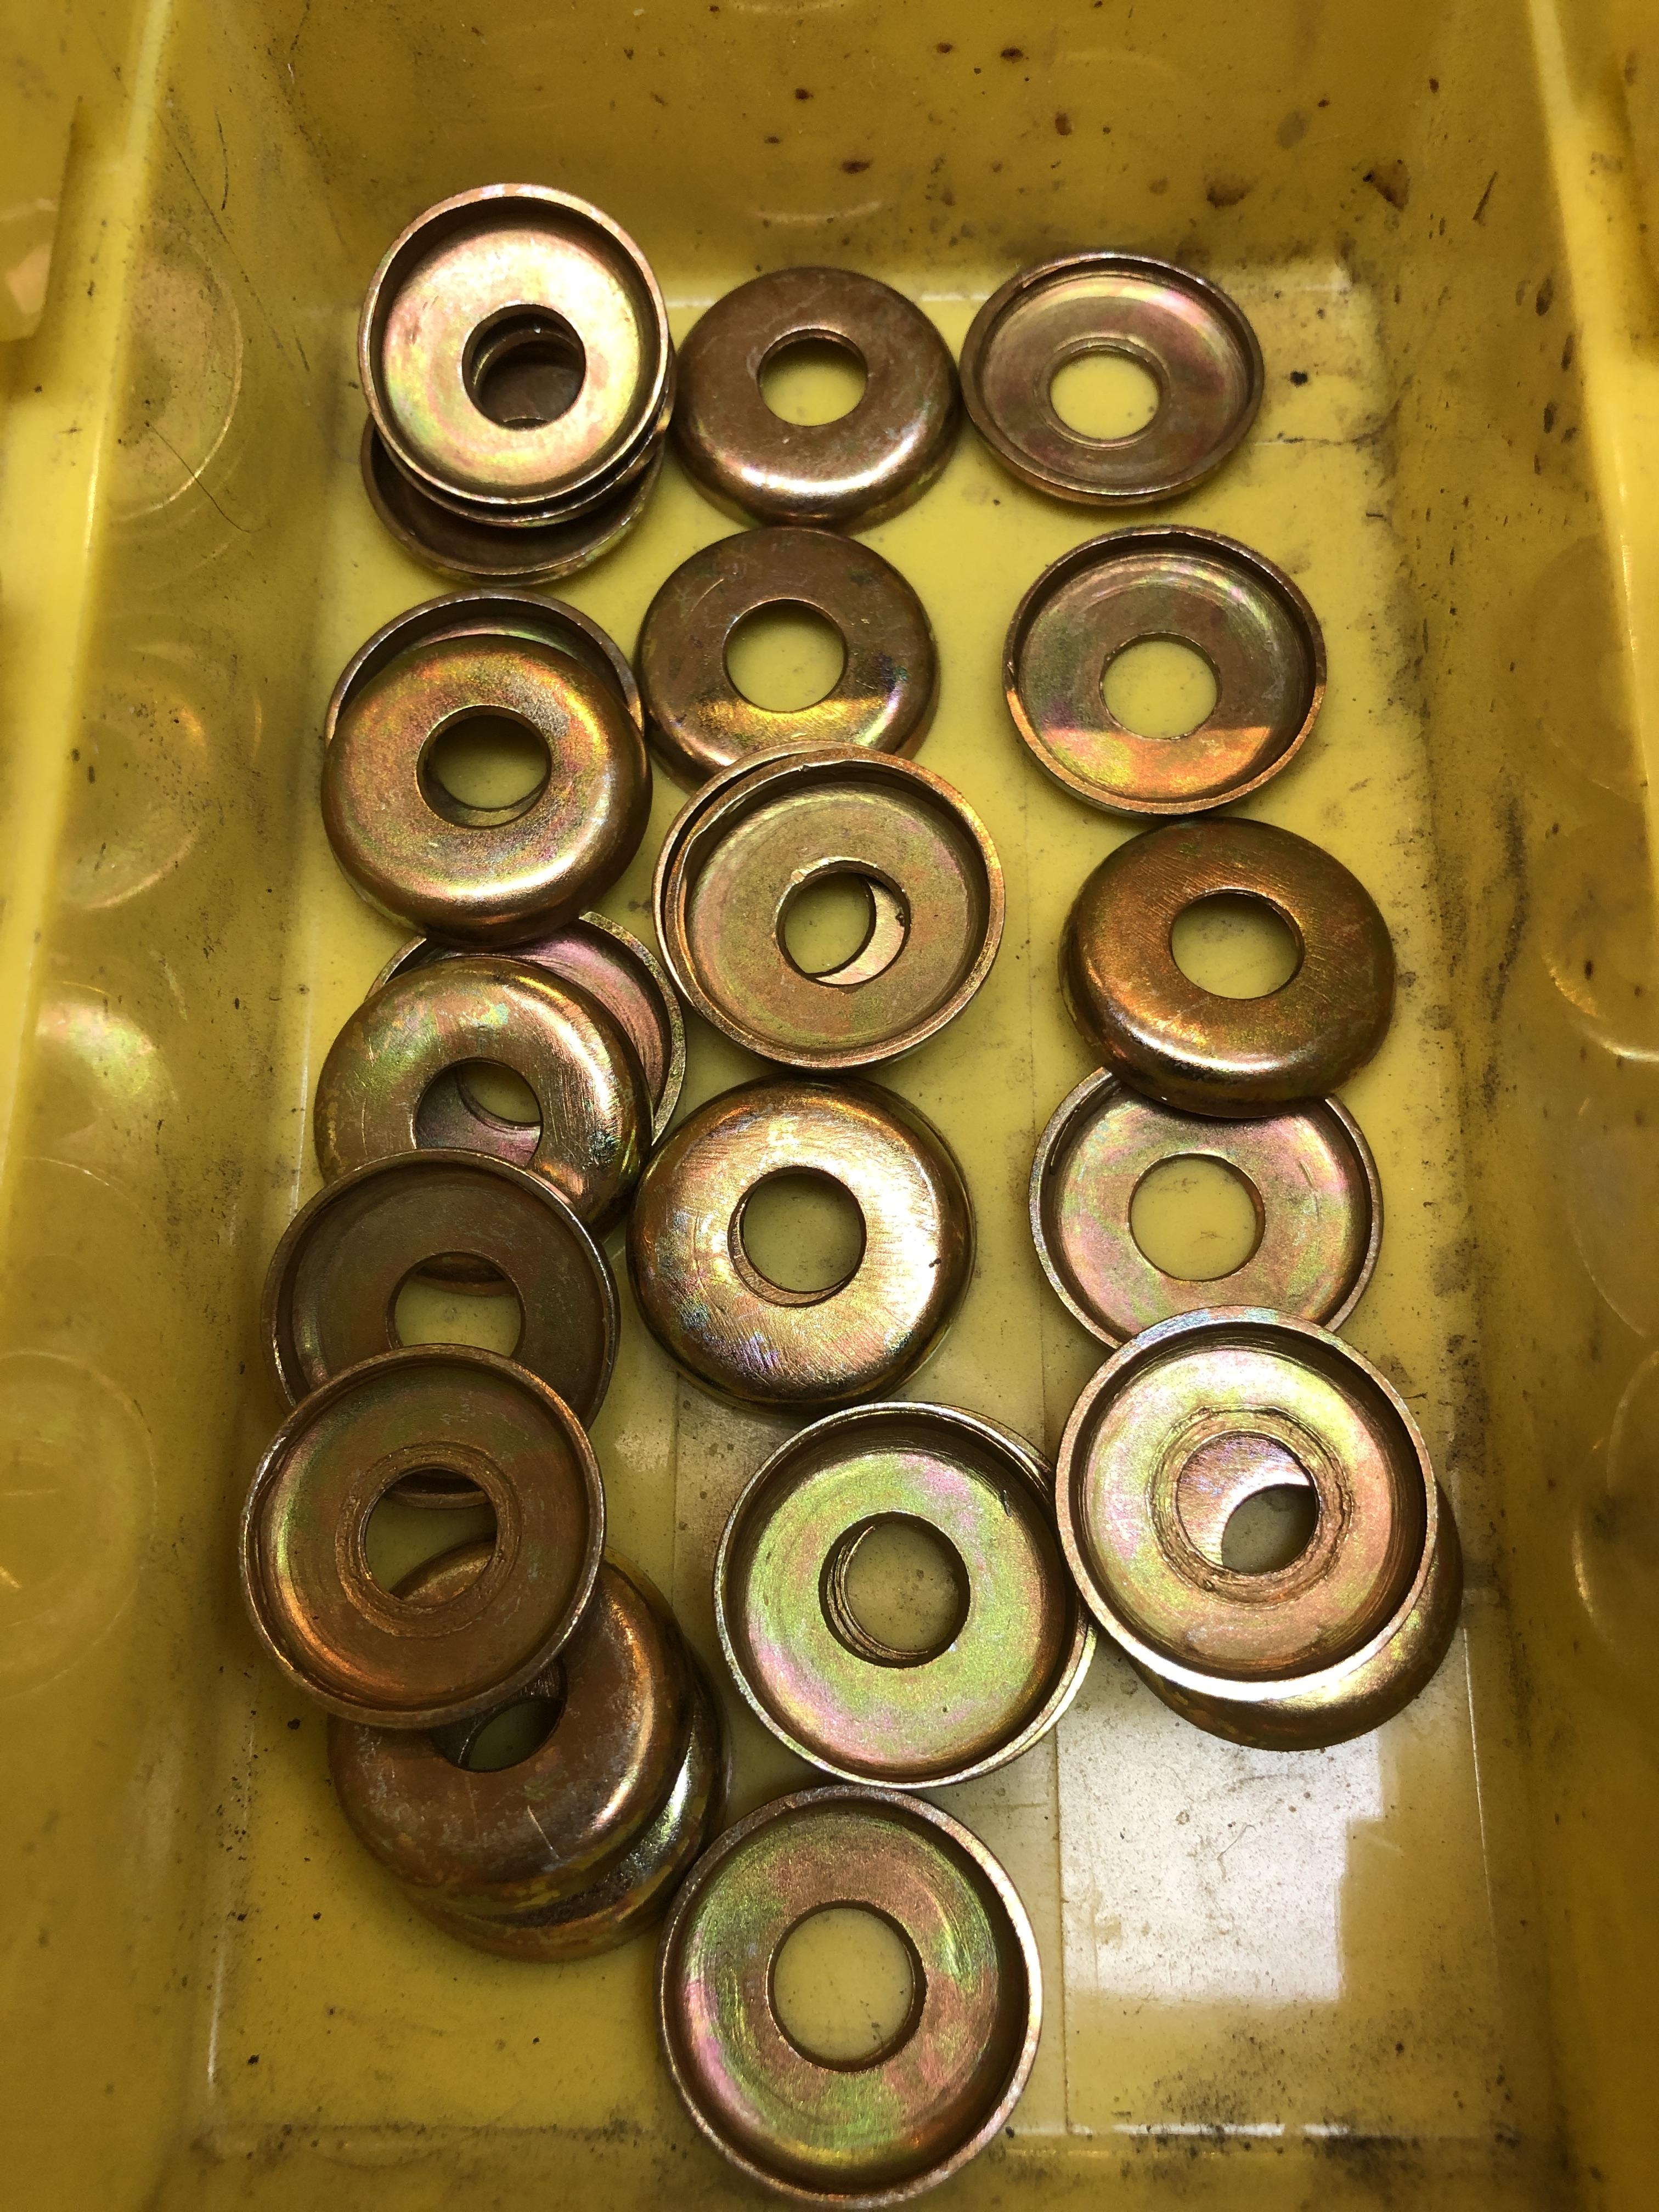
There are silver linings indeed. Spending more time with my 3 yr old grand daughter than I ever thought I would. We are playing daycare four days a week. Never played so much barbie or Hide and seek in my life. Even have an indoor swing, and that thing does NOT swing itself. Also have her earning her keep in the shop. Doing her part sanding the air cleaner bolt cup washers. F495BC45-70B6-4744-9B6E-545B7CC5E79E.MOV
-
Small medium, no wait. Tall, Grande, Venti? All the holes are exactly 17mm

-
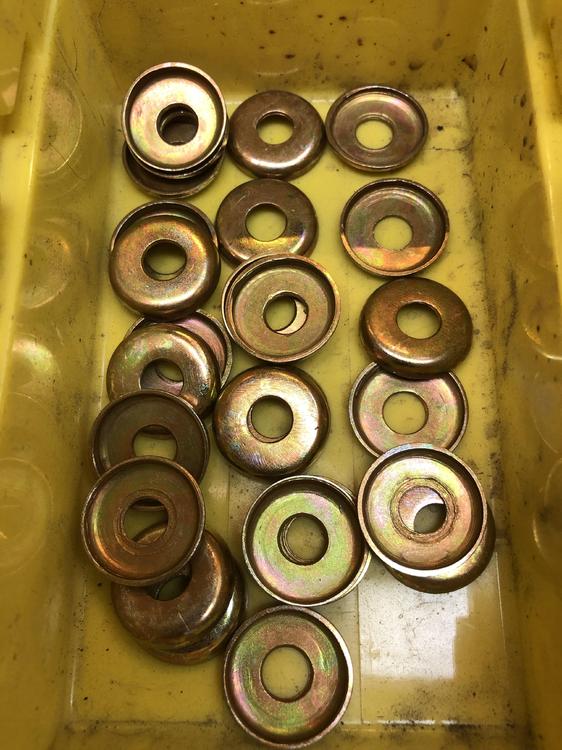
Progress today. Cup washers are back from the plater. Look good to me! Now I have to go buy more plumbing rubber washers to complete them. By “go out” I of course mean, order on line. I found some at Ukrainian Tire. Coming next week. Never ordered anything from CDN Tire. usually it’s a reason to go out for a look-see, like Princess Auto or Harbour Freight....
-
Regarding naming. Leading contenders are: Dizzy Disk TimeSlot FreeTime DatSlot DatTime AnyTime EasyTime
-
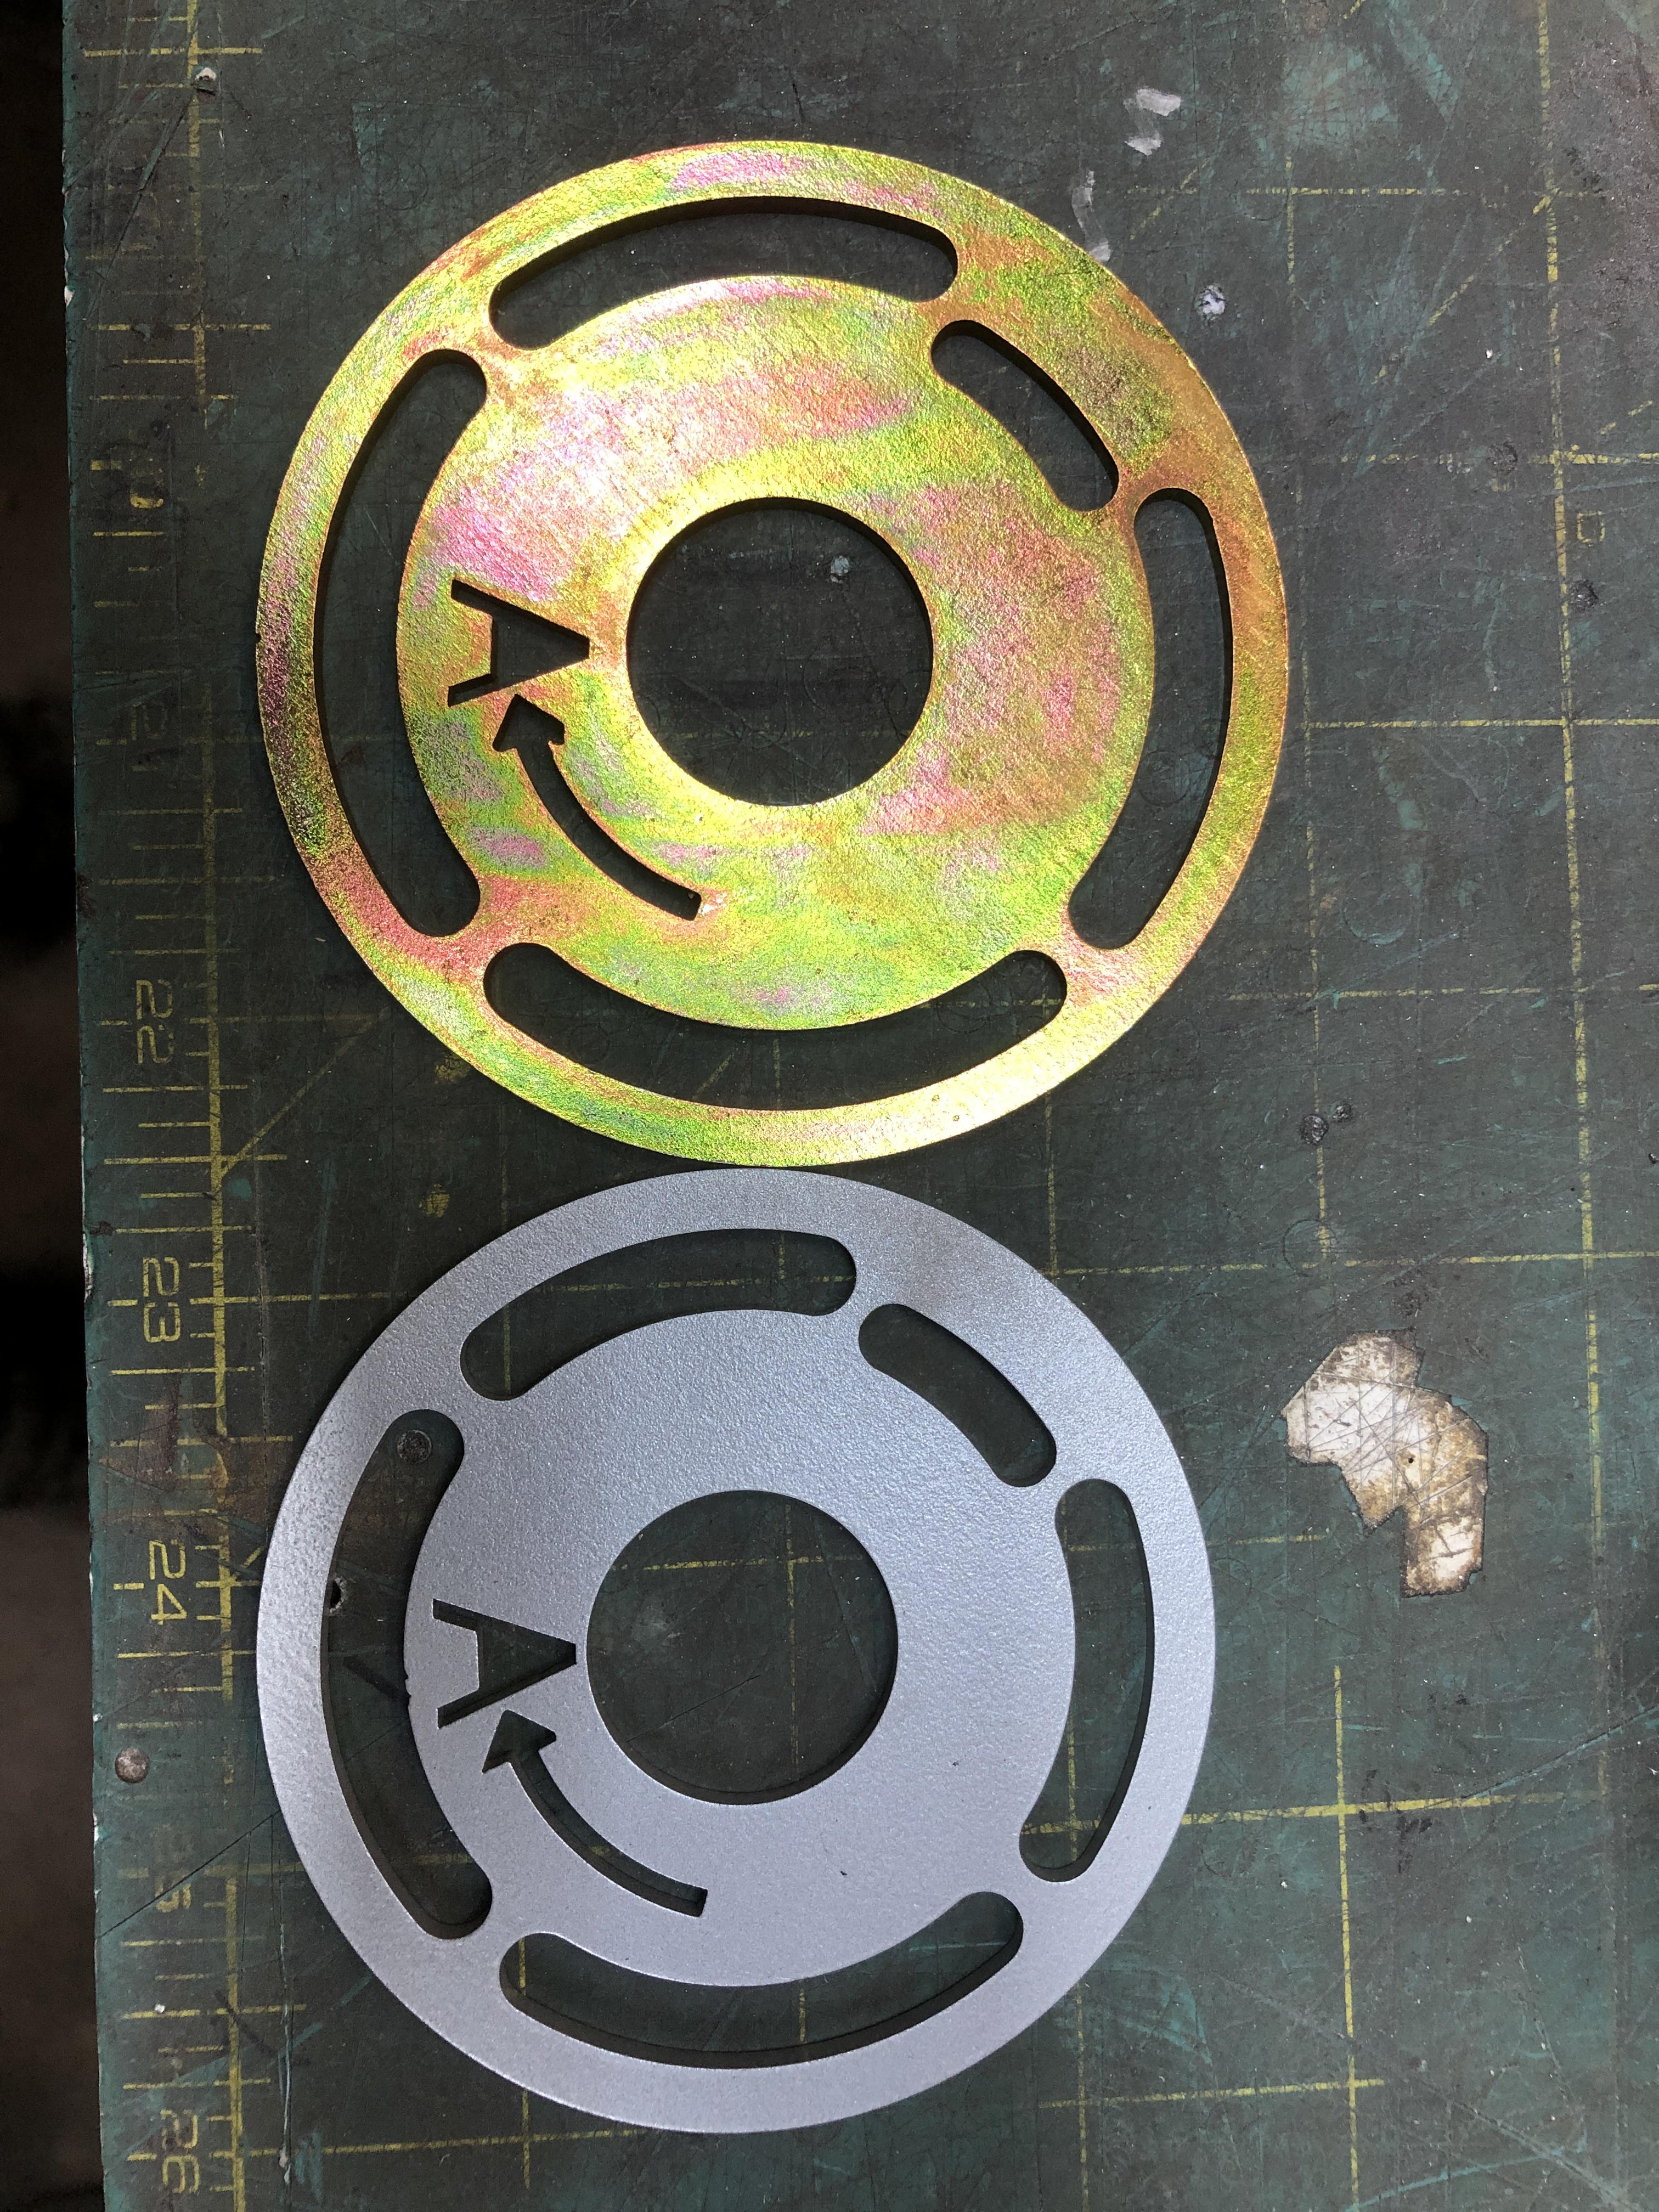
Some progress. Got some test plates back from the plater. Big one in yellow zinc and little one in powder coat 'cast aluminium'

-
Let me look. I likely have one. At least I’ll tell you the size of the hole. Making one should be pretty straight forward. Do you have the clips that hold the clutch line at this hole? I can send a set of these too.
-
I have some spares. PM me.
-
Oh sure I mention a stupid high price in a moment of jest and everyone goes quiet. There was a WINKY face people! Maybe there’s a world crisis that has you pre-occupied. That must be it. ? I would like to get a couple of others in tester’s hands, let me know if anyone else wants one.This here is the tab that you see when you take the ring off. The sender body has the matching notch.
 Oh I'll make all my money back when I go commercial. They are going to be $299 USD! ?Have you seen the exchange rate with It's 1.16 right now CAD to AUD. Time to hit up their Datsun vendors. For the US, it even crazier 1.63! Huge advantage for us North American'sI have a couple of requests so far, and I've started the shipping process to send them out. I've done a bit of postal shipping estimates to the four corners of the lower 48. The packaging I'm using a bubble mailer, 24x18x1cm, 0.14 kg for the large plate. It's the same no matter where it goes. Given the usual payment method of paypal, I decided a flat $15 USD charge no matter where you are in the USA is the price to play for the few of you that will be the testers. Postal rates in Canada vary greatly, I'll quote actual rates as needed, and we can send cheaper e-transfers. In the spirit of the current reality, I will also disinfect the package contents before I seal the envelope.Send me the email or PM me with your shipping details, we’ll get one on the way.Did any specific machines catch your eye and not your wallet?Send me an email to z240@shaw.ca and we’ll exchange contact info. I’ll only ask for the cost of postage to for a proto type Obliges you to test, feed back, send some pics, maybe some good press if you like it.Jim Shim. Nice ring to it. Add it to the list. “About Time” is leading in my book. Quite an advanced concept really. The onesix has it’s own base, this thing won’t help.I like that idea. A quick browse of laser engravers that can do steel are out of the price range of practicality and $$. I may be able to find a service that does it that makes the per item cost reasonable. I know! I’ll hand engrave and sign each one. Harder to knock off. I have one of these.
 The danger is in the advance getting too high, retard is not an issue. Even things like spark plug wire tension might affect which way it would tend to wander. Maybe an addition “Stop” of some sort (small bolt and nut) to add to the slot CW of the main hold down bolt to prevent it wandering in that direction?Since it works on the L4 as well, would have to include 1342 as well. Maybe not a bad idea to inscribe both. It does add considerable expense to have them engraved however. The laser cutter cannot be used to do both cut and engrave. I suppose I should engrave a trade mark as well. Trying hard to make this cheap and easy, not get rich or make so expensive that it won’t do all the good I hope it does. I understand the danger of feature creep. Add this, add that, make it shinier, etc etc.Interesting point. If the main bolt comes loose, I wonder which the dizzy body would naturally tend to rotate? At least a good point to include in the instructions.It’s laser cut. And it does need a way to indicate top and bottom. The “A” is still an “A” when it’s upside down.... Maybe it should be “R” . Maybe time to buy that desktop Laser engraver I keep getting badgered about on FaceBook. Name Possibilities: Time It! Dizzy Disk TimeBase TimeSlot AnyTime! AnyTooth That thing with the slots.....Cool! I hoped it would meet with general approval. Seems that is the case. I sent some out for Yellow Zinc plating, hope they get back before Alberta closes all non-essential services. I can powder coat gloss black, Cast Aluminum, blue, red here in the shop, or supply them “naked” and let you do the sanding, prep and final finish. But first, of course, we need to run a contest for the best name for this thing. Free timing plate to the best three suggestions.


Important Information
By using this site, you agree to our Privacy Policy and Guidelines. We have placed cookies on your device to help make this website better. You can adjust your cookie settings, otherwise we'll assume you're okay to continue.