Leaderboard


Popular Content
Showing content with the highest reputation on 11/16/2022 in Posts
-
3 pointsInterestingly fast evolution. Yesterday they didn't exist on Japanese cars, and today they do, but only because of..... reasons. Within a few more days we may well see them blamed for Covid-19, the war in Ukraine, Global Warming and wearing Flip Flops on public transport. Impossible to know. Good luck with your quest. Me, I rather like them in the right context. Unlike the AMCO towel rails, which only their mother can love.3 points
-
2 pointsquick update, shifter is awesome with the full manual vb, I got a new carb proform 750, switched to a holley style carb with high speed airbleeds and more stuff i can tune. i started college, im at ERAU prescott studying aerospace engineering, learning a lot of good things that i can later apply to the car, and theres lots and lots of mountain roads around here so once the cars up here that should be fun. over the summer i did do more autoX racing and claimed a first place finish in my class by default(no one else was racing in my class) and ive been improving my handling, i adjusted all my ride heights for even height side to side and even camber, and slightly less rake to keep the back end a lil more planted, illl document my handling journey as i gain more seat time and can hit my now local mount roads more often. i blew a headgasket before leaving for college, caught it early enough that there wasnt any damage, but i snapped a headbolt on reassembly so ill deal with that when i get home for thanksgiving. going to rebuild with head studs and mls headgaskets, and gonna swap to a much bigger cam, 4/7 swap with 250ish duration and .530ish lift, solid lifter ect. i also have nitrous if i need more speed, but i imagine i wont get much use out of it around here. i been looking at swaybars to help with the bodyroll, but theyre pretty expensive especially for a now broke college student, anyone have any experience with making their own for these cars? i was looking at doing like a splined setup but ill have to see, may just end up buying some anyways. ill upload pics when i get back to texas next week.2 points
-
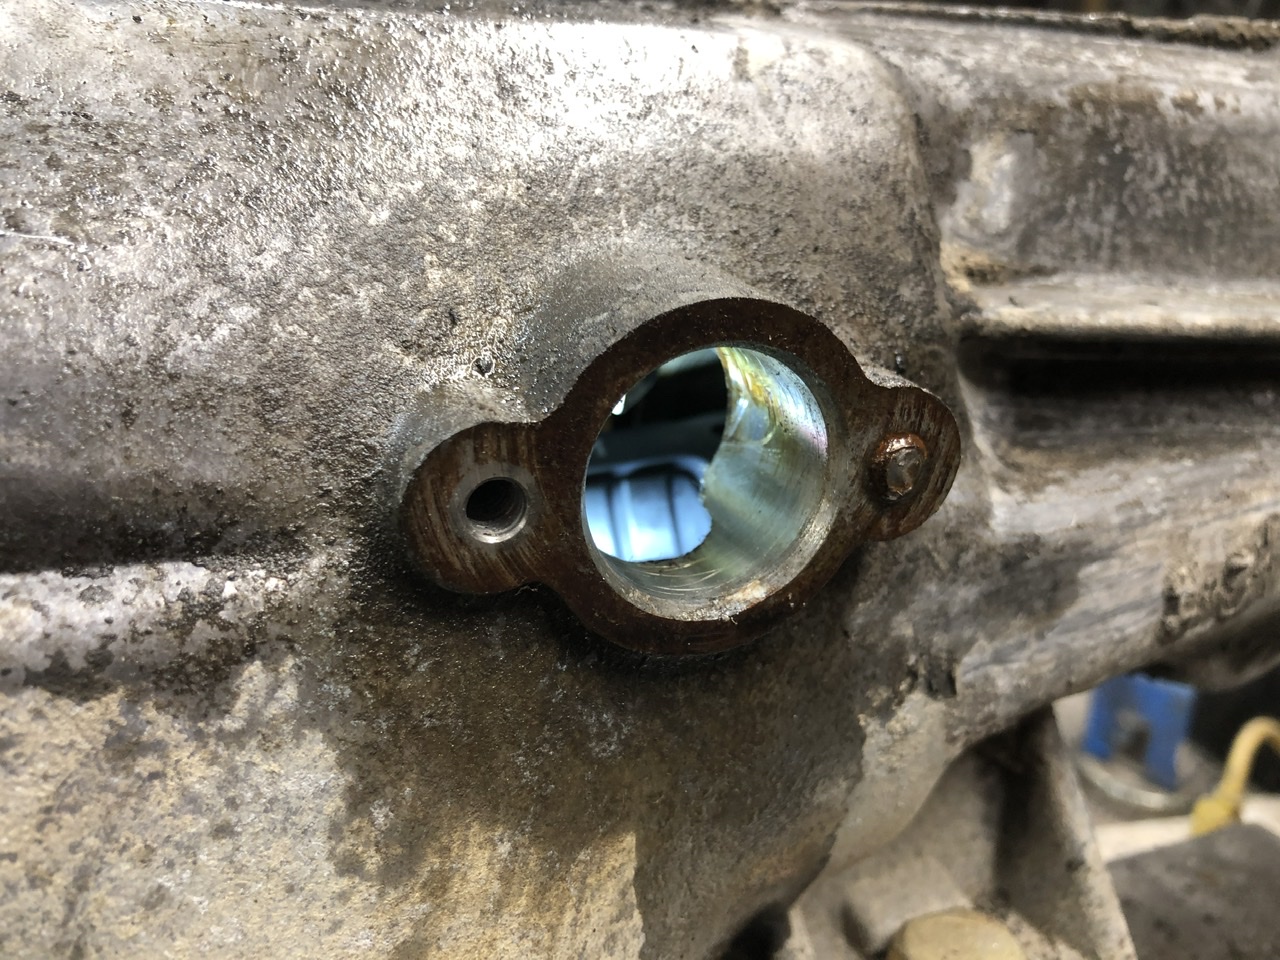
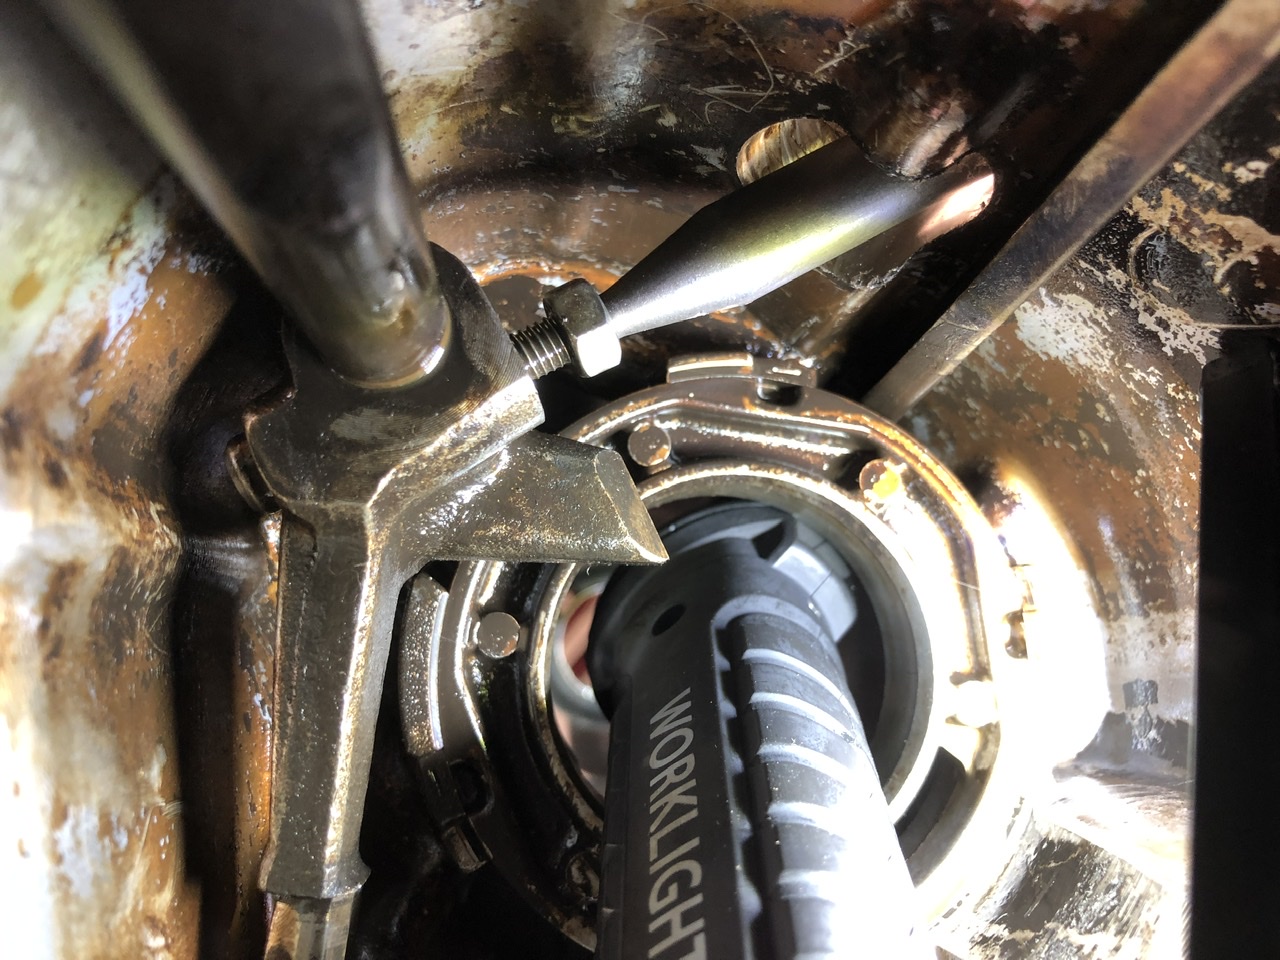
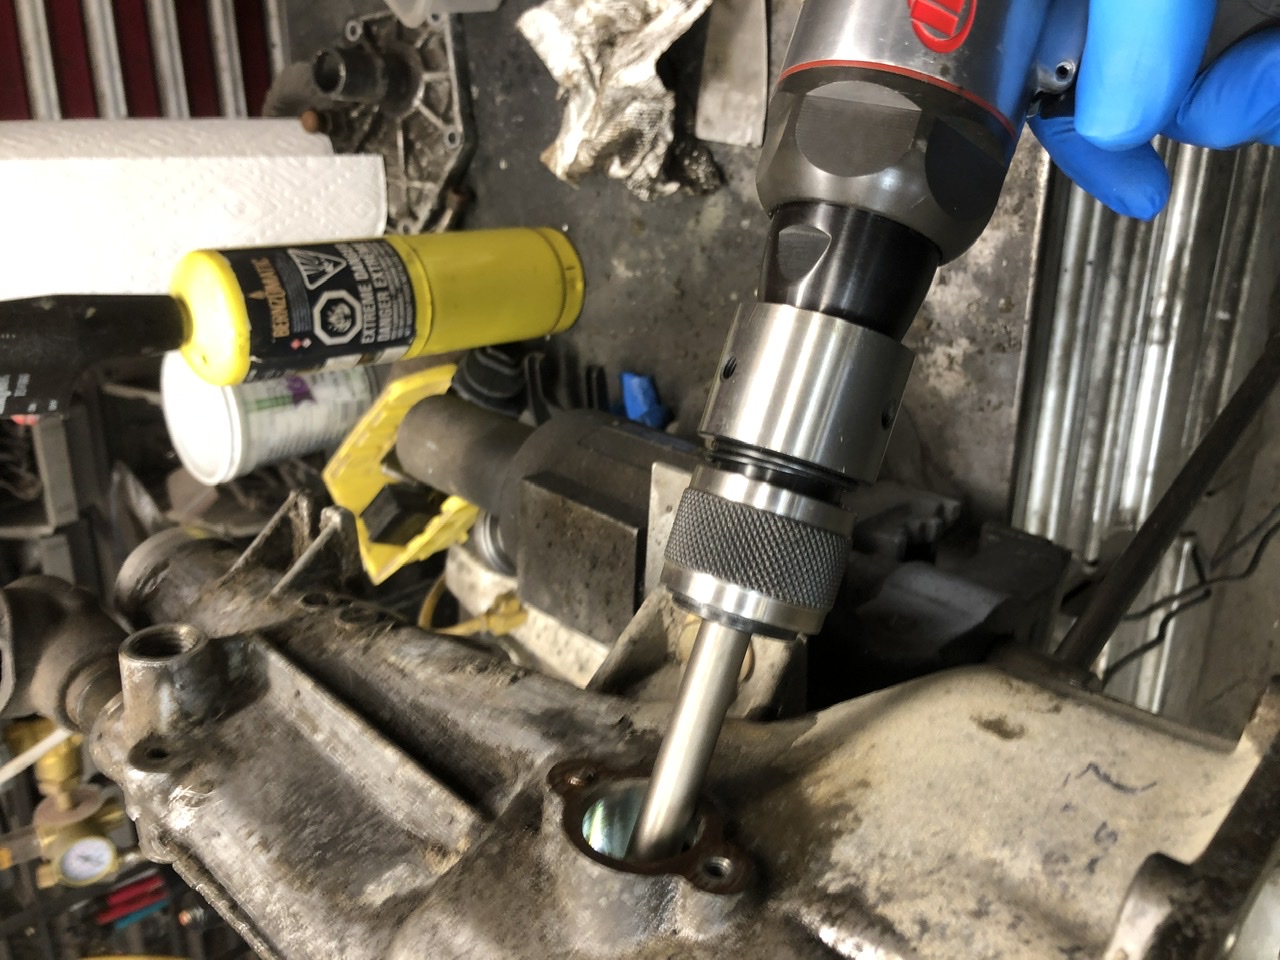
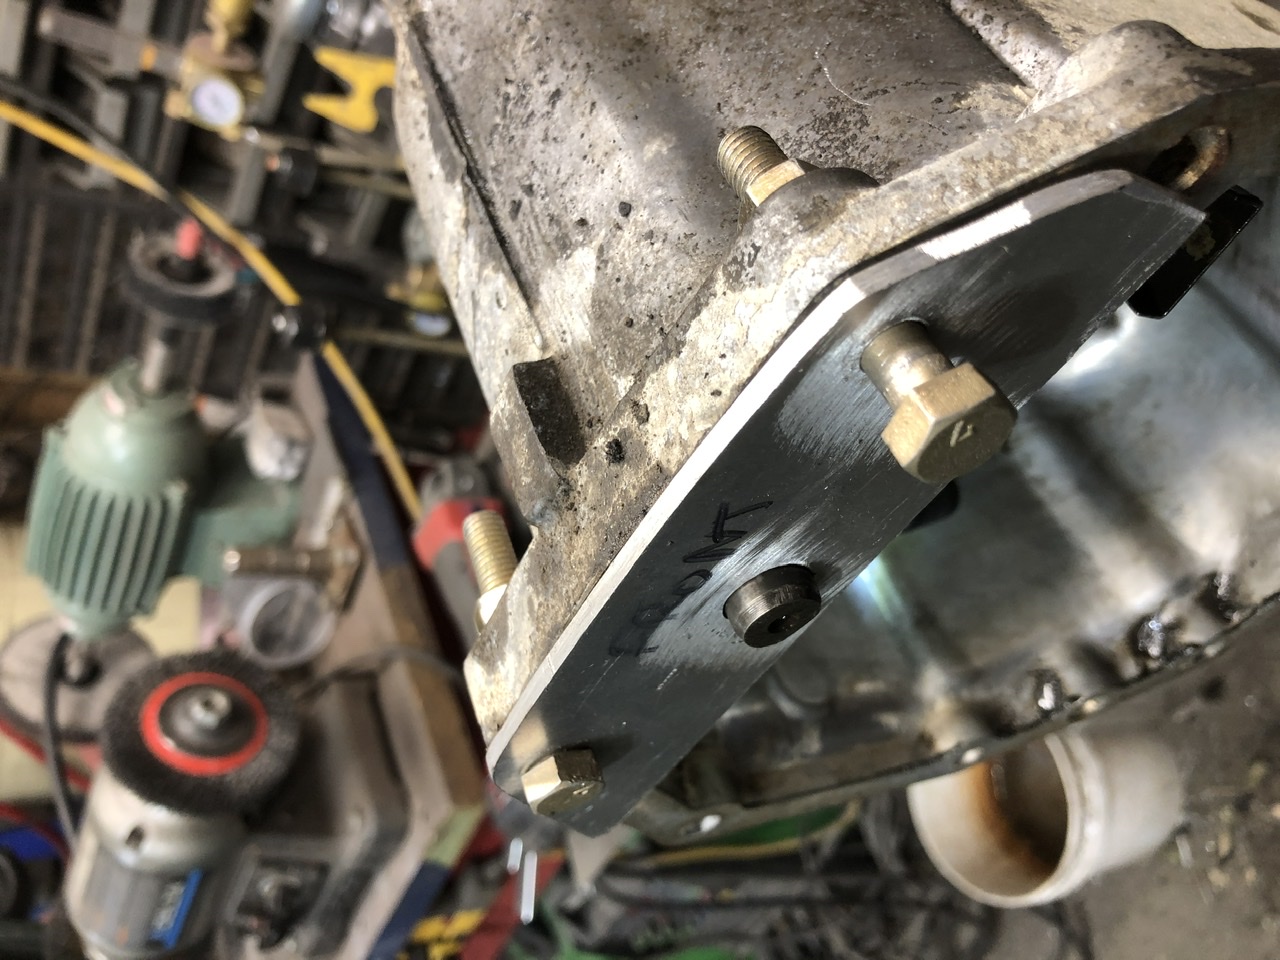
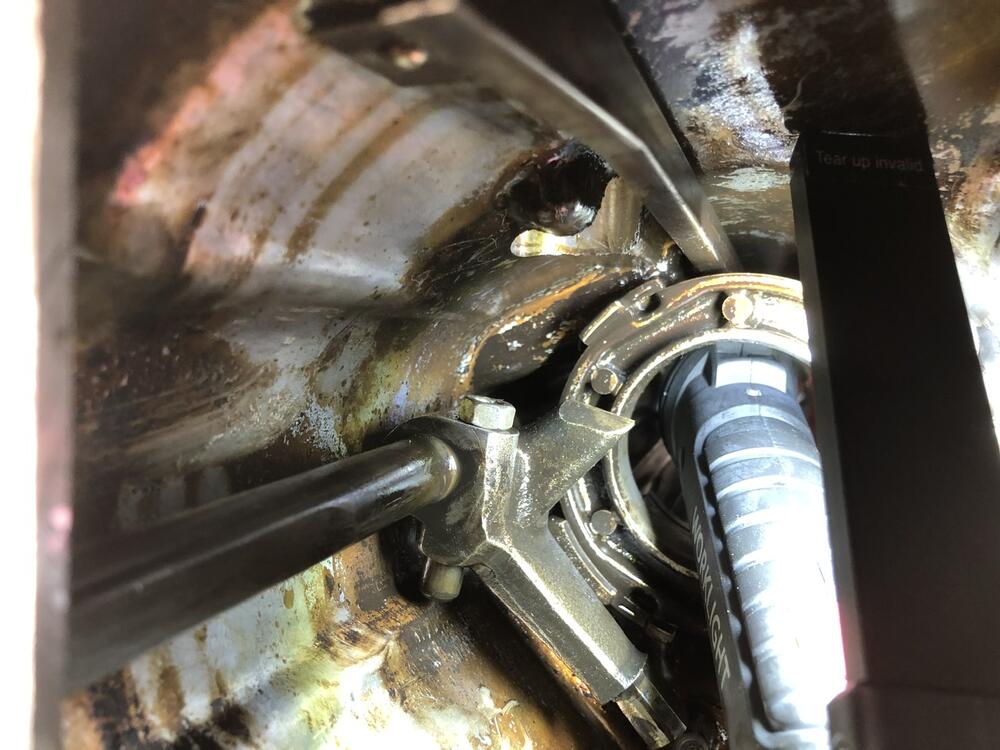
1 pointAnd for the sake of completeness, today I’m rebuilding a later 5 speed that DOES have the reverse lockout switch access, so I took a few pictures to show how to get that shift rod pin out. No trick necessary, just take the reverse lockout (don’t break a bolt like I did, grr….), position the lock pin so you can see it and get a straight shot at it through that hole, get your air chisel out, put the nut back on the bolt (about 2/3rds of the nut thickness) so the tip of the air chisel has a place to set, then pull the trigger for maybe 1/2 a second. Boom it’s out. Remember you can’t put the reverse lockout thingy in the wrong way, the holes are offset. Another detail, the o-ring on the reverse lockout thingy, and on the end of the shift rod, and the one on the outside of the speedo cable drive cog are all the same.


 1 point
 -
1 pointYeah.. and why were those stupid weights on the list? because they had to make them anyway! The question that comes up... HOW MANY fairlady's were driven with those (To me.. damn ugly... ) things on? 😮1 point
-
1 point
-
1 pointRear window vertical stripes are common on the early "series 2" (sorry Alan).1 point
-
Just posting as a curiosity... Looking to try and find out whatever happened to my old '71 Z. She was sold to a fellow club member (Newt Zane of ZSport of San Antonio) back in 2008: VIN #18684. He used to stop by the house every once in awhile to allow me some "visitation'! I've since lost track of him and was just wondering where she might have ended up at. She and I spent 15 years together, 8 of those years being a very long & slow restoration process. It's like losing contact with one of your kids and you just want to make sure that they're alright.1 point
-
1 pointBack in the day when I restored my Series 1 (I agree with others here, you have a S1 console), I used SEM Black in Satin finish for the respray on my console and other interior bits. The finish was near spot-on. The SEM product line for plastic has an Activator that is sprayed on before the color. It ended up very durable. I've heard good things about the DupliColor line for plastic paint, but I've never used it. I have used the SEM product line on multiple vehicles and multiple colors. Top of the line product in my book.1 point
-
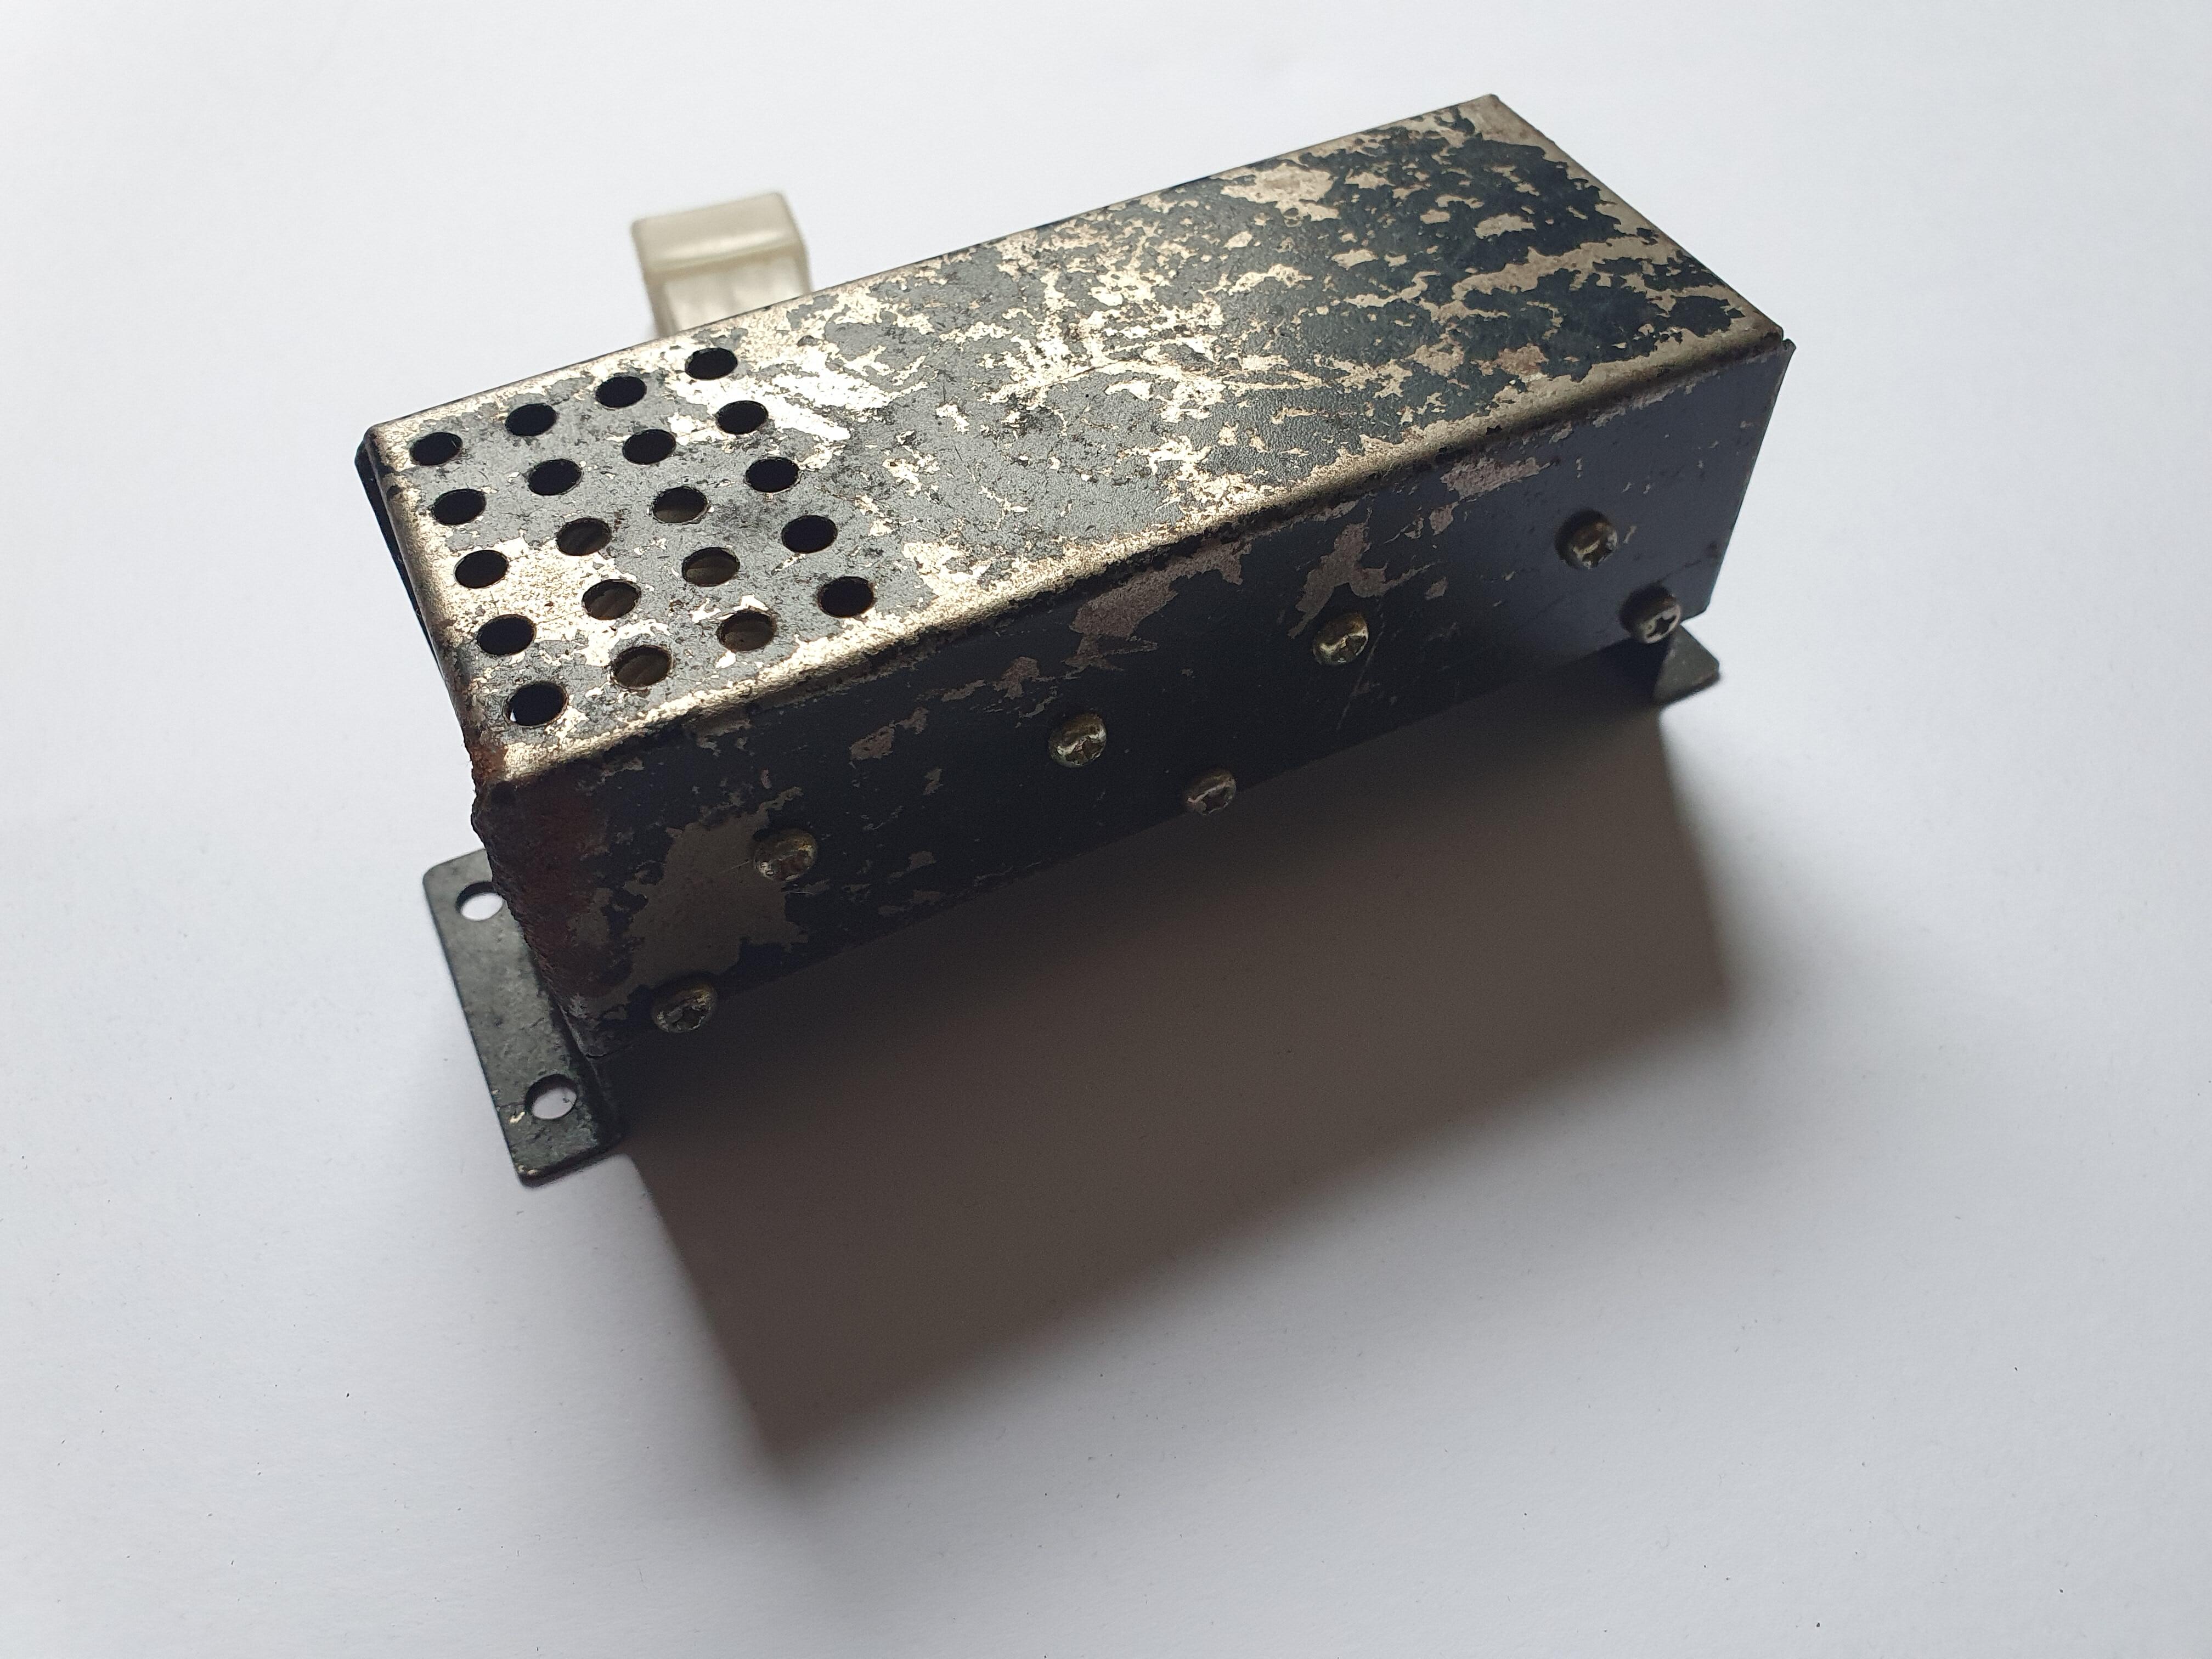
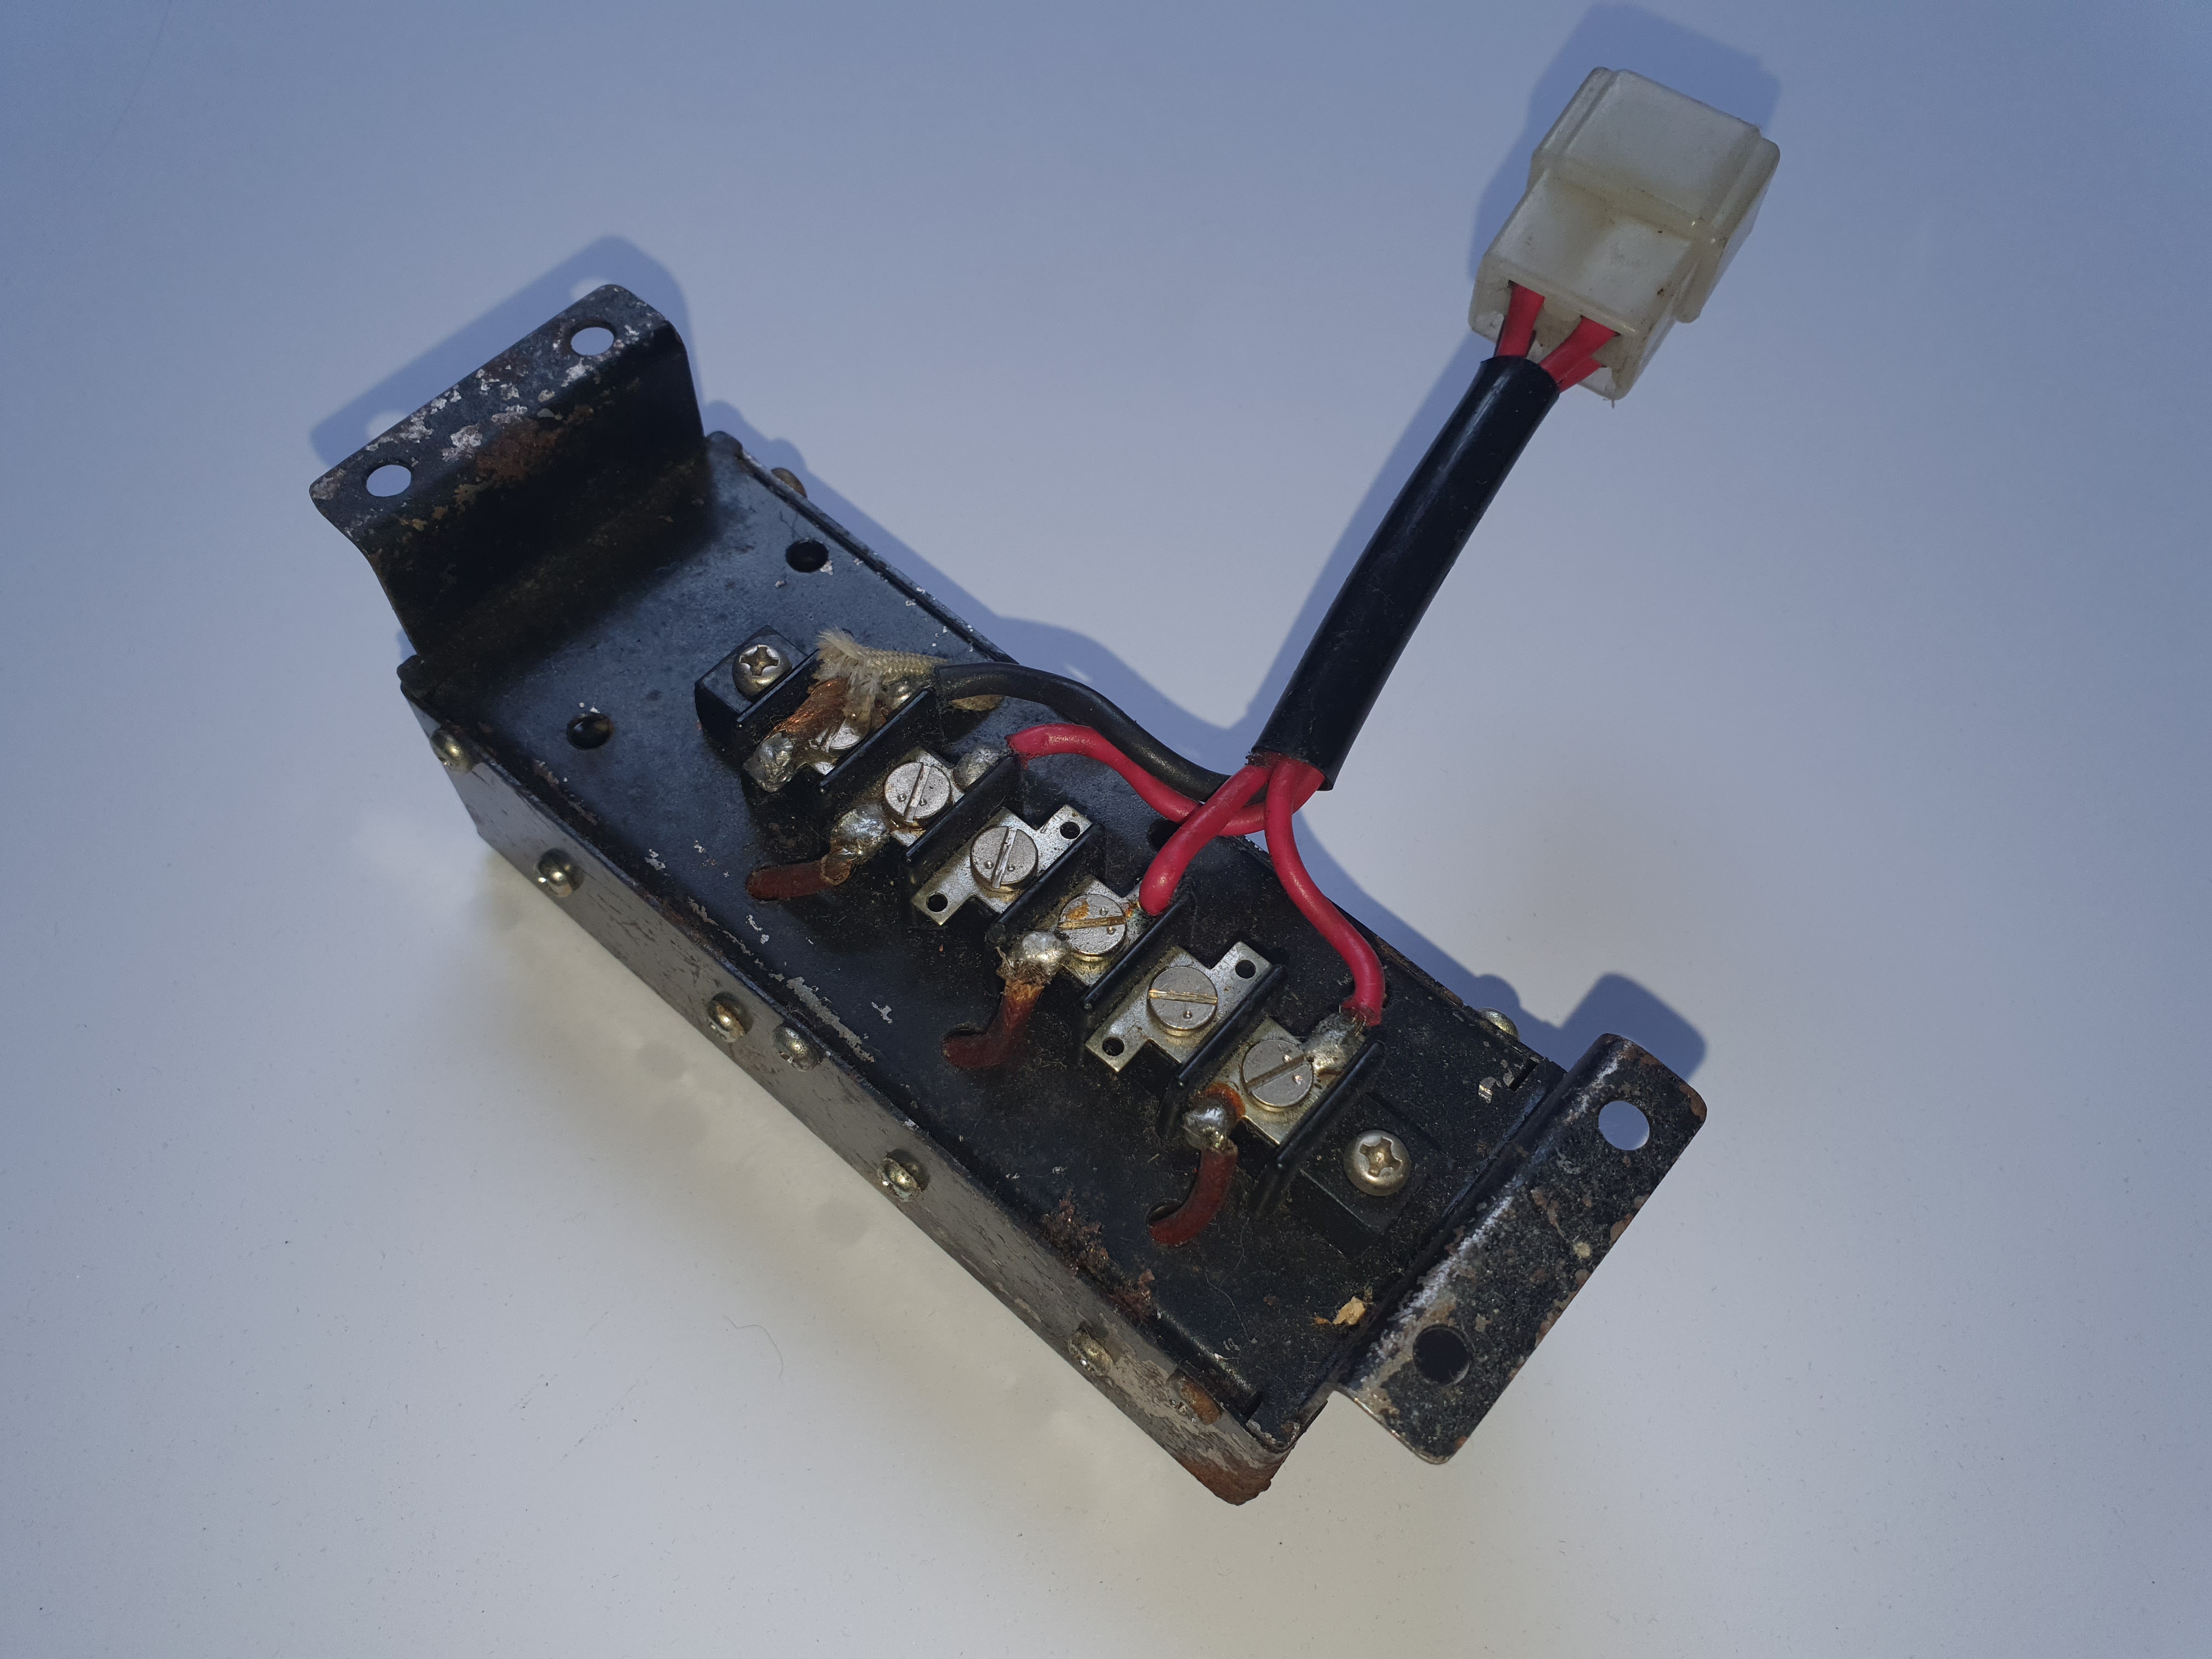
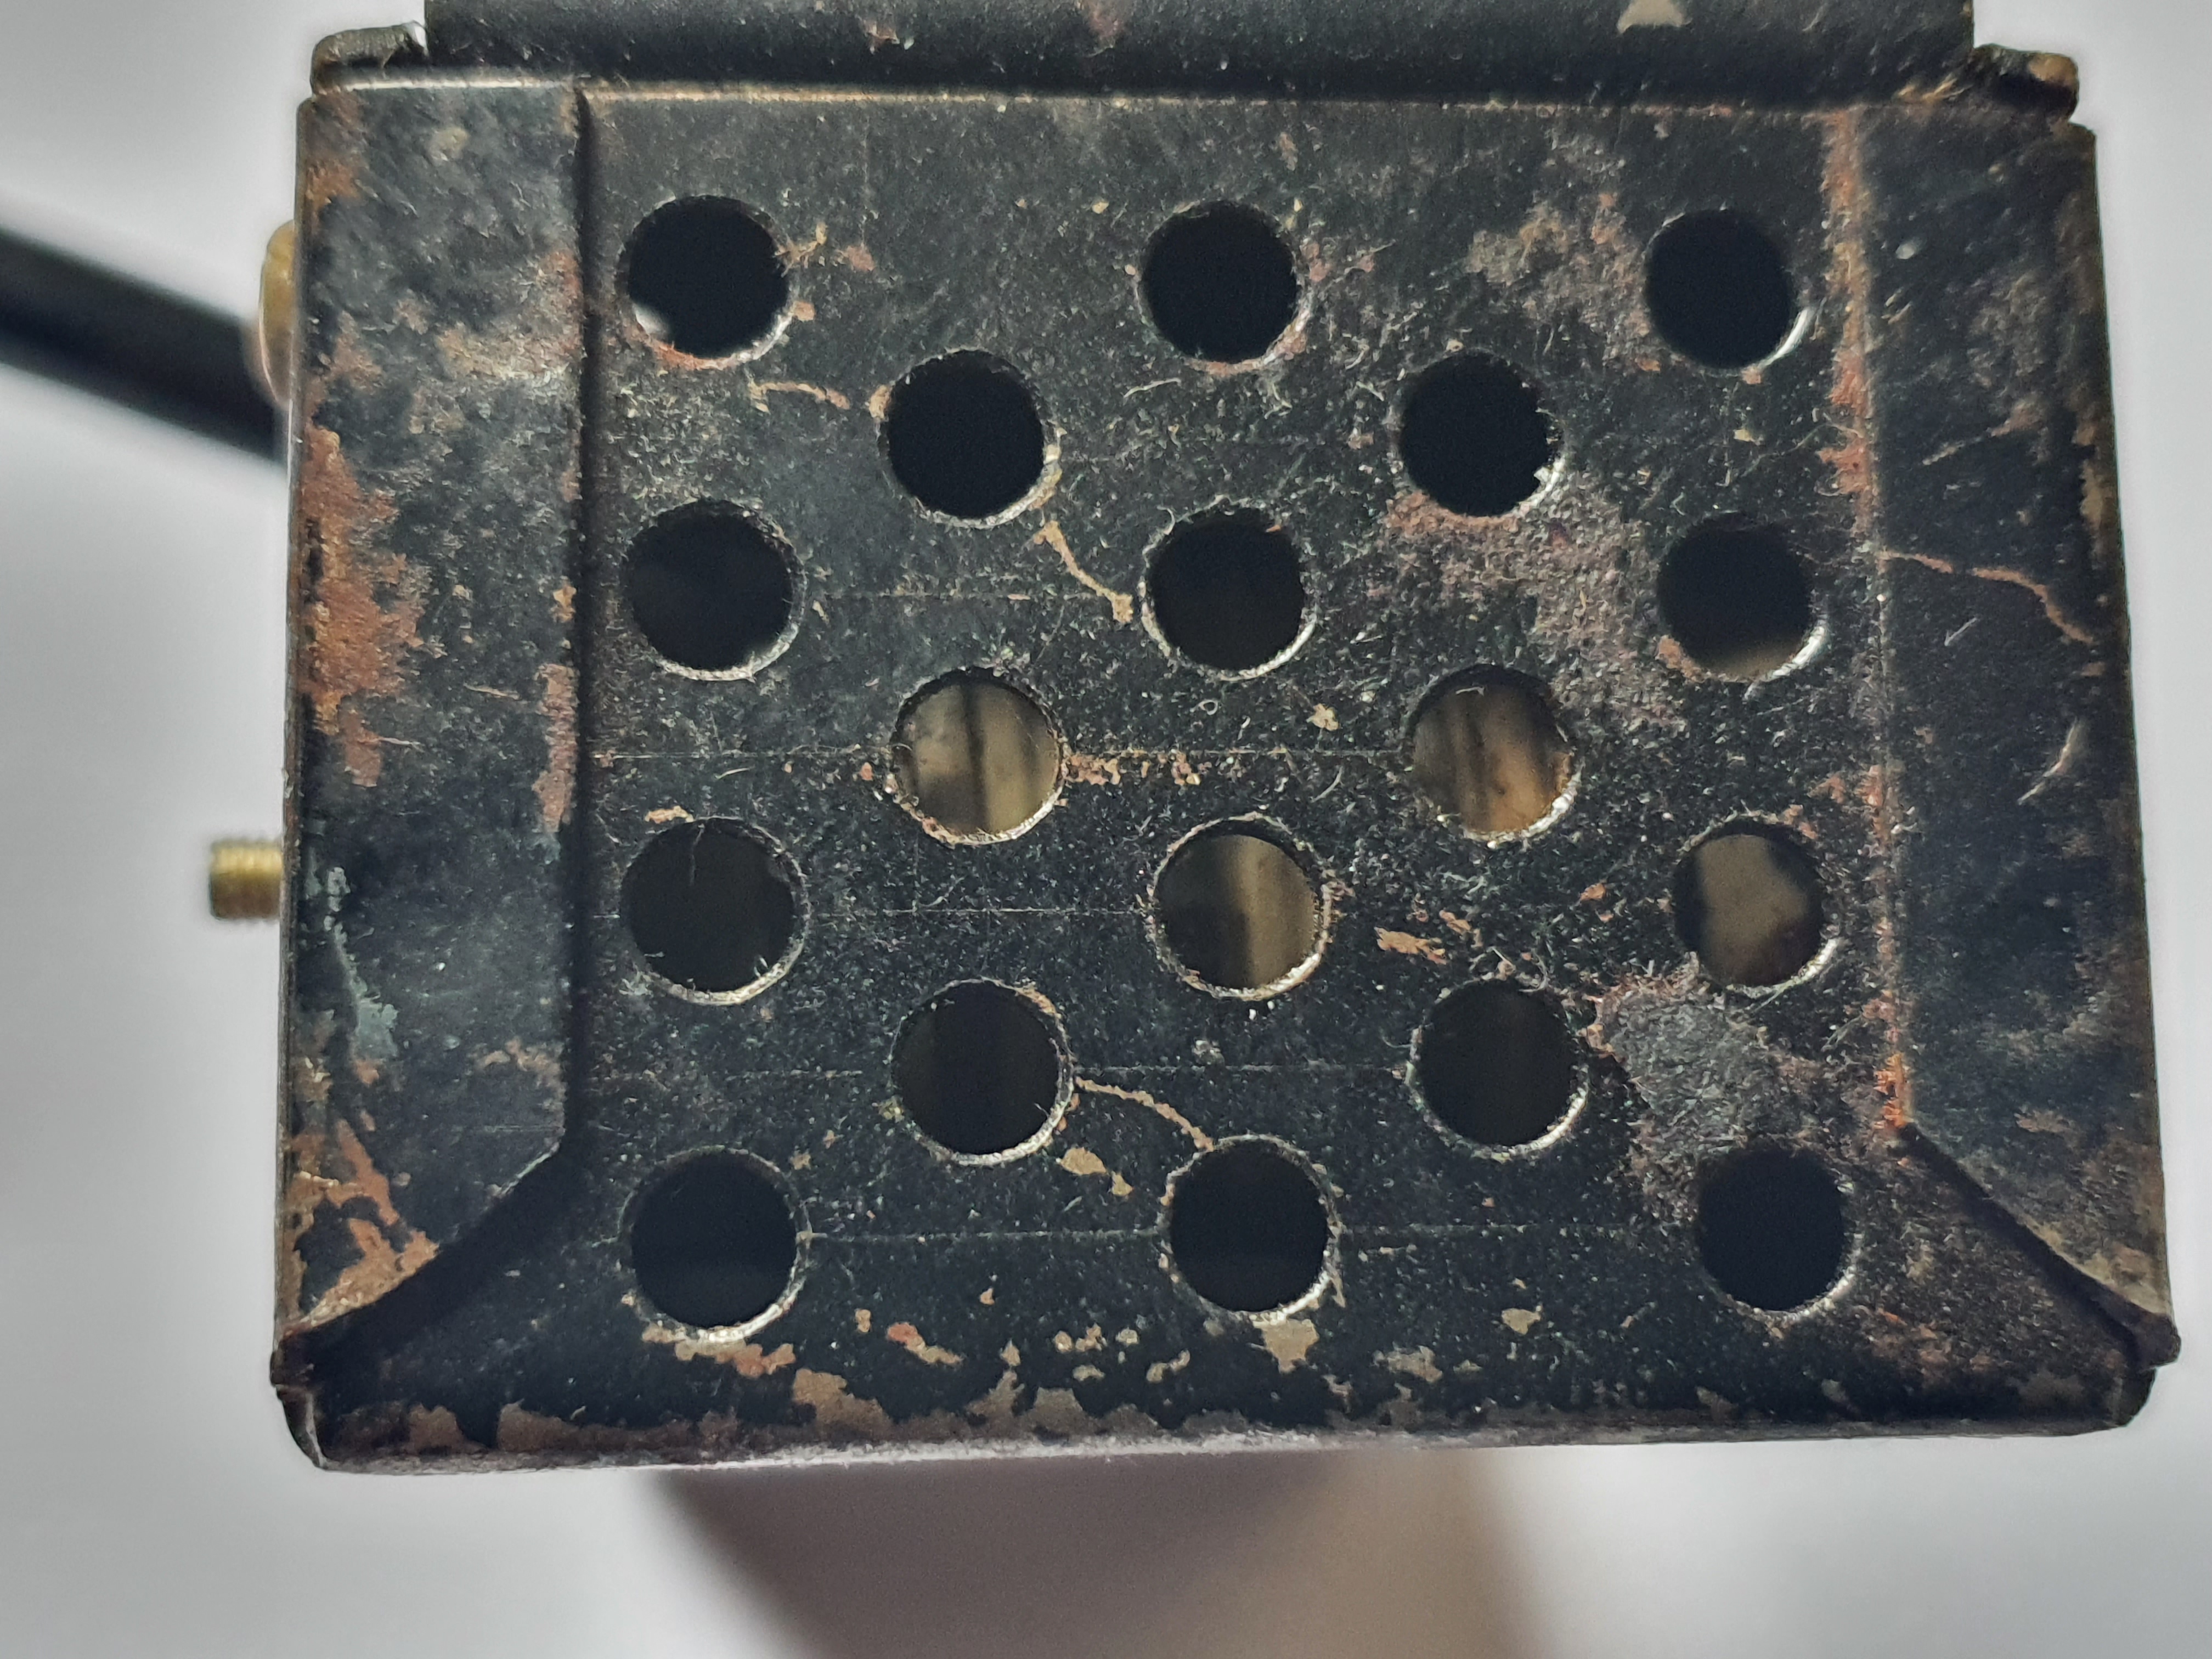
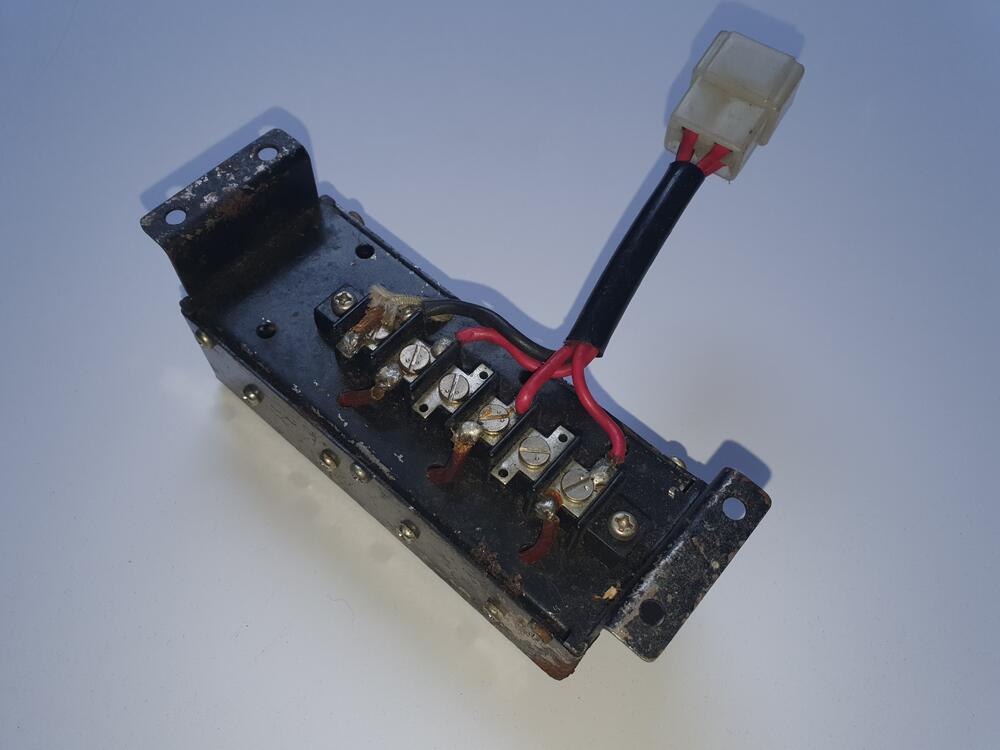
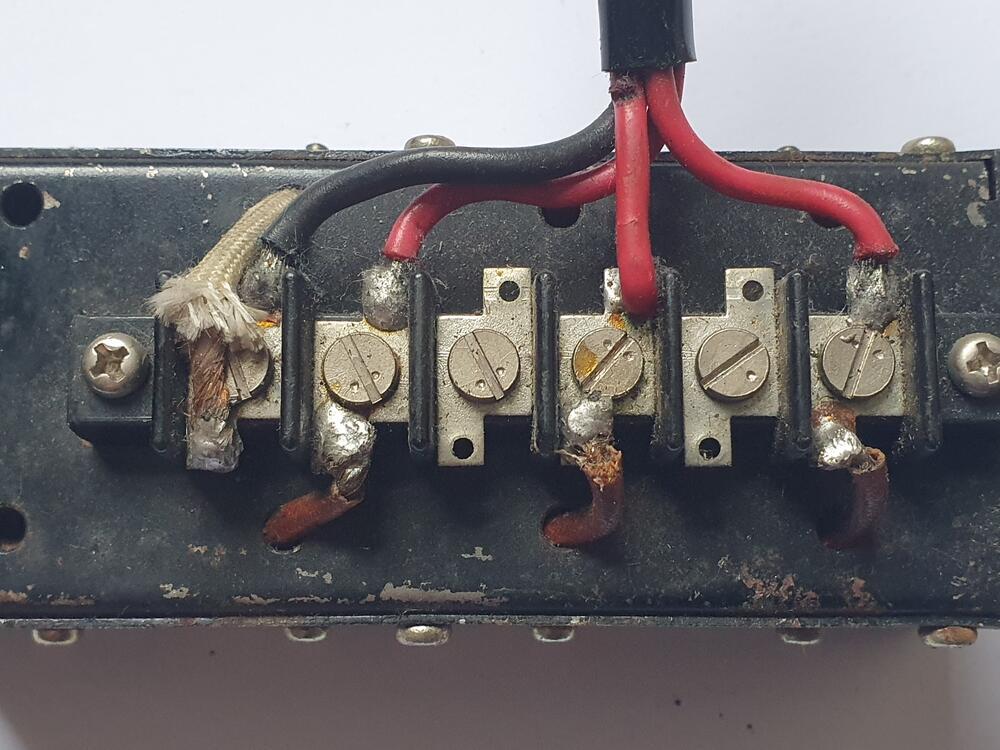
As mentioned privately, I honestly think this is case of mistaken identity. The dash control labelled 'Head Rheo' is - surely? - the dimmer switch for the navigator-specific auxiliary lighting ('P' Light illumination for maps, timers and Haldas). I don't see any reason why it would be necessary to have a rheostat-controlled dimming function of headlamps, spot lamps and fog lamps on a rally car. I've got one of the 'mystery' boxes too (leftovers from Works activities here in the UK) and - notably - the wire colours are different than on yours. I have three reds and a black going into a square 4-spade male connector: Referencing a factory carnet import inventory for the 1971 RAC Rally, I see Works part number 'Y9821-22438 Diode a**'y' which seems to fit the bill as it is listed amongst other auxiliary lighting parts. Would it not be more likely that this Diode box acts as a one-way 'gate' in the lighting system of the car, helping to protect against switching combinations that would otherwise overload/mess up the wiring? I'm absolutely not any kind of expert on auto electrics, but it seems to me that there's a lot going on with the Works rally car lighting system that is not apparent to us on the outside looking in, and certainly so with regard to the different combinations of lighting possible with the column switch, the individual fog & spot lamp switches, a master lighting switch and the push-to-pass momentary switch that (I think?) you have on the end of your car's indicator stalk?


 1 point
 -
1 pointSo, the cars without bumperettes are mere base models when compared to the more upscale well optioned models. 🤣1 point
-
The gauge faces are thin-gauge sheet-metal stampings. They're one-piece (full-disc) stampings for the speedo, tach and clock; two-piece (two half-discs) for the other two. IIRC, the half-disc stampings can be removed without taking off the gauge needles. The full-disc stampings require removing the gauge needle first (Blue showed an interesting technique to achieve this by using a pair of spoons as levers). You may want to think twice about attempting a refurb using a rattle can. It would be nearly impossible to mask off the white gauge markings. If you have only a few minor scratches to fix, I suggest you use multiple coats of thinned-down flat black modeller's paint (Testors or similar) applied with a very fine-tip artist's brush (and a very steady hand). I wouldn't touch the gauge face with sandpaper, either before or after. The topic of painting the inside of the gauge 'cans' with gloss-white paint has been covered well in another thread somewhere on this site (use the 'Search' bar). Brush-on paint will be fine. Mine already had factory-applied white paint, although the coverage wasn't complete and the paint had yellowed a bit. EZ job. Choice of replacement light bulbs for the Z gauges is debatable. Many have switched to LED's and are happy with these. MSA has recently introduced higher-wattage replacement incandescents and these look promising. The trick is to make sure that you don't buy a higher-wattage bulb that has the correct bayonet fitting but has a glass bulb that's too long (these won't fit inside the green-plastic bulb shroud that's mounted on the inside of the bulb housing). Perhaps someone who's bought the new MSA bulbs can comment on their effectiveness and fit. One thing you didn't mention is cleaning up the clear plastic gauge covers. These are just clear acrylic plastic discs and they respond well to power buffing (Dremel tool) with a liquid plastic cleaner. They're easy to remove in the case of the speedo and tach, but very challenging in the case of the 3 small gauges. In the two small twin-gauges, they are held in place by a stamped-metal shroud which fits over tiny plastic pins. The shroud was locked down at the factory by melting the ends of the pins to form nubs. You'll need to grind off these nubs in order to remove the shroud and the clear-plastic disc. Unfortunately, this means that when you go to re-fit the disc and shroud, the remaining pin length is only long enough to locate the shroud. There's nothing left that you can re-melt. Instead, you'll need to drill a (tiny) hole down into each of the pins and then use (tiny) self-tapping screws with (tiny) flat washers to hold the shroud in place. A visit to your local model train shop should provide the necessary screws and washers. Be careful when drilling into the pins - if you go too far, the drill exits through the front of the bezel and you will now have visible 'air conditioning' holes. Getting the clear plastic face out of the clock is another challenge. Instead of using melted-over locating pins, the clock's clear-plastic face is glued onto a narrow ledge molded into the inside the black plastic gauge bezel. While the disc can be removed successfully, you'll need to be very careful or else you'll either crack the disc or splinter the glued edge. The disc comes out with the centre time adjustment knob captive. When re-installing, this disc needs to be glued back in place and the glue job has to be strong enough to withstand the pressure of you pushing on the time adjust knob when you go to set the clock time. If you get this wrong, the disc will come loose and may bend the clock hands (or worse). Overall, if any of your gauges are in really bad shape, I'd suggest that you just get a used replacement unit (lots of them around). Hope this helps.1 point