Leaderboard
-
KenFirch
 Subscriber
 5Points271Posts
 -
BAS_DXB
Free Member3Points69Posts -
Mark Maras
Free Member3Points3,719Posts -
Patcon
Subscriber2Points11,142Posts


Popular Content
Showing content with the highest reputation on 02/22/2021 in Posts
-
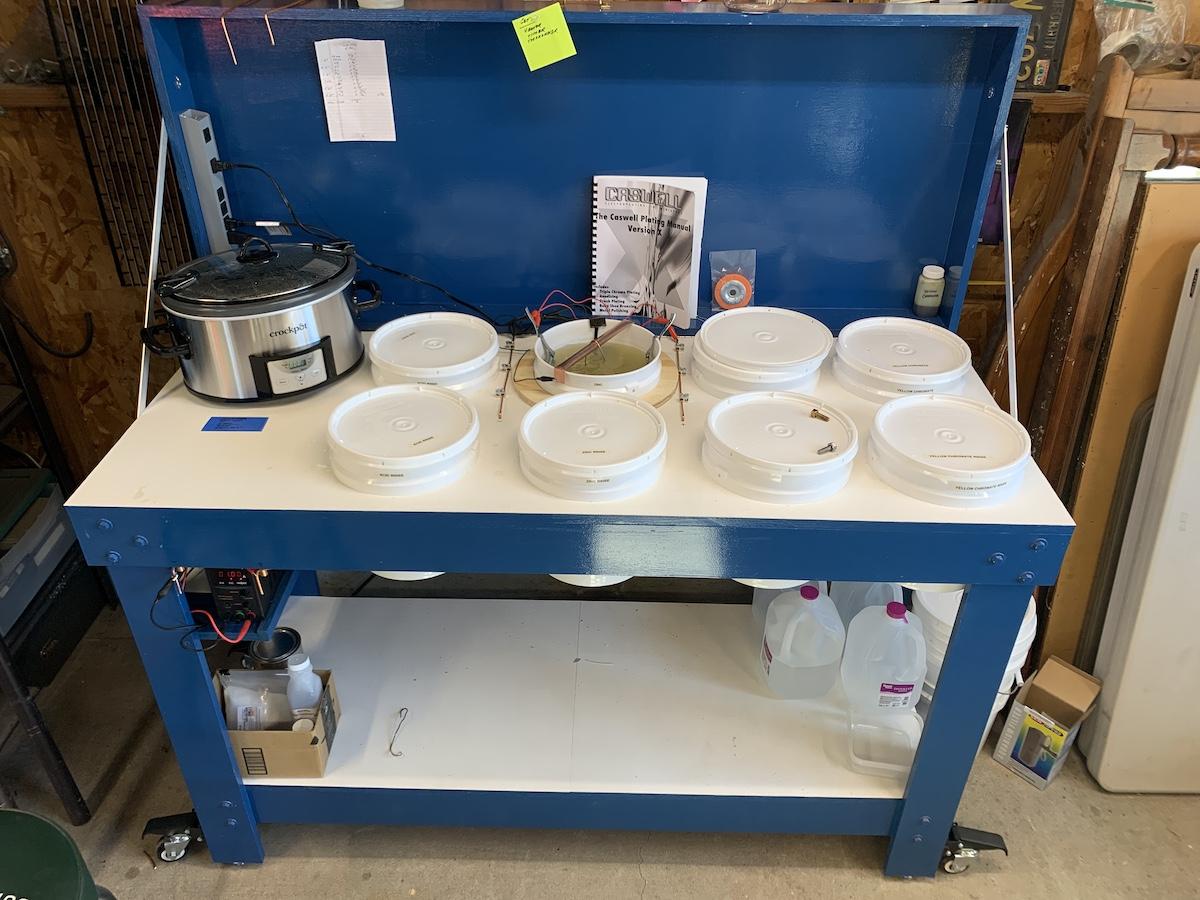
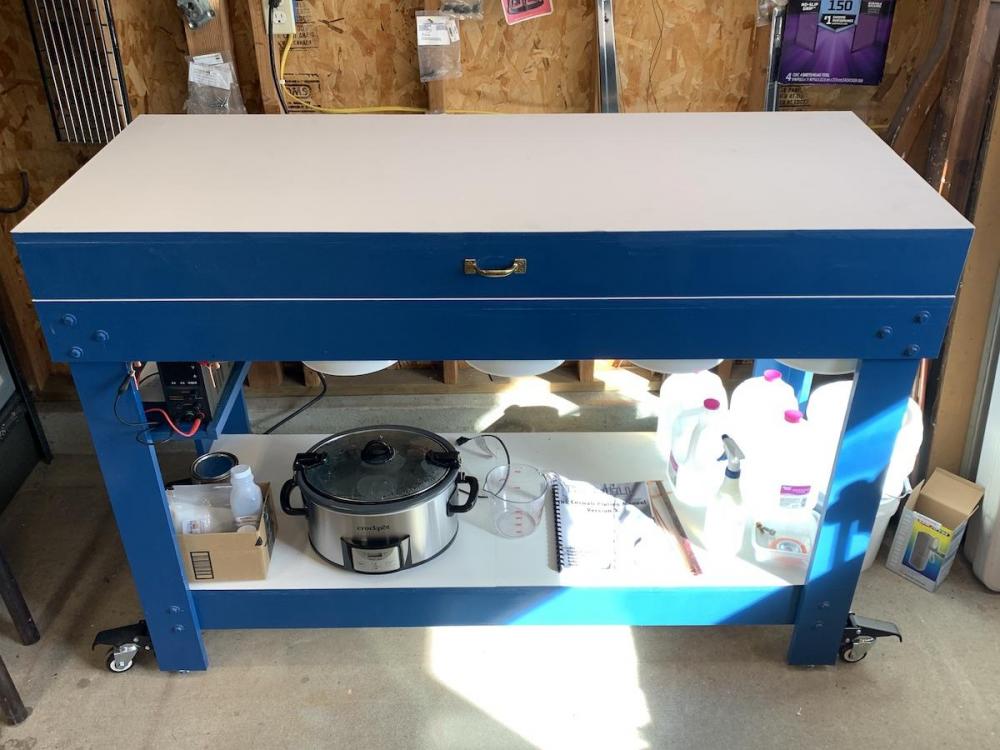
5 pointsI've been lurking on the Caswell thread for months, and finally pulled the trigger and bought the 1.5 gallon system. Built a cabinet: 2 sheets of plywood and sheet of poly from Home Depot, removable casters and power supply from Amazon, and Crockpot from Costco. Didn't want it any longer than 6 feet long, and wanted a fold down top so it's not a wasted space and I can also use it to work on whatever. Rustoleum Royal Blue paint looks surprisingly like the color of my 240Z block. 🤷♂️ Just starting off with small pieces and fasteners as I work on various stuff. So far, some success, some so so. Need more practice to get the routine down. Nice to be able to learn from others experiences.

 5 points
 -
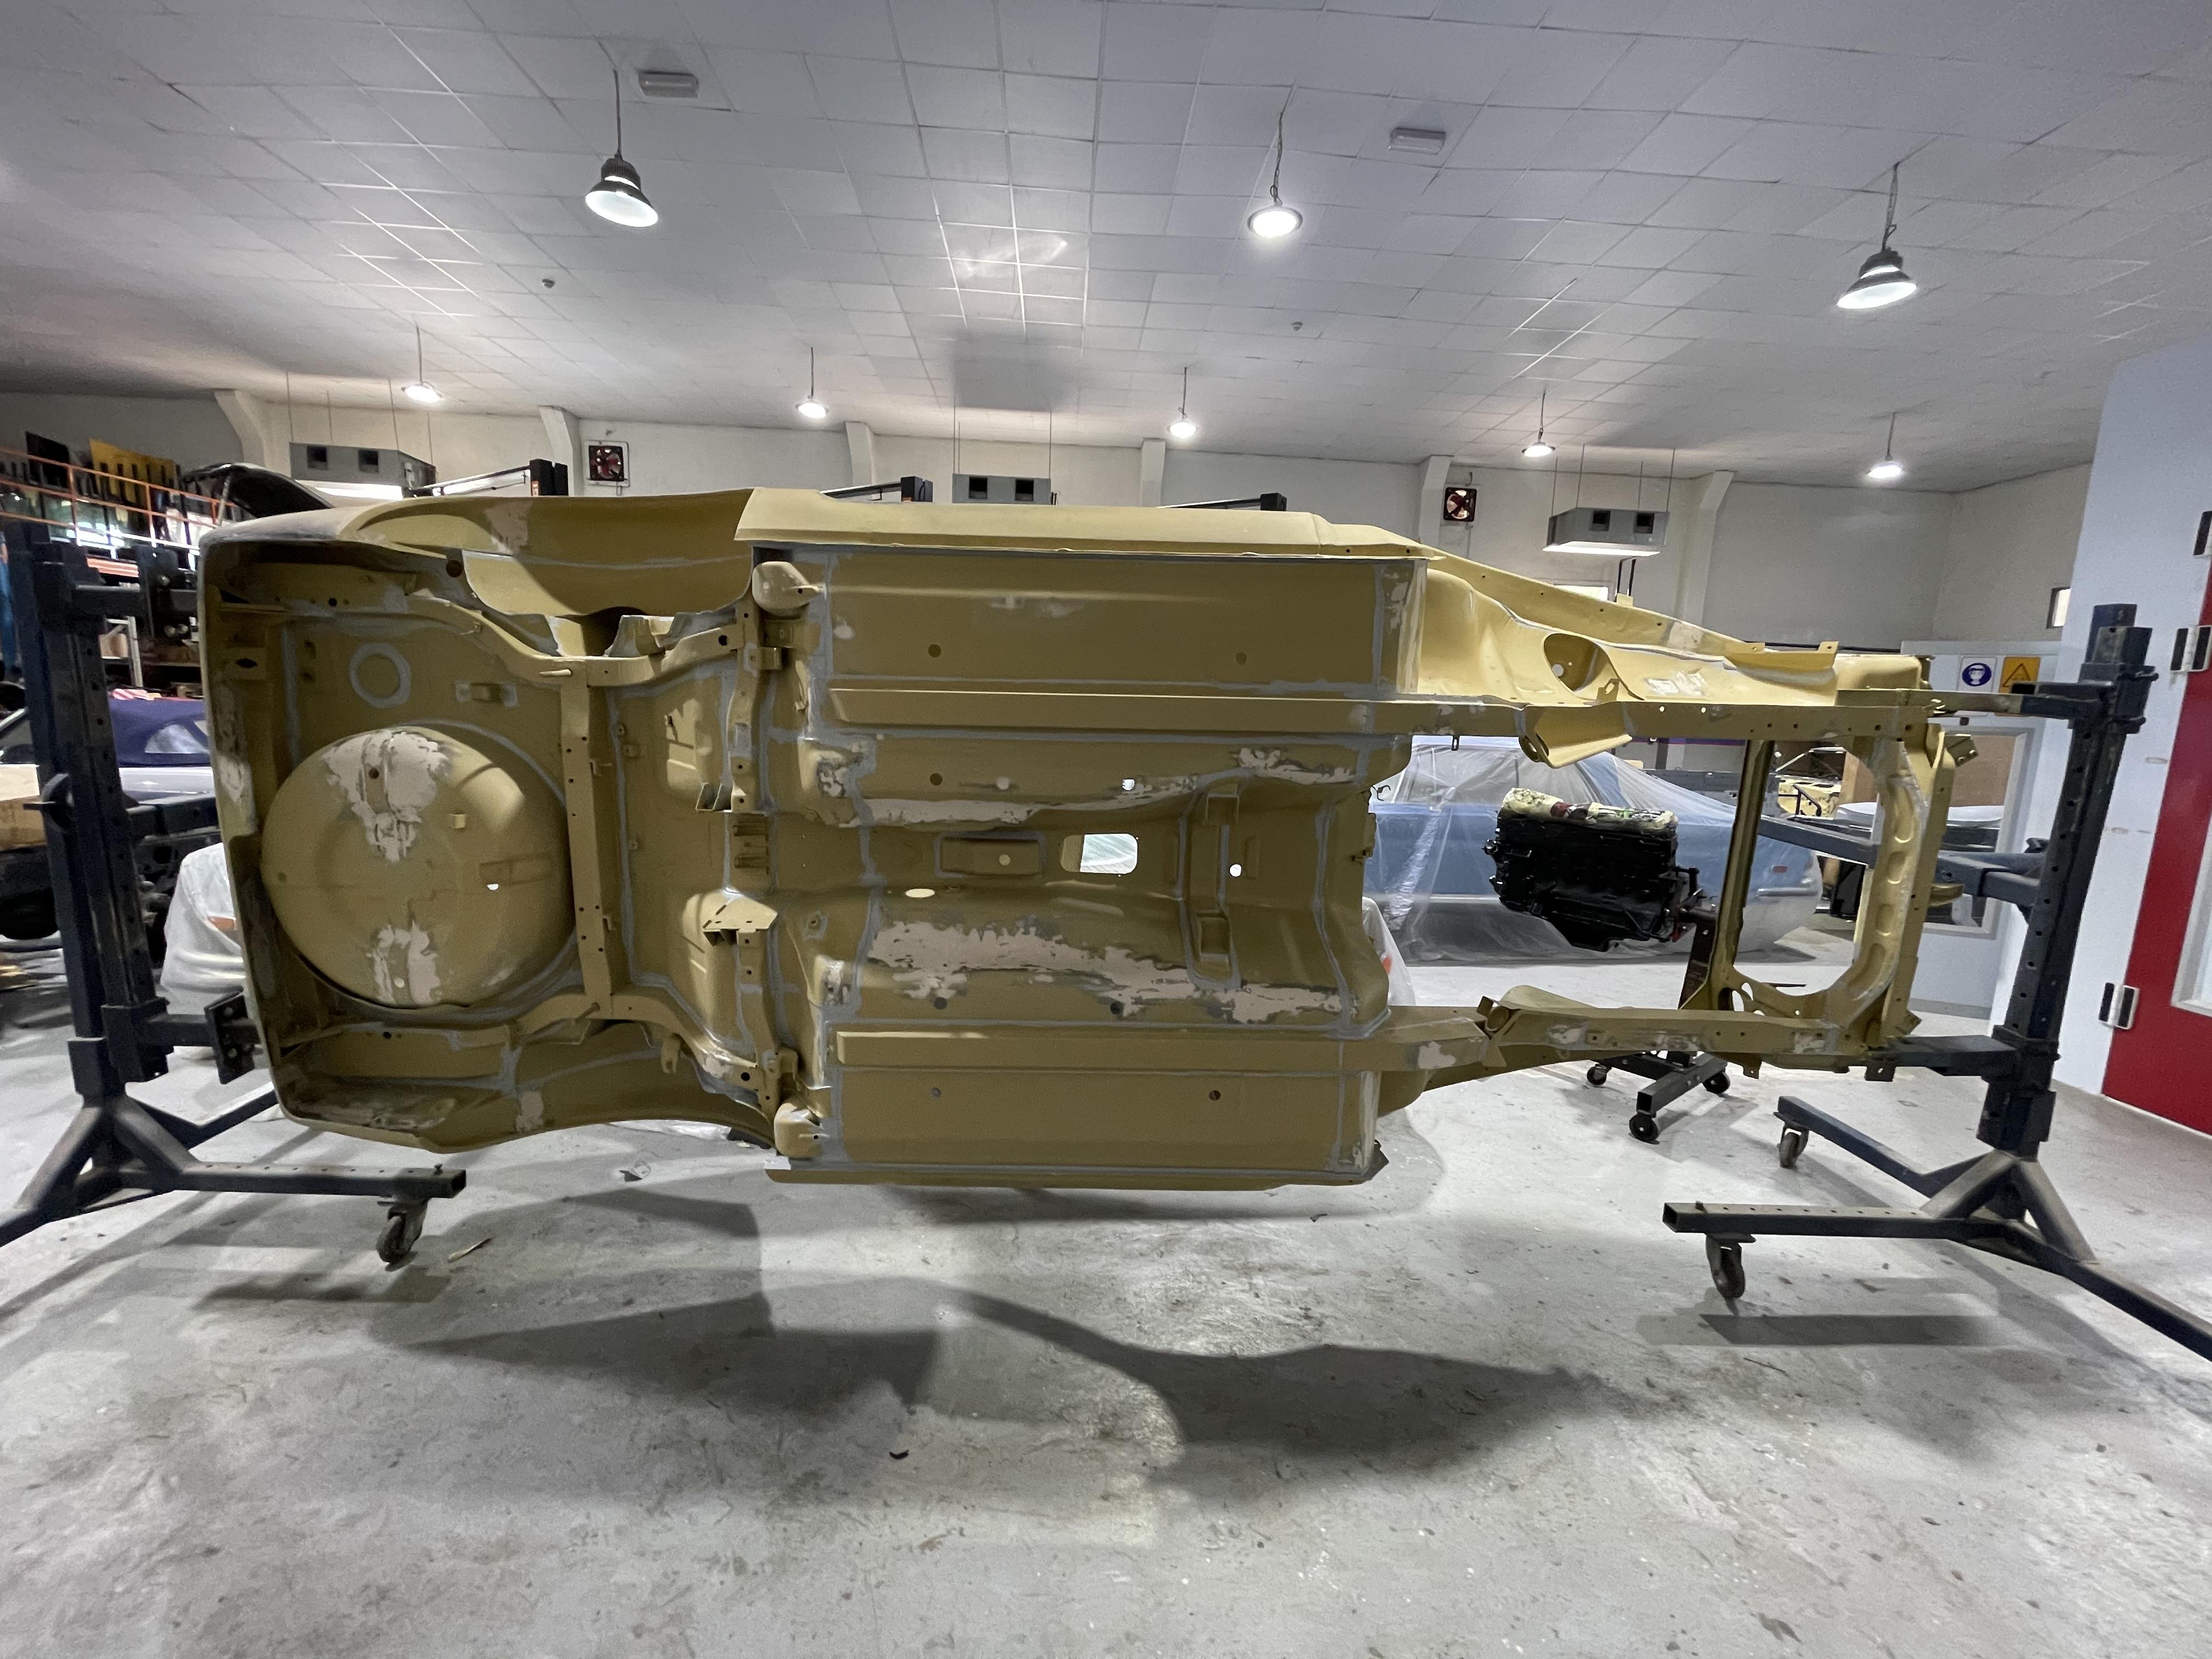
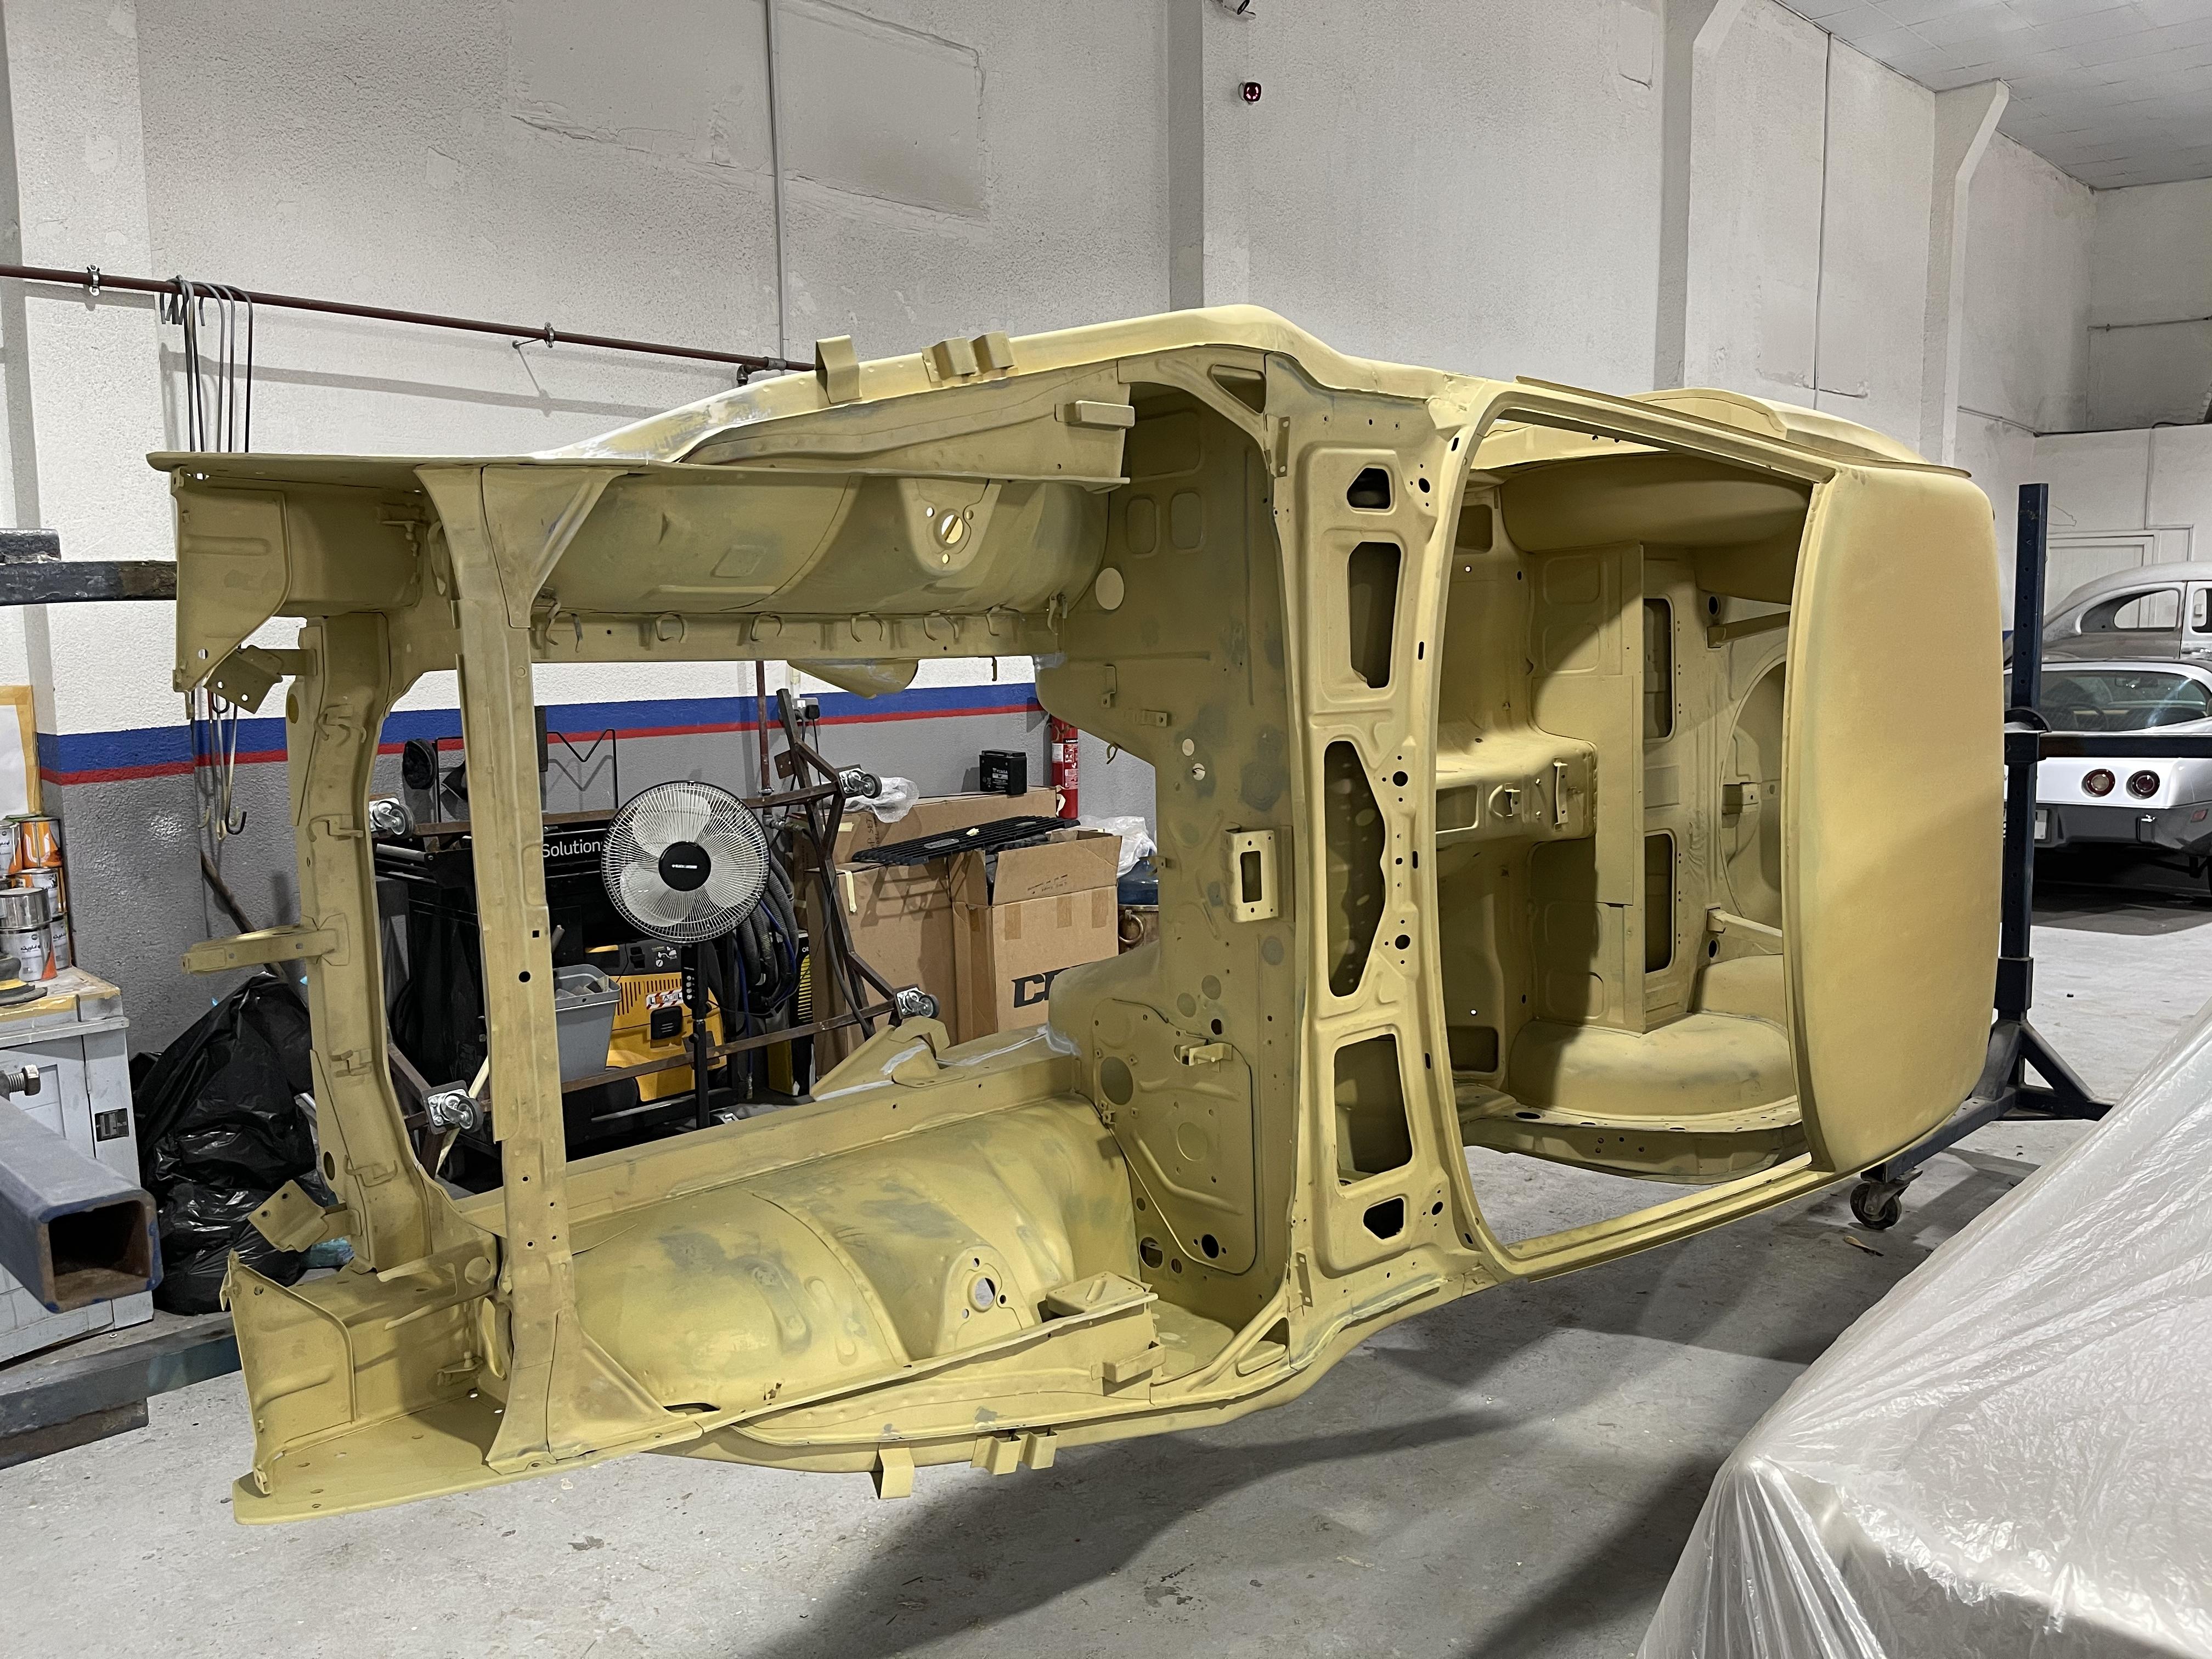
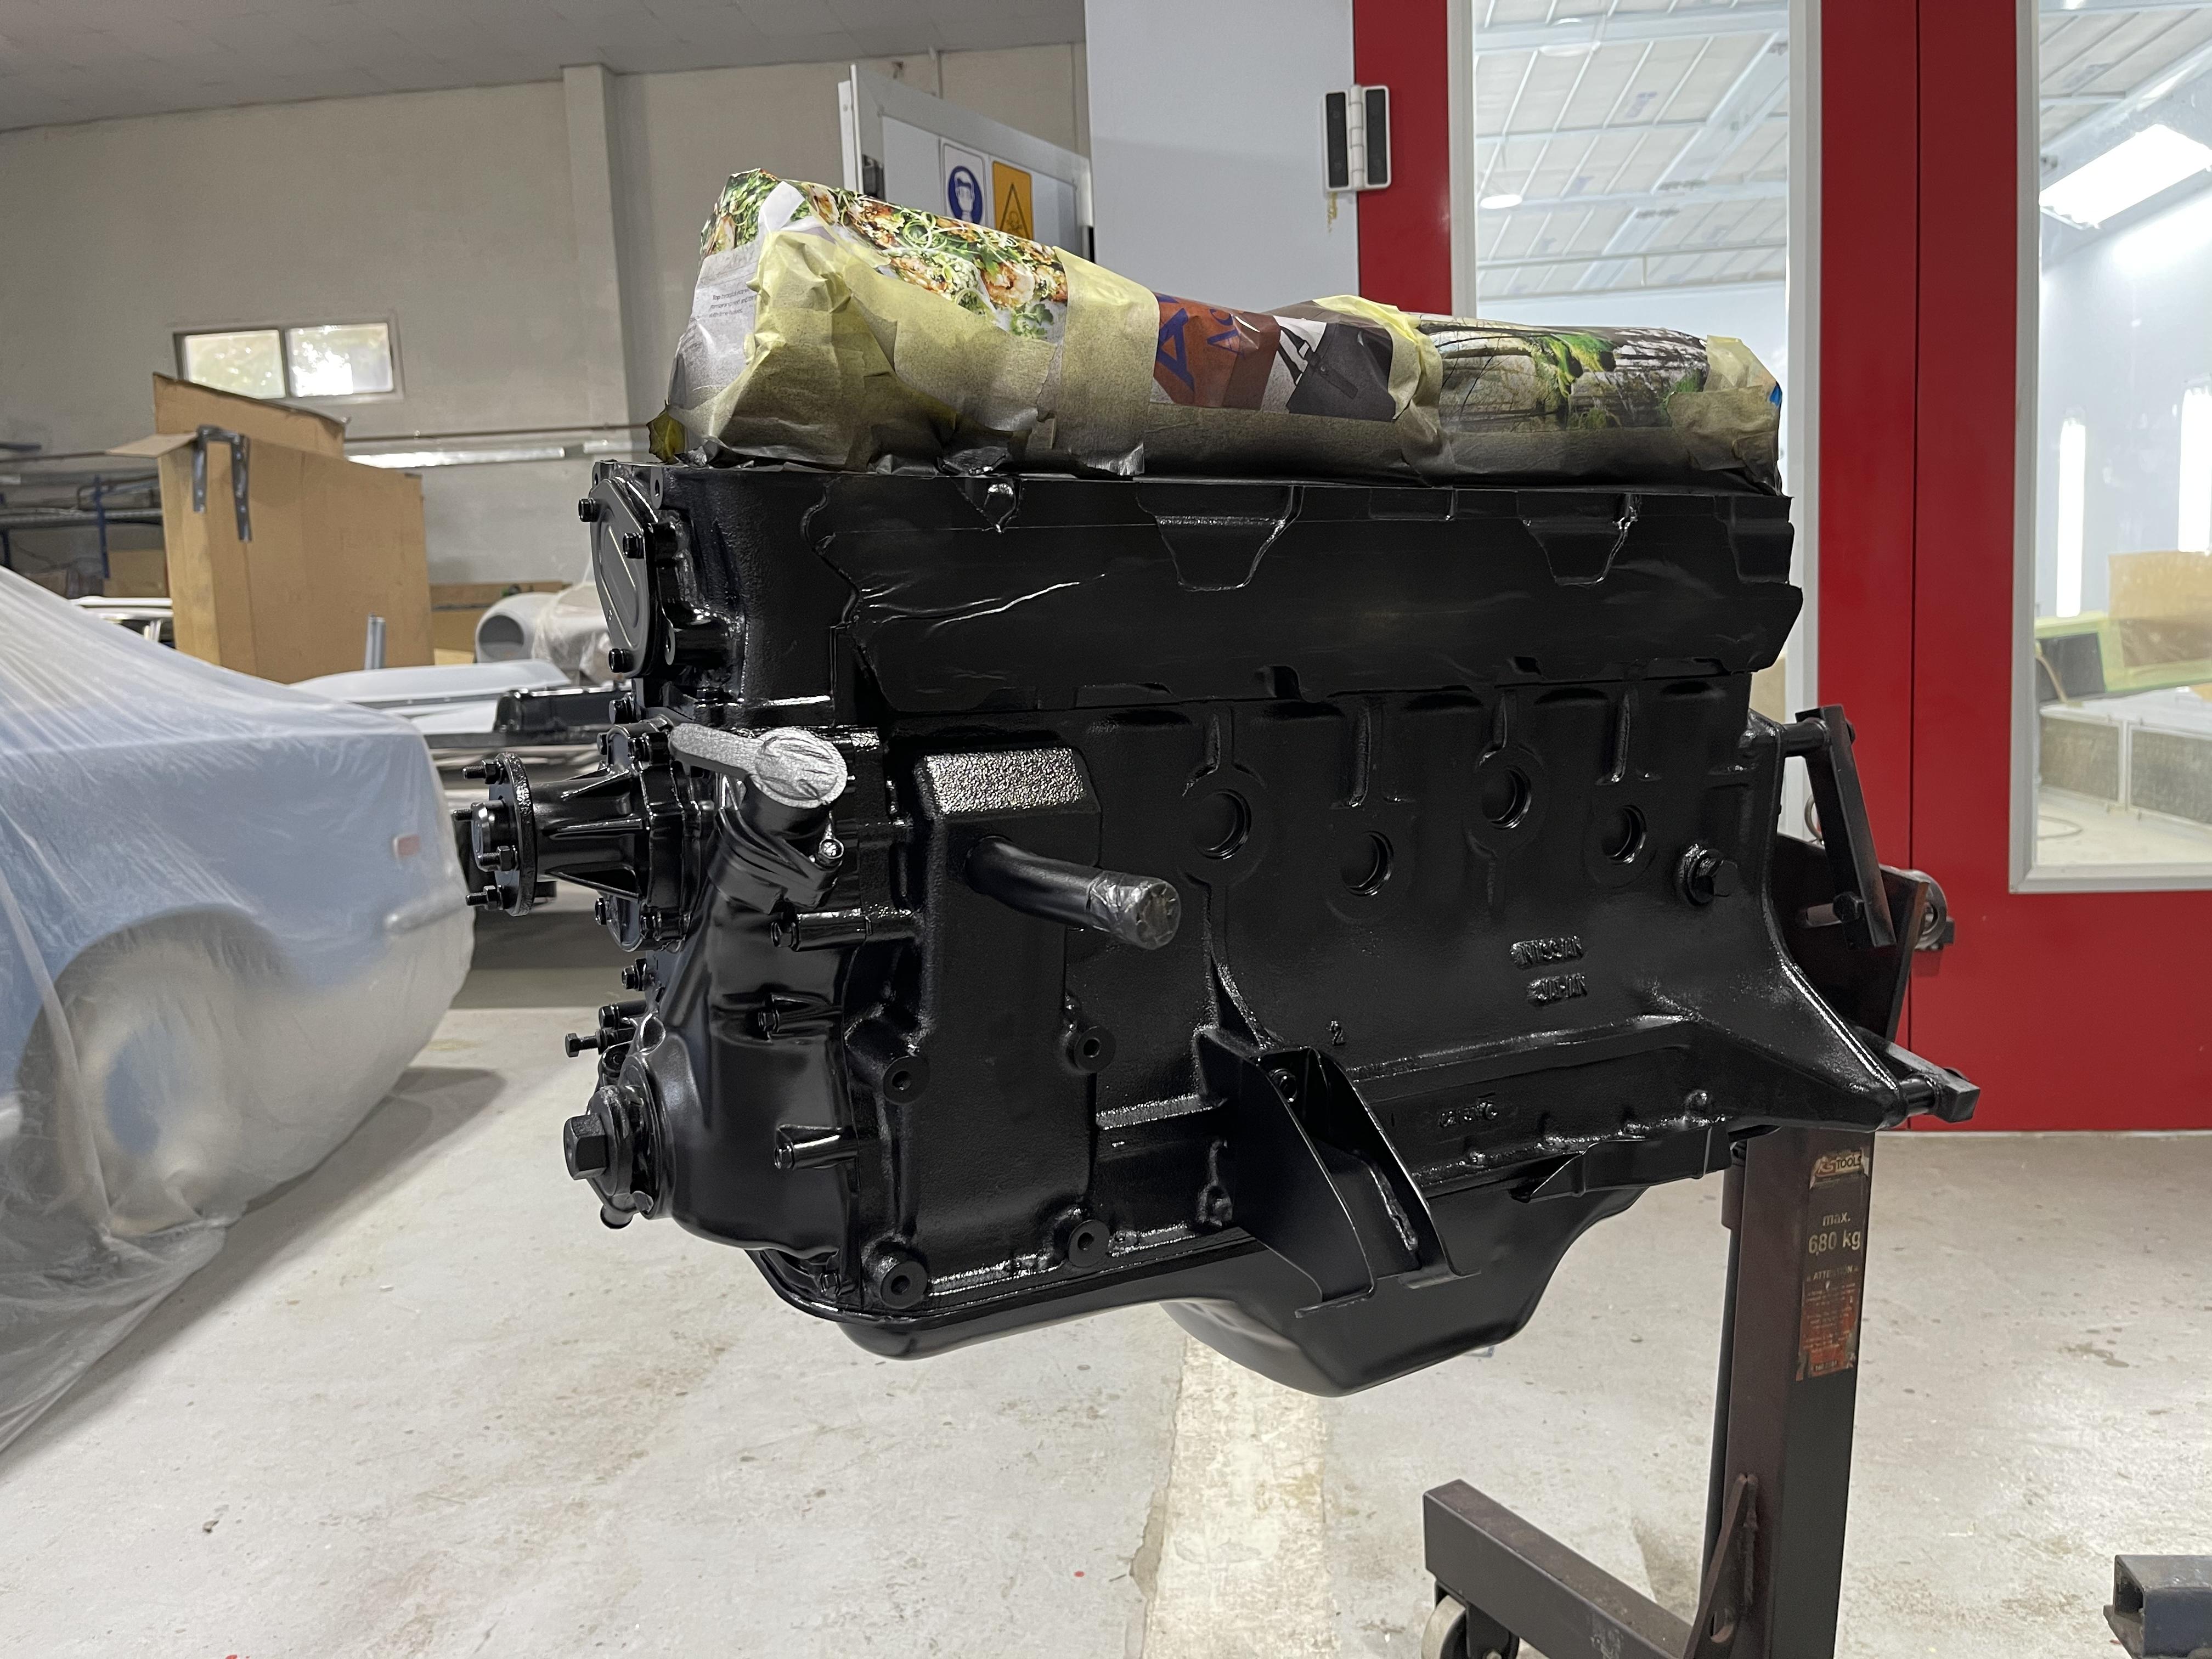
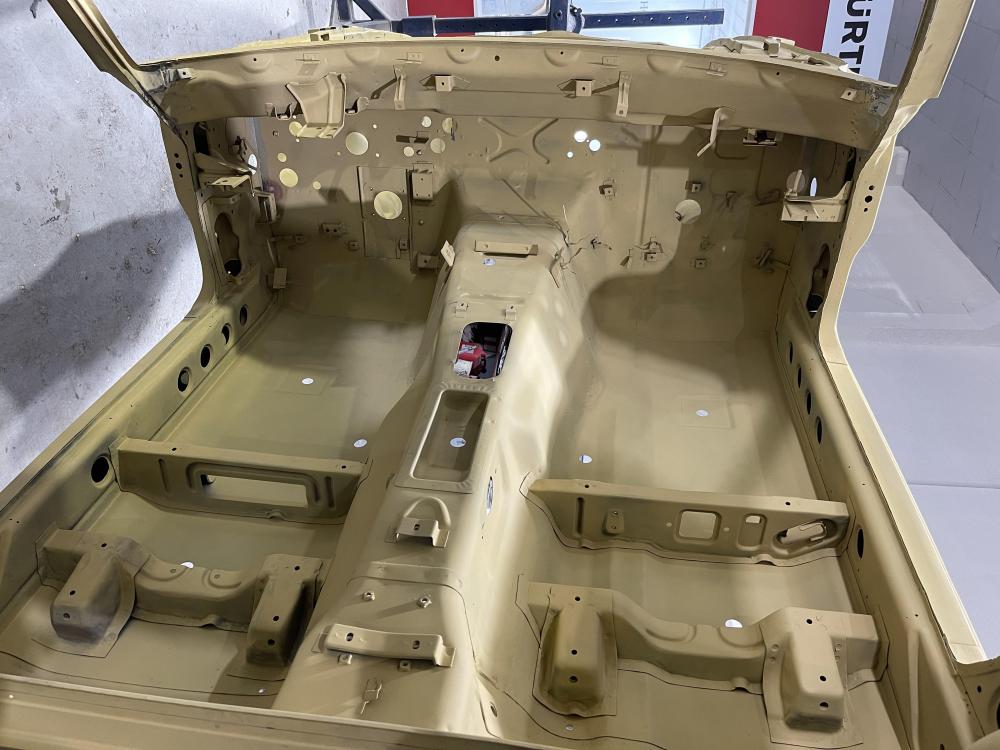
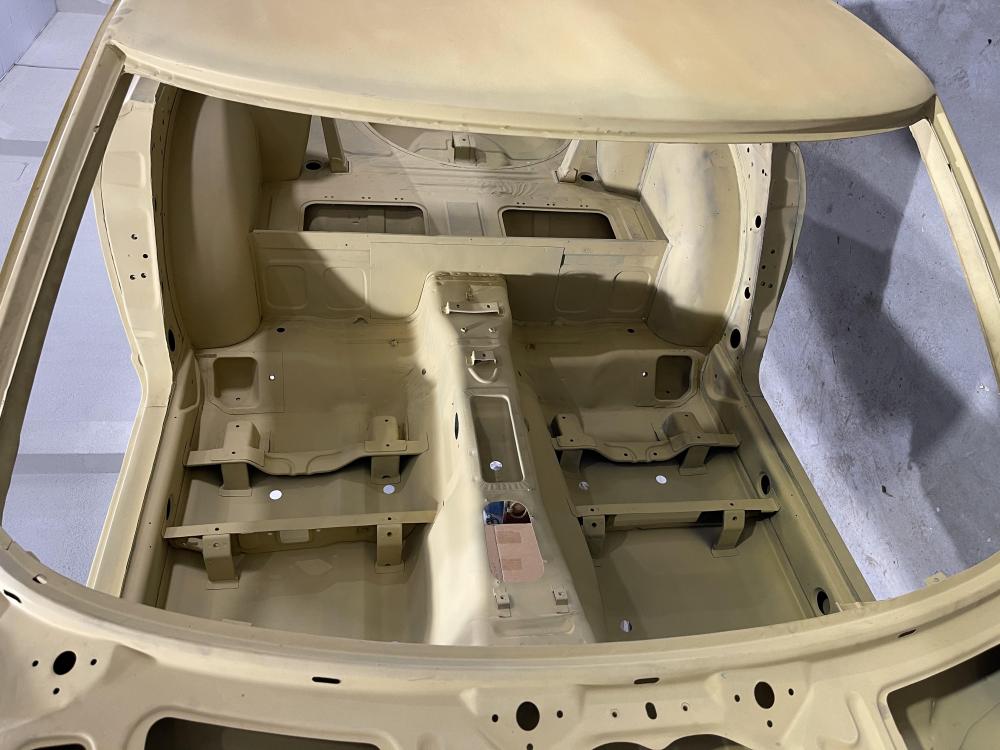
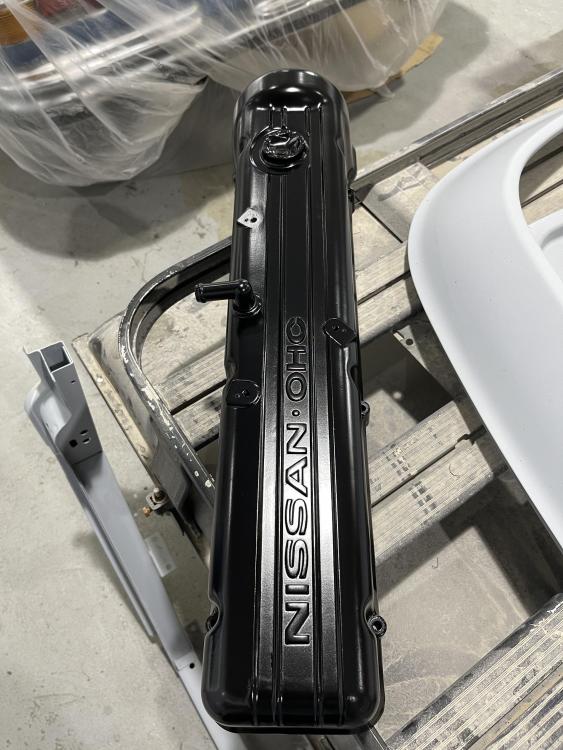
2 pointsAnd it started! First step with the overall primer, then seam seal and light body filler to smooth the denting done on the transmission tunnel and spare wheel well. First focus is on the under carriage as starting with the rock guard/paint under the car first (to be completed by Thursday). A first coat/body filler step in the engine bay and interior as well, but this will be finalized once under carriage is done and the suspensions / trains / wheels installed, before the rest of the painting starts. Having everything in a uniform color is super satisfying, the progress is real. The hood and trunk have been taken care of as well, some light denting but overall clean condition (trunk lock deleted in favor of an automatic release button). Finally, progress on the engine - Let there be black! Everything black (only the water pump and alternator in aluminum, the oil filter is the original Nissan light blue). The valve cover will receive a final touch that I won't reveal before the car is completed...


 2 points
 -
2 pointsOr you could install the 5 speed and use a four speed knob. Most people would never know the difference!2 points
-
1 pointGradually pull the choke on when it's stumbling. If it improves, the stumbling is from a lean mixture. Was the detonation a backfire out of the carbs? I'd also pull a spark plug to check the color.1 point
-
Beck-Arnley had a good reputation for quality in the past. I'm going to assume their quality is still good. I'd go for it, but I'd disassemble both cylinders and clean the bores. Be sure to tell us if you find any swarf in them. Have you changed the valve seals yet?1 point
-
1 pointI got mine from Germany, but from the USA I found this shop that seems legit: https://relicate.com/collections/alcantara/products/alcantara-unbacked?variant=21398827860048.1 point
-
1 pointThanks for the comment. I noticed your VIN is your signature. The Z in my avatar is a 12/70 also - VIN 16511.1 point
-
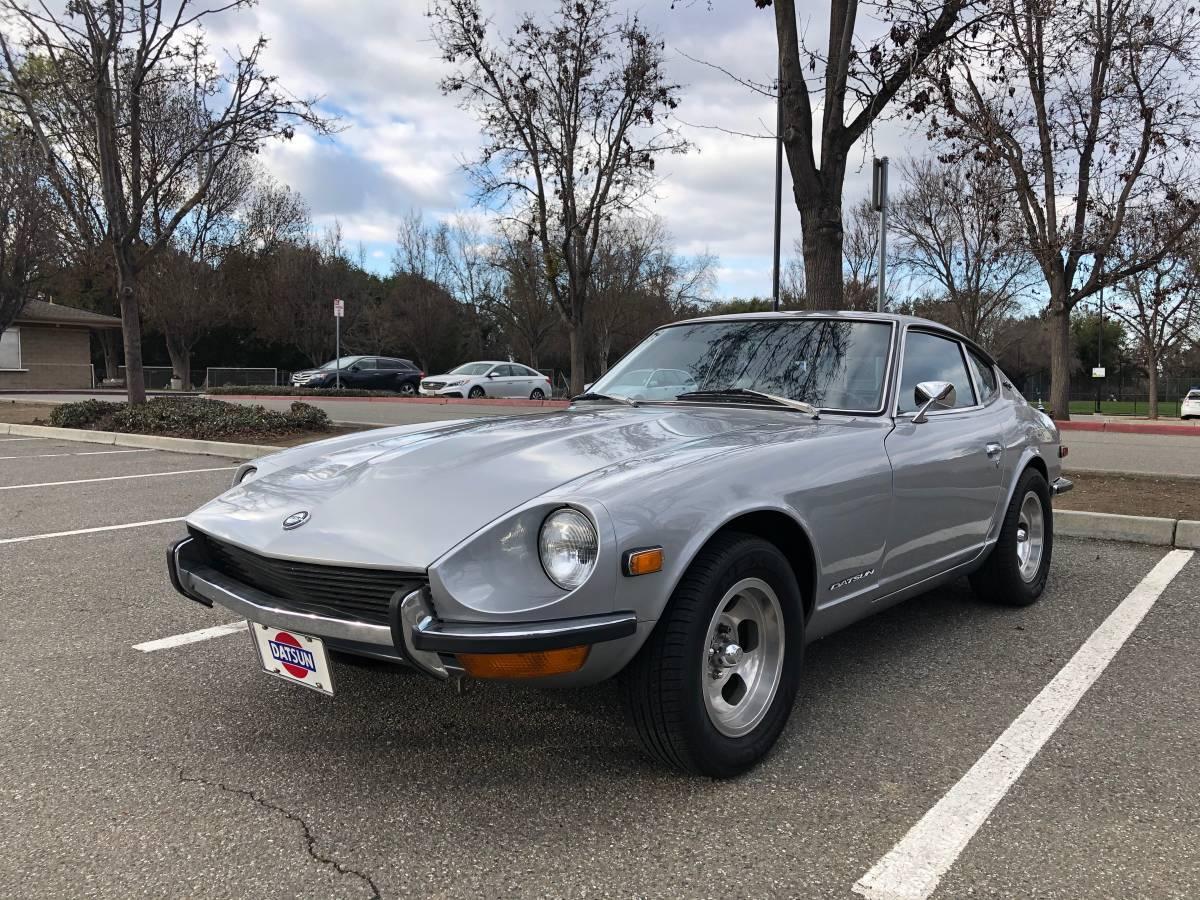
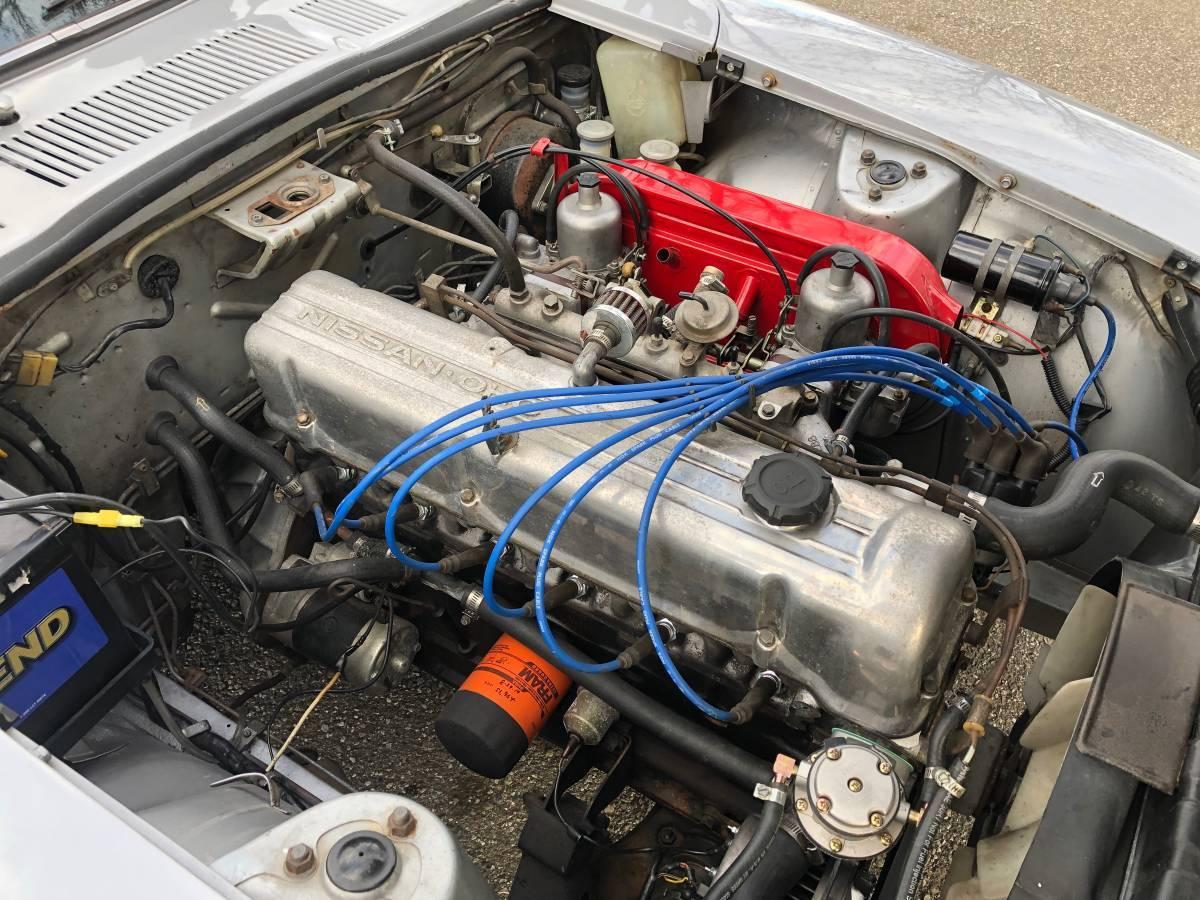
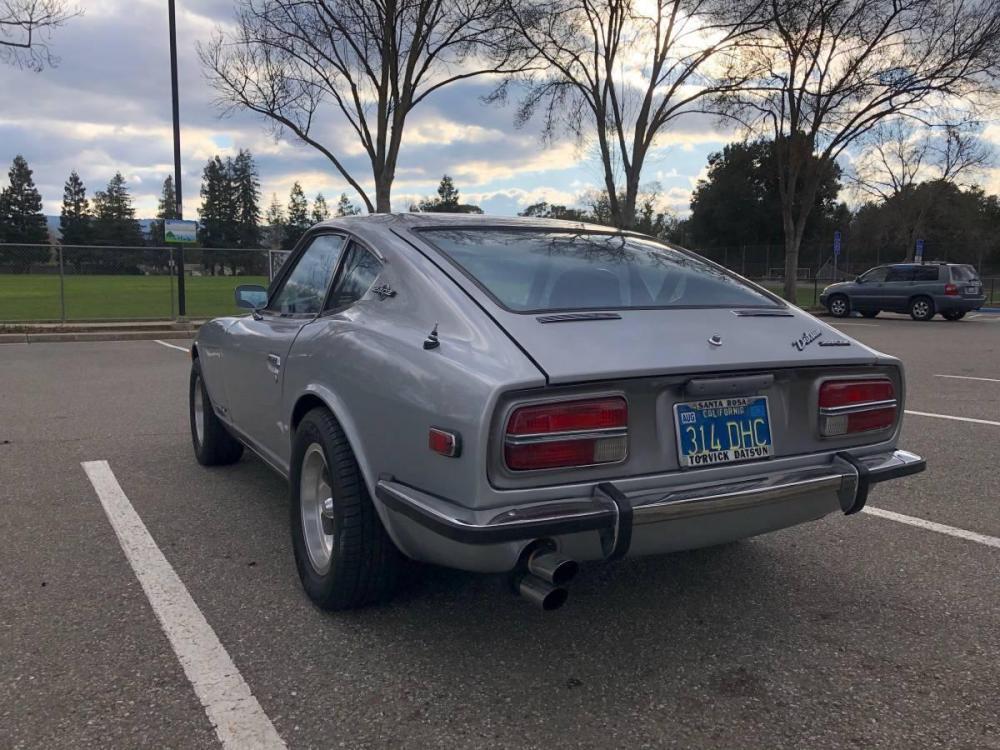
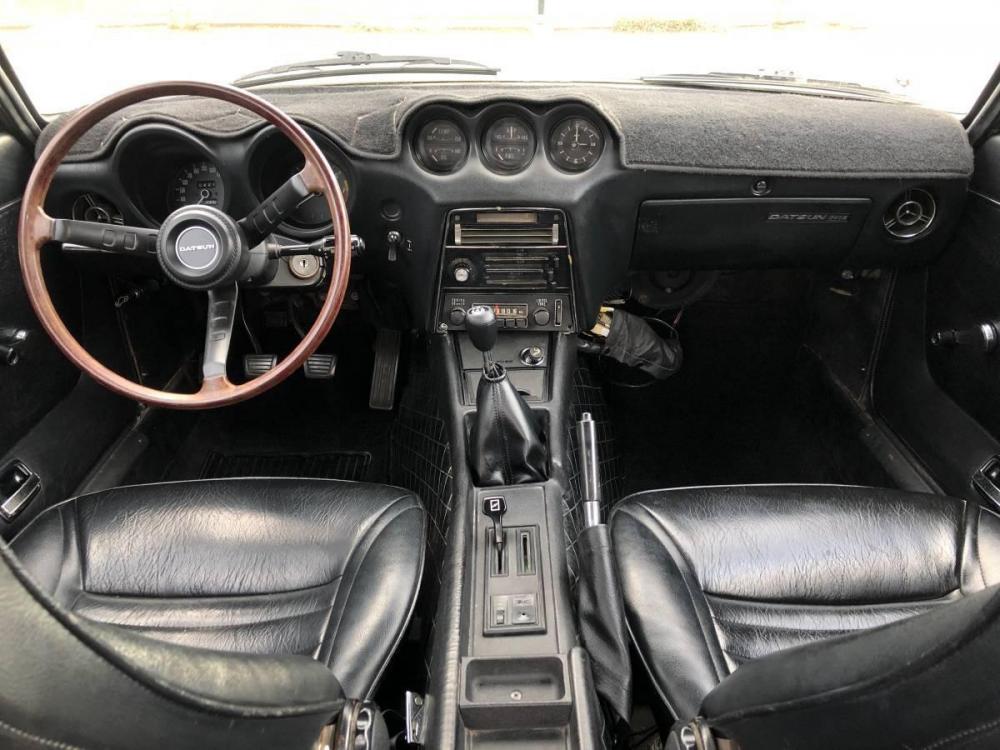
Here's a late Series I 240Z that I found on the Los Angeles Craigslist: 1971 Datsun 240Z - Series 1 - $32,000 https://losangeles.craigslist.org/lac/cto/d/san-jose-1971-datsun-240z-series/7279996761.html CAR IS LOCATED IN SAN JOSE, CA (Northern California). Please include your contact number when you email me. NO LOW BALLERS, JOY RIDES. Due to the COVID-19 pandemic, I ask that we both respect each others time when scheduling viewing. I will not show to parties that refuse to wear a mask. More Photos: https://drive.google.com/drive/folders/1LiqZgsw9V6sZVK56eSR5Hcr7t3x2U8e3?usp=sharing 1971 Datsun 240Z VIN: HLS30- 20198 Color: 901 Silver Asking Price: $32,000 Miles: 152,XXX This 1971 Datsun 240Z is a late-Series 1 model and is an original California Blue Plate car. It was sold brand new by Torvick Datsun in Santa Rosa, California to Walter Frederickson on March 13, 1971 for $4,314.30. It has spent its entire life in Northern California, specifically the Santa Rosa area. The vehicle has always maintained its original silver exterior and black interior, and was professionally resprayed in the last 16 years. It has had a total of three owners (Walter Frederickson, Dante Liberatore, and Will Meyer) in its 49 years of existence, all of which are documented through bill of sales. The vehicle received a full refresh/repaint in 2004 and has seen very little miles since. The car comes extremely well-documented with the original purchase agreement, window sticker, user manuals, and brochures. All receipts from the original, second, third owners are included with the vehicle. Body During its last restoration in 2004, the body was stripped to bare metal, with all body work done by a professional. It was painted with five coats of Dupont Chroma Premier in the factory silver metallic color, followed by three coats of clear coat. Bumpers were re-chromed and assembled with all new bumper rubber. All new weather stripping was installed for the front windshield, rear hatch window, doors, hatch, quarter windows, and side windows. The car has no apparent rust rot outside of superficial surface rust. The battery tray had some acid drip on it, so it was a bit scaly when I got the car. I have since sanded it down and sprayed some matching paint on it. Floor pans, dog legs, hatch deck, and other areas that are typically known to rust are clean. One door has ever so slight bubbling under the paint (see photos). The chassis is believed to have roughly 152k miles, judging by the provided documentation. All Series 1 specific emblems are still maintained on the car - hatch vents, quarter panel “240Z” emblems, etc. Engine The engine was replaced in 1979 by the first owner, hence the car does not retain its original numbers matching engine. An appropriate 2.4L engine was fitted. In the last restoration, the radiator and heater core were overhauled and installed with all new hoses. When purchased by the current caretakers, the car had a Holley 390 CFM four barrel carburetor with Clifford manifold. This was replaced with a used pair of factory Hitachi SU carburetors and tuned to appropriate specifications. New NGK spark plugs, Taylor performance ignition wires, intake filter, valve cover seal and fuel filter were fitted. The oil was changed to an oil with high phosphorus and zinc oil, and radiator fluid was changed. The engine was professionally rebuilt in 2006 with a Crane 168-0010 cam, headers, and period correct stylish twin-tip Monza exhaust system. A compression test was taken on December 5, 2020 and resulted in the following numbers: 1. 165, 2. 162, 3.160, 4. 160, 5. 165, 6. 162. At the time, the car received a new battery, alternator, regulator, distributor, Pertronix Electronic Ignition and OEM spec coil. A new fuse box and harness utilizing a printed circuit and new spade fuses replaced the stock fuse box. The gas tank was completely cleaned in 2006, resealed and installed with all new hoses, including the proper emissions hoses and filler hoses. Brakes Front rotors and rear drums were reground during the last restoration, with remanufactured calipers, pads, and brake lines installed. New inner and outer wheel bears, races, and oil seals were also installed. In current ownership, both the brake and clutch hydraulic fluid have been replaced. Car does brake amazingly, not like your typical spongy brakes! Transmission The 4-speed factory transmission was professionally rebuilt in 2006, along with new shifter bushings installed. A new factory clutch, pressure pate, throw out bearing, pilot bushing, master cylinder, slave cylinder, driveshaft u-joints, and half shafts were installed. Interior Seats were professionally reupholstered with new foam and new reproduction seat covers. NOS door panels, new carpet, shift boots (inner and outer), emergency brake boot, window cranks, door handle escutcheons were added to touch up the interior. An Autopower roll bar, aftermarket luggage bar were also added. The car maintains several original Series 1 components such as the 20-mph speedometer, behind-seat compartments, center console, coin tray, ashtray, hole-free spoked steering wheel, hatch inner vent panel, choke knob, radio, etc. Car comes with the AC system that was removed by the prior owner. Suspension In 2006, the car received a new rack and pinion steering rack, rubber bushings, and steering coupler. New factory strut cartridges were also installed. Original dealer installed mags were also installed during this time.


 1 point
 -
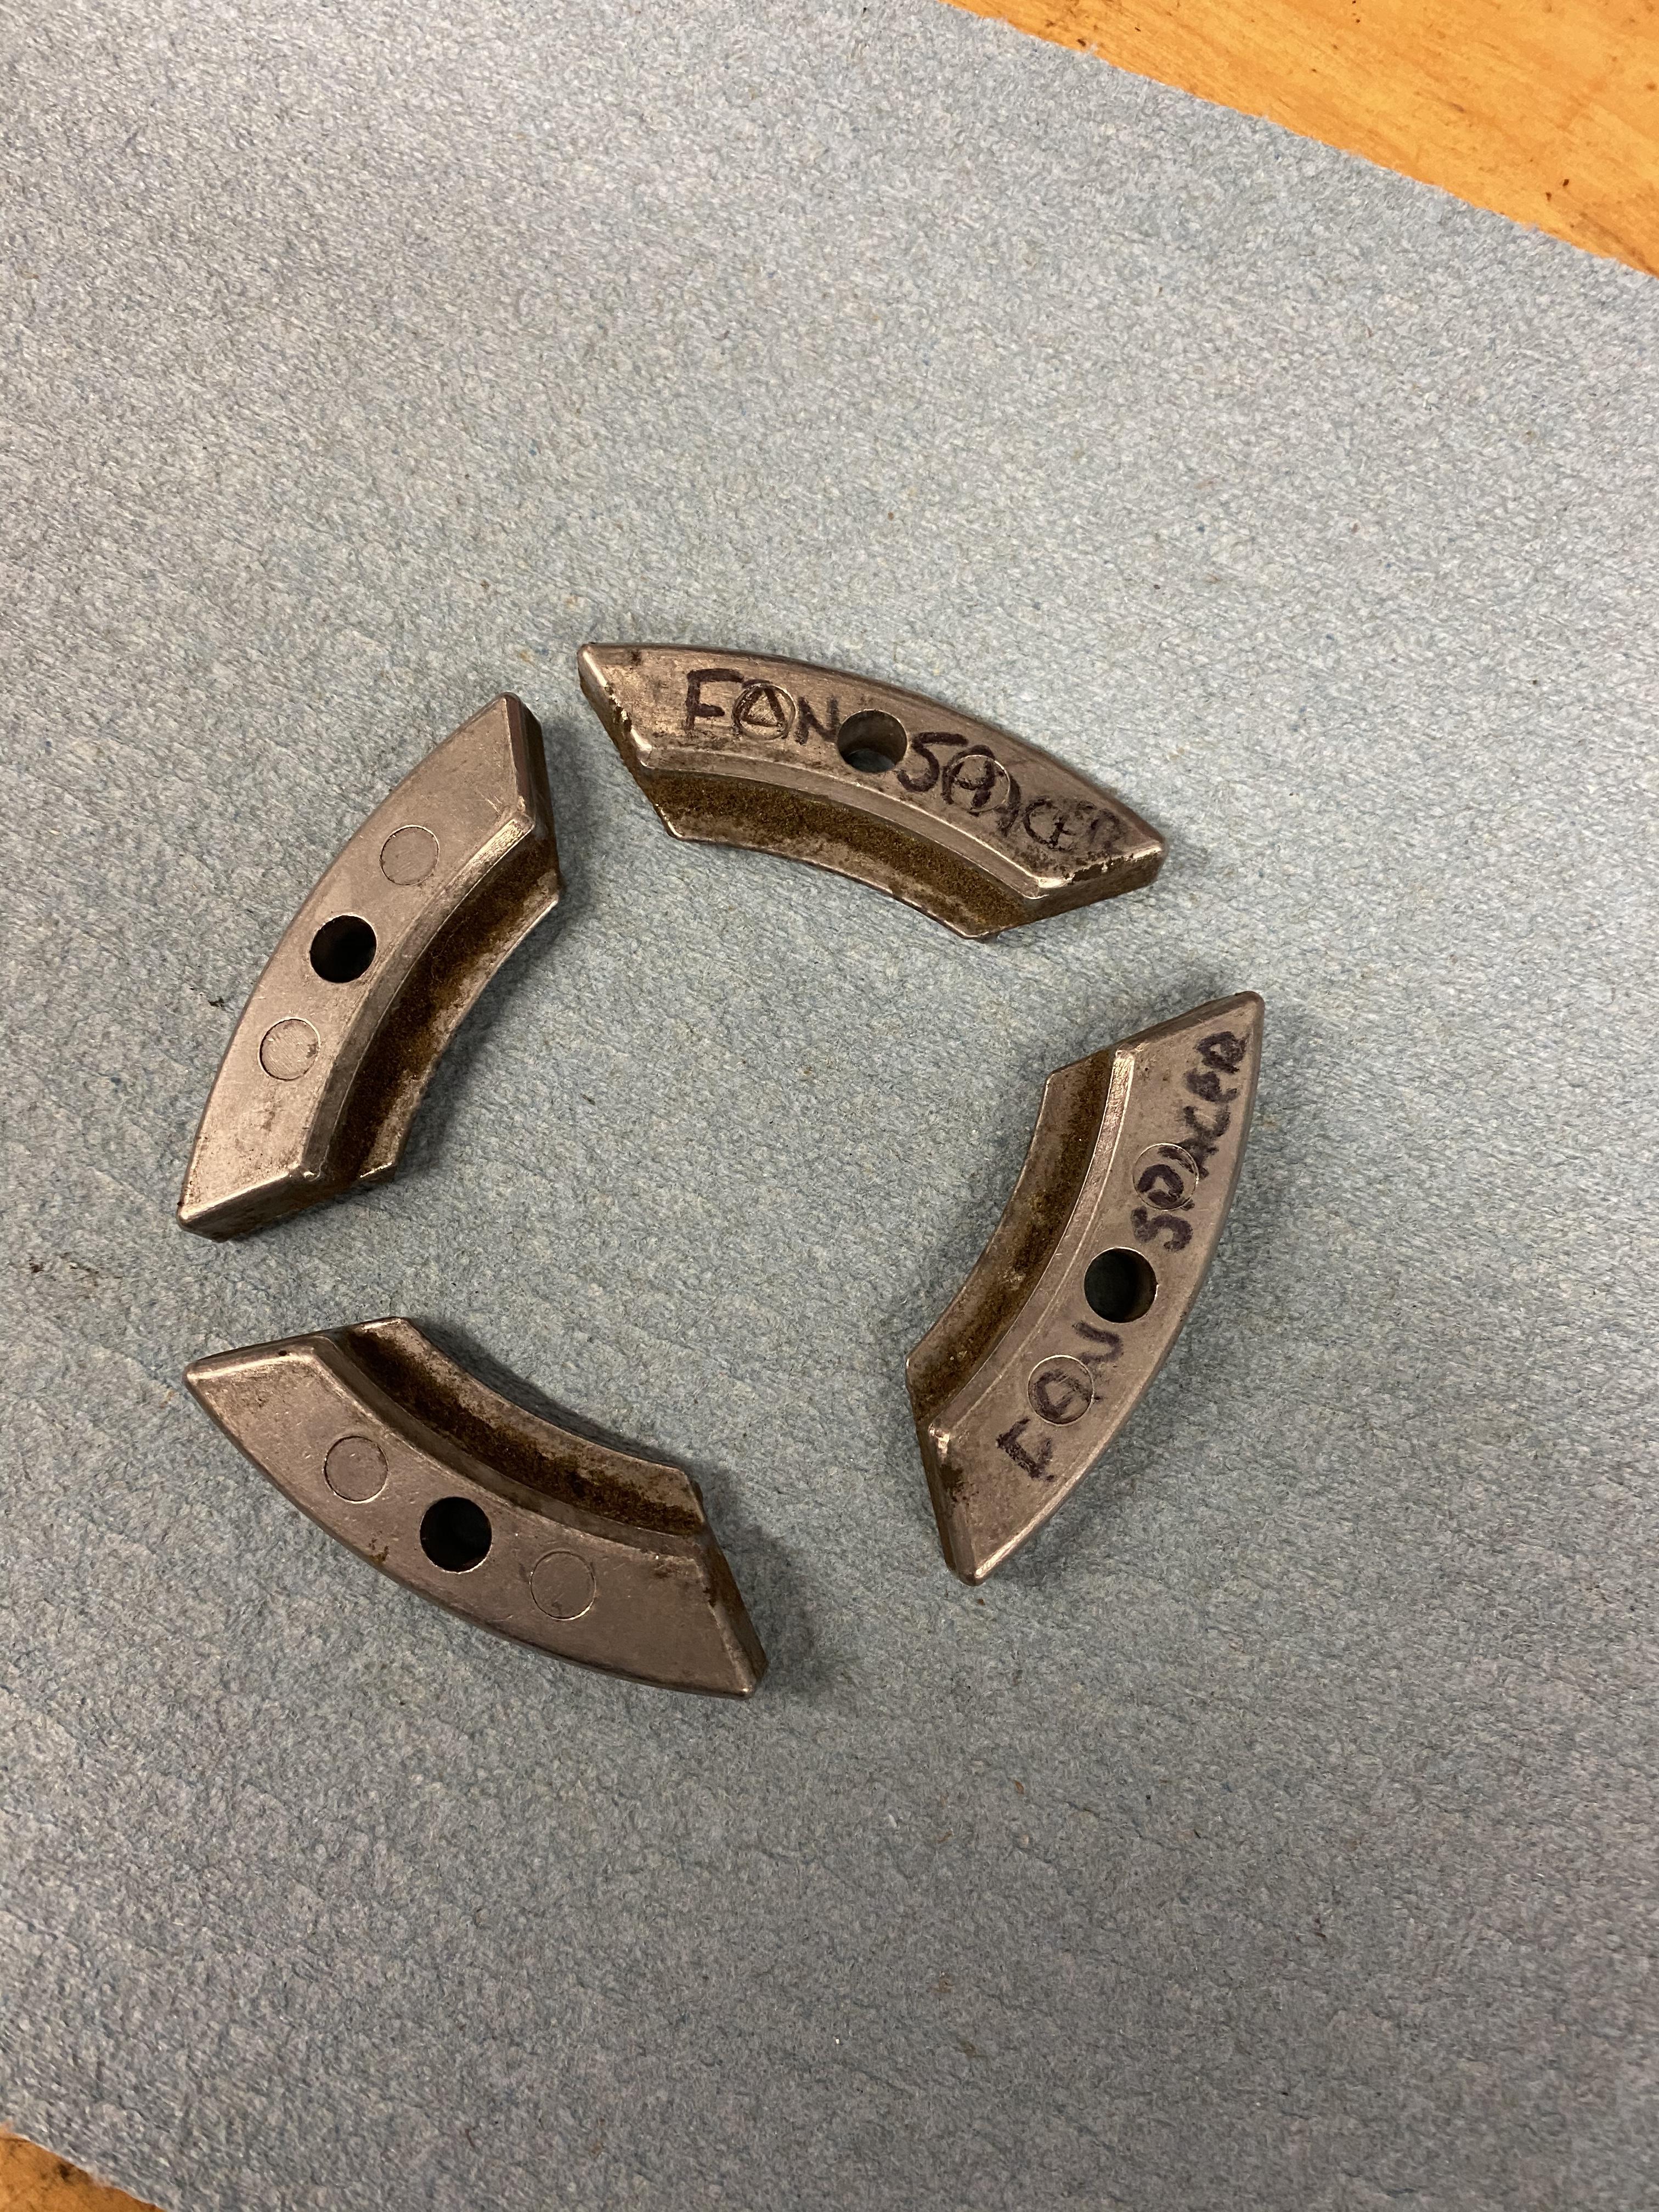
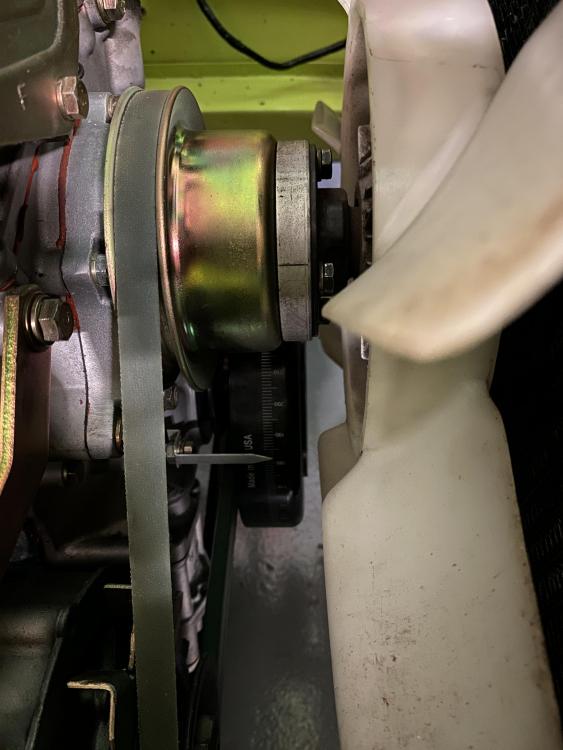
1 pointHere is the fan I had to go with to clear the Super Damper....still barely cleared. Also, a picture of a set of fan spacers. I assume they are for the 280ZX’s to clear the three row dampers, but don’t have a clue if that’s correct. I guess you could easily make your own spacer out of a number of materials. Stickie outie is what I had too.....just glad it didn’t push the fan too close to the radiator....I didn’t want to go electric.Now that I look at it, I wonder if I could have symmetrically removed some of the inside corner of the fan blades to clear the stickie outie bolts?

 1 point
 -
Pull the rubber boots from the ends of the cylinders. If there's brake fluid inside the rubber boots, the cylinder is leaking. In the past I've found that if I only replaced the one leaking cylinder (slave or master), the other cylinder didn't last long and had to be replaced or repaired. Now I replace them both at the same time.1 point
-
1 pointCongratulations! If that's a before and after shot, wow! It looks great. Enjoy that car.1 point