Leaderboard
-
zKars
 Subscriber
 5Points3,770Posts
 -

Zed Head
Free Member4Points19,238Posts -
DatsunZGuy
Free Member3Points930Posts -

Dave WM
Free Member2Points3,591Posts


Popular Content
Showing content with the highest reputation on 08/18/2020 in Posts
-
3 points
-
Ok, what I think the issue is that the top cap is installed at the factory 90 degrees wrong, The internal center rib on the cap MUST be aligned with the mating center rib between the two check valves. Having the cap on with the ribs crossed allows flow to sneak through that upper diaphragm. This was the case with the one I looked at today. Turned the cap 90 and put it back on, and boom. Perfectly functioning pump. I wanted others with failed pumps to take the top off and see if the factory has the ribs aligned or crossed. My guess is that from the factory, the diaphragm is sticky enough in some way to limit the leak, but eventually and quickly the dam bursts and that’s it No more suction. At least that’s today’s theory. I need someone else to find the same flaw. Secretly I ordered three more GMB pumps from RockAuto today (can’t beat $17.83 CAD each!) to see if any or all have the flaw. Is it random or is the assembly line guy/robot slapping them together. however they like?3 points
-
2 pointshttps://www.facebook.com/groups/1822782428004038/permalink/2836027283346209/?sale_post_id=2836027283346209 Guy names Chris Myers has a box with fuel pump goodies including the elusive bracket for sale
 2 points
 -
2 pointsCollege Greek life...how could they be so irresponsible?! Completely unexpected! Who could have foreseen this? (Irony). https://apnews.com/66745a09e003a27b6c13e4578636d300 Same topic. They tried to get past the cancellation deadline but didn't make it. Lock that money in. Also learned a new word - "de-densification". It is incumbent on all of to de-densify until the virus is controlled. https://indyweek.com/news/orange/unc-chapel-hill-calls-off-in-person-classes/ https://www.unc.edu/posts/2020/08/17/shift-to-remote-cm/?utm_campaign=081720+Message+from+University+leaders+on+changes+in+the+Fall+2020+Roadmap&utm_medium=bitly&utm_source=Twitter "Given the number of positive cases, we are making two important changes to de-densify our campus."2 points
-
1 pointWe didn't torque tapered roller bearings "back in the day". We would spin the wheel while tightening the nut until the nut was snug and usually tighten it until the next slot in the nut aligned with the hole in the spindle. On my 71 the next alignment slot felt too tight, so I backed the nut off. That slot left the wheel bearings with an almost imperceptible amount of play. I consulted my Dad (ex-logger) about the looseness and he said a tapered wheel bearing would last a lot longer a bit loose than a bit too tight. I don't know why, to this day, but I left the bearings a bit loose and other than occasionally greasing them, I ran them over 175,000 miles. I did have to tighten them, temporarily, for novice races. Tech didn't like loose wheel bearings.1 point
-
1 pointLooks interesting. They use the typical "Stage" 1,2,3 labels, whatever that means. All the way up to Stage 6! (Should have gone to 11). They sell flywheels too, apparently. But their web page only goes back to 1981, oddly. And it doesn't work for finding a product. Some Ford Mustang stuff, but no other brands. I guess it's all eBay. The numbers seem right at the bottom of the eBay page. Surprising that it's so cheap. Too good to be true? Made in America and dirt cheap? https://clutchmax.net/pages/about-us1 point
-
To make it easier for people to find the bulbs that worked well: https://www.bulbtown.com/1813_Miniature_Bulb_Ba9S_Base_p/1813.htm https://www.bulbtown.com/274020_GM_General_Motors_Replacement_Bulb_p/274020.htm https://www.bulbtown.com/274004_GM_General_Motors_Replacement_Bulb_p/274004.htm1 point
-
1 pointIt sounds a little bit different but still there. The change while subtle is noticeable so I presume I am on the right track, perhaps I just need a new inner tie rod.1 point
-
1 pointEcto-cooler and bacon grease? Oh - how they came together? My breakfast!1 point
-
1 pointMaybe your battery is about to fall out? You never know. Assume the unassumable.1 point
-
1 pointlow side is fire wall to compressor, High side is compressor to condenser in front of the radiator. On the SWP123 the back is the low side, the middle is the high side. you can also look for a D for discharge (high side) and a S for suction (low side) stamped on the case of the compressor. the hookup to the gauges is you remove the brass screw on caps on the compressor and then you hook up the hoses, they are old style screw on, not the R134 push on. Would need to see your gauges to know what you have. The assumption is you have no R-12 currently as bleeding it into open are is not legal. So assuming its all leaked out you will have no pressure, so after attaching the hoses (gauges should read 0 psi both high side and low side). you hook up the vacuum pump, open both the gauge valves, turn on the pump and you should immediately see a vacuum. the high side does not read neg pressure so just keep watching the low side. You should get to -29 if you have a good pump and no leaks. Once there close off both gauge valves, turn of the pump, and watch the low side. If it holds you may luck out. if it does not you will need to replace the pump with compressed air or better still nitrogen. open up the valve from the nitrogen then crack open the low side valve on the gauge, assuming you started at zero just allow the pressure to build to about 70psi. Don't go higher, no need for testing for leaks, get some soapy water and spray around the hoses, compressor, drier, any fittings and esp the front of the condenser. look for bubbles to form. Often you will also see oil stains, esp on the condenser that is also a sign of a leak.1 point
-
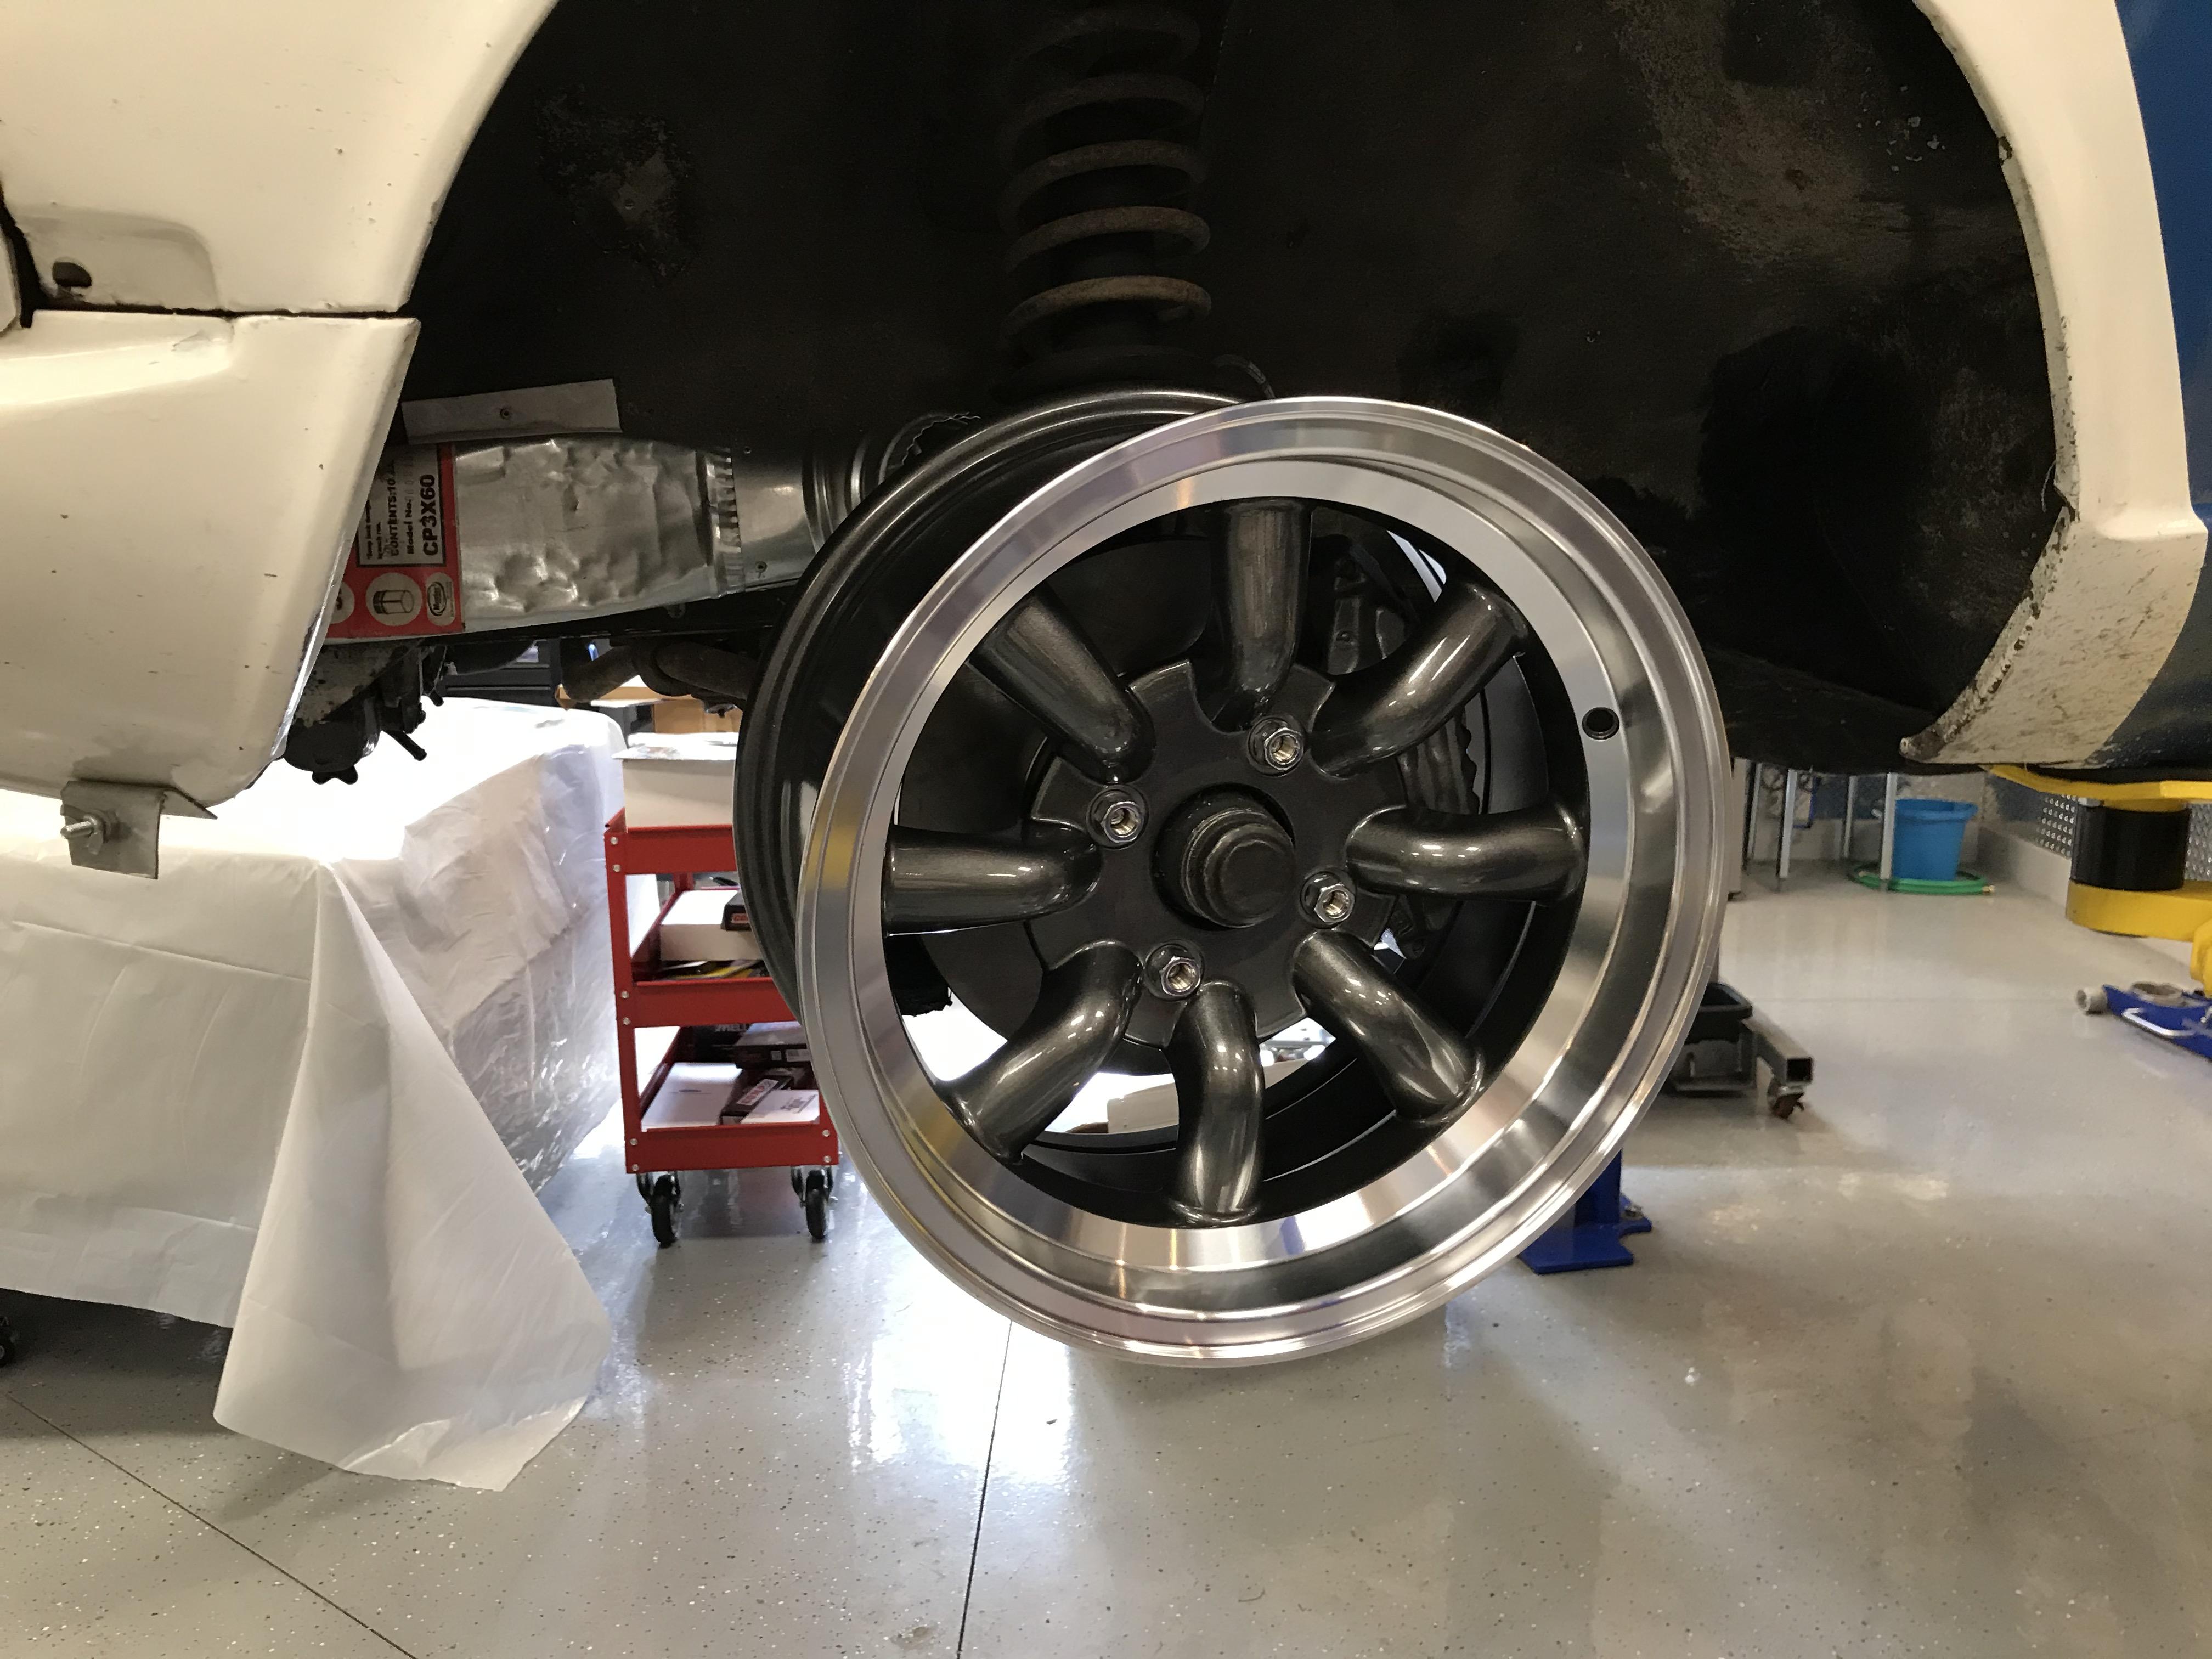
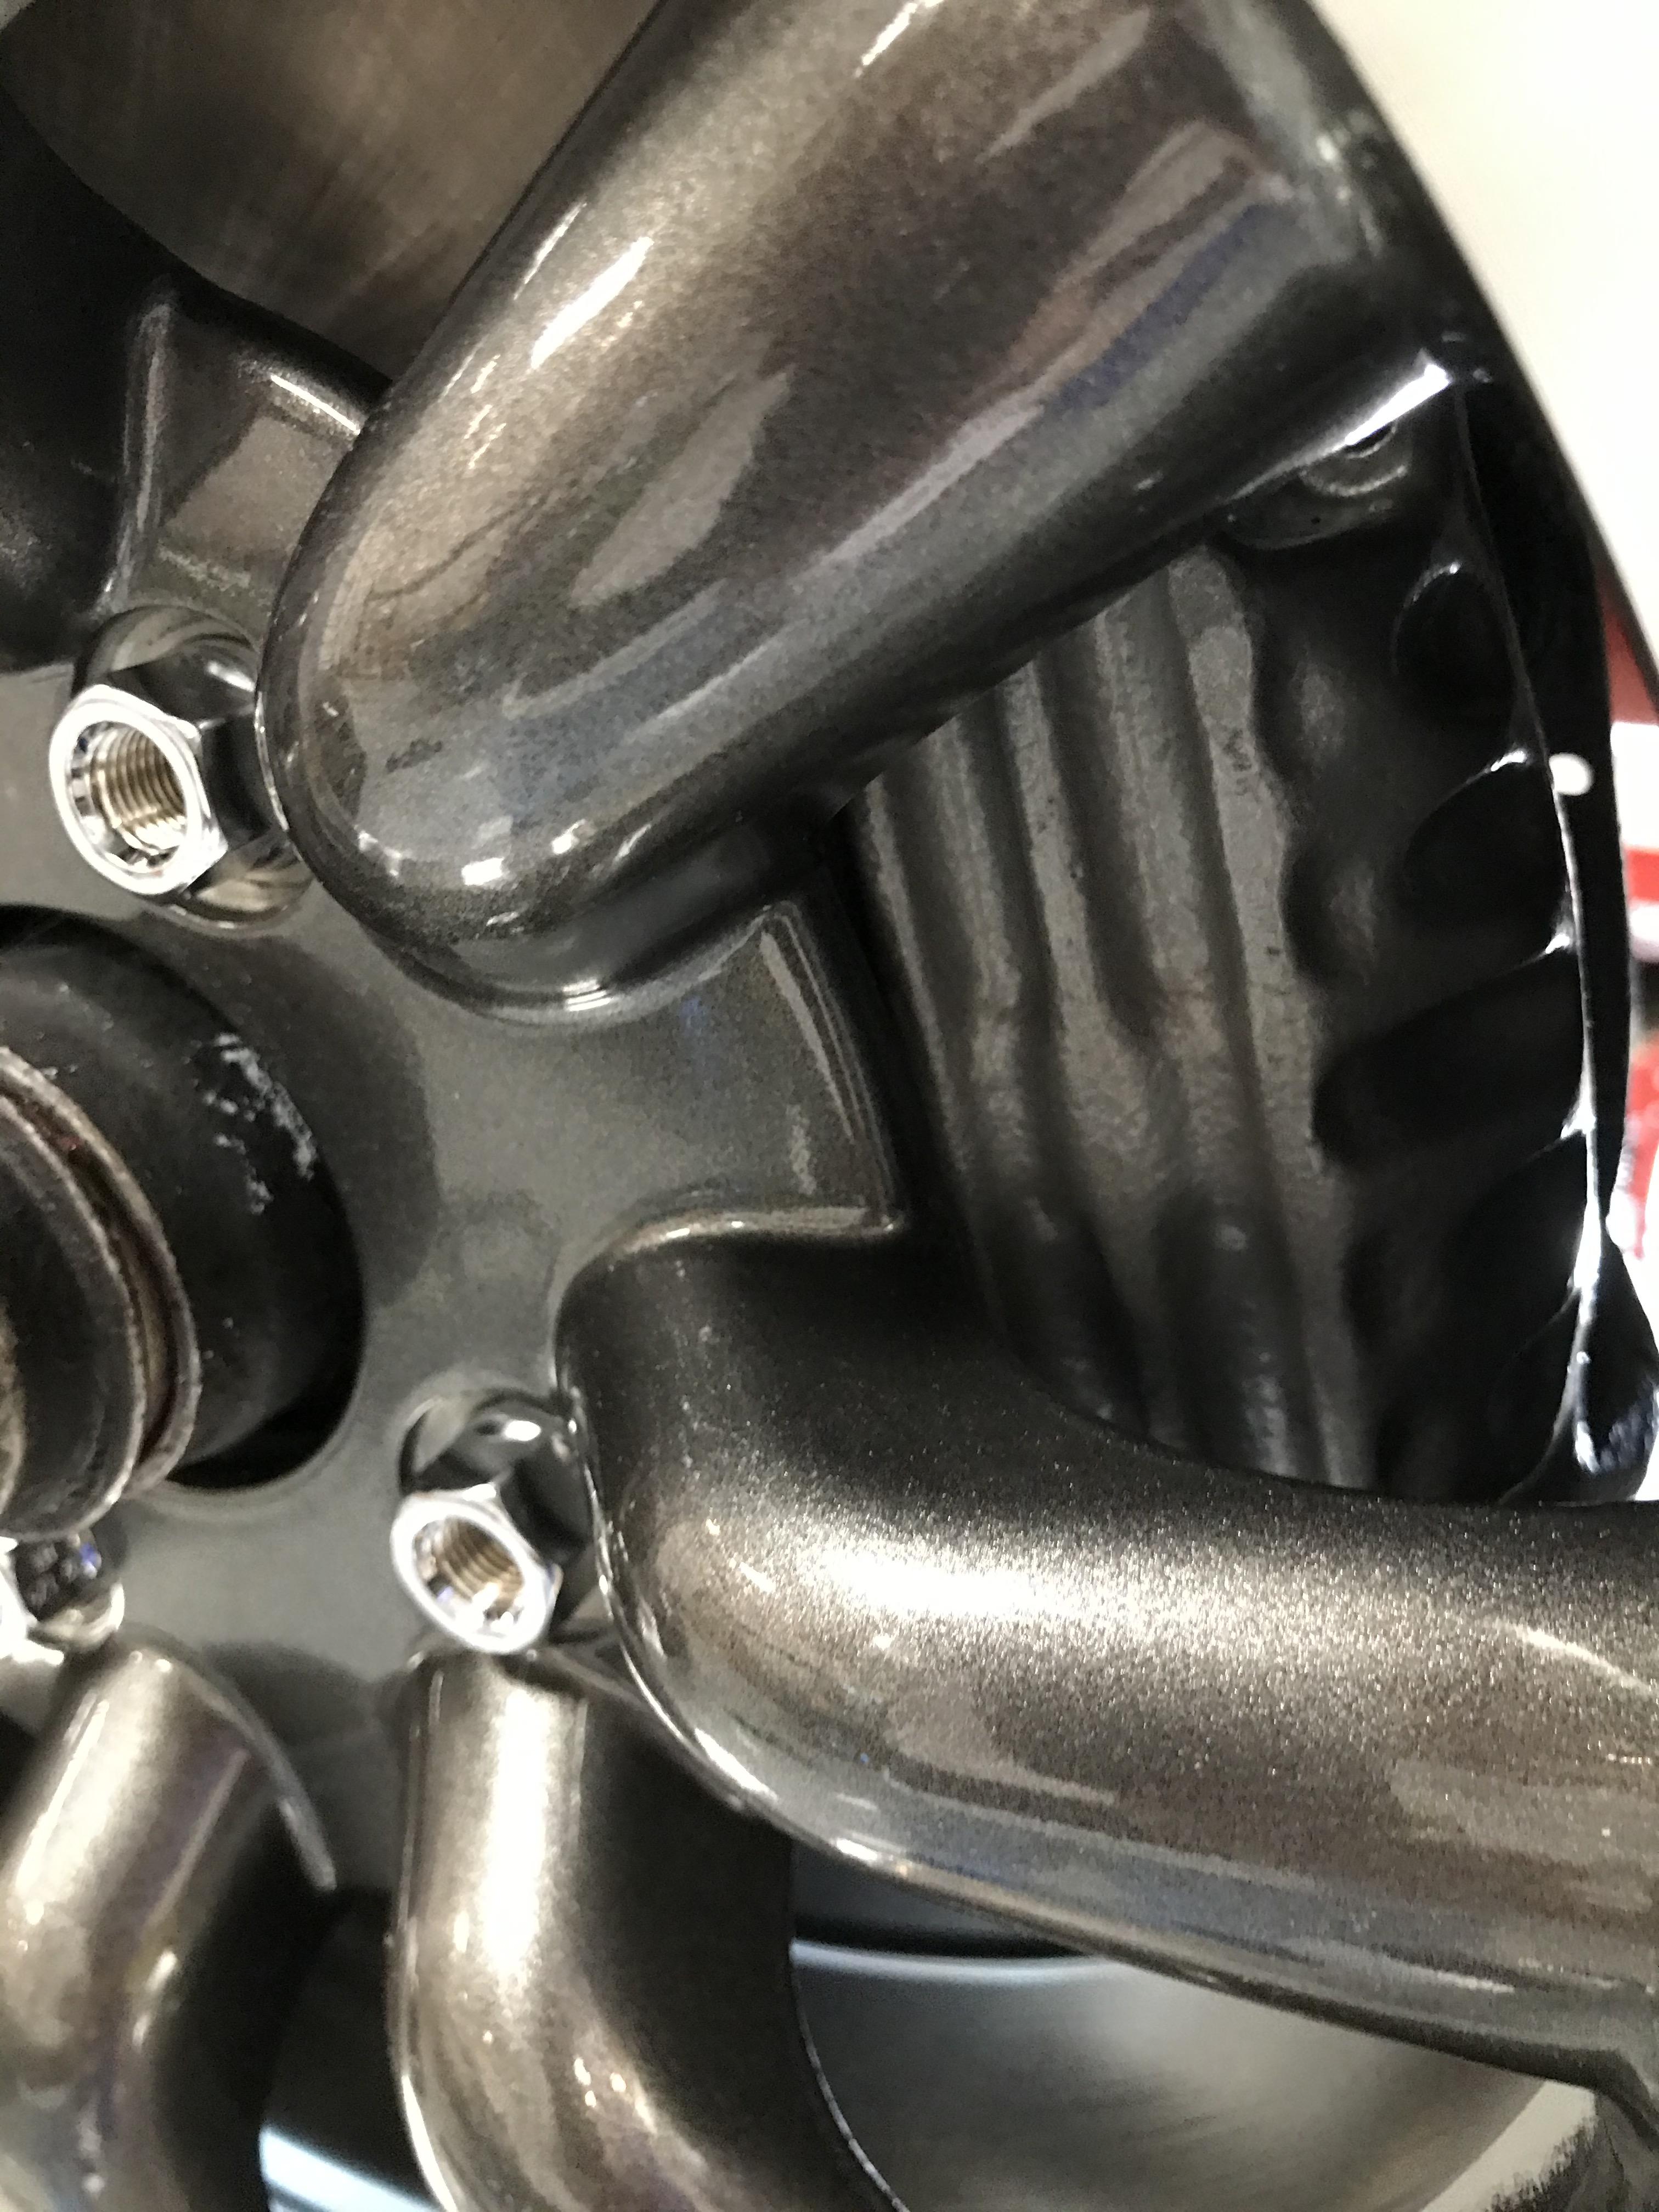
I finally got back into the shop over the weekend to keep working on my brake upgrade. I installed the vented Z31 rotors with T3 spacers and Toyota S12+W calipers. I knew they would be close, but thought that the 15x7 with zero offset Konig Rewind wheels would fit without hitting the calipers. I was wrong. There is a small interference between the innermost cooling fin on the caliper and the hub of the rim. I also realized that the stock length wheel studs are not long enough to get proper thread engagement. Rather than grind at the calipers, I plan to add 3 - 5mm wheel spacers all around and 3" long ARP wheel studs. The current studs are only bout 1.25" long in front which isn't even enough without the spacers.

 1 point