


Leaderboard

 Subscriber


Popular Content
Showing content with the highest reputation on 12/29/2017 in Posts
-
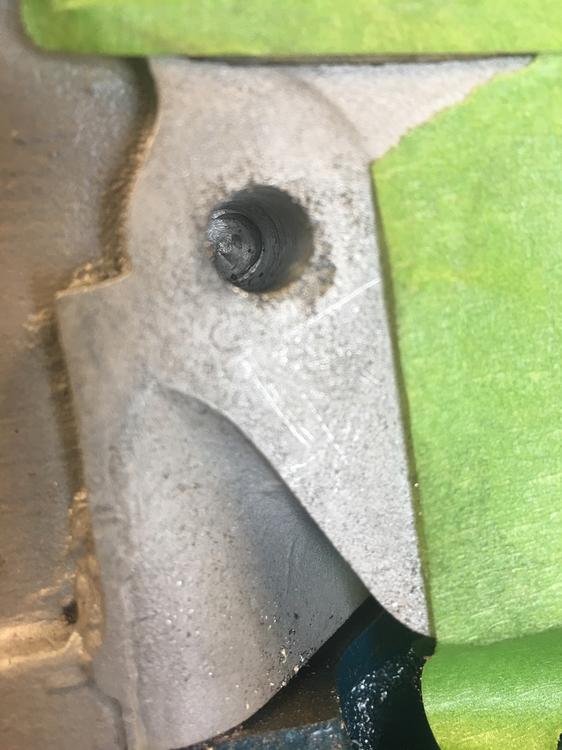
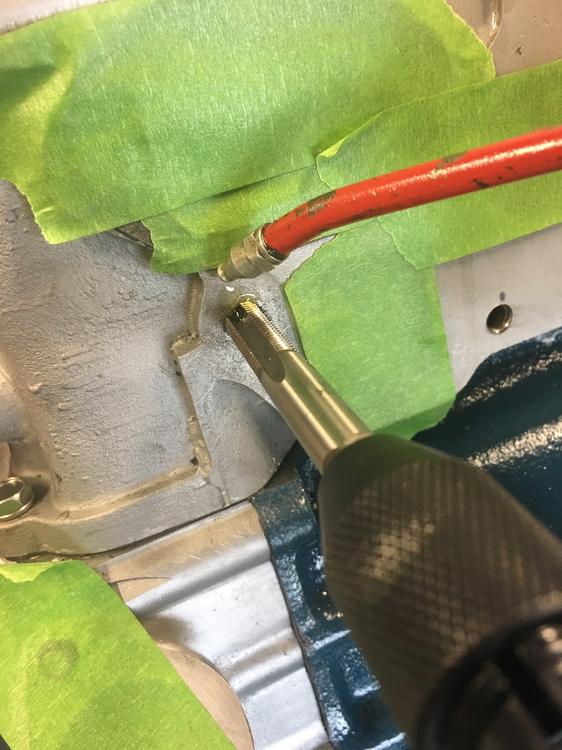
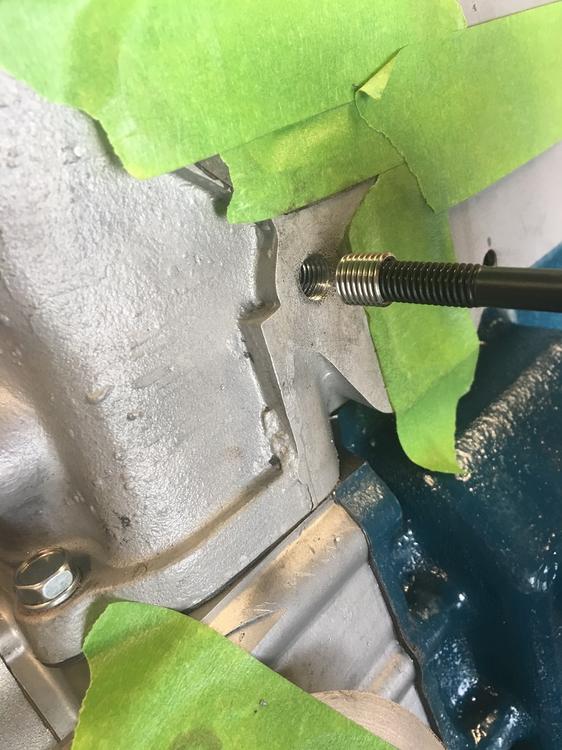
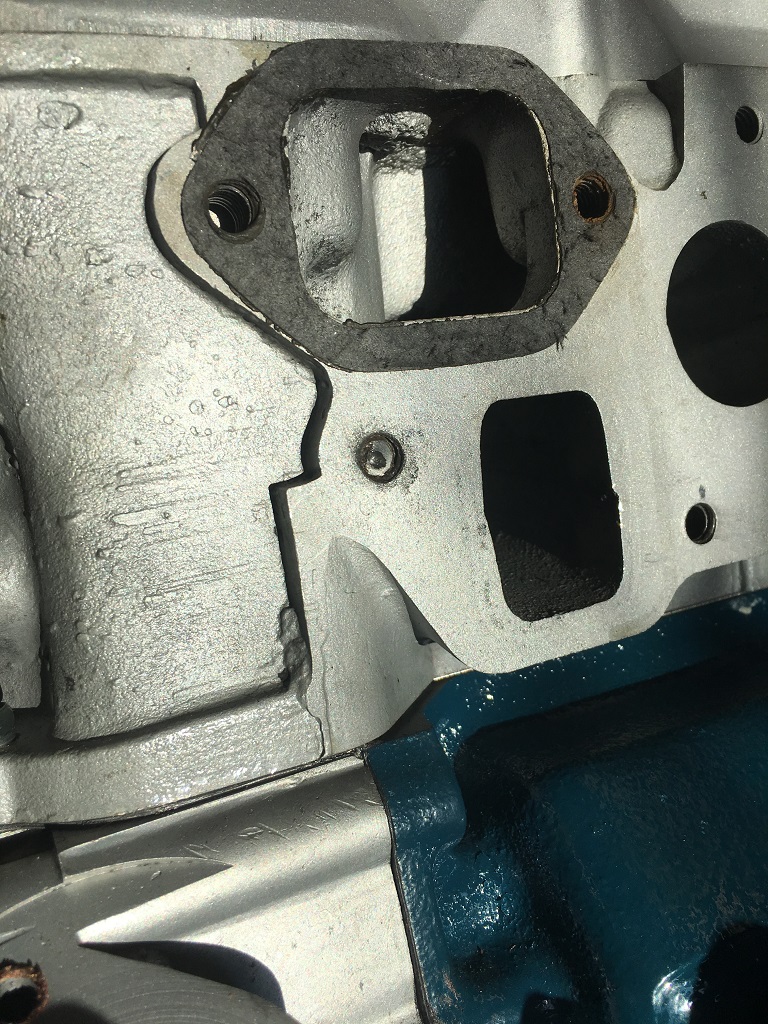
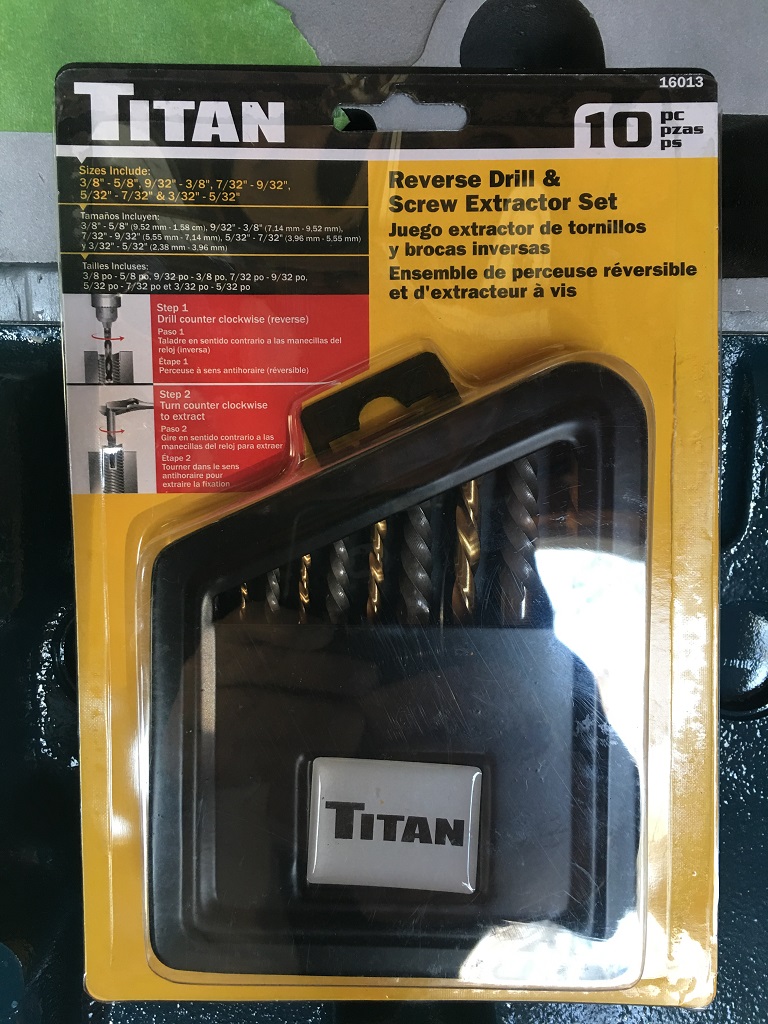
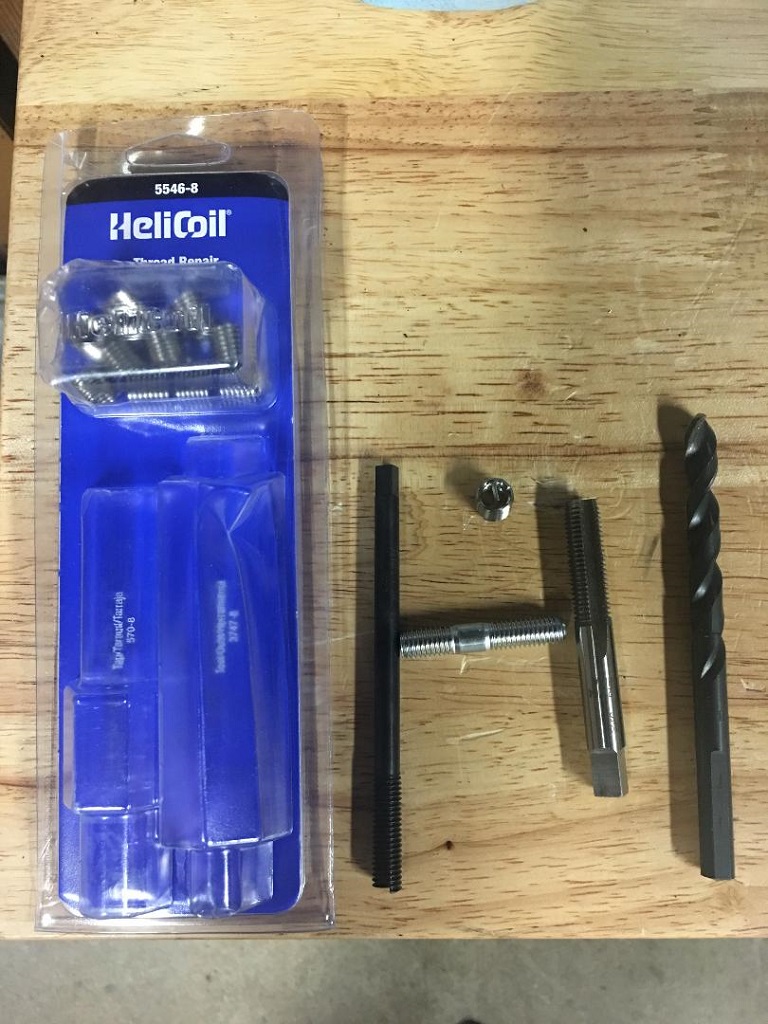
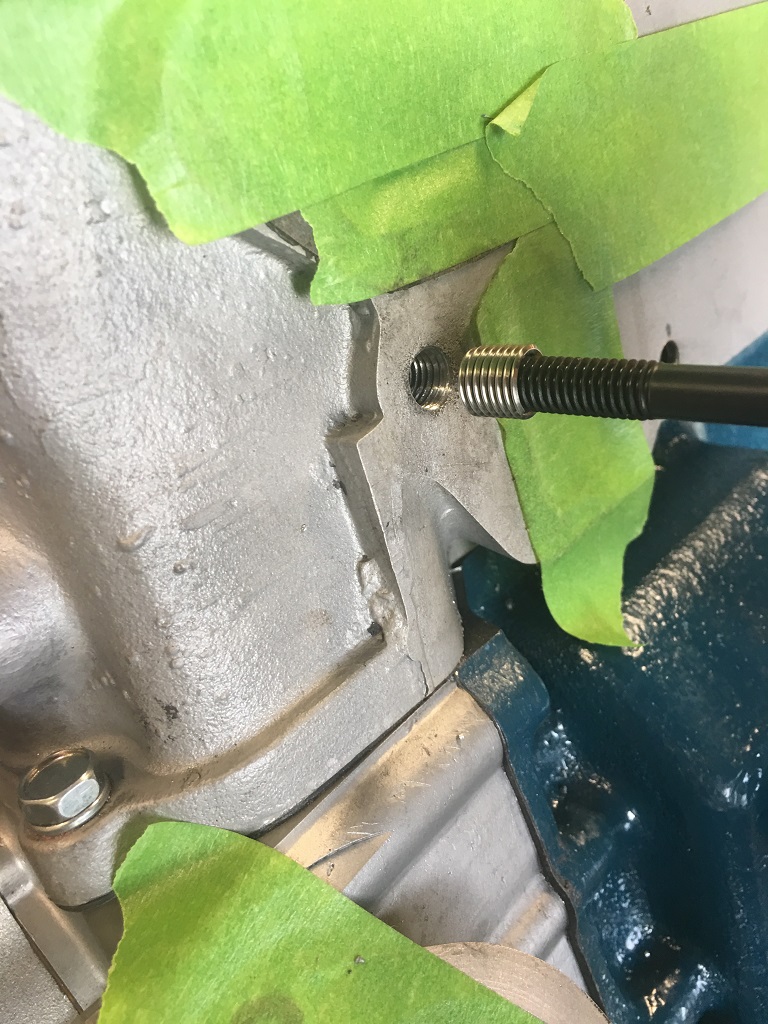
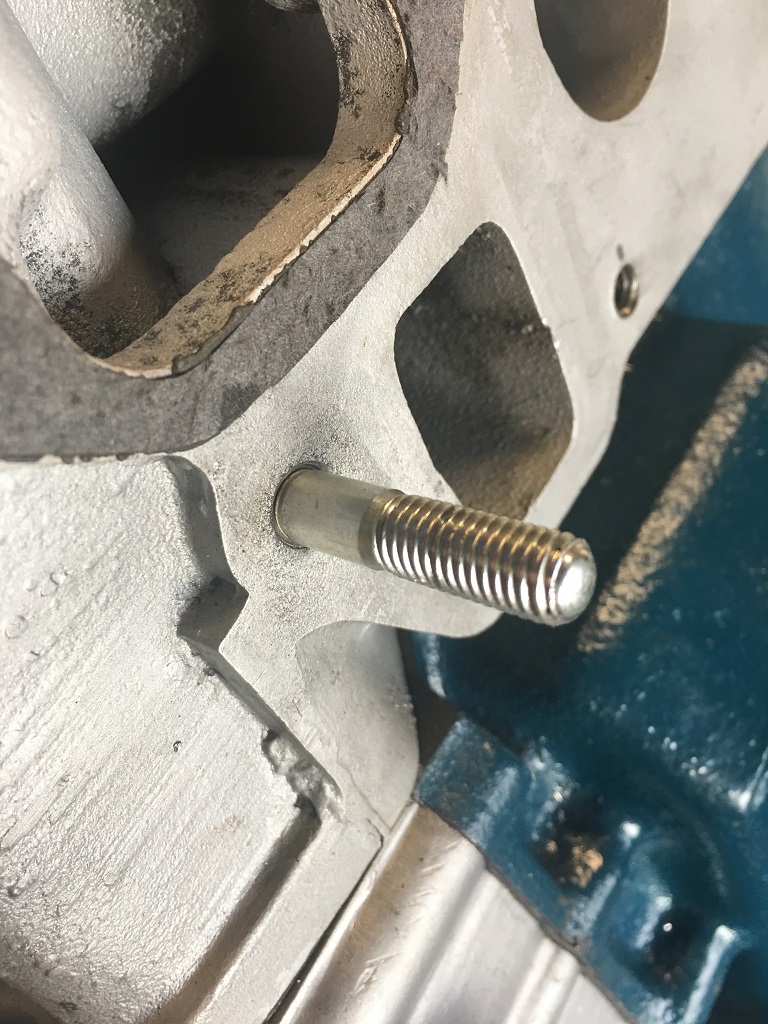
3 pointsWhile removing the manifold studs on my rebuilt head to replace with new studs from MotorSports, the front one broke off below the head surface! The one that broke was already broken to where only a 1/4" worth of thread was usable, and I couldn't double-nut it, so it had to be replaced. The others came out okay after a good soaking with Kroil, a bit of heat, and double-nutting to loosen. But the front #1 exhaust wouldn't budge and broke while trying to remove with vice grips. Lucky for me the engine is on a stand, easier to work on. I figure I'd post some pics of the Helicoil job since I didn't see one around here, in case someone else has the "joy" of doing this in the future. I've done a few, but definitely not an expert. Feel free to add your thoughts or tips to the thread. Above shows broken stud. I've already center punched it to help get the drill bit centered. Here was my first choice, screw extractor and left handed drill bits. Tried 2 different sizes, no luck. Plus I'm always afraid the extractor will break off and make further drilling a real pain, so I didn't crank on them too hard. Since I already had the stock M8 1.25 stud kit, I opted for that size instead of going to a stouter 10M stud. Ordered a real Helicoil kit instead of cheaper knockoff. Kit includes some threaded inserts, a tap, and tool to install inserts into newly tapped hole. Didn't include the 21/64" drill bit, which I had. Carefully drill, keeping hole perpendicular to surface, and no deeper then existing hole, and centered. I started with 1/8" hole, 1/4", 5/16" then the final 21/64". Tap the hole, using oil to help get a clean cut. Work tap back and forth and remove a few times to clean out debris. Insert is threaded in using the tool. There's a little tang at the bottom of the insert that you break off after you get it in place. Done. Be sure to use anti sieze on the threads when installing new studs. I'm not sure how well this will hold up in the long run, and the repeated hot/cold cycles. I guess I'll find out.


 3 points
 -
2 points
-
2 pointsForgot to say thank you everyone for your help! I have replaced all my bearings minus the centers and turned my Keys/dogs around. Everything shifts smooth now!!!! Yay no more worrying about trains hitting my car! I just have to wait for some parts to come in so I can finish doing my manual conversion!2 points
-
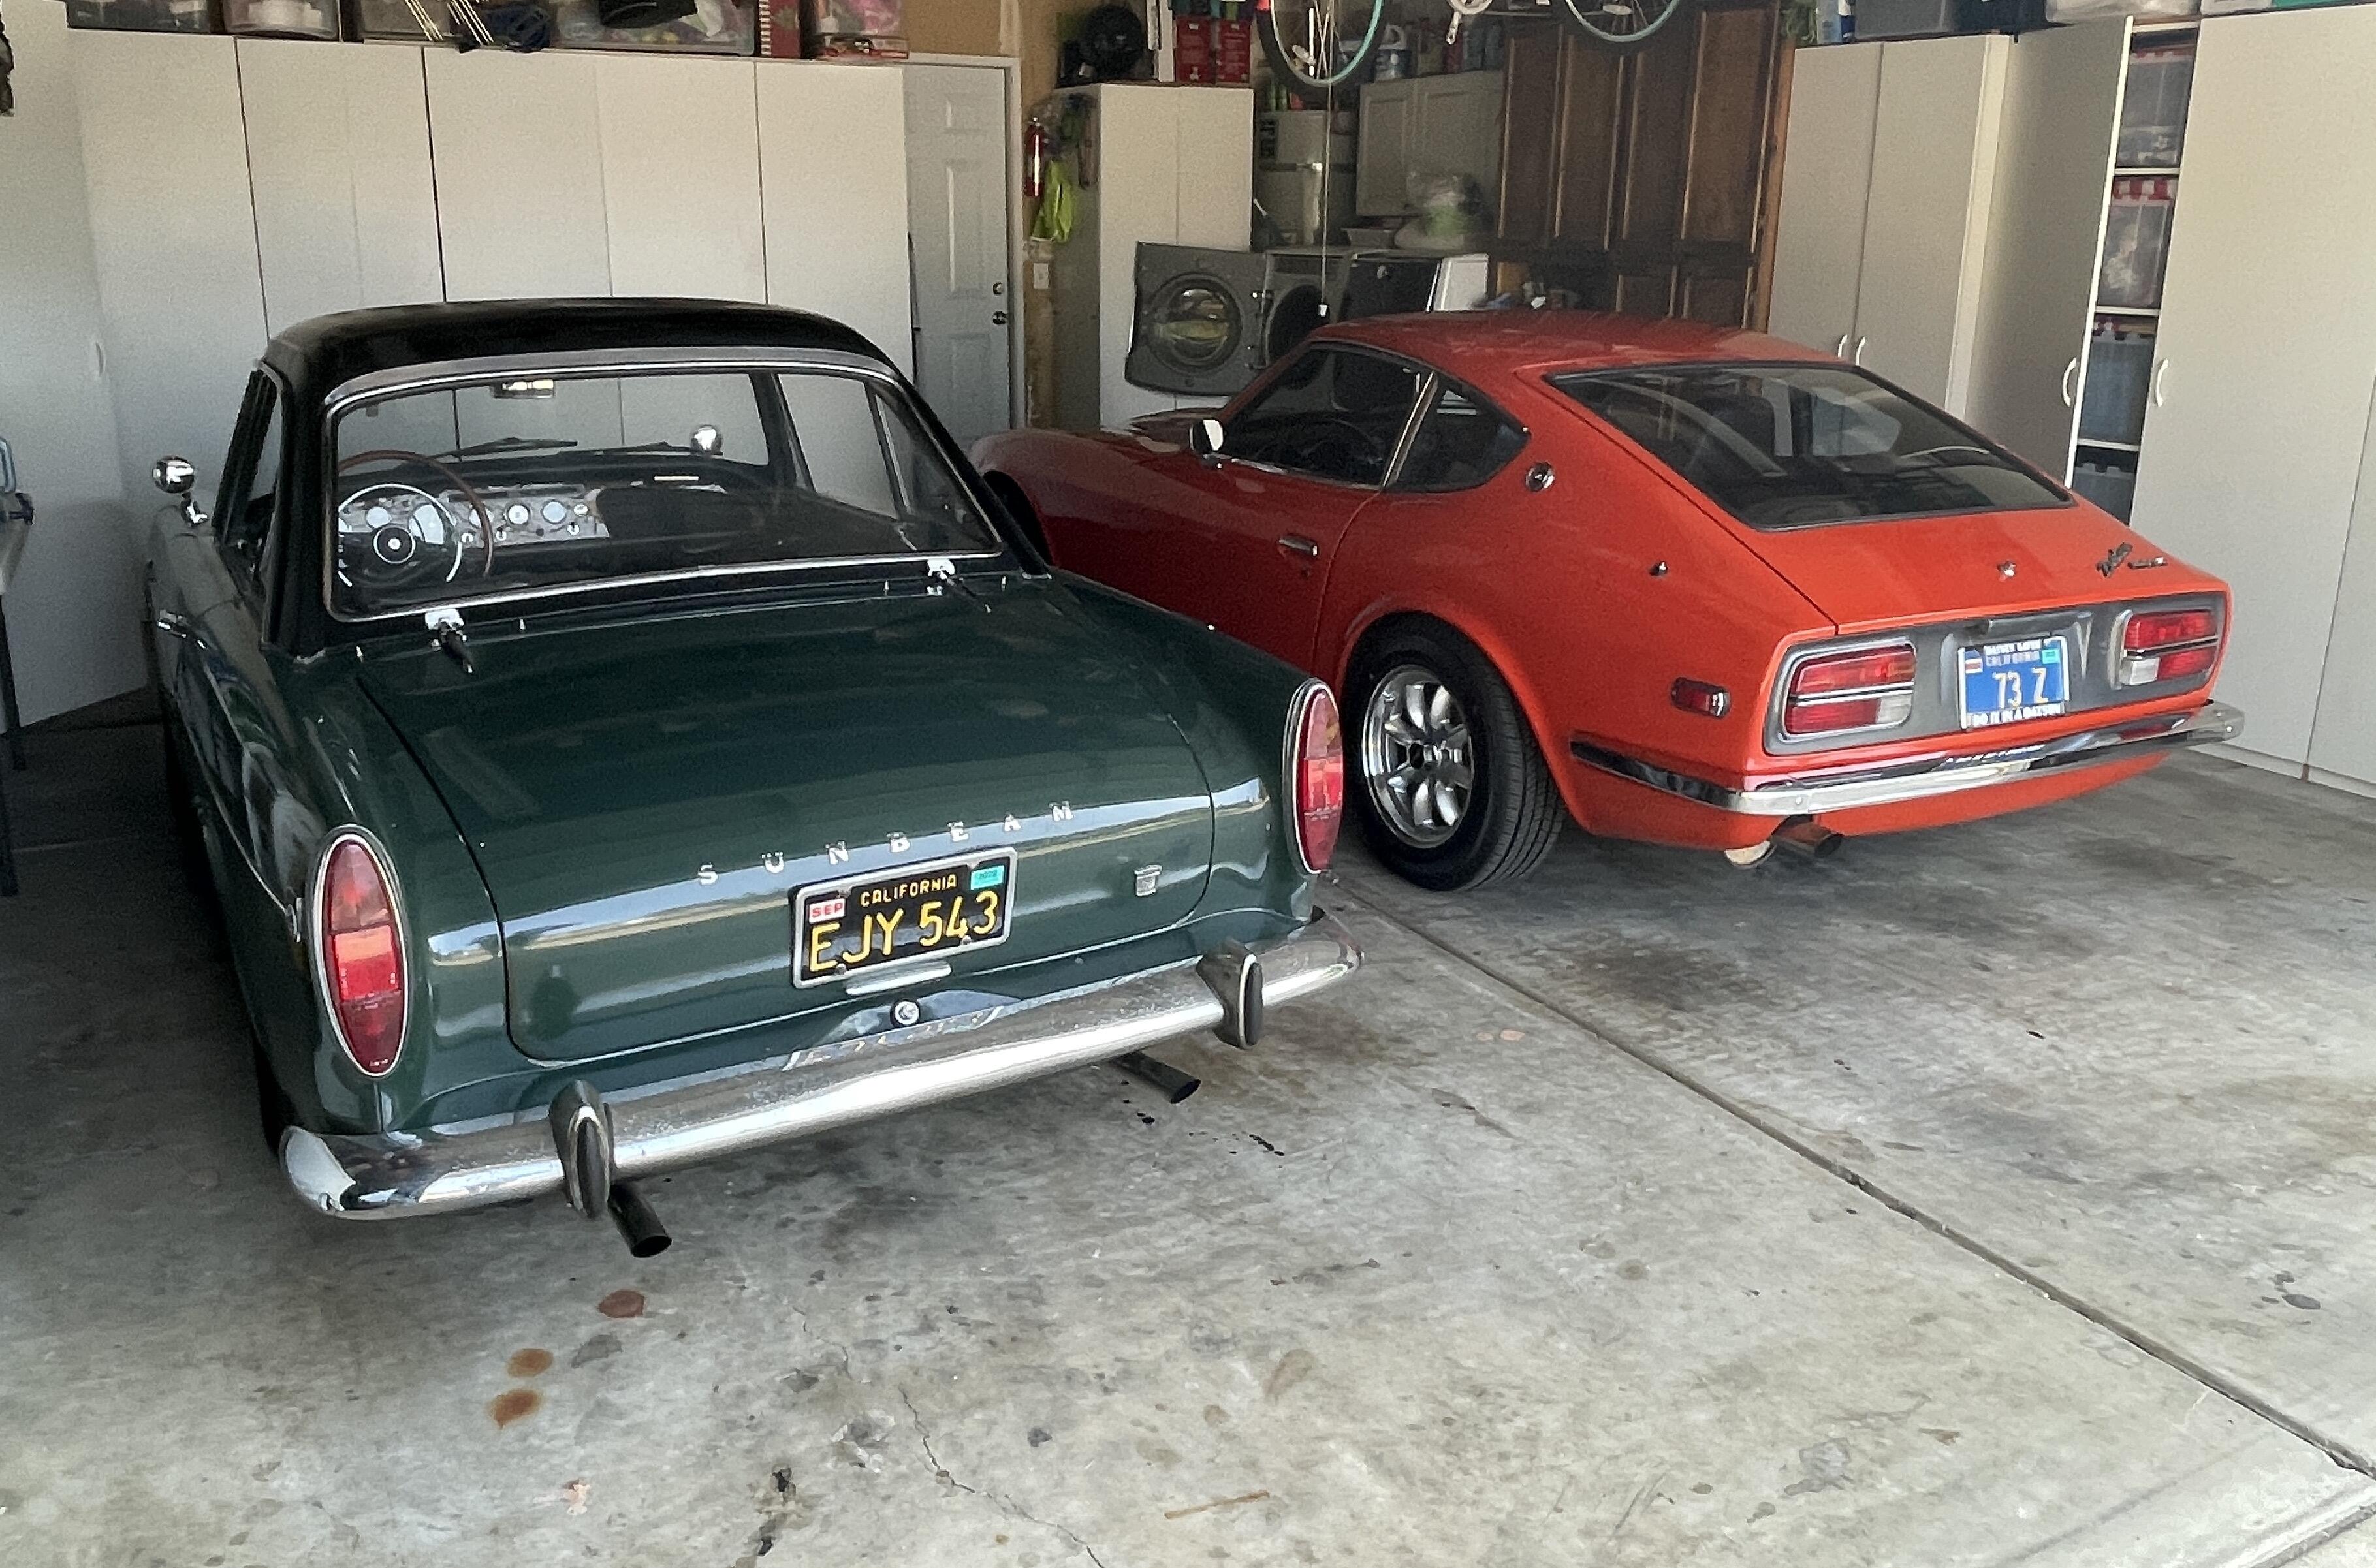
2 pointsWell....life took an opposite tac back in 2008 and we just seem to be getting back on course now. Both cars and the donor body shell have been in dry storage. 26th is about ready for paint. Meanwhile, almost all of the drive train has been restored. I still need to decide what to do about shocks and I haven't done the carburetors yet. I need a big chunk of change to make the body green again. Then there is the whole question of the interior. I have a way to go. It was good to watch the auction and get into the conversation. HLS30U-00305 is going to need floors and frame rails. The rear quarter is not going to be easy either. It looked solid, other than that. Gas tank looked all bent up. The thing is that these cars are appreciating fast enough such that the car will be worth close to what is in it by the time it is finished. Or at least one can hope!2 points
-
It's gonna be about 80 down here today, and the garage fridge is stocked with beer. Come on over Mark! [emoji3] Sent from my SM-G950U1 using Tapatalk1 point
-
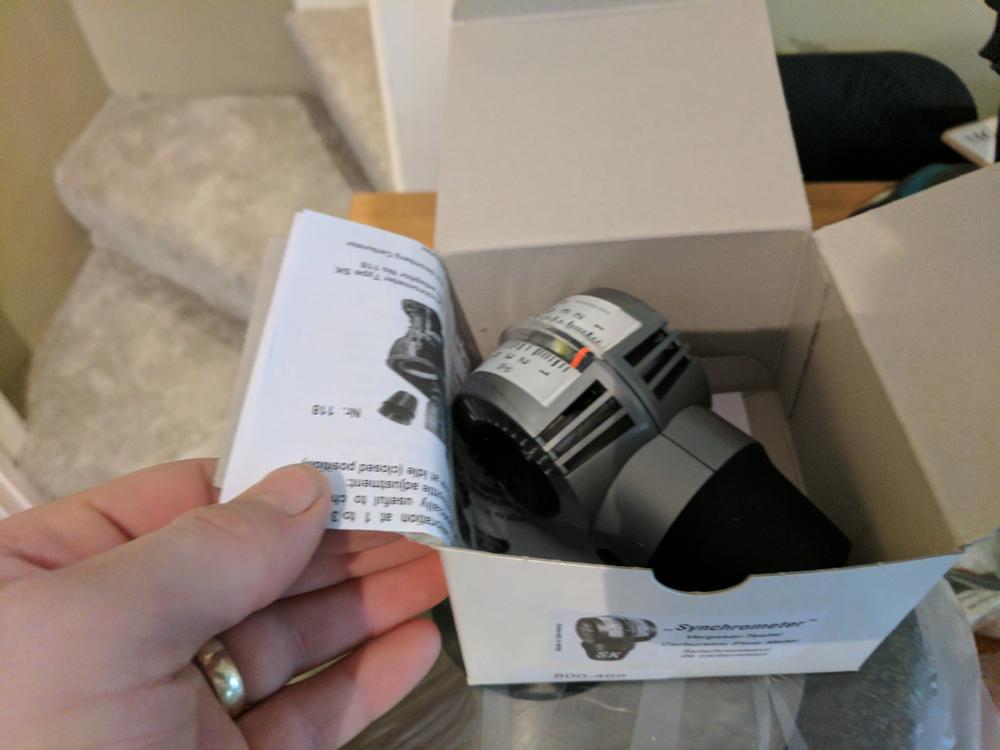
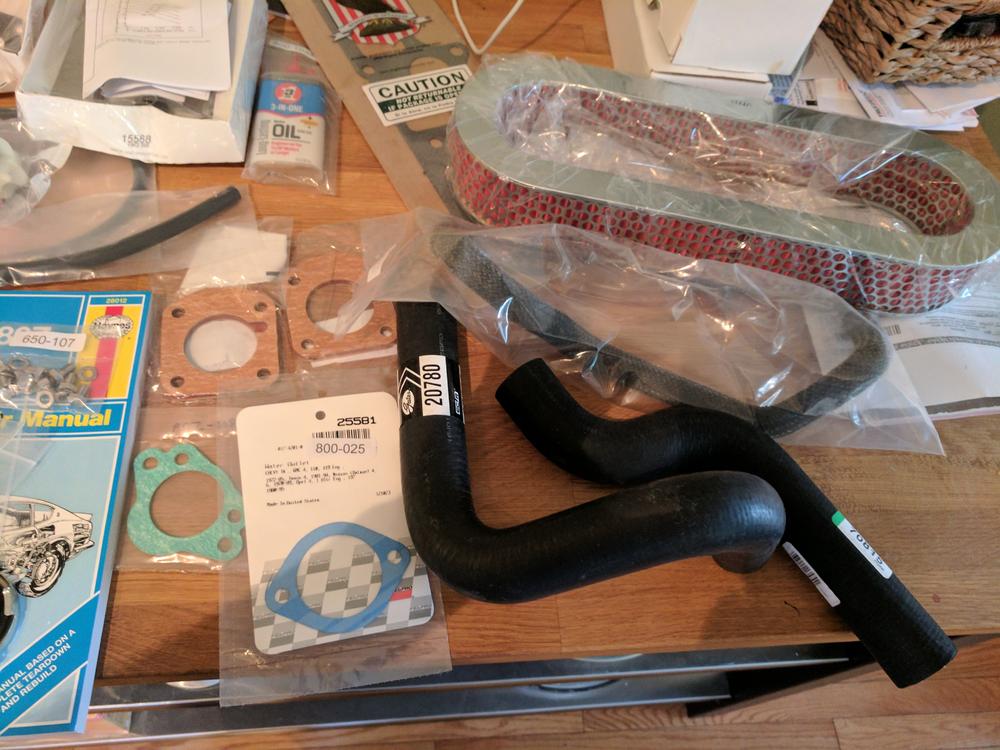
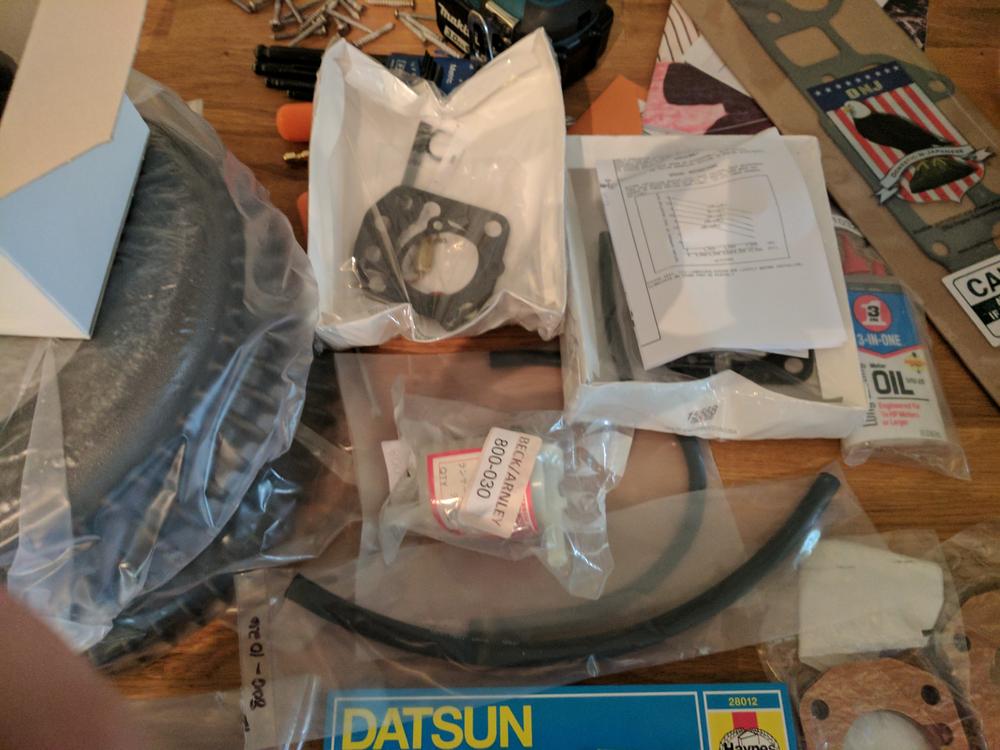
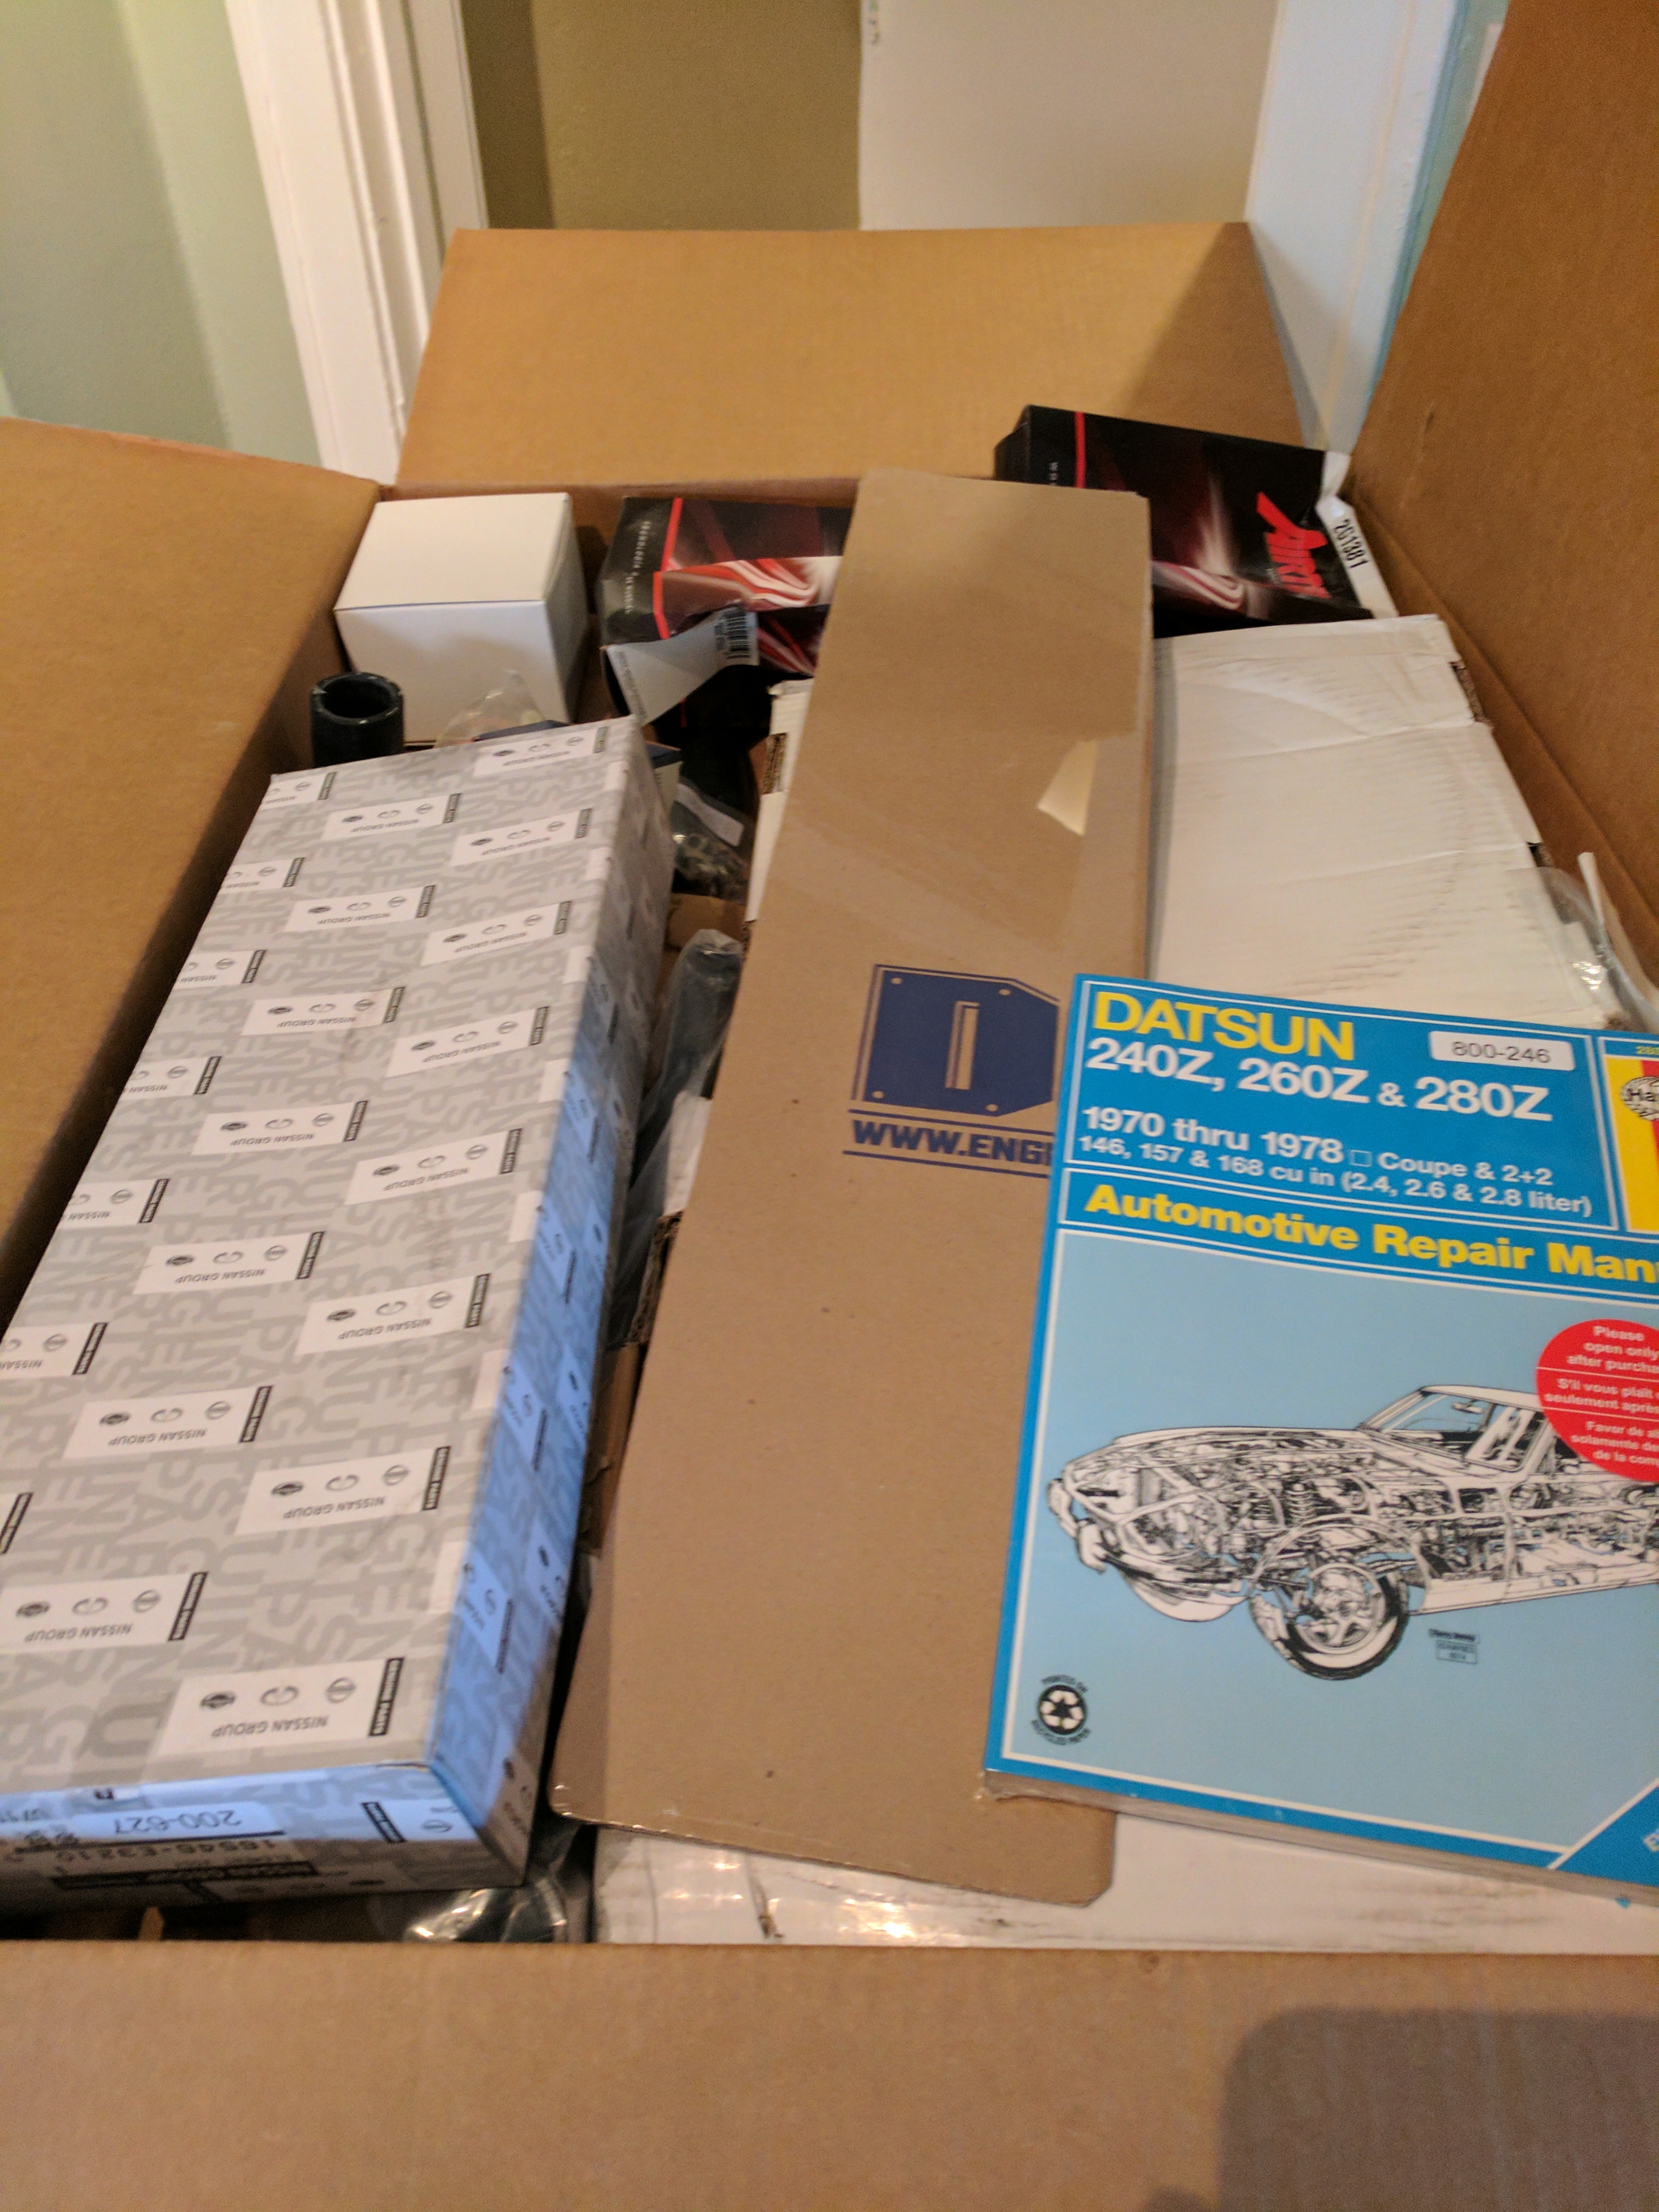
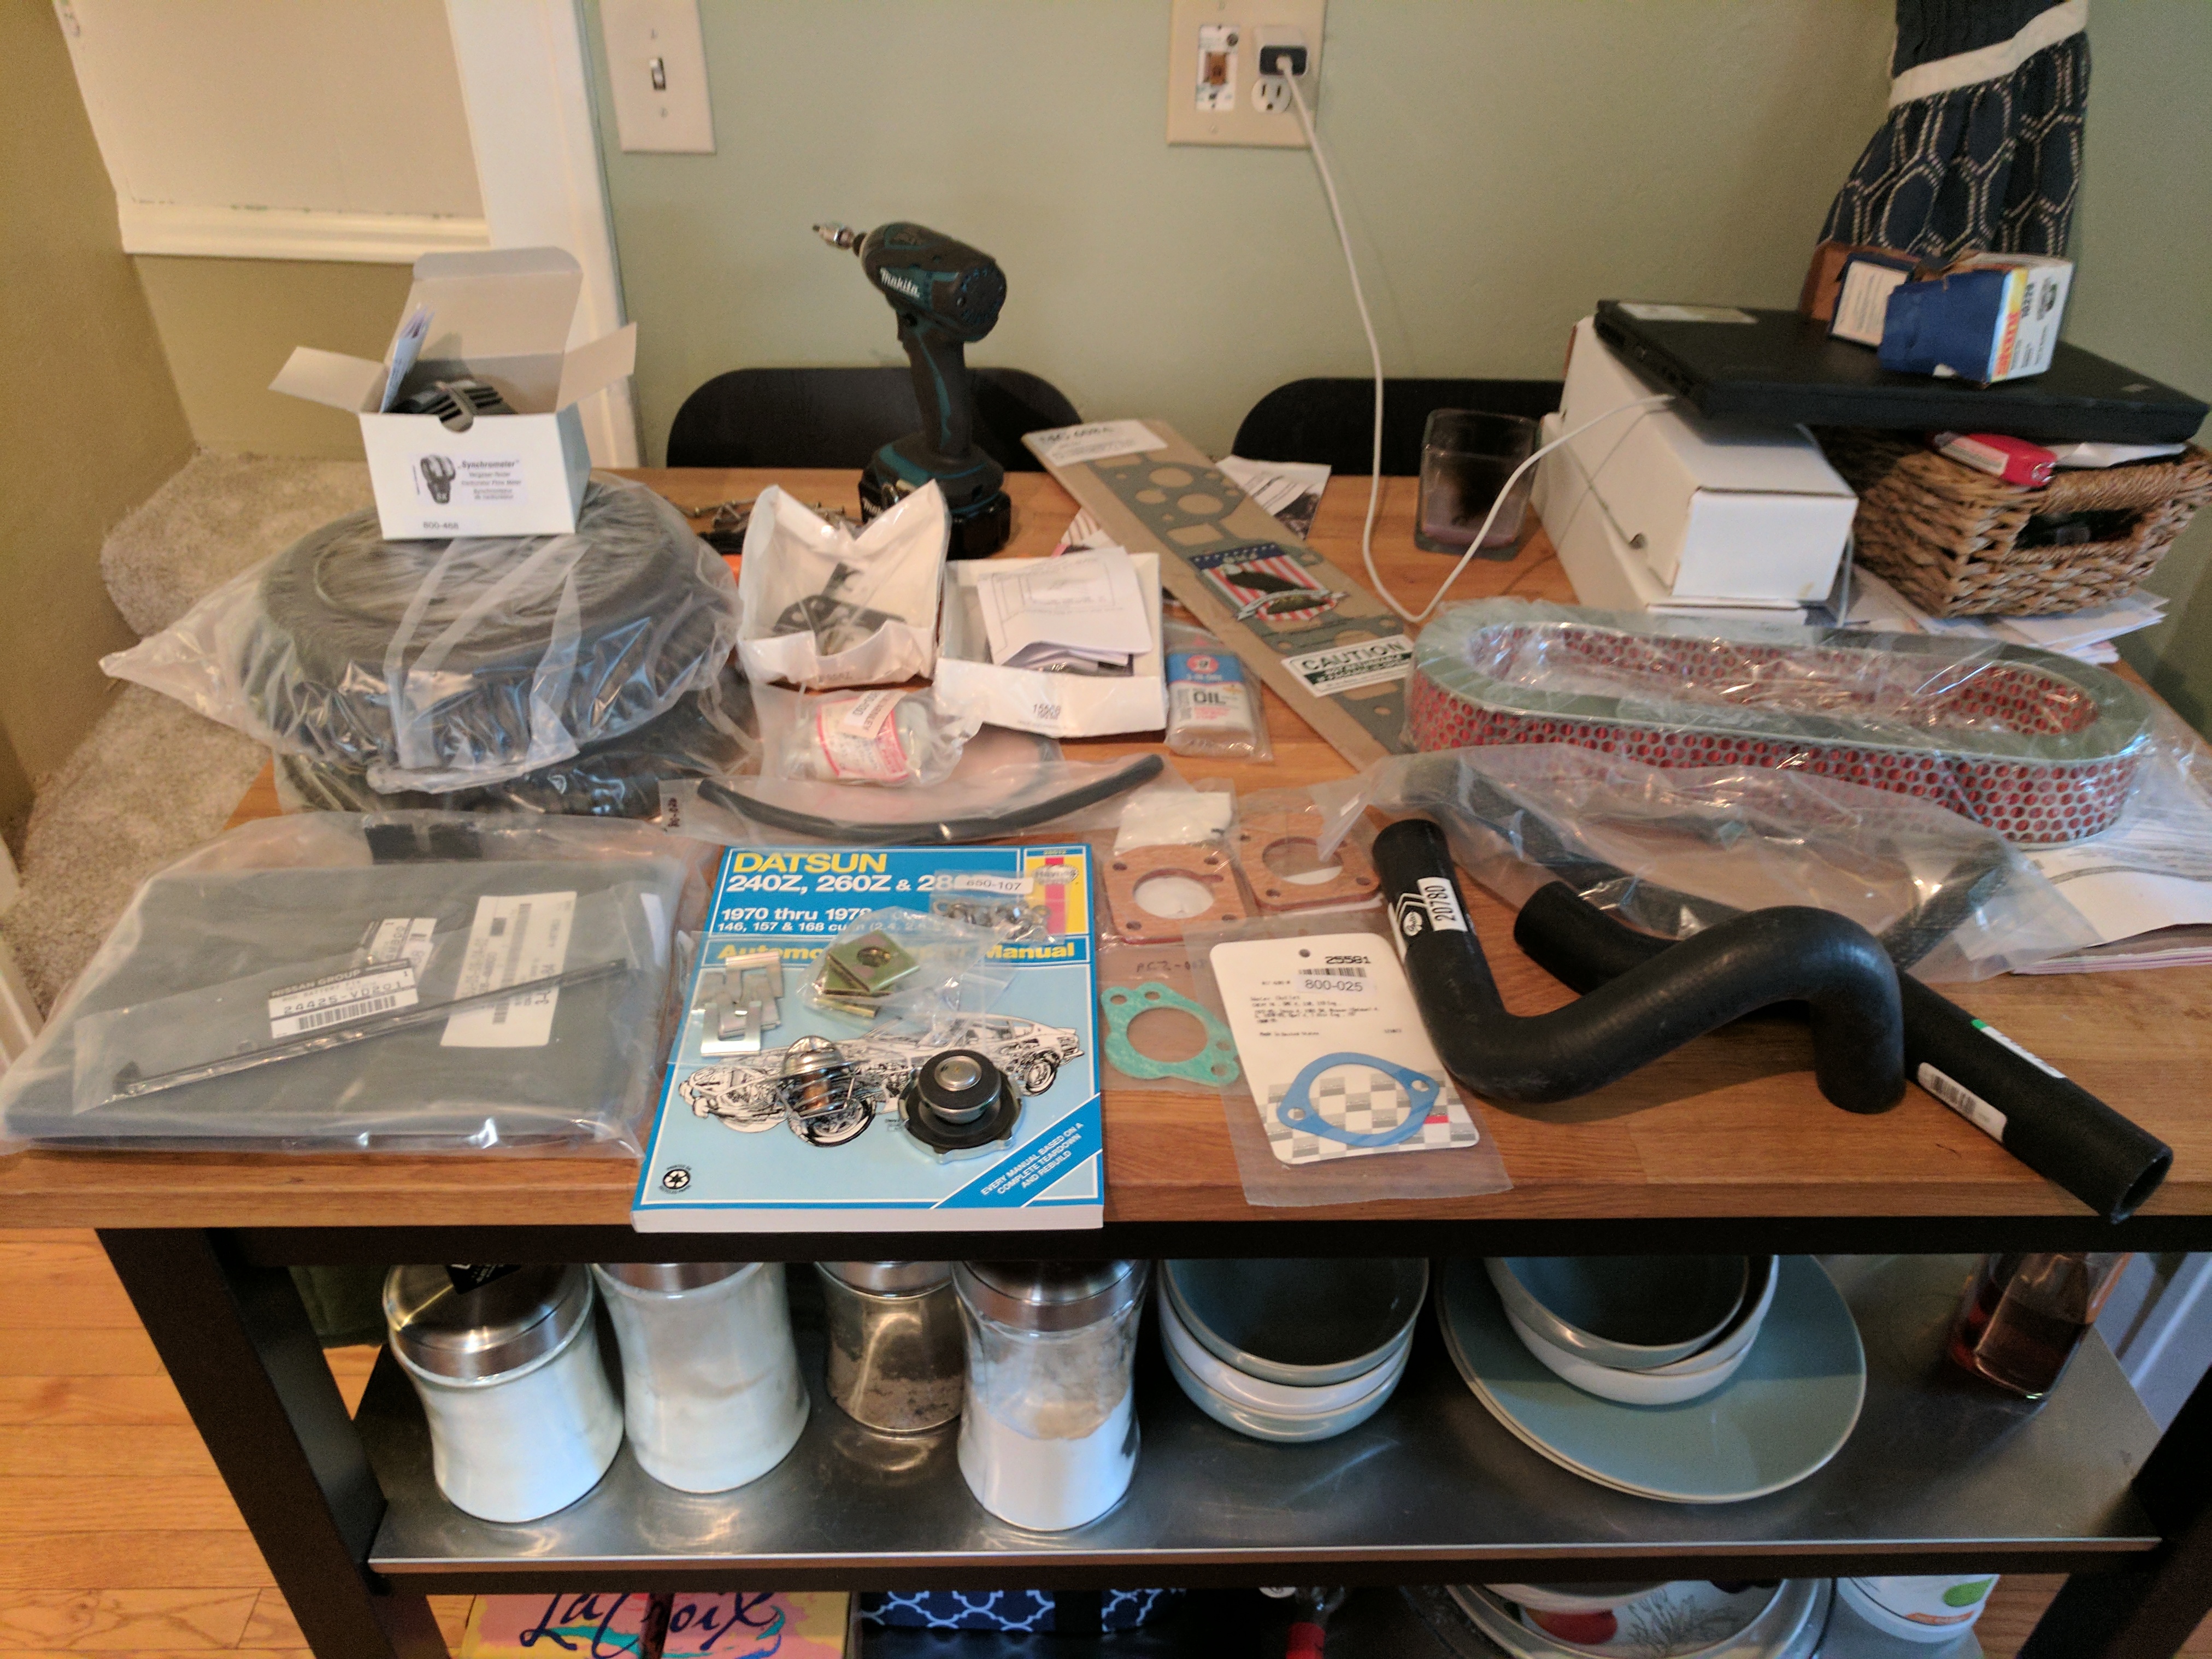
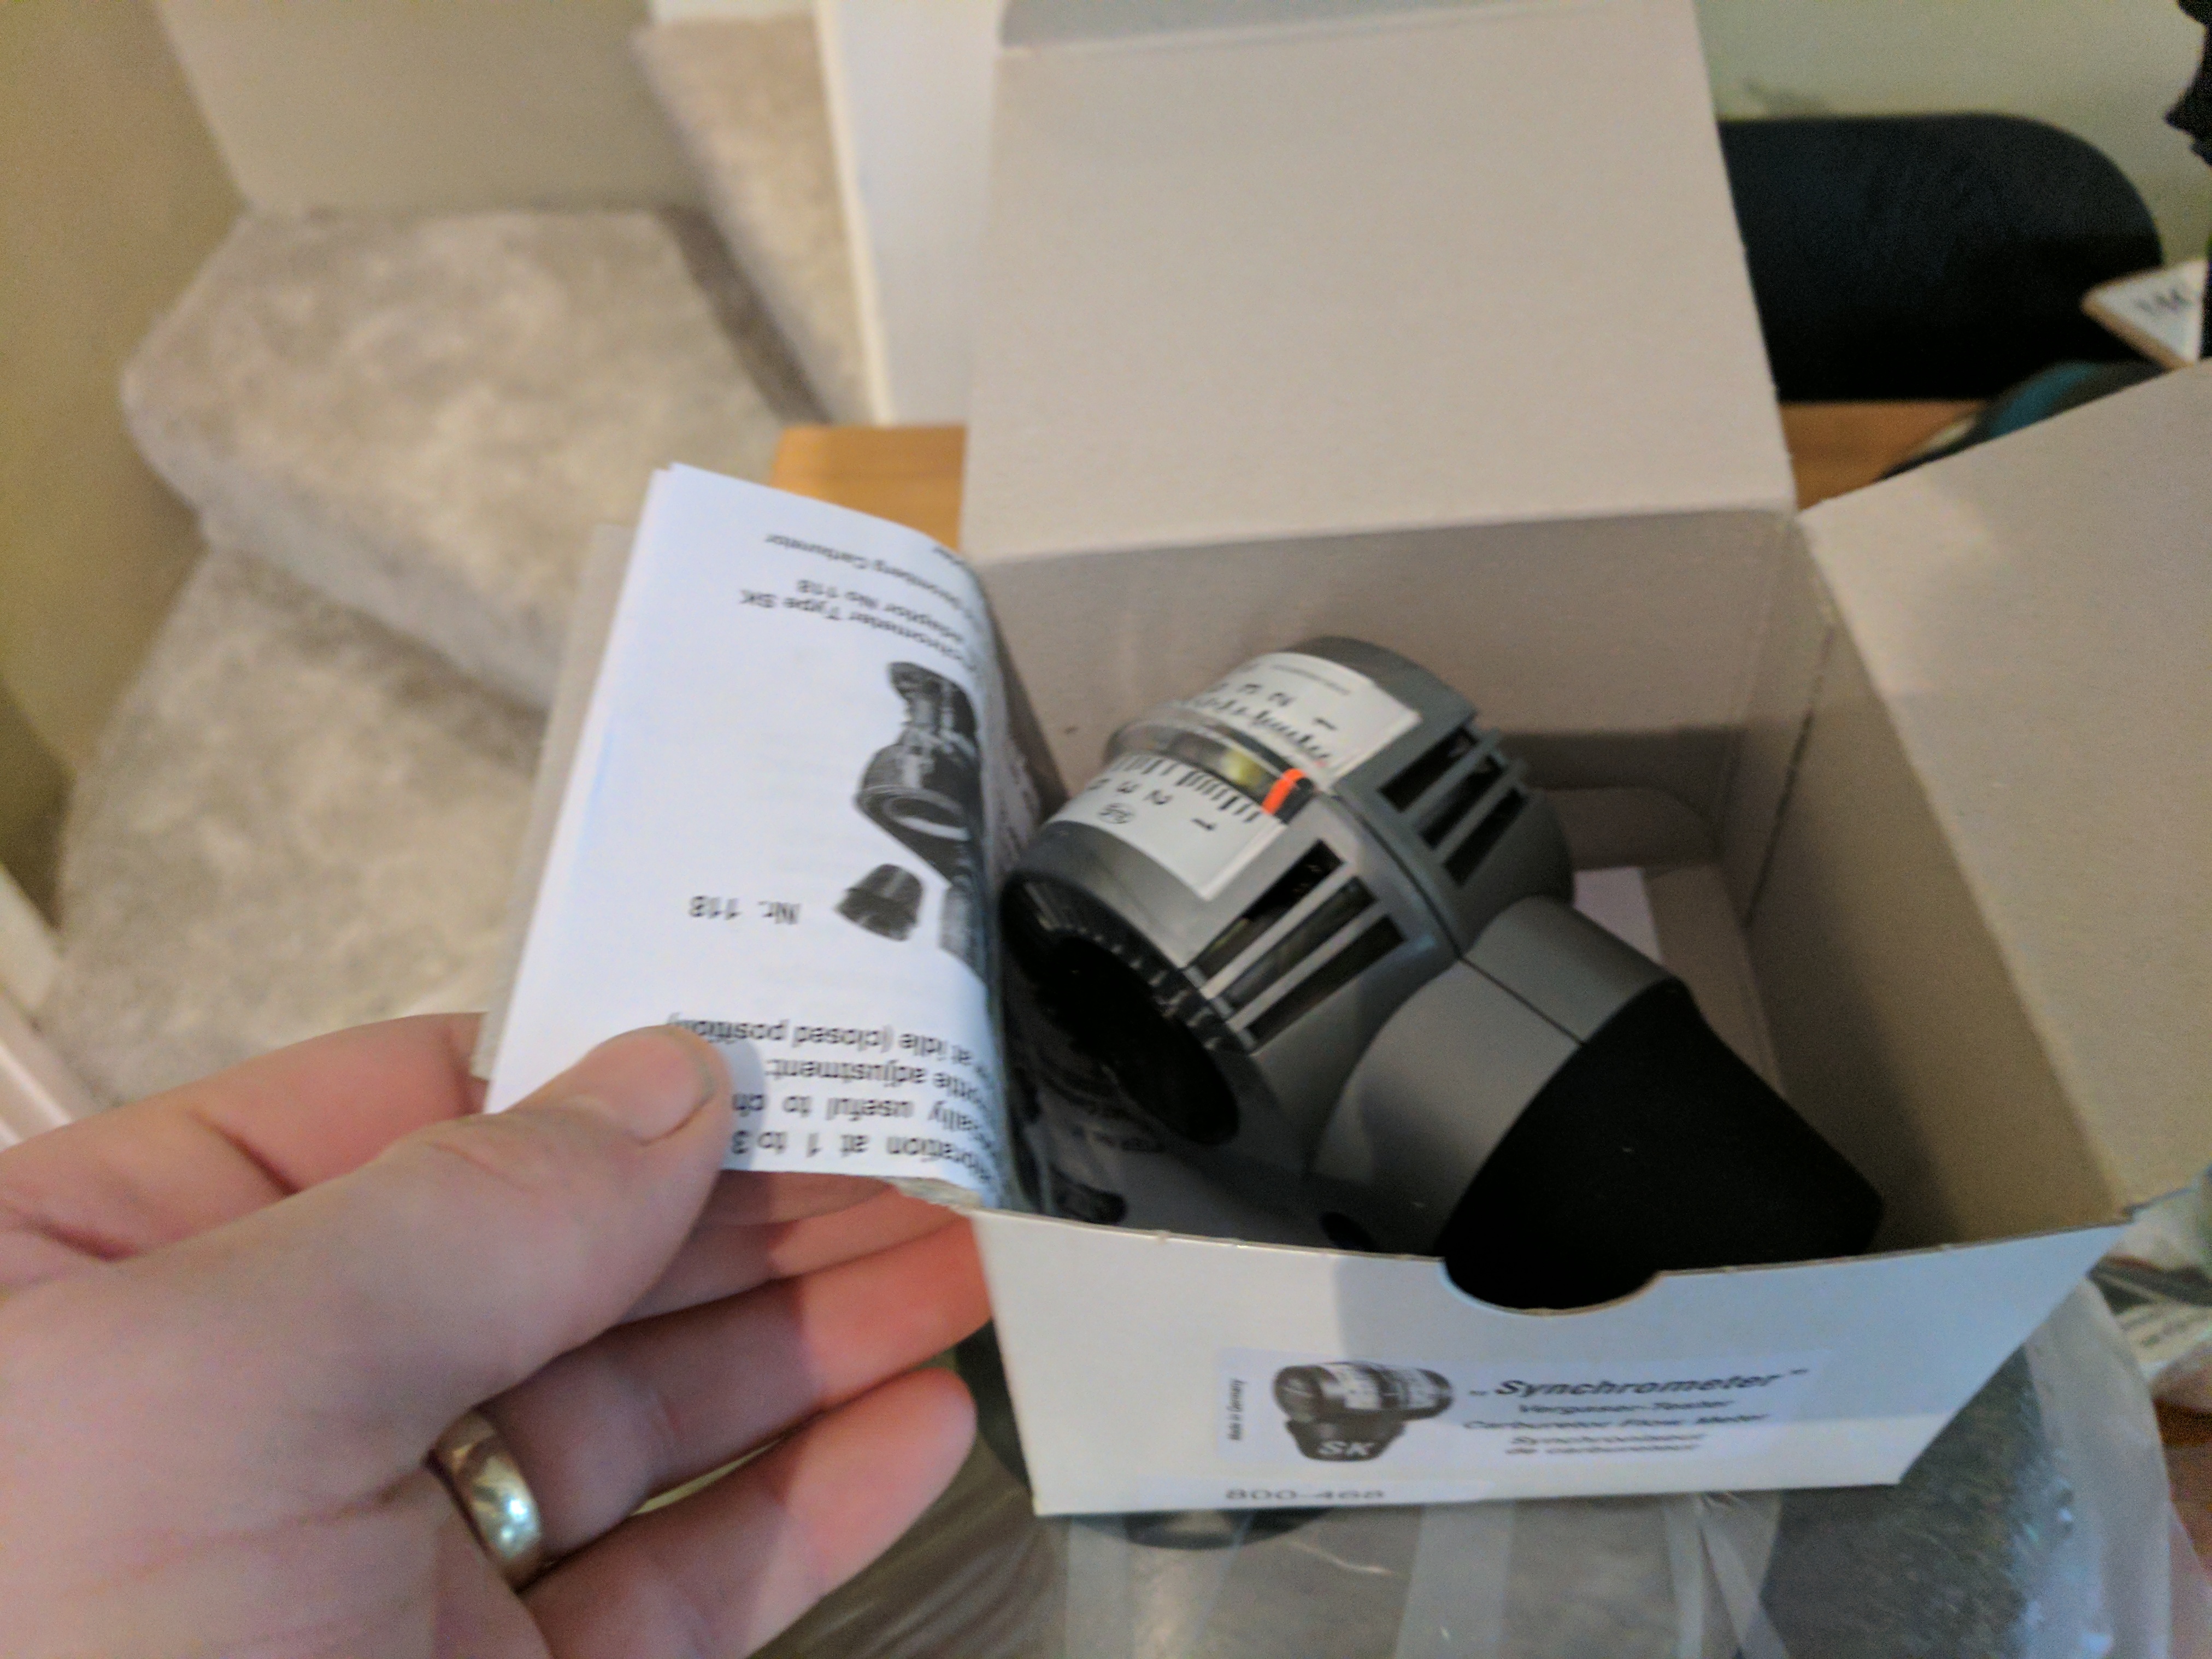
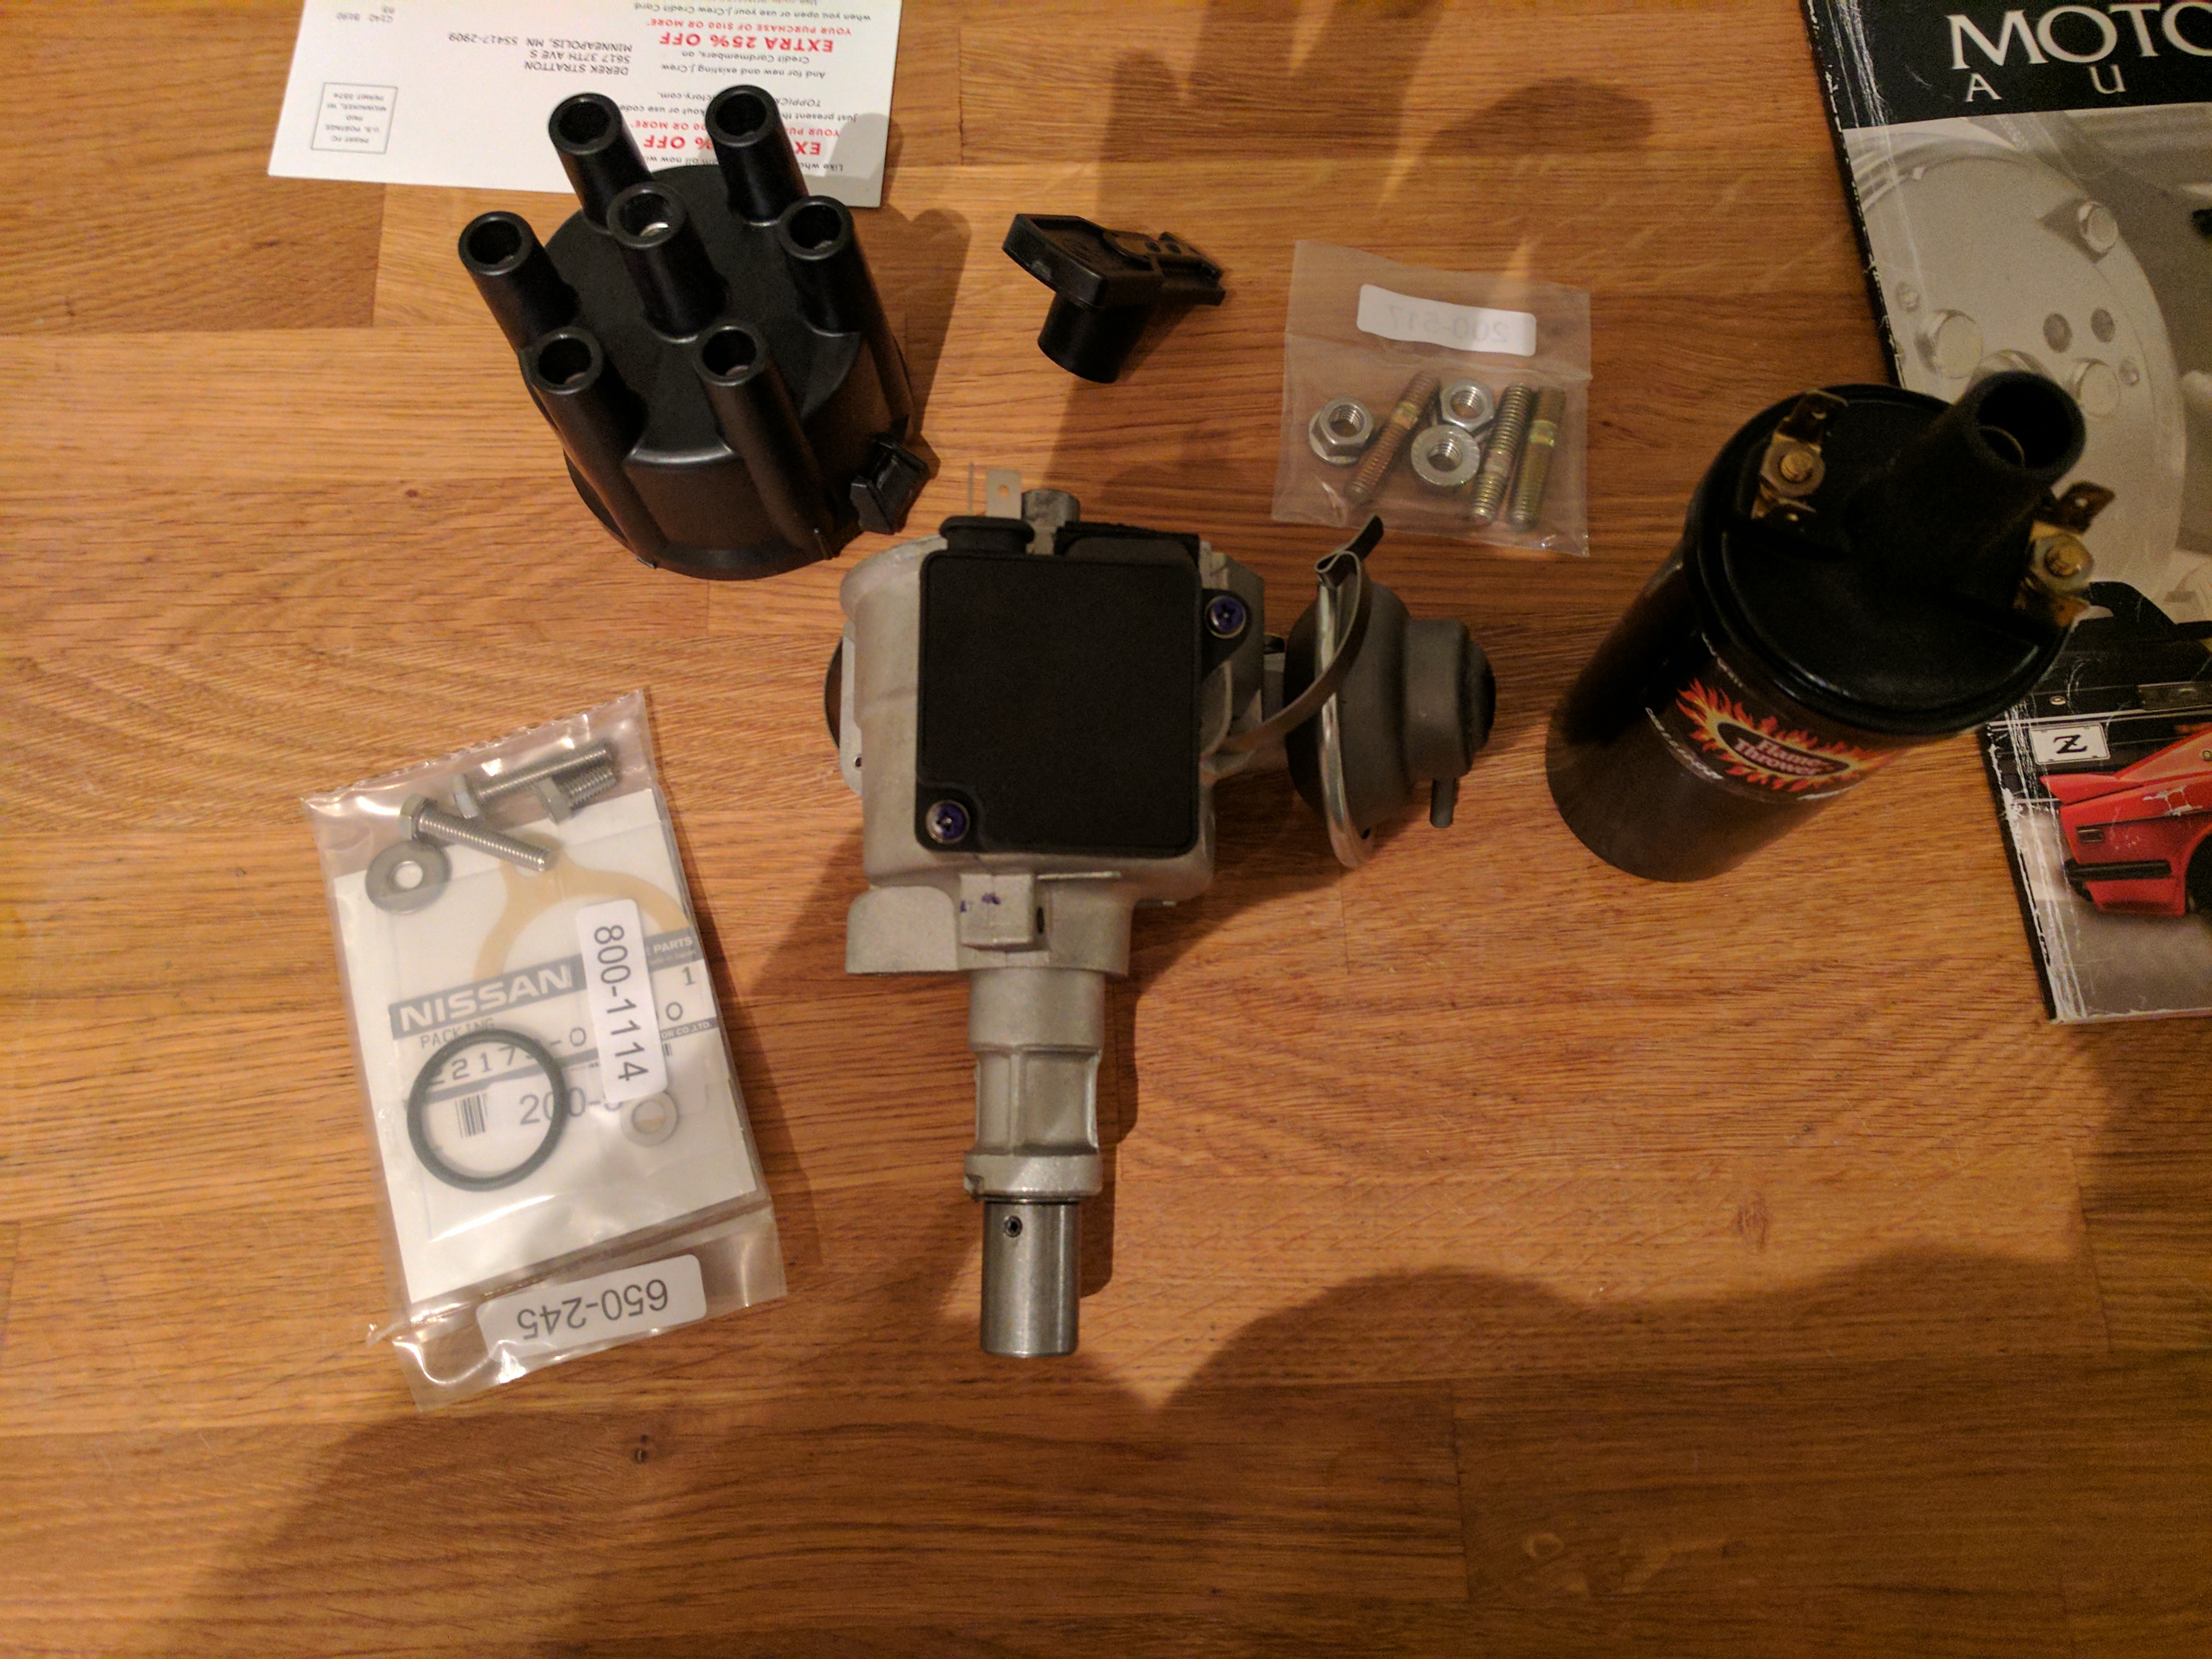
1 point1 point1 point1 pointGood to hear that things are back on course for 26th and that you are making progress! $11k looks to be well-bought for #305, as I was guessing it would go for about $15k based on its condition and the matching-numbers engine, etc.1 point1 pointWith the brakes sorted I then turned to getting the damn thing running . It ran when I bought it, but was really hard to start and ran like poo. I wanted to get this thing to the point where the wife and I could take short trips in the car, so that meant getting it running and changing out all of the old hoses and such to make this decently reliable. First things first, we need more parts. Getting this box full of parts was the highlight of August. Our kitchen became the Datsun staging area. The box held intake and exhaust gaskets, carb rebuild kits, air cleaner, a bunch of hoses, thermostat w/ gasket, radiator cap, fuel filter, spark plugs, electronic distributer (280zx), igniton coil, spark plugs and a few other odds and ends. Also picked up a synchrometer to help tune the carbs, and because I love specialty tools.


 1 point1 pointI can't criticize writing if I can't do reading. But, "throughout" doesn't really tell the whole story. You're right though, if the front link bushings are polyurethane now, then that FSM passage doesn't matter. Back to Eibach springs. The're something weird about the Eibachs. Many people have problems, either too high or too low, but there doesn't seem to be much consistency. It's a dice roll as to what you'll get. Could be counterfeits, could be low QC on a low volume product. I'd never use Eibachs myself, too many people have problems. I'd post some links but there are so many stories. Some too high, some too low...general confusion. You can read the stories but none will have a solid answer.1 point1 pointHi everyone, I want to put some new things but I can not spent much time in front of my laptop. I will talk about a Fairlady 240ZG. Bits and pieces, differences from other S30s. Kats
 1 point


Important Information
By using this site, you agree to our Privacy Policy and Guidelines. We have placed cookies on your device to help make this website better. You can adjust your cookie settings, otherwise we'll assume you're okay to continue.