Leaderboard
-
AZ-240z
Free Member4Points956Posts -
Oiluj
Free Member2Points1,877Posts -
jfa.series1
 Subscriber
 1Points2,733Posts
 -
westpak
Free Member1Points684Posts


Popular Content
Showing content with the highest reputation on 08/03/2015 in all areas
-
Pictures of my car from the local car show have been posted to Classic Car Pictures Almanac! Three pictures total. Check them out at: http://classiccarpicturesalmanac.com/archives/cars/1972_datsun_240zcoupe_2393cc_151hp_6cylinder_ofjf The green car is my mine is my next door neighbor's Z. They would look nicer without my in one wiping tree needles off the hood... Julio2 points
-
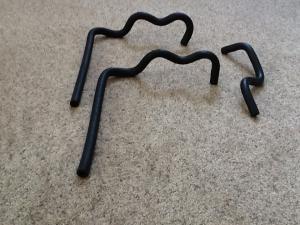
Just to add to my last post, and I thought that this would be the most logical place for this, I wanted to see how difficult it would be to make a full set of these hoses using my technique. I did make a pretty nice set with the correct 11/32" ID brake vacuum hose and 1/4" copper tubing. I first formed the copper tubing, and then, with some sil-glide lube, threaded to hose over the tubing. In retrospect, I probably wouldn't compete the copper tubing bends, just start them so as to make getting the hose on a little easier. I have attached an image of the hoses with the ones I made in the foreground and to the right. The vac side hose in the back of the image is an NOS rubber vac hose I used to replicate. I trial fitted both hoses to my car and the fit was perfect, as far as I could tell. My experiment successfully completed, I am offering these to anyone in need of a set of early mastervac hoses for the cost of mailing. Please PM me with your response, and I hope that this may help others on this forum. Dan
 2 points
 -
The process I used to create this master vac hose section is something I learned from Kats. Kats used braided fuel hose which is the exact correct size, but much softer than rubber vacuum tubing, and brass rod to give the hose perminent shape. I used 11/32" ID brake vacuum hose from NAPA AUTO PARTS which is an exact match in size and texture to the Nissan hose, and 1/4" copper refrigerant tubing from Home Depot. Using a length of the copper tubing, I shaped it first and then slid the rubber hose over the tubing. A little sil-glyde on the tubing made the process fairly smooth but guard against using excessive pressure that might kink the copper tubing. Before inserting the copper tubing, you must cut enough off of each end of the copper tubing, one to one and a half inches, to allow room for the master vac, check valve, or engine mounting fitting in the rubber tubing. I, also, leave an extra 1/2" or so on the rubber tubing that can later be trimmed for a perfect fit. I plan to make a compete set of these master vac hoses and will take all the measurments for those who might want to try this for there own project. I'll try to attach the reference to Kats posting. http://www.classiczcars.com/topic/23900-datsun-240z-vs-fairlady-z432/page-8 Look at post #154 on this page. Let me know if there are any questions as to how I made this hose. And, yes, the copper tubing remains in the vacuum hose to maintain the shape. Dan2 points
-
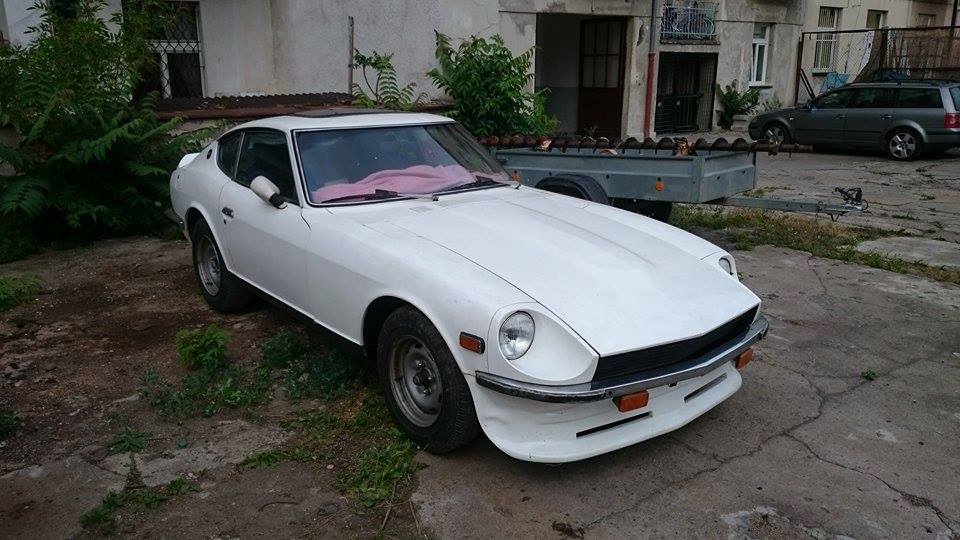
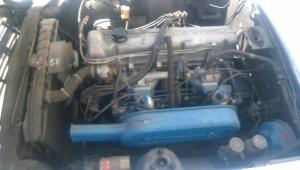
1 pointSo I finally managed to find a 240z which I always desired. It will take a lot of time to make her beautiful again but I am sure the time spent on restoration will be definitely worth it. Not my first car which will be rebuilt (already completed Miata NA version) so I kind of know what amount of work to expect but I am really afraid of rust. There are a lot of non genuine parts on the car so I plan to get her to stock look as much as possible. First I need to start the car after 12y sitting in a barn. I just can't wait to hear the engine. So if anyone here is selling the parts, PM me I am definitely looking for inspection light, mirrors, seats, front bumper, wheels...


 1 point
 -
1 pointCliff, Wear eye protection. Those tools are a bit flakey. This combined with oily surfaces can send parts faster than you can blink. If you are using the C clamp and its starts to slip off, stop, loosen then recentre and begin again. Don't try to make a save. Have fun!1 point
-
1 pointWell slow process, two years after blasting she is back home after body repairs and painting, most of that time was trying to find someone that didn't want an arm and a leg to fix/paint, just an arm anyway I was able to find donor sections to avoid making replacements or splicing, you see the Swiss cheese in previous posts And some frame repair Now some time to build wallet back up1 point
-
1 pointWith all wire transfers graciously handled by the Prince Nogomutu branch of the Bank of Nigeria.1 point