


Leaderboard
-
240260280z
Free Member4Points5,426Posts -
ericjump
Free Member3Points34Posts -
HaZmatt
Free Member3Points566Posts -
John Coffey
Free Member1Points1,566Posts


Popular Content
Showing content with the highest reputation on 04/21/2015 in all areas
-
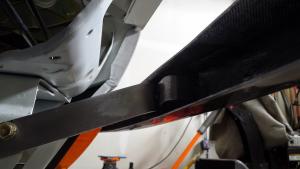
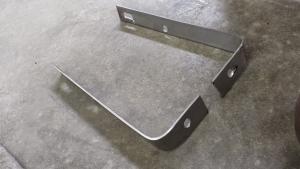
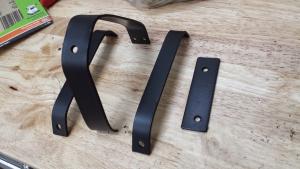
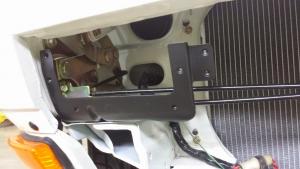
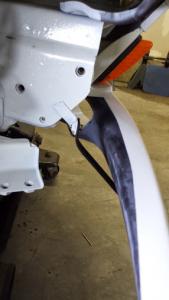
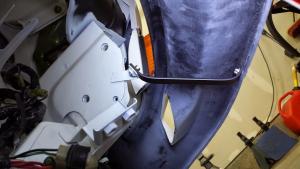
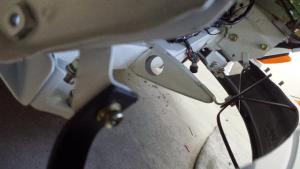
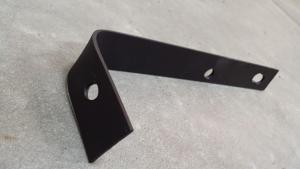
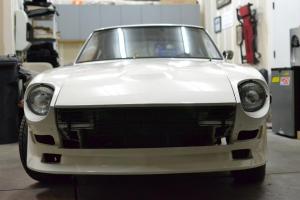
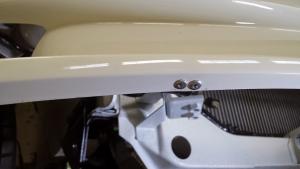
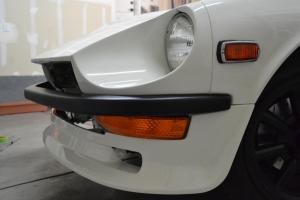
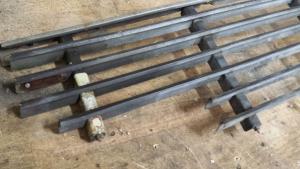
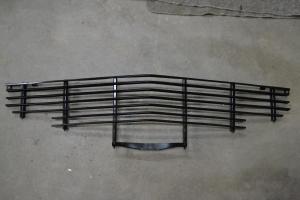
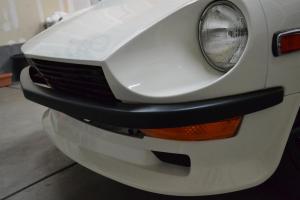
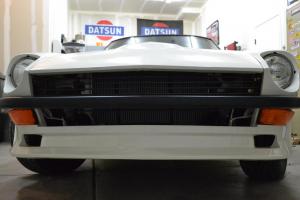
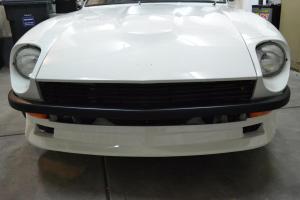
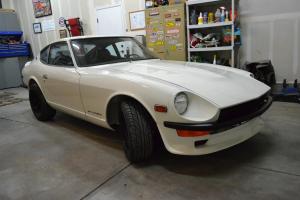
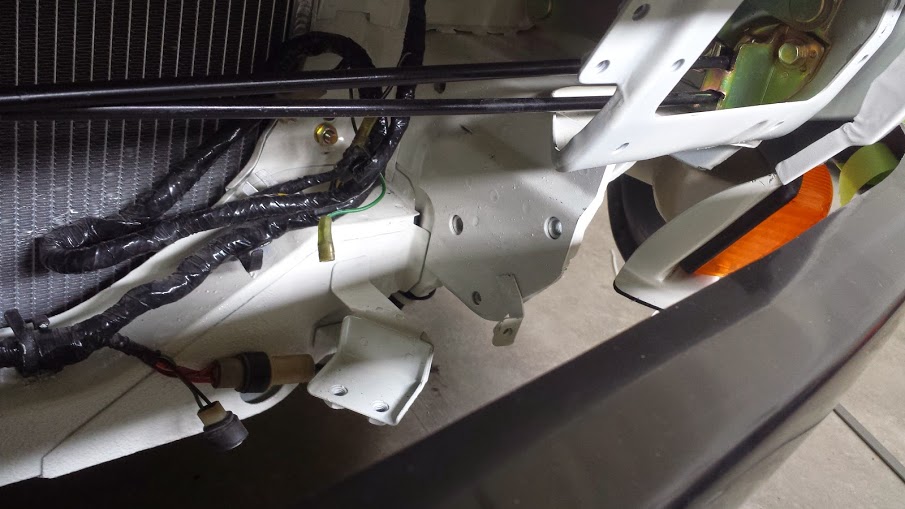
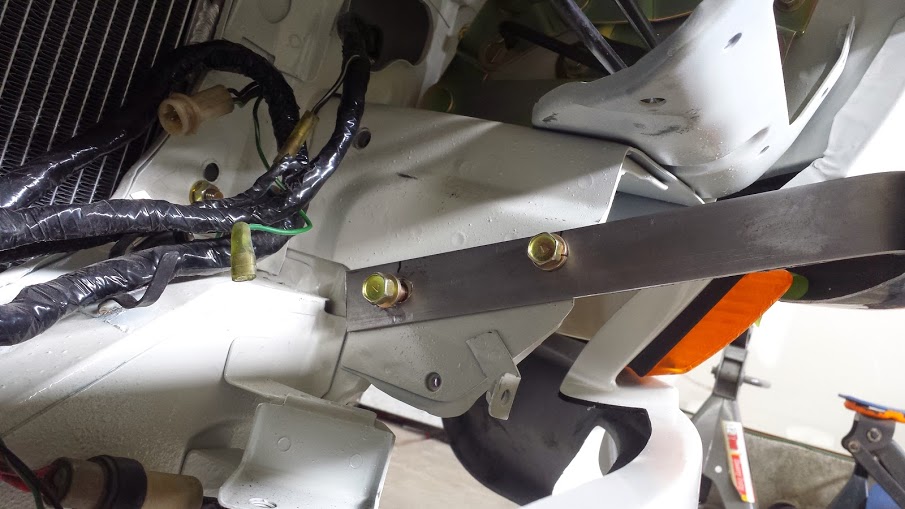
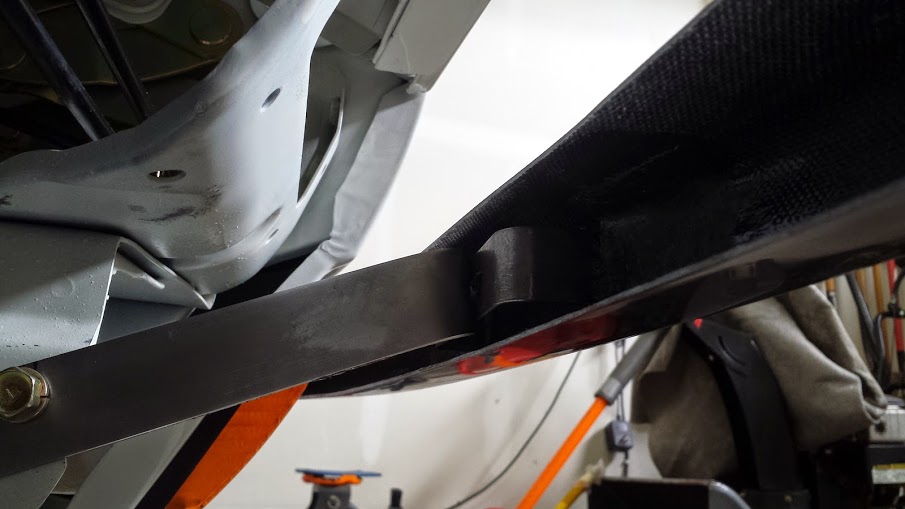
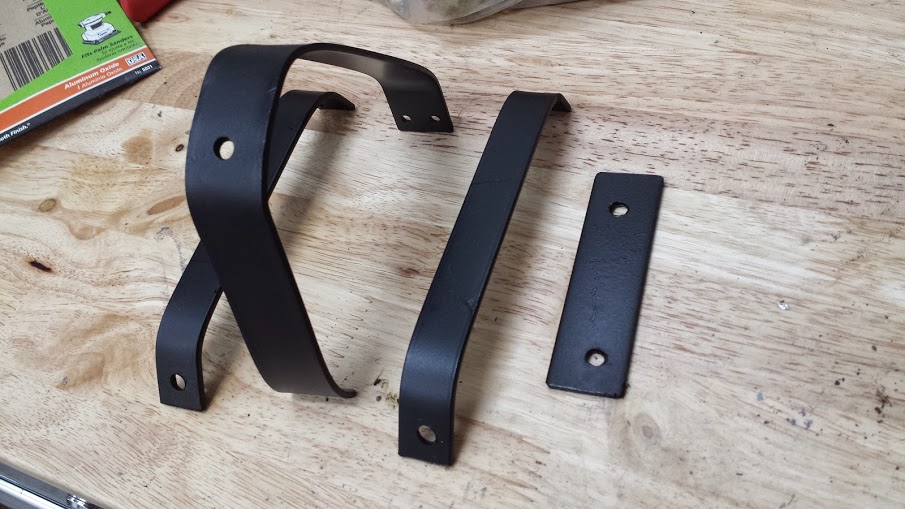
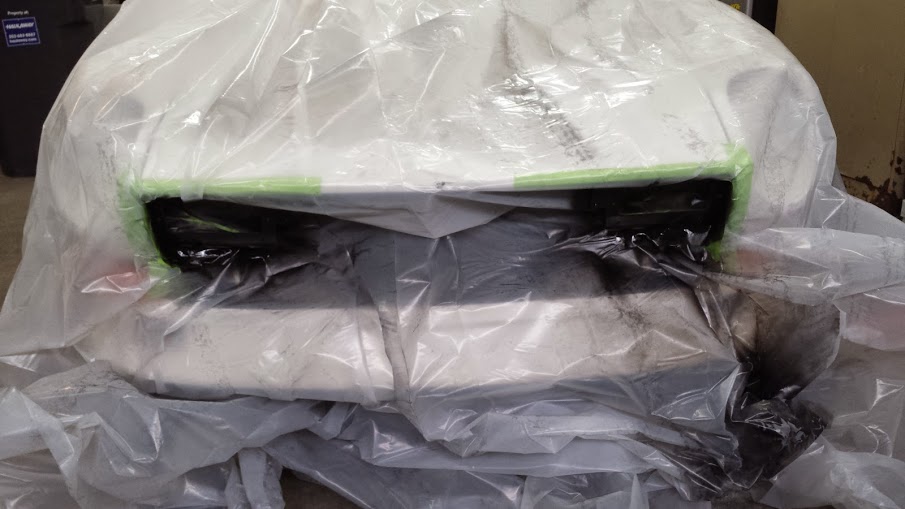
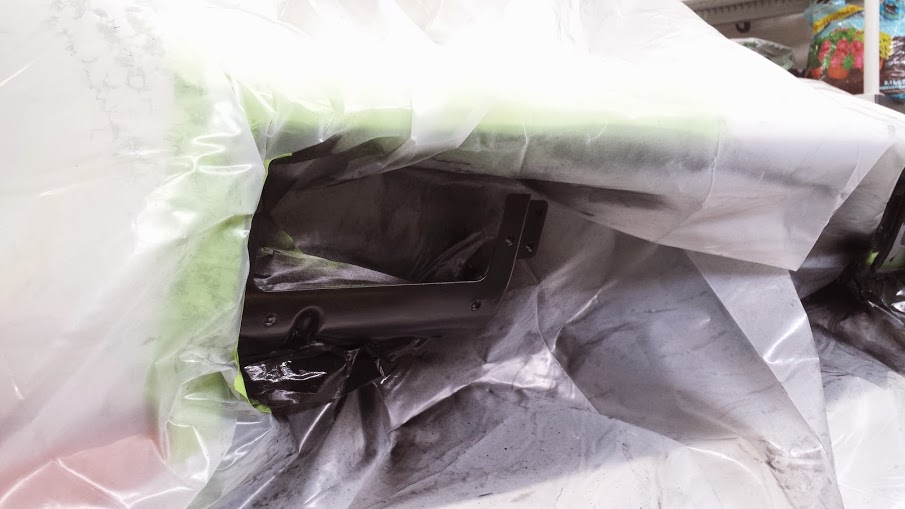
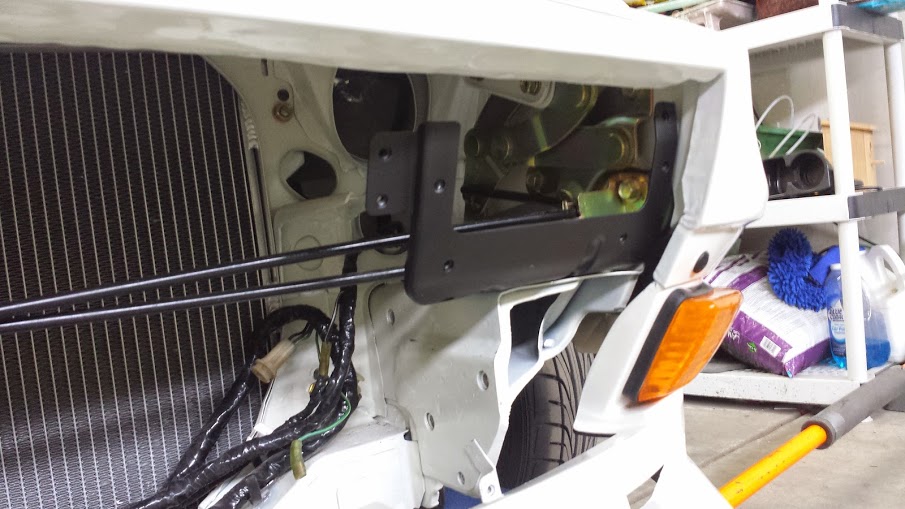
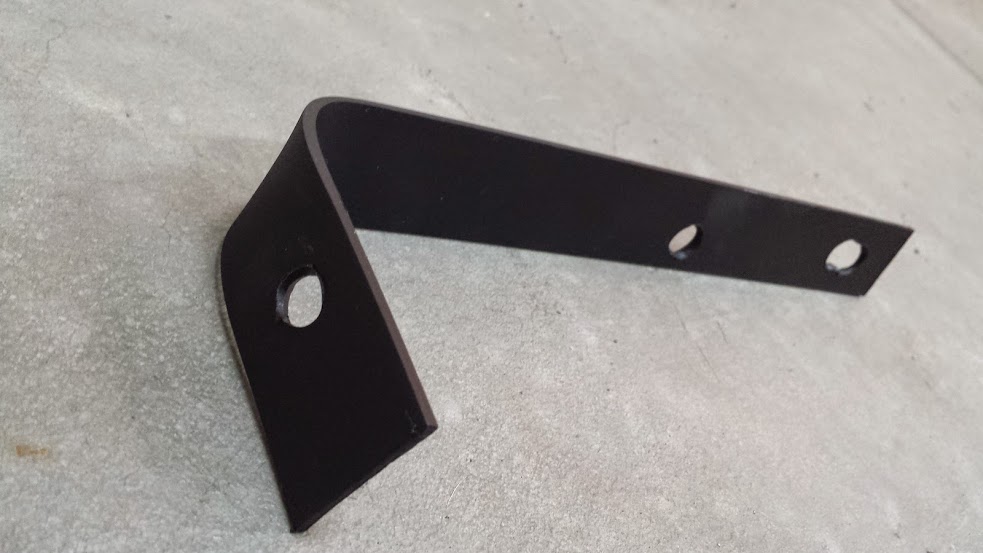
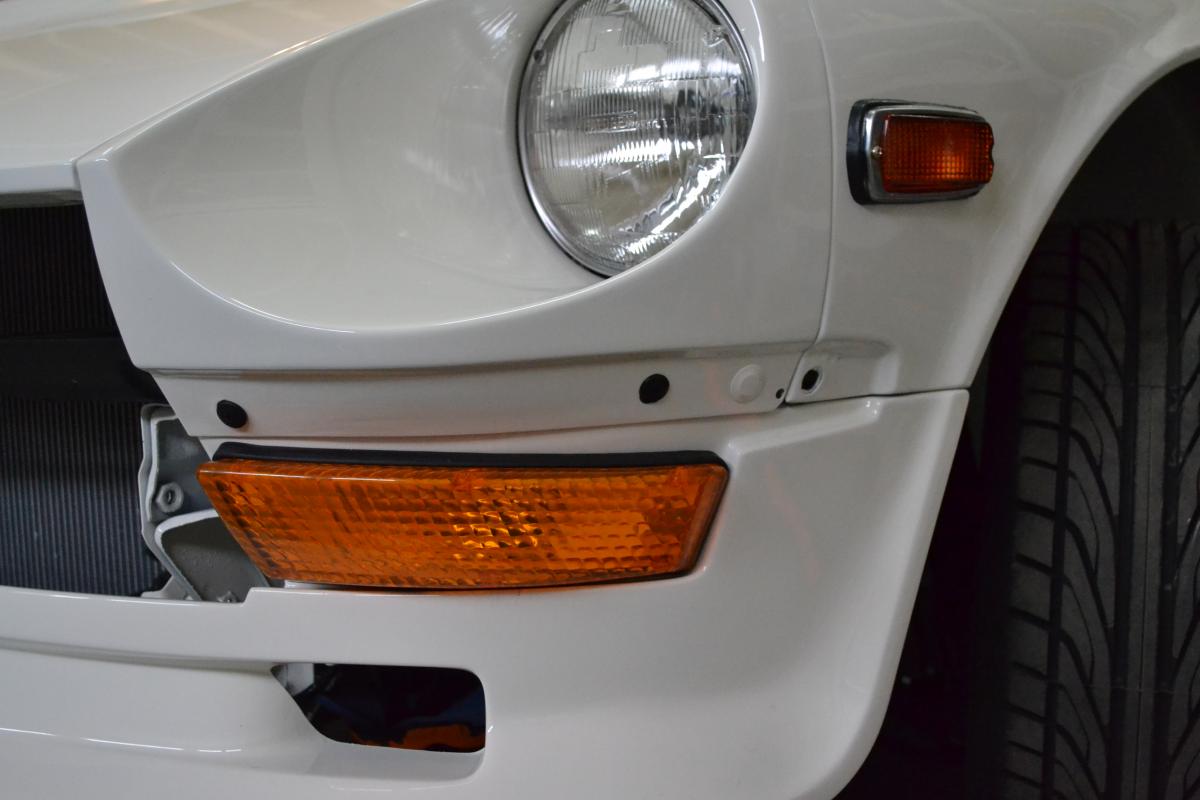
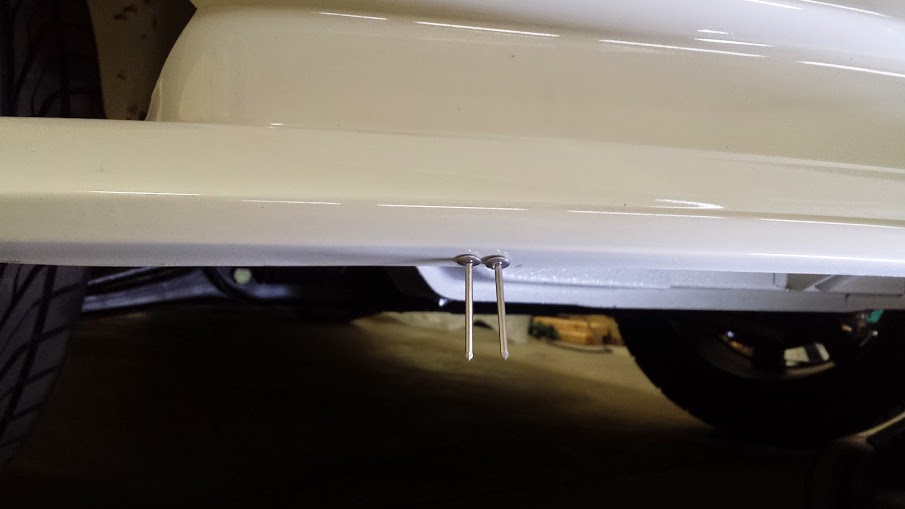
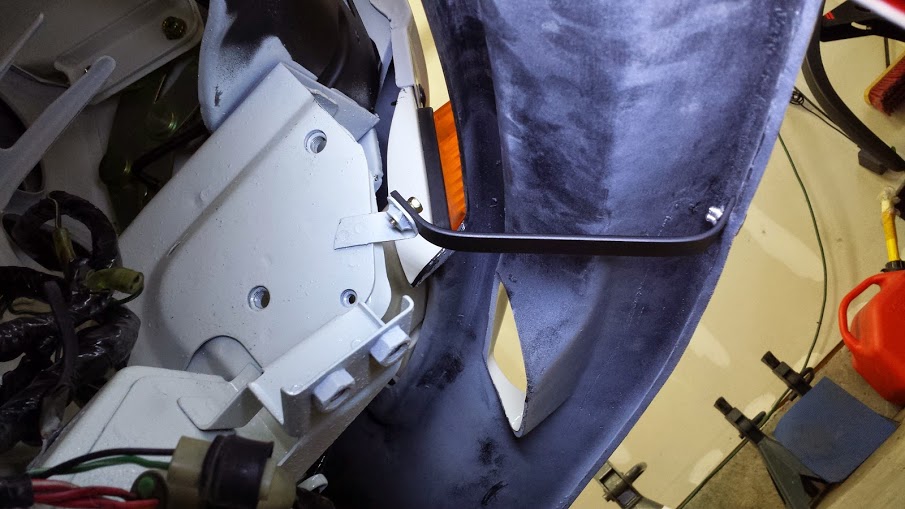
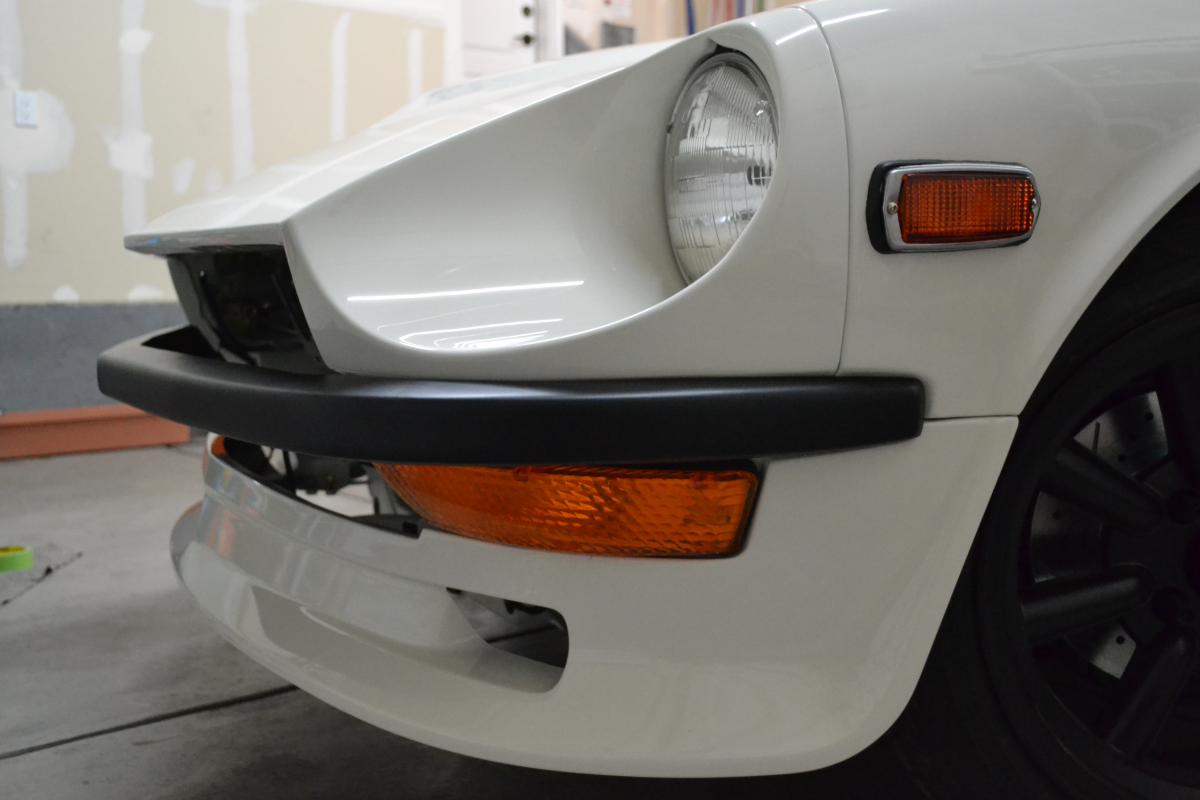
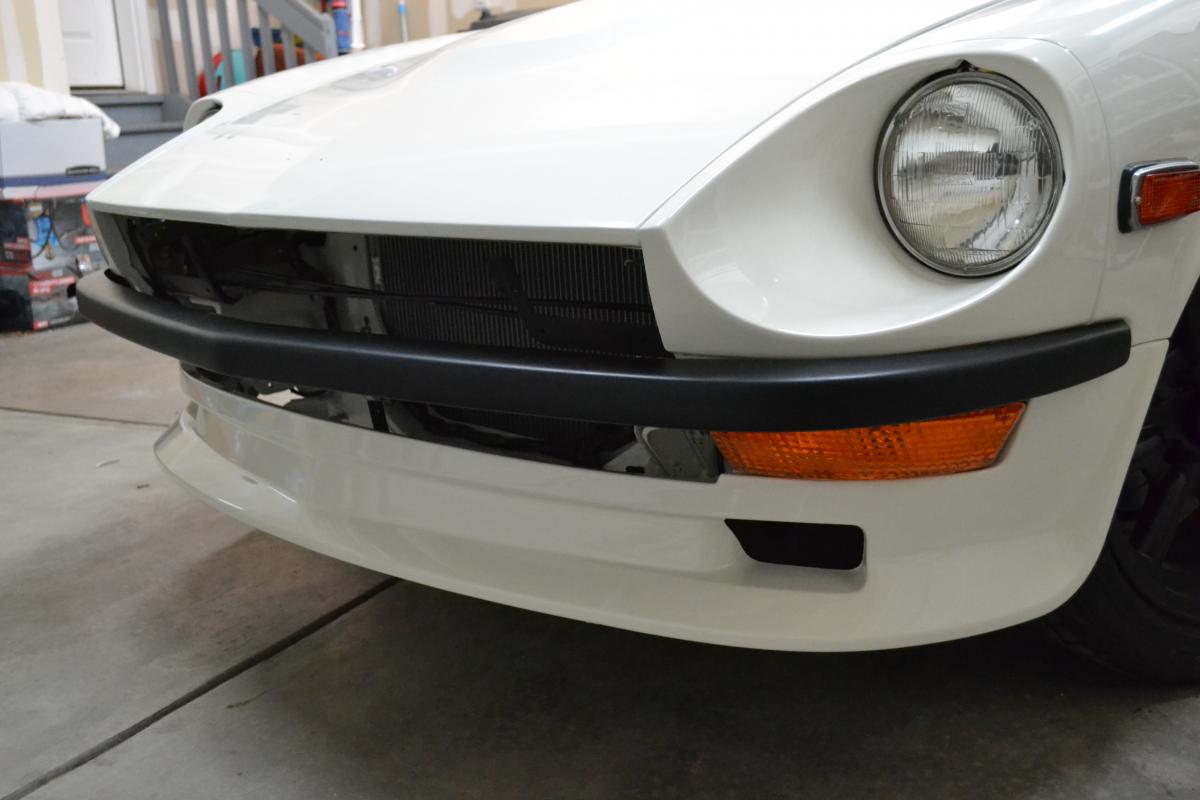
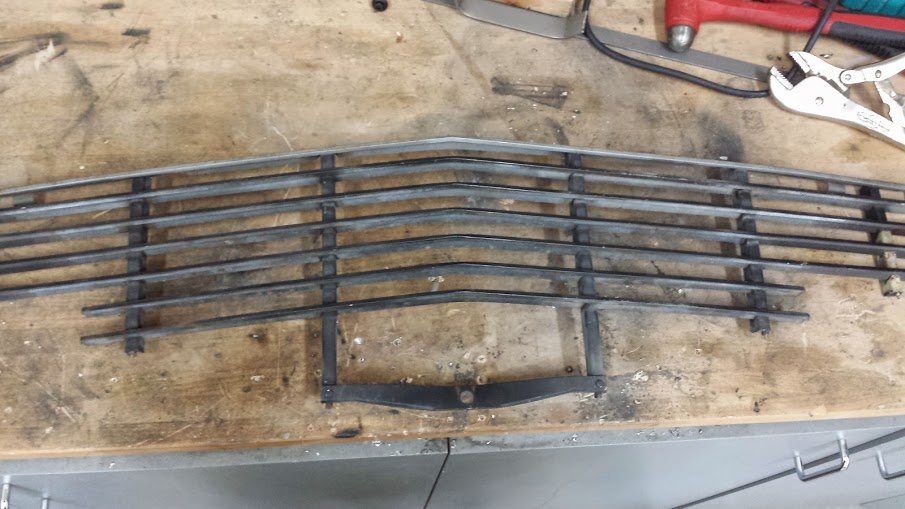
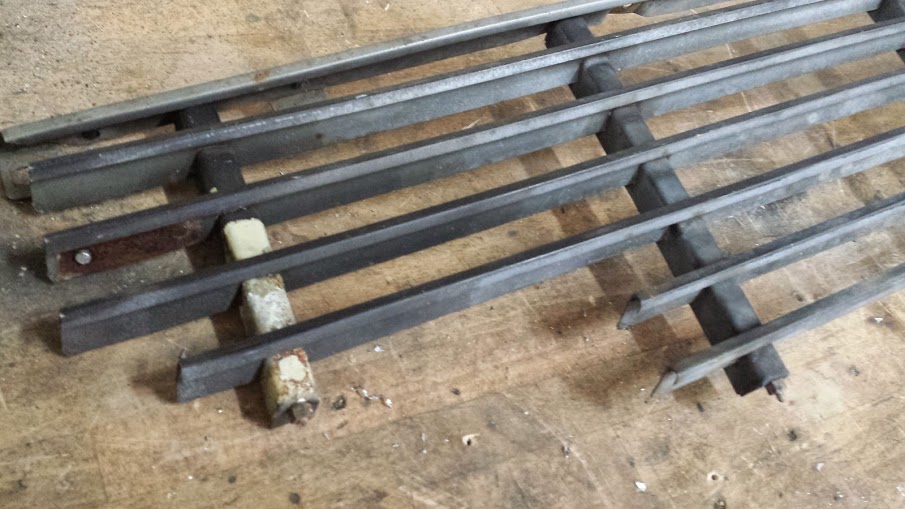
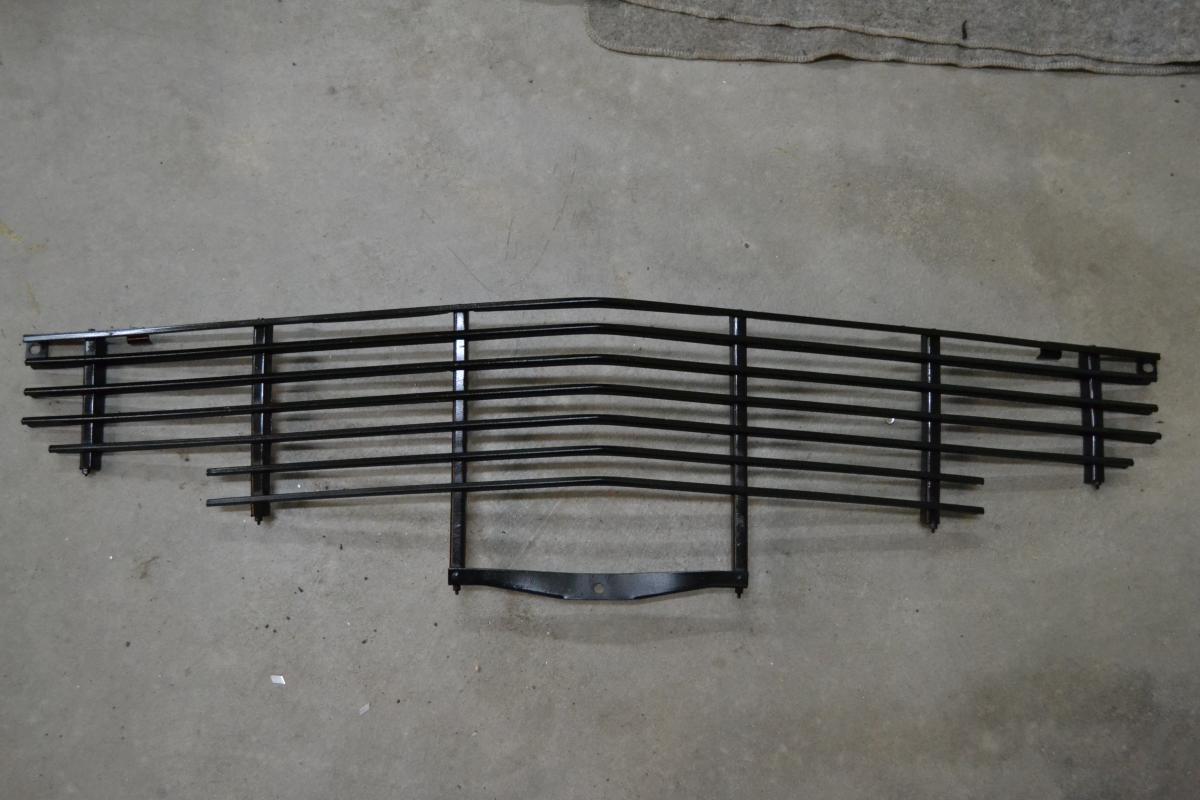
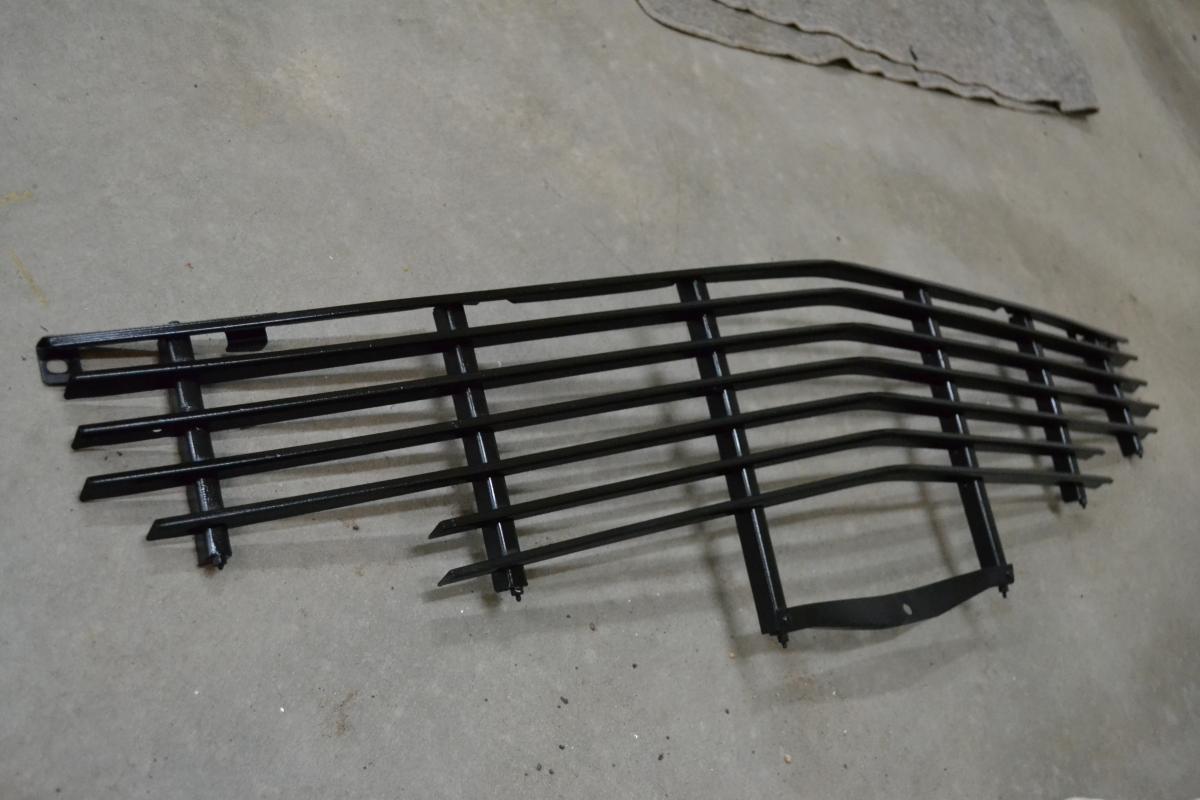
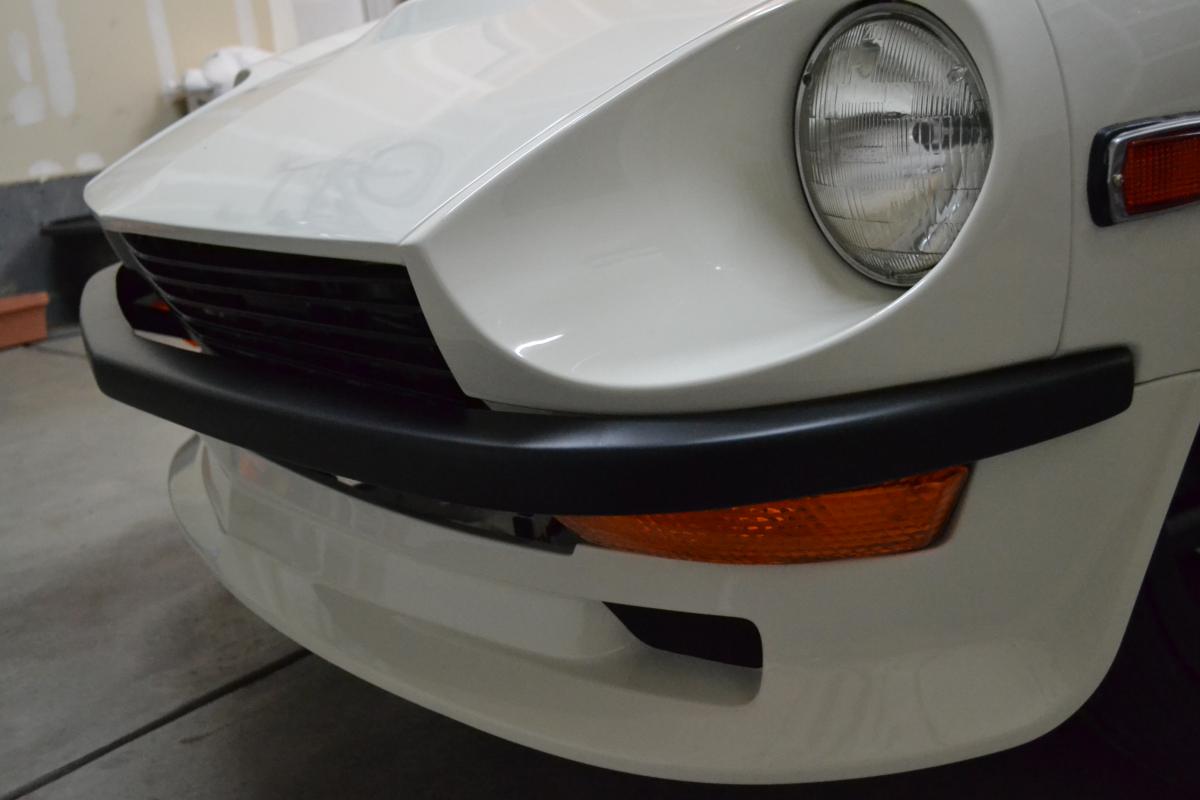
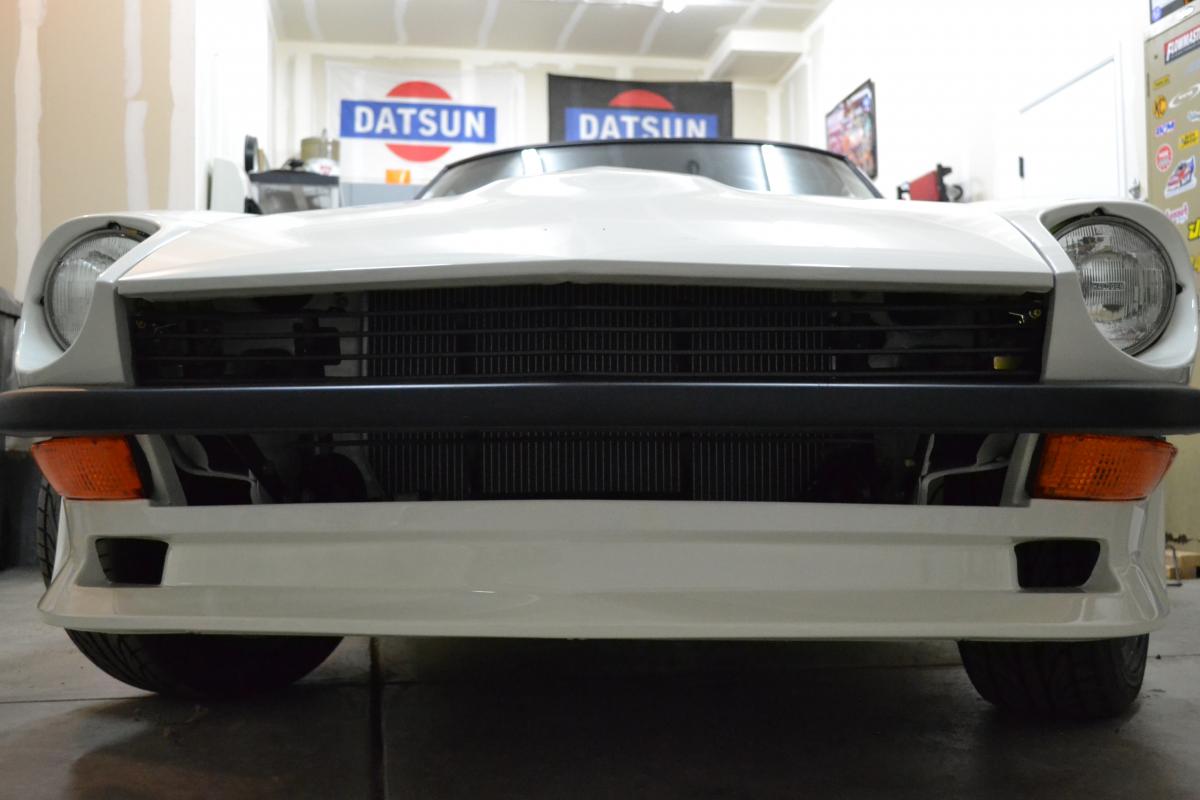
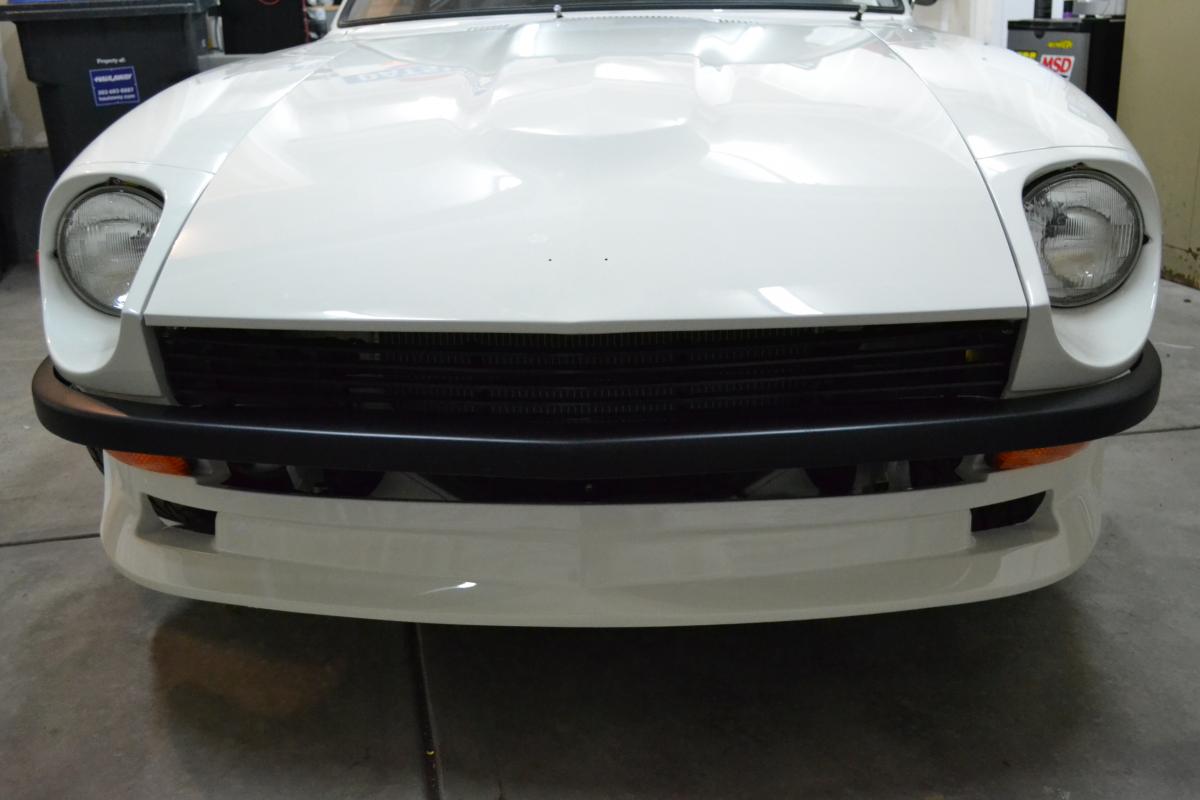
3 pointsBeen busy the last couple days working on getting the front end done. Finally finished tonight and I think it turned out pretty good. I have the Xenon uerethane air dam with the 240Z parking lights, 240Z fiberglass bumpers, and a modified 240Z grill. I had some help from my dogs. First I attached the air dam using some plastic rivets and 10mm bolts I ended up cutting out a couple inches of the center area that is always wavy. This made it a little more flimsy so I fabbed up some brackets out of 1/4"x3/4" steel strips I got at Lowes. I painted them flat black. I used a factory mounting point and the bracket goes down to the bottom lip of the air dam where I riveted it to the dam. From underneath Riveted the bottom I then realized that my factory turn signal mounts were very white and would show through the grill so I masked off the car and sprayed them flat black. I should've done this a long time ago but oh well, now I know. With my air dam nice and secure I started on the bumper brackets. I purchased a set online from somewhere when I got the bumpers and they were complete garbage. I then tried using some factory 240z brackets but they were going to be way too much to make them work, So I decided to make my own. I recommend attaching the bumper on the sides first then taping it up where you want it. Then carefully measure for the brackets and make them fit to the bumper not the other way around (if that makes sense) I used 1/4"x1 1/4' steel strip and simply made an L bracket. Cut off the excess Put a slight twist in the bracket side that attaches to the bumper Drilled my holes I removed my horns for better access Test fit Painted flat black as well Then mounted. They're attached to the bumper by a 10mm bolt and nut Now for the grill I bought a 240Z grill and basically just swapped the top bar with the one off of my 280Z grill, that way I can use the 2 factory mounting points up top. Sanded it down and painted it a semi gloss black. Installed the grill. The front end is done!


 3 points
 -
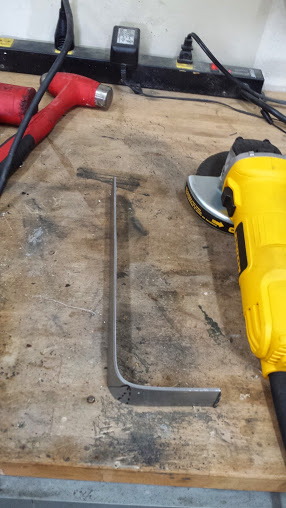
2 pointsSprings are installed, problem Fixed! Installed the springs in the 3/4th and Reverse housings (couldn't reach the 1/2nd bolt) and that fixed the problem of it popping out of 3rd. Thanks so much for your help. I'll install the 1/2nd next time I have the console/shifter boot off. I made a little hook to remove the springs, (Remember the hook has to go inside the spring to remove it). I's post a picture but can't figure out how to do it. Thanks again. Ericjump2 points
-
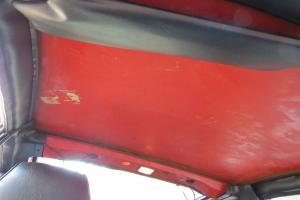
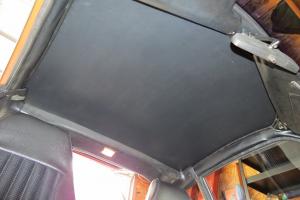
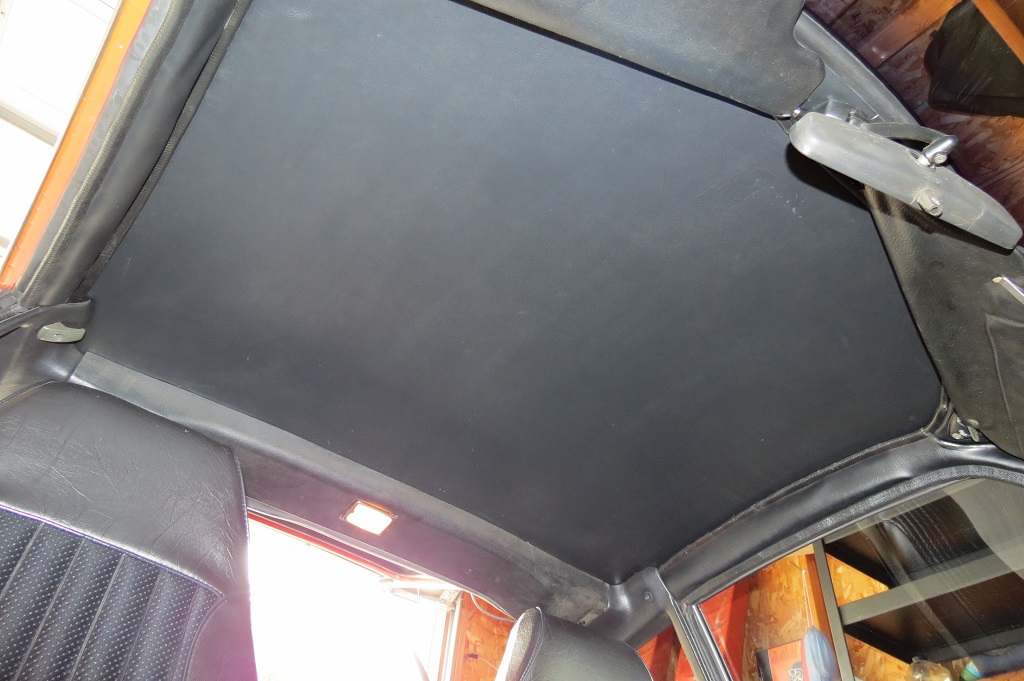
1 pointI finally got around to installing the new headliner in the Z, which was missing when I bought it. It wasn't too bad, was somehow able to do it without a second pair of hands. I strung baling wire from the upper mirror mount to the interior light to drape it over as I worked it into place. Then dropped each side to spray the glue and attach. so here's the before: And the after: Still missing one hanger
 1 point
 -
1 pointWords of wisdom. You will always lose if you play Chicken with a chicken. X2 Groan1 point
-
1 pointIf you aimed higher you could have had Grilled Chicken...... groan.1 point
-
1 pointMark, extraneous bulls**t is part of the charm of any vintage object -- like the inspection lids, tool boxes, and service light! I'd be leary of a remote start button beneath the hood for theft reasons, but otherwise I think it would be a fun feature -- a conversation piece. Of course if someone is already underneath your hood, I suppose it's pretty obvious how to energize the starter, even without a button.1 point
-
1 point
-
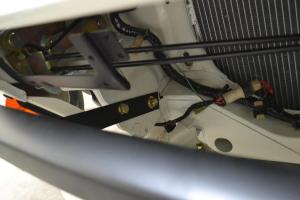
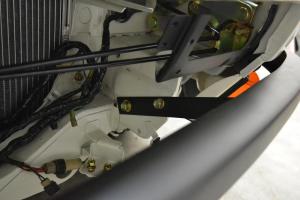
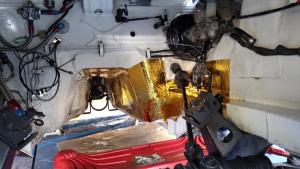
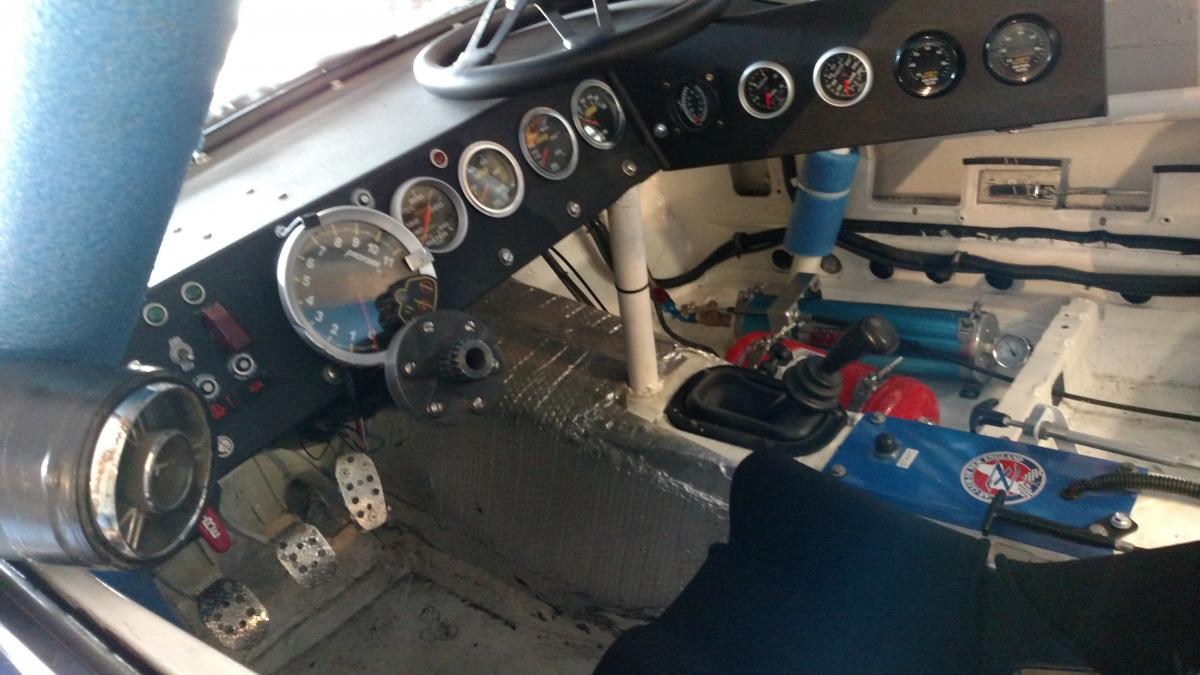
1 point1 point1 pointAre you buckling your seat belt when you're trying to start the car? The 74 had the nefarious seat belt interlock relay. Was it defeated properly? You post wasn't clear to me about what was going on. When you turn the key to Start, does the starter turn and do you have voltage to ground at the coil? If so, the seat belt interlock relay is not interfering. Just for grins, find the red button in the engine bay. It should be on the right fender for an early 260Z and possibly on the firewall for a late 260Z. Turn the key to ON, press the button, and try starting the car.1 point1 pointOK, after making sure the bolts holding the rear end to the mustache bar were tight, and ordering new strut insulators, I dug into the rear struts to see what was causing my "Clunk" in the suspension. It was only happening when I went over bumps, nothing on accelerating or decelerating. Here's what I found: I replaced the shocks (stock shocks from Black Dragon) when I rebuilt the suspension, after I removed the strut insulator and the spring, I grabbed the shock rod and it rattled around in the strut housing. I don't know how I missed this when I assembled them. The new shock came with new gland nuts and the instructions said to use the new nuts. After screwing the glad nut down there was defiantly some play between the shock and the gland nut. So here's the fix! I got a large washer that fit into the gland nut, drilled out the center so it would fit over the shock shaft and screwed the gland nut on, amazing the play was gone! I added a "glug" of motor oil to the strut before installing the shock, put it all together and the clunk is gone. Repeat on other side. Thanks for the help with the elusive "Clunk" A little advice for anyone who is replacing shocks, remove the emergency brake cable before you start, (this will eliminate having to do it while supporting the strut with your knee), remove the brake line where the hard line hits the body and rubber line (same reason), support the strut with a floor jack and lower it down until the strut can swing down out of the shock tower. On reassembly reverse the process (with the floor jack), when the 3 studs won't line up with the holes in the top of the shock tower put a socket down through the center hole in the shock tower and turn clockwise( Tightening the nut) until they line up, jack the strut back up into place attach with washers and nuts.1 pointGot the dash extension in, the BSR GTU air scoop mounted and some gold insulation film installed on the header side of the engine bay and tunnel.

 1 point


Important Information
By using this site, you agree to our Privacy Policy and Guidelines. We have placed cookies on your device to help make this website better. You can adjust your cookie settings, otherwise we'll assume you're okay to continue.