2ManyZs
Community Member
-
Joined
-
Last visited
Everything posted by 2ManyZs
-
Ya, but my tools and garage are here! Another Z? You trying to have more than me??? And it is warmer down here!
-
Maybe she put a brick on the accelerator and jumped.
-
Well, bring it down here and I can do the compression test for you. Time? Probably 4-6 hours, I guess working by myself changing a head gasket will pretty much kill an afternoon, if no studs break or anything out of the ordinary. Cost?? How much you willing to pay?:eek: Just remember the old saying, you get what you pay for. And make sure they have the right tools or the timing chain is going to cause a lot more work and expense. Here I sat all week with no work, and I could have made some money.
-
It's pointing in the direction of a head gasket leak. Try having a pressure test done on the radiator and see if it is holding pressure. If it leaks down you know it's going somewhere. If it isn't leaking on the outside it's probably got a leak in the head gasket. :mad: Most any garage should be able to do a pressure test on the radiator, then if it indicates a leak try the compression test. Sorry, wish I could give you better news.
-
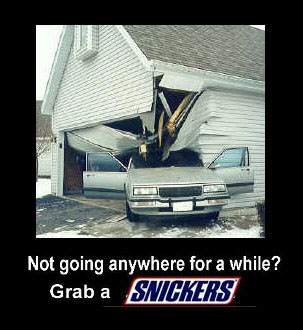
Is this what happens when the Z project takes up the parking space normally reserved for your wife's car??? Perhaps a Goody's is more fitting if this happens. Would this be considered "road rage"????
-
Well, if you can budget the 600 for the ZTherapy carbs they are definately worth it. They do much more than just polish and re-plate the housings and linkage. Every piece of the carb is as good as it was when it was brand new and in some cases it probably is better. They re-bush, re-plate and rebuild every part of the carb. If I ever get the body work on my 71 it's getting a set and I may have to get another set for my other 240. Consider what a new four barrel carb goes for now and I think you will see that ZTherapy carbs aren't really all that expensive considering the carbs are as good as new.
-
I doubt if anyone has ever taken a fender off an old Z without snapping at least one of those four bolts off, the water runs out of the drain for the front cowl area and runs right down the panle and into the front of the rocker panel and there is no drain there to get rid of it. You have two choices, you can drill them out and try to remove them (you may snap the nut loose trying this) and re-thread them in the next size up or you could just replace the whole rocker panel. Replacing it might be the best route to take, the is the possibility that there is more rust in the rocker under the door you haven't found yet (people like to pack them full of bondo) and replacing a rocker panel is not the most difficult job and replacement panels are fairly inexpensive. If you do replace them, be sure to drill a small (1/8 inch) hole between or near the bolts to drain out any water that may get in there in the future. A little seam sealer on the top flange of the panel is also a good idea to keep as much out as possible. As for the battery area, if the hole is away from the firewall you can cut it out and make a patch panel without too much trouble. The battery tray itself is another matter, you will probably need to find one out of a parts car that is in better shape than yours as I don't think there is anyone making replacements.
-
Try a product called RESTORE, I used it in an old 200sx I had and it did help to cut down on its oil useage, not a lot but enough to notice. It didn't cure the problem, but it didn't hurt. They have a can for 4 cylinder, 6 cylinder or 8 cylinder engines and you should put a can in with every oil change. The 200sx had over 160k on it when I bought it, and it was still going at 210K when I got rid of it. The engine had never been taken apart. But, if the rings and cylinder bores are that bad, the only true cure is a good honing, and new rings if it doesn't need to be bored. Like we said before, a compression check and leakdown test is the only truly accurate way to find out how bad (or good) condition the engine is in. And there still is the possibility this could be in the valve seals, if one or more is almost completely gone, it could be causing a lot of the smoke. Is the smoke heavier when you first start the engine and then lessens after it has be run a while?
-
While you have the door panel off, it's also a good idea to lube the window regulator pivots with some lithium grease. Also take a look at the plastic clips on the door latch assembly. They get brittle and break and the next thing you know you are trapped in your car with a door that won't open or worse, locked out. There are also adjustments on the rods so if you have to yank on the handle to get the door to open, try making some adjustments while you are in there and you won't have to worry about pulling the clips loose.
-
I still think the idea of a license plate frame is good, what better way to advertise the club but on the car itself at a show? This won't have to be stuck on a window and can be taken from one car to the next. Best of all it should be quite inexpensive to do.
-
Not that I know of, in fact the valve adjustment tool that MSA sells is in fact made by Snap-On, that may be why it's so expensive. It is a type of crowsfoot wrench but is made on one piece. Take a look at it if you have their catalog and you could try to catch a Mac Tools salesman or Craftsman may have one very similar that will be a bit cheaper. BTW, I have used just 2 plain open end wrenches to adjust valves, but they tend to get in each others way. Unless you have a cheap one you could put in a vise and bend just a little so they aren't interfering with each other all the time.
-
Well Royce, I'm not sure about the later 280's but my 75 has the holes in the quarters where the rubber bumper ends mount. The bumpr ends are a little different than the later 77-78's. I guess if you wanted to cut the flange off the bumper shock absorber where the bumper mounts you might be able to wiggle it through the hole without dropping the tank. You can access the mounting bolts without too much trouble, it's getting the shock to pull through the hole in the body where you will run into trouble. The gas tank is in the way to pull them straight back through the hole. I wouldn't cut into the shock itself, but if you cut off the mounting flange you might have enough room to slip it through. I think the passengers side will be the worst as the shock mount is close to the tank, on the drivers side it is close to the muffler so you will have a little more room on that side.
-
Well, for me it's classic rock no matter if I'm driving or working in the garage. Fleetwood Mac, Eagles, Bob Segar, 38 Special, anything from the 70's and 80's. Takes me back to when I was young and having fun, and brings back a few not so good memories too.
-
Should work, that is basically what the special tool is anyway. But it is a good idea to double check the lock nut with a wrench after you are done as sometimes you will find using this tool you don't get the locknut tight. You can't get the right leverage on the tool to tighten them as tight as they should be, they snug them down good to keep the adjustments, but it is better to be safe and double check it before you re-install the valve cover.
-
A wire feed Mig will work the best IMO for sheet metal such as body repairs. TIG will work, but the equipment is very expensive compared to Mig and TIG is better for aluminum and stainless steel. I have tried TIG in the past and it is not easy. A wire feed MIG can be had for under $500 if you get the one that has Argon or CO2 shielding gas. A gasless will work but IMO one with the shielding gas will give better results, less splatter and nicer welds. I have not tried a gasless MIG with the flux wire so I can only guess at this. You can buy timers for the MIG so that you will not overheat what you are working on and cause the panels to warp. It is always best to do the welding in very short increments to keep the heat from warping the surrounding panel. You can also by a heat shielding putty to surround the work area to minimize warping due to the heat. Brazing will work, but with the heat needed to braze, you may warp the panel. Brazing will not be as strong as a good MIG weld. Just my opinion, since I am a "shadetree" welder at best.
-
Have you replaced the steering rack bushings and steering coupler yet? If not, this could be a lot of the problem. Worn tie rods could be a culprit as well as the ball joints. Loose or worn wheel bearings could add to the problem too. If all these are in good condition the only thing left would be the steering rack itself. I'd start at the rack bushings and steering coupler first, then on to tie rods ends and ball joints etc. Might as well start with the cheaper parts and then on to the more expensive items until you find the shaking is cured.
-
The plate with the spring loaded stud would need to be riveted to the cover, and the latch plate would then need to be screwed, riveted or welded to the headlight bucket. It won't be easy to do, but it could be done nicely with a little patience. The mounts that come with the headlight covers have a screw(?) the goes into an L shaped bracket that mounts to the headlight bucket, so even these will be a little tricky to line up right. BTW, you could look in the specialty section in the hardware store, you might be able to find screws that would work that have a very coarse thread that would only take a turn or two to release.
-
Well, if you are changing from an automatic to a manual you are going to need trans, clutch pedal assembly, and a few other little bits and pieces. $600 might be a little on the high side unless he's throwing in a 3.90 rear too. You only have to change the mustache bar and rear diff mount if you are going to use an R-200. You should be able to find a 3.90 R-180 out of a 200sx and use that, save changing parts, and save a little weight too. I didn't realize you had an automatic. You already should have a 3.54 rear so to save a little money for the trans swap you might want to leave the 3.54 in until you get everything else done. Then you can search for the 3.90 rear. BTW, if you can get your hands on the tranny, let me know, I am going to be stripping a 72 sometime this summer and can let you have the clutch pedal and all that for a lot less.
-
You might want to look at the thread I put in the Tech articles on transmission and rear end gearing. You won't like your car in 5th gear if you don't swap to a lower ring and pinion. It will end up being too high and you'll be lugging the engine, same result, lousy gas mileage.
-
If you look on www.zhome.com you will find a complete list of colors and paint codes by year and model. I think your's may have been the 517 beige that looks like light gold, if that is the original color on your car.
-
Depending on how you drive and if you spend a lot of time in stop and go traffic, 18-20 is probably pretty good. Do you spend a lot of time on the freeways at higher speeds? If you do look at the tach, it's probably on the high side of 2000rpm right? If you had an overdrive it would probably help a little. It has been so long since I had a street car on the road and drove it regularly I was just guessing at the mileage. I'm not even sure I ever checked it when I did drive a Z on the road a lot. I just had too much fun driving it, and probably with the way I drove it, my gas mileage would have been a lot lower than yours.
-
Figure about 20 for an average. Depending on how and where you drive you could get as low as 18 to a high of 25 or more. Also depends on the condition of the mechanicals.
-
Well, you could use a pair of 280 side mirrors. Or you could just buy a set of aftermarket mirrors. Not sure about using a factory drivers side and doing any modifications. Not hardly worth the effort if you buy a decent pair of aftermarket for very little. IMO go with the later 280 mirrors, they are not chrome and could be painted body color so as not to be as noticeable, unless you want the chrome ones. In which case you could probably find a pair of chrome ones at the local auto parts store that closely resemble the originals.
-
If the car came with A/C from the factory it should have a position on the vent control on the far left for A/C. It should be right above the temperature control. If not this is probably an aftermarket add on A/C system. If it is there then perhaps someone wired up the control direct to save money by not bying the factory switch. I think A/C was an option in 77, not standard equipment. 1850 sounds like a fair price for a 77 if it is in good mechanical condition. It sounds like you have looked the car over pretty well, in terms of rust. Be sure to check under the battery tray for rust, and check the strut towers. If the outside of the body looks good, you should take a small refrigerator magnet with you and try to stick it on the rocker panels, and around the wheel well lip. If it won't stick it is a sign of prior rust that has been fixed(?) with bondo. Also check the lower front fenders. Also, look at the back of the bumpers as these were prone to rust out from the inside. I believe there was a tan or gold factory color but I'm not sure of the true color name, or the paint code. Other than rust, take it for a long test drive and check for any noises, funny handling traits etc. Good Luck.
-
Pecan shells and walnut shells are usually used to clean up engine components as they are less harmful if a tiny piece is not cleaned out of the engine block or wherever. They usually don't work well on heavy rust, or not as well as glass bead or plastic media. They can also be used on plastics without too much trouble. Plastic blasting media and glass beads can be used on metal and will not generate the heat that silicon carbide does. Silicon carbide is usually used on really bad rust as it is much coarser and is sharper than the rest of the medias.