Everything posted by 240260280z
-
Wiring harnes
Jan 9 71 is the on the dash and 01/71 is on the door plate and 01-71 is fuel pump date so it is the cusp.
-
Wiring harnes
I am doing a jan 71 now and will try to blueprint the wiring but i am now pressed for time and may not do as much as I would like. I'll post data next week.
-
Another 240z Hatch Gas Strut Source
http://www.carpartsdiscount.com/auto/parts/72/nissan/240z/lift_struts/rear_hatch_damper.html?3593=122903 Mfgr: Stabilus Part Number SG 225005
- time for new wheels!
-
Power antenna Area Reference Photos
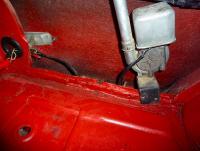
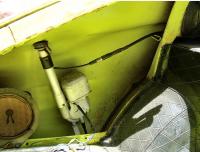
I am out numbered by good friends. I must concede. The resto is someone else's cars so I will ask the history (He was original owner so he should know). It was interesting to see the two holes in the yellow pic above. This car has no holes due to body work so I will have to re-drill. The fact that all pics I googled have only one bracket that goes deep to the wing nut; but the 73 yellow photo above seems like the correct drilling for the holes, I see how it should work but I am confused.
-
Door Seal Reference Photos
I bought a full kit from Motorsport Auto.Here is their page of products: http://www.thezstore.com/page/TZS/CTGY/SWR01 You can also buy from BlackDragon Auto (be sure to request their papre catalogue.... it is great to have): http://www.blackdragonauto.com/icatalog/zr/t.aspx?Page=12 (click "next" and previous to go through the catalogue on line).
-
Arne answers questions.
Saw a Z1 in Paris in 94 or 95 Cool at the time but now looks like a TR-7
-
Strong fuel smell in the car when I turn LEFT
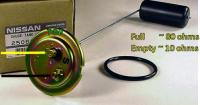
Could have been hung up. Also there is an adjustment screw on the back of the fuel gauge that (if remember correctly) controls the radial distance between the indicator needle and the bimetal strip for calibration. I think I will have to test bench (v) and photo doc(v) the system once and for all as this seems to be one of those "black magic"areas when in fact it is EZ PZ.
-
Strong fuel smell in the car when I turn LEFT
The voltage flickering is normal. It is actually heating a piece of bimetal in the dash gauge. When the metal heats, it moves and brakes the electrical contact thus the voltage is 13V when no contact and 0V when contacted. I believe when the resistance is low (10 ohms at full), every time the bimetal cools and makes the circuit, a bigger current flows thus heating it very quickly and moving it further. When the resistance is high 80 or 90 ohms, every time the bimetal cools and makes the circuit, a smaller current flows thus heating it very slowly and not as much and moving it less far. Very analogue and cooldesign. The common problem maybe that your wiper wiping on a warn out part. Bend it a little.
-
Power antenna Area Reference Photos
-
Reinstall Half Shafts
Nah, you are not special: we all were there too.
-
Reinstall Half Shafts
I found the best way to install was to pull the wheel off and play with box end wrenches and extensions while rotating the shaft so that I could get a wrench on the nuts. At certain places in the rotation, it is easier to turn some of the nuts. Actually I am about to install the same shafts and may find a better way than how I did it 8 years ago when I started wrenching. Click
-
Arne answers questions.
Hmmm I just worked on a colleagues 2003 BMW 330. Internal fabric on A pillars and B pillars coming off, window seals falling off, water pump and belts failed, front caliper seized.... buy a BMW and I guarantee you will be wrenching I'd say get a Ferrari 250 GTO kit or a factory five kit. Good investment, prices are only going up: Here is a nice page: http://www.ffcars.com/forums/18-factory-five-cars-sale-wanted-sponsored-intercity-lines/
-
Arne answers questions.
So what can replace a z? Z4?
-
Strong fuel smell in the car when I turn LEFT
It could be upside down too. I believe the yellow cabled +pos connection (with stand-off) should be on the top at 12 o-clock.
- 240Z in movies
-
240Z in movies
I think they used one in Mythbusters. We had a club car in a movie about a football player who becomes paralyzed:
-
Teaching my Daughter how to tune "Her" Z
Well she knows how to lean over the fender without resting on it.... sign of a true mechanic! Here is my attempt years ago: Well she can now drive a stick so my job is done.
-
Door wont lock
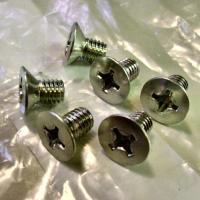
There are 2 long and 3 short counter-sunk screws that hold the dovetail and the latch mechanisim in the door... of the 3 screws that hold the mechanism, the screw closest to the car must be short or the locking mechanism will hang up on it... I found out.... slightly longer than stock ss screw caused me grief.
-
Most hidden rubber part.
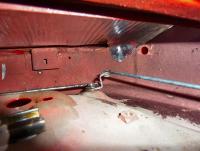
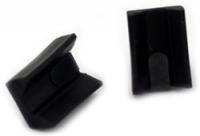
I thought the antenna drain grommet, inner fender seals and cowl drain grommets were well tucked away... but did you know a small rubber lives inside the door and is a rest for the window when fully lowered? Here it is and also where it goes: See the bracket/stand-offon the bottom of the door with the rectangular hole? That is where in mounts. Another shot: I saw a photo of a rubber wire-tied there but I cna not find it now.
-
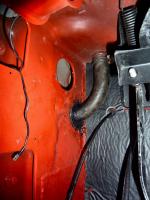
Reference Cowl Drain above driver's feet Photo
- DIY Cowl Rubber Bumper
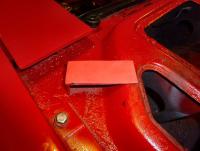
Sheet of red closed cell craft rubber 8 1/2" X 11" cut and glued to the bracket where the cowl sits... no rattle. You can buy black sheets and do the rectangles where the hood sits in the inspection lids.- Power antenna Area Reference Photos
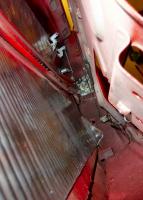
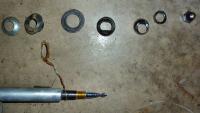
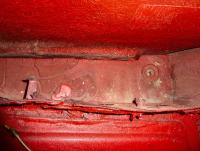
The antenna on this 71 240z does not seem to be stock. Here are the parts (in sequence) when removing/installing The area between the rear quarter panel (fibreglass) and the rear deck: There is a wingnut and stud which I guess is where the original antenna is attached. There is also a drain hole for a tube coming out of the antenna (potential fume hole). Lots of painted ziebart in the bottom too Here is the tube in place. I used the wing nut to ground the antenna's ground lead.- Door Seal Reference Photos
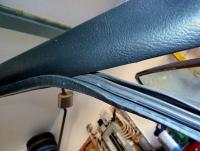
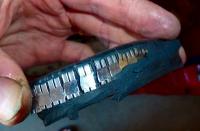
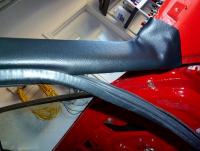
Some photos of the Precision Weather Stripping for the Door. There are steel "U" ribs in the stripping that pinch the pinch weld. When you cut the stripping with a knife, try to cut between the "U" pieces. Here is a side view with some of the side rubber shaved to expose the chain of U clips.- Custom battery cables-DIY
- DIY Cowl Rubber Bumper
Important Information
By using this site, you agree to our Privacy Policy and Guidelines. We have placed cookies on your device to help make this website better. You can adjust your cookie settings, otherwise we'll assume you're okay to continue.


